Painting the emblem or burger
 09-08-2010, 04:27 PM
#1

Painting the emblem or burger
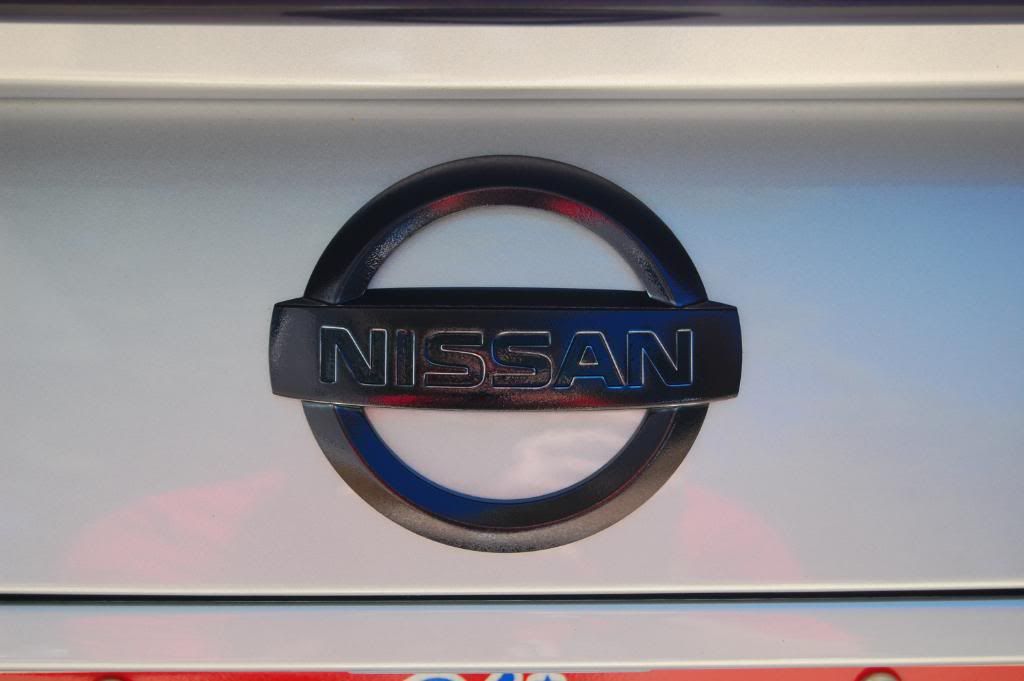
My grill emblem is not what it used to be, Im thinking about hitting it with some white to cover up the chrome and some black just to refresh the letters where it says "Nissan" I know there was a thread on this and I checked but I could not find it and Im not sure if it was here or on another forum either since Im on more then one. Anyways. anyone have a outline or guide on do's and donts? Ive never painted anything automotive and its a bit nerve racking doing it with just spray cans.
Thanks,
Vik
Thanks,
Vik
 09-08-2010, 05:26 PM
#2
Banned

Join Date: Nov 2009
Location: Brooklyn, NY
Posts: 129
i had the similler problem.. but in my case it was the grill.. i just grab a box cutter blade and carefully slice the top plastic cote ... it came out perfect...like new..
--Sorry.. if that would help as i have no idea ..if it is gonna work for the emblem.
GL
--Sorry.. if that would help as i have no idea ..if it is gonna work for the emblem.
GL
09-08-2010, 11:10 PM
#3
Senior Member

Join Date: May 2010
Location: inside my own mind
Posts: 1,506
This is what you need:
*Everything can be bought at a local auto shop
-1 can of Duplicolor Adhesive promoter
-1 can of Duplicolor White paint
-1 can of Duplicolor clear coat
-1 Duplicolor black touch-up paint
-scoth blue painters tape
-exacto knife
-400, 1500, 2000 (optional) grit wet/dry sandpaper
-polishing and rubbing compound
-wax
-Meguiar's ScratchX 2.0 (optional)
-polish
*Tips:
1.When you sand the "chrome" off the emblem then make sure it's smooth or otherwise it will show in the finish.
2. If your sanding it in between coats of paint then use LIGHT pressure because if you don't then it can remove the paint and promoter and you will have to start the process all over again.
3. Always spray light coats of paint or whatever because it will give it a good finish and doesn't leave drips and other imperfections. Also with heavier coats will lead to it chipping or cracking faster than it would.
4. NEVER touch anything that your painting....EVER. The paint is still soft during the painting process and you can leave finger prints that won't disappear with additional coats.
Once you remove the burger from the car (if you don't know how to do that then let me know).
1.Use a 400 grit piece of wet/dry sand paper and sand everything out until it's smooth and all the "chrome" is gone. Then use some soap and water to wash everything off and then dry it with a paper towel.
2. Then use some Duplicolor adhesive promoter and do about three coats. Waiting about 15 min in between each coat and use your first coat of paint within 10 minutes of the last coat. (I recommend that you use only Duplicolor products because it's not a good idea to mix paints/primer of different brands.)
3. Then after each coat of paint, you should use a 1500 grit piece of wet-dry sandpaper to LIGHTLY sand it . This will result in a smooth finish......wait about 20 min in between coats.
4. Wait for about two hours before adding the clear coat. Wait about 20 min in between coats. I recommend that you don't sand it at this time.
*If you don't care about a mirror finish then just spray the coats and don't even sand it.
4. Wait for about a day for the paint to dry and then use some blue scotch painter's tape and cover up the area around where it says "Nissan"......usse an exacto knife and cut carefully around the letters for them to be painted (be PRECISE or else it will show in the final product and you don't want that).
5. Use some of the Duplicolor touch up paint to brush it in the letters Wait about 30 min in between each coat. Wait about two hours before removing the tape.
FINALLY after two days, you use a 1500 grit wet/dry sandpaper and wet sand it. Then use a 2000 grit to finish it off. After that use some rubbing compound, polishing compound, Meguiars scratchX 2.0, and wax)
OR
You don't necessarily have to sand it if your satisfied with the result. Just use the rubbing and polishing compound. Then polish and wax......
*To put it back on your car I recommend that you use 3M tape because it isn't permanent. Just in case later down the road you decide to paint it again. BIG possibility of that happening in about 5 yrs or less.
Last edited by 6.5affiliate; 09-11-2010 at 08:57 PM.
09-09-2010, 05:54 PM
#5
Senior Member
Join Date: May 2010
Location: inside my own mind
Posts: 1,506
No, you don't have to buy a new emblem.....all you need is 3M tape to attach it back onto the car. There are two types of emblems and it depends on what your car has.
-The first would be easily removable (2007-2008 with or without spoiler).
-The other one is has holes behind the emblem and bolts that keep it in there (with 6th gen spoiler and I don't know this process). You probably have to go to the trunk and take out the lining and unscrew it from the back of the emblem.
-And if you don't have a spoiler than you can use this process.
The process of removing the emblem is relatively easy. All you need is a;
*hair dryer
*goo gone
*plastic knife from Mcdonalds, tool that's included in the small package of goo gone OR a 10-20 pound test fishing line.
What you do is heat the emblem up with the hair dryer for approximately 10 minutes or so;
1. Take the plastic knife or the tool that's included with the goo gone and carefully work it on both sides making sure not to scratch the paint.
2.For the fishing line.....you would actually have to use a sawing motion from top to bottom (I don't like the fishing line because there's a bigger chance of scratching the paint)
Repeat the process if necessary until it comes off.
3. Use your finger nails and remove some of the adhesive that is there as best as you can.
4.Take a terry cloth and put some of the goo gone on there. Then you rub where the remaining adhesive is and it should all come off pretty easy.
5.QUICKLY use soap and water to wash the goo gone off. Otherwise the goo gone will dull the paint. Use a separate terry cloth and make SURE that you keep turning the towel to prevent any of that stuff to stay on there.

 09-09-2010, 11:09 PM
#8
Senior Member
Join Date: May 2010
Location: inside my own mind
Posts: 1,506
No problem but yeah, if you take your time and have some patience then everything is gonna come out great.
Plus, all these products and stuff that I've listed can be used for other projects such as painting your headlights, roof strips, interior pieces, etc. etc. It's the same process with almost everything that you paint..So, in the end.......it will be money well spent.
The 2 compounds, ScratchX, wax and polish will obviously be used again for detailing if you don't already have them.
Last edited by 6.5affiliate; 09-09-2010 at 11:24 PM.
09-10-2010, 10:35 AM
#11
Member

Join Date: Dec 2009
Posts: 34
Oh, and by the way, just asking. Do you know anything about LED tailight installation? I think I know how to replace the whole taillight assembly ( same as changing a bulb? right?) My question is the wiring. Does it use the existing wiring or do you need to do something different? I have looked at different posts and it is very confusing to me. Any details would be appreciated.
Thank you.
Thank you.
09-10-2010, 12:25 PM
#12
Oh, and by the way, just asking. Do you know anything about LED tailight installation? I think I know how to replace the whole taillight assembly ( same as changing a bulb? right?) My question is the wiring. Does it use the existing wiring or do you need to do something different? I have looked at different posts and it is very confusing to me. Any details would be appreciated.
Thank you.
Thank you.
and thanks 6.5affiliate for the answers, Buying a new emblem MAY be cheaper then all things listed but in my situation isn't feasible because I want to match emblem to body color.
09-10-2010, 12:56 PM
#13
Member
Join Date: Dec 2009
Posts: 34
Sorry about the wrong thread. I thought 6.5 affiliate might help me, being so knowledgeable and detailed with his replys.
Anyway are you saying all I have to do is plug the new wiring harness into the existing wiring harness in the trunk and everything will work perfectly without any additional wiring work necessary?
Anyway are you saying all I have to do is plug the new wiring harness into the existing wiring harness in the trunk and everything will work perfectly without any additional wiring work necessary?
Last edited by lionshott; 09-10-2010 at 02:34 PM.
09-10-2010, 03:47 PM
#14
Sorry about the wrong thread. I thought 6.5 affiliate might help me, being so knowledgeable and detailed with his replys.
Anyway are you saying all I have to do is plug the new wiring harness into the existing wiring harness in the trunk and everything will work perfectly without any additional wiring work necessary?
Anyway are you saying all I have to do is plug the new wiring harness into the existing wiring harness in the trunk and everything will work perfectly without any additional wiring work necessary?


 09-10-2010, 11:09 PM
#16
Senior Member
Join Date: May 2010
Location: inside my own mind
Posts: 1,506
Not the right thread for it but when you have the tail lights in had you will see that the wire harness from the car (after you remove the bulbs) will plug right into the wire harness in the new LED lights.
and thanks 6.5affiliate for the answers, Buying a new emblem MAY be cheaper then all things listed but in my situation isn't feasible because I want to match emblem to body color.
and thanks 6.5affiliate for the answers, Buying a new emblem MAY be cheaper then all things listed but in my situation isn't feasible because I want to match emblem to body color.
Last edited by 6.5affiliate; 09-11-2010 at 12:11 AM.
09-11-2010, 07:09 AM
#18
Your welcome. All I did was mine was spray it down a few times with Dupli-color Prep Spray. 3 coats of Dupli-color Adhesion Promoter, and then 3 coats of Dupli-color "shadow" base followed by 4 coats of Dupli-color "shadow" clear.


 09-11-2010, 07:15 PM
#23
09-11-2010, 08:26 PM
#24
Senior Member
Join Date: May 2010
Location: inside my own mind
Posts: 1,506
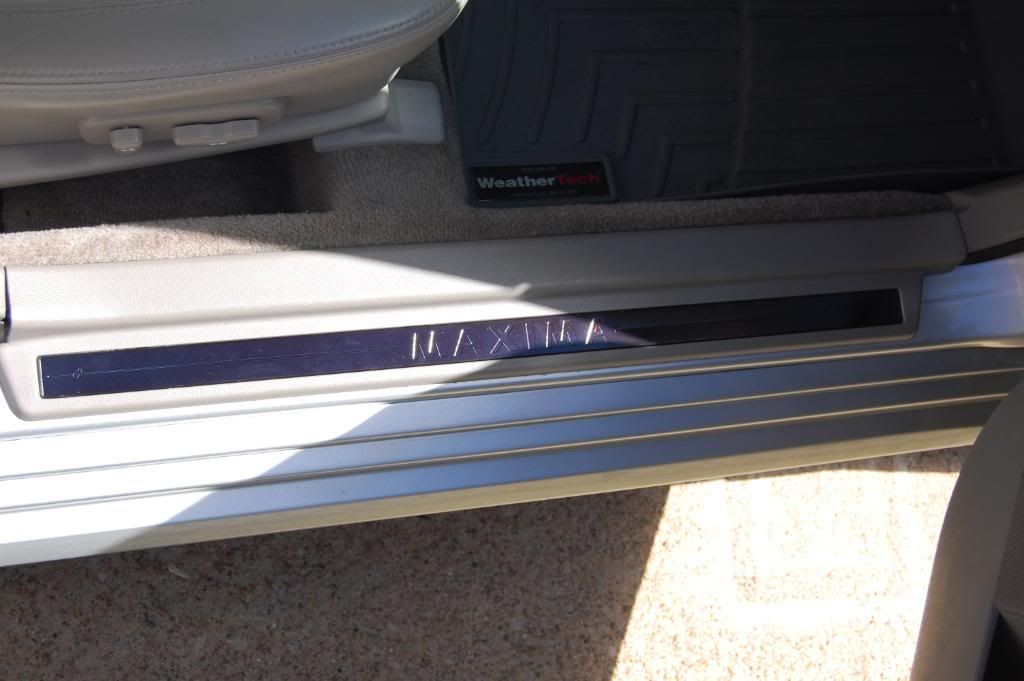
All the info you need is listed above......just look at how the person wanted to paint everything white and have the black on the "NISSAN". It's the same deal with the sills except that you tape the WHOLE thing up and cut out the parts you want to paint. BE EXACT !!!!!!!! And press everything down to ensure that your painting what you want to be painted. Or else you will REALLY regret it, seriously. It's not a joke and anything like that.
Last edited by 6.5affiliate; 09-11-2010 at 08:28 PM.
09-11-2010, 08:38 PM
#25
Junior Member

Join Date: Aug 2010
Location: Cincinnati, OH
Posts: 15
This is what you need:
*Everything can be bought at a local auto shop
-1 can of Duplicolor Adhesive promoter
-1 can of Duplicolor White paint
-1 can of Duplicolor clear coat
-1 Duplicolor black touch-up paint
-scoth blue painters tape
-exacto knife
-400, 1500, 2000 (optional) grit wet/dry sandpaper
-polishing and rubbing compound
-wax
-Meguiar's ScratchX 2.0 (optional)
-polish
*Tips:
1.When you sand the "chrome" off the emblem then make sure it's smooth or otherwise it will show in the finish.
2. If your sanding it in between coats of paint then use LIGHT pressure because if you don't then it can remove the paint and promoter and you will have to start the process all over again.
3. Always spray light coats of paint or whatever because it will give it a good finish and doesn't leave drips and other imperfections. Also with heavier coats will lead to it chipping or cracking faster than it would.
Once you remove the burger from the car (if you don't know how to do that then let me know).
1.Use a 400 grit piece of wet/dry sand paper and sand everything out until it's smooth and all the "chrome" is gone. Then use some soap and water to wash everything off and then dry it with a paper towel.
2. Then use some Duplicolor adhesive promoter and do about three coats. Waiting about 15 min in between each coat and use your first coat of paint within 10 minutes of the last coat. (I recommend that you use only Duplicolor products because it's not a good idea to mix paints/primer of different brands.)
3. Then after each coat of paint, you should use a 1500 grit piece of wet-dry sandpaper to LIGHTLY sand it . This will result in a smooth finish......wait about 20 min in between coats.
4. Wait for about two hours before adding the clear coat. Wait about 20 min in between coats. I recommend that you don't sand it at this time.
*If you don't care about a mirror finish then just spray the coats and don't even sand it.
4. Wait for about a day for the paint to dry and then use some blue scotch painter's tape and cover up the area around where it says "Nissan"......usse an exacto knife and cut carefully around the letters for them to be painted (be PRECISE or else it will show in the final product and you don't want that).
5. Use some of the Duplicolor touch up paint to brush it in the letters Wait about 30 min in between each coat. Wait about two hours before removing the tape.
FINALLY after two days, you use a 1500 grit wet/dry sandpaper and wet sand it. Then use a 2000 grit to finish it off. After that use some rubbing compound, polishing compound, Meguiars scratchX 2.0, and wax)
OR
You don't necessarily have to sand it if your satisfied with the result. Just use the rubbing and polishing compound. Then polish and wax......
*To put it back on your car I recommend that you use 3M tape because it isn't permanent. Just in case later down the road you decide to paint it again. BIG possibility of that happening in about 5 yrs or less.
as mentioned in other comments, it can be time consuming but it will set the paint job off and look very nice. i just painted my engine bay covers and thought "i dont have the time to commit to the wet sanding process" so i didn't...i can definitely see the difference, despite the 5 coats of clear coat i put on them.
 i simply did the following:
1. washed pieces to be painted
2. sprayed a plastic primer on pieces to be painted
3. sprayed a few coats of paint on primered pieces
4. sprayed 5 coats of clear coat on painted pieces
regret: i can see little paint splatter marks, dust, blemmishes, etc...not visible to the naked/ untrained eye, but visible to me, the "artist".
if you can live with an imperfect job that looks good/ decent, then you can cut out the wet sanding.
MAD PROPS to the great outline/ guidance by 6.5affiliate, above!
09-11-2010, 08:56 PM
#27
Senior Member
Join Date: May 2010
Location: inside my own mind
Posts: 1,506
Just had to add another forgotten step which is to NEVER touch anything that you paint during the painting process. I'm extremely sorry about this.......should've remembered to write that tip the first time around. If anybody had this happen, just wet sand it until the finger print is gone. Then do another coat of paint and the problem will be fixed.
Last edited by 6.5affiliate; 09-11-2010 at 09:00 PM.
09-11-2010, 08:59 PM
#28
Junior Member
Join Date: Aug 2010
Location: Cincinnati, OH
Posts: 15
This is what you need:
*Everything can be bought at a local auto shop
-1 can of Duplicolor Adhesive promoter
-1 can of Duplicolor White paint
-1 can of Duplicolor clear coat
-1 Duplicolor black touch-up paint
-scoth blue painters tape
-exacto knife
-400, 1500, 2000 (optional) grit wet/dry sandpaper
-polishing and rubbing compound
-wax
-Meguiar's ScratchX 2.0 (optional)
-polish
*Tips:
1.When you sand the "chrome" off the emblem then make sure it's smooth or otherwise it will show in the finish.
2. If your sanding it in between coats of paint then use LIGHT pressure because if you don't then it can remove the paint and promoter and you will have to start the process all over again.
3. Always spray light coats of paint or whatever because it will give it a good finish and doesn't leave drips and other imperfections. Also with heavier coats will lead to it chipping or cracking faster than it would.
4. NEVER touch anything that your painting....EVER. The paint is still soft during the painting process and you can leave finer prints that won't disappear with additional coats.
Once you remove the burger from the car (if you don't know how to do that then let me know).
1.Use a 400 grit piece of wet/dry sand paper and sand everything out until it's smooth and all the "chrome" is gone. Then use some soap and water to wash everything off and then dry it with a paper towel.
2. Then use some Duplicolor adhesive promoter and do about three coats. Waiting about 15 min in between each coat and use your first coat of paint within 10 minutes of the last coat. (I recommend that you use only Duplicolor products because it's not a good idea to mix paints/primer of different brands.)
3. Then after each coat of paint, you should use a 1500 grit piece of wet-dry sandpaper to LIGHTLY sand it . This will result in a smooth finish......wait about 20 min in between coats.
4. Wait for about two hours before adding the clear coat. Wait about 20 min in between coats. I recommend that you don't sand it at this time.
*If you don't care about a mirror finish then just spray the coats and don't even sand it.
4. Wait for about a day for the paint to dry and then use some blue scotch painter's tape and cover up the area around where it says "Nissan"......usse an exacto knife and cut carefully around the letters for them to be painted (be PRECISE or else it will show in the final product and you don't want that).
5. Use some of the Duplicolor touch up paint to brush it in the letters Wait about 30 min in between each coat. Wait about two hours before removing the tape.
FINALLY after two days, you use a 1500 grit wet/dry sandpaper and wet sand it. Then use a 2000 grit to finish it off. After that use some rubbing compound, polishing compound, Meguiars scratchX 2.0, and wax)
OR
You don't necessarily have to sand it if your satisfied with the result. Just use the rubbing and polishing compound. Then polish and wax......
*To put it back on your car I recommend that you use 3M tape because it isn't permanent. Just in case later down the road you decide to paint it again. BIG possibility of that happening in about 5 yrs or less.
09-12-2010, 02:39 AM
#29
I ended up with a small hair in one of my pieces, and I was able to use the sticky side of a piece of blue painter's tape to get it out without messing up the paint job. I just folded the tape over on itself, and VERY LIGHTLY touched the tape to the foreign object in the paint, and it lifted it right out.

Thread
Thread Starter
Forum
Replies
Last Post
litch
4th Generation Maxima (1995-1999)
123
01-04-2024 07:01 PM
BPuff57
Advanced Suspension, Chassis, and Braking
33
04-16-2020 05:15 AM
REDinLV
7th Generation Maxima (2009-2015)
4
10-18-2015 05:31 AM