
Question about my HID kit


Thread Starter
Senior Member
Joined: Apr 2013
Posts: 317
From: Frisco, TX
Question about my HID kit
I've been trying to do research on here how most people installed their HID kit but there isn't an actual step by step tutorial for noobs (myself).
I know you can take off your wheels and go through the wheel well to install the kit. I'm confused because my HID kit came with a relay? I've been reading others posts and most have said they are plug and play..
Here are some pictures.


I have a base 2010 SV model. My question is, do I NEED to have the relay or can I just plug the ballast with the bulbs? Is there a benefit to installing the relay if I don't need it?
I know you can take off your wheels and go through the wheel well to install the kit. I'm confused because my HID kit came with a relay? I've been reading others posts and most have said they are plug and play..
Here are some pictures.
I have a base 2010 SV model. My question is, do I NEED to have the relay or can I just plug the ballast with the bulbs? Is there a benefit to installing the relay if I don't need it?


Thread Starter
Senior Member
Joined: Apr 2013
Posts: 317
From: Frisco, TX

Thread Starter
Senior Member
Joined: Apr 2013
Posts: 317
From: Frisco, TX
Good to know. I was really confused when it came in with a relay because reading so many posts about how everyone was just "plug and play" 'ing their kits really threw me off.
The connector with the orange/light brown wire goes to the OEM plug on the driver side. The red wire with the inline fuse goes to the positive terminal on the battery. Each connector with the blue/black wires go to the ballasts. You must ground those connectors to the chassis wherever you see fit. From there, the bulbs plug into the ballasts and that's that. Then install the bulbs and you're good to go.
Good luck.
Thread Starter
Senior Member
Joined: Apr 2013
Posts: 317
From: Frisco, TX
Was it not labeled when you got it?
The connector with the orange/light brown wire goes to the OEM plug on the driver side. The red wire with the inline fuse goes to the positive terminal on the battery. Each connector with the blue/black wires go to the ballasts. You must ground those connectors to the chassis wherever you see fit. From there, the bulbs plug into the ballasts and that's that. Then install the bulbs and you're good to go.
Good luck.
Thread Starter
Senior Member
Joined: Apr 2013
Posts: 317
From: Frisco, TX
Was i not labeled when you got it?
The connector with the orange/light brown wire goes to the OEM plug on the driver side. The red wire with the inline fuse goes to the positive terminal on the battery. Each connector with the blue/black wires go to the ballasts. You must ground those connectors to the chassis wherever you see fit. From there, the bulbs plug into the ballasts and that's that. Then install the bulbs and you're good to go.
Good luck.

Also... does this part goto the battery or is it supposed to be mounted

Lastly is this the red wire you are speaking of that needs to be hooked to the battery or does this wire also get grounded?

Thanks for all your help so far, i really don't want to pay $150.00 to a shop if I could just grasp the concept of hooking it up myself.

Uh... I think you should not touch the entire kit until you have a better idea about:
I am worried that you WILL fry A LOT of stuff, and probably WILL start a fire.
Before you proceed any further, read this post, give me about 15 min so that I can edit a few pictures, and write a lot of information to hopefully clarify everything before you proceed.
- How a HID system works
- How electricity works
- How waterproofing works
I am worried that you WILL fry A LOT of stuff, and probably WILL start a fire.
Before you proceed any further, read this post, give me about 15 min so that I can edit a few pictures, and write a lot of information to hopefully clarify everything before you proceed.
Sorry if this is redundant but circled in blue, would that be the correct connection. black connection going into the black wire that will be grounded to chassis?
Also... does this part goto the battery or is it supposed to be mounted
Lastly is this the red wire you are speaking of that needs to be hooked to the battery or does this wire also get grounded?
Thanks for all your help so far, i really don't want to pay $150.00 to a shop if I could just grasp the concept of hooking it up myself.
Okay:
(Standard disclaimer here, proceed at your own risk, I aim for 100% accuracy with my information, but I may be wrong somewhat.)
(Standard disclaimer here, proceed at your own risk, I aim for 100% accuracy with my information, but I may be wrong somewhat.)
- How a HID system works
Stating the obvious, A HID system is not your traditional halogen bulb. If you simply give a HID bulb 12 volts, nothing will occur, because there is not enough energy to jump mixture of gasses inside the bulb and create an arc of light.
In a traditional halogen bulb, there is a wire filament, thin enough and resistive enough that when current flows through it, it heats up from the resistance, and becomes hot enough until light is emitted.
With some basics covered, we move onto ballast and ignitor, both essential parts of the HID system.
The ignitor creates a very sharp power spike that creates starts the bulb per se, and the ballast will then take over, and keep a constant high voltage the hid bulb for the arc inside of it to stay "on". - How electricity works
Positive Terminal -> Something that needs power -> Negative Terminal
Positive is usually red or white in color, while negative is usually black in color. Of course, there are variances in these, but as a general rule of thumb though, this is true. - How waterproofing works
Well, it is the keep water out. Water by itself is non conductive. But since water usually has more stuff inside of it than just water, that is what makes it conductive. Also, corrosion, etc etc.


That looks wrong. I believe that taps into your High beams for power. For now though, leave it unconnected to anything.
That is a relay, it is self contained, so mount it to the body of the car somewhere.
Battery. The fuse on there is to protect your car and you in case something goes wrong from in the system
That is a relay, it is self contained, so mount it to the body of the car somewhere.
Battery. The fuse on there is to protect your car and you in case something goes wrong from in the system
Thread Starter
Senior Member
Joined: Apr 2013
Posts: 317
From: Frisco, TX
Okay:
(Standard disclaimer here, proceed at your own risk, I aim for 100% accuracy with my information, but I may be wrong somewhat.)
(Standard disclaimer here, proceed at your own risk, I aim for 100% accuracy with my information, but I may be wrong somewhat.)
- How a HID system works
Stating the obvious, A HID system is not your traditional halogen bulb. If you simply give a HID bulb 12 volts, nothing will occur, because there is not enough energy to jump mixture of gasses inside the bulb and create an arc of light.
In a traditional halogen bulb, there is a wire filament, thin enough and resistive enough that when current flows through it, it heats up from the resistance, and becomes hot enough until light is emitted.
With some basics covered, we move onto ballast and ignitor, both essential parts of the HID system.
The ignitor creates a very sharp power spike that creates starts the bulb per se, and the ballast will then take over, and keep a constant high voltage the hid bulb for the arc inside of it to stay "on". - How electricity works
Positive Terminal -> Something that needs power -> Negative Terminal
Positive is usually red or white in color, while negative is usually black in color. Of course, there are variances in these, but as a general rule of thumb though, this is true. - How waterproofing works
Well, it is the keep water out. Water by itself is non conductive. But since water usually has more stuff inside of it than just water, that is what makes it conductive. Also, corrosion, etc etc.
Thank you again, I know most wouldn't want to take the time to explain this to such a noob like myself. I appreciate it.
Wow! Thank you a lot for explaining this. I don't think your response was rude but very informative. I don't have a clue what I was doing until you broke it down. ChrisMan287's post made sense but I was confused because of all the extra wires coming from the actual bulb itself. I'm guessing I can just zip-tie those together and just use the connections that come off of the ballast output.
Thank you again, I know most wouldn't want to take the time to explain this to such a noob like myself. I appreciate it.
Thank you again, I know most wouldn't want to take the time to explain this to such a noob like myself. I appreciate it.
In some cars, when the high beams are turned on, the low beams are turned off and in some cases, the fog lights are turned off as well.
For example, the 4th generation Maxima did exactly this, when the high beams are used, it was wired to turned off low beams and fog lights.
For the 7th generation Maxima with a HID system, the fog lights turn off, but the low beams stay on. I do now know what happens on the 7th gen with halogen lights.
With that said, if you can post a picture of the bulb with all the wires unraveled so we can see it better, that would help a lot in figure out what that wire is for.
EDIT: In my last picture, instead of "To original low beam bulb" I meant "To original low beam bulb socket"
Last edited by Akiyukio; May 18, 2013 at 06:44 PM.
Thread Starter
Senior Member
Joined: Apr 2013
Posts: 317
From: Frisco, TX
You are welcome, I forgot to mention the reason why I am unsure what that wire in the first picture does, and to leave it disconnected for now.
In some cars, when the high beams are turned on, the low beams are turned off and in some cases, the fog lights are turned off as well.
For example, the 4th generation Maxima did exactly this, when the high beams are used, it was wired to turned off low beams and fog lights.
For the 7th generation Maxima with a HID system, the fog lights turn off, but the low beams stay on. I do now know what happens on the 7th gen with halogen lights.
With that said, if you can post a picture of the bulb with all the wires unraveled so we can see it better, that would help a lot in figure out what that wire is for.
EDIT: In my last picture, instead of "To original low beam bulb" I meant "To original low beam bulb socket"

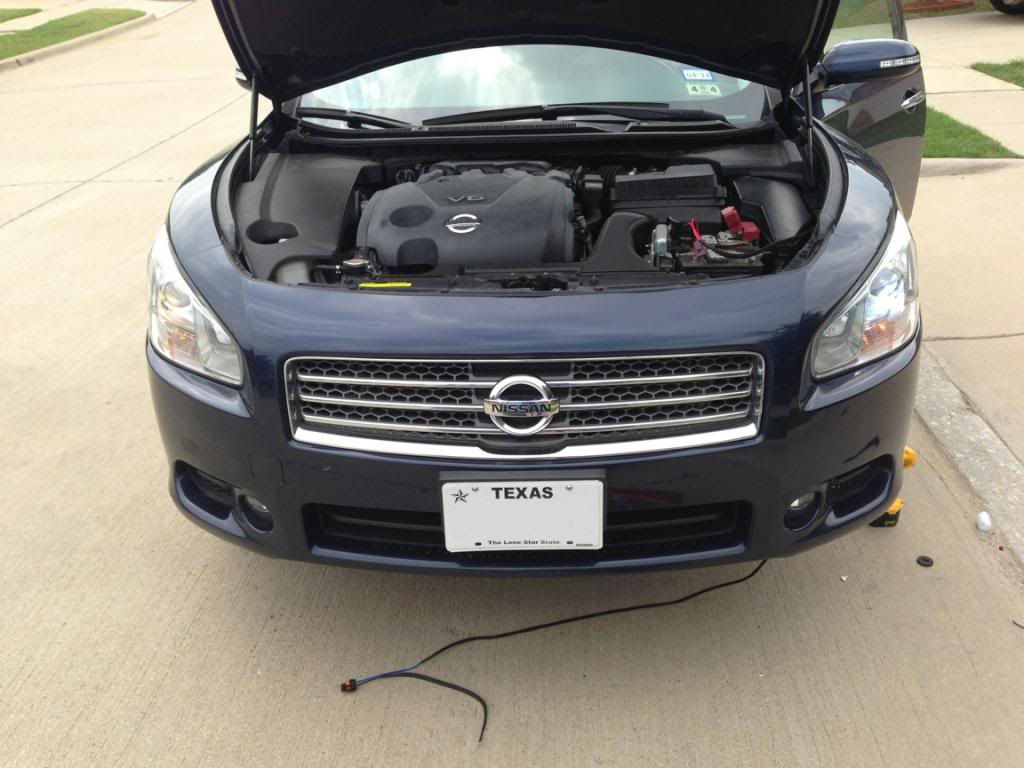
Here is how I have it connected now. The only problem I see is where I'm going to mount the actually relay part. I guess i'll see when I get under the car.

First picture:
I suspect that that wire is to tap into the high beams for power in case the low beams do turn off. My 7th gen has the stock HID system, so it is configured to remain on. Do a test on yours and see if yours stays on or not. If your low beams do stay on while your high beams are on as well, then you can safely remove that wire, as it has no use.
Second Picture:
As far as I can tell, it looks good.
About your comment of where to mount the relay, anywhere really is fine, even zip-tying is just fine, just so it does not rattle/bounce around the car.
Heck, you can leave it dangling somewhere, but of course, securing it always best so it doesn't bump into something over and over damaging itself and whatever it is hitting.
Thread Starter
Senior Member
Joined: Apr 2013
Posts: 317
From: Frisco, TX
First picture:
I suspect that that wire is to tap into the high beams for power in case the low beams do turn off. My 7th gen has the stock HID system, so it is configured to remain on. Do a test on yours and see if yours stays on or not. If your low beams do stay on while your high beams are on as well, then you can safely remove that wire, as it has no use.
Second Picture:
As far as I can tell, it looks good.
About your comment of where to mount the relay, anywhere really is fine, even zip-tying is just fine, just so it does not rattle/bounce around the car.
Heck, you can leave it dangling somewhere, but of course, securing it always best so it doesn't bump into something over and over damaging itself and whatever it is hitting.
I suspect that that wire is to tap into the high beams for power in case the low beams do turn off. My 7th gen has the stock HID system, so it is configured to remain on. Do a test on yours and see if yours stays on or not. If your low beams do stay on while your high beams are on as well, then you can safely remove that wire, as it has no use.
Second Picture:
As far as I can tell, it looks good.
About your comment of where to mount the relay, anywhere really is fine, even zip-tying is just fine, just so it does not rattle/bounce around the car.
Heck, you can leave it dangling somewhere, but of course, securing it always best so it doesn't bump into something over and over damaging itself and whatever it is hitting.

Thread Starter
Senior Member
Joined: Apr 2013
Posts: 317
From: Frisco, TX
Finally got the time to throw it on the car. It took me 3 hours to do... i think it was because I jacked one side of the car at a time.
Here's a pic of the stock bulb and the hid bulb.

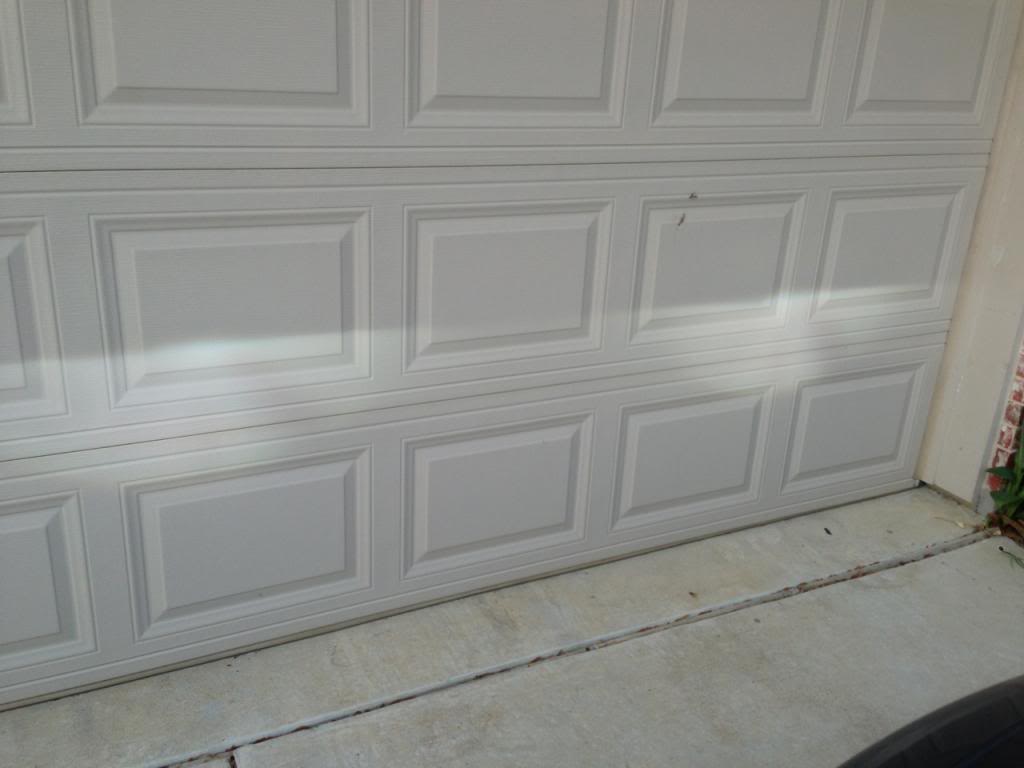
Here's how they shine in the daytime on the garage. I couldn't even see my stock bulbs in the day time on the garage
Here's a pic of the stock bulb and the hid bulb.
Here's how they shine in the daytime on the garage. I couldn't even see my stock bulbs in the day time on the garage


Thread
Thread Starter
Forum
Replies
Last Post
The Frye
7th Generation Maxima (2009-2015)
6
Sep 2, 2021 11:03 AM
MaxLife17
8th Generation Maxima (2016-)
43
Jun 27, 2019 01:37 PM