
***WARNING to all ES control arm bushing owners***


Donating Maxima.org Member

Joined: Aug 2001
Posts: 2,940
Originally Posted by Matt93SE
The factory setup only has a washer on the front, but the ES bushing set needs two to hold the bushings in place. As you can see form the pics above, they're just pressed in by hand and will walk out if there's not a washer holding them in.
Of the dozen or so ES kits I've installed, *MOST* of them had the washers in them, but a couple sets were missing them. strange. I contacted ES about it and they said it was a mistake and they would go through the kits again and check things over.
Of the dozen or so ES kits I've installed, *MOST* of them had the washers in them, but a couple sets were missing them. strange. I contacted ES about it and they said it was a mistake and they would go through the kits again and check things over.

I was putting everything together in a hurry when I did mine, so the rear bushing never occurred to me..... Now I guess I have to take it apart again and put a second washer in there! *curse* *curse* *curse* Maybe I'll just install that LTB I bought from you and move those washers to the rear....
My kit didn't come with any washers at all.


as per my sig on another site....
Bman, sounds like you've got a plan. pulling the control arm isn't horribly hard on ours now.. just hope that center sleeve pulls off easy!
you guys are picky as **** for internet nerds
Bman, sounds like you've got a plan. pulling the control arm isn't horribly hard on ours now.. just hope that center sleeve pulls off easy!
Donating Maxima.org Member
Joined: Aug 2001
Posts: 2,940
Originally Posted by Matt93SE
Bman, sounds like you've got a plan. pulling the control arm isn't horribly hard on ours now.. just hope that center sleeve pulls off easy!

It had better come off easy! After the ordeal I had to go through to get the arms off in the first place I cleaned everything up and put anti-sieze all over the gusset pivot. I expect everything to come apart easily this time around.
I'm going to park the car for now and do it this weekend - I'm sick of freezing AND working by lamp light in the dark....
Originally Posted by Bman
Now I guess I have to take it apart again and put a second washer in there! My kit didn't come with any washers at all.
Oh, and be careful of the 3 bolts on the control arm bushing pin. I found pretty good thread sheer on some bolts making it tough to remove and reinstall. Maybe from my driving punishment but maybe normal wear.
It seems that a lof ot people have issues with those bolts. A lot of the B14 and B15 guys are stripping those out when they pull the gussets off, and I've seen it happen on the 3rd gens as well. I'm thinking it's a bit of an issue with overtorquing from the factory.
Nonetheless, I just run a tap through them and clean up the threads, then treat everything liberally with anti-sieze. haven't had one sieze or strip out yet.
Nonetheless, I just run a tap through them and clean up the threads, then treat everything liberally with anti-sieze. haven't had one sieze or strip out yet.
Donating Maxima.org Member
Joined: Aug 2001
Posts: 2,940
Originally Posted by BEJAY1
Oh, and be careful of the 3 bolts on the control arm bushing pin. I found pretty good thread sheer on some bolts making it tough to remove and reinstall. Maybe from my driving punishment but maybe normal wear.

Originally Posted by Broaner
People that think torque specs don't change with different material parts need a reality check. Lets think about this. The OEM bushing is rubber and is designed to deflect a bit. Replace those bushings with these and the deflection will be nearly eliminated. Yet, "the car was designed around" the fact that the rubber bushings would compress under torquing. Since the urethane bushings don't deflect as much the nut will be in a different position(not as deep on the threads) when it reaches the recomended torque. How this will effect the performance of the part is irrelevant to our disagreement. I love it when people call out someones logic for the sole reason that they are young.

Well, I got it all put back together this weekend. I had to remove the plate that holds the rear control arm pivot so I could work it all back into place without seperating the ball joint. I made sure the threads on both sides were clean and put some Permatex blue thread lock on before torquing them down.
Got the alignment done and everything went right back into spec, so nothing was permanently damaged in all of this.
Got the alignment done and everything went right back into spec, so nothing was permanently damaged in all of this.

Member
Joined: Jun 2004
Posts: 38
Had something scary happen on a friend's B13 which we installed ES control arm bushings on. We didn't have a press at the time to get the old bushings out so in order to get them out we drilled out the rubber and then used a hacksaw to remove the outer sleeve of the bushing that is pressed into the control arm. We ended up cutting into the control arm cylindrical part where the bushing goes in, but it didn't look too deep so we didn't think anything of it. Something like a year later my friend was driving on the highway and this control arm just plain ripped free of the car. Luckily he somehow had decent control of the car and could pull over and didn't spin out or anything. He replaced the control arm with a junkyard part and all was fine.
I plan on getting these bushings soon so I'll take extra care to understand how things come apart and then put them back together the same way (washers, etc.)
I plan on getting these bushings soon so I'll take extra care to understand how things come apart and then put them back together the same way (washers, etc.)

Originally Posted by Broaner
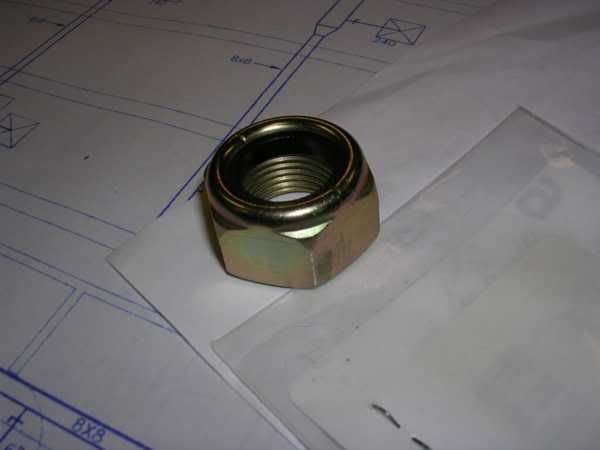
Anybody know the thread size on that? I buggered up the thread on the piece that goes through the bushing and I need to buy a tap to fix 'er up.
I don't know the diameter, but I'm willing to bet it's a regular 1.5 coarse metric thread. The rest of the bolts on the car are.
Here is the deal. I buggered up the thread on the end of it(Actually VQuick buggered it up. LOL Tom). But only the first 1.5 threads is messed. I tried all the standard taps we have at school. I put them in the nut and found one that fit perfectly(5/8" in whatever thread it was). I'm wondering if it fit so well or seemed to fit so well because of the nylock part. What do you think? I really only need to be able to get the first two threads cleaned up. I want to use the die we have but not if its going to force the nut to misthread. There is no point in buying a single die. Normally I'm of the opinion that buying the tools required is a good investment but this time I don't feel that way. I would much rather buy the whole set but I honestly don't forsee many situations in which I need dies.
it's a 16 or 18 x 1.5mm thread, IIRC..
just buy the damn tap. they're like $5 or 10. do it right and stop trying to "redneck engineer" solutions for it. the $10 is well worth it when you screw it up with the wrong die and end up having to buy a new gusset from the dealer for $100+ or even a junkyard part at $25.
just buy the damn tap. they're like $5 or 10. do it right and stop trying to "redneck engineer" solutions for it. the $10 is well worth it when you screw it up with the wrong die and end up having to buy a new gusset from the dealer for $100+ or even a junkyard part at $25.
That six inch piece of steel is $100? D@mn. If I can't find a die to borrow I will buy a whole set. That is just the way I am. I would feel incomplete if I bought only one. It would be floating around in the tool chest all lonely.
Donating Maxima.org Member
Joined: Aug 2001
Posts: 2,940
I doubt you'll be able to find a tap and die that big in any kind of set that isn't extremely expensive.
When I had to go and buy a tap and die for some of the large, rear bolts I had to get it separately and I took the bolt along with me to verify... you can take the nut to check. Either that or buy a thread pitch gauge for a few bucks.
In case anyone's wondering I moved the front CA washers to the rear, and installed Matt's LTB to replace them in the front. The rear half bushing had worked out of one CA, but wasn't damaged or scuffed up very much so I regreased it and tried to reinstall it. Because I was trying to push only one bushing in, the trapped air in between tried to push it back out. Very annoying. I ended up pushing down on it (with a board) and prying at it really hard with a small screwdriver in an attempt to let the air escape. This let me get it in most of the way and I just used the CA nut to press it in the rest of the way (like <1/4") as I put everything back together. I'm confident eventually the air will naturally work its way out with use so this won't create a problem.
****, sorry we messed up the thread, Broan! Even though I was wielding the hammer I think it was an oversight on both of our parts....just like when we dented part of my unibody with the jack! 
Bman, why not just drill a pin-hole through the bushing to allow the air to escape easily? I think that is what I'll do.
I agree. I was stupid not to think to have the nut on the end protecting it. BTW, that part we dented with the jack is the area that would be filled with that foam.
I agree. I was stupid not to think to have the nut on the end protecting it. BTW, that part we dented with the jack is the area that would be filled with that foam.
Donating Maxima.org Member
Joined: Aug 2001
Posts: 2,940
Originally Posted by Broaner
Bman, why not just drill a pin-hole through the bushing to allow the air to escape easily? I think that is what I'll do.


woah.. amazing I saw this thread...
My contact info is linked at the bottom of each page on my website: http://www.mattblehm.com/contact.html
My contact info is linked at the bottom of each page on my website: http://www.mattblehm.com/contact.html

Thread
Thread Starter
Forum
Replies
Last Post
tarun900
4th Generation Maxima (1995-1999)
19
Dec 20, 2021 06:57 PM
CAN-Toronto FS: Basement cleaning
knight_yyz
5th Generation Classifieds (2000-2003)
12
Nov 1, 2015 01:34 PM
RealityCheck
4th Generation Maxima (1995-1999)
7
Oct 2, 2015 06:34 PM
DC_Juggernaut
7th Generation Maxima (2009-2015)
4
Sep 28, 2015 04:07 PM