
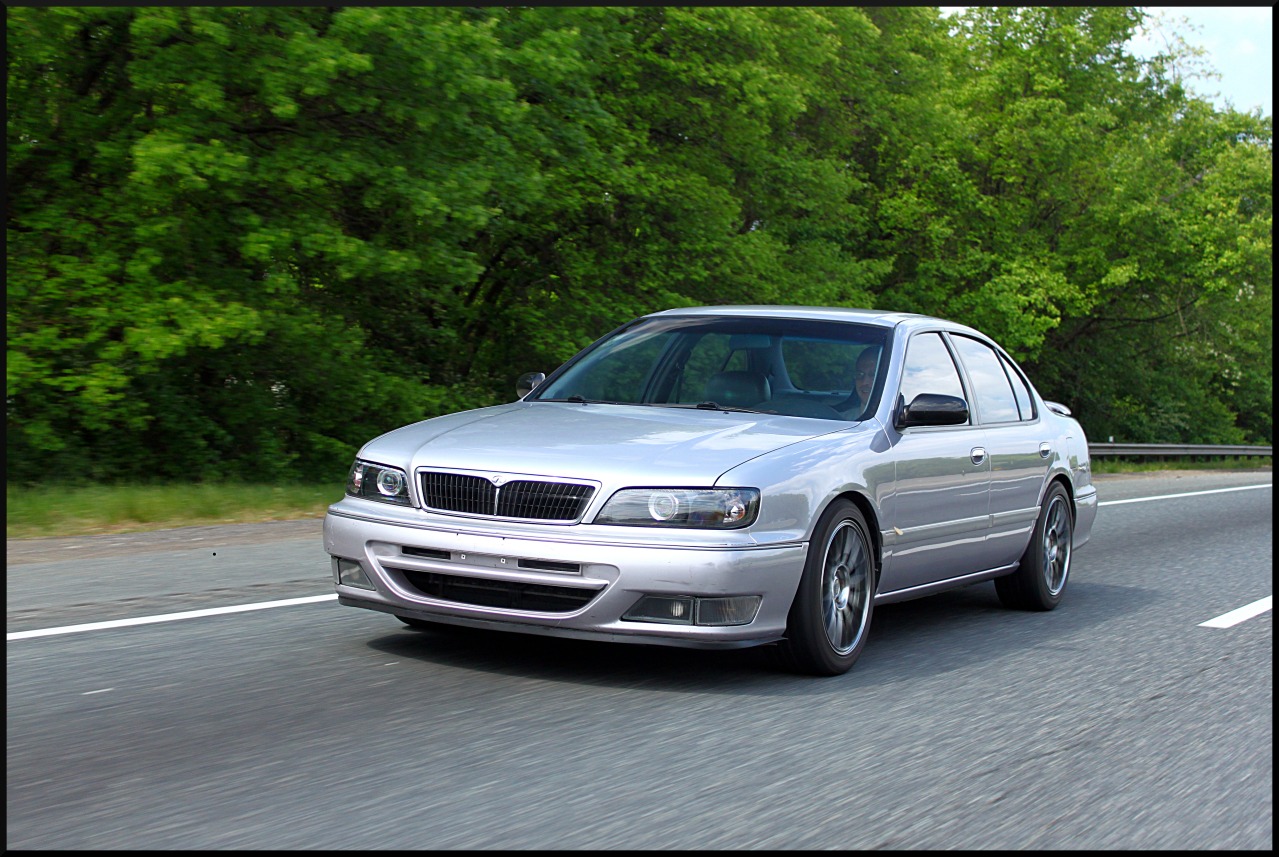
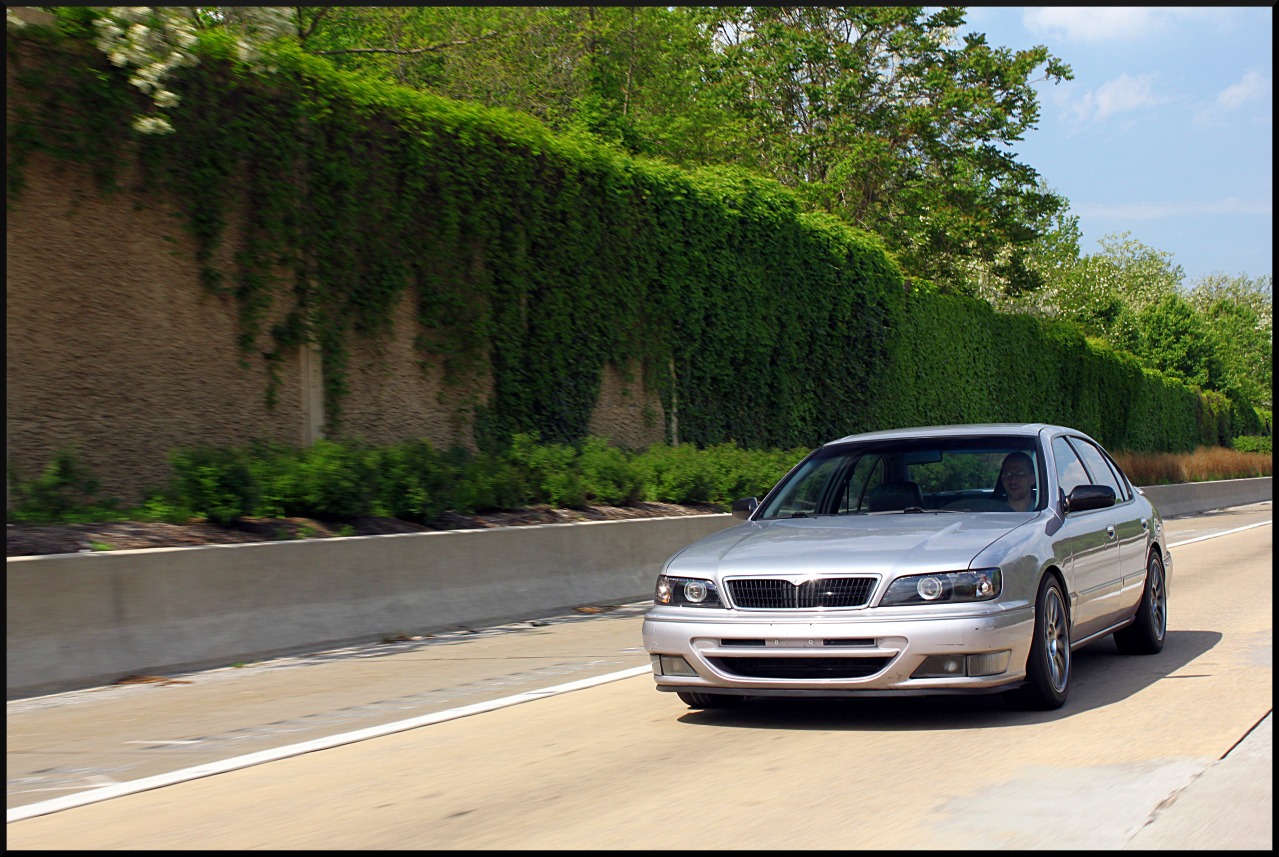
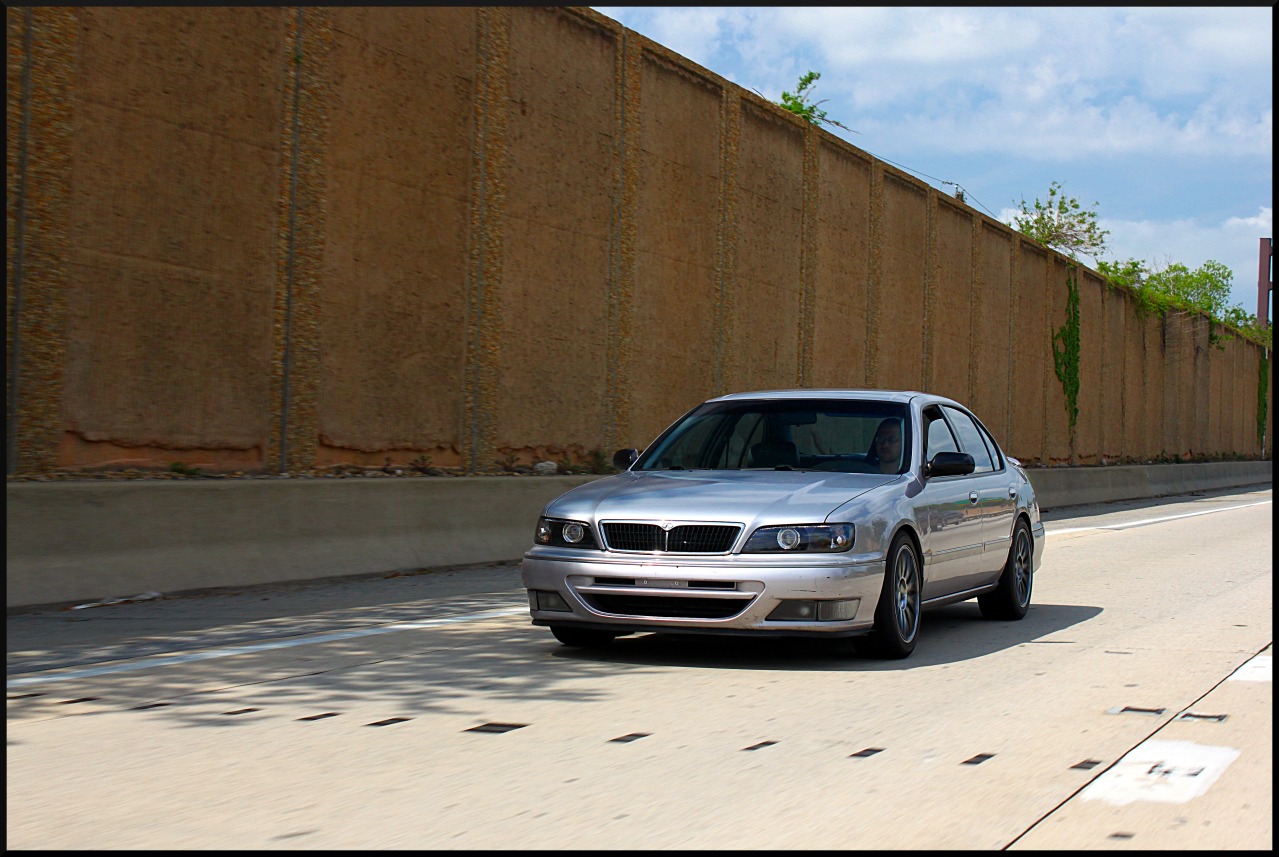
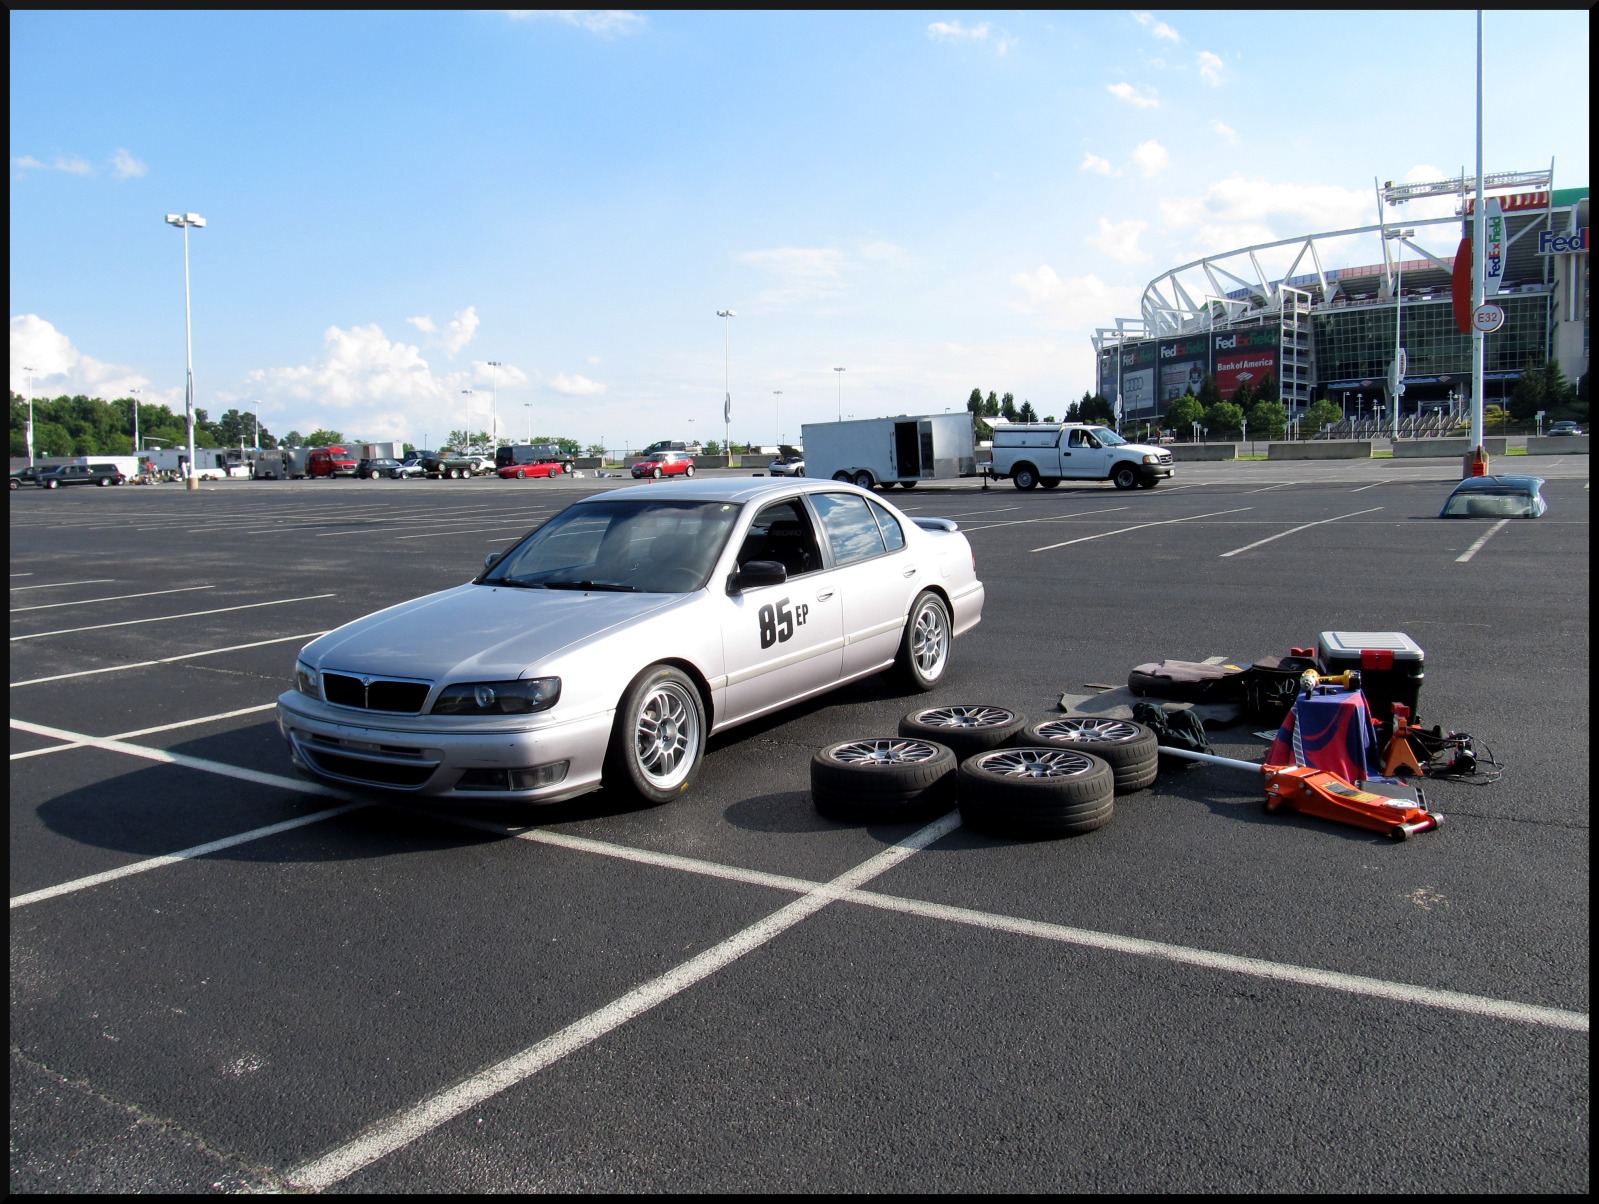
My Massive I30 Revival and Build Thread


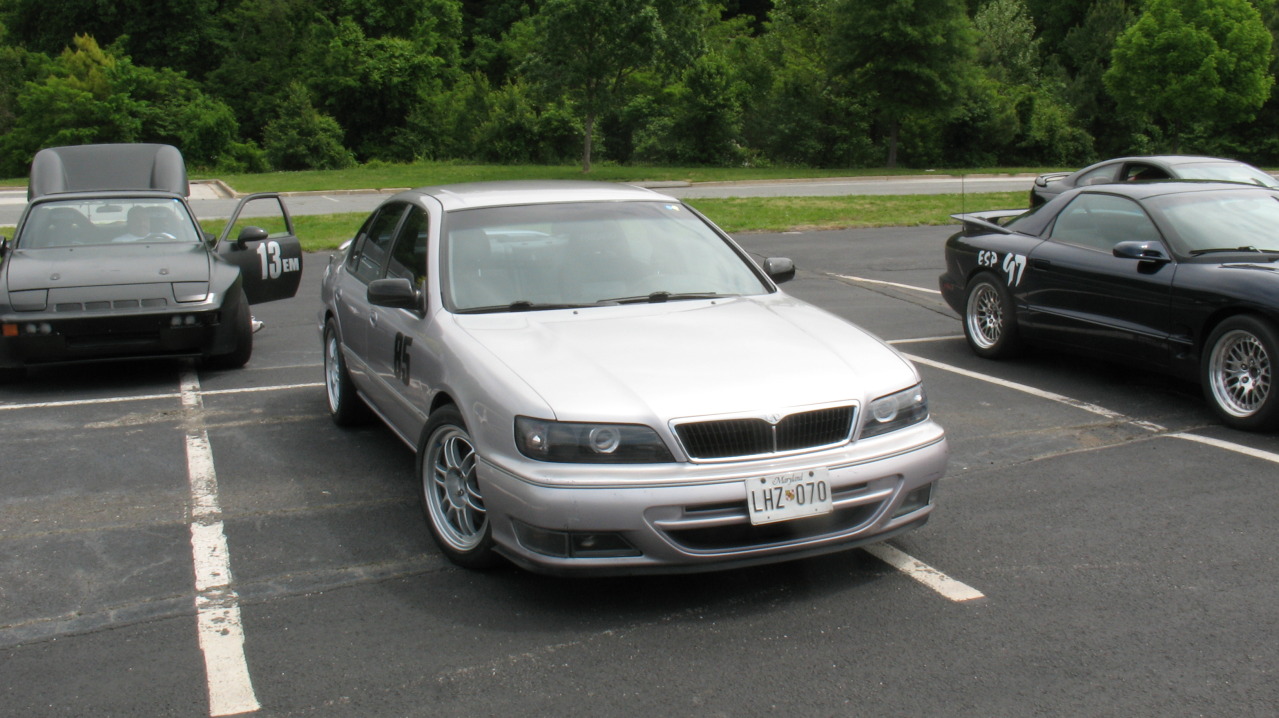
Thanks for the compliments! Let's see, it's a full DE-K with Cattman headers, 2.5" exhaust/G35 sedan muffler, PF TB, JWT ECU, NWP IM spacers, SRI, and a nice tuneup (new spark plugs, coil packs, O2 sensors, KS, clean EGR, etc). I'm planning on building a 3.5" MAF/intake setup with an icebox and doing some fine tuning with an SAFC2 in the near future. I'm shooting for 220 whp, but I think 230 might be possible on a good day. It's not much compared to the 3.5 guys, but it keeps me in a reasonable class for BMW and SCCA racing.


Supporting Maxima.org Member

Joined: Dec 2003
Posts: 678
From: Memphis, TN
Nice work with the I30! Re the G35 muffler, did you simply neck down the 2.5" catback to the G35" inlet? That is, I'm assuming the G35 muffler inlet is 2" or is it 2.25" or something?
I've been running Maxima variable capacity mufflers for years on my little project car, a '93 Altima 2.4L. It's basically the same as the SpecV mufflers, both having a small 2" inlet diameter which surprised me a little....
Jeremy
I've been running Maxima variable capacity mufflers for years on my little project car, a '93 Altima 2.4L. It's basically the same as the SpecV mufflers, both having a small 2" inlet diameter which surprised me a little....
Jeremy
Love threads like thes, just the little things that make all the difference. Car is coming along great, those projectors really give it a nice look.
I love my fender braces too, it give that front end such a solid feel.
Keep it up!
I love my fender braces too, it give that front end such a solid feel.
Keep it up!


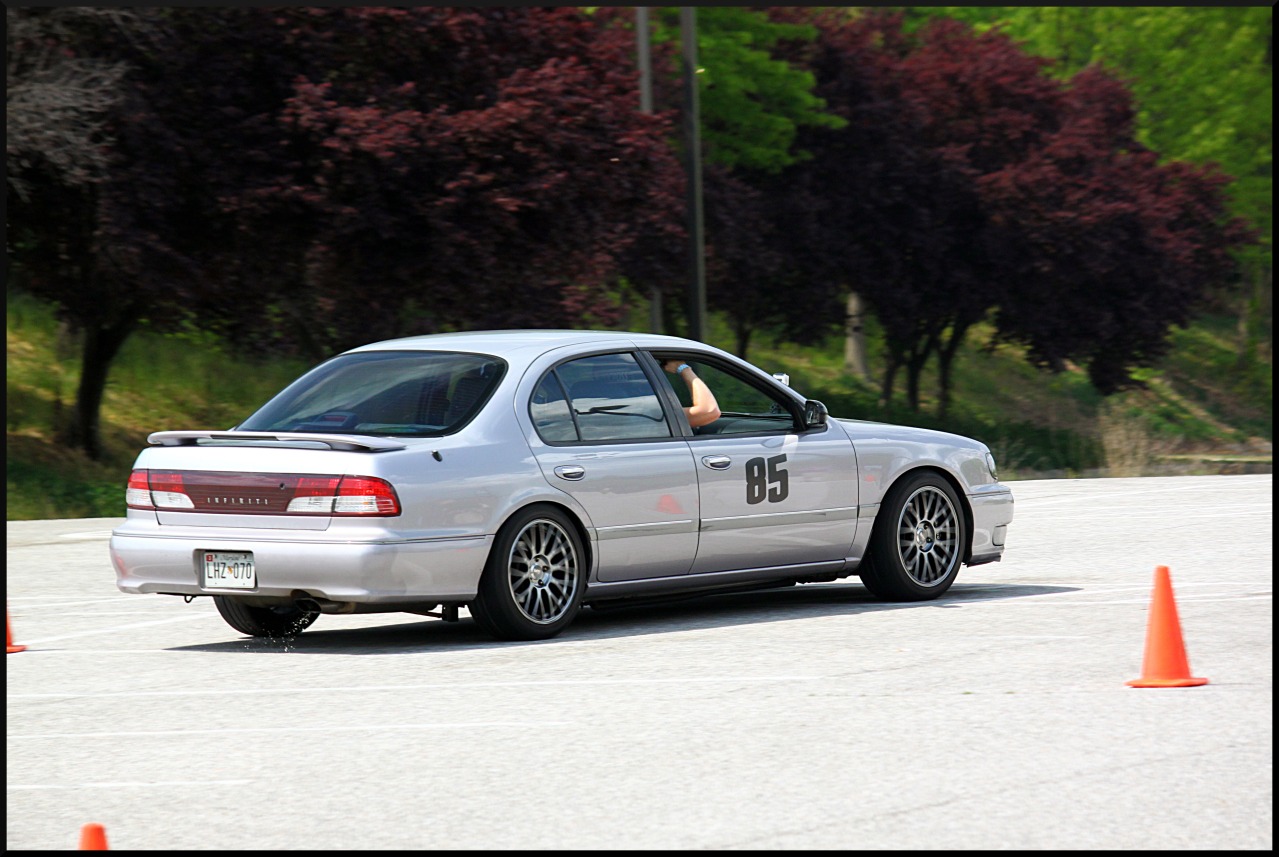
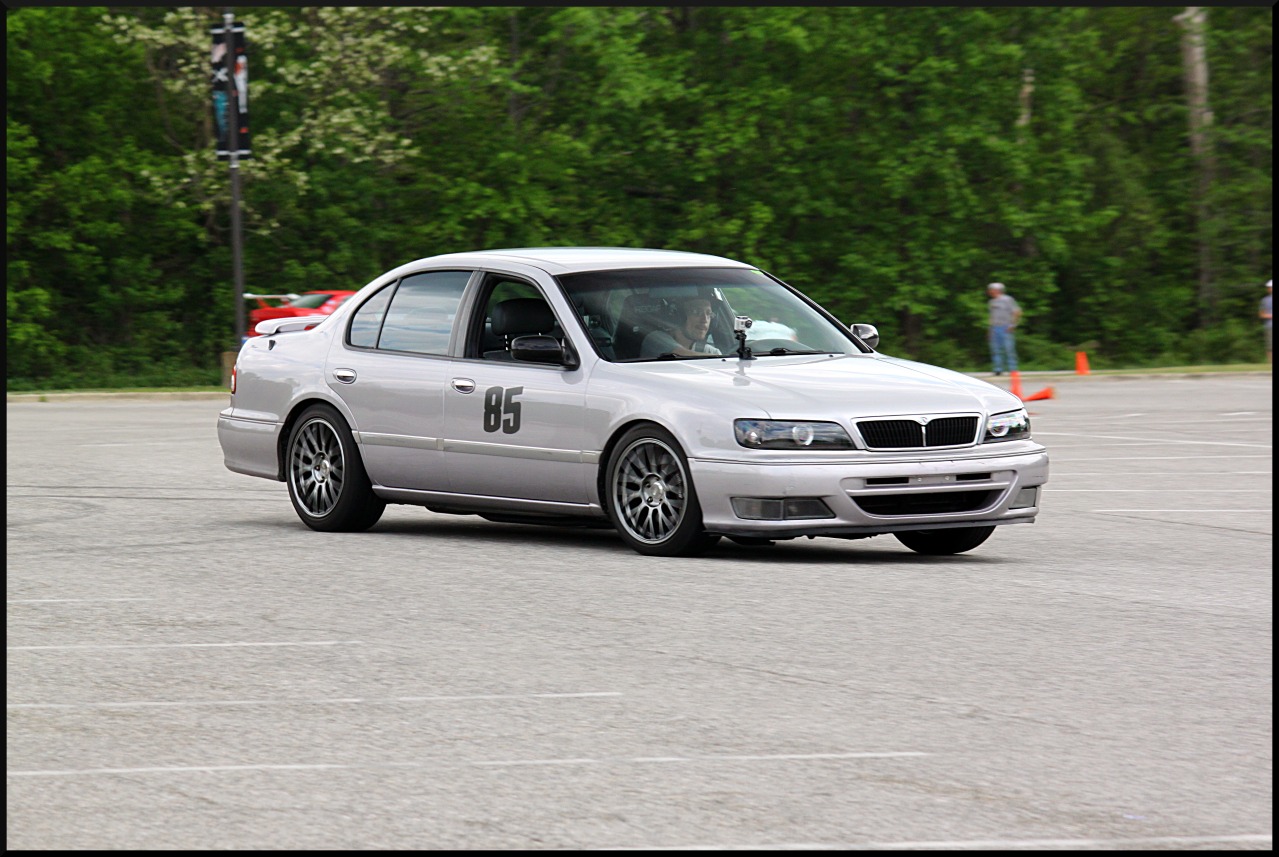
Yeah, these fender braces are amazing. I got to race with them this weekend and the car feels incredible. Turn-in is fantastic and the front end just feels so stable. Not to mention going over nasty bumps no longer makes the front end feel like it's going to fall apart.
Originally Posted by ElectricalBen
Ah man... Glad to see you enjoy the fender braces turned out great for a proto type looks like they fit like a glove too I was a little worried about that
Originally Posted by OneFastStanza
This is a legit build! Very nice 
More pictures and videos of the races coming soon. And I'm heading down to 2JR again this week to have them install the coilovers (it's included in the purchasing price, so why not), their offset rear trailing arm bushings, and fab up a brake master cylinder brace
Oh yeah, and I'm hitting up the Tail of the Dragon again on the way down, except this time I have my GoPro2 camera

Very nice, BCs i have to do some more reading on i might have gotten them mixed up with Ksports. My biggest thing is our locations in the north, and most coilovers not having the best longevity in the cold especially daily driving.
Good luck on the install @ 2JR. And whats the Tail of the Dragon?
I have stage II. IIRC you have stage II also. At least you have the SBCollars installed, which I imagine does provide very similar enhancements.
Very nice, BCs i have to do some more reading on i might have gotten them mixed up with Ksports. My biggest thing is our locations in the north, and most coilovers not having the best longevity in the cold especially daily driving.
Good luck on the install @ 2JR. And whats the Tail of the Dragon?
Very nice, BCs i have to do some more reading on i might have gotten them mixed up with Ksports. My biggest thing is our locations in the north, and most coilovers not having the best longevity in the cold especially daily driving.
Good luck on the install @ 2JR. And whats the Tail of the Dragon?
This is the Tail of the Dragon:

I may or may not be posting a video of my exploits

Supporting Maxima.org Member
Joined: Dec 2003
Posts: 678
From: Memphis, TN
I used to enjoy drives like that....we've been to/through Gatlinburgh and East Tenn quite a bit over the last 11 years (since our honeymoon lol) but this last time we hit Biltmore in Asheville and hit the Parkway on the way back. I didn't check before hand and by the time I could get off, we must have driven about 45mins to an hour thanks to the 40mph zone.
I took the first exit that I figured could get me back to I-40 and flying down the mountains taking those corkscrews and S curves, I thought my front brakes were going to catch on fire but I couldn't get back fast enough to civilization lol!!
This was in a 2012 rental Altima 2.5....
Jeremy
I took the first exit that I figured could get me back to I-40 and flying down the mountains taking those corkscrews and S curves, I thought my front brakes were going to catch on fire but I couldn't get back fast enough to civilization lol!!
This was in a 2012 rental Altima 2.5....
Jeremy
Paint and body work
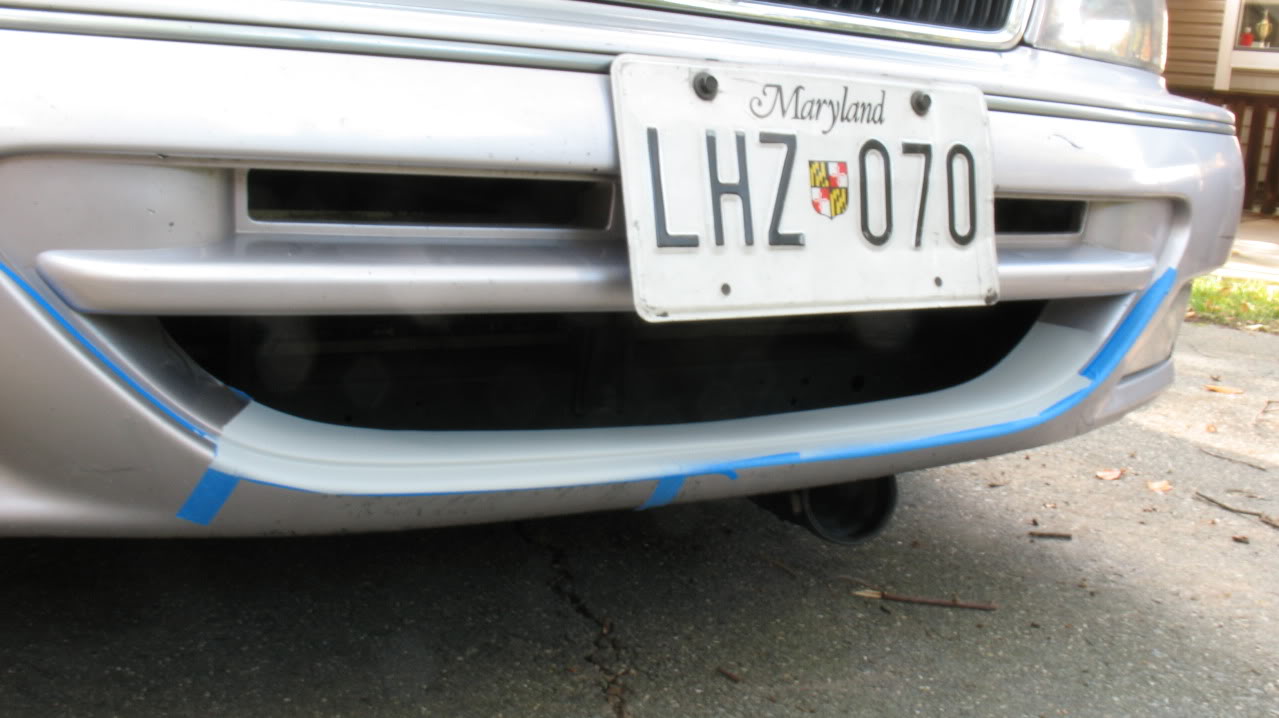
When I bought this I30 some 9 years ago, there were a fair amount of scratches and dents in the bumpers and body. I still haven't taken care of the dents (PDR is expensive!) but I decided to try a cheap method of touching up my bumpers. I bought a can of touch up paint when I bought the car and did some work with it, but it eventually dried out and the dealership said they couldn't get them in that color again.
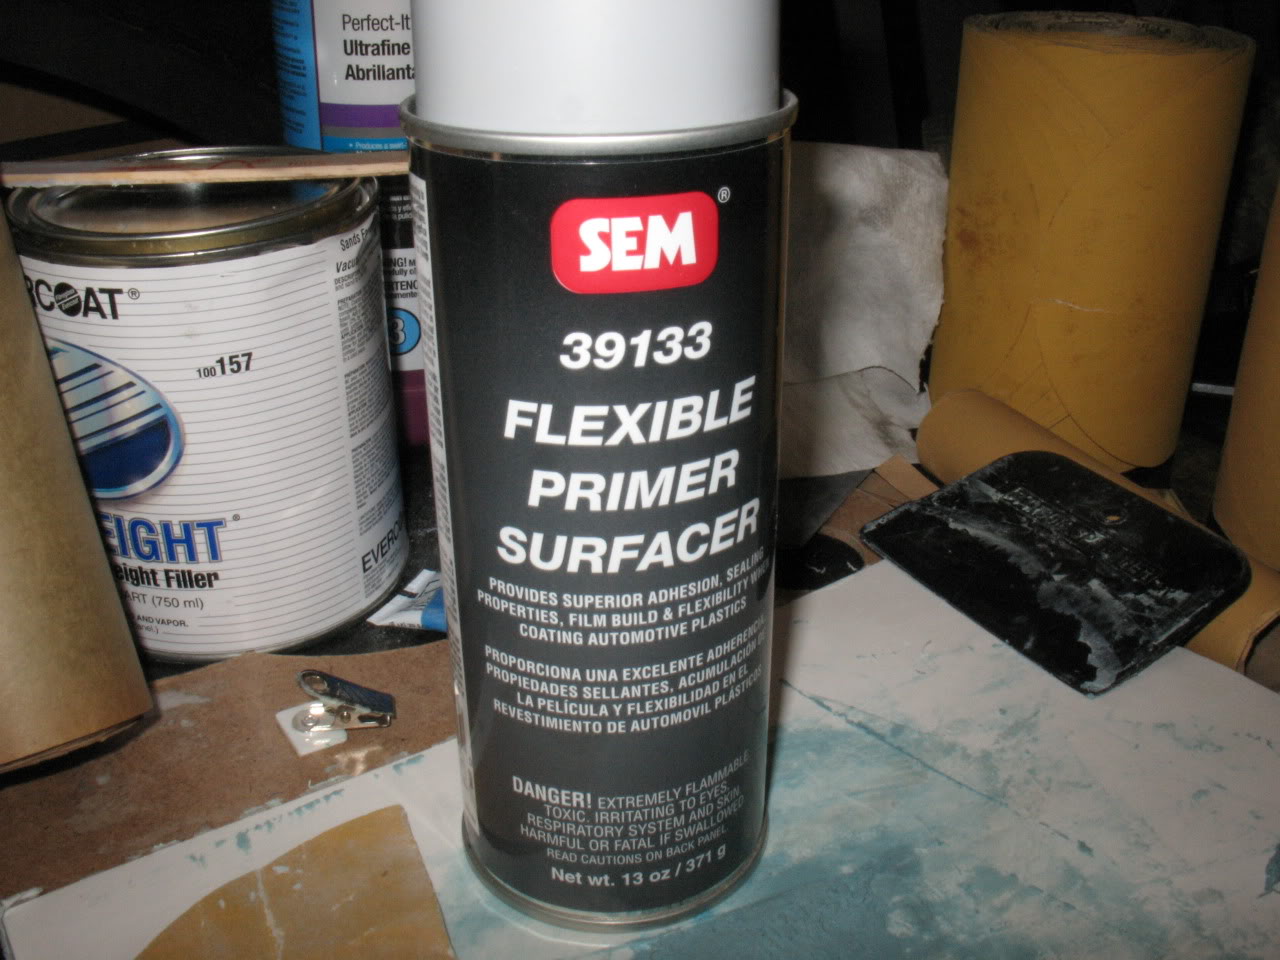
I had heard about Paintscratch.com over the years and had always been curious about how their rattle can paint would turn out. While working at Joe's Professional Auto Care I met a guy named Chris who used to do body and paint work and he said he would help me out with stuff if I got the kit from Paintscratch.com. Since my bumpers had some deep gouges I bought their kit that included spot putty and body filler along with the flexible primer, paint and clear coat.
We started on the front bumper by repairing my atrocious work of cutting off the three vertical bars on the lower grille opening when I first bought the car. We sanded the nubs down and had to use some fiberglass to fill in the larger openings. Then it was on to the putty/filler and primer.
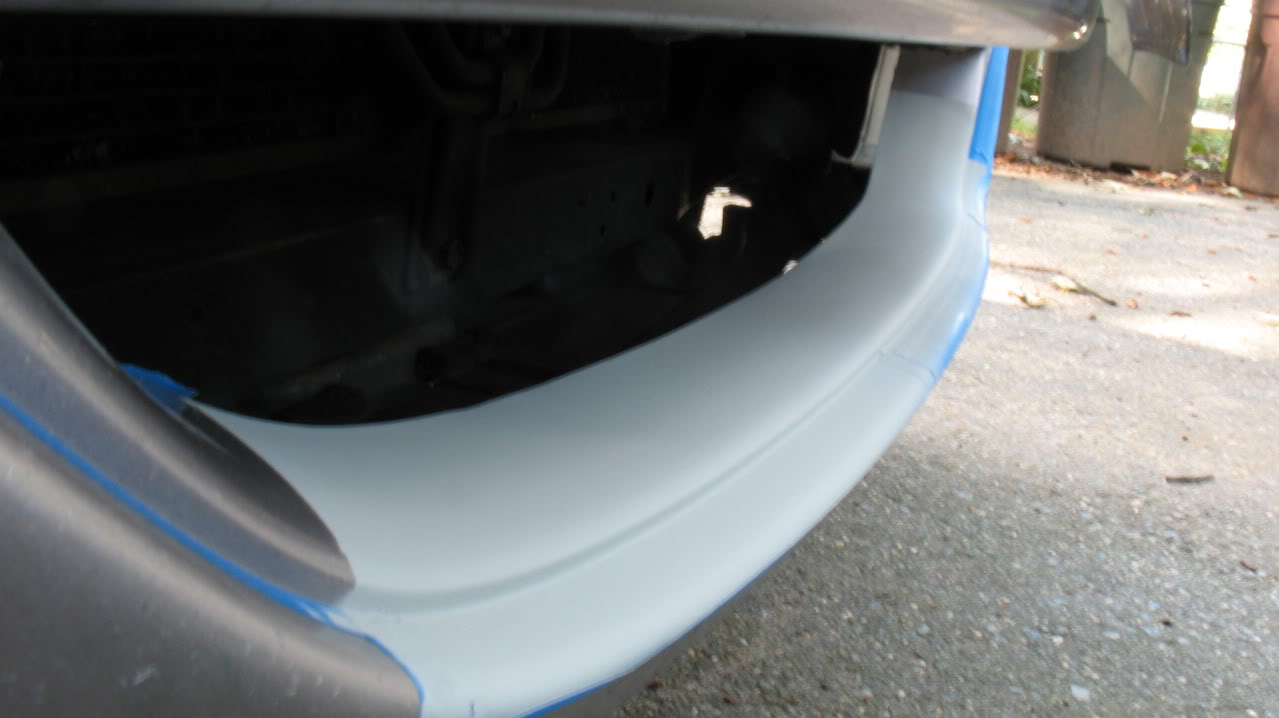
I didn't get any good pics of what the bottom looked like before, but this is what the top looks like (we didn't fix the top since you can't see it)
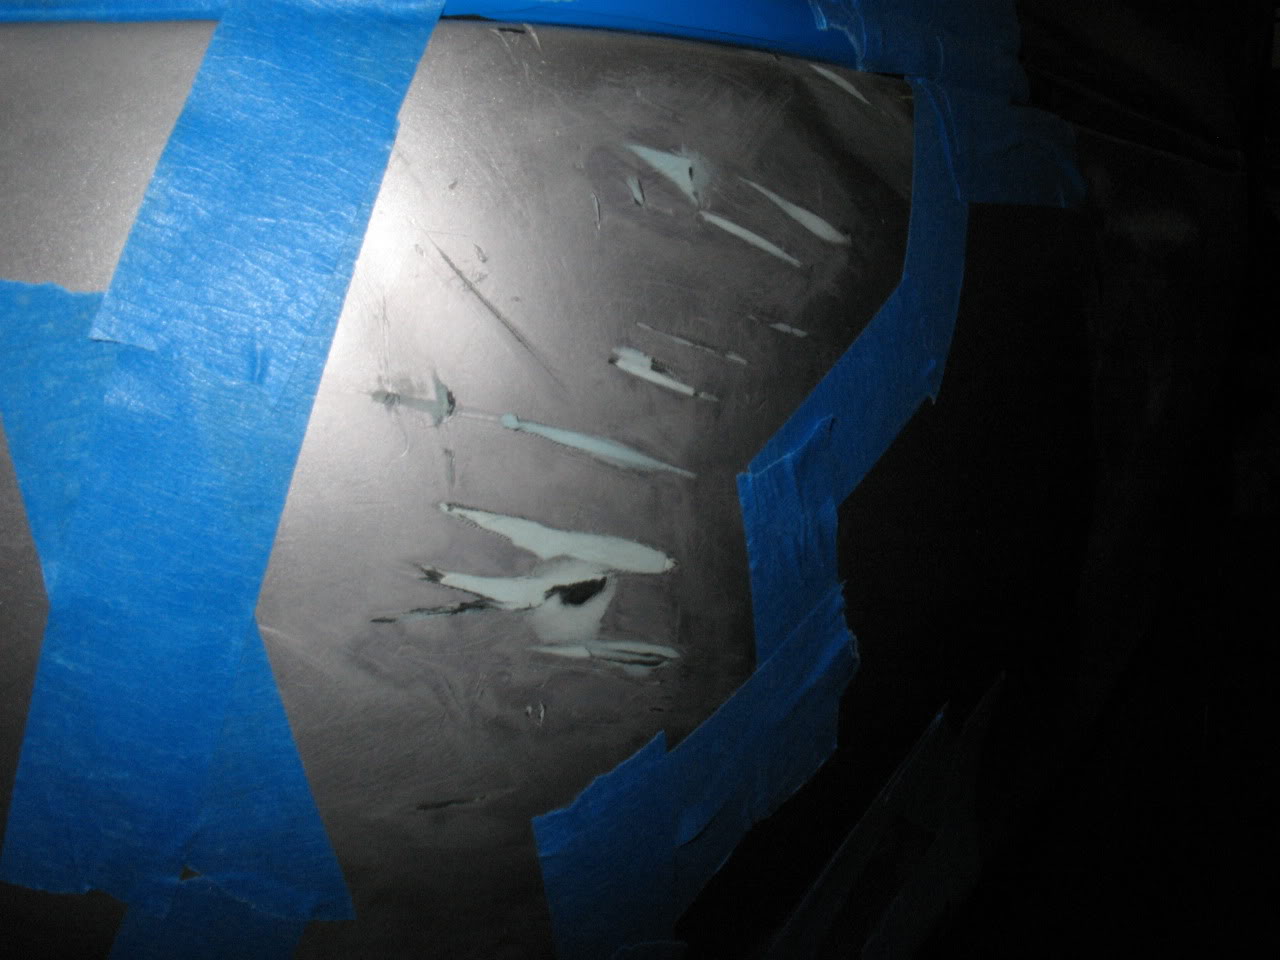
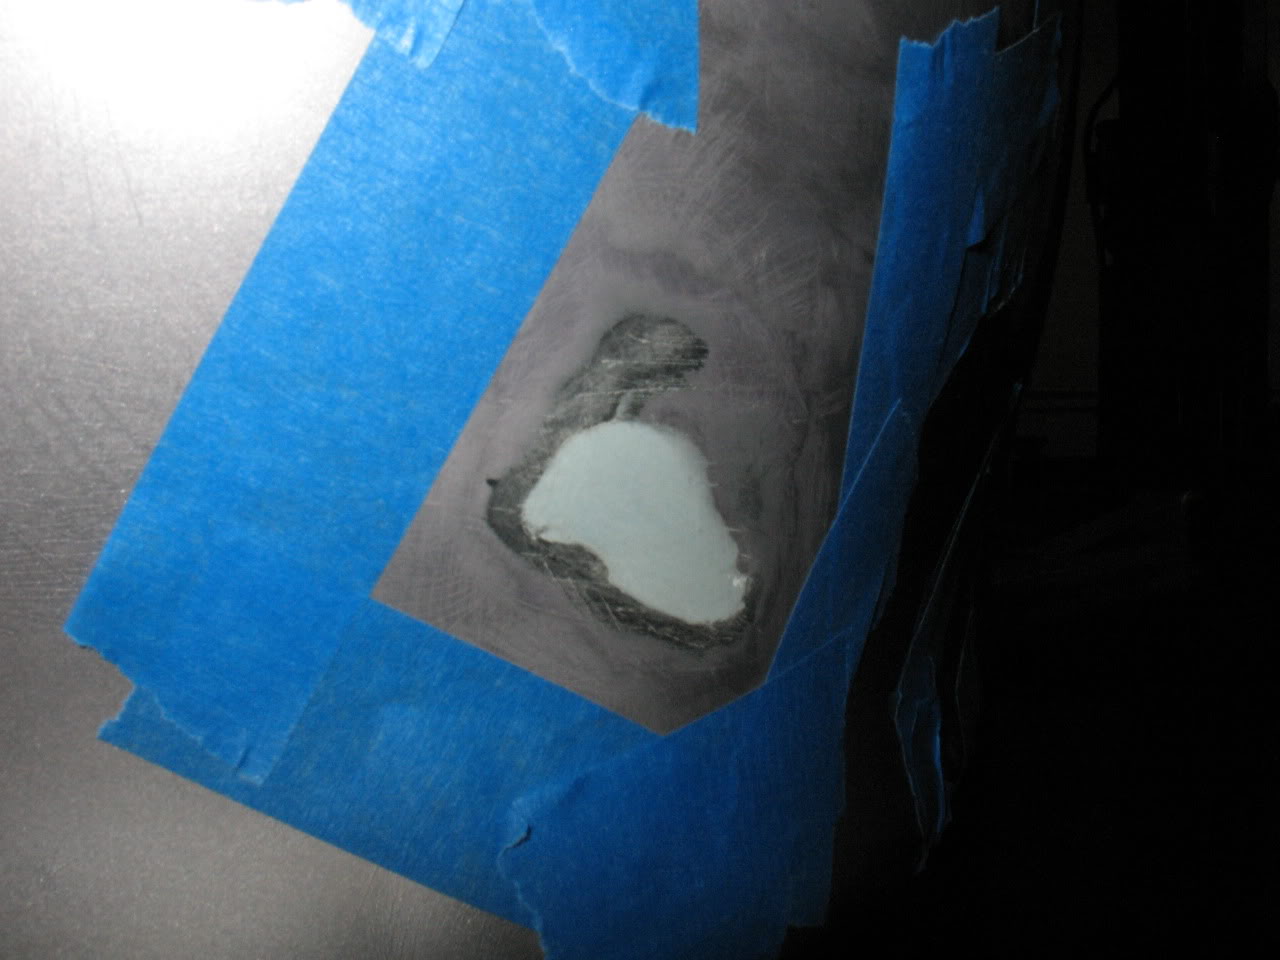
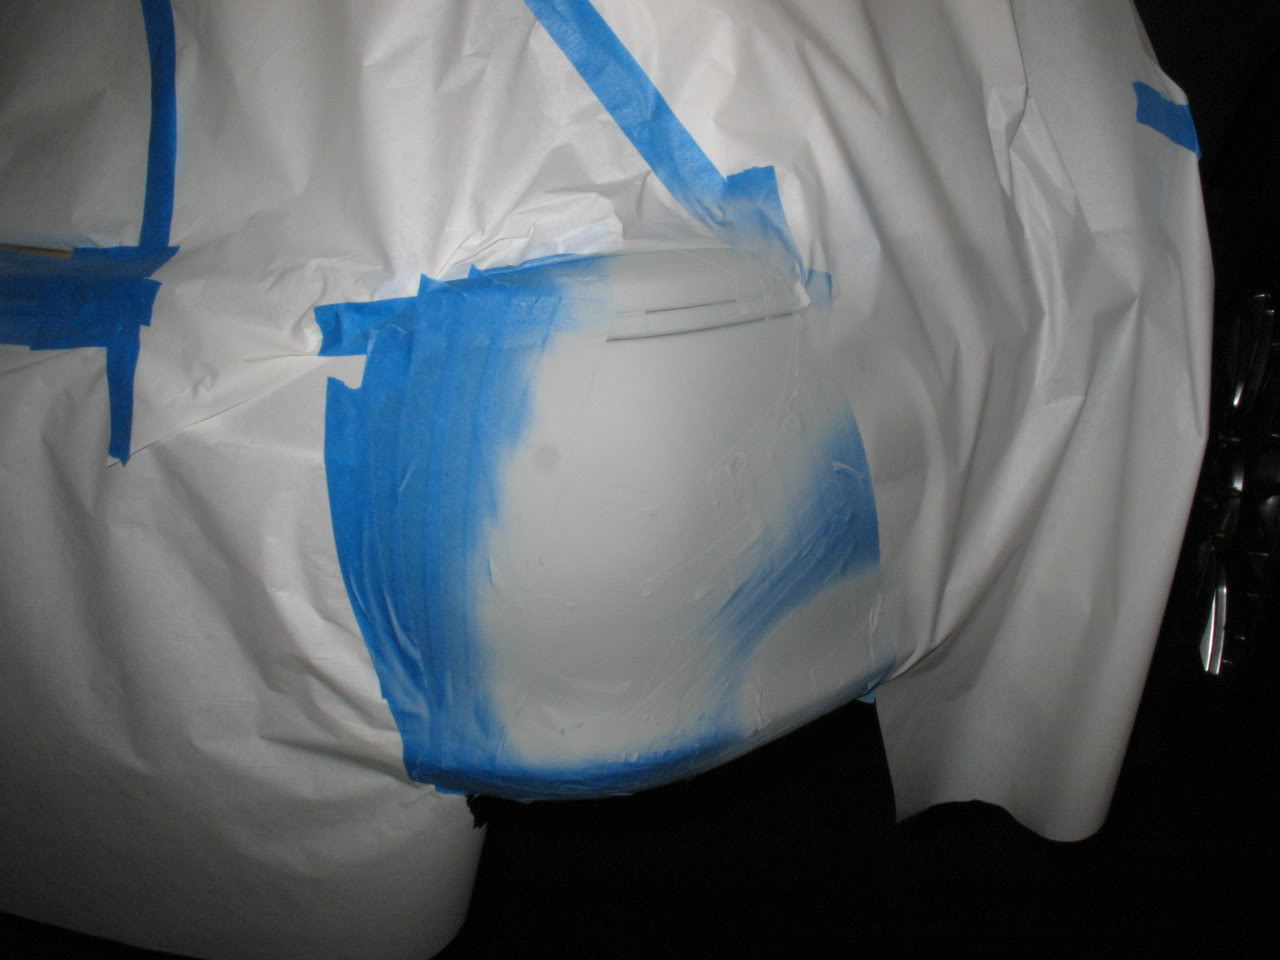
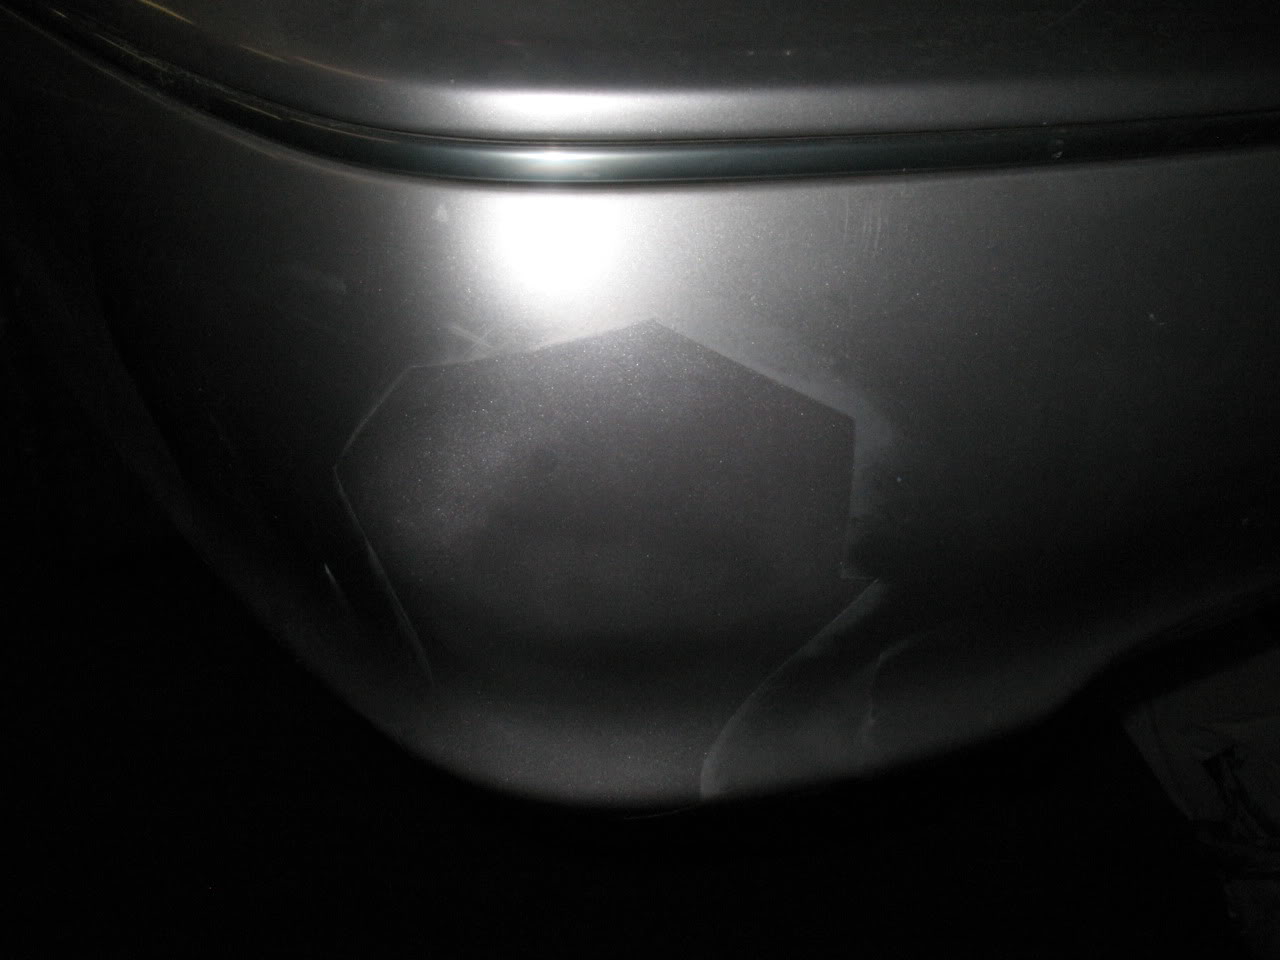
I also had a mysterious scuff on the PS of my front bumper that removed all the paint but didn't leave a single scratch. It looked like something rubber had rubbed off the paint, but I have no idea when or where it happened. This is what it looked like after priming:

And after a few hours, these were the results:
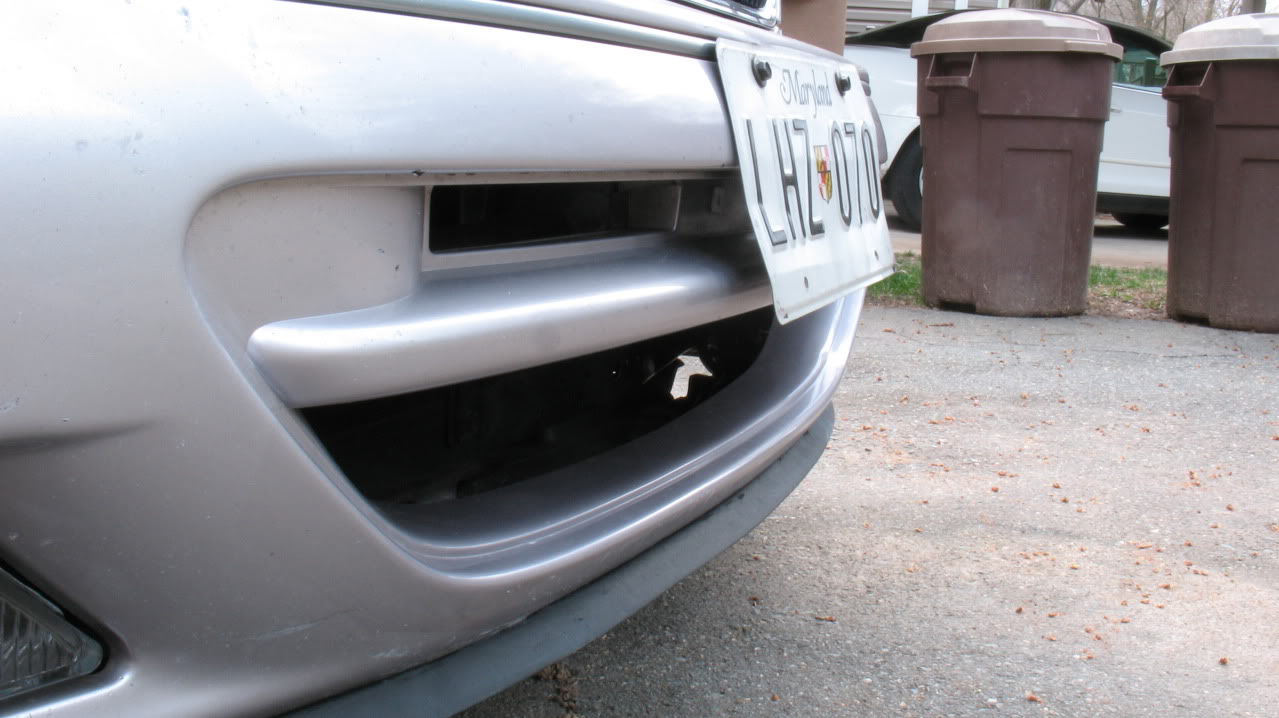
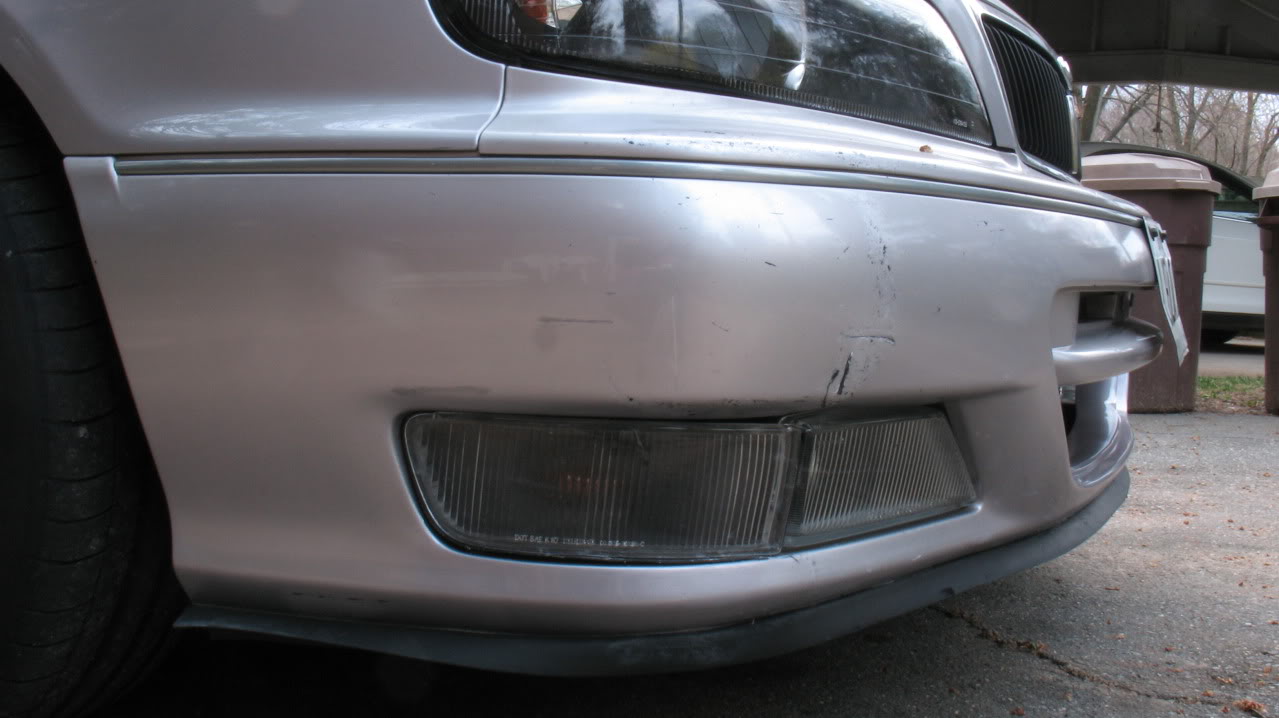
I quickly realized how difficult it is to blend in new paint with 15 year old paint, especially since the bumpers are considerably more faded than the rest of the car is. For what it all cost, I'm pretty happy with the way the front turned out. It's by no means perfect, but replacement bumpers for the I30 aren't cheap and I was curious to see how well their kit works. I would say that if you have paint experience, you can get something around a 7/10 job. If you don't know what you're doing it will probably turn out more like a 4/10 job. There are obviously still plenty of other blemishes and scratches on the front bumper that I no longer have any desire to try and repair. Some day this car will get new bumpers and all will be well in the world.
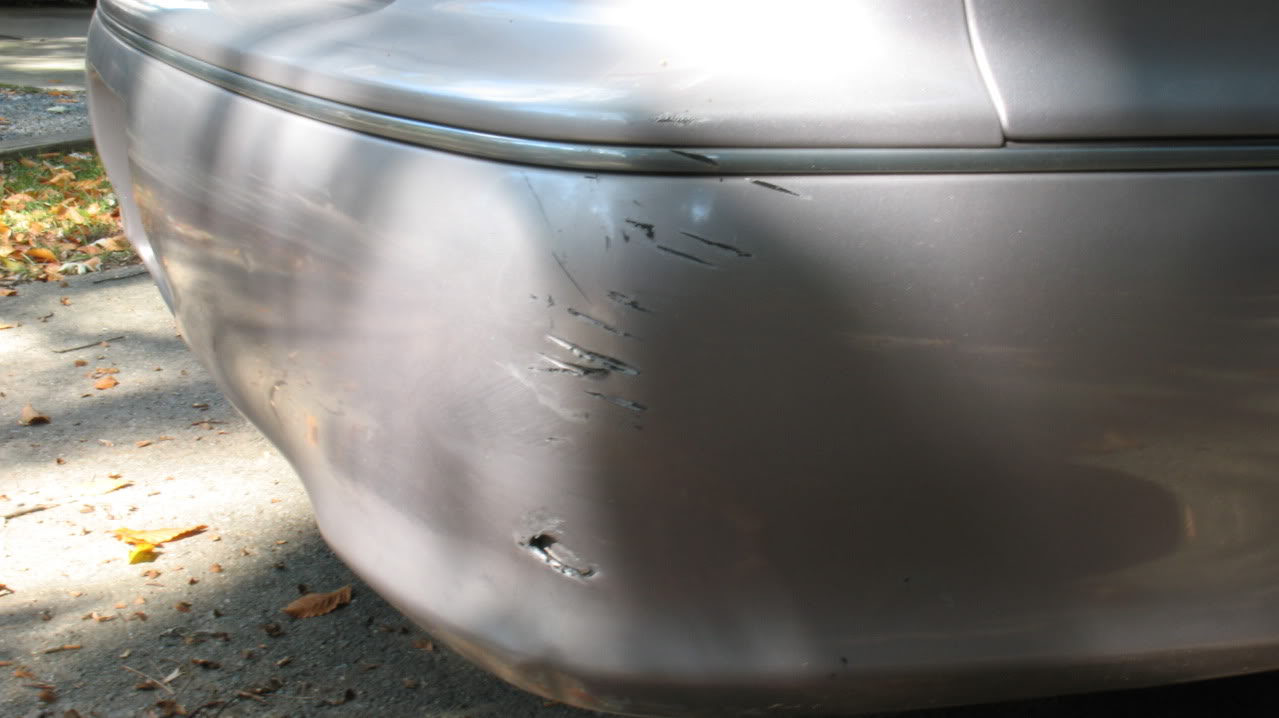
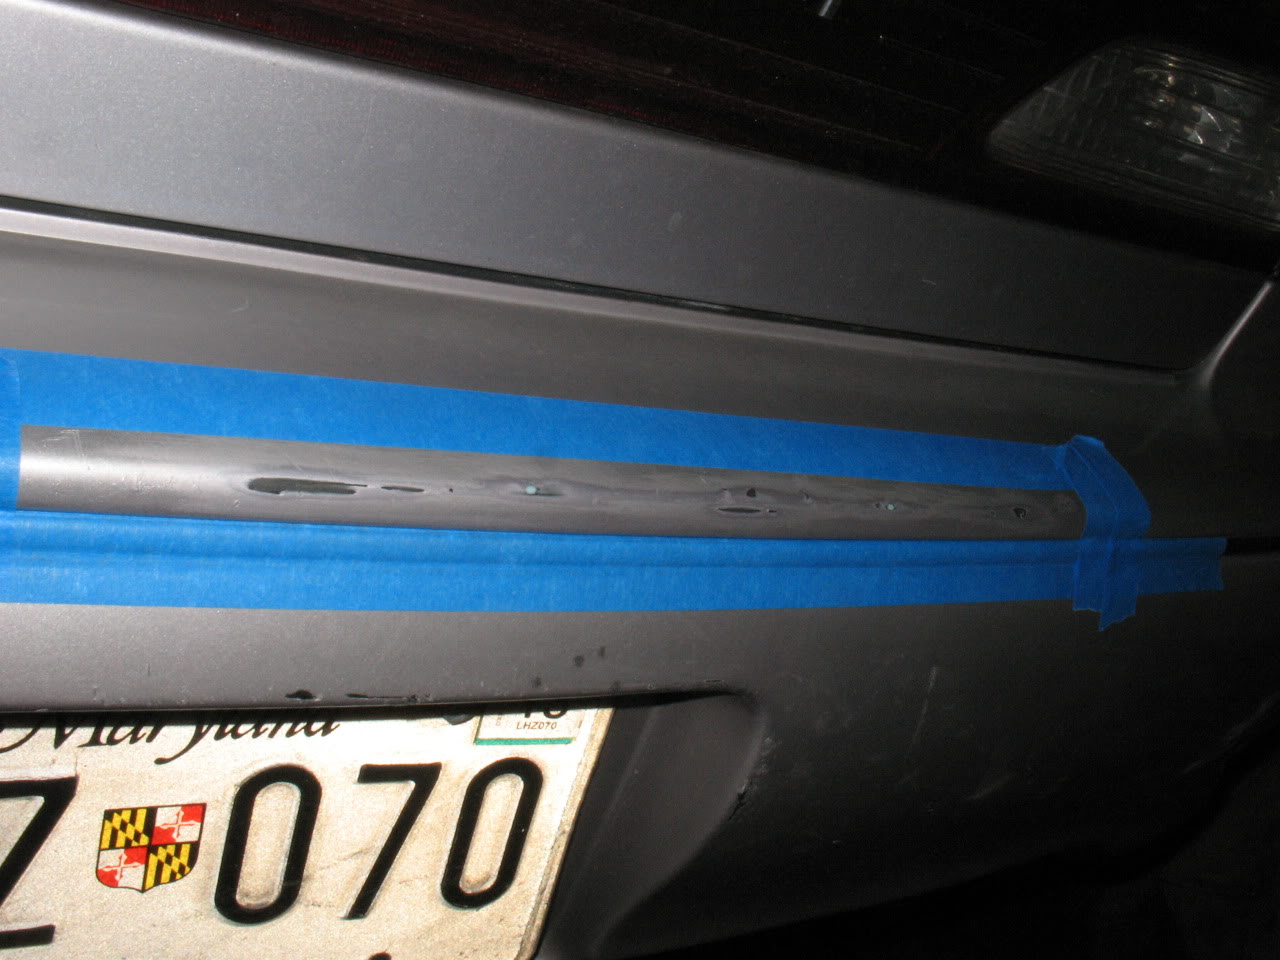
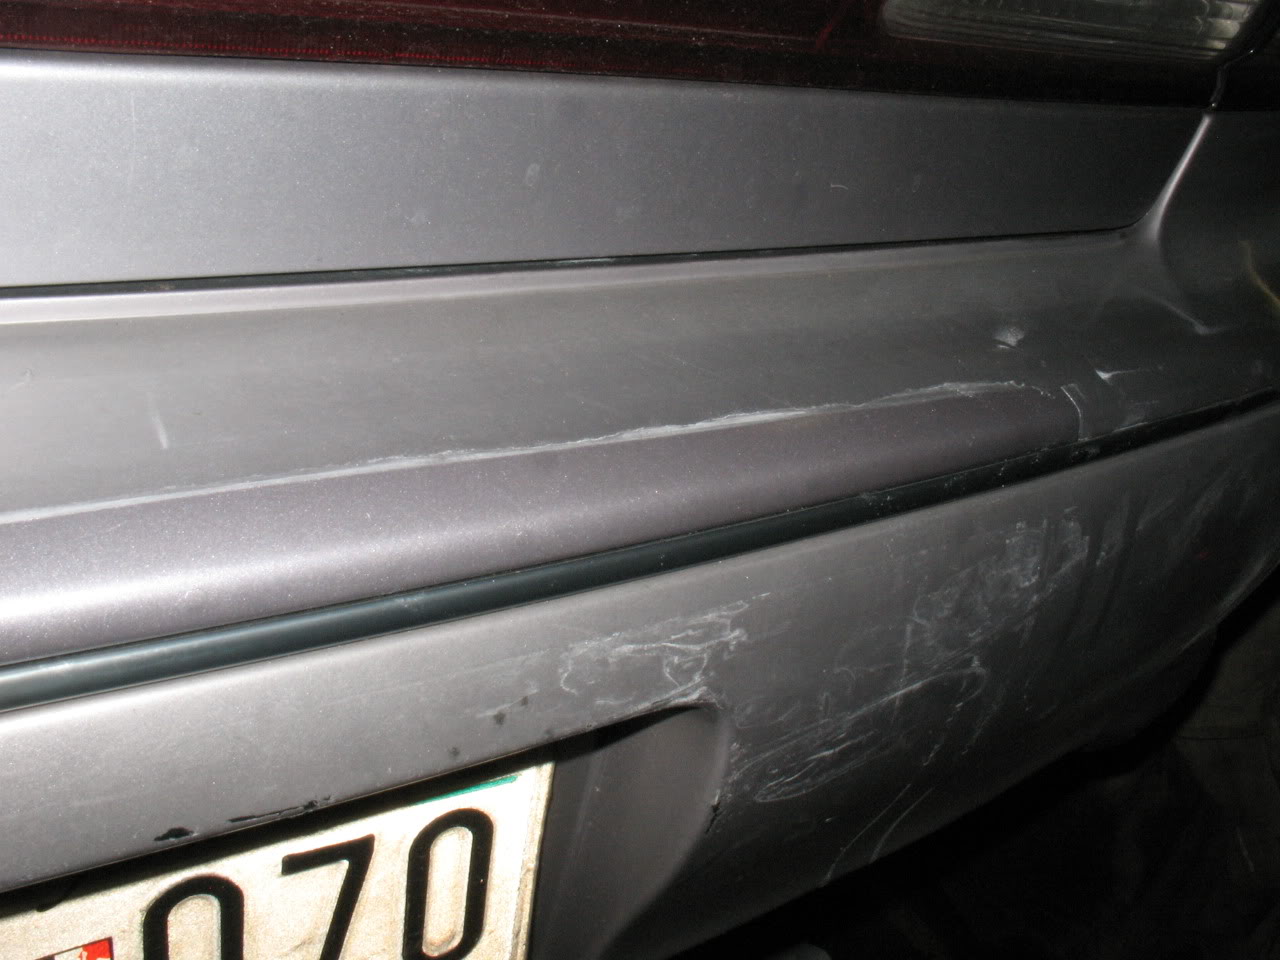
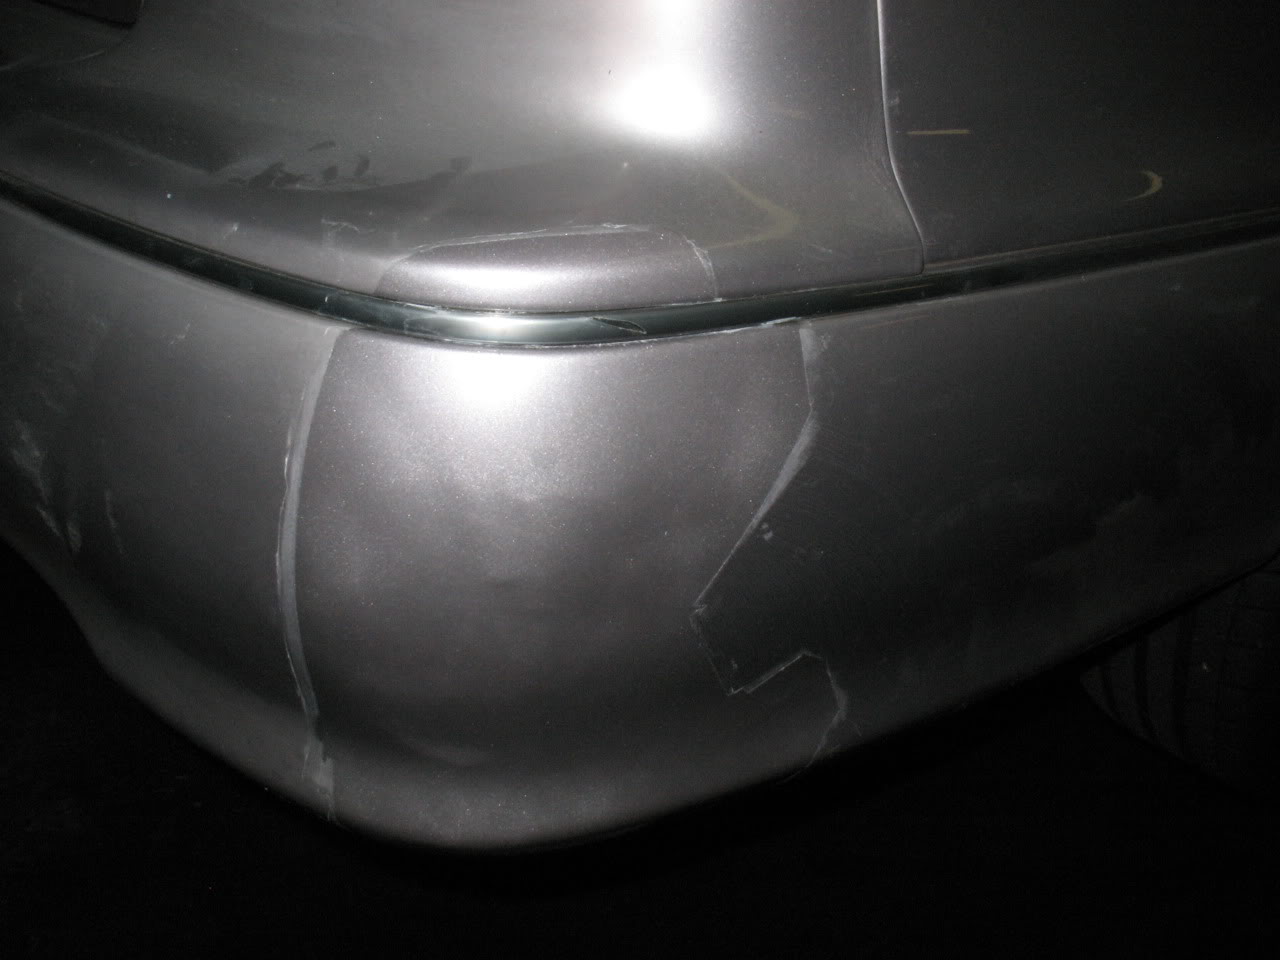
The rear bumper had more problems than the front, but we decided to take a risk and see how it would turn out. Sadly, it didn't go as well as the front did.
Some before pics:
I had heard about Paintscratch.com over the years and had always been curious about how their rattle can paint would turn out. While working at Joe's Professional Auto Care I met a guy named Chris who used to do body and paint work and he said he would help me out with stuff if I got the kit from Paintscratch.com. Since my bumpers had some deep gouges I bought their kit that included spot putty and body filler along with the flexible primer, paint and clear coat.
We started on the front bumper by repairing my atrocious work of cutting off the three vertical bars on the lower grille opening when I first bought the car. We sanded the nubs down and had to use some fiberglass to fill in the larger openings. Then it was on to the putty/filler and primer.
I didn't get any good pics of what the bottom looked like before, but this is what the top looks like (we didn't fix the top since you can't see it)
I also had a mysterious scuff on the PS of my front bumper that removed all the paint but didn't leave a single scratch. It looked like something rubber had rubbed off the paint, but I have no idea when or where it happened. This is what it looked like after priming:
And after a few hours, these were the results:
I quickly realized how difficult it is to blend in new paint with 15 year old paint, especially since the bumpers are considerably more faded than the rest of the car is. For what it all cost, I'm pretty happy with the way the front turned out. It's by no means perfect, but replacement bumpers for the I30 aren't cheap and I was curious to see how well their kit works. I would say that if you have paint experience, you can get something around a 7/10 job. If you don't know what you're doing it will probably turn out more like a 4/10 job. There are obviously still plenty of other blemishes and scratches on the front bumper that I no longer have any desire to try and repair. Some day this car will get new bumpers and all will be well in the world.
The rear bumper had more problems than the front, but we decided to take a risk and see how it would turn out. Sadly, it didn't go as well as the front did.
Some before pics:
Paint and body work continued
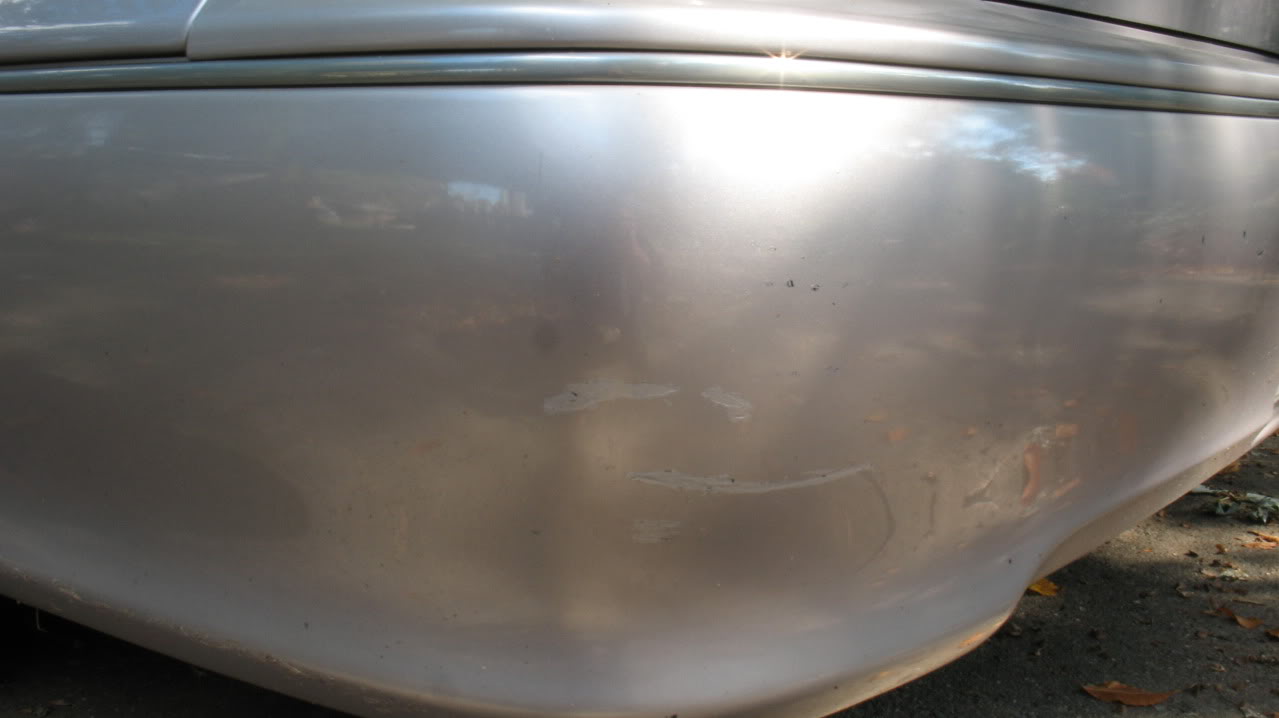
I think I'll let the pictures speak for themselves.

It's by no means perfect, but in most lighting the flaws aren't especially obvious. It was a lot of work, but it didn't cost too much, so I really shouldn't complain. Chris did a great job; it's not his fault my paint is so damn faded. I hoped the paint would match better if used on a metal surface that had shinier paint. So on to the next project.....
It's by no means perfect, but in most lighting the flaws aren't especially obvious. It was a lot of work, but it didn't cost too much, so I really shouldn't complain. Chris did a great job; it's not his fault my paint is so damn faded. I hoped the paint would match better if used on a metal surface that had shinier paint. So on to the next project.....
Last edited by 95maxrider; Apr 7, 2012 at 03:17 PM.

Senior Member
Joined: Oct 2009
Posts: 1,410
From: Frederick, MD
Not bad work, I think I did touch up paint on my car and got similar results. No matter what treatment you use, I still think there will always be a trace of that blemish. New bumpers indeed seems like the only solution.
By the way, what front lip is that?
Edit - you just uploaded the after pics, my touch up has nothing on that lol
By the way, what front lip is that?
Edit - you just uploaded the after pics, my touch up has nothing on that lol
More paint work
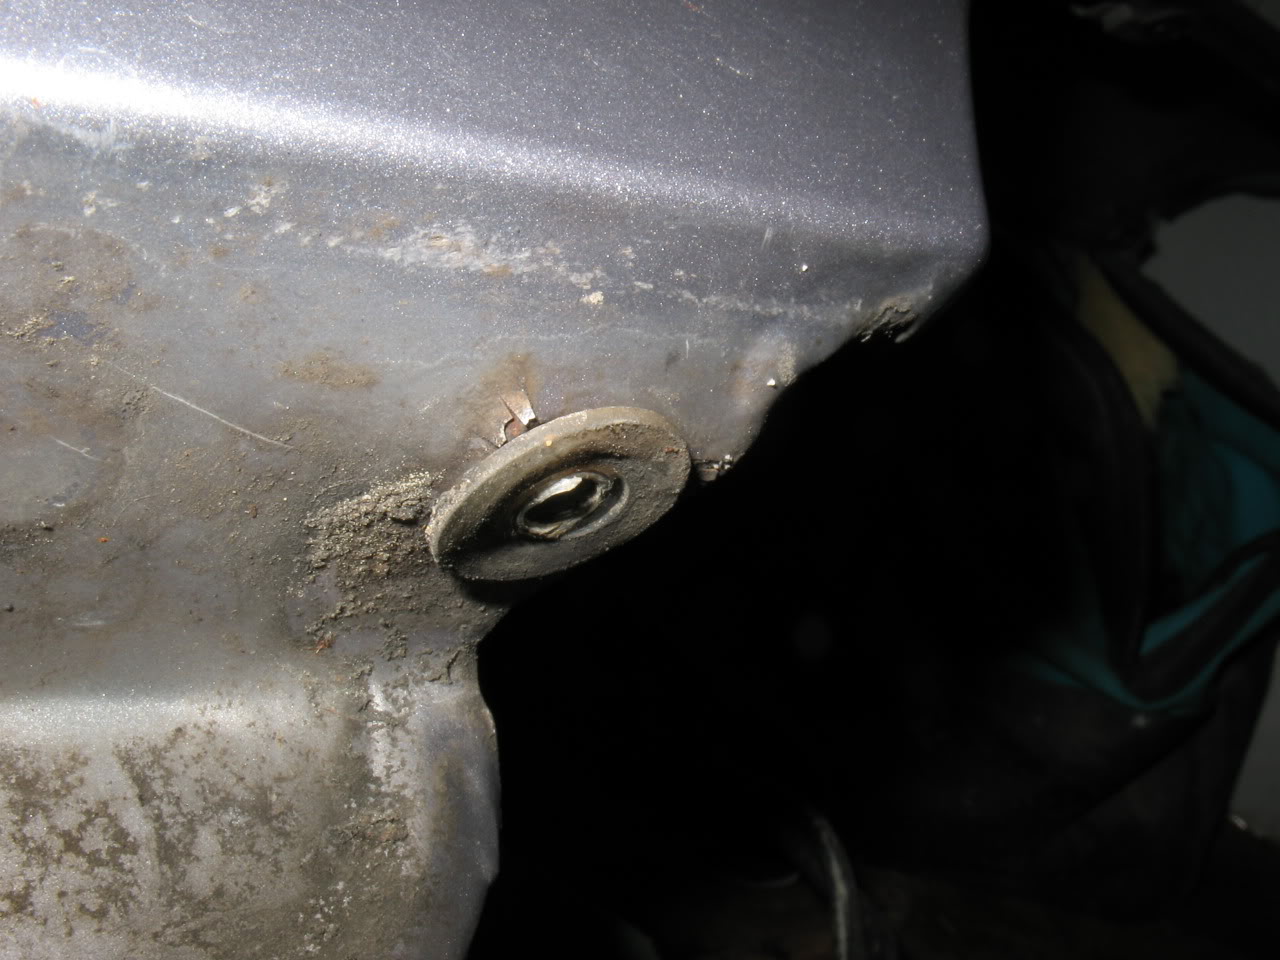
A few years ago someone backed into my front bumper and it got pushed up and bit and didn't sit flush with the fender. Some paint also got knocked off and it began to rust in that area. Since I still had plenty of paint and clear, I decided to touch up the area when we had the fenders off to install the braces. I was in a rush, and wasn't looking to do a professional job; I really just wanted to get rid of the rust and get some paint on it. Needless to say that results aren't that impressive, but I think it was worth it to get rid of the rust. We were also able to straighten out the bent mounting tab so the bumper sat flush with the fender again.
The gap:

The rust:
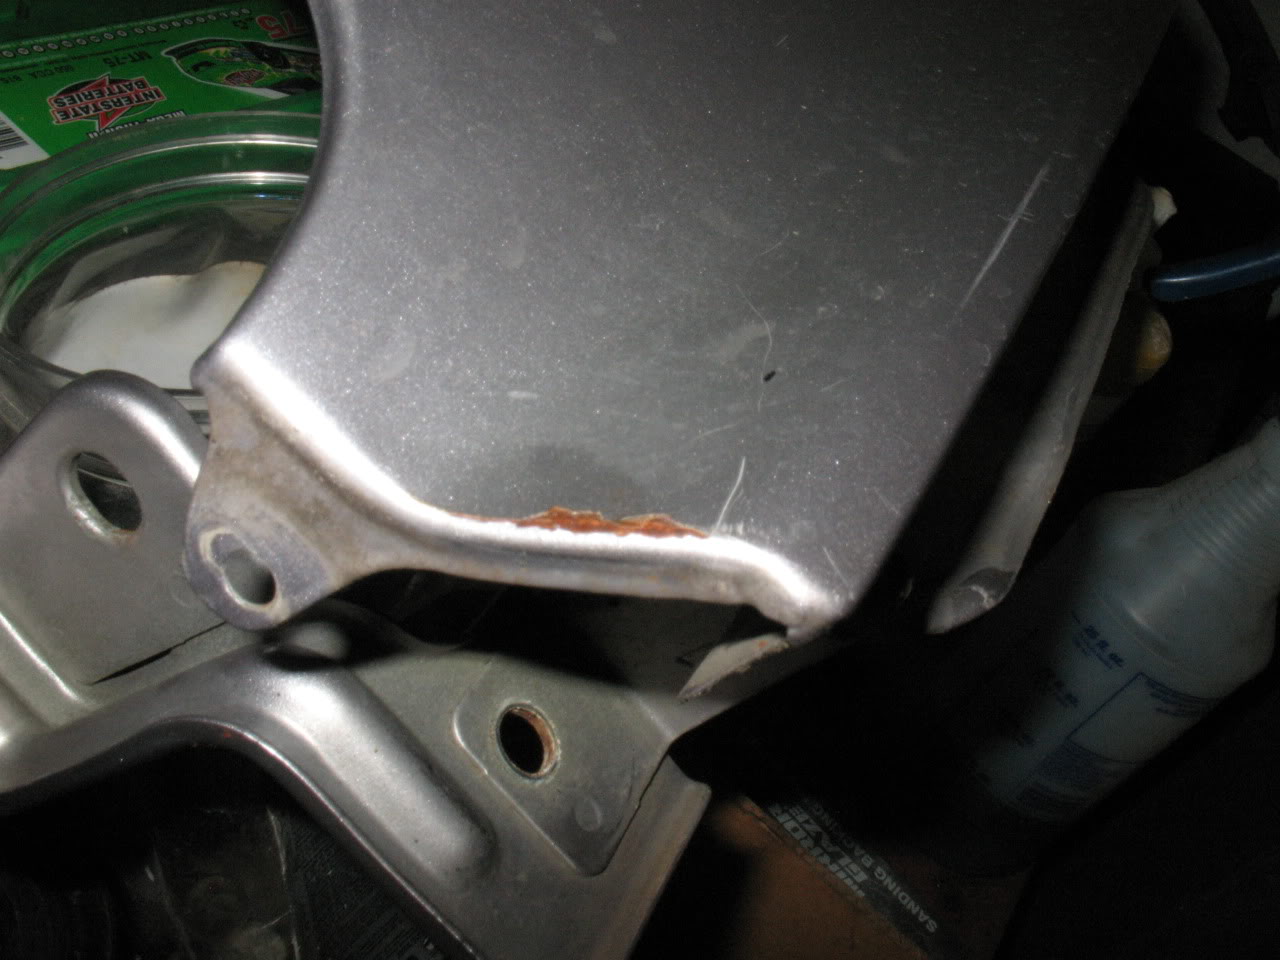
The bent tab:
Prepping:
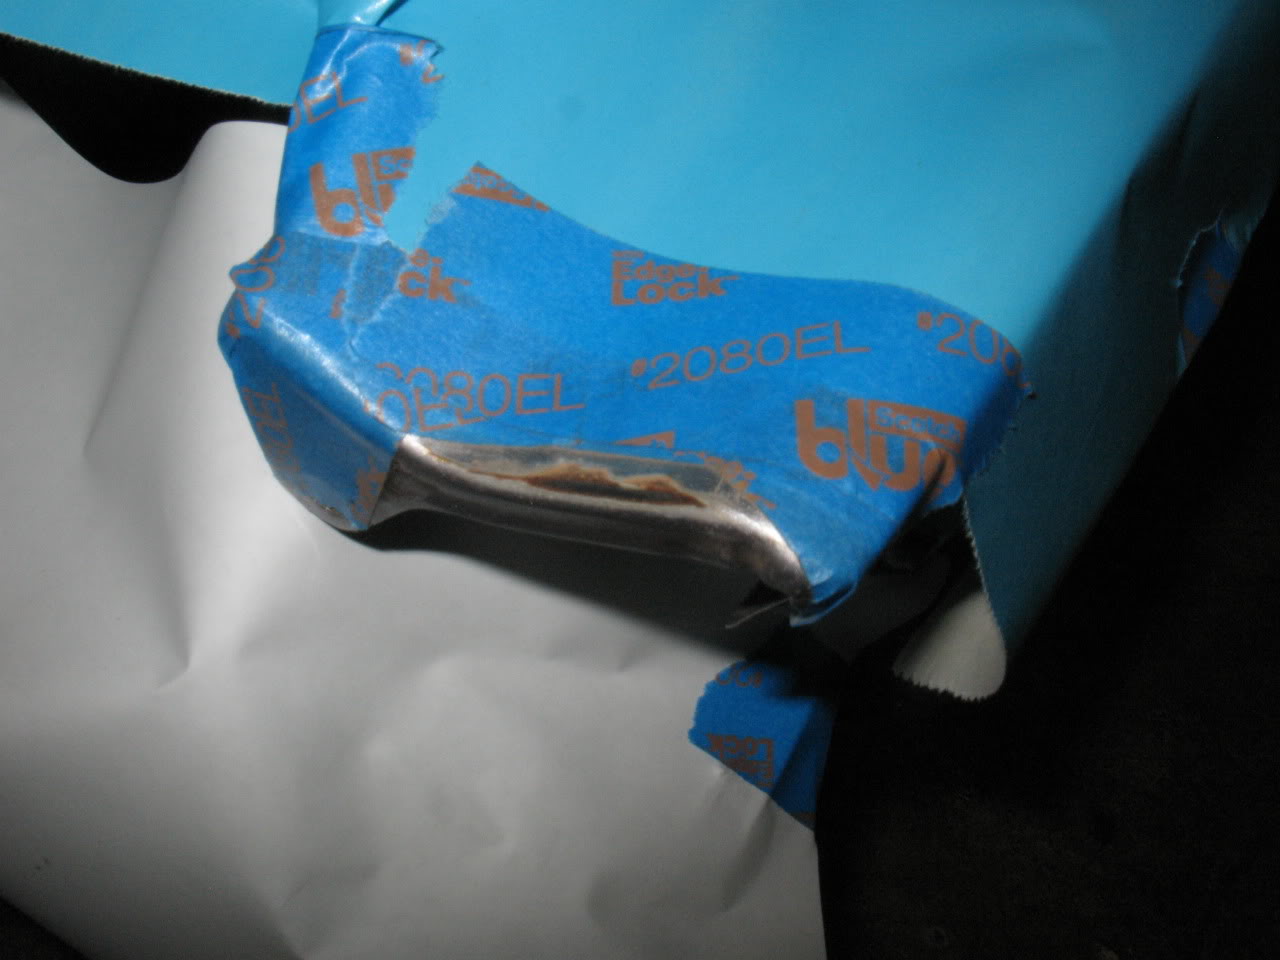
Damn I'm good!
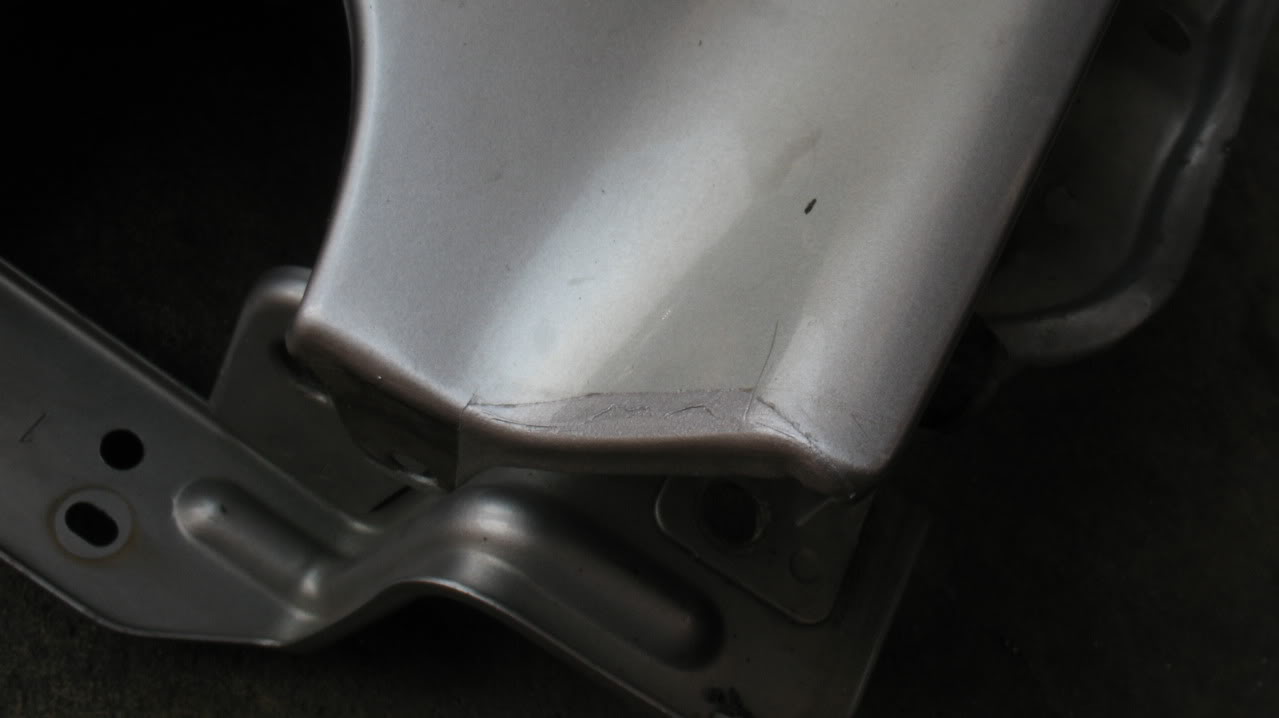
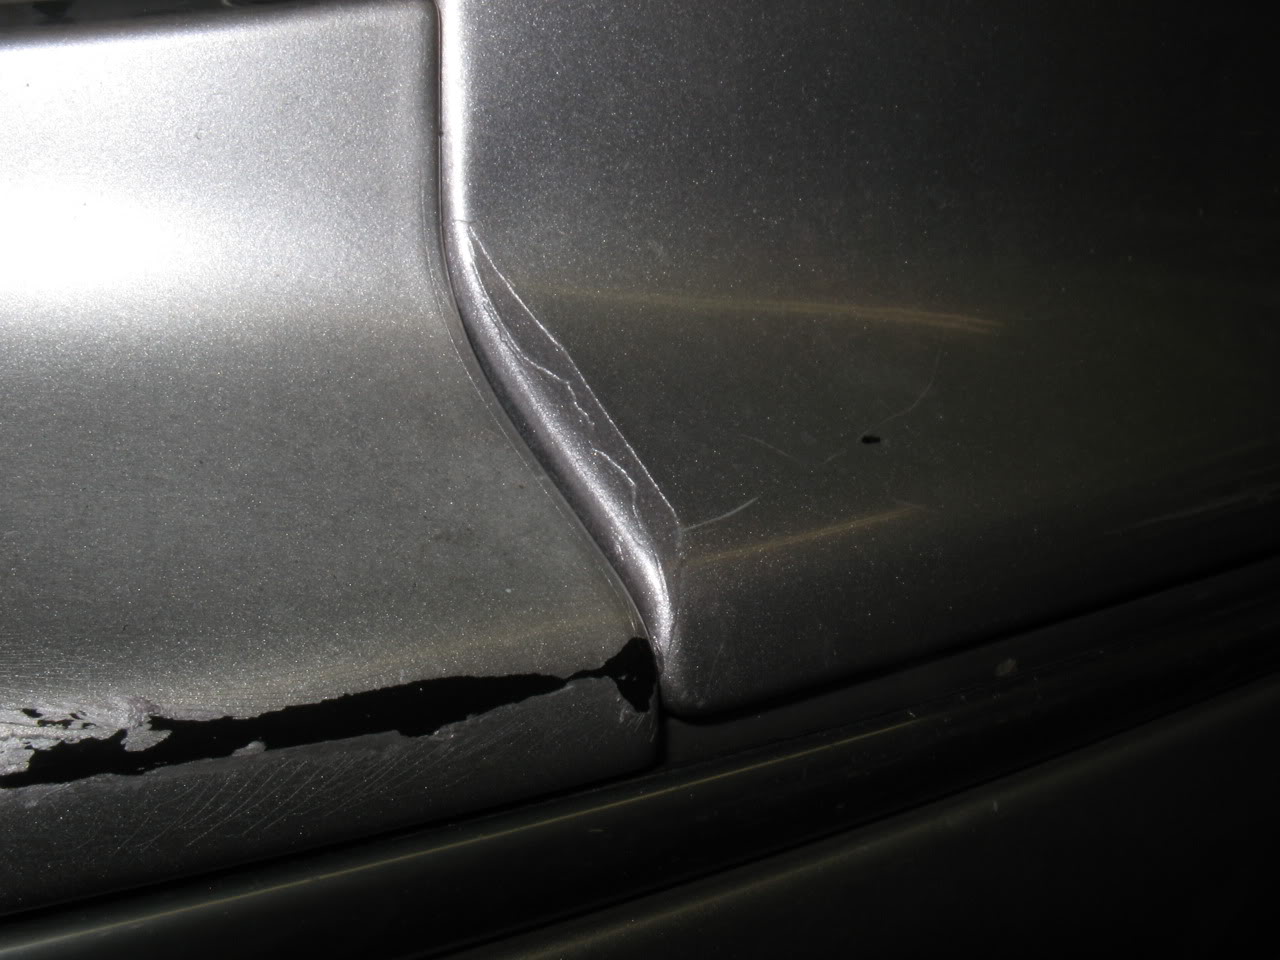
No more gap!
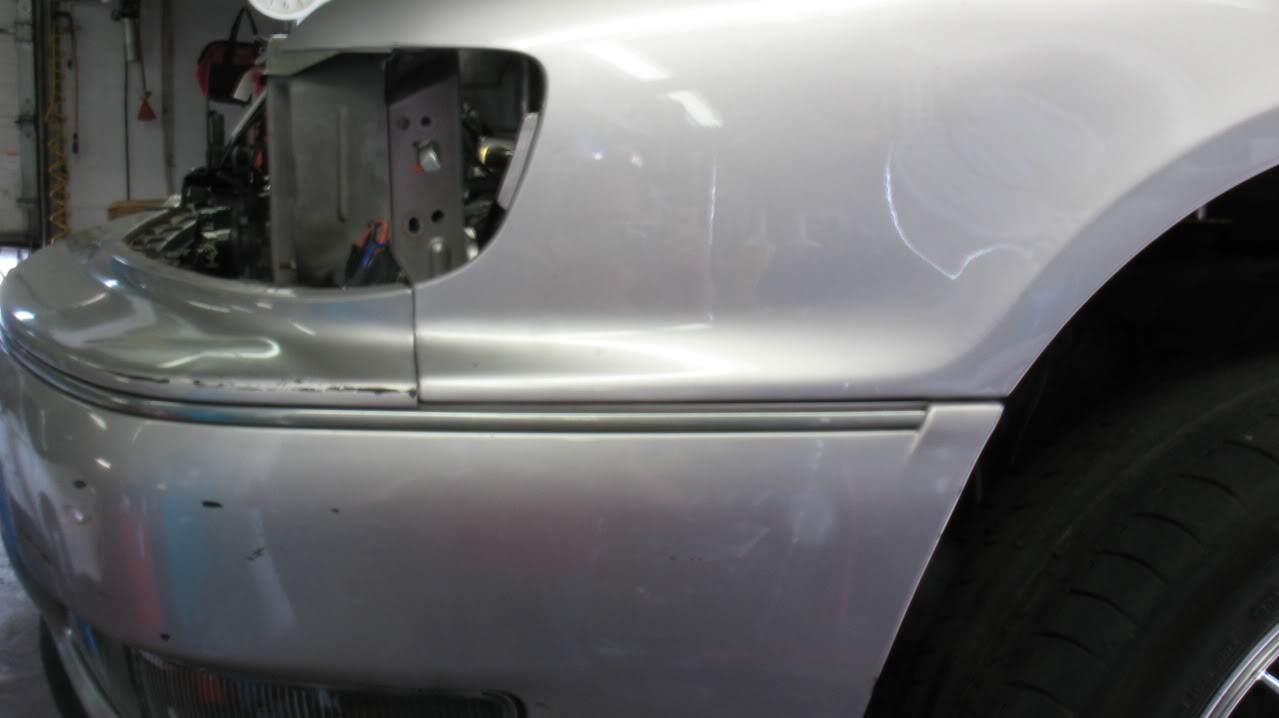
Again, it didn't quite match the existing paint, but who cares. Lesson learned; leave the paint work to the pros.
The gap:
The rust:
The bent tab:
Prepping:
Damn I'm good!
No more gap!
Again, it didn't quite match the existing paint, but who cares.
Lesson learned; leave the paint work to the pros.
Not bad work, I think I did touch up paint on my car and got similar results. No matter what treatment you use, I still think there will always be a trace of that blemish. New bumpers indeed seems like the only solution.
By the way, what front lip is that?
Edit - you just uploaded the after pics, my touch up has nothing on that lol
By the way, what front lip is that?
Edit - you just uploaded the after pics, my touch up has nothing on that lol
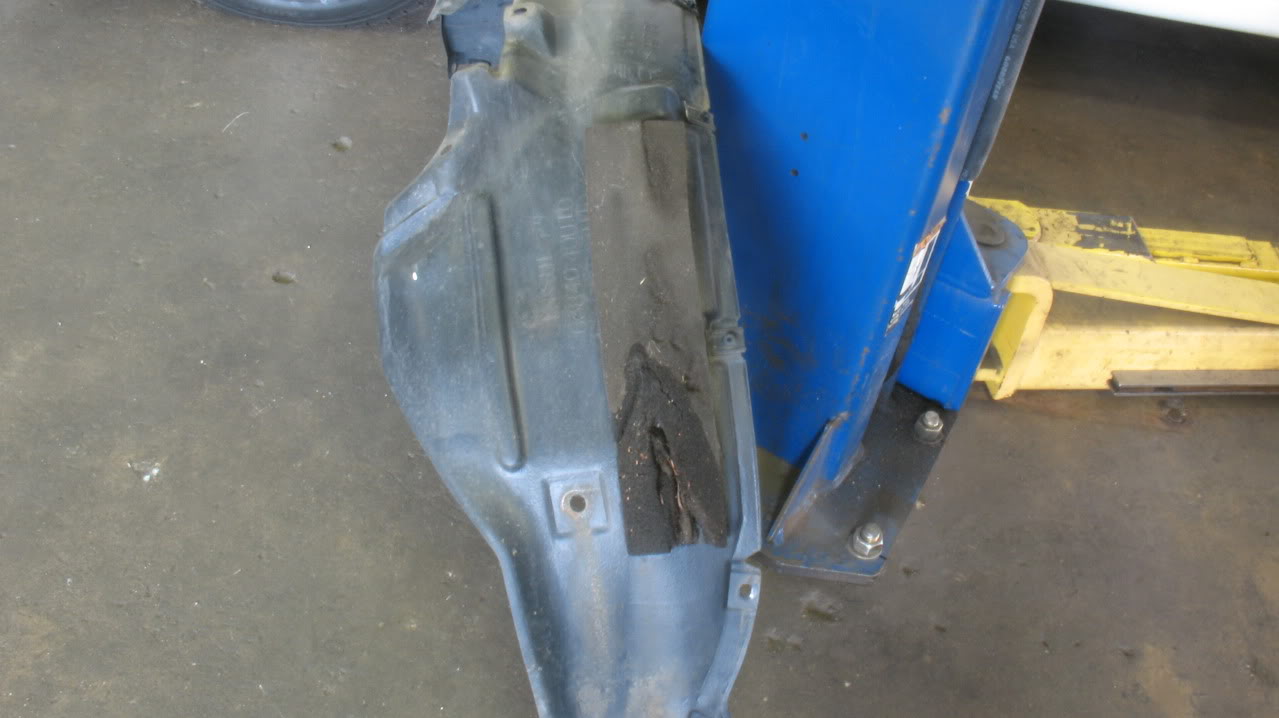
Sound deadening
I started this project last year when I had to install a new fender liner. My DS fender liner apparently didn't get reattached properly after some work and got destroyed on the highway, so I replaced it with one from a Maxima since finding a used I30 one in good condition is near impossible and I didn't feel like spending $75 on one from the dealership. While doing the swap I noticed the I30 liner had a piece of foam that acted as sound deadening that the Maxima liner didn't have, so I swapped the foam to the Maxima liner and took it a step further and threw on some E-Dead sound deadening. Note to self: Maxima and I30 fender liners are not the same
Well both liners came out when doing the fender brace job and I decided to complete what I started. The DS liner already had one or two pieces on it but I decided to go full crazy and pretty much cover the rear half with E-Dead. The PS got the same treatment.
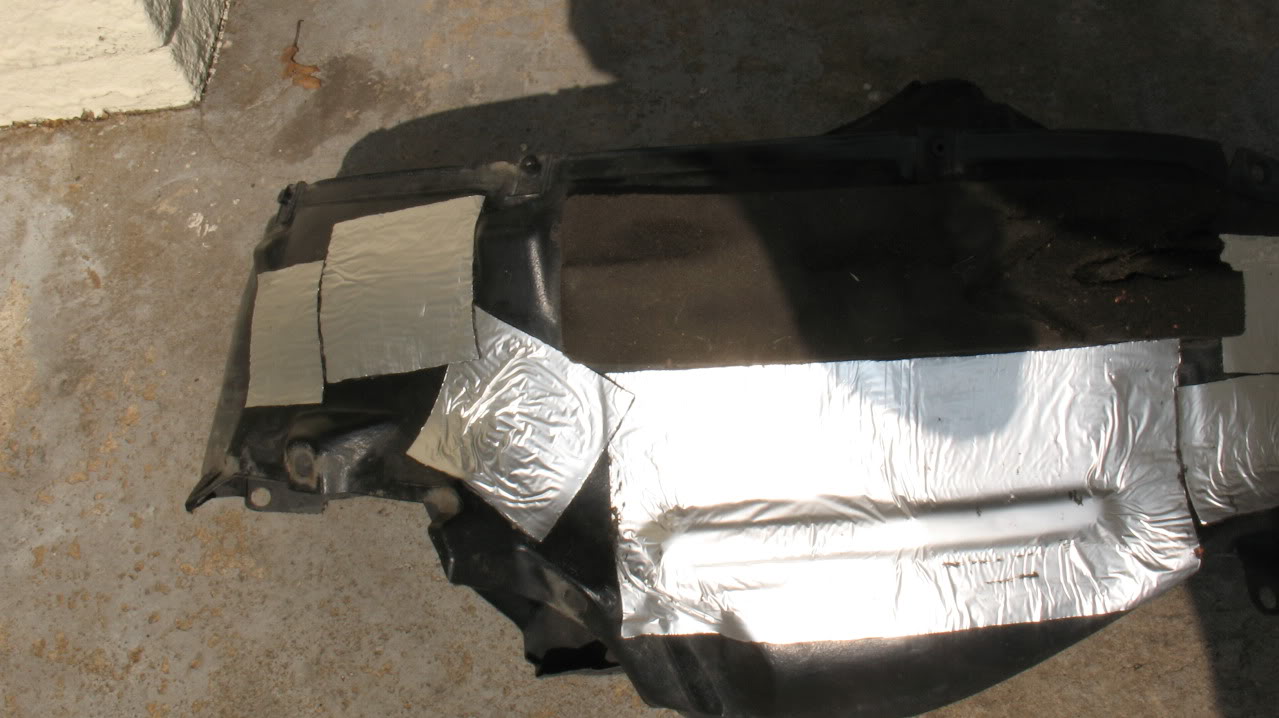
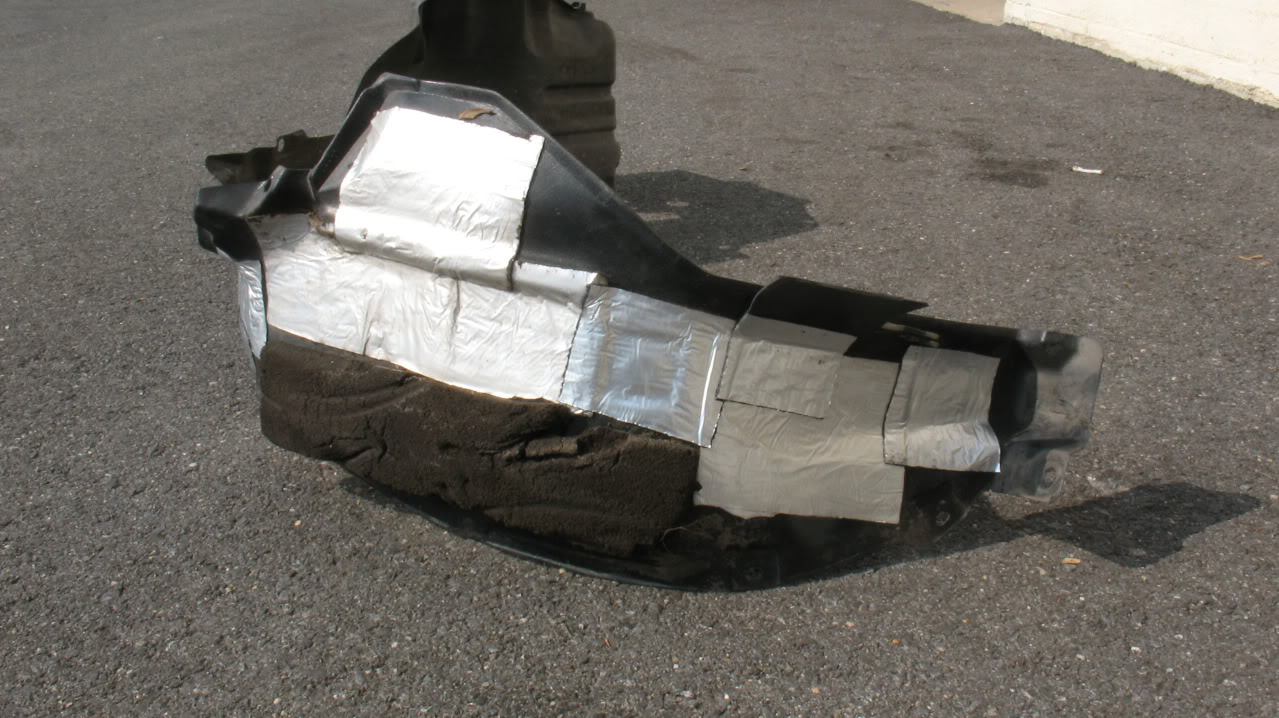
I seem to remember reading a sound deadening thread a long time ago and the guy said a lot of noise entered the cabin through the footwell area, so I decided to slap on some more E-Dead to the outer portion of the wheel well. Why not.....
There might or might not be a difference from what I did, but it didn't cost me a dime and it can only help, so why not? I did feel like the front end was a bit quieter on my recent road trip, but it could have easily been in my head.
Well both liners came out when doing the fender brace job and I decided to complete what I started. The DS liner already had one or two pieces on it but I decided to go full crazy and pretty much cover the rear half with E-Dead. The PS got the same treatment.
I seem to remember reading a sound deadening thread a long time ago and the guy said a lot of noise entered the cabin through the footwell area, so I decided to slap on some more E-Dead to the outer portion of the wheel well. Why not.....
There might or might not be a difference from what I did, but it didn't cost me a dime and it can only help, so why not? I did feel like the front end was a bit quieter on my recent road trip, but it could have easily been in my head.
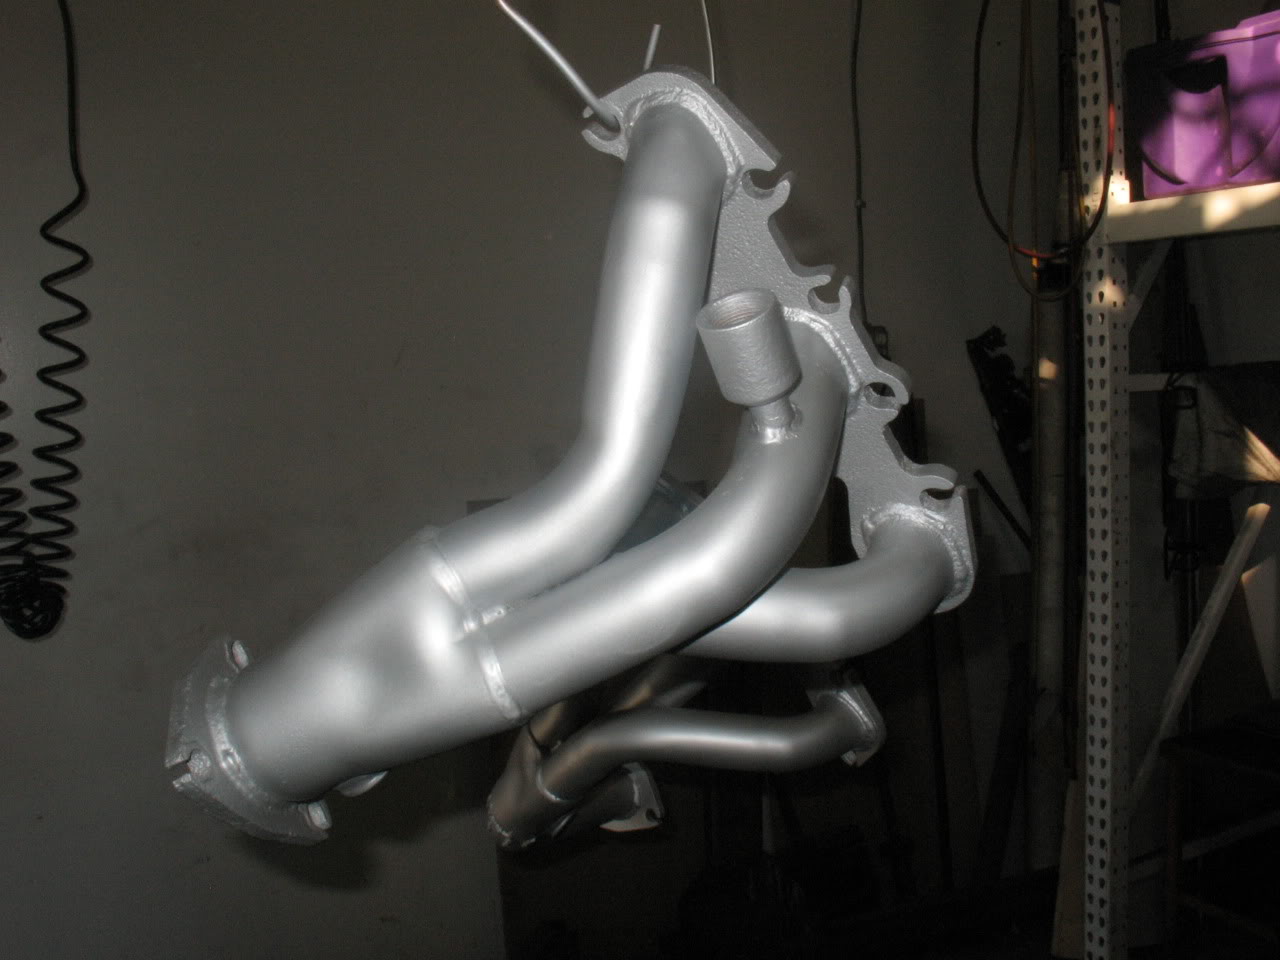
Cattman headers
For years I’ve secretly lusted after some Cattman headers, but never had the budget to afford them, and was still unsure of the HP gains. Well my buddy Darius (oTranscendental) hadn’t had any luck selling his old pair after his car got wrecked, so he gave them to me at a good price and I promised to give them a good home.
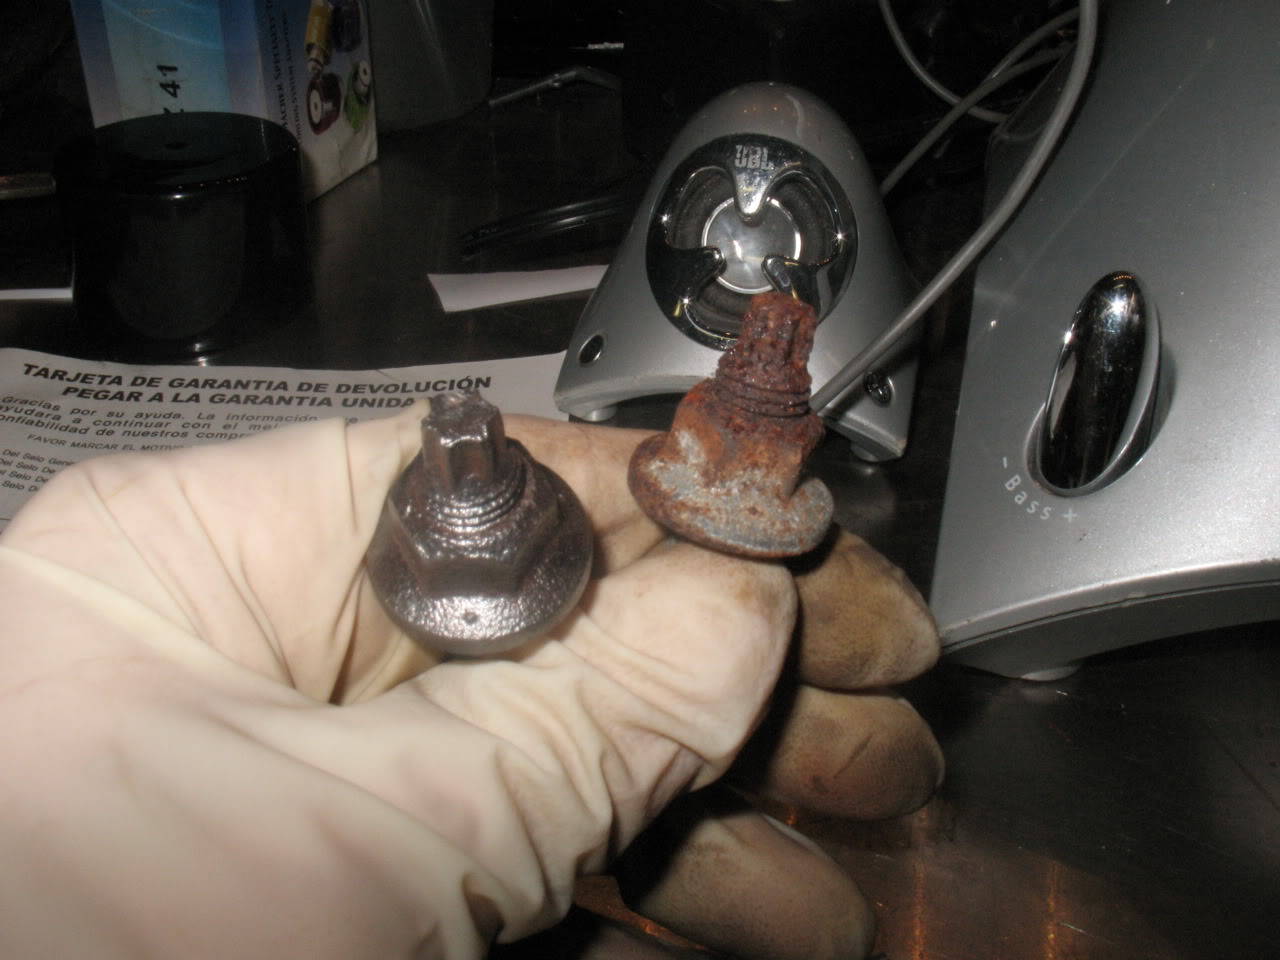
Darius already had them on his 4th gen for something like 6-7 years, so they weren’t looking so hot. I knew the install on them would be hell, and I sure didn’t want to ever do it again, so I figured I would make them look all pretty before installing them. I planned on ceramic coating them, but headache after headache kept delaying the process. The rear header was still on Darius’ old 3.5 motor (which is still for sale with a lot of goodies!), so I went over to remove it. Little did I realize that the nut on the EGR tube is 23mm, and it’s damn near impossible to find a 23 mm wrench. We tried a 15/16, but that just ended up rounding off the edges. After much searching I located a 23 but the nut was already a little too rounded off and stuck, so we had to just cut off the EGR tube and deal with it later.
This is what they looked like when I got them:
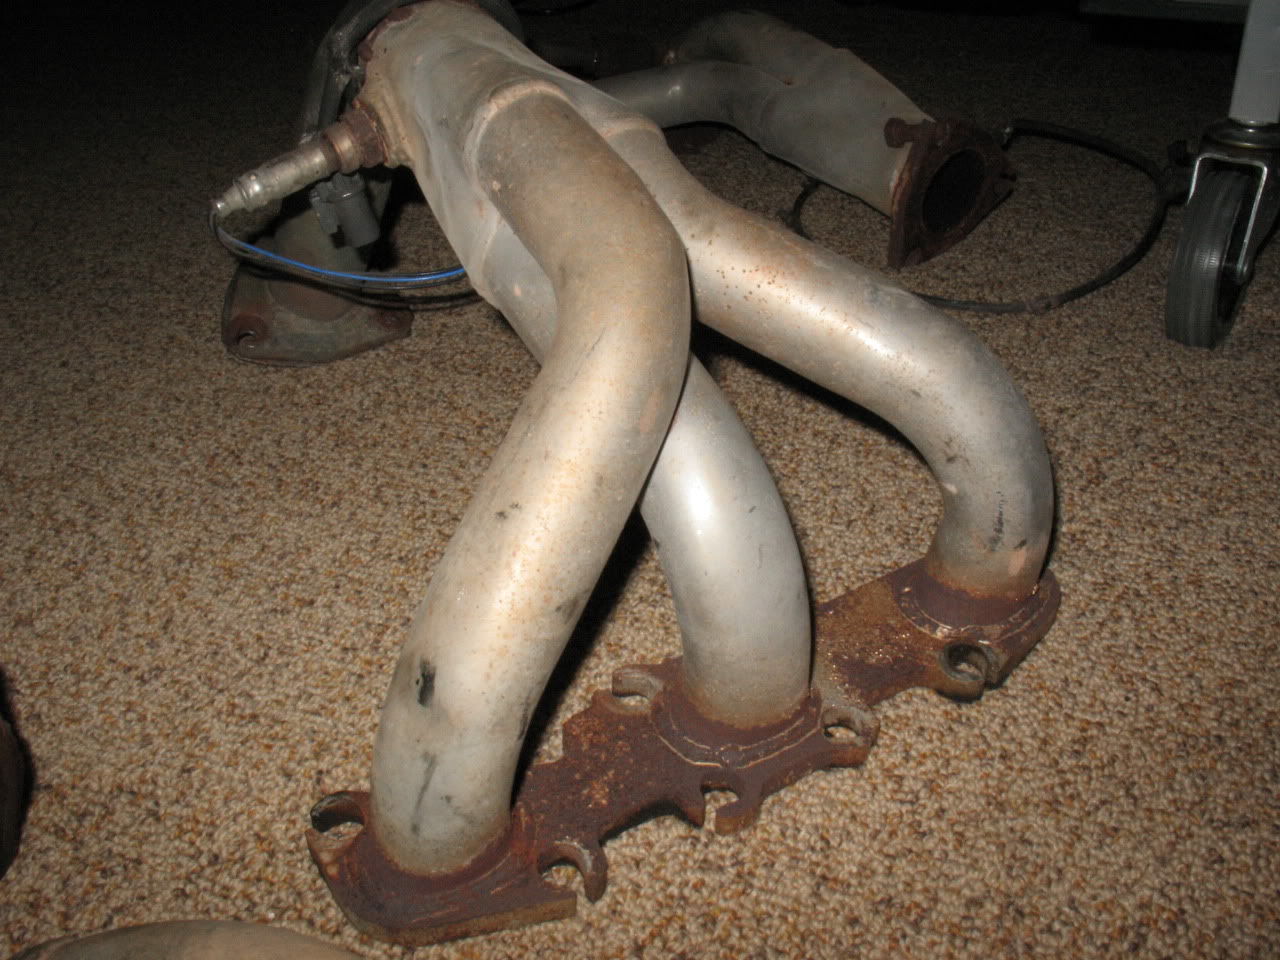
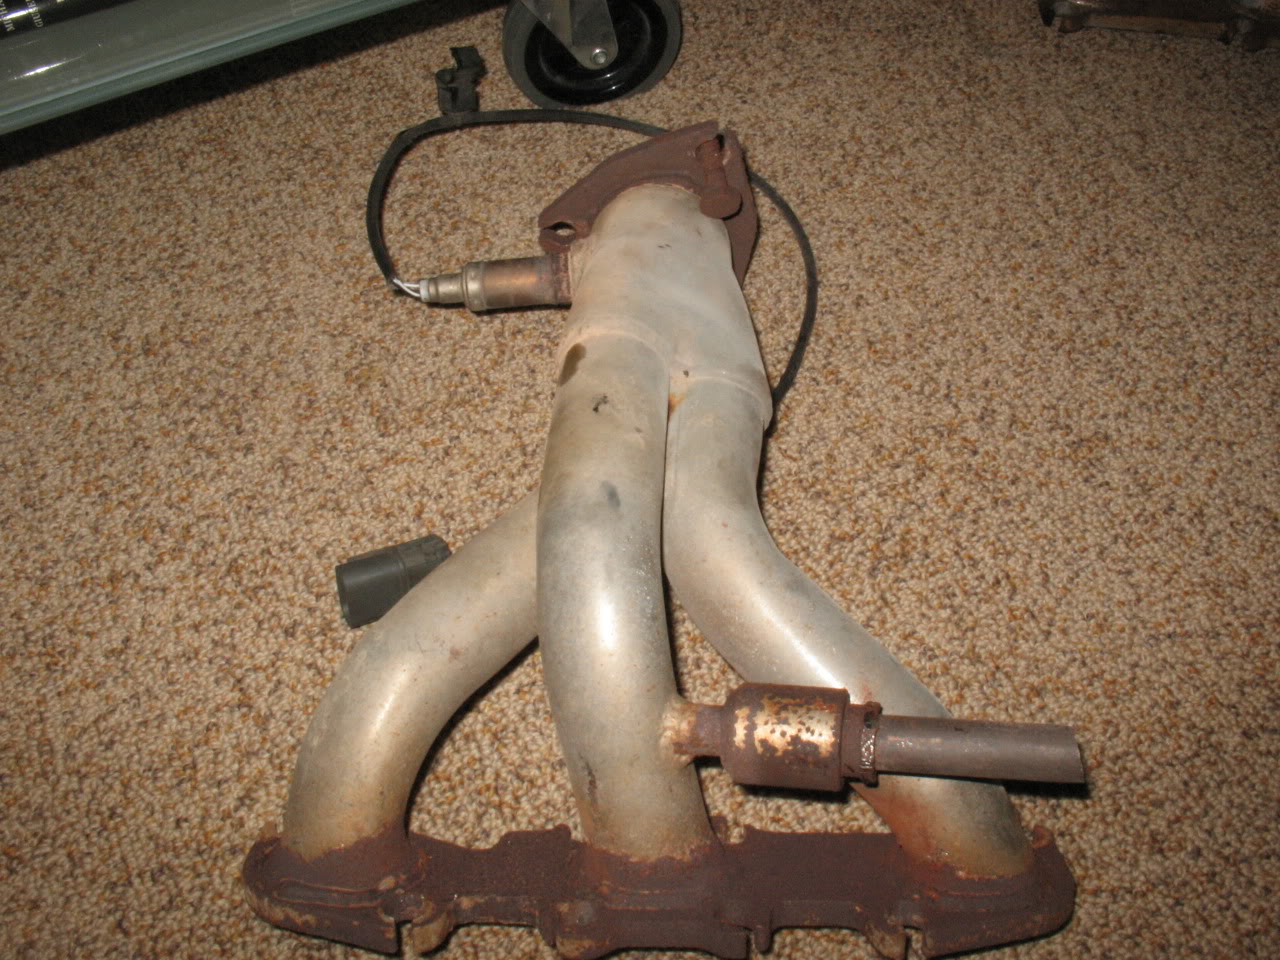
Then after much sanding....
Later at the garage, we were able to get the nut off with some special tool that I forget the name of, but we quickly found other problems. Both O2 sensor threads were stripped and needed to be rethreaded. After more digging around we found the right bit and got them nice and new.
Much time was then spent trying to remove the EGR nut from the headers on my car, even though it had come off easily enough two weeks before when I cleaned out another EGR tube and did the NWP IM spacers. The less said about this the better.
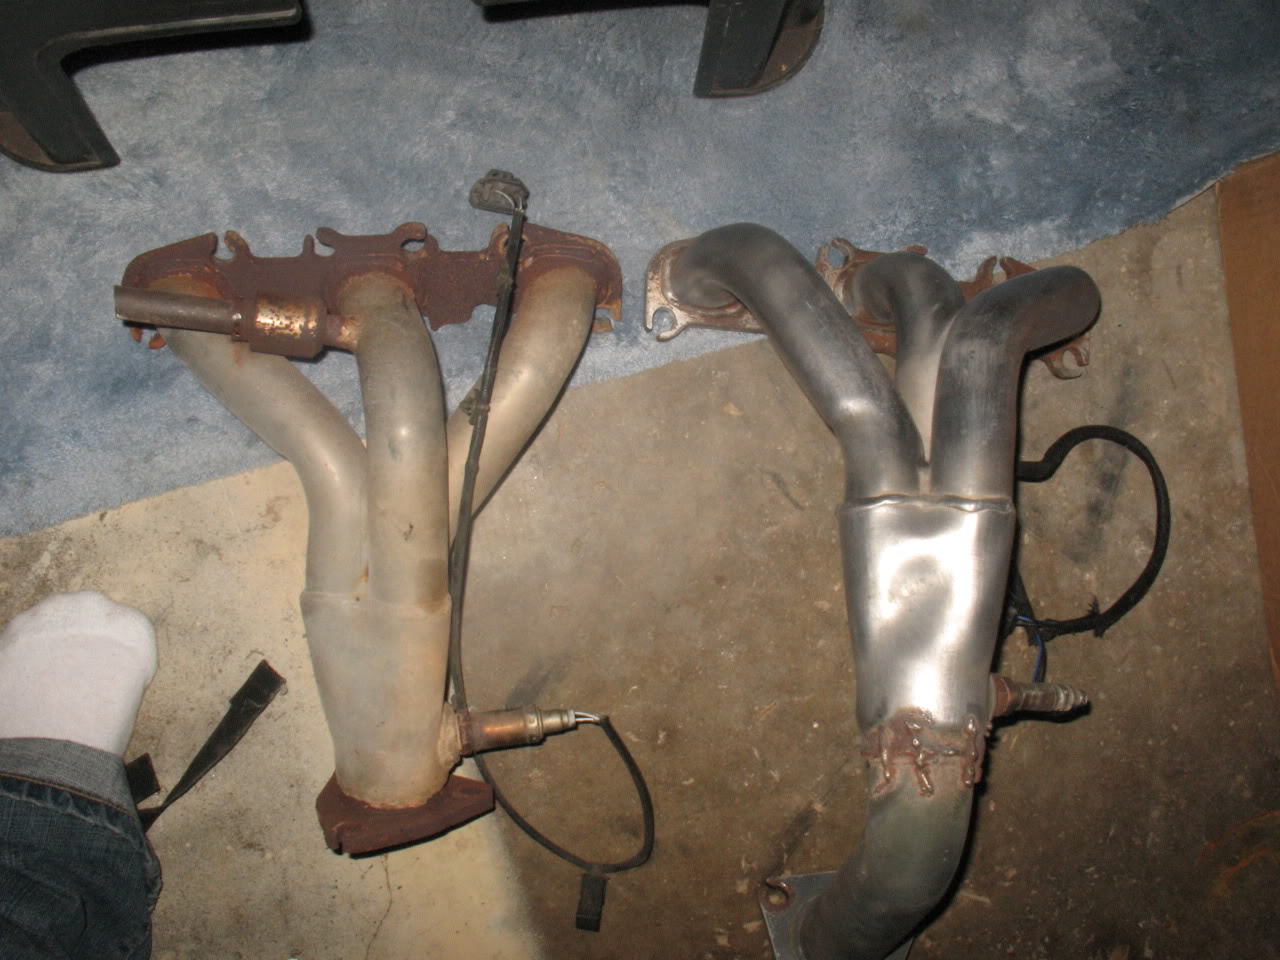
I had originally planned to ceramic coat all three of the header pipes, but ended up being too busy and was only able to coat the actual header pipes. I used the silver VHT Ceramic Coat spray, and so far am pretty happy with the results. The headers have been on for more than a month, and while a small section of coating has peeled, there’s still another layer or two beneath it and it still looks silver. It took a few hours of sanding and using a wire brush to get the headers to a point where I felt like painting was appropriate. Immediately before painting I used a propane torch to burn off any oils left on the surface, and there was apparently plenty, as I could see it burning off. Now I’m not very good at any sort of painting, so I ended up with a couple runs in the coat, but overall I’m very pleased with the results.
Fixing the threads:
After painting:

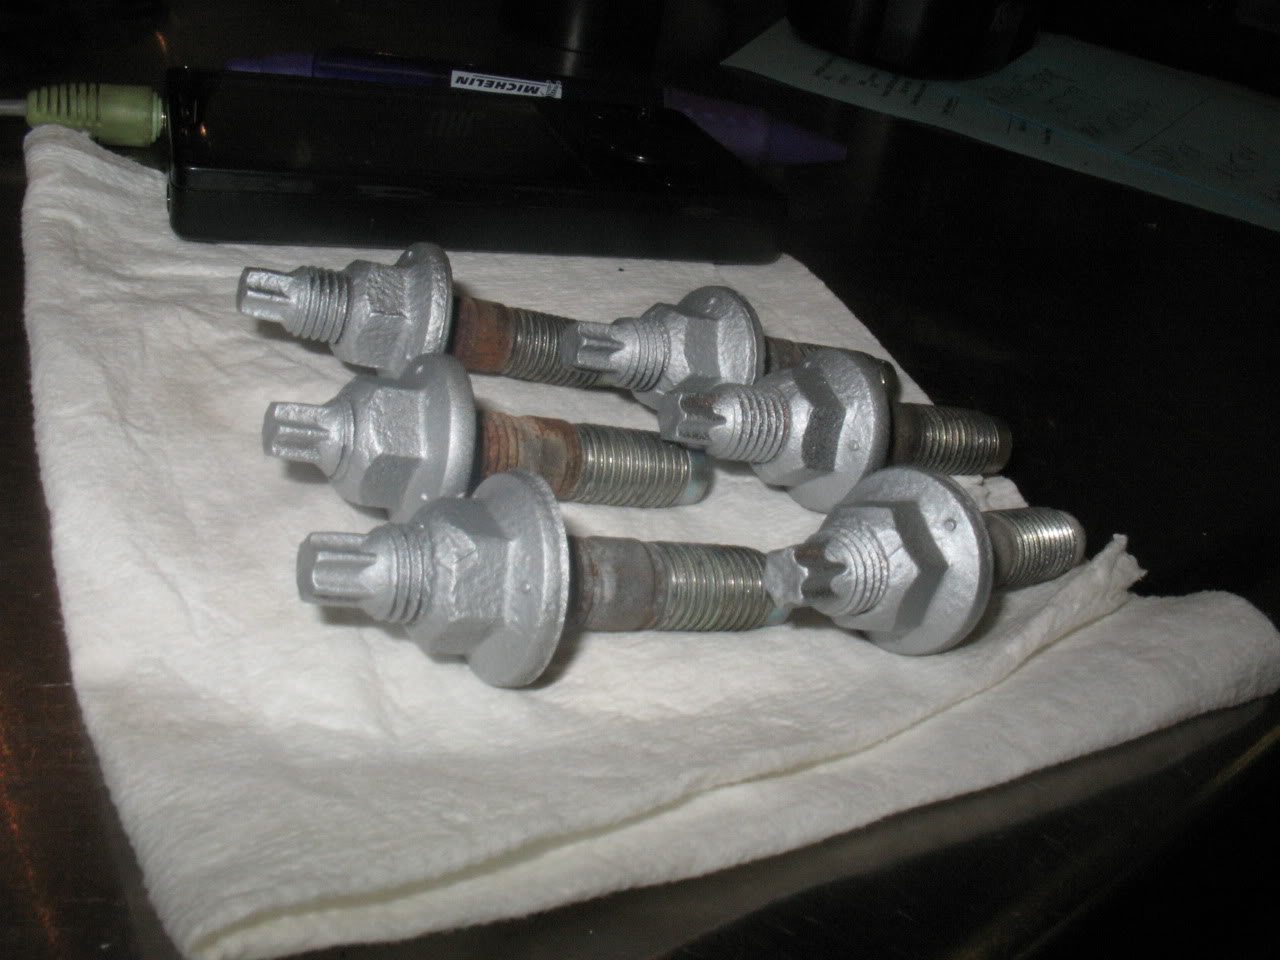
And hey, why not clean up and paint the bolts? Wire wheels are fun!
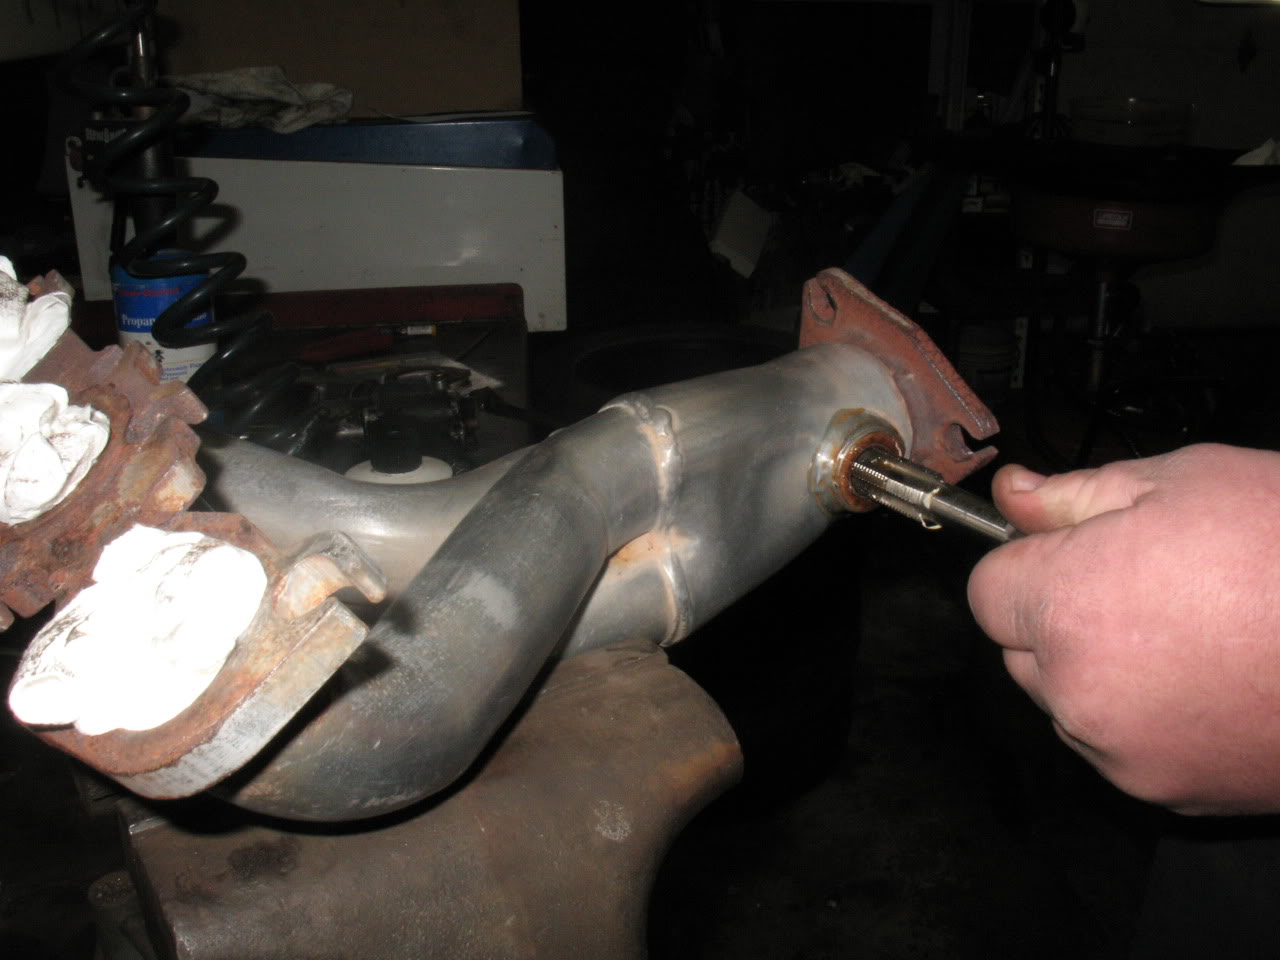
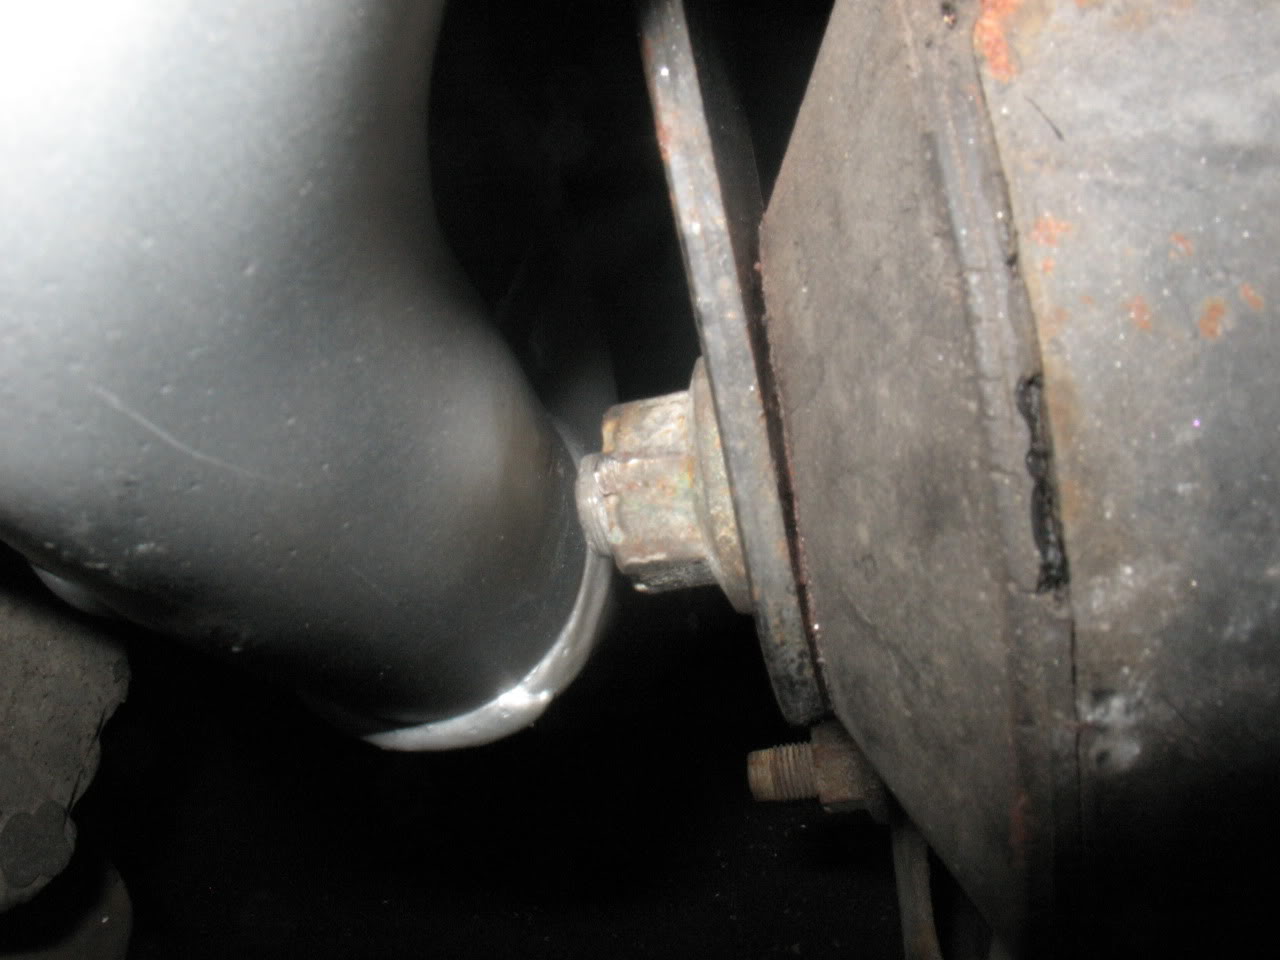
The installation went pretty well after all that, except the bolt for the front motor mount didn't clear the pipes so we had to space it out with some washers.

Darius already had them on his 4th gen for something like 6-7 years, so they weren’t looking so hot. I knew the install on them would be hell, and I sure didn’t want to ever do it again, so I figured I would make them look all pretty before installing them. I planned on ceramic coating them, but headache after headache kept delaying the process. The rear header was still on Darius’ old 3.5 motor (which is still for sale with a lot of goodies!), so I went over to remove it. Little did I realize that the nut on the EGR tube is 23mm, and it’s damn near impossible to find a 23 mm wrench. We tried a 15/16, but that just ended up rounding off the edges. After much searching I located a 23 but the nut was already a little too rounded off and stuck, so we had to just cut off the EGR tube and deal with it later.
This is what they looked like when I got them:
Then after much sanding....
Later at the garage, we were able to get the nut off with some special tool that I forget the name of, but we quickly found other problems. Both O2 sensor threads were stripped and needed to be rethreaded. After more digging around we found the right bit and got them nice and new.
Much time was then spent trying to remove the EGR nut from the headers on my car, even though it had come off easily enough two weeks before when I cleaned out another EGR tube and did the NWP IM spacers. The less said about this the better.
I had originally planned to ceramic coat all three of the header pipes, but ended up being too busy and was only able to coat the actual header pipes. I used the silver VHT Ceramic Coat spray, and so far am pretty happy with the results. The headers have been on for more than a month, and while a small section of coating has peeled, there’s still another layer or two beneath it and it still looks silver. It took a few hours of sanding and using a wire brush to get the headers to a point where I felt like painting was appropriate. Immediately before painting I used a propane torch to burn off any oils left on the surface, and there was apparently plenty, as I could see it burning off. Now I’m not very good at any sort of painting, so I ended up with a couple runs in the coat, but overall I’m very pleased with the results.
Fixing the threads:
After painting:
And hey, why not clean up and paint the bolts? Wire wheels are fun!
The installation went pretty well after all that, except the bolt for the front motor mount didn't clear the pipes so we had to space it out with some washers.
Last edited by 95maxrider; Apr 7, 2012 at 04:14 PM.
Exhaust note/sound
Now over the last couple years I’ve been on a quest to make my car not sound like ****. I’ve replaced my test pipe with a resonated test pipe, and that got rid of about 25% of the rasp. My 10 year old WSP y-pipe’s flex section had started to fray, and since I heard they now use a better/quieter flex section, I had it welded in. After about 4 hours of cutting/welding it was in place, but I was quite disappointed to hear almost no change in rasp/tone. That was very disappointing.
The last thing I could change was the headers, and I had heard good things about the tone they provide. I was not disappointed this time. I still hear a little rasp when WOT in gear, but more importantly, there is no rasp on the overrun/deceleration in gear above 3500 rpm. It’s just smooth. The exhaust note finally matches the character of the engine! And as an added bonus, the car feels like it has quite a bit more pep in the upper rev range. I only wish I could have gotten these earlier, because they make the car so much more enjoyable to drive. I’m no longer ashamed of my exhaust note at auto-x events, where the car is in overrun a good portion of the race.
In search of eliminating that last bit of rasp at WOT and getting a couple more horsepower, I decided to replace my Budget B-pipe/2k Maxima muffler with a Budget/G35 sedan combo. Again, this part came off of Darius’ old Maxima. The piping leading into the muffler is 2.5”, versus 2” for the 2k Maxima muffler. It’s not much, but I’m hoping it’s worth a couple HP at the top end and maybe a change in the exhaust note. I don't have this installed yet, but should within a week or so. For now, enjoy (or not) some videos of how the exhaust note has improved. I didn't include a before/after of the flex section work because you wouldn't be able to hear the difference in a video.
Here's what it sounded like with a y-pipe, unresonated test pipe, Budget b-pipe and 2k maxima muffler. You might want to turn your speakers down, because this sounds like shit:
And after the headers were installed (now with resonated test pipe) but before the G35 sedan muffler has been installed:
I will update this after the G35 muffler is on the car. I have high hopes!
Last edited by 95maxrider; Apr 7, 2012 at 04:16 PM.


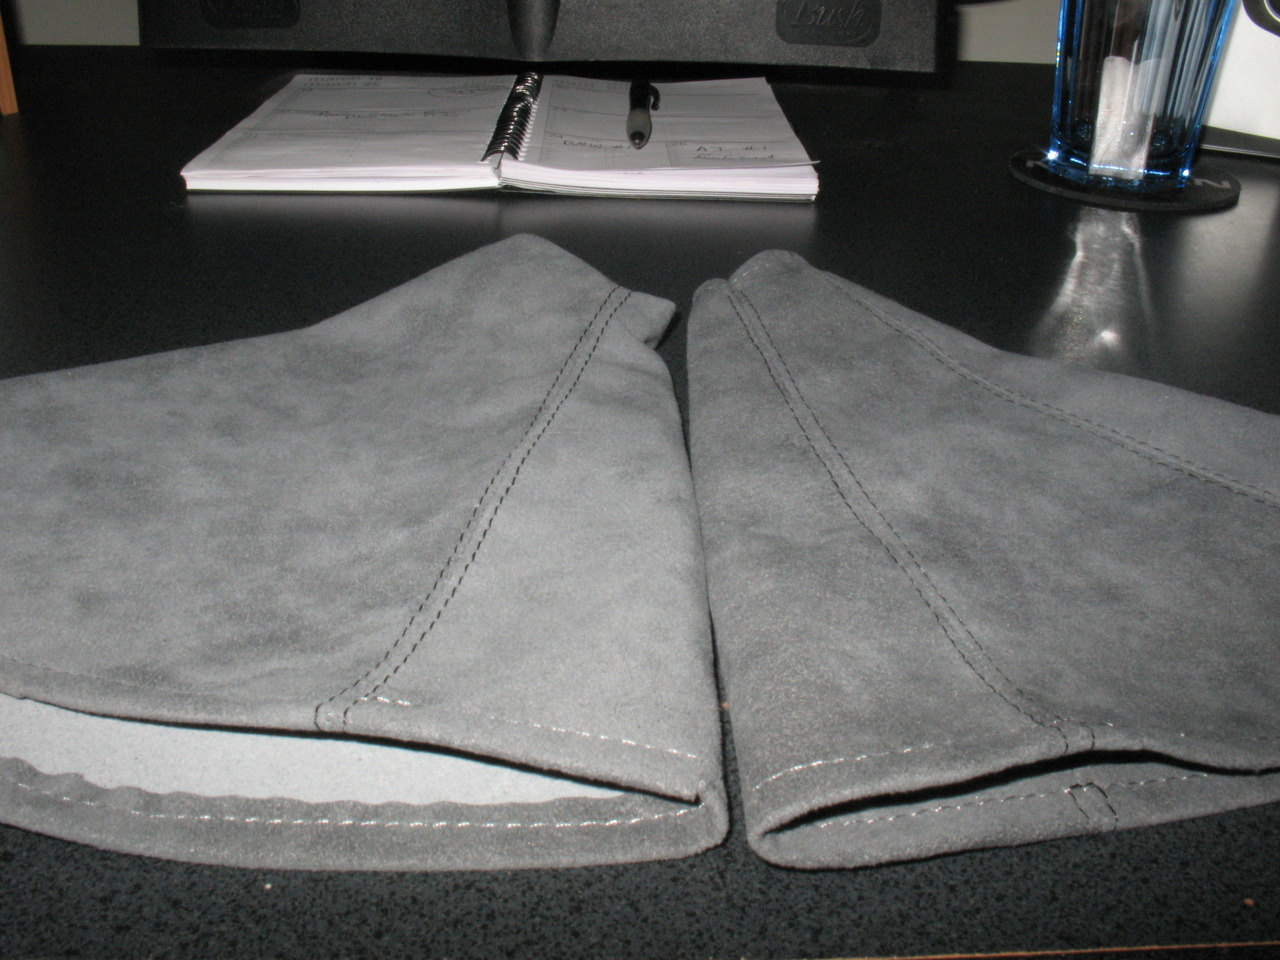
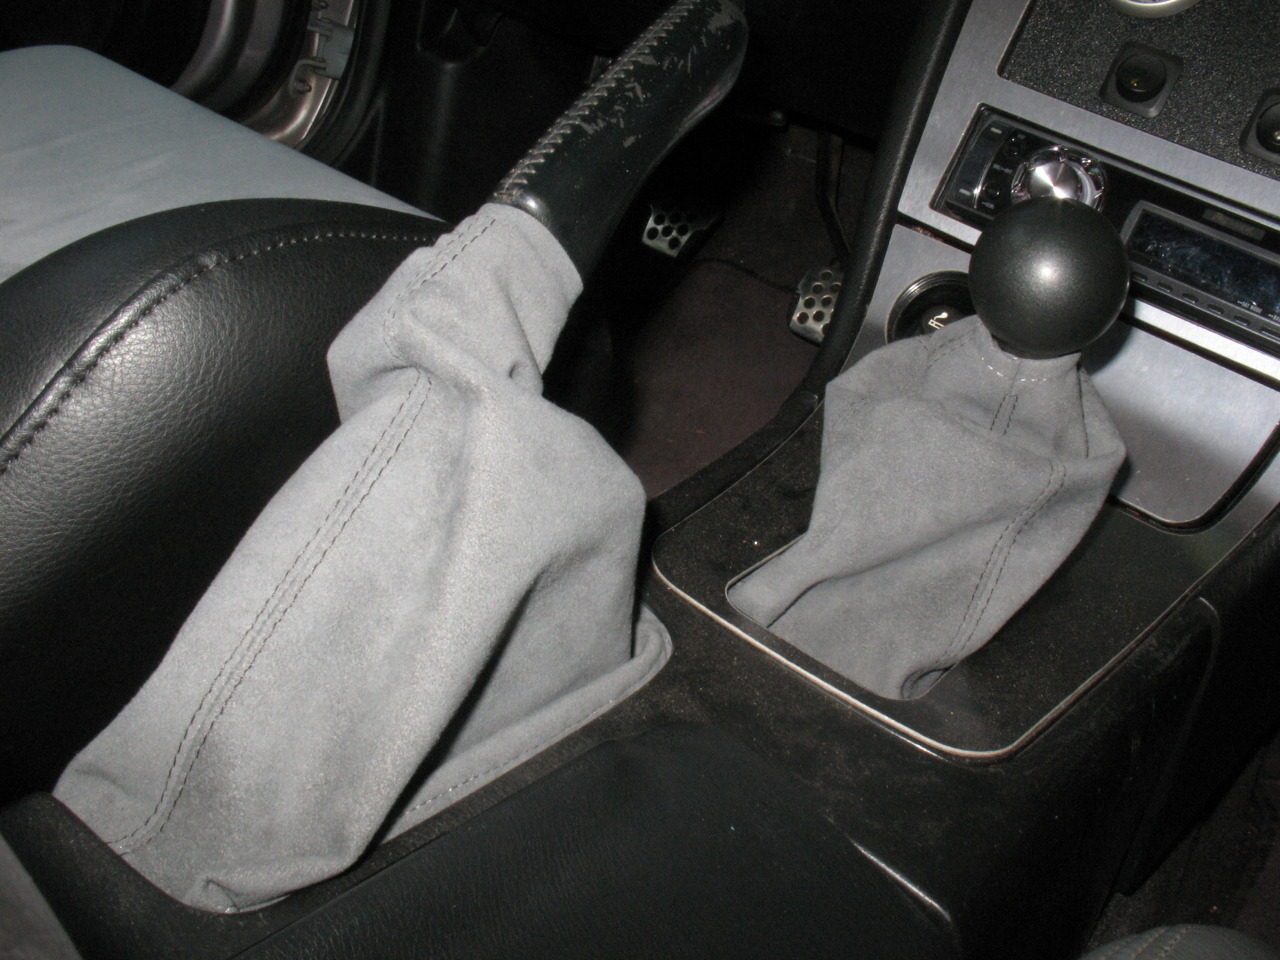
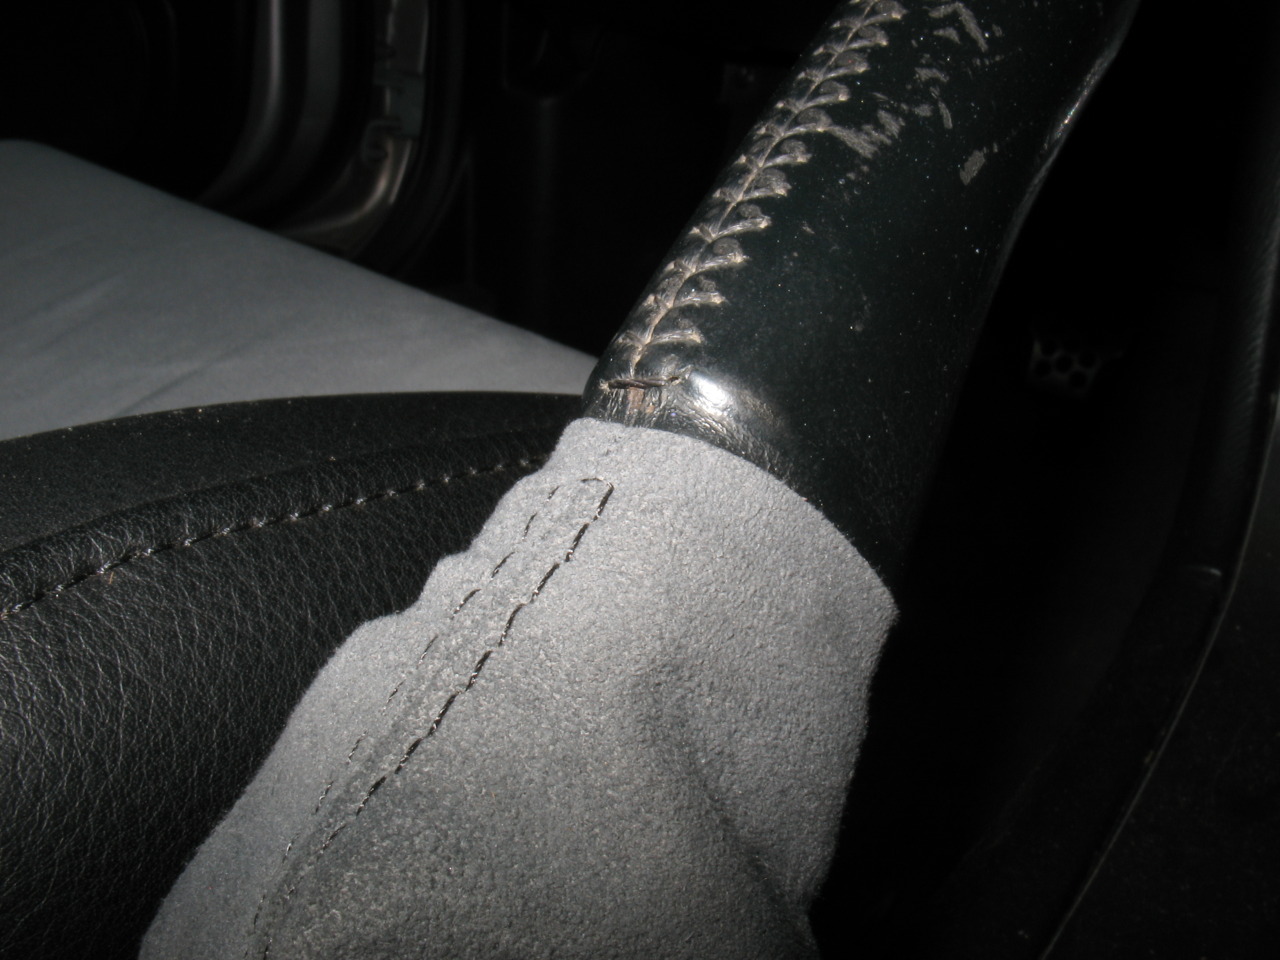
Alcantara shift boots
Well I haven't completed all of my Alcantara work yet, but I wanted to get these pics posted up. I plan on recovering some spare leather door panels with the spare Alcantara, but I haven't had much time to do them yet, so here are some pics of the shift and e-brake boots. They were made by RedlineGoods and aside from how the top of the e-brake boot fits the handle, I'm very impressed with the stitching. I have had their black leather boots in my car for the last 8-9 years, but after seeing some BMWs with Alcantara, I decided I wanted to give it a try. I wanted to keep the leather arm rest cover, as I was worried Alcantara would wear too quickly in that location due to how often it's used/touched compared to the boots.
After some digging I found a vendor for Alcantara in the US and bought a 3'x5' sheet for $100. I had six samples of colors to choose from, but none were a perfect match for the stock gray leather. I had choice between a gray that was too light and one that was too dark, and went with the darker one because it matched the carpet, if nothing else. I had Redline use black stitching and made a four panel version for the shift boot. Shipping to Poland was about $10, and the cost of the labor for the boots (including return shipping) was about $65. Very reasonable!
The fabric has a very nice feel to it, and so far I'm very pleased with how it all turned out. Let me know what you think!
Last edited by 95maxrider; Apr 27, 2012 at 04:39 PM.


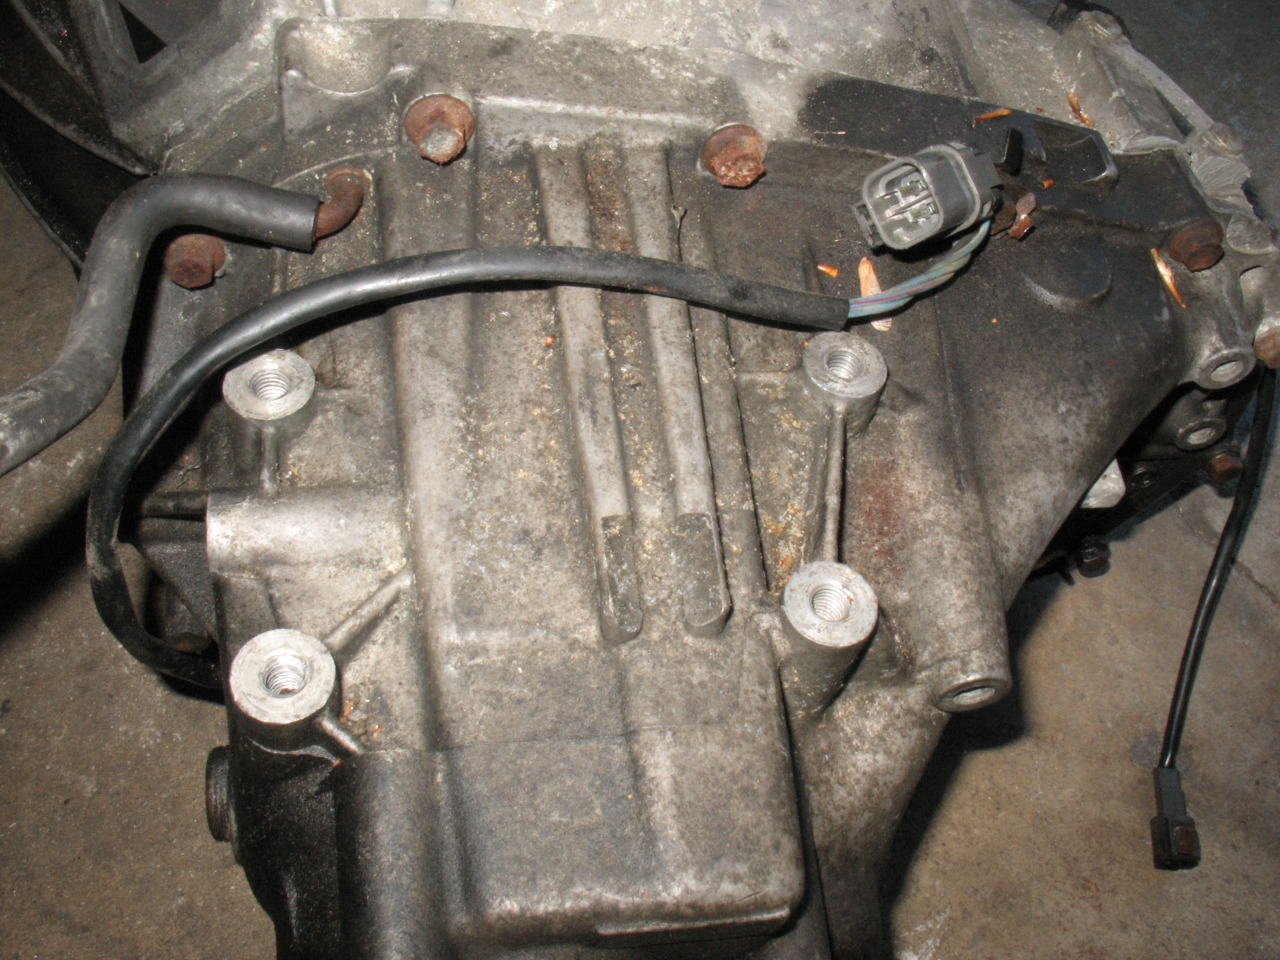
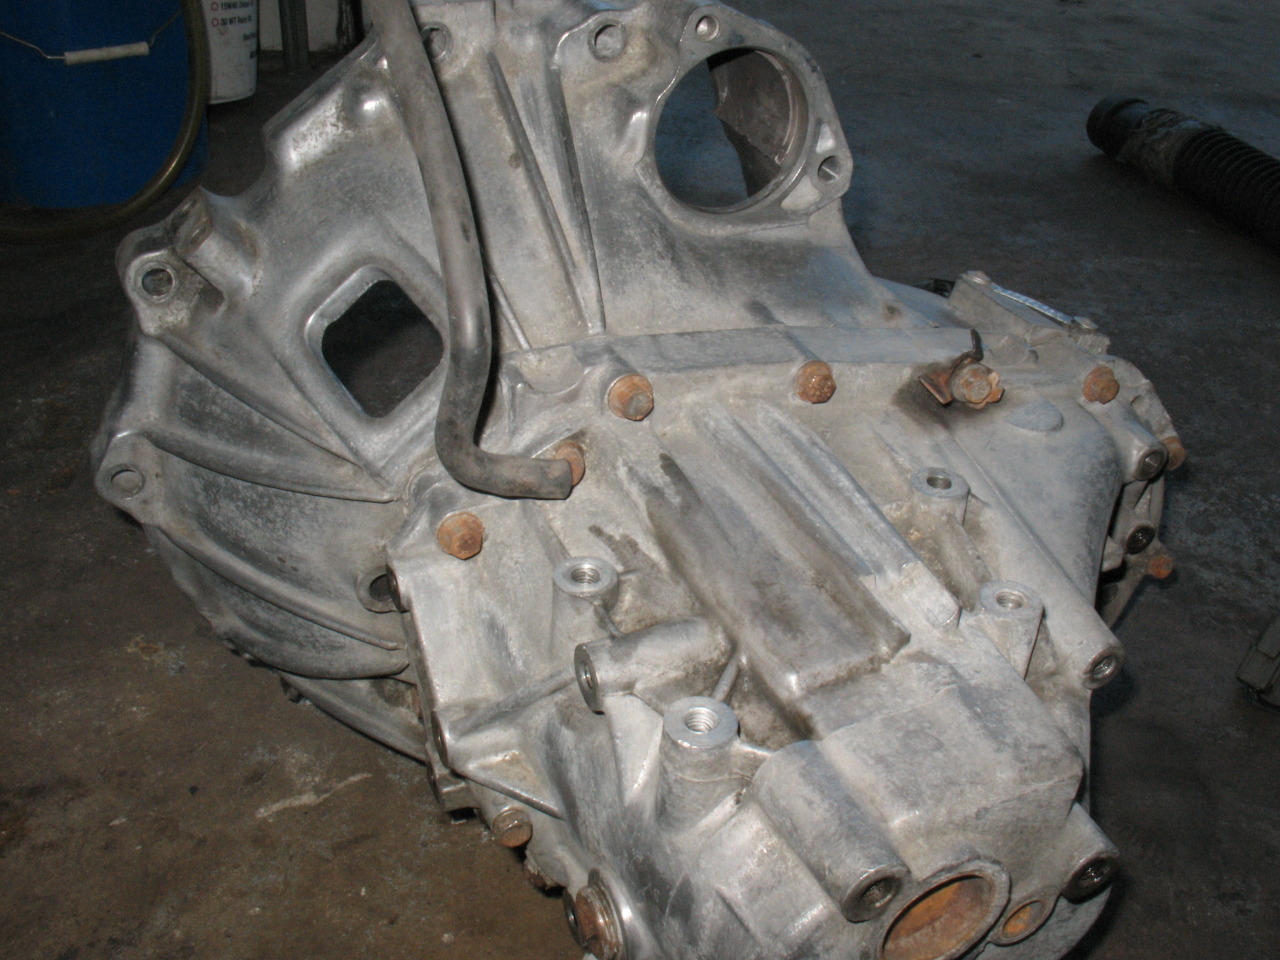
New/used transmission with Quaife differential!
Well in my never-ending search to rid my car of its annoying vibration during acceleration and to aid traction while racing, I picked up a trans from Crusher with a Quaife in. It was pretty nasty after sitting outside, so I cleaned it up in the parts washer and a wire brush. The install went smoothly, but unfortunately my vibration remains. The next step is to replace my crankshaft position sensor, as it looked like it might have a hairline crack in it. Then I will be installing the rebuilt DEK injectors from RC Engineering. But for now, pics!
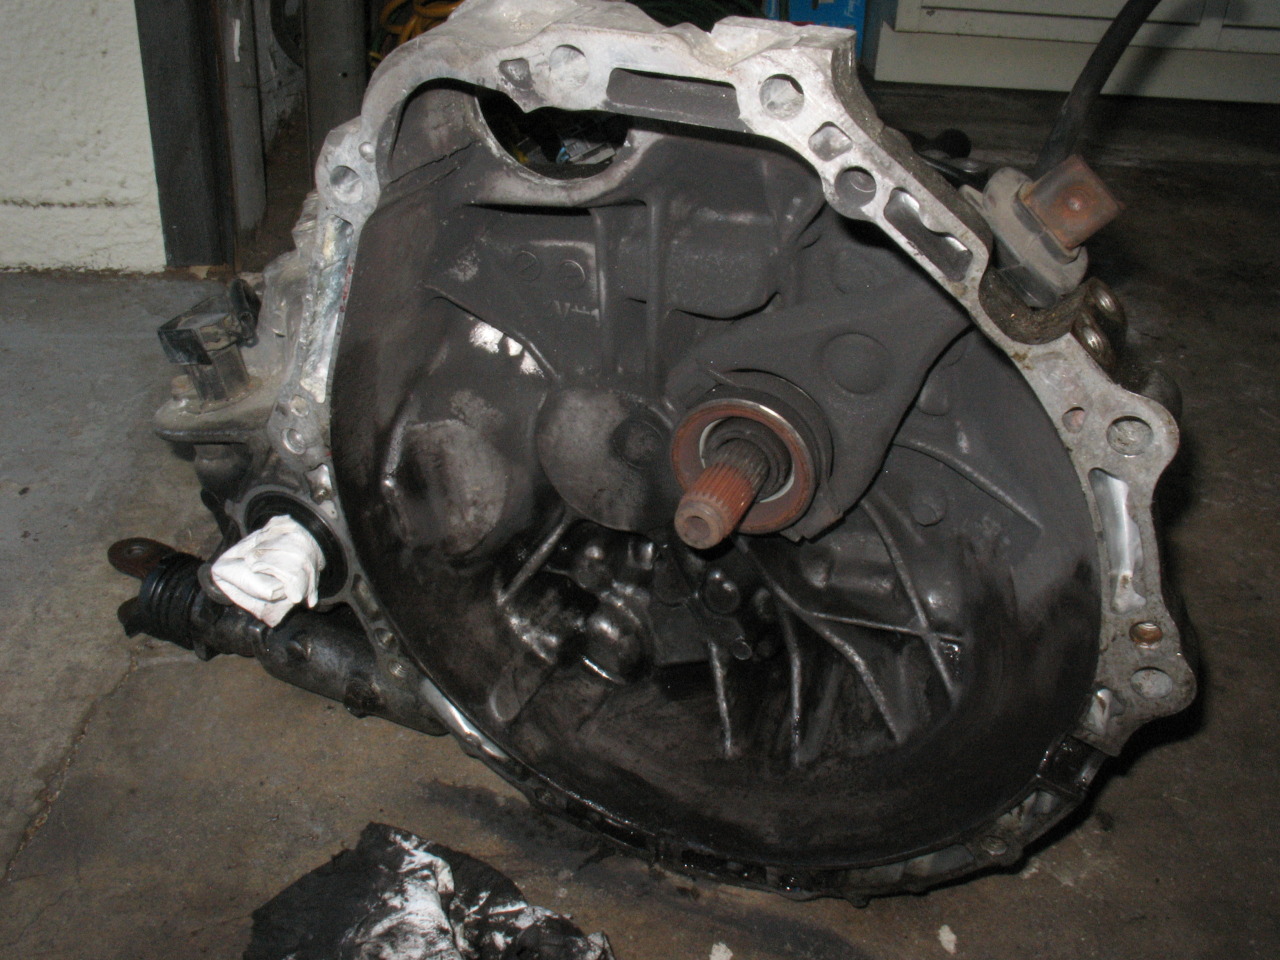
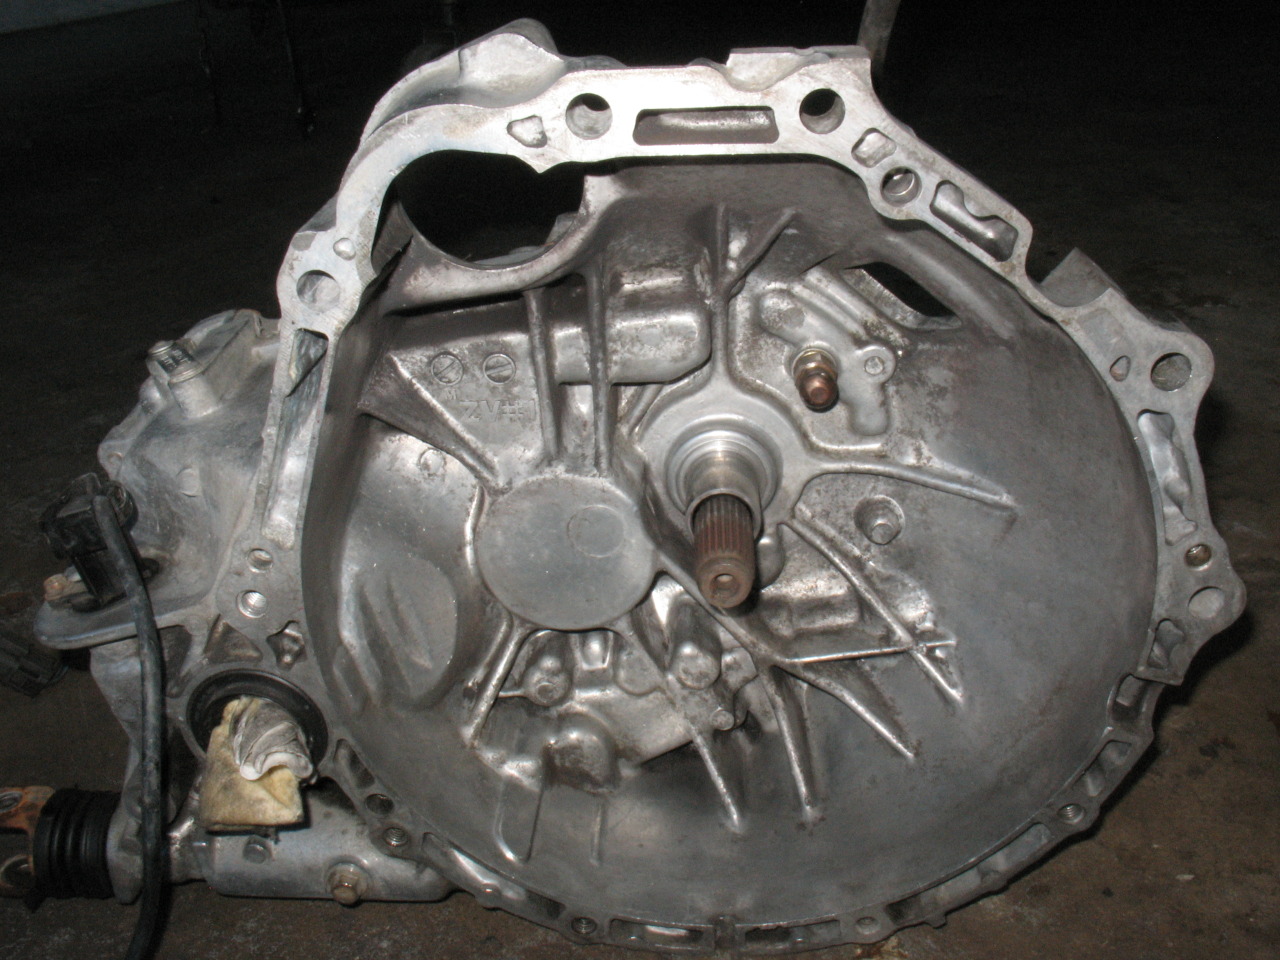
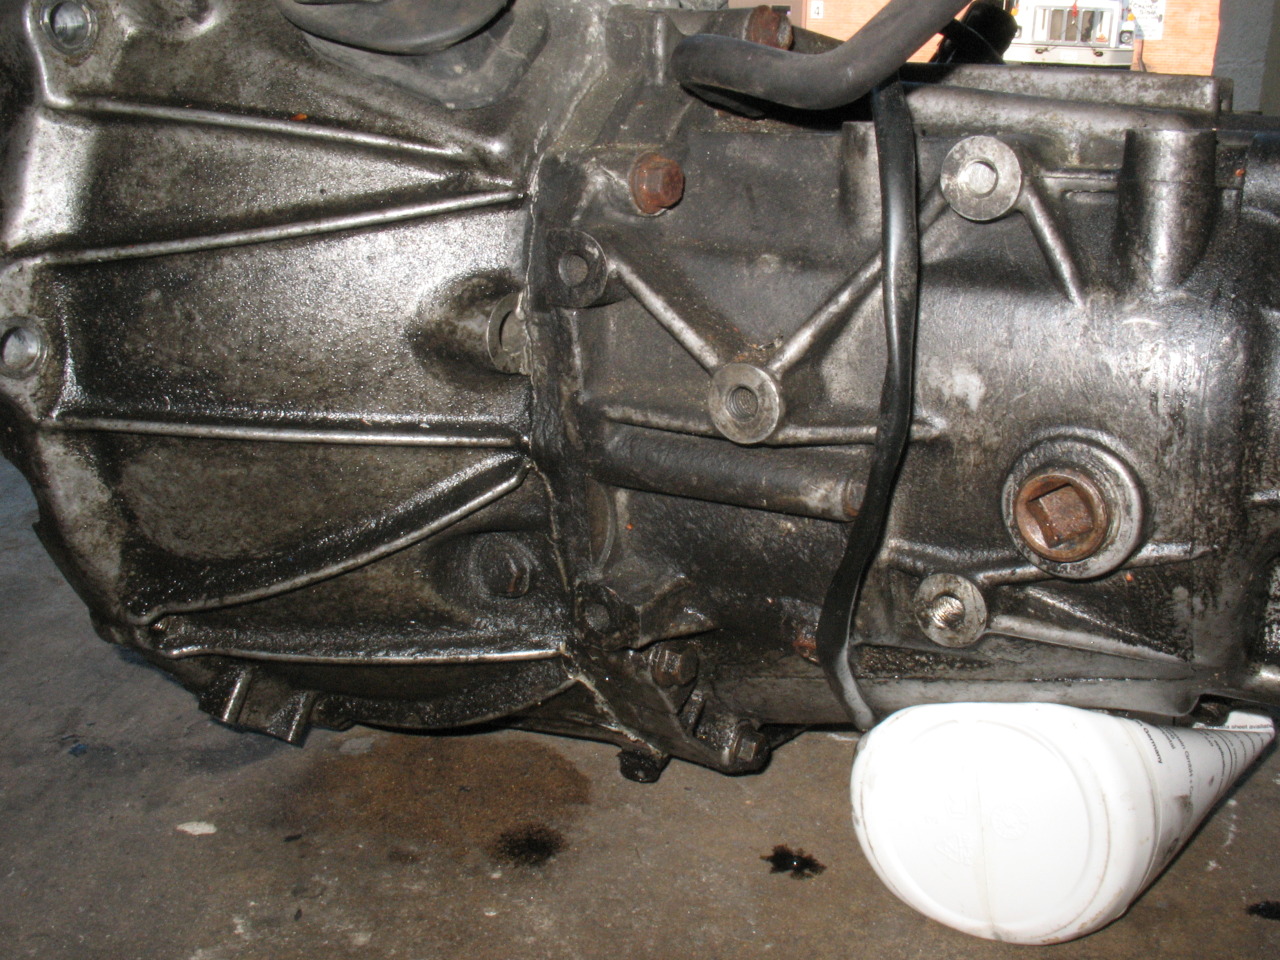
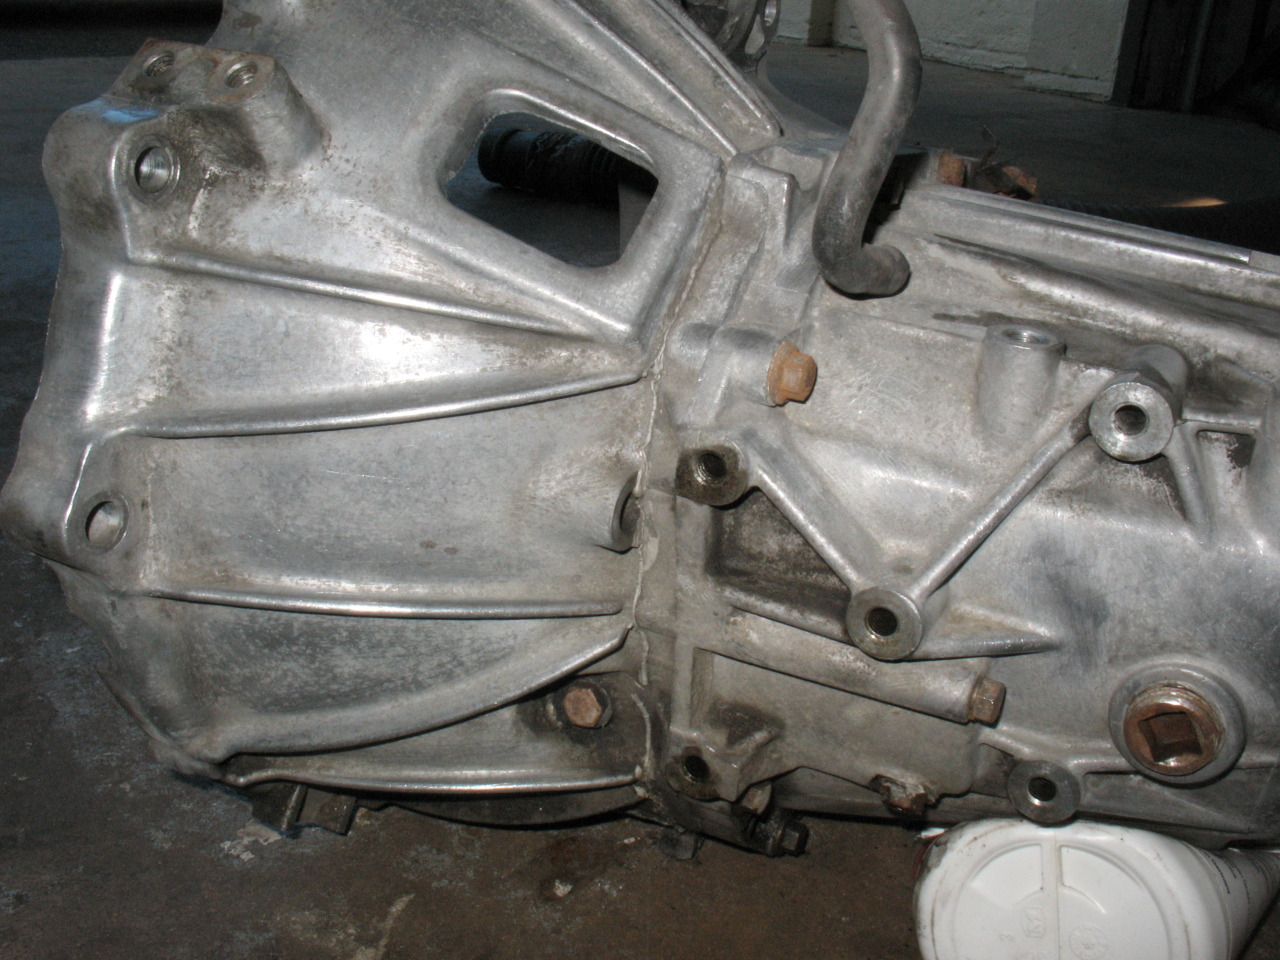
I decided to clean up one of the trans mounts while we had it out....
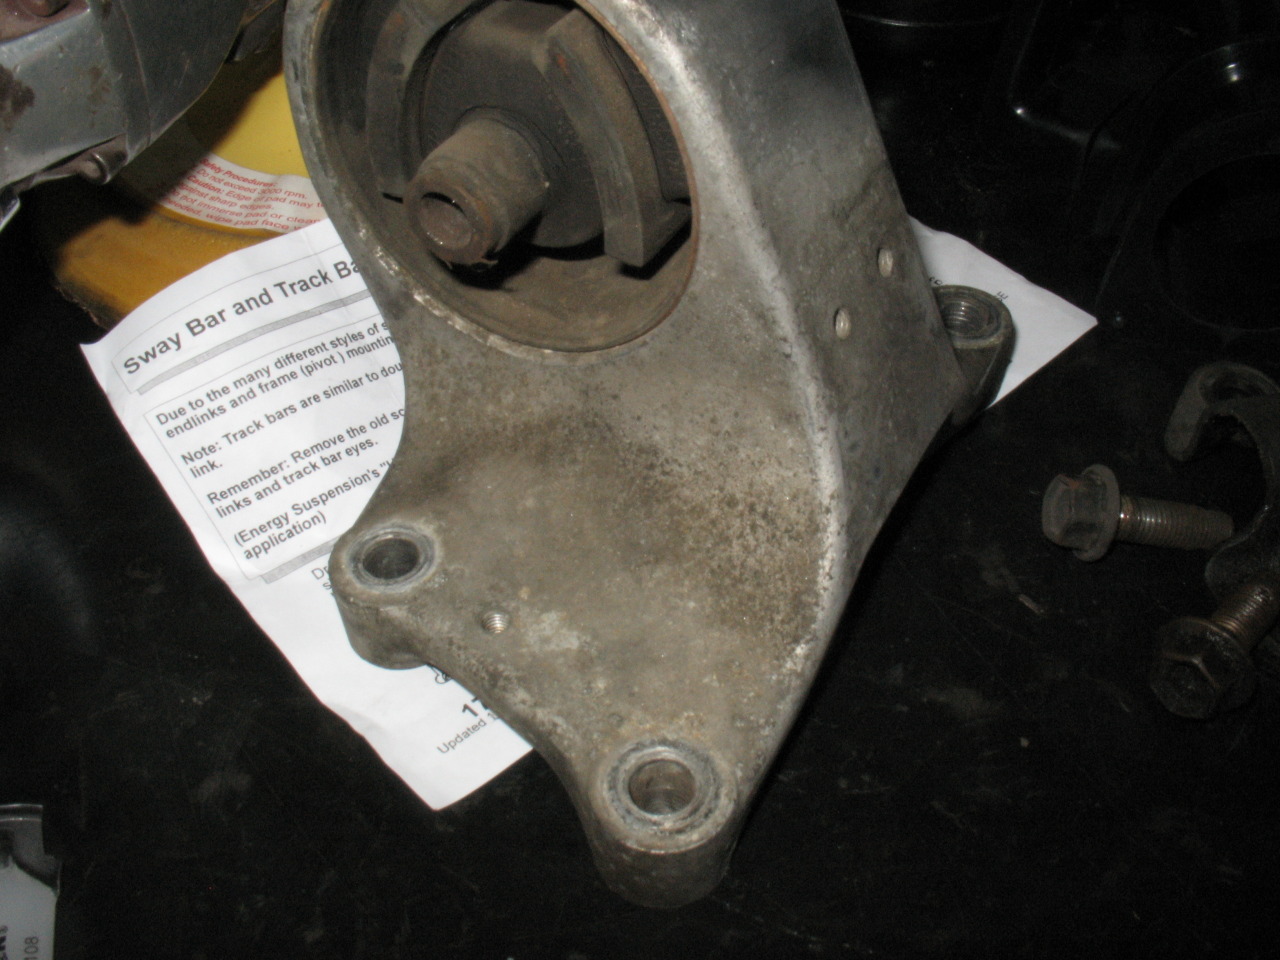
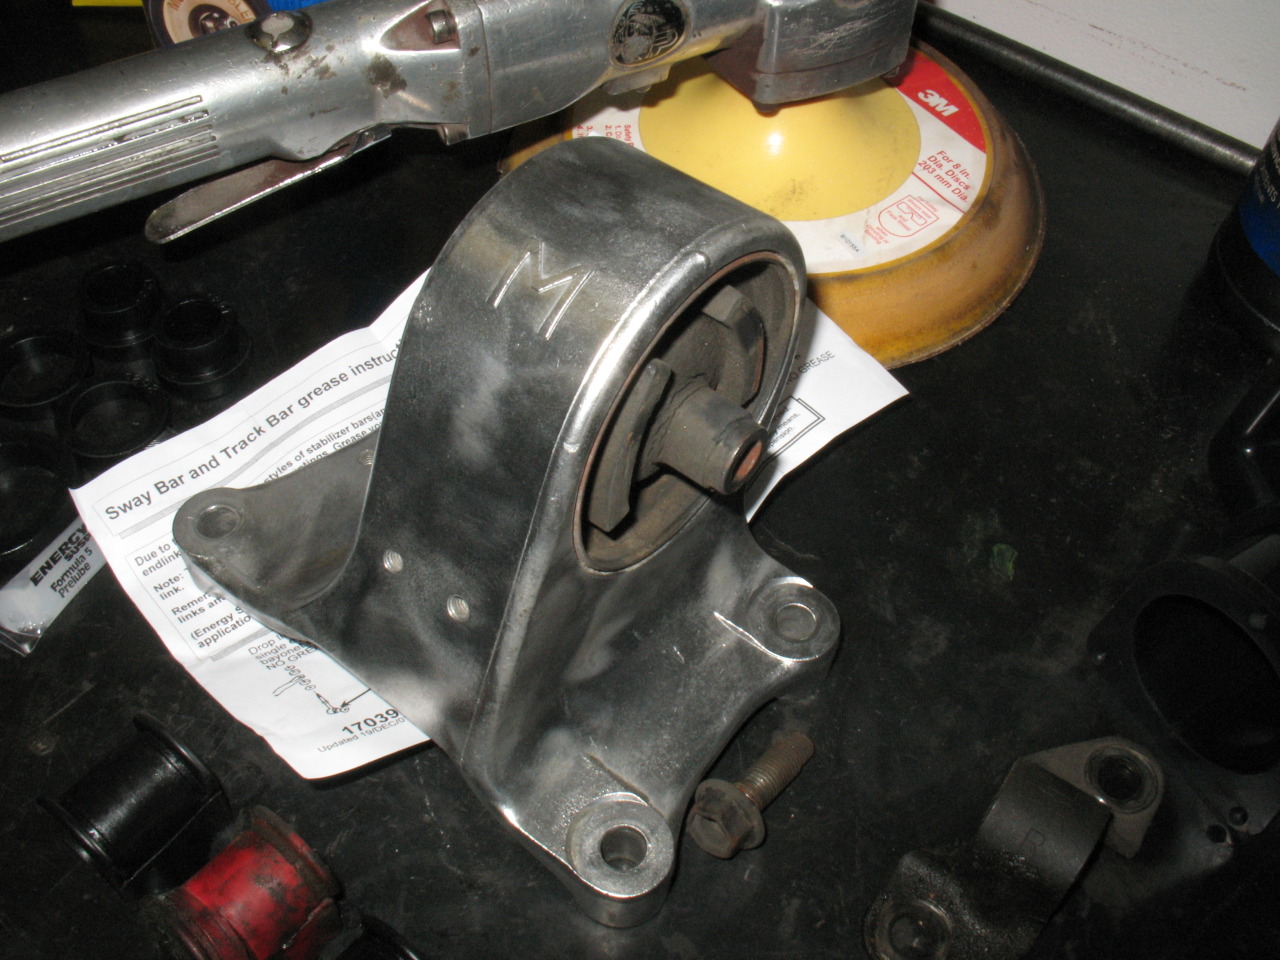
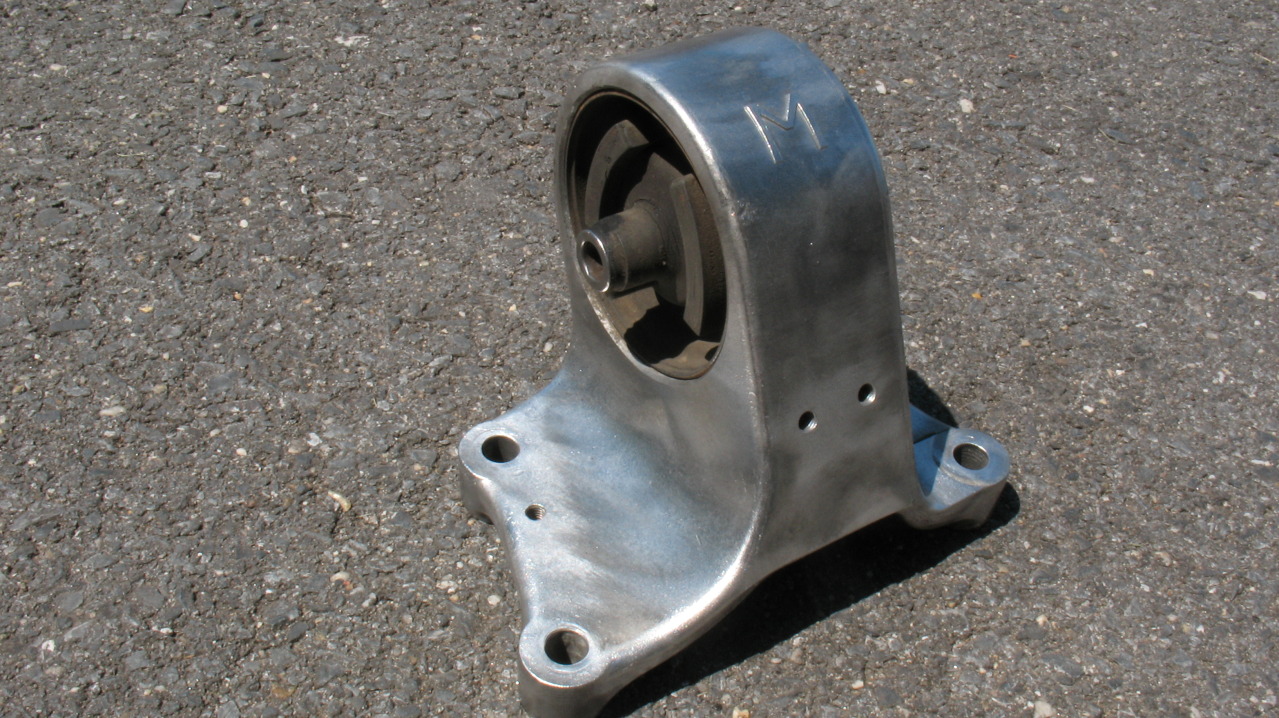
It's pretty worn out.....thankfully a guy on the org is making poly inserts for them, which I will be buying with the quickness!
Quaife review:
I was able to drive around in the rain a bit and could really feel the diff working coming out of corners. I noticed a similar benefit after going from an open diff to the stock VLSD, so I'm very pleased with the results. I have a race on Saturday which should give me a better idea of what this thing can really do. More impressions to come later.
Unfortunately, I've noticed an odd behavior from this transmission. About 20% of the time I put the shifter in first gear at a stop, I hear a clunk coming from the trans. It can't be good, but I'm sure not ripping this thing out to get it rebuilt yet. Does anyone have any idea what the clunk could be? I
I decided to clean up one of the trans mounts while we had it out....
It's pretty worn out.....thankfully a guy on the org is making poly inserts for them, which I will be buying with the quickness!
Quaife review:
I was able to drive around in the rain a bit and could really feel the diff working coming out of corners. I noticed a similar benefit after going from an open diff to the stock VLSD, so I'm very pleased with the results. I have a race on Saturday which should give me a better idea of what this thing can really do. More impressions to come later.
Unfortunately, I've noticed an odd behavior from this transmission. About 20% of the time I put the shifter in first gear at a stop, I hear a clunk coming from the trans. It can't be good, but I'm sure not ripping this thing out to get it rebuilt yet. Does anyone have any idea what the clunk could be? I
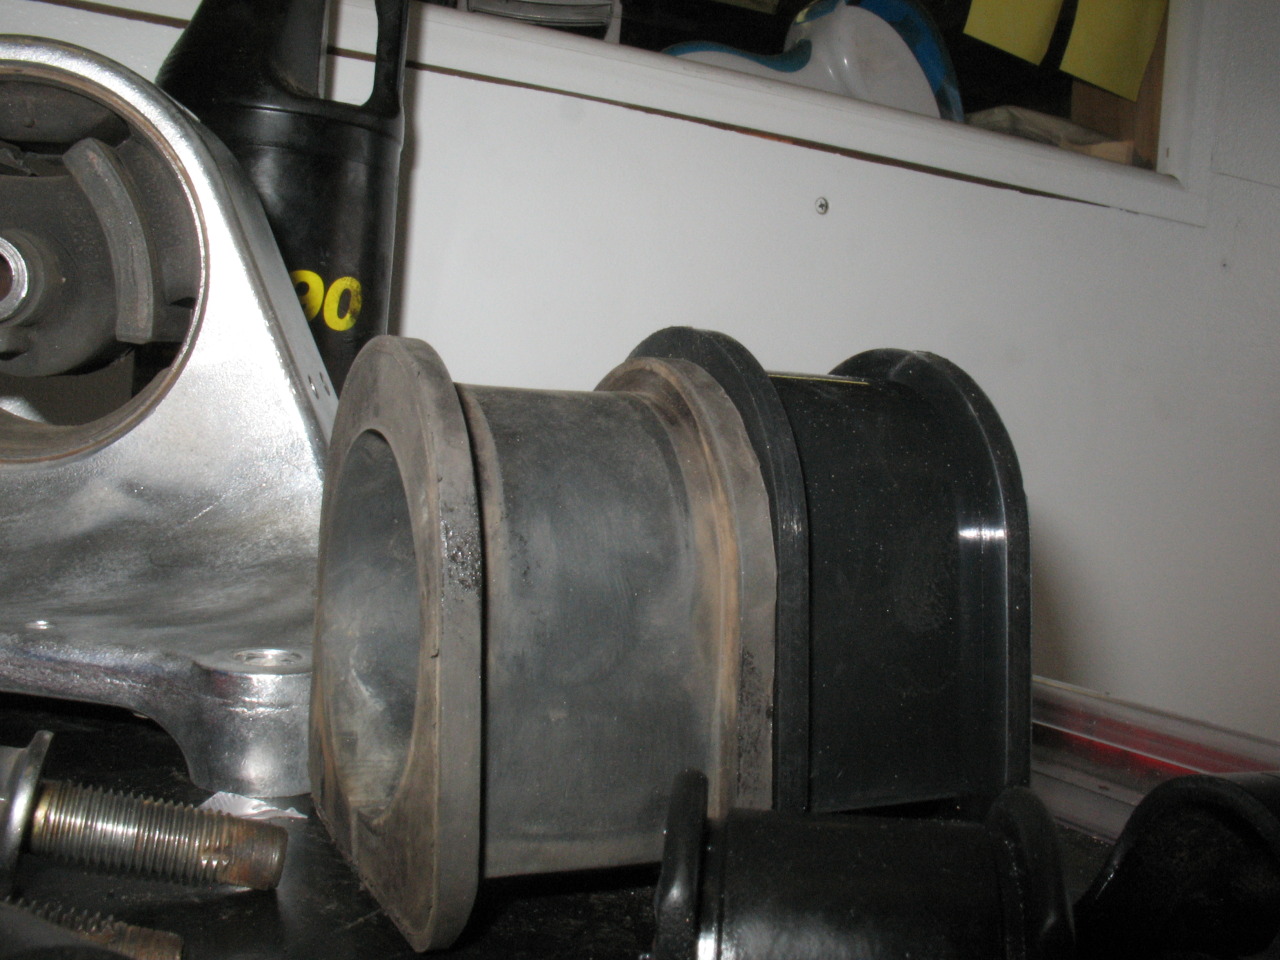
More ES bushings!
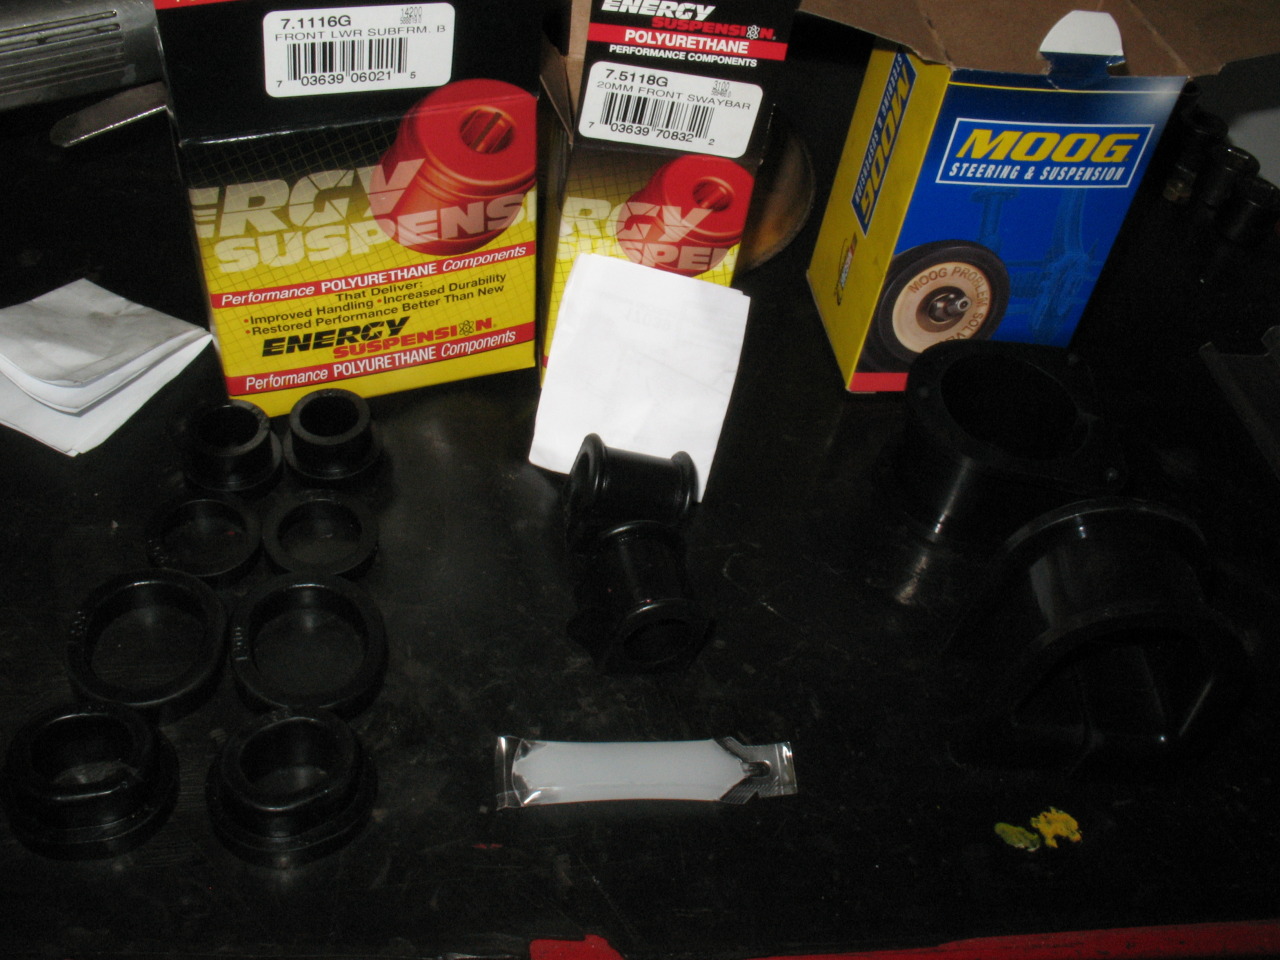
I installed a second set of ES bushings in my car about 2-3 years ago after the original set had died. For whatever reason my dumb-ass decided to order the red ones instead of the black ones with the built-in graphite, so these made noises from time to time. By last year the control arm bushing had completely failed so I installed the delrin ones that were for sale on the org. On to my third set of ES bushings, yay!! (Is it me, or are these things not the greatest quality?)
From last year:
Delrin:
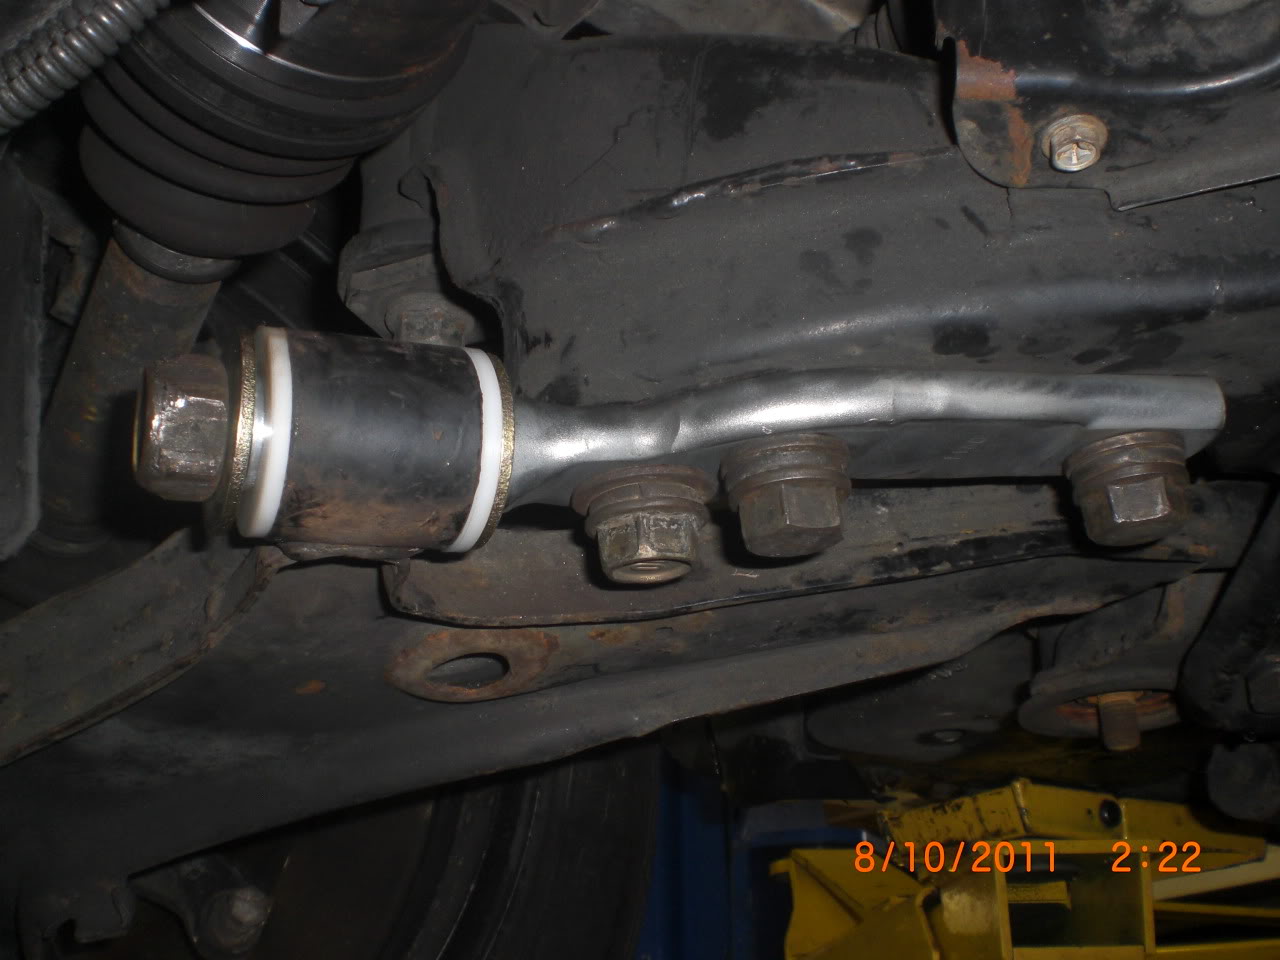
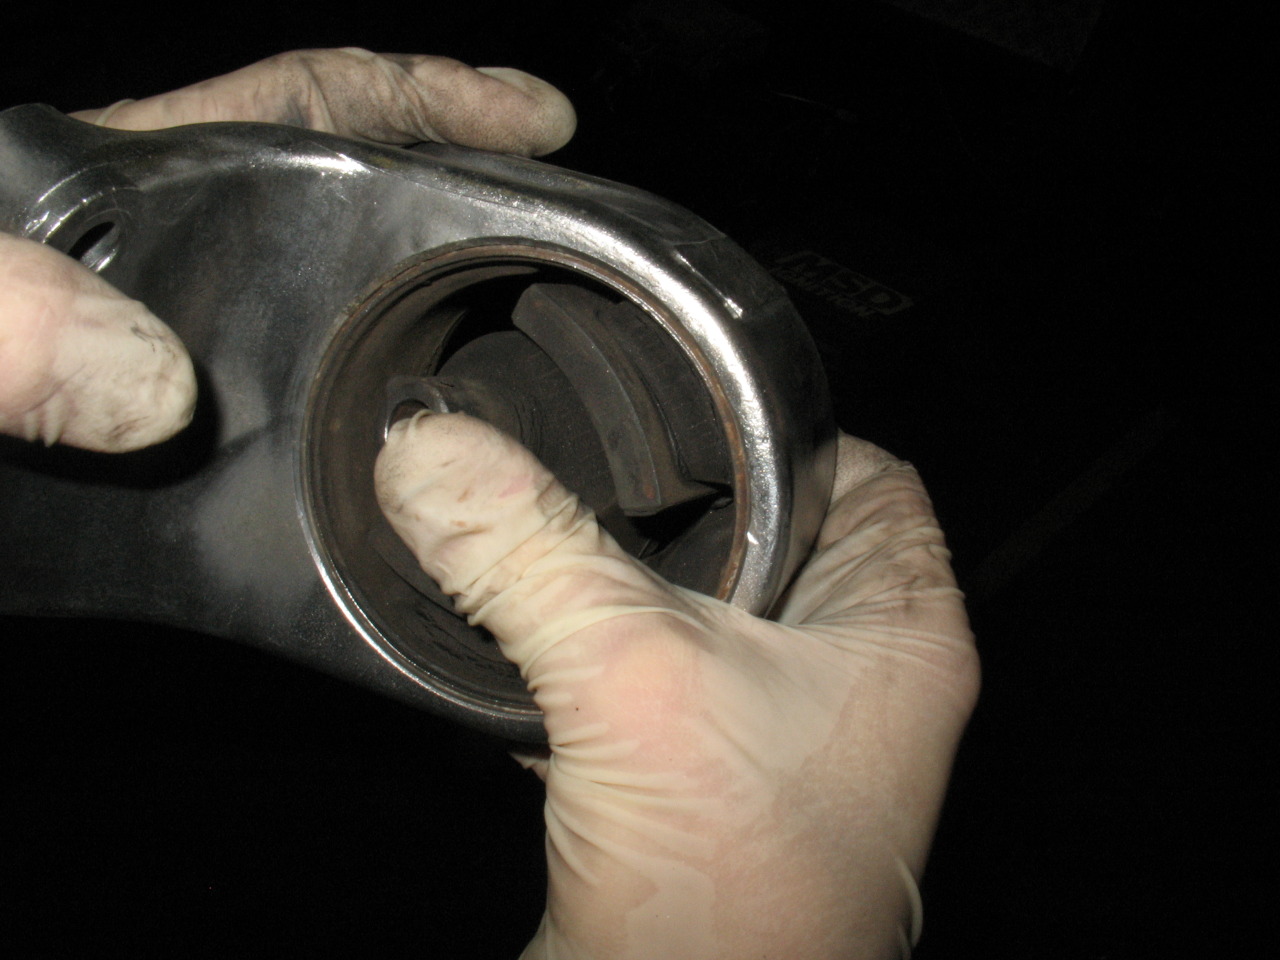
This time around I just replaced the sway bar and crossmember bushings while the trans was out. Needless to say, these things weren't in the best shape.
Swaybar bushings:
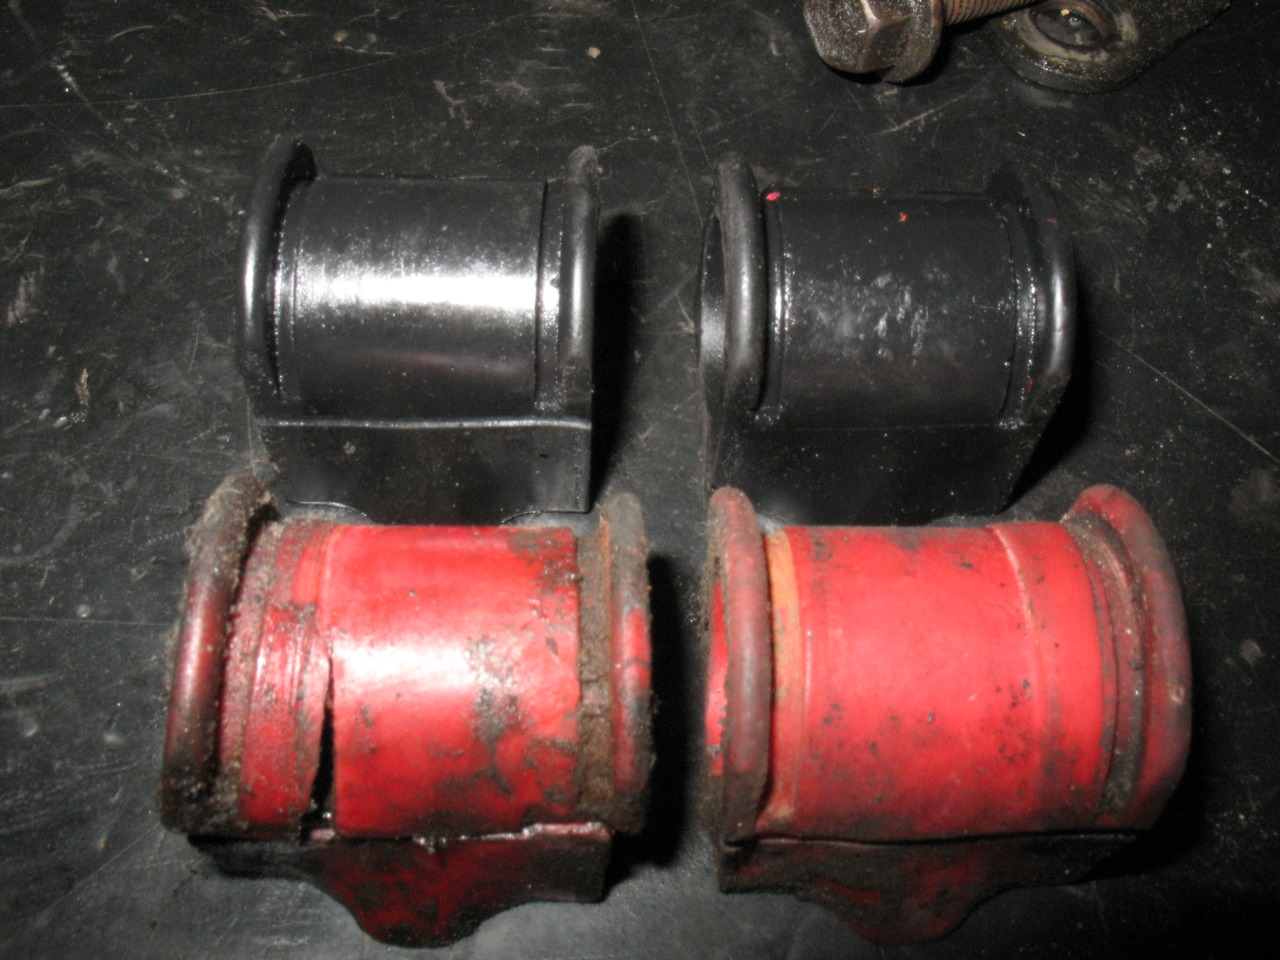
The cracked one was on the PS where I have a PS fluid leak, which I think may have contributed to its demise. Still, the other one was plenty deformed and very soft. Notice how much softer the used crossmember bushing is compared to new:
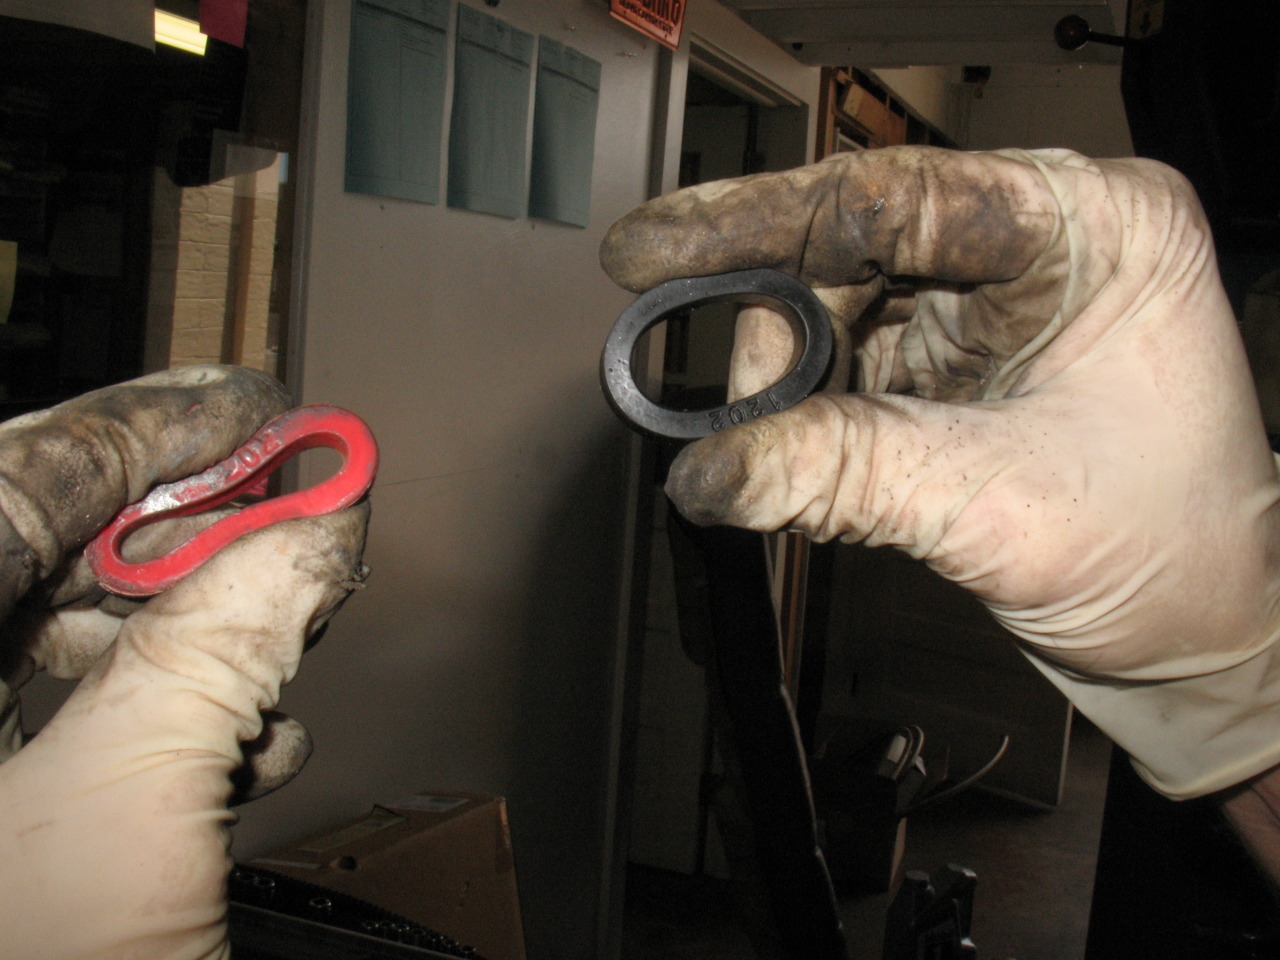
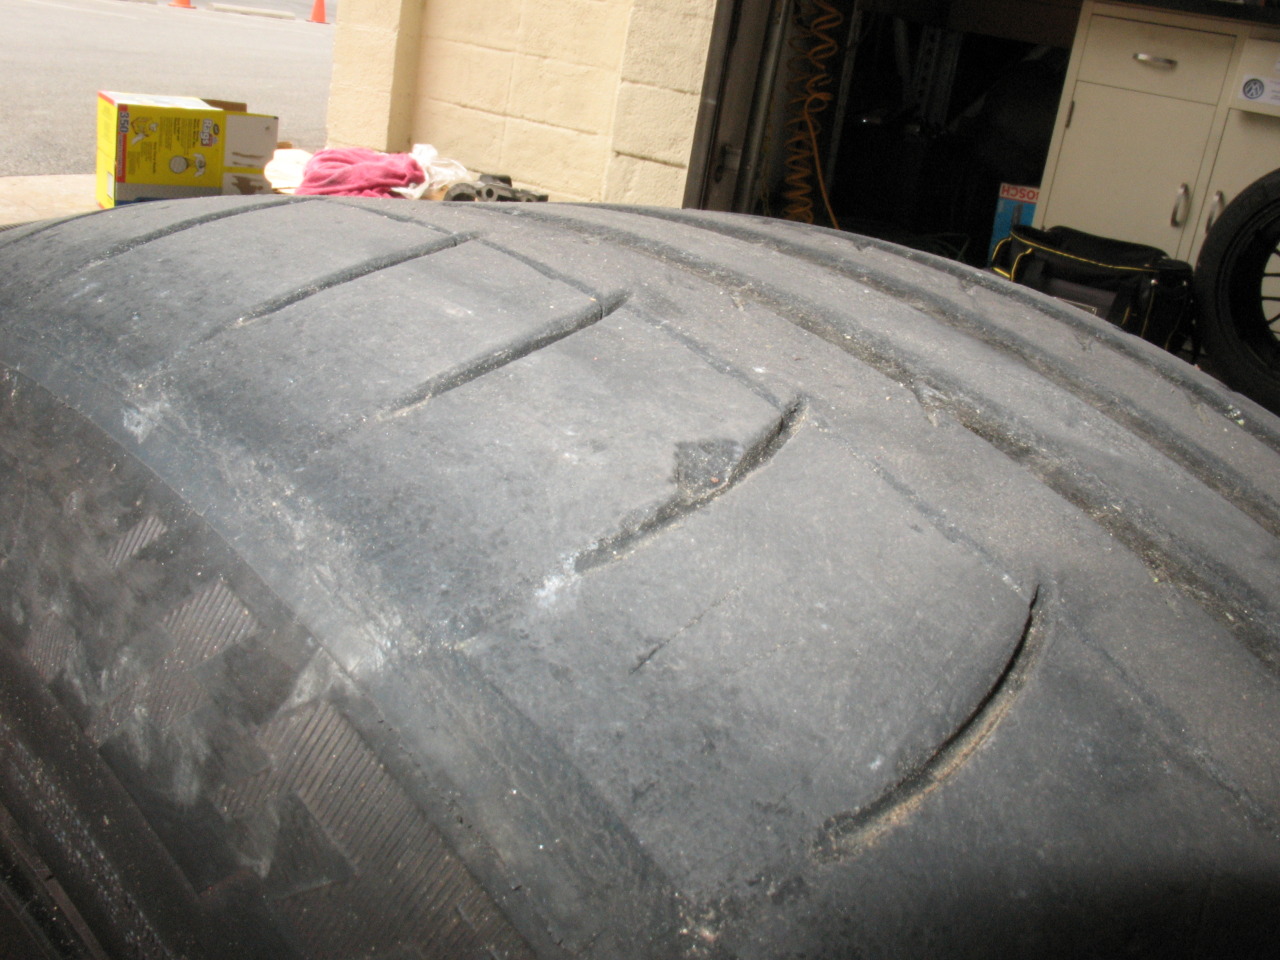
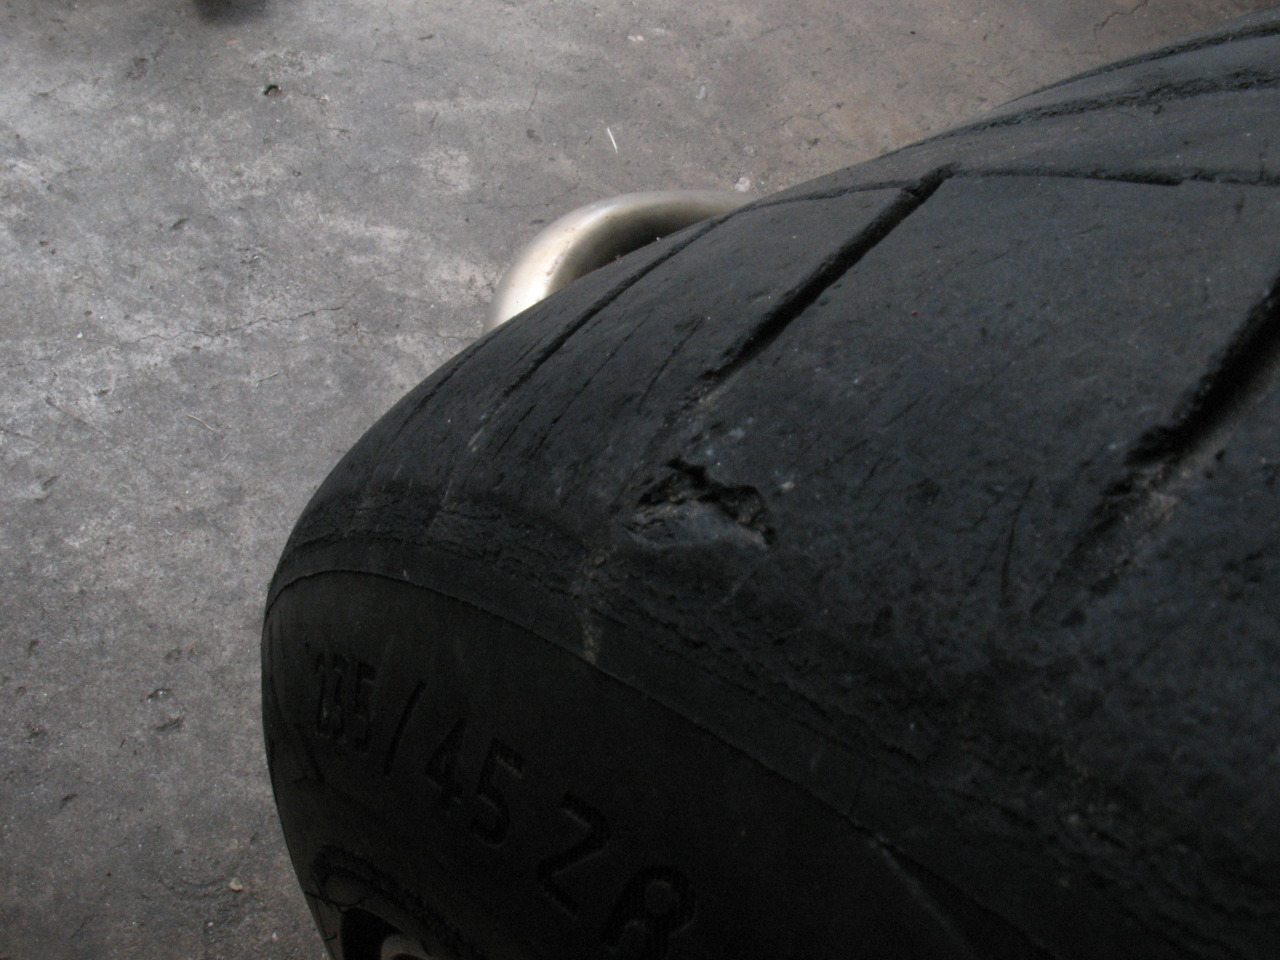
I also installed new Moog steering rack bushings in an attempt to figure out what caused my steering wheel to be offset to the left 15*. Clearly, the old ones have seen better days.
I also rotated my terribly worn front tires to the rear, and between that and the bushings, the car feels "better". It's tough to put my finger on. Either way, I'm glad to get this tire off the front of my car. Even PS2s aren't immune to the Tail of the Dragon:
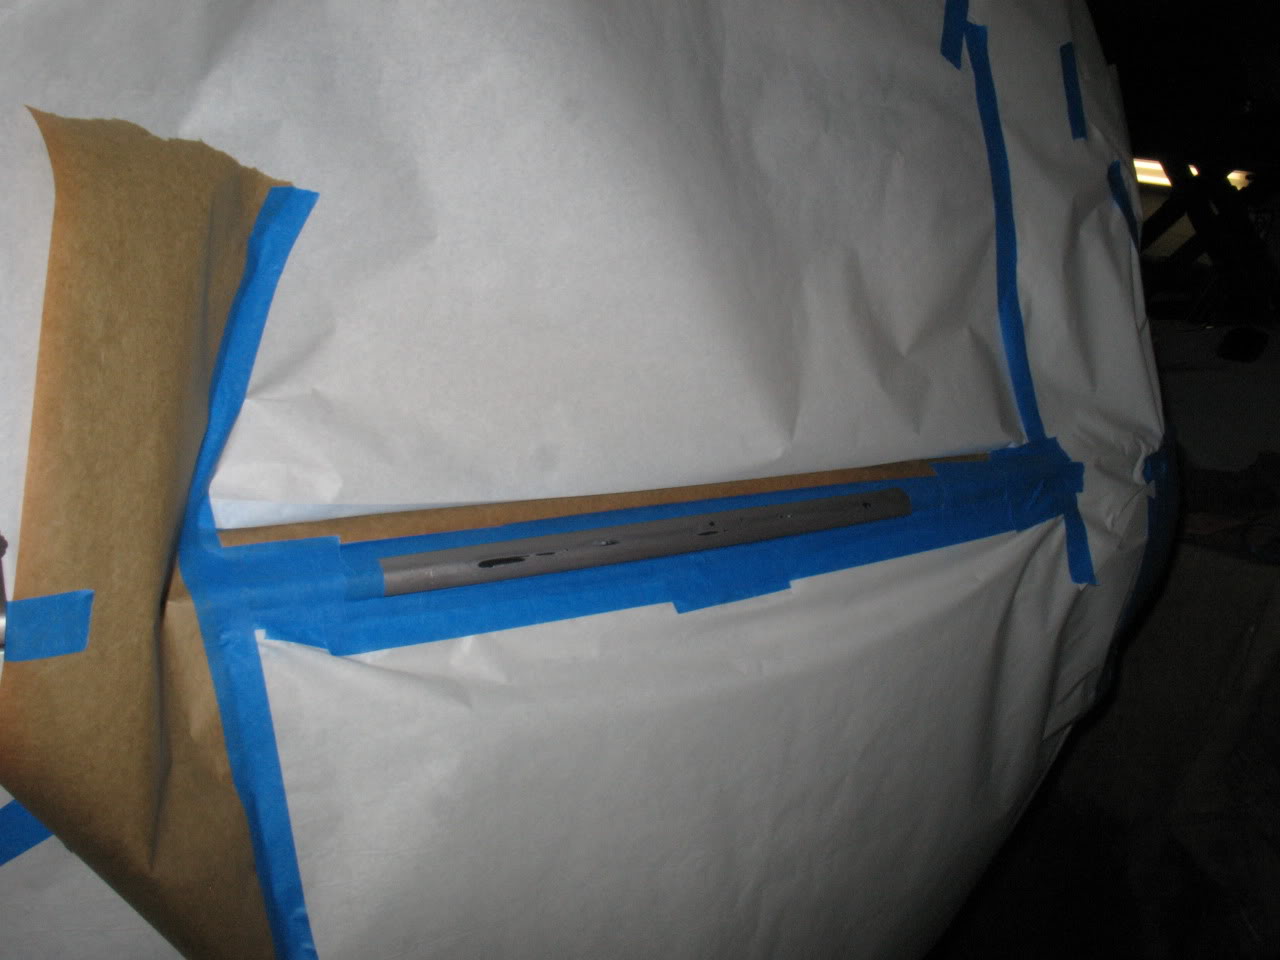
Cat-back exhaust update
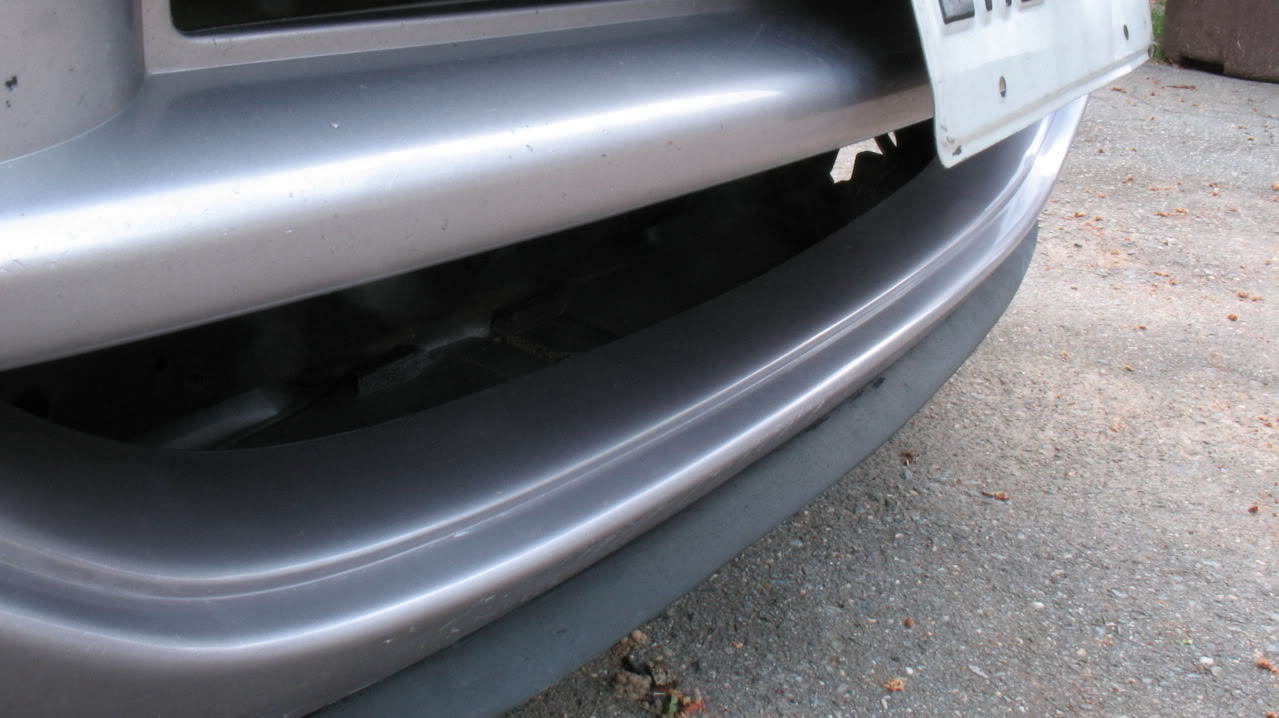
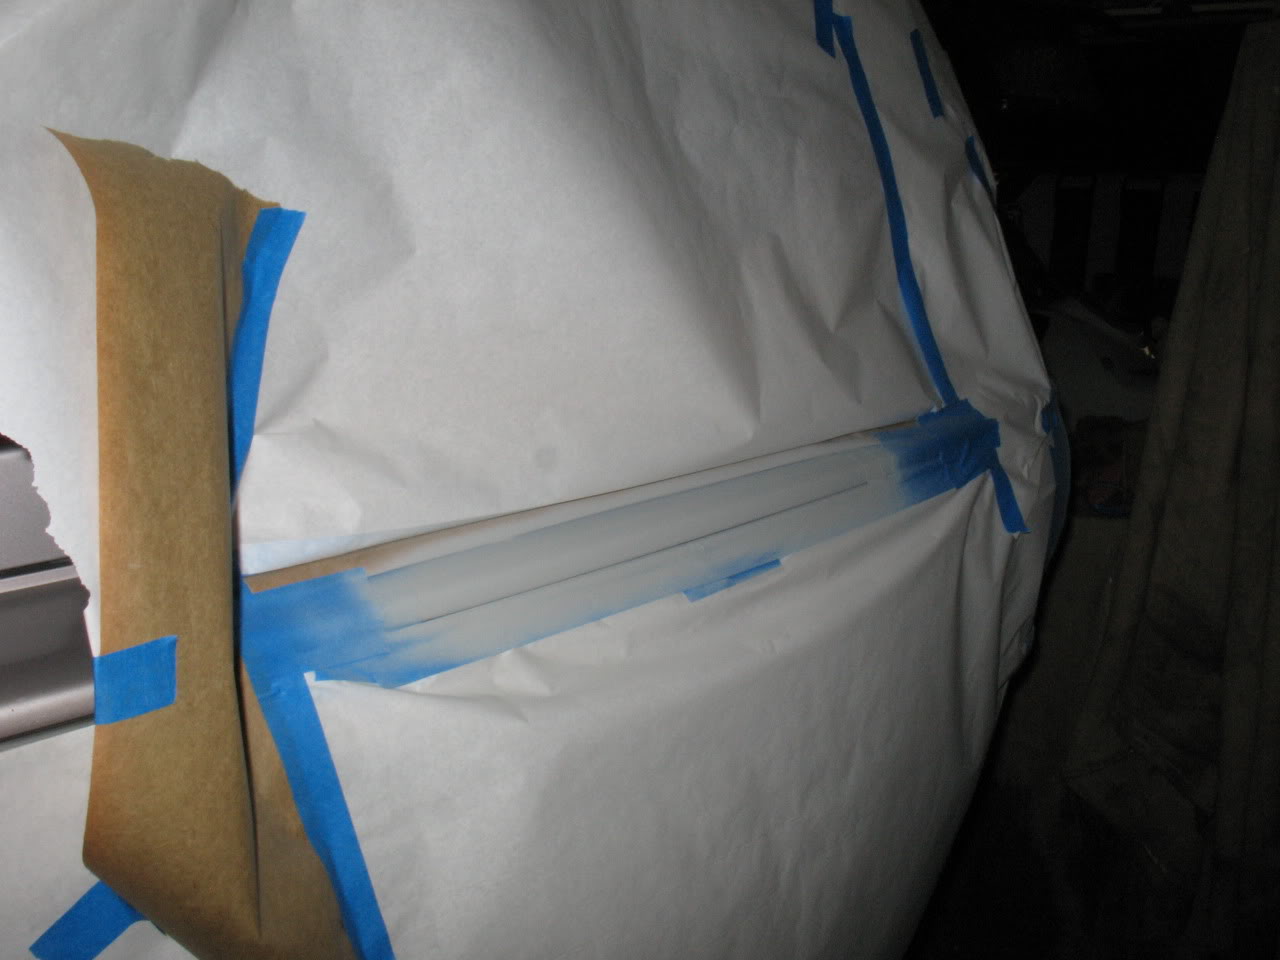
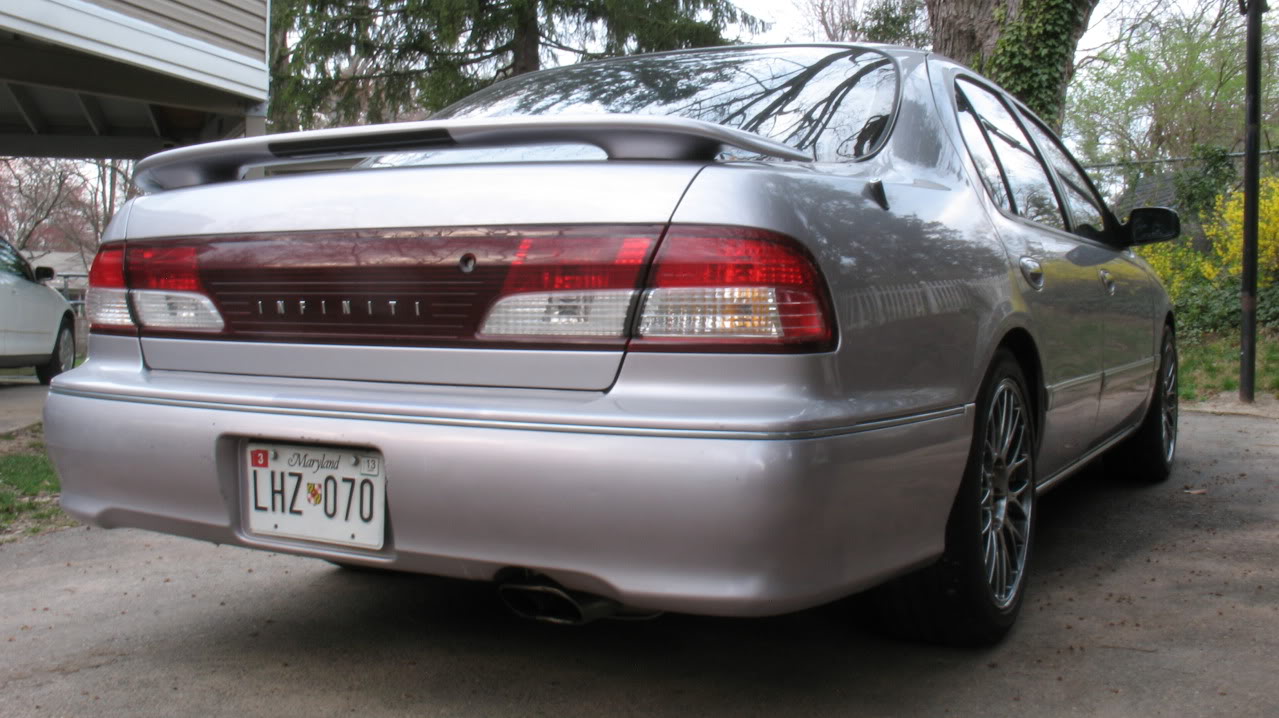
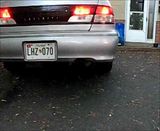
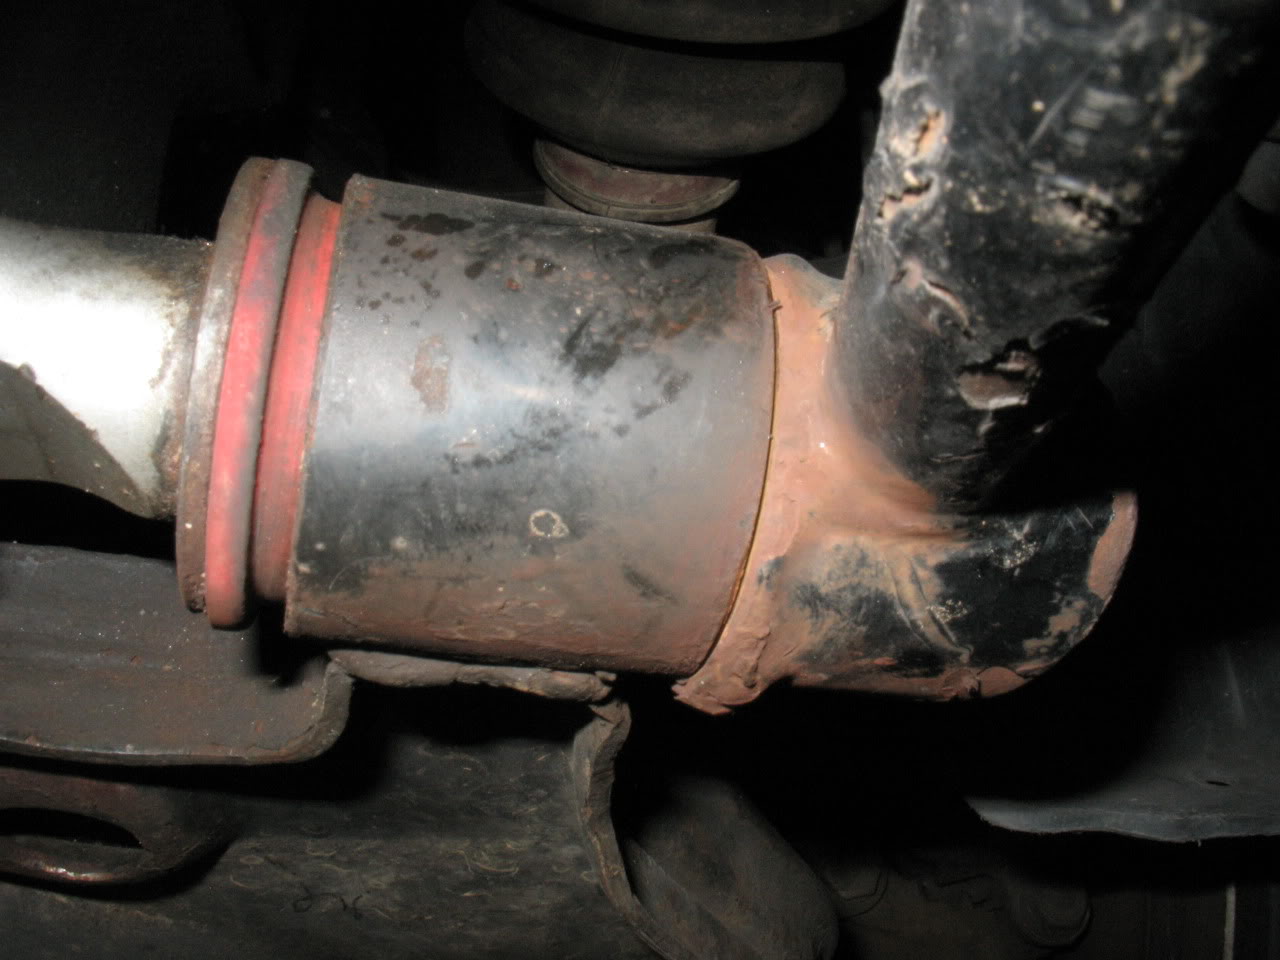
Well I finally was able to pick up Darius' old cat-back (Budget b-pipe to a G35 sedan muffler) from Albert and threw it on the car. Unfortunately, Darius' car was a 97, which I believe have slightly different exhausts than the 95-96 cars, so this thing didn't quite line up the way I had hoped. We will be redoing the piping this weekend. But for now, marvel at the tiny piping I had going into my old 2k Maxima muffler (2" inlet!!). Also, note how small the twin pipes are on the back of the muffler.
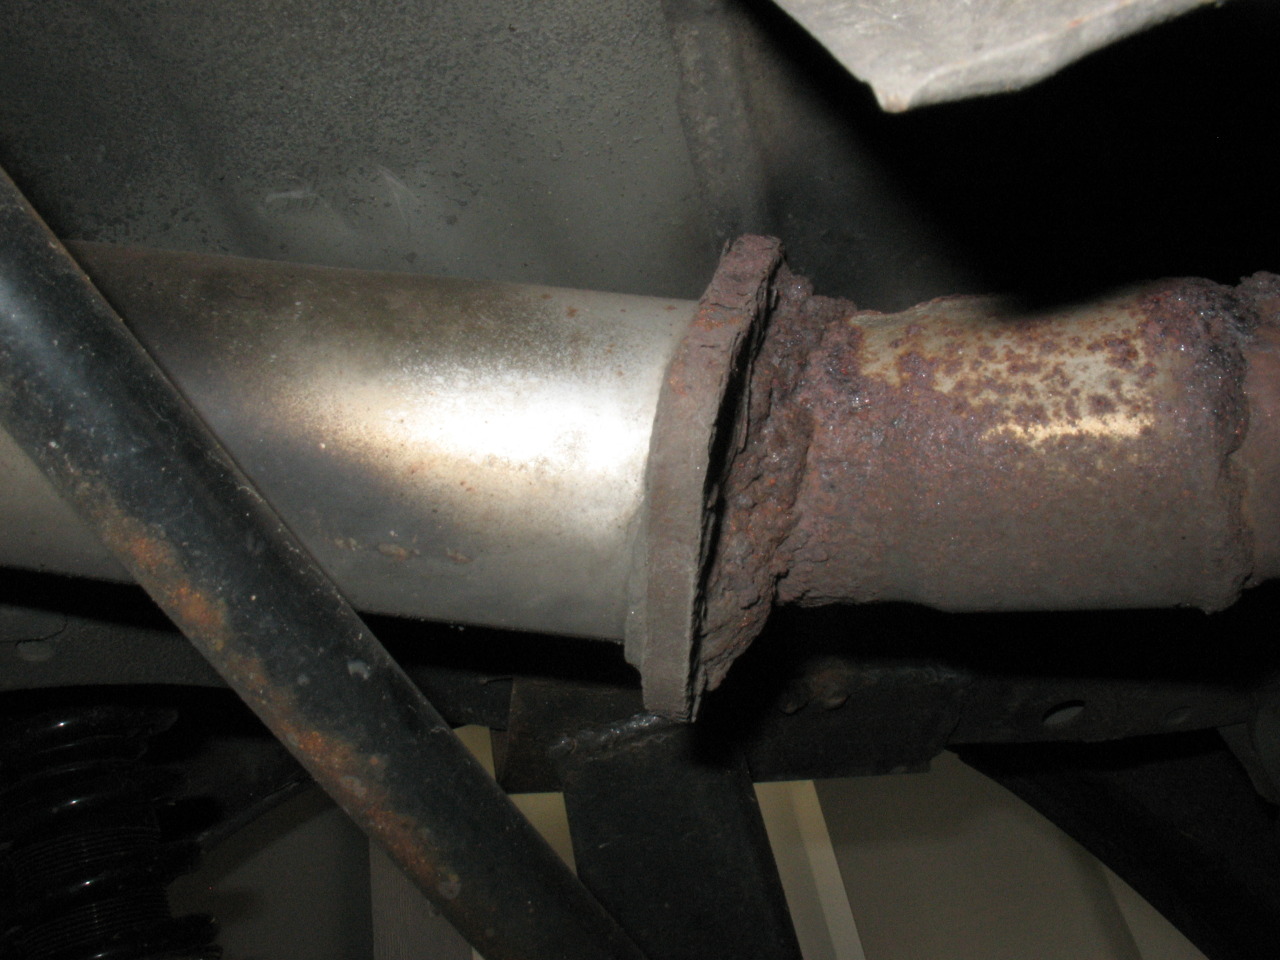
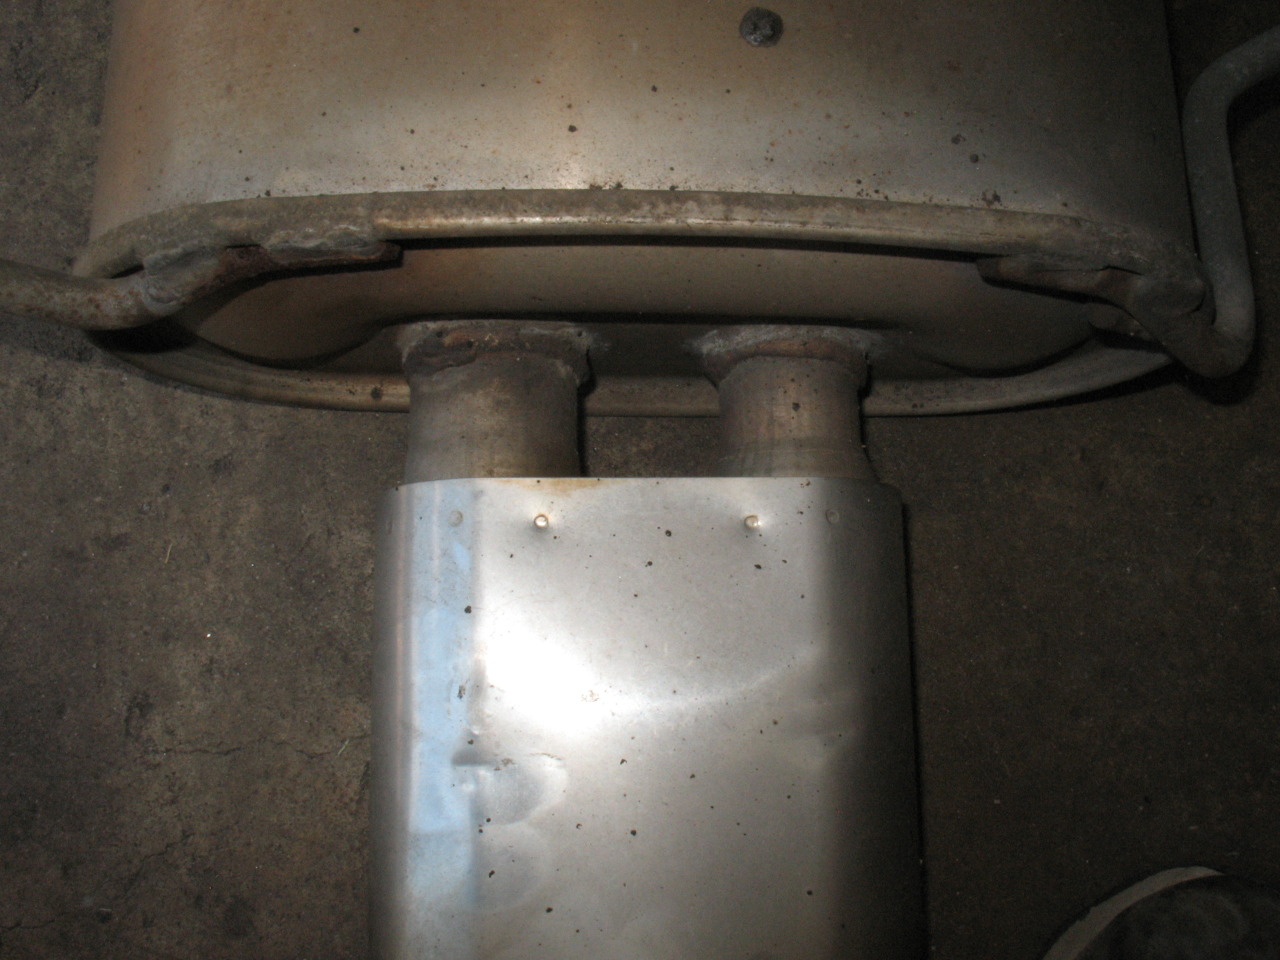
Finally, 2.5" all the way back!!
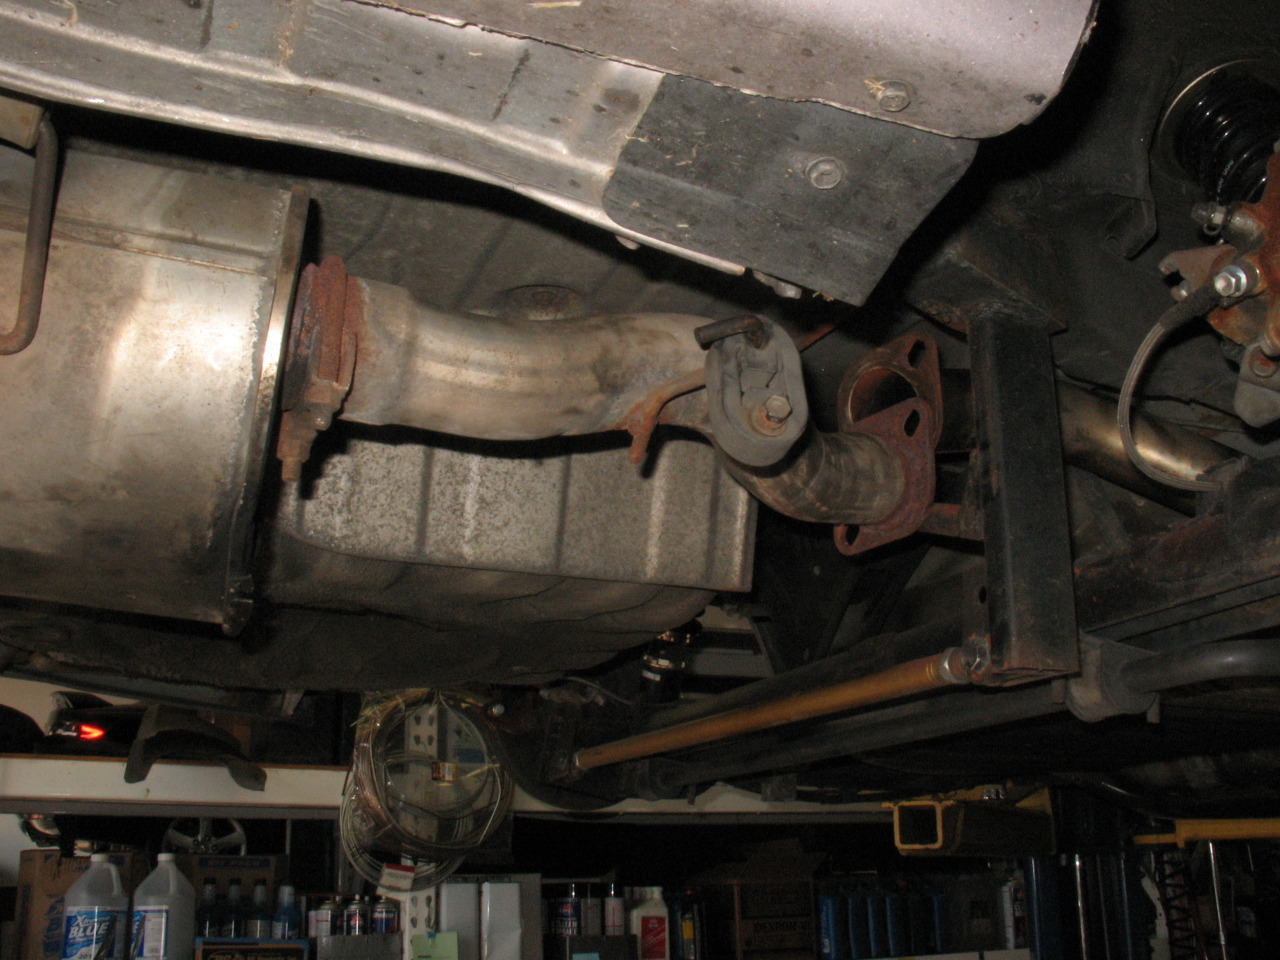
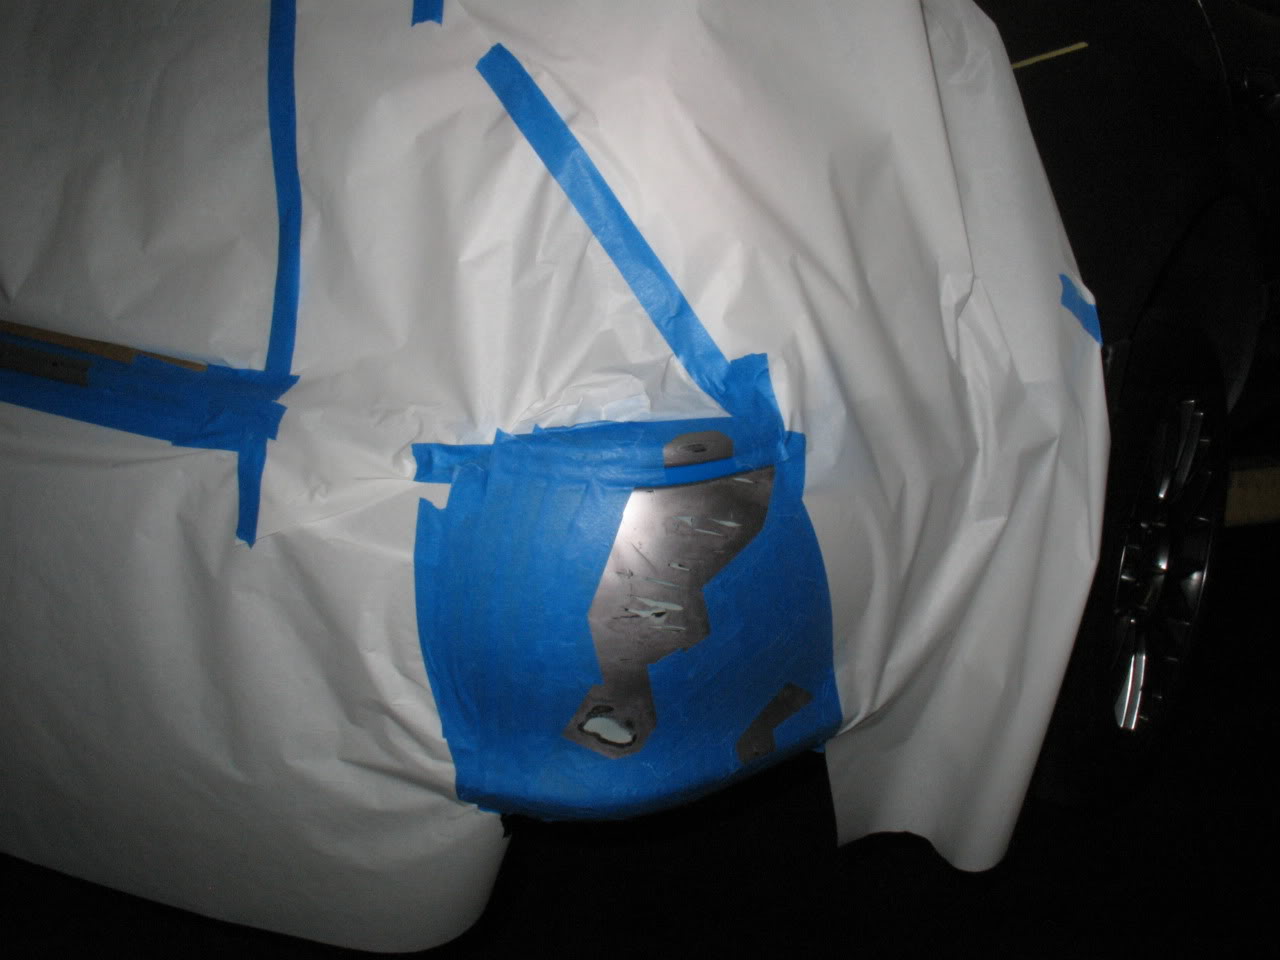
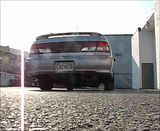
After having a Stillen muffler on my old Maxima, I have been very wary of loud exhausts/mufflers, which is why I've been running the 2k Maxima muffler for so long. Well, the silence has been broken. This thing is pretty loud! There's a lot more volume at startup and overall volume is up, but there's not much drone, and I think I've finally gotten rid of my exhaust rasp! This thing really does sound like some sort of G coupe with this muffler and the Cattman headers. I will post up a video and pics after we fix the piping. I'm pretty sure I picked up a few HP along the way too, which is always nice! Some of the black coating has peeled off the back of the muffler exposing the silver metal underneath, so I'm thinking of respraying it all black.
Finally, 2.5" all the way back!!
After having a Stillen muffler on my old Maxima, I have been very wary of loud exhausts/mufflers, which is why I've been running the 2k Maxima muffler for so long. Well, the silence has been broken. This thing is pretty loud! There's a lot more volume at startup and overall volume is up, but there's not much drone, and I think I've finally gotten rid of my exhaust rasp! This thing really does sound like some sort of G coupe with this muffler and the Cattman headers. I will post up a video and pics after we fix the piping. I'm pretty sure I picked up a few HP along the way too, which is always nice! Some of the black coating has peeled off the back of the muffler exposing the silver metal underneath, so I'm thinking of respraying it all black.
Ugh, we were planning on fixing the exhaust this weekend but some things came up and we didn't get a chance to do anything. The video will have to wait because right now the muffler is rattling against the heat shield and making all sorts of noises that you don't want to hear.

Well in my never-ending search to rid my car of its annoying vibration during acceleration and to aid traction while racing, I picked up a trans from Crusher with a Quaife in. It was pretty nasty after sitting outside, so I cleaned it up in the parts washer and a wire brush. The install went smoothly, but unfortunately my vibration remains. The next step is to replace my crankshaft position sensor, as it looked like it might have a hairline crack in it. Then I will be installing the rebuilt DEK injectors from RC Engineering.
Quaife review:
I was able to drive around in the rain a bit and could really feel the diff working coming out of corners. I noticed a similar benefit after going from an open diff to the stock VLSD, so I'm very pleased with the results. I have a race on Saturday which should give me a better idea of what this thing can really do. More impressions to come later.
Unfortunately, I've noticed an odd behavior from this transmission. About 20% of the time I put the shifter in first gear at a stop, I hear a clunk coming from the trans. It can't be good, but I'm sure not ripping this thing out to get it rebuilt yet. Does anyone have any idea what the clunk could be? I
Transmission problems
The ongoing vibration or the clunking from the new/used transmission?
The vibration still seems to be there, but with every repair I do seems to be less noticeable. I almost don't notice it sometimes, which is very nice.
The new/used transmission is a different story. In addition to clunking occasionally when putting the shifter into first, two more alarming problems have surfaced. The first is that when in third, fourth or fifth gear, the shifter rocks back and forth slightly when I get on/off the throttle. See the video:
That can't be good.
I've checked, and it doesn't happen in first or second, so this leads me to believe there are internal problems in the trans.
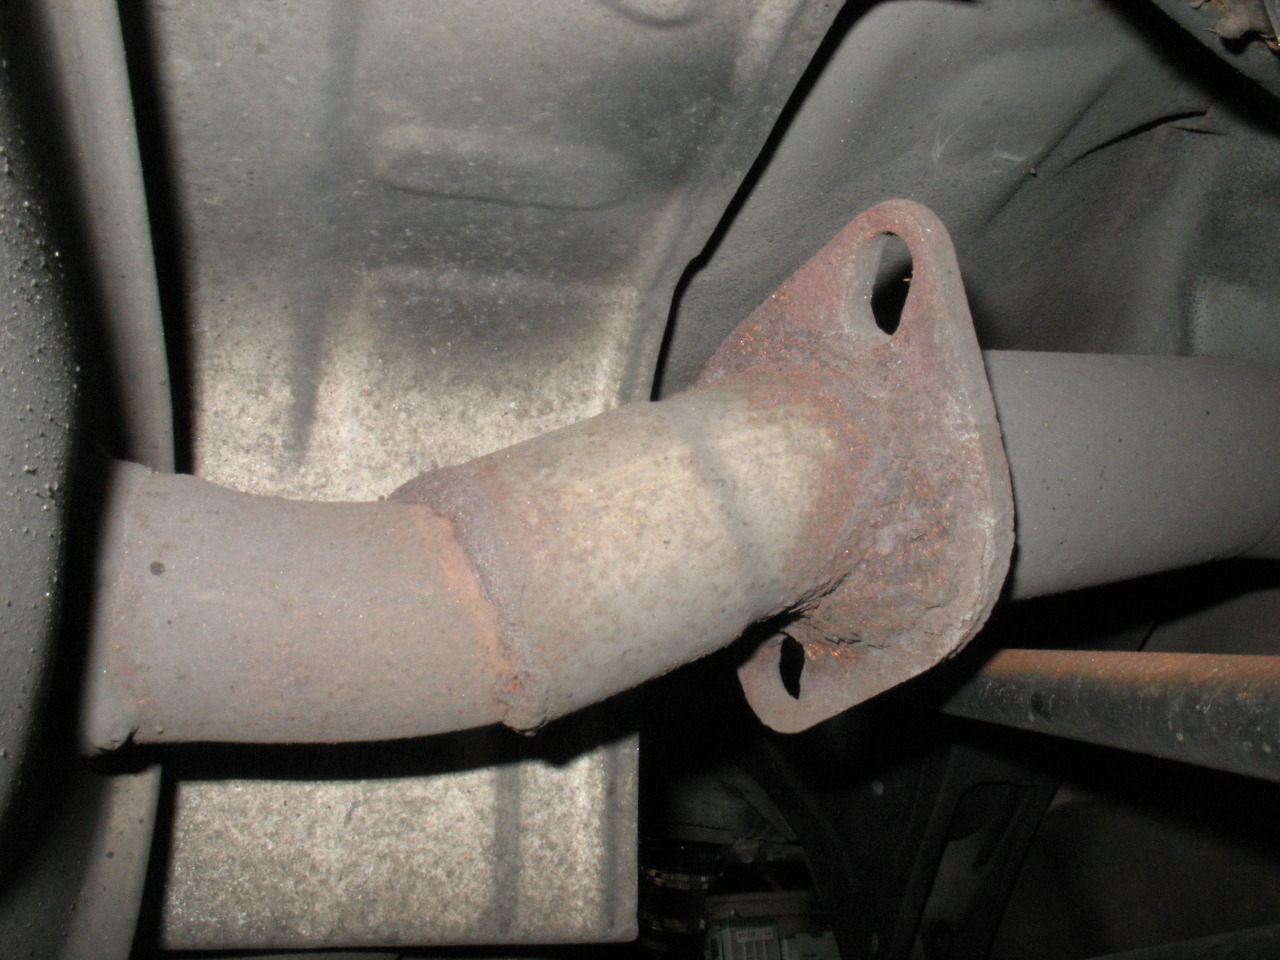
As apparent verification of internal problems, check out the two week old Amsoil that came out when we replaced both axle seals this weekend (the first two we installed from Advance Auto Parts were garbage).
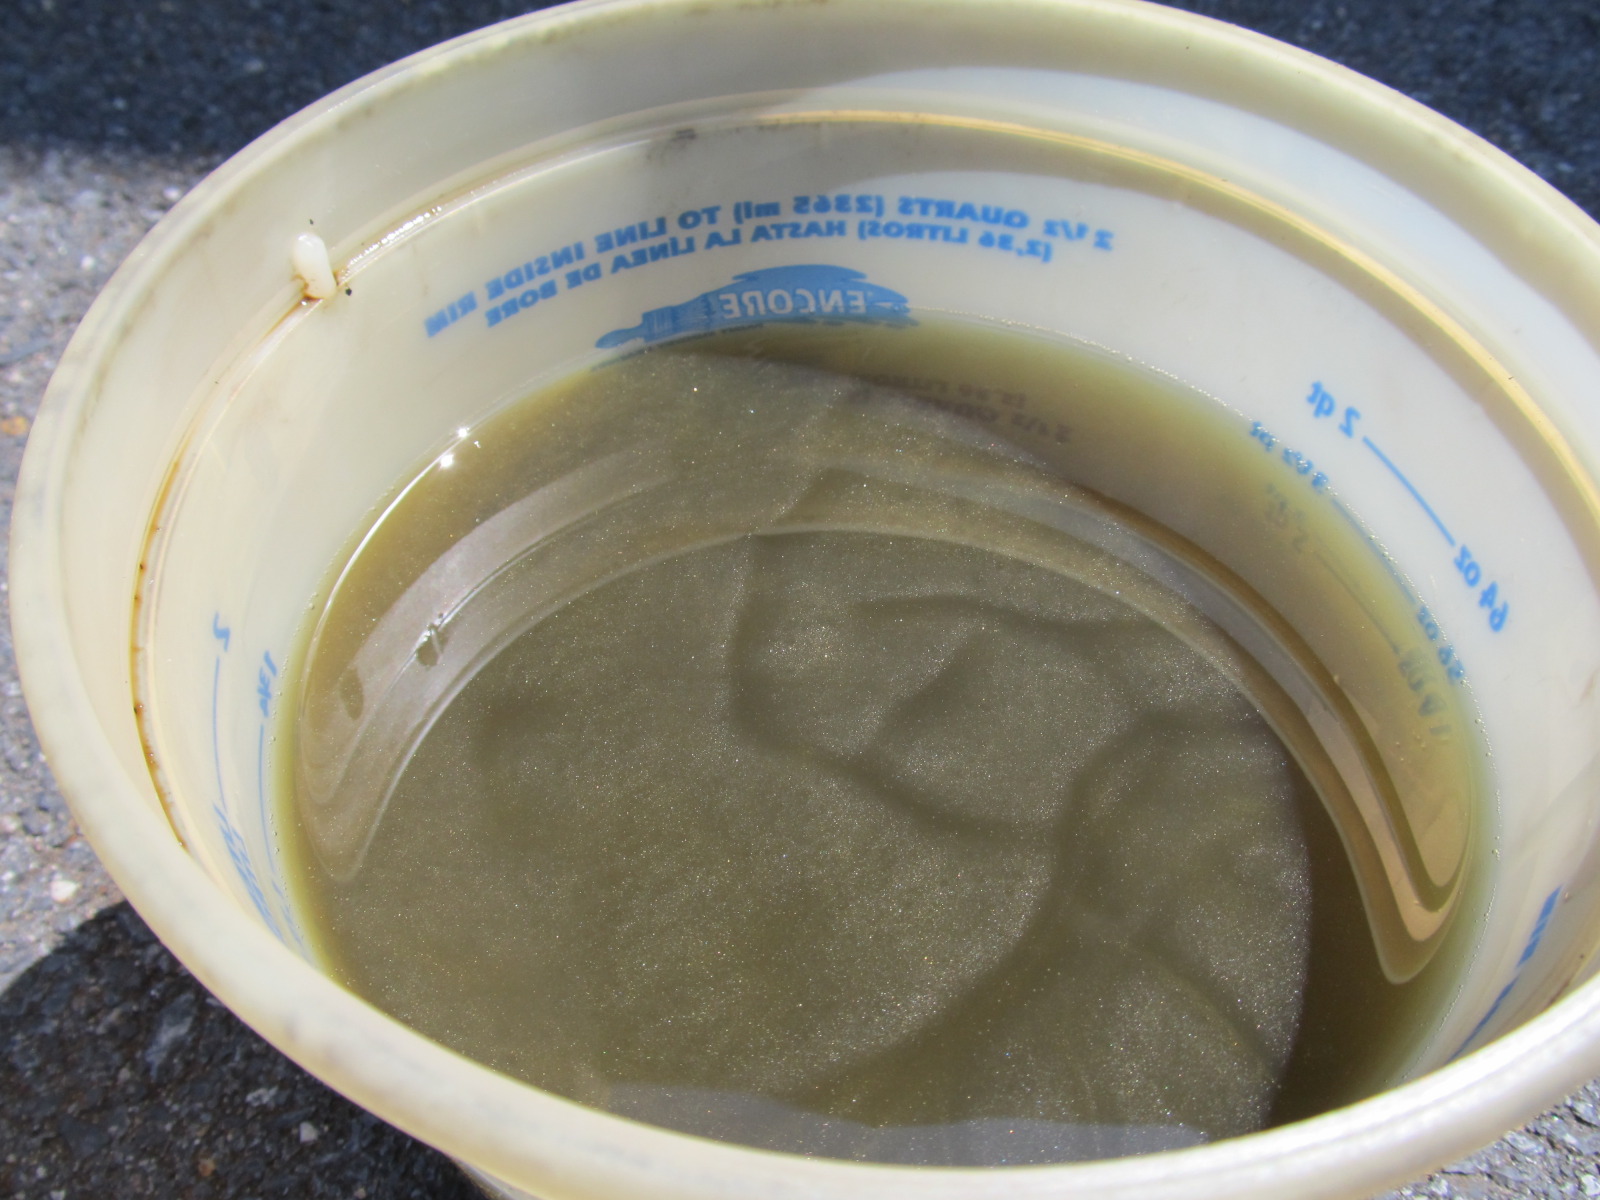
This also, can't be good.
My buddy thinks the metal particles are from the bearings in the trans since it's pretty golden. However, the trans doesn't make any noise or whine, so he's hoping it's just the bearing getting "broken in" since the trans was sitting for so long outside without much fluid in it. I'm thinking of changing out the fluid once to see if the problem continues. If it does, then this thing will probably need a rebuild this winter (if it even lasts that long).
I'm curious to see if anyone has an idea what could be causing my shifter to move like that while in gear, but I wouldn't be surprised to find that it's related to the metal flakes in the fluid and the clunk going into first gear.
The vibration still seems to be there, but with every repair I do seems to be less noticeable. I almost don't notice it sometimes, which is very nice.
The new/used transmission is a different story. In addition to clunking occasionally when putting the shifter into first, two more alarming problems have surfaced. The first is that when in third, fourth or fifth gear, the shifter rocks back and forth slightly when I get on/off the throttle. See the video:
That can't be good.
I've checked, and it doesn't happen in first or second, so this leads me to believe there are internal problems in the trans.
As apparent verification of internal problems, check out the two week old Amsoil that came out when we replaced both axle seals this weekend (the first two we installed from Advance Auto Parts were garbage).
This also, can't be good.
My buddy thinks the metal particles are from the bearings in the trans since it's pretty golden. However, the trans doesn't make any noise or whine, so he's hoping it's just the bearing getting "broken in" since the trans was sitting for so long outside without much fluid in it. I'm thinking of changing out the fluid once to see if the problem continues. If it does, then this thing will probably need a rebuild this winter (if it even lasts that long).
I'm curious to see if anyone has an idea what could be causing my shifter to move like that while in gear, but I wouldn't be surprised to find that it's related to the metal flakes in the fluid and the clunk going into first gear.
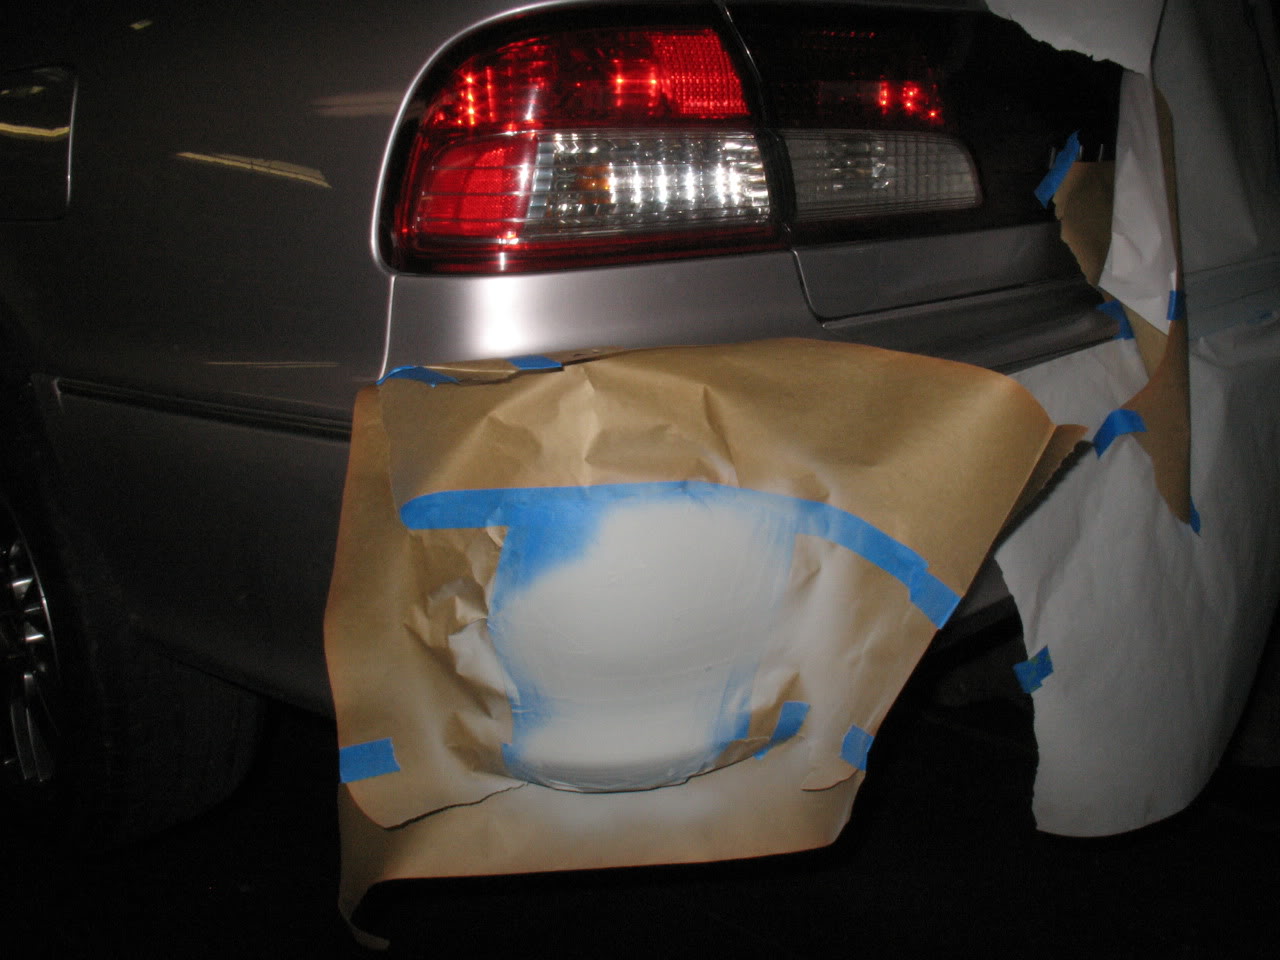
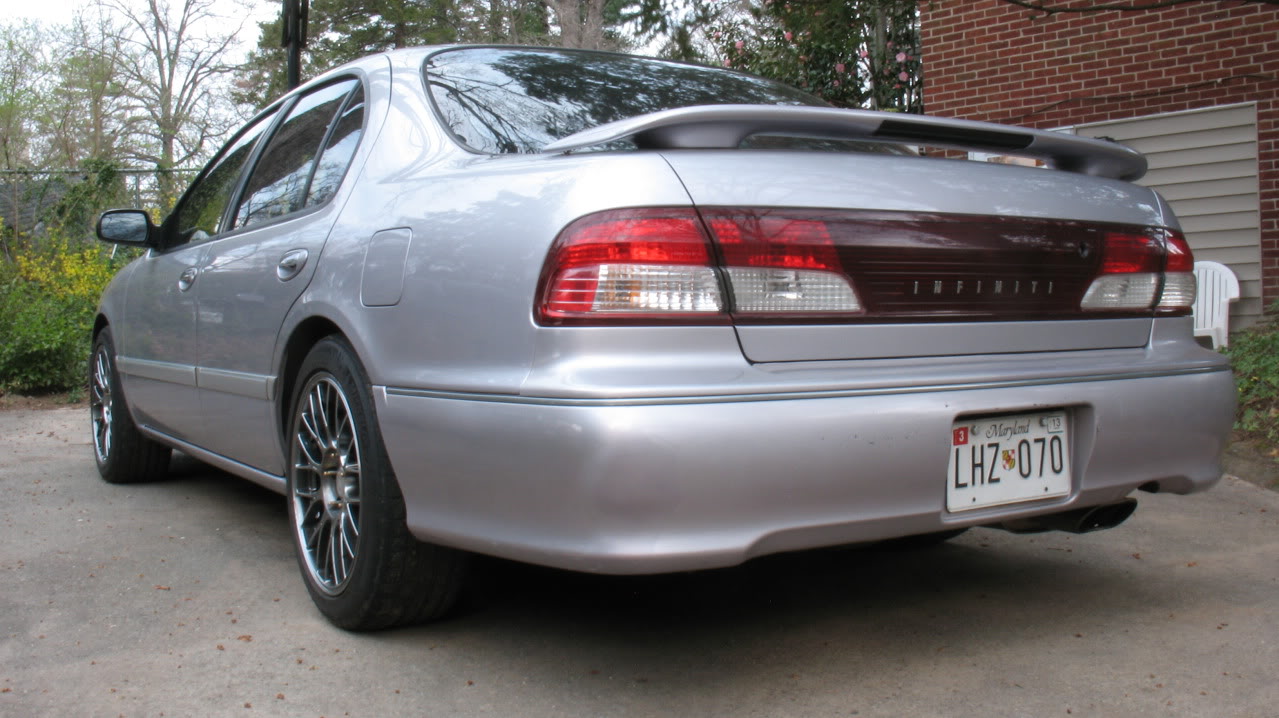
G35 sedan muffler installed!
Well we did some tweaking to the b-pipe and were able to get the muffler to sit level with the bumper and not rattle against everything. This is a big muffler!
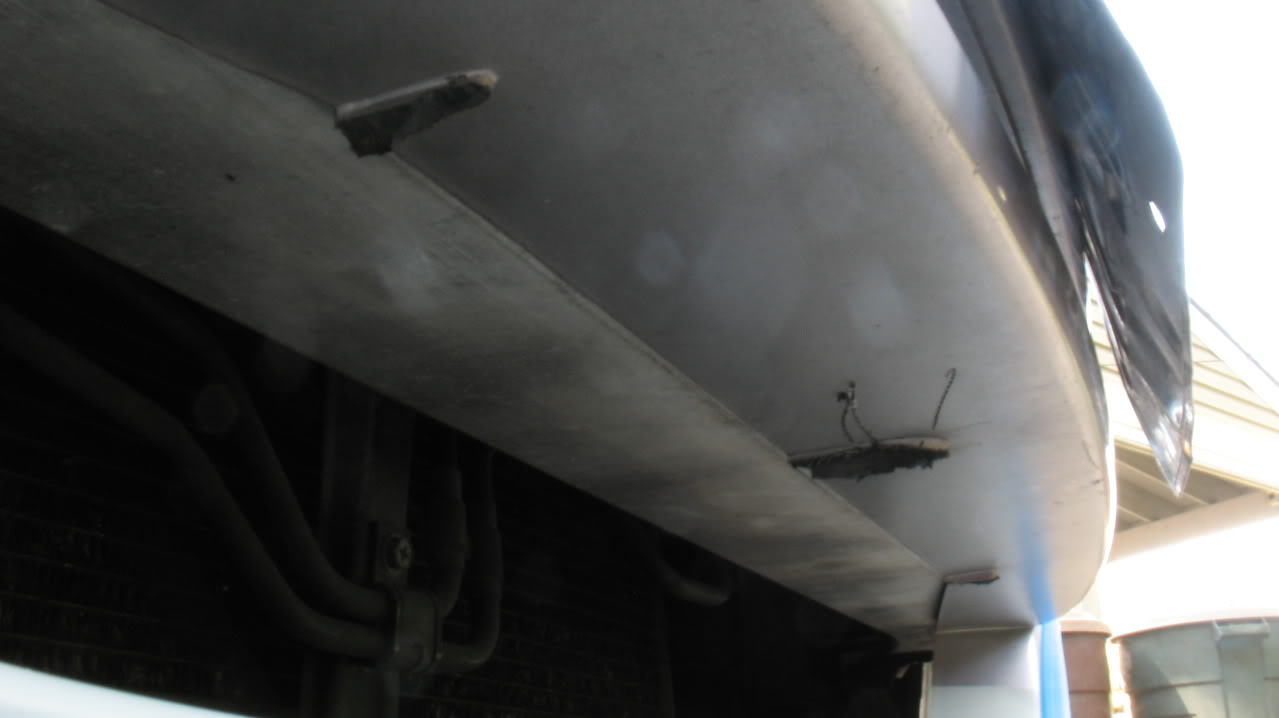
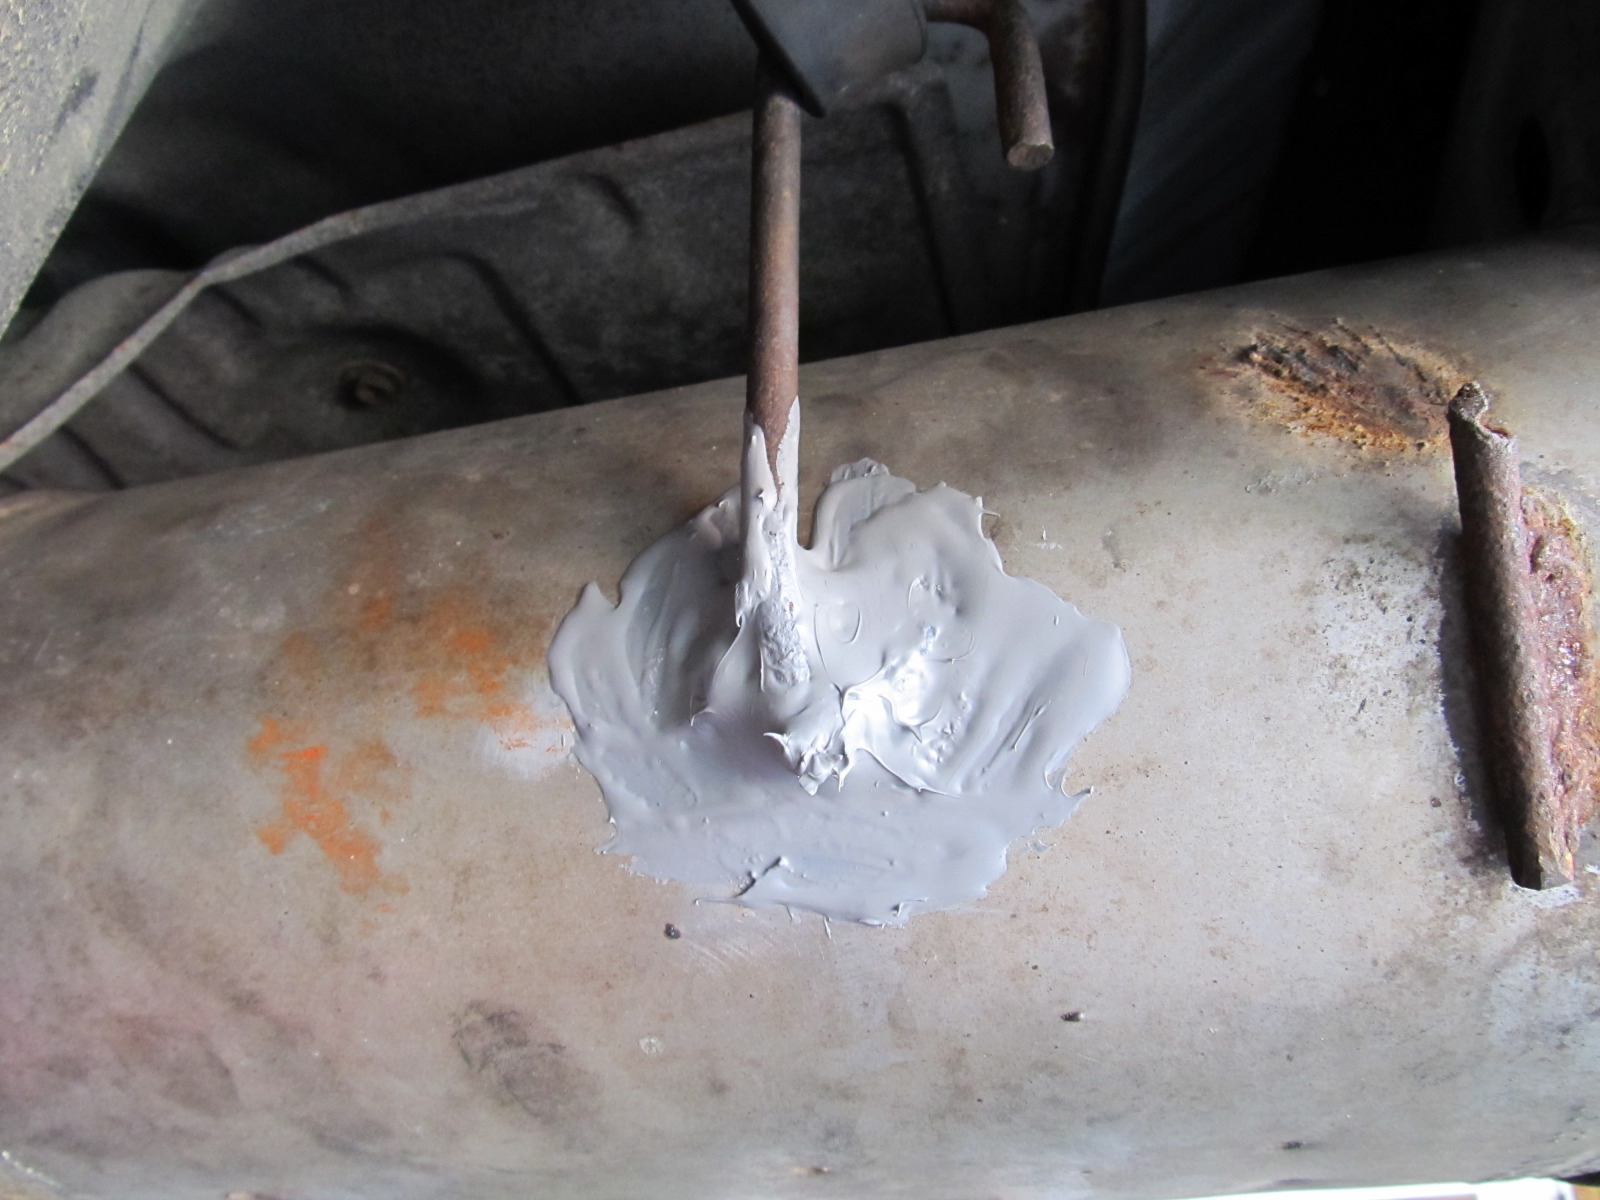
Here are some pics to tide you over until I get a decent video of the exhaust. I noticed a small hole on the side of the muffler from what appeared to be a dirty welding job that burned through the shell, so we patched it up with some special stuff we had at the shop. When the goop dries I need to sand it down.
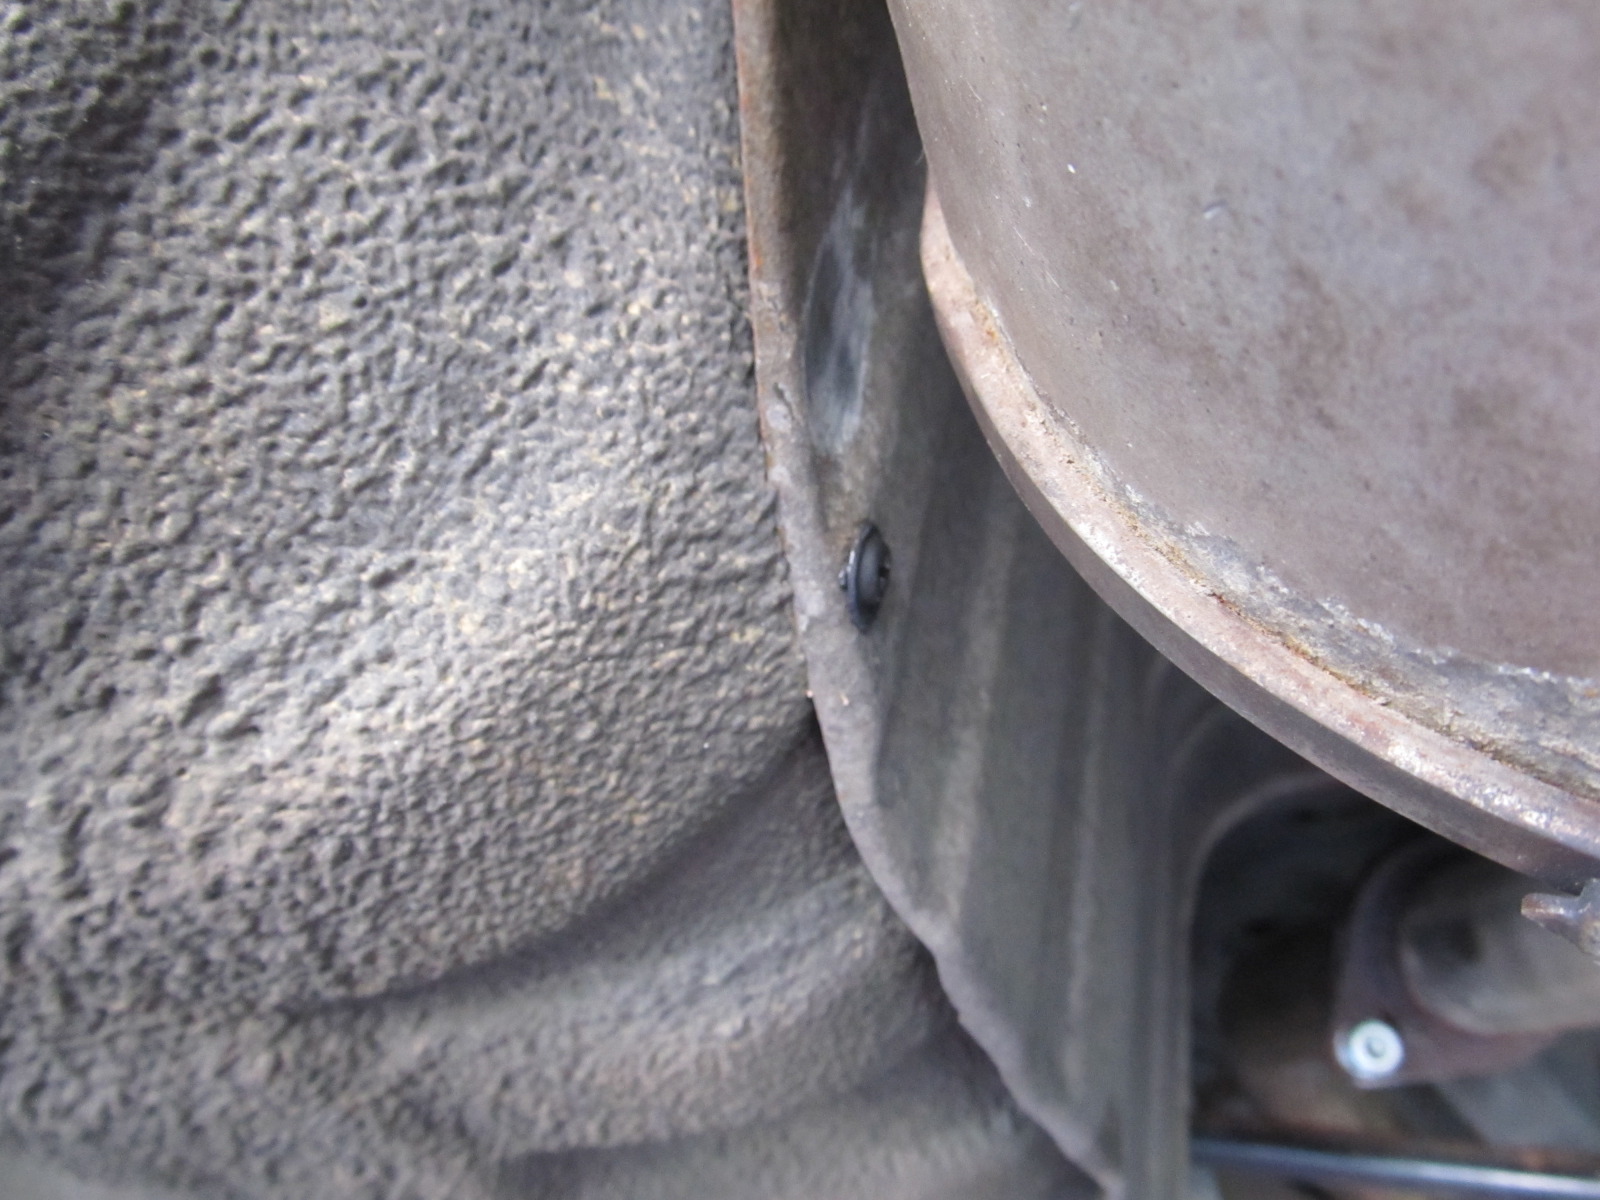
We decided to bolt the heat shield to the spare tire well to get a little extra clearance.
Finished product!

And two more for fun
I will update this post when I get a good video!
Here are some pics to tide you over until I get a decent video of the exhaust. I noticed a small hole on the side of the muffler from what appeared to be a dirty welding job that burned through the shell, so we patched it up with some special stuff we had at the shop. When the goop dries I need to sand it down.
We decided to bolt the heat shield to the spare tire well to get a little extra clearance.
Finished product!
And two more for fun
I will update this post when I get a good video!
Can the muffler come up at all without hitting anything? It looks low.
Also, you should look at getting a heat gun and molding the bumper up to clear the tips. you might even use a rivet gun to add some metal flashing to the bottom of the bumper if you fear that heat might cause issues, but I think that molding it out of the way should allow you to bring it up. Assuming, of course, that it can come up without any clearance issues under the car.
As for the trans fluid, that looks BAD. I'd try running it for a couple hundred miles and making another fluid change.
I know, the fluid looks pretty scary. But I'm equally concerned about the shifter movement. Make sure you watch the video with the sound on. What in the world could cause it to move that much in 3-5 but not 1-2? It hasn't popped out of gear, it doesn't make any noise, and it shifts smoothly. WTF
