
Something I'm thinking about doing...


Heads were delivered today. The boss reminded me that they could surface the valve seats, and verify the valve lash for each valve. I explained that I was familiar with selecting and trimming the valve lifters to the correct lash, but I needed the heads decked first so I can start installing the new valve springs and shims to check for full travel, then lap in all valves (and check for full seal w/water). If everything is healthy, then I can bolt down the heads with one pair of valves, with soft springs and valve lash verified, and install cams and chains and checking valve clearances through two complete revolutions of the crank, 5 degrees at a time. Lots of lift in those cams... Several time-consuming tasks to accomplish - after all valve lash setting are normalized with all new cams. I'm betting I'll need at least 12 -15 new lifters to meet factory specs. ($16.70 each)
Plenty of time to finish modifications to the oil pan...")
EDIT: I ordered a 25mm "C" micrometer thru eBay and three new DLC valve lifters from Courtesy Nissan, from smallest, medium, and longest center pin, so I can measure and modify existing lifters when trying to mate them with four new cams, because you know everything will change. At least the DLC lifters don't do a break-in to the cam lobes - you can move them around. The center stub varies from 7.88mm to 8.40mm, so once I set up the stub grinder again, I can customize each lifter to its lobe. I probably should buy a stack of the biggest ones and just grind to fit.
Plenty of time to finish modifications to the oil pan...
EDIT: I ordered a 25mm "C" micrometer thru eBay and three new DLC valve lifters from Courtesy Nissan, from smallest, medium, and longest center pin, so I can measure and modify existing lifters when trying to mate them with four new cams, because you know everything will change. At least the DLC lifters don't do a break-in to the cam lobes - you can move them around. The center stub varies from 7.88mm to 8.40mm, so once I set up the stub grinder again, I can customize each lifter to its lobe. I probably should buy a stack of the biggest ones and just grind to fit.
Last edited by grey99max; Dec 16, 2015 at 08:41 PM.
different ignition coils
I keep looking for things I still need, and...... new ignition coils !! And spark plugs !! And maybe new coil connectors - gotta research this one. Hmmmm... maybe a set of used coils will do.
Friday - I got a call from the machine shop earlier today - and the heads are ready for pickup. The owner will be in the shop tomorrow afternoon, so if possible I'll call and check about picking up the heads tomorrow !!
Brought my babies home today
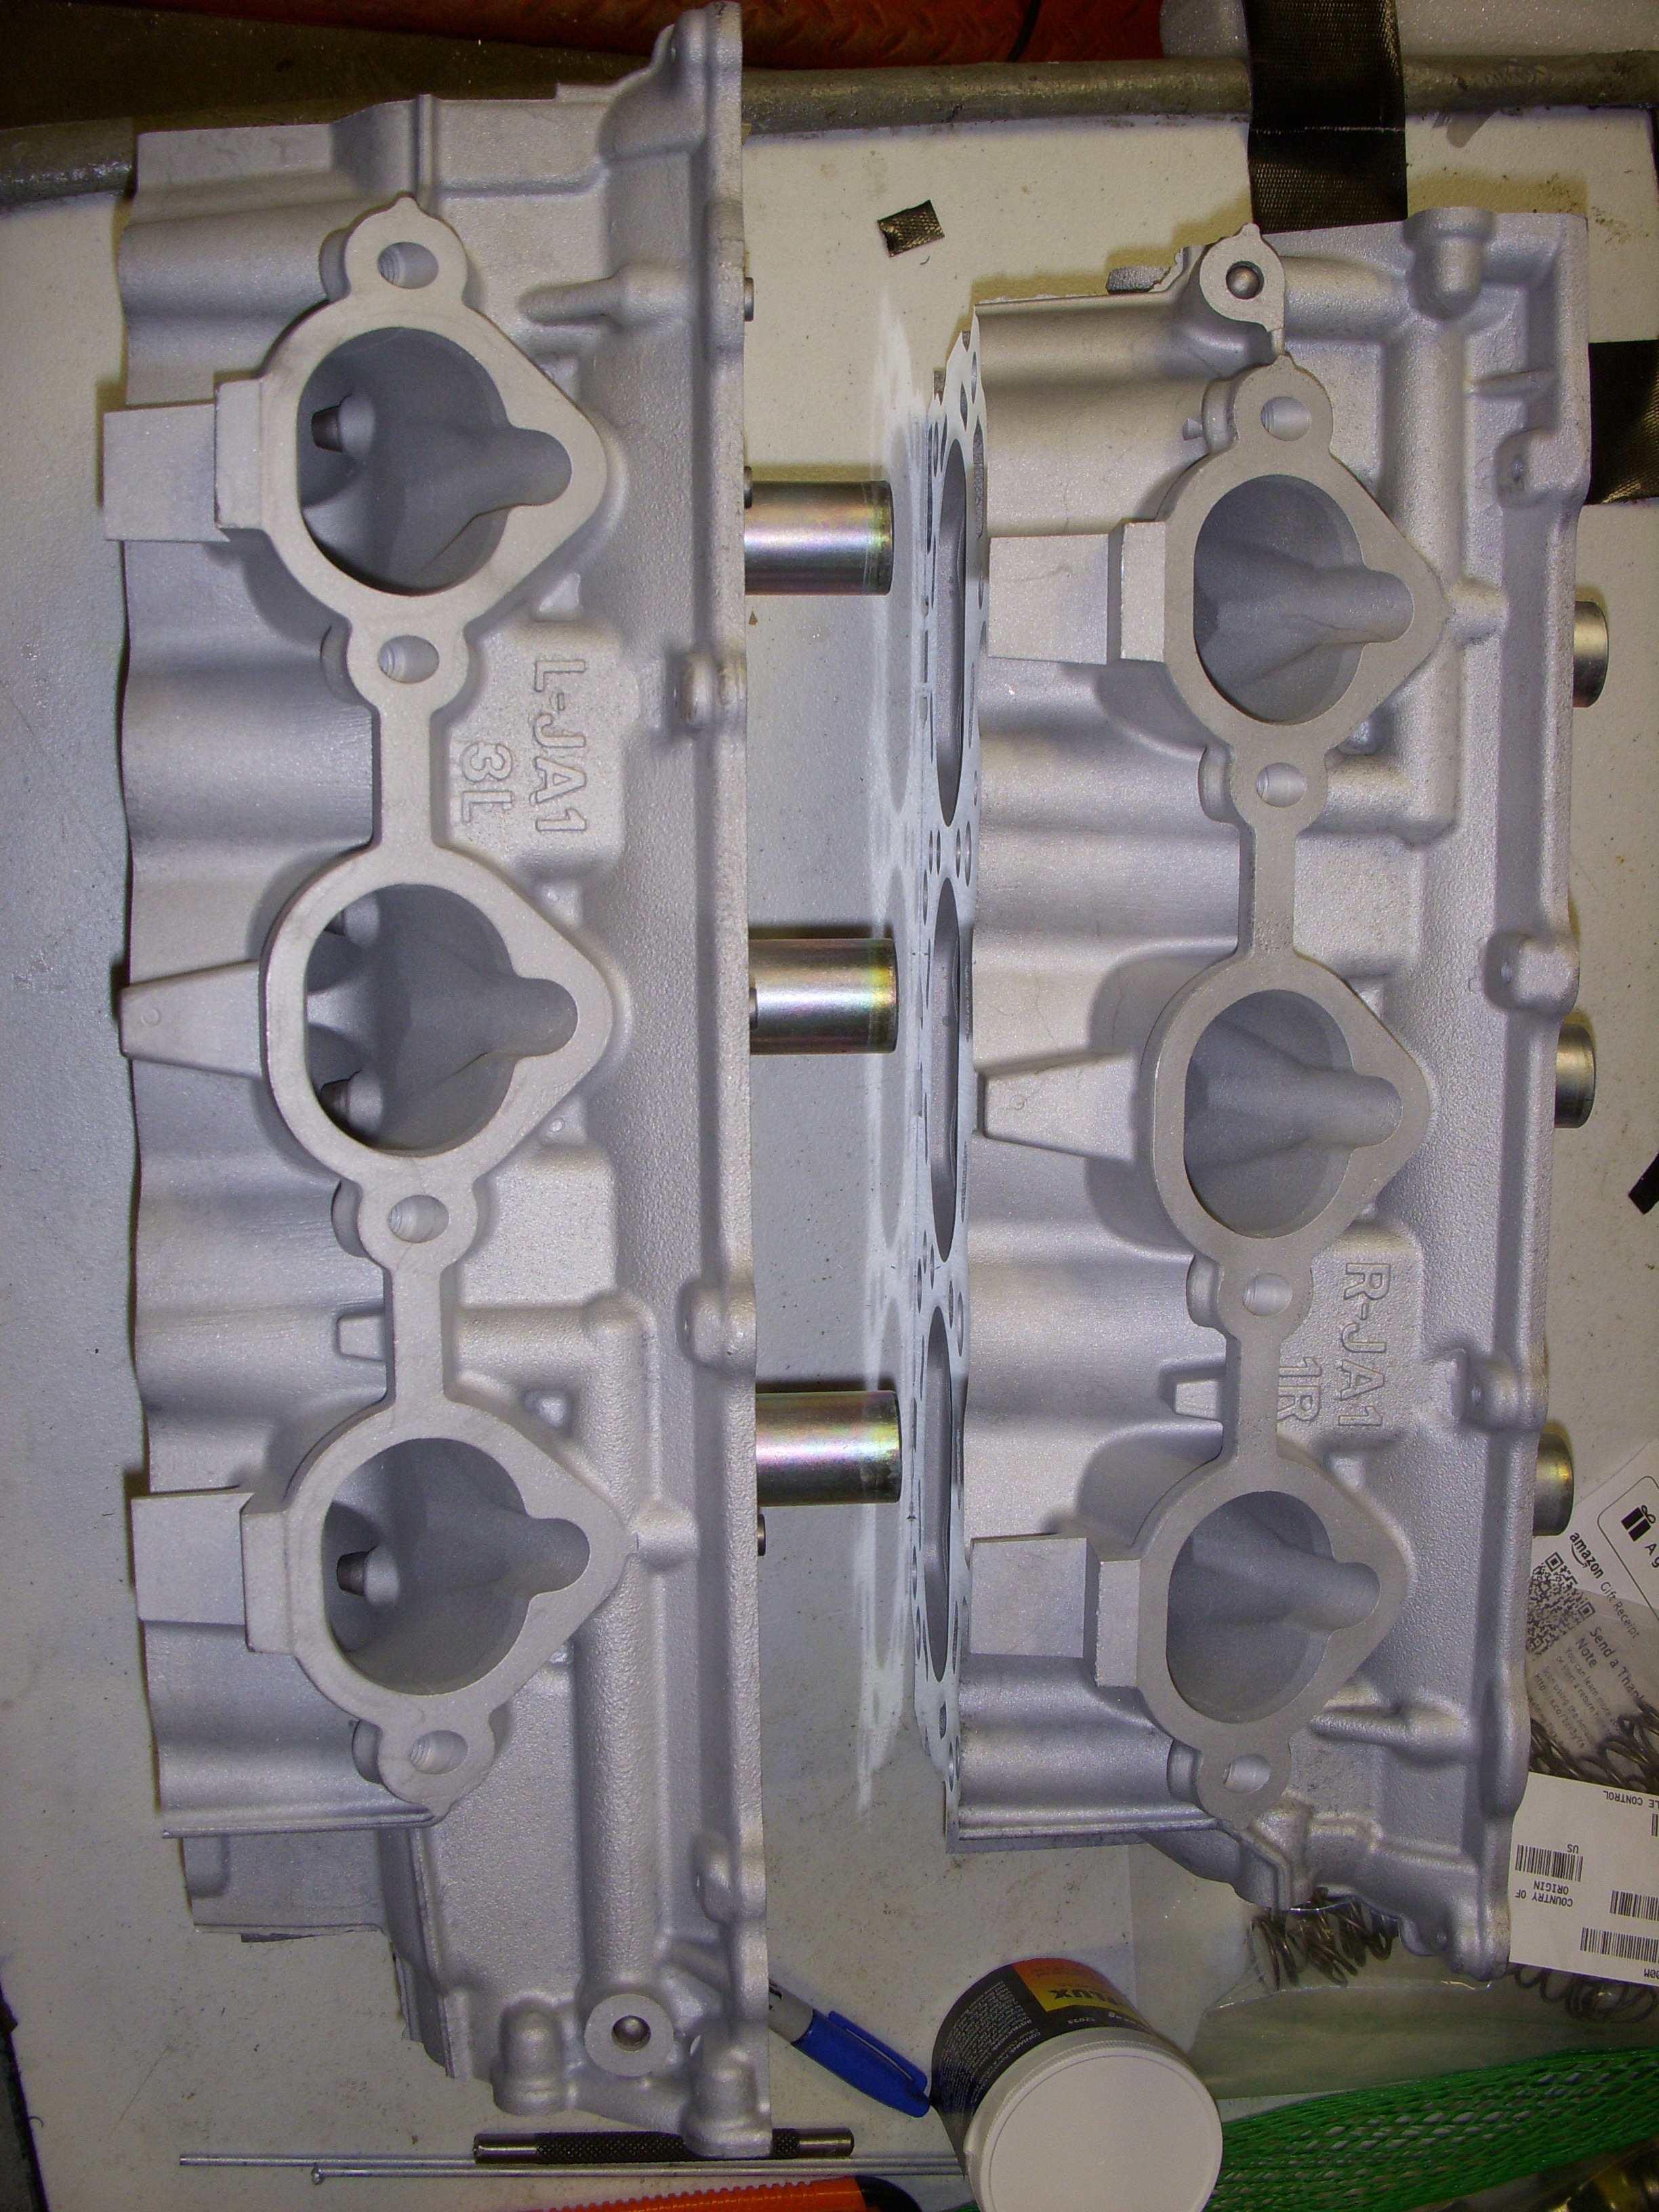
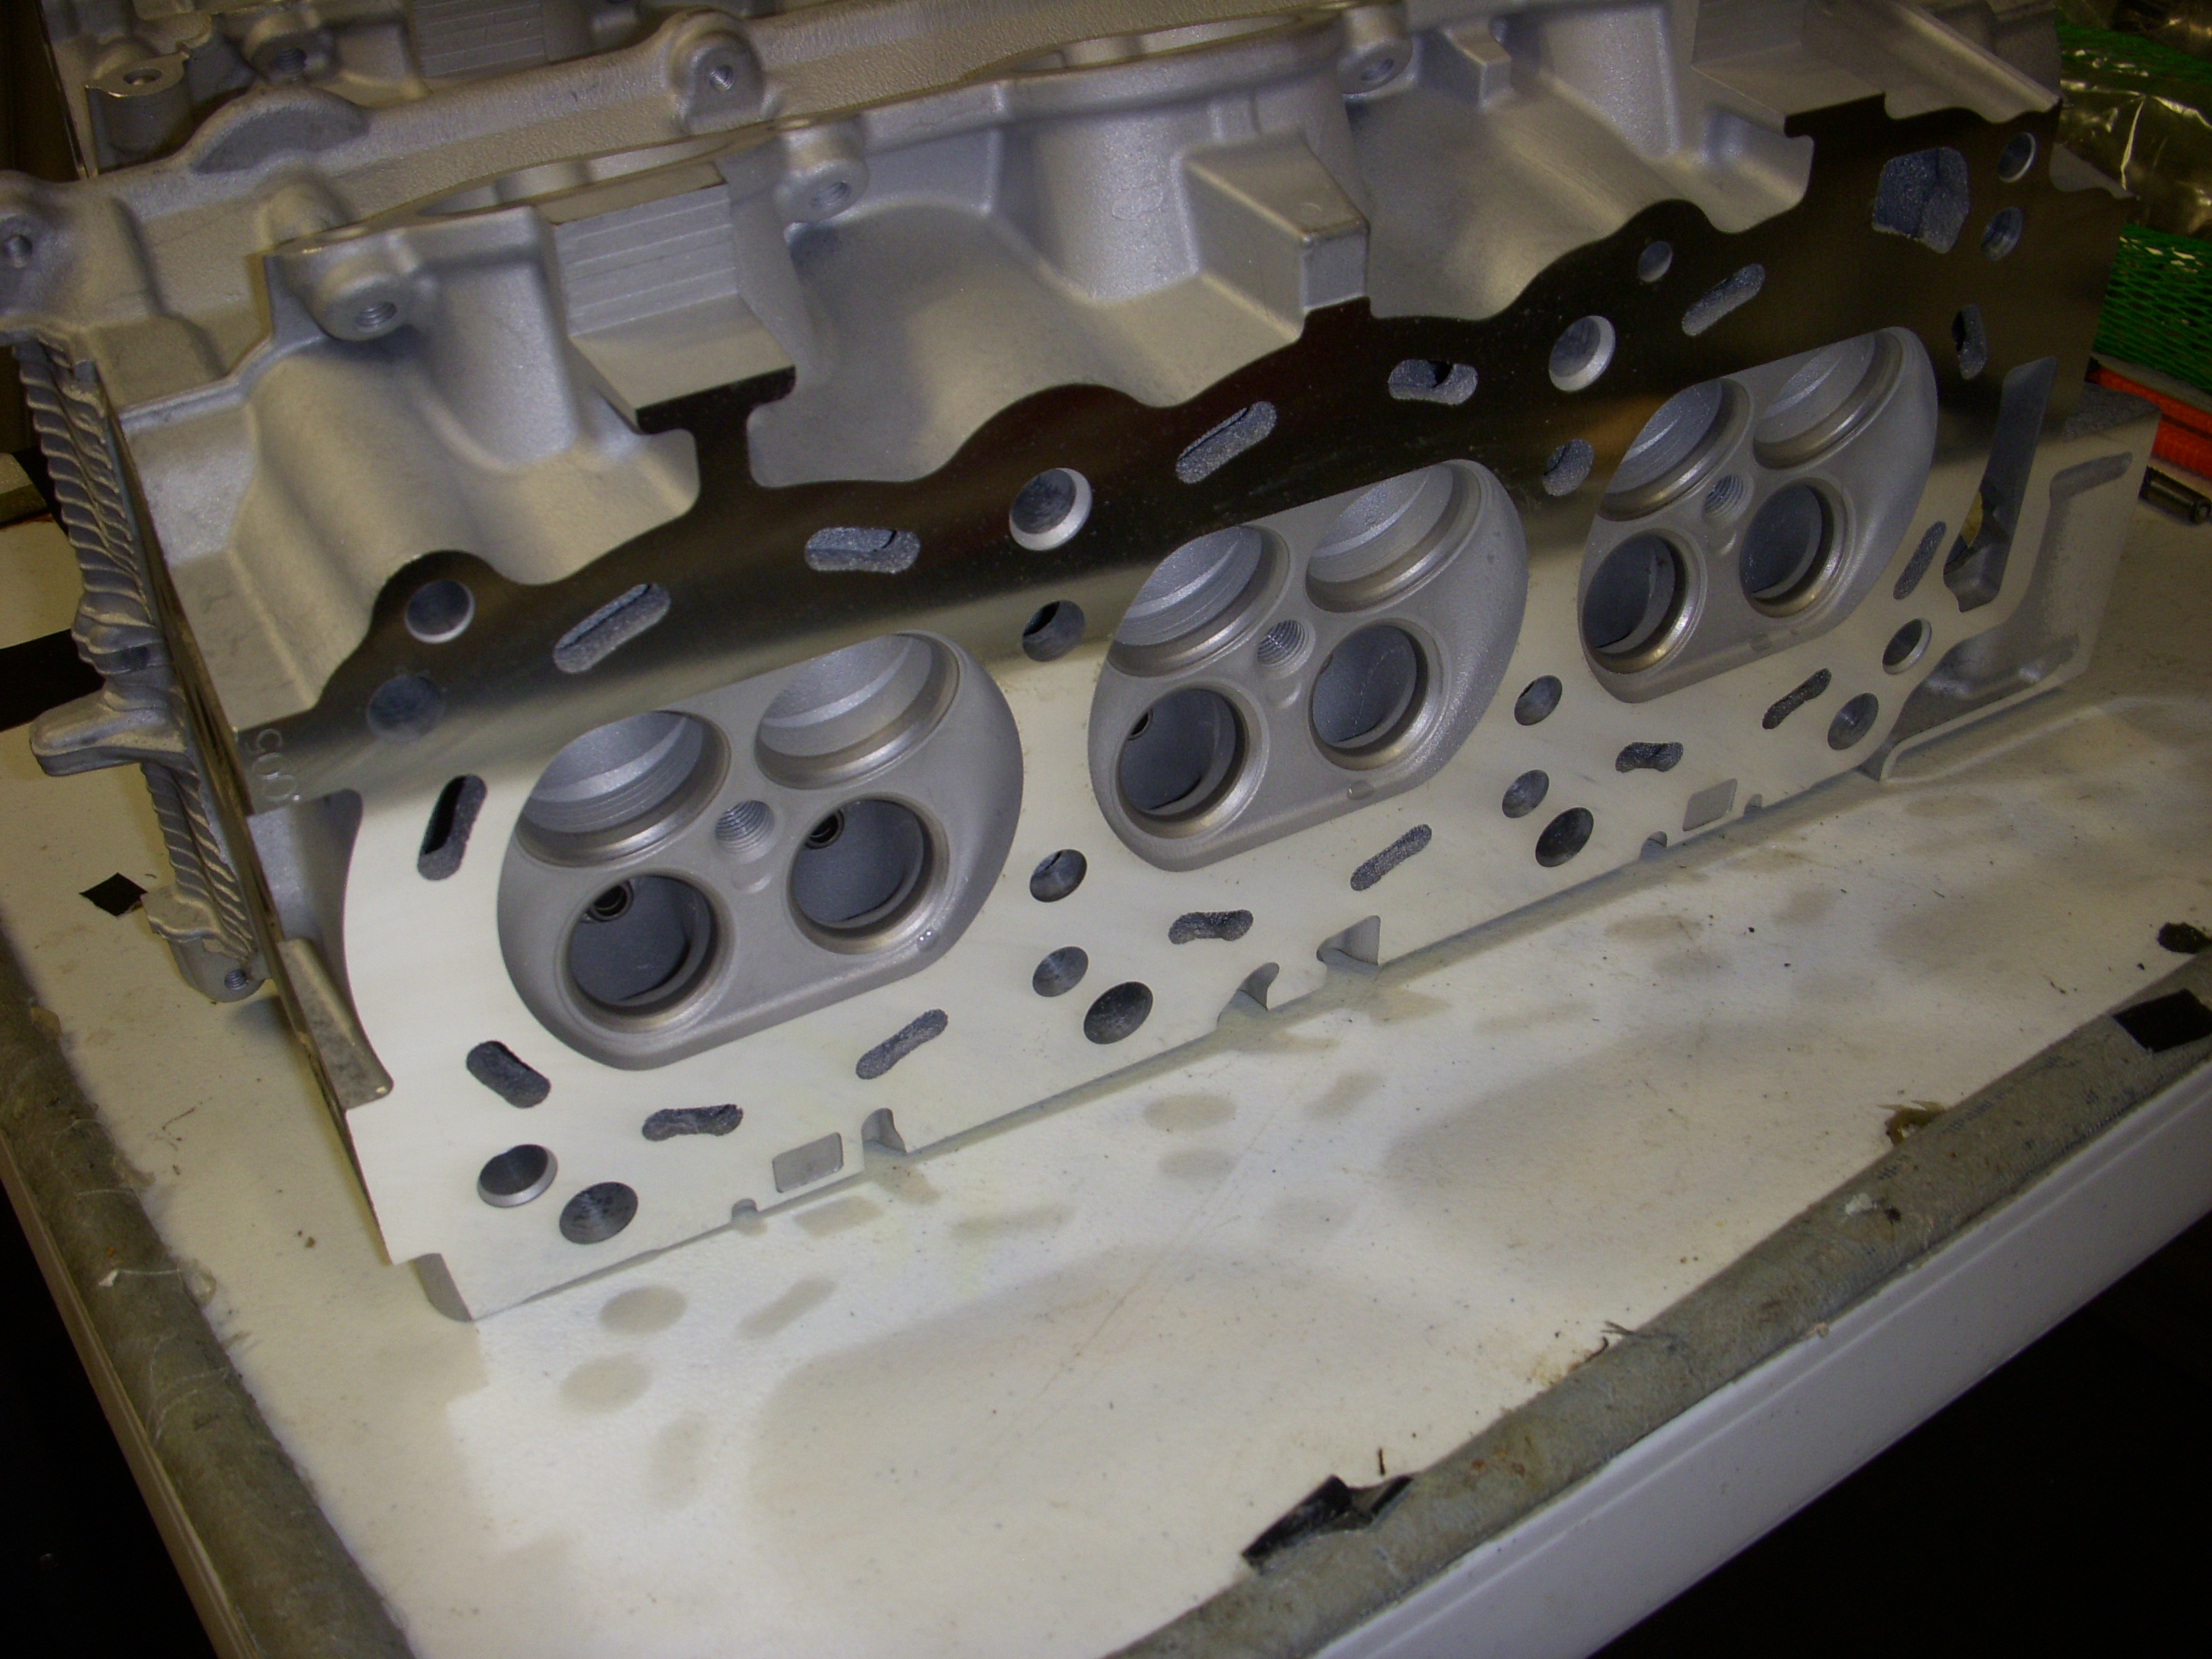
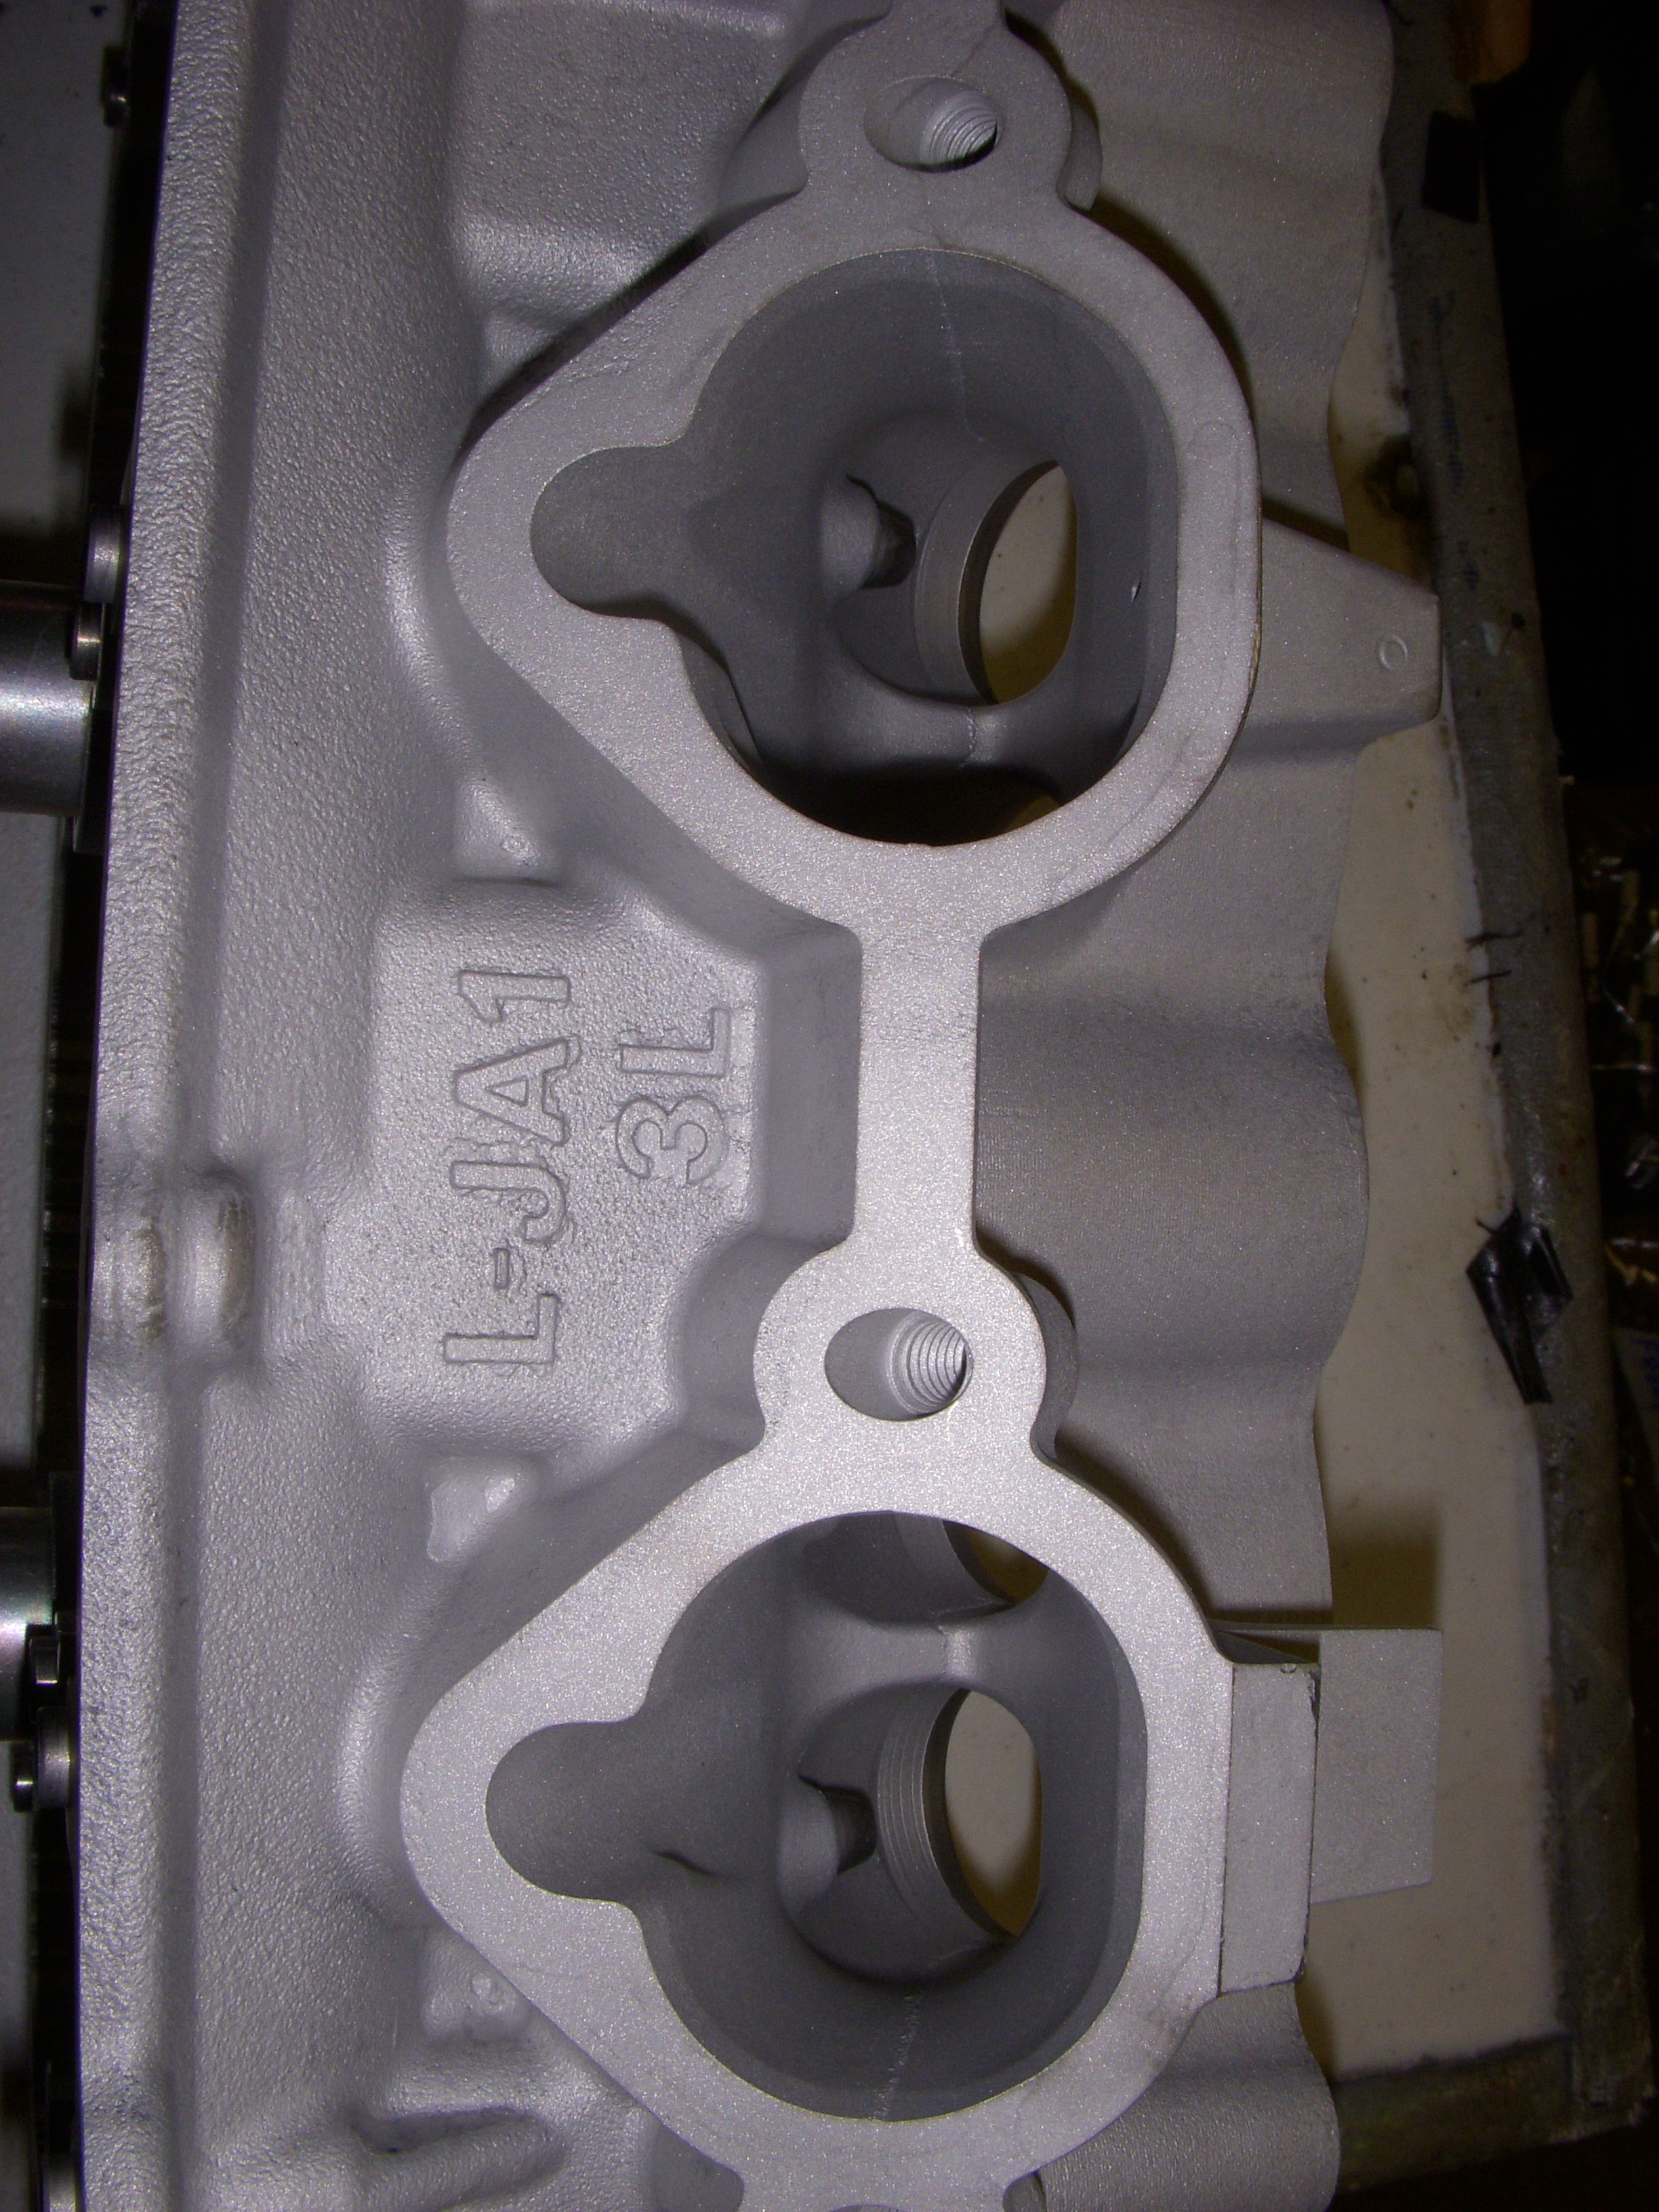
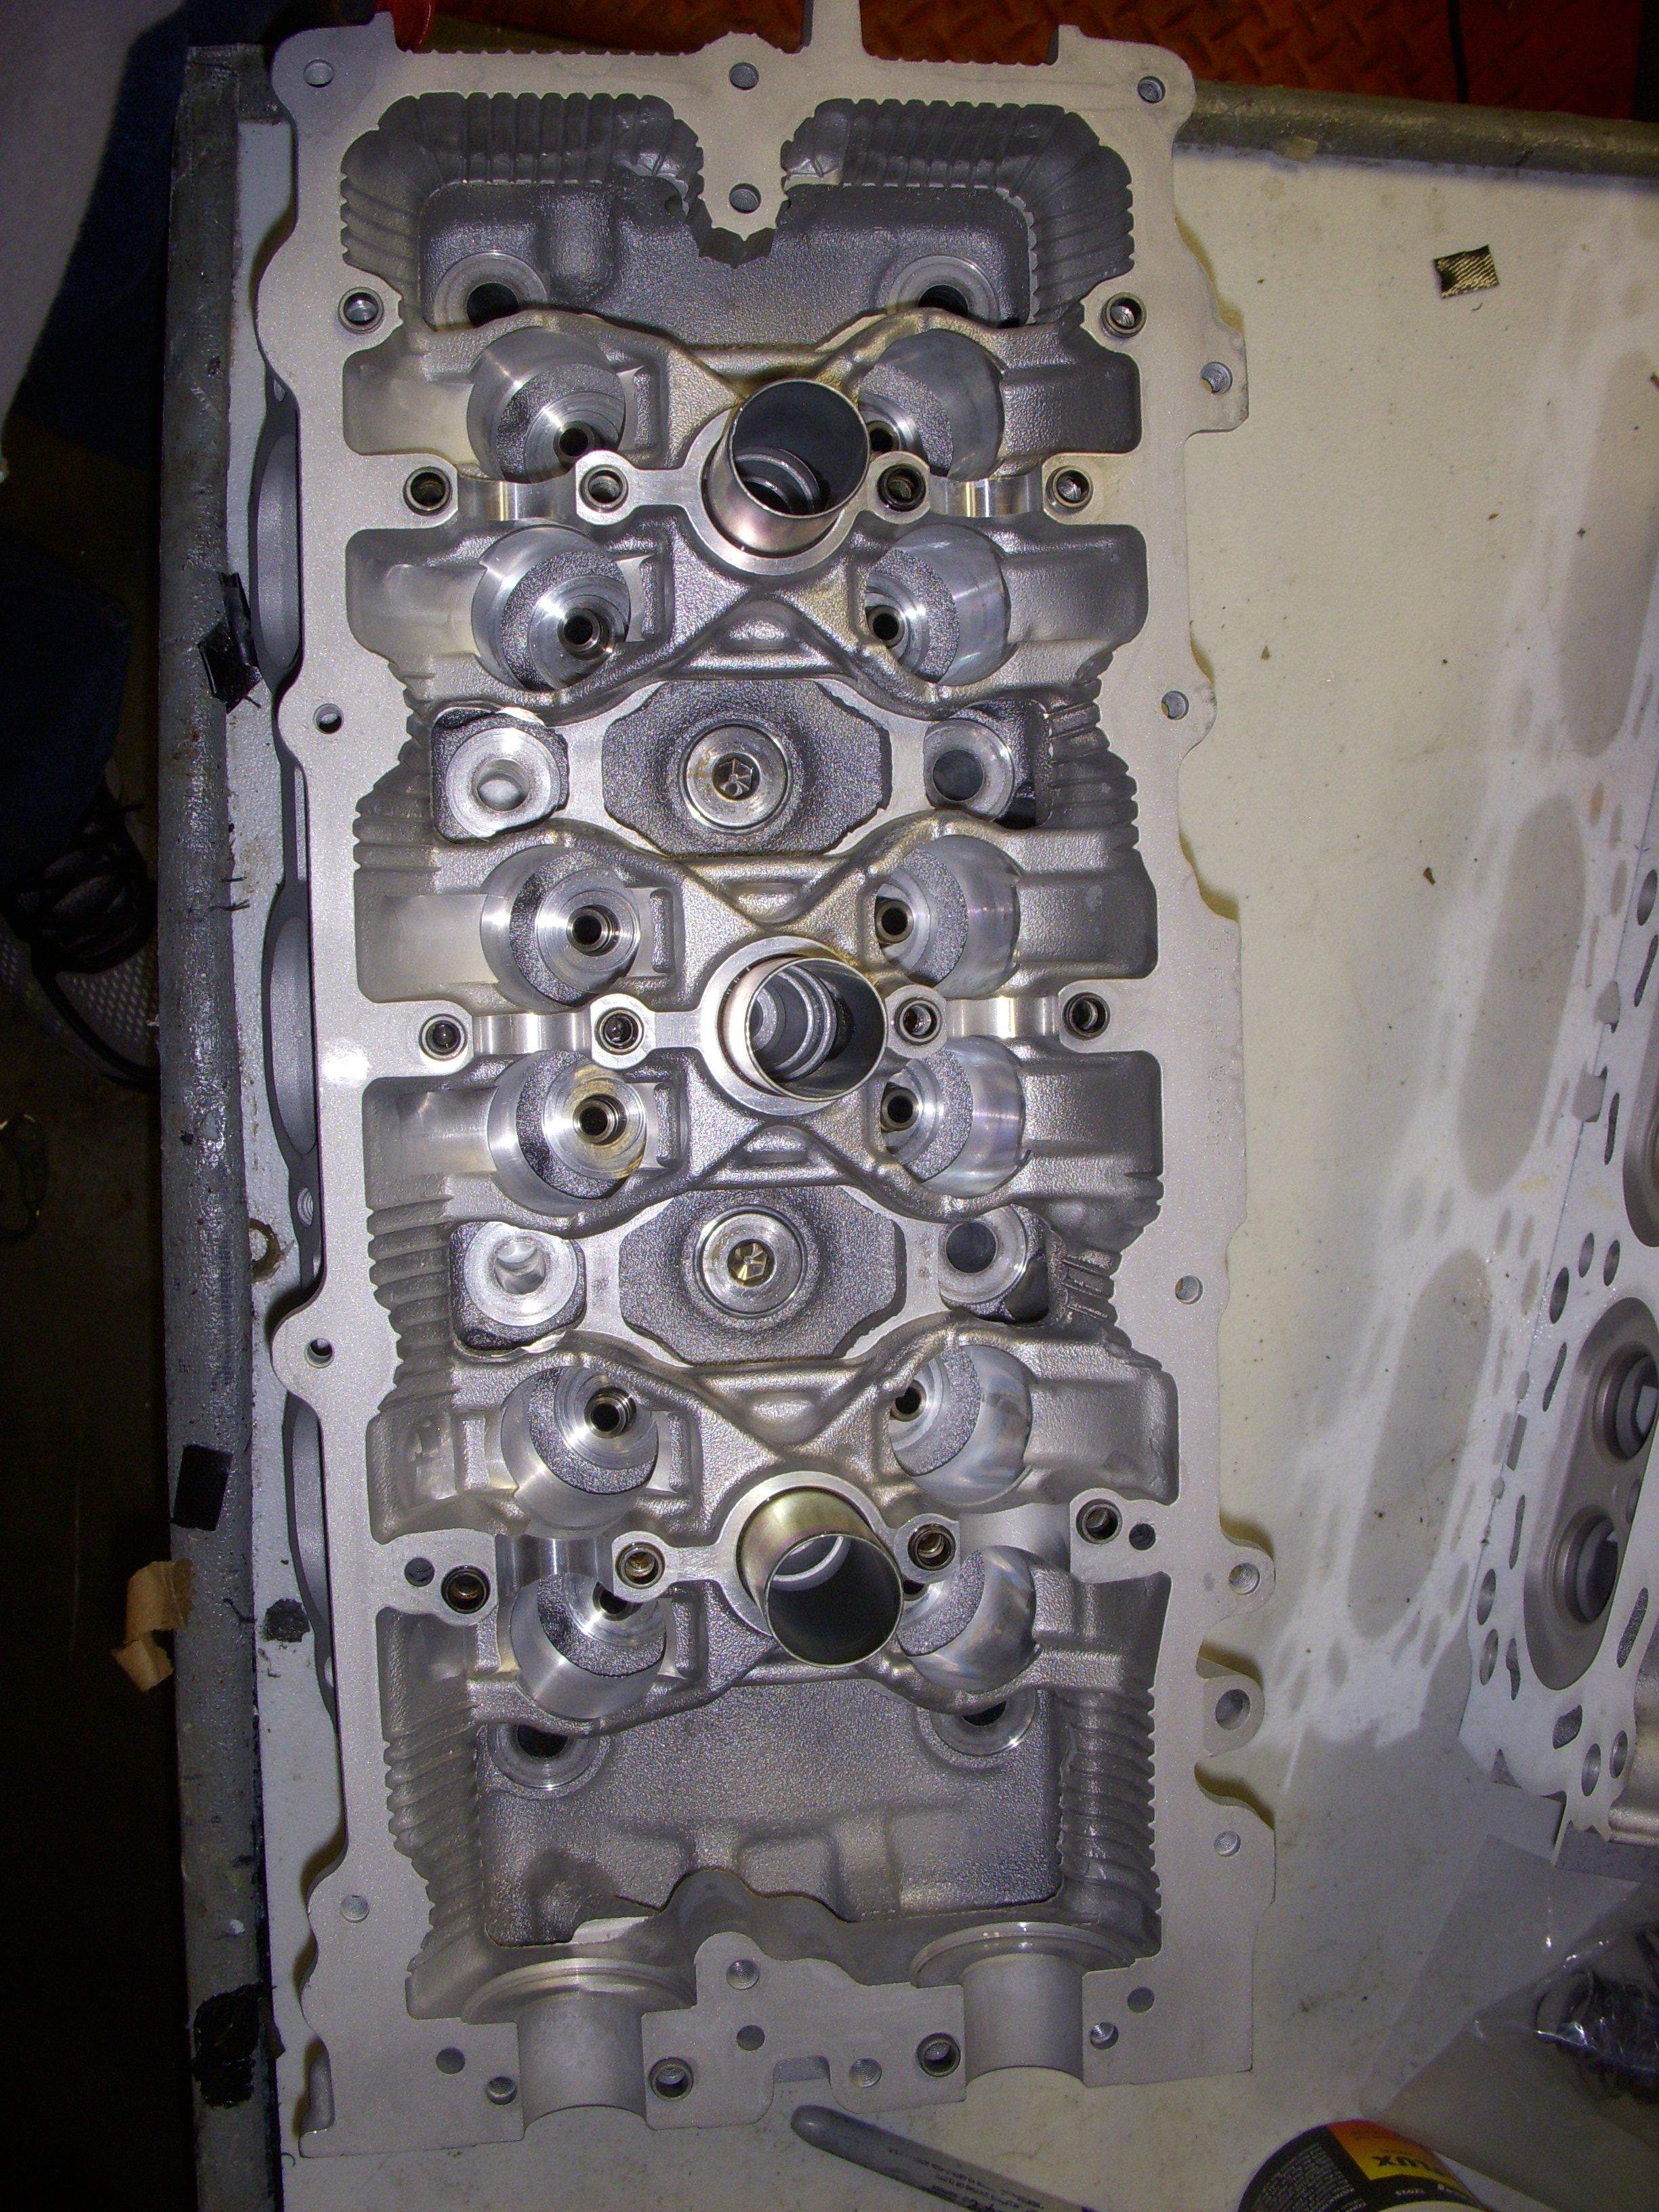
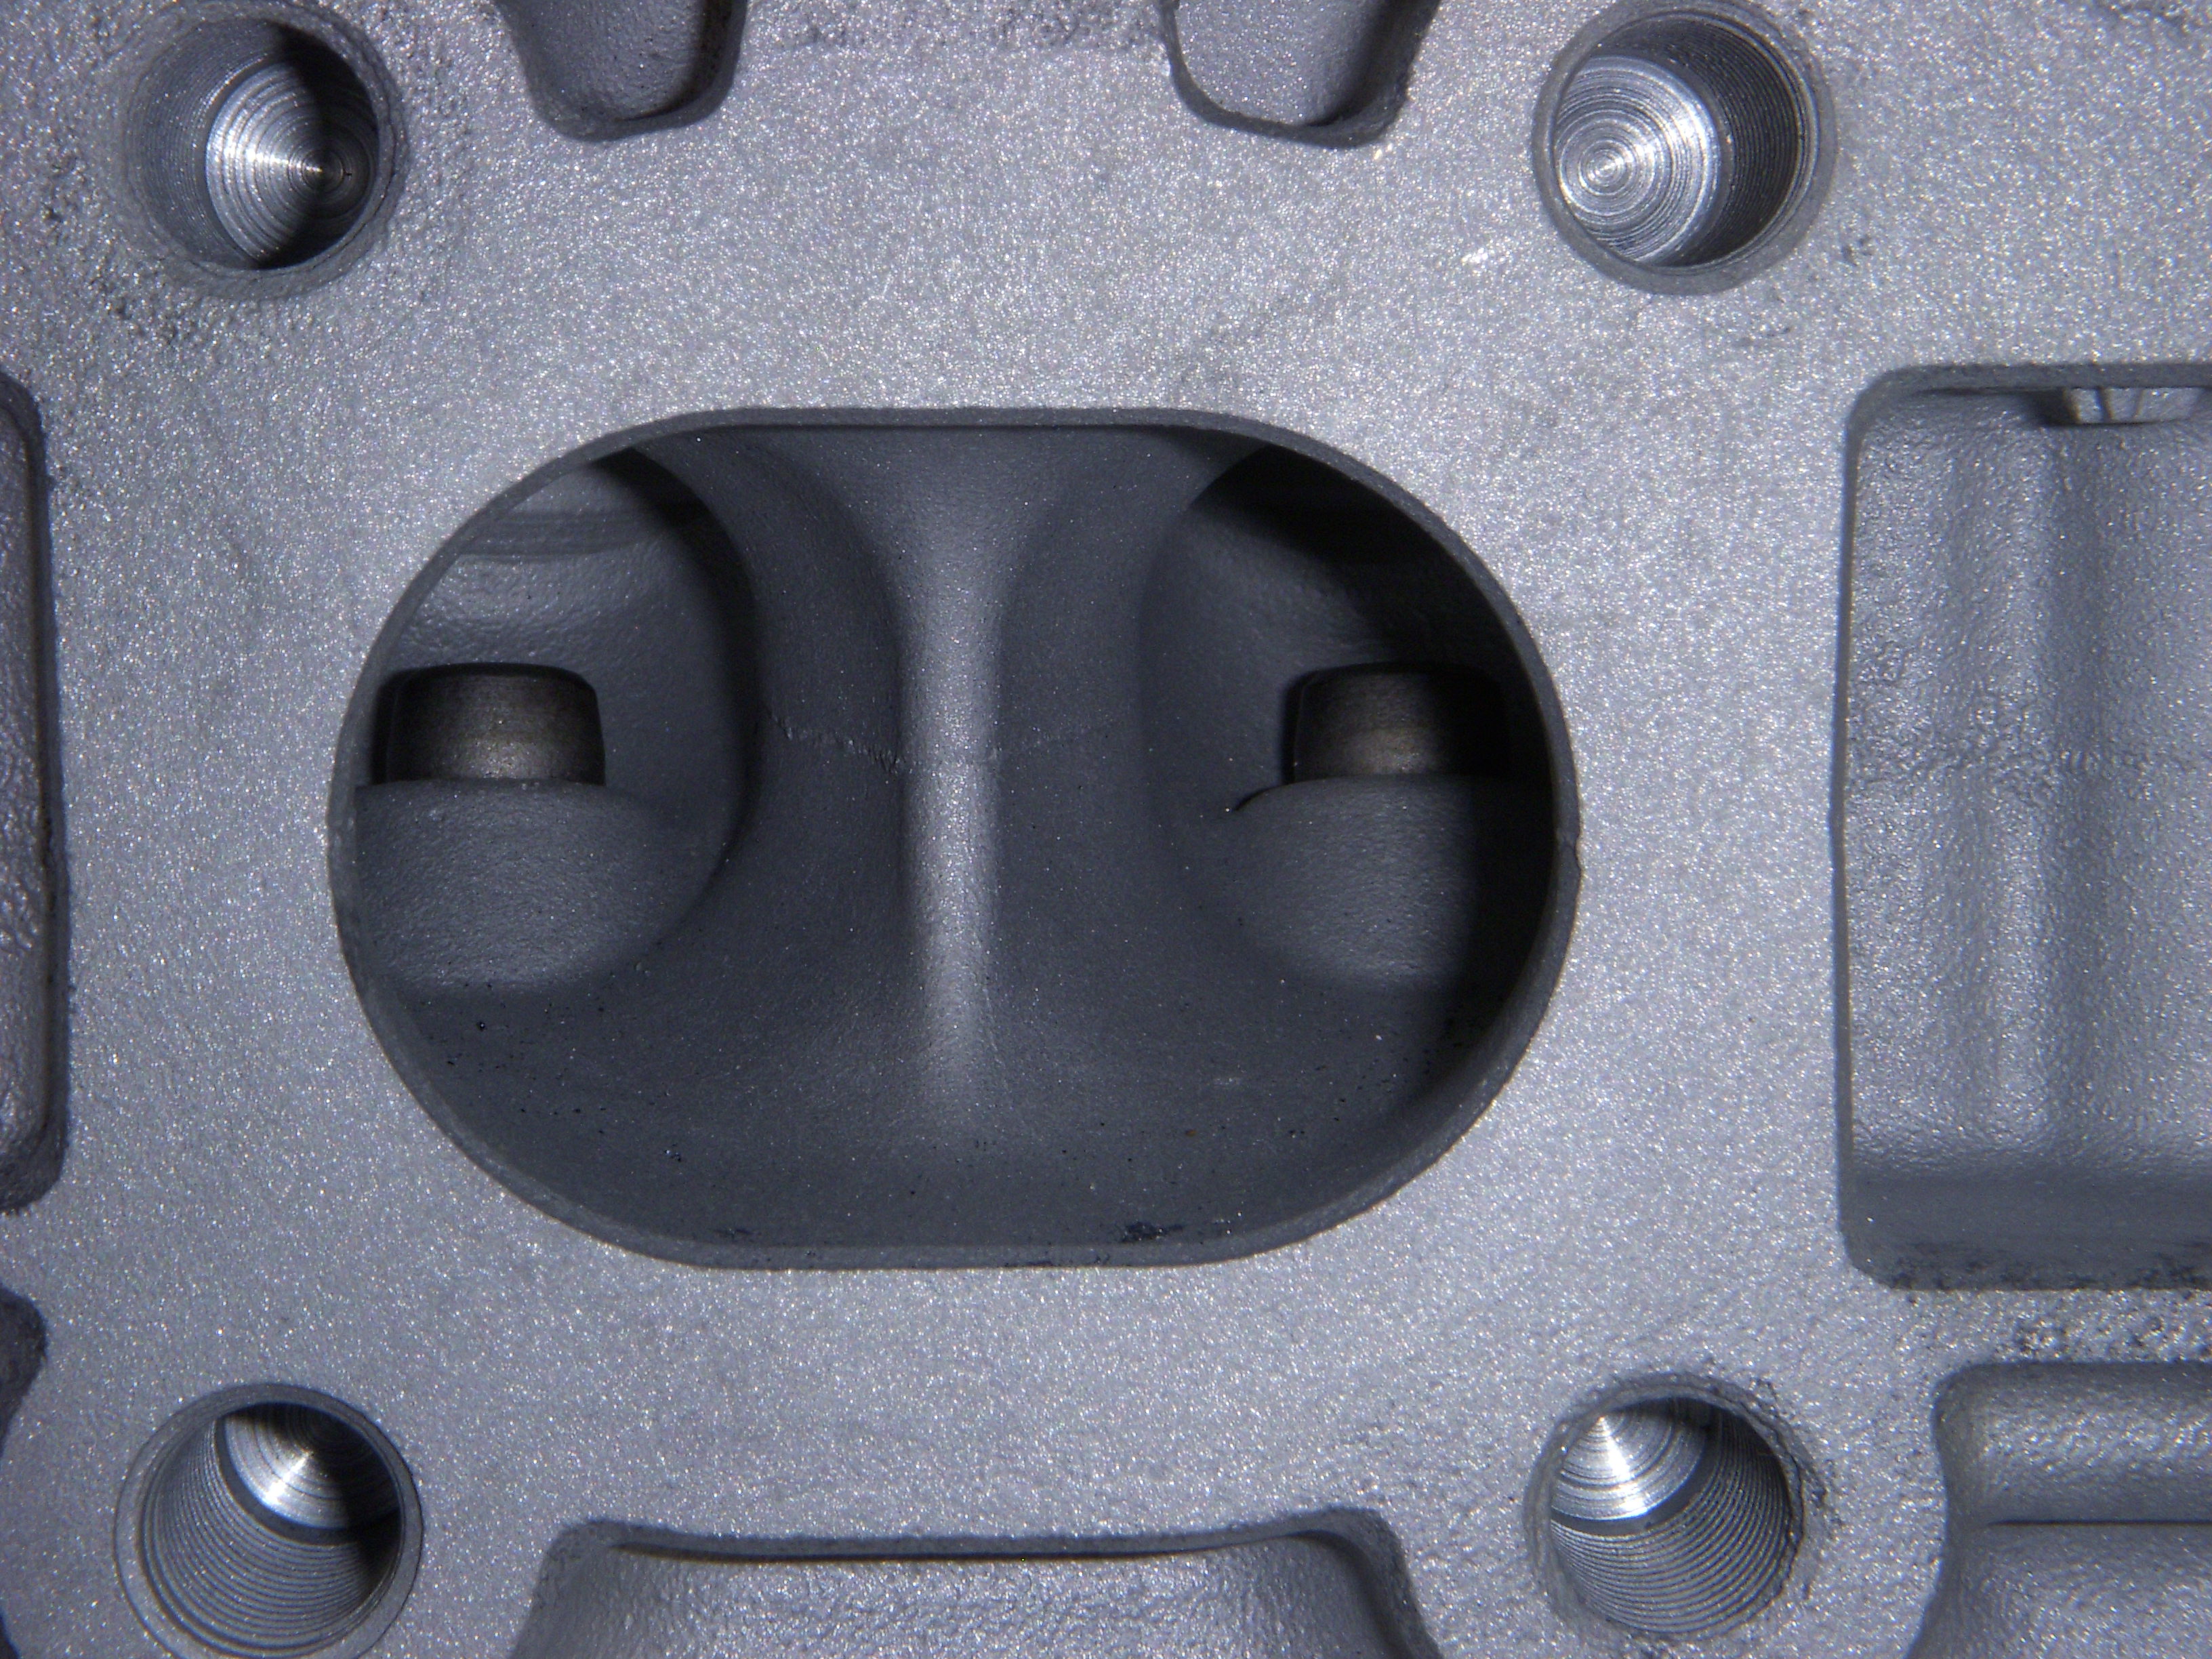
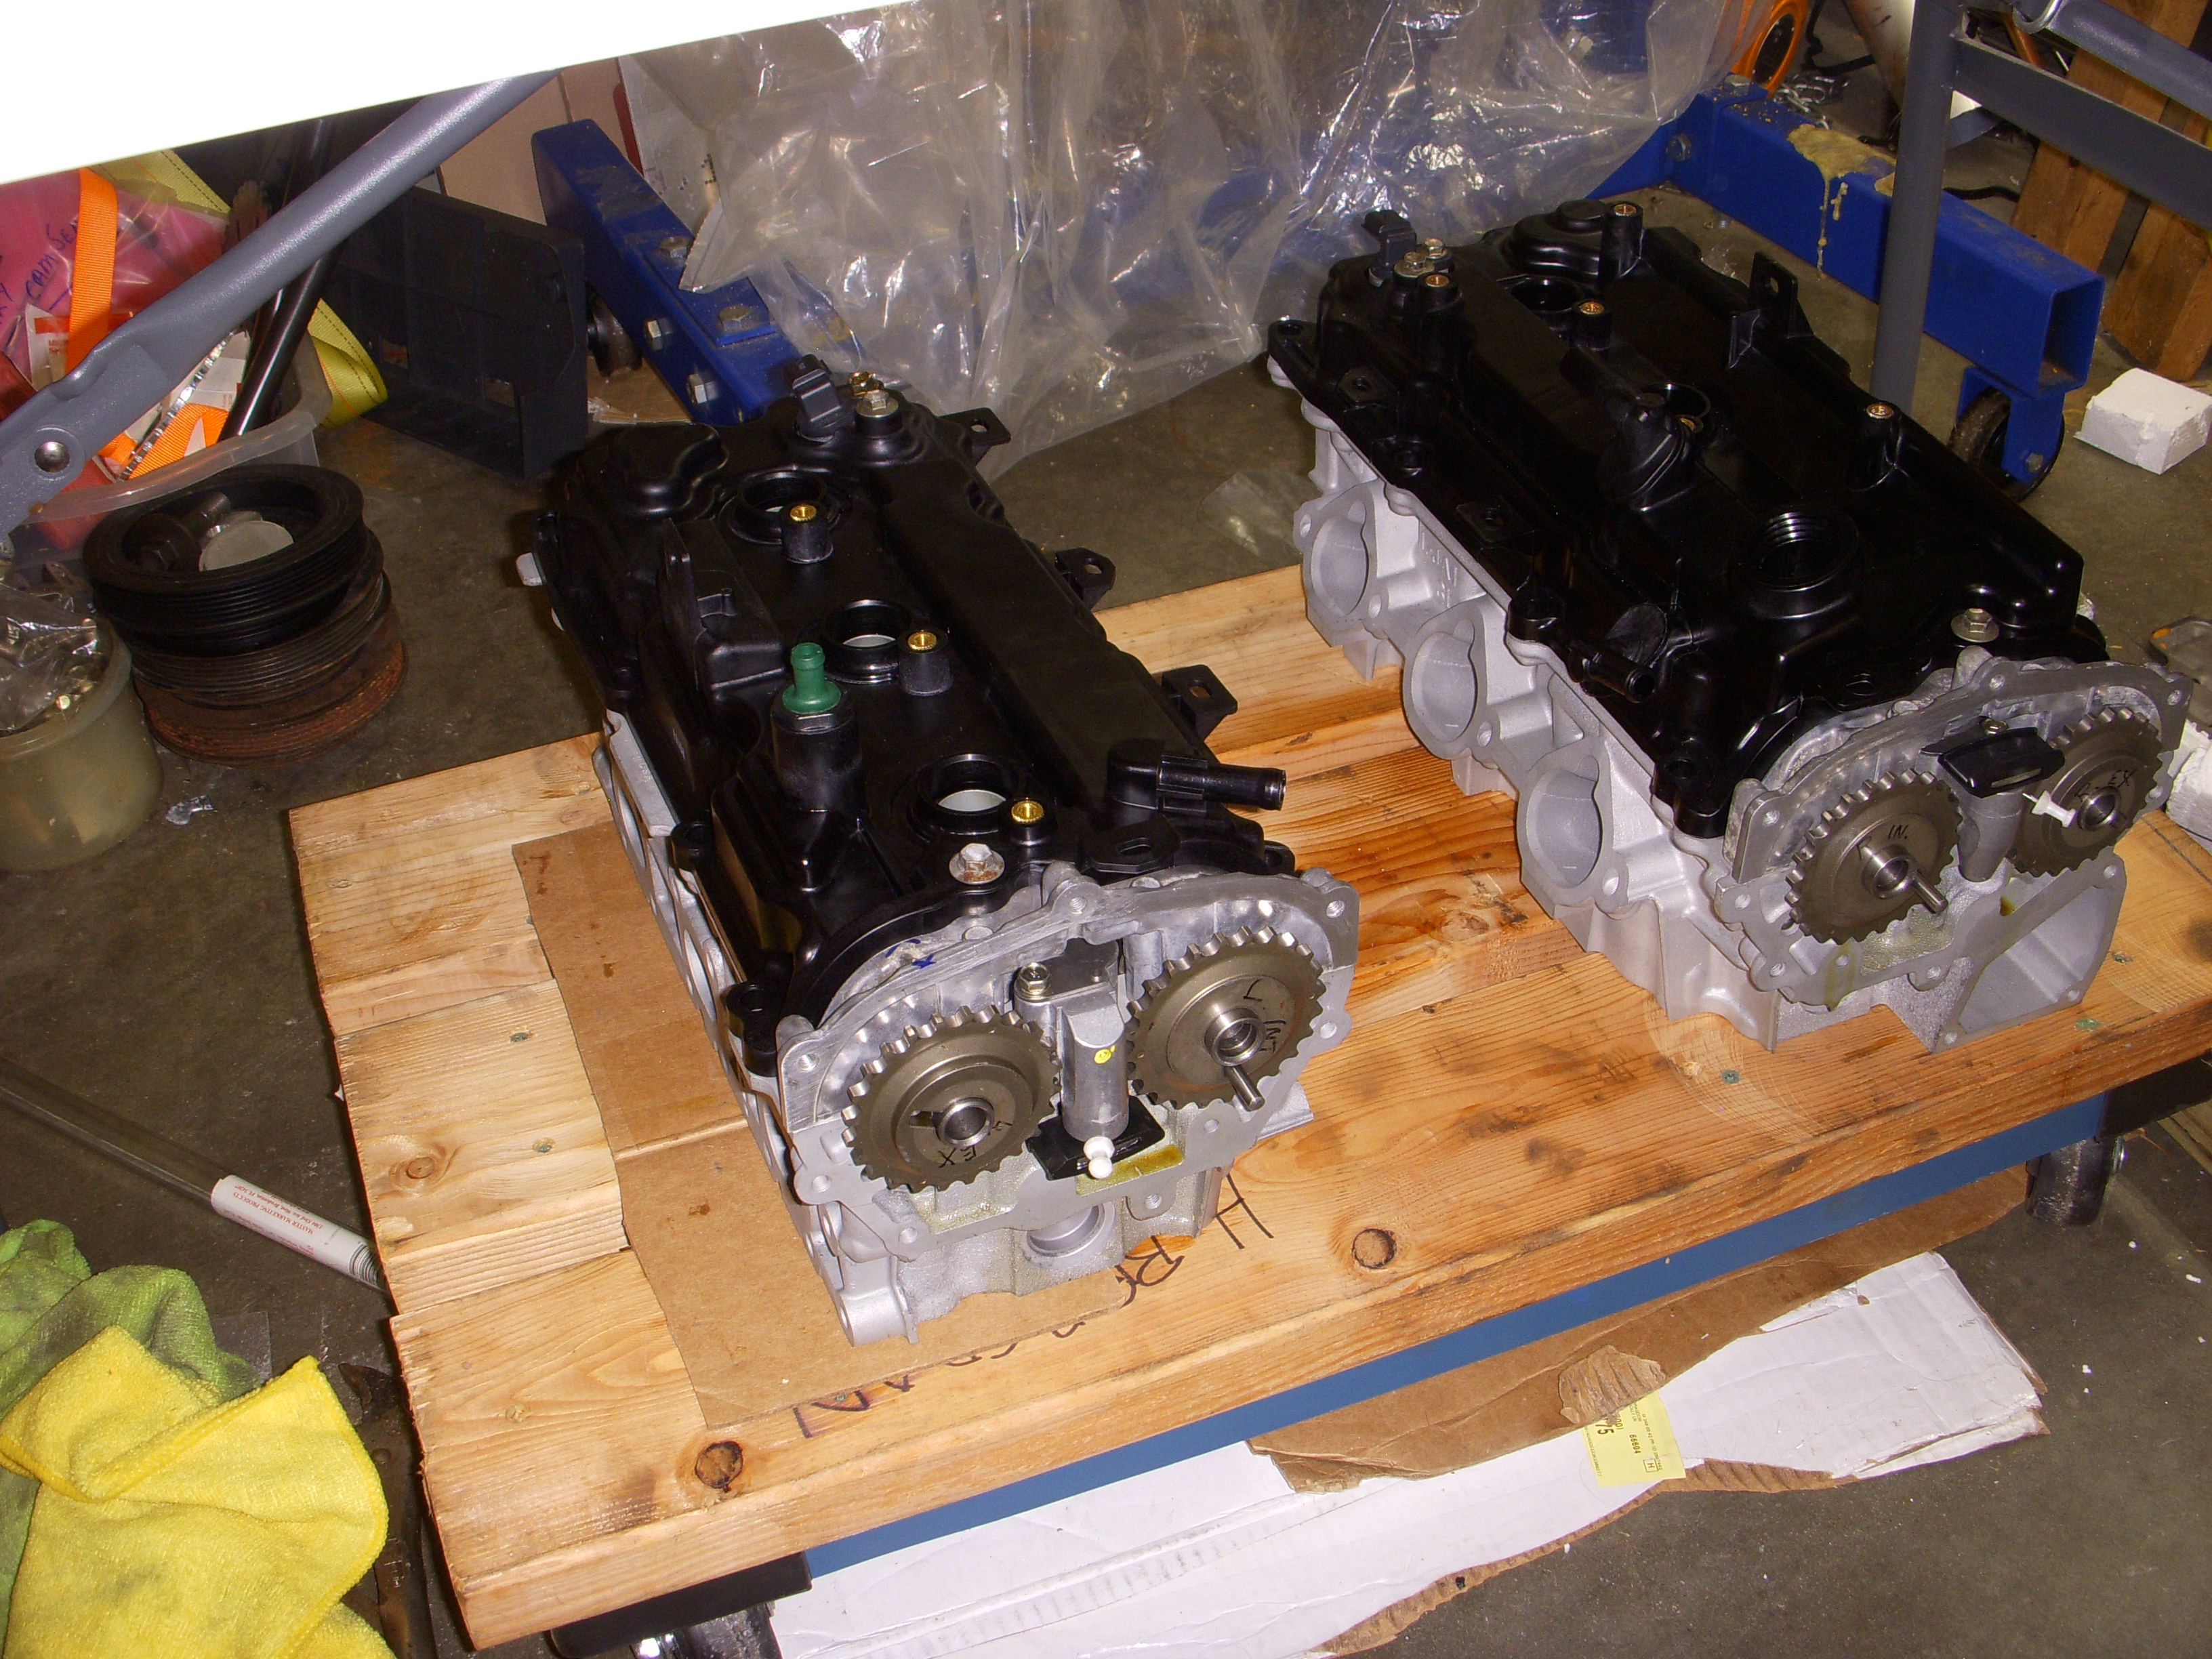
Picked up the planed - and beaded - and cleaned - HR heads today and took some pix. The head decking looks like a mirror, and oil passages were cleaned out and both heads were glass-beaded, and probably look better now than when they were made. I flushed them both with a couple of cans of brake cleaner.
In no special order:

In no special order:


Last edited by grey99max; Jan 15, 2017 at 11:39 AM.
Last update for 2015..
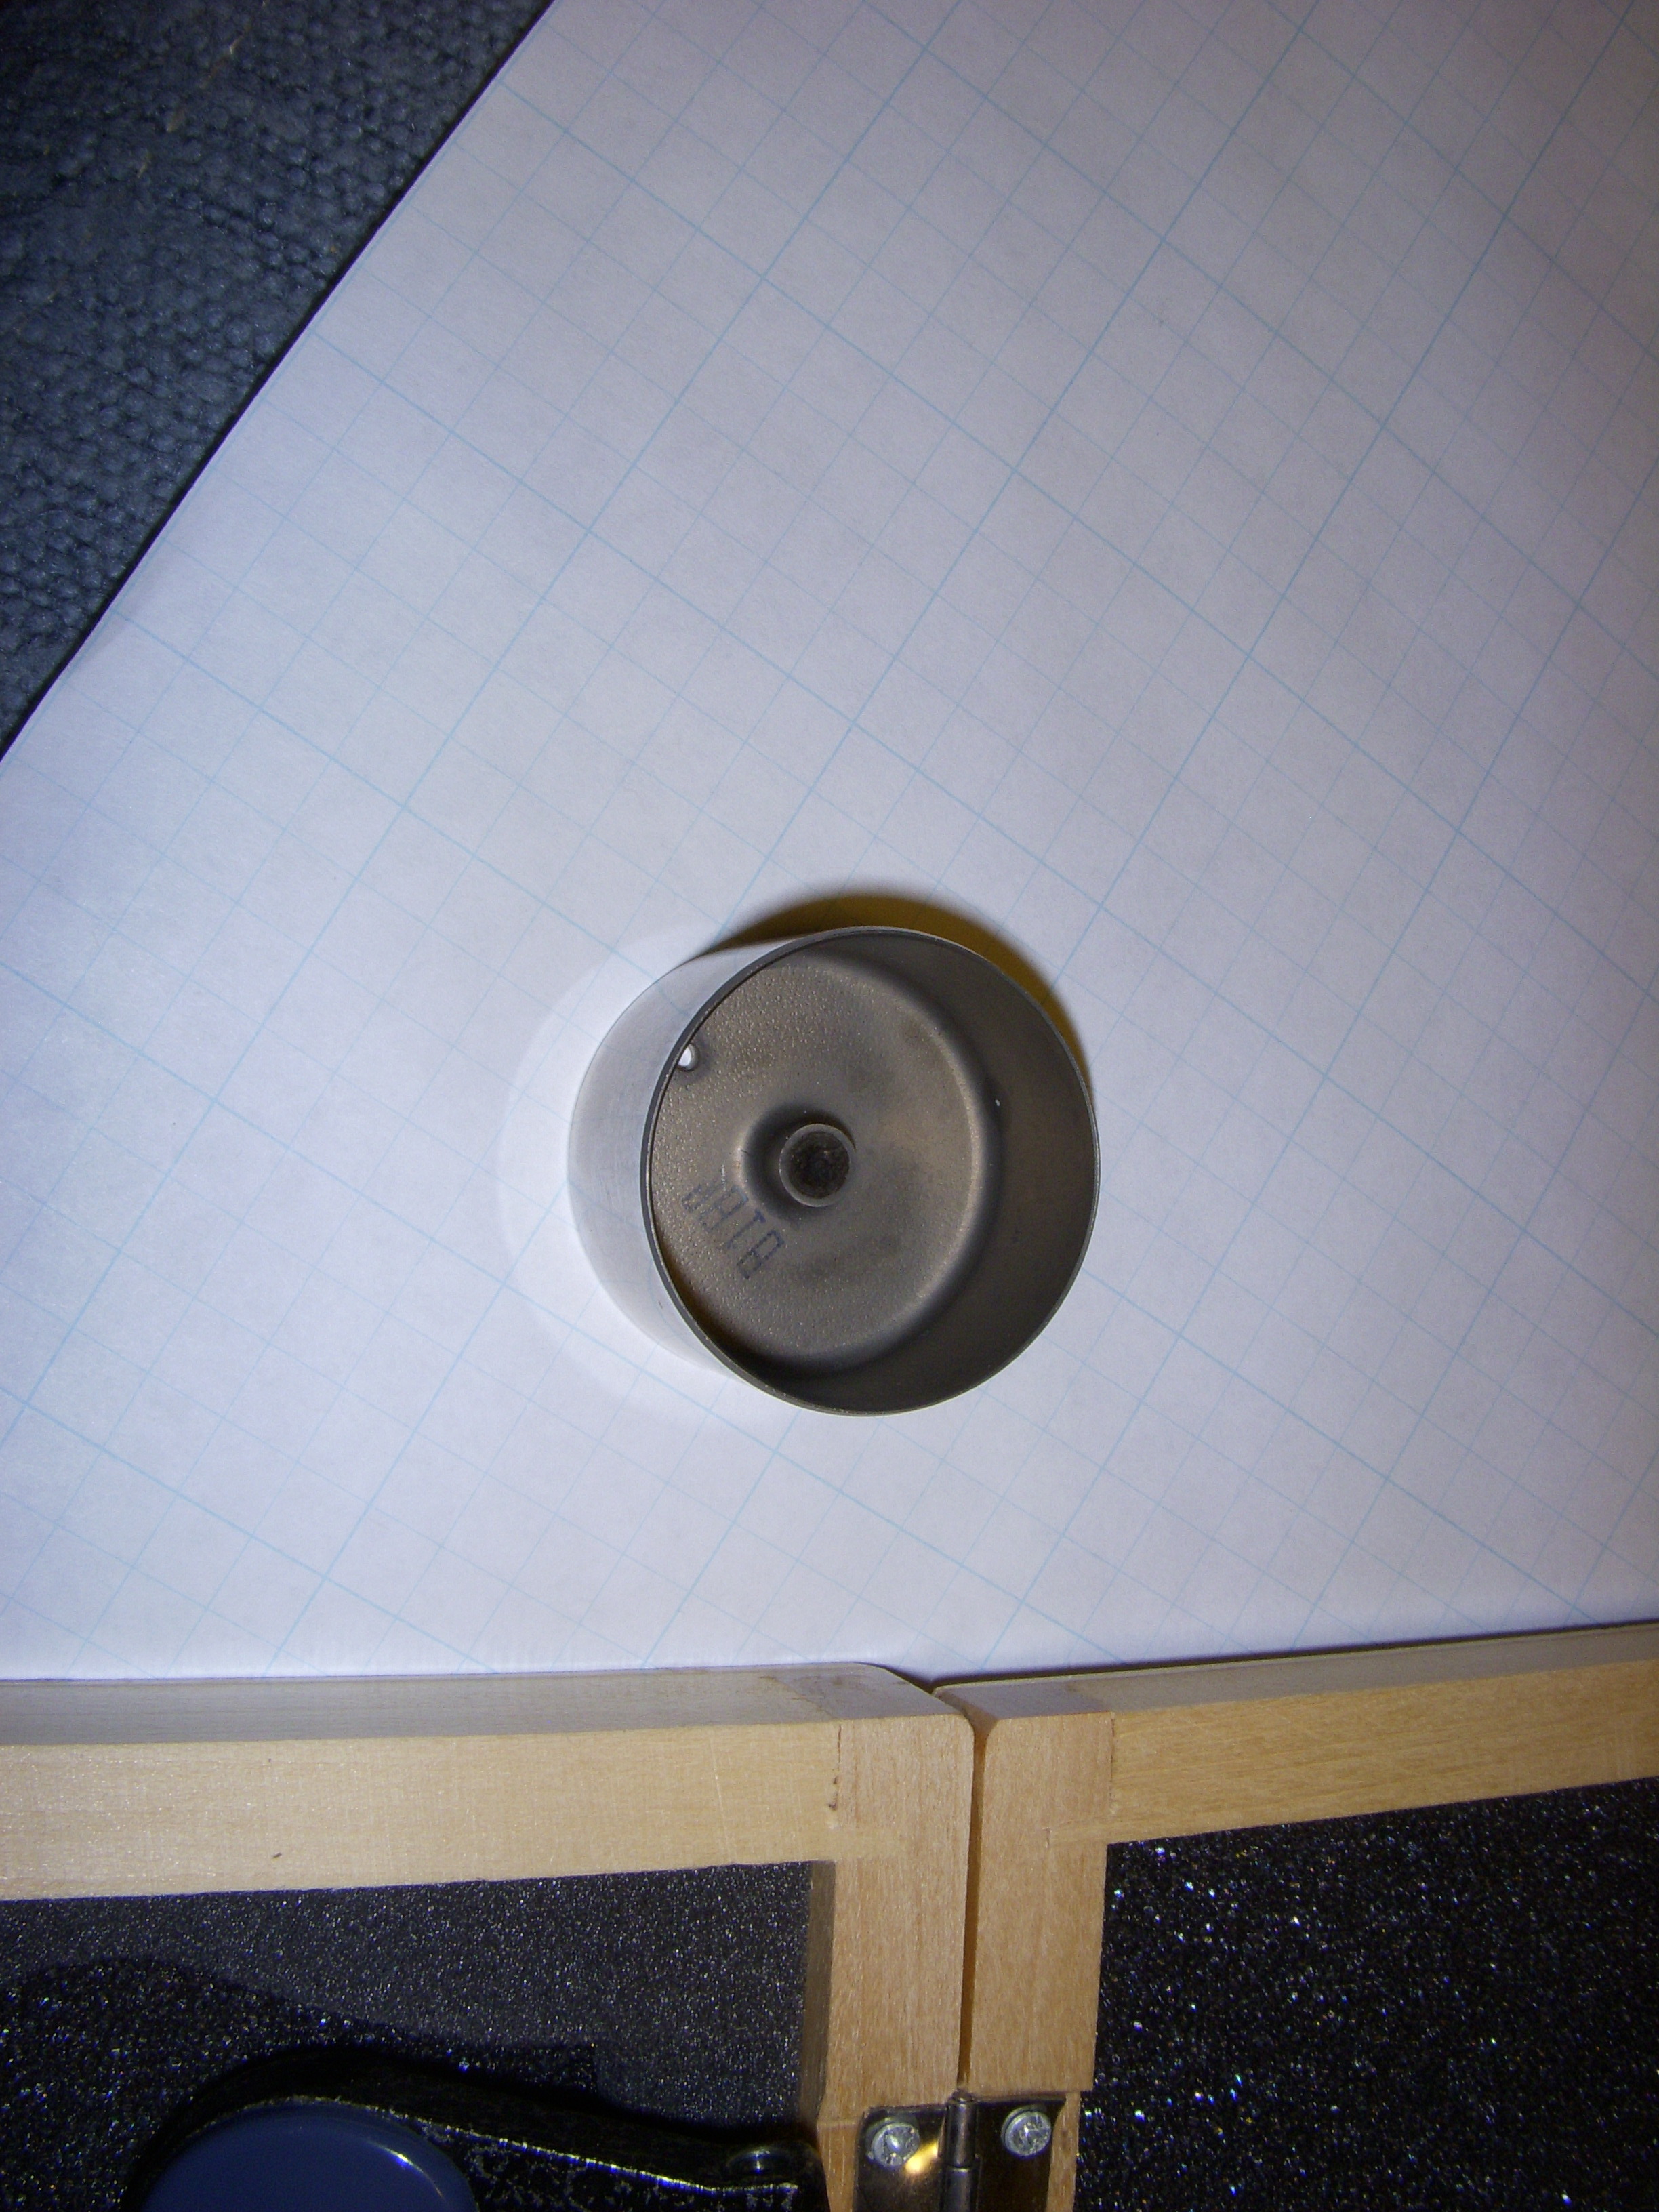
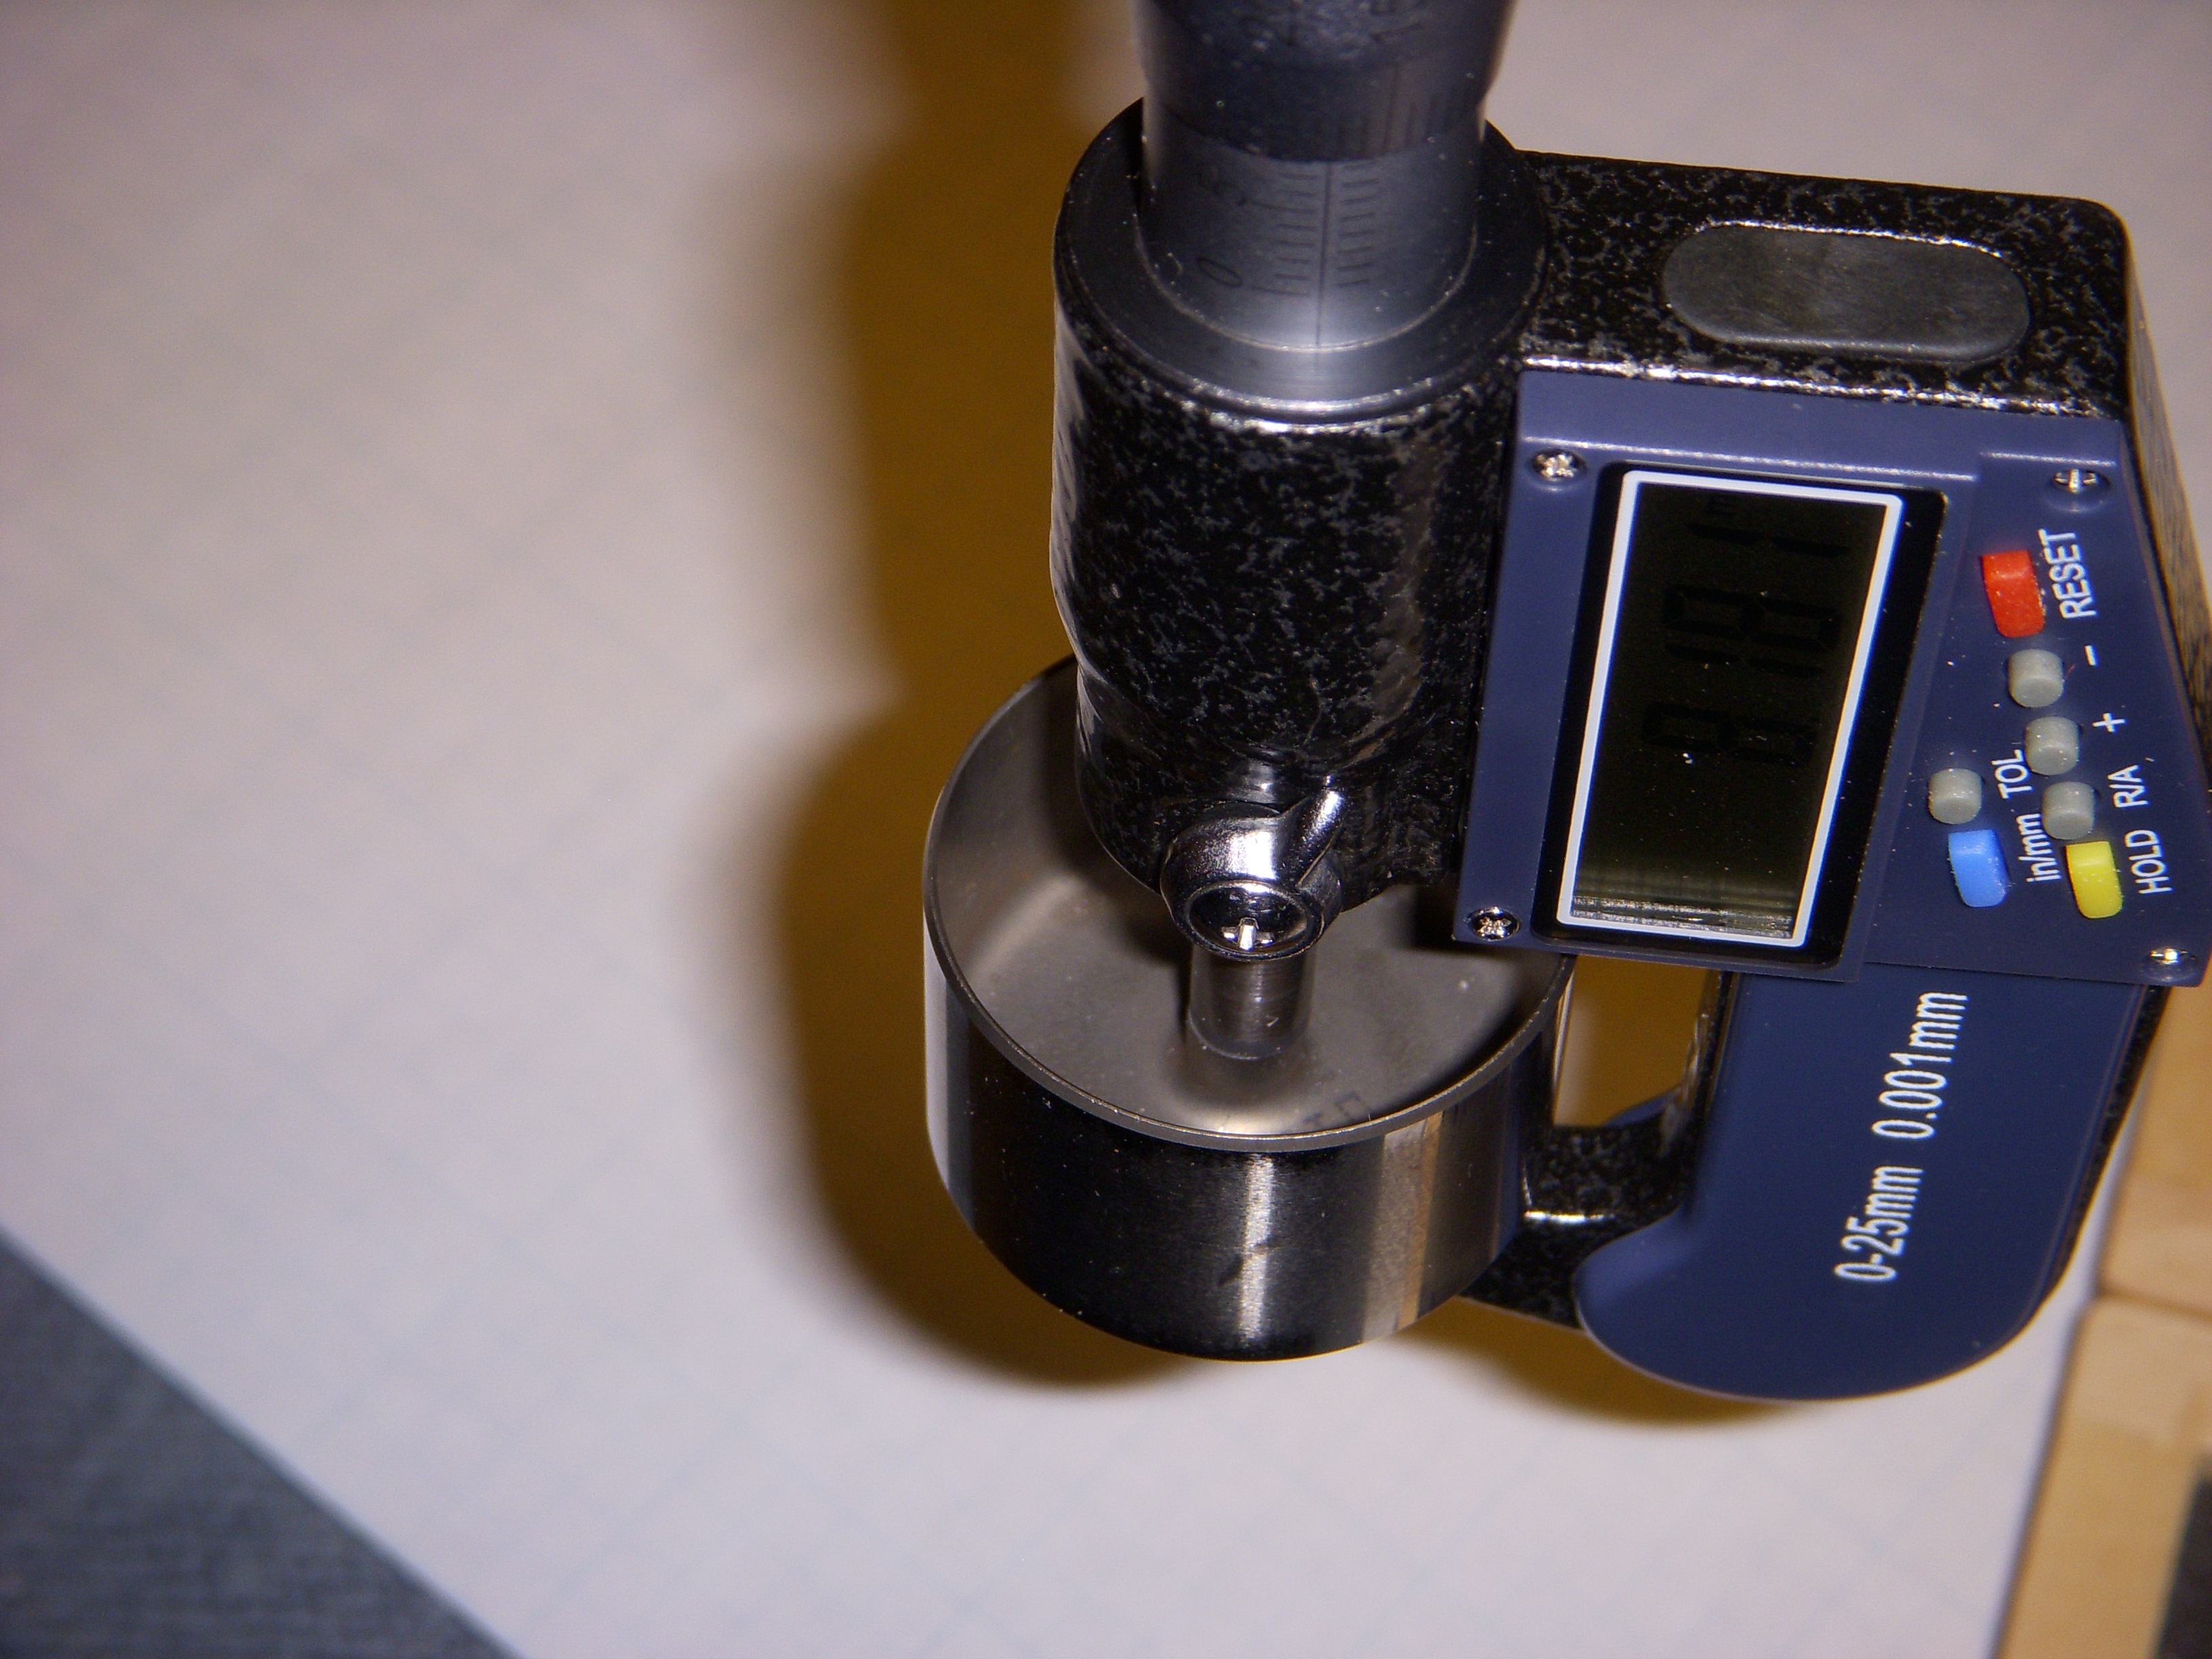
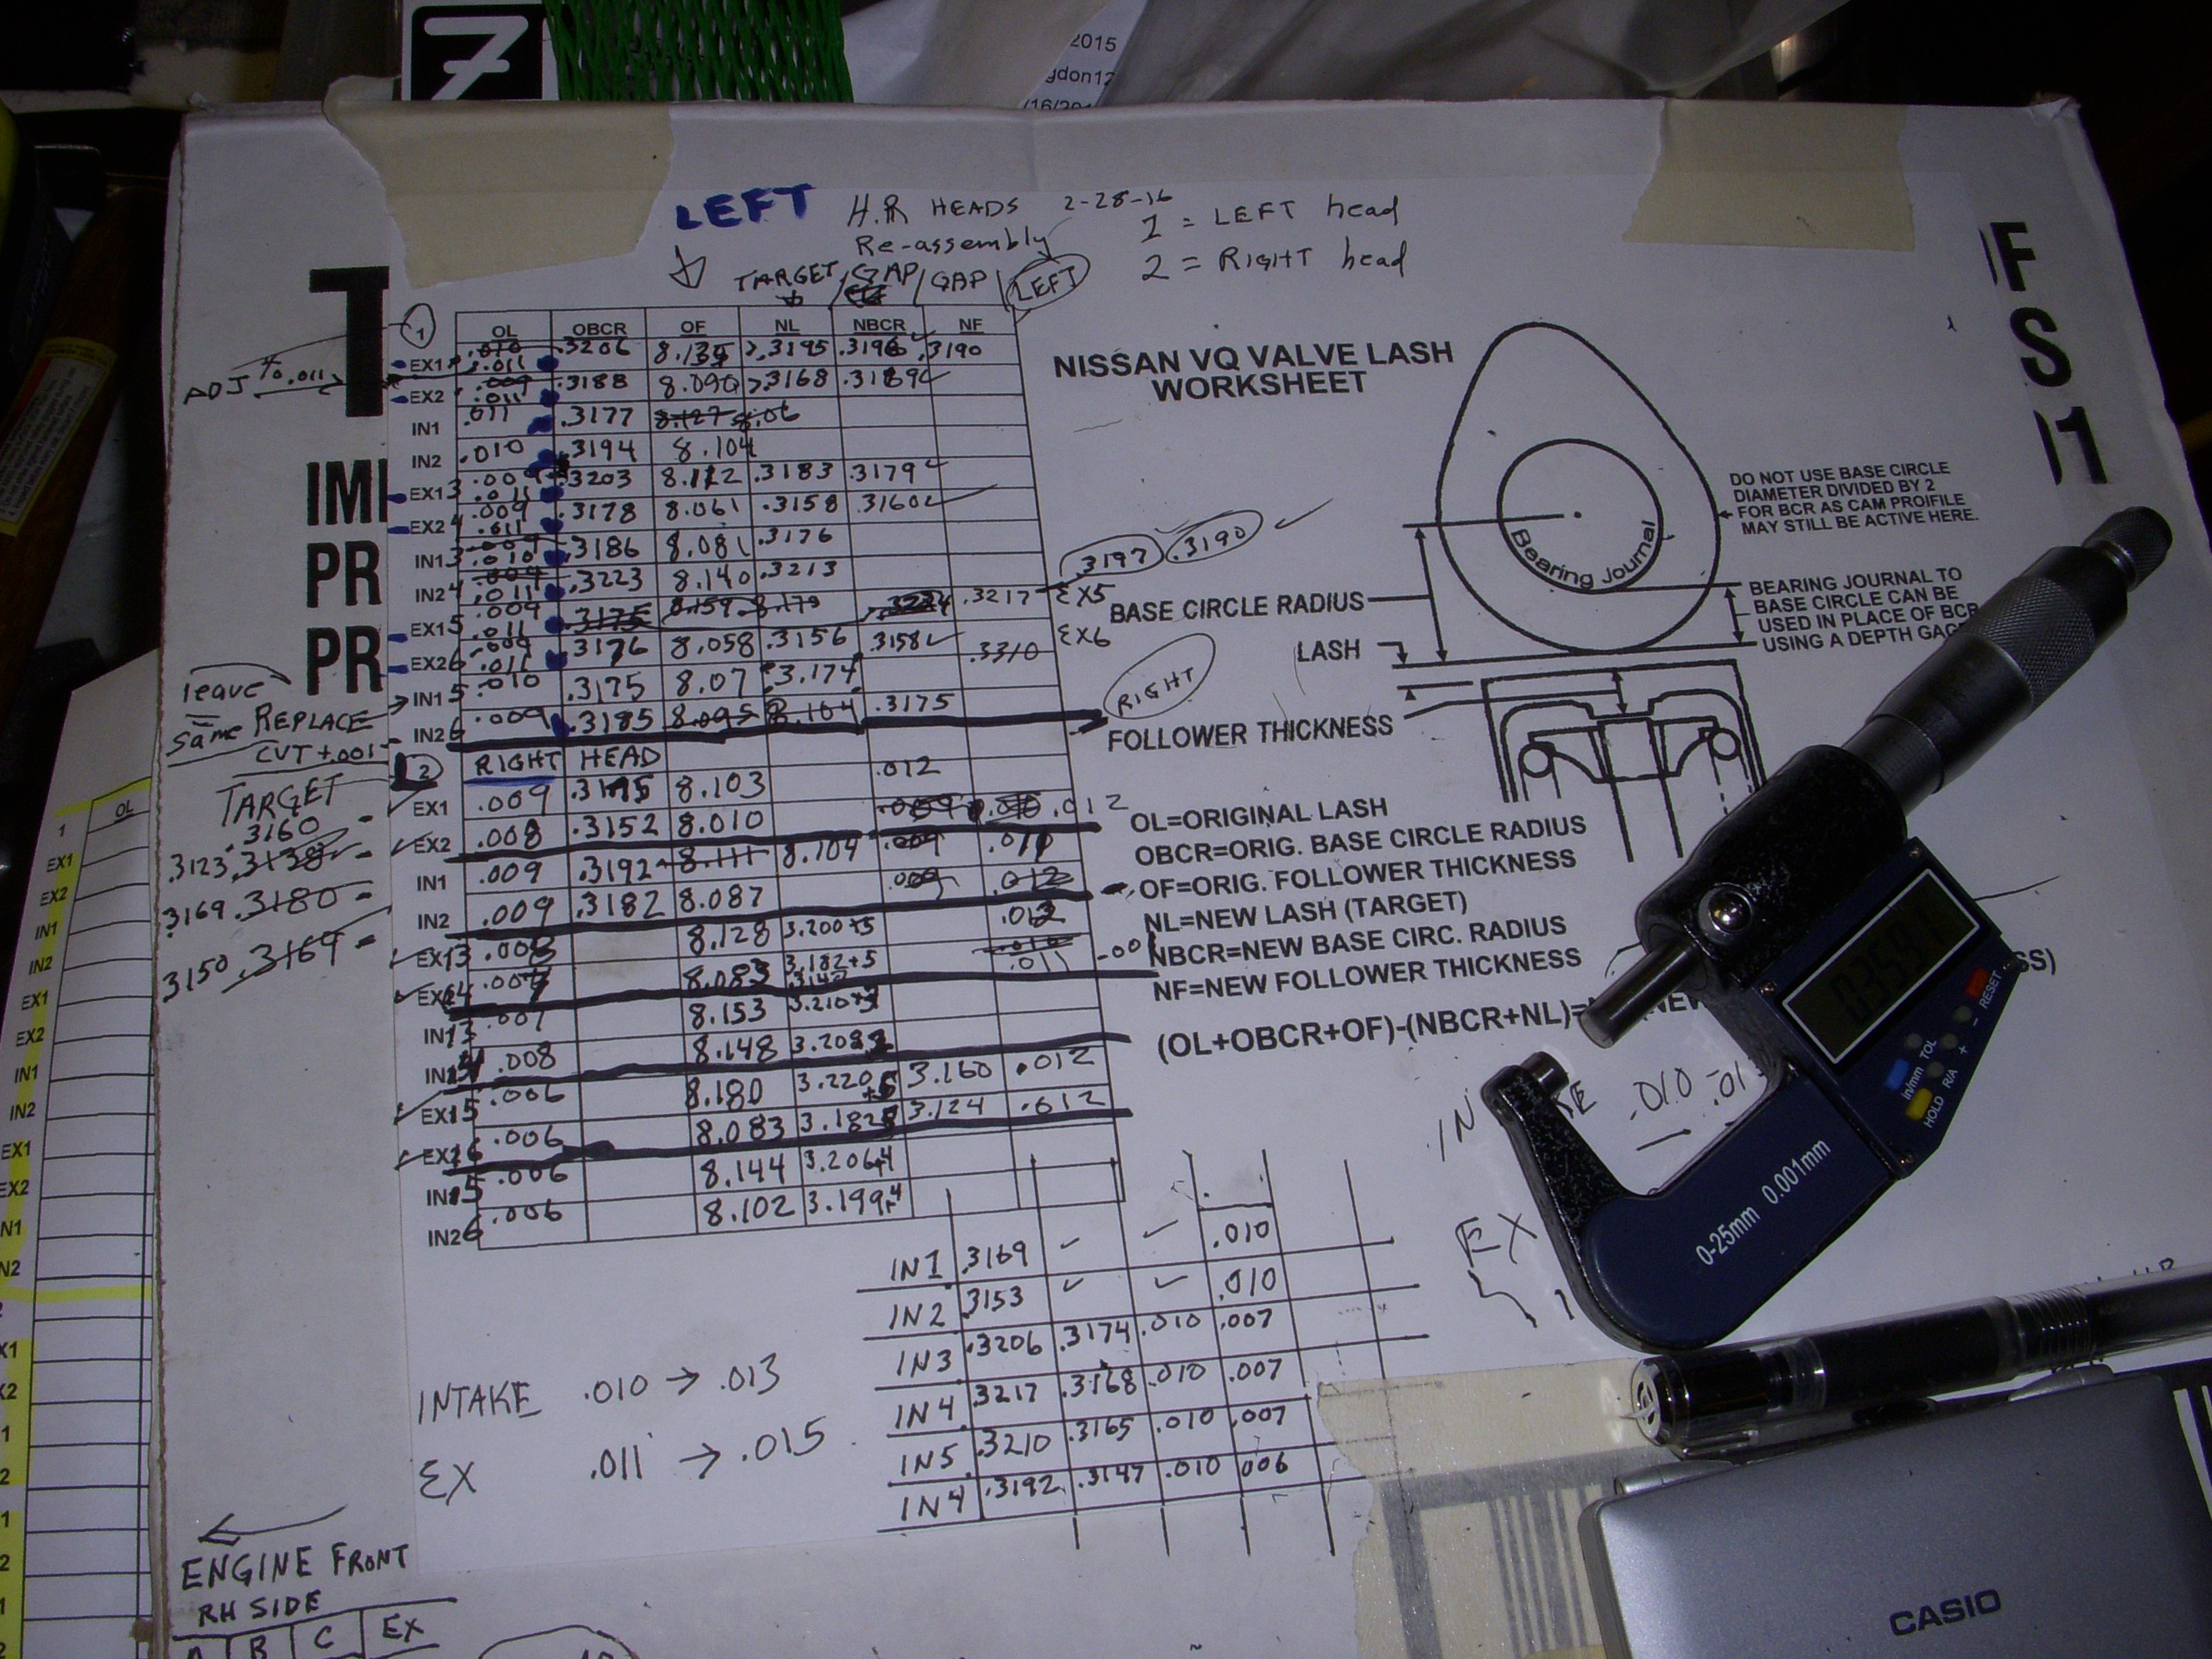
Shown here is how I'm going to set valve lash on all valves after a light lap dance. An inexpensive inside digital micrometer, to measure the height of the inside "bump" which can be used to decide how much to grind off with my Dremel stand. Actually pretty simple, and the longest lifter can be used to create all other sizes.
After this, I'll update every month or two, although I will continue to photograph every step, for my own records. It's been fun, but I feel like I'm talking to myself mostly, and I have better things to do with my time.


Merry Xmas...
After this, I'll update every month or two, although I will continue to photograph every step, for my own records. It's been fun, but I feel like I'm talking to myself mostly, and I have better things to do with my time.


Merry Xmas...
Last edited by grey99max; Jan 15, 2017 at 11:45 AM.

You're not talking to yourself. I've been following this thread for months. There is a wealth of information that if other people who think they know what they're doing would read, they'd probably not make mistakes while building their engine. I really hope you keep posting your narrated play by play. I've learned a lot of things just by reading and looking at the pictures. I know I don't post in the thread often but to be honest a lot of this stuff is beyond my abilities and knowledge. But by you posting it I can get a visual idea of what you're talking about. I really hope you change your mind but I understand if you don't. When I see the blue dot next to the nitrous thread it's like the bell ringing for class 20+ years ago in high school. I just try a soak it all in.


You're not talking to yourself. I've been following this thread for months. There is a wealth of information that if other people who think they know what they're doing would read, they'd probably not make mistakes while building their engine. I really hope you keep posting your narrated play by play. I've learned a lot of things just by reading and looking at the pictures. I know I don't post in the thread often but to be honest a lot of this stuff is beyond my abilities and knowledge. But by you posting it I can get a visual idea of what you're talking about. I really hope you change your mind but I understand if you don't. When I see the blue dot next to the nitrous thread it's like the bell ringing for class 20+ years ago in high school. I just try a soak it all in.

Well said.
Thanks for the kind words, gentlemen (you too, Fakie  ), but I need to focus on the details of this build and I kinda feel like I have a silent audience, staring at me through their computer screens, and I don't want that right now. I'll answer any questions if I see them...
I have a ton of things to do over the next couple of months, including maybe a surprise intake system, and of course the Megasquirt MS3-Pro ECU, so that's my priority through the winter. This will be the first stroker 3.5 DE with HR heads and C11/RZ1 cams, so some surprises are sure to pop out of the woodwork. Come spring, I hope to be tearing up the local track for some tuning, then who knows?

), but I need to focus on the details of this build and I kinda feel like I have a silent audience, staring at me through their computer screens, and I don't want that right now. I'll answer any questions if I see them...I have a ton of things to do over the next couple of months, including maybe a surprise intake system, and of course the Megasquirt MS3-Pro ECU, so that's my priority through the winter. This will be the first stroker 3.5 DE with HR heads and C11/RZ1 cams, so some surprises are sure to pop out of the woodwork. Come spring, I hope to be tearing up the local track for some tuning, then who knows?
Thanks for the kind words, gentlemen (you too, Fakie ), but I need to focus on the details of this build and I kinda feel like I have a silent audience, staring at me through their computer screens, and I don't want that right now. I'll answer any questions if I see them... I have a ton of things to do over the next couple of months, including maybe a surprise intake system, and of course the Megasquirt MS3-Pro ECU, so that's my priority through the winter. This will be the first stroker 3.5 DE with HR heads and C11/RZ1 cams, so some surprises are sure to pop out of the woodwork. Come spring, I hope to be tearing up the local track for some tuning, then who knows?
), but I need to focus on the details of this build and I kinda feel like I have a silent audience, staring at me through their computer screens, and I don't want that right now. I'll answer any questions if I see them... I have a ton of things to do over the next couple of months, including maybe a surprise intake system, and of course the Megasquirt MS3-Pro ECU, so that's my priority through the winter. This will be the first stroker 3.5 DE with HR heads and C11/RZ1 cams, so some surprises are sure to pop out of the woodwork. Come spring, I hope to be tearing up the local track for some tuning, then who knows?
Lapping valves in the Right-side HR head
I've started on prepping the first HR head for a complete rework of the valves and seats, custom valve seals, the special lightweight springs and spacers, grinding each DLC valve lifter to match each of the JWT cam lobes when cams are mounted, then once everything checks out, I will install the selected HR valve springs and matched spacers then check each valve for compression travel to the JWT specs. Different specs for intake and exhaust valves, of course. Then the JWT springs come back out and the lightweight springs go back in. Repeat for other head.
I will install the ARP head studs next, then put the heads on old-style head gaskets, then next is the rear timing cover then all the timing gears and chains and misc parts to connect the heads to the crank. I will rotate the crank in 5-degree increments, using the valve compressor tool to check piston clearance on one cylinder of each head. That's for one intake and one exhaust valve for each head to verify everything for two complete crank revolutions. I'll use my Jegs degree tools to map everything, and also verify exactly where lobe centers are located. I don't expect to find them where they are supposed to be, but I gotta know where they are initially. "Some adjustment may be required".
If everything actually checks out, then I take the heads off and install the JWT springs and re-check total valve travel. If everything passes, that's step one.
Probably left out some stuff, which leaves me more fun...
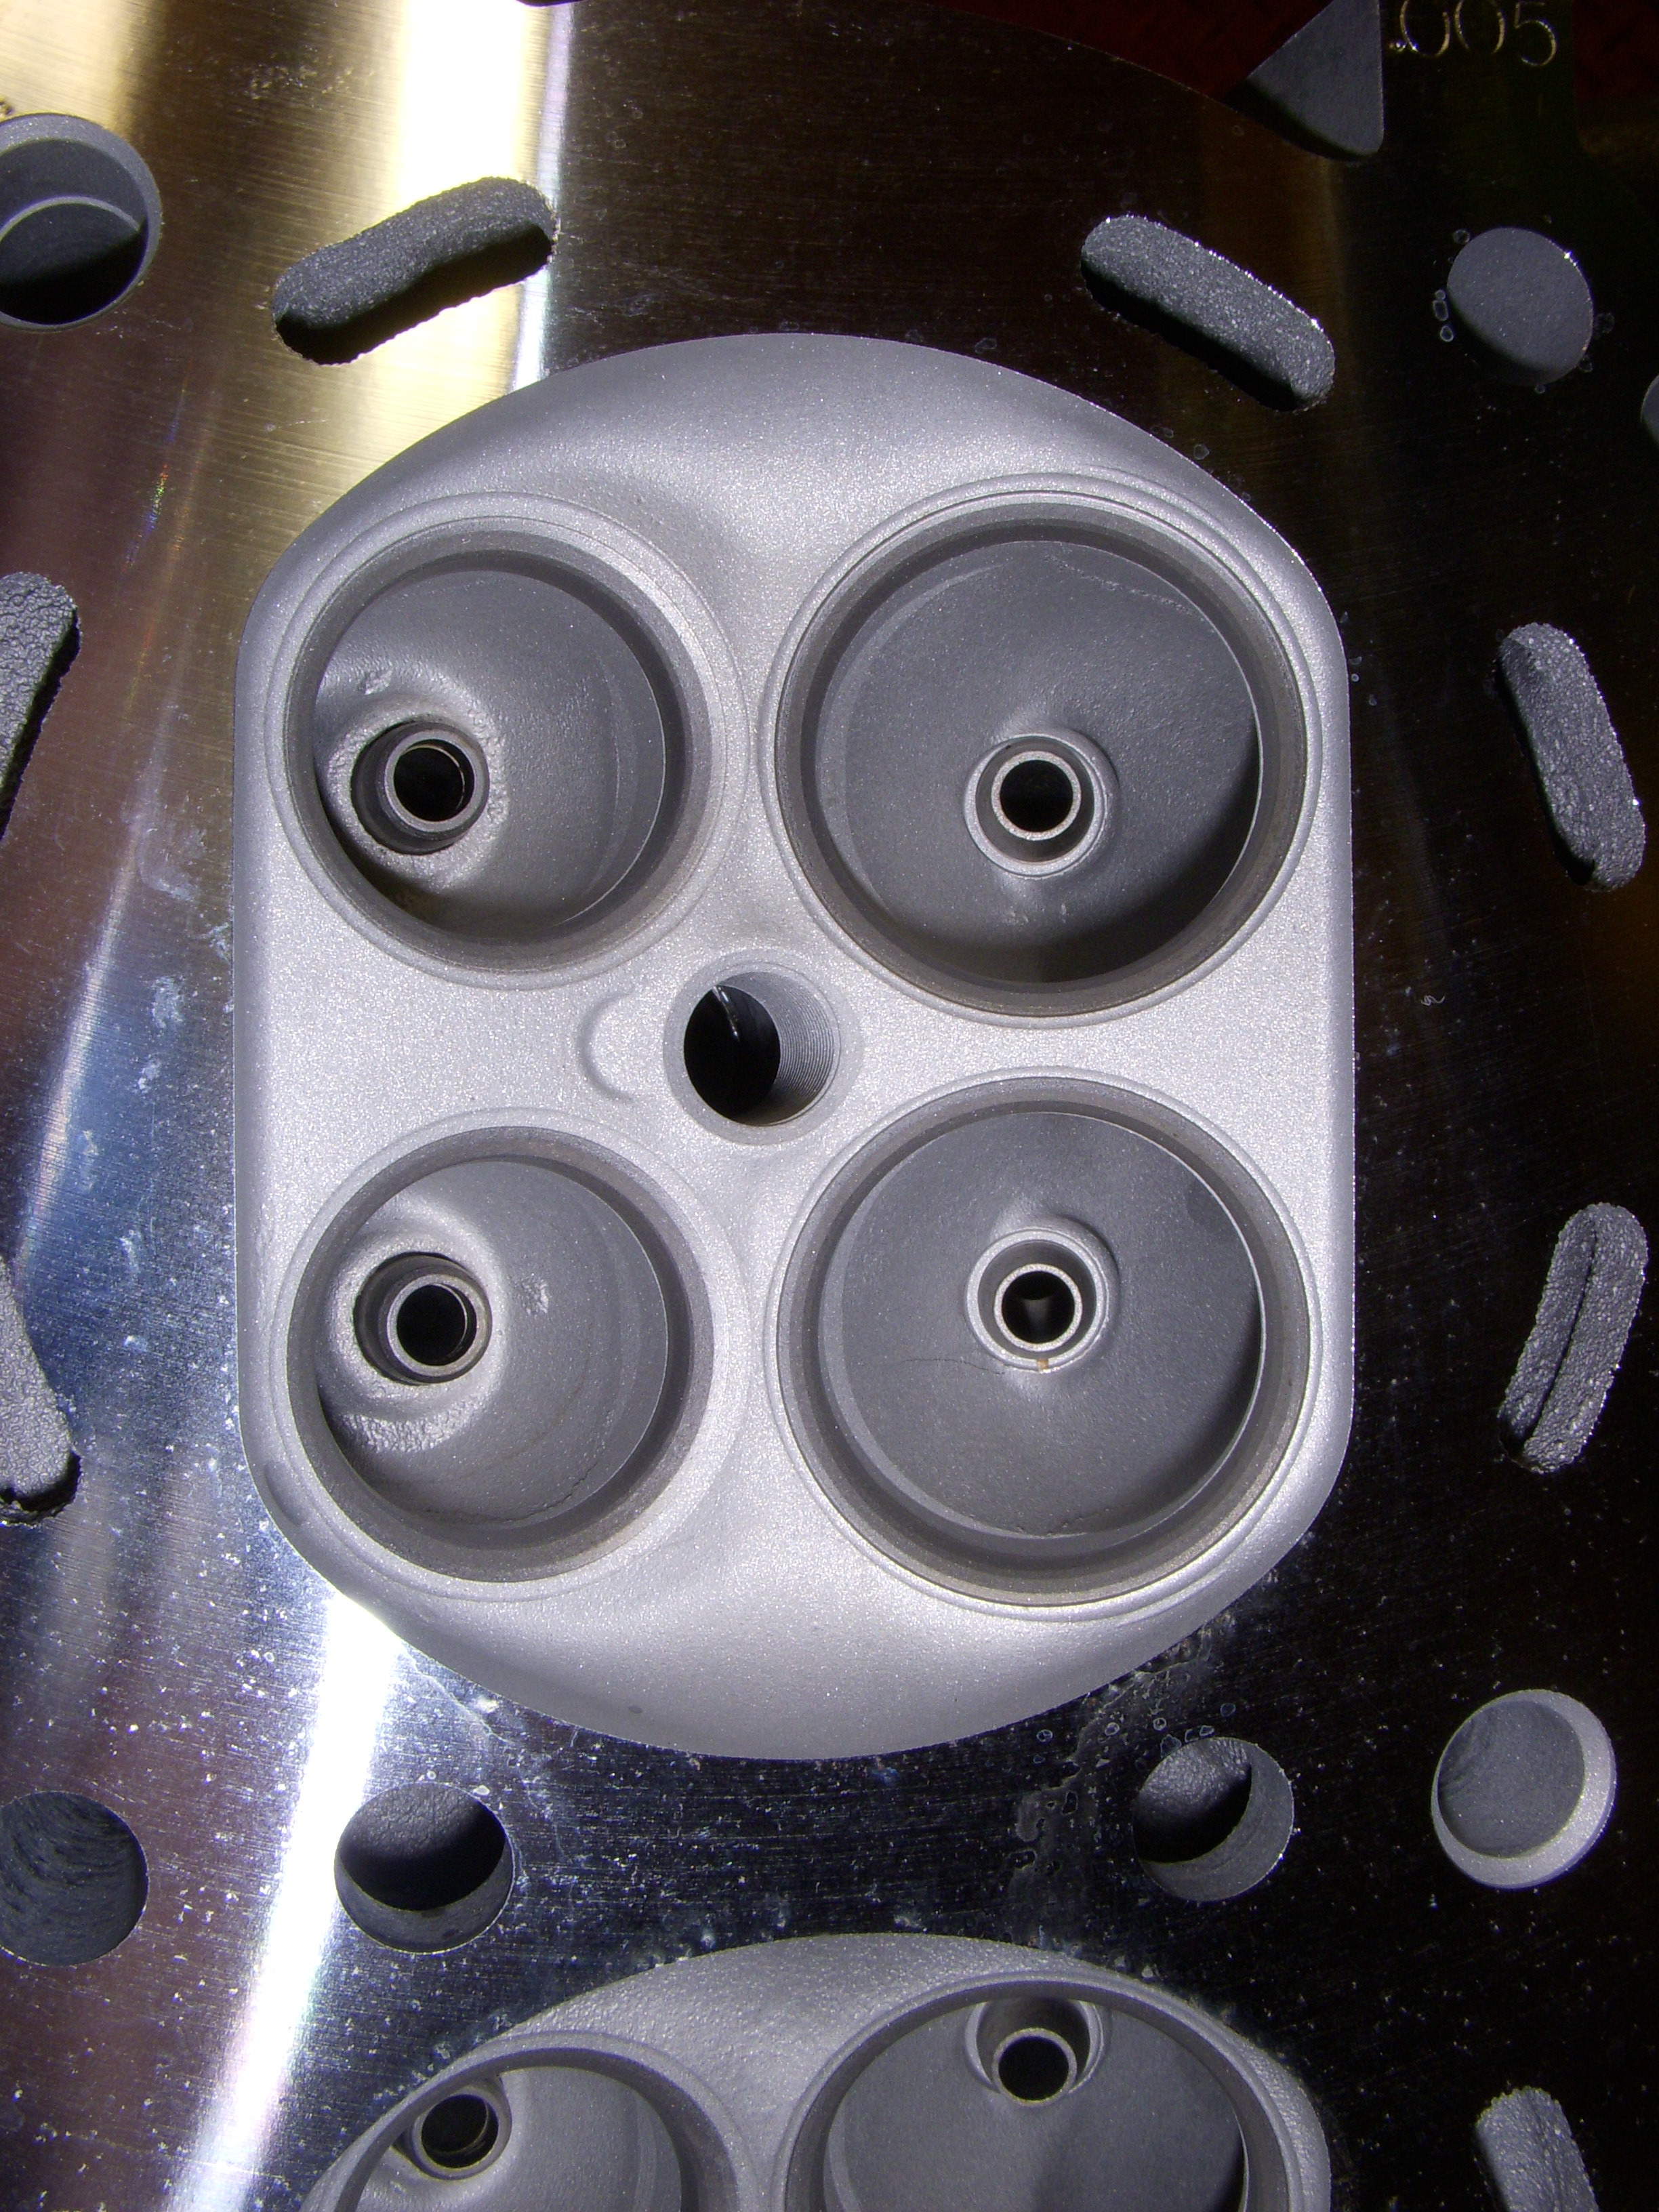
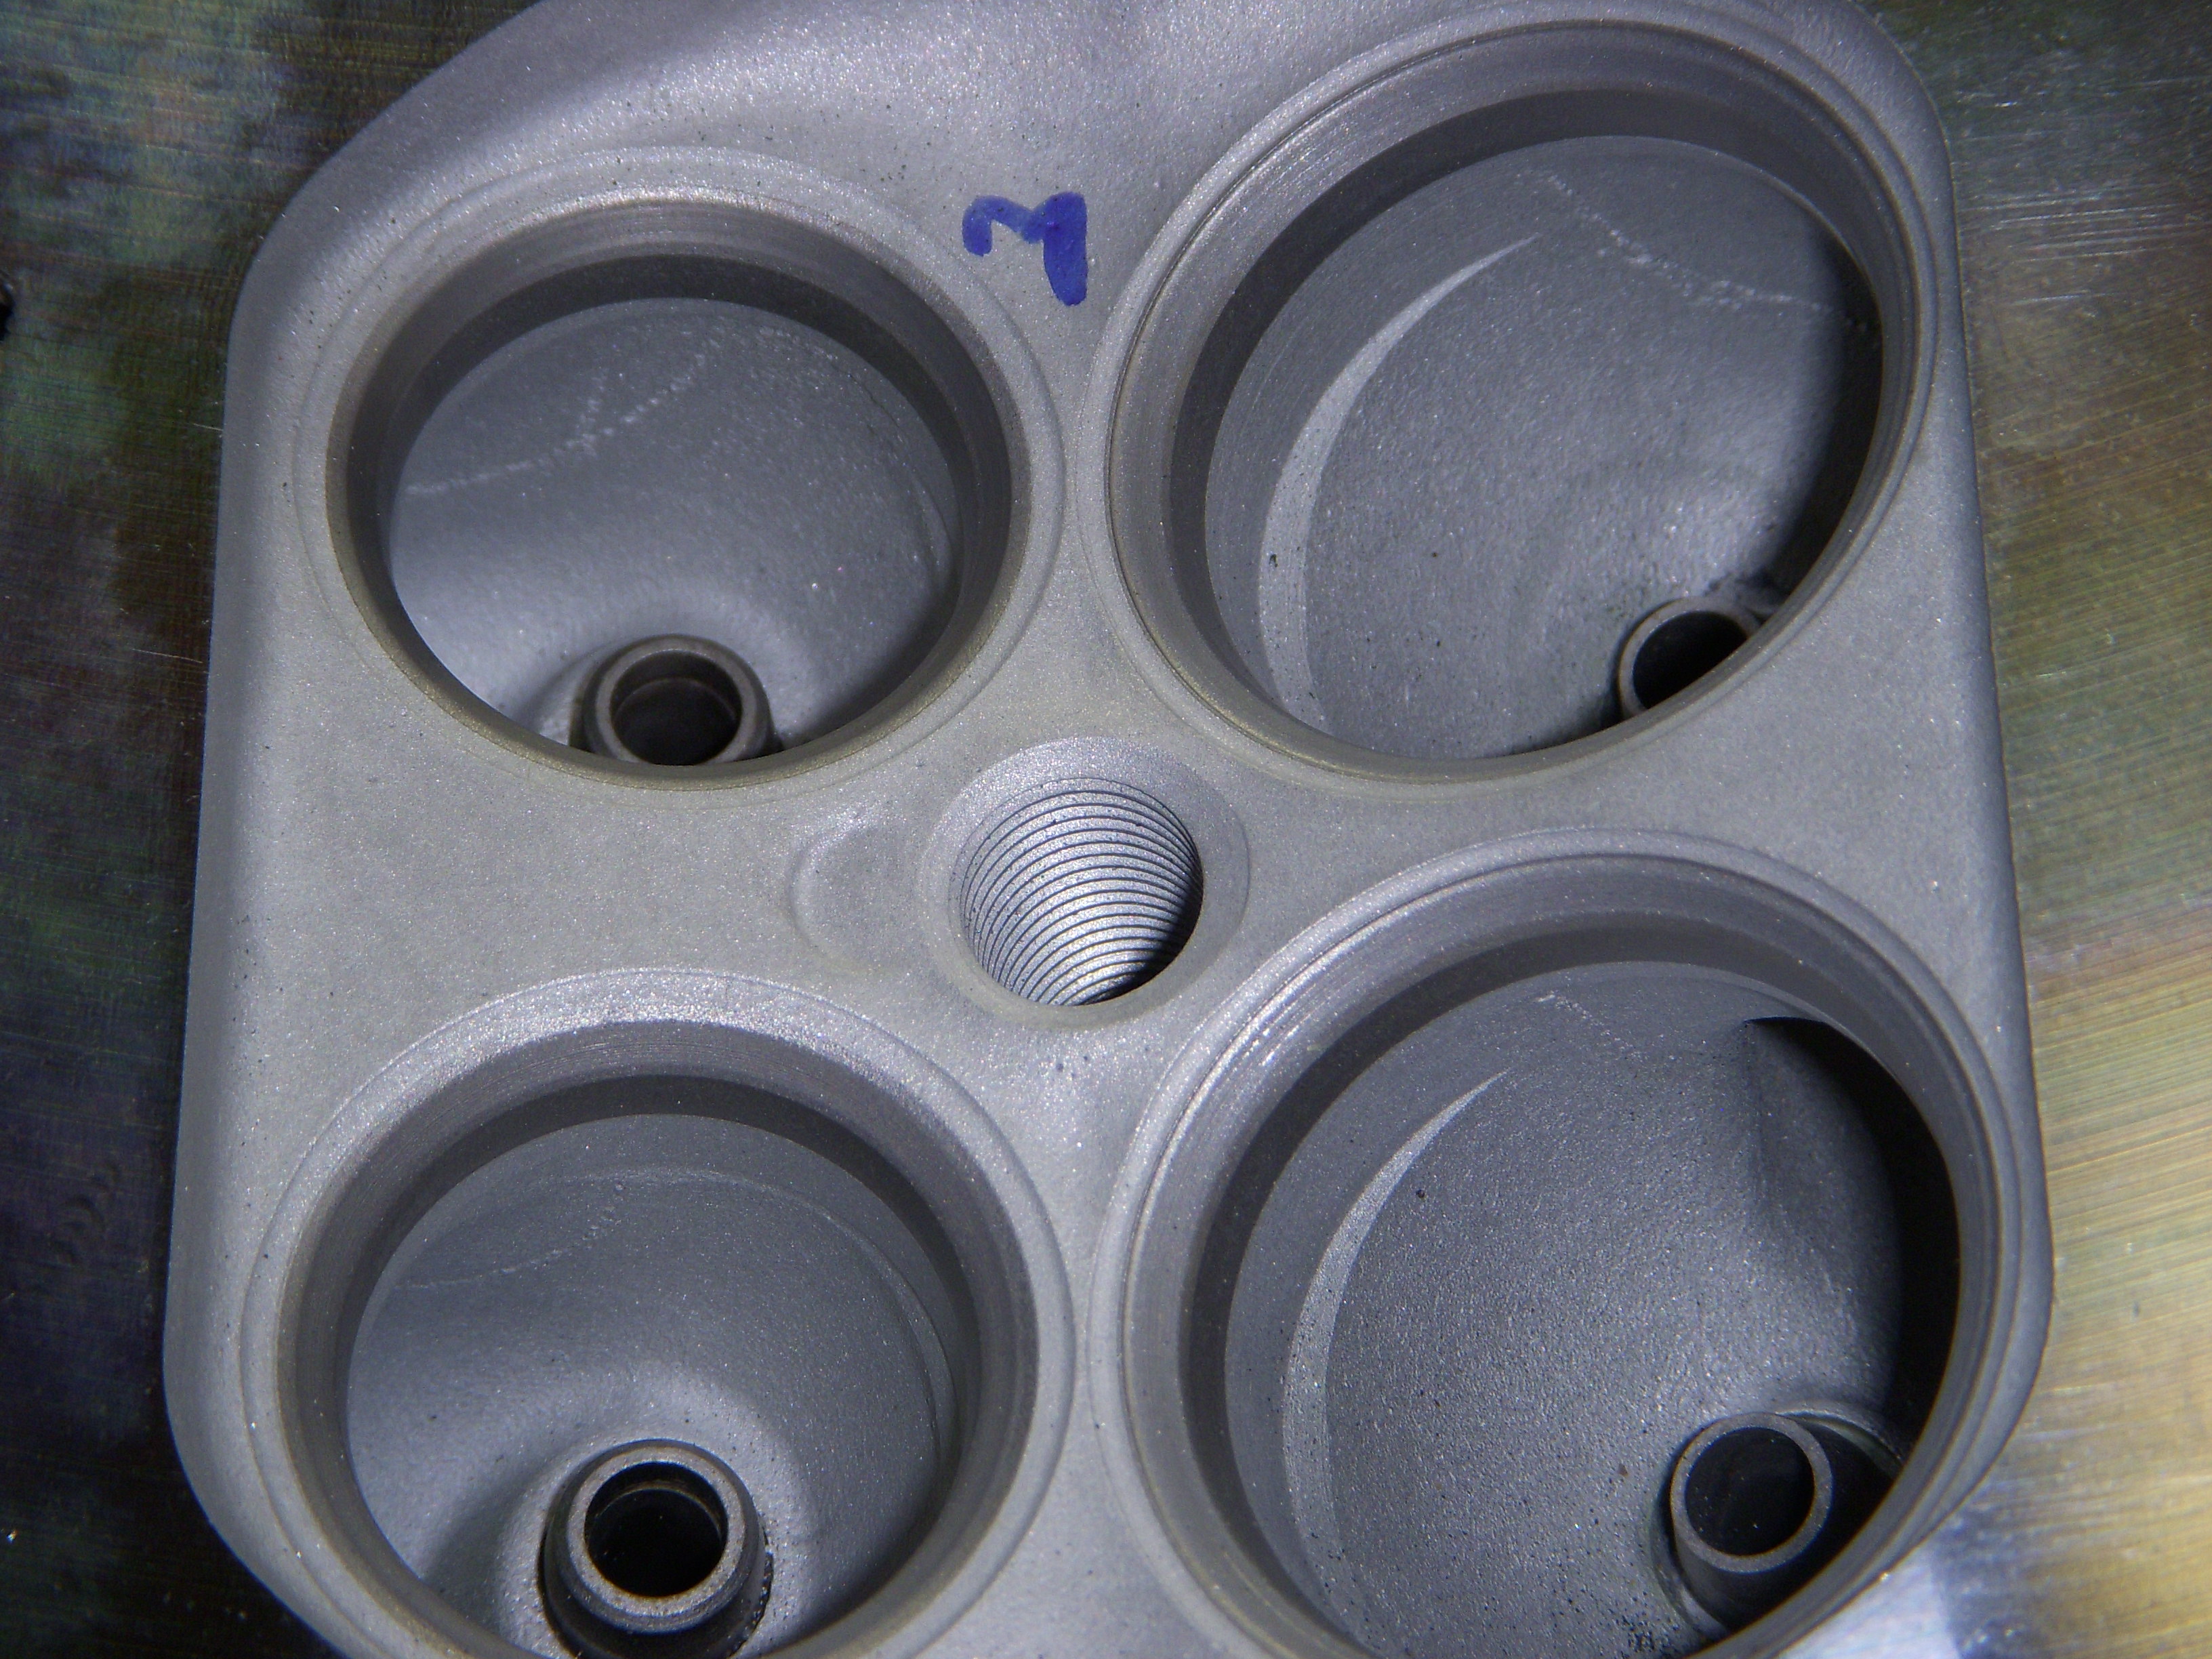
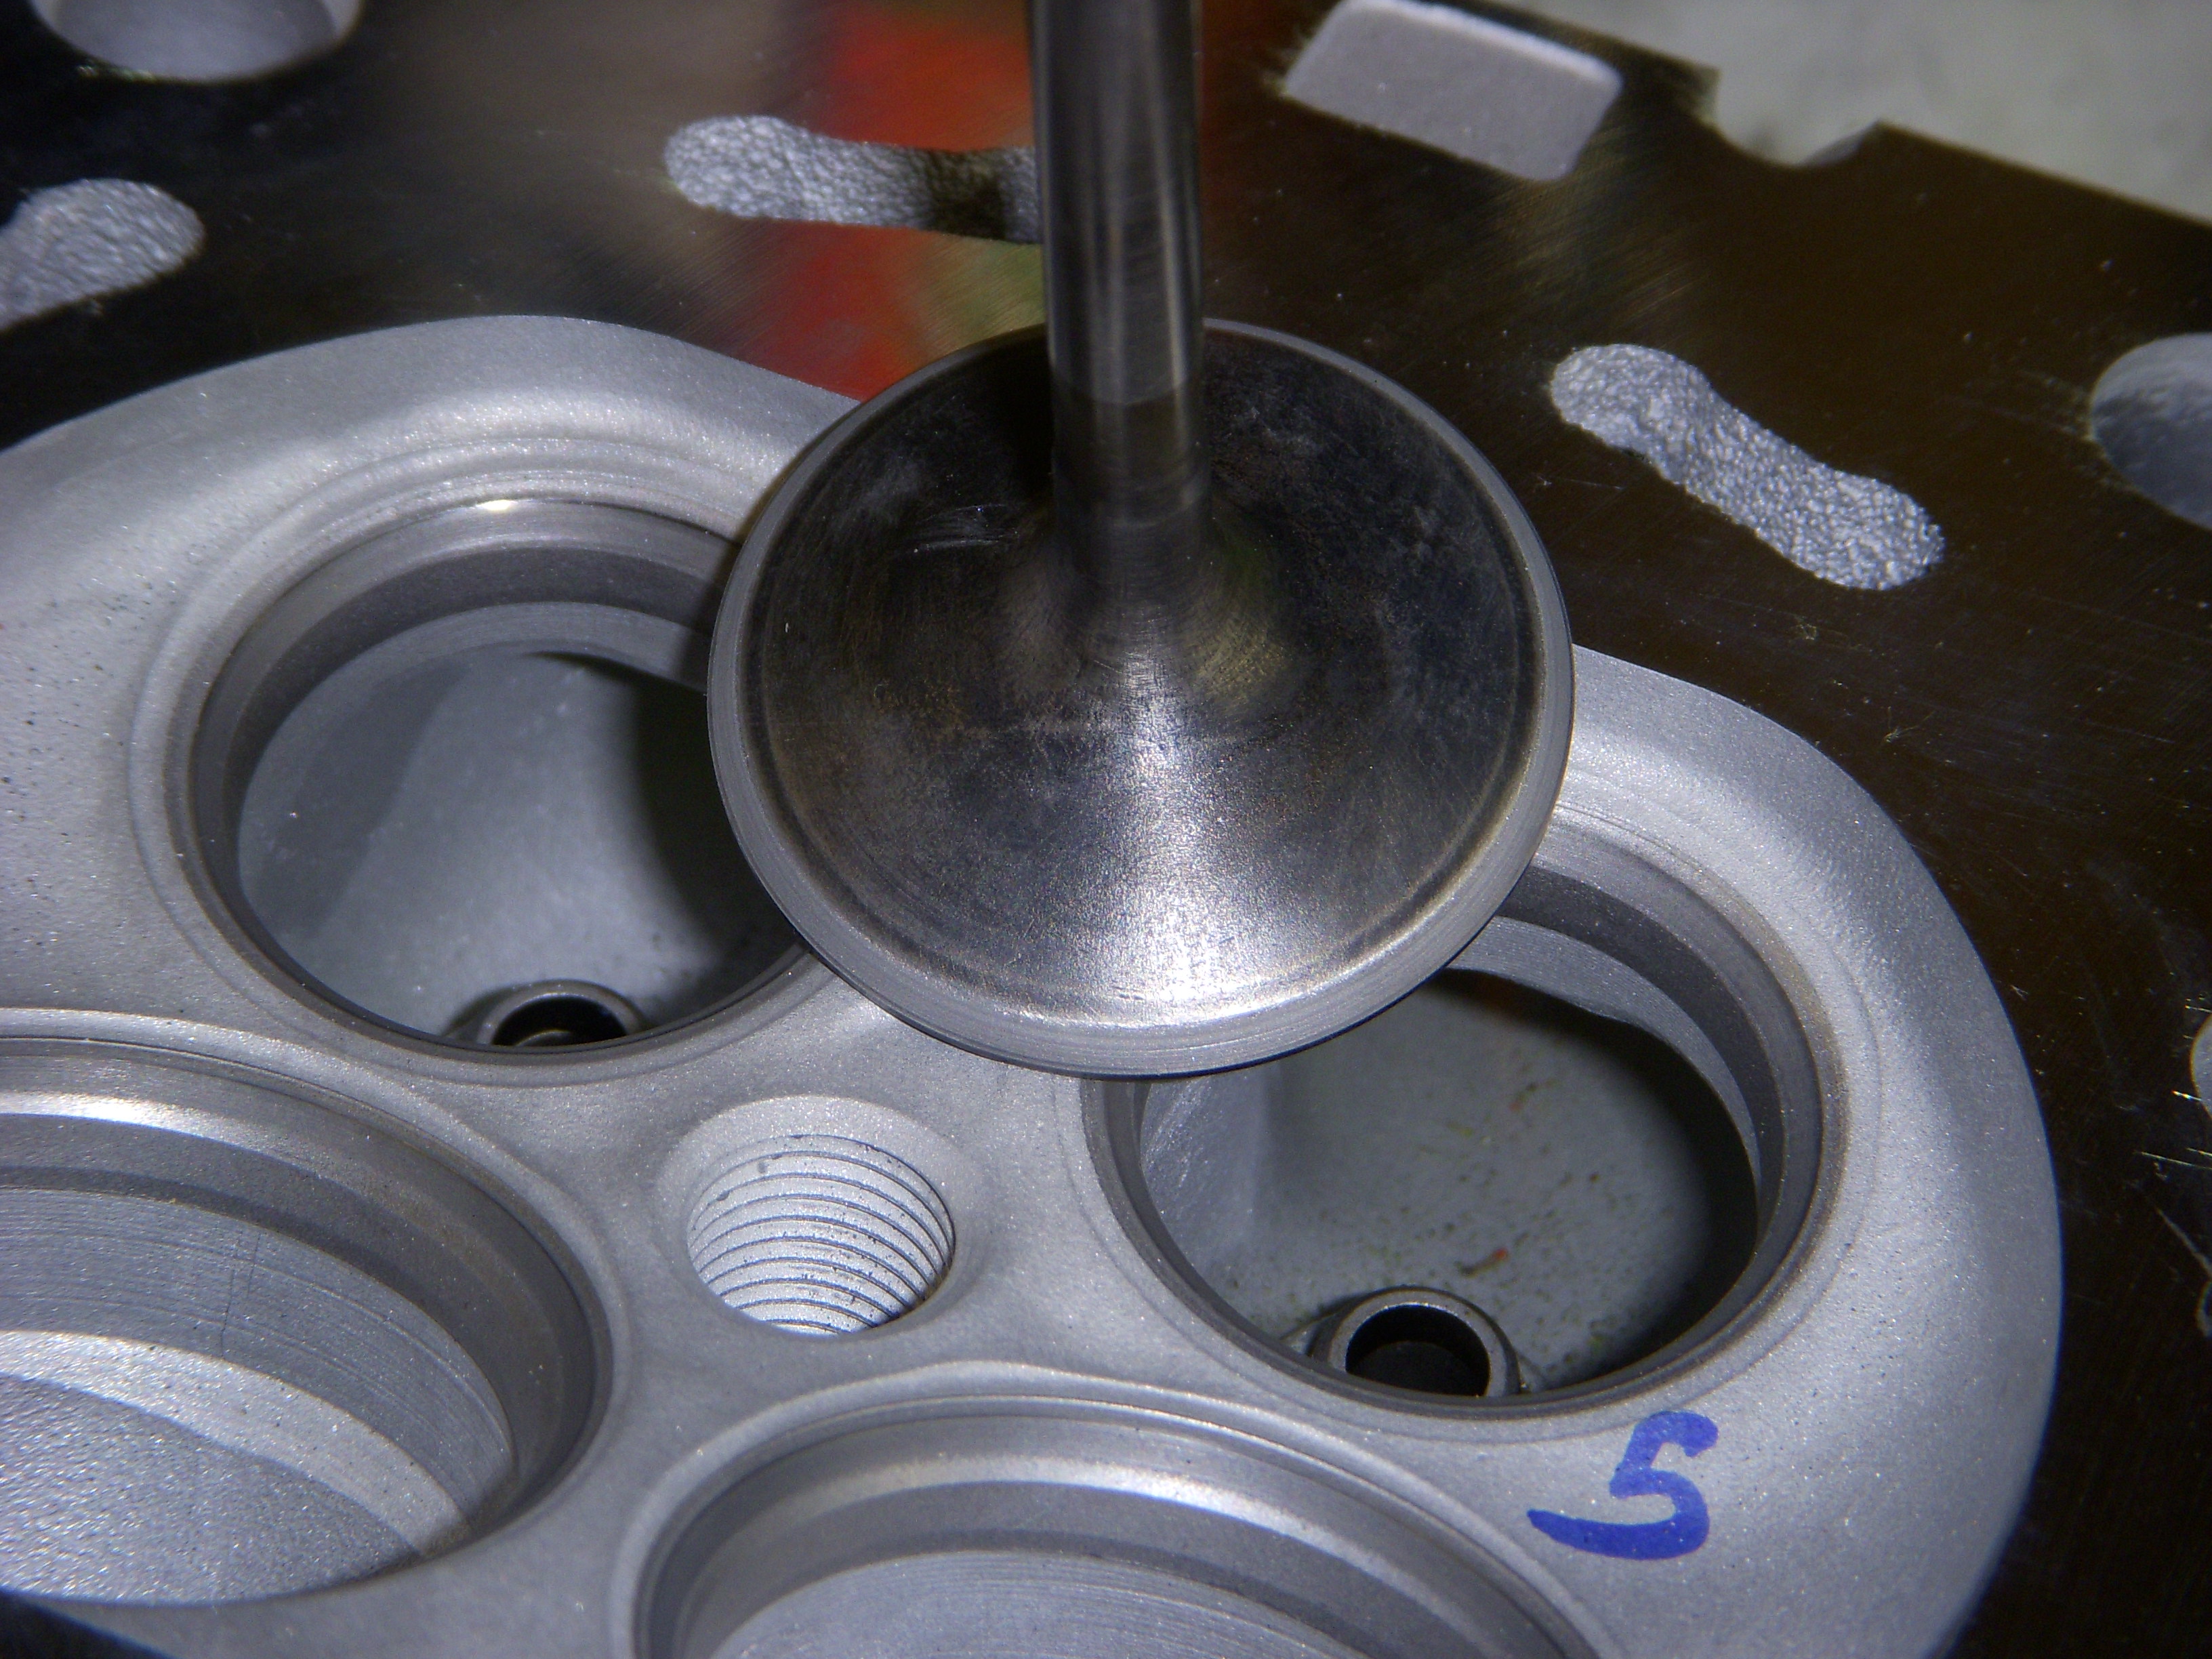
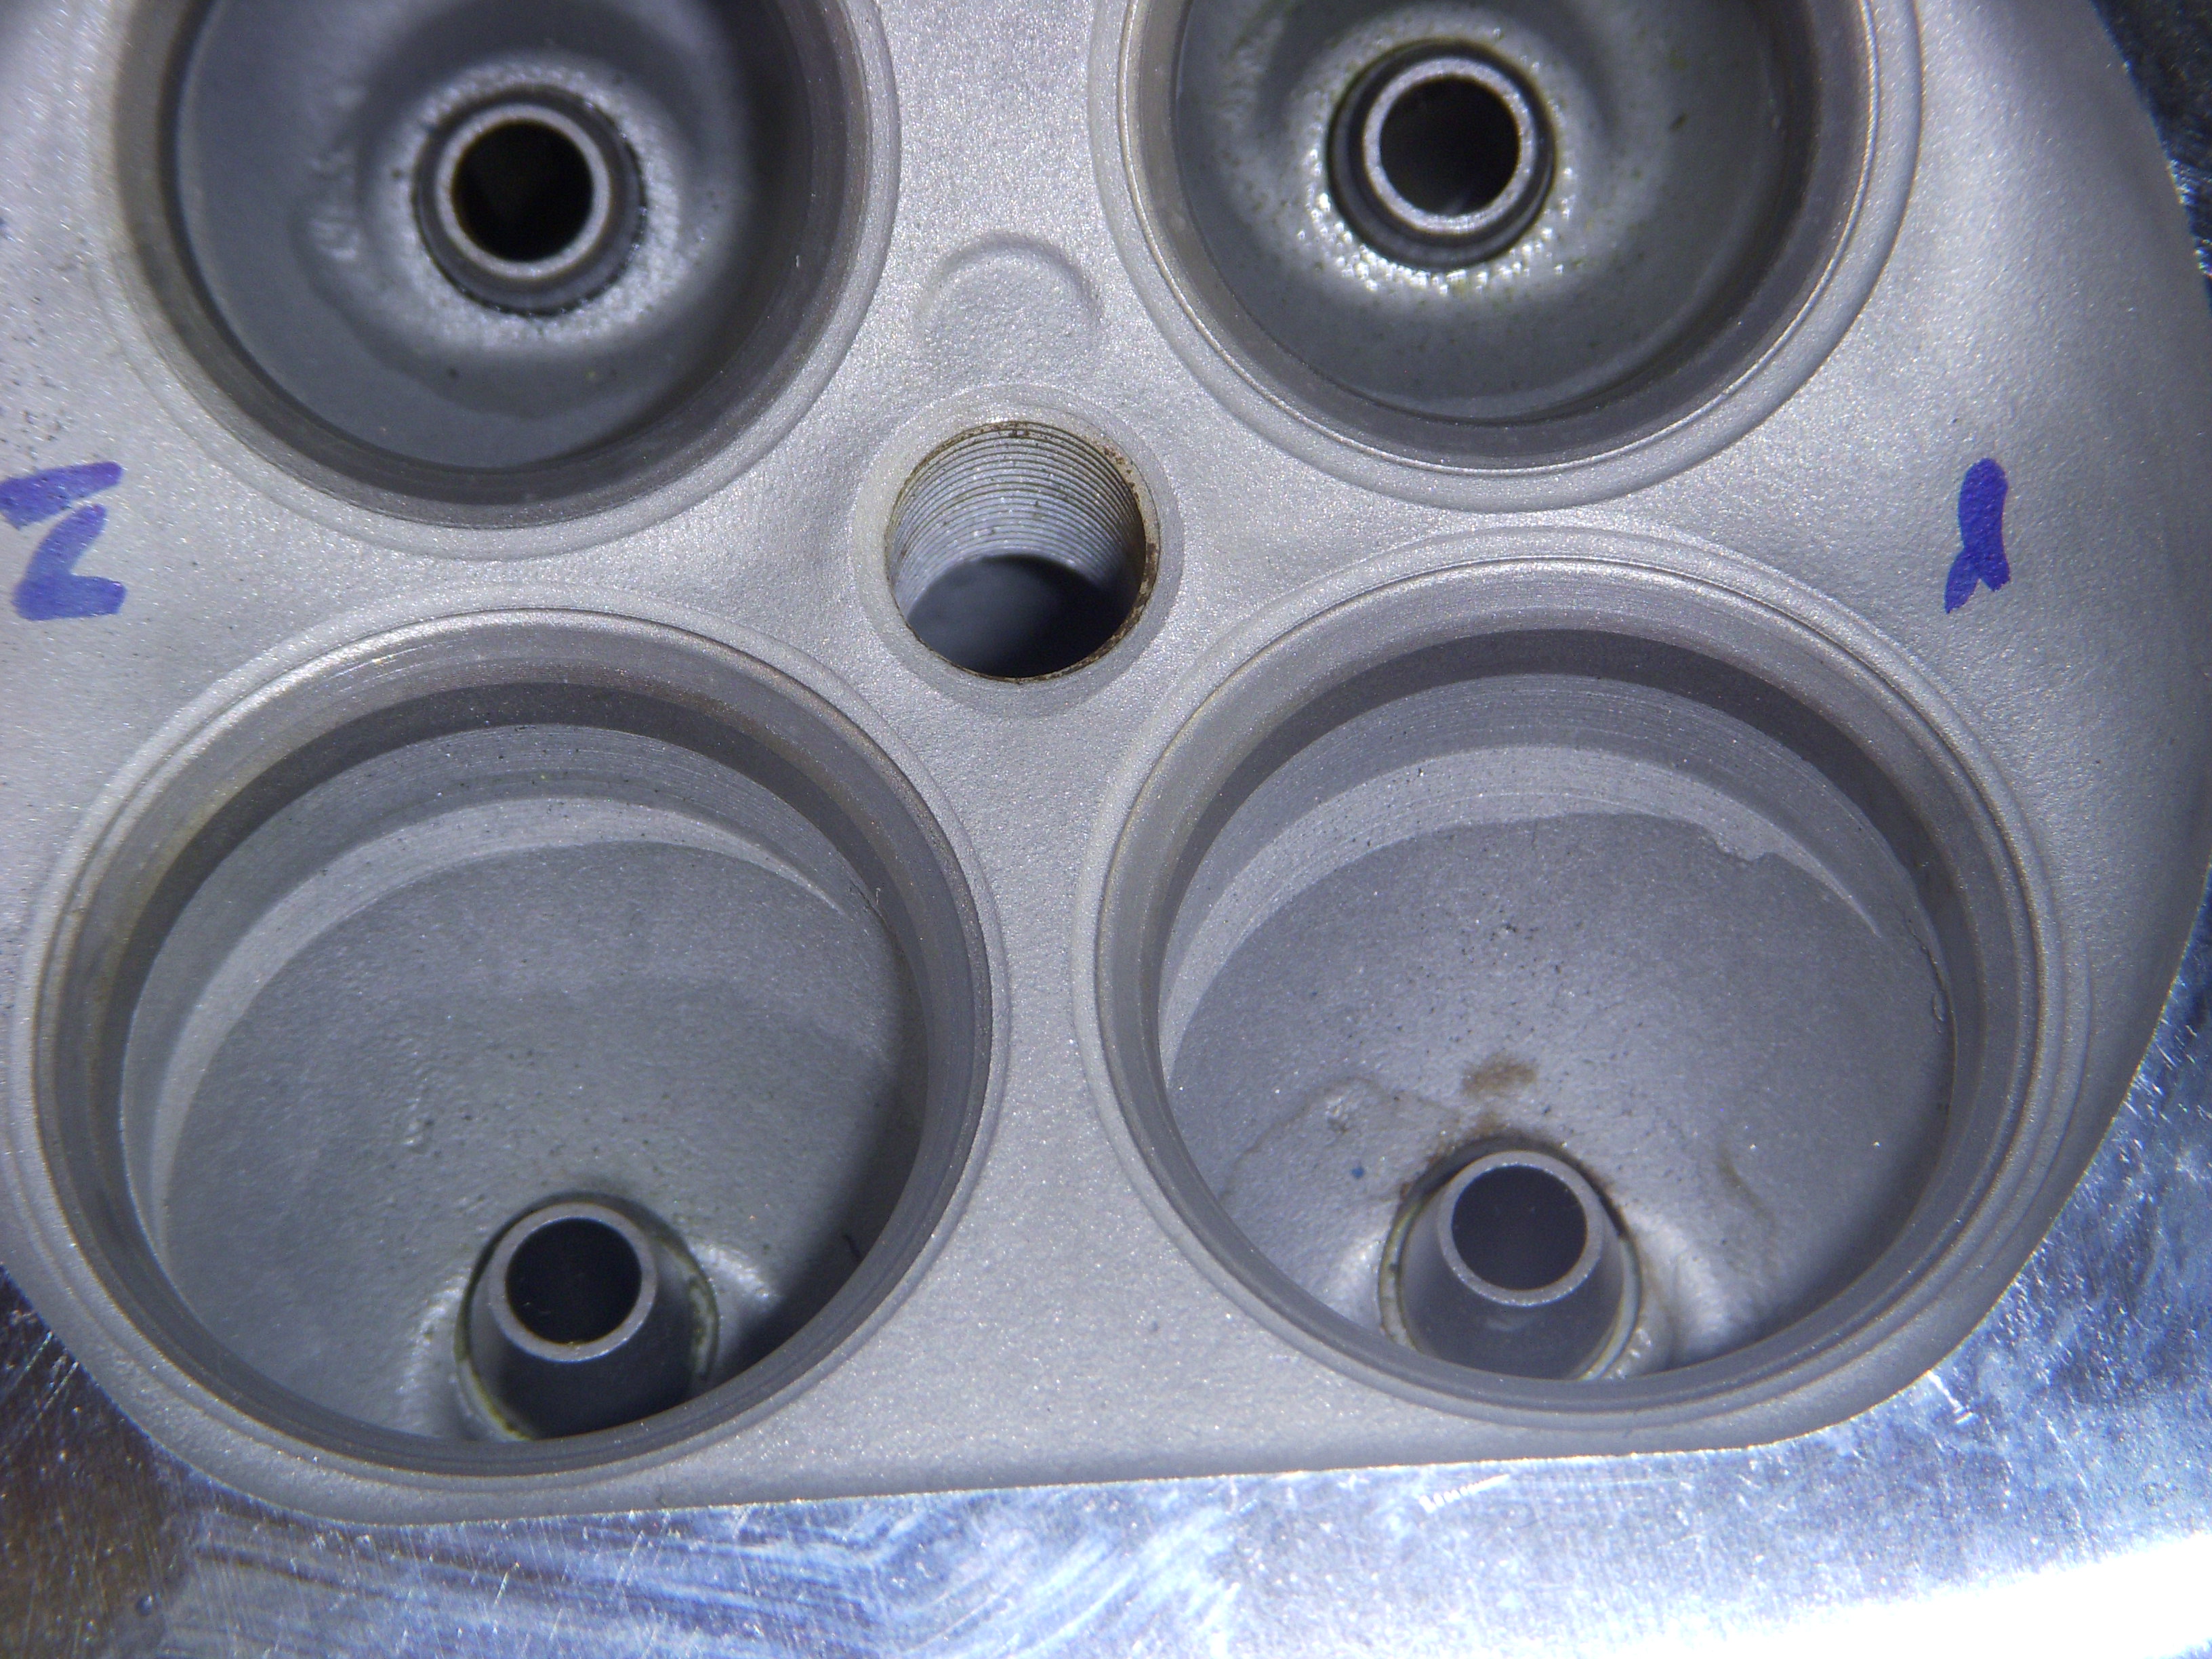
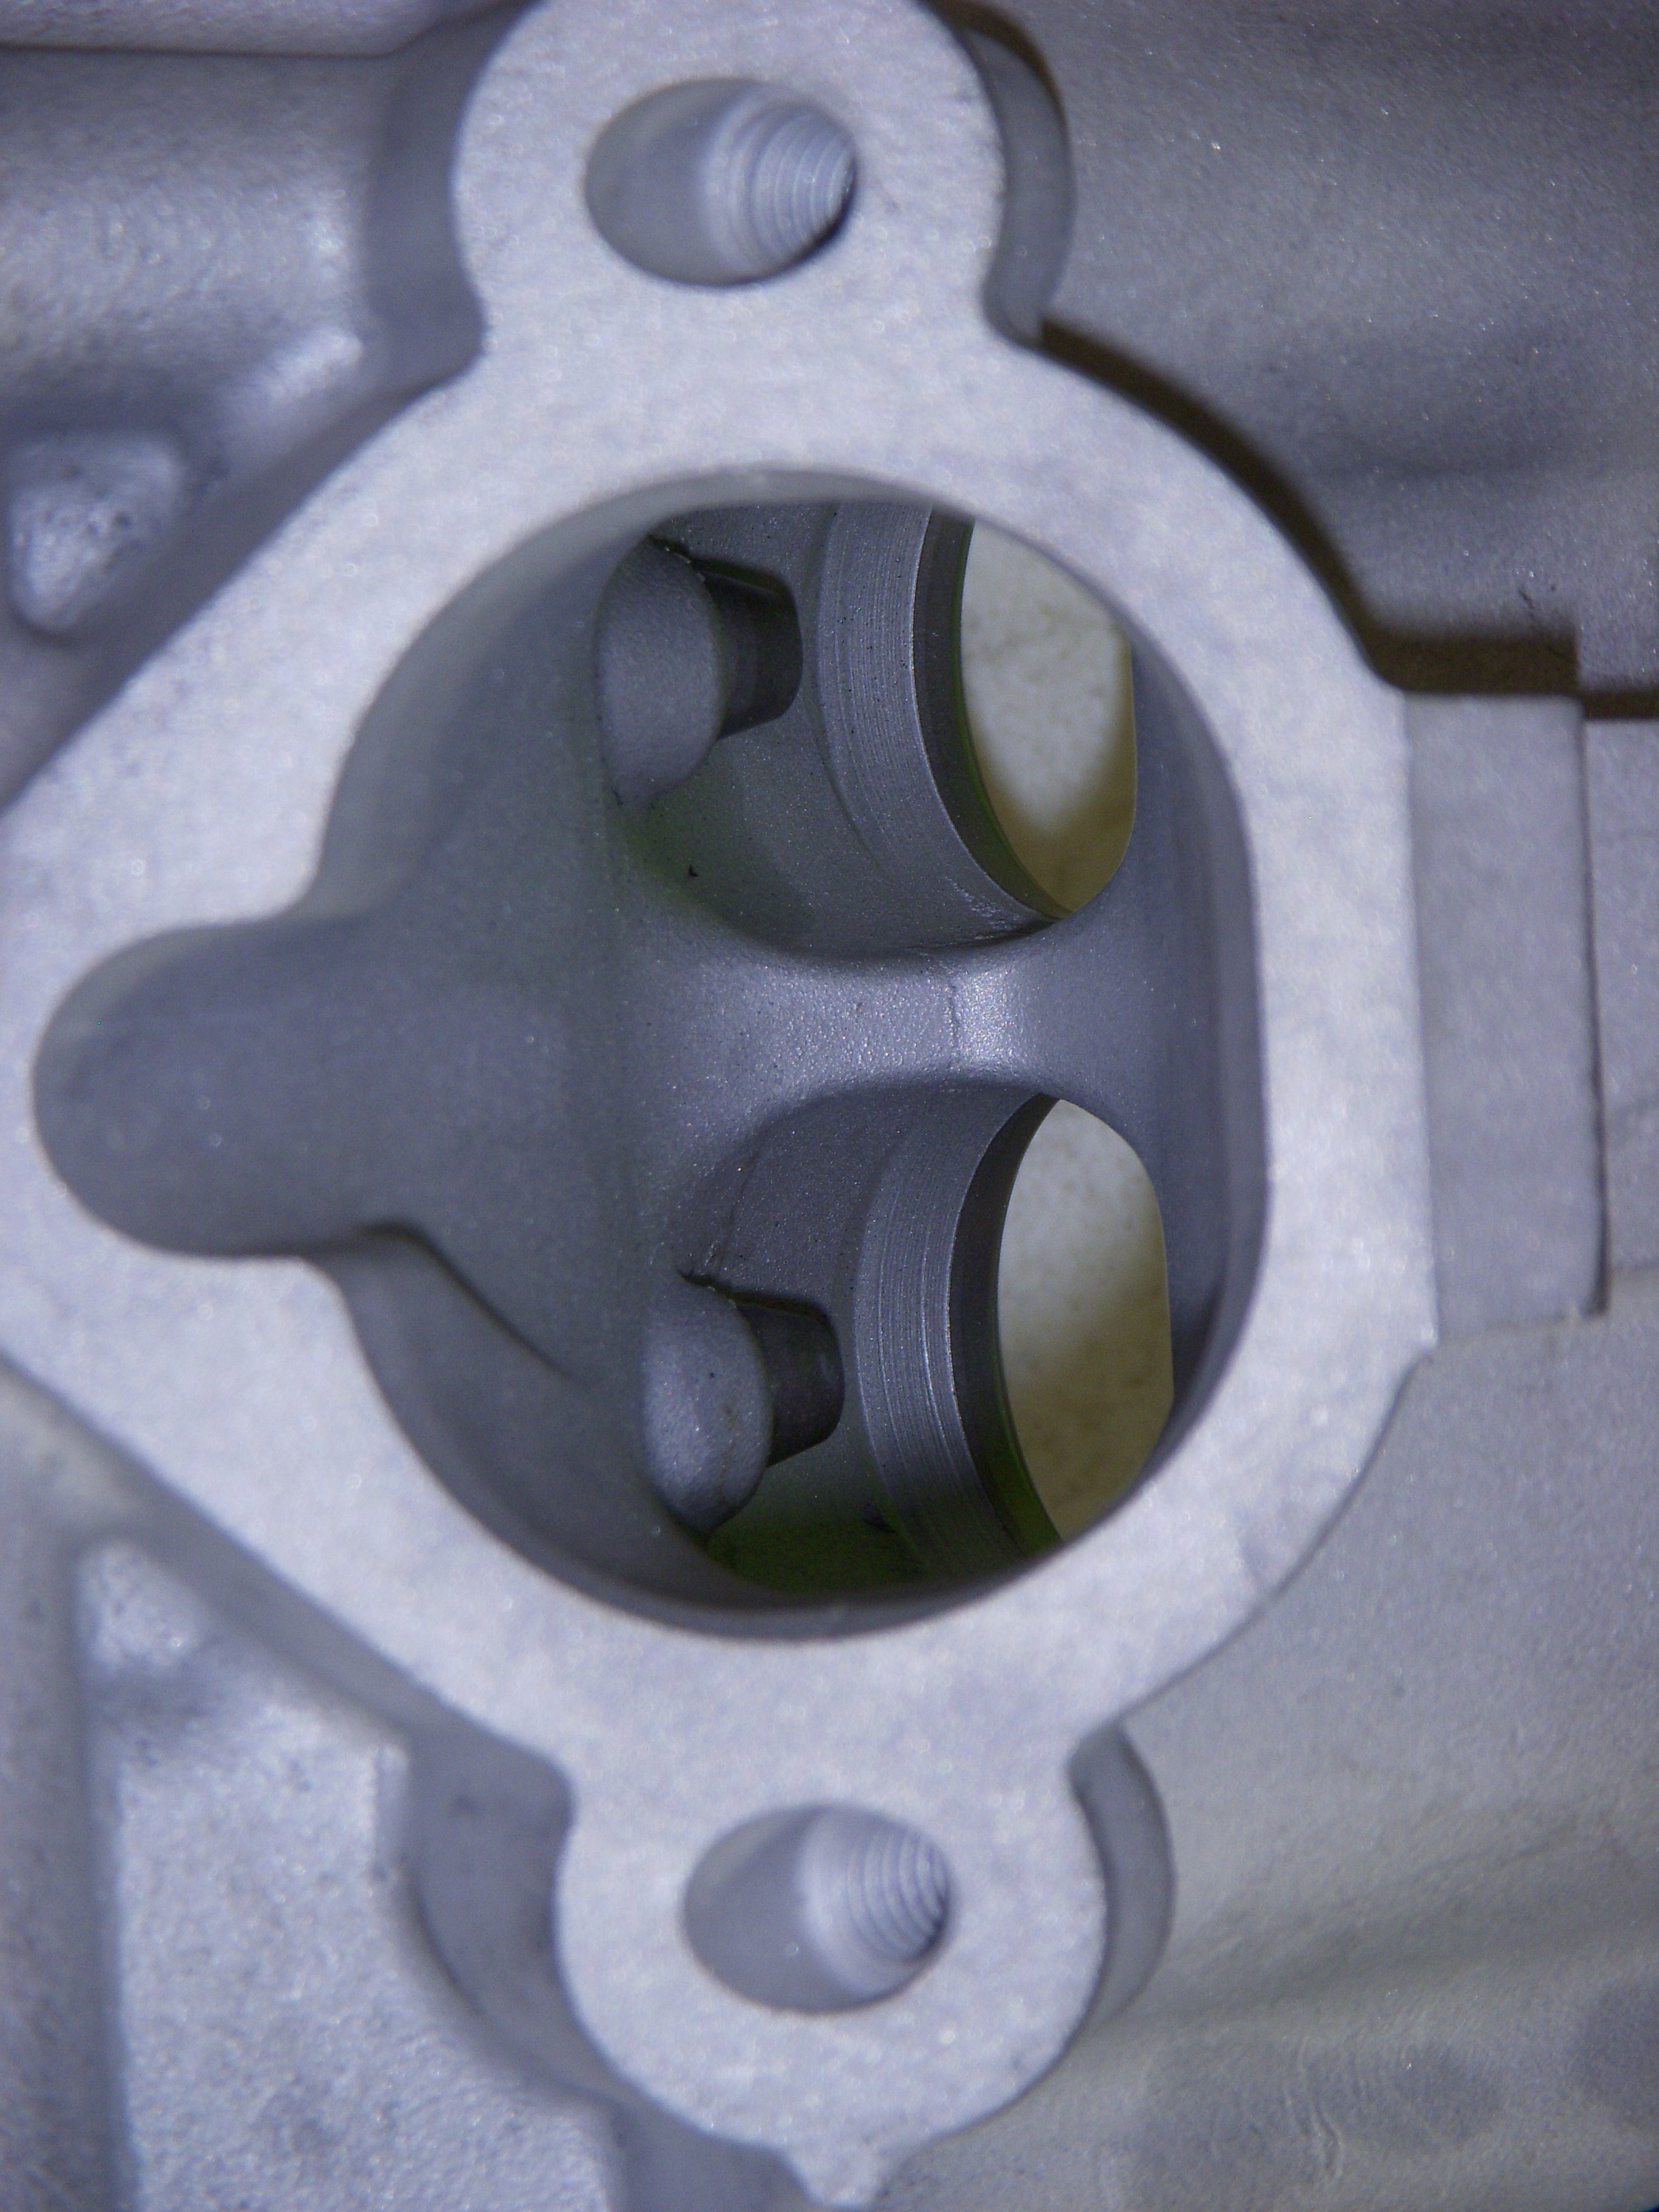
Party Pix: lots of lapping... 30*, 45*, 60* angles, but the 45* seat is the important one.
<a href="http://s48.photobucket.com/user/hwb123/media/01_JAN_2016/DSCN4072_zpsbwgqykda.jpg.html" target="_blank"><img src="http://i48.photobucket.com/albums/f216/hwb123/01_JAN_2016/DSCN4072_zpsbwgqykda.jpg" border="0" alt=" photo DSCN4072_zpsbwgqykda.jpg"/></a>
EXHAUST:
<a href="http://s48.photobucket.com/user/hwb123/media/01_JAN_2016/DSCN4073_zps9u2yffxb.jpg.html" target="_blank"><img src="http://i48.photobucket.com/albums/f216/hwb123/01_JAN_2016/DSCN4073_zps9u2yffxb.jpg" border="0" alt=" photo DSCN4073_zps9u2yffxb.jpg"/></a>
INTAKE:
<a href="http://s48.photobucket.com/user/hwb123/media/01_JAN_2016/DSCN4074_zpsm906iwlz.jpg.html" target="_blank"><img src="http://i48.photobucket.com/albums/f216/hwb123/01_JAN_2016/DSCN4074_zpsm906iwlz.jpg" border="0" alt=" photo DSCN4074_zpsm906iwlz.jpg"/></a>
<a href="http://s48.photobucket.com/user/hwb123/media/01_JAN_2016/DSCN4078_zps3uyslsl5.jpg.html" target="_blank"><img src="http://i48.photobucket.com/albums/f216/hwb123/01_JAN_2016/DSCN4078_zps3uyslsl5.jpg" border="0" alt=" photo DSCN4078_zps3uyslsl5.jpg"/></a>
<a href="http://s48.photobucket.com/user/hwb123/media/01_JAN_2016/DSCN4079_zpsw71fgdpa.jpg.html" target="_blank"><img src="http://i48.photobucket.com/albums/f216/hwb123/01_JAN_2016/DSCN4079_zpsw71fgdpa.jpg" border="0" alt=" photo DSCN4079_zpsw71fgdpa.jpg"/></a>
<a href="http://s48.photobucket.com/user/hwb123/media/01_JAN_2016/DSCN4080_zps9v5cupin.jpg.html" target="_blank"><img src="http://i48.photobucket.com/albums/f216/hwb123/01_JAN_2016/DSCN4080_zps9v5cupin.jpg" border="0" alt=" photo DSCN4080_zps9v5cupin.jpg"/></a>
<a href="http://s48.photobucket.com/user/hwb123/media/01_JAN_2016/DSCN4082_zpsf70y3nuu.jpg.html" target="_blank"><img src="http://i48.photobucket.com/albums/f216/hwb123/01_JAN_2016/DSCN4082_zpsf70y3nuu.jpg" border="0" alt=" photo DSCN4082_zpsf70y3nuu.jpg"/></a>
Until next time...
I will install the ARP head studs next, then put the heads on old-style head gaskets, then next is the rear timing cover then all the timing gears and chains and misc parts to connect the heads to the crank. I will rotate the crank in 5-degree increments, using the valve compressor tool to check piston clearance on one cylinder of each head. That's for one intake and one exhaust valve for each head to verify everything for two complete crank revolutions. I'll use my Jegs degree tools to map everything, and also verify exactly where lobe centers are located. I don't expect to find them where they are supposed to be, but I gotta know where they are initially. "Some adjustment may be required".
If everything actually checks out, then I take the heads off and install the JWT springs and re-check total valve travel. If everything passes, that's step one.
Probably left out some stuff, which leaves me more fun...
Party Pix: lots of lapping... 30*, 45*, 60* angles, but the 45* seat is the important one.
<a href="http://s48.photobucket.com/user/hwb123/media/01_JAN_2016/DSCN4072_zpsbwgqykda.jpg.html" target="_blank"><img src="http://i48.photobucket.com/albums/f216/hwb123/01_JAN_2016/DSCN4072_zpsbwgqykda.jpg" border="0" alt=" photo DSCN4072_zpsbwgqykda.jpg"/></a>

EXHAUST:
<a href="http://s48.photobucket.com/user/hwb123/media/01_JAN_2016/DSCN4073_zps9u2yffxb.jpg.html" target="_blank"><img src="http://i48.photobucket.com/albums/f216/hwb123/01_JAN_2016/DSCN4073_zps9u2yffxb.jpg" border="0" alt=" photo DSCN4073_zps9u2yffxb.jpg"/></a>

INTAKE:
<a href="http://s48.photobucket.com/user/hwb123/media/01_JAN_2016/DSCN4074_zpsm906iwlz.jpg.html" target="_blank"><img src="http://i48.photobucket.com/albums/f216/hwb123/01_JAN_2016/DSCN4074_zpsm906iwlz.jpg" border="0" alt=" photo DSCN4074_zpsm906iwlz.jpg"/></a>

<a href="http://s48.photobucket.com/user/hwb123/media/01_JAN_2016/DSCN4078_zps3uyslsl5.jpg.html" target="_blank"><img src="http://i48.photobucket.com/albums/f216/hwb123/01_JAN_2016/DSCN4078_zps3uyslsl5.jpg" border="0" alt=" photo DSCN4078_zps3uyslsl5.jpg"/></a>

<a href="http://s48.photobucket.com/user/hwb123/media/01_JAN_2016/DSCN4079_zpsw71fgdpa.jpg.html" target="_blank"><img src="http://i48.photobucket.com/albums/f216/hwb123/01_JAN_2016/DSCN4079_zpsw71fgdpa.jpg" border="0" alt=" photo DSCN4079_zpsw71fgdpa.jpg"/></a>

<a href="http://s48.photobucket.com/user/hwb123/media/01_JAN_2016/DSCN4080_zps9v5cupin.jpg.html" target="_blank"><img src="http://i48.photobucket.com/albums/f216/hwb123/01_JAN_2016/DSCN4080_zps9v5cupin.jpg" border="0" alt=" photo DSCN4080_zps9v5cupin.jpg"/></a>

<a href="http://s48.photobucket.com/user/hwb123/media/01_JAN_2016/DSCN4082_zpsf70y3nuu.jpg.html" target="_blank"><img src="http://i48.photobucket.com/albums/f216/hwb123/01_JAN_2016/DSCN4082_zpsf70y3nuu.jpg" border="0" alt=" photo DSCN4082_zpsf70y3nuu.jpg"/></a>

Until next time...
Last edited by grey99max; Jan 15, 2017 at 11:53 AM.
I've started on prepping the first HR head for a complete rework of the valves and seats, custom valve seals, the special lightweight springs and spacers, grinding each DLC valve lifter to match each of the JWT cam lobes when cams are mounted, then once everything checks out, I will install the selected HR valve springs and matched spacers then check each valve for compression travel to the JWT specs. Different specs for intake and exhaust valves, of course. Then the JWT springs come back out and the lightweight springs go back in. Repeat for other head. I will install the ARP head studs next, then put the heads on old-style head gaskets, then next is the rear timing cover then all the timing gears and chains and misc parts to connect the heads to the crank. I will rotate the crank in 5-degree increments, using the valve compressor tool to check piston clearance on one cylinder of each head. That's for one intake and one exhaust valve for each head to verify everything for two complete crank revolutions. I'll use my Jegs degree tools to map everything, and also verify exactly where lobe centers are located. I don't expect to find them where they are supposed to be, but I gotta know where they are initially. "Some adjustment may be required". If everything actually checks out, then I take the heads off and install the JWT springs and re-check total valve travel. If everything passes, that's step one. Probably let out some stuff, which leaves me more fun... Party Pix: lots of lapping... 30*, 45*, 60* angles, but the 45* seat is the important one. <a href="http://s48.photobucket.com/user/hwb123/media/01_JAN_2016/DSCN4072_zpsbwgqykda.jpg.html" target="_blank"><img src="http://i48.photobucket.com/albums/f216/hwb123/01_JAN_2016/DSCN4072_zpsbwgqykda.jpg" border="0" alt=" photo DSCN4072_zpsbwgqykda.jpg"/></a> EXHAUST: <a href="http://s48.photobucket.com/user/hwb123/media/01_JAN_2016/DSCN4073_zps9u2yffxb.jpg.html" target="_blank"><img src="http://i48.photobucket.com/albums/f216/hwb123/01_JAN_2016/DSCN4073_zps9u2yffxb.jpg" border="0" alt=" photo DSCN4073_zps9u2yffxb.jpg"/></a> INTAKE: <a href="http://s48.photobucket.com/user/hwb123/media/01_JAN_2016/DSCN4074_zpsm906iwlz.jpg.html" target="_blank"><img src="http://i48.photobucket.com/albums/f216/hwb123/01_JAN_2016/DSCN4074_zpsm906iwlz.jpg" border="0" alt=" photo DSCN4074_zpsm906iwlz.jpg"/></a> <a href="http://s48.photobucket.com/user/hwb123/media/01_JAN_2016/DSCN4078_zps3uyslsl5.jpg.html" target="_blank"><img src="http://i48.photobucket.com/albums/f216/hwb123/01_JAN_2016/DSCN4078_zps3uyslsl5.jpg" border="0" alt=" photo DSCN4078_zps3uyslsl5.jpg"/></a> <a href="http://s48.photobucket.com/user/hwb123/media/01_JAN_2016/DSCN4079_zpsw71fgdpa.jpg.html" target="_blank"><img src="http://i48.photobucket.com/albums/f216/hwb123/01_JAN_2016/DSCN4079_zpsw71fgdpa.jpg" border="0" alt=" photo DSCN4079_zpsw71fgdpa.jpg"/></a> <a href="http://s48.photobucket.com/user/hwb123/media/01_JAN_2016/DSCN4080_zps9v5cupin.jpg.html" target="_blank"><img src="http://i48.photobucket.com/albums/f216/hwb123/01_JAN_2016/DSCN4080_zps9v5cupin.jpg" border="0" alt=" photo DSCN4080_zps9v5cupin.jpg"/></a> <a href="http://s48.photobucket.com/user/hwb123/media/01_JAN_2016/DSCN4082_zpsf70y3nuu.jpg.html" target="_blank"><img src="http://i48.photobucket.com/albums/f216/hwb123/01_JAN_2016/DSCN4082_zpsf70y3nuu.jpg" border="0" alt=" photo DSCN4082_zpsf70y3nuu.jpg"/></a> <a href="http://s48.photobucket.com/user/hwb123/media/01_JAN_2016/DSCN4072_zpsbwgqykda.jpg.html" target="_blank"><img src="http://i48.photobucket.com/albums/f216/hwb123/01_JAN_2016/DSCN4072_zpsbwgqykda.jpg" border="0" alt=" photo DSCN4072_zpsbwgqykda.jpg"/></a> Until next time...
grind them valves
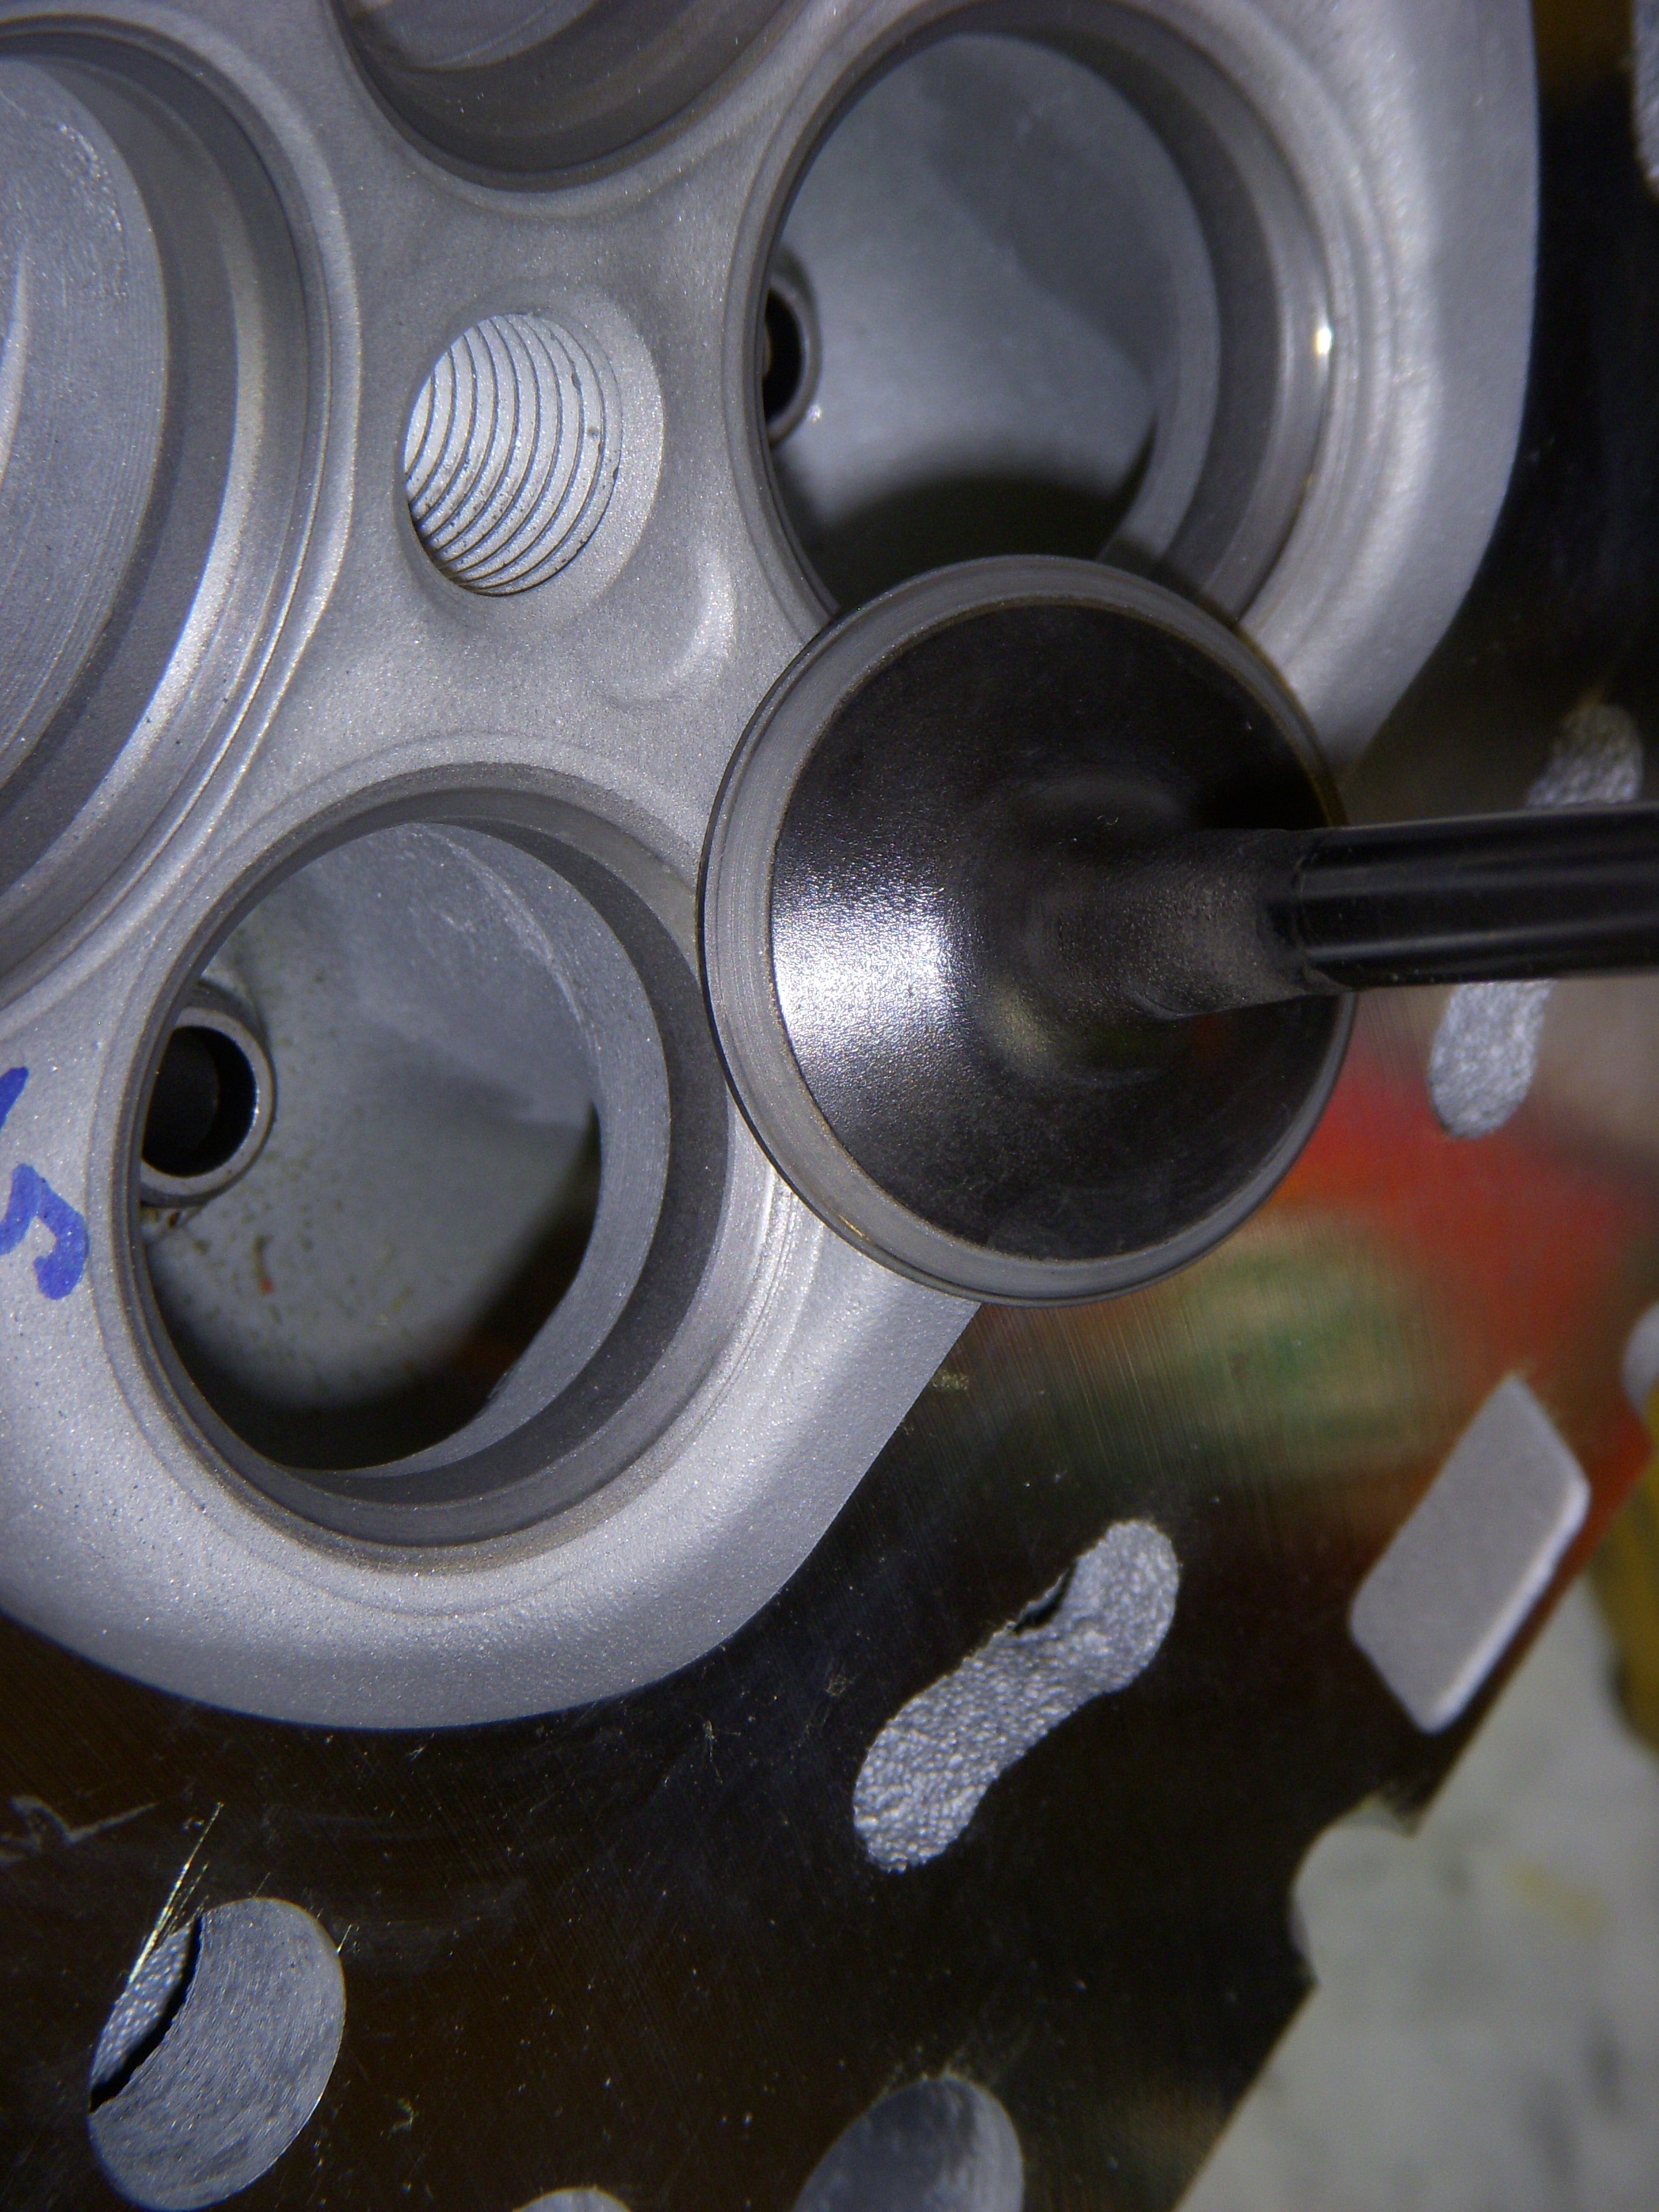
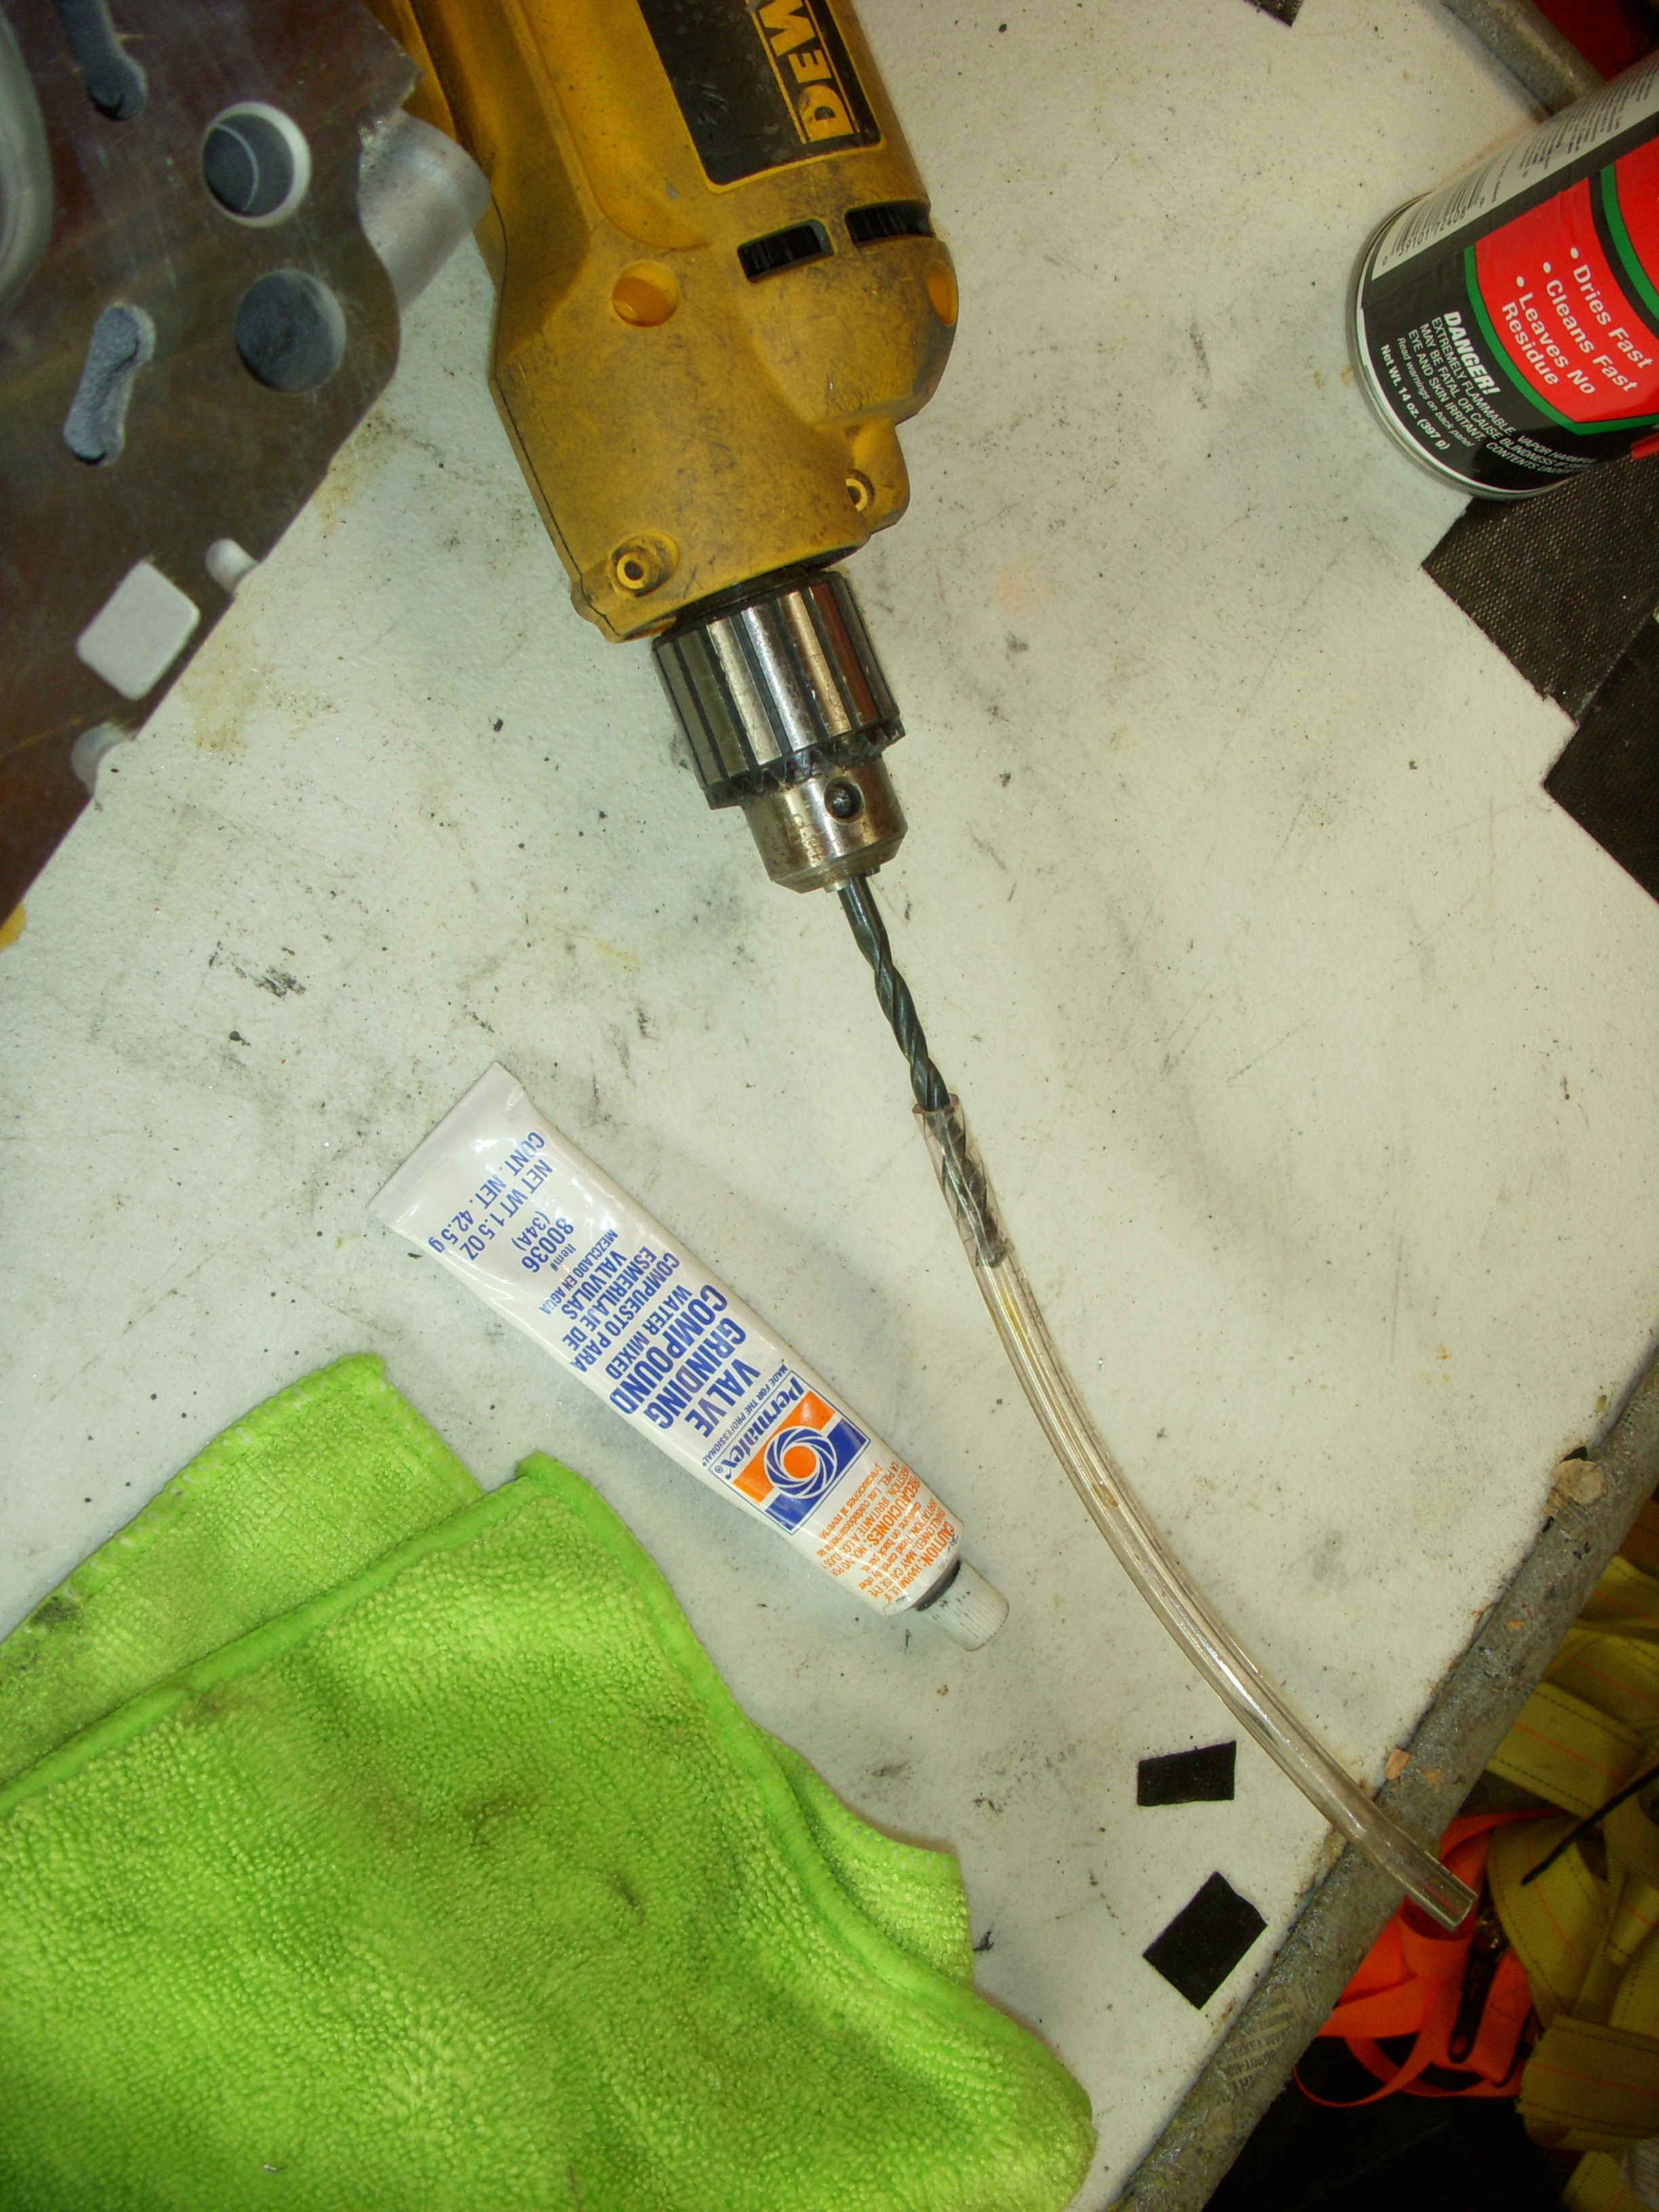
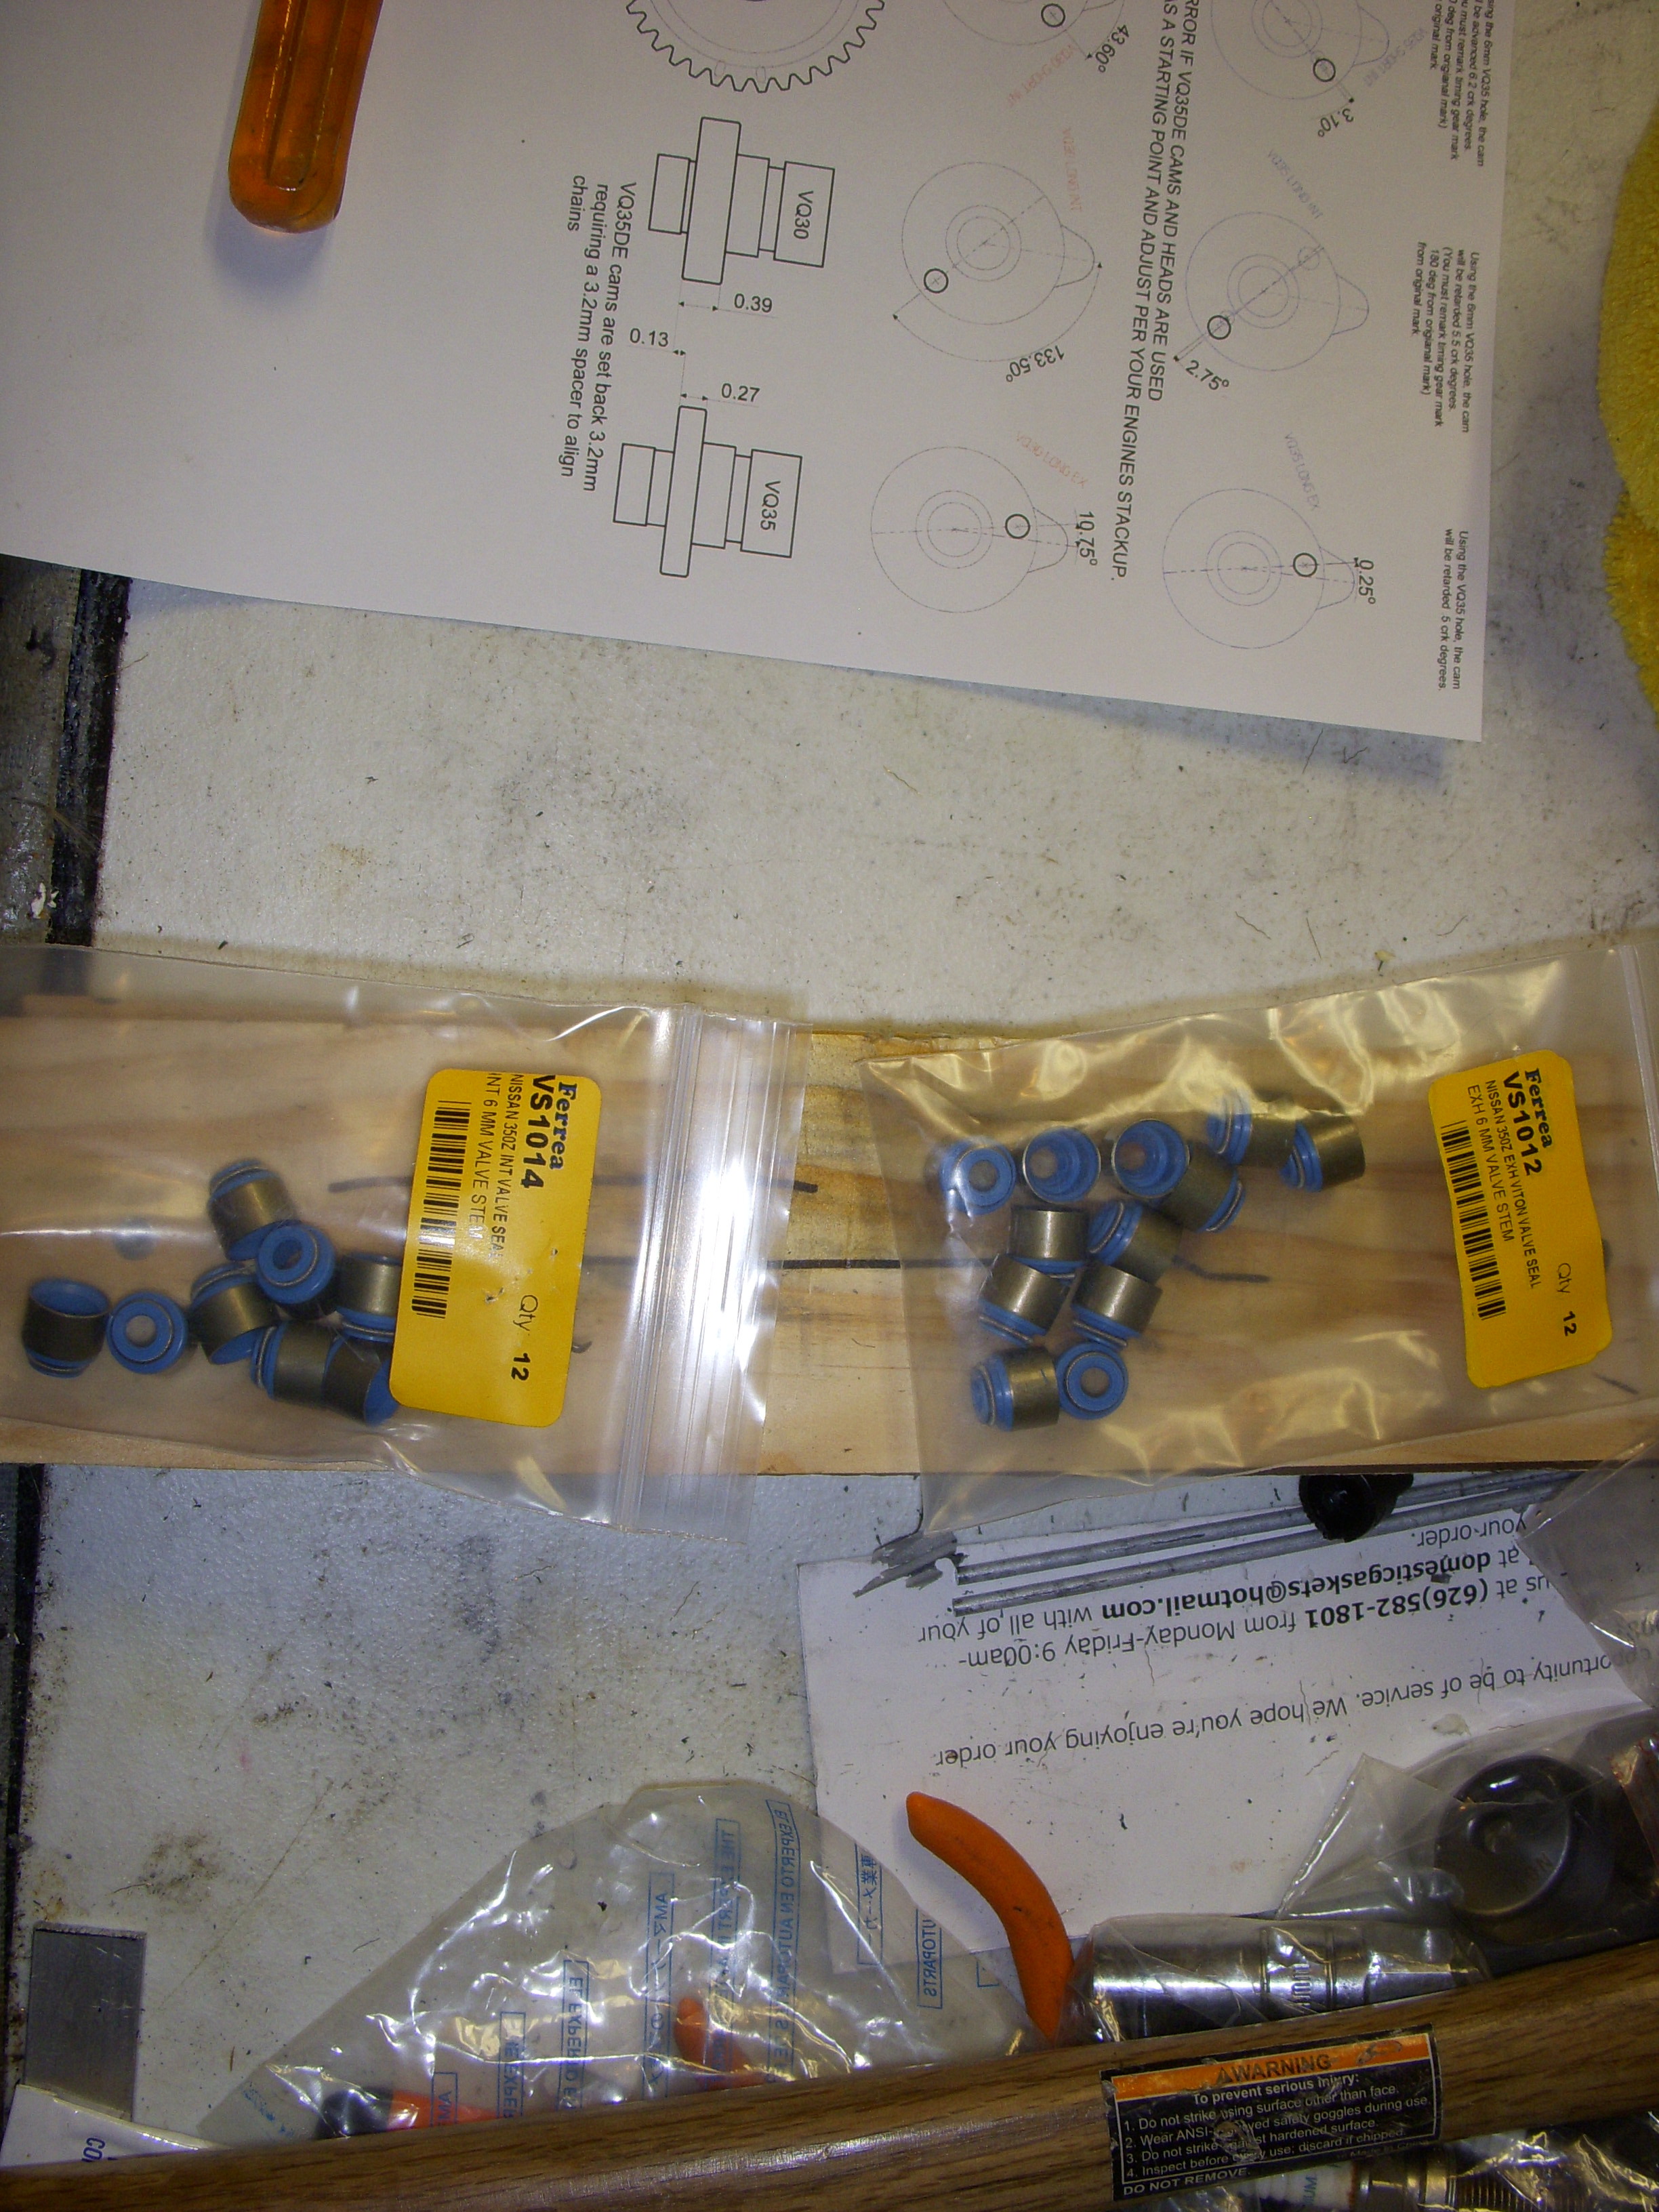
YouTube has lots of good ideas - like that one. For our valves, I use a piece of hardware store 3/16" PVC tubing and whatever drill bit that worked. Since the valves have a 6mm stem with 5.5mm head for the valve keepers, I just use a pair of pliers to push on the tubing once a valve is pushed in its guide - properly oiled, of course. Dab on some compound (auto parts store) on the valve and seat to start, spin up slowly and move the valve in and out a bit, repeat for a while, reverse the drill and repeat. May need to dab on a bit more compound, then repeat everything again. A few minutes of this for each valve and you can do a 12-valve head in half an hour. This worked so well that I had to share. Oh, and be sure to keep any compound off valve stems and guides.
Sure beats a wooden stick and vacuum cups...
Sure beats a wooden stick and vacuum cups...
Last edited by grey99max; Jan 9, 2016 at 08:21 AM.

Hey Mr Harold. I have a stupid question but I'm going to ask anyway.
Do you use facebook?
Not because I'm interested in what you ate for dinner, but this thread is the definitive guide to all things nitrous. There is a new page up that has gathered as many of the orignal max people and their respecitve knowledge bases... Electrical guru's, exhaust ninjas, turbo, na, professional machine shop guys... You get the point. I can't think of anyone in the community with the wealth of knowledge that you possess when it comes to giggle gas. I would like to extend a formal invitation to you to join up. Shoot me a pm if you're interested, otherwise we will keep sending people to the "something I've been thinking about" thread.
May's update on the engine assembly
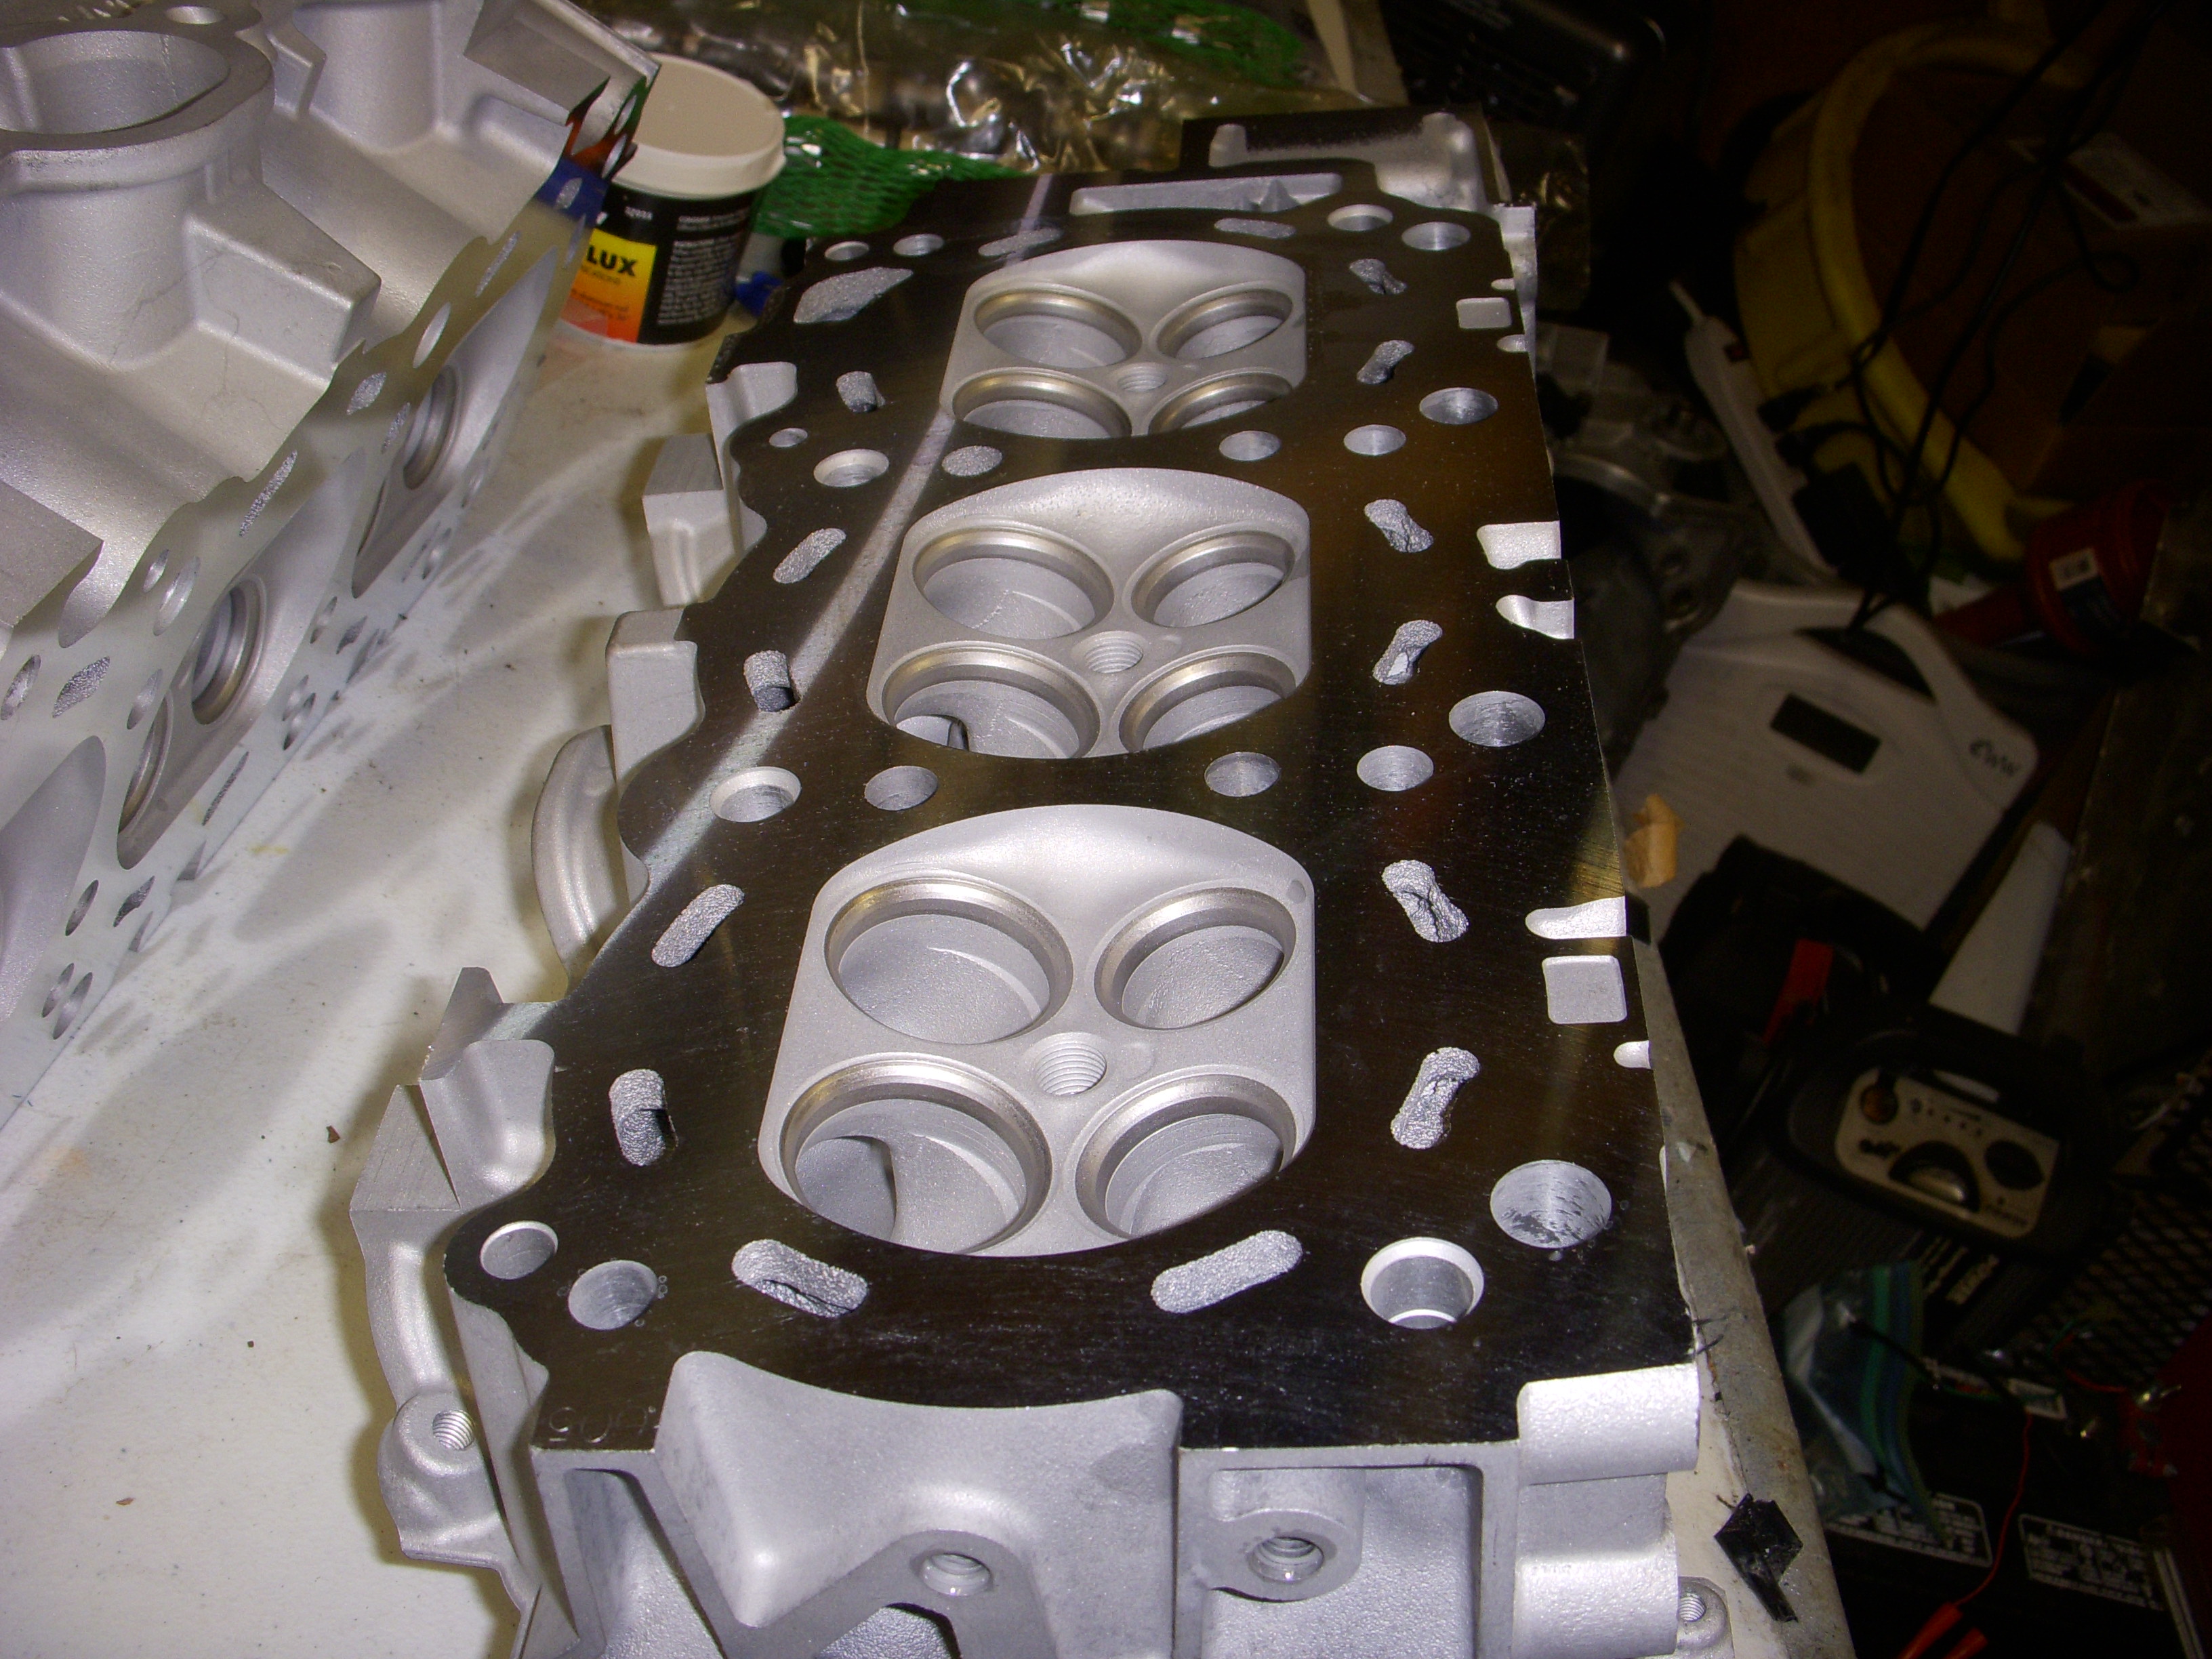
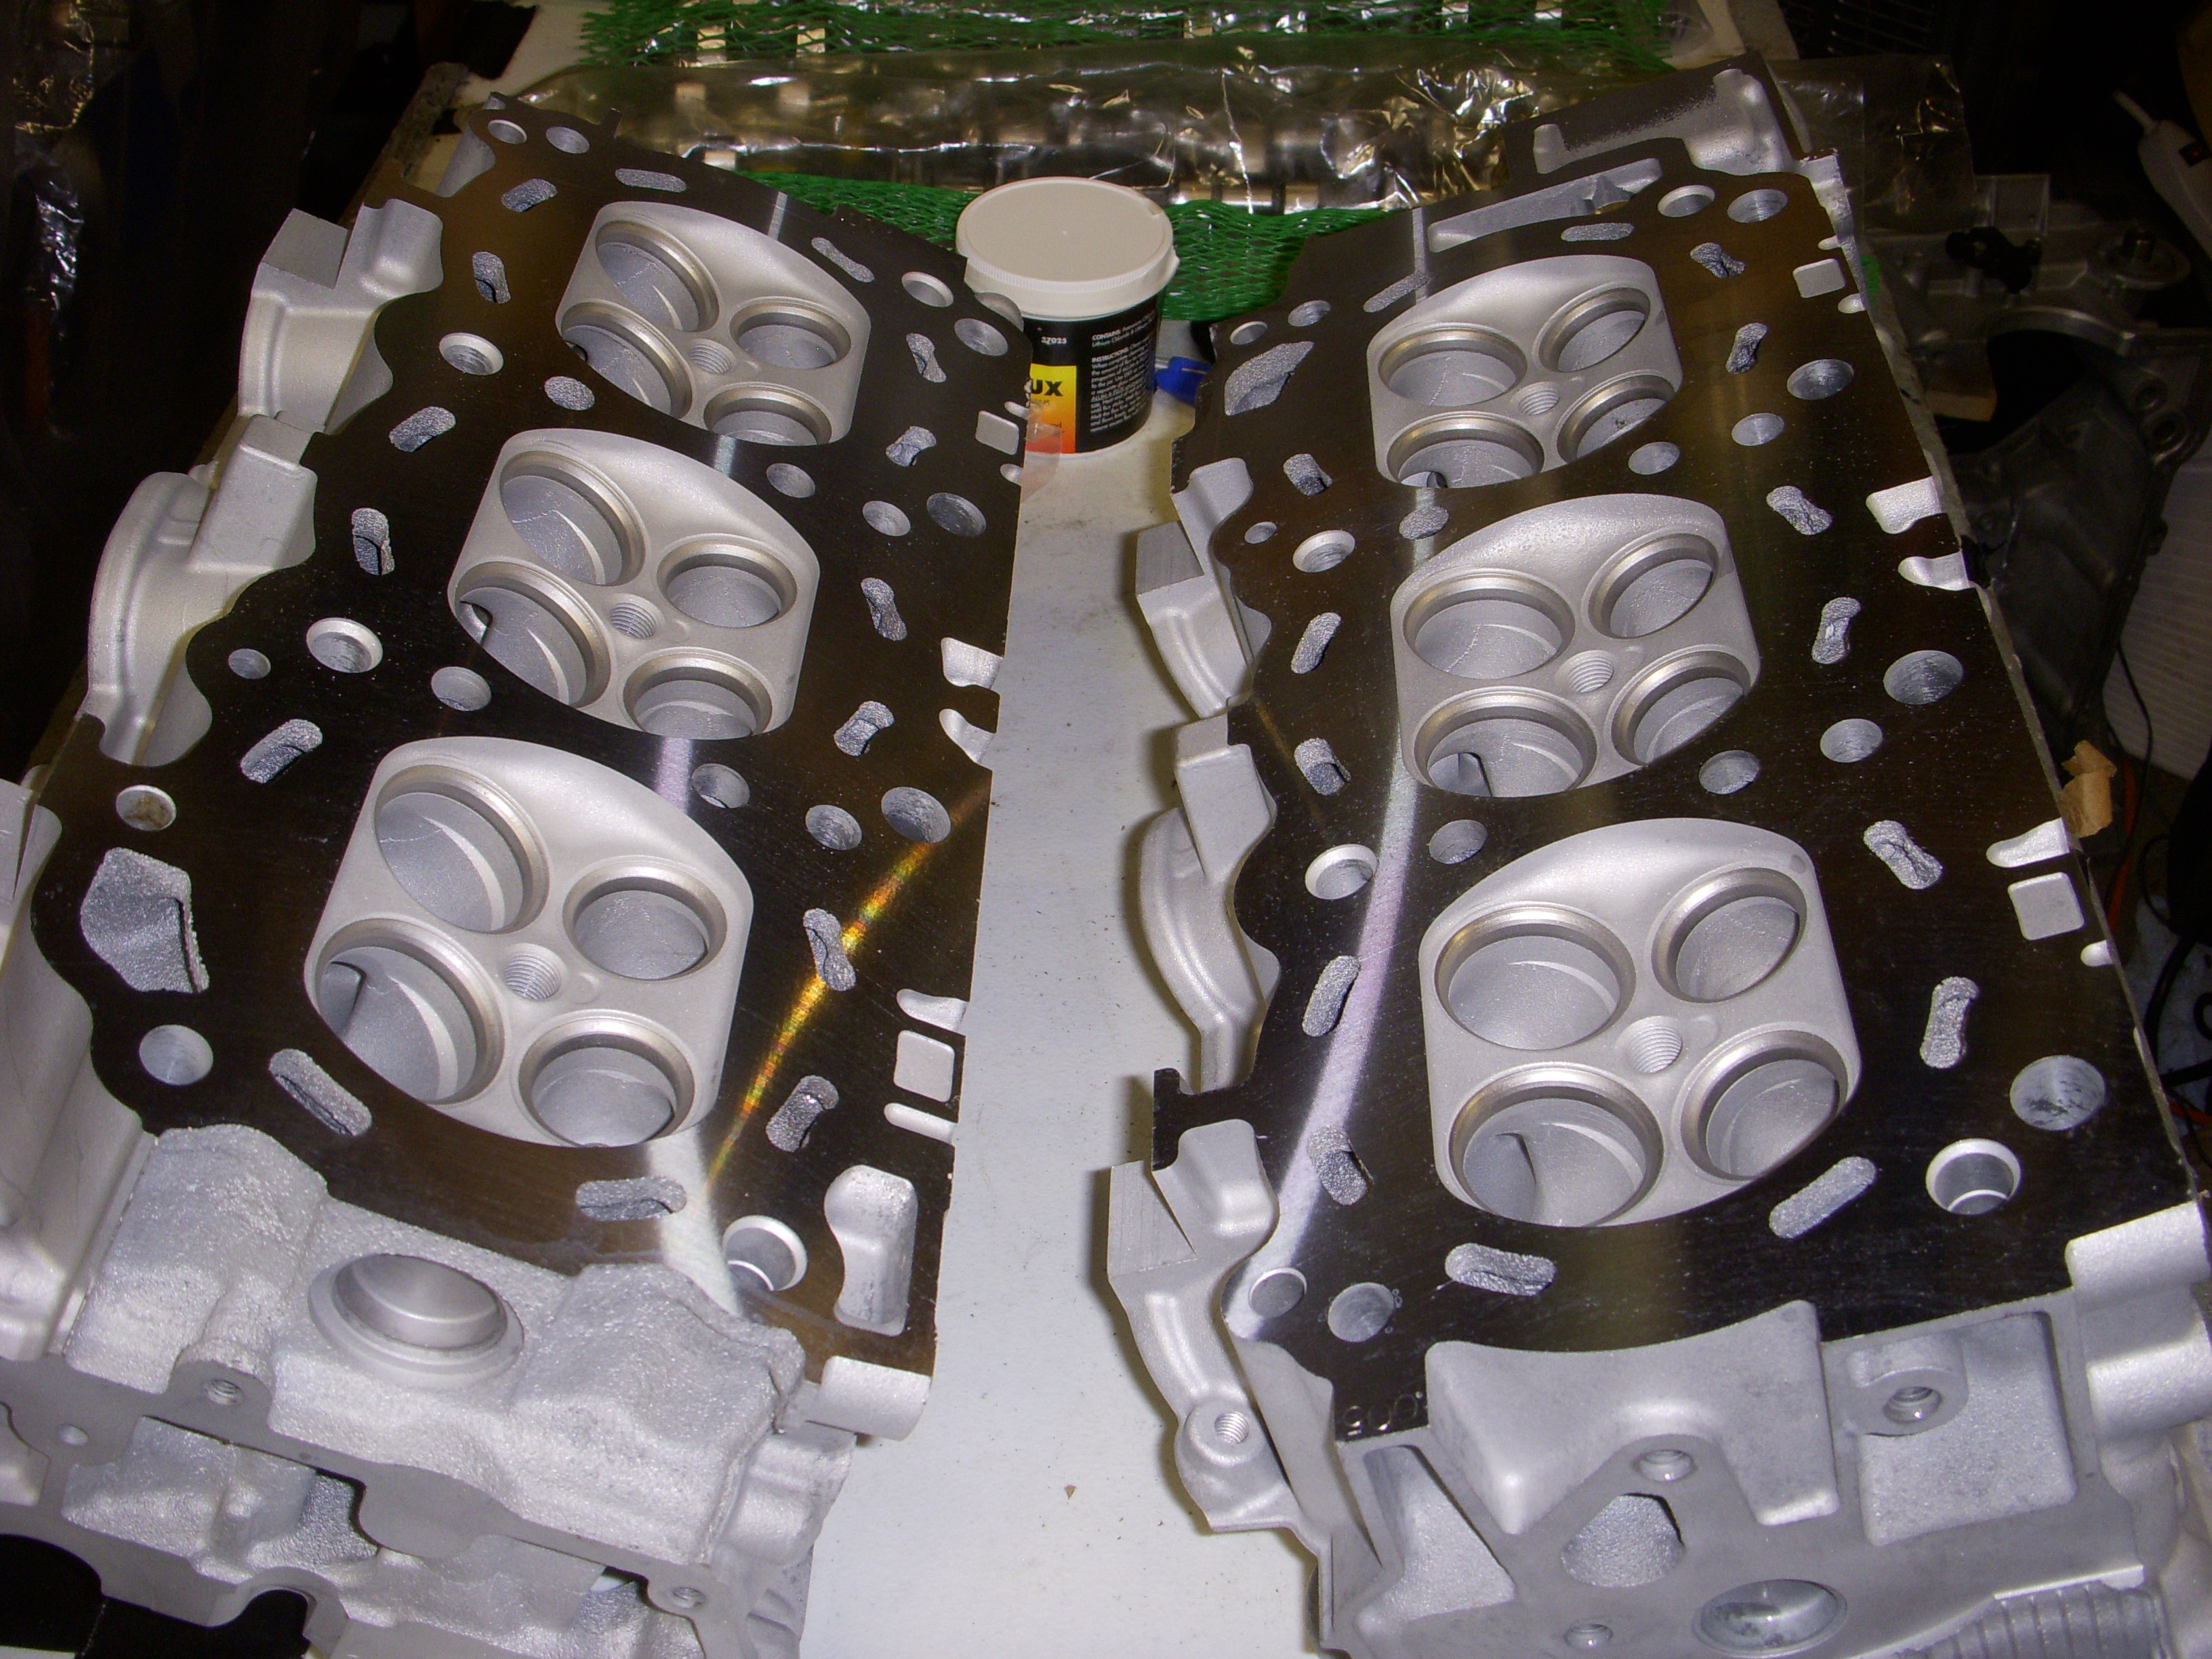
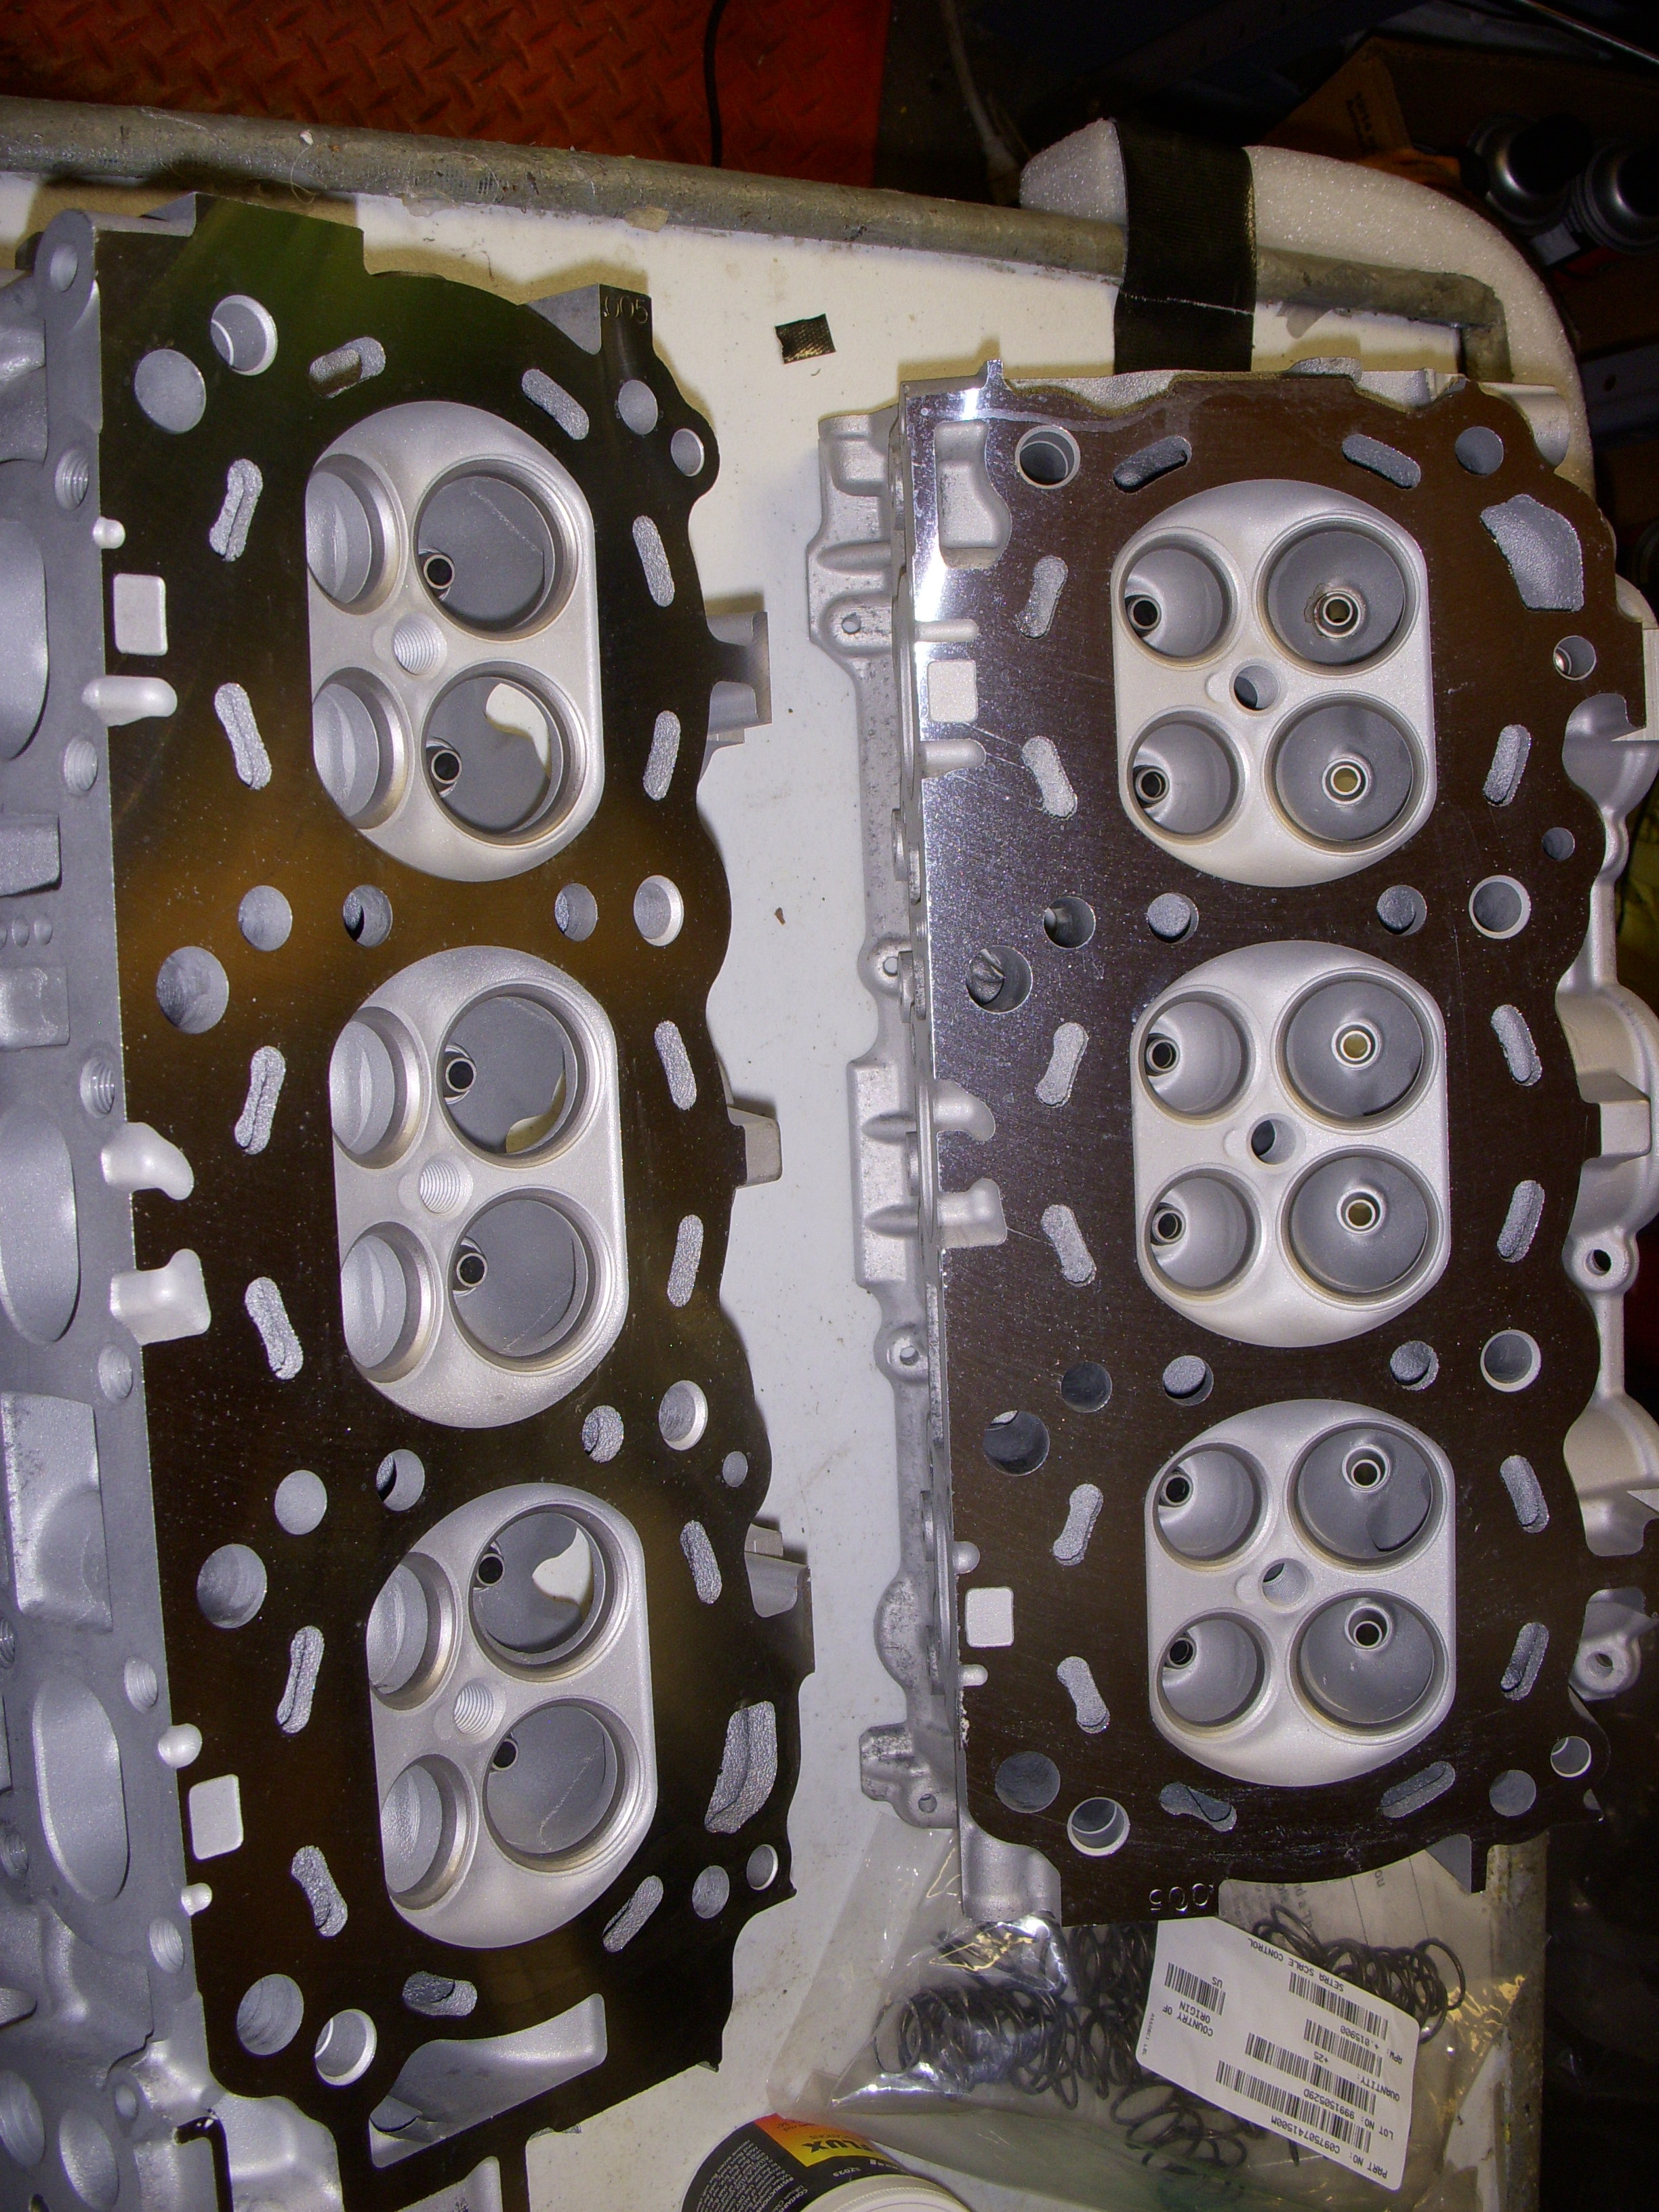
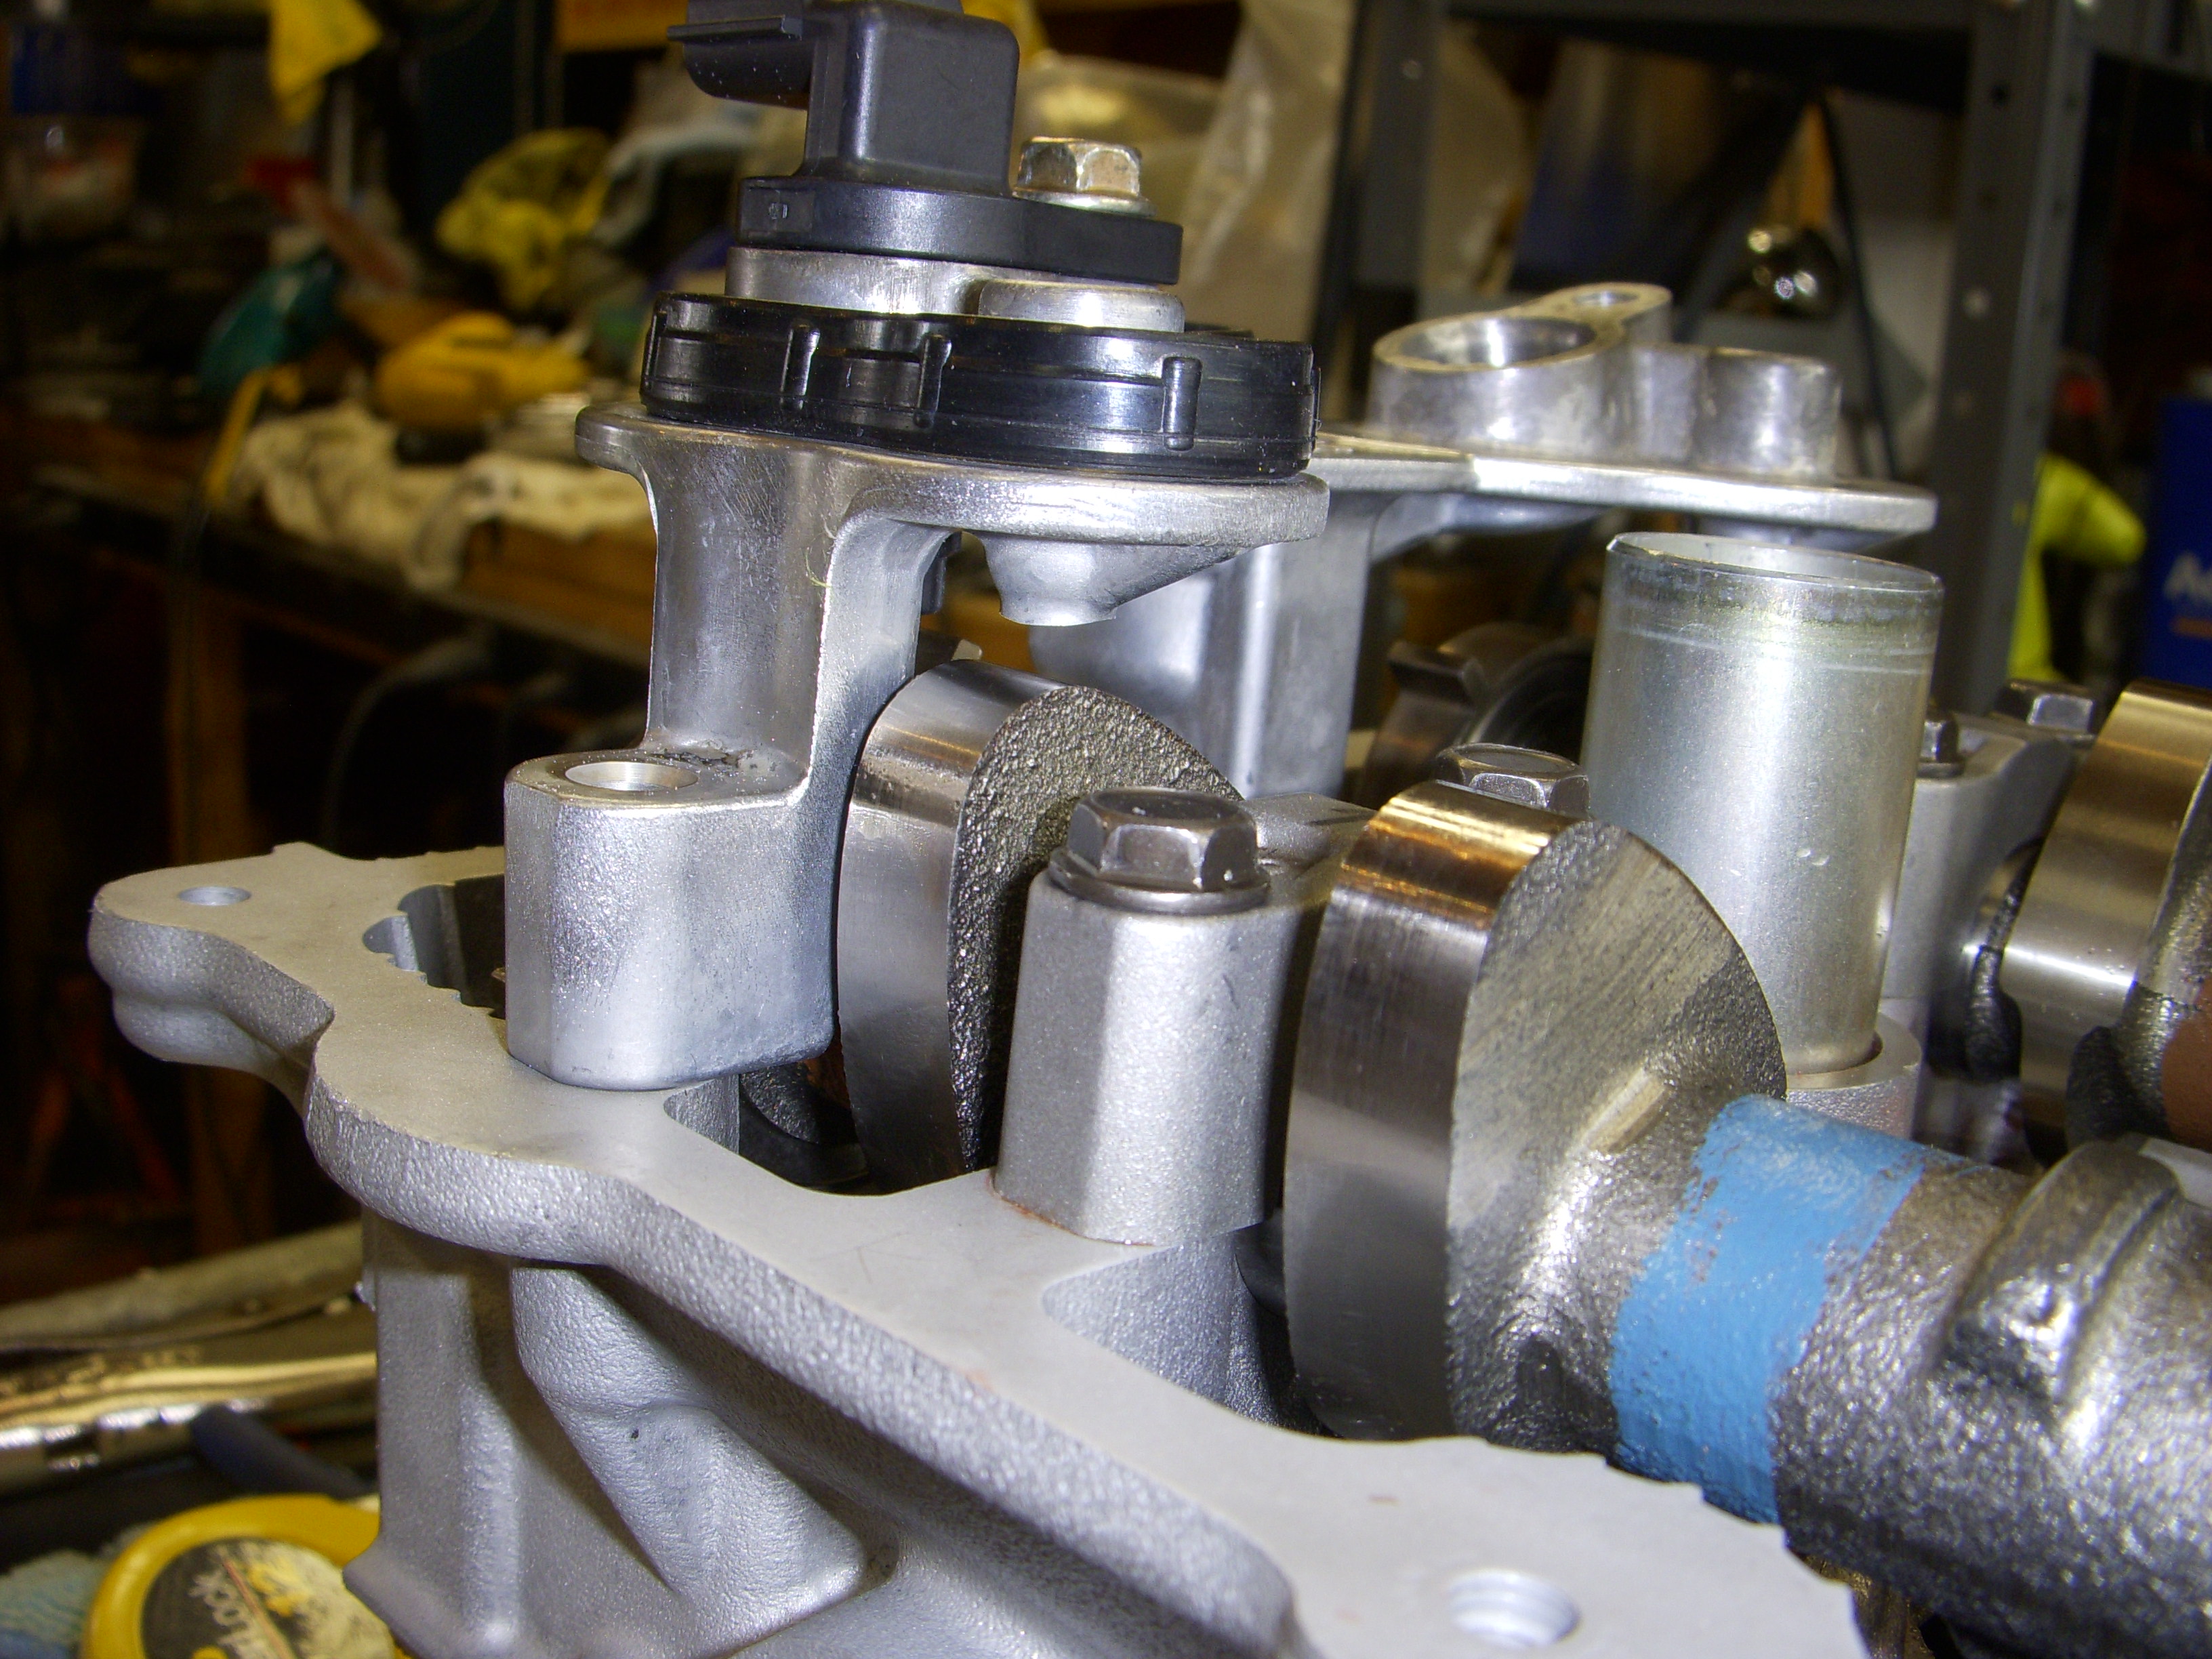
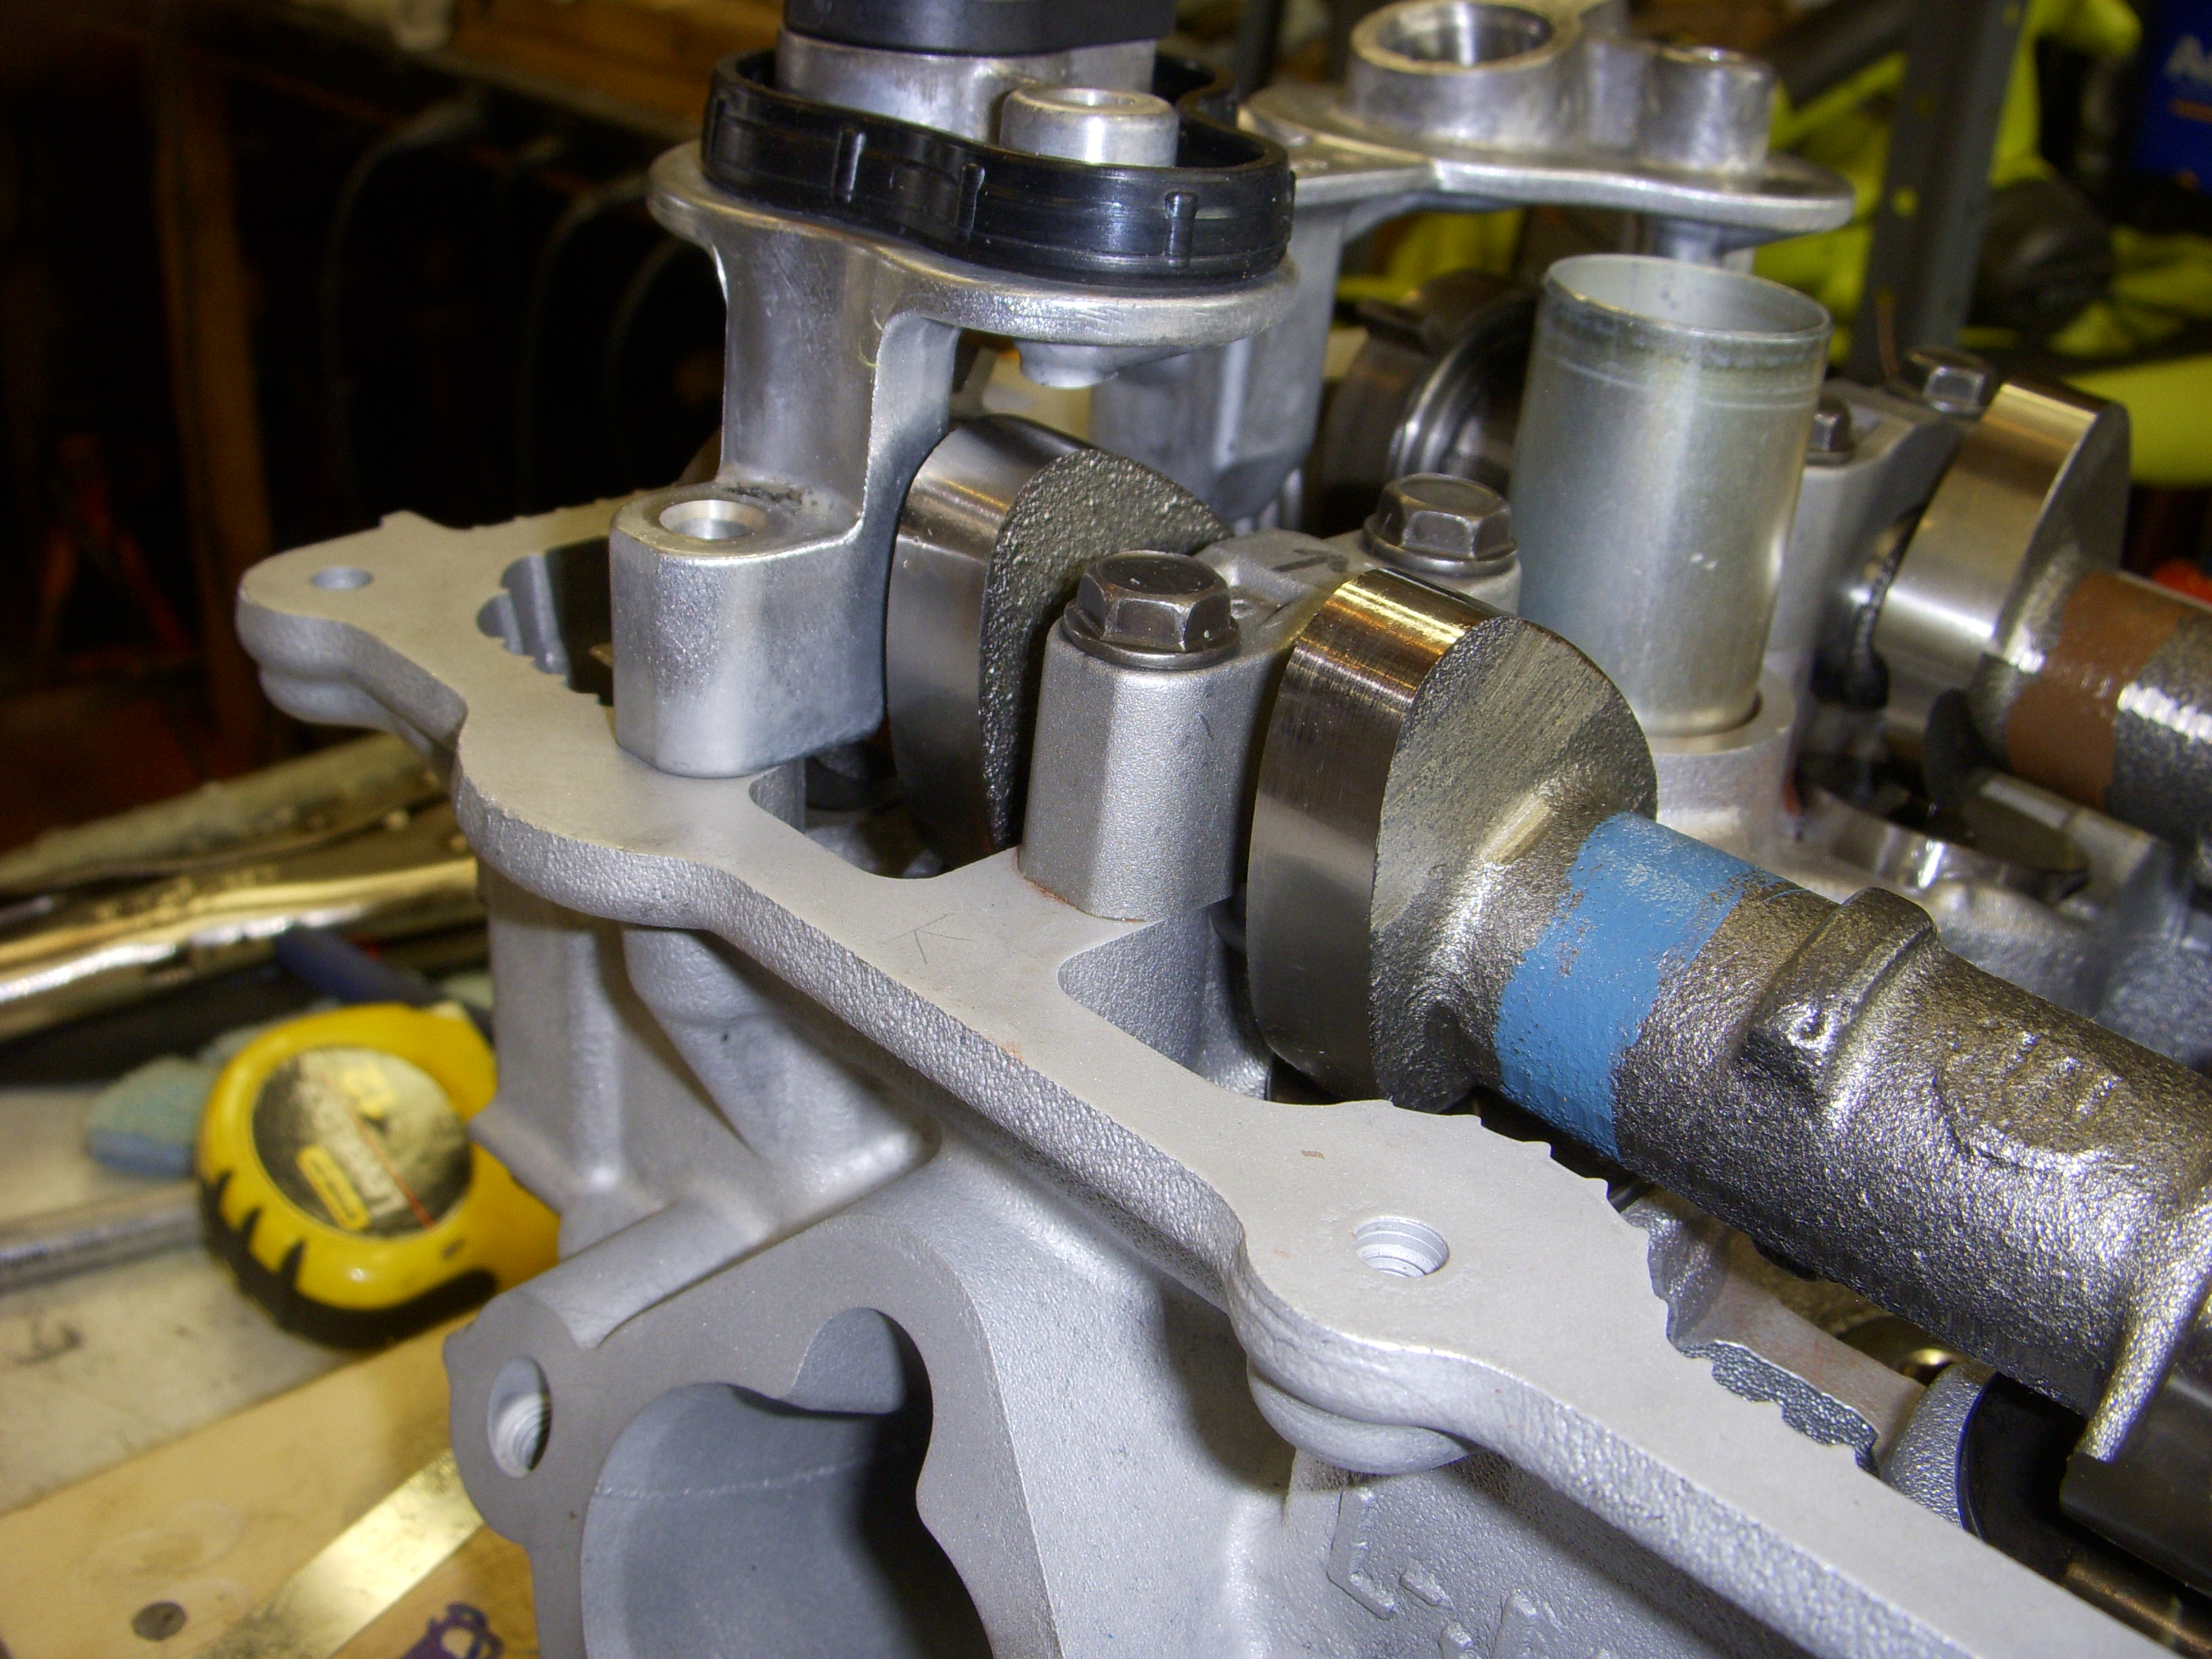
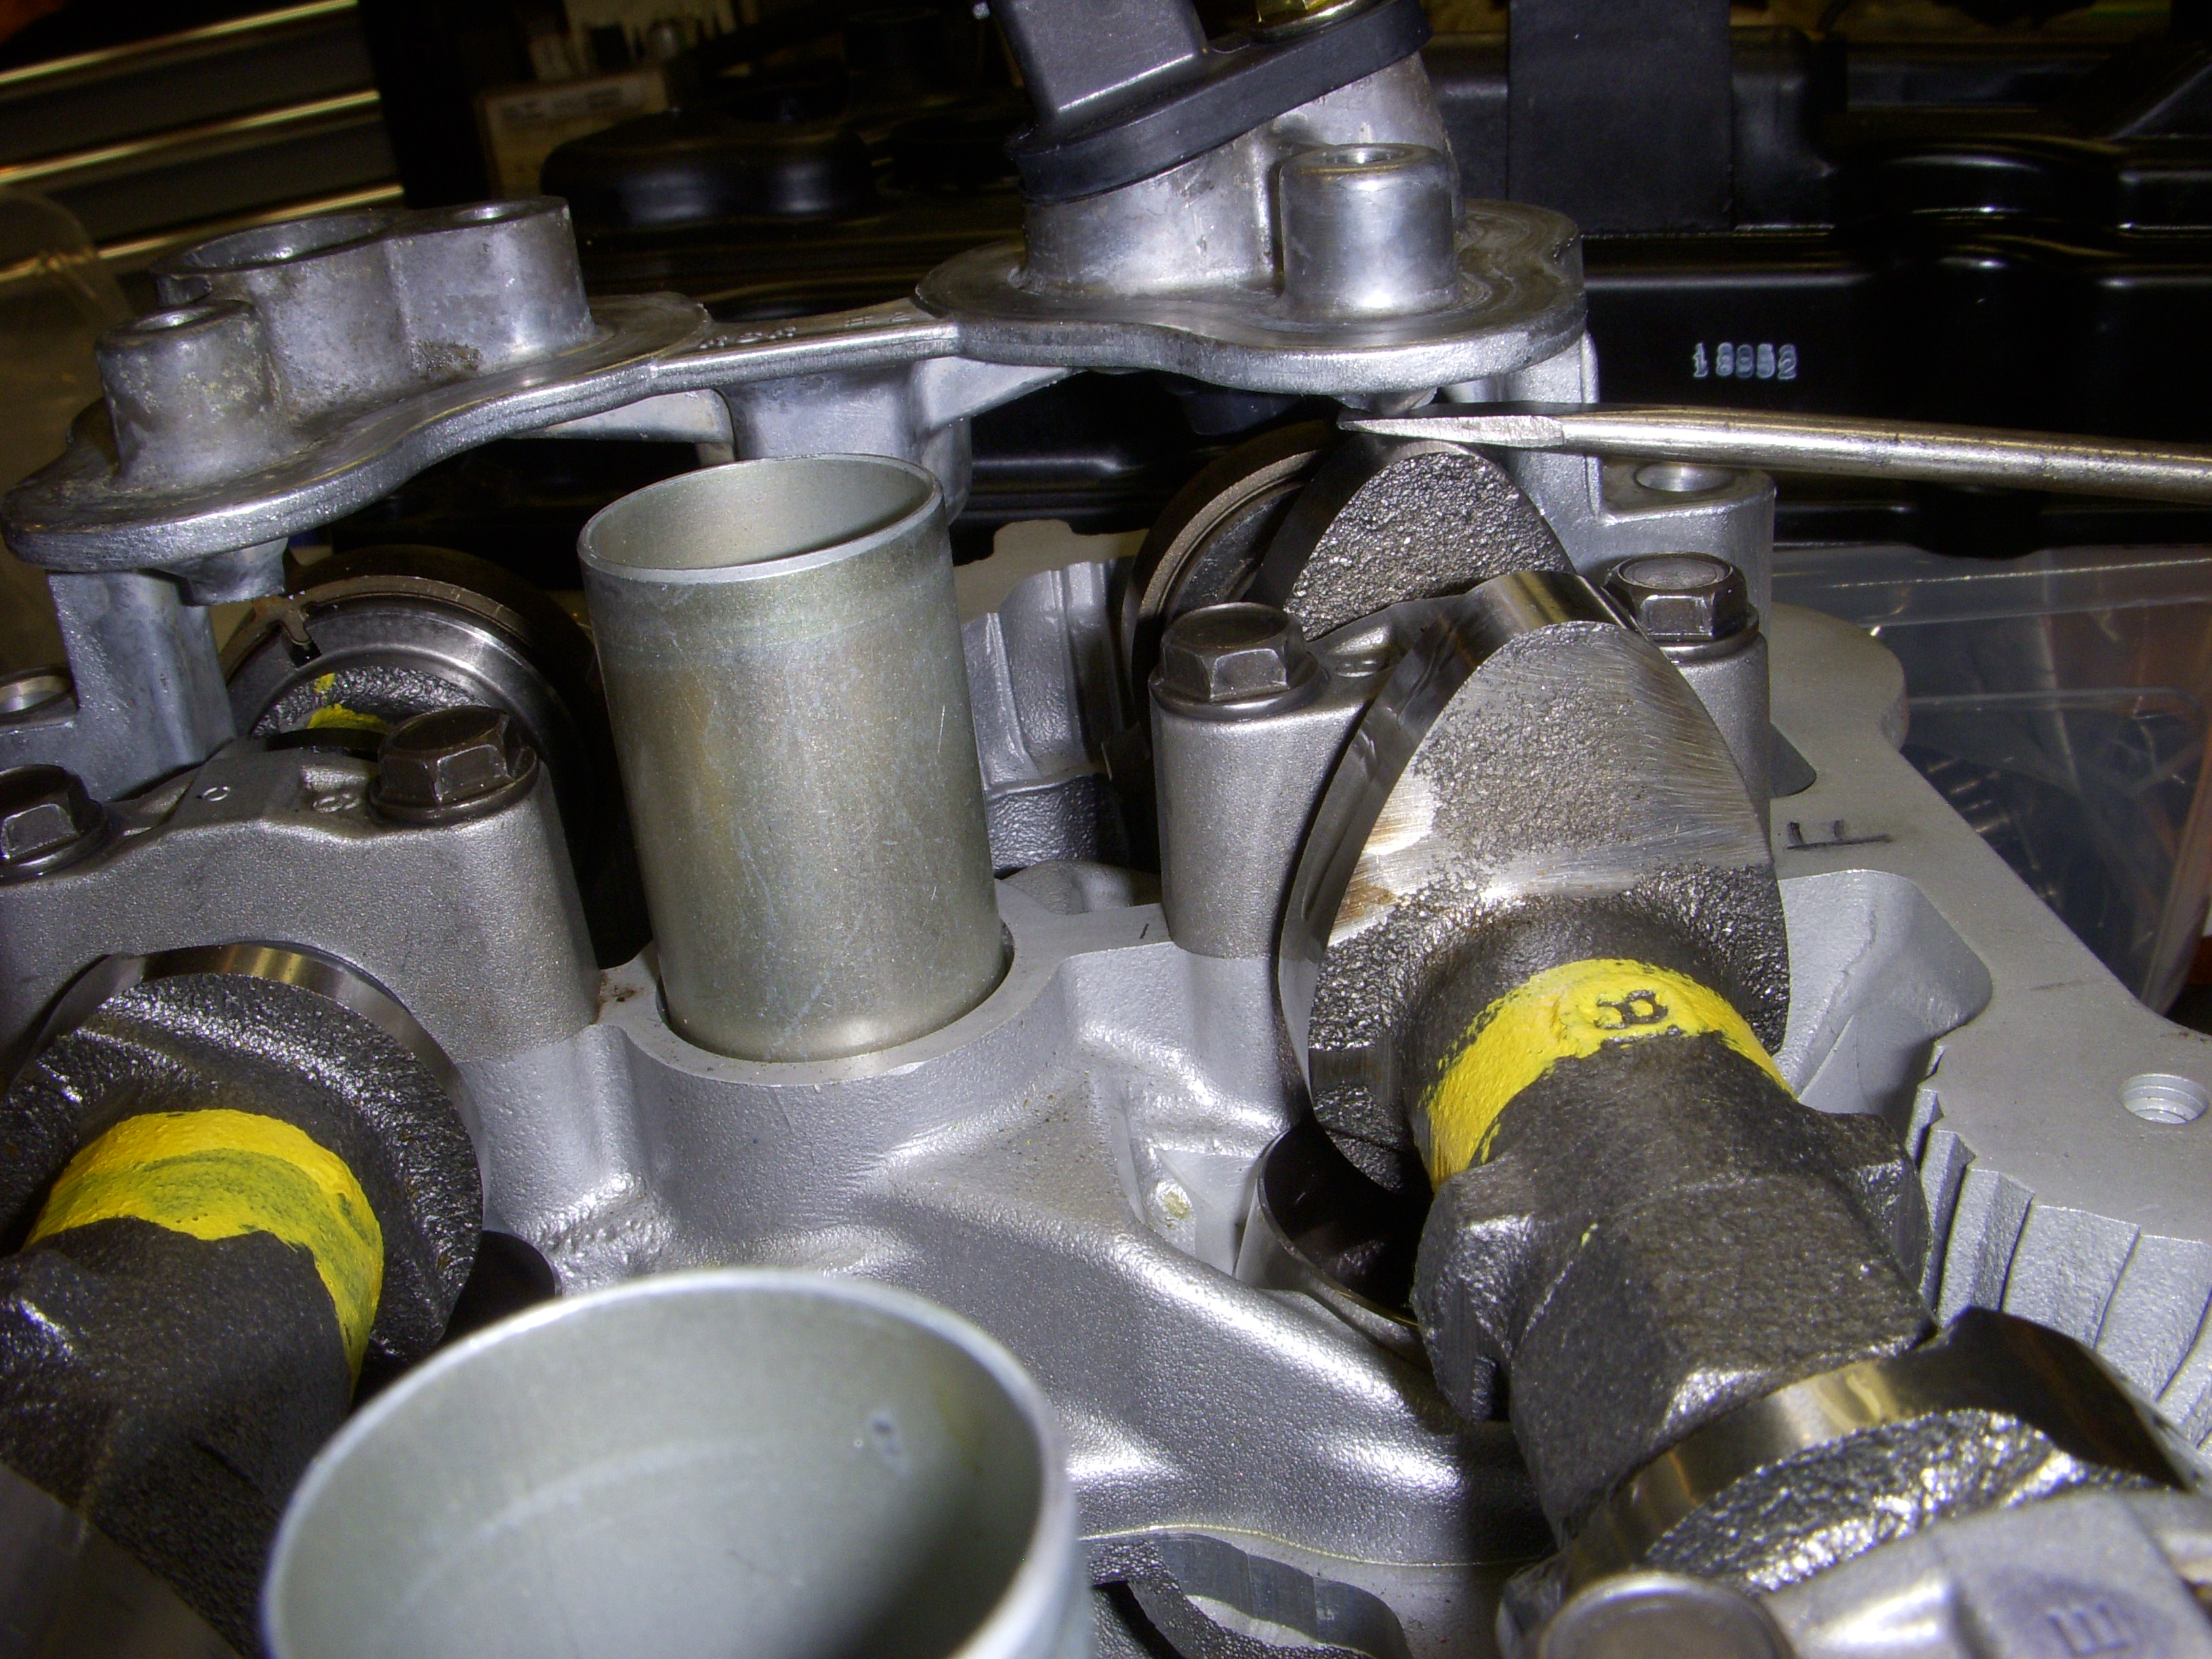
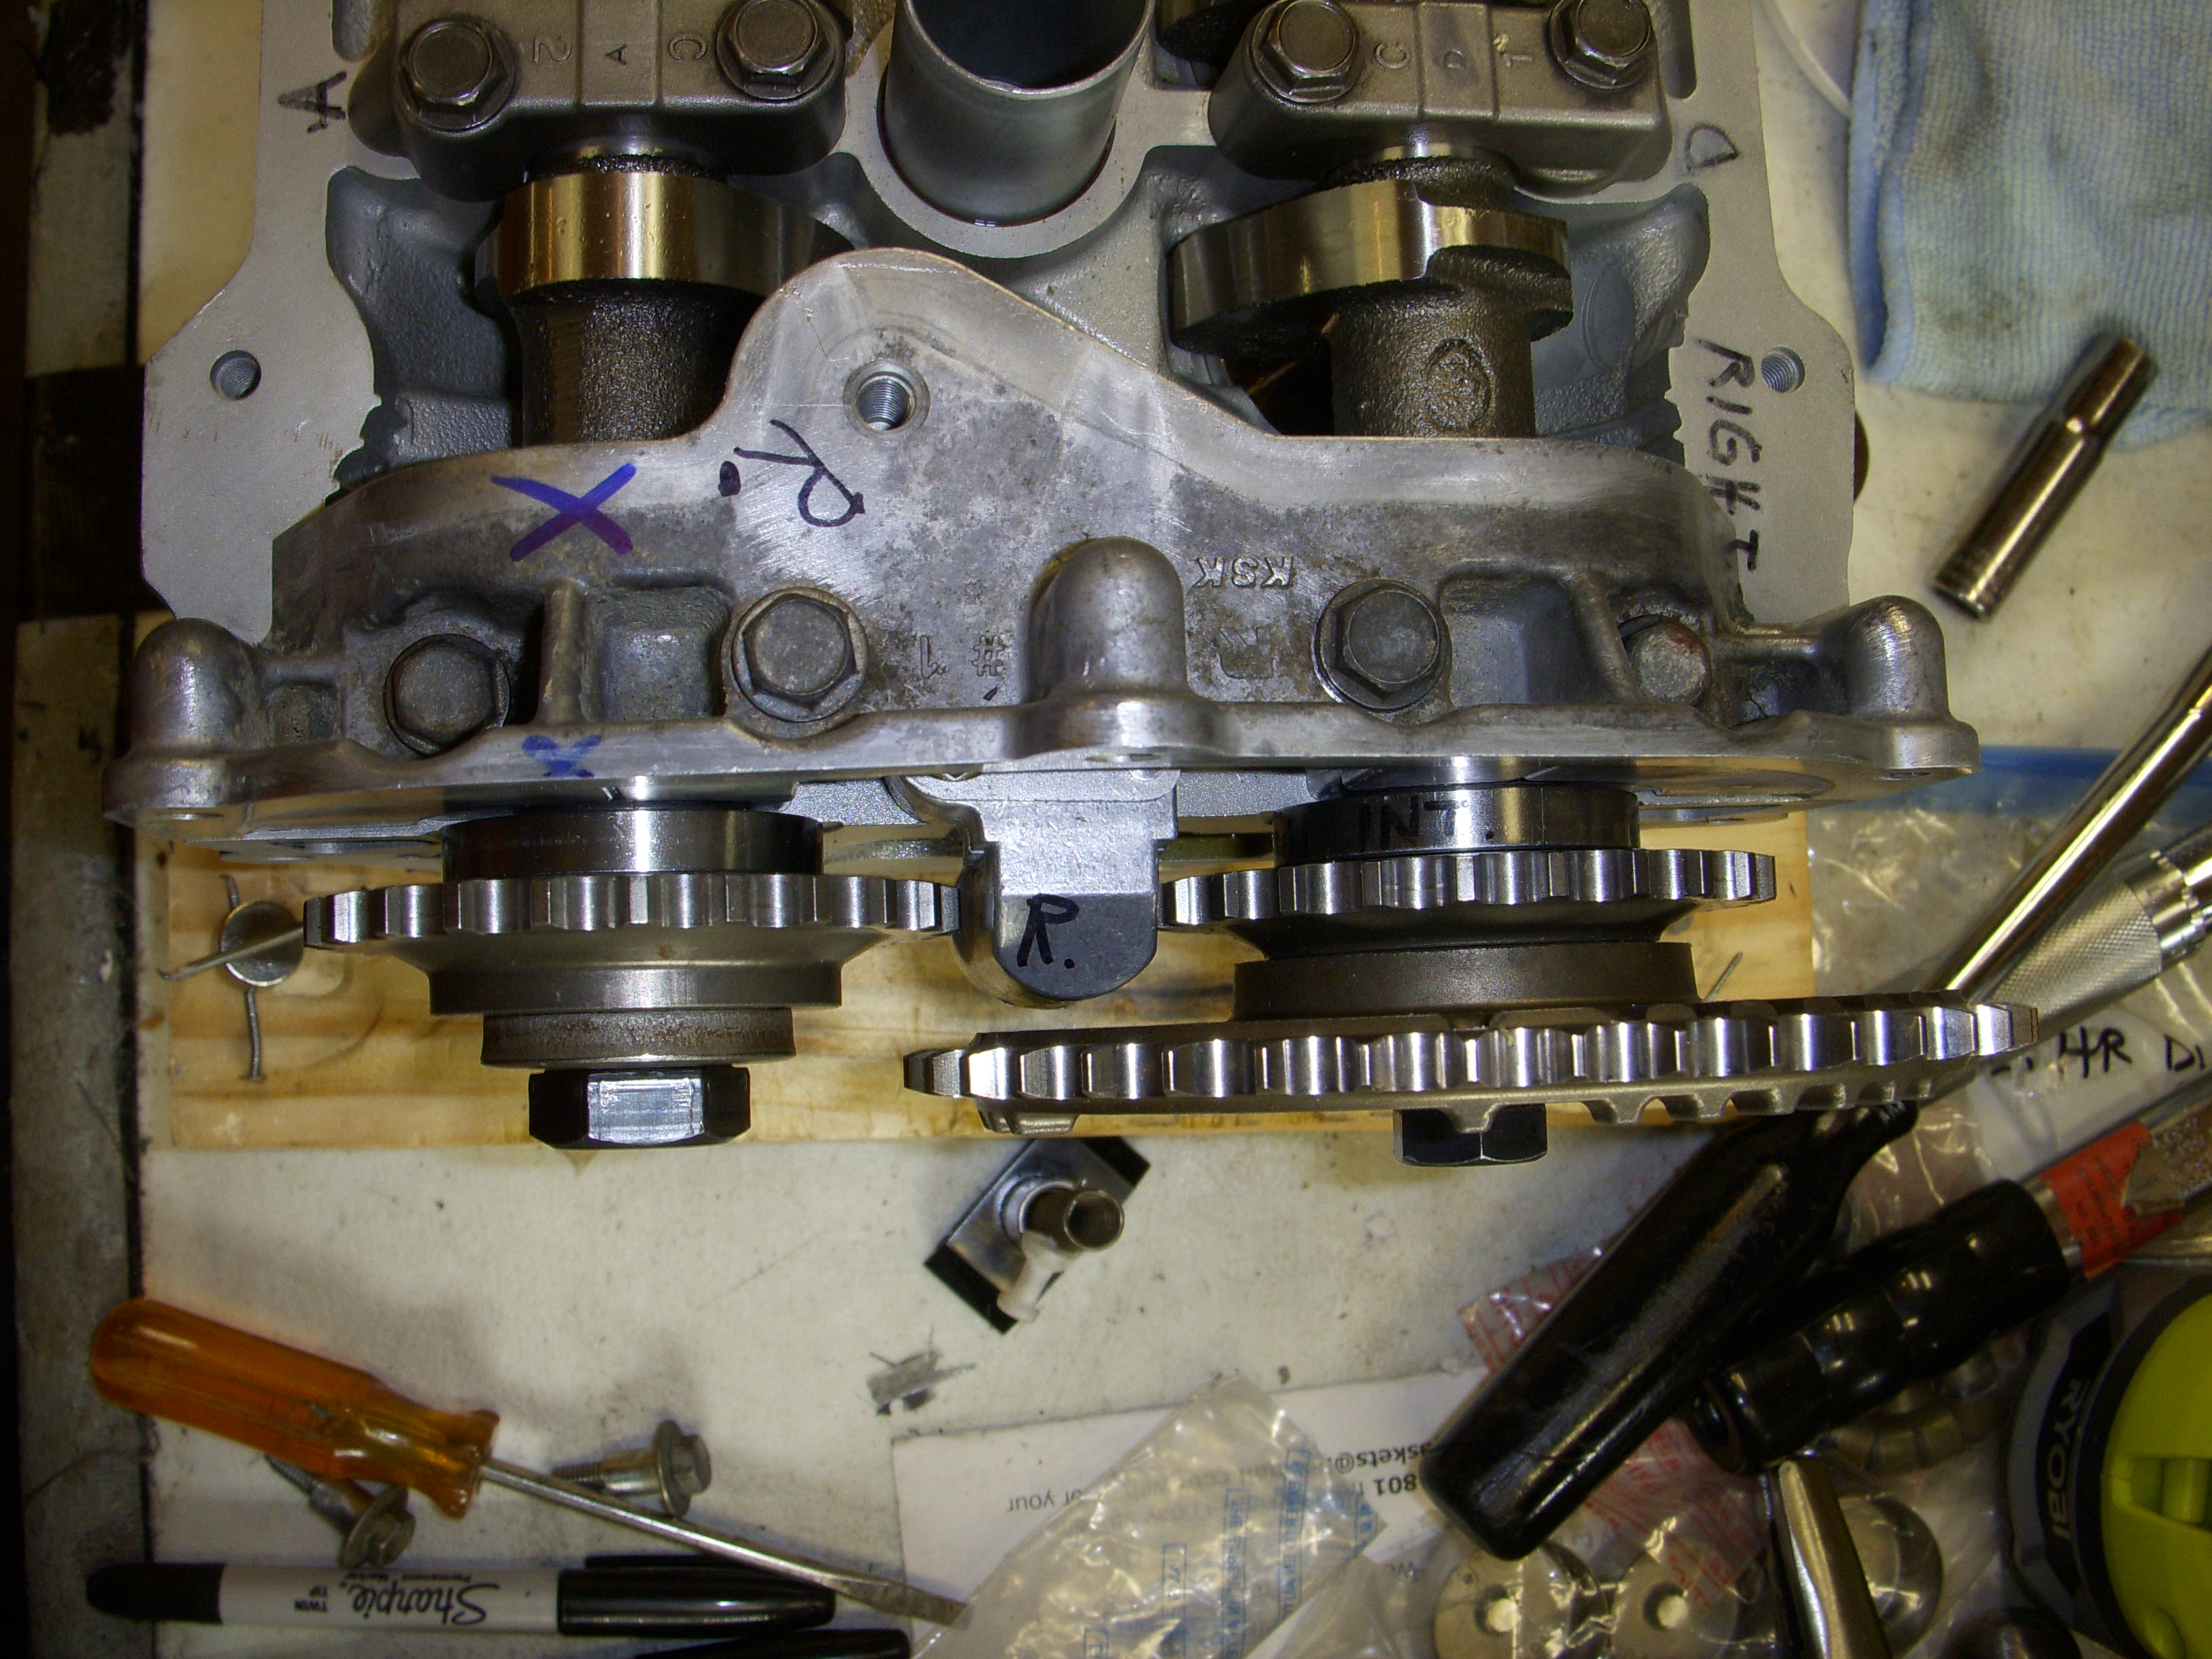
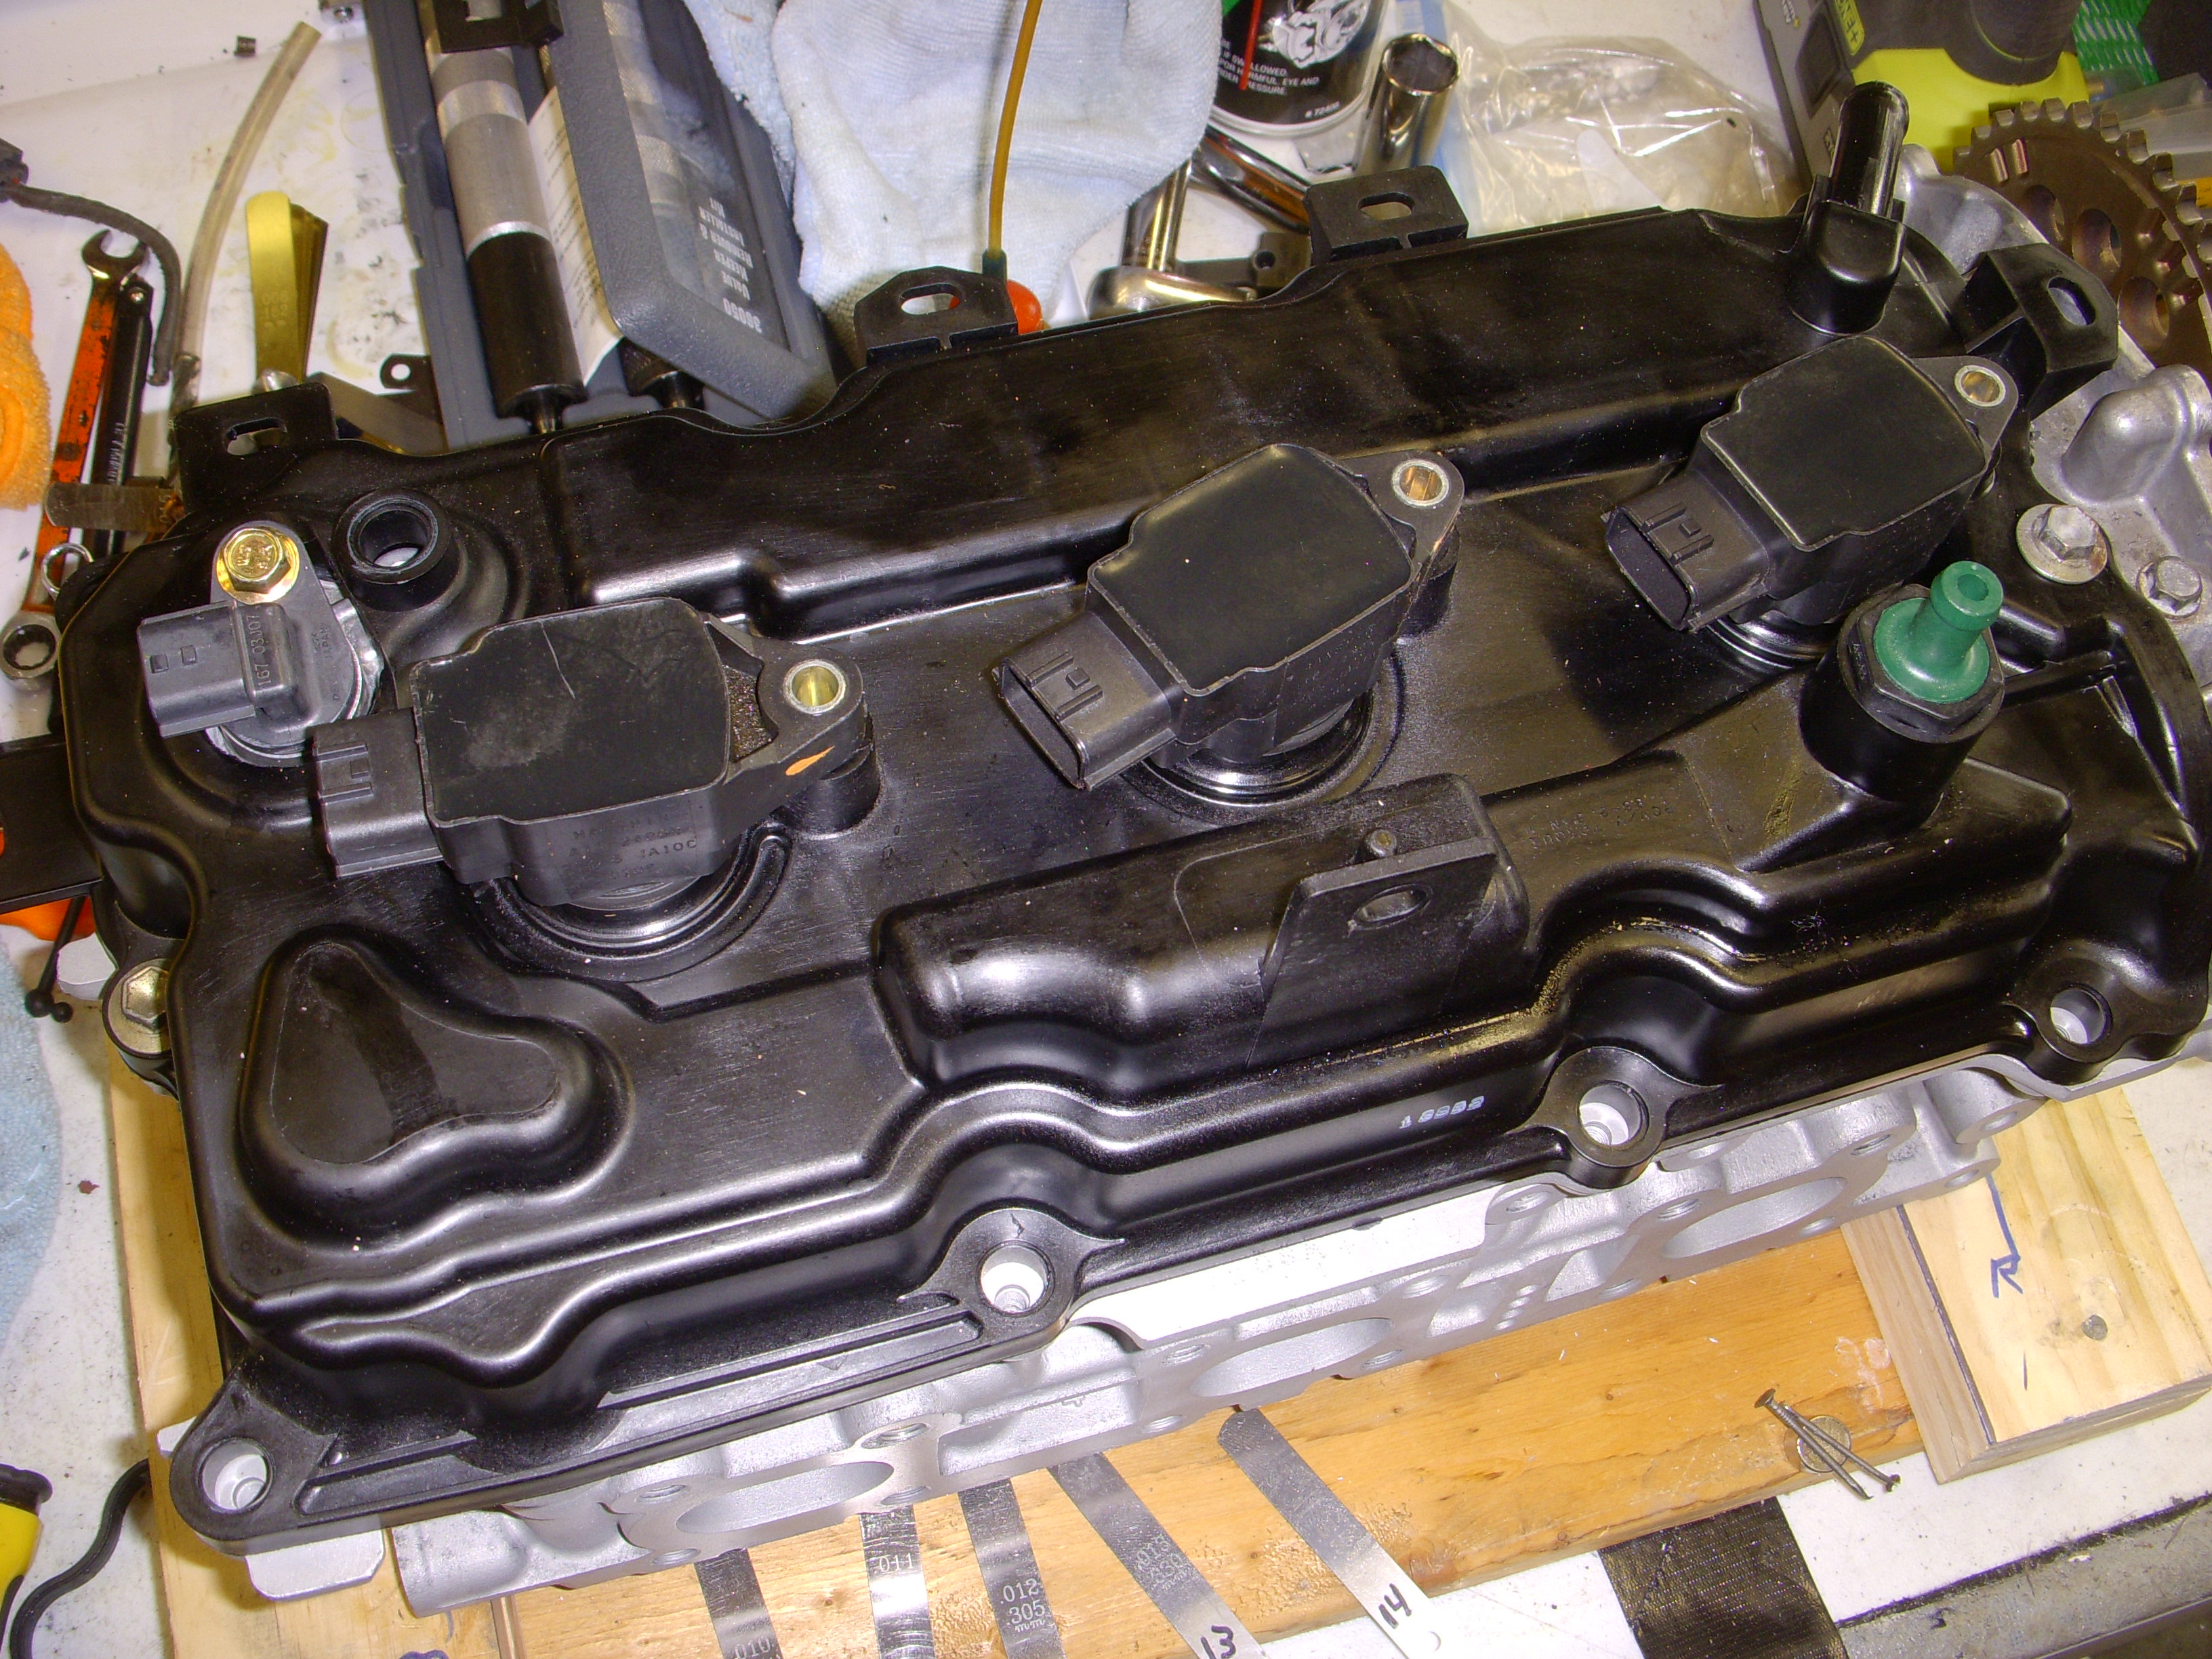
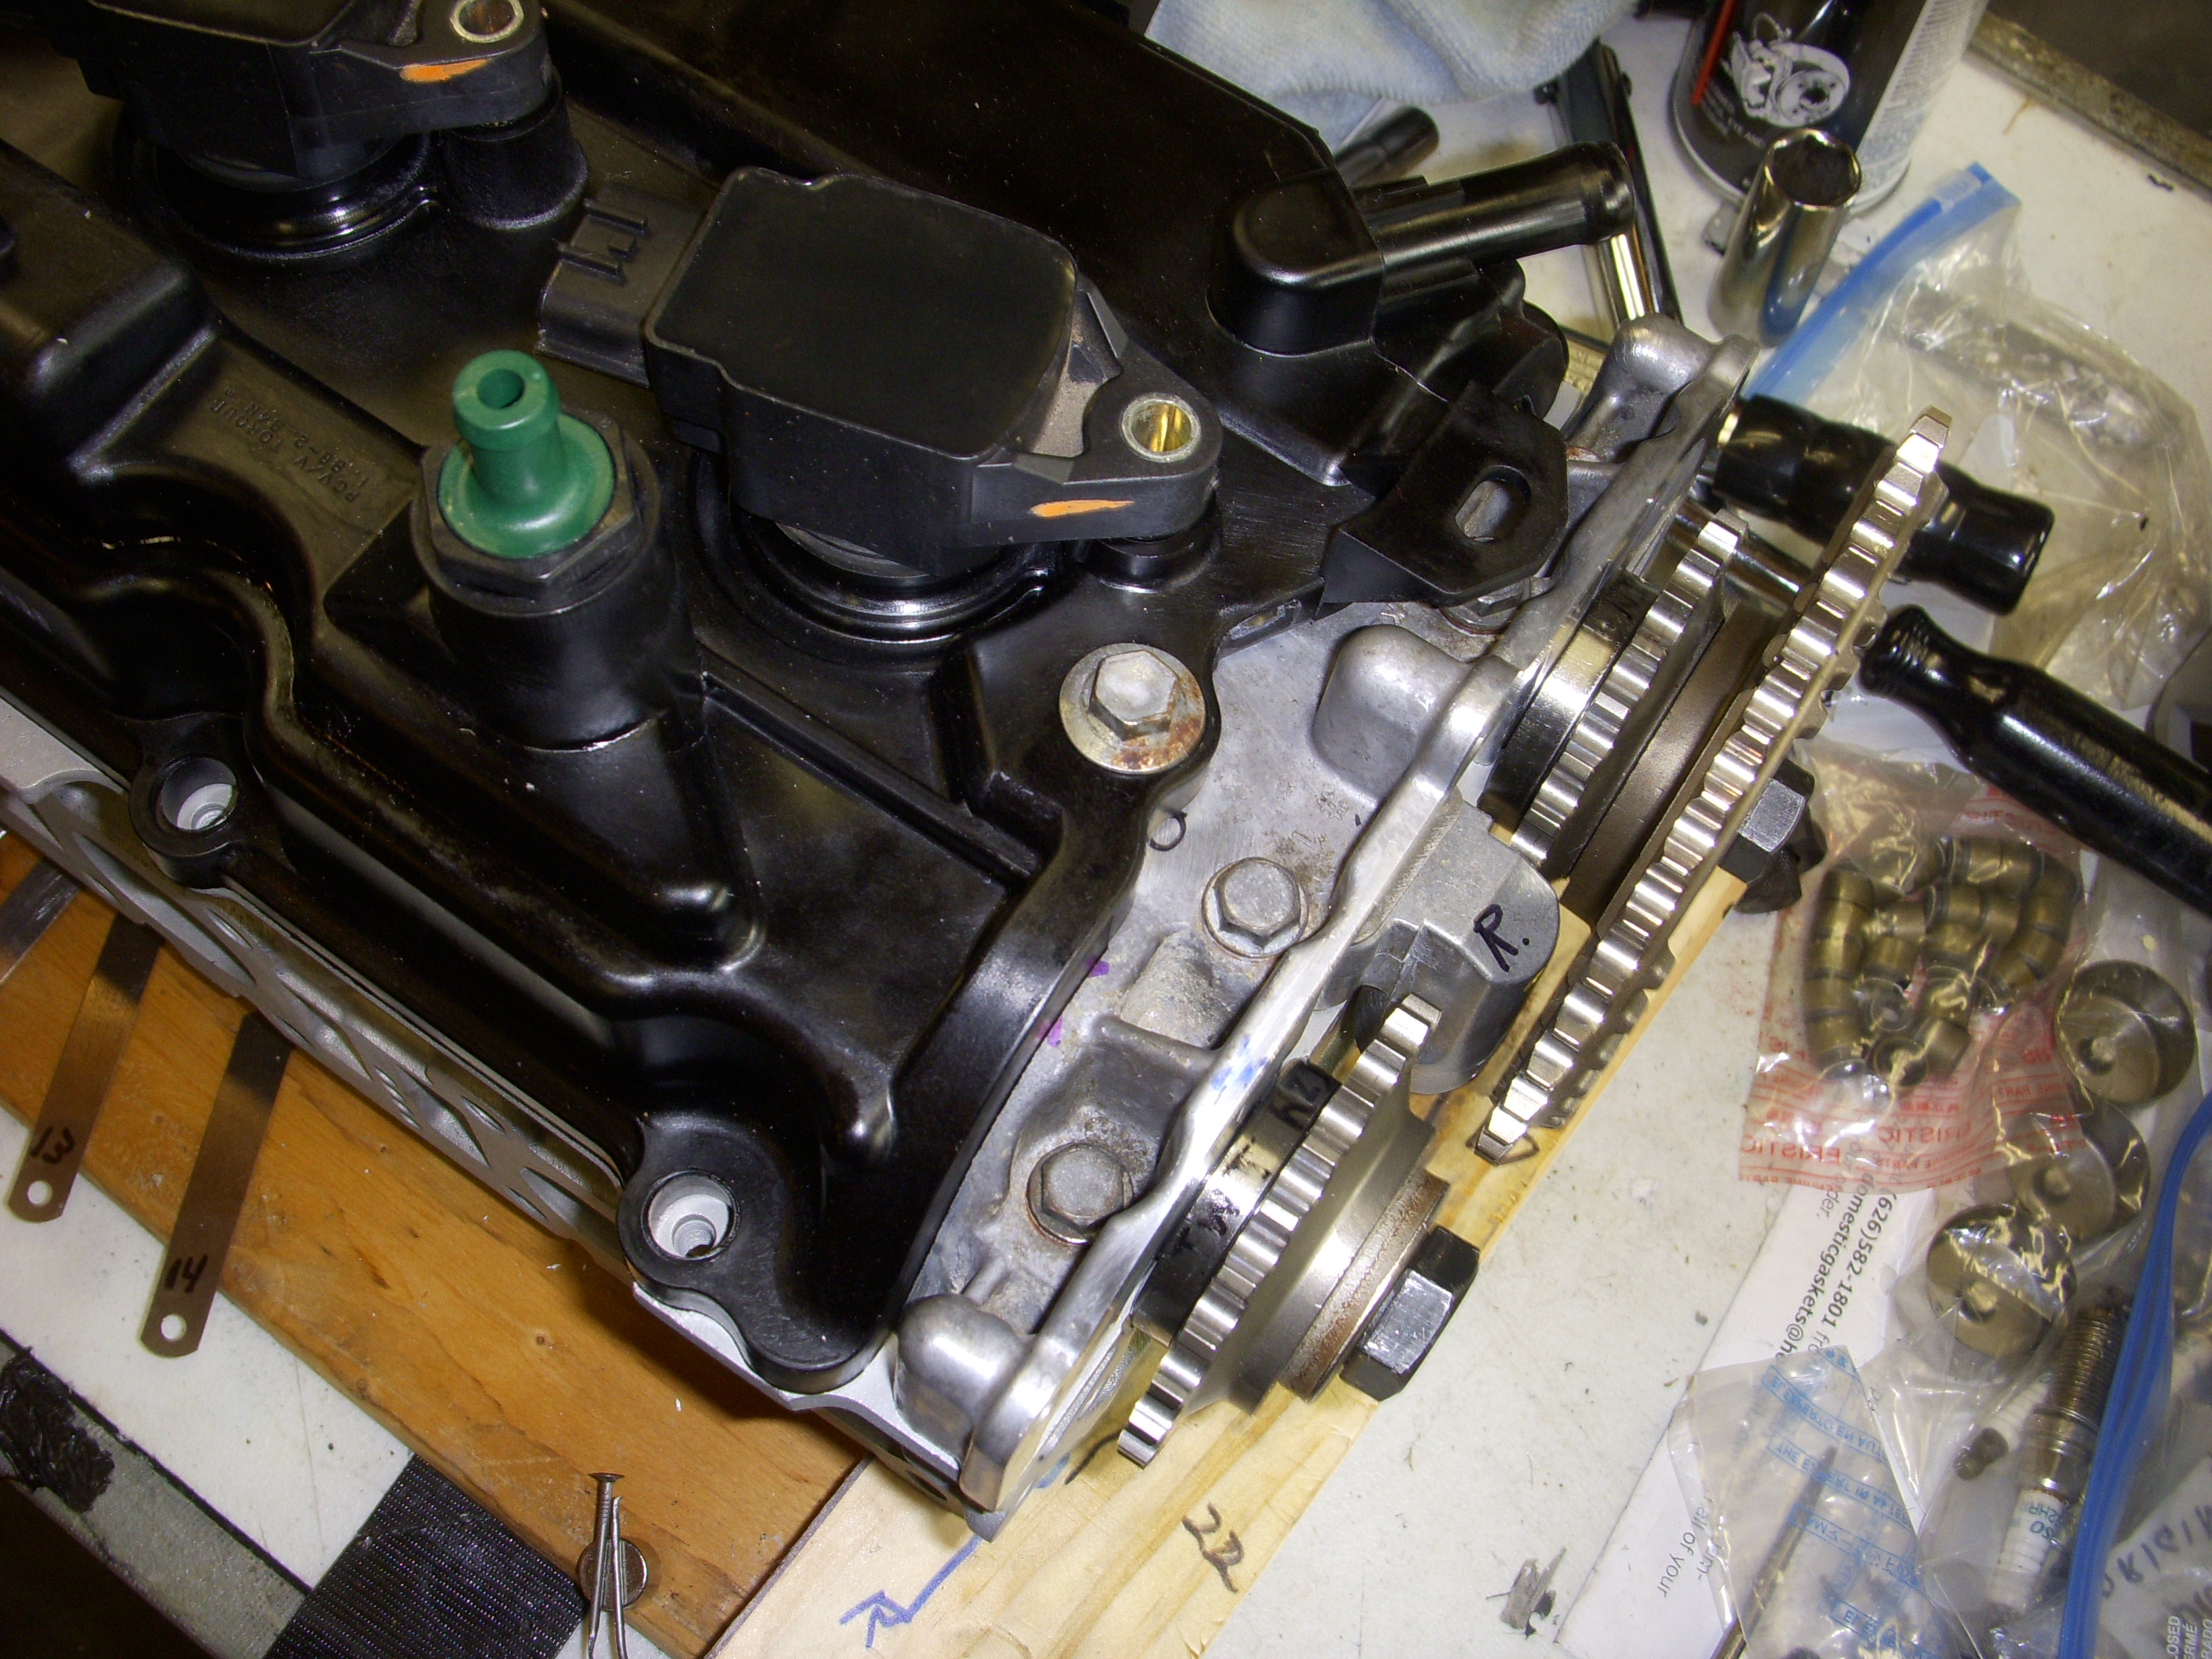
I'm at this stage of building the heads up. All valves were lapped for a fluid seal, a full set of test valve springs were installed with the Lisle tool, the first set of valve seals were installed, all 24 valve lifters were cut (several were new parts) to within .001" of the minimum specs, cam bearing clearances were ported for cam rotation clearance, valve covers were cut out to provide clearance for all intake lobes, and the valve covers and intake cam sensors were installed to check clearances. They will require several other tests before they will be ready for the last installations on the block. Then it will be time for cam timing and adjustments... but that's another month...

Last edited by grey99max; Jan 15, 2017 at 11:58 AM.

I'm at this stage of building the heads up. All valves were lapped for a fluid seal, a full set of test valve springs were installed with the Lisle tool, the first set of valve seals were installed, all 24 valve lifters were cut (several were new parts) to within .001" of the minimum specs, cam bearing clearances were ported for cam rotation clearance, valve covers were cut out to provide clearance for all intake lobes, and the valve covers and intake cam sensors were installed to check clearances. They will require several other tests before they will be ready for the last installations on the block. Then it will be time for cam timing and adjustments... but that's another month...
<a href="http://s48.photobucket.com/user/hwb123/media/05_MAY_2016/DSCN4190_zpsfni8hze4.jpg.html" target="_blank"><img src="http://i48.photobucket.com/albums/f216/hwb123/05_MAY_2016/DSCN4190_zpsfni8hze4.jpg" border="0" alt=" photo DSCN4190_zpsfni8hze4.jpg"/></a>
<a href="http://s48.photobucket.com/user/hwb123/media/05_MAY_2016/DSCN4190_zpsfni8hze4.jpg.html" target="_blank"><img src="http://i48.photobucket.com/albums/f216/hwb123/05_MAY_2016/DSCN4190_zpsfni8hze4.jpg" border="0" alt=" photo DSCN4190_zpsfni8hze4.jpg"/></a>
Thanks for the comments, guys... This HR head project has layers I haven't mentioned yet, like after they are mounted on the block, rotating the crank and checking valve-piston clearance every 10* for 6 cylinders times 4 valves- then depressing each valve to be sure there is at least .050" clearance left. Of course this is after all timing gears are installed and actual timing is verified.
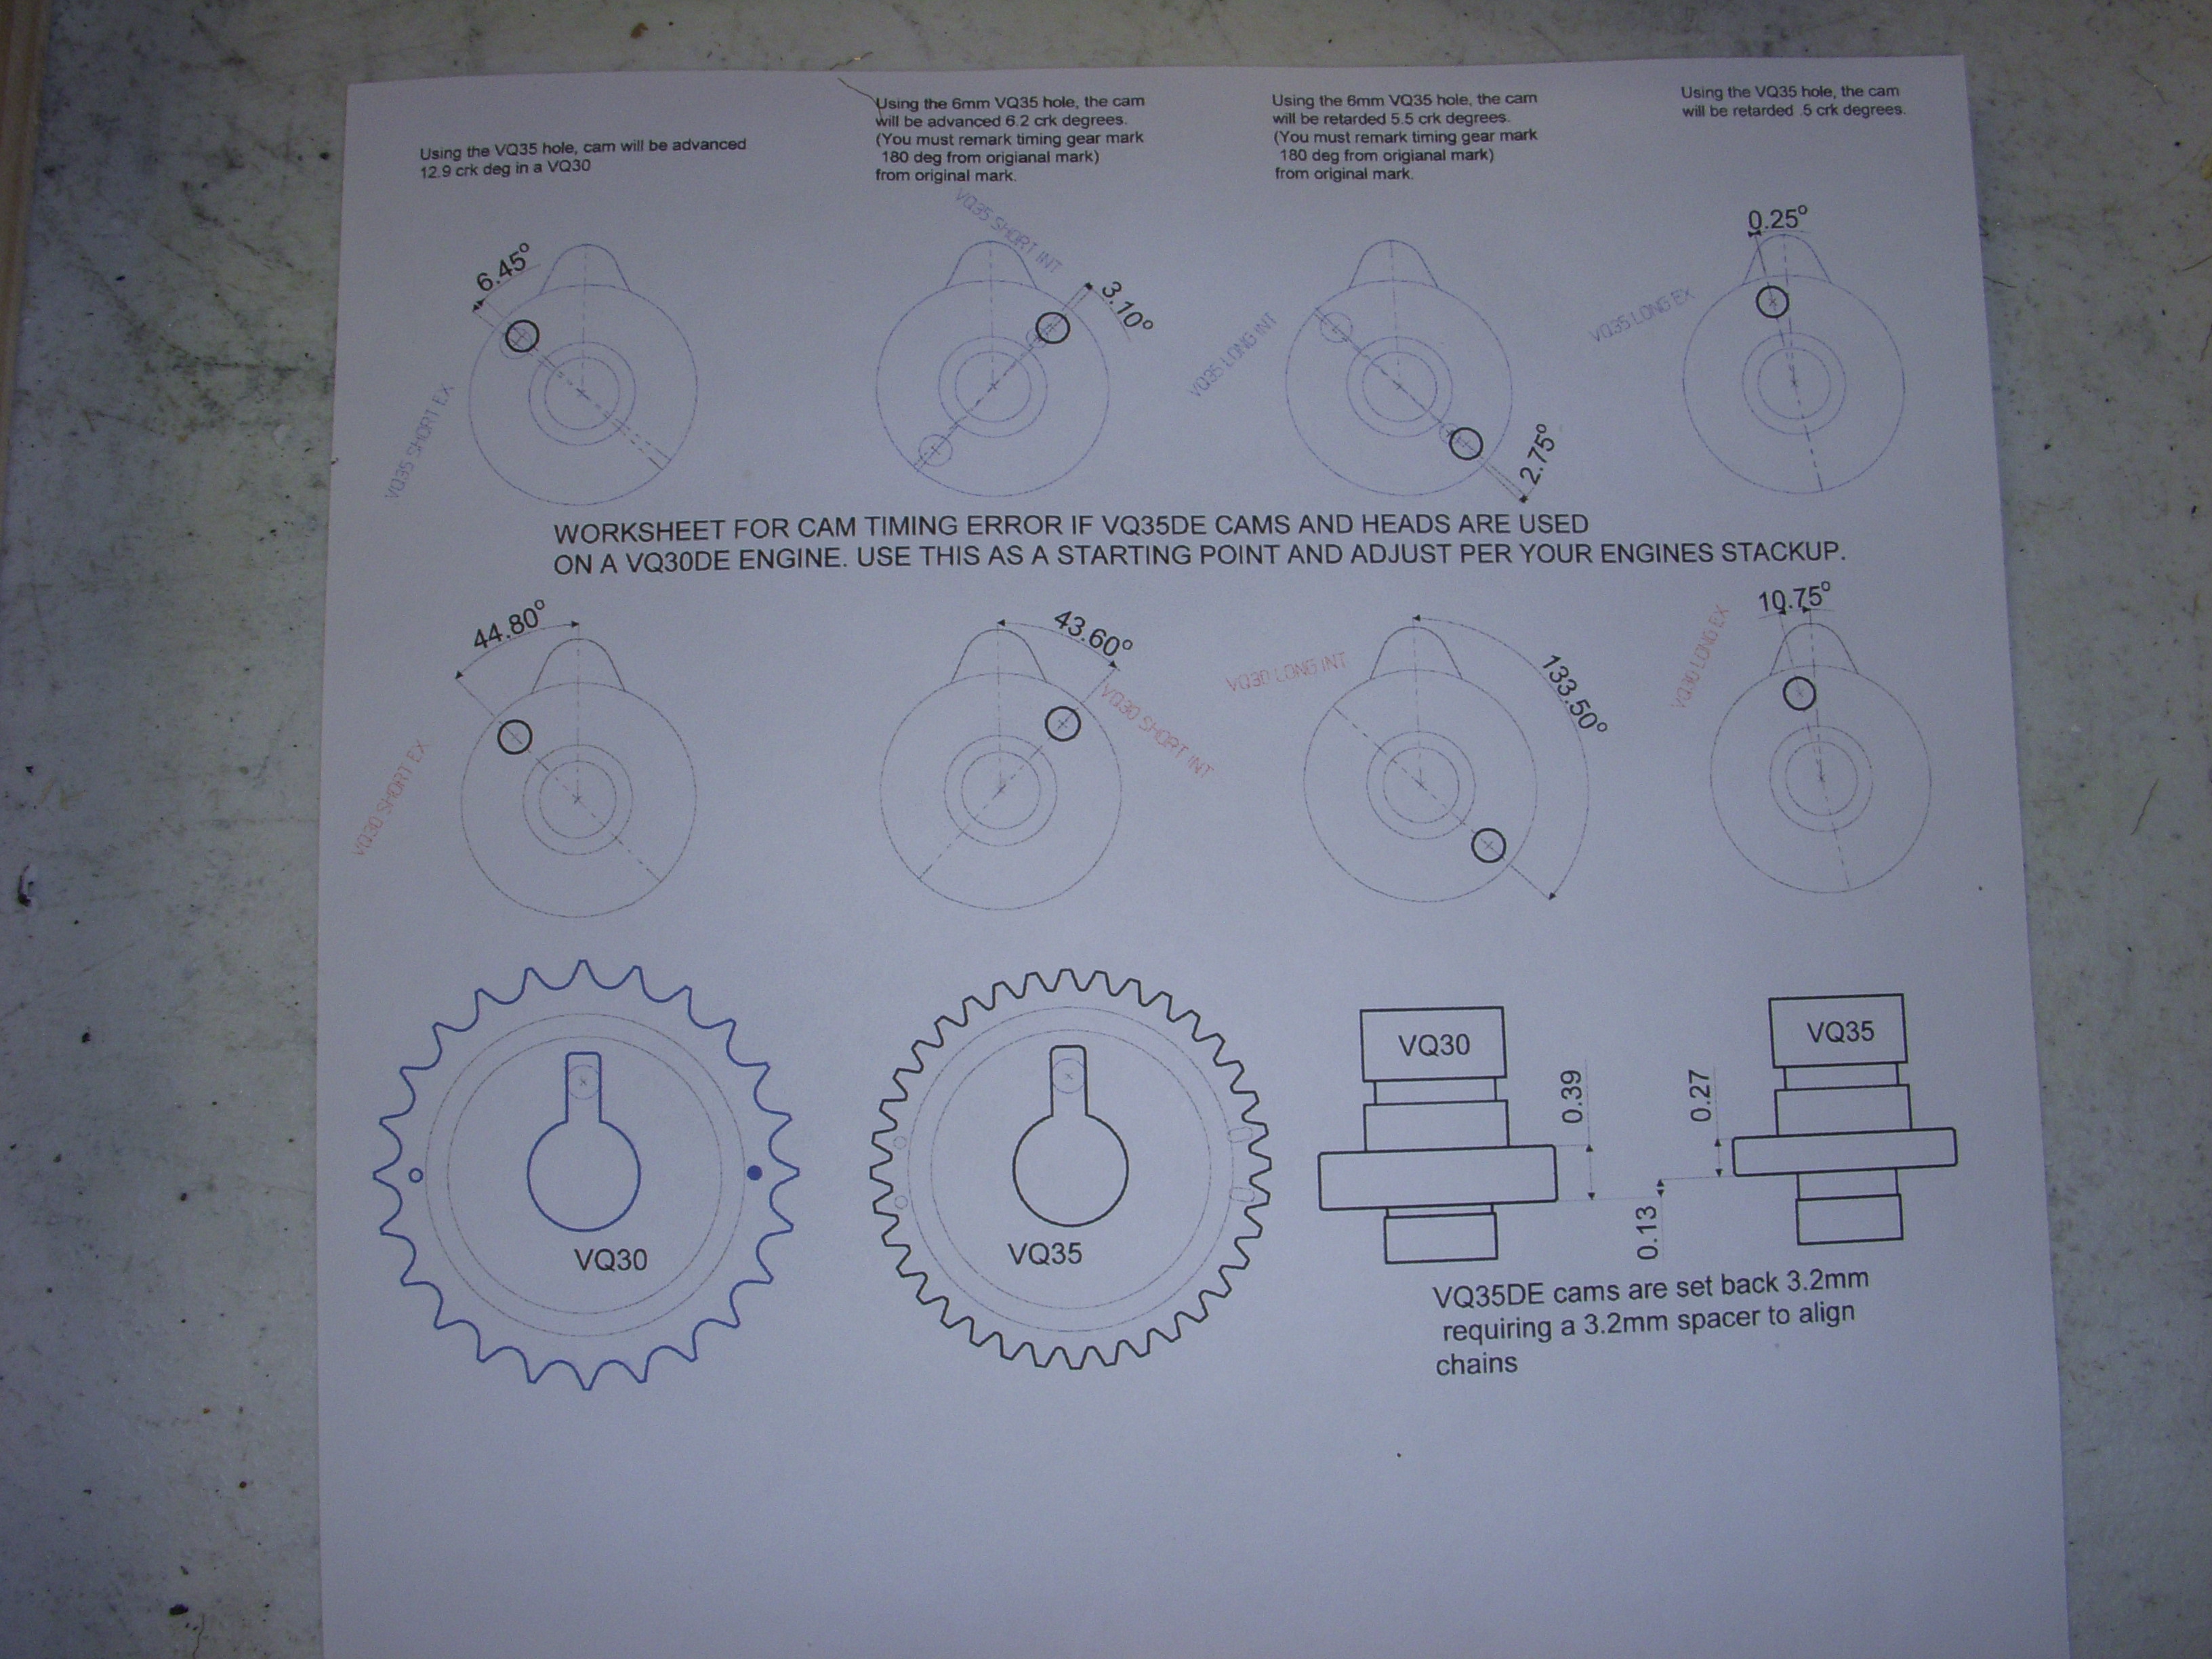
JWT expects that the gears may need surgery to meet specs, even though the cams were drilled to match the 3.0 specs. Because the lobes are huge the actual lobe timing will be different between left and right pairs - actual measurements are required. The 50lb test springs make this easier than the real HR monster springs.
If I can get this far, then the heads come off and the test valve springs come out and the new hand-picked HR springs and special spacers will be installed, heads re-installed, and the whole clearance testing plan starts over - also with measurements made of clearances for each valve seal made, because they may require surgery - Ferrera seals are the starting point, but no guarantees, just real measurements required.
There's more but now I have a headache. Streetz, I just noticed that you wanted to discuss automatic trannys (woops, bad word now). How do you want to chat ??


more new stuff ...
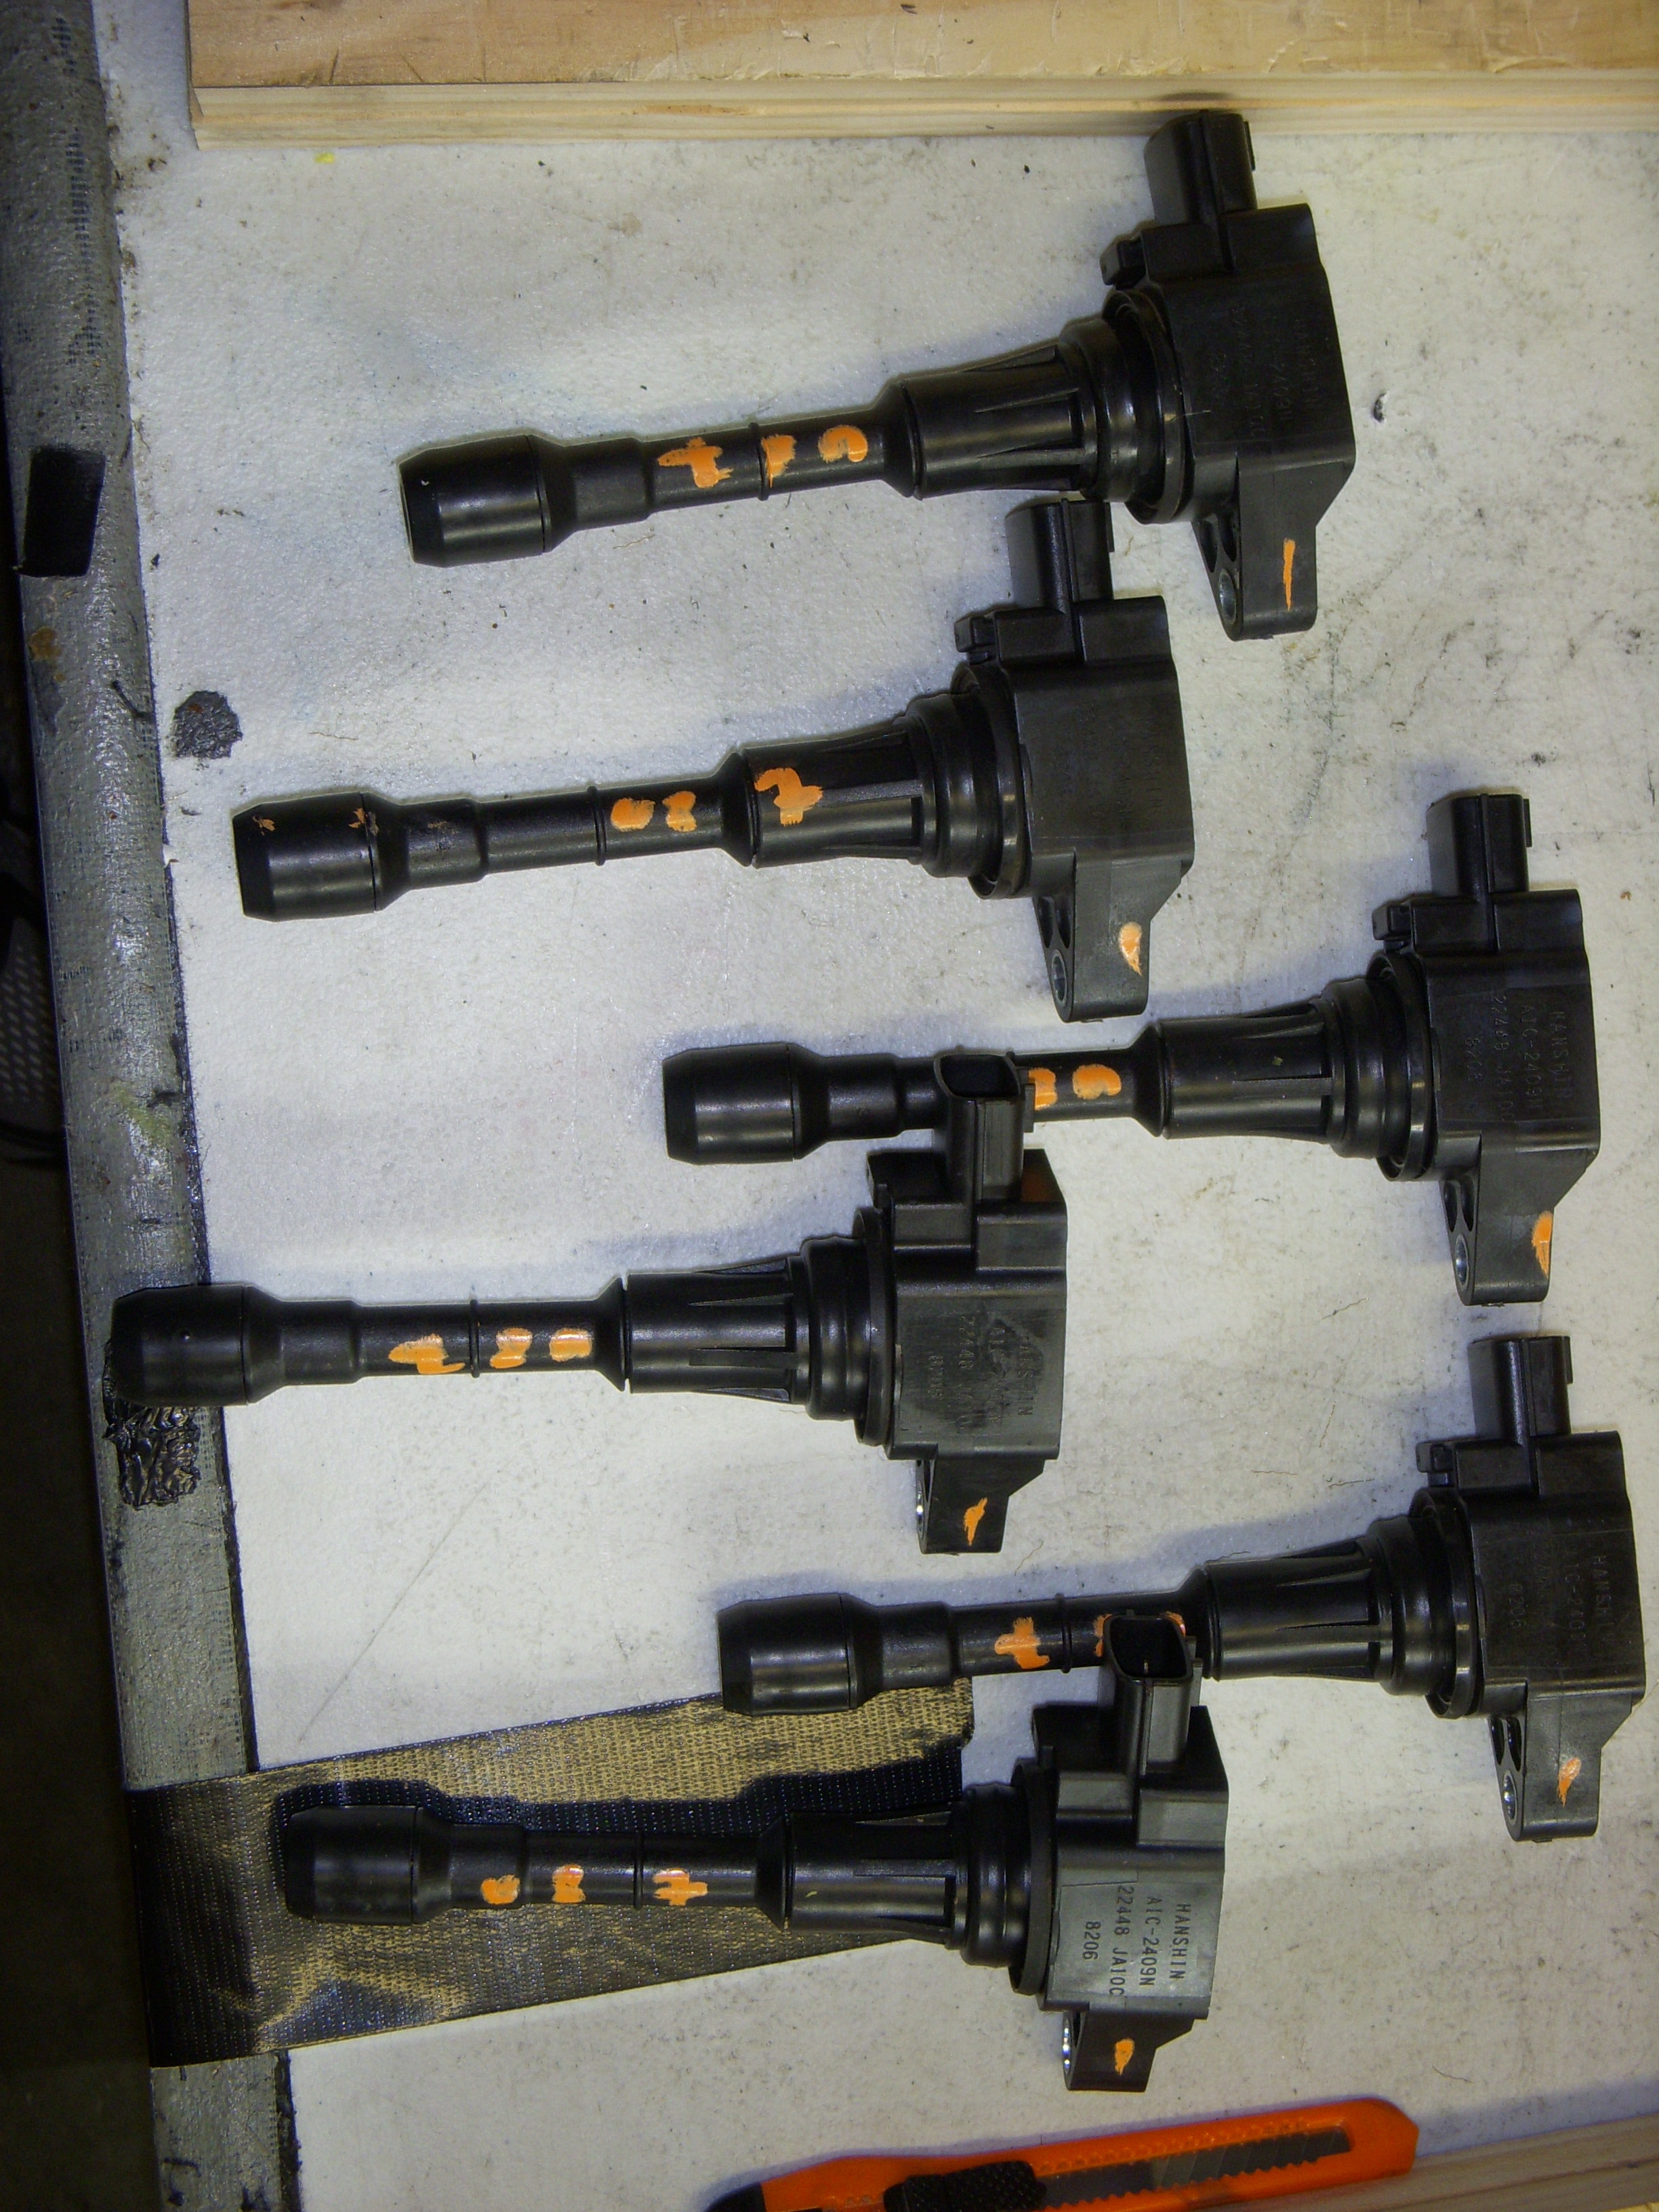
Don't have photos available yet, but I bought a Razco alloy crank dampener because it looks racecar (which came with a list of belts for PS and Alt/AC) and received 6 OEM Nissan 2009 350Z ignition coils which will fit on the Altima valve covers when mounted on the HR heads I'm working on. I bought the heads used without valve covers or coils or cam sensors, and since they are kinda tied together and there are a lot of OEM options, I selected the Altima valve cover because I need only one intake cam sensor for the Megasquirt MS3-Pro part of the project, so I can have a Plan-B cam sensor (bought two replacement sensors) available on the right head... I bought a couple of 2009+ cheap factory replacement coils to verify mounting, then ordered a set of 6 used OEM coils which mount correctly on the Altima covers and the new Denso iridium plugs.
Now that I have valve covers, spark plugs, ignition coils, and cam sensors figured out, I am really thinking about turbocharging the new engine, and have been reading some of my books on that subject. It looks pretty simple to do - change pistons to 8.5 CR, add a couple of controllers, weld some tubing, and PRESTO - 30+ psi of boost - right ???
Now that I have valve covers, spark plugs, ignition coils, and cam sensors figured out, I am really thinking about turbocharging the new engine, and have been reading some of my books on that subject. It looks pretty simple to do - change pistons to 8.5 CR, add a couple of controllers, weld some tubing, and PRESTO - 30+ psi of boost - right ???
A few more updated photos
Some misc parts photos, and while I was studying the JWT C11/Rz1 cam timing sheets, I found that JWT has a slightly different valve lash spec for both cams - .013" + or - .001", so I'll need to open up the valve clearances on most valves. At least I documented everything as-is.
Got to get this hole welded up..
The six 2009 350Z coils I need:


Got to get this hole welded up..

The six 2009 350Z coils I need:

Last edited by grey99max; Jan 15, 2017 at 12:27 PM.


Some catchup photos and information - because - well, because...
Over the weekend I went to two of the three days of the NHRA Kansas Nationals at the refurbished Heartland Park race tracks. Friday was the first day of eliminations, and I was invited to the pits of "Fast Jack" Beckman, the #2 Fuel Funny car driver and team manager. I got a 15-minute tour of his main trailer, which is where they store huge numbers of parts ( 12 engines!) and another complete car up in the top of the trailer. I met all three crew chiefs and the rest of the crew - just before another elimination round, so things were hectic.
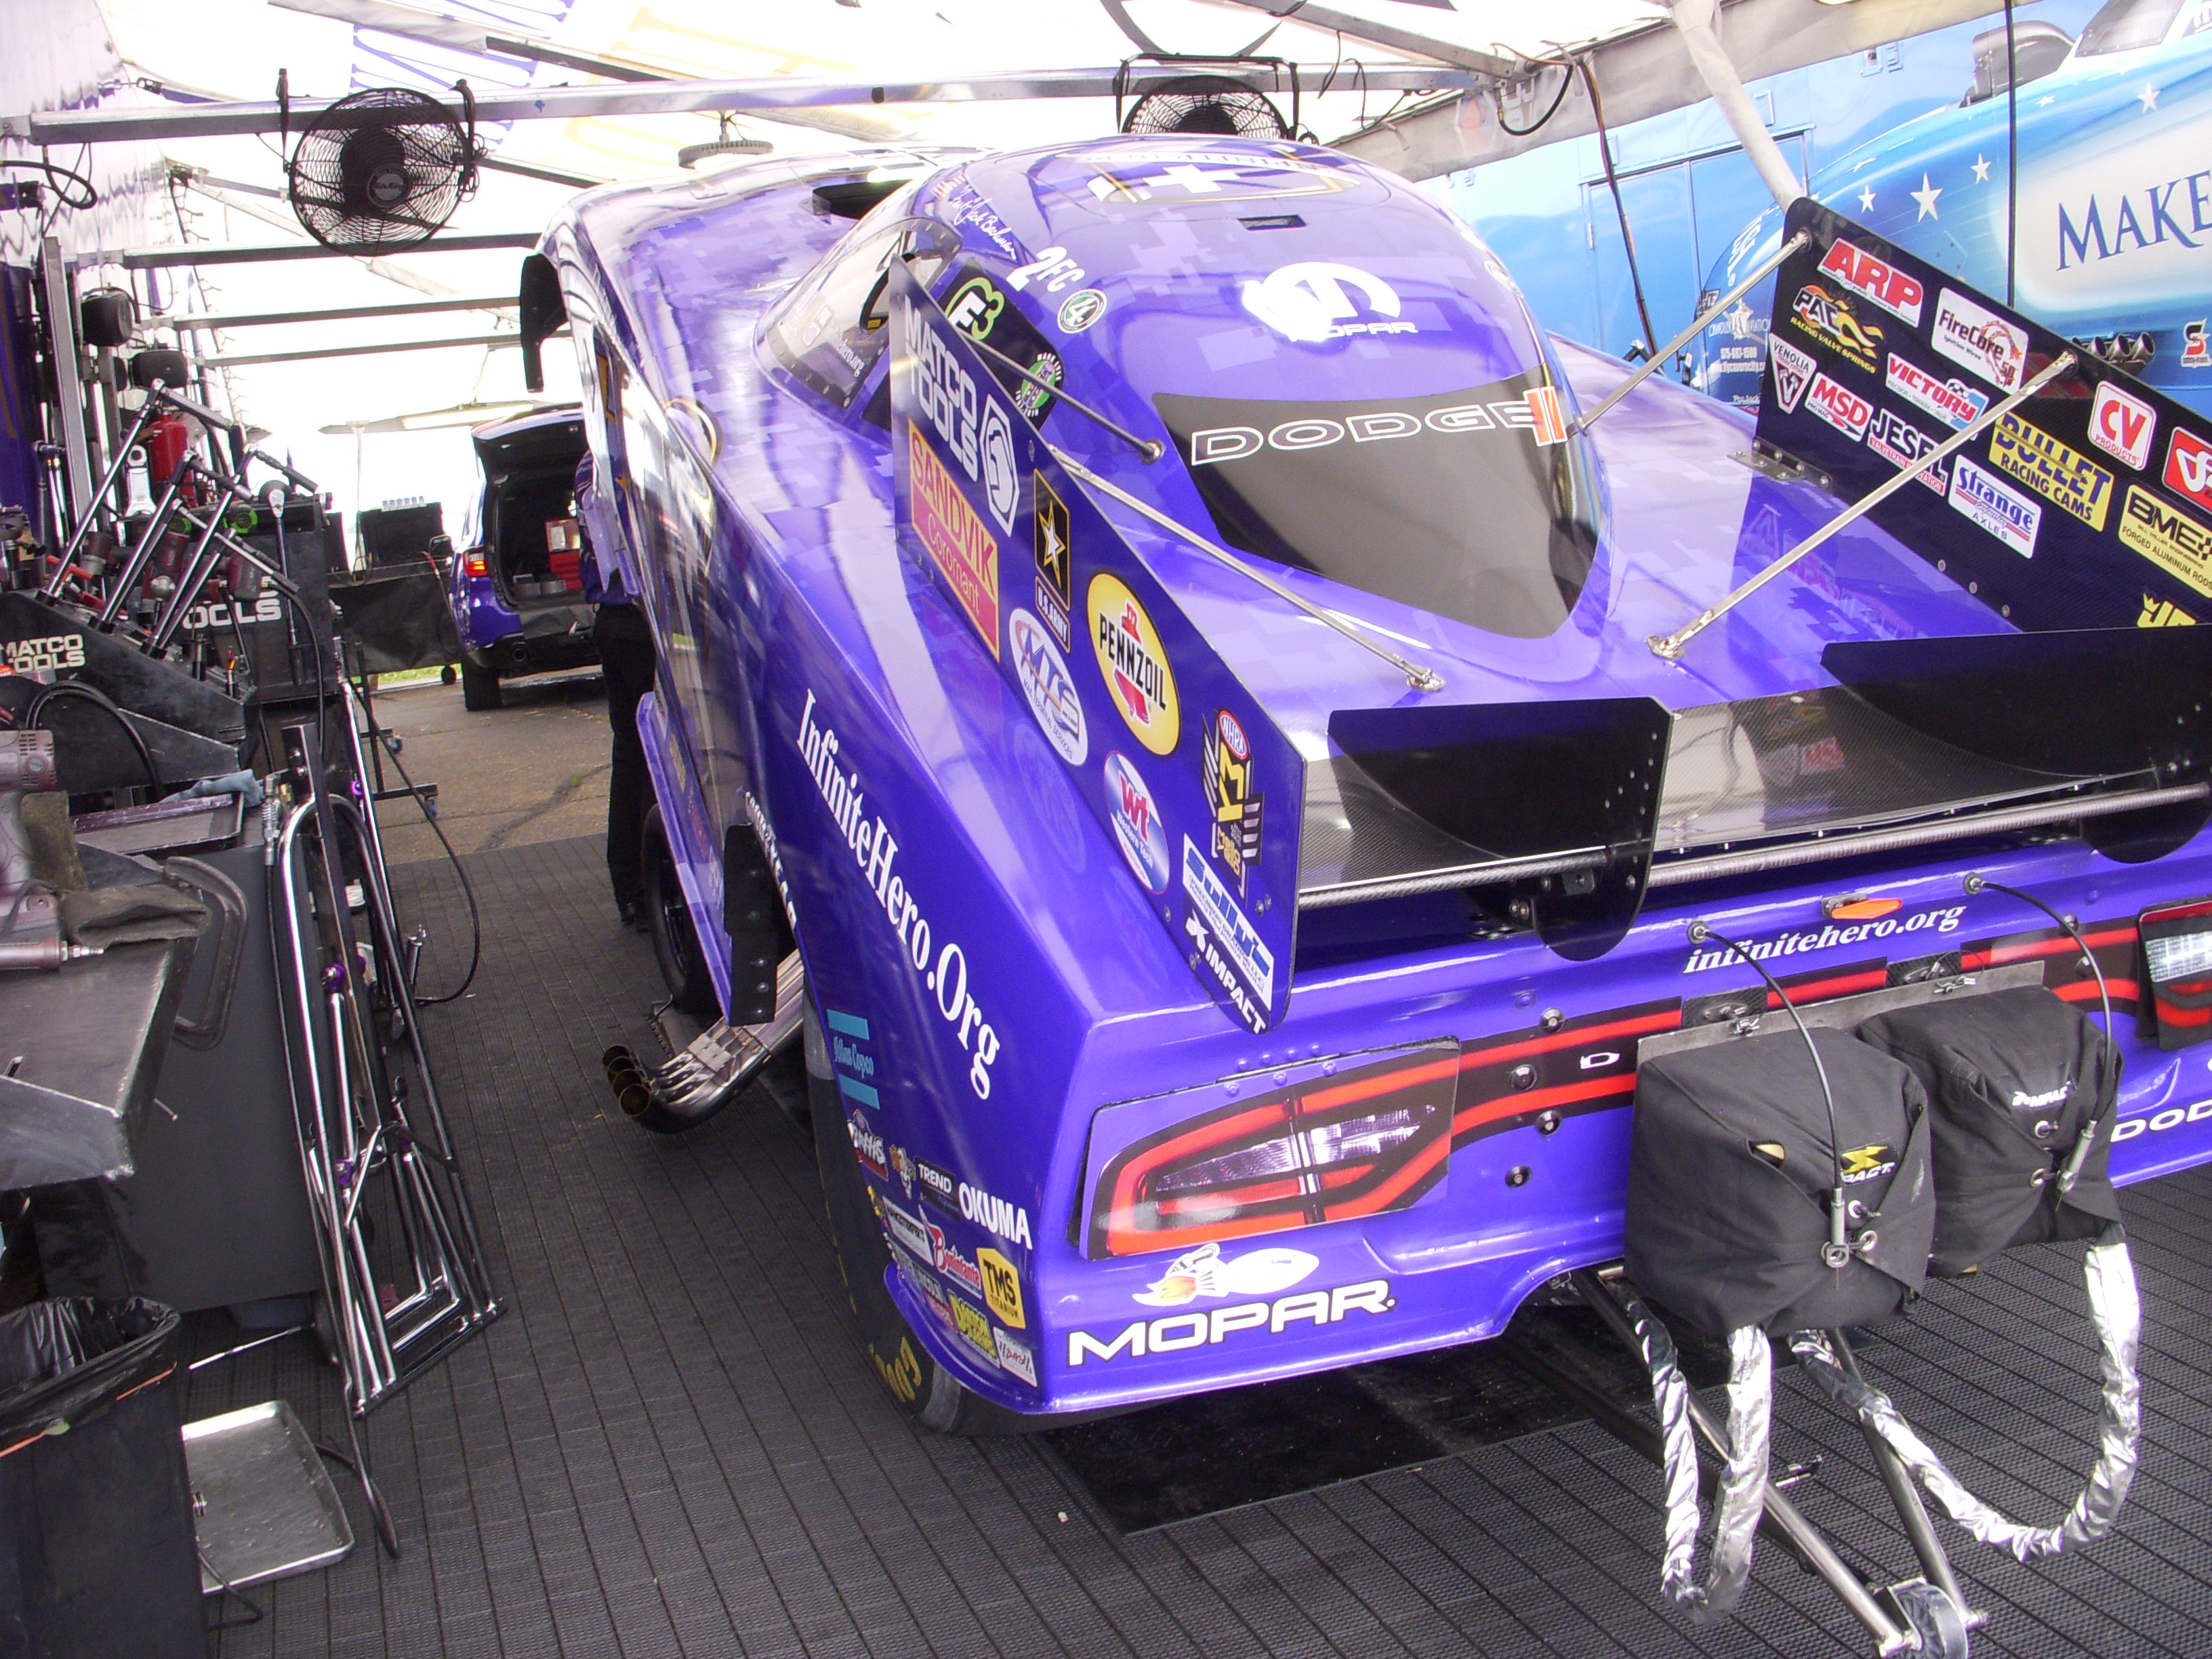
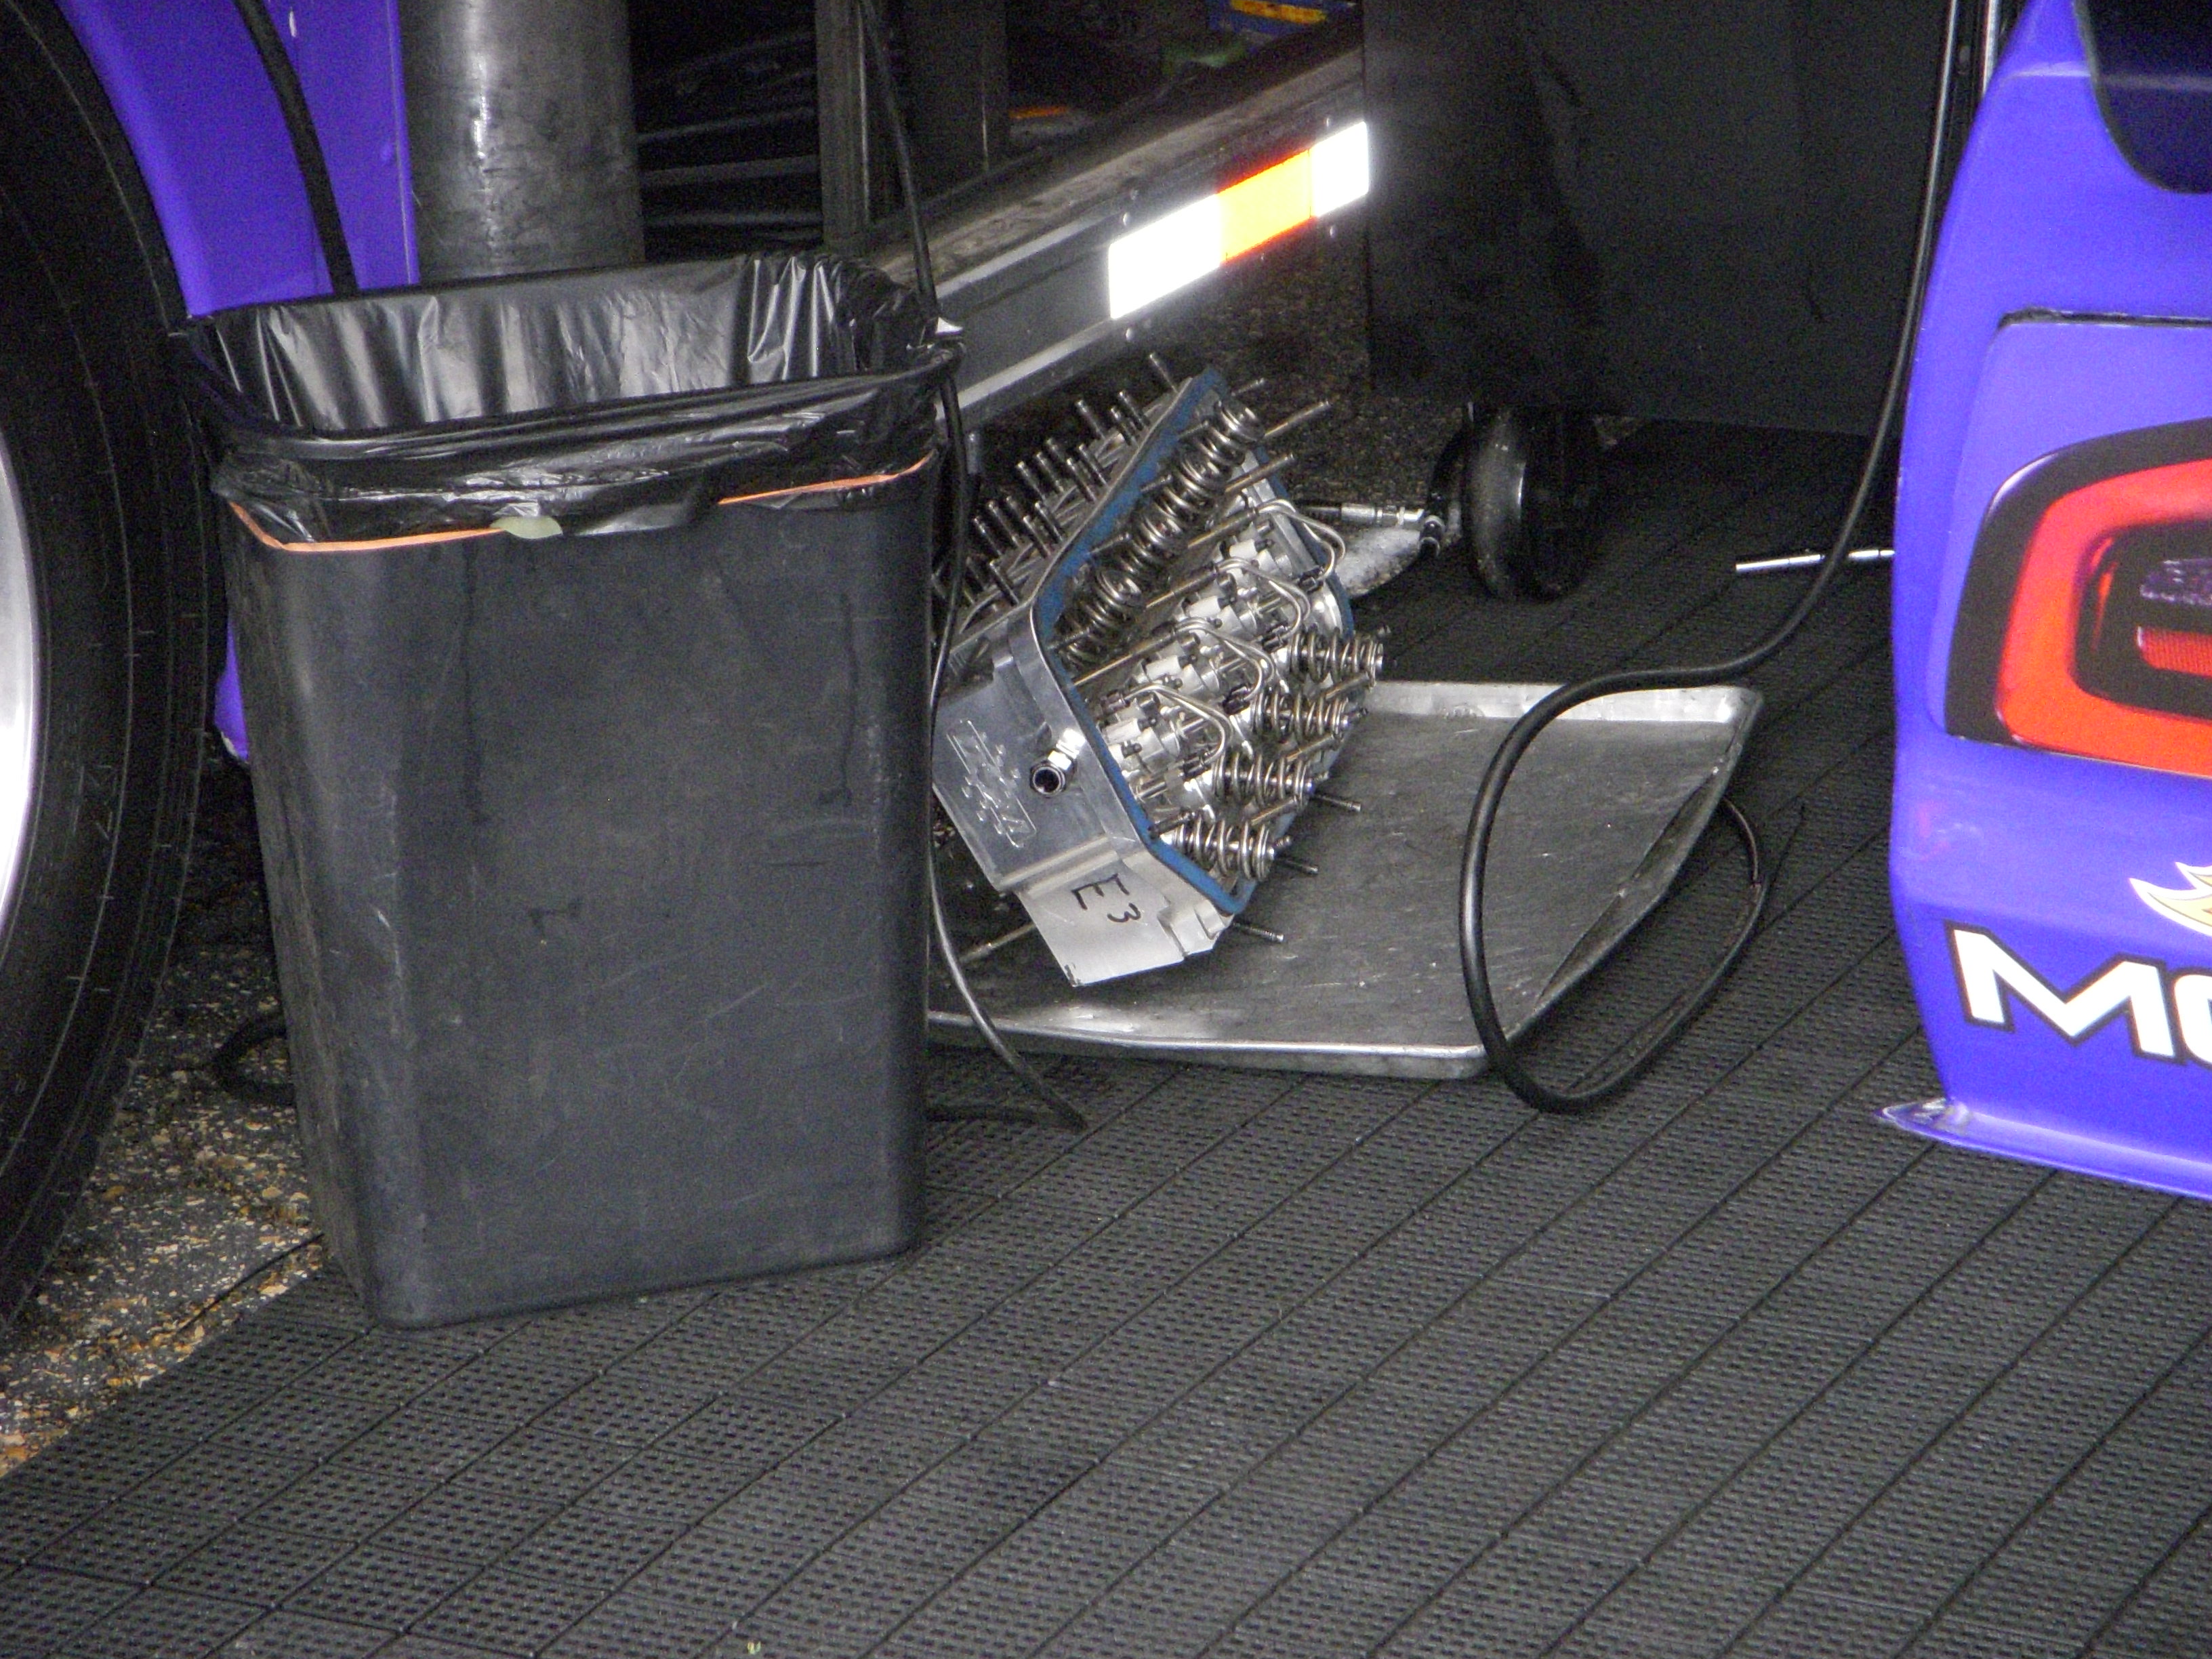


Jack was #2 in national rankings, and made it all the way to the final day and last round, when both cars broke traction on the launch - more than once. Fast Jack lost out.
But this thread isn't about NHRA National events, so I'll go onto my experiences with the HR heads...
Over the weekend I went to two of the three days of the NHRA Kansas Nationals at the refurbished Heartland Park race tracks. Friday was the first day of eliminations, and I was invited to the pits of "Fast Jack" Beckman, the #2 Fuel Funny car driver and team manager. I got a 15-minute tour of his main trailer, which is where they store huge numbers of parts ( 12 engines!) and another complete car up in the top of the trailer. I met all three crew chiefs and the rest of the crew - just before another elimination round, so things were hectic.


Jack was #2 in national rankings, and made it all the way to the final day and last round, when both cars broke traction on the launch - more than once. Fast Jack lost out.
But this thread isn't about NHRA National events, so I'll go onto my experiences with the HR heads...
Last edited by grey99max; Jan 15, 2017 at 12:37 PM.
I had to go back through all the valves and reset everything to .013" + or - .001" so there was a lot of grinding down some lifters or cutting a few new ones to get everything back into JWT spec. I did get everything done, and spent more time tweaking cam rotating clearances so all cams spin freely. There was a problem with clearance of one intake cam lobe against the support of the rear cam support - so I ground down the point of contact on both heads. The exhaust cam lobes have less lift so no problem with them.


Last edited by grey99max; Jan 15, 2017 at 12:43 PM.
Time to begin mounting the cam gears and see what else JWT forgot to mention. They provided 4 sets of "N" cam bolts which provide internal support to the cam ends. There were copper crush washers on each bolt but only two M12 5mm washers plus the four OEM washers. These won't work when using 3.0 timing gears with JWT custom HR cams on HR heads. I ordered more copper and M12-5mm stainless washers so everything will work together.
I did use the 3.2mm spacers from my last project, and once I get the washers I think I can mount the heads on the short block, install the rear cover and mount all the timing parts and see what works.
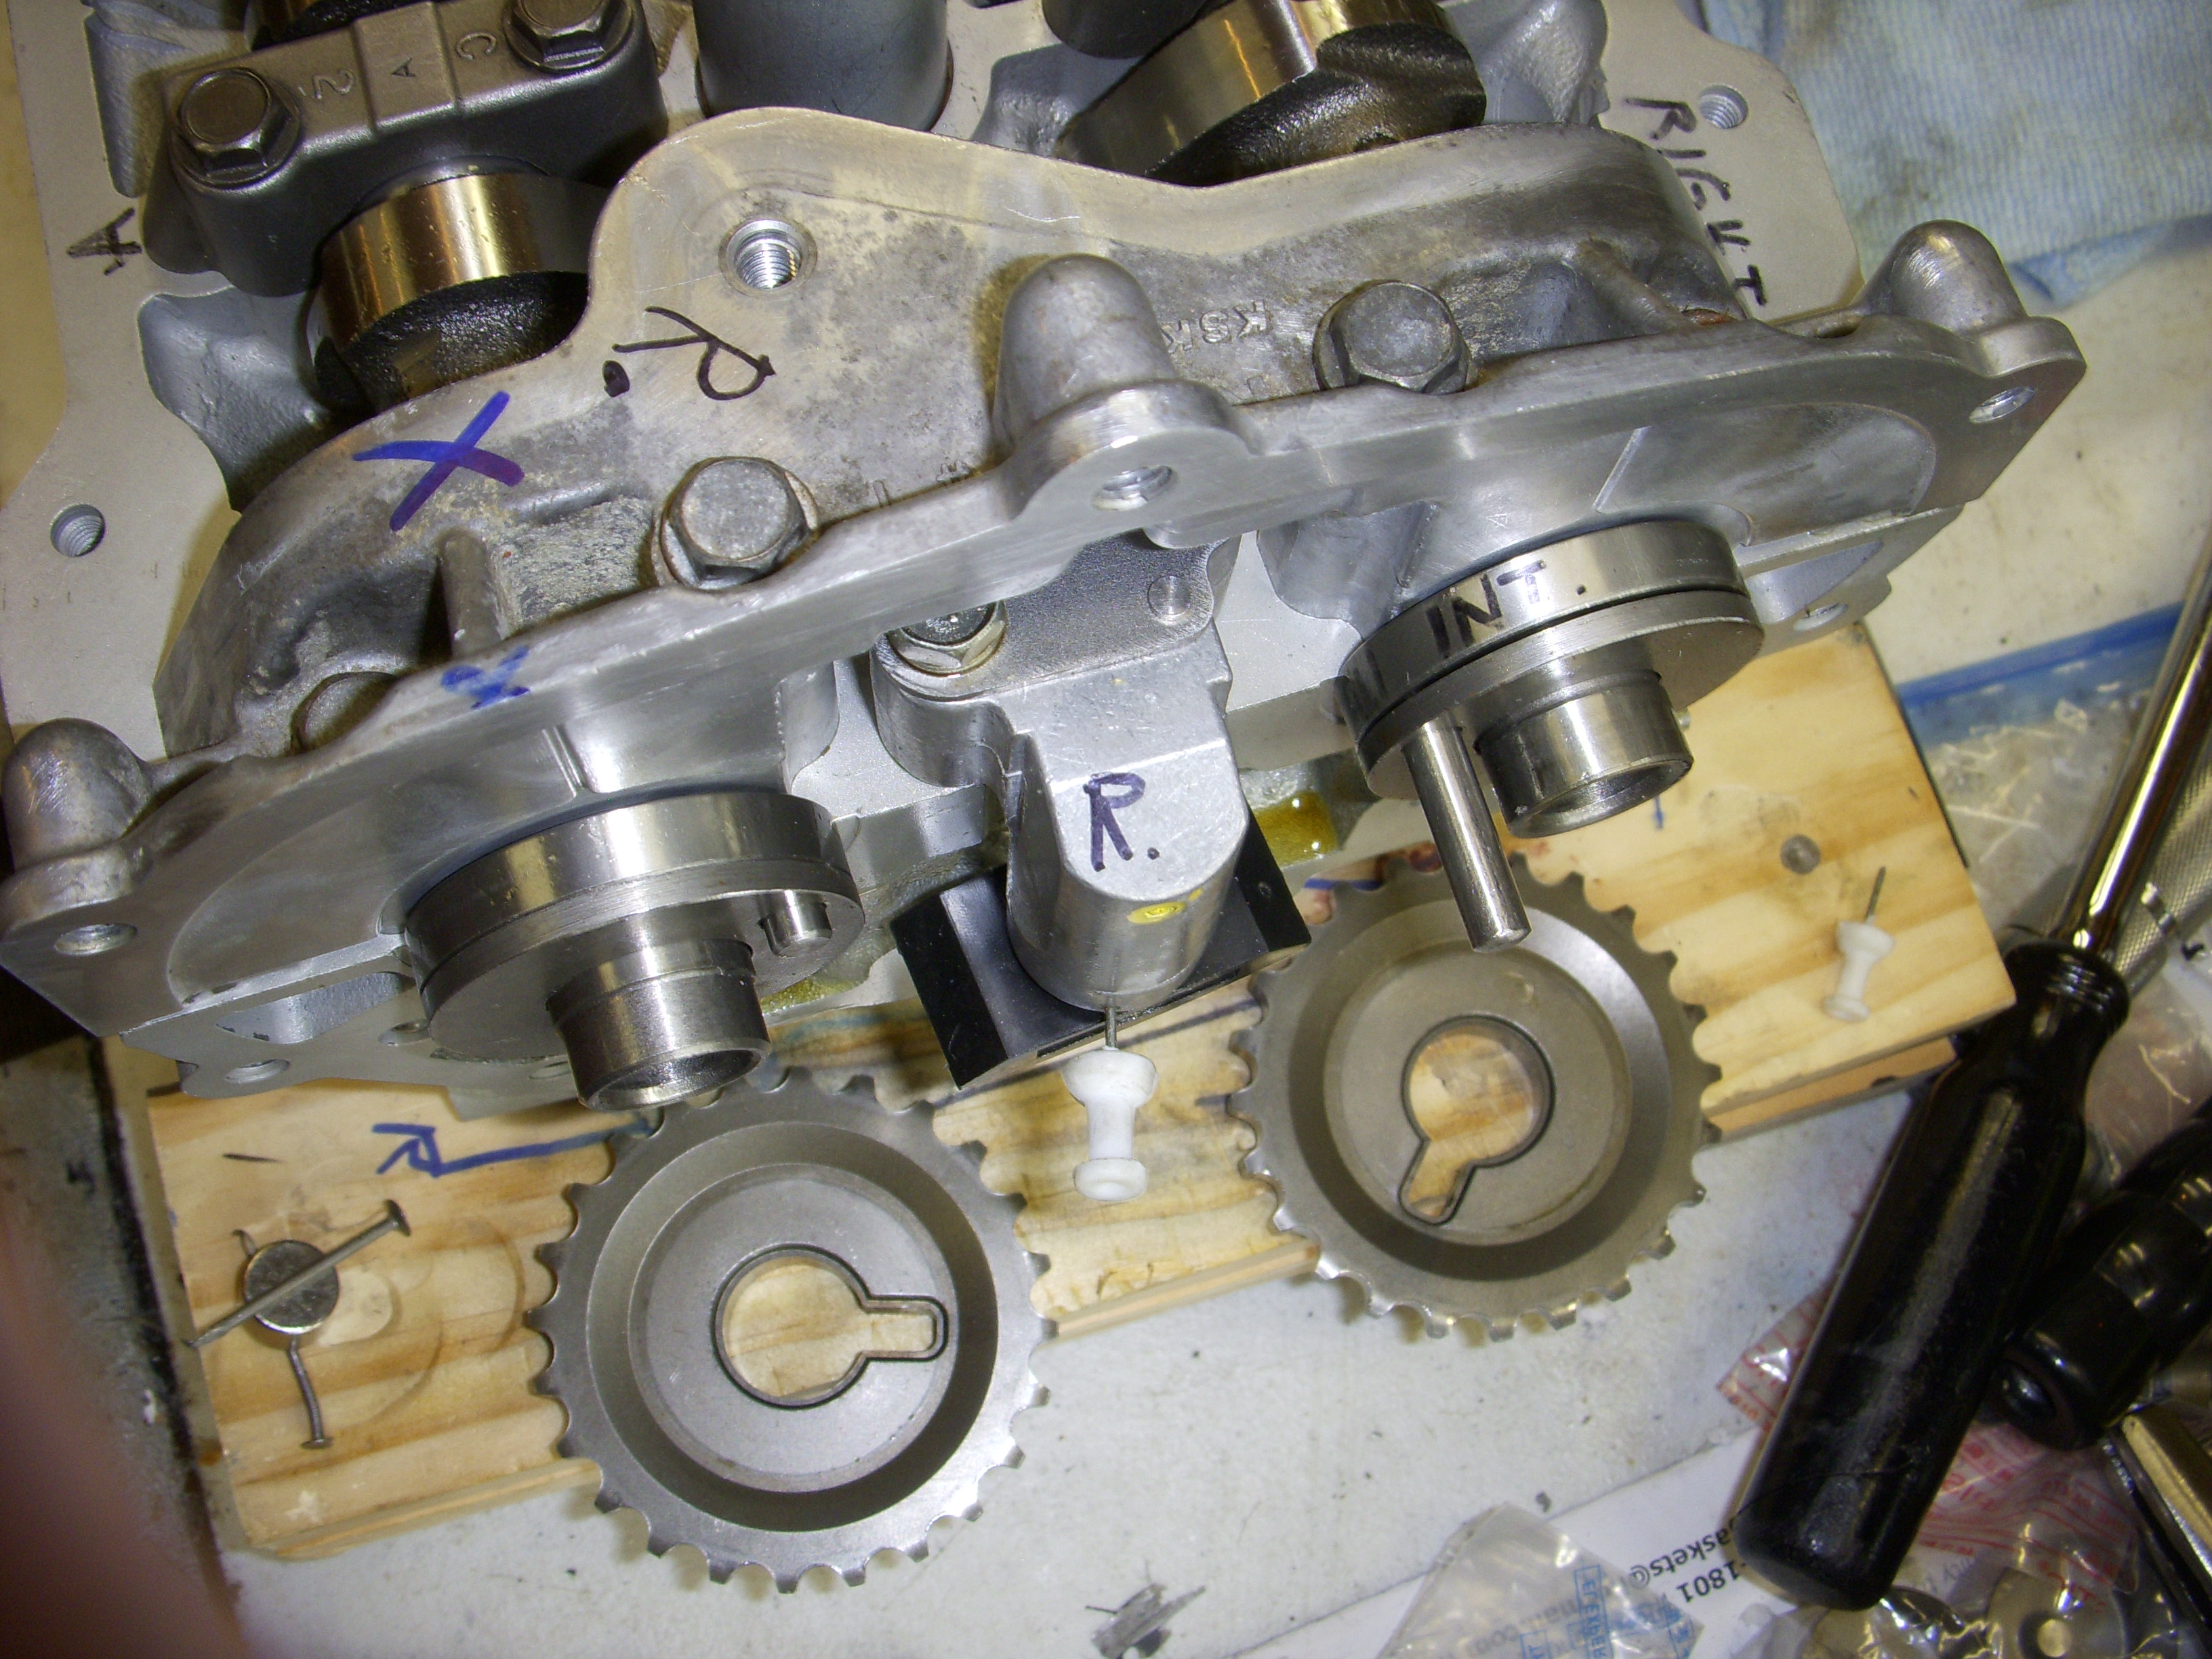
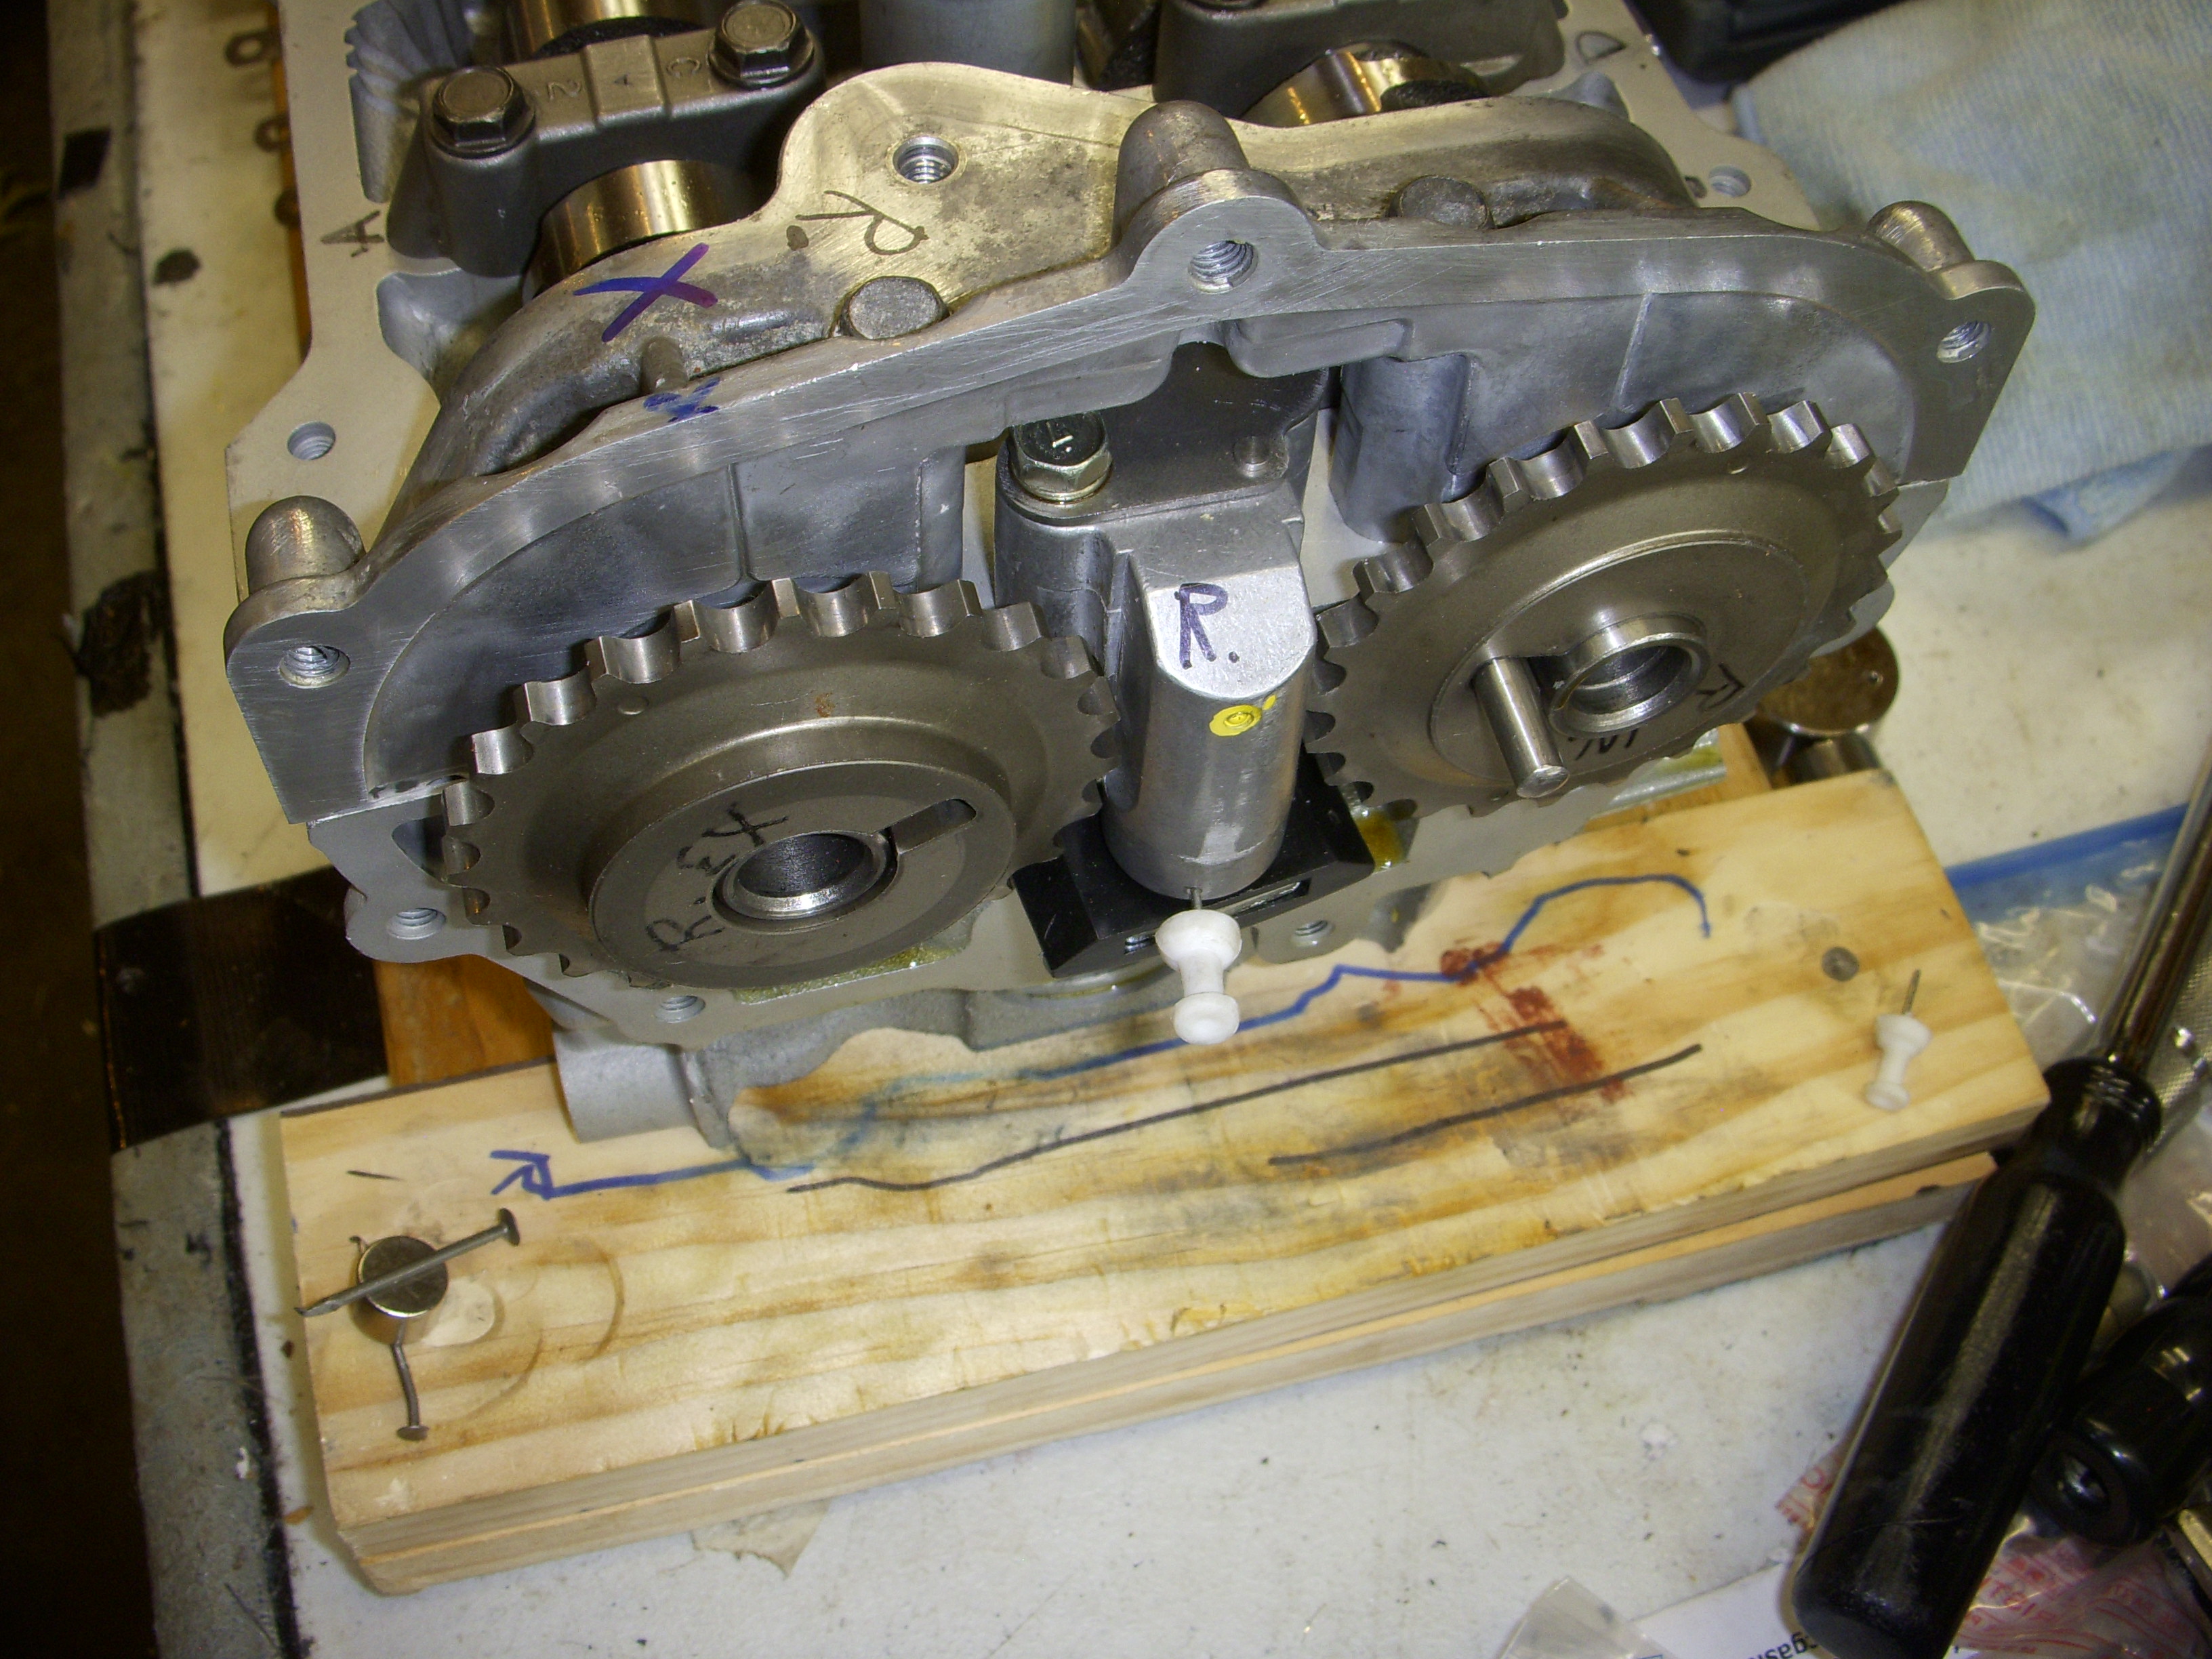

I did use the 3.2mm spacers from my last project, and once I get the washers I think I can mount the heads on the short block, install the rear cover and mount all the timing parts and see what works.


Last edited by grey99max; Jan 15, 2017 at 12:51 PM.


6-14-2016 Updates Girdle Updates and Mods
I talked nice to my engine today, gave it a couple of beers, and got its girdle off.
The new girdle was too thick, preventing the oil pan from fitting (about 1/2" too tall) and I've been trying different ways to braze aluminum patches over the hole I made in the base, but seven different types of rods and different sources of heat wouldn't flow metal, so I quit trying. Instead I took mama's girdle to a machine shop to get one end shaved down to the height of the OEM girdle for half of the distance between the main bolts. I took both pieces to the machine shop to avoid mistakes. Should be finished this week.
I'll re-install the new girdle and check with the second oil pan and if everything clears, the upper pan goes back on. Then I can install the APR head bolts, install the heads on new gaskets, install the rear cover and timing components and start checking cam timings.


Last edited by grey99max; Jan 15, 2017 at 01:56 PM.
June update, summary...
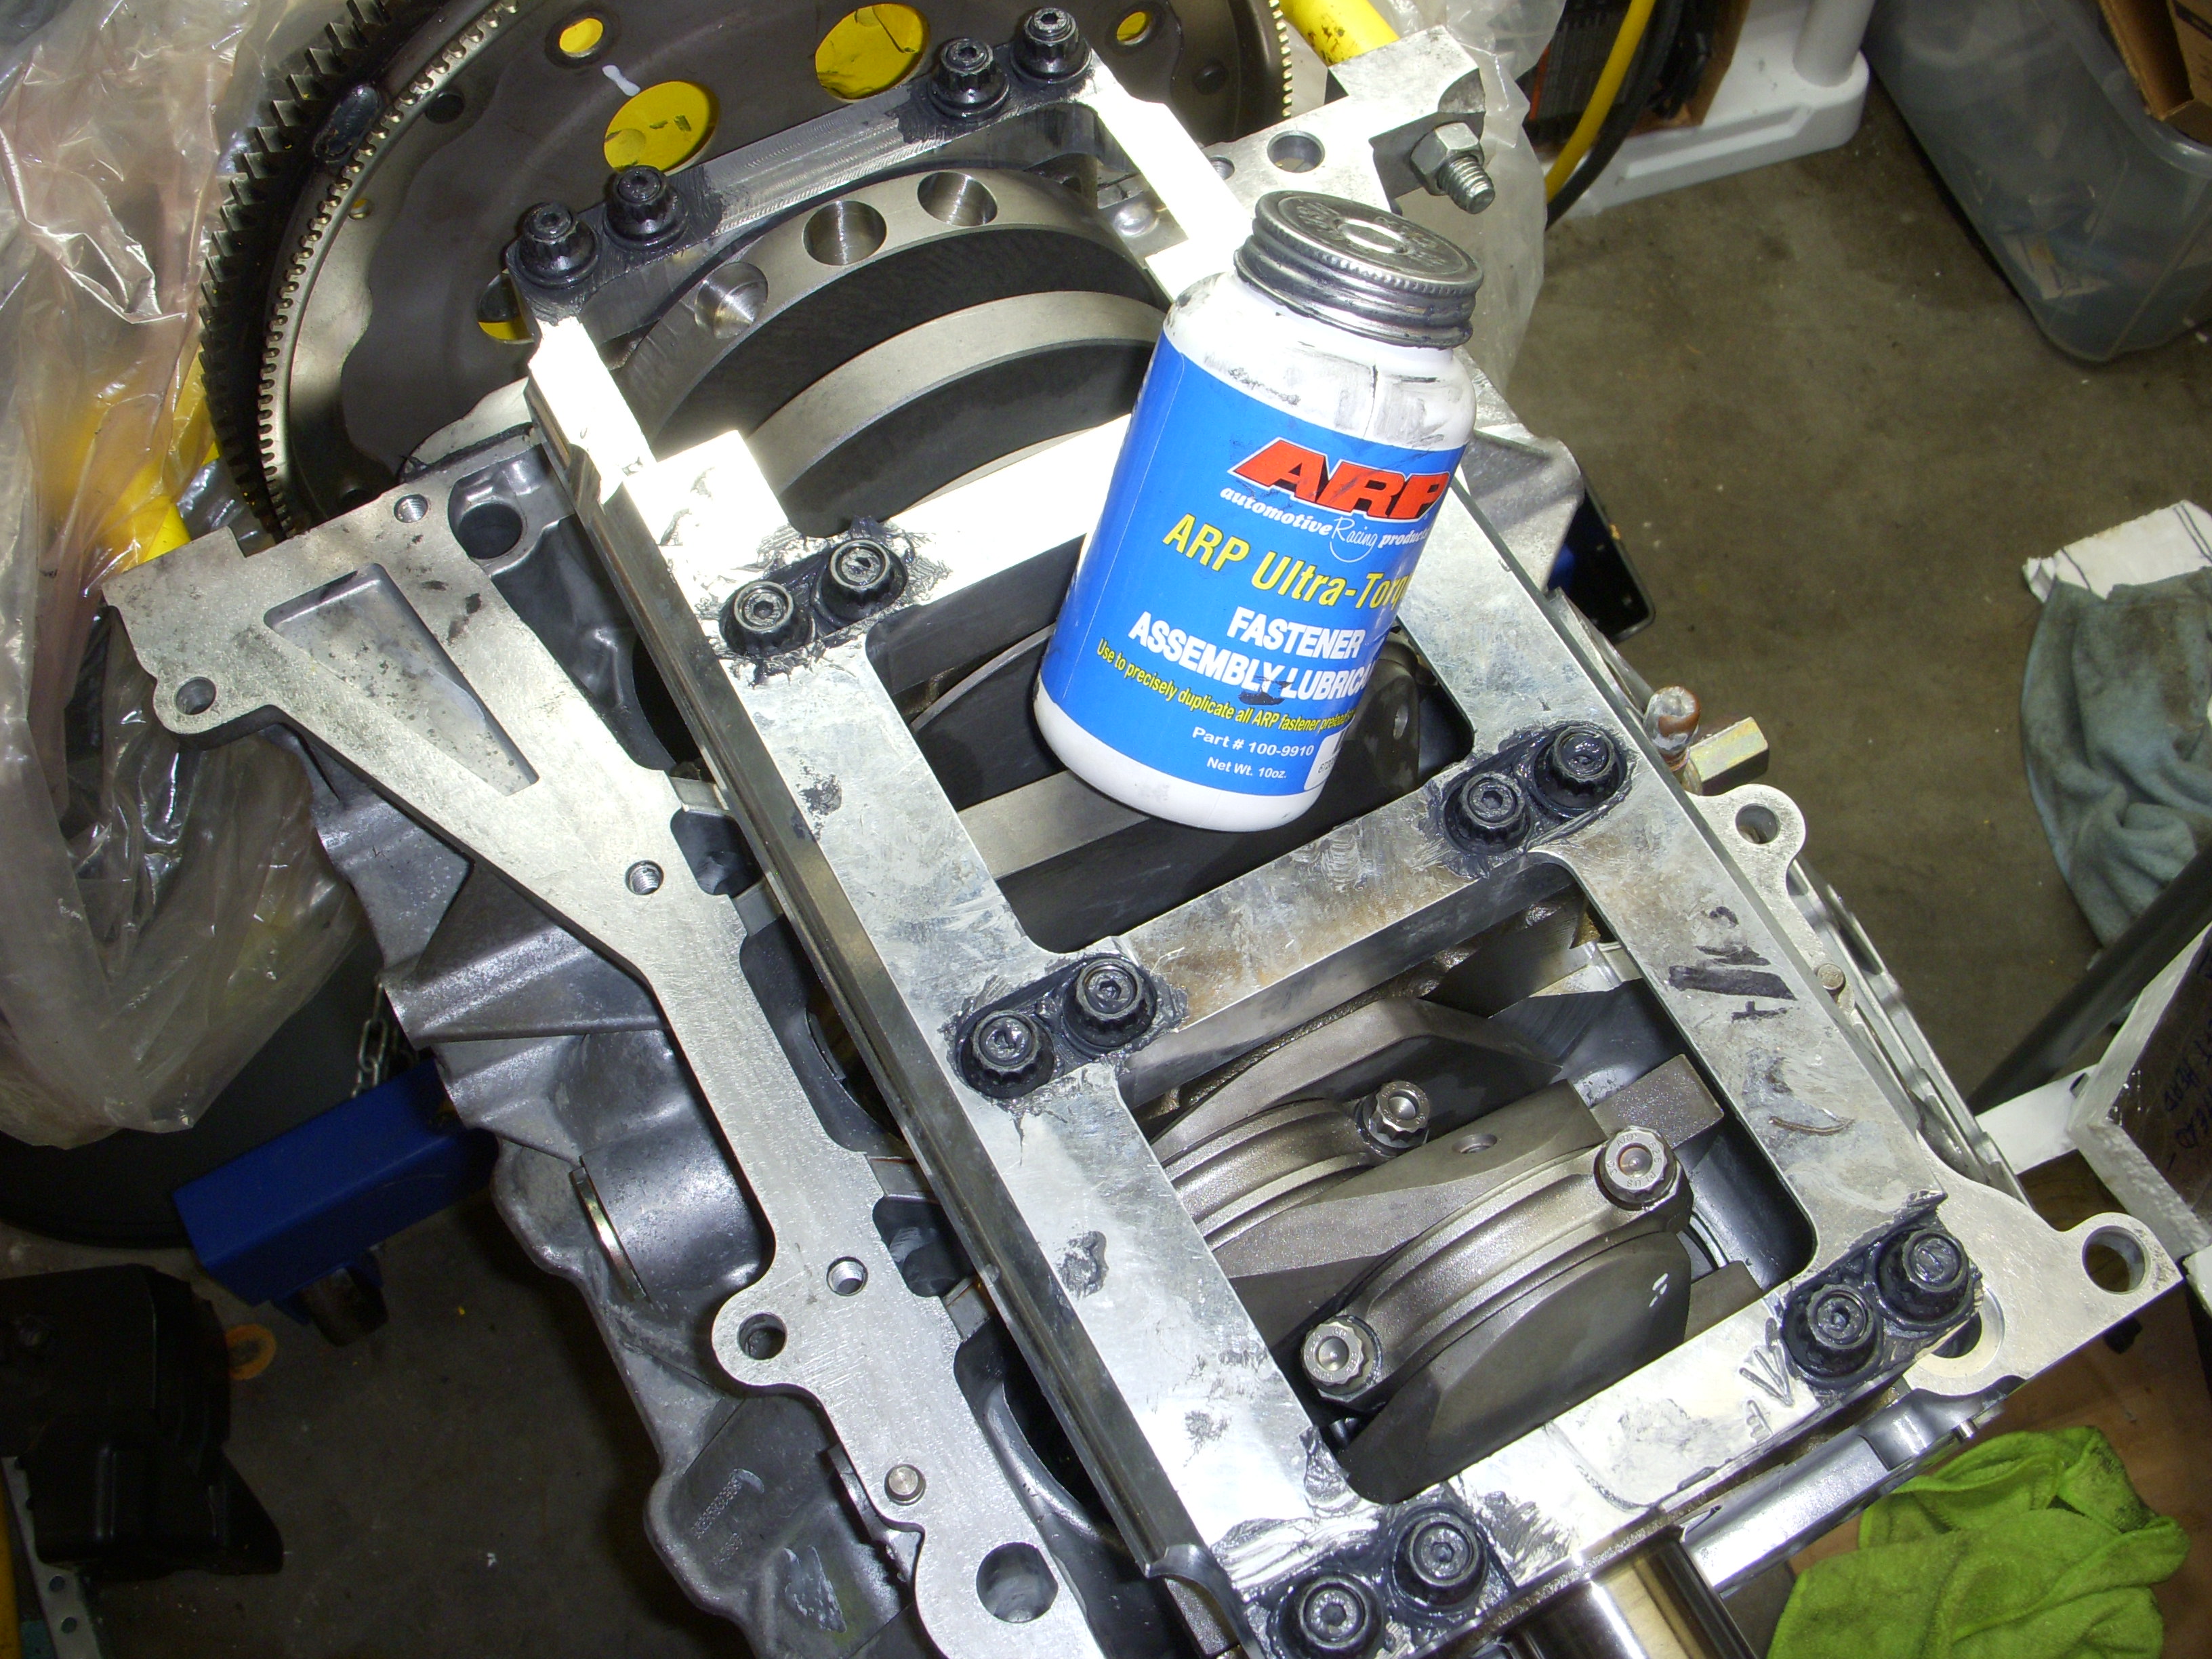
Since I'm waiting for a bucket of ARP Moly Assembly Lube, $26.00 for 10oz from Jegs, I'll finish updating photos and give a summary of the several projects going on together here.
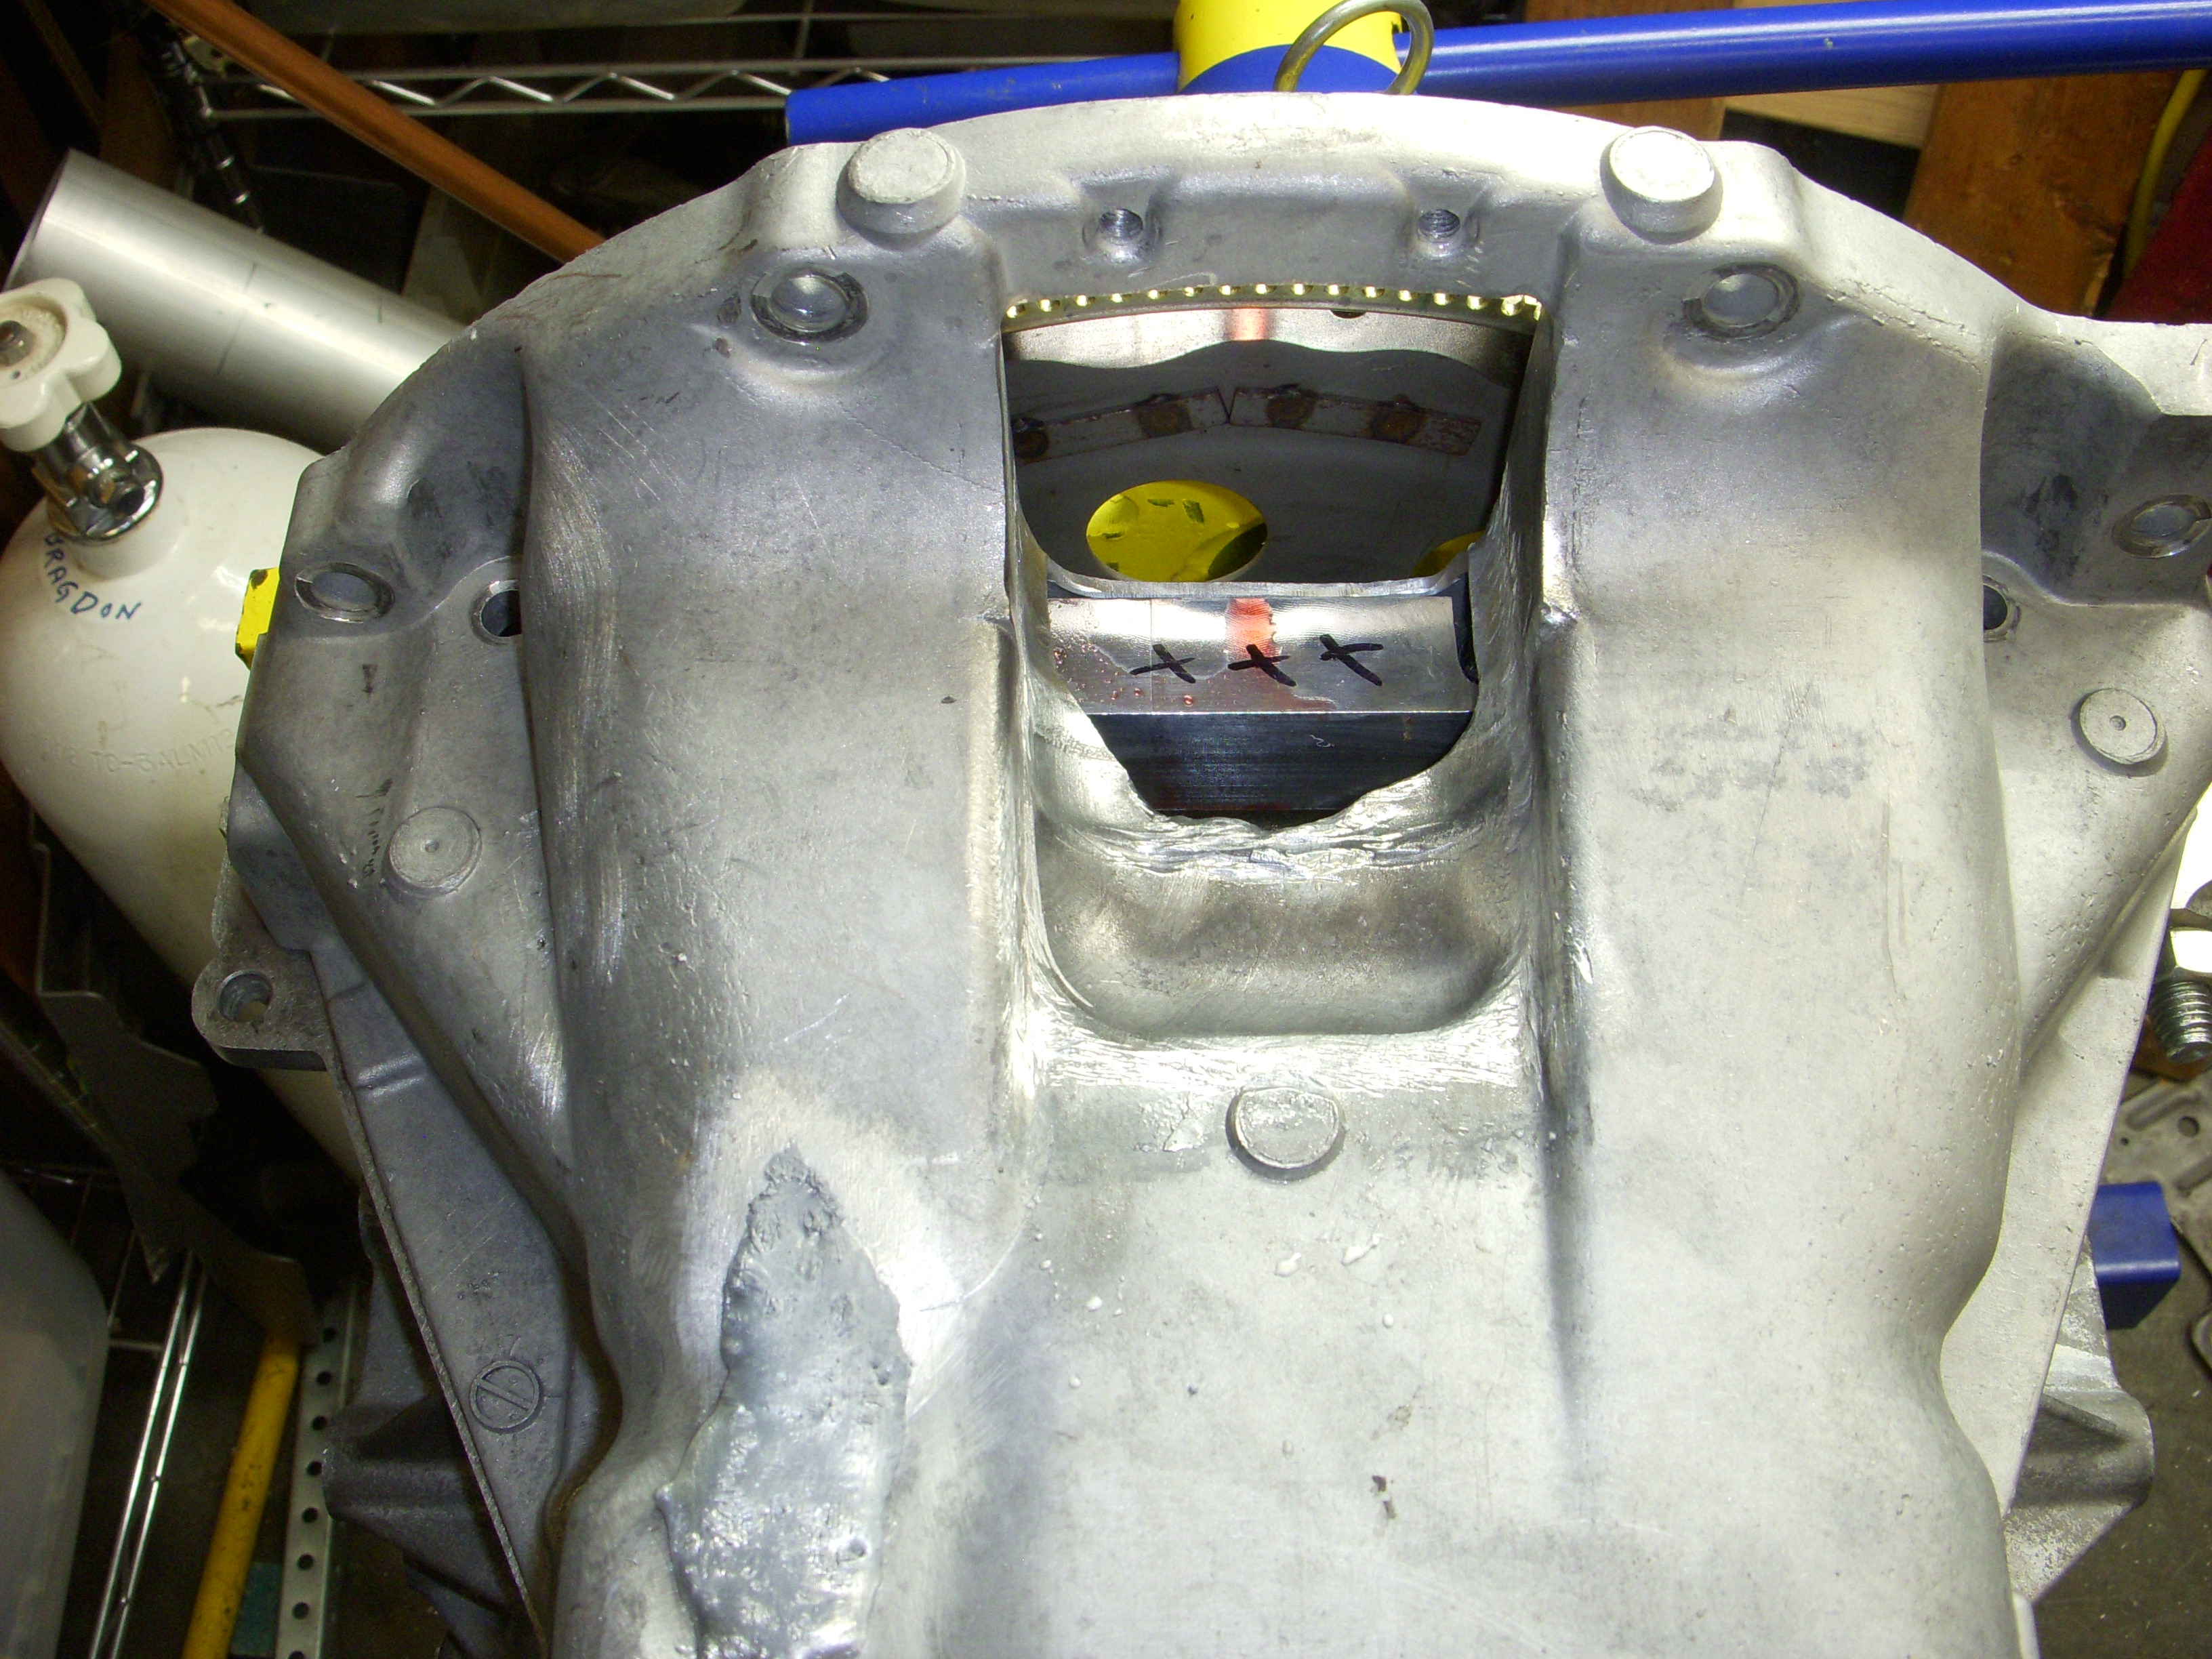
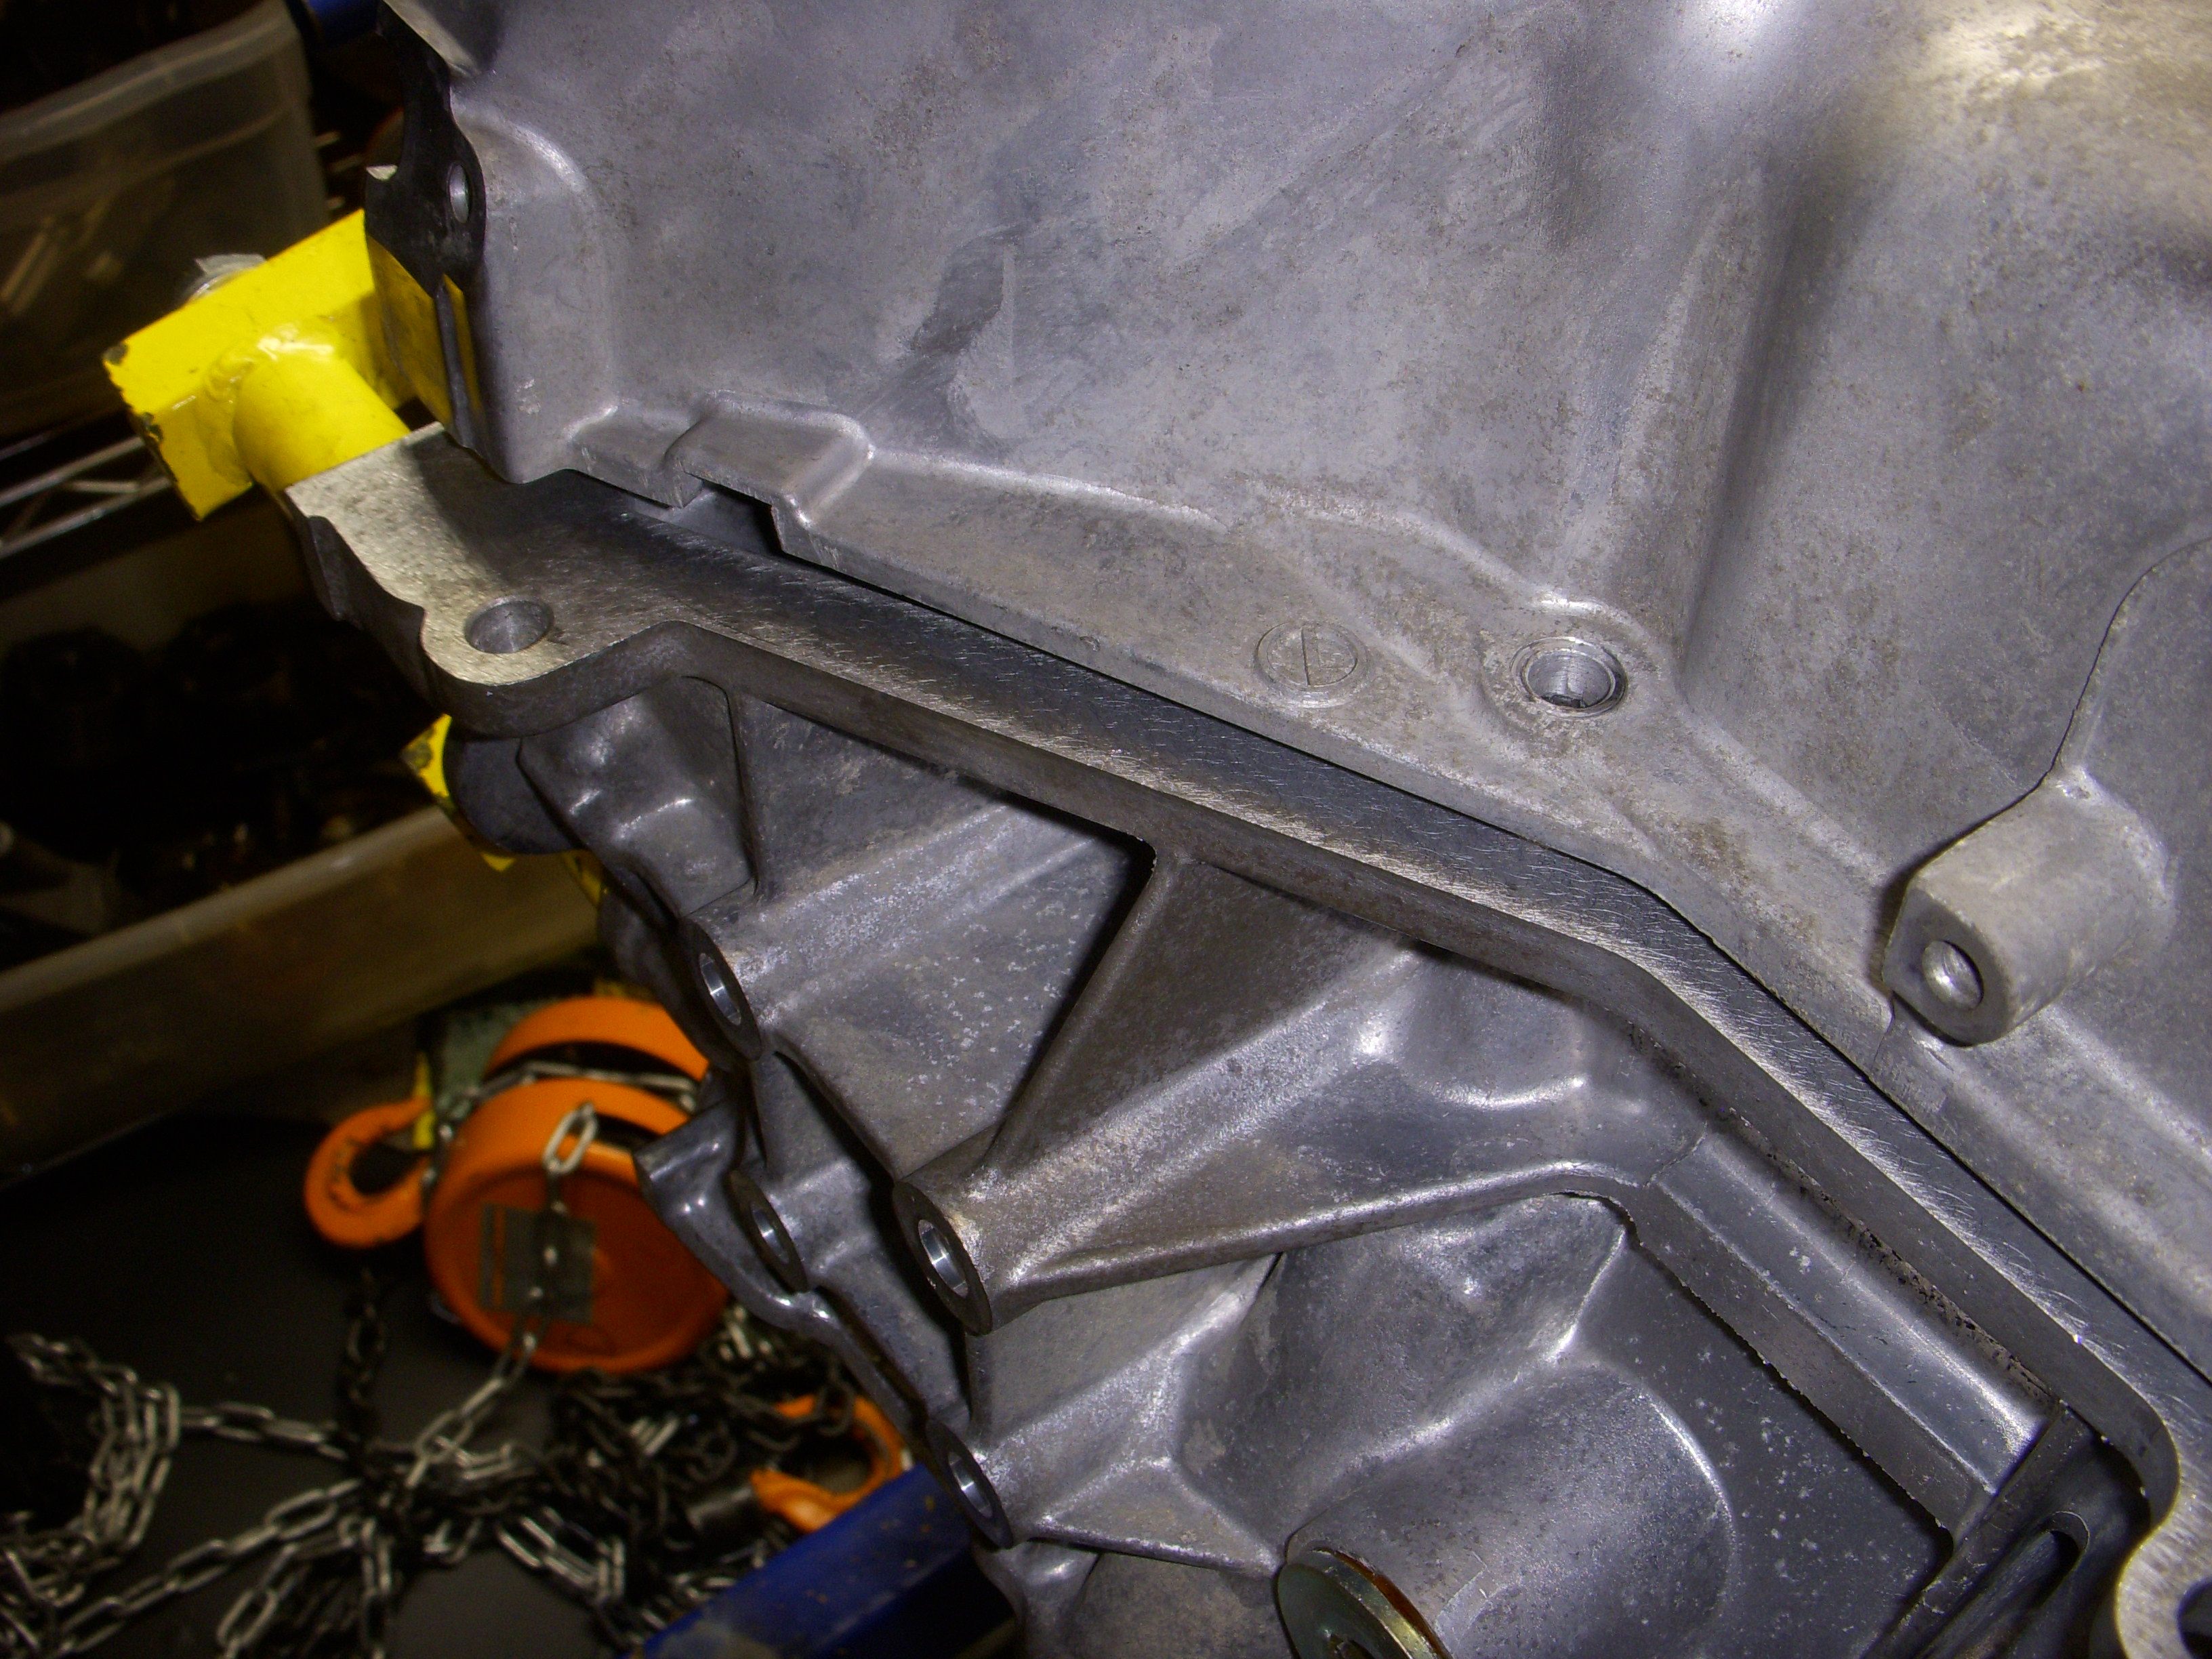
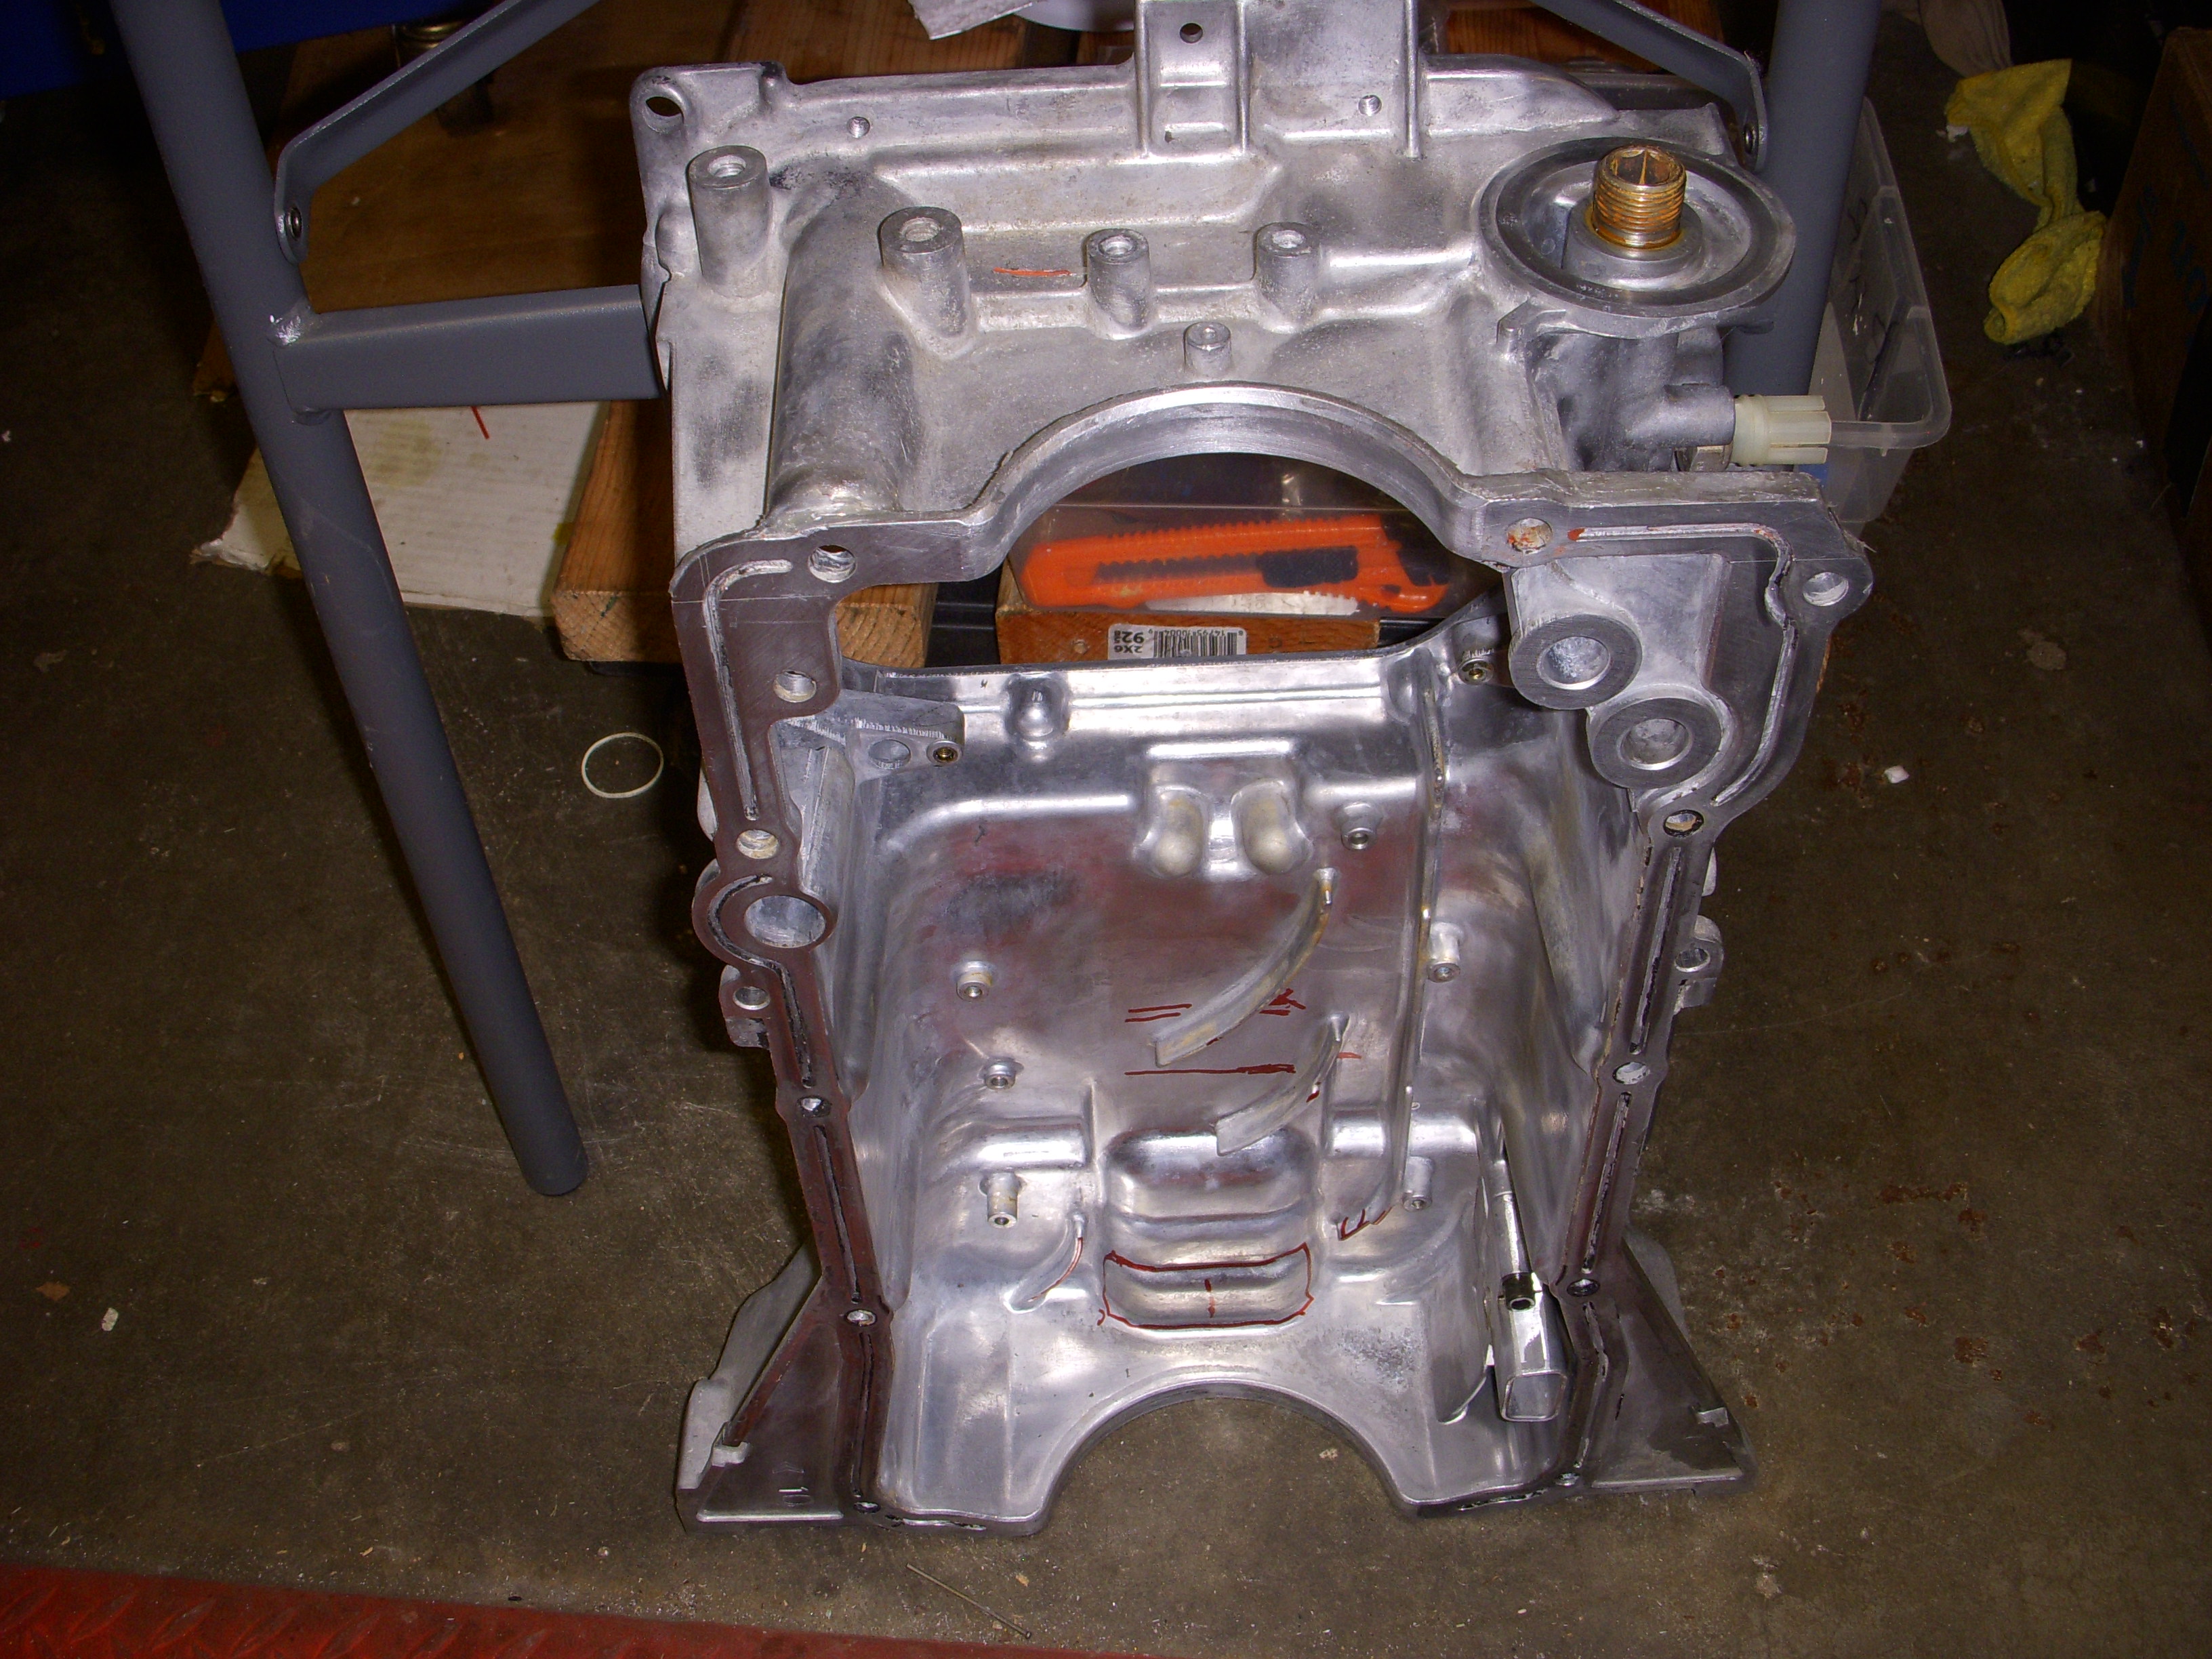
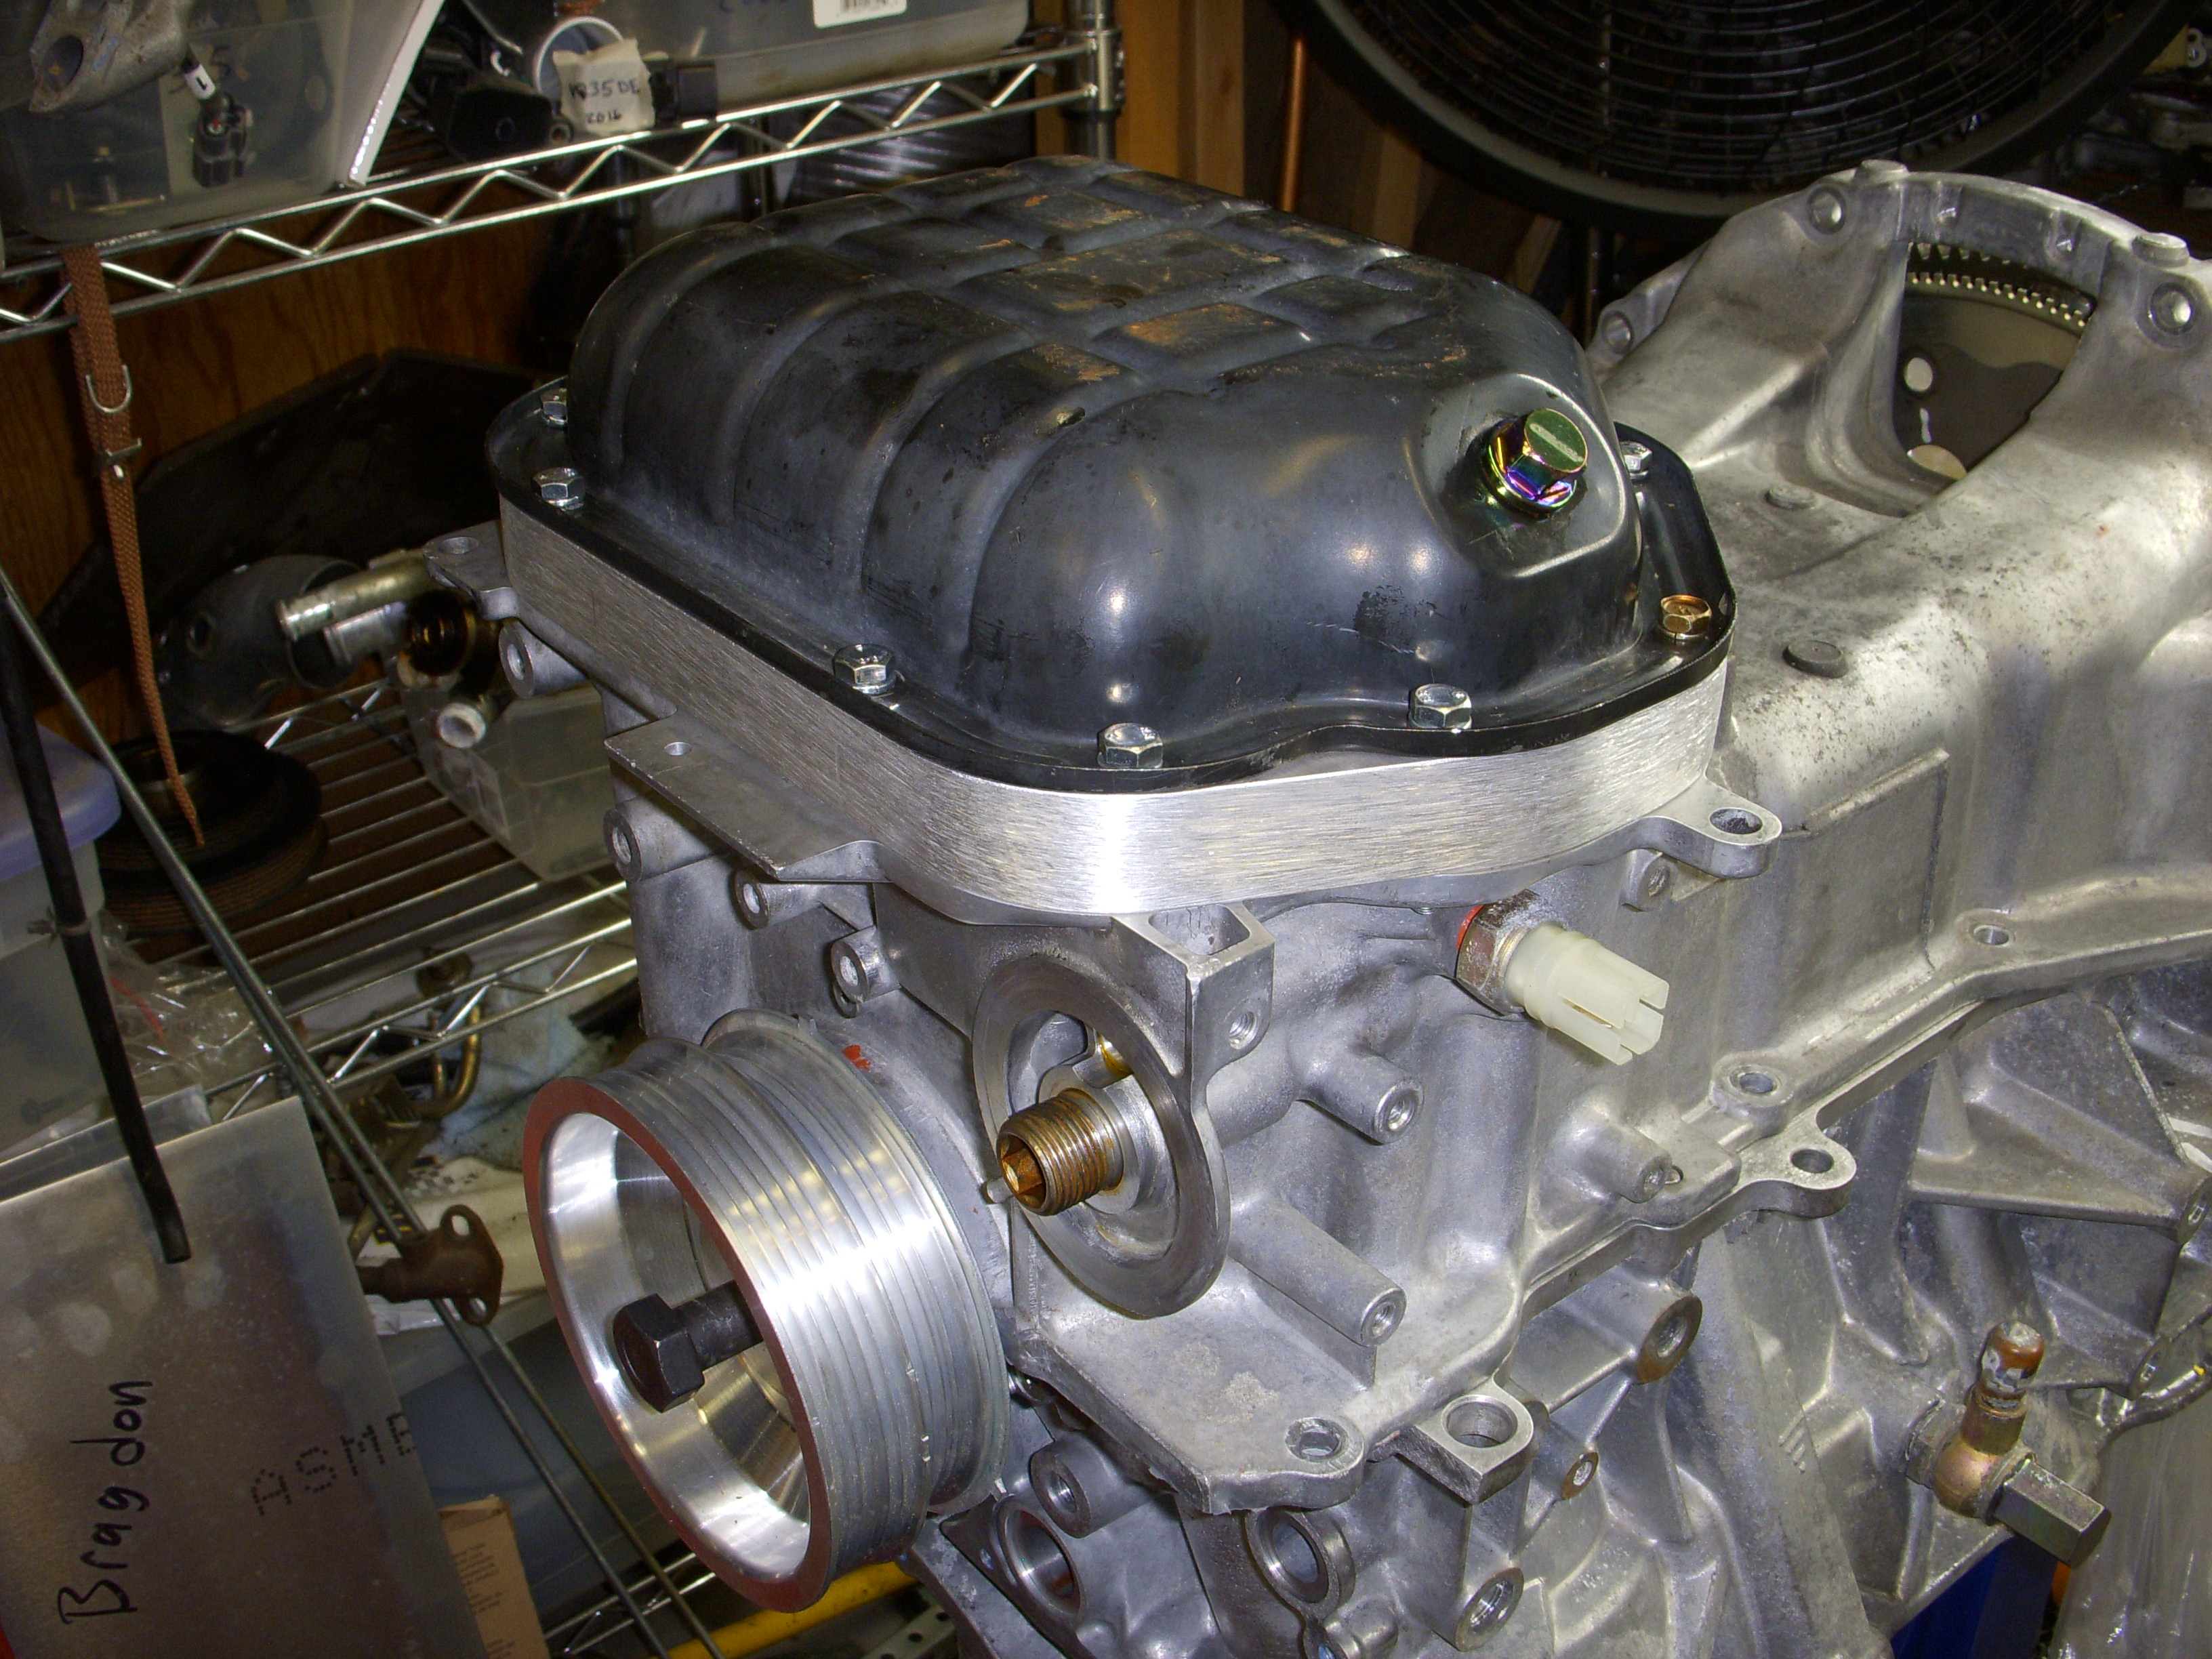
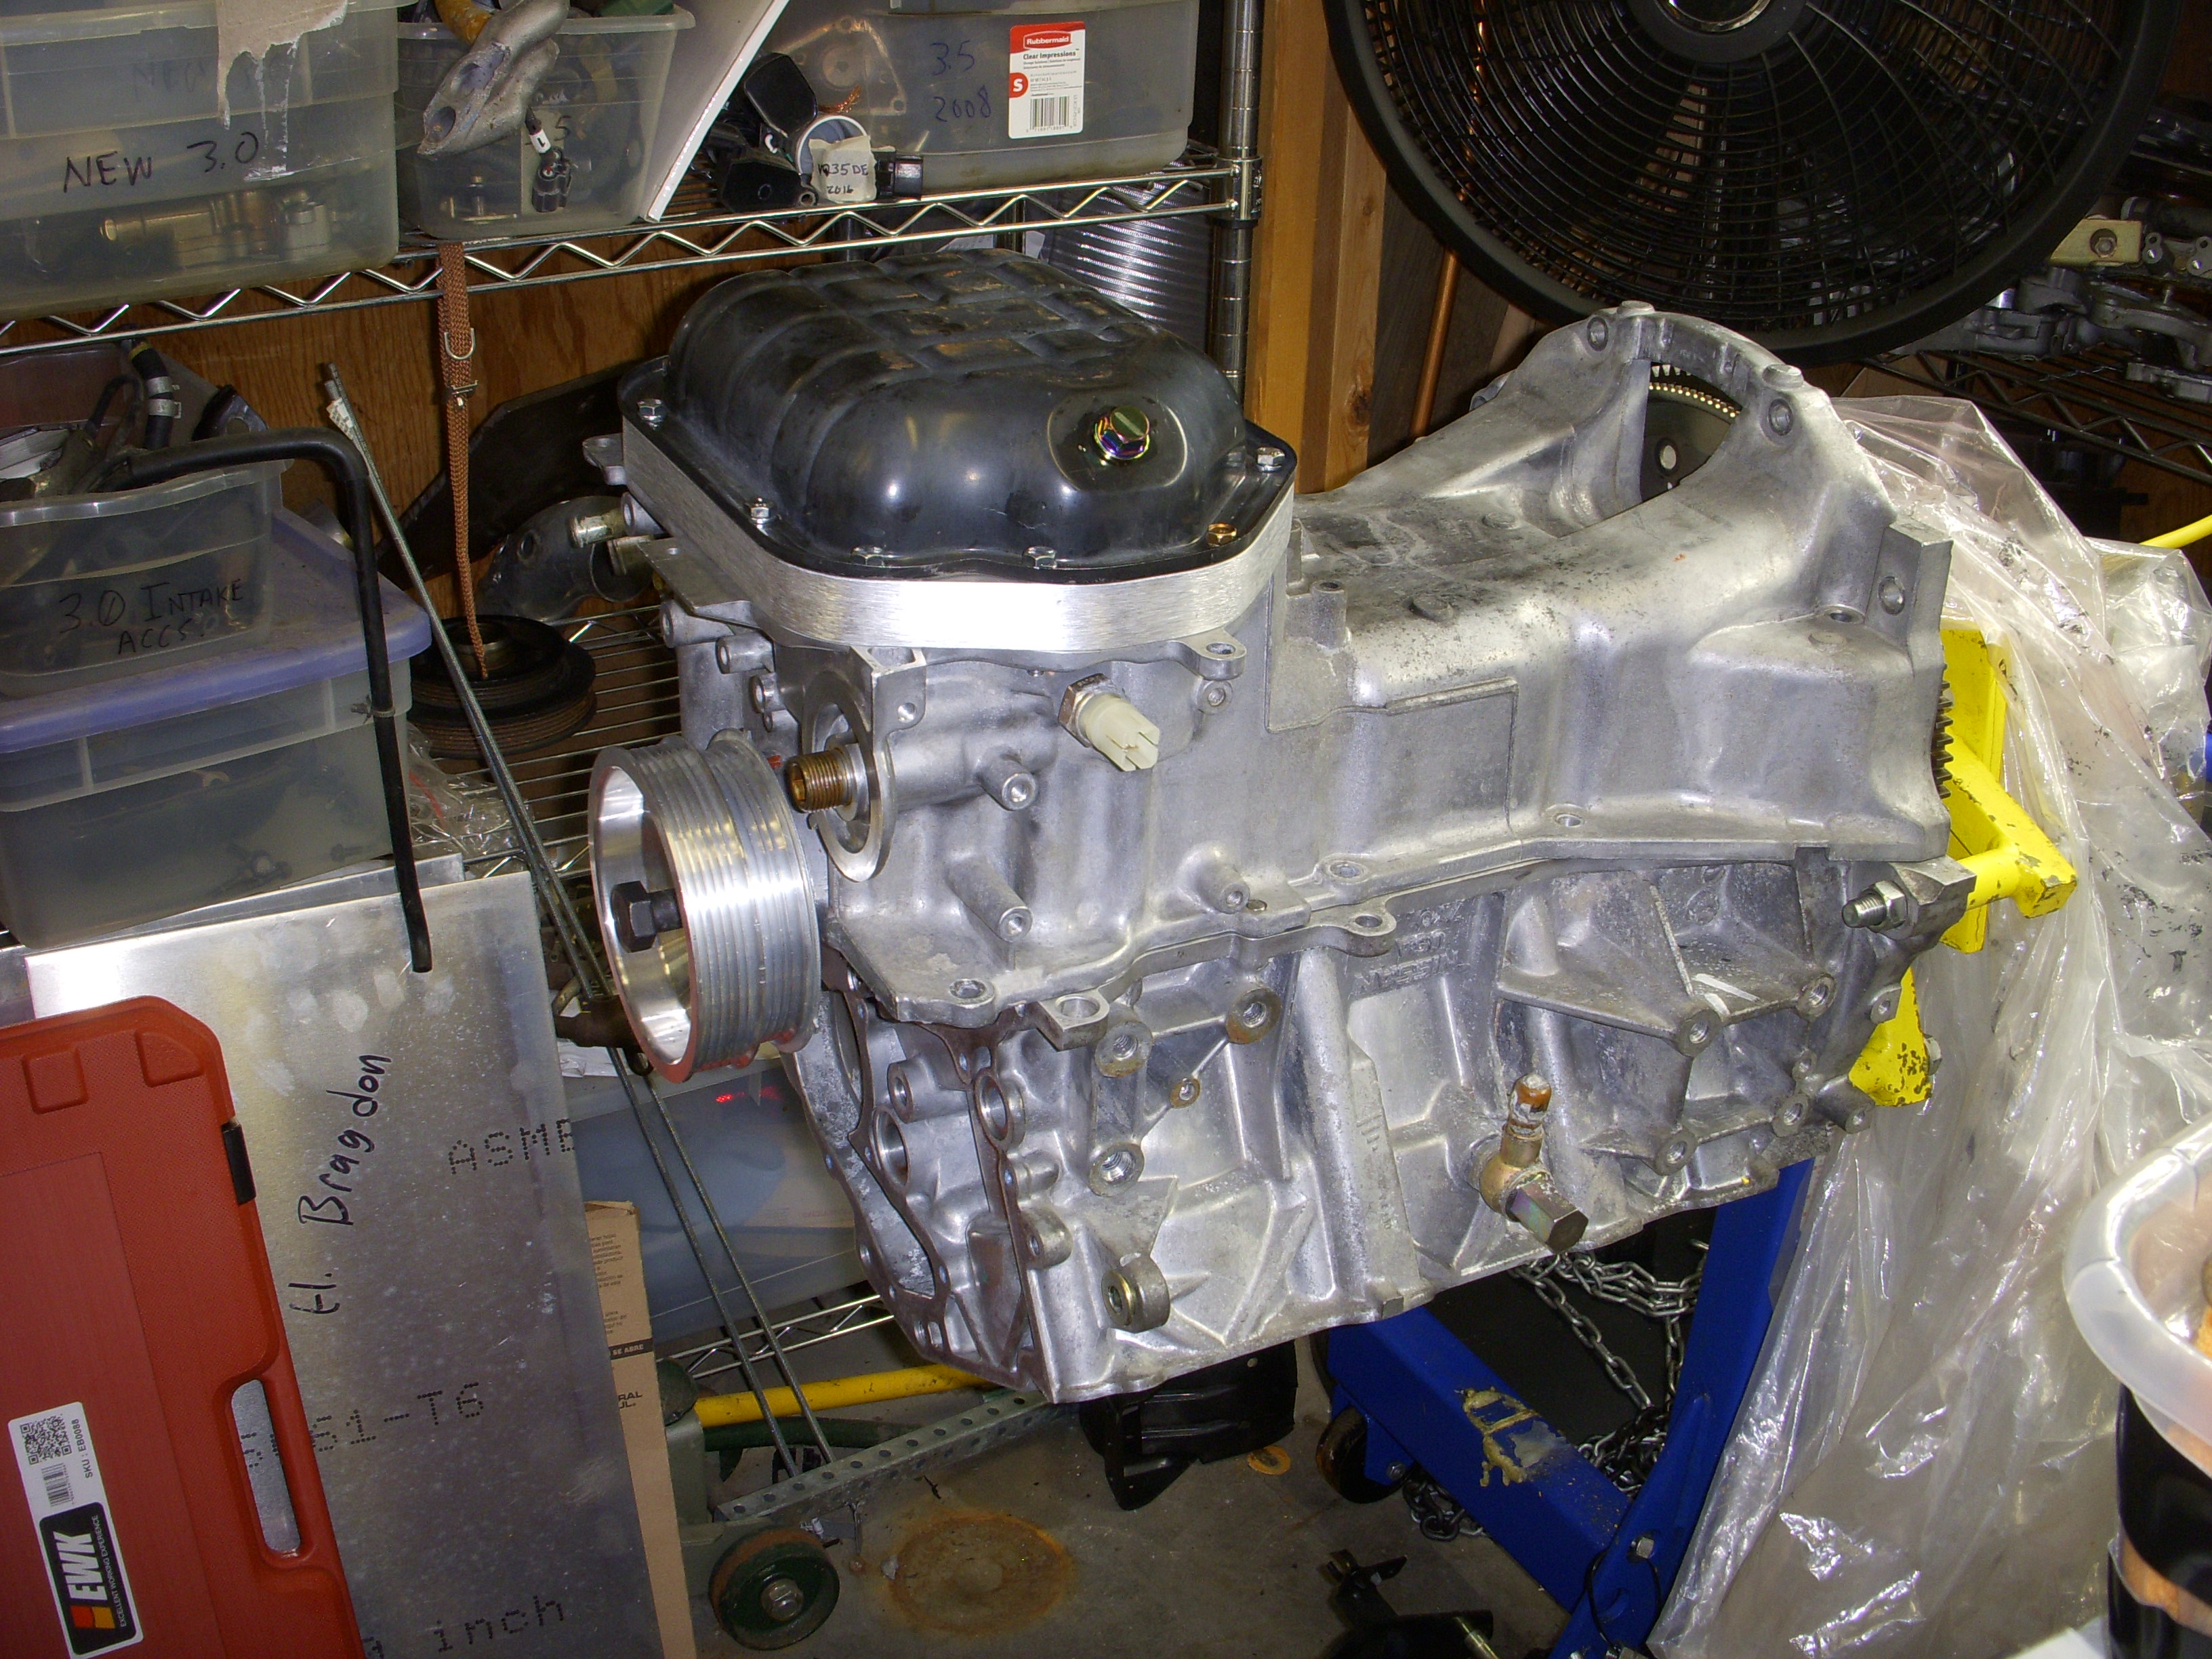
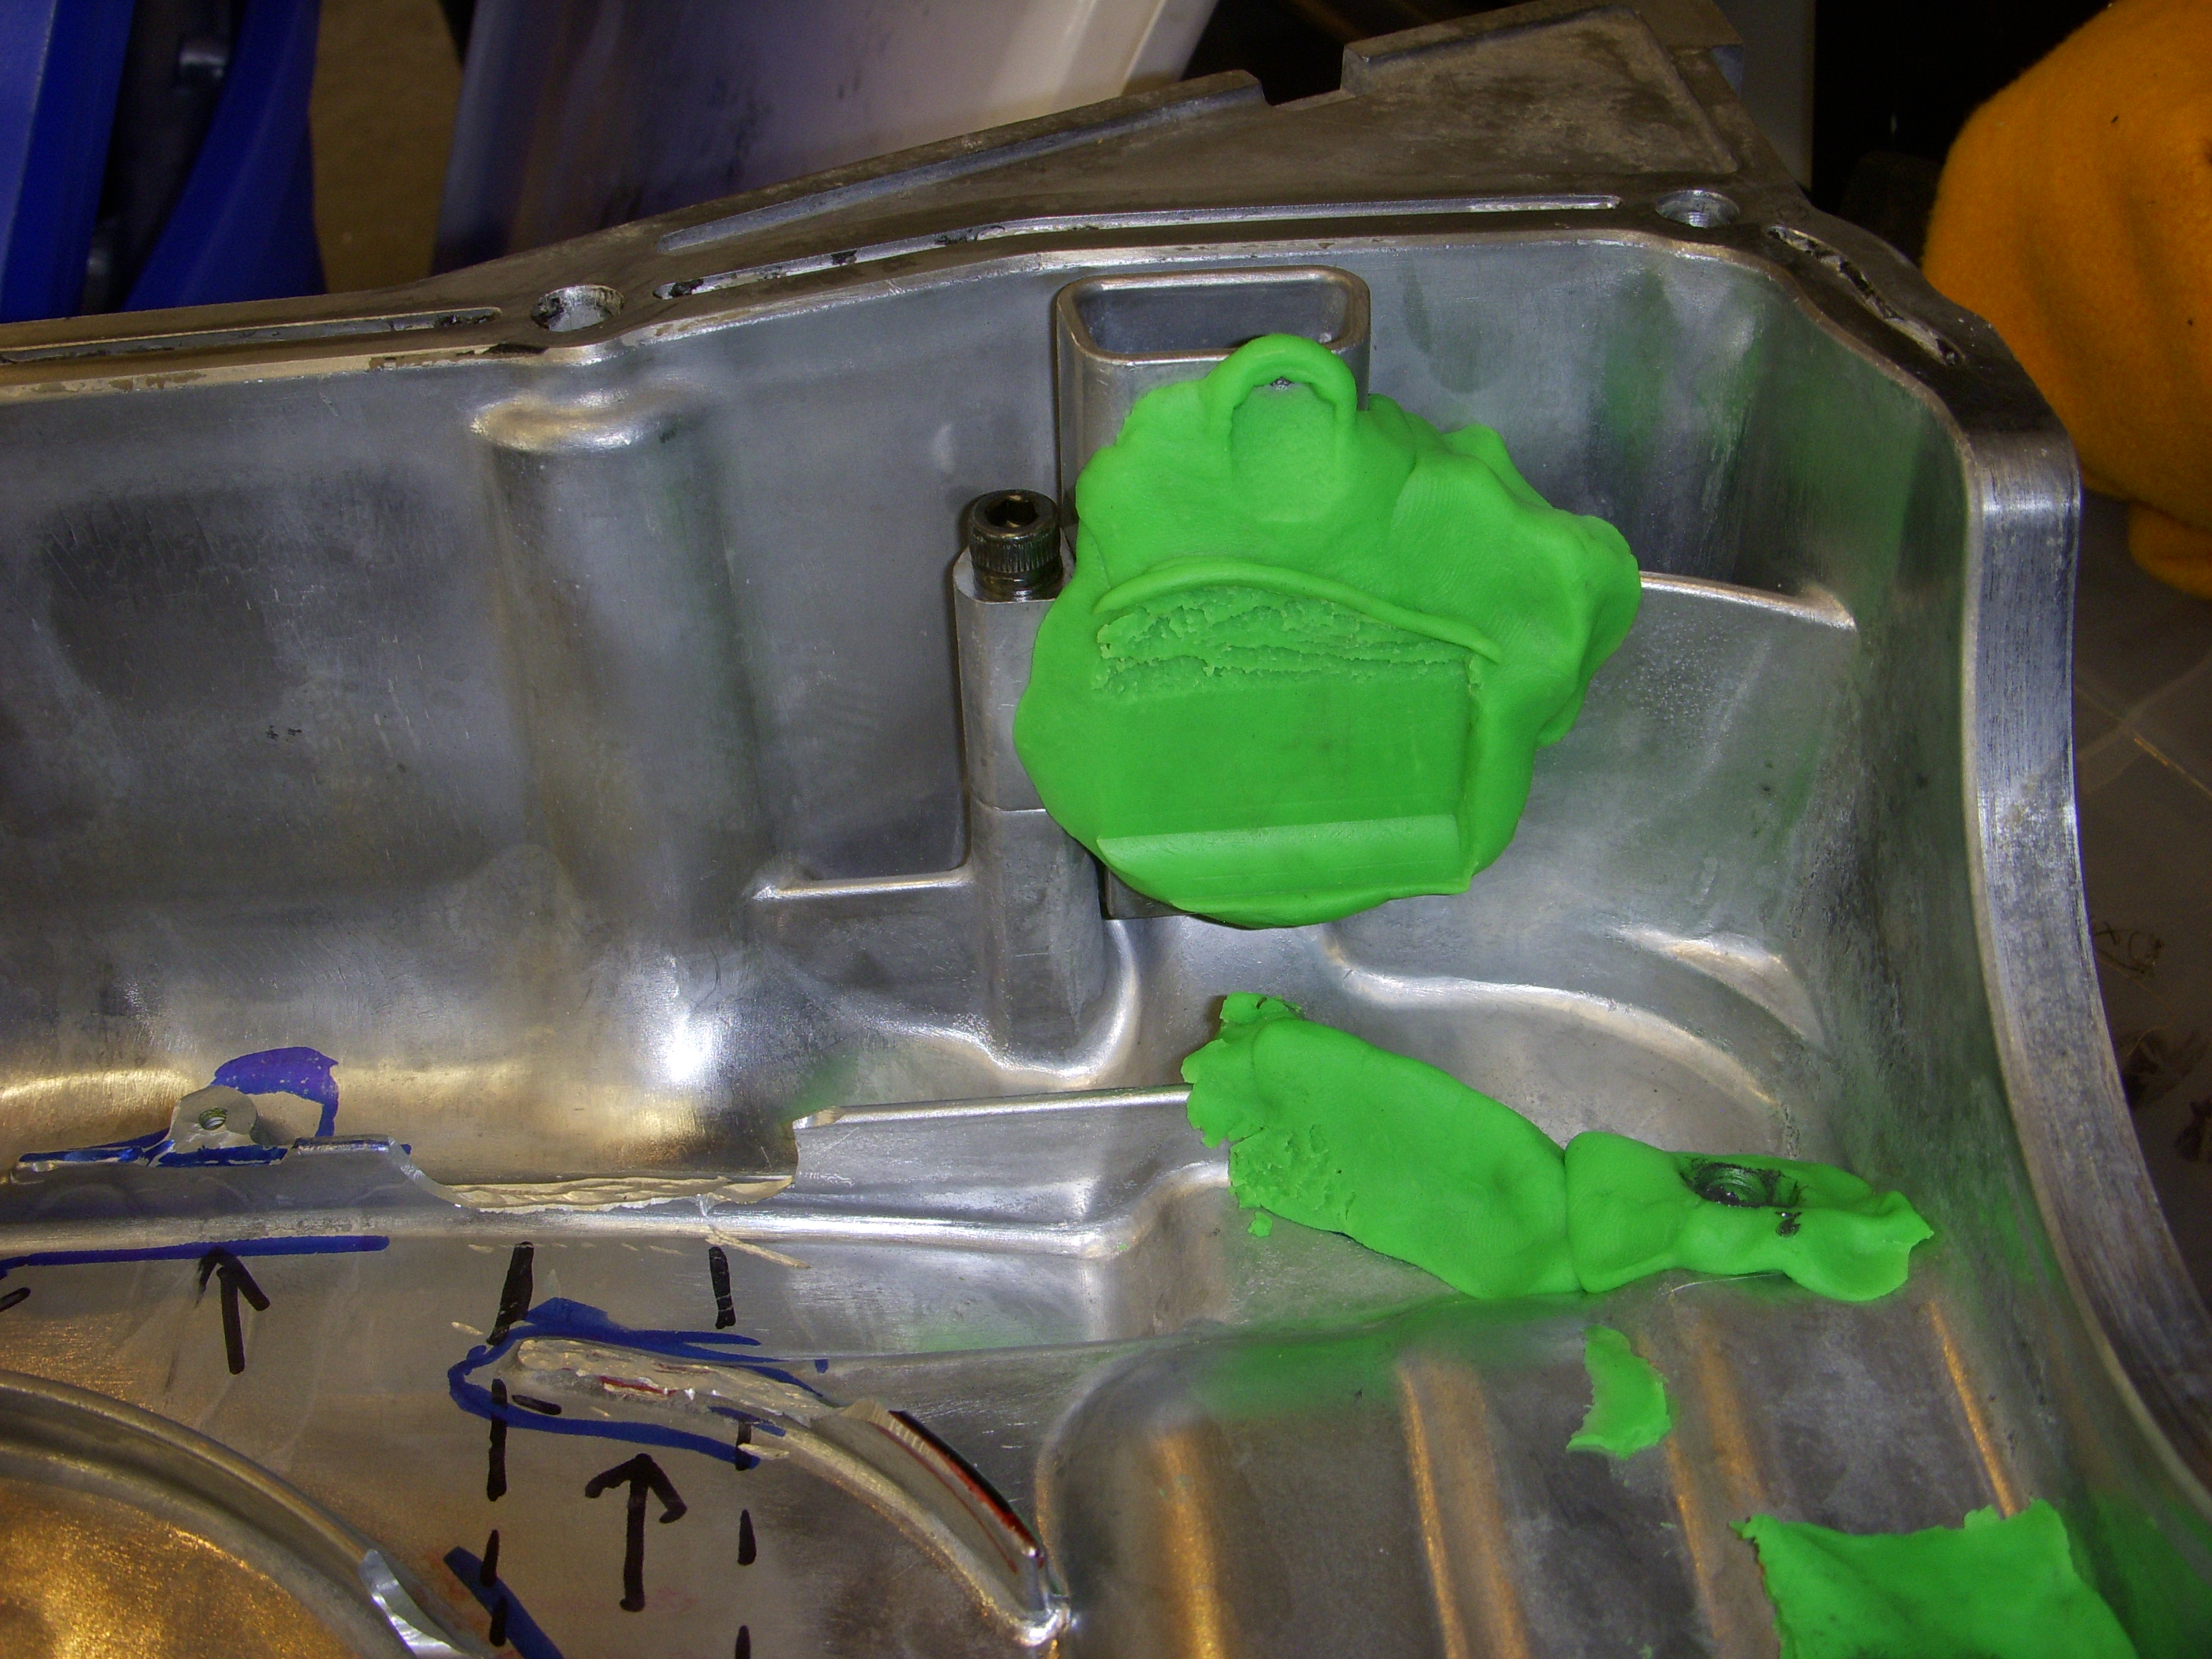
The upper oil pan now clears the girdle and ARP 12-pt nuts. This took $2.00 of Play-Doh from Target and a lot of work with a Dremel tool and cutting bits to make clearances for everything. Of course I did all of this on the second oil pan, since the first one proved impossible to weld or aluminum-braze with seven different brands of rods... I think the oil pan is made from metals besides aluminum. like maybe bull****tium... I have another oil pan on order, for Plan C.
I'm still working on the 36-1 timing wheel installation for the Orza crank pulley, based on a 5 1/4" x 3/8" round aluminum disc, the trigger wheel from Minsk, Belarus, a 90mm M16 bolt from Webeboltsandshizz, a schoolkid caliper with modded tips, some several 2" aluminum discs with 16mm holes, and a few pointed-tip allen screws. At least these make for fun pictures..
After I get the girdle re-installed, I need to get back to re-installing the ARP head studs, hang some new HR head gaskets on the block, install the rear timing cover and associated parts, put the heads on and torque down the ARP nuts (w/moly goop) and then begin certifying the cam timings and all the rest This will be - complicated - but essential, and uses depth gauges, degree wheels, and a lot of measurements. Lots...


Timing wheel detials - but not finished yet.
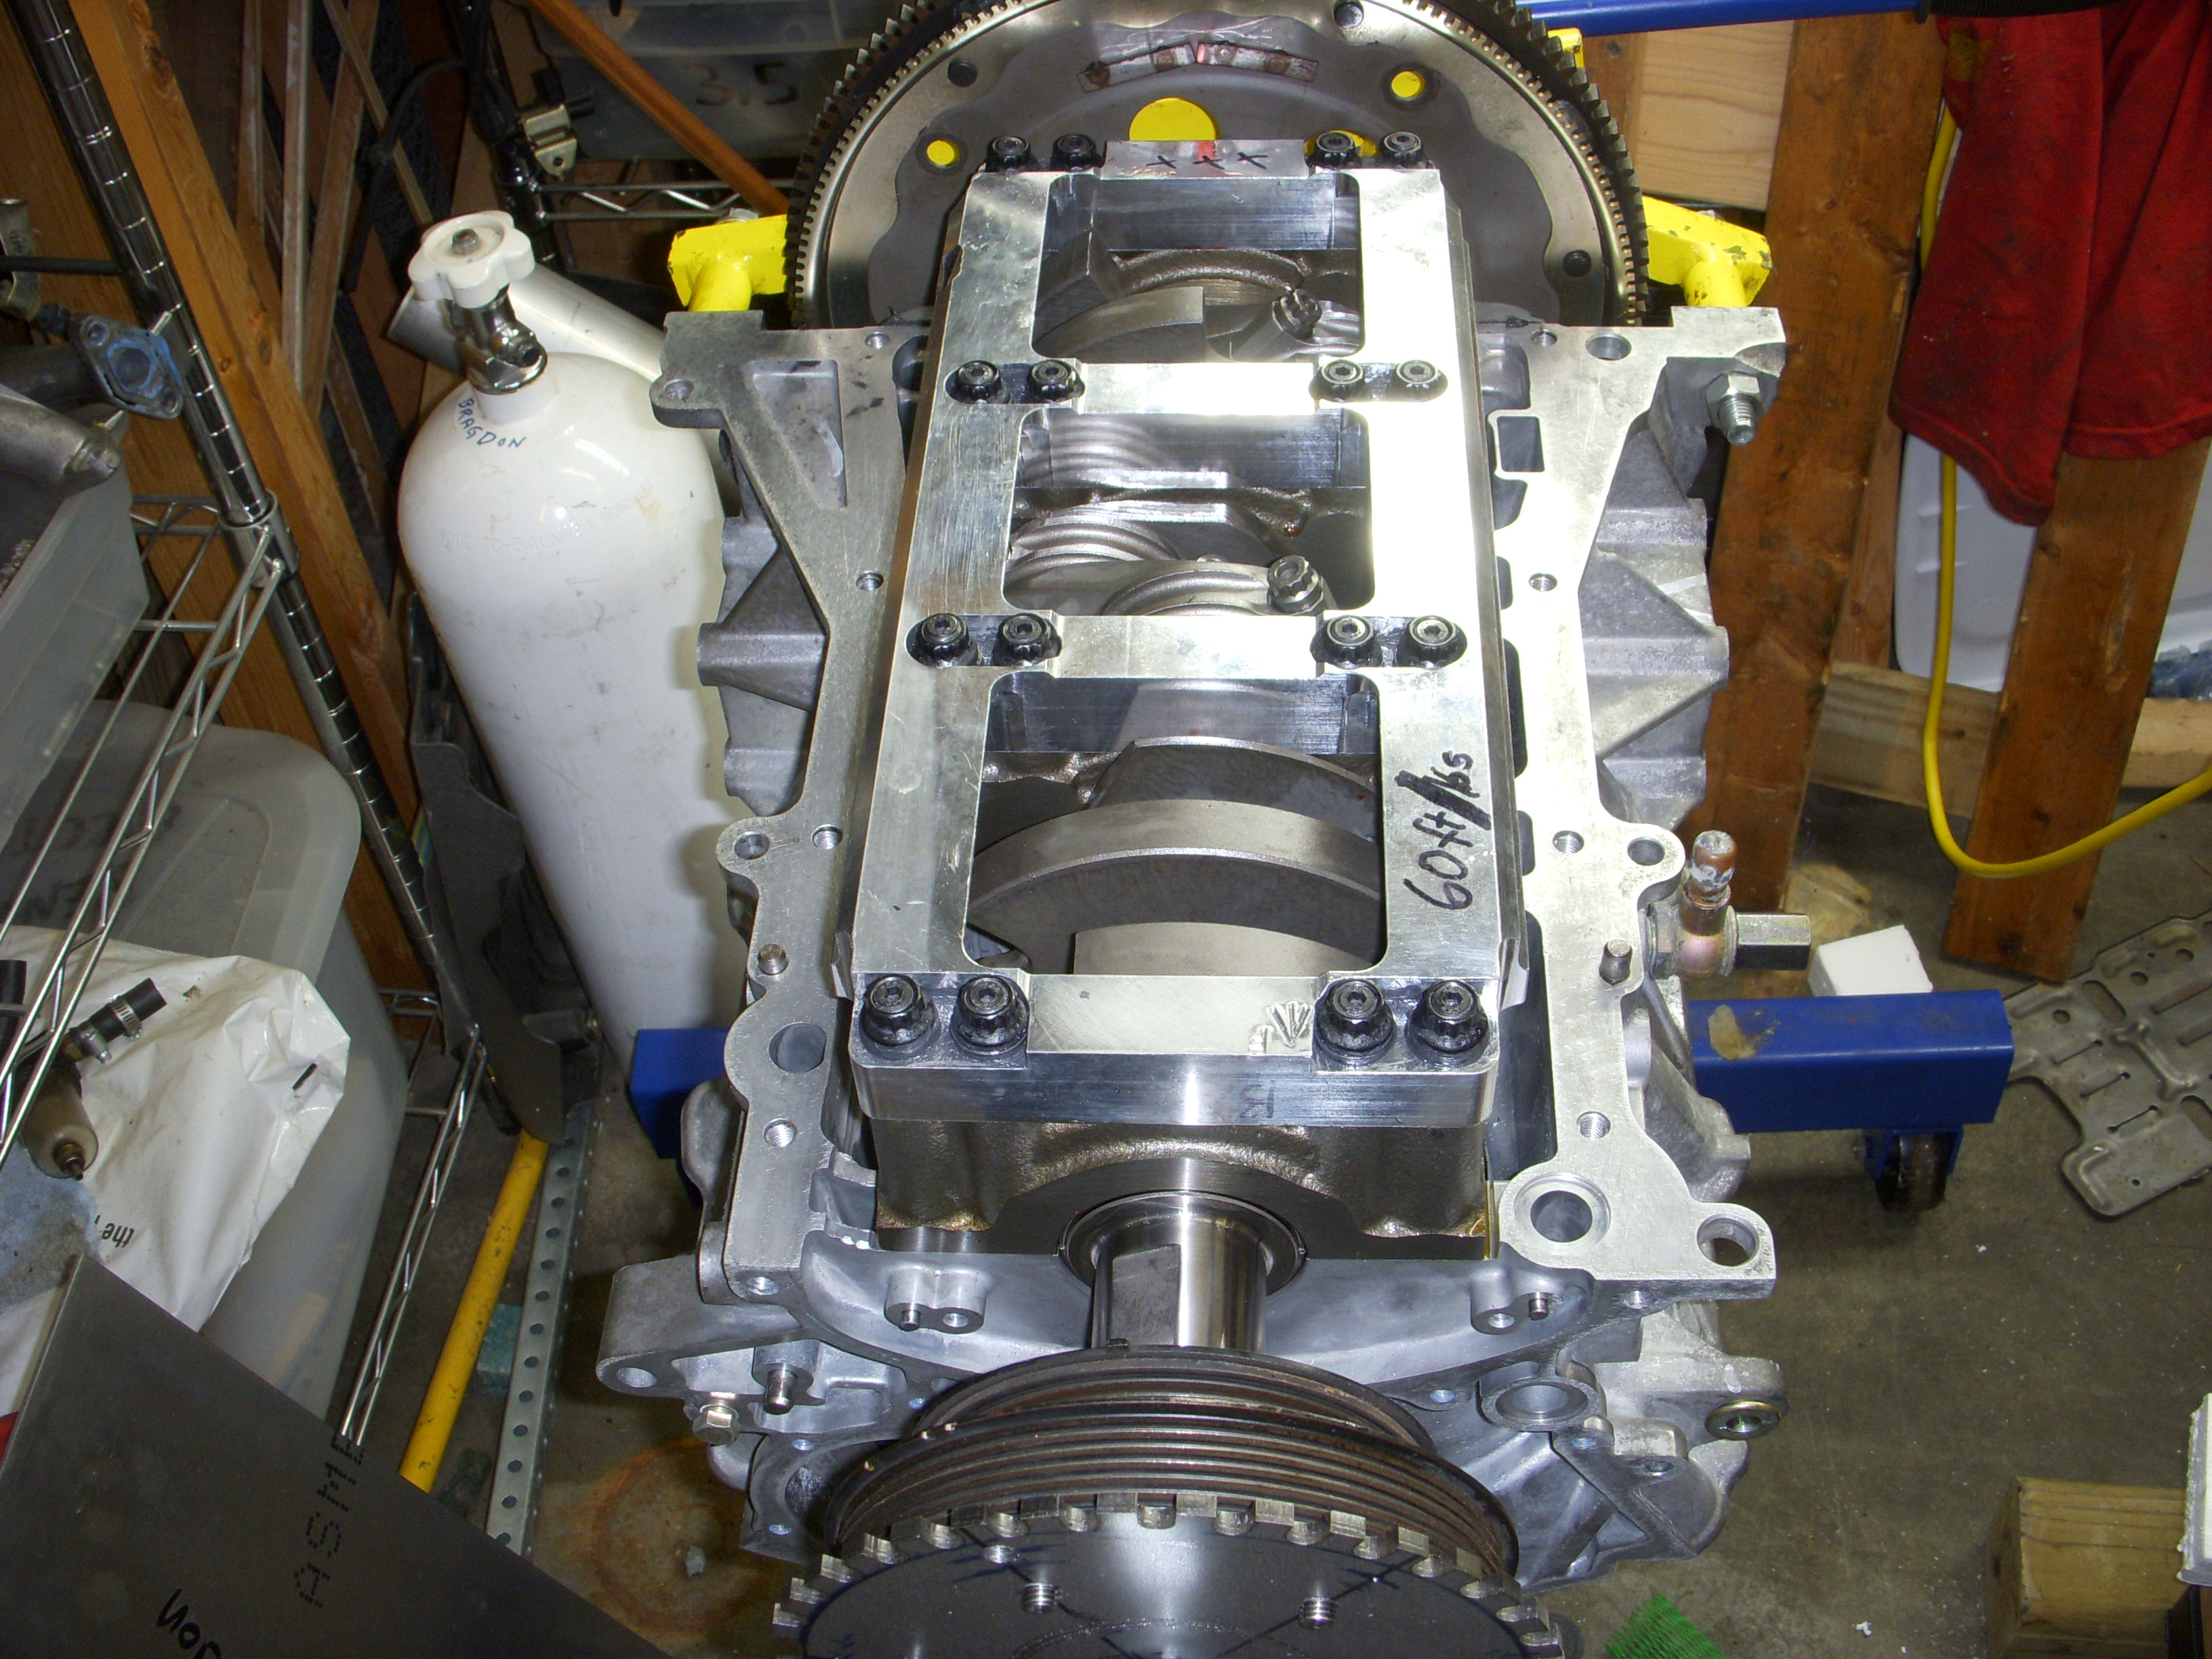
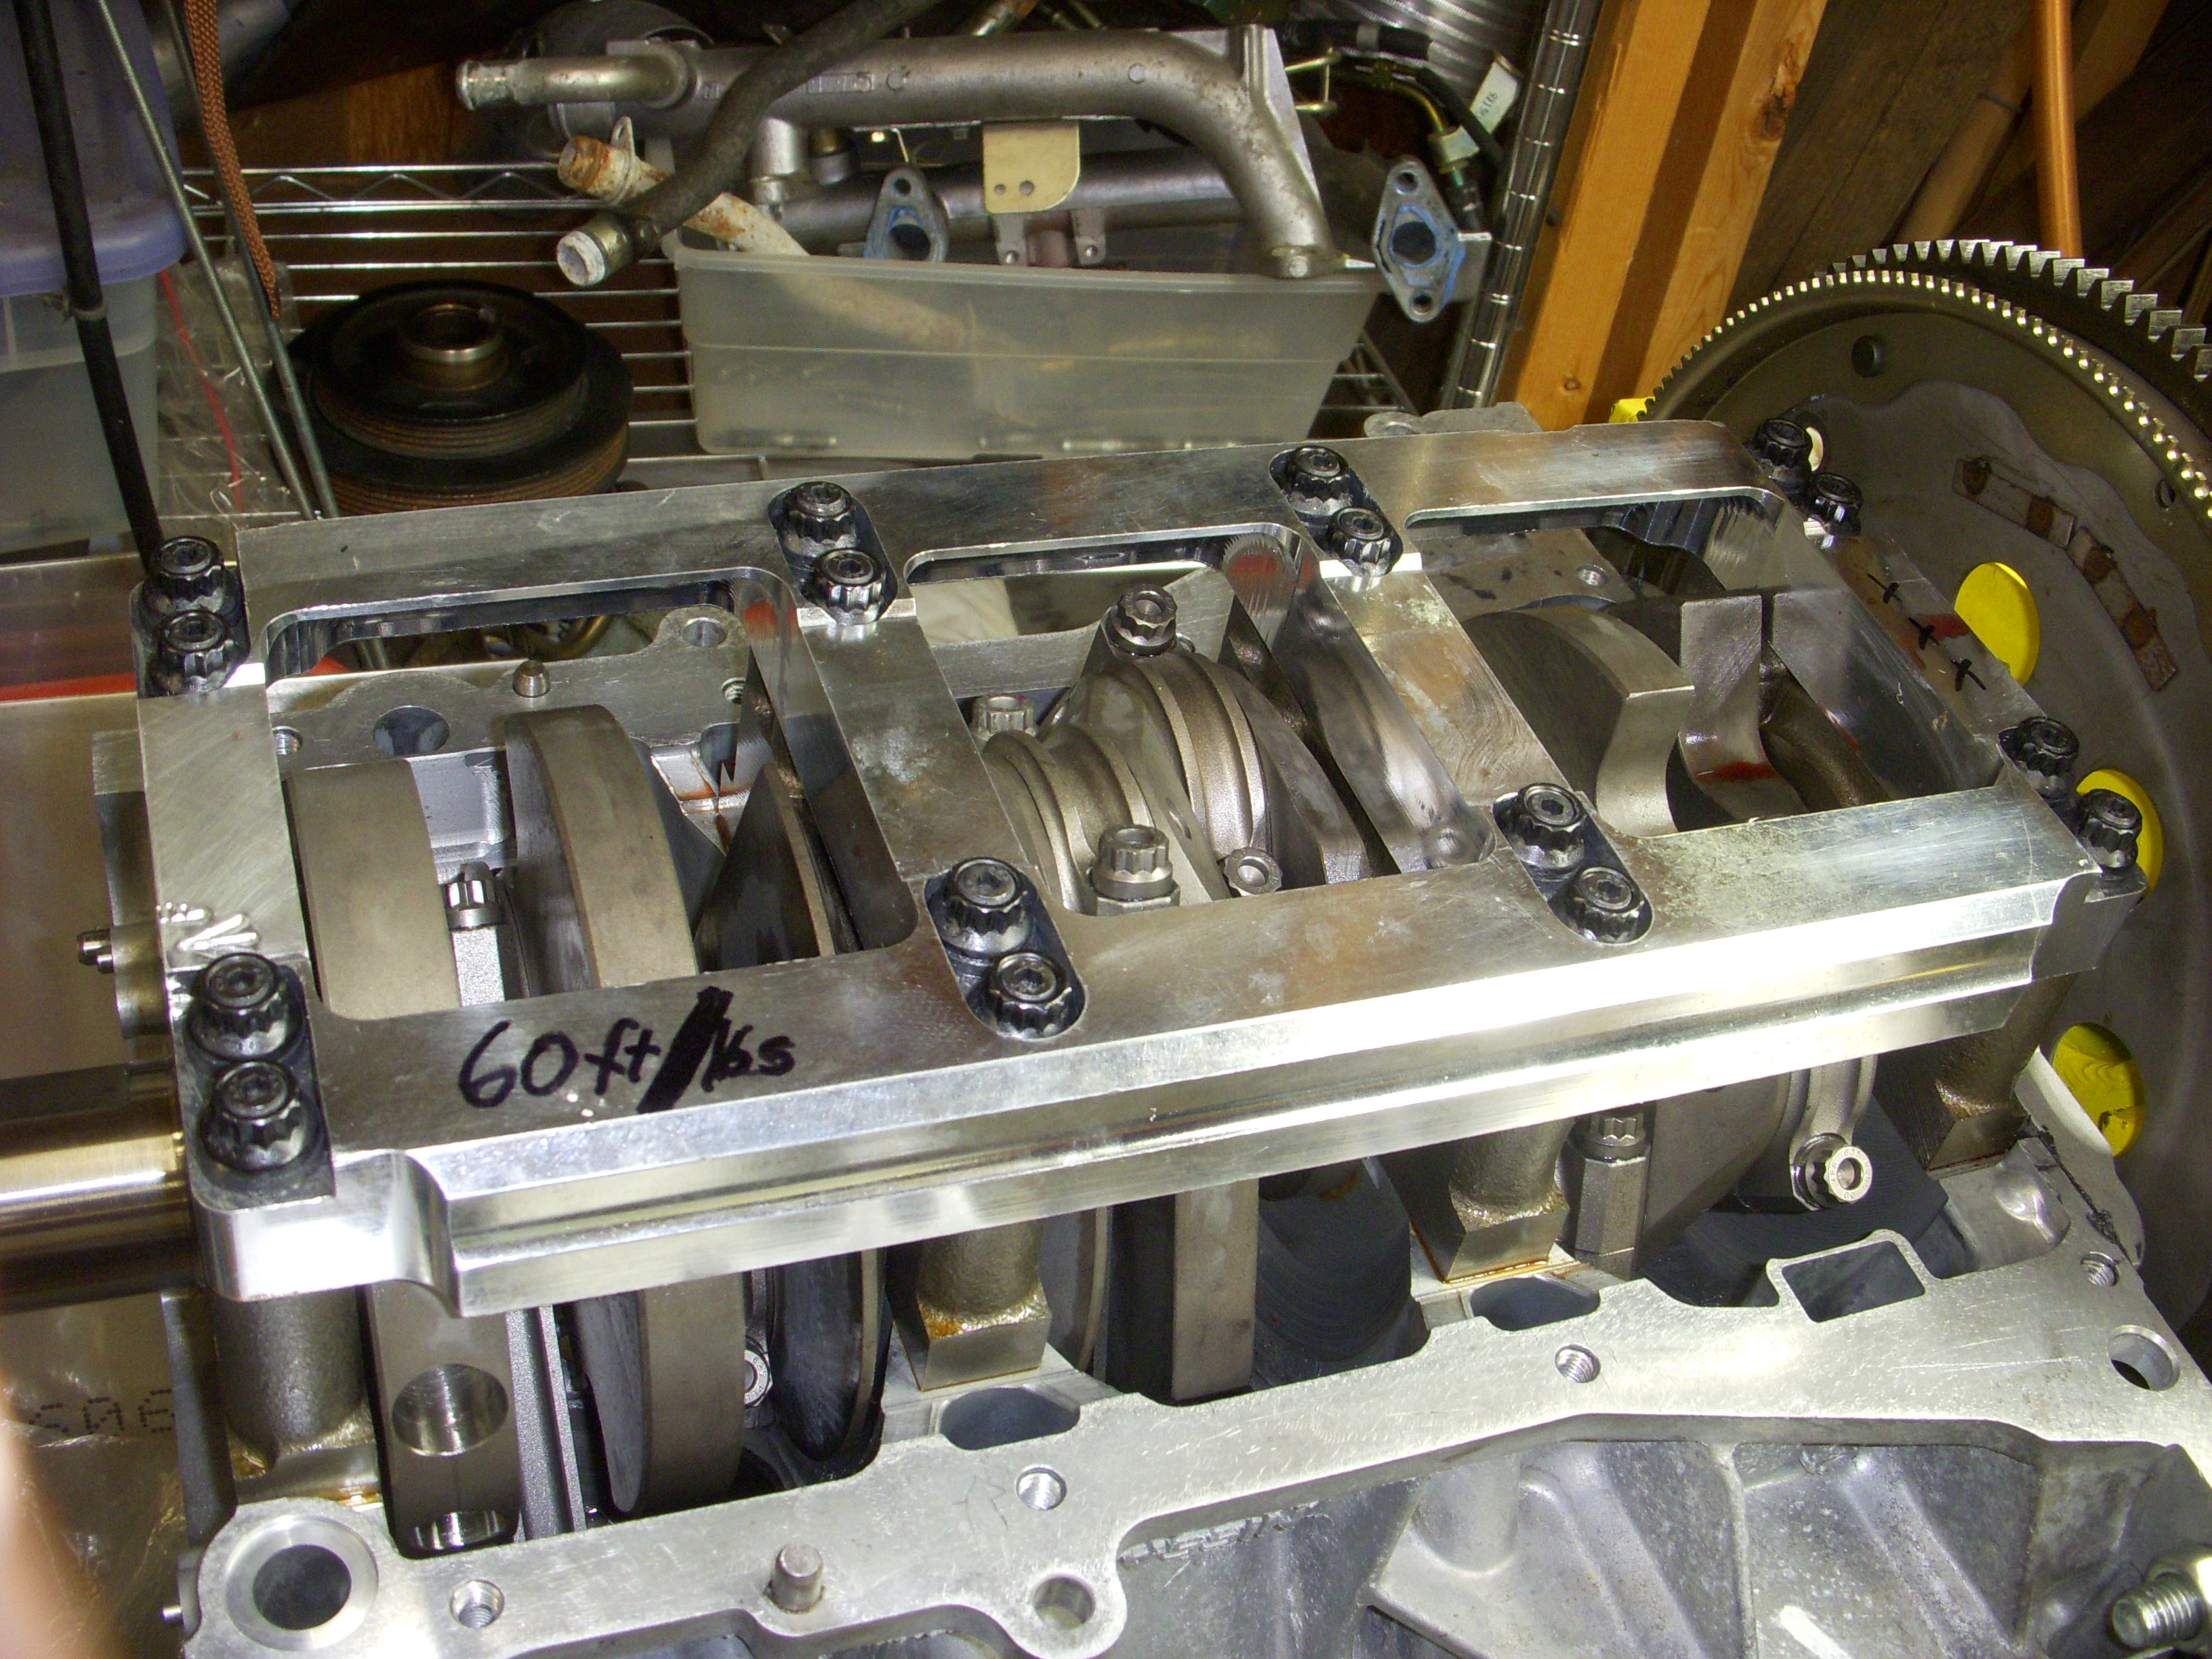
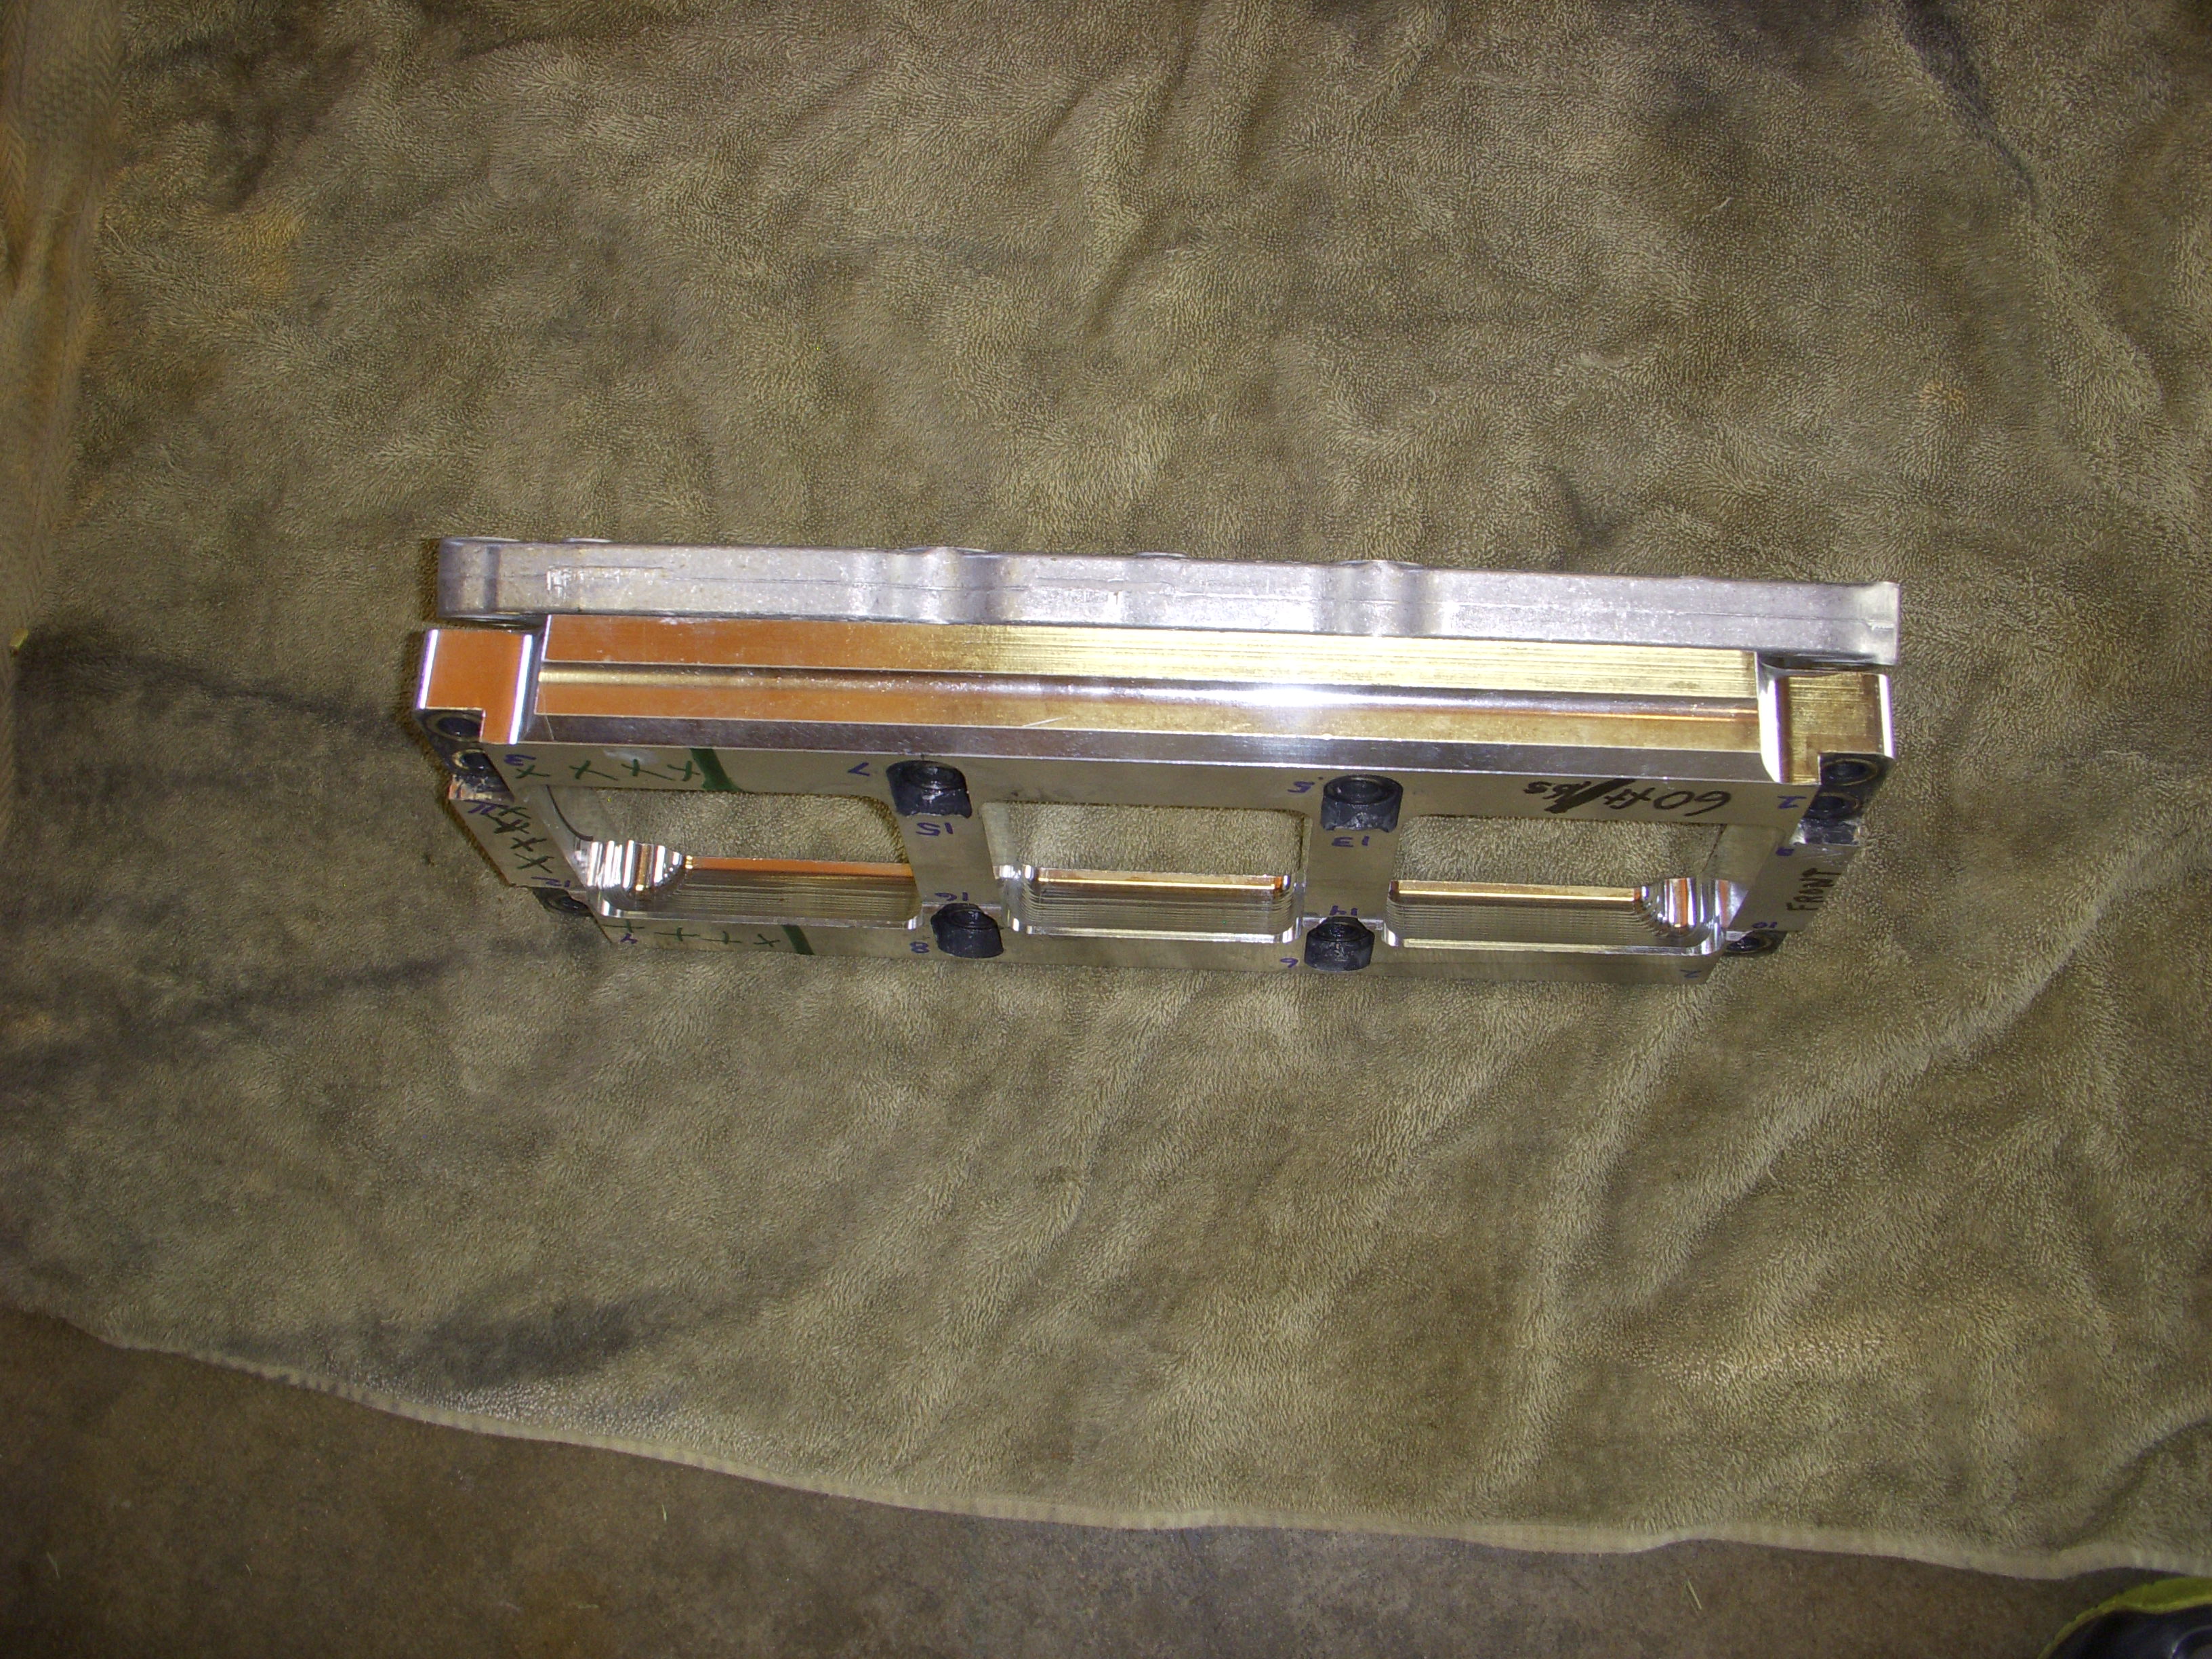
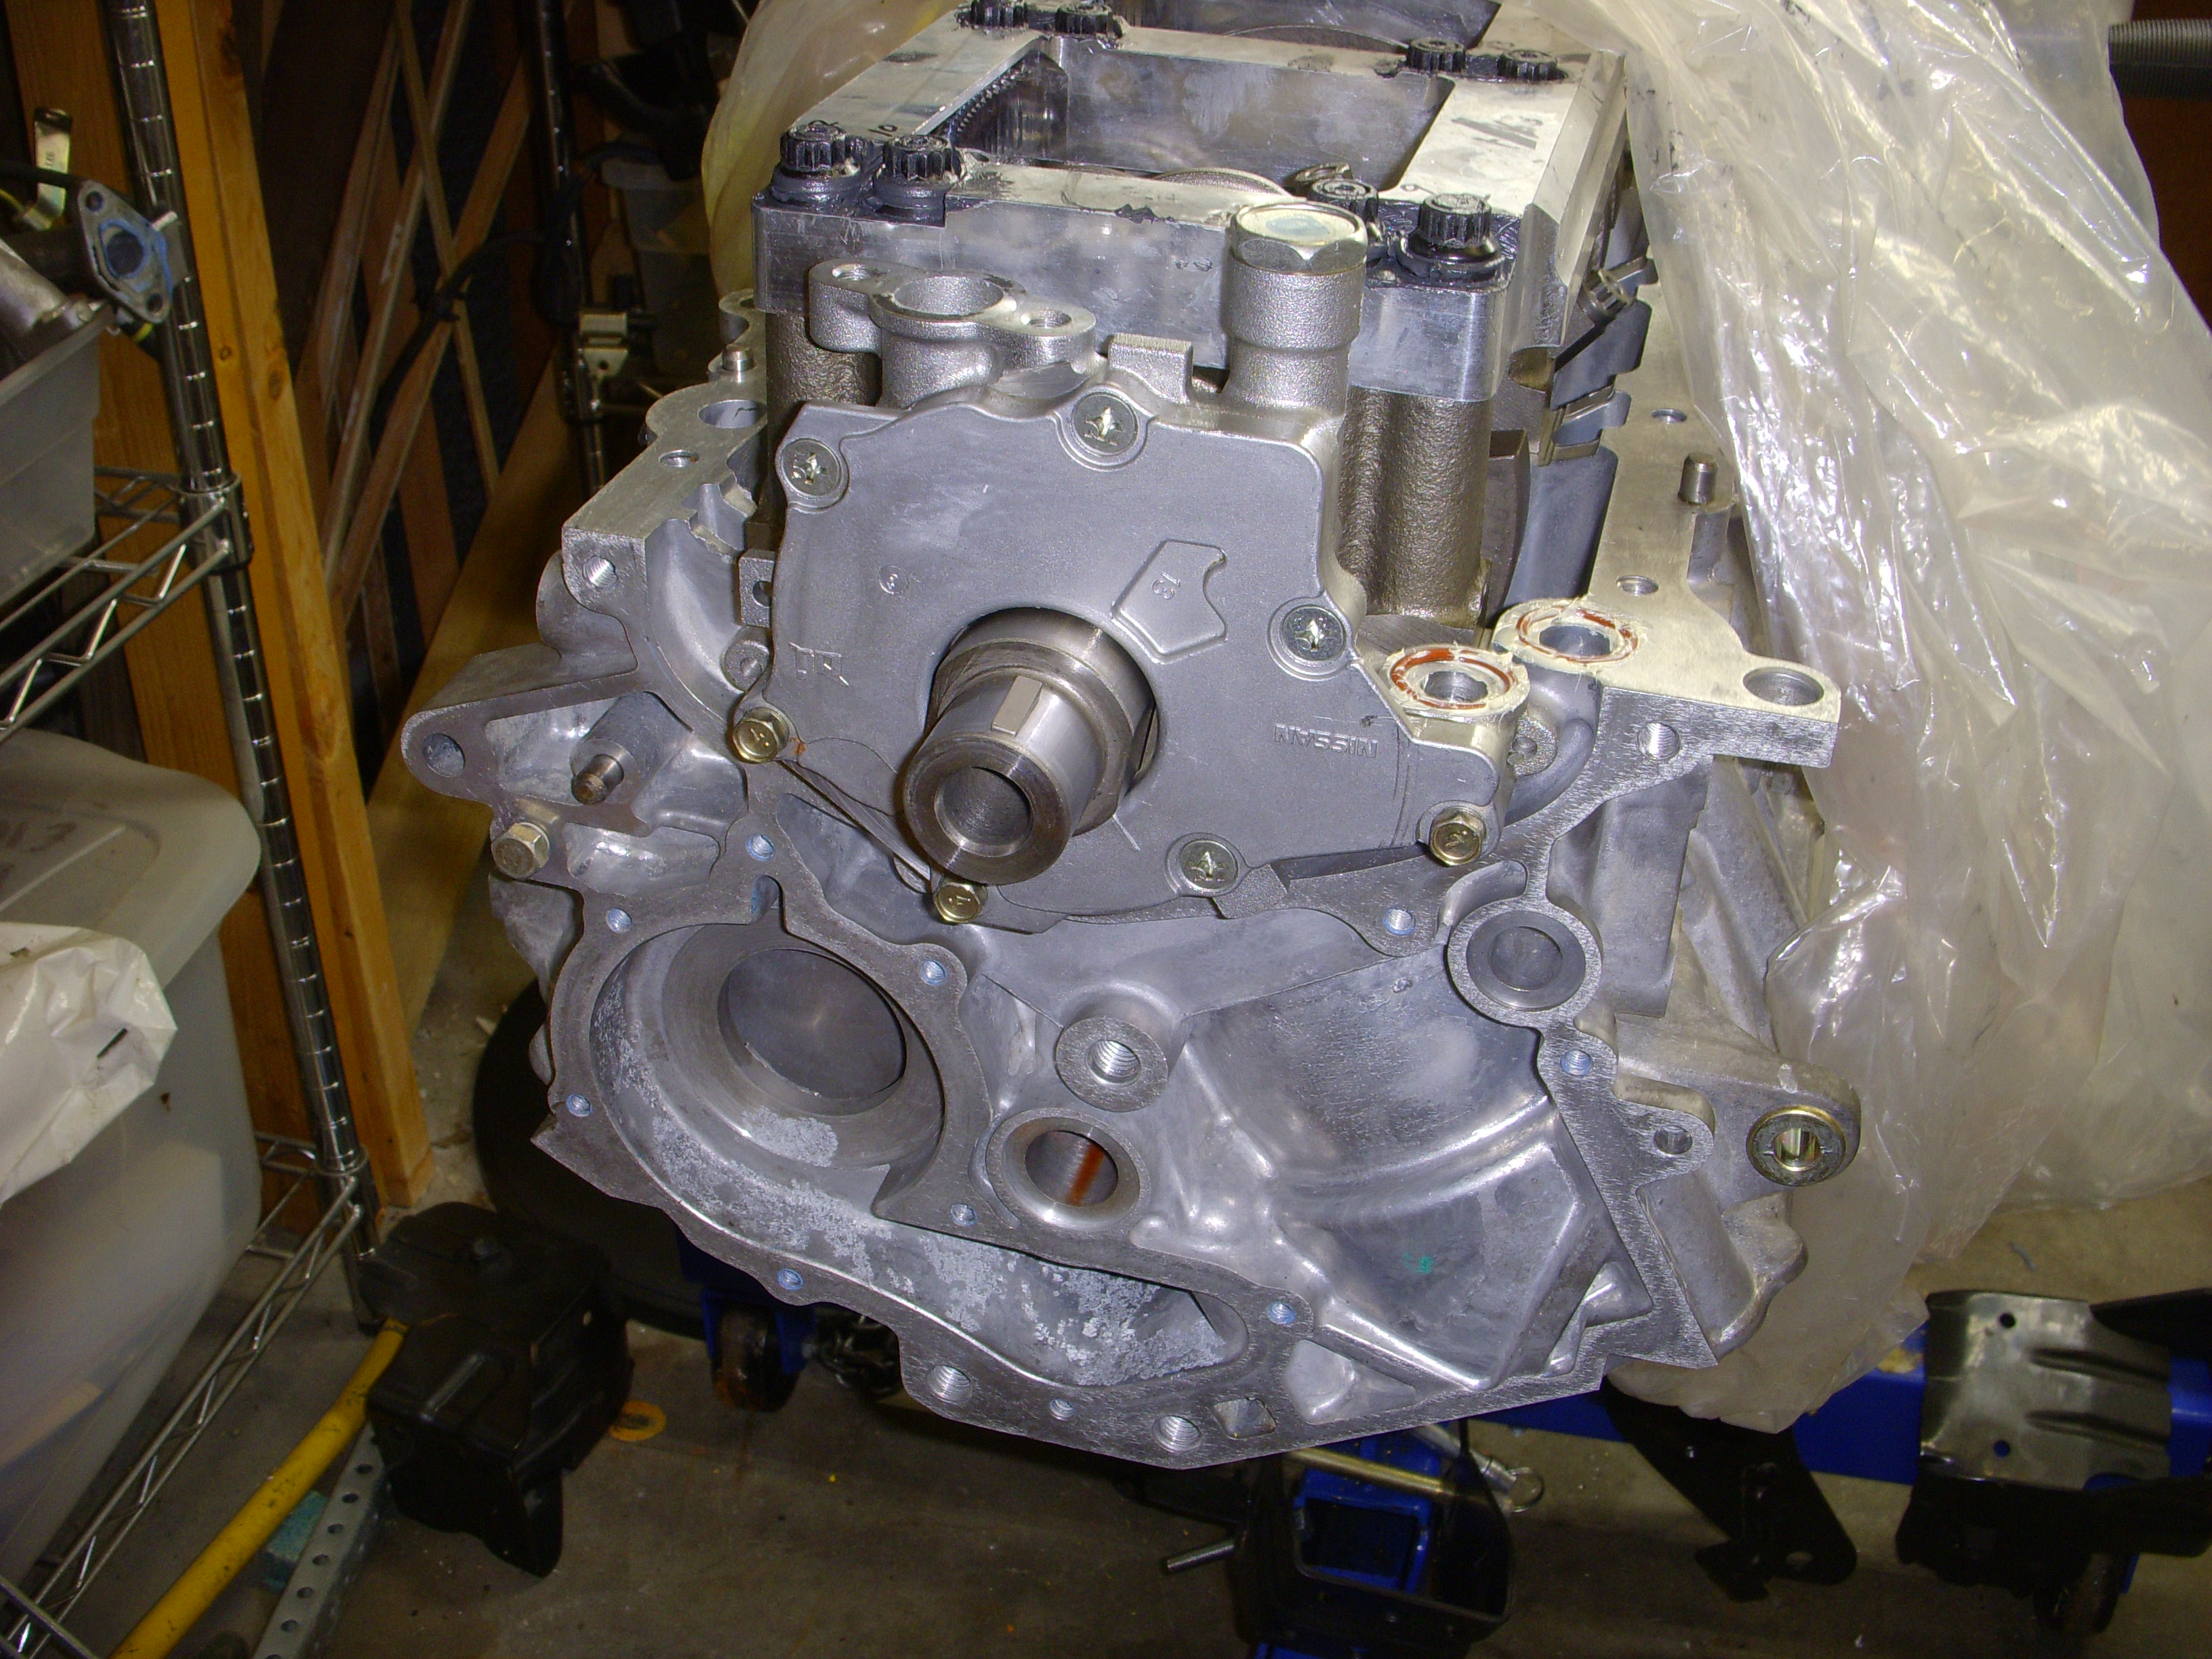
PIX of the machined-down girdle - this was installed back on the block before all the tests with clay.

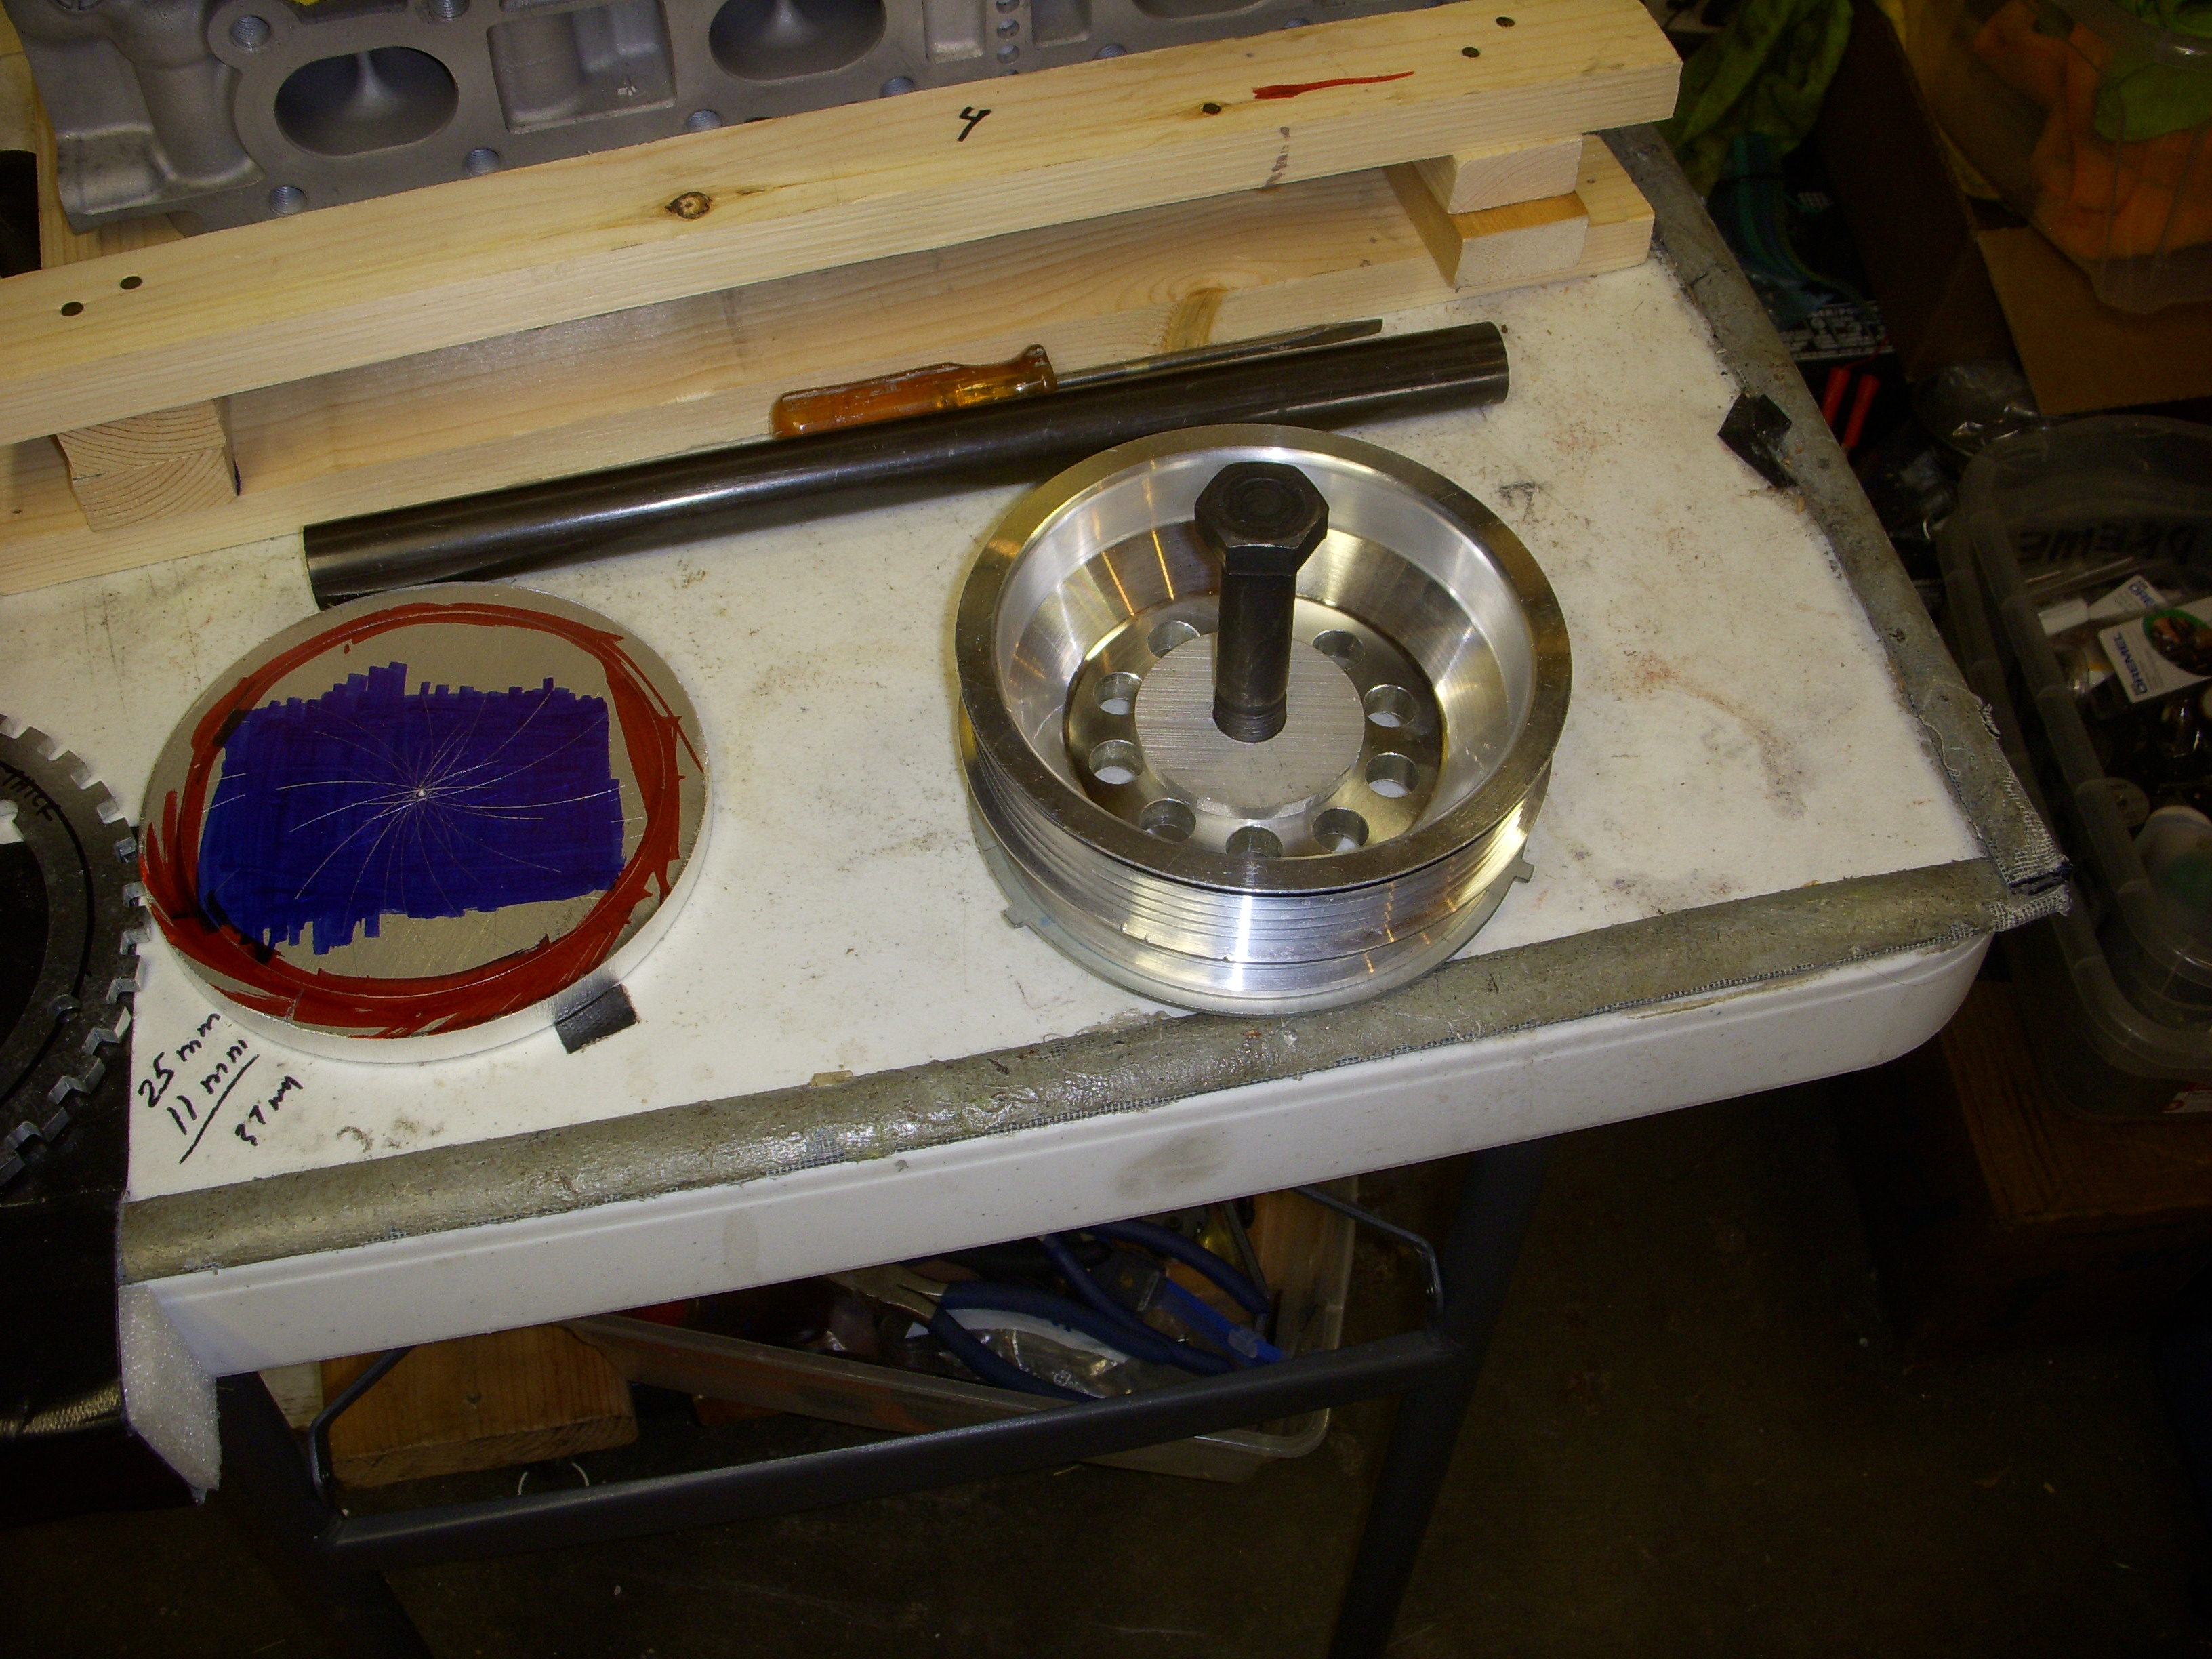
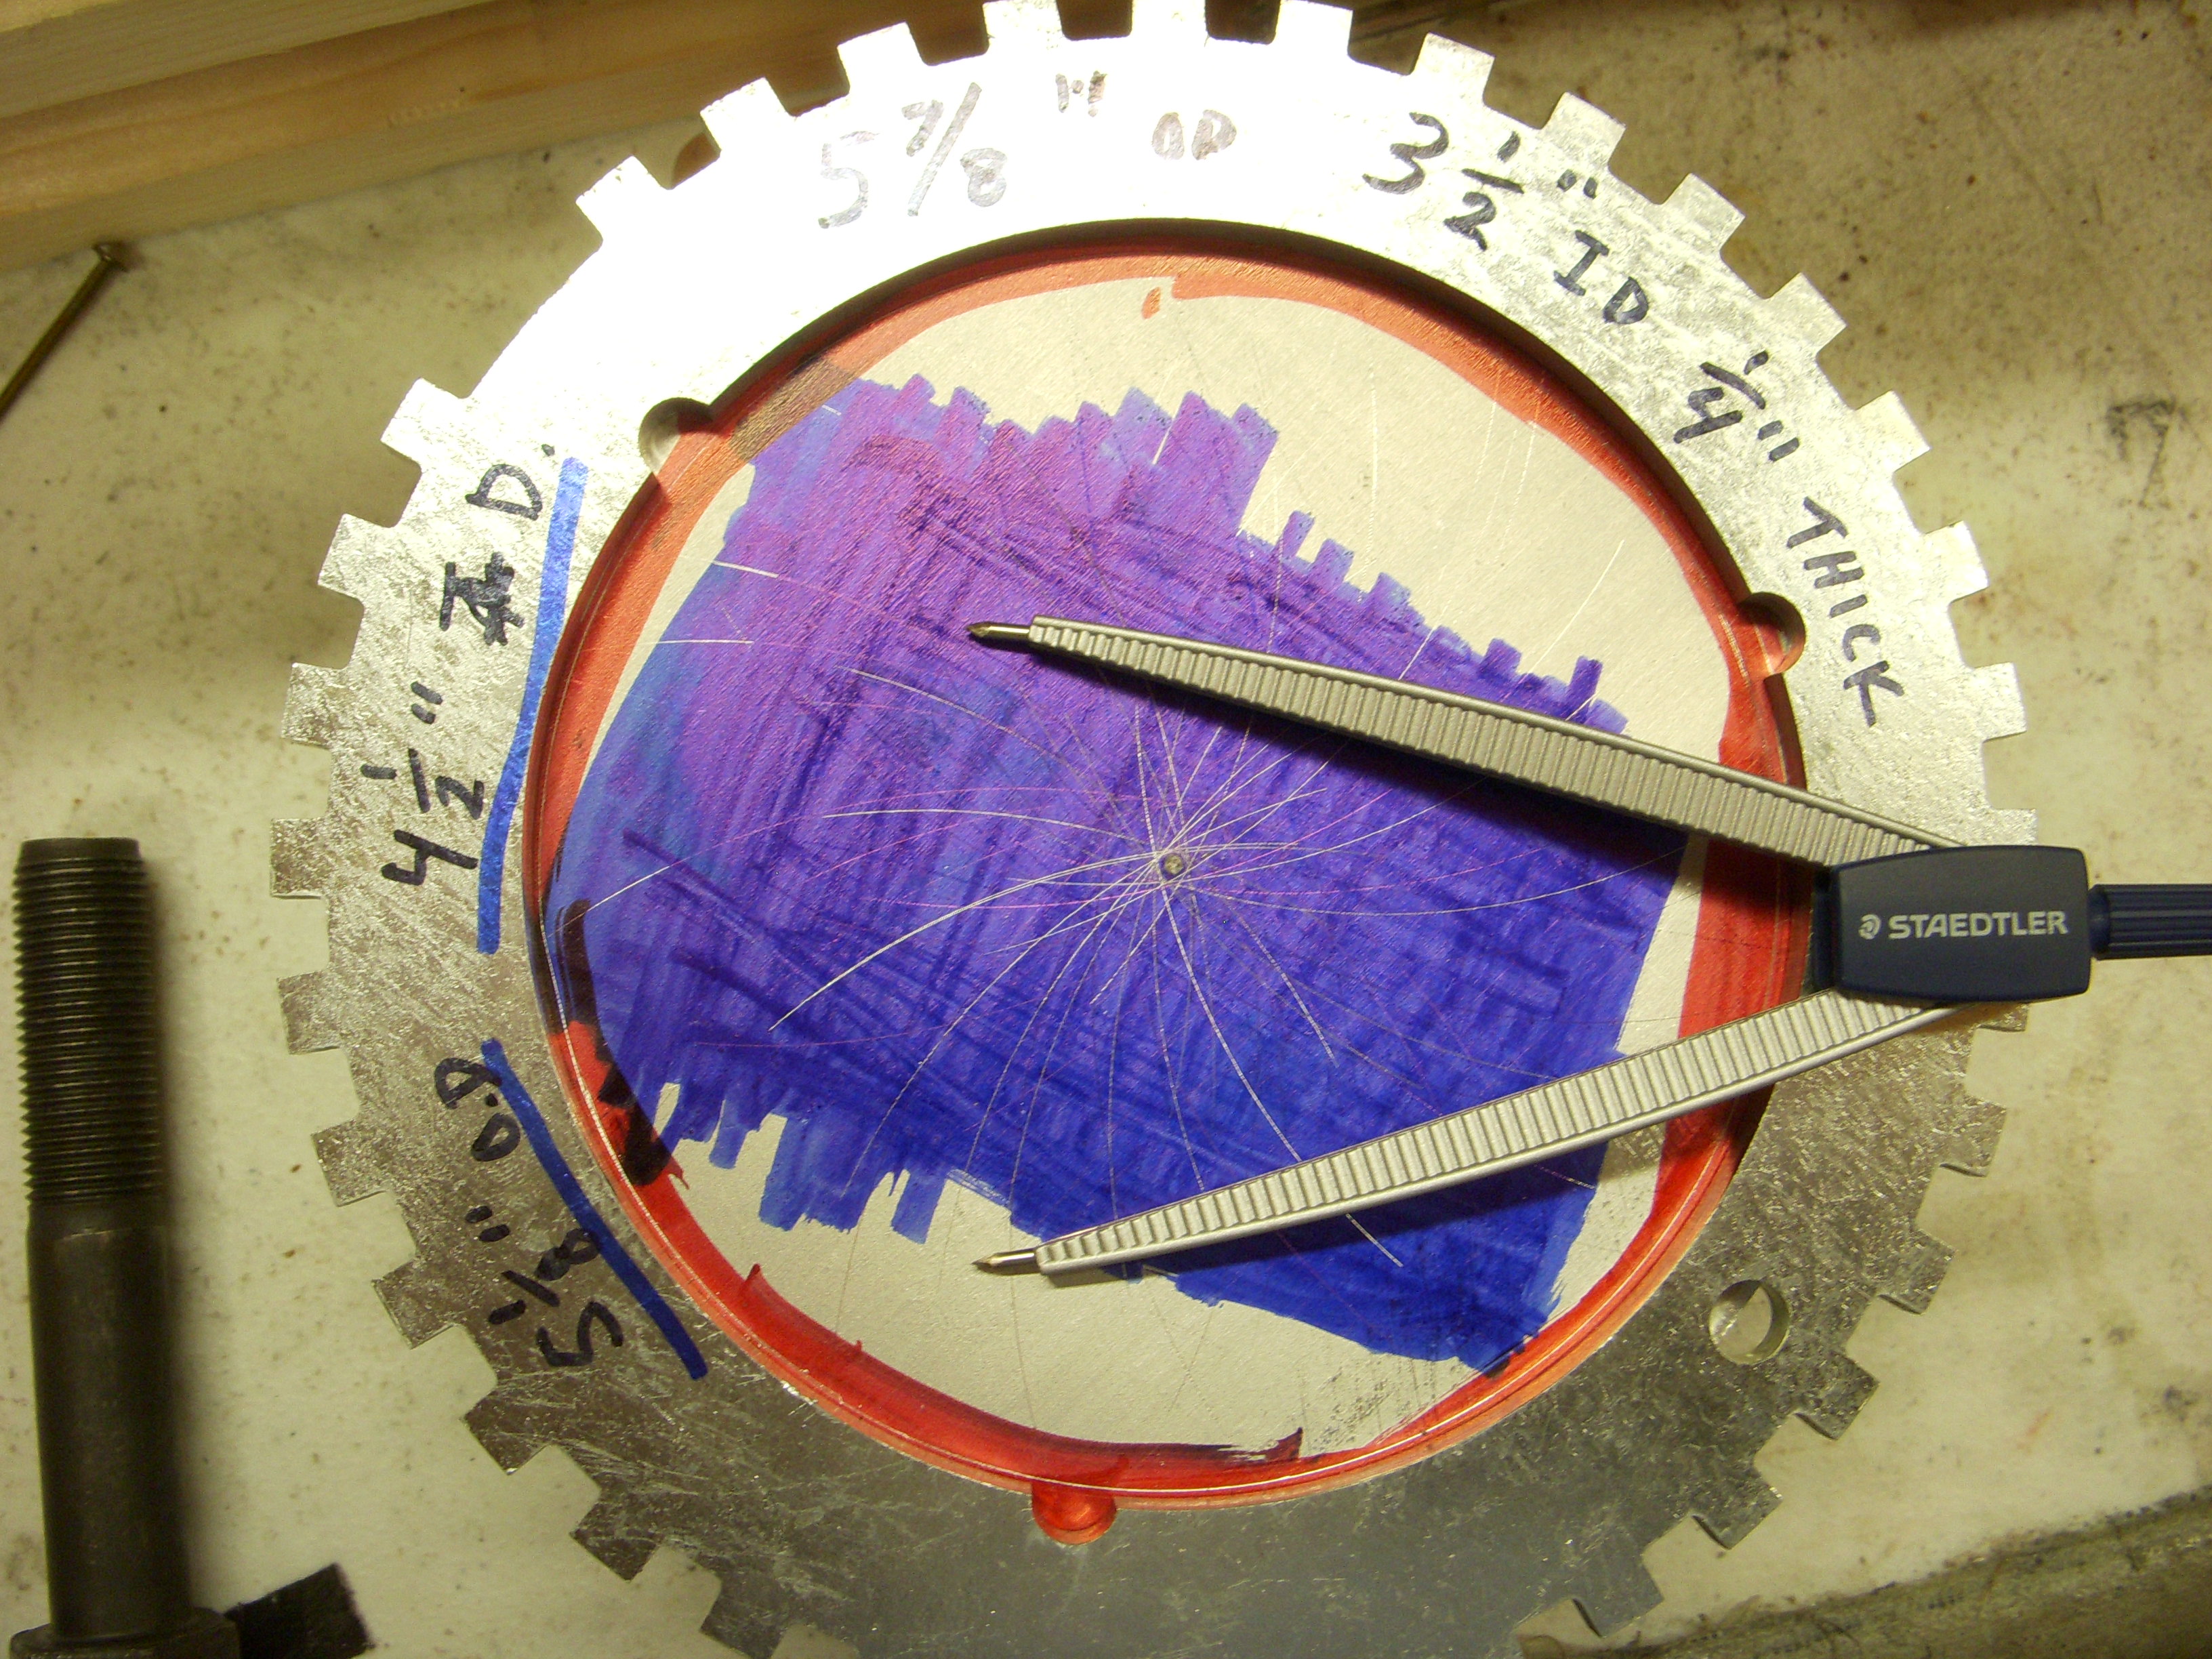

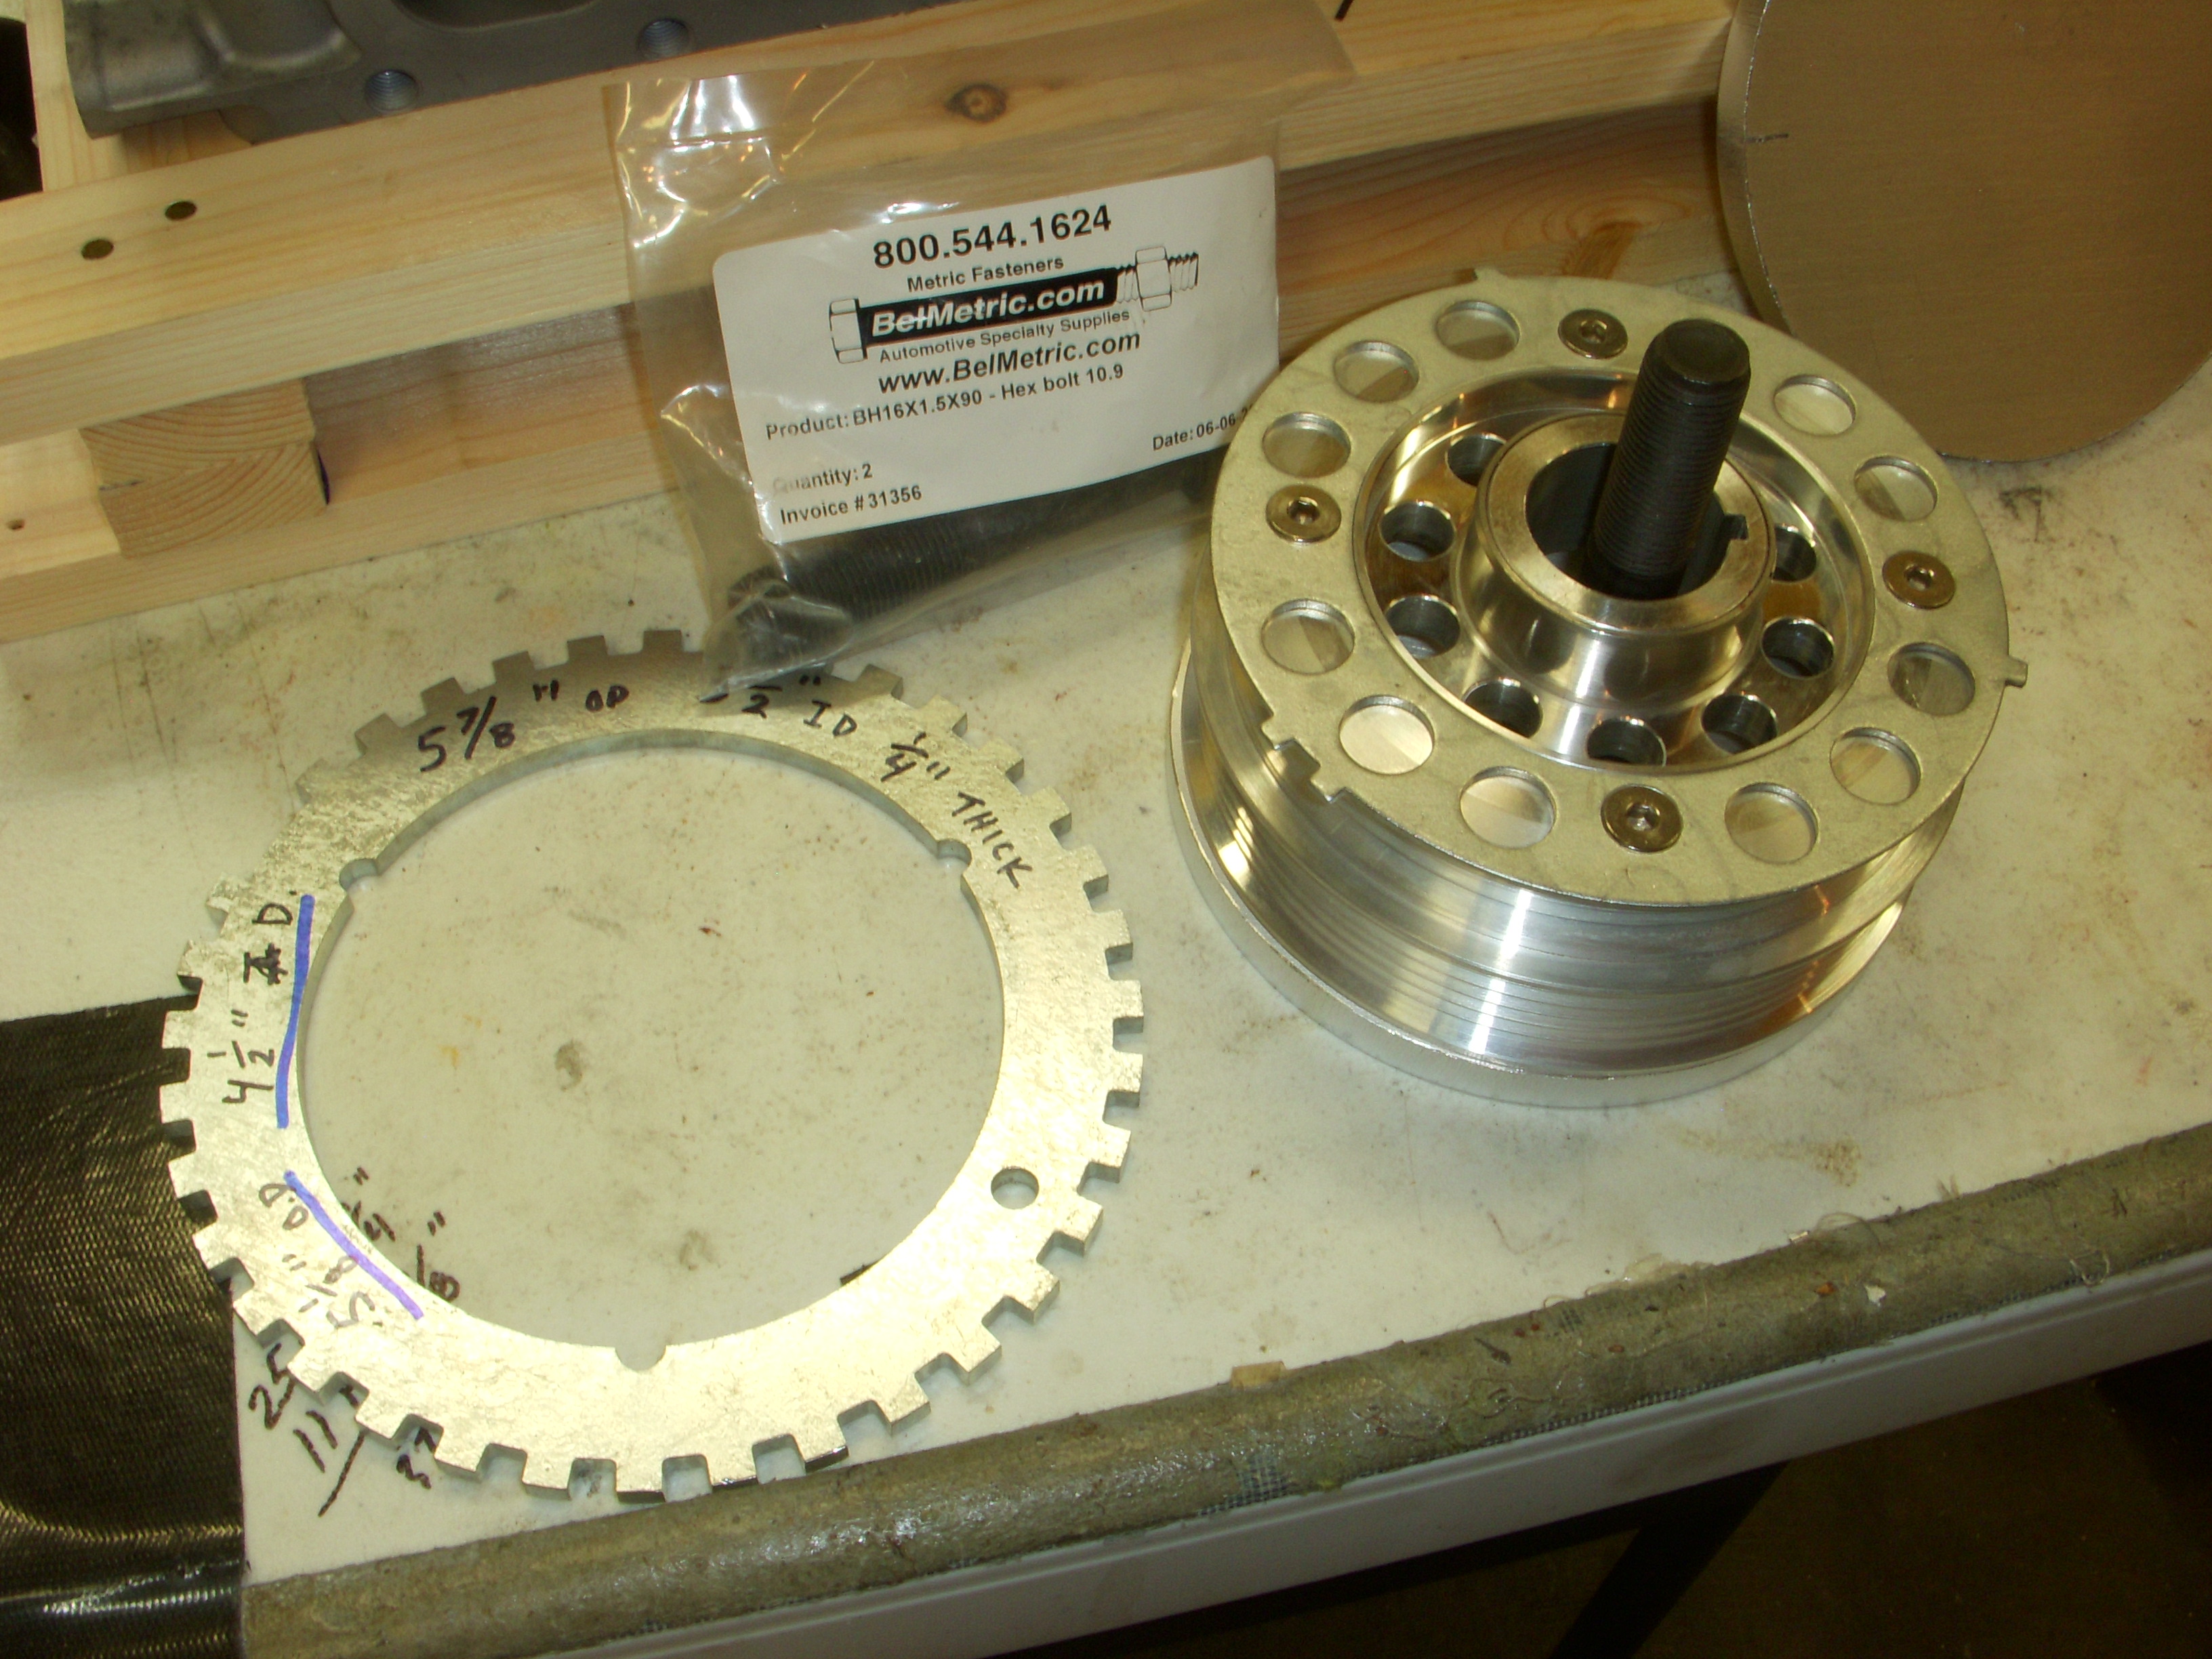
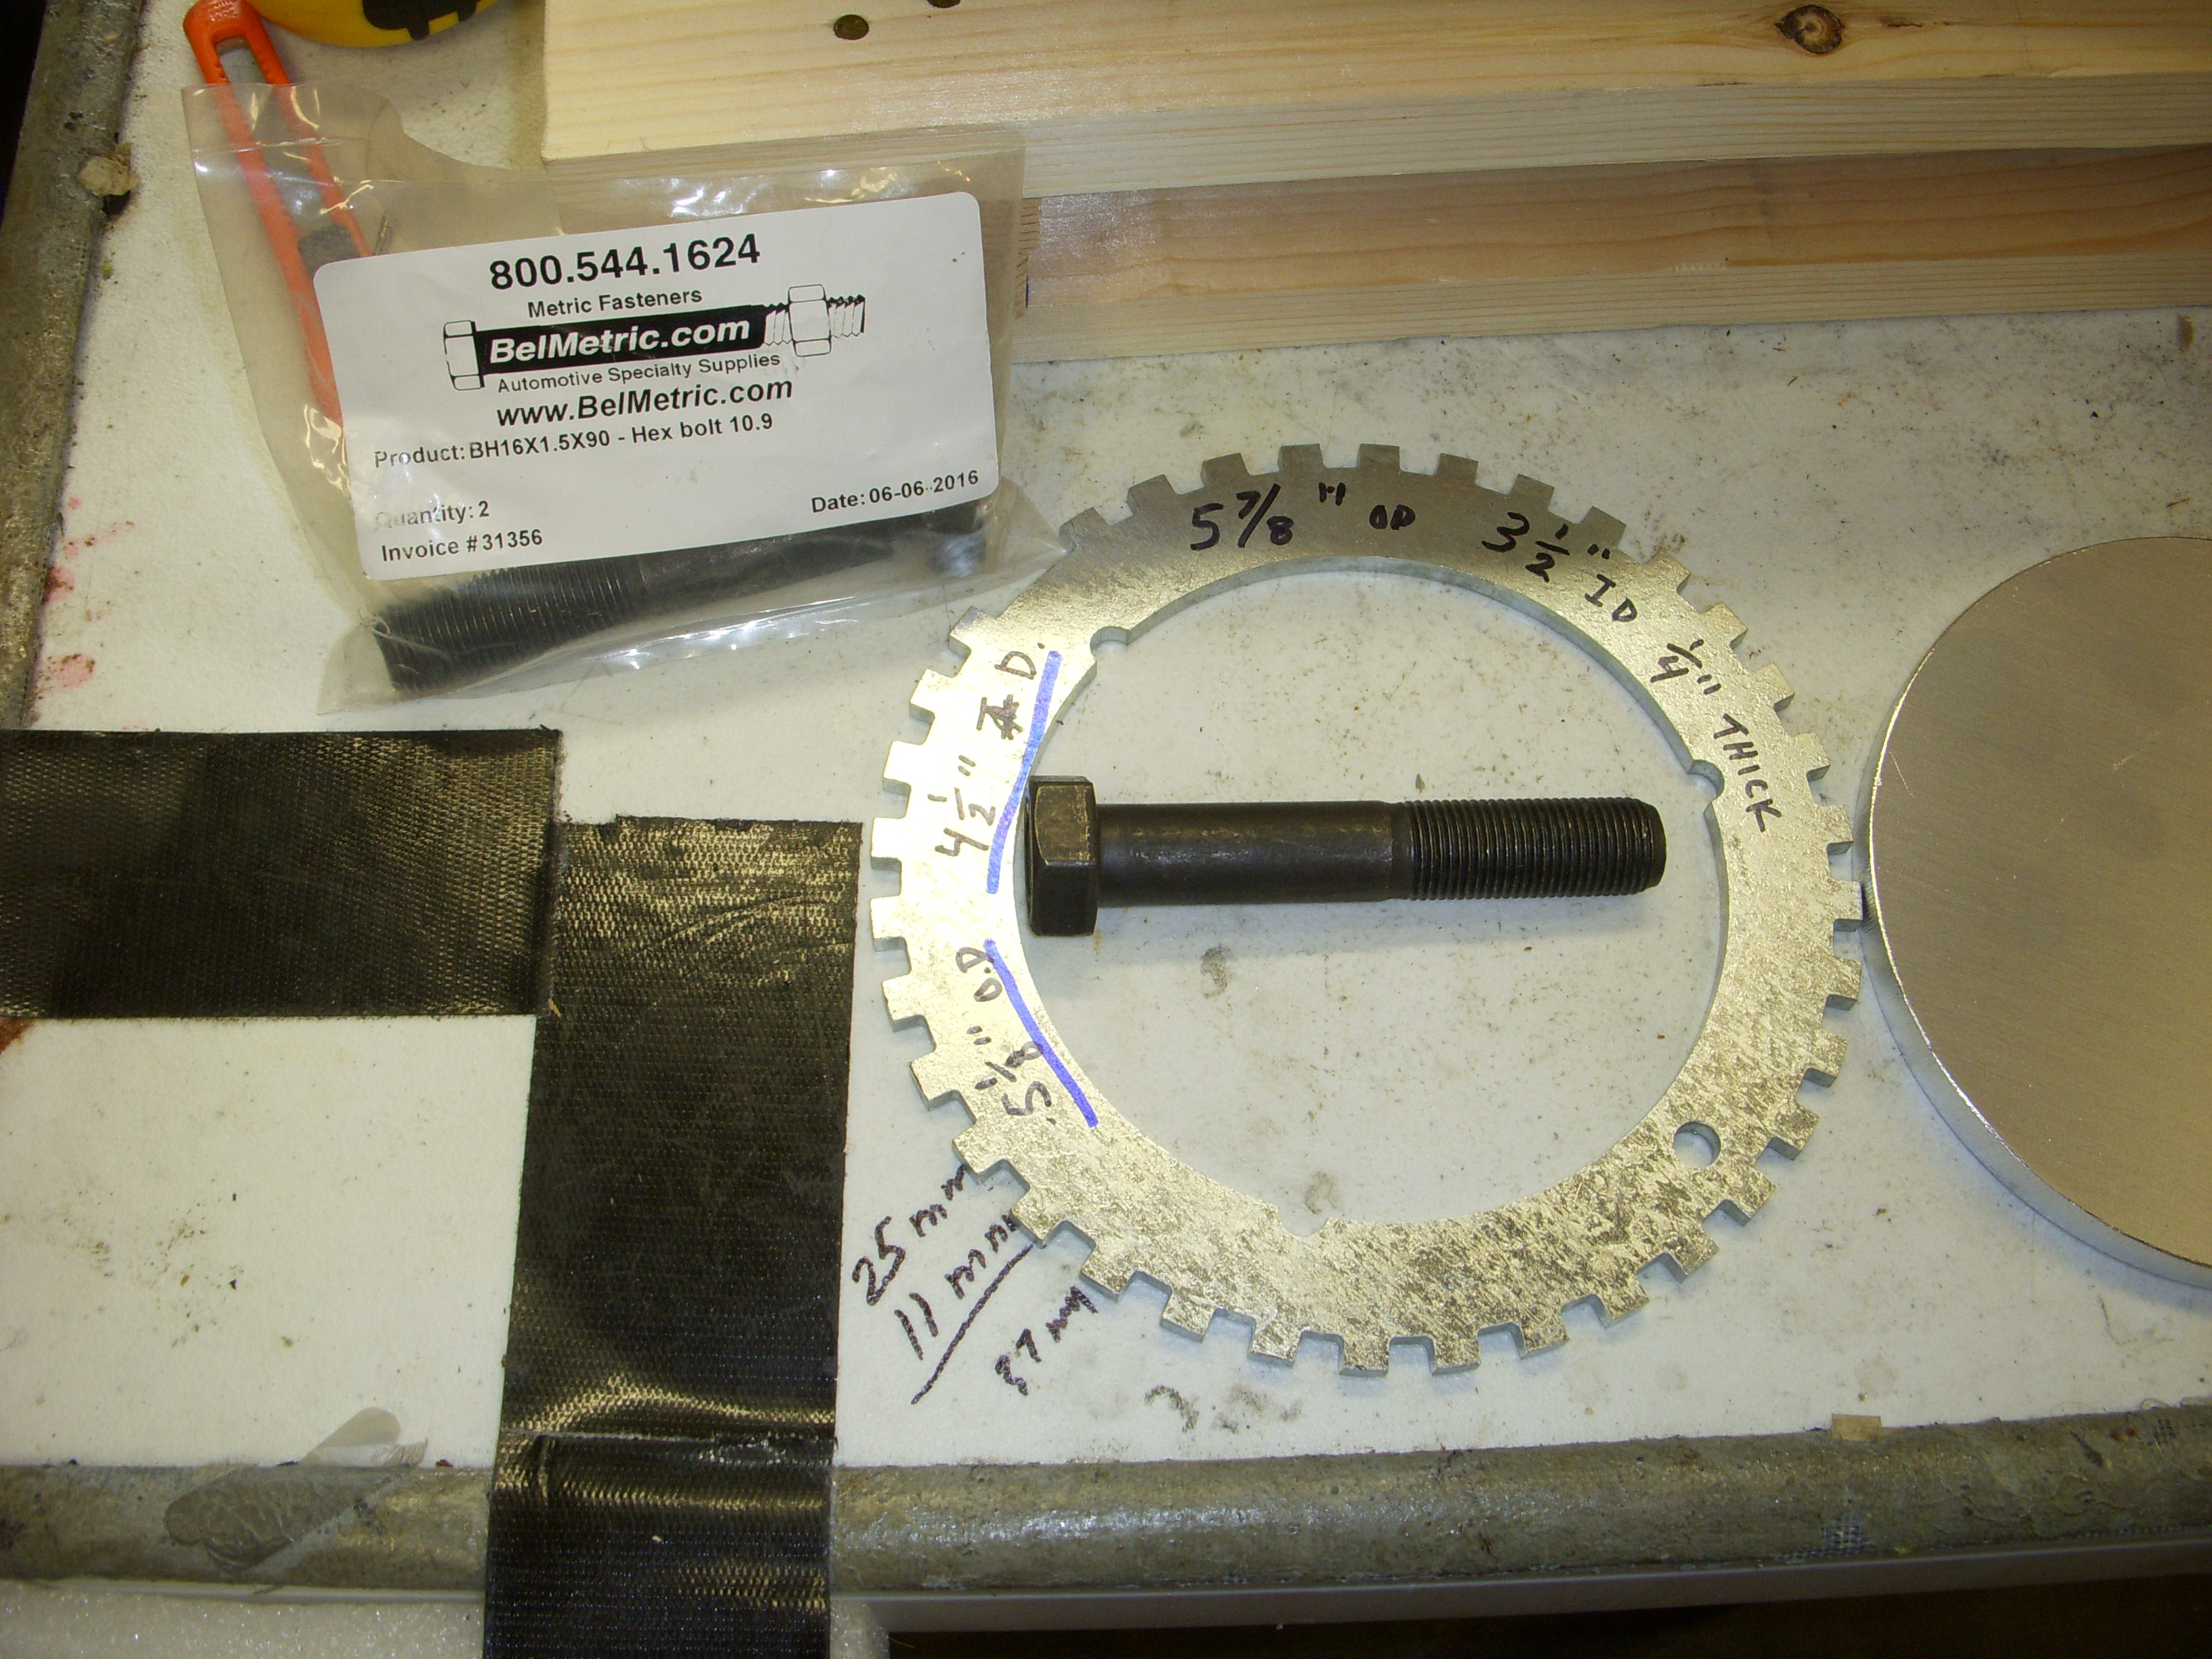
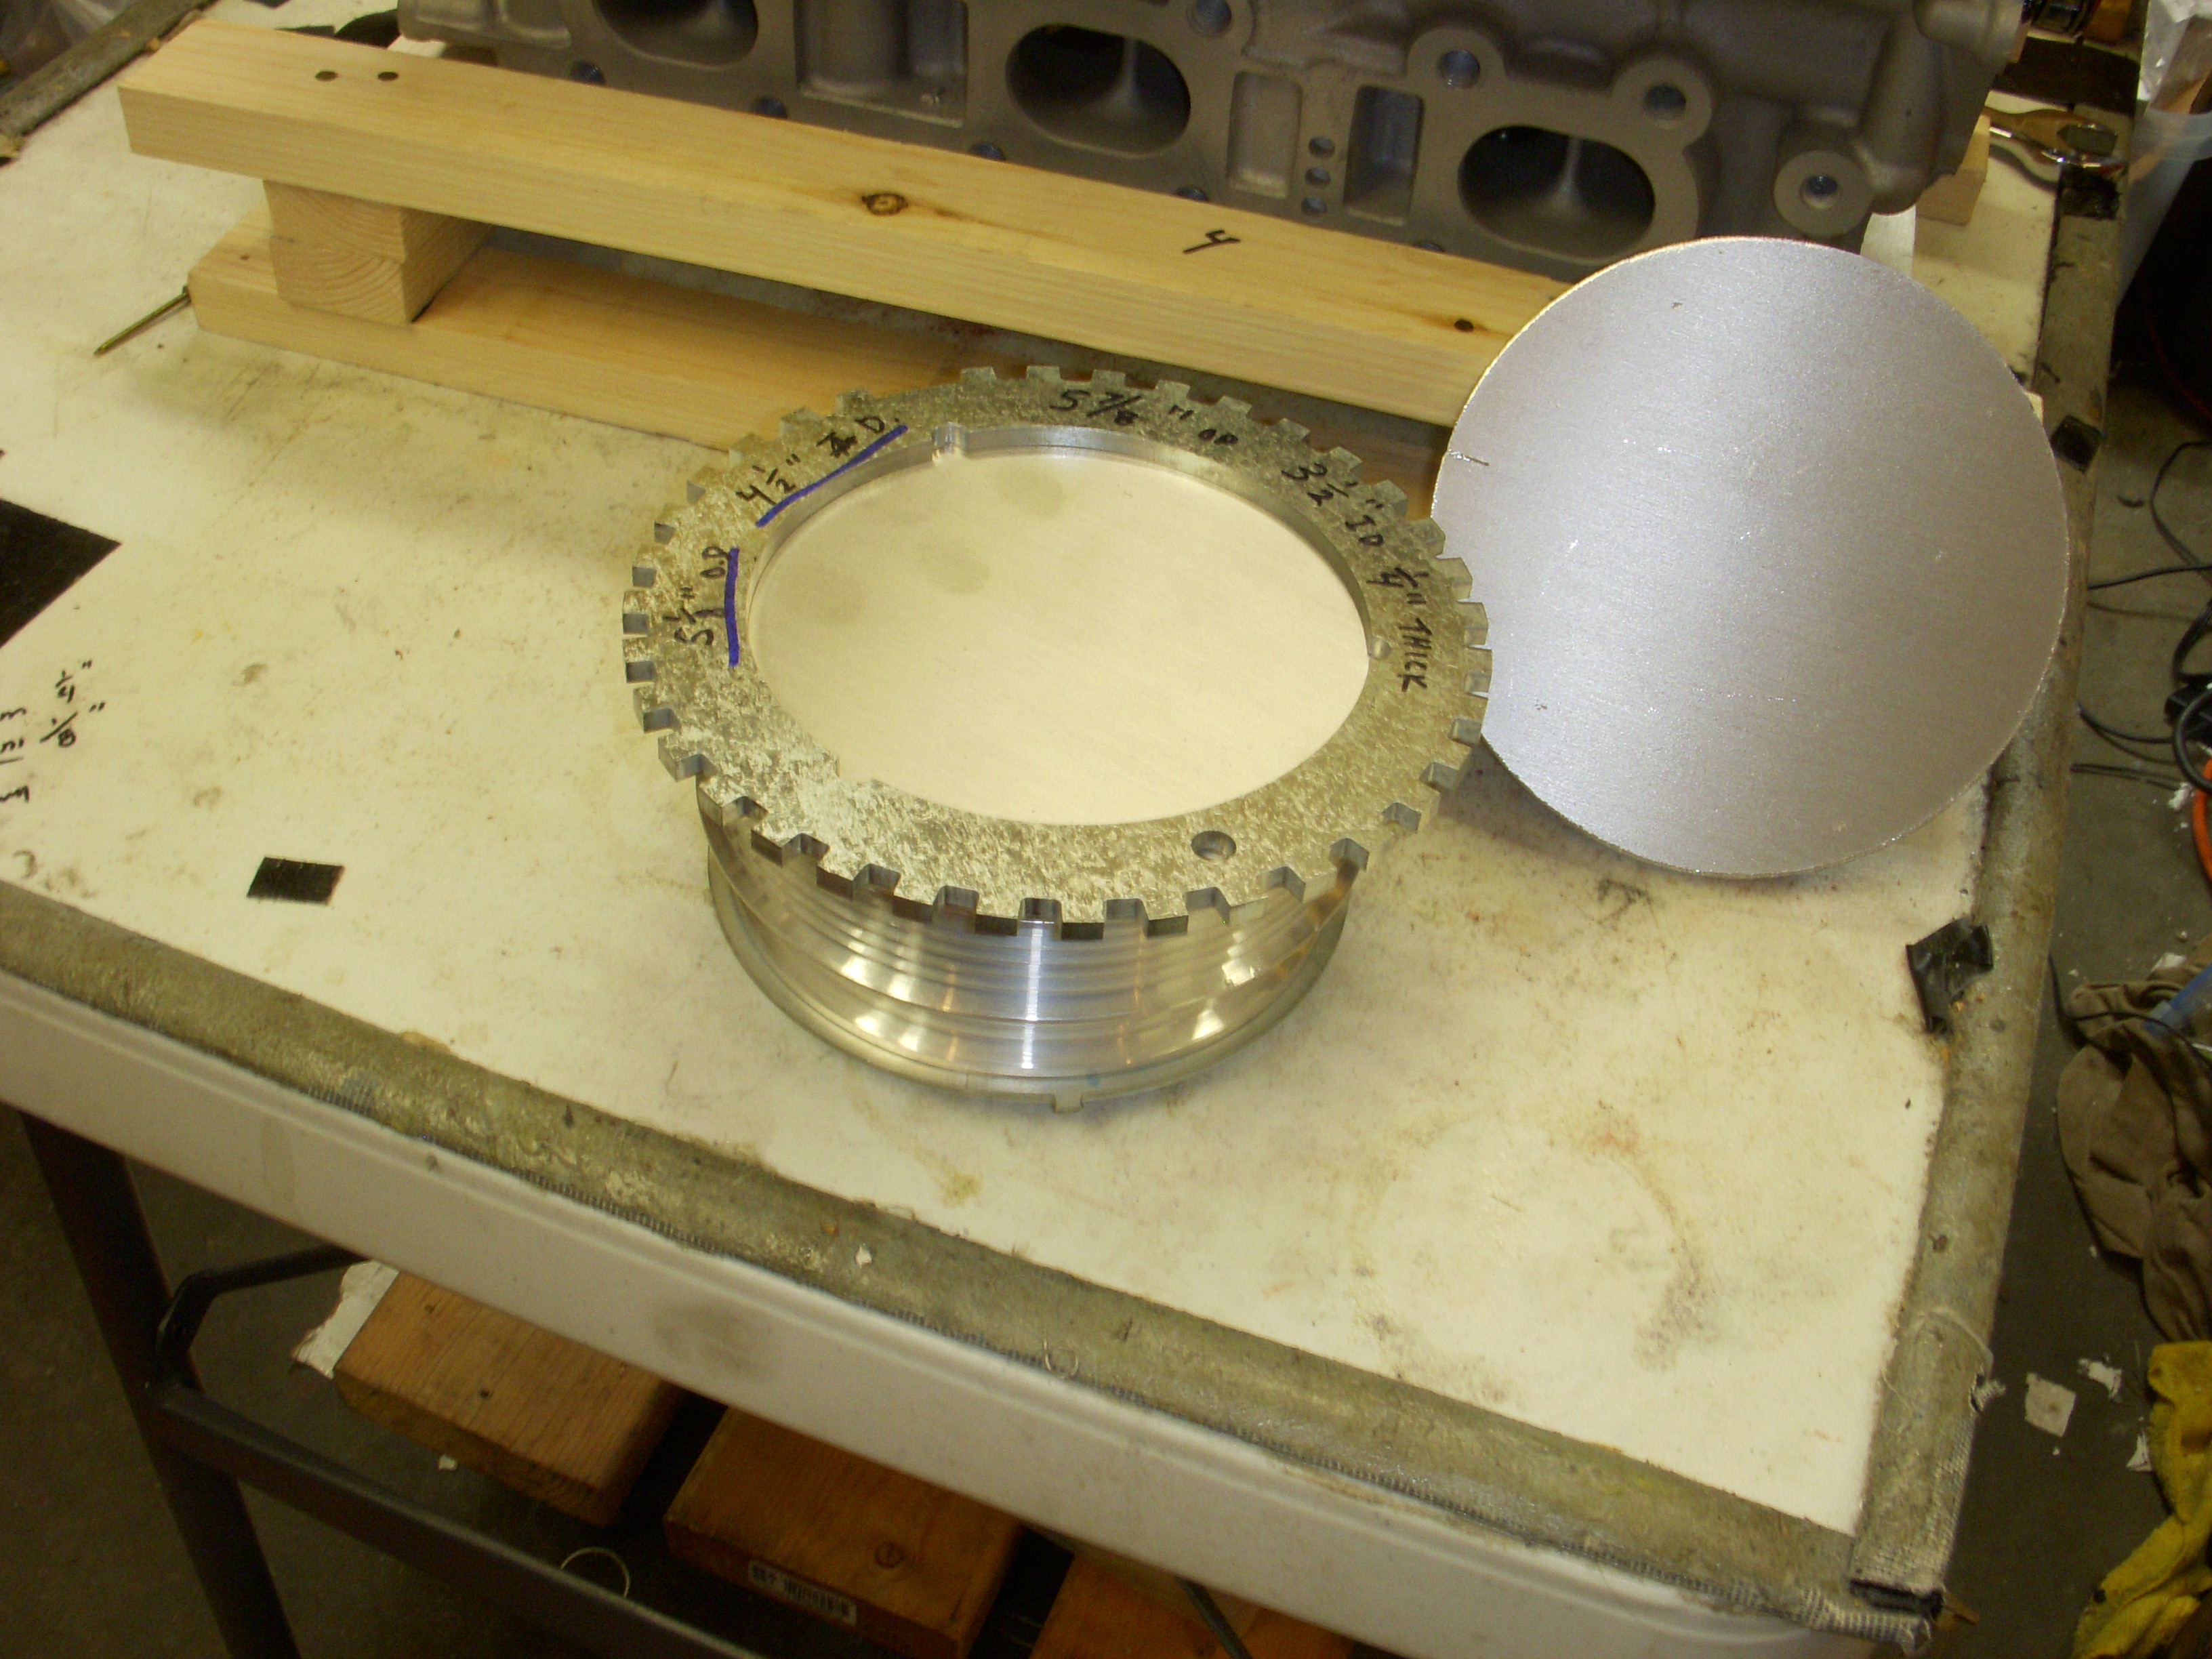
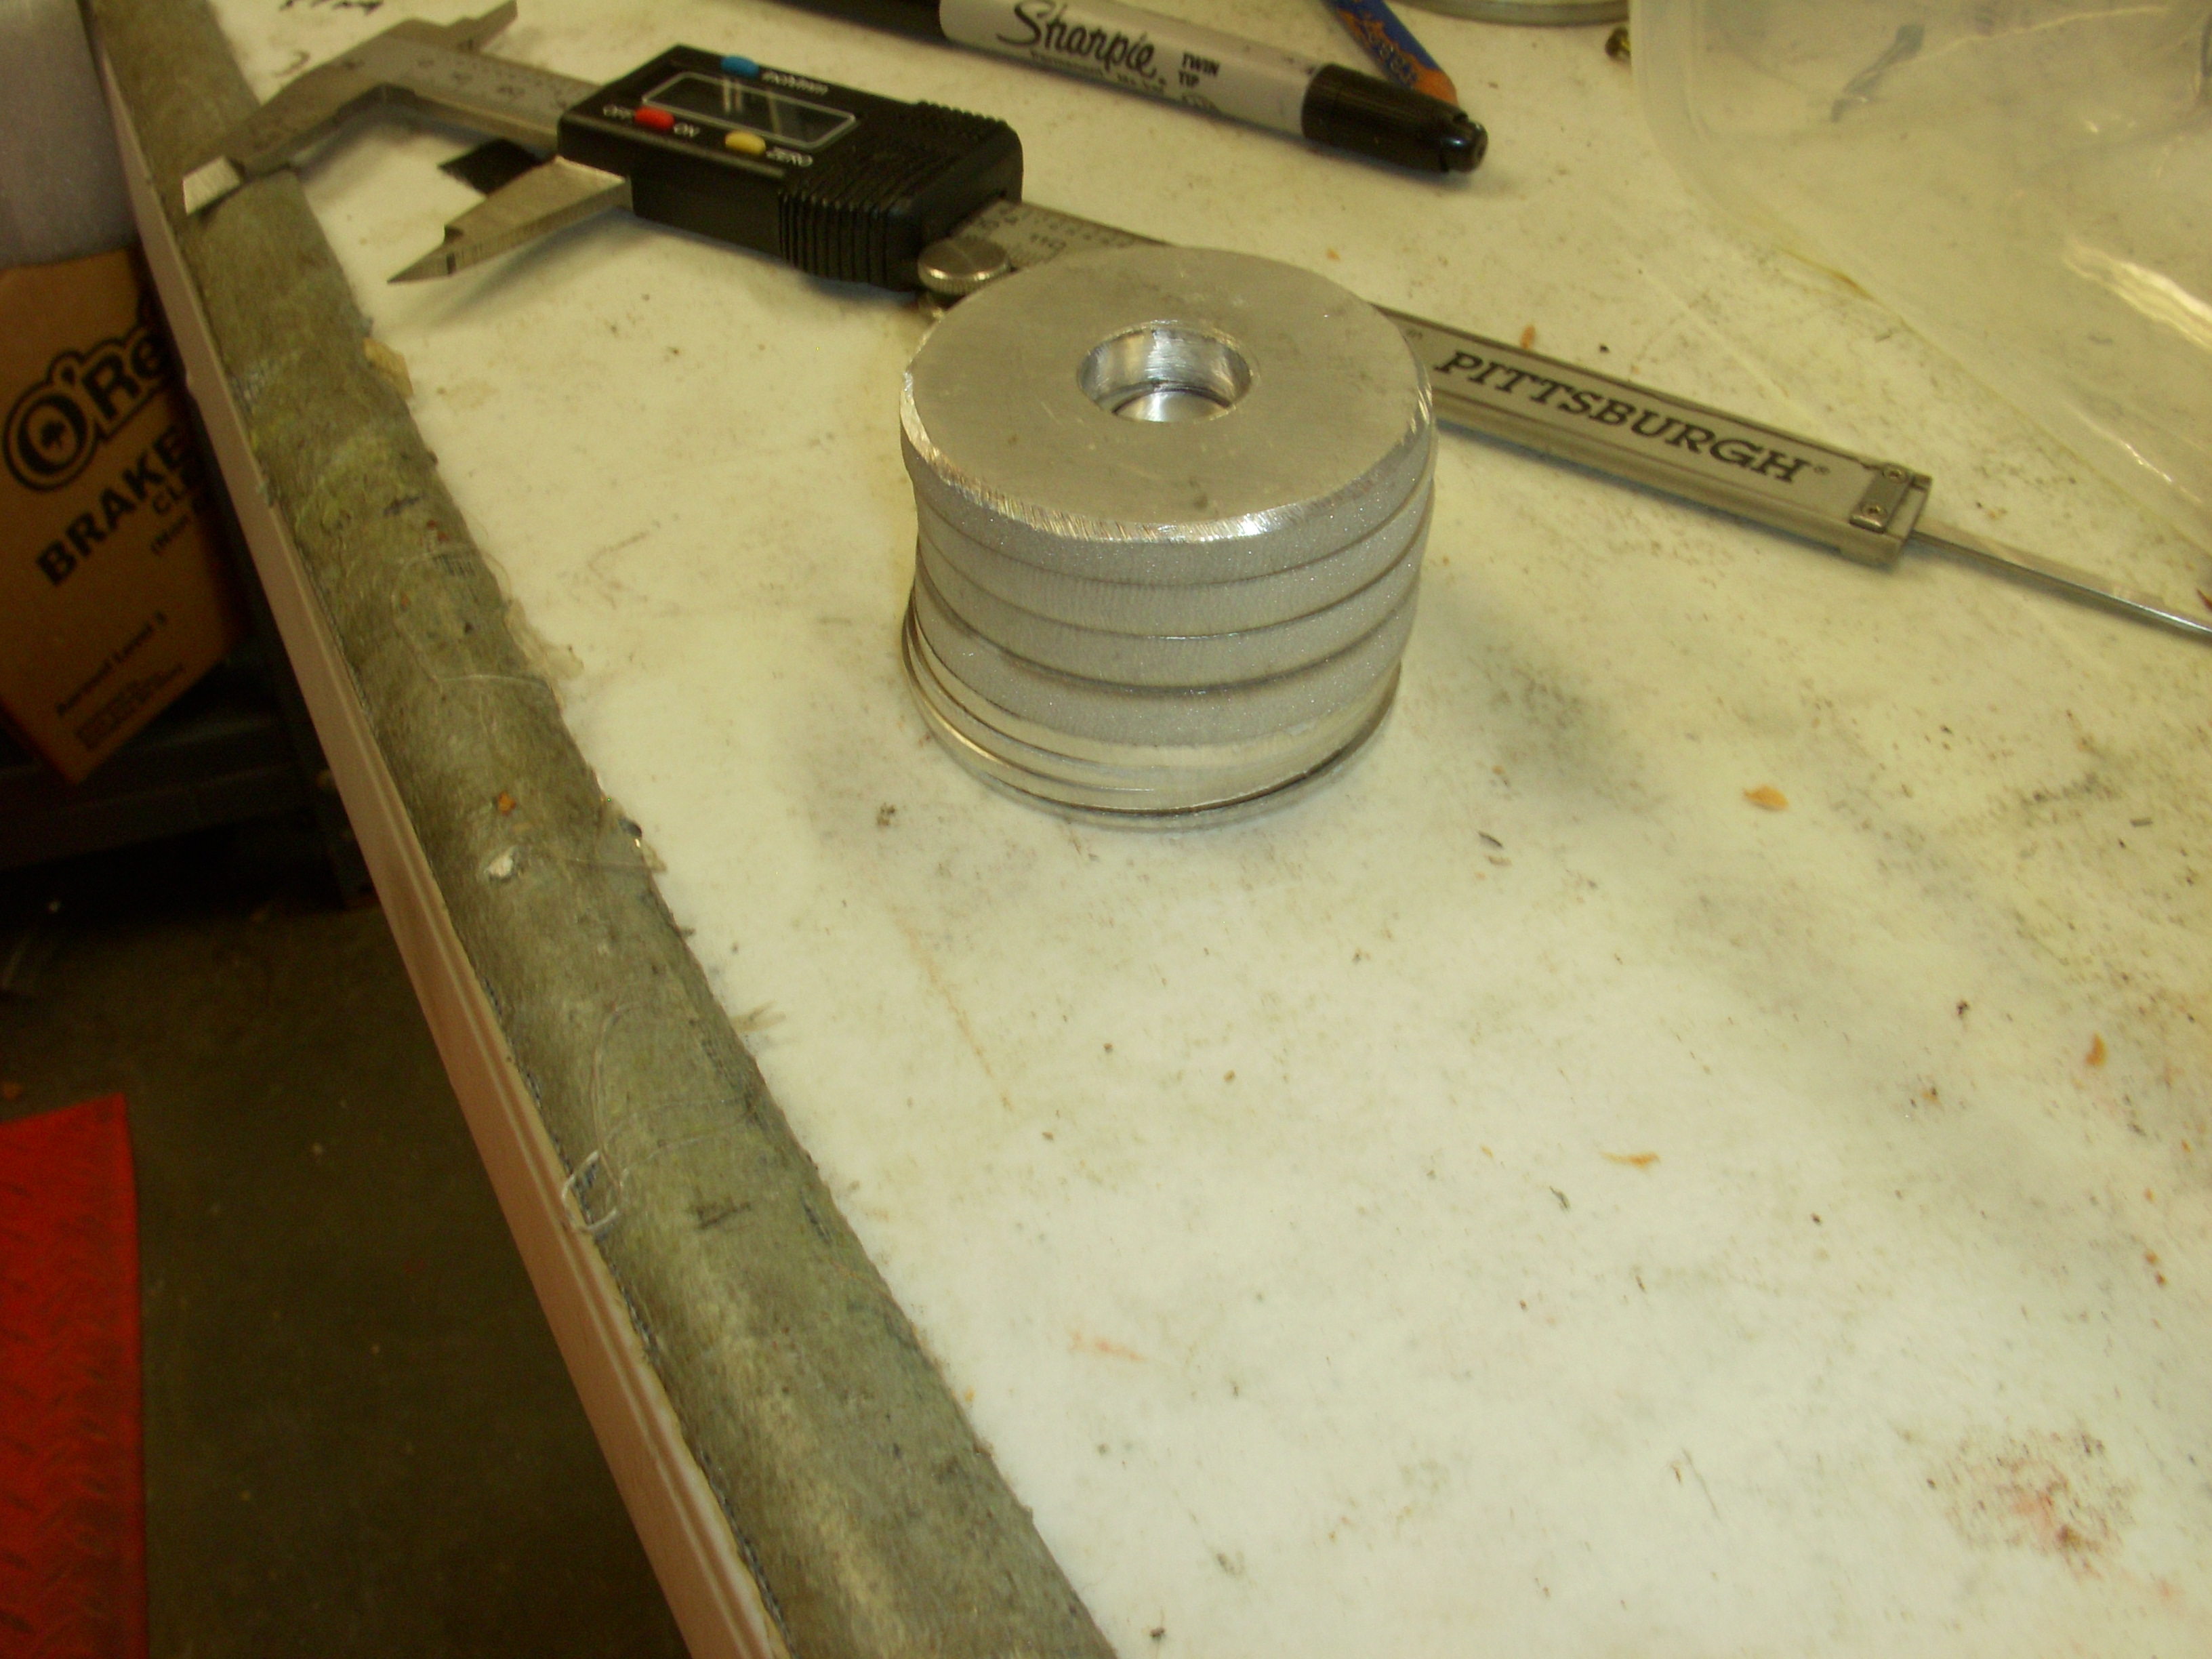
The pieces are intended to stack like pancakes and bolt together by torqueing down the center bolt against the stack of aluminum discs. The 5 1/4" disc will press against the aluminum pulley complete with pointed allen screws, the 36-1 toothed disc will be fastened to the 3/8" disc with metric bolts, and still the 36-1 disc can be adjusted for position by loosening the center bolt, moving the 36-1 disc, and tightening the center bolt. Pretty elegant, I think.


The pieces are intended to stack like pancakes and bolt together by torqueing down the center bolt against the stack of aluminum discs. The 5 1/4" disc will press against the aluminum pulley complete with pointed allen screws, the 36-1 toothed disc will be fastened to the 3/8" disc with metric bolts, and still the 36-1 disc can be adjusted for position by loosening the center bolt, moving the 36-1 disc, and tightening the center bolt. Pretty elegant, I think.
Last edited by grey99max; Jan 15, 2017 at 02:11 PM.
I forgot to mention....
I decided to "lighten ship" with this new engine project. The smaller alloy crank pulley will save around 5 LB of rotating mass, removing the air conditioner parts will drop more weight, pulling out the spare tire and OEM toolset is some more LB-loss, and I'm thinking about a set of Weld true drag wheels.
I'm going to remove all the nitrous computers and hardware before startup - I need the space under the hood. With the locked diffy and the 275/50/15 3753R M/T DRs, I'll still need power steering.
I'm going to remove all the nitrous computers and hardware before startup - I need the space under the hood. With the locked diffy and the 275/50/15 3753R M/T DRs, I'll still need power steering.
button-up time
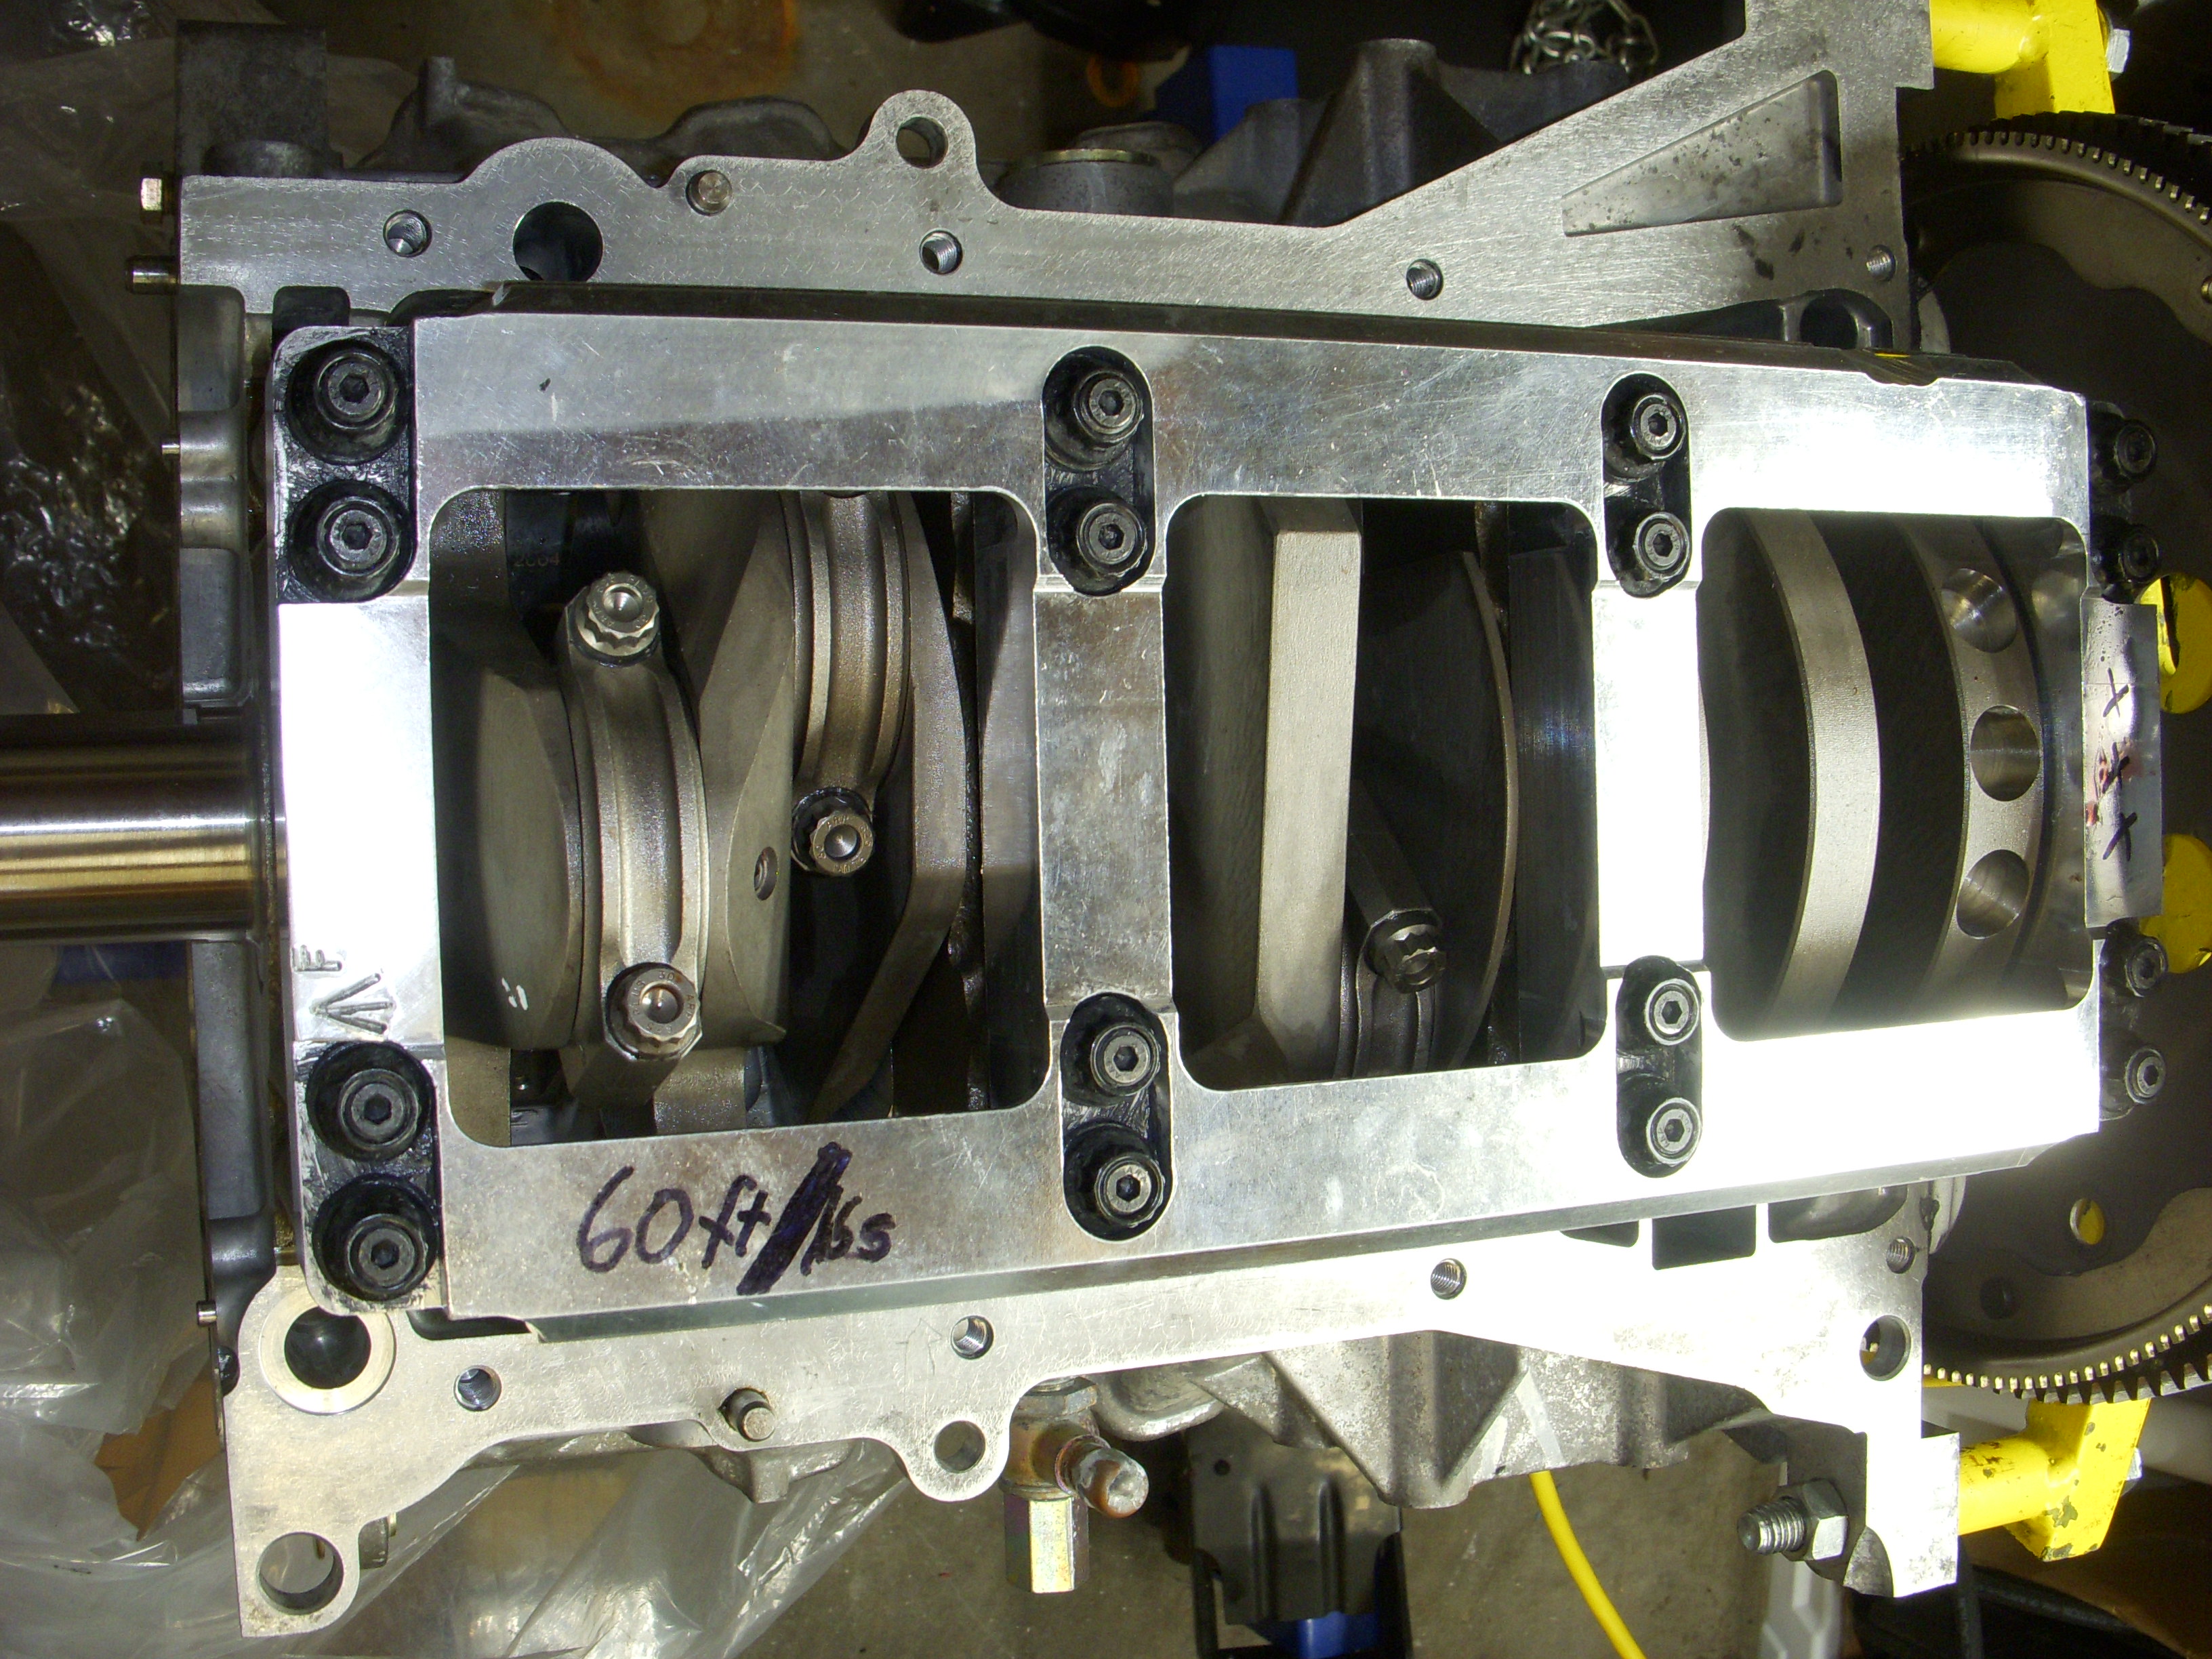
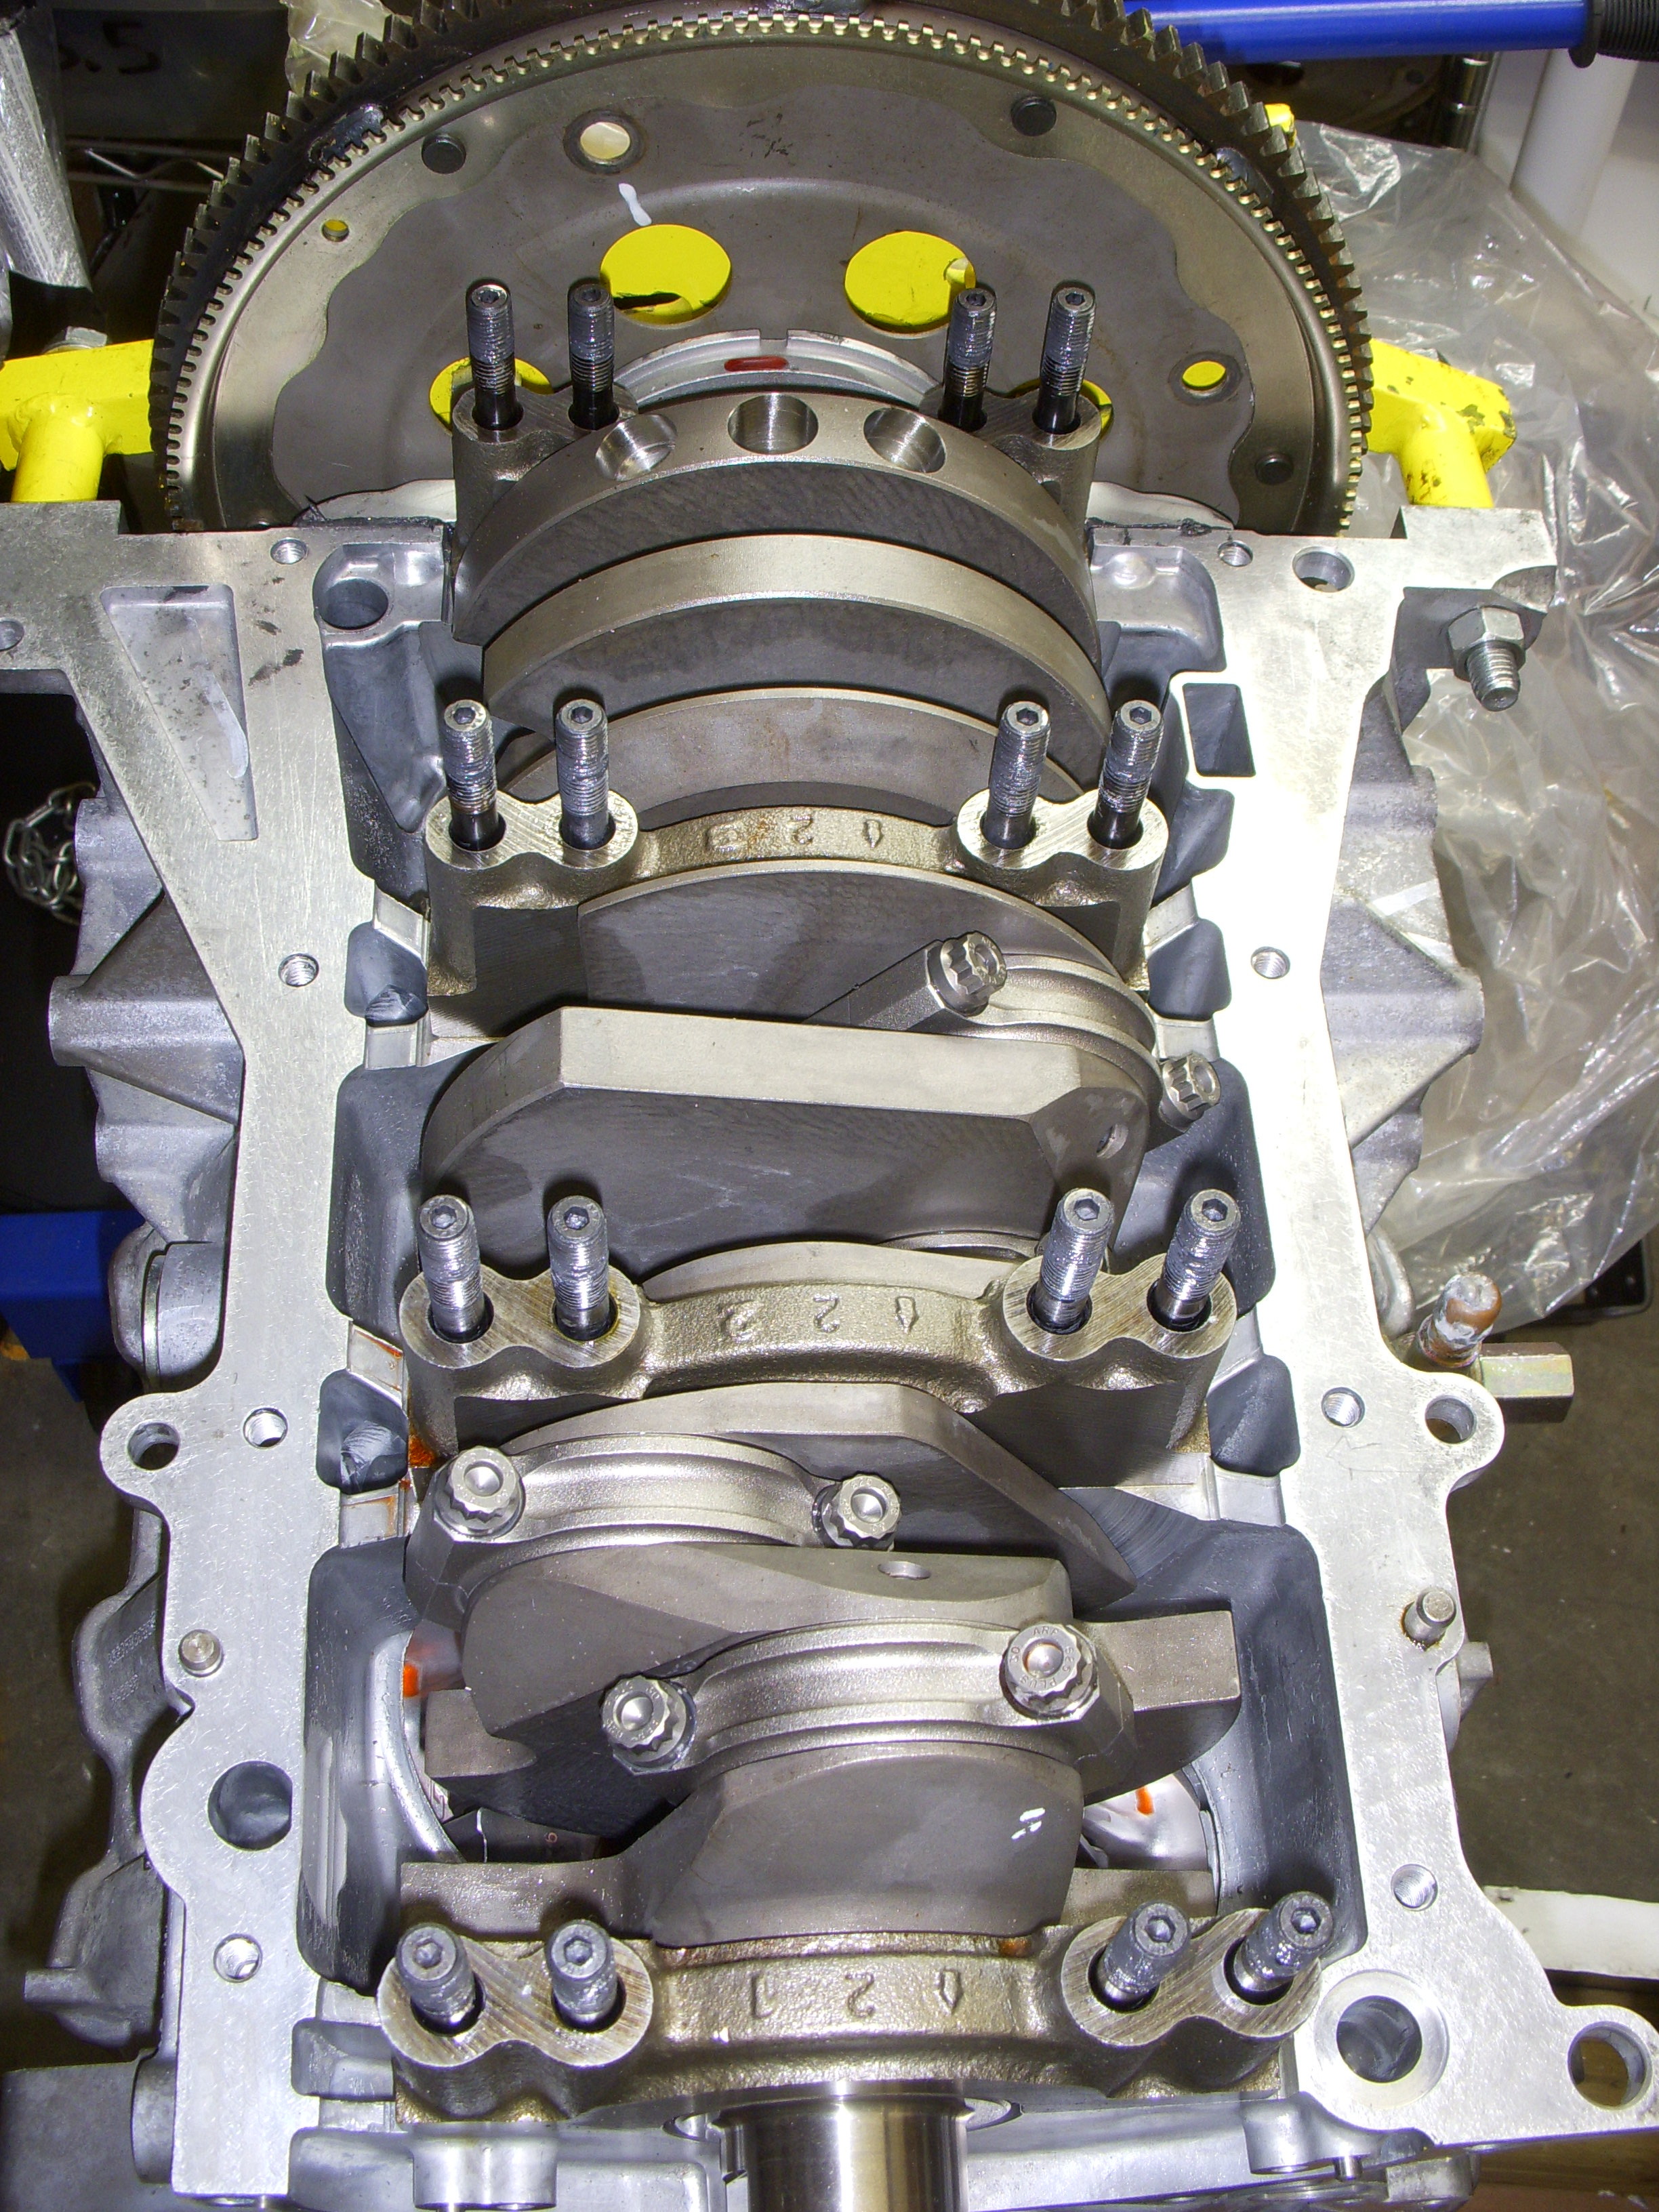
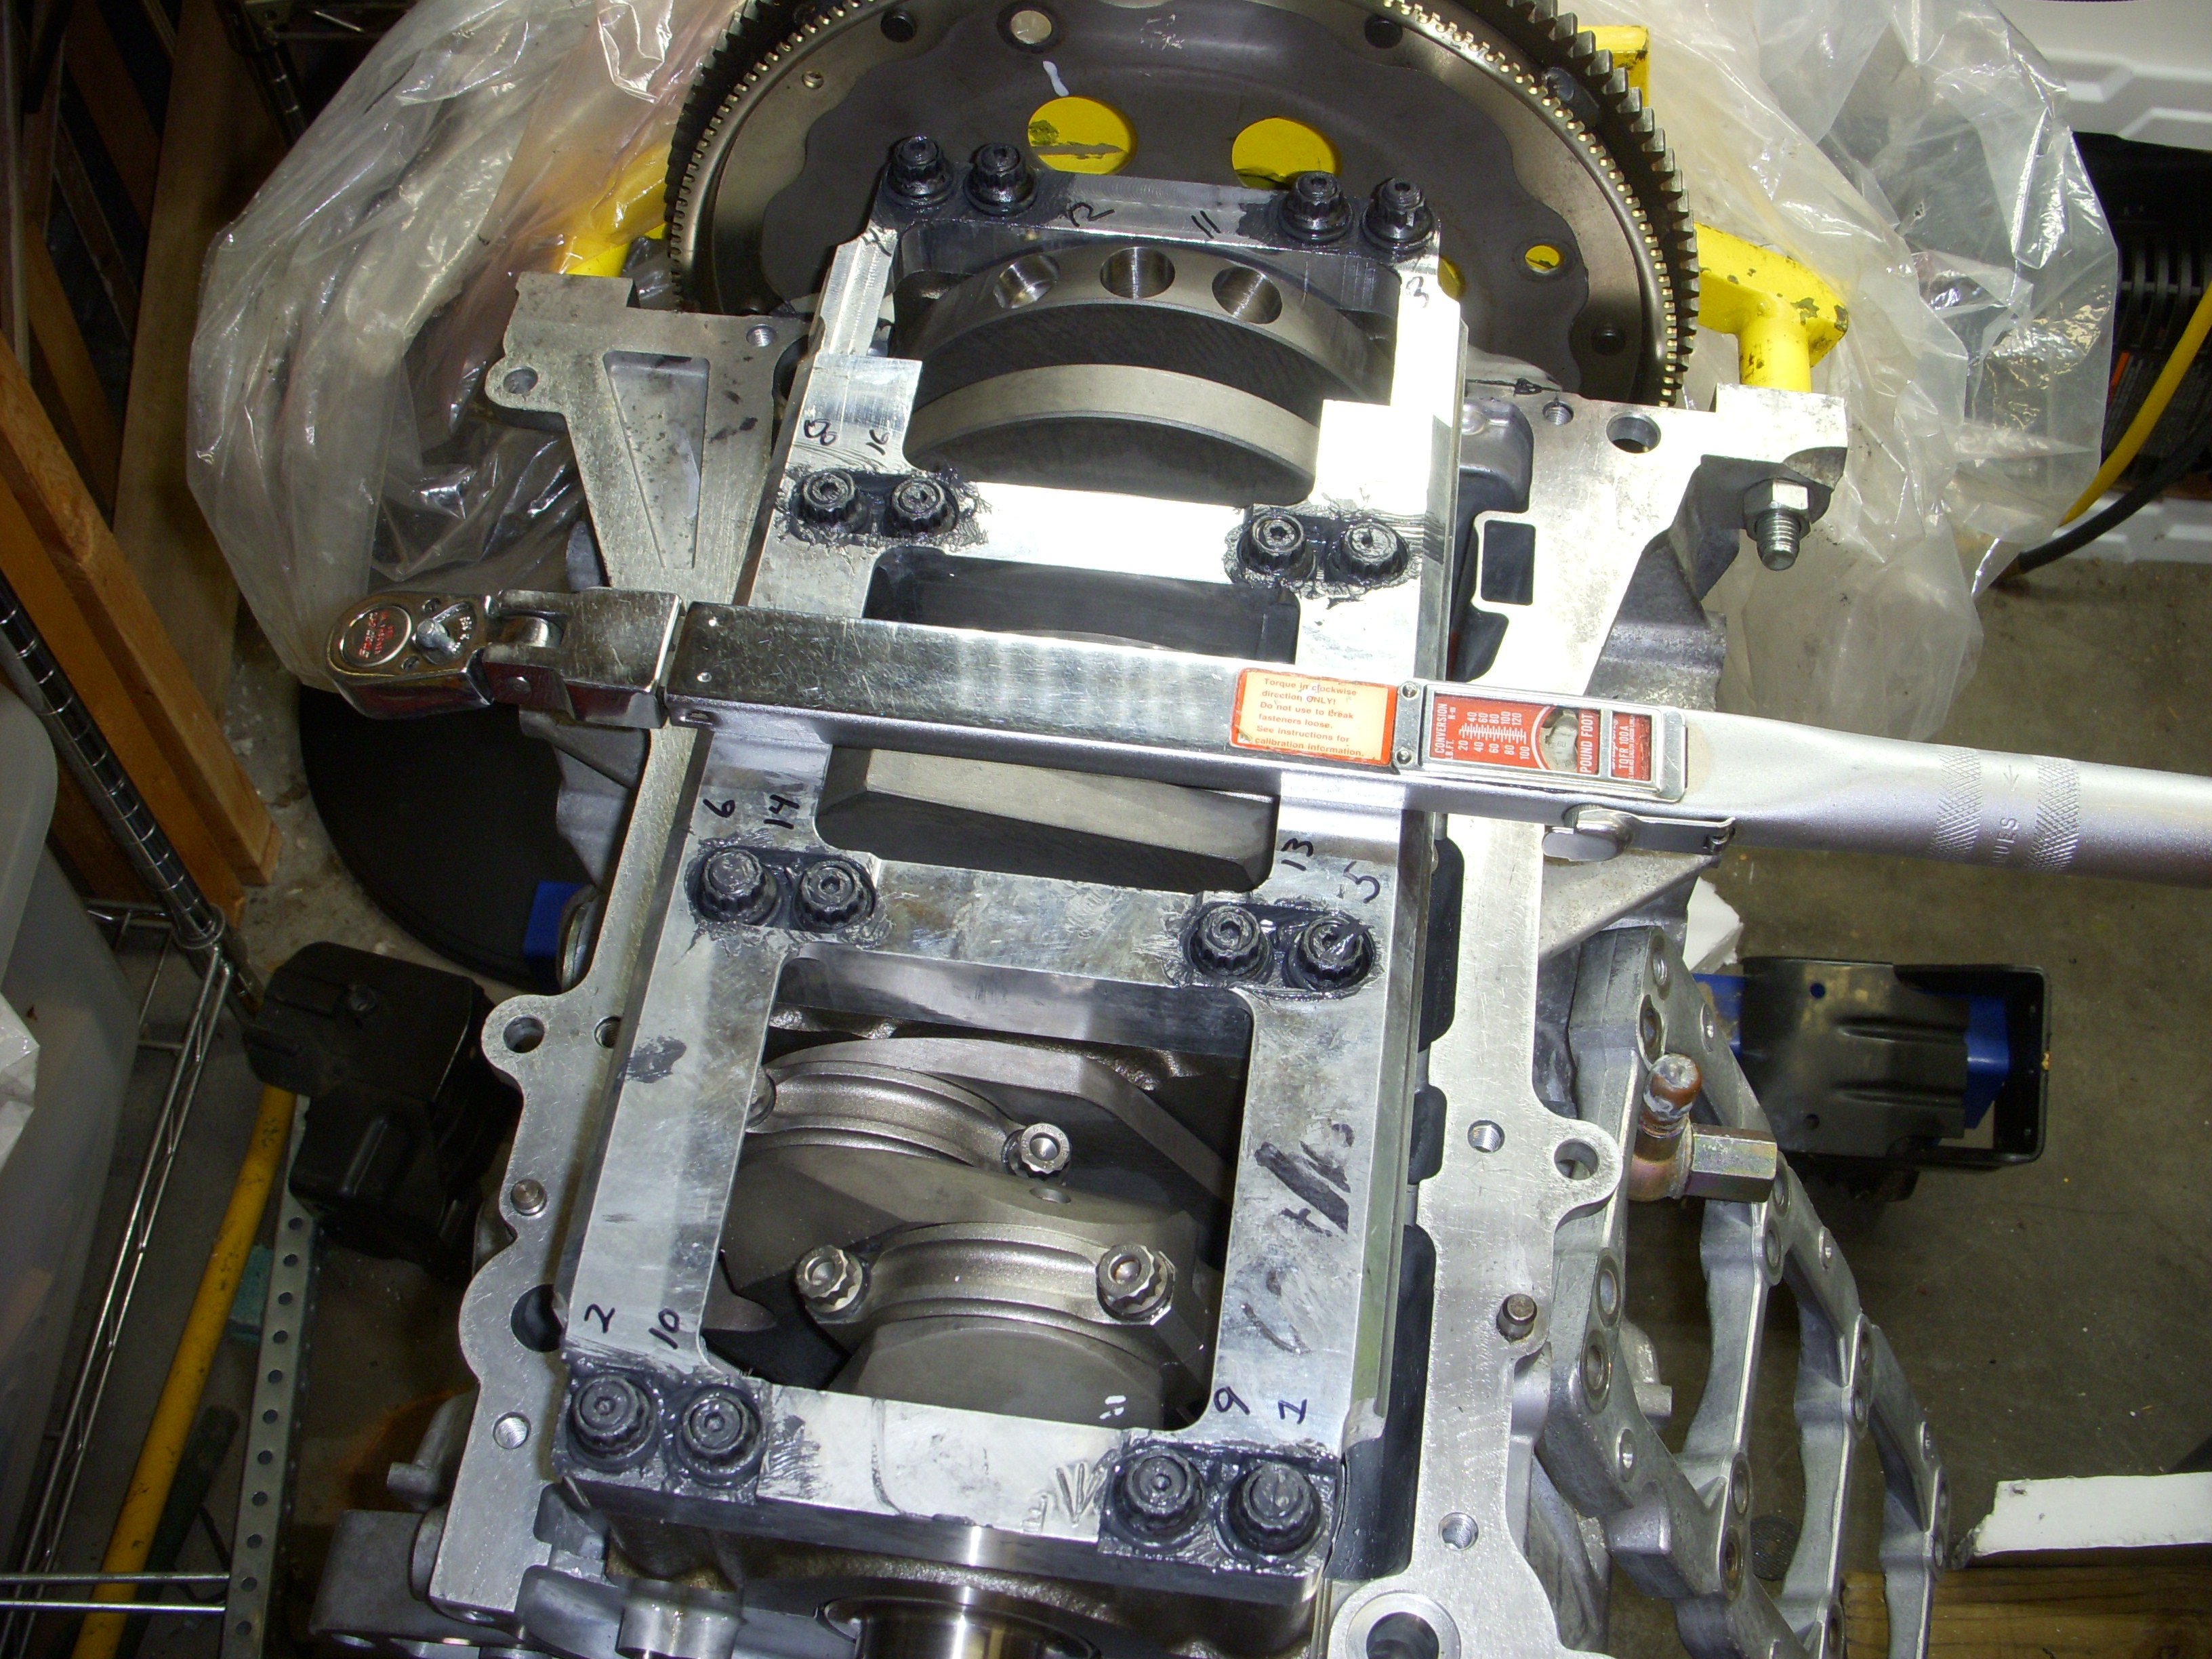
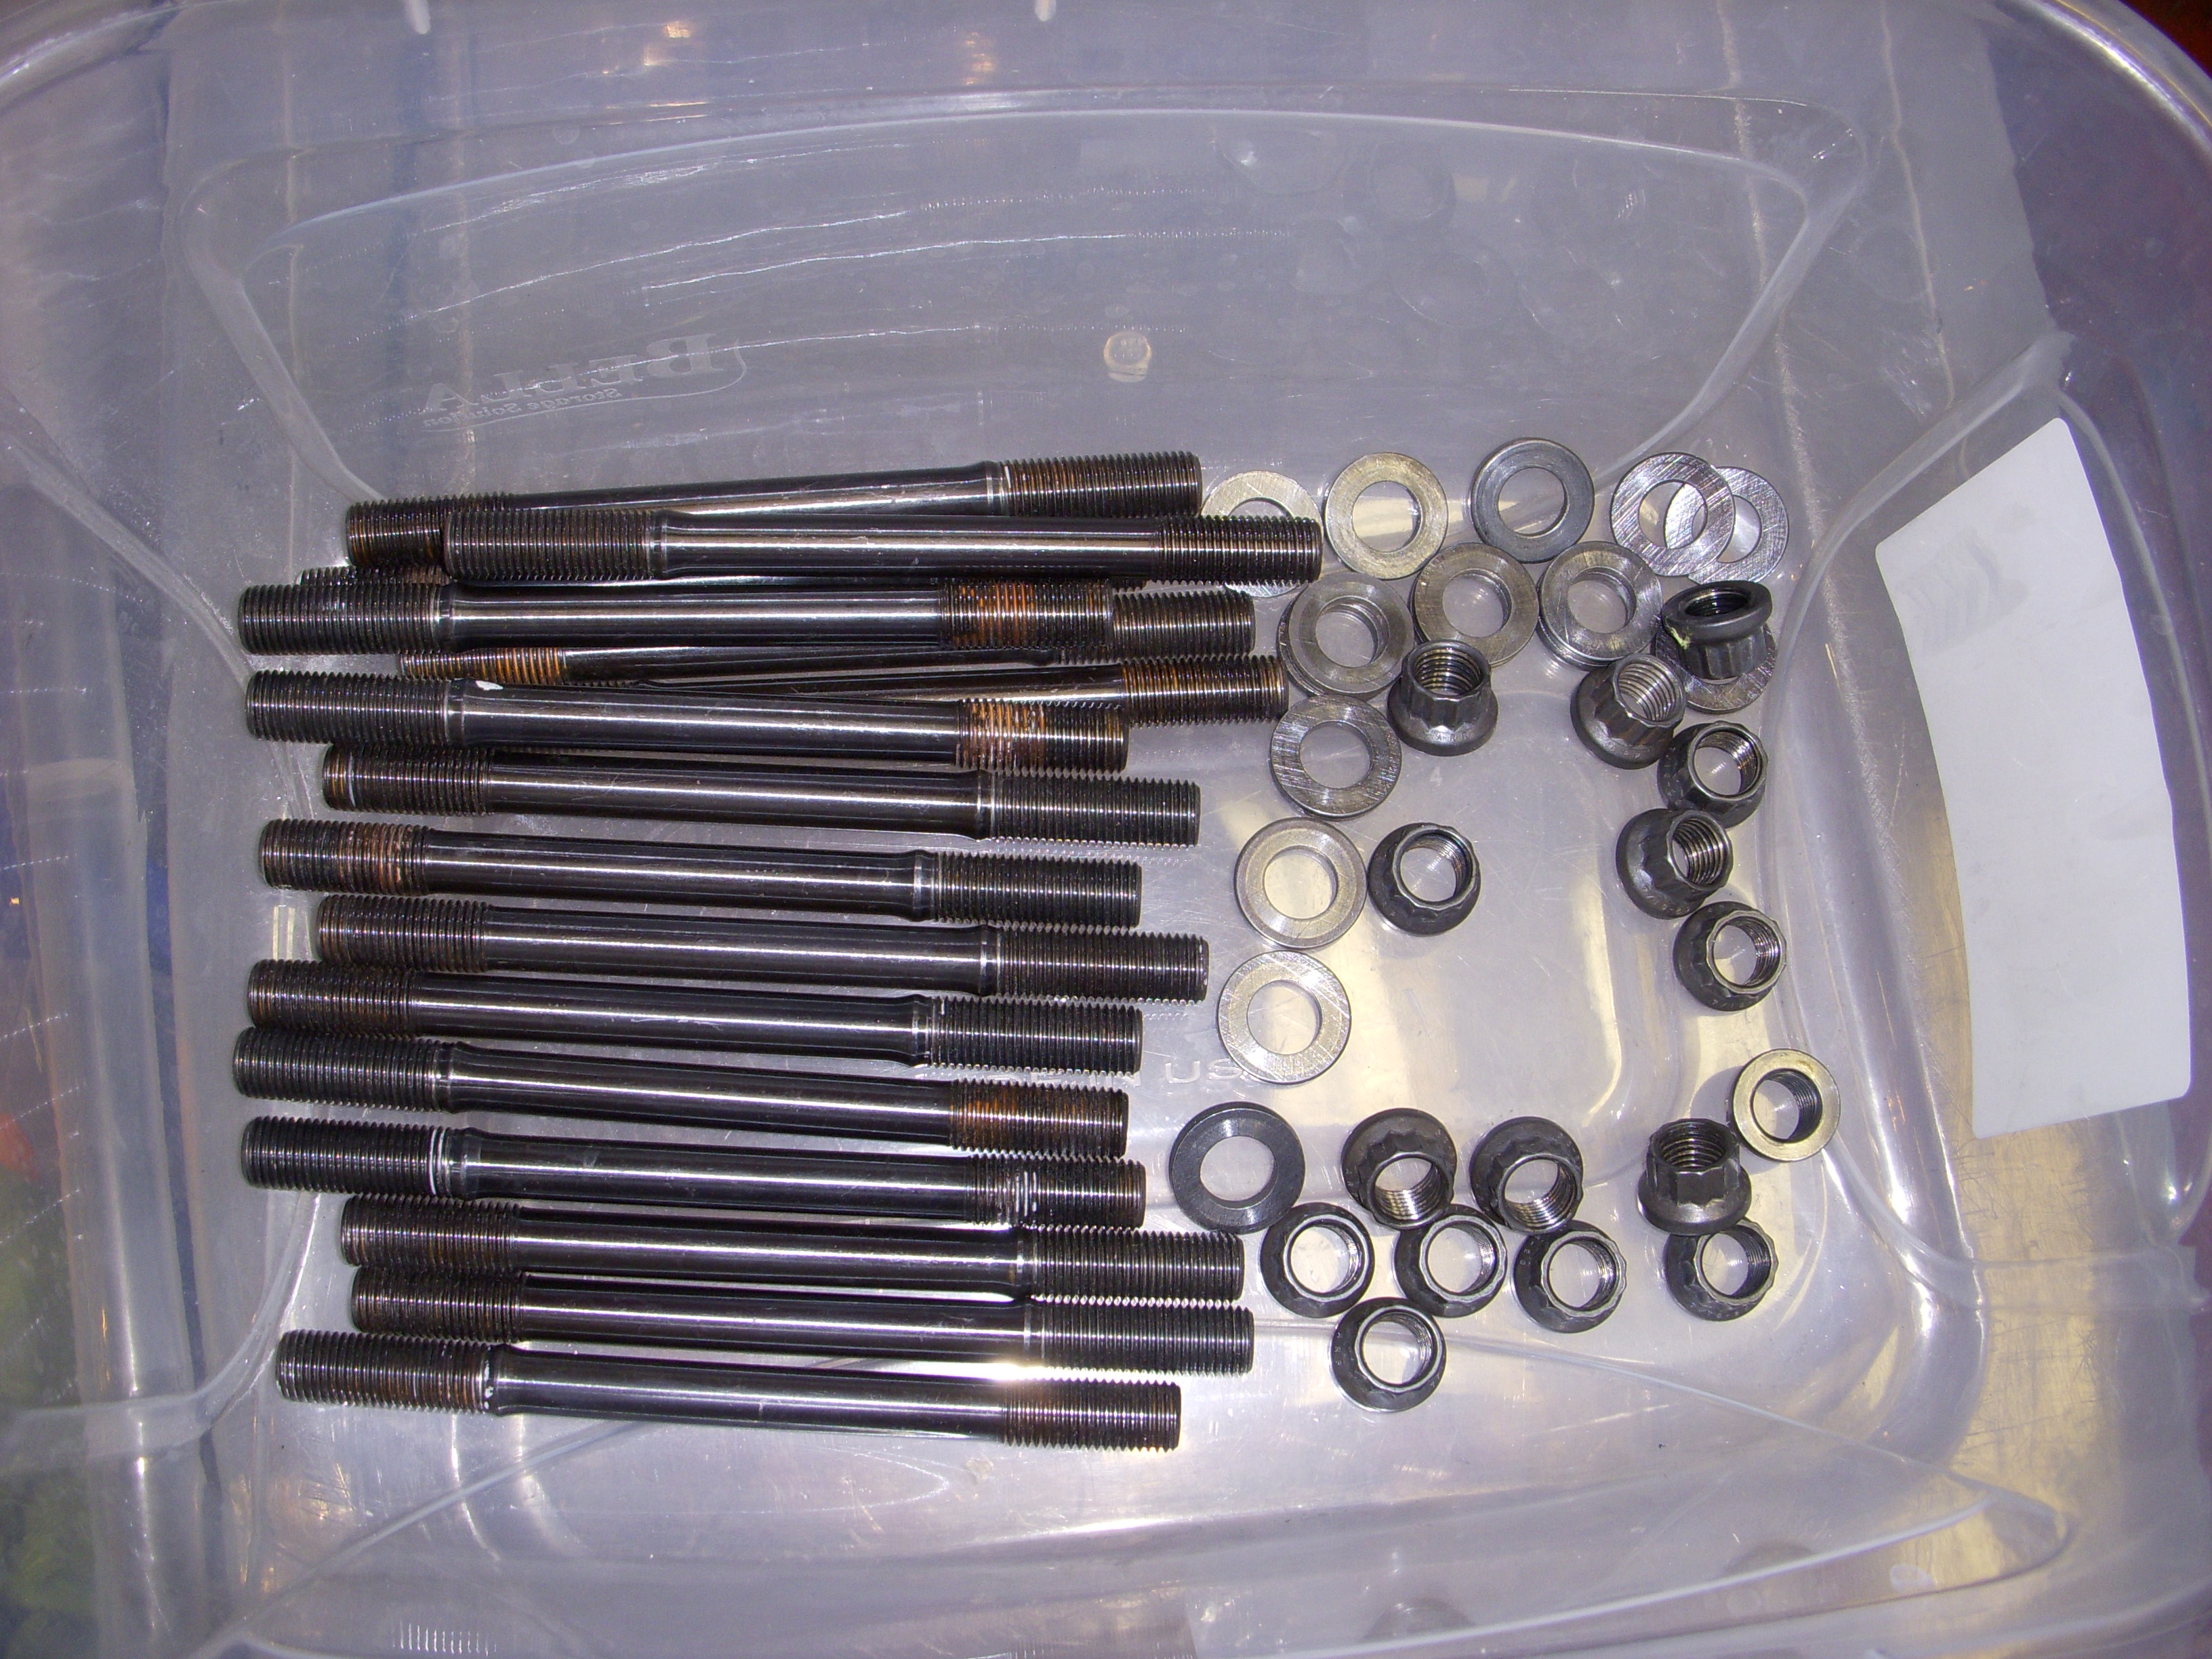
The ARP moly goop arrived, so I'll yank the girdle, clean the nuts, washers, and studs, goop everything, and torque it all down. 60 ft/lb in four steps, to catch any loose studs - and I did find four of them with my good ol' Snap-On torque wrench.
Hella set of BIG drill bits in a nice metal case - for about $35. Got some holes to drill, so eBay for a "bit of a deal".... These came greased and sealed in individual bags.
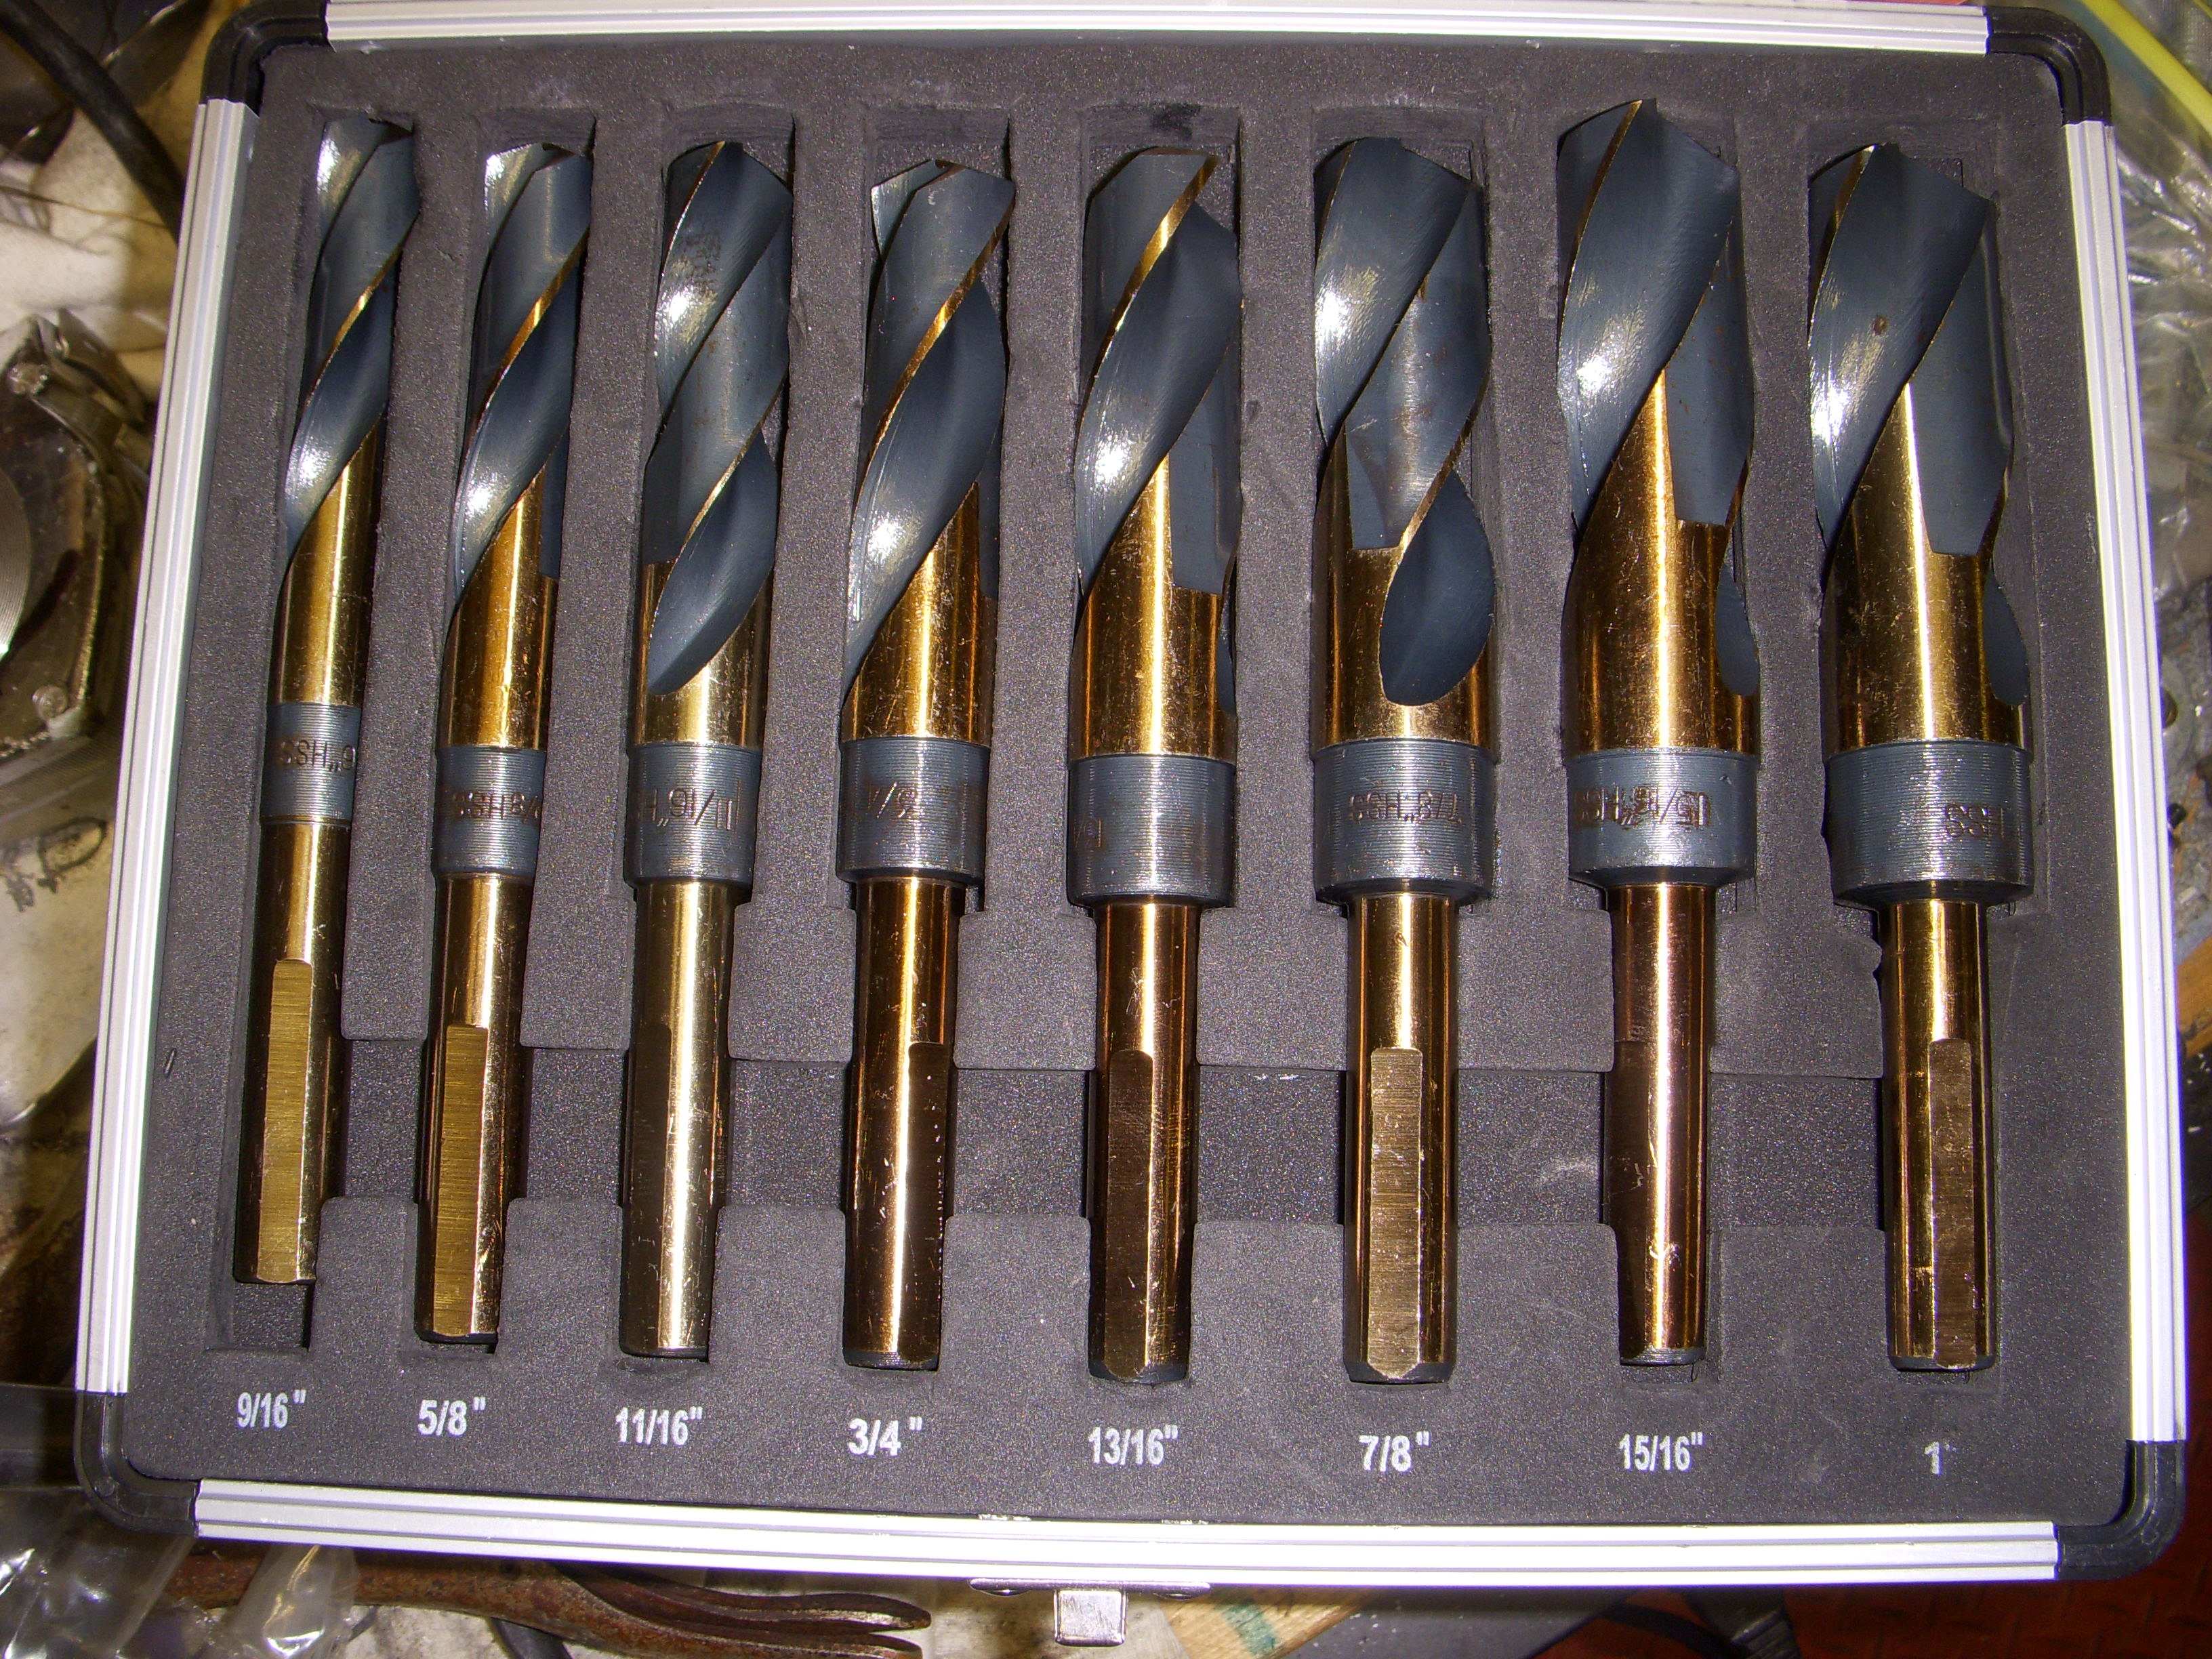

Installed the RevUp oil pump, put the JWT deep-sump oil stuff together, and put the oil pan back on with four bolts and no RTV - this is all temp stuff until the cams are bedded in with the degree wheel.

Just a comment here - our weather has been hot, hotter, Oh Shiz, and peaked at 103* yesterday, so getting work done in the garage is not fun or fast.


Hella set of BIG drill bits in a nice metal case - for about $35. Got some holes to drill, so eBay for a "bit of a deal".... These came greased and sealed in individual bags.


Installed the RevUp oil pump, put the JWT deep-sump oil stuff together, and put the oil pan back on with four bolts and no RTV - this is all temp stuff until the cams are bedded in with the degree wheel.


Just a comment here - our weather has been hot, hotter, Oh Shiz, and peaked at 103* yesterday, so getting work done in the garage is not fun or fast.
Last edited by grey99max; Jan 15, 2017 at 02:23 PM.
Thanks for the kind comment - I noticed a long time ago that serious builders in this forum generally document and explain what they're doing - and why they did it. I learned from the best and try to keep that tradition alive. So I take lots of photos and post them along with explanations. At least 50% of what I post is work down a path before it's completed and proven, but it may make people think, even if it's not completed. Words are just words, but photos tell what you have done. I enjoy reading other threads with other projects about things I know little about, but that's still a learning experience.
I have some parallel threads going on here obviously.
The perpetual-pully-project, where I switched from the OEM cast iron pulley with 36-1 trigger to an alloy pulley with 36-1 timing gear. How I'm going to complete that isn't done yet, but the path should be obvious by now. That trigger wheel with Hall sensor and one bump on an intake cam timing lobe will let anyone convert to a Megasquirt MS3-PRO, or a Haltech or most any advanced ECU. Personally, I'm going to be starting up on the factory 99 ecu and learn how to transition to the MS3-PRO - and be able to switch back quickly.
JWT C11/RZ1 cam installations will be interesting. I'll string the usual 3.0 timing gears and chains on the rear timing cover after the HR heads are mounted on the block, mount my degree wheel on the crank pulley, find a true TDC reference, and gently start mapping the cams while checking valve/piston clearances through two full rotations. This won't be simple or easy or well documented. Just documenting the valve travel for 24 valves will take a lot of work.
I have plans for a new intake manifold design, using one version of a HR LIM, fuel rails, and a Q45 MAF, but that's for later. And there's always what to do about a real exhaust system...
It's always something... ain't it great ??
Speaking of always something...
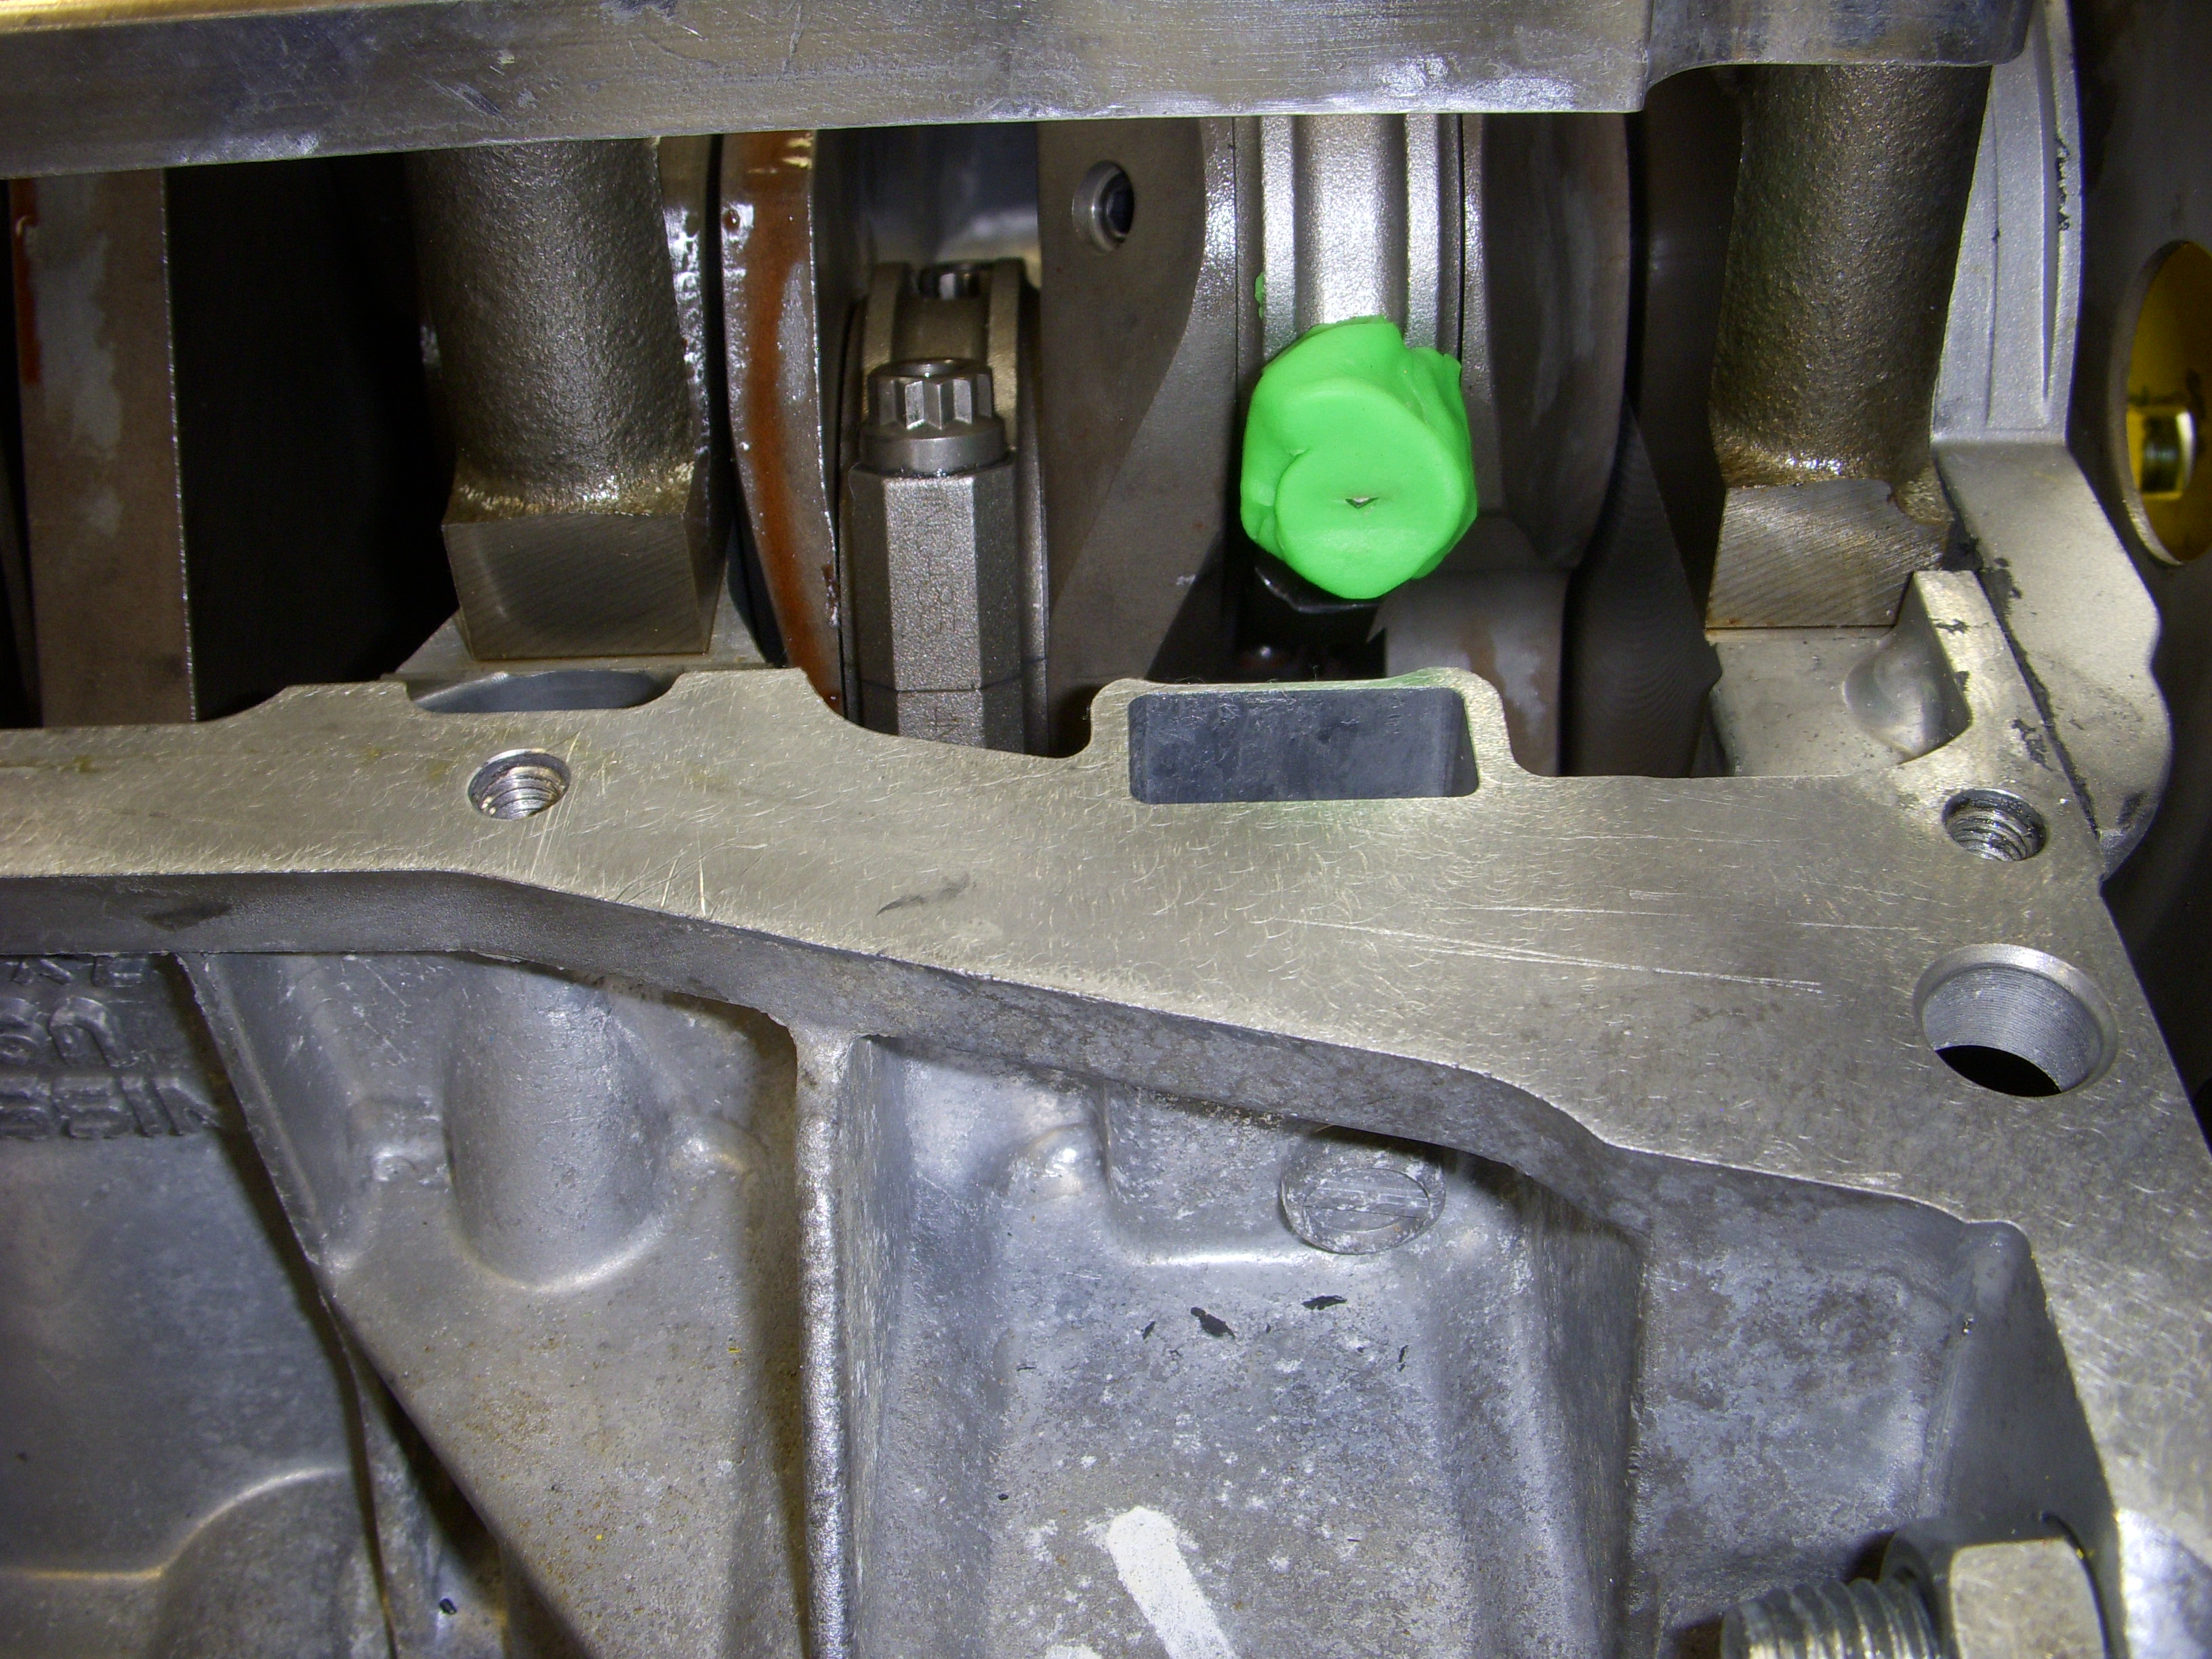
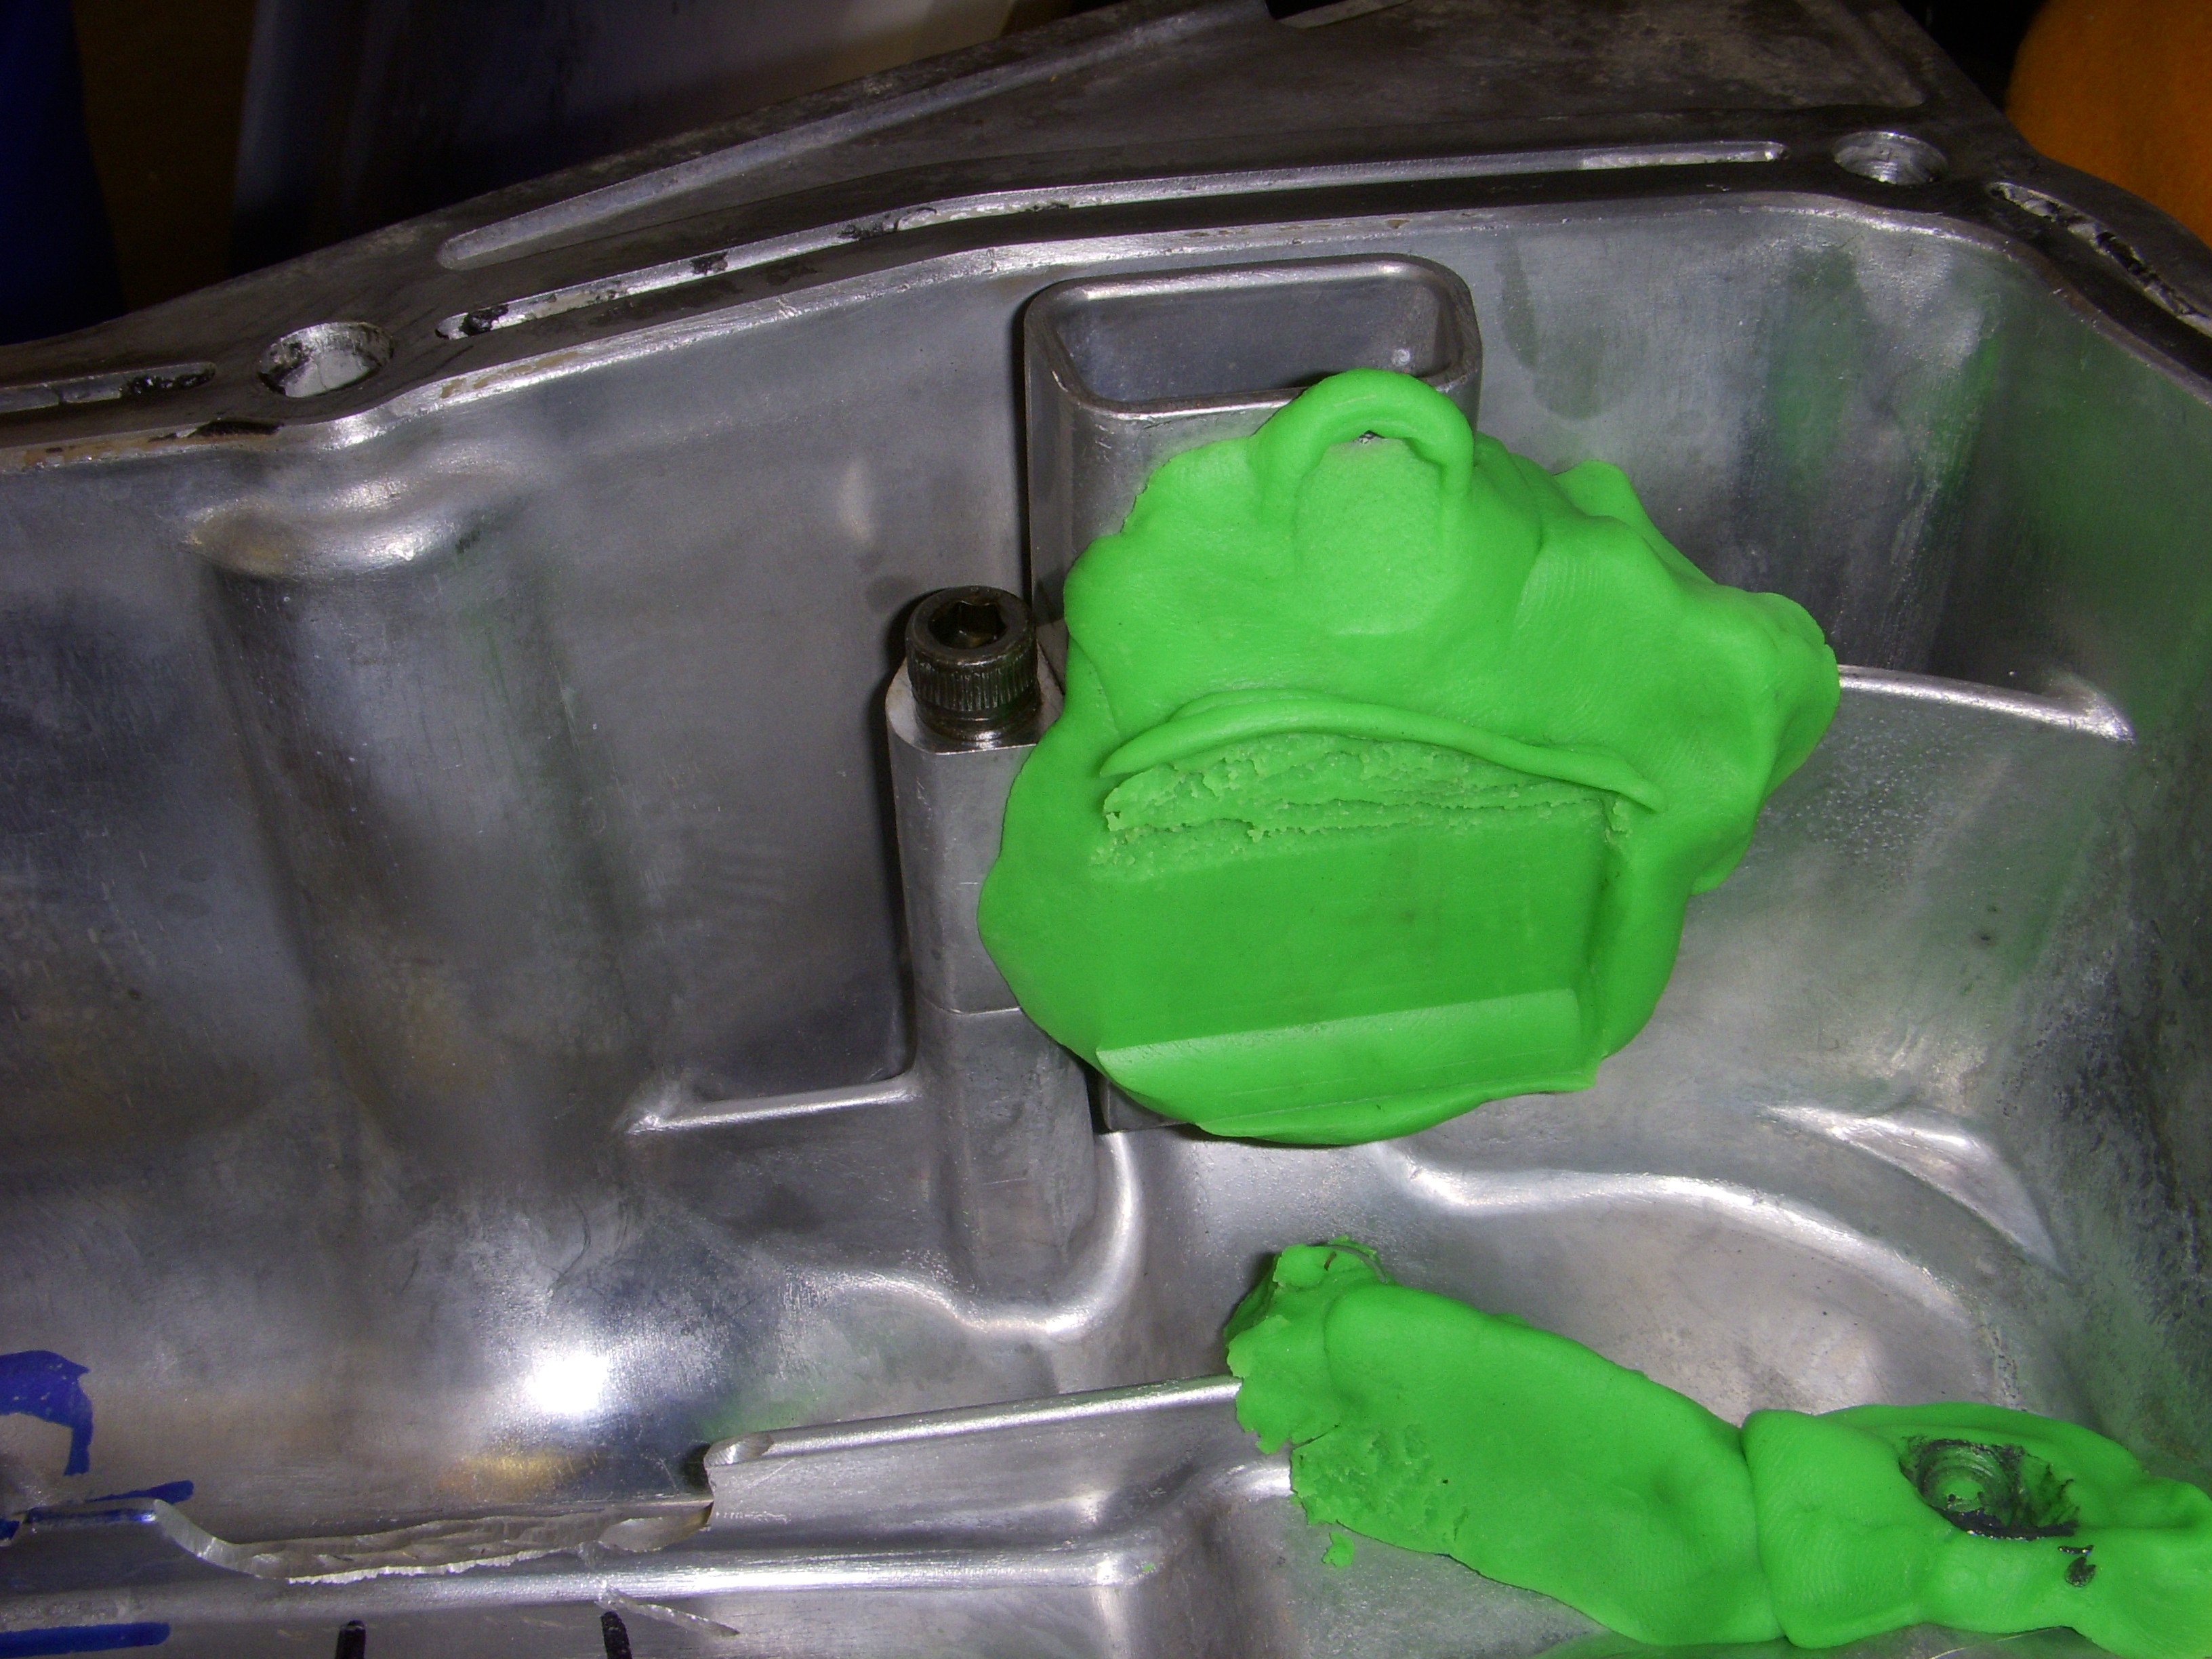
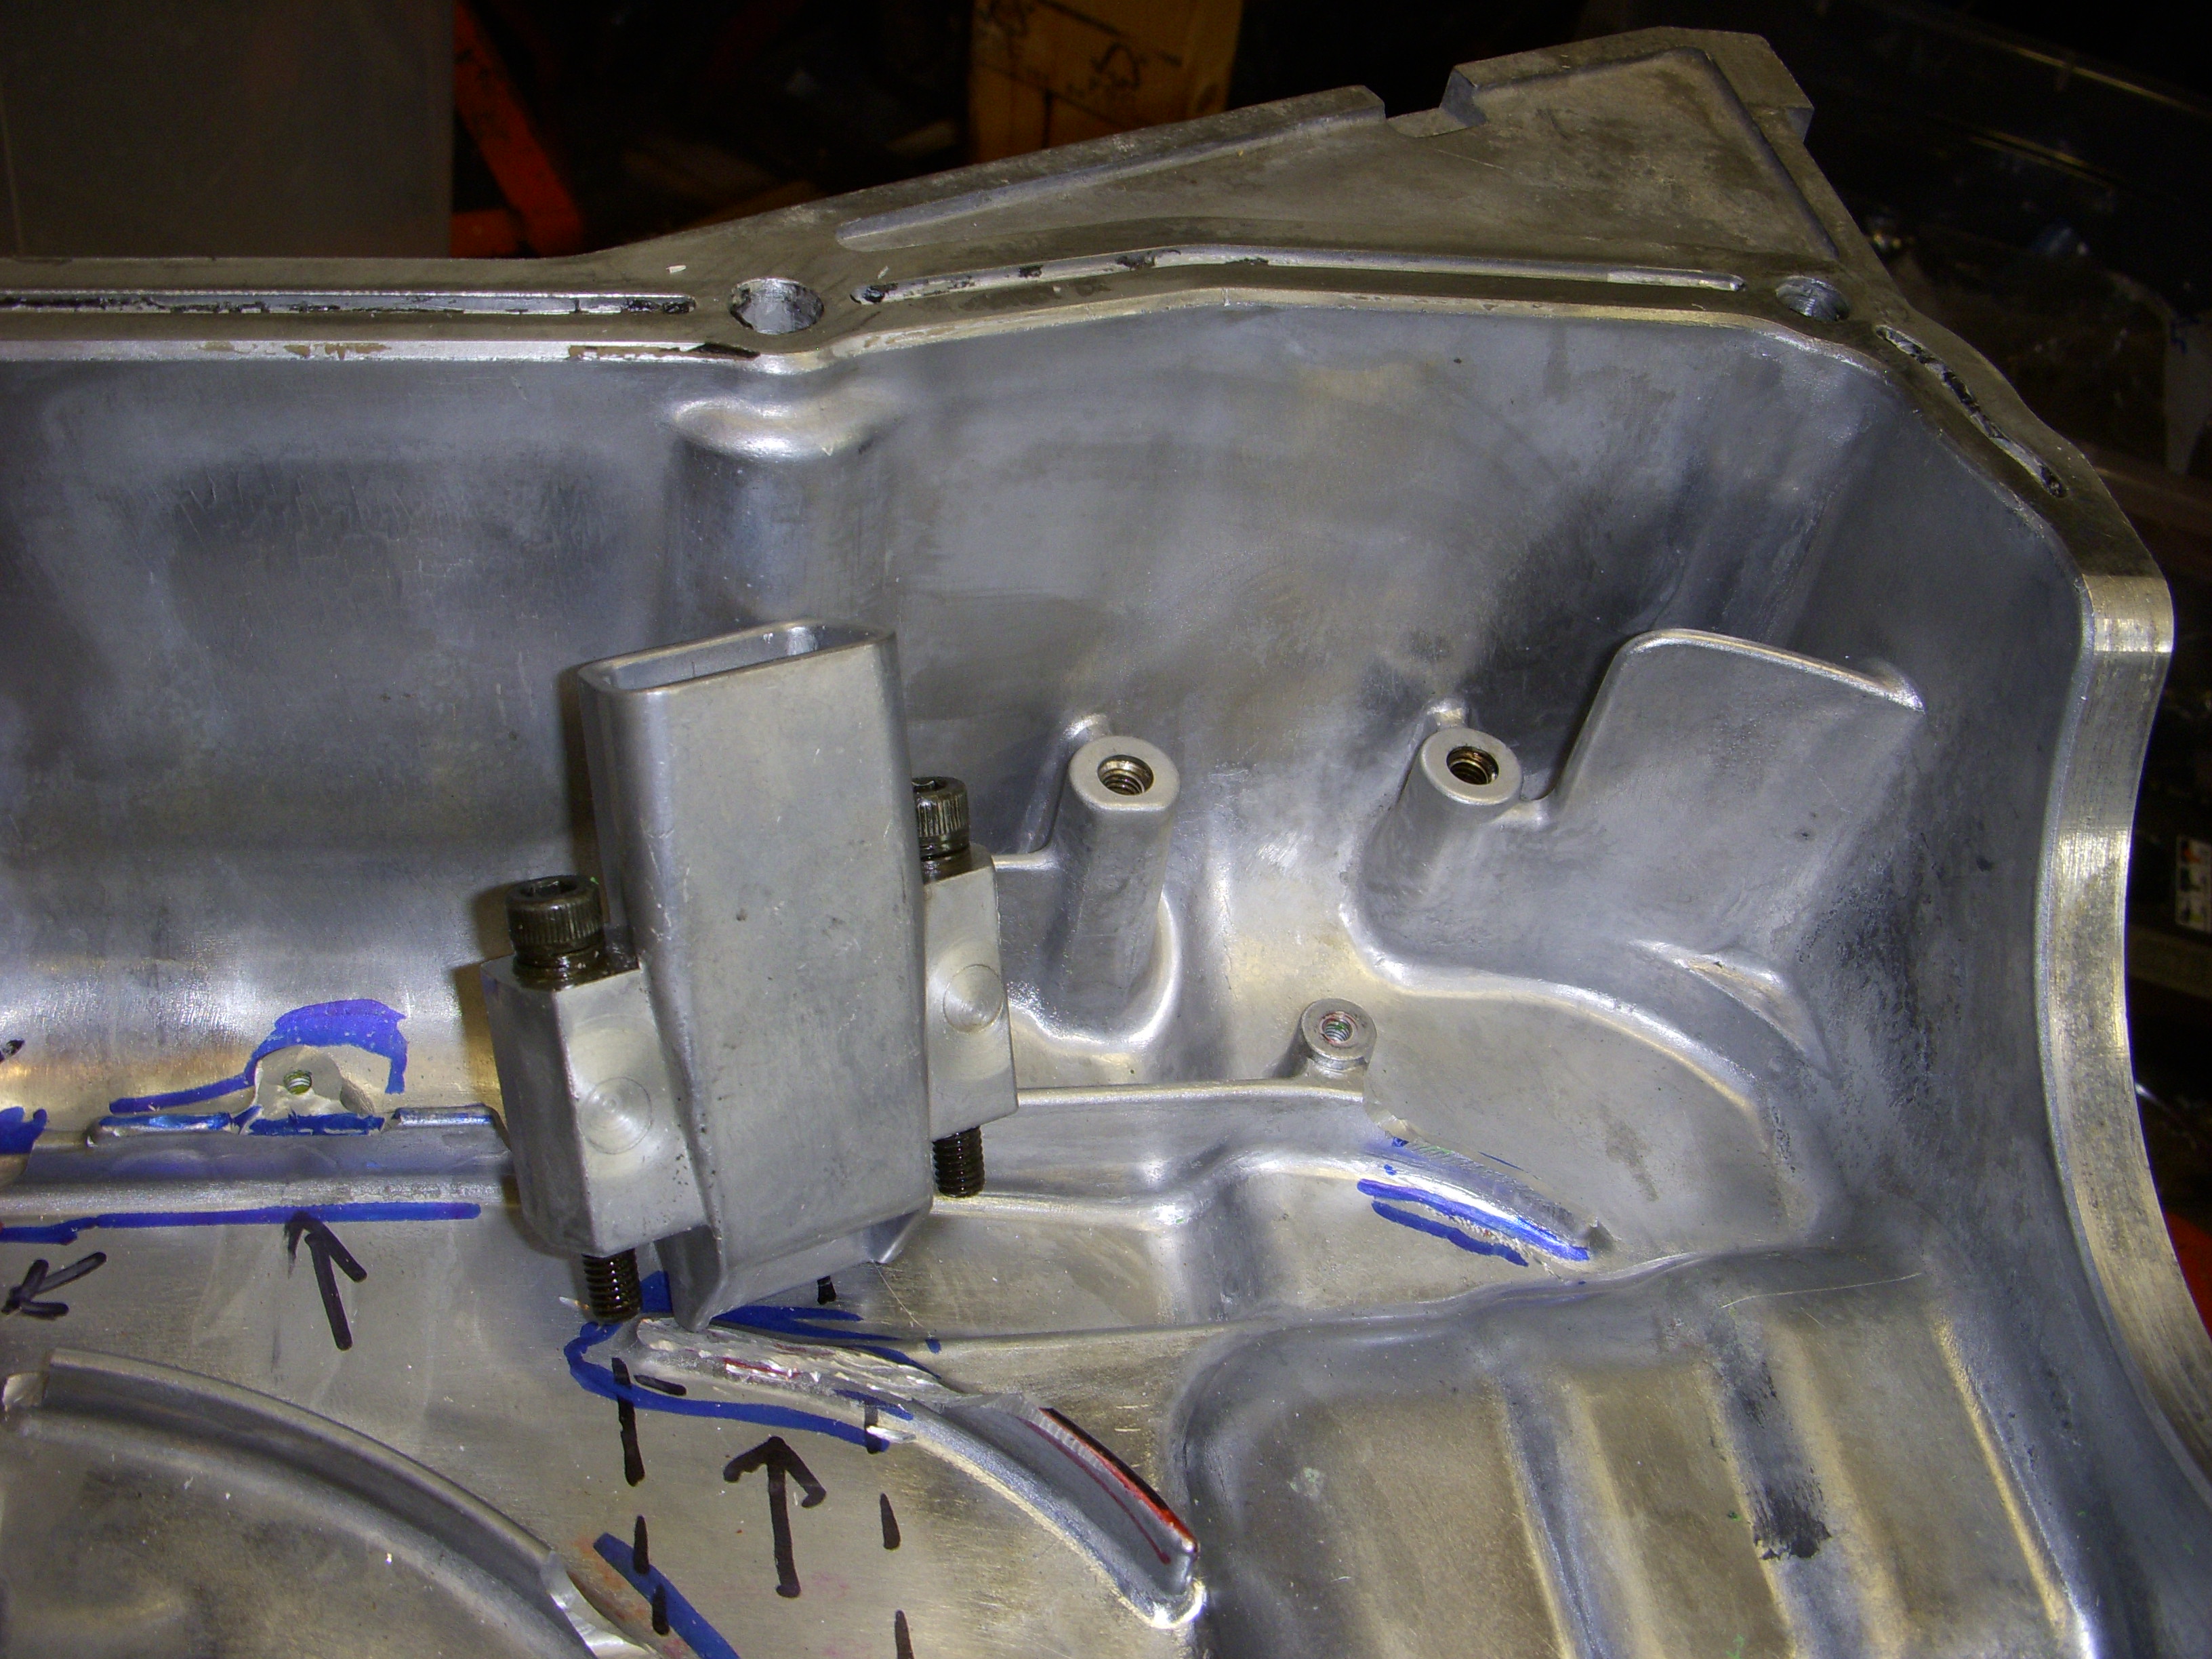
Last night I was getting to ready to install the nice clean ARP head studs by flipping the engine on the stand, and guess what, I remembered that I had never rotated the innards after grinding off parts of the oil pan. So I put a 15mm long wrench on a flexplate bolt, started slowly rotating the crank , and CLUNK - something stopped the rotation. Back and forth, still CLUNK at the same place. Daymn... Got out some green Play-Doh and stuck pieces here and there (where I hadn't ground off anything) and narrowed it down to the oil draindown piece on the side of the pan. Took that off and end-of-problem....
Now I gotta figure out what to do about it...
Happy Harold, though:
Rod bolt was hitting the drain tube piece attached to the pan.
Now I gotta figure out what to do about it...
Happy Harold, though:


Rod bolt was hitting the drain tube piece attached to the pan.


Last edited by grey99max; Jan 15, 2017 at 02:37 PM.