
Another Ebay CAI installed! Pics!

Originally Posted by GReDdyXMaXiMa
Am I missing ? I asked one question is that does it require to cut the hole into the fender and I dont have a special tools since I am in Miami and left all special tools in Boston. I guess, I ll have to work harder to cut the hole with a drill n bits to see how it goes from there and i might reconsider to sell the cai which the package isnt open so it is all brand new , any thoughts?
Well portdave just took a hammer and awl (sharp pointed steel tool used to punch holes for you to drill) and just went around in a circle with it and it thats how he did his. If you dont have tools I would suggest trying that.

Member
Joined: May 2003
Posts: 130
The awl did work really well. I was able to make a really nice hole and then just used some fuel hose slit longways and lined the hole with that. You might need some snips or a hacksaw blade to trim the part that is thicker near where one of the battery nuts is welded to. You can do it.
David
David


Originally Posted by GReDdyXMaXiMa
I m not too quite sure what awl looks like and maybe you can show me a picture or some link ?
here's a pic
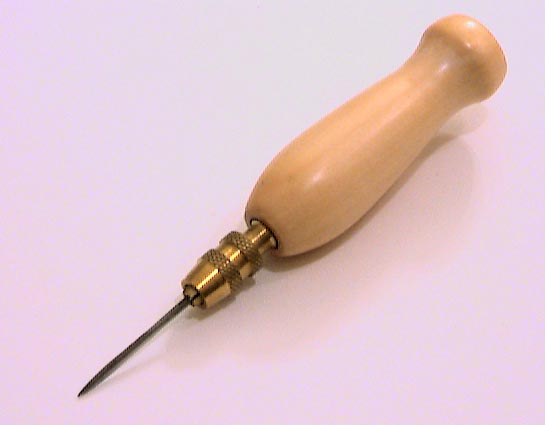
you should check out www.google.com . You can find out about almost anything on there very quickly and it even has an images section to find pictures of things (like an awl)
Supporting Maxima.org Member

Joined: Aug 2001
Posts: 715
From: Carson, CA
@Jack.
It's supposed to fit, but of course you'll need to cut the hole for the piping to go into the wheel well. I just got mine in the mail today, and it looks really nice (just like the pictured one, except the piping's different). I'm getting my other mechanical issues dealt with today, so I'm feeling pretty hyped. If it hadn't just rained and wasn't so damned windy outside, I'd try to install the CAI tonight, but I'll have to wait
I just ordered the Carsound Hi-Flow cat from eBay today too ($60 shipped) and found out today that my cousin's boyfriend can have the other items I purchase installed for me when I'm ready (suspension, y-pipe & cat) I plan to do the CAI myself, and maybe the y-pipe & cat too.
Now that my other main issues are being taken care of, I feel a whole lot better about moving on to the next level with the ride. And as soon as I get going on the installation, I'll have pics up on my website for you VG owners to peep at.
peace2u
It's supposed to fit, but of course you'll need to cut the hole for the piping to go into the wheel well. I just got mine in the mail today, and it looks really nice (just like the pictured one, except the piping's different). I'm getting my other mechanical issues dealt with today, so I'm feeling pretty hyped. If it hadn't just rained and wasn't so damned windy outside, I'd try to install the CAI tonight, but I'll have to wait
I just ordered the Carsound Hi-Flow cat from eBay today too ($60 shipped) and found out today that my cousin's boyfriend can have the other items I purchase installed for me when I'm ready (suspension, y-pipe & cat)
I plan to do the CAI myself, and maybe the y-pipe & cat too.Now that my other main issues are being taken care of, I feel a whole lot better about moving on to the next level with the ride. And as soon as I get going on the installation, I'll have pics up on my website for you VG owners to peep at.
peace2u
Guest
Posts: n/a
Thanks for the picture. I'll see how it goes from there and I ll be aware of it to use the google from now on to get the picture.
I know that michael explained pretty good and remember , I am deaf and sometimes I m having hard time to understand and thanks for being patient with me.
I know that michael explained pretty good and remember , I am deaf and sometimes I m having hard time to understand and thanks for being patient with me.
Supporting Maxima.org Member
Joined: Aug 2001
Posts: 715
From: Carson, CA
Question to those of you that have completed their CAI installs and who used the template that was mentioned earlier...
Did you guys have to modify/remove the battery tray??? I followed the template and cut the hole already, but when I was unable to finish with the lower half of the CAI because I haven't received my MAF adapter yet, so only the first half of the CAI is complete, and I used my old filter until I get the adapter for the new one. Looks nice, but I want to finish the install this coming weekend. After I cut the hole, though, I noticed that the battery tray was covering part of the hole when I reinstalled the battery. Did anybody else have this problem, and if so, what did you do to remedy it? I got a couple of scratches on my lower CAI pipe because I was trying to see if it would fit in the hole, and if it would match up with the MAF and the new "S" pipe. I can't wait to get this finished so I can move on to the next project.
BTW --> To cut the hole, I used a 3/8" drill with a 7/16" drill bit, and went around the template drilling holes. I then used a sabre saw to get the hole going, which I was able to get about 2/3 of the hole cut with the sabre saw cutting along the drilled holes I had made. Then I used a rubber mallet and a heavy metal chisel-like tool, which amazingly cut through the metal inside the fender pretty easily. It must have taken me about 40 minutes to get that hole cut, and I'm probably going to line it with some leftover wire loom that I have in my toolbox. Granted, the hole isn't very pretty, but who in the hell is going to be looking that close at it, especially where it's located??? Mi nah bizzness...
Thanks guys!!!
peace2u

Senior Member
Joined: Sep 2003
Posts: 297
Does anyone have a picture of a 90-93 accord CAI on their VG max? I know i've seen a ram intake that was a 93 accord one but has anyone done it fully into a cai? I just ordered one of those intakes I'm hoping they're as compatible as they say they are.
Supporting Maxima.org Member
Joined: Aug 2001
Posts: 715
From: Carson, CA
@Jack.
Workin' on it bro!!! Got halfway done, but I'm waiting for the MAF adapter. I hope you checked on your kit to make sure it comes with one, otherwise you'll have to order it separately. As soon as I get mine completely installed, I'll have pics available.
peace2u
Workin' on it bro!!! Got halfway done, but I'm waiting for the MAF adapter. I hope you checked on your kit to make sure it comes with one, otherwise you'll have to order it separately. As soon as I get mine completely installed, I'll have pics available.
peace2u
Senior Member
Joined: Sep 2003
Posts: 297
No i ordered one separately at the same time. Intake adapter and y pipe should be here by friday. I just hope that it works out for you guys. Does the piping wrap around with no fitment issues and does the battery need to be relocated? I know you don't have it fully installed but can you tell by just mock fitting what you have?

Newbie - Just Registered
Joined: Apr 2003
Posts: 5
There is a Canadian guy selling CAI for the VE at around $90 (C$124), here is the link.
http://cgi.ebay.com/ws/eBayISAPI.dll...MEWA%3AIT&rd=1
Or go to his website www.cosmoracing.com
http://cgi.ebay.com/ws/eBayISAPI.dll...MEWA%3AIT&rd=1
Or go to his website www.cosmoracing.com
Supporting Maxima.org Member
Joined: Aug 2001
Posts: 715
From: Carson, CA
@Jack.
I'm pretty sure it will fit, but I'm waiting for the adapter to get here so I can finish up. There really isn't too much more I can do to the hole since it's pretty much where it has to be. I'm still wondering what others have done with their battery tray.
UPDATED: PLEASE CHECK MY WEBSITE (P.2) FOR PIC.
peace2u
Supporting Maxima.org Member
Joined: Aug 2001
Posts: 715
From: Carson, CA
@Jack.
I was waiting for my adapter to come in the mail so I could install the rest of it. It arrived yesterday, so I'm planning to complete the install sometime on Sunday, but I'm troubled by the location of the battery tray right now because I don't think where the hole is located now that there's enough room for it next to the stock battery tray, and there's really noplace else to cut at this point...
Any suggestions anyone??? Please holla atcha boi...!
peace2u
Senior Member
Joined: Sep 2003
Posts: 297
Honestly i think the endpipe's angle is too lengthy for the bend. Since this is for the 93 accord i think they had more engine bay space for this to go. I took out the entire tray and i couldn't even get the pipes to fit inside the bay regardless of how it was situated. Cutting won't work because then it loses the angle and makes it even more impossible. I do like how it feels now even if it's a ram air intake. Anyway, i'm off to install the y pipe.
Supporting Maxima.org Member
Joined: Aug 2001
Posts: 715
From: Carson, CA
@Jack.
Surprise! Surprise! I got the lower half in, but it took some minor modifications to get it to work. First of all, I had to cut about 2" off the end of the "S"-shaped pipe on the end leading to the MAF. I did this with a sabre saw, so it wasn't very pretty afterwards, but you'd never know it by the looks . This, I discovered, was the part of the intake that was too long. Once that was cut, I also had to cut one of the blue rubber connectors that came in my kit in order to get it over the MAF adapter (which doesn't fit perfectly either...
  - I hate when you buy stuff that's SUPPOSED to be for your car, but it winds being some b.s. that doesn't even fit, but I was determined to get this done
  ).
).
Anyway, after I modded those parts, I was able to make it fit. Looks pretty good, but I'm looking forward to seeing how well it works. Oh, and it still fits, even with the battery tray in there!!! (Now I see why nobody said anything...) Many thanks to whomever came up with the template for the hole. If anyone decides to do this mod, I highly recommend that you use this template that was mentioned earlier. I lined the hole with some black wire loom that I had left in my toolbox, so it doesn't scratch up the pipe any more. The pic is up on my website now, but I'm including it here so you guys can see it. The filter is a tight fit, but it's a nice filter and I got it in there. I'm SO glad that it's finally done!
After completing this mod, I came to realize that you almost have to go into "modding" with the mentality that you may have to wind up "modding" the items you purchase. Makes you think a bit harder, but when it's all said and done, you can sit back with the satisfaction that you did it yourself and that you figured it out on your own.

peace2u
Surprise! Surprise! I got the lower half in, but it took some minor modifications to get it to work. First of all, I had to cut about 2" off the end of the "S"-shaped pipe on the end leading to the MAF. I did this with a sabre saw, so it wasn't very pretty afterwards, but you'd never know it by the looks
. This, I discovered, was the part of the intake that was too long. Once that was cut, I also had to cut one of the blue rubber connectors that came in my kit in order to get it over the MAF adapter (which doesn't fit perfectly either... - I hate when you buy stuff that's SUPPOSED to be for your car, but it winds being some b.s. that doesn't even fit, but I was determined to get this done ).Anyway, after I modded those parts, I was able to make it fit. Looks pretty good, but I'm looking forward to seeing how well it works. Oh, and it still fits, even with the battery tray in there!!! (Now I see why nobody said anything...) Many thanks to whomever came up with the template for the hole. If anyone decides to do this mod, I highly recommend that you use this template that was mentioned earlier. I lined the hole with some black wire loom that I had left in my toolbox, so it doesn't scratch up the pipe any more. The pic is up on my website now, but I'm including it here so you guys can see it. The filter is a tight fit, but it's a nice filter and I got it in there. I'm SO glad that it's finally done!
After completing this mod, I came to realize that you almost have to go into "modding" with the mentality that you may have to wind up "modding" the items you purchase. Makes you think a bit harder, but when it's all said and done, you can sit back with the satisfaction that you did it yourself and that you figured it out on your own.
peace2u


Supporting Maxima.org Member
Joined: Aug 2001
Posts: 715
From: Carson, CA
Thanks for the compliments guys...
Now, on to the suspension...
BTW, do you guys think $70 is too much for installation of struts/shocks & springs all the way around? I was referred by someone to this mechanic that does it out in O/C, I think...
peace2u
Now, on to the suspension...
BTW, do you guys think $70 is too much for installation of struts/shocks & springs all the way around? I was referred by someone to this mechanic that does it out in O/C, I think...
peace2u

Supporting Maxima.org Member
Joined: Aug 2001
Posts: 715
From: Carson, CA
@TSoprano...
Oh, yeah bro!
It didn't seem to be that big a deal at first since I was running the "ram" intake setup with my old filter, but after about 2 days of driving, I suppose that the old computer finally adjusted itself to the increased airflow (I'm guessing the richer air) and acceleration has been noticably better, smoother and more responsive. Kinda wishing I'd known about this before, but I guess the time was right for me. Noise-wise, though, it seems like it's quieter than the popcharger and the ram setup. It could just be me, though.
I'm going to take some more pics and post them on my website soon so you can see it a bit better. I just wish my little cheapo digicam was working when I was installing it... I'd have many more photos to show. Hard to beat this mod for the price. Just took a bit more elbow grease than I had first anticipated is all...
BTW - For those who want to know what inspired me to get this done, here's the article I read from NissanPerformanceMag.com regarding the CAI setup. Note that it's written in the context for application in a Sentra, but it really cleared up the whole issue about the advantages of cold air to an engine for me. This isn't exactly the article I read, but it's the closest one I could find. Hope it helps!
"Project Spec V is a step closer to breathing easier and receiving all the O2 it needs. Out of all the air induction systems, the Cold Air Intake system (CAI) is by far the one with the most potential to gain the most horsepower. The CAI is a system that allows the engine to receive cooler denser air, which makes for a greater power gain due to it�s increased oxygen content. The length of the intake pipe is also tuned to harness the resonance of the air column to help increase volumetric efficiency in the mid range. Finally the intake and filter have less restriction than stock to reduce the engines pumping losses. A CAI is a great bang for the buck and gives a large power increase for the money. The good thing about this system is that it is a simple bolt on that can be installed in your own garage."
Thanks again for the compliments guys. I have all of you to thank anyway! Just call it giving back to the .ORG...
peace2u
Oh, yeah bro!
It didn't seem to be that big a deal at first since I was running the "ram" intake setup with my old filter, but after about 2 days of driving, I suppose that the old computer finally adjusted itself to the increased airflow (I'm guessing the richer air) and acceleration has been noticably better, smoother and more responsive. Kinda wishing I'd known about this before, but I guess the time was right for me. Noise-wise, though, it seems like it's quieter than the popcharger and the ram setup. It could just be me, though.
I'm going to take some more pics and post them on my website soon so you can see it a bit better. I just wish my little cheapo digicam was working when I was installing it... I'd have many more photos to show. Hard to beat this mod for the price. Just took a bit more elbow grease than I had first anticipated is all...
BTW - For those who want to know what inspired me to get this done, here's the article I read from NissanPerformanceMag.com regarding the CAI setup. Note that it's written in the context for application in a Sentra, but it really cleared up the whole issue about the advantages of cold air to an engine for me. This isn't exactly the article I read, but it's the closest one I could find. Hope it helps!
"Project Spec V is a step closer to breathing easier and receiving all the O2 it needs. Out of all the air induction systems, the Cold Air Intake system (CAI) is by far the one with the most potential to gain the most horsepower. The CAI is a system that allows the engine to receive cooler denser air, which makes for a greater power gain due to it�s increased oxygen content. The length of the intake pipe is also tuned to harness the resonance of the air column to help increase volumetric efficiency in the mid range. Finally the intake and filter have less restriction than stock to reduce the engines pumping losses. A CAI is a great bang for the buck and gives a large power increase for the money. The good thing about this system is that it is a simple bolt on that can be installed in your own garage."
Thanks again for the compliments guys. I have all of you to thank anyway!
Just call it giving back to the .ORG...peace2u

Thread
Thread Starter
Forum
Replies
Last Post
lowpost99
1st & 2nd Generation Maxima (1981-1984 and 1985-1988)
22
Sep 2, 2015 04:38 PM
kirkhilles
5th Generation Maxima (2000-2003)
2
Aug 8, 2015 10:53 AM