
I have my hands full this weekend Engine bay makeover!
 02-01-2012, 06:37 AM
#1
Senior Member
Thread Starter

Join Date: Dec 2011
Posts: 344
I have my hands full this weekend Engine bay makeover!
So I've decided to bite the bullet and I've bought:
New Aluminum radiator
Colored red upper and lower radiator hoses
Replacing front and rear valve cover gaskets
Wrinkle painting valve covers red
Wrinkle paingting the whole intake manifold Black
Course, new upper and lower IM gaskets
Cleaning ERG tube with new gaskets
Replacing upper and lower oil pan gaskets
replacing the power steering tank tubes
The sensor on the side of the timing belt cover, I noticed it has oil leaking out of it. Anyone RTV'd it to stop the leak? Also what about the Throttle body gasket and anyother gaskets that might need to be replaced as I am knee deep in this, espcially any seals that I am forgetting since the IM will be going in the oven and everything taken off of it.
I will have pics of before during and after if anyone is interested.
 02-01-2012, 06:54 AM
#2

that sensor on the timing cover is your cam position sensor and you just need to replace the gasket on it. its like $3 don,t rtv it. other then that bro i would take a good look at the front main seal also to see if you need to replace those.
 02-01-2012, 07:44 AM
#4
Senior Member
Thread Starter
Join Date: Dec 2011
Posts: 344
Anyone have any info on the front main seal? Will it be much more work with what I am already doing? like a diagram. I'd have to take off the the crank pulley to replace that wouldn't I? And I heard that was a pain! I'm guessing it seats in the the upper oil pan?
02-01-2012, 07:51 AM
#5

Just out of curiosity... Why are you doing the upper pan oil seal?  If it isn't leaking, I would leave it as is, unless you plan to drop transmission, cross member and all that good stuff which would take hours, hard labor, many sandwiches, cursing, beers, and eventually crying that you ever touched the damn thing... But of course, that is if it IS leaking, then I say you have your work cut out for you
As for the camshaft sensor, yeah, as everybody has said, buy the o-ring from Nissan or if you're lucky enough to find a hardware store that sells it, by all means. I chose to just purchase it for $4.xx from Nissan, and have never been happier and a buddy of mine did rtv it, but had to let it dry almost the entire night as to let it harden and not get into the engine.
TB gasket is essential. Don't skimp out on it! Also, don't forget the egr guide tube gasket since you are taking off the IM, extra coolant, gas (fuel injection high pressure ones only!!!), and vacuum hoses that you might need that could look cracked or old.
Clean out your EVAP solenoid motor valve on top of the IM if it has charcoal buildup, get MAF cleaner to clean your MAF and regain 4HP! yiikes!!! lol
While you're down there after it's all set and done, degrease the crap outta everything if you feel like it to make it brand spanking new and shiny, and lose some crud weight, and potentially find any other areas of trouble
And lastly, spend some quality bonding time with your Max
If it isn't leaking, I would leave it as is, unless you plan to drop transmission, cross member and all that good stuff which would take hours, hard labor, many sandwiches, cursing, beers, and eventually crying that you ever touched the damn thing... But of course, that is if it IS leaking, then I say you have your work cut out for you As for the camshaft sensor, yeah, as everybody has said, buy the o-ring from Nissan or if you're lucky enough to find a hardware store that sells it, by all means. I chose to just purchase it for $4.xx from Nissan, and have never been happier
and a buddy of mine did rtv it, but had to let it dry almost the entire night as to let it harden and not get into the engine.TB gasket is essential. Don't skimp out on it! Also, don't forget the egr guide tube gasket since you are taking off the IM, extra coolant, gas (fuel injection high pressure ones only!!!), and vacuum hoses that you might need that could look cracked or old.
Clean out your EVAP solenoid motor valve on top of the IM if it has charcoal buildup, get MAF cleaner to clean your MAF and regain 4HP!
yiikes!!! lolWhile you're down there after it's all set and done, degrease the crap outta everything if you feel like it to make it brand spanking new and shiny, and lose some crud weight, and potentially find any other areas of trouble
And lastly, spend some quality bonding time with your Max
02-01-2012, 08:21 AM
#6
Senior Member
Thread Starter
Join Date: Dec 2011
Posts: 344
Yeah, I've bought tons of grease cleaner and will being a heavy duty before work on and a light cleaning afterwards. I guess I'll pick up the TB gasket and the o ring for the sensor. Think I'll hold off on the front main seal as I have my hands pretty full.
As far as the Upper oil pan gasket, the gasket wasn't that much when I was getting the rest and I'd rather have it just in case. Not totally sure if it's leaking but ready if so. I do know the bottom and all the others are.
I didn't think of extra lines but I'll take my chances on that part and if they break I'll head up to the parts store.
Bonding time yes, but bet she will not enjoy my foul mouth when I get pissed cause I can't get something off! LOL
Thanks guys, I really can't wait! My engine bay is dirty, I put a new altenator in about a year ago and was looking at it and my brand new condensor and they are black from the oil...really pissed about that.
02-01-2012, 08:30 AM
#7
Simple fix for that... Remove the belt, and belt tensioner if you also want to check for any cuts in the tensioner adjuster rod, and you could do what I did, which was remove the entire assembly, remove alternator, A/C compressor, and just went nuts on degreasing that bottom portion. It may have taken me a couple of hours, but I was, and am still pretty damn pleased with the results that it all looks clean, fresh and new.
If you're gonna clean up the bay after doing all the gaskets, clean under the battery, on the opposite side as well where you can just pop off the coolant reservoir container, but just make sure to remove the battery and set it up top on high ground, never on the floor!
I'll post up a pic of my bay later on today if you'd like just to show you what I mean about clean
02-01-2012, 09:01 AM
#8
Senior Member
Thread Starter
Join Date: Dec 2011
Posts: 344
Please send the pics, post here would love to see them. The battery will be coming off the car and staying while all of this is going on. I'll be cleaning the IM and the valve covers while that's off so I'm mainly worried about areas like you are talking about. I've had the top cap portion of the radiator spraying a little bit too so there is that mess as well. This is going to be a PITA but well worth it when it's done!
02-01-2012, 09:05 AM
#9
Senior Member
Thread Starter
Join Date: Dec 2011
Posts: 344
I know years ago this was very true but I've heard that designs have changed over the years and that there is plates or something in the battery now which helps from being harmed if put on the ground. Not that I would anyways but does anyone know if current time if this is still factual?
02-01-2012, 09:09 AM
#10
Senior Member
Thread Starter
Join Date: Dec 2011
Posts: 344
here you go. Googled the question...but just to be safe it will sit on another surface.
http://www.thebatteryterminal.com/Te...n_Concrete.htm
http://www.thebatteryterminal.com/Te...n_Concrete.htm
 02-01-2012, 10:30 AM
#13

If it helps super clean will help clean the side walls in the engine bay, i recently cleaned the pass. side of mine wen i replaced the water pump, it took the dirt and all the grime off nice.
or anyother strong degreaser...
or anyother strong degreaser...
02-01-2012, 03:56 PM
#14

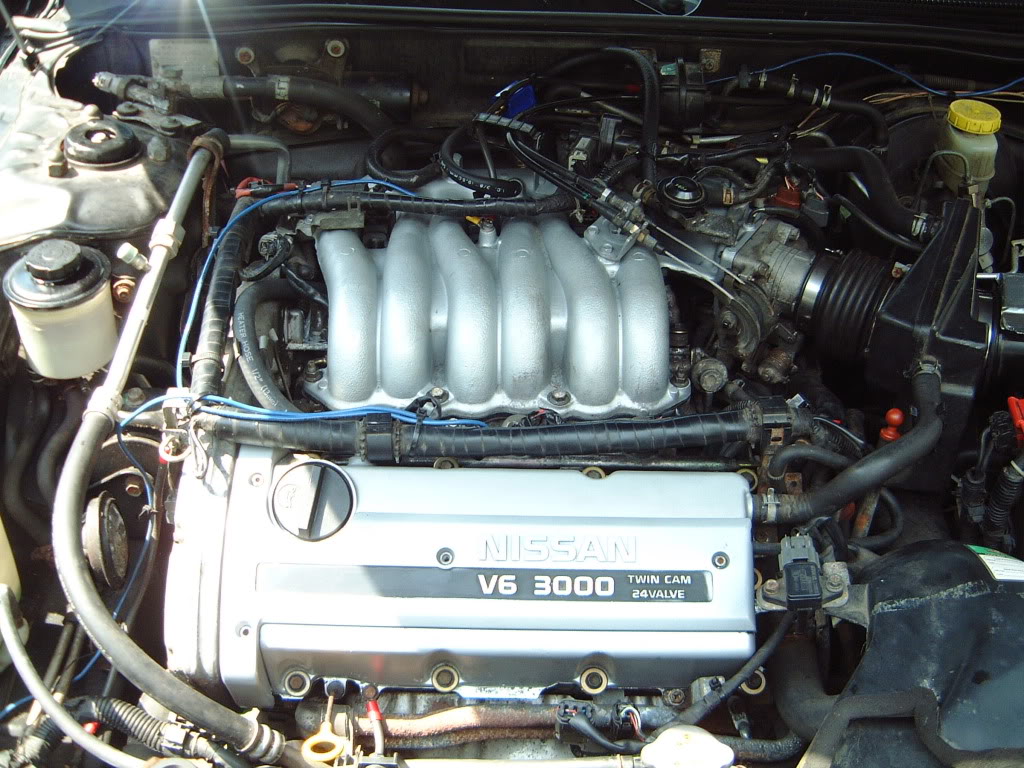
As promised. Here's just a sample shot that I took with my phone camera today before class. Not the greatest but I hope it'll do


And a shot of the side where the camshaft is at. Notice, no leaks or oil crud anywhere

Last edited by SandyMax96; 02-01-2012 at 04:04 PM.


 02-05-2012, 07:29 AM
#22

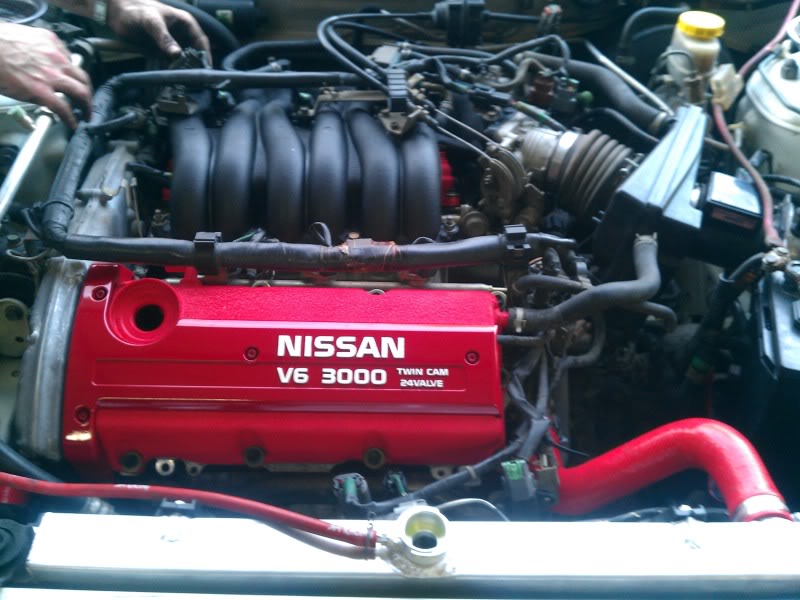
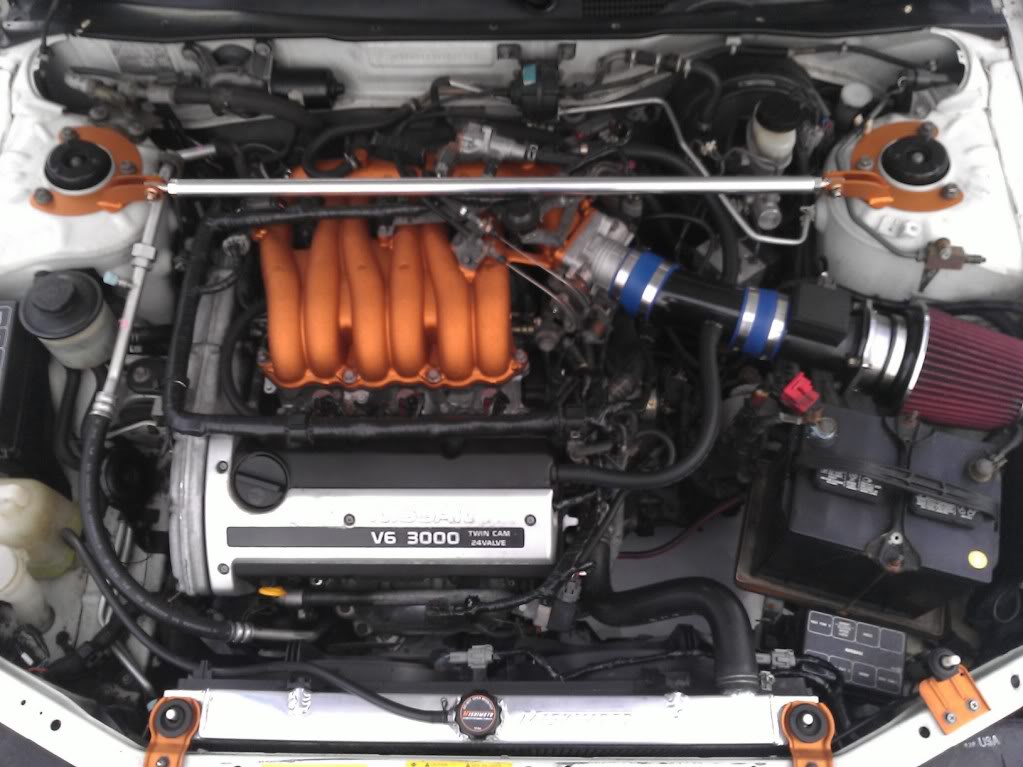
That sure stand out good. I painted my front valve cover, plenum, and coil pack cover but was lazy and left the hiding rear valve alone after cleaning it.
DSCF0029.jpg?t=1311691379
SBKMax96, if your front valve cover M6 shoulder bolt is broken you can drill it out right handed and it'll slide right out of the cylinder head. I used the dremel starting with 1/16" bit. The bolt, 13224-31U00, cost $3.35 at my local stealership.
DSCF0029.jpg?t=1311691379
SBKMax96, if your front valve cover M6 shoulder bolt is broken you can drill it out right handed and it'll slide right out of the cylinder head. I used the dremel starting with 1/16" bit. The bolt, 13224-31U00, cost $3.35 at my local stealership.
02-05-2012, 07:33 AM
#23
Senior Member
Thread Starter
Join Date: Dec 2011
Posts: 344
That color is sick on your UIM, love it! That's the color you are going to do on your Coil pack cover right? What I did was paint the whole thing Red and then used my daughter's crackle nail polish to do the letters (giving that nice cracking effect) and then clearcoated the whole thing.


Thread
Thread Starter
Forum
Replies
Last Post
fastcarny
5th Generation Maxima (2000-2003)
2
10-06-2015 10:42 AM