
Dash mounted gauges


Thread Starter
Member
Joined: Aug 2007
Posts: 124
From: Cincinnati, OH
Dash mounted gauges
I have a custom mounting solution for you guys but this one takes a lot of time patience and skill. This is totally custom and took me about 30 hours worth of time to complete and that is without the wiring.
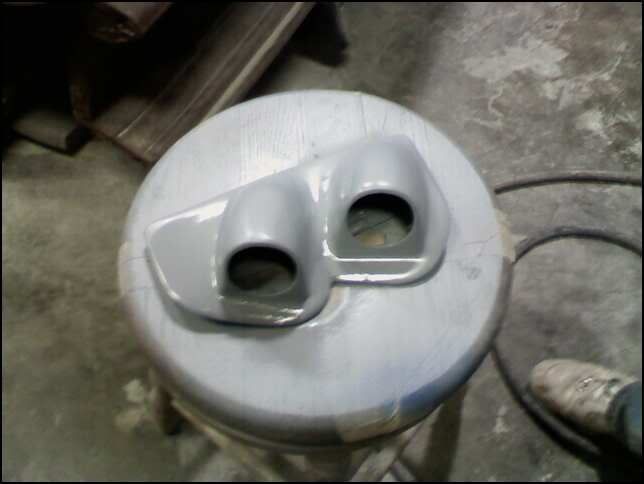
I started off with one of those two guage a pillar setups and cut it down to just the pods themself and mounted them on a piece of sheet steel that i custom fit to the dimensions of the hole.
I then covered this with three layers of fiberglass to solidify everything and give myself a little shape.
The next step was kitty hair. This took a few layers to build up and get the shape that i wanted but it also took a LOT of sanding.
The step you see in these the pics below is the laying of bondo over the whole assembly. I used aluminum foil to cover my dash and form the shape but when it came to sanding it left a lot of fingers in the bottom of the bondo so it was a bit of a pain
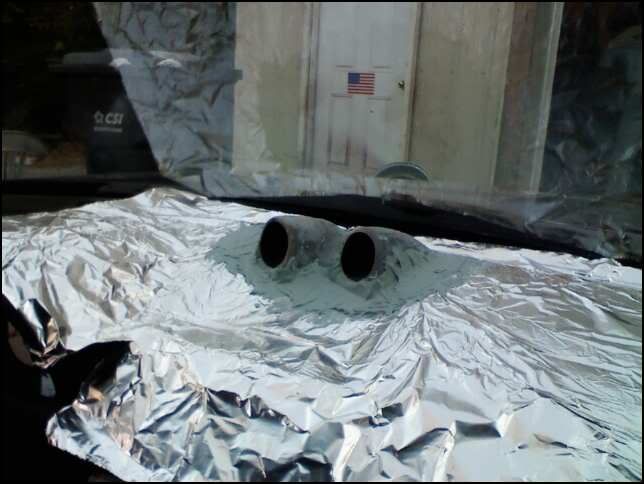
After this i let it set up and just started shaping it with sandpaper.
After a few more layers of bondo to get the exact shape and dimensions correct i sprayed a few layers of high build primer on it to help fill some pin holes.
I then sanded this down and fixed a few low spots and high spots with some more bondo then sprayed the entire thing with slicksand (this is basically liquid bondo it is self leveling and will fill in almost any imperfections on the surface you are working and once wet sanded doubles as a primer) I then wet sanded with 600 grit and went to painting.
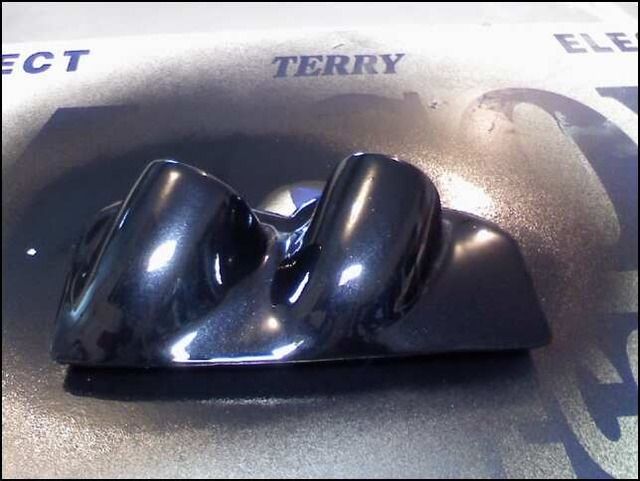
This actually worked out perfect cause i had a few days before had my buddy start mixing a new paint color for my car for me so i got to use it on this and know i know exactly how my car is going to look.
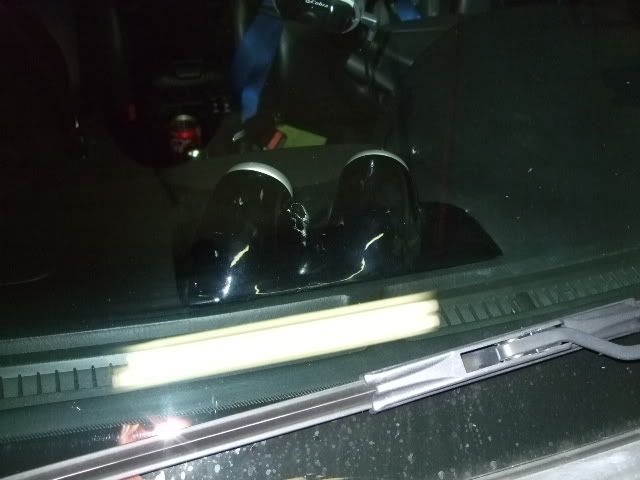
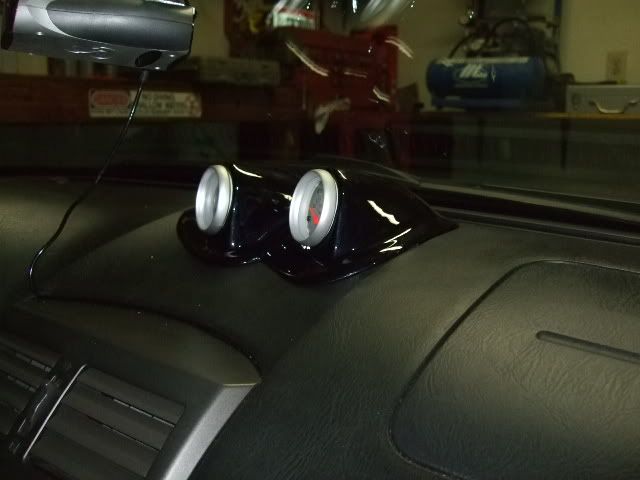
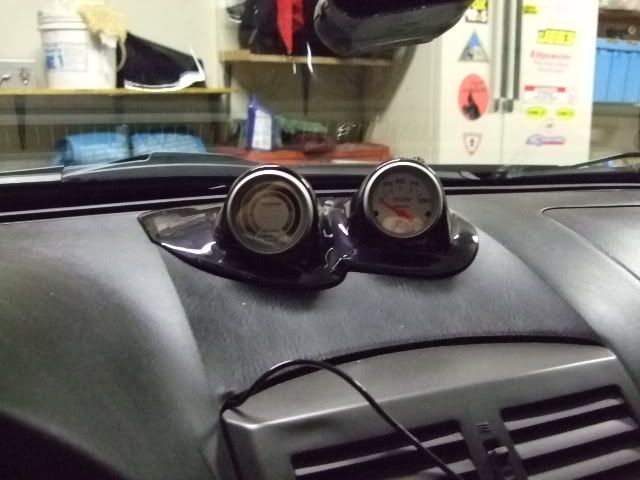
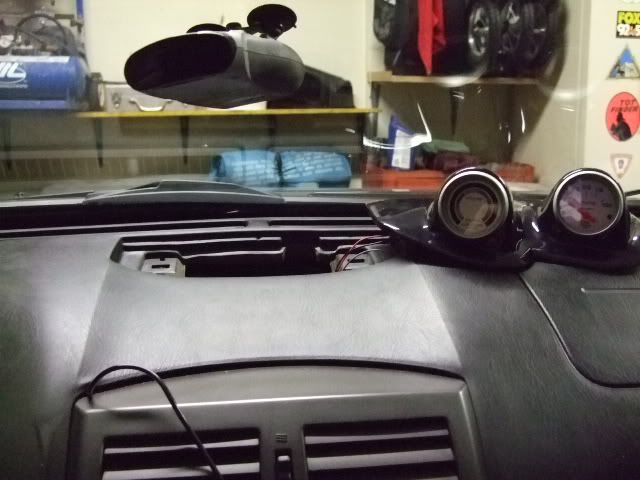
Here is the fittment and the look. It is not totally pulled down into the hole yet cause i still need to wire the oil guage and then i will bolt it in and it will pull down and fill in flush with the dash.
I started off with one of those two guage a pillar setups and cut it down to just the pods themself and mounted them on a piece of sheet steel that i custom fit to the dimensions of the hole.
I then covered this with three layers of fiberglass to solidify everything and give myself a little shape.
The next step was kitty hair. This took a few layers to build up and get the shape that i wanted but it also took a LOT of sanding.
The step you see in these the pics below is the laying of bondo over the whole assembly. I used aluminum foil to cover my dash and form the shape but when it came to sanding it left a lot of fingers in the bottom of the bondo so it was a bit of a pain
After this i let it set up and just started shaping it with sandpaper.
After a few more layers of bondo to get the exact shape and dimensions correct i sprayed a few layers of high build primer on it to help fill some pin holes.
I then sanded this down and fixed a few low spots and high spots with some more bondo then sprayed the entire thing with slicksand (this is basically liquid bondo it is self leveling and will fill in almost any imperfections on the surface you are working and once wet sanded doubles as a primer) I then wet sanded with 600 grit and went to painting.
This actually worked out perfect cause i had a few days before had my buddy start mixing a new paint color for my car for me so i got to use it on this and know i know exactly how my car is going to look.
Here is the fittment and the look. It is not totally pulled down into the hole yet cause i still need to wire the oil guage and then i will bolt it in and it will pull down and fill in flush with the dash.
Thread Starter
Member
Joined: Aug 2007
Posts: 124
From: Cincinnati, OH
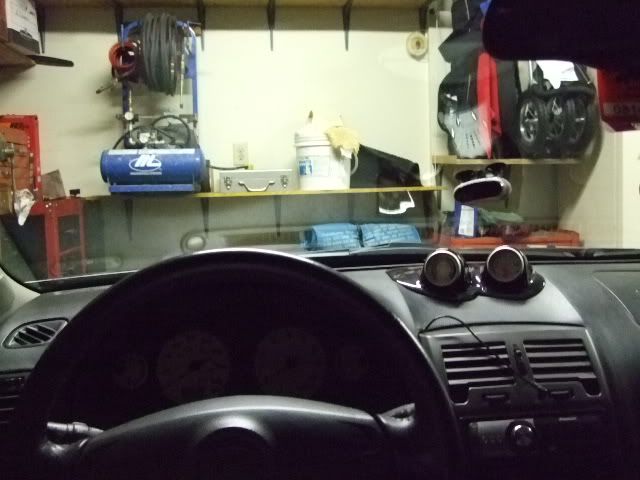
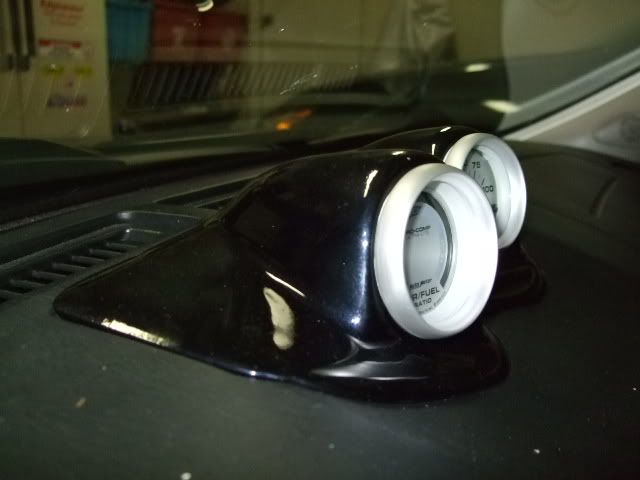
Heres some more pics. I still have a little sanding and buffing to do on the clear coat cause my buddy came over after i had cleared it and was like wow that looks amazing and decided to pick it up while it was still wet and ended up finger f***ing the s**t out of it.


Member
Joined: Oct 2008
Posts: 93
I will start by saying I respect the work performed and the outcome of the effort.
The asethetics leave something to be desired. A base like that could easily be replicated in under an hour by placing some clay on the same area, mixing bondo and FG resin, and pouring over the mold to retain the base shape. The curves ruin the straight lines of the interior. Shaping with a ton of filler WILL lead to shrinkage over time.
That being said, this is your mod, your car. A for effort.
Thread Starter
Member
Joined: Aug 2007
Posts: 124
From: Cincinnati, OH
I will start by saying I respect the work performed and the outcome of the effort.
The asethetics leave something to be desired. A base like that could easily be replicated in under an hour by placing some clay on the same area, mixing bondo and FG resin, and pouring over the mold to retain the base shape. The curves ruin the straight lines of the interior. Shaping with a ton of filler WILL lead to shrinkage over time.
That being said, this is your mod, your car. A for effort.
The asethetics leave something to be desired. A base like that could easily be replicated in under an hour by placing some clay on the same area, mixing bondo and FG resin, and pouring over the mold to retain the base shape. The curves ruin the straight lines of the interior. Shaping with a ton of filler WILL lead to shrinkage over time.
That being said, this is your mod, your car. A for effort.
I am completely open to ideas on how the lines should be altered. I got to that point in this project and just started scratching my head and ended up going with what i had. Seriously critisism is a must on this!!!

Last edited by quiksilver20004; Nov 20, 2008 at 10:03 PM.
Thread Starter
Member
Joined: Aug 2007
Posts: 124
From: Cincinnati, OH
A/F gauge doesnt bounce. I contacted autometer and they told me exactly which wire to hook it to. But it will never read perfectly cause it only reads off of one bank. I am switching to a wideband when i get the money.


Member
Joined: Oct 2008
Posts: 93
Dude, I give you props for the work - even more props for being able to take CONSTRUCTIVE criticism.
Ok, so let's start with what went right:
The finish is superb. Obviously you did a lot of work smoothing to contours to get nice flow within the piece, and it shows. The gauges are well-aimed and the overall fit is very good. You nailed the details.
For next time:
Tape off the area, and use 2oz. chopmat w/ 435 layup resin for the base. Tape off the area (tape is better than foil here and the tape will not sag in to the opening). Lay your chopmat down and resin. This is how your base, which will have the perfect contours of the dash. Once it cures, trim. You're now about 2 hours in to the peice. Spray the underside of the peice w/ 3M Super 90 spray glue, and run a peice of fleece from half of the gauge from each side to the underside of the panel. Resin, and allow to cure, making sure NOT to hit the spray glue lines and is will be dissolved by the resin. Complete the middle section using chop mat. Cut away the excess fleece Mix a 50/50 mix of bondo/resin, and pour over the mold for strength. This offers an additional advantage - it will fill A LOT of the pits / gaps on the peice. Finally, sand.
30 hours? I'll bet you can do the next one in under 10.
Looks great, but just make sure your maintaining the clean lines of the interior for the next run! GL!
Thread Starter
Member
Joined: Aug 2007
Posts: 124
From: Cincinnati, OH
Spray the underside of the peice w/ 3M Super 90 spray glue, and run a peice of fleece from half of the gauge from each side to the underside of the panel. Resin, and allow to cure, making sure NOT to hit the spray glue lines and is will be dissolved by the resin. Complete the middle section using chop mat.
Any idea what to do about the lines??
Last edited by quiksilver20004; Nov 21, 2008 at 06:35 AM.


Thread
Thread Starter
Forum
Replies
Last Post
Unclejunebug
5th Generation Maxima (2000-2003)
10
Apr 2, 2016 05:42 AM