
What do you do to make your engine look pretty? :)


 04-16-2011, 05:20 PM
#922
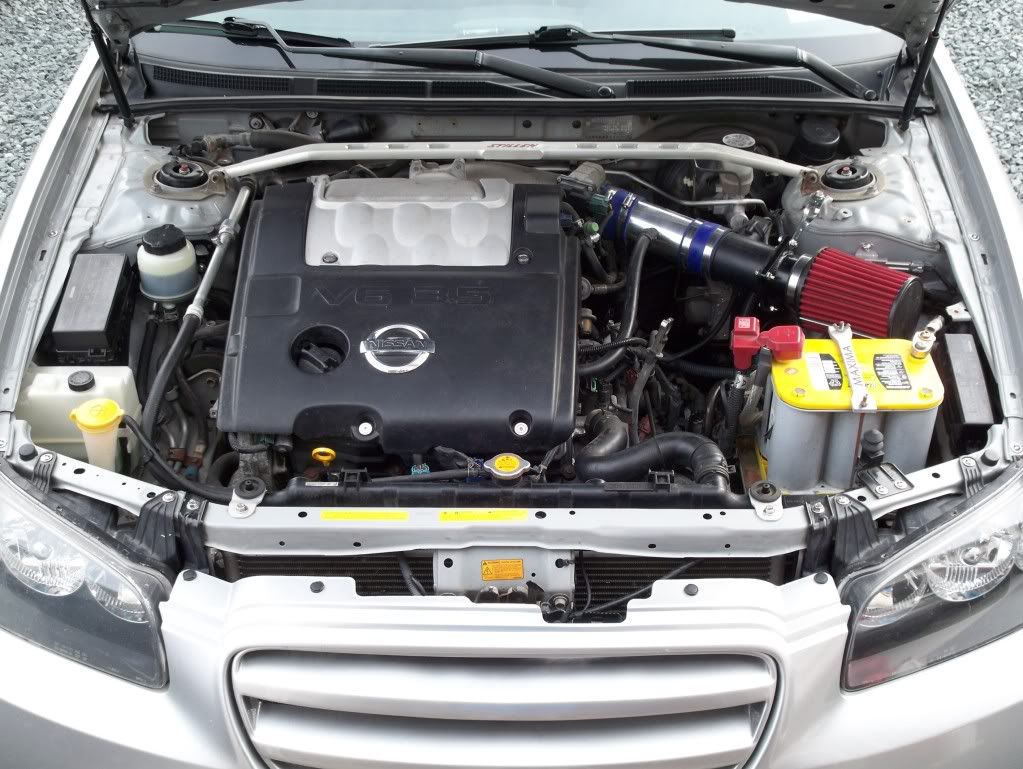
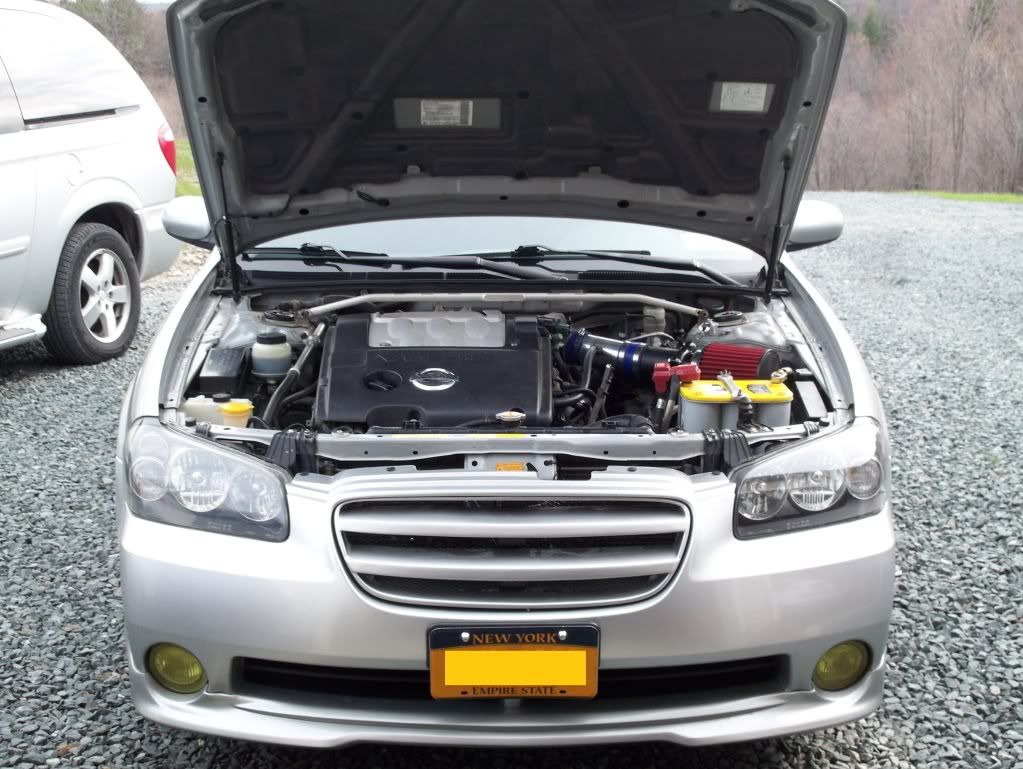
The water pipes are on the car, with somewhat of an anti-climatic reception. By that, I mean they looked downright amazing in my hands, but when on the car, they just kind of blend in as just some more hardware.
Which isn't necessarily a bad thing, because the original pipes looked like total pooh. They were extremely rusty, and you couldn't help but notice it. Whereas these new pipes go somewhat *unnoticed*, because they aren't rusty. Know what I mean?
Anyway... pictures.


Which isn't necessarily a bad thing, because the original pipes looked like total pooh. They were extremely rusty, and you couldn't help but notice it. Whereas these new pipes go somewhat *unnoticed*, because they aren't rusty. Know what I mean?
Anyway... pictures.

 04-16-2011, 05:52 PM
#924

The water pipes are on the car, with somewhat of an anti-climatic reception. By that, I mean they looked downright amazing in my hands, but when on the car, they just kind of blend in as just some more hardware.
Which isn't necessarily a bad thing, because the original pipes looked like total pooh. They were extremely rusty, and you couldn't help but notice it. Whereas these new pipes go somewhat *unnoticed*, because they aren't rusty. Know what I mean?...
Which isn't necessarily a bad thing, because the original pipes looked like total pooh. They were extremely rusty, and you couldn't help but notice it. Whereas these new pipes go somewhat *unnoticed*, because they aren't rusty. Know what I mean?...
04-17-2011, 12:40 AM
#926


Very subtle pipes Rochester. You are right. They just sort like blend in with the engine cover. It's a good thing though. The last thing you want is for them to attract attention and take away from the rest of the engine bay.
04-17-2011, 06:42 AM
#927
Rochester, I couldnt help but notice that you still have the stock clutch lines from the master cylinder to the slave. Going the stainless steel route for this might (or might not) make it "pop" too much for your engine bay. At the very least, you can probably polish the sections of the hard lines that might be exposed since you dont have the stock air box anymore.
04-17-2011, 06:55 AM
#928
Is that the line that crosses over my battery negative cable?
Educate me a little, essential1, if you don't mind. Where specifically are the line(s), and why would I go SS other than for the bling?
Educate me a little, essential1, if you don't mind. Where specifically are the line(s), and why would I go SS other than for the bling?
04-17-2011, 07:19 AM
#929
Yes, it is that rubber hose that crosses over the negative battery terminal in the following picture.
That section of hose doesn't look bad at all. But if the factory 6MT cars are anything like the 5MT, if you keep following that up, you should see a jungle gym of hard metal lines that eventually lead you to the clutch master cylinder behind the strut tower. More often than not, these lines look pretty nasty.
You can get a full stainless steel braided line that replaces both the hard lines and that smaller black rubber line from the GD section for $40 shipped. Or if you want to maintain a more suttle look, you can just replace the hard lines and keep that black rubber line crossing over the battery terminal.
People also usually report a better clutch pedal feel after going to the SS line. Possibly because you're basically shortening the distance the clutch fluid has to travel to get to the slave cylinder. Giving you a more "direct" feel with the clutch.
04-19-2011, 06:16 PM
#931
Now that the new water pipes are on the car, I started looking at the O2 sensor wires, and the different color, cloth covers. It looks exposed, and kind of odd... what with the color and the material. This picture, for example:
So I wrapped them in 1/4" high-temperature, black wire loom. It looks a lot better. Makes me want to clean up a number of other wires in the engine bay.

So I wrapped them in 1/4" high-temperature, black wire loom. It looks a lot better. Makes me want to clean up a number of other wires in the engine bay.
Last edited by Rochester; 04-19-2011 at 06:25 PM.
04-19-2011, 06:49 PM
#933
04-19-2011, 06:51 PM
#934
Now that the new water pipes are on the car, I started looking at the O2 sensor wires, and the different color, cloth covers. It looks exposed, and kind of odd... what with the color and the material. This picture, for example:
So I wrapped them in 1/4" high-temperature, black wire loom. It looks a lot better. Makes me want to clean up a number of other wires in the engine bay.
So I wrapped them in 1/4" high-temperature, black wire loom. It looks a lot better. Makes me want to clean up a number of other wires in the engine bay.
04-19-2011, 07:12 PM
#937
I bought the high-temp wire loom from this ebay company.
http://stores.ebay.com/National-Shoc...id=p4340.l2563
Wicked fast, professionally packaged... and you get a sizable pack of black zip ties.
http://stores.ebay.com/National-Shoc...id=p4340.l2563
Wicked fast, professionally packaged... and you get a sizable pack of black zip ties.
04-19-2011, 07:53 PM
#939
Firstly, I want to say, bravo, you are as picky as I am sir, and I commend you for it. We are just picky at different things. If we lived closer we could create the perfect show car I think.
And now, the inevitable comment, when are you pulling the tranny to clean it up?
Oh, there's also a rubber cleaner and protector you can buy that would work great on some of those 'always dirty' looking components. Will make them look great. (firewall boots, shift boot, etc, etc.)
I personally just use Tire Cleaner and Tire Shine/protectant on them, but there are application specific products I used to have a few when I stored my 300ZX.
These products are intended for many things, but mostly used on vehicles that are stored for long periods of time. The protectant stops the rubber from cracking, especially effective on Coolant lines, etc when they are not used.
04-20-2011, 05:22 AM
#940
 I'm afraid the answer to that is, "Never."
Everything I've done under the hood for engine bay detailing are things that I can do myself, with some shop rags, some crappy tools, and a little elbow grease. But dropping the transmission so that I can paint it...?
No, Matt. That's never going to happen. Unless my transmission suddenly seizes up into trash, and I'm forced to replace it (HLSD). But the likelihood of that happening is somewhere between unlikely and impossible.
04-20-2011, 07:20 AM
#941

Dang Rochester, Can't wait to see all you've done tomorrow. I only wish my engine bay would look like that at the moment. Right now, I'm only trying to clean up all the issues the previous owner seemed to neglect, or for that case what most people don't care about.

 at the epicness Rochestor presents to this thread
04-20-2011, 08:02 PM
at the epicness Rochestor presents to this thread
04-20-2011, 08:02 PM
#943
John, look how dirty/ugly that thing is. The rest of your bay is so damn clean it stands out like a sore thumb. I think you could get in there and clean and DIY paint it half-decent without removal. That may be something to consider instead.
Just giving you a hard time
Yes, Epic indeed!
Just giving you a hard time
Yes, Epic indeed!
04-21-2011, 05:17 AM
#944
A friend of mine gave me what remains of a small can of black "Chassis Saver", which is pretty much the same as "por 15". There are a few things I want to try it out on, like the transmission mount.
04-21-2011, 01:53 PM
#945

I'm with you mane! So far, that's all I've been doing...trying to bring the car back to where it needs to be. So far I'm making some headway.
But looking at what Roch has going on...makes me a little jelly
") . BTW Roch...that's a compliment because I don't get jealous.
. BTW Roch...that's a compliment because I don't get jealous.In due time. Keep up the good work everyone. And for those of you who are tryingto get to that point...patience.
04-21-2011, 10:20 PM
#946
Well, I started to tackle my engine bay list today. It was supposed to be a nice day up here. But the temperature started dropping so I gave up.
Sprayed the engine bay with por-15's Marine Clean De-greaser. Let it sit for 5 minutes then hosed it all down.
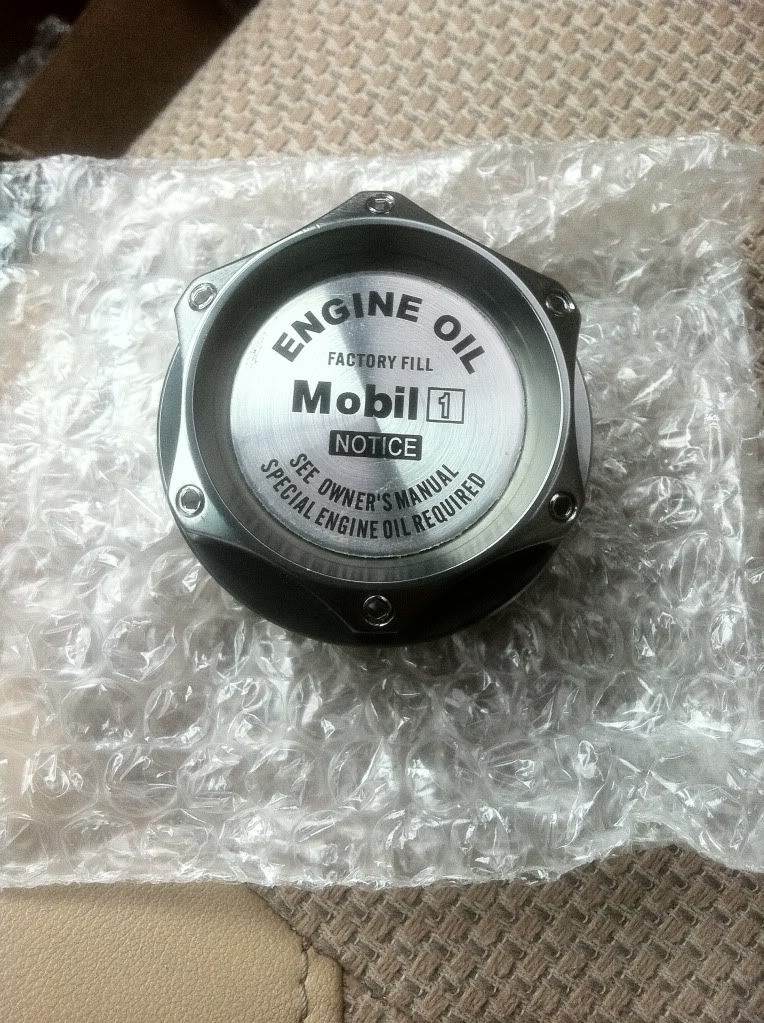
I installed my new blue aluminum reservoir caps in the washer fluid/brake fluid/oil/powersteering.
Next on the list is change out all the black loom for blue, paint any plastic parts blue. Such as the t-junction on the drivers side, and the junction at the passenger side near the block off plate.
Then replace all the black hoses with blue hoses, and replace most of the ugly clamps with stainless t-bolt style.
Still waiting for good weather to paint all the water pipes and install them
Sprayed the engine bay with por-15's Marine Clean De-greaser. Let it sit for 5 minutes then hosed it all down.
I installed my new blue aluminum reservoir caps in the washer fluid/brake fluid/oil/powersteering.
Next on the list is change out all the black loom for blue, paint any plastic parts blue. Such as the t-junction on the drivers side, and the junction at the passenger side near the block off plate.
Then replace all the black hoses with blue hoses, and replace most of the ugly clamps with stainless t-bolt style.
Still waiting for good weather to paint all the water pipes and install them
04-22-2011, 04:24 PM
#947
Making some progress... Cleaned ALOT of old stuck on grime and grease. Replaced hardware with stainless (even in places like the relay box and coolant overflow bottle)
Gonna keep at it, have ALOT more cleaning to do...
But here is how she sits...
Gonna keep at it, have ALOT more cleaning to do...
But here is how she sits...
04-23-2011, 07:09 AM
#948
Good progress, CusomLowz. Getting to the point where you have to look intently to find issues, eh?
Consider removing those OEM stickers. There's a lot of color clash that's primarily due to all the yellow.
Love your front grille. Yellow lamin-x on the fogs, not so much.
Lastly, taking full-car photos on large, crushed gravel... brilliant! I need to remember that.
Consider removing those OEM stickers. There's a lot of color clash that's primarily due to all the yellow.
Love your front grille. Yellow lamin-x on the fogs, not so much.
Lastly, taking full-car photos on large, crushed gravel... brilliant! I need to remember that.
04-23-2011, 02:15 PM
#949
04-23-2011, 04:26 PM
#950
I re-wrapped my radiator fan wiring this evening, stripping off the OEM casing, replacing it with high-temp wire loom. Strangely enough, it doesn't really look any better. Not at all as nice as re-wrapping the O2 sensor wires. Not sure why, though.
Oh well. Done is done. Not worth pictures. But here's one anyway.
I need to do something about that radiator overflow hose clamp. Anyone have a good idea?

Oh well. Done is done. Not worth pictures. But here's one anyway.
I need to do something about that radiator overflow hose clamp. Anyone have a good idea?
Last edited by Rochester; 04-23-2011 at 05:14 PM.
04-23-2011, 05:25 PM
#951
My front bank Intake Valve Timing Sensor looks about 60 years old. I'm sure the back one does, too. But, well that's in back.
To remove the sensor, is it just that one bolt in front?
Can I scrape it down and paint it?

 According to this picture of a new one at Courtesy Parts (for $140), it looks more like the IVT Sensor is that whole piece. Hmm...

To remove the sensor, is it just that one bolt in front?
Can I scrape it down and paint it?
According to this picture of a new one at Courtesy Parts (for $140), it looks more like the IVT Sensor is that whole piece. Hmm...
Last edited by Rochester; 04-23-2011 at 05:30 PM.
04-23-2011, 05:39 PM
#952
I'd pop the engine cover off unplug the harness, go nuts with a wire brush and then paint it. If it's oxidized though it will always appear pitted regardless.
04-23-2011, 05:44 PM
#953
Ever replace an IVT Sensor, Tuner? Does it come off easy enough? I need to search...
04-23-2011, 07:17 PM
#954
Oh if it comes off easy, without fear of damage, I agree, much easier to remove it. I have a DE-K, no idea man, sorry 
I really need to get at my engine bay, so many other things to finish up though.
I really need to get at my engine bay, so many other things to finish up though.
04-23-2011, 07:29 PM
#955

Never really noticed the mickey mouse wire holder there before John, but now that you have centered it out your right it does look mickey mouse. I picked up a bag of assorted sizes hose pinch clips ( from Canadian Tire) to replace a few here and there in the engine bay as they appeared to rather weak and of course looked a little worn. Perhaps just replace that clip with a nice fresh black pinch clip ... has to look better than that wire that they used.
04-24-2011, 06:37 AM
#957
Yep. Next time I'm at the auto parts store, I should look for something with this in mind.

