
My Massive I30 Revival and Build Thread


Oooh, I'm getting all warm just thinking about your CO's and plates, not to mention the little bushing and it's personal shield, so cool. When I did mine I too never got good communication back from Ground Control, shame given all their Sentra work. Back then I went the Hypercoil route only because they offered a 7" length for my fronts. Can't wait to see the on track results!

Oooh, I'm getting all warm just thinking about your CO's and plates, not to mention the little bushing and it's personal shield, so cool. When I did mine I too never got good communication back from Ground Control, shame given all their Sentra work. Back then I went the Hypercoil route only because they offered a 7" length for my fronts. Can't wait to see the on track results!

I finally published the 6 speed installation guide I wrote a long time ago, I think it's a substantial improvement over the two existing guides. Check it out and let me know what you think!
Time for some updates!
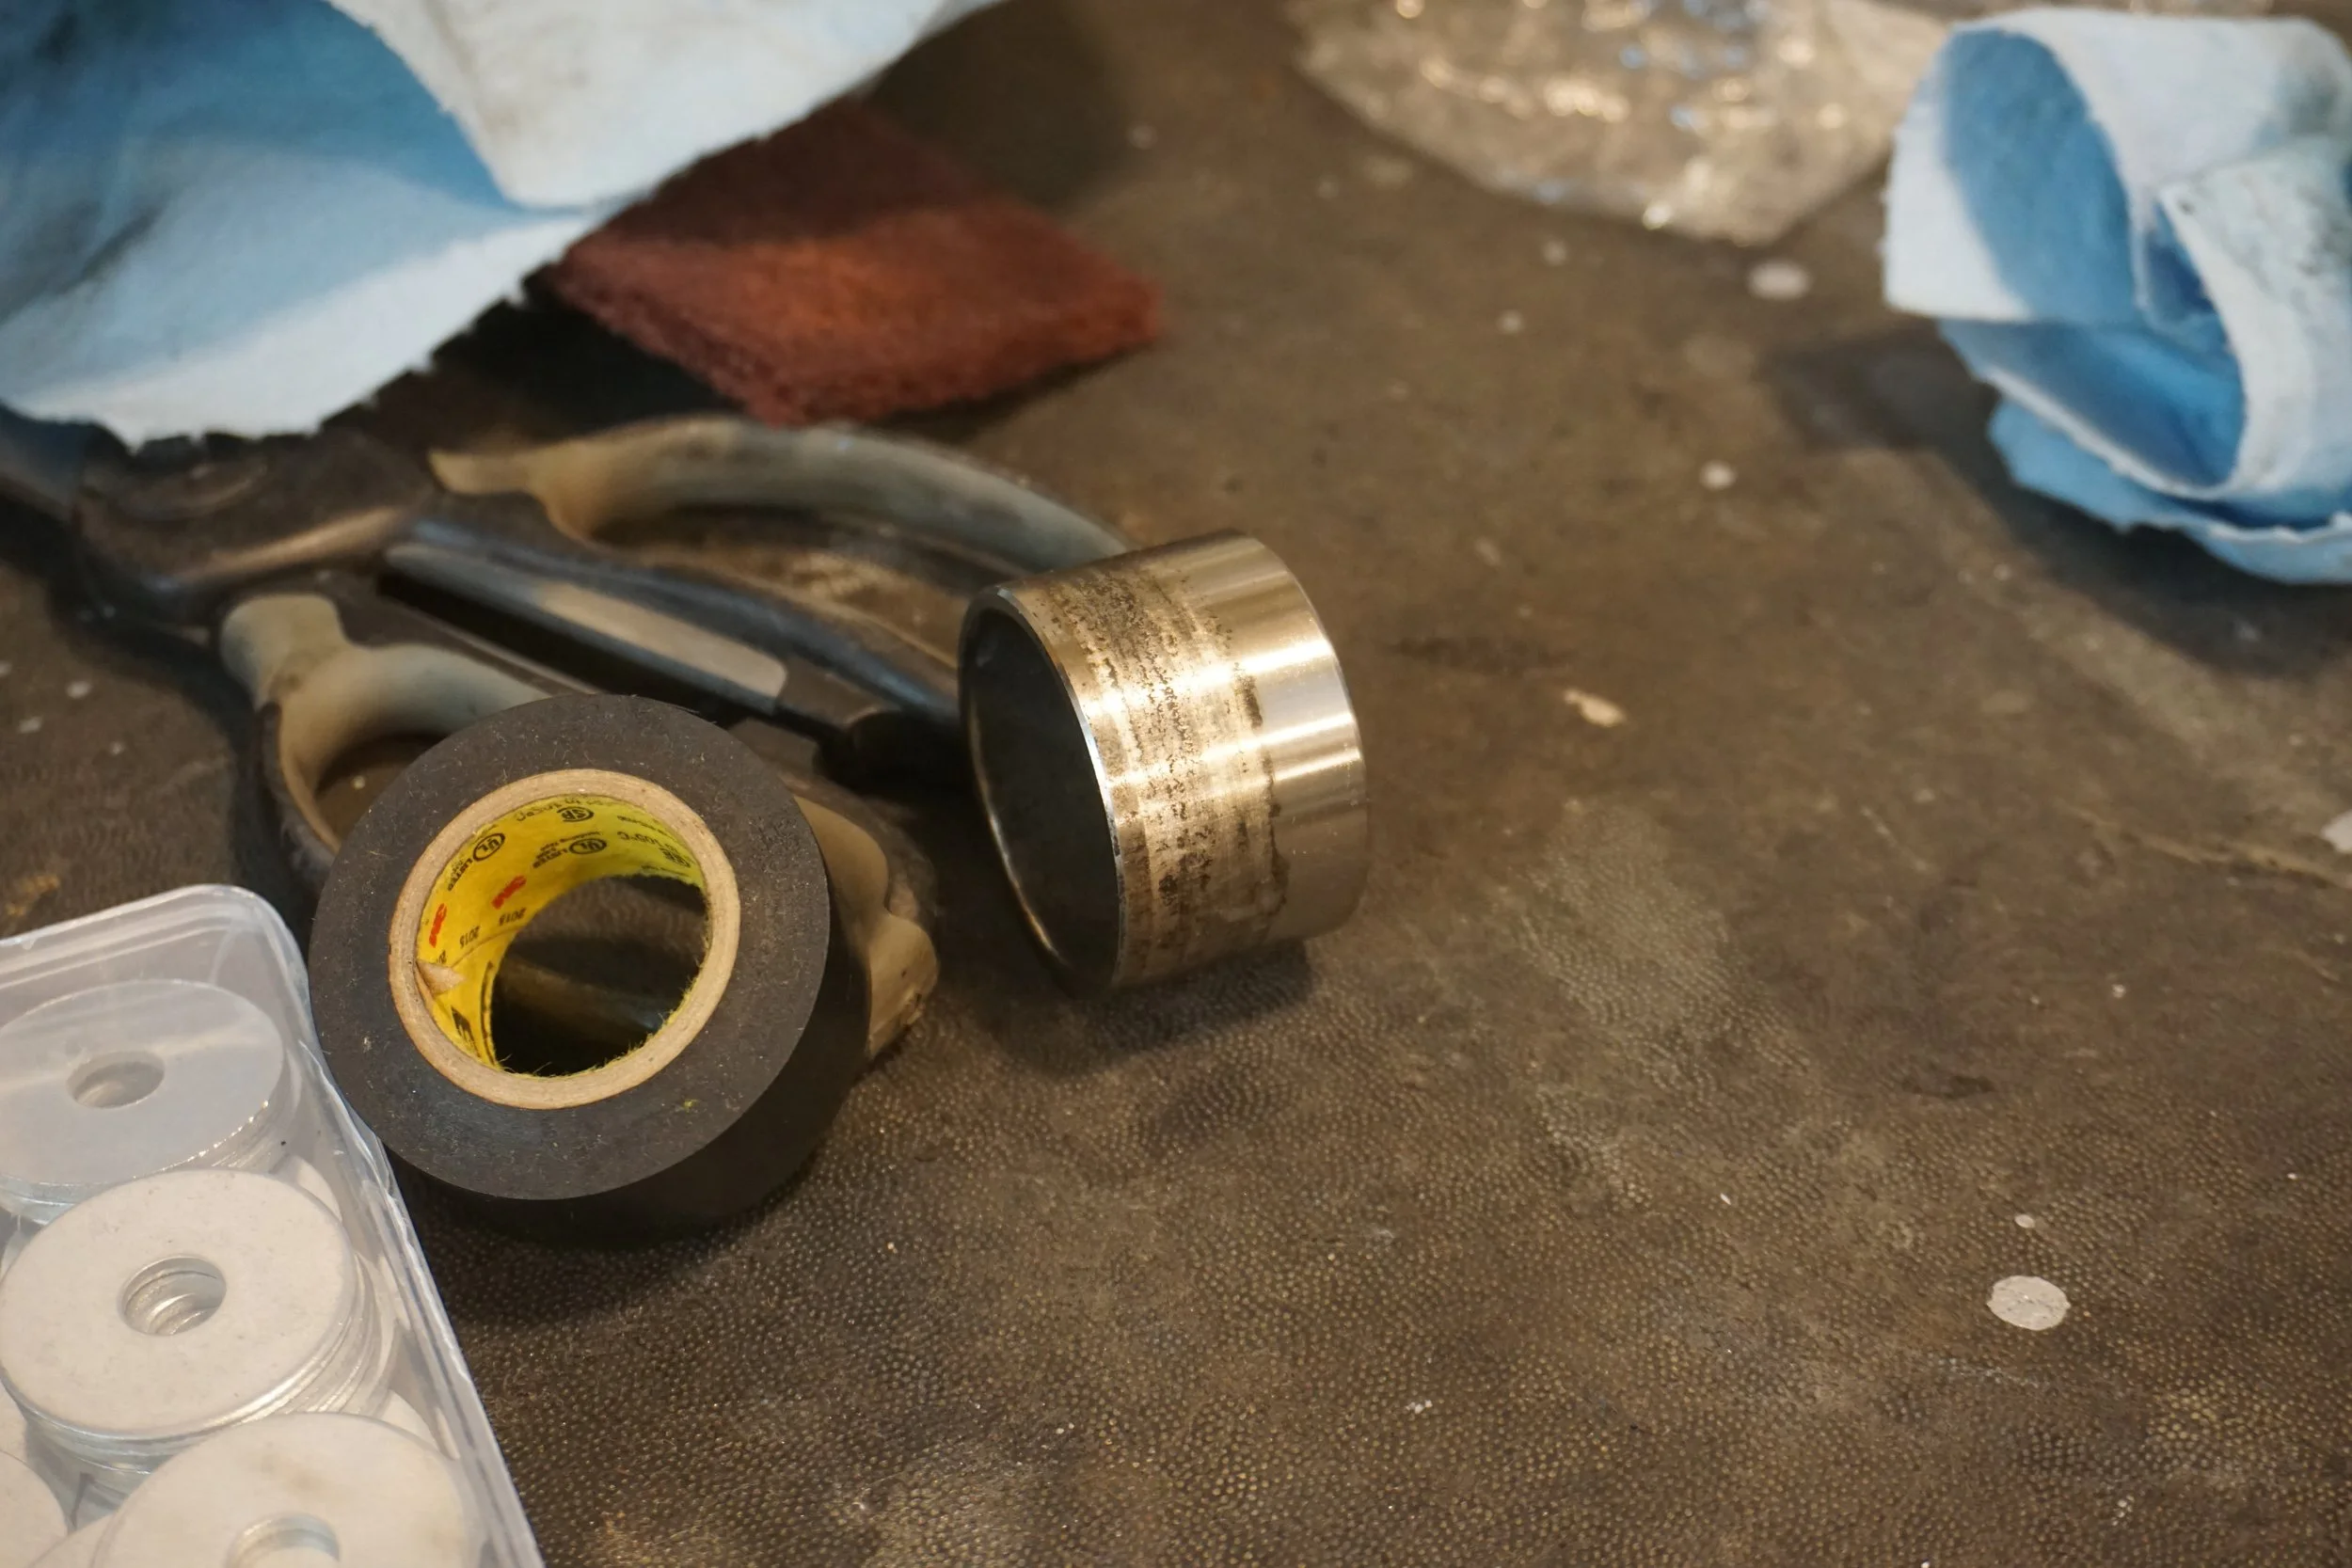
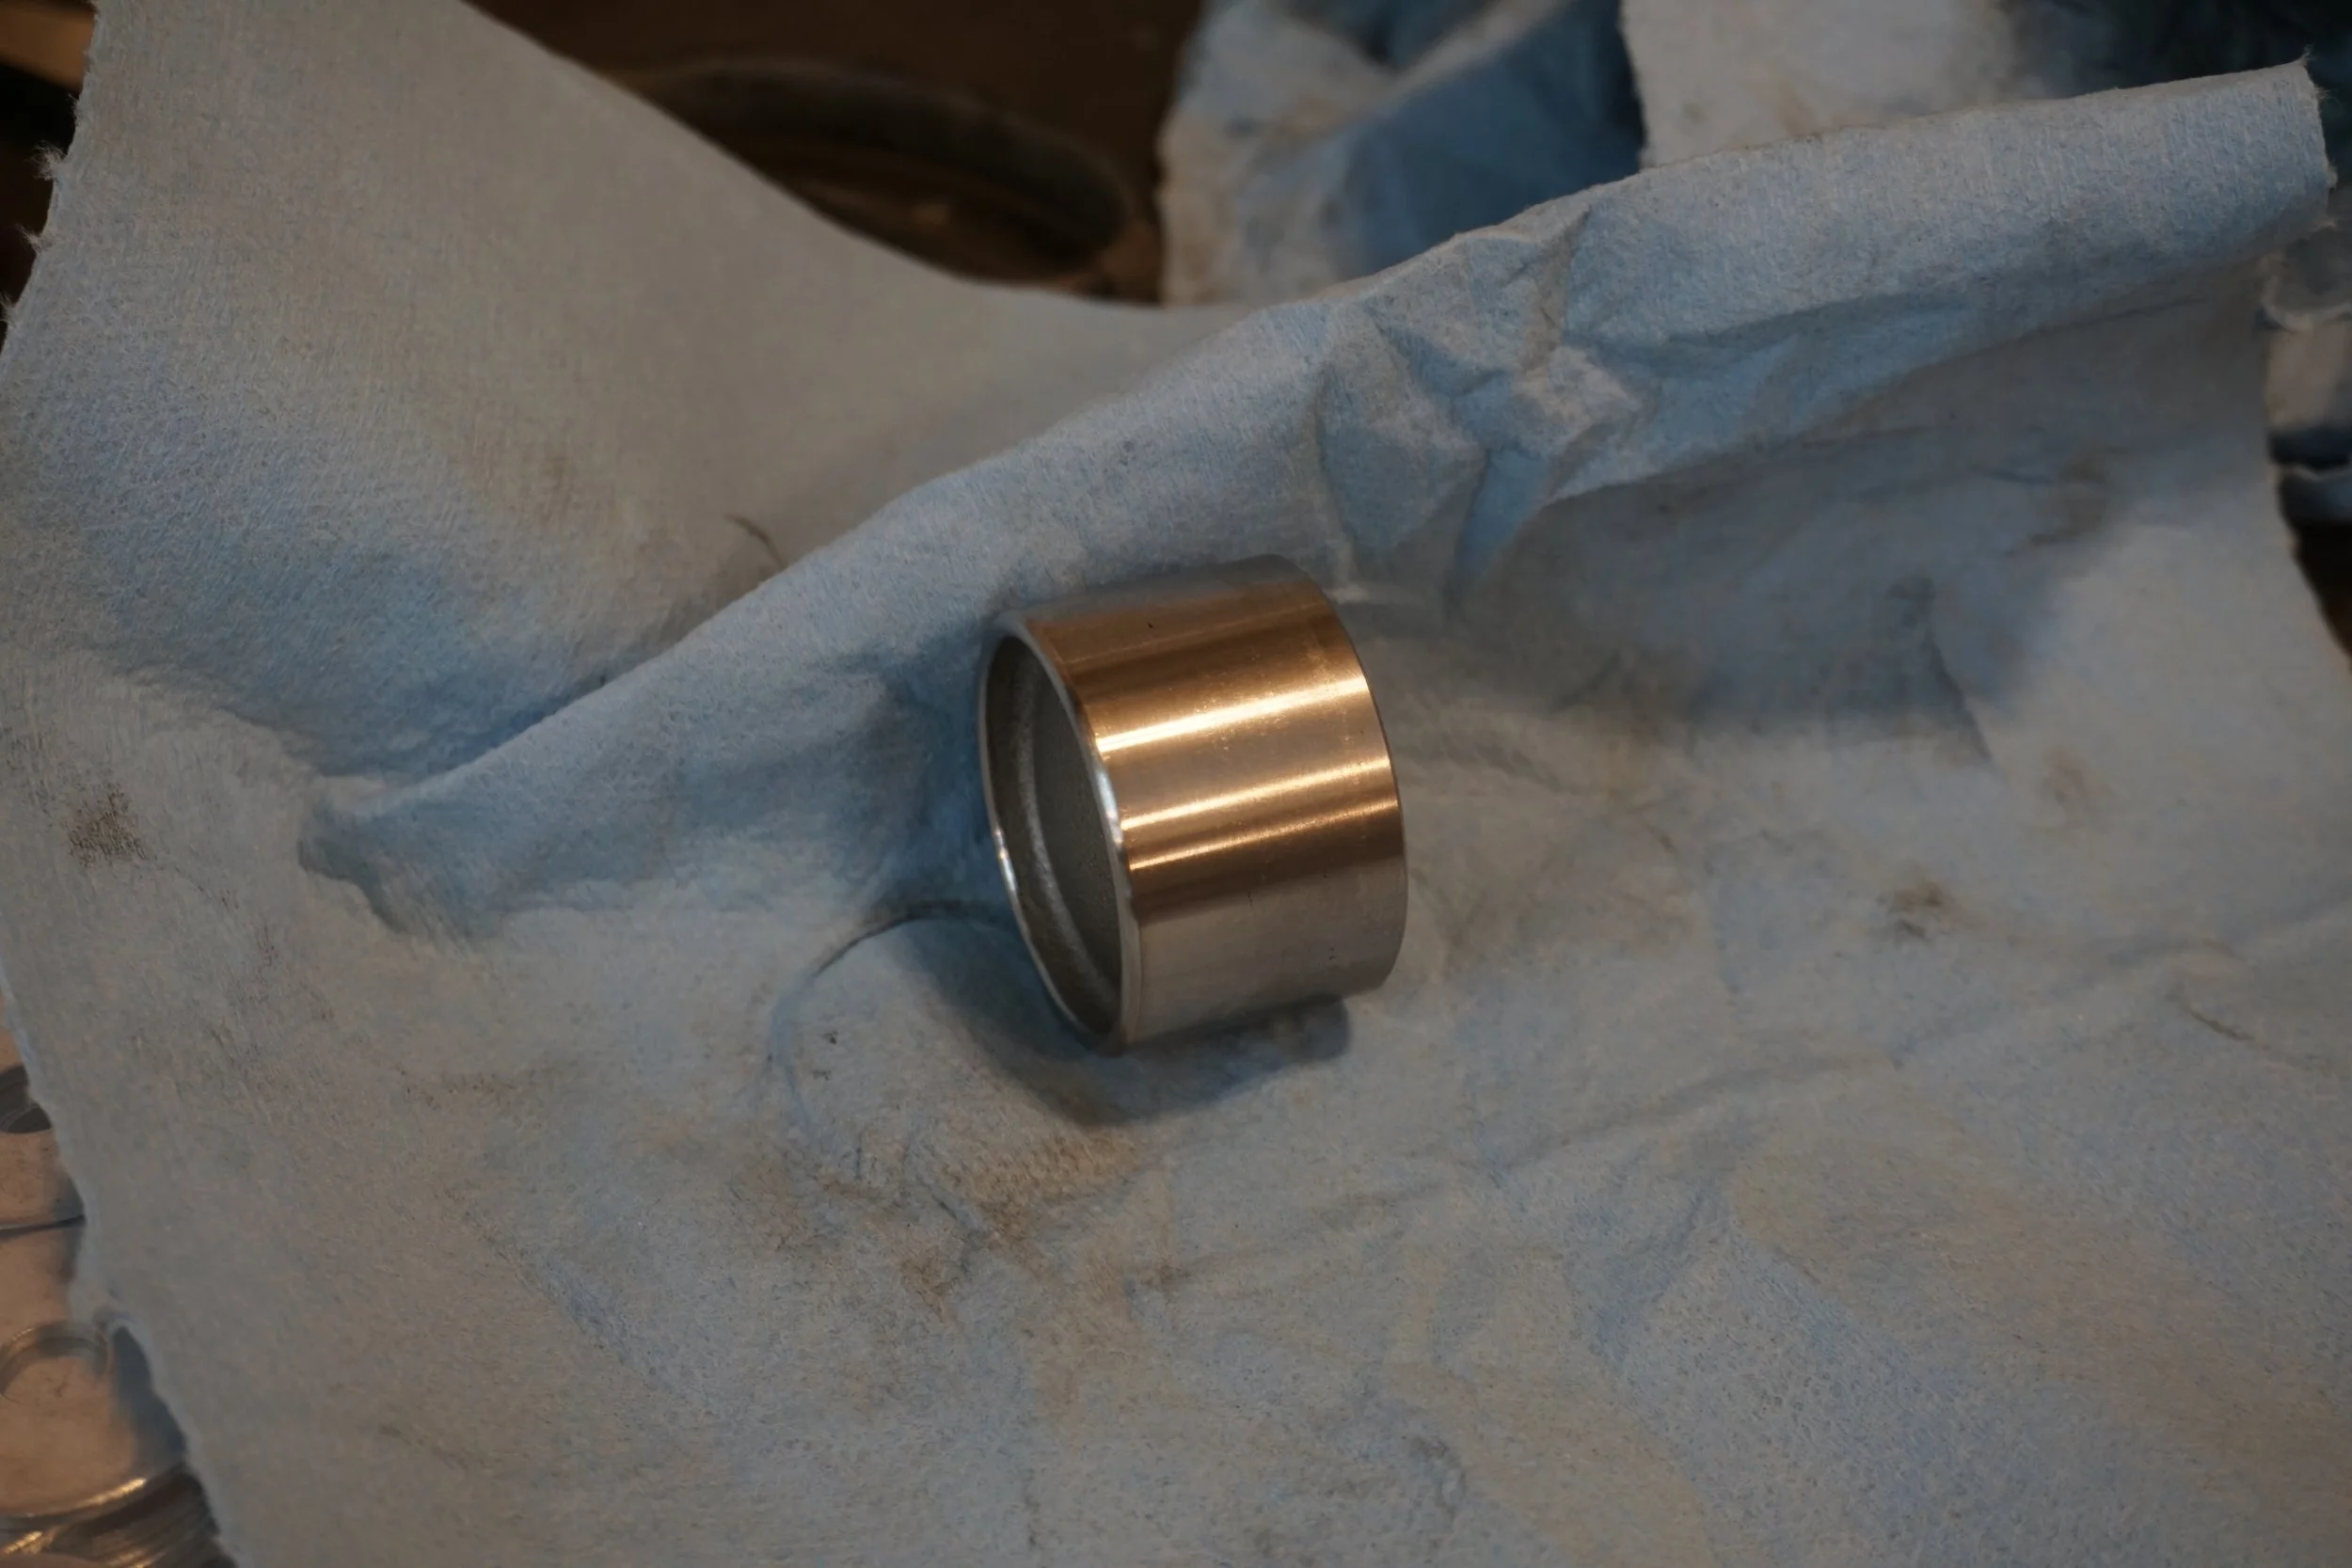
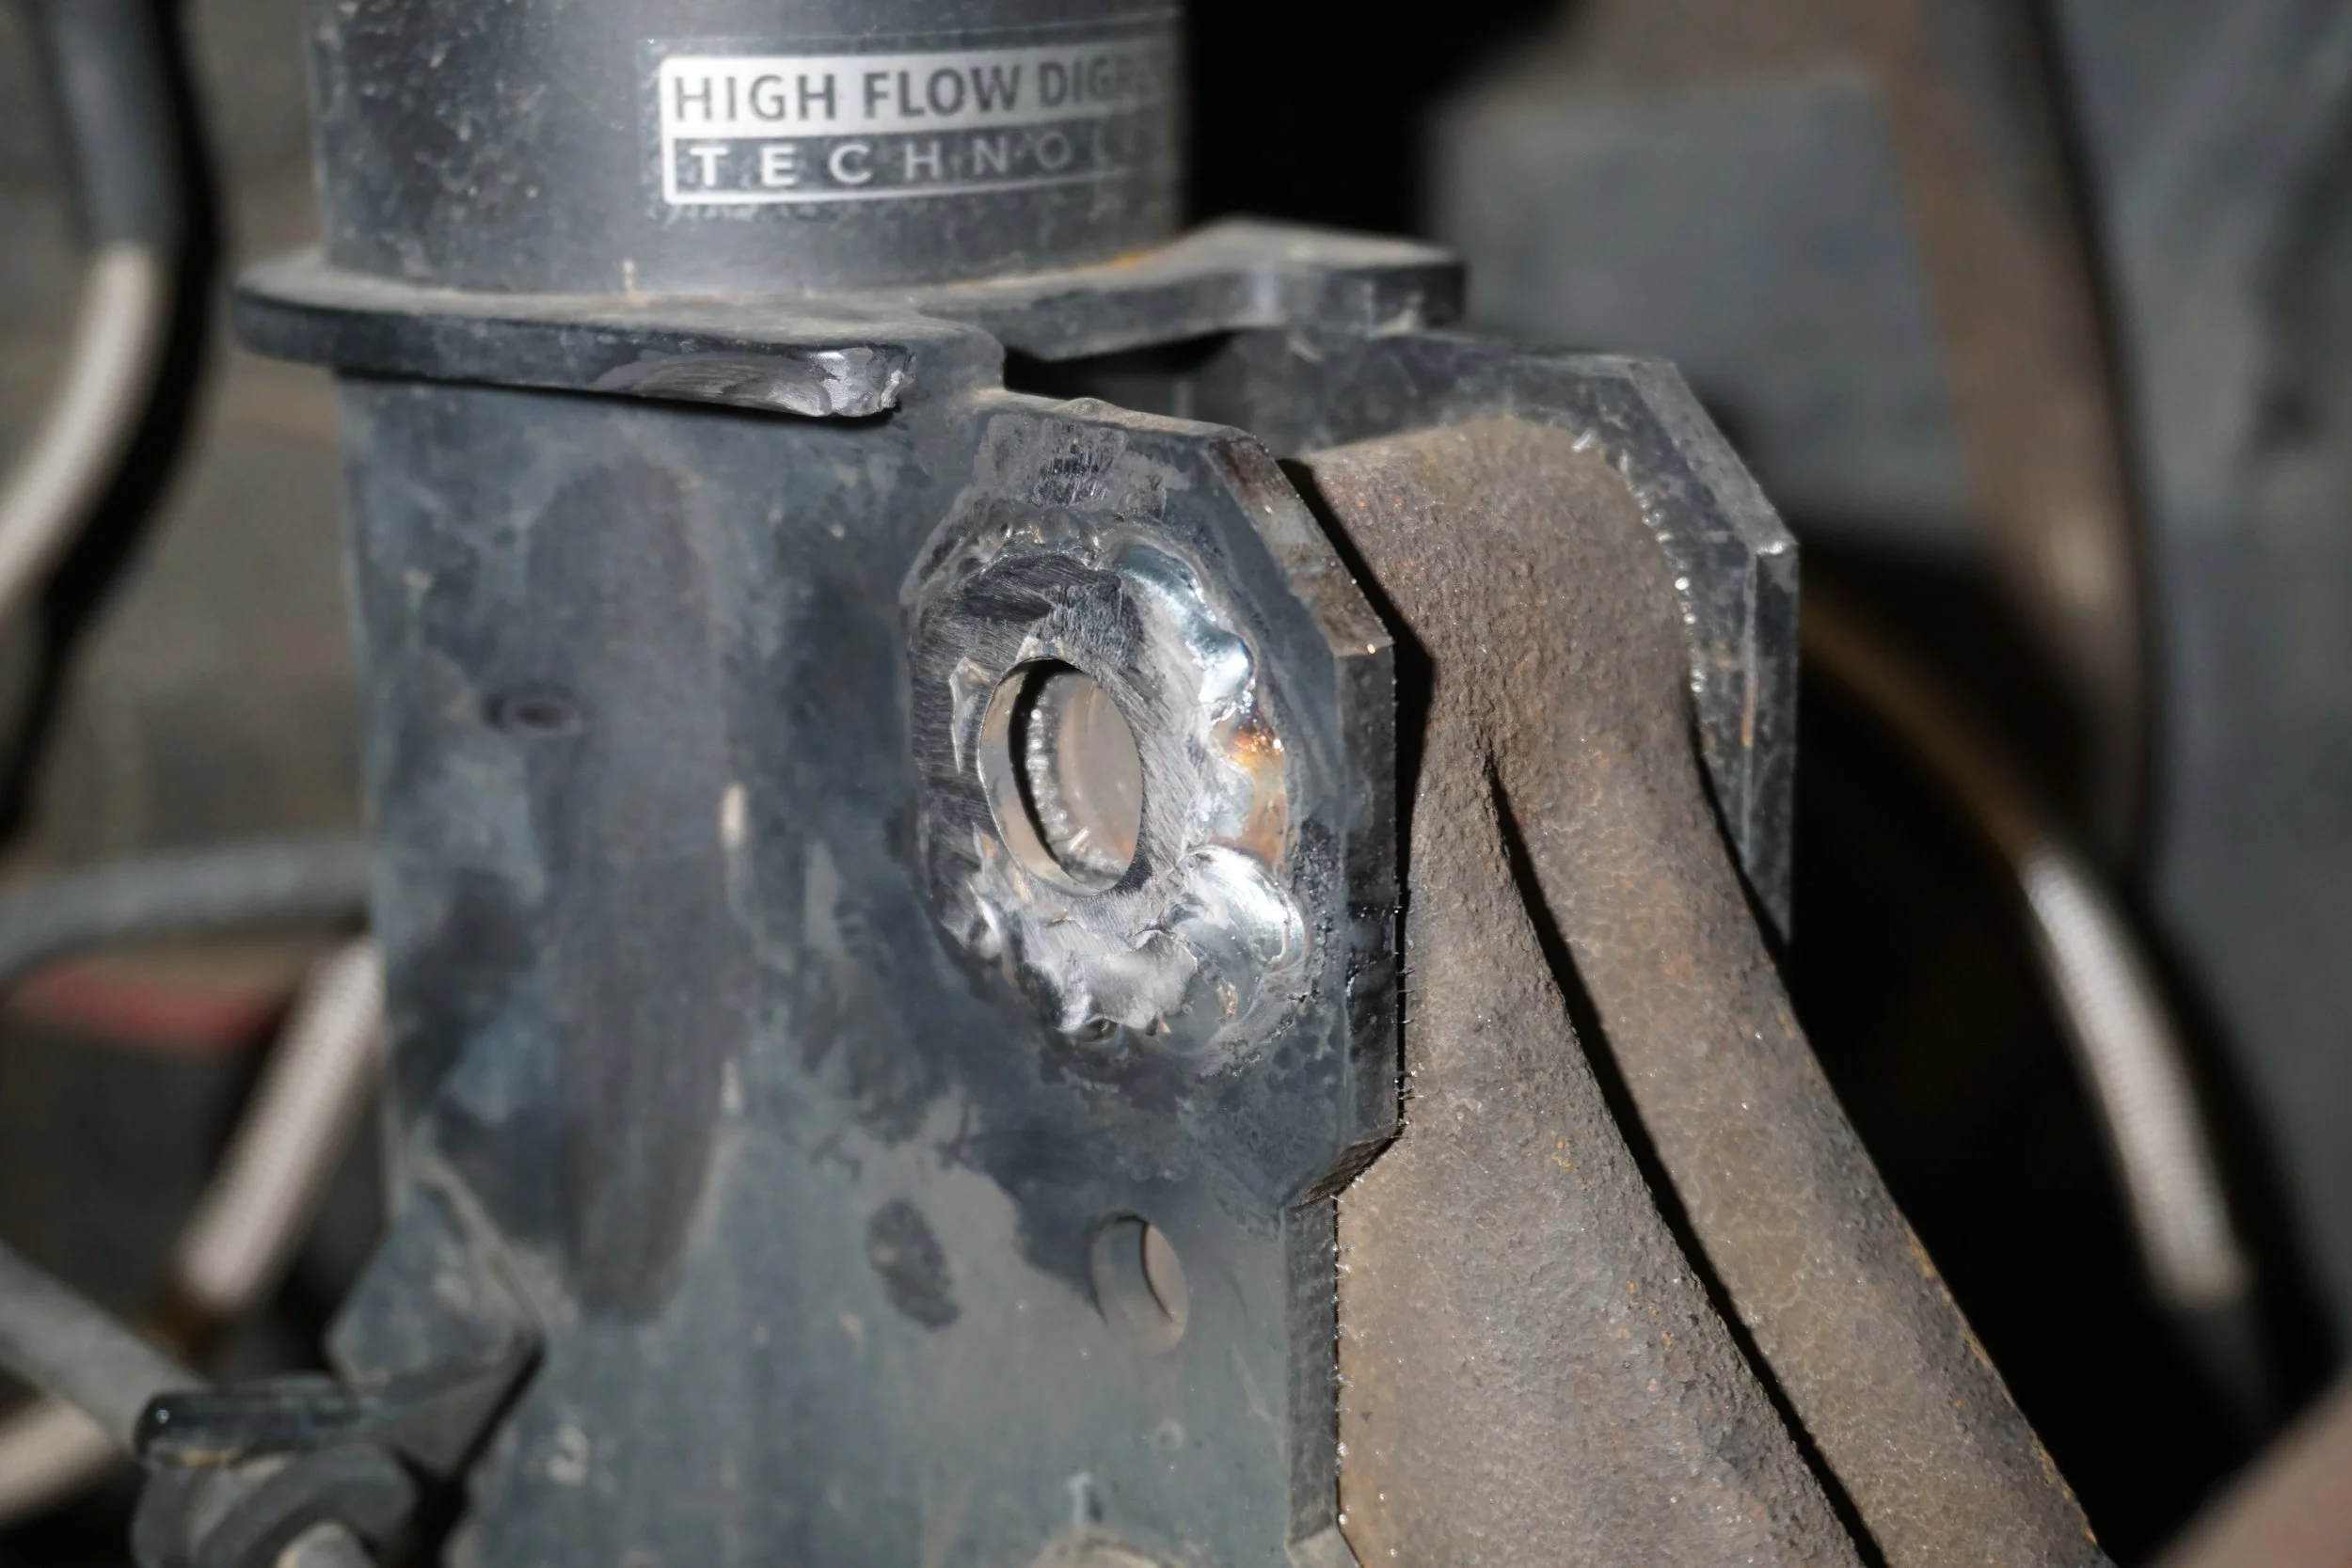
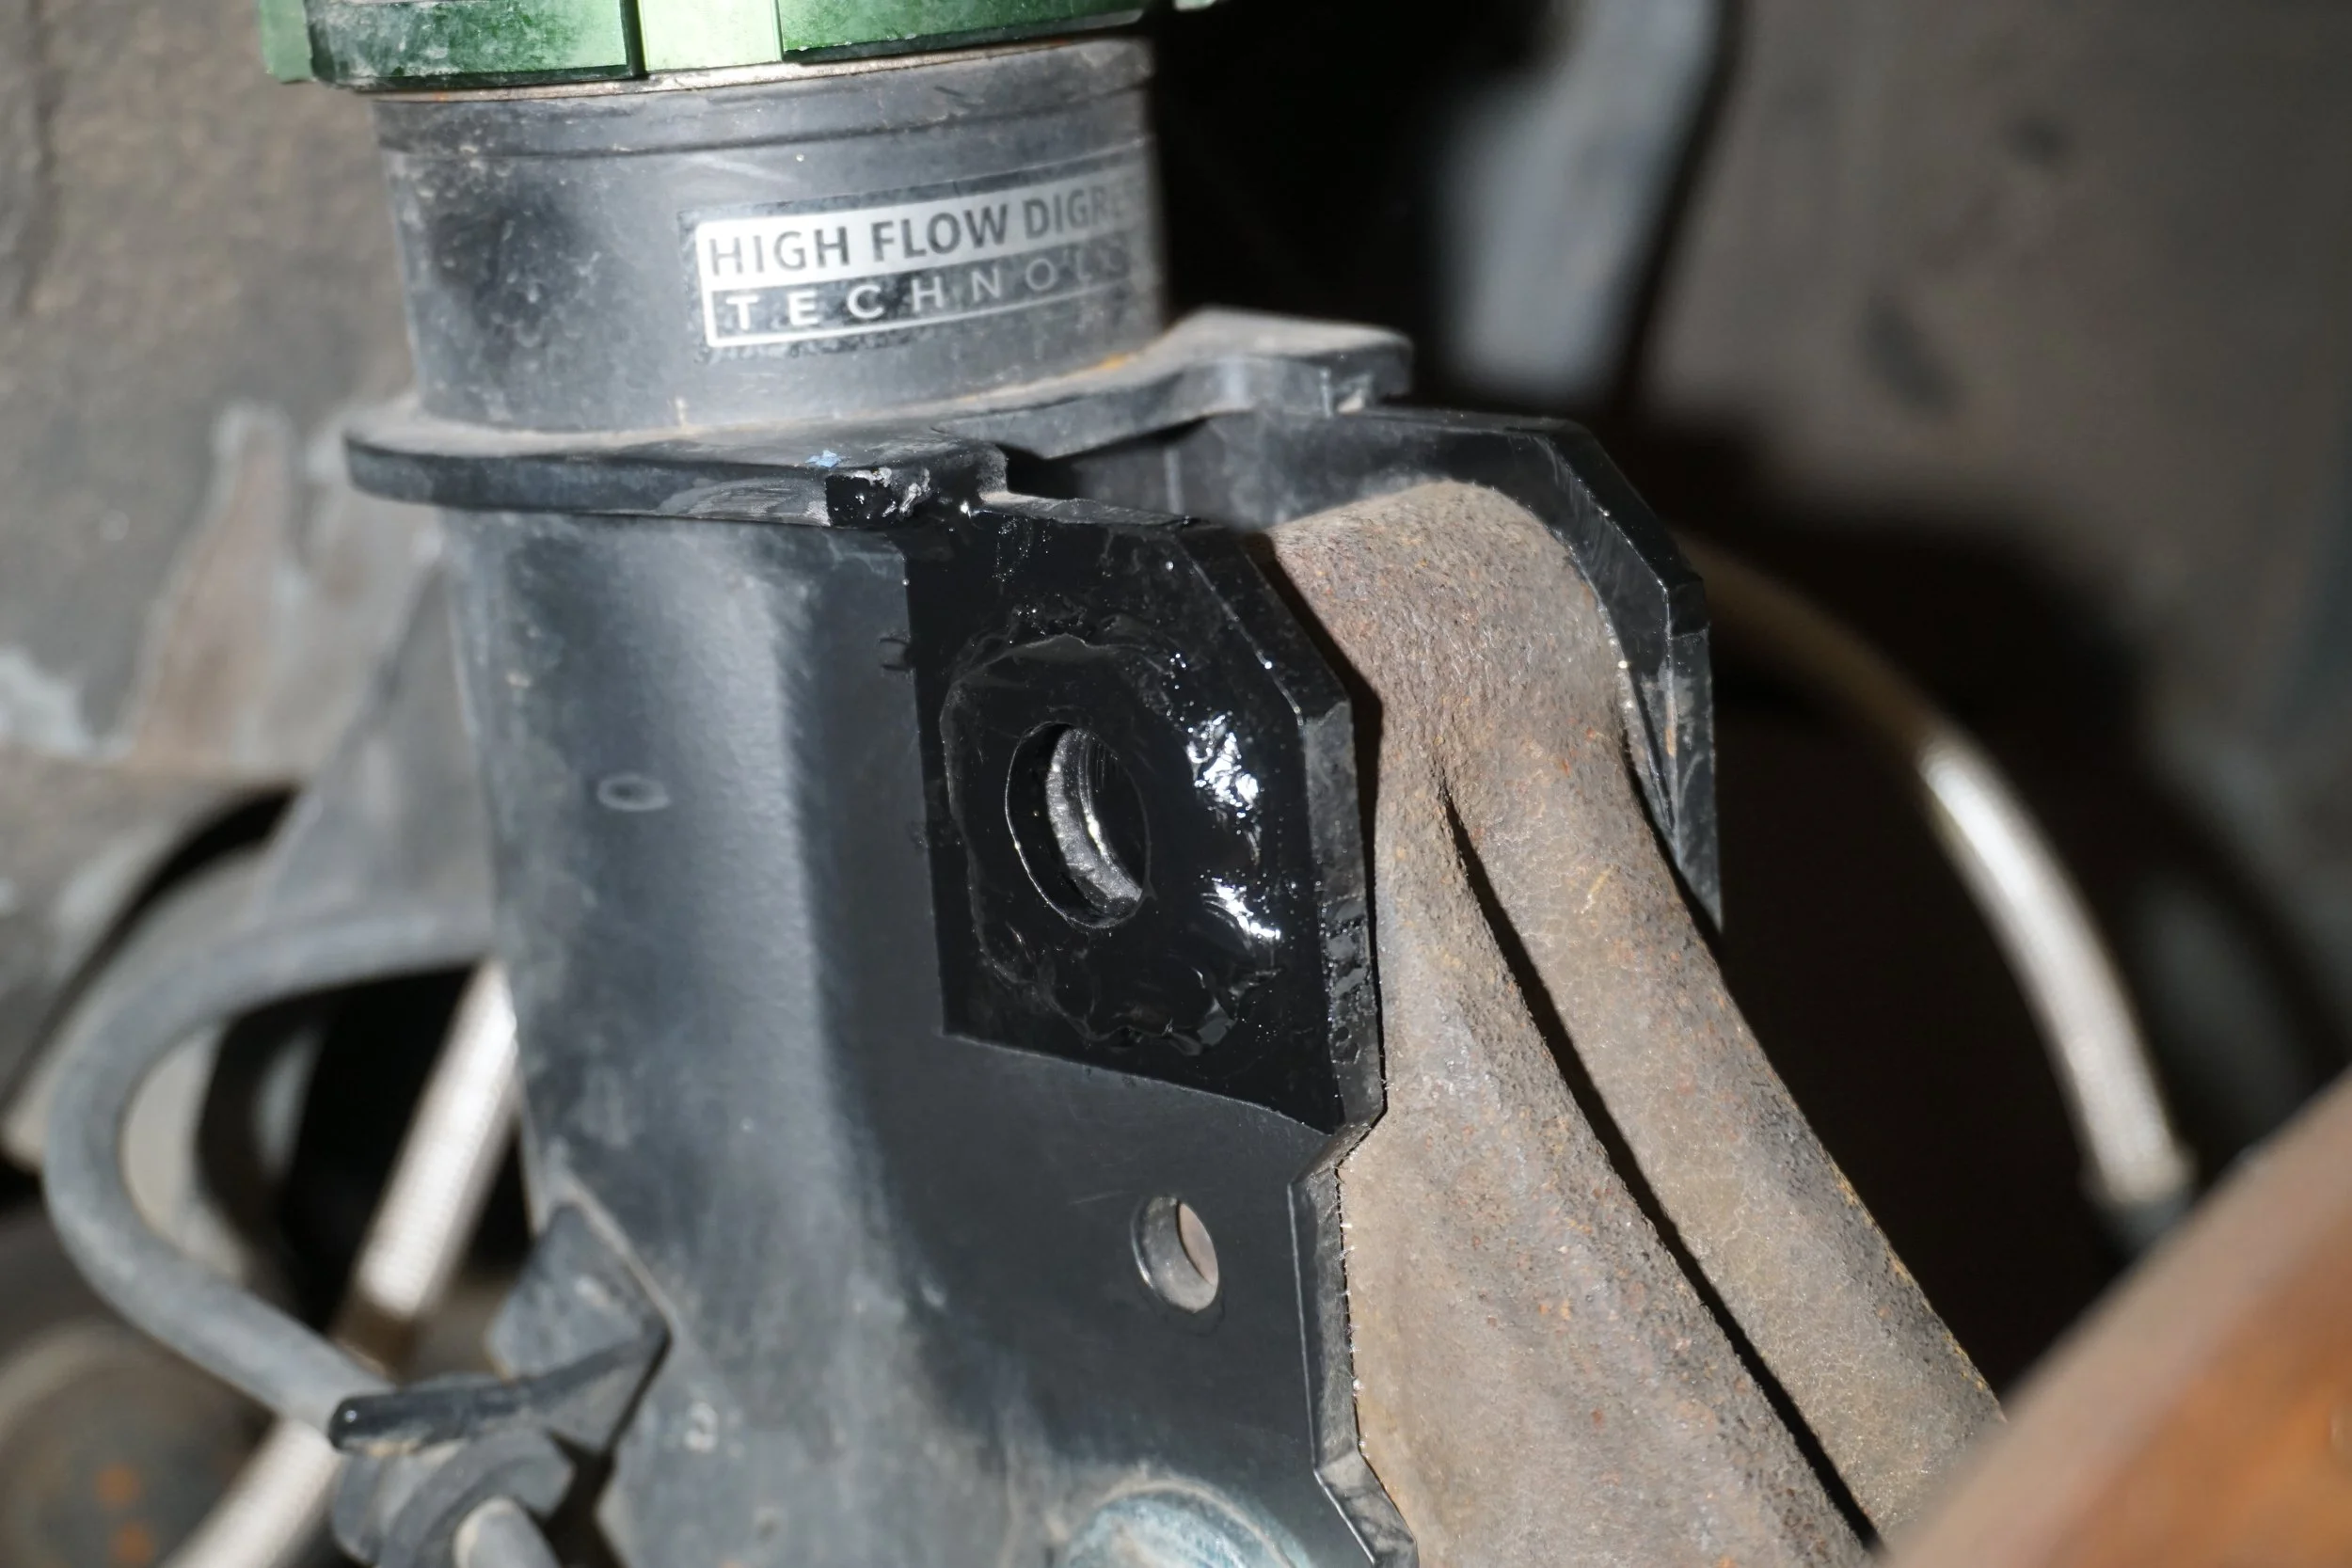
I had to re-do my control arm bushing heat/oil shield, as it rotated all the way around when I torqued down the nut. I decided to drill a little hole in the control arm, hopefully it won't affect the strength of the arm Excuse the blurry pic. Now I can take it on and off easily and it stays in the correct orientation.
Next up was the 5th gen FSTB. Ever since I installed the 3.5 in my car I haven't had a FSTB since my old Stillen bar wouldn't fit. I bought a cheap Megan Racing bar a while back, but didn't want to install it (and re-drill the holes) until the new coilovers/camber plates were installed. With the Fortune Autos installed, I installed the bar, but there was interference with my hood and insulation. Sprinkling some flour on top of the bar confirmed where the problem was:
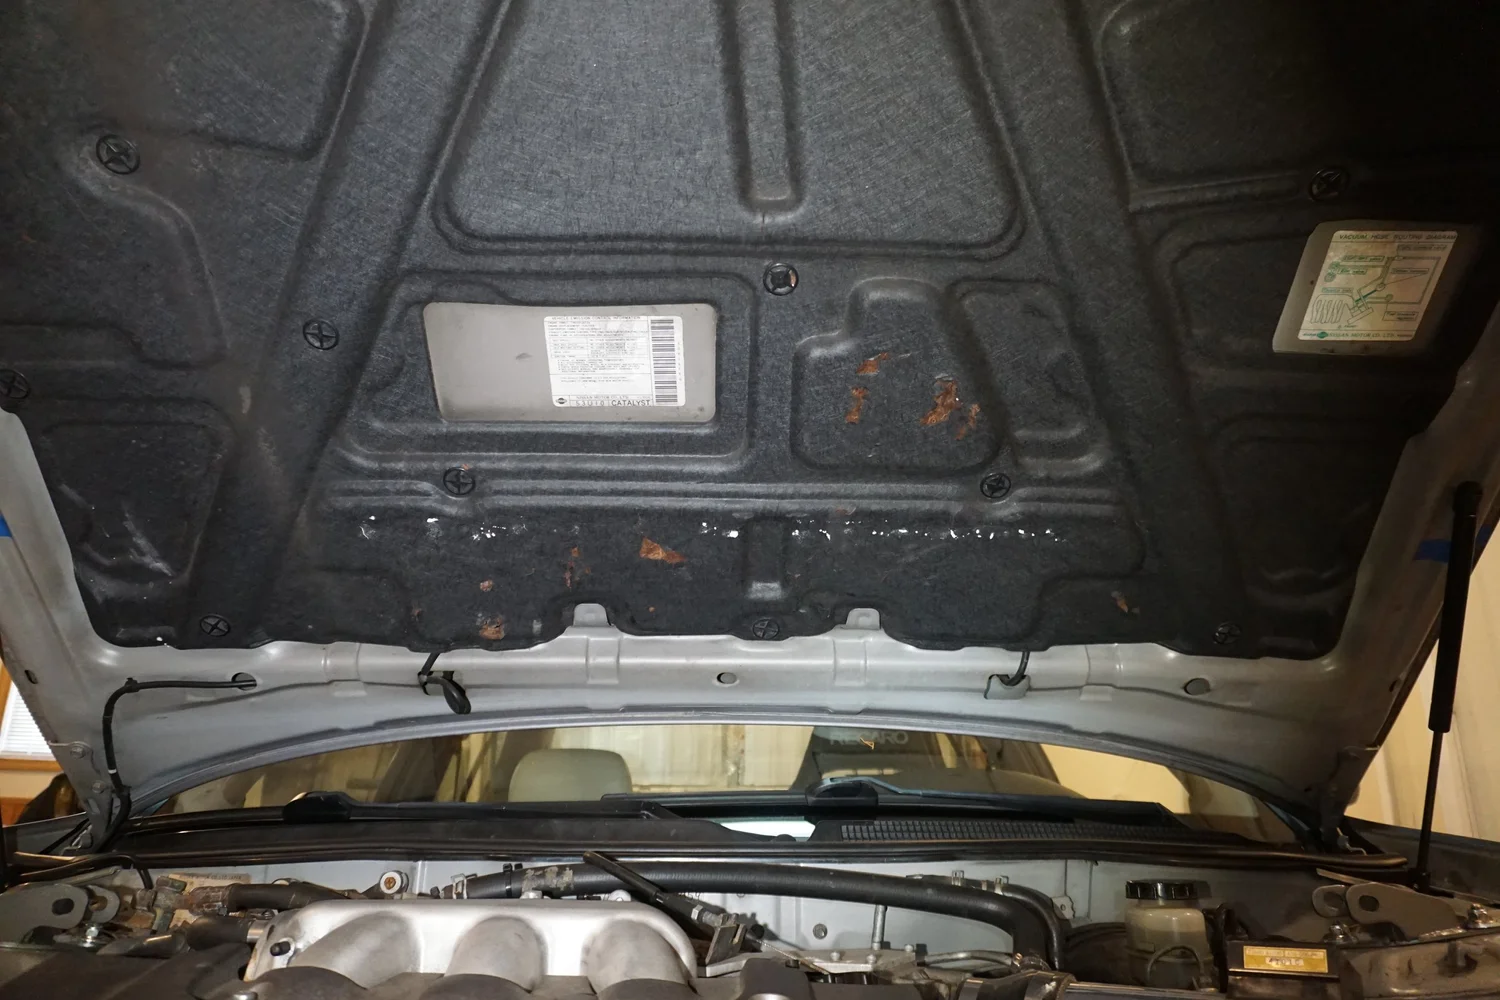
So I cut out the insulation in that area.
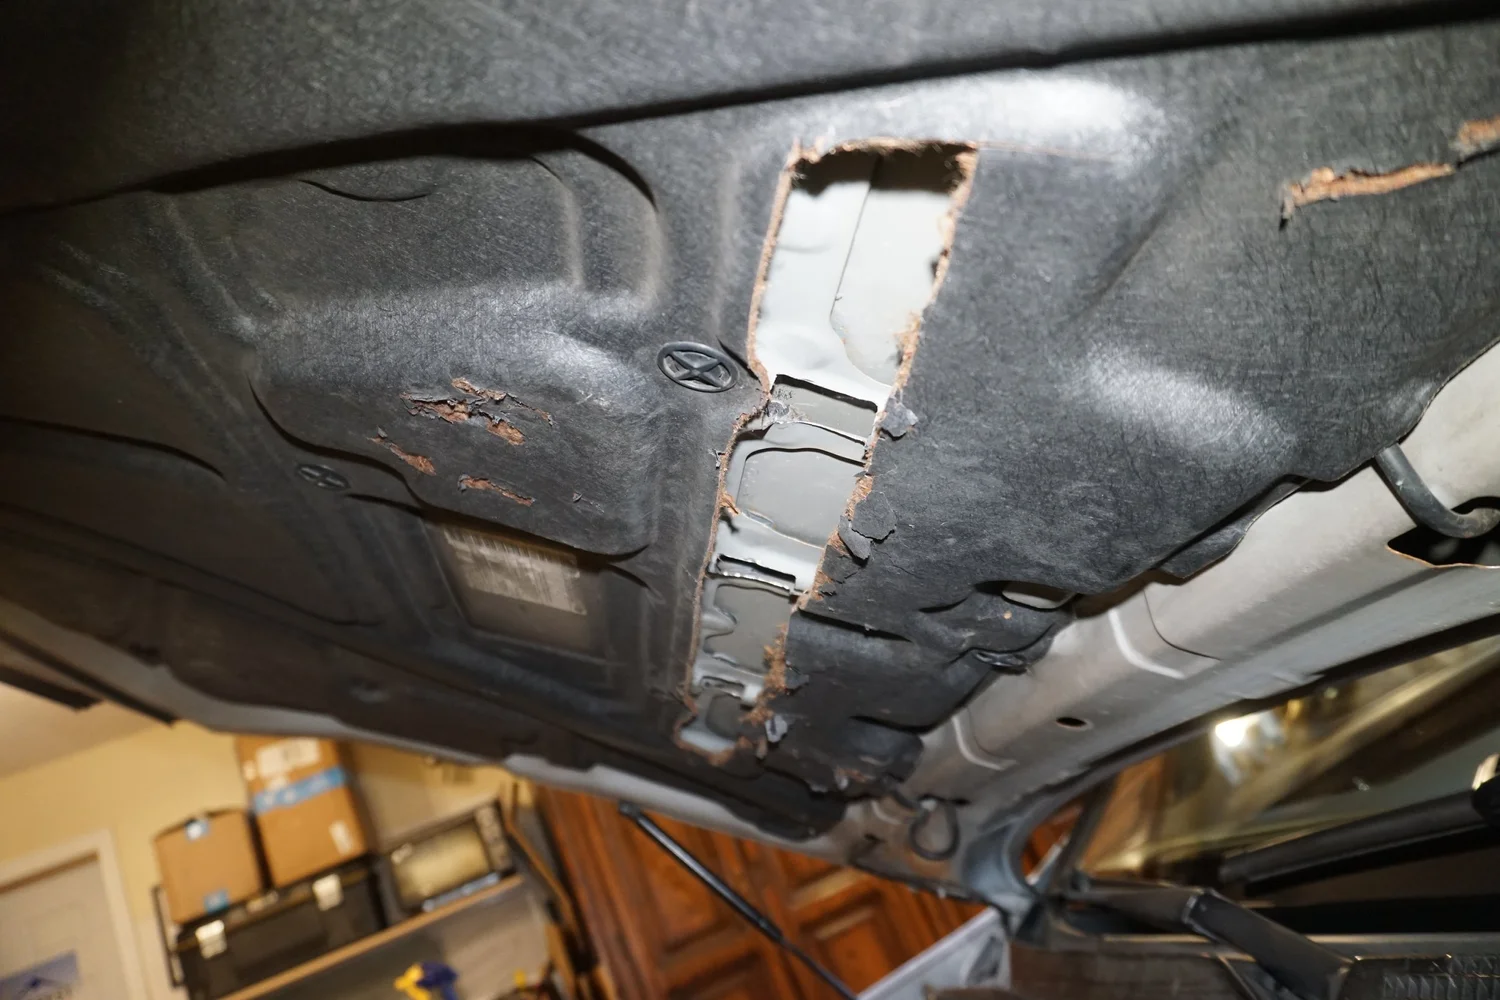
I drove around like that for a while, but when I checked on it later I saw there were marks on the bar from the hood, so I carefully cut out some sections from the hood reinforcements to get some more space.
And then got some black tape around the edges of the insulation since I was tired of it making a mess.
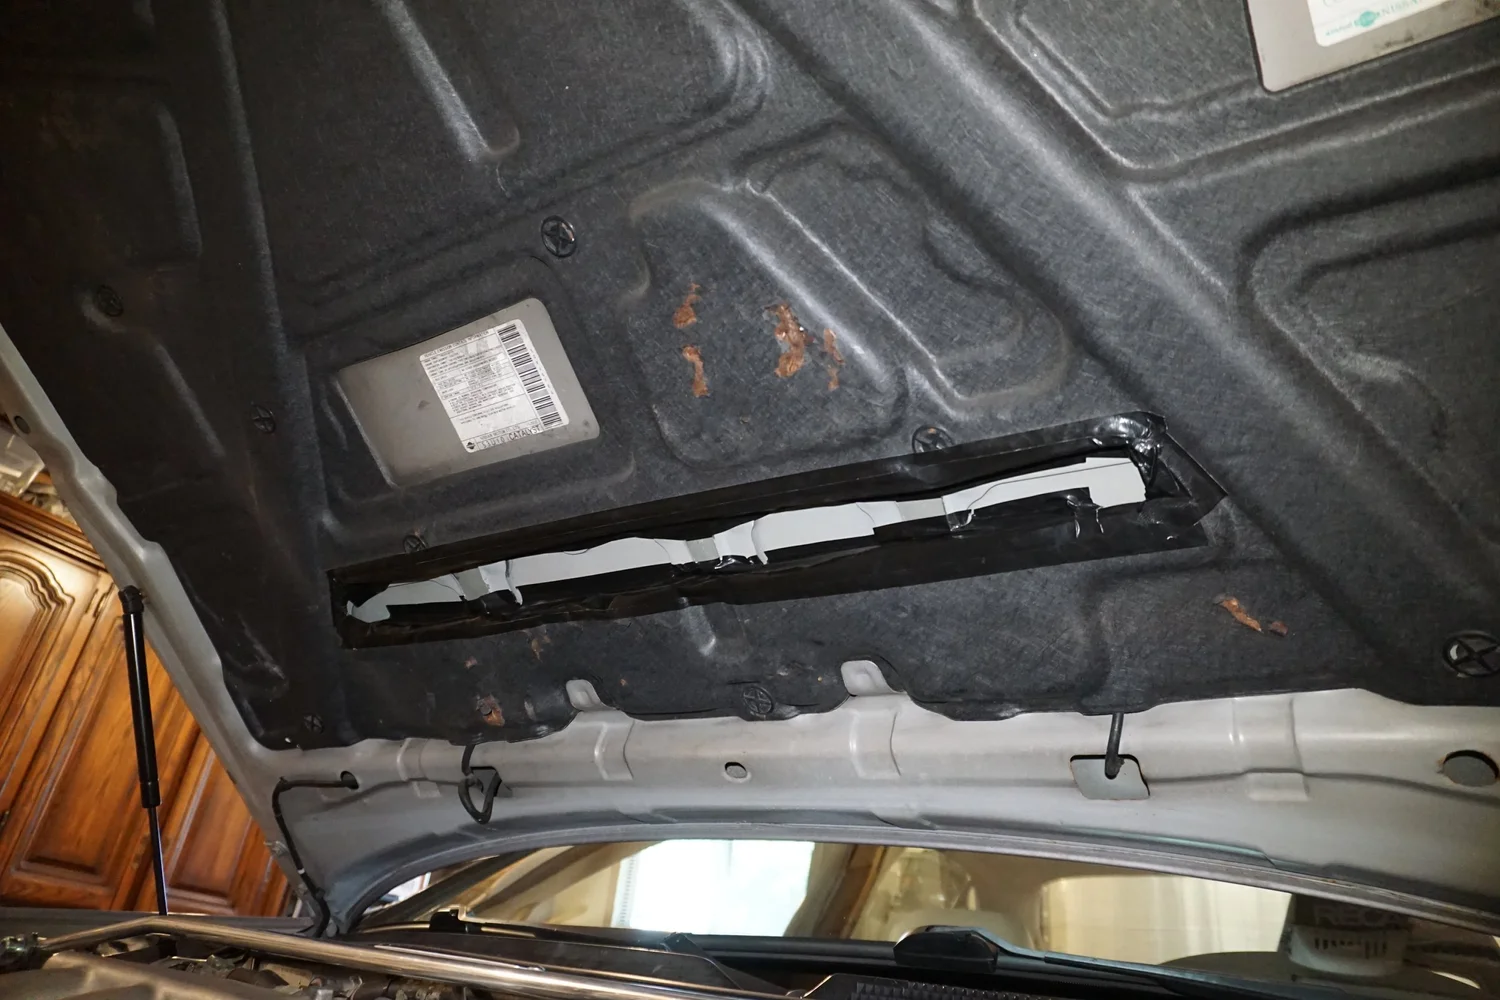
Problem solved!
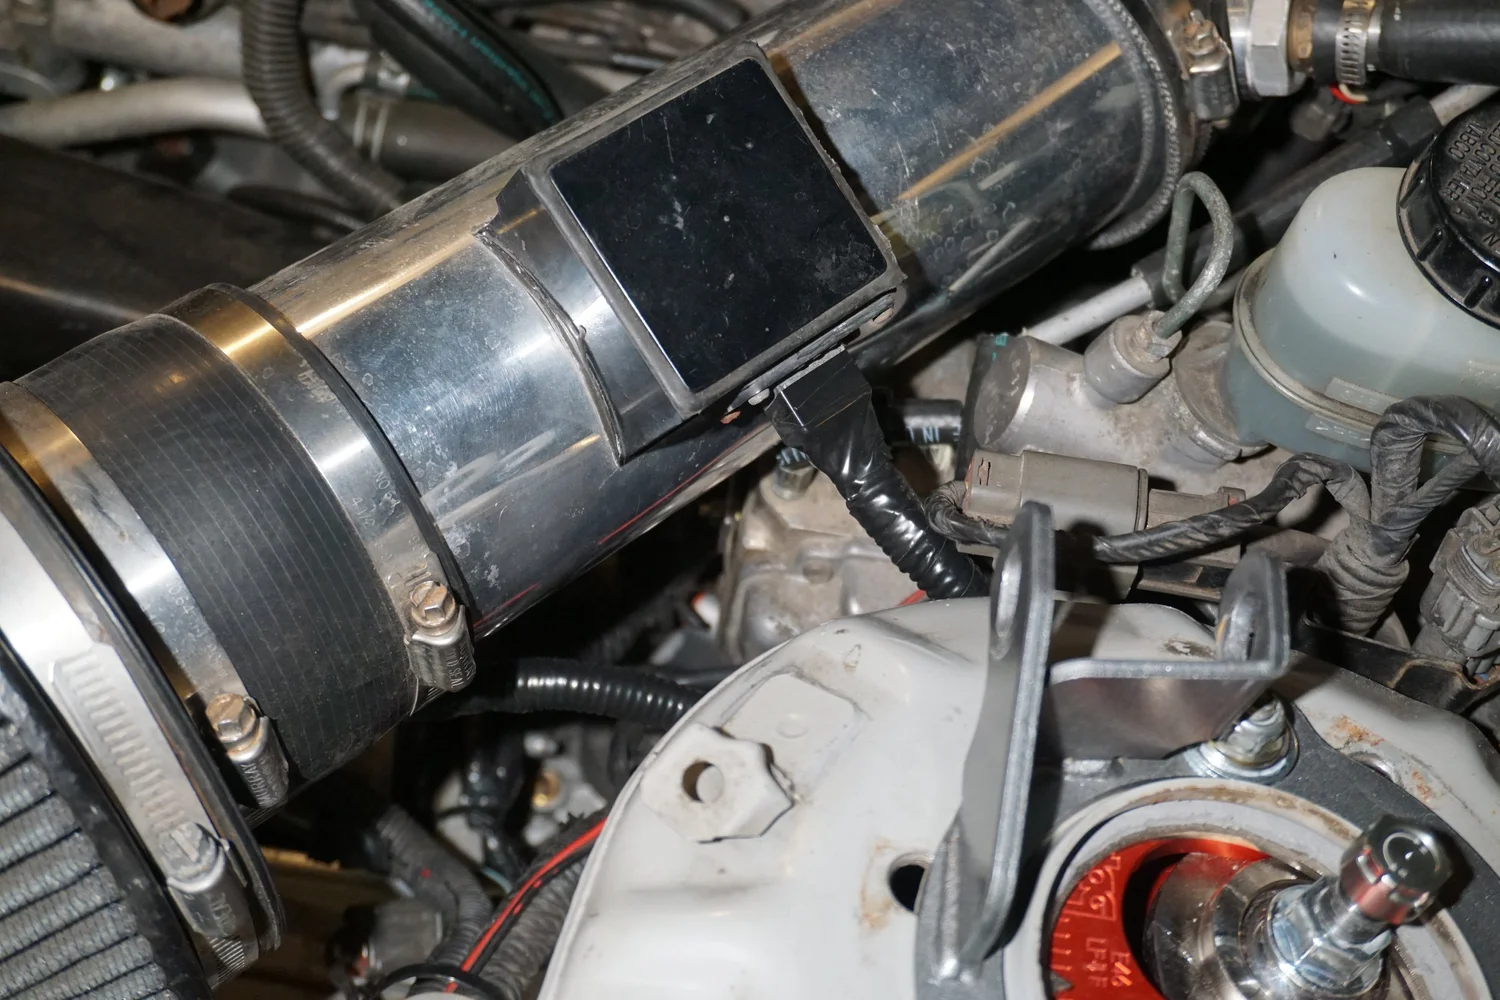
Next up was an intermittent rough running issue, one that I had kind of diagnosed and fixed earlier, where the car would occasionally idle super right with the AFR between 9-10, and sometimes even stall out. I traced it to the wiring for the Q45 MAF, but after I jiggled them the problem went away for a long time. Well, the problem came back so I decided to properly fix it. The problem was that the wires going into the body-side connector for the Q45 MAF had aged out, so the sheathing was cracked and the wires had started to break.
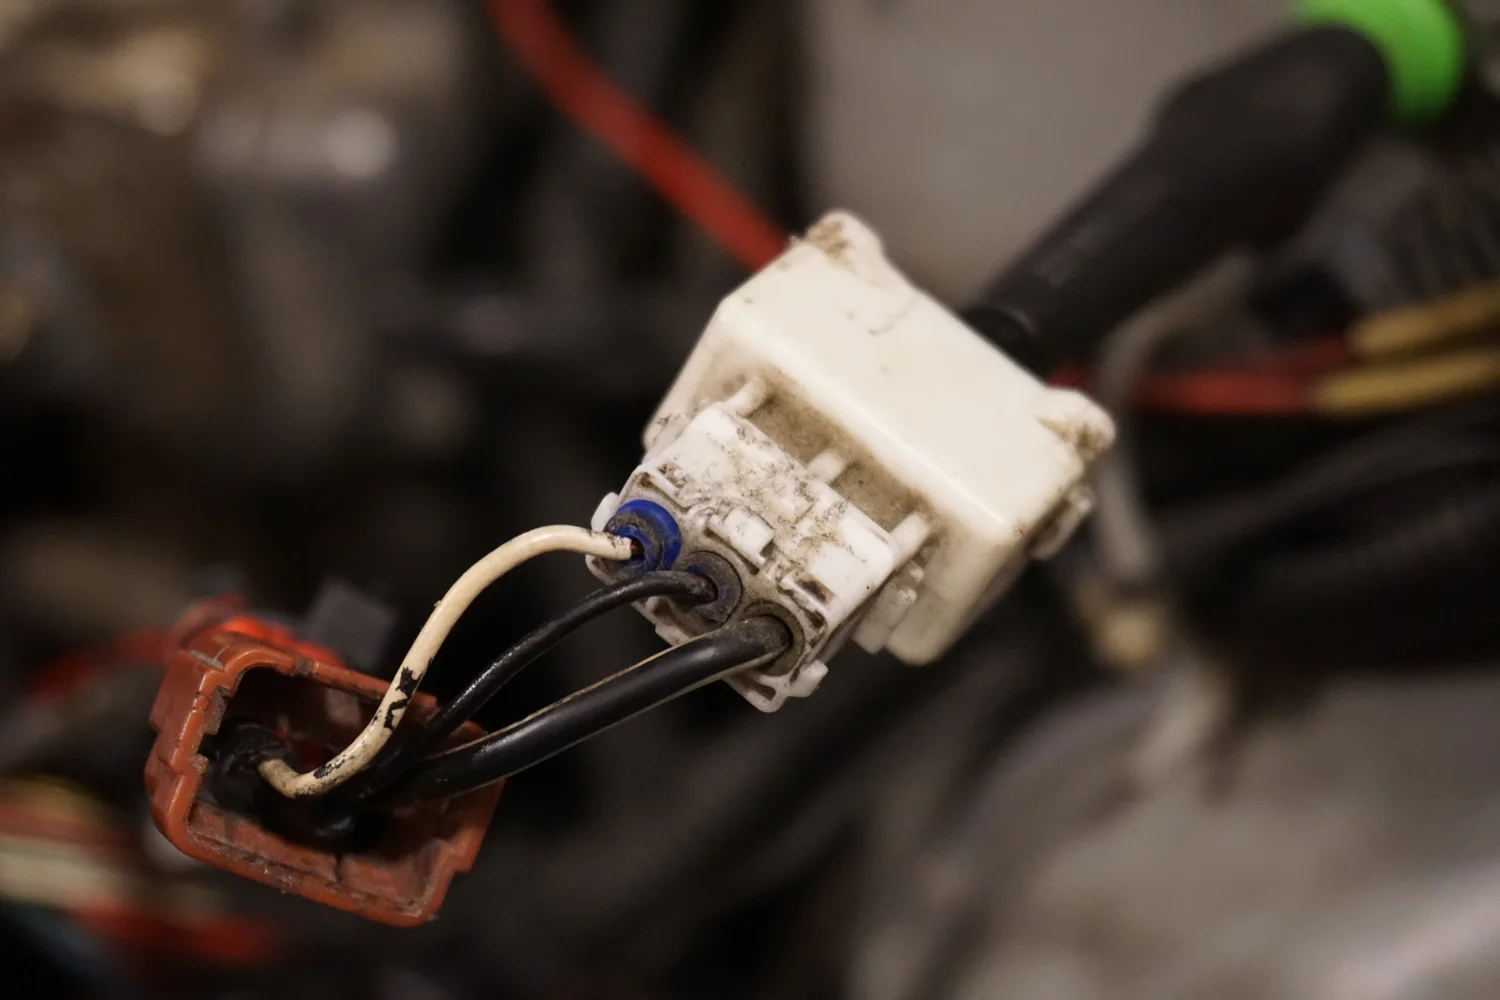
I wanted to reuse the factory connector, but the pins for it are some special type, and I couldn't reuse them since they were so delicate/brittle.
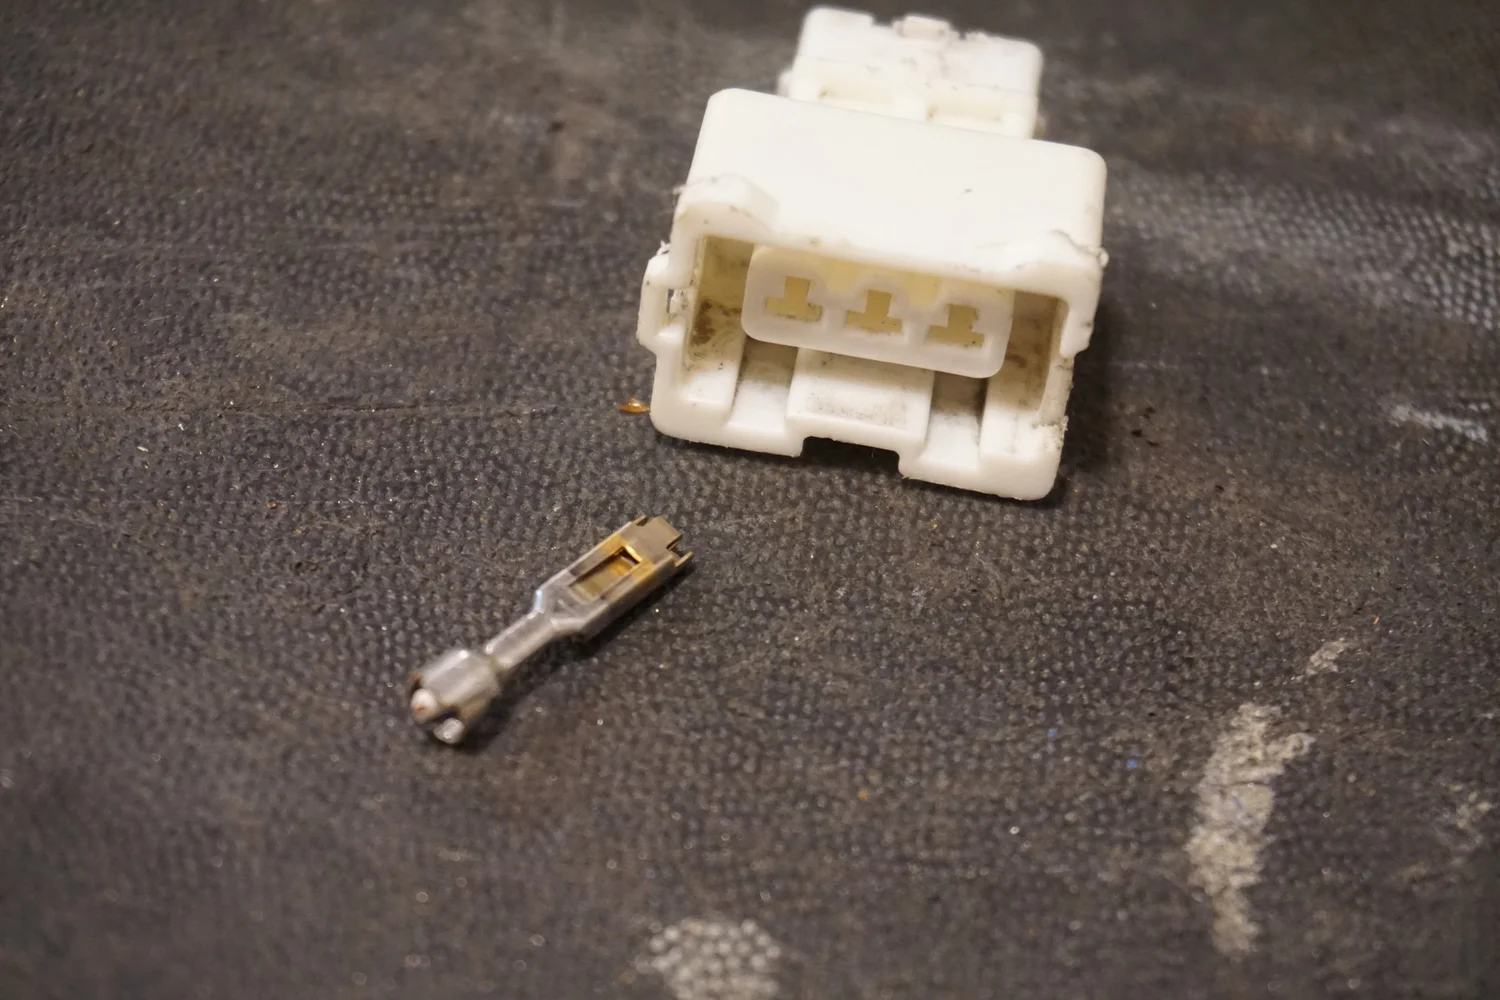
So I did the next best thing and just ran direct female terminals right to the MAF. I don't love it, but I didn't know what else to do.
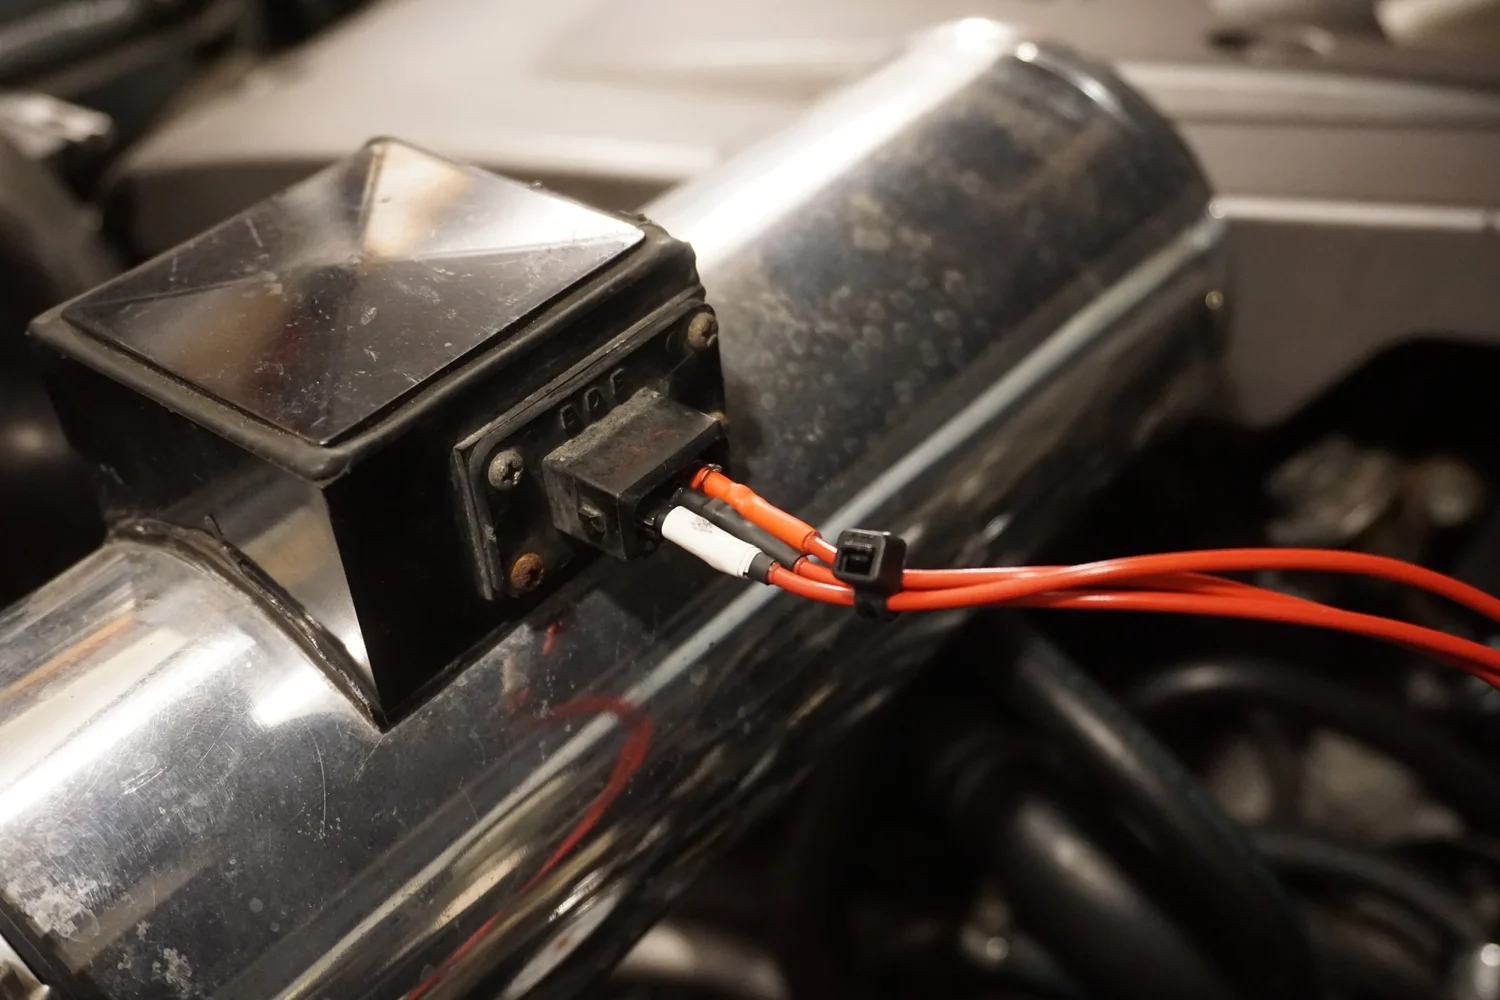
But so far the repair has worked and the car is running great, so I'm quite happy.
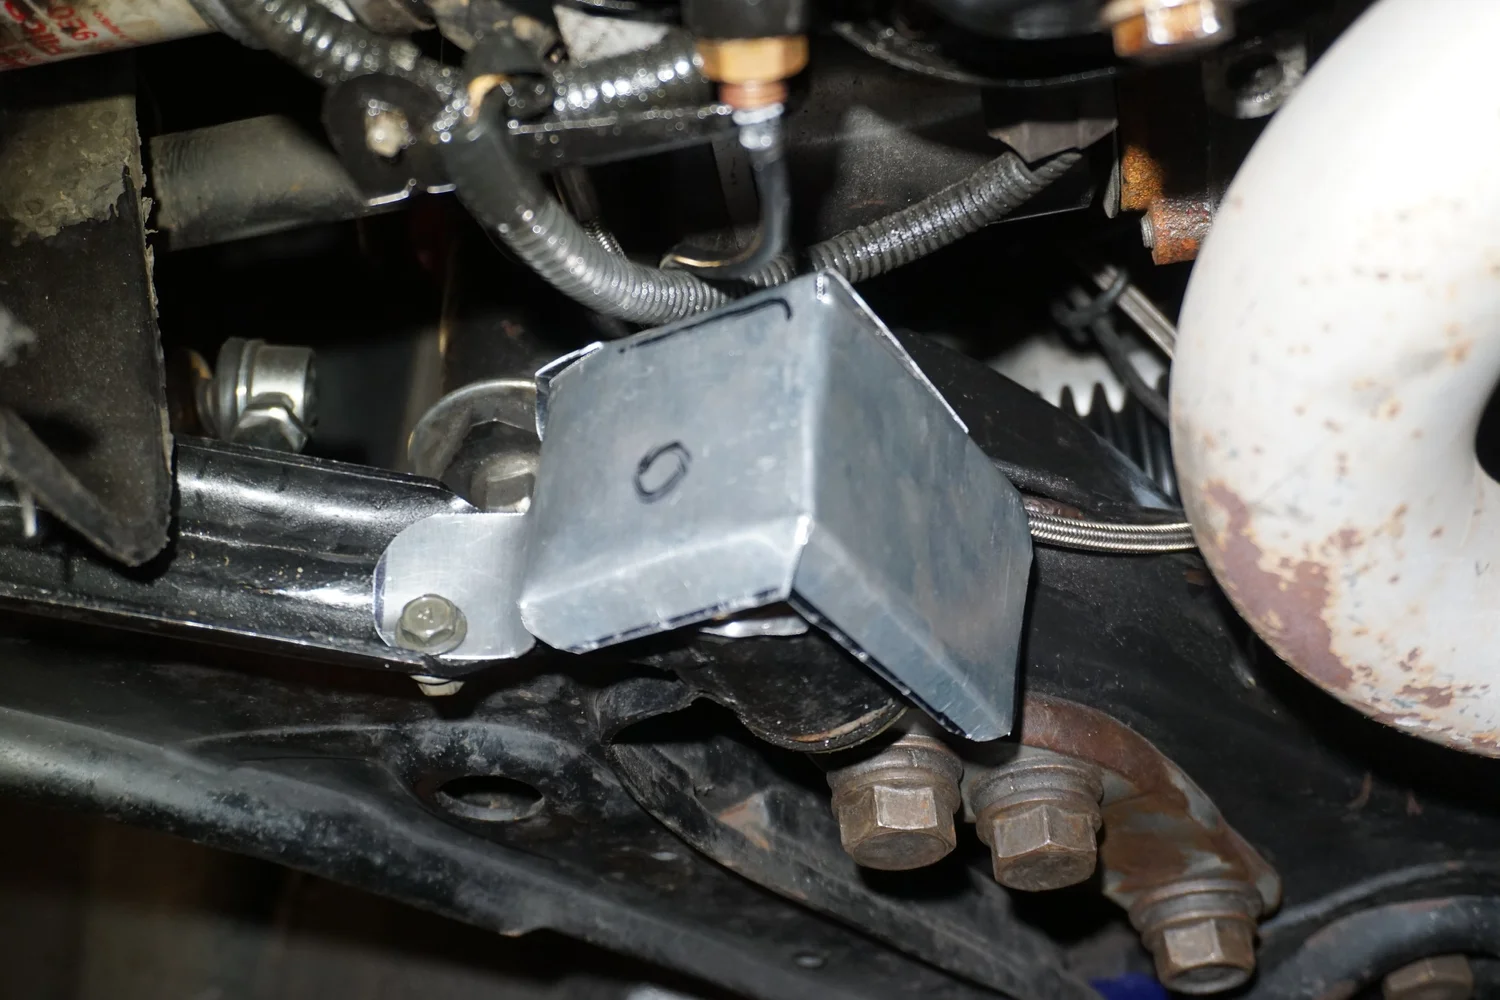
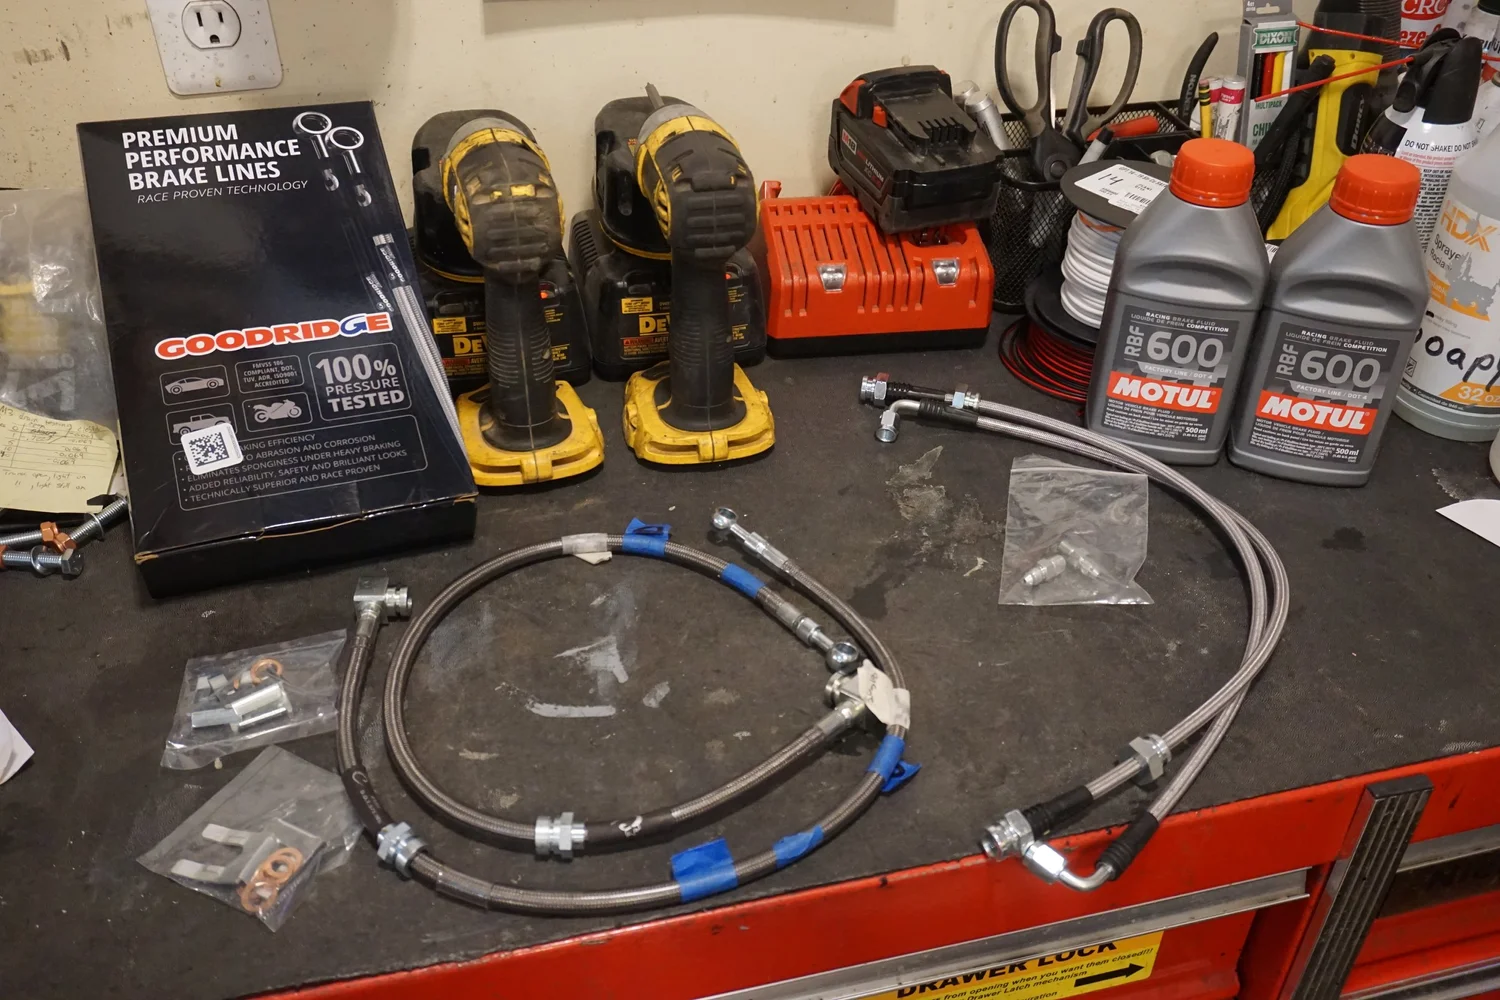
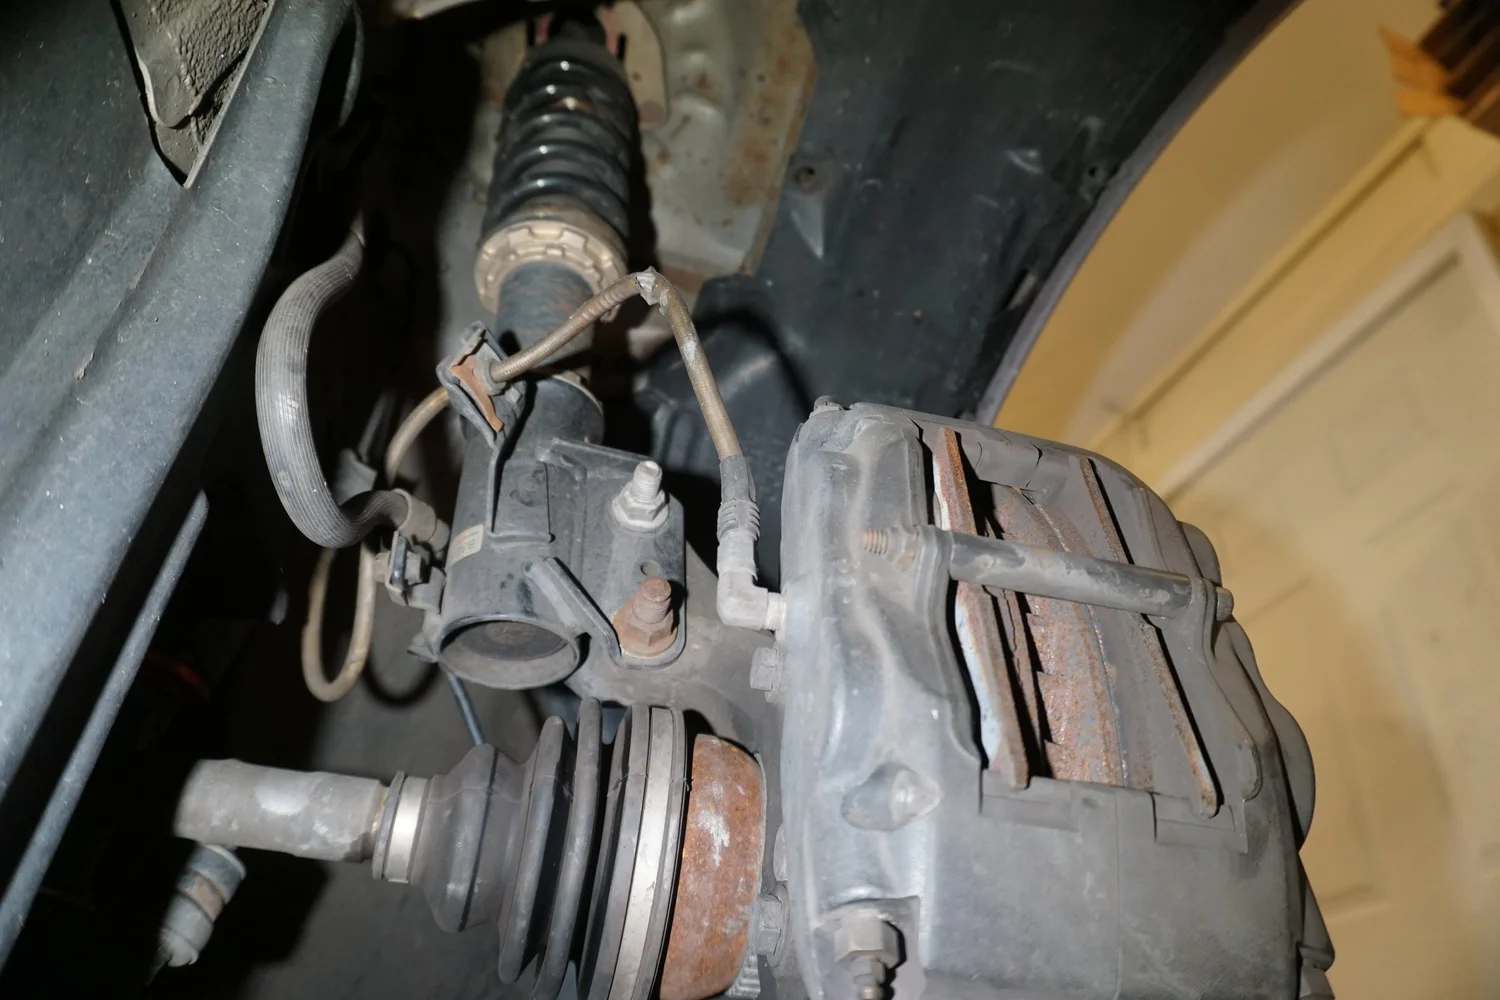
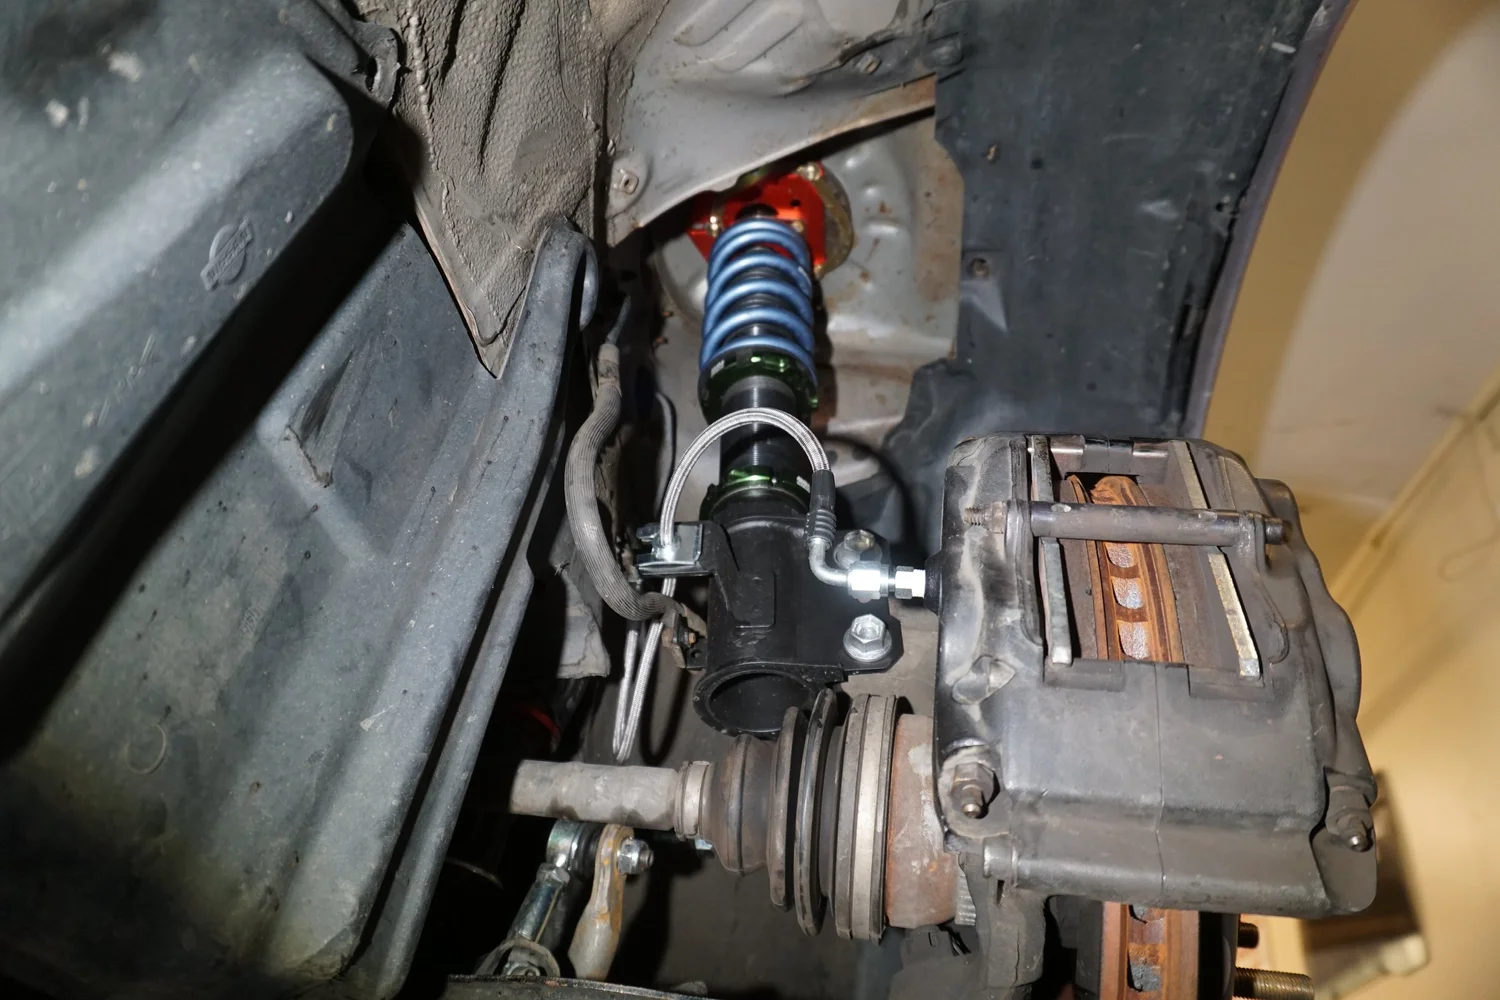
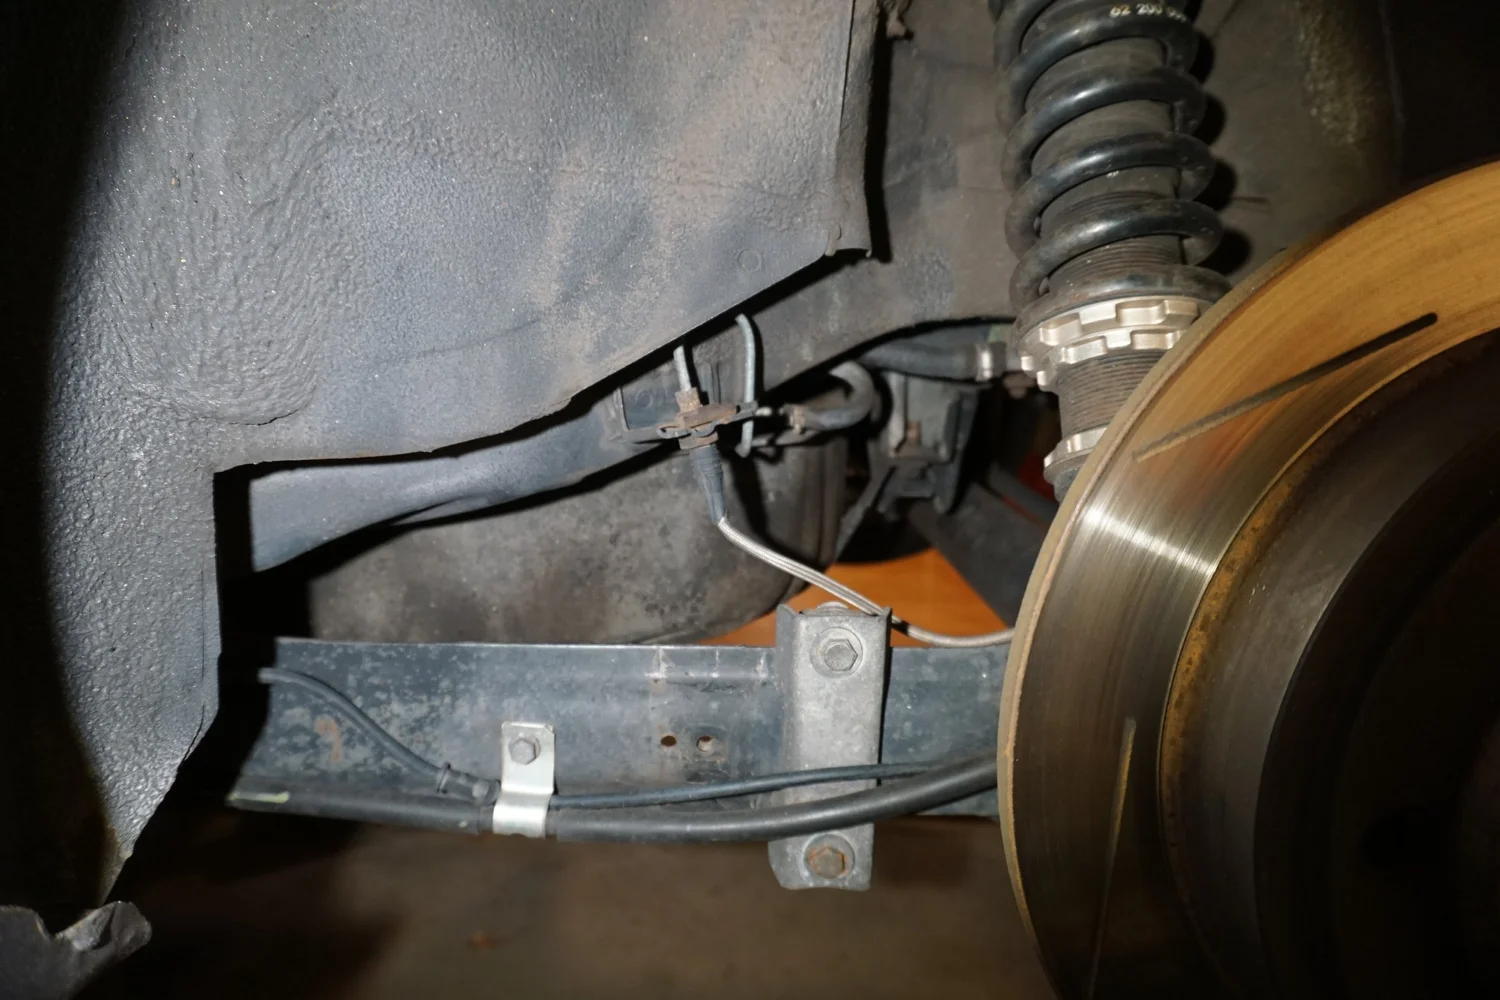
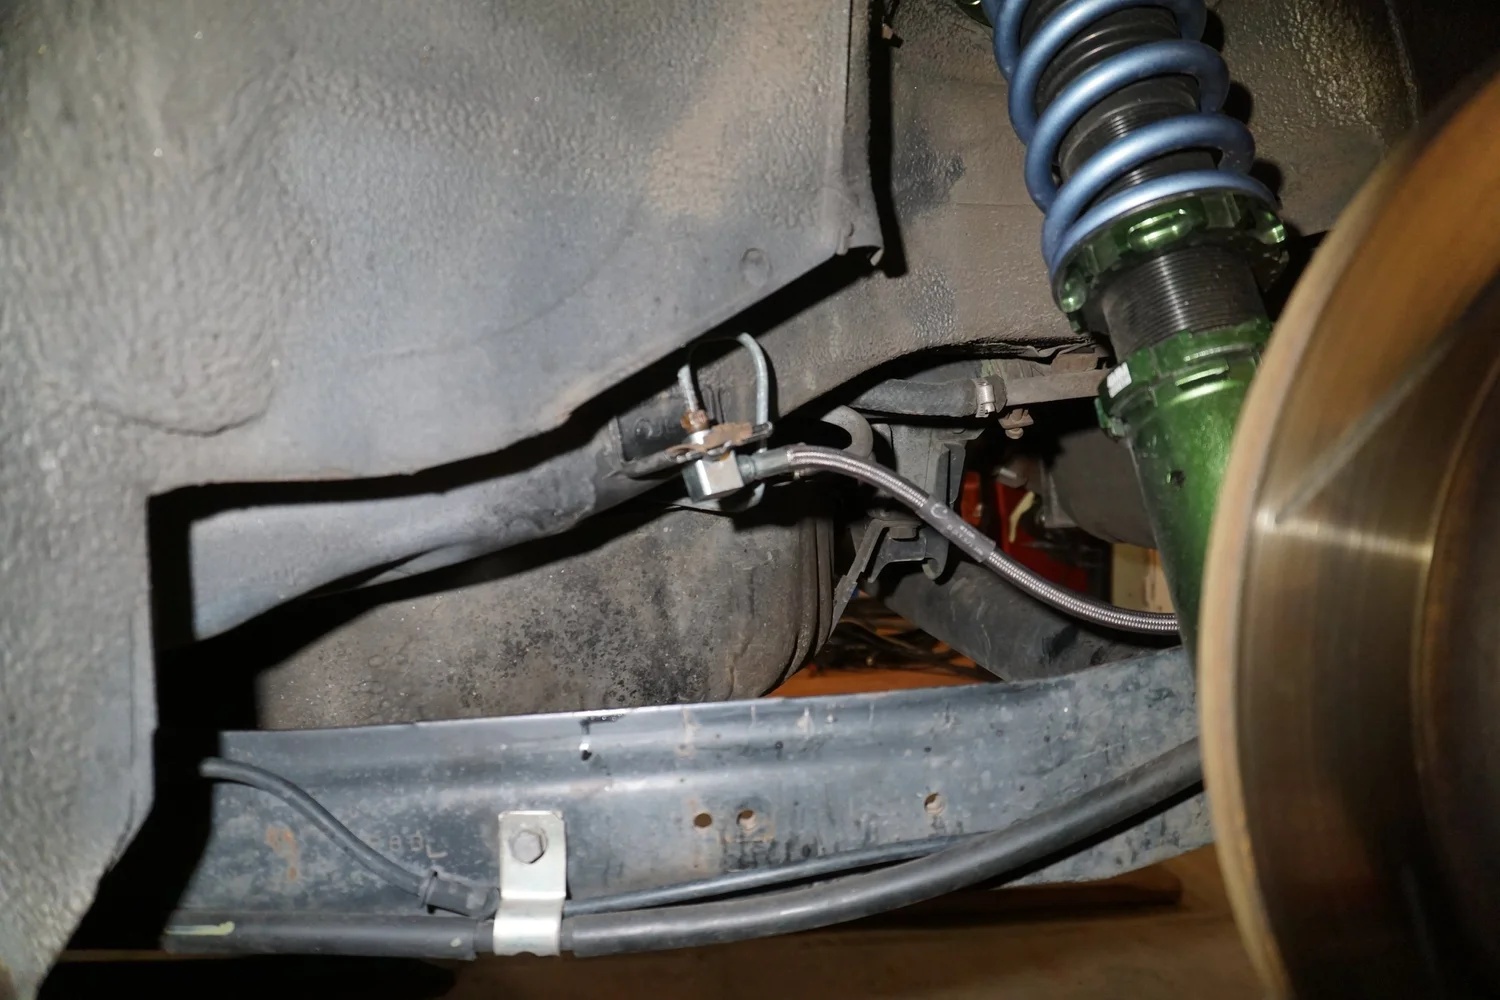
Last up were the new brake lines. I wanted to replace the old SS lines on the car for a couple of reasons, so I initially bought some Goodridge lines before remembering they wouldn't work with the Wilwoods, and I wanted to try something different in the rear. So I ordered new lines for the Wilwoods from Fastbrakes, which thankfully were a new and improved design. Then I worked with Crown Performance to make some custom lines for the rear. I wanted to move the front part of the line up and away from the trailing arm and RSB bracket, as I had smashed mine at one point, and I didn't want to do it again. I'm pretty happy with how it turned out! I also upgraded from my regular ATE DOT 4 fluid to some Motul RBF600.
More big news coming soon
I had to re-do my control arm bushing heat/oil shield, as it rotated all the way around when I torqued down the nut. I decided to drill a little hole in the control arm, hopefully it won't affect the strength of the arm
Excuse the blurry pic. Now I can take it on and off easily and it stays in the correct orientation.Next up was the 5th gen FSTB. Ever since I installed the 3.5 in my car I haven't had a FSTB since my old Stillen bar wouldn't fit. I bought a cheap Megan Racing bar a while back, but didn't want to install it (and re-drill the holes) until the new coilovers/camber plates were installed. With the Fortune Autos installed, I installed the bar, but there was interference with my hood and insulation. Sprinkling some flour on top of the bar confirmed where the problem was:
So I cut out the insulation in that area.
I drove around like that for a while, but when I checked on it later I saw there were marks on the bar from the hood, so I carefully cut out some sections from the hood reinforcements to get some more space.
And then got some black tape around the edges of the insulation since I was tired of it making a mess.
Problem solved!
Next up was an intermittent rough running issue, one that I had kind of diagnosed and fixed earlier, where the car would occasionally idle super right with the AFR between 9-10, and sometimes even stall out. I traced it to the wiring for the Q45 MAF, but after I jiggled them the problem went away for a long time. Well, the problem came back so I decided to properly fix it. The problem was that the wires going into the body-side connector for the Q45 MAF had aged out, so the sheathing was cracked and the wires had started to break.
I wanted to reuse the factory connector, but the pins for it are some special type, and I couldn't reuse them since they were so delicate/brittle.
So I did the next best thing and just ran direct female terminals right to the MAF. I don't love it, but I didn't know what else to do.
But so far the repair has worked and the car is running great, so I'm quite happy.
Last up were the new brake lines. I wanted to replace the old SS lines on the car for a couple of reasons, so I initially bought some Goodridge lines before remembering they wouldn't work with the Wilwoods, and I wanted to try something different in the rear. So I ordered new lines for the Wilwoods from Fastbrakes, which thankfully were a new and improved design. Then I worked with Crown Performance to make some custom lines for the rear. I wanted to move the front part of the line up and away from the trailing arm and RSB bracket, as I had smashed mine at one point, and I didn't want to do it again. I'm pretty happy with how it turned out! I also upgraded from my regular ATE DOT 4 fluid to some Motul RBF600.
More big news coming soon
Last edited by 95maxrider; Sep 11, 2023 at 08:14 AM.


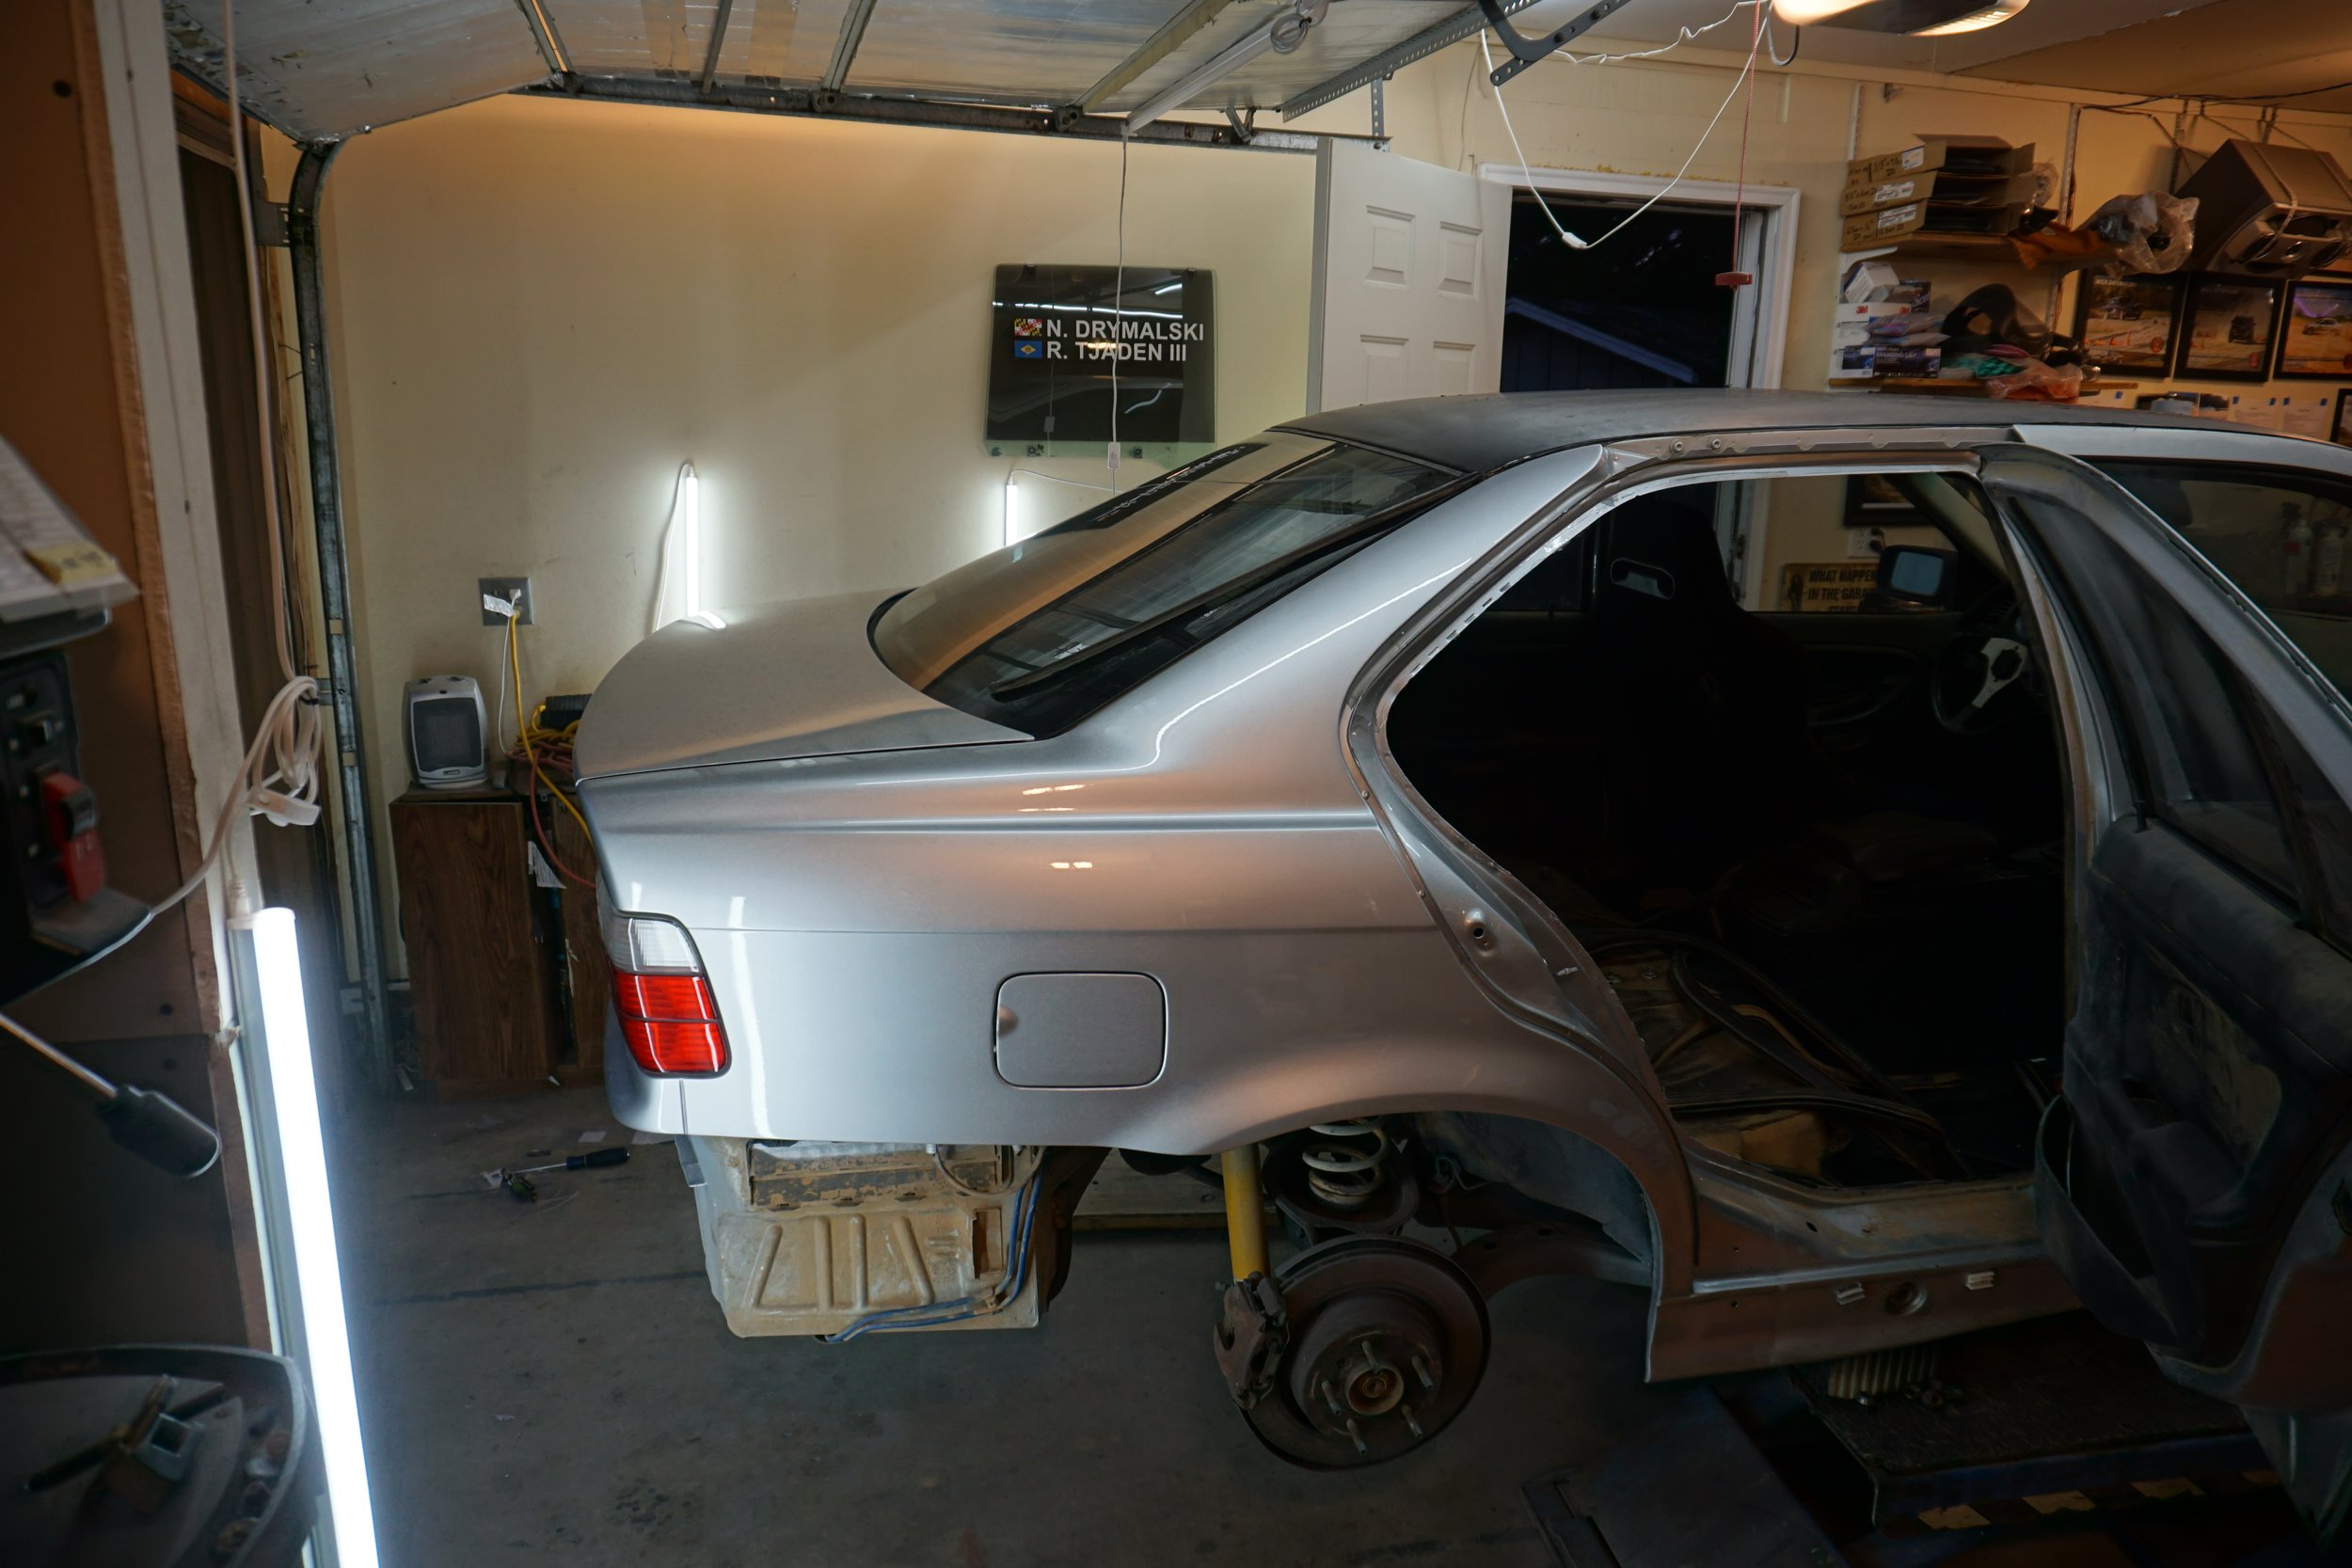
Alright, time for the big (to me) news: I successfully (but partially) bent my rear beam (closer) to zero toe!
I've wanted to have this done for close to 15 years now, but I wasn't about to drive out to California to have the original developer of the idea do the project, and the guy from the Sentra forum who used to travel and do it stopped doing that, so I pretty much gave up on the idea. I learned a year or two ago that 2J Racing had started to offer the service, so I thought about driving all the way down there again to have them do it. But that's a long drive, they charge like $500+ for the work, and they don't exactly have a great reputation at this point. I found a local race shop that was down to do the work and they're only an hour from me, but again, it was going to cost $600+ pretty easy. So in the end, I decided I would try to do it myself. What's the worst that could happen?
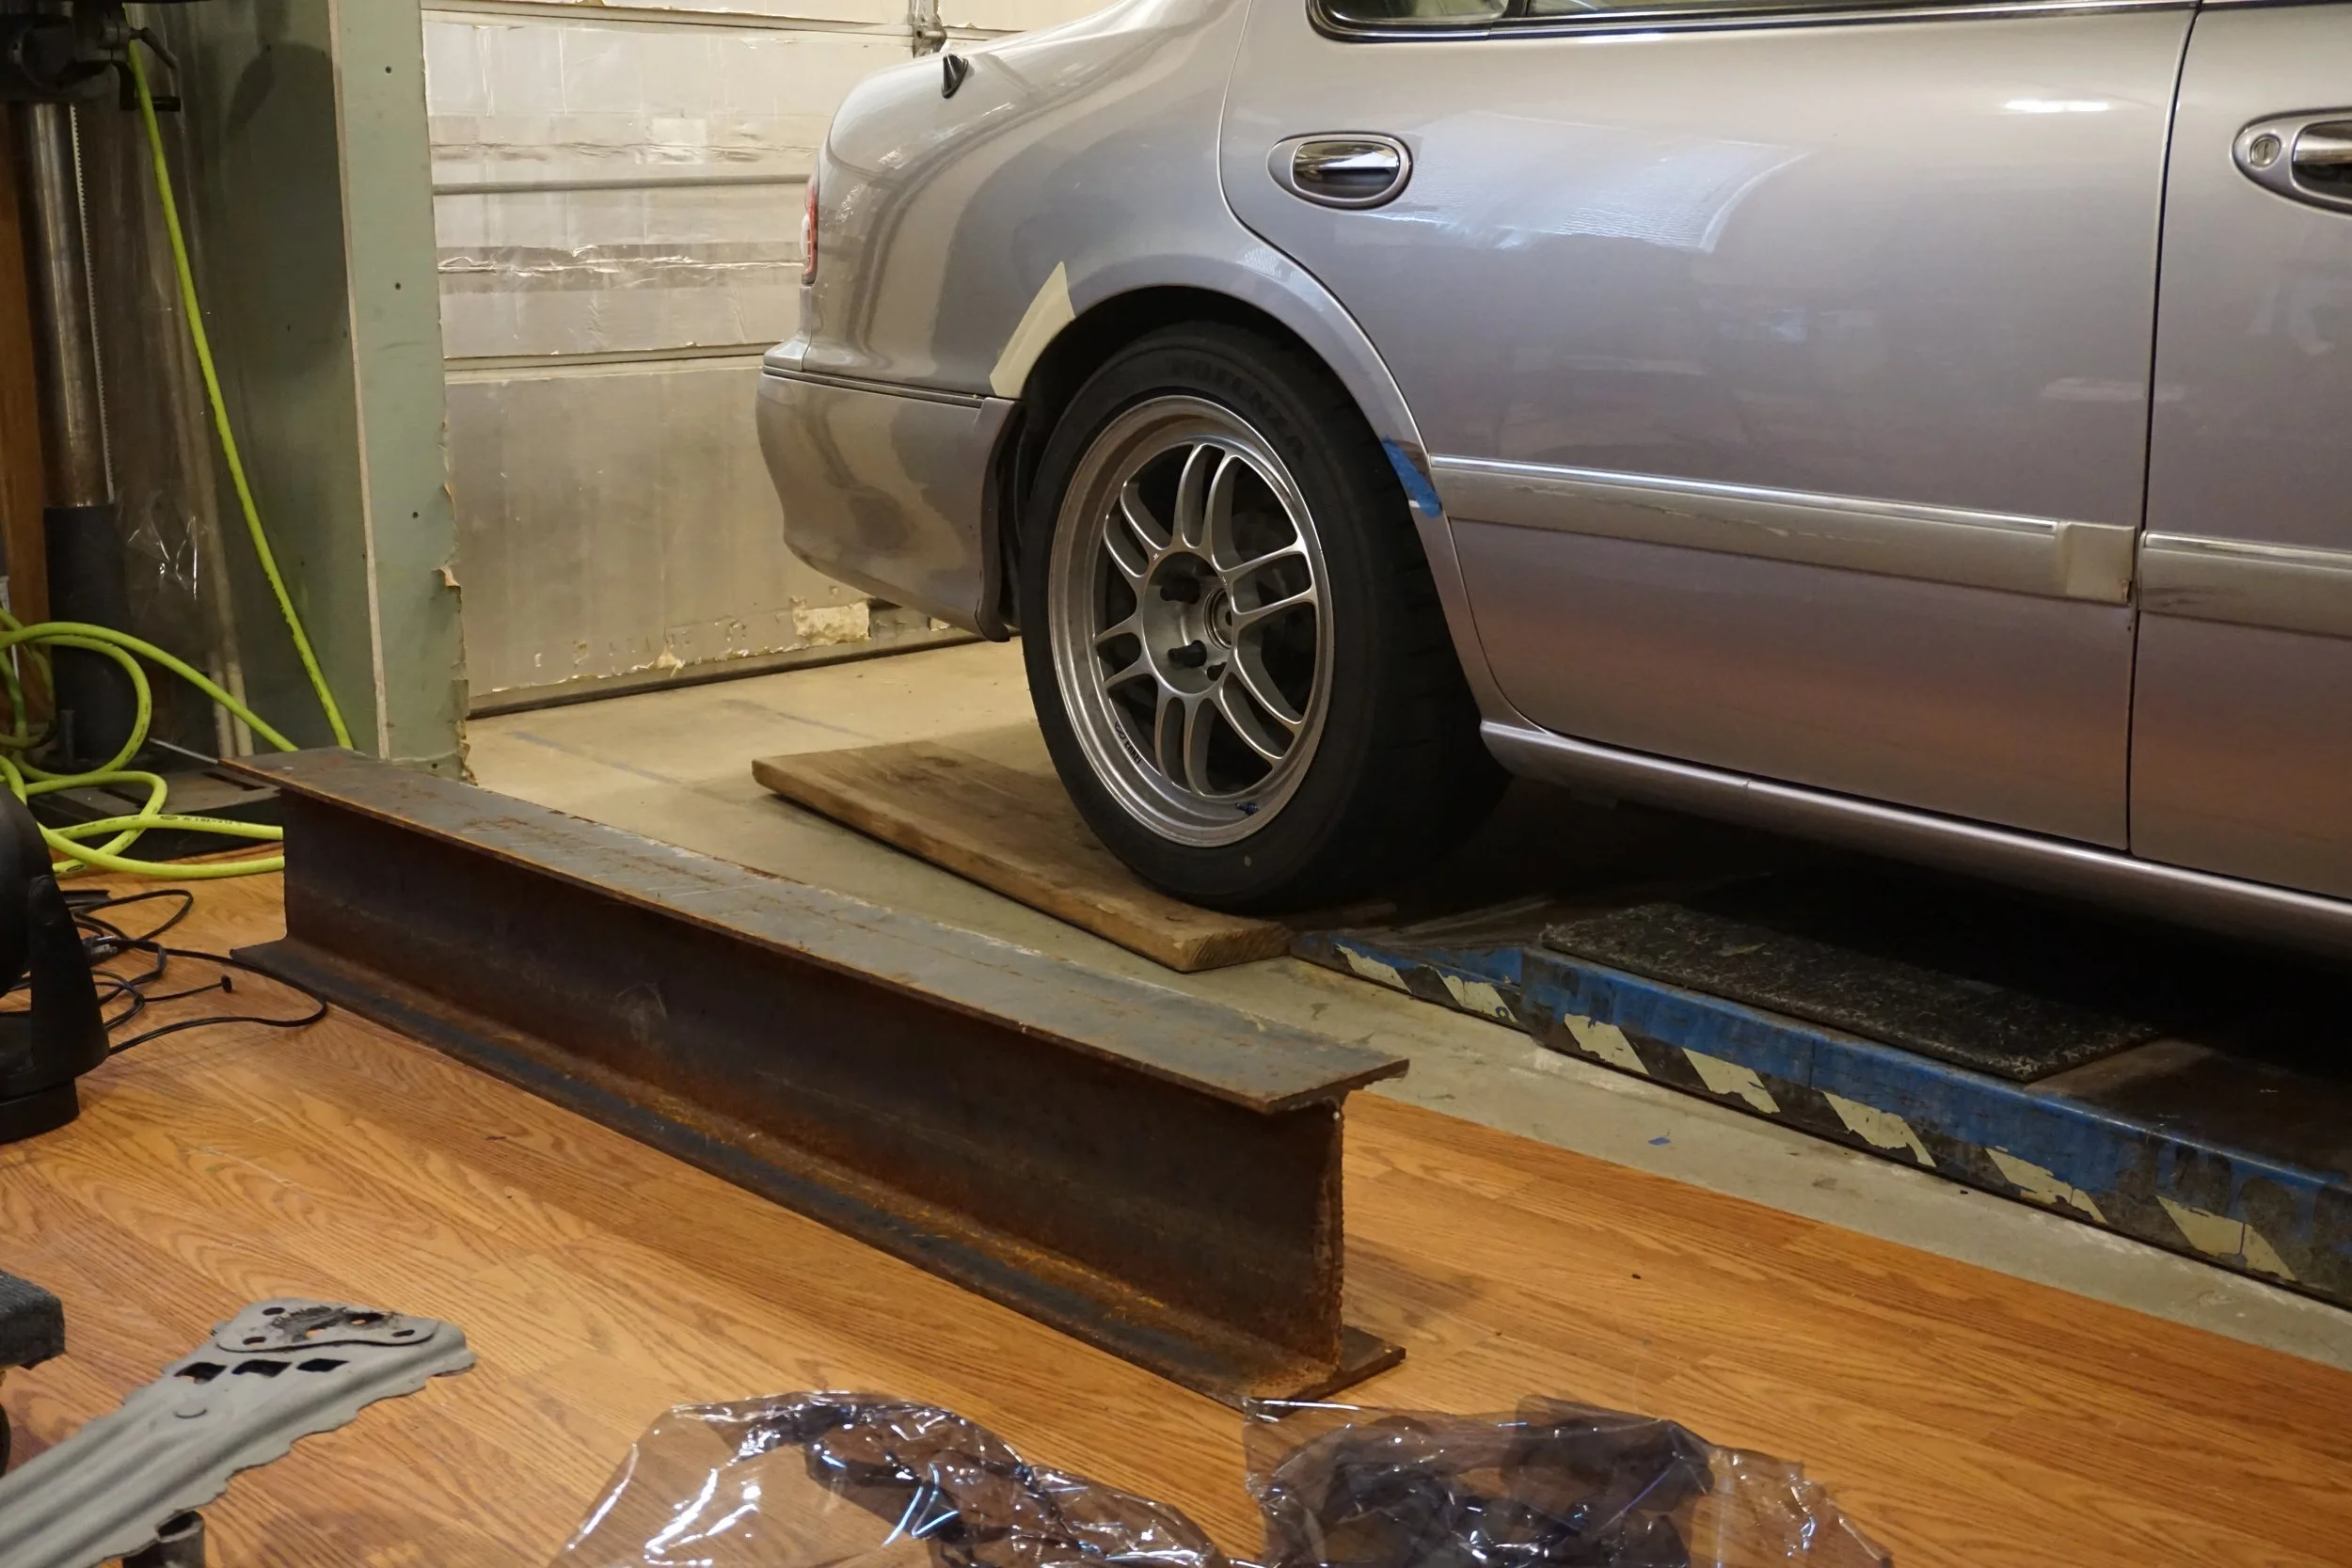
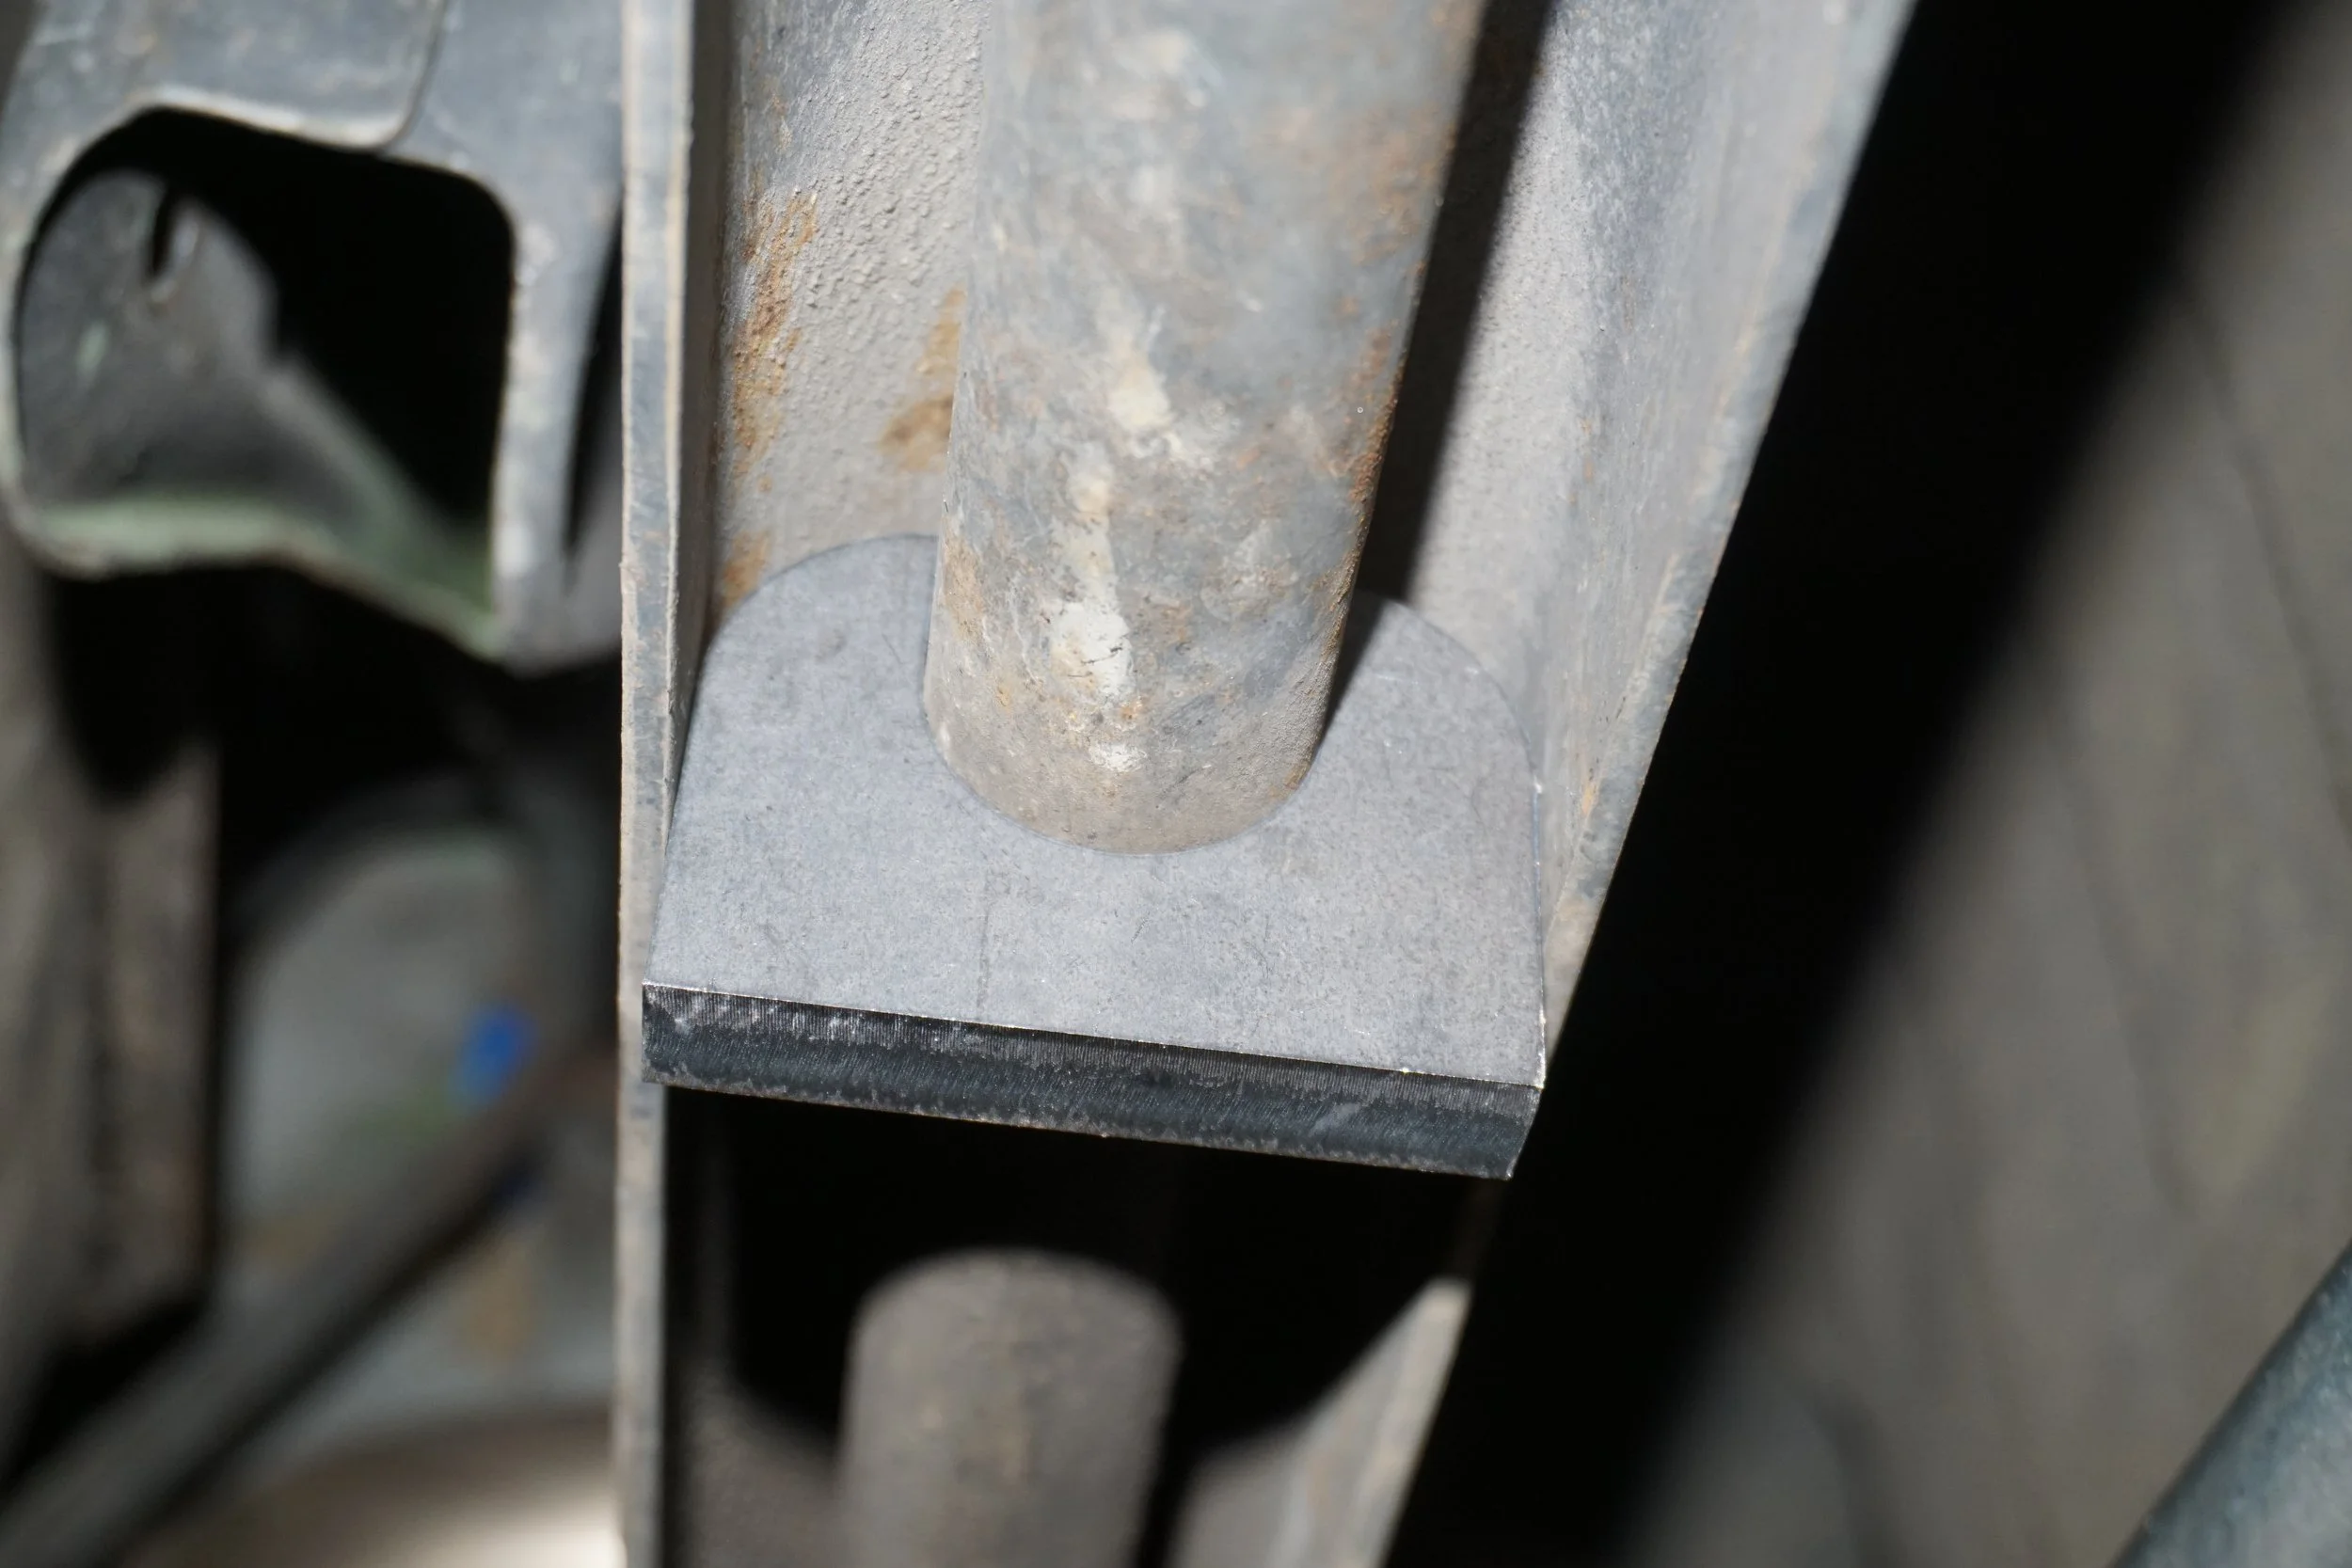
First, I needed the supplies to do the job. I found some super old pictures that showed how the guy in California did it to one of Mike Kojima's Sentras, so I knew I would need some strong chains, a bottle jack, and some sort of I beam. Working with schmellyfart, he developed some steel spacers/supports to fit inside the beam and around the inner torsion (?) bar, so that the outer upside down U structure wouldn't collapse/bend when force was applied with the jack and chains. The goal is to bend the inner torsion bar along with the outer structure. I then had to track down some sort of beam to serve as the strong base for the jack and chains, and it had to be much stronger than the rear beam on the car. Buying something long enough and strong enough new was going to be very expensive, so I looked for something on the used market. I got lucky and found the owner of a construction company an hour away from me who had a number of different beams for sale, and came home with this monstrosity for less than $100.
Here are the parts schmelly came up with, along with my cut up pizza pans to use as turn plates for doing alignment work.

Here's how they fit up in the beam. I placed two at the jack point, and two at each chain point.
And I bought a DIY alignment kit. Measuring toe is quick and easy!
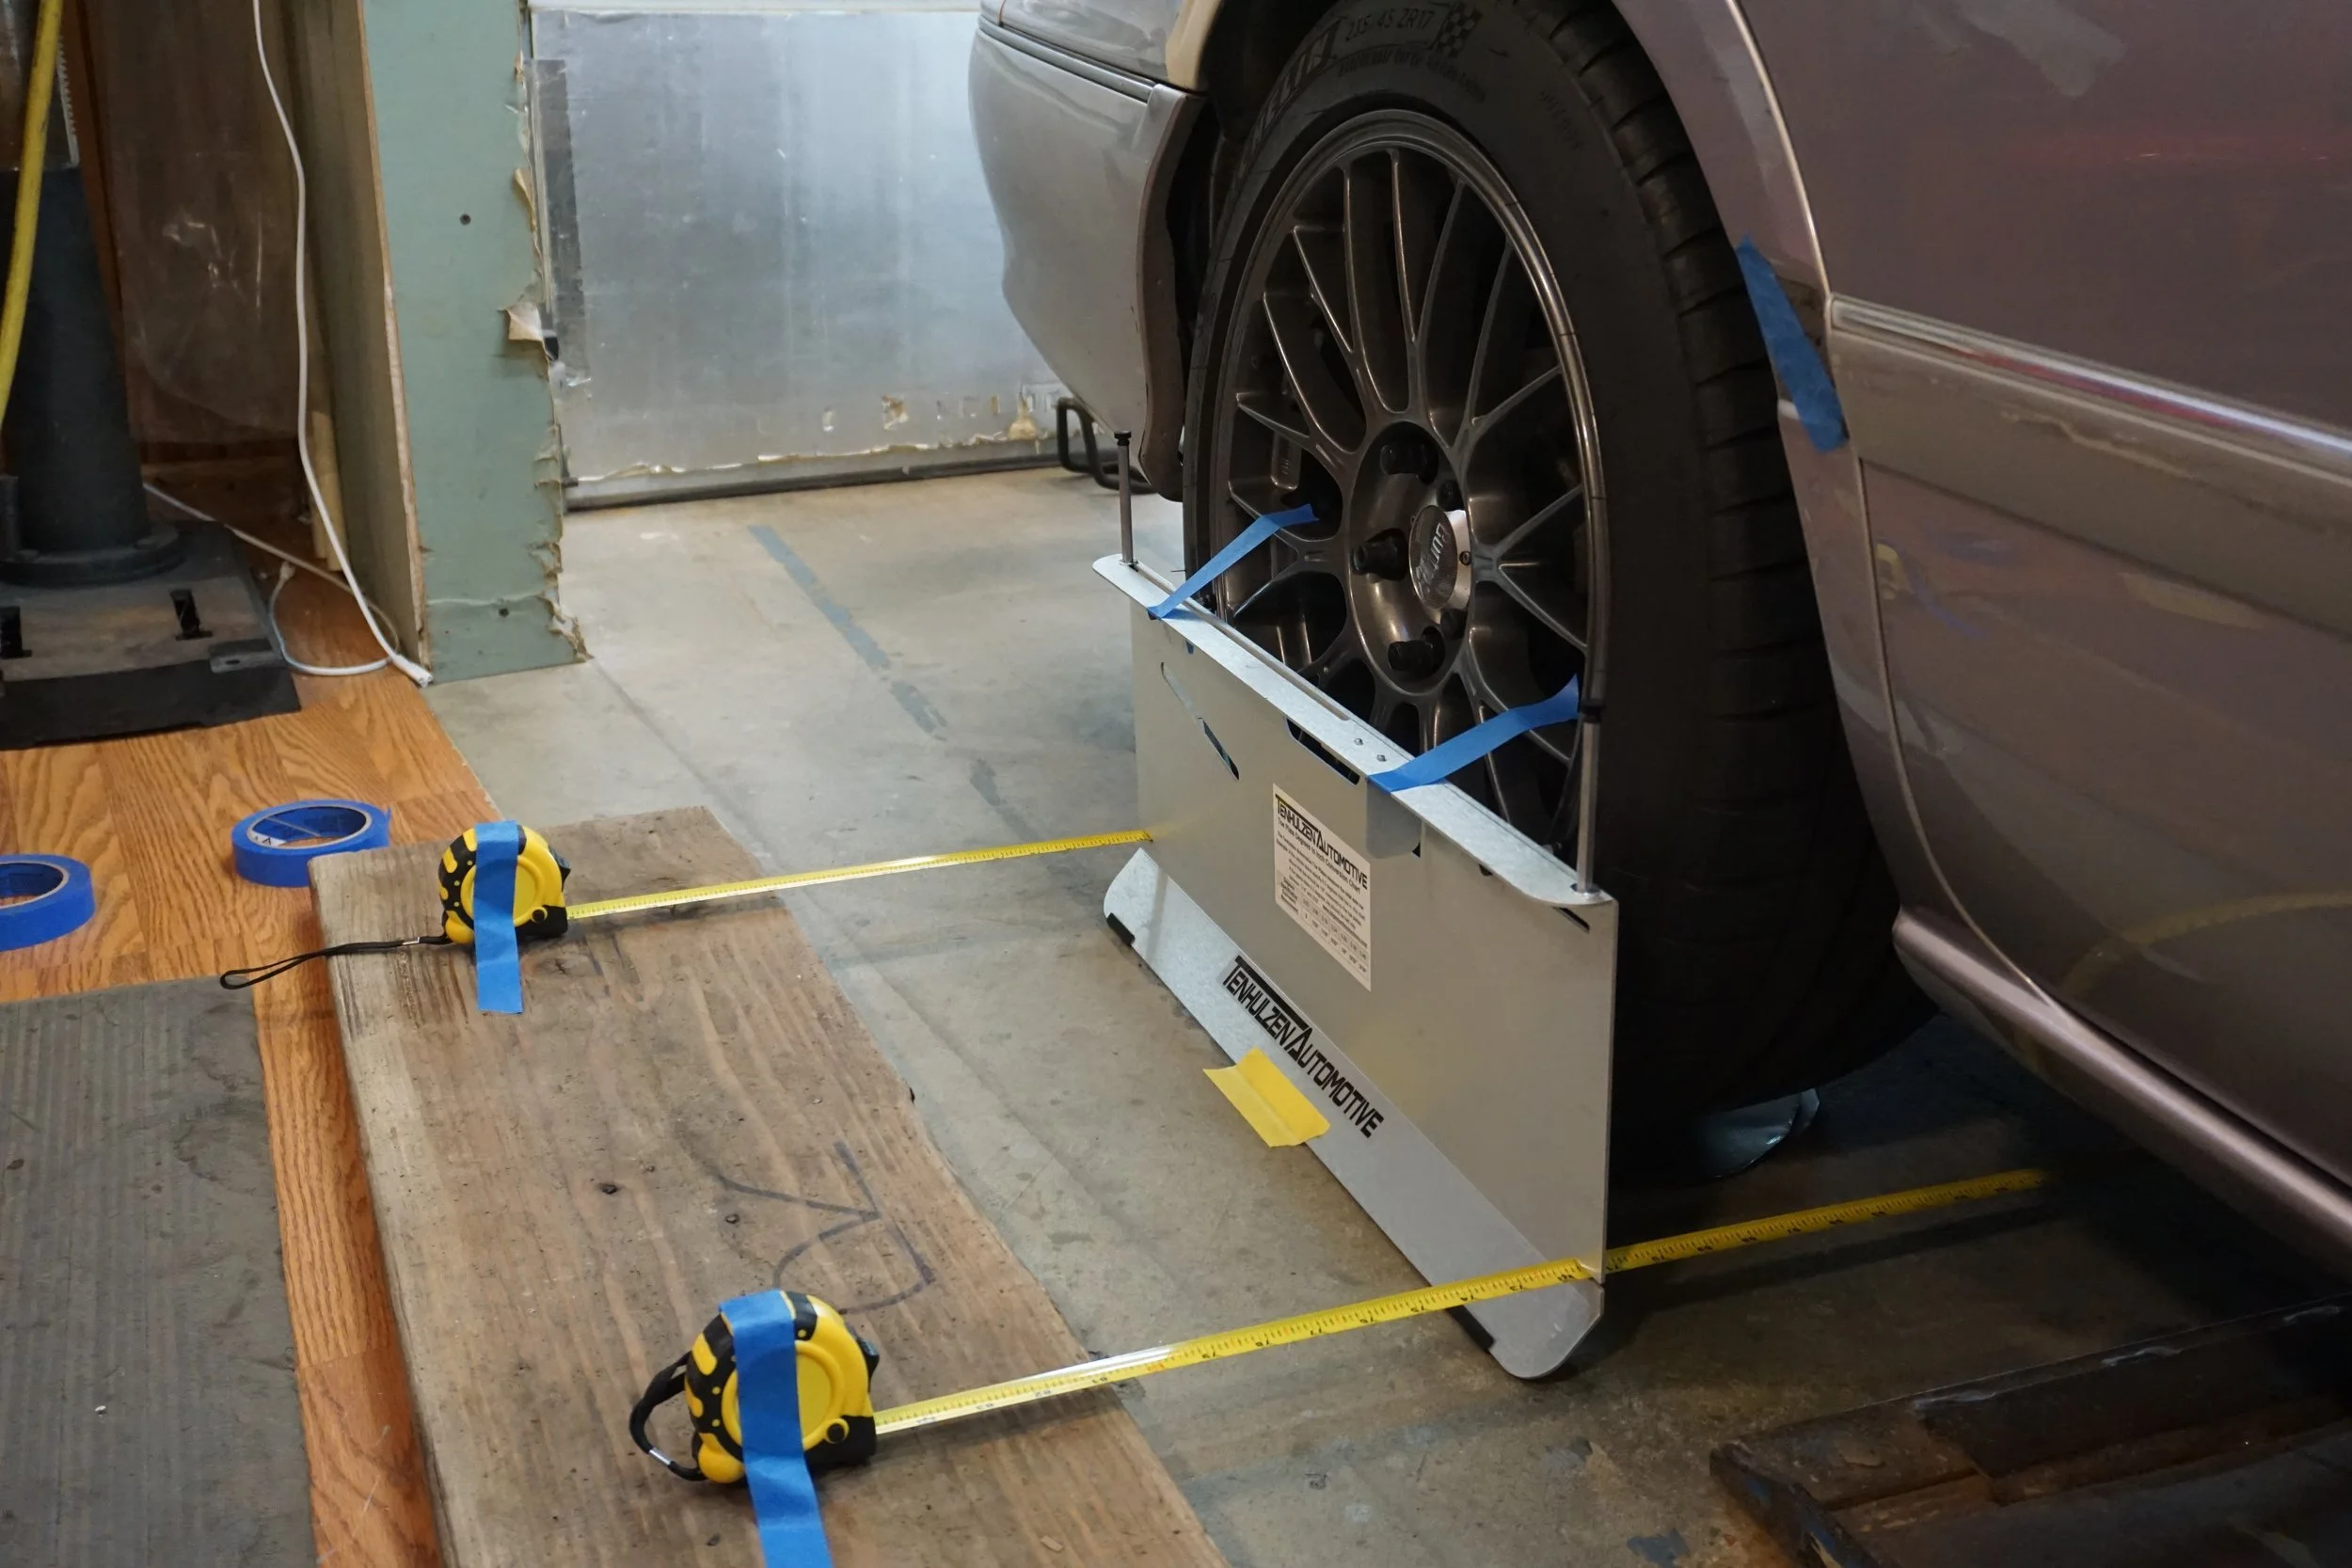
I took my before measurements, and compared them to a recent alignment I got. The alignment printout showed I had 0.42* total toe in, or almost 3/16". My measurement showed 3/16", success!
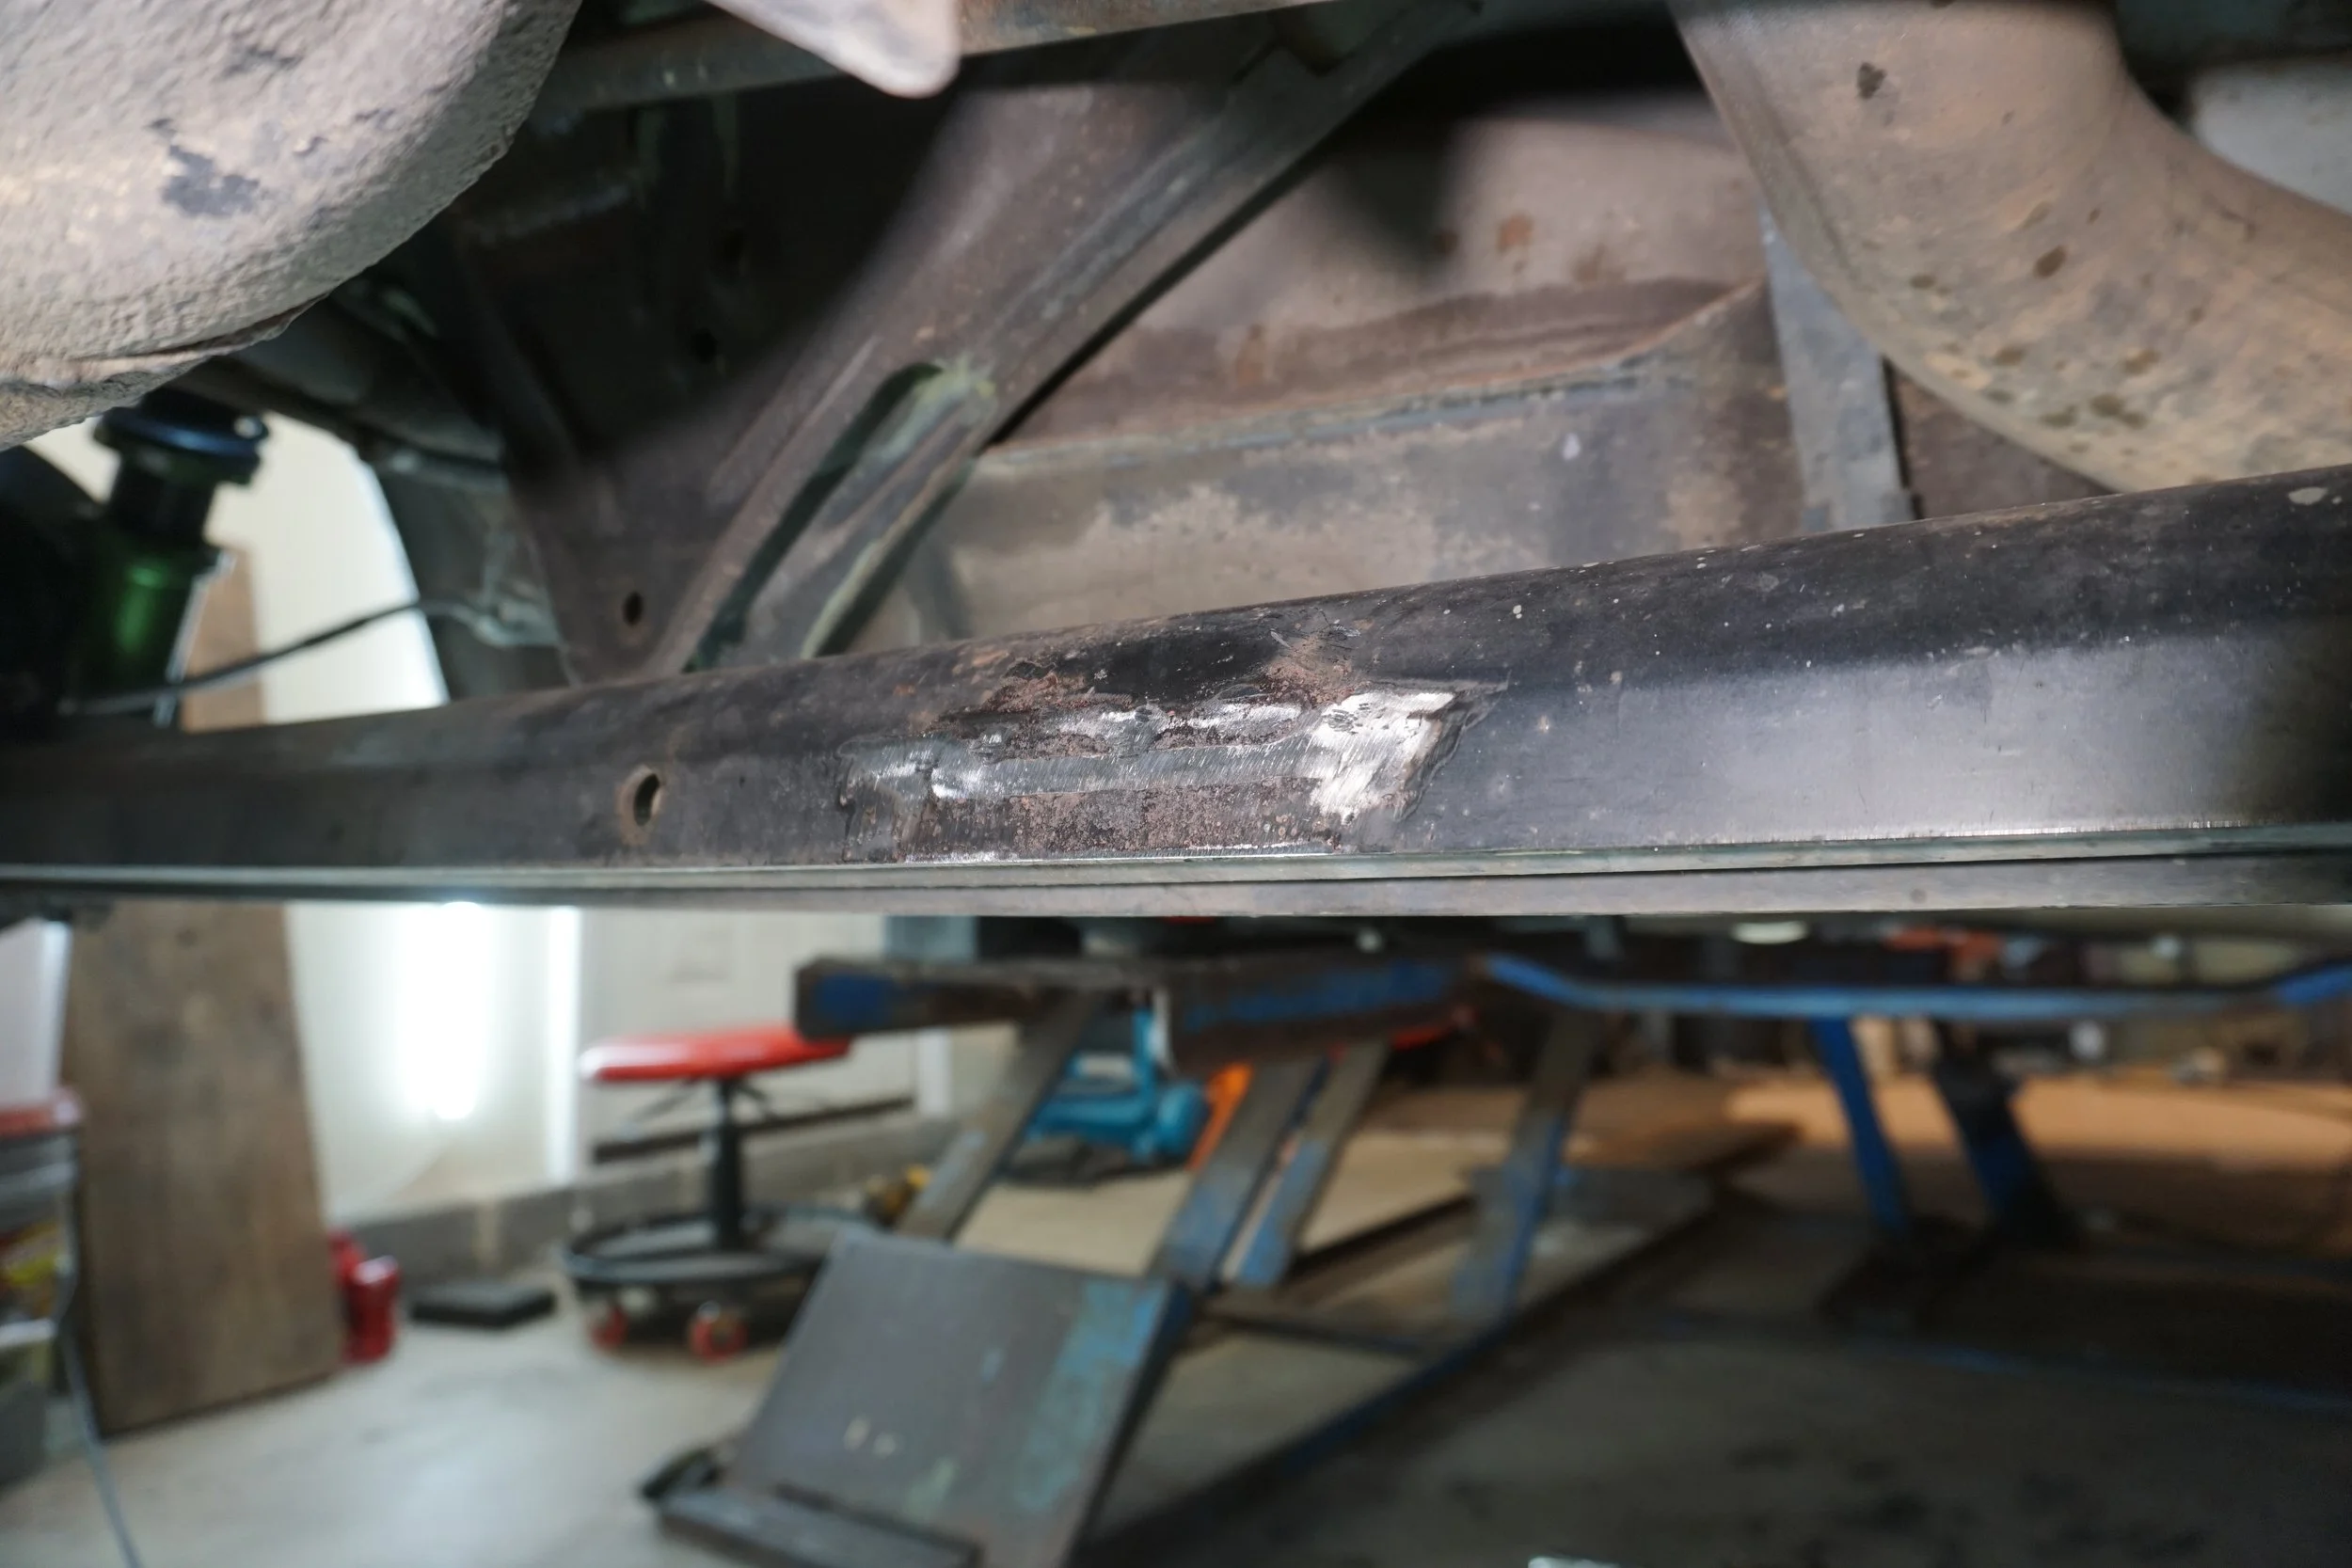
Before I got started, I cut off the remaining bits of the OEM brackets for the Scott-Russel Linkage. I wanted to make sure those areas weren't any stronger/stiffer than the rest of the beam, so the beam could bend easily and evenly. I also just wanted to get rid of them since they appeared to be great at capturing debris and thus prone to rusting.
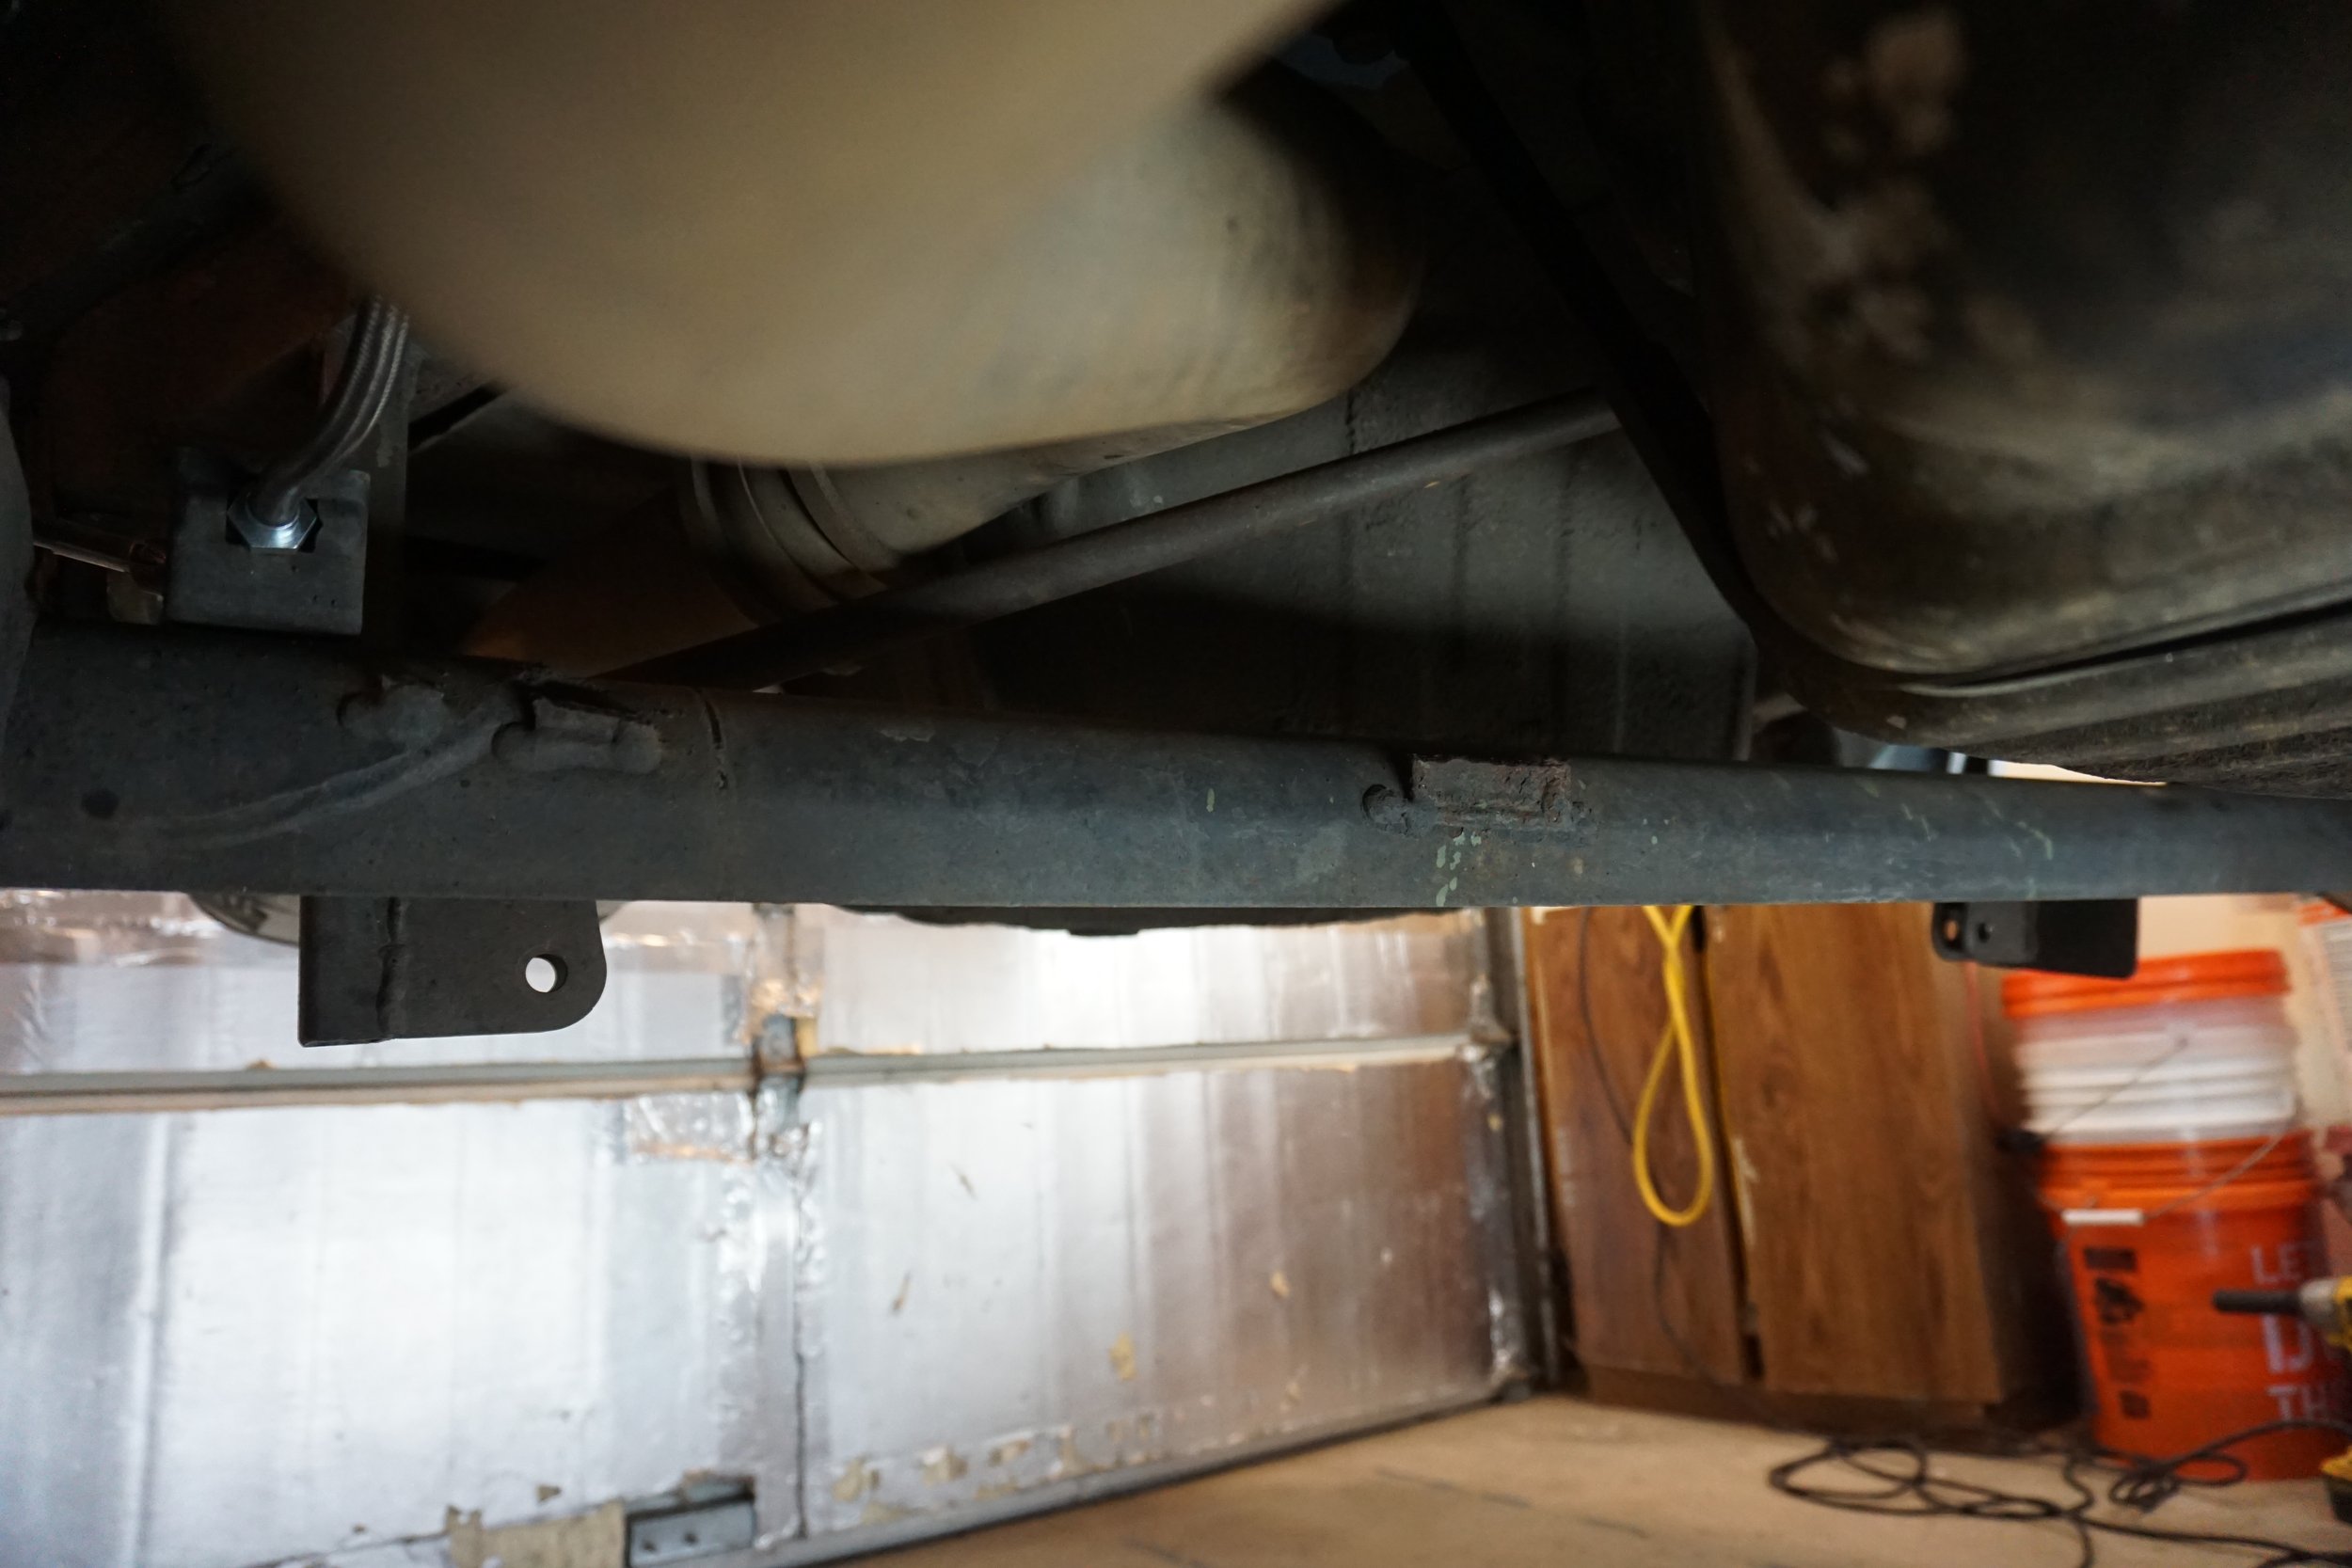
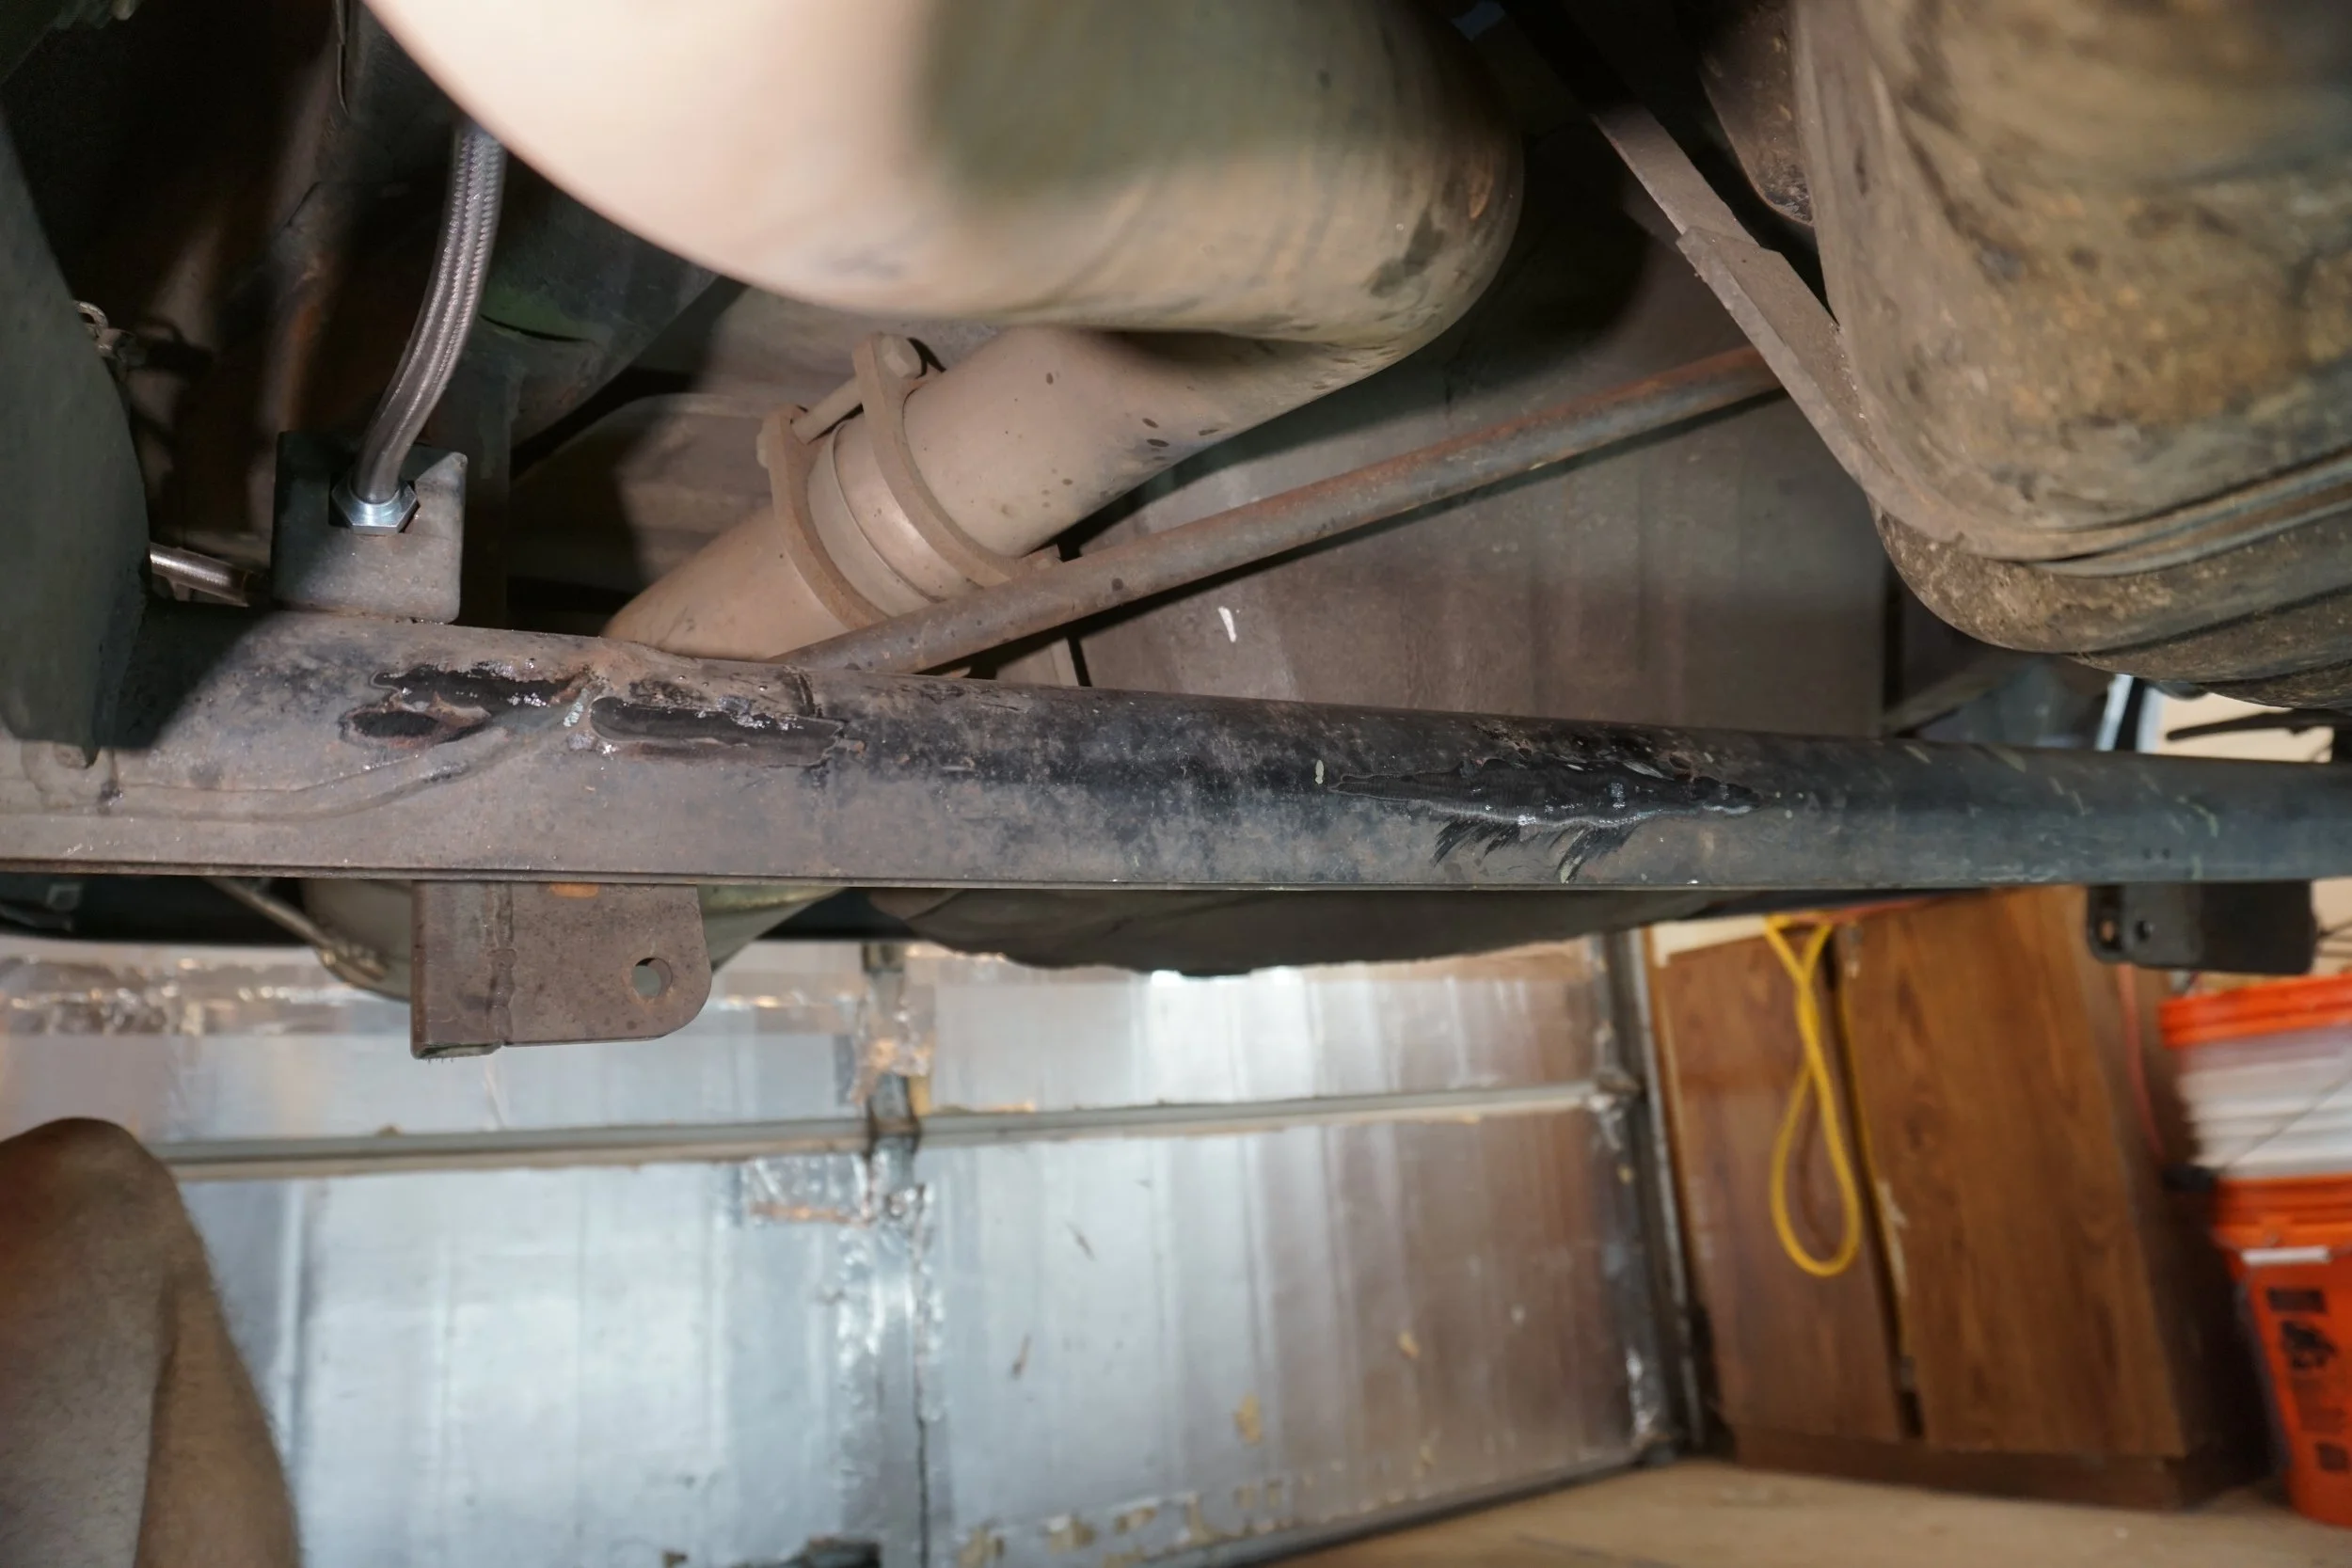
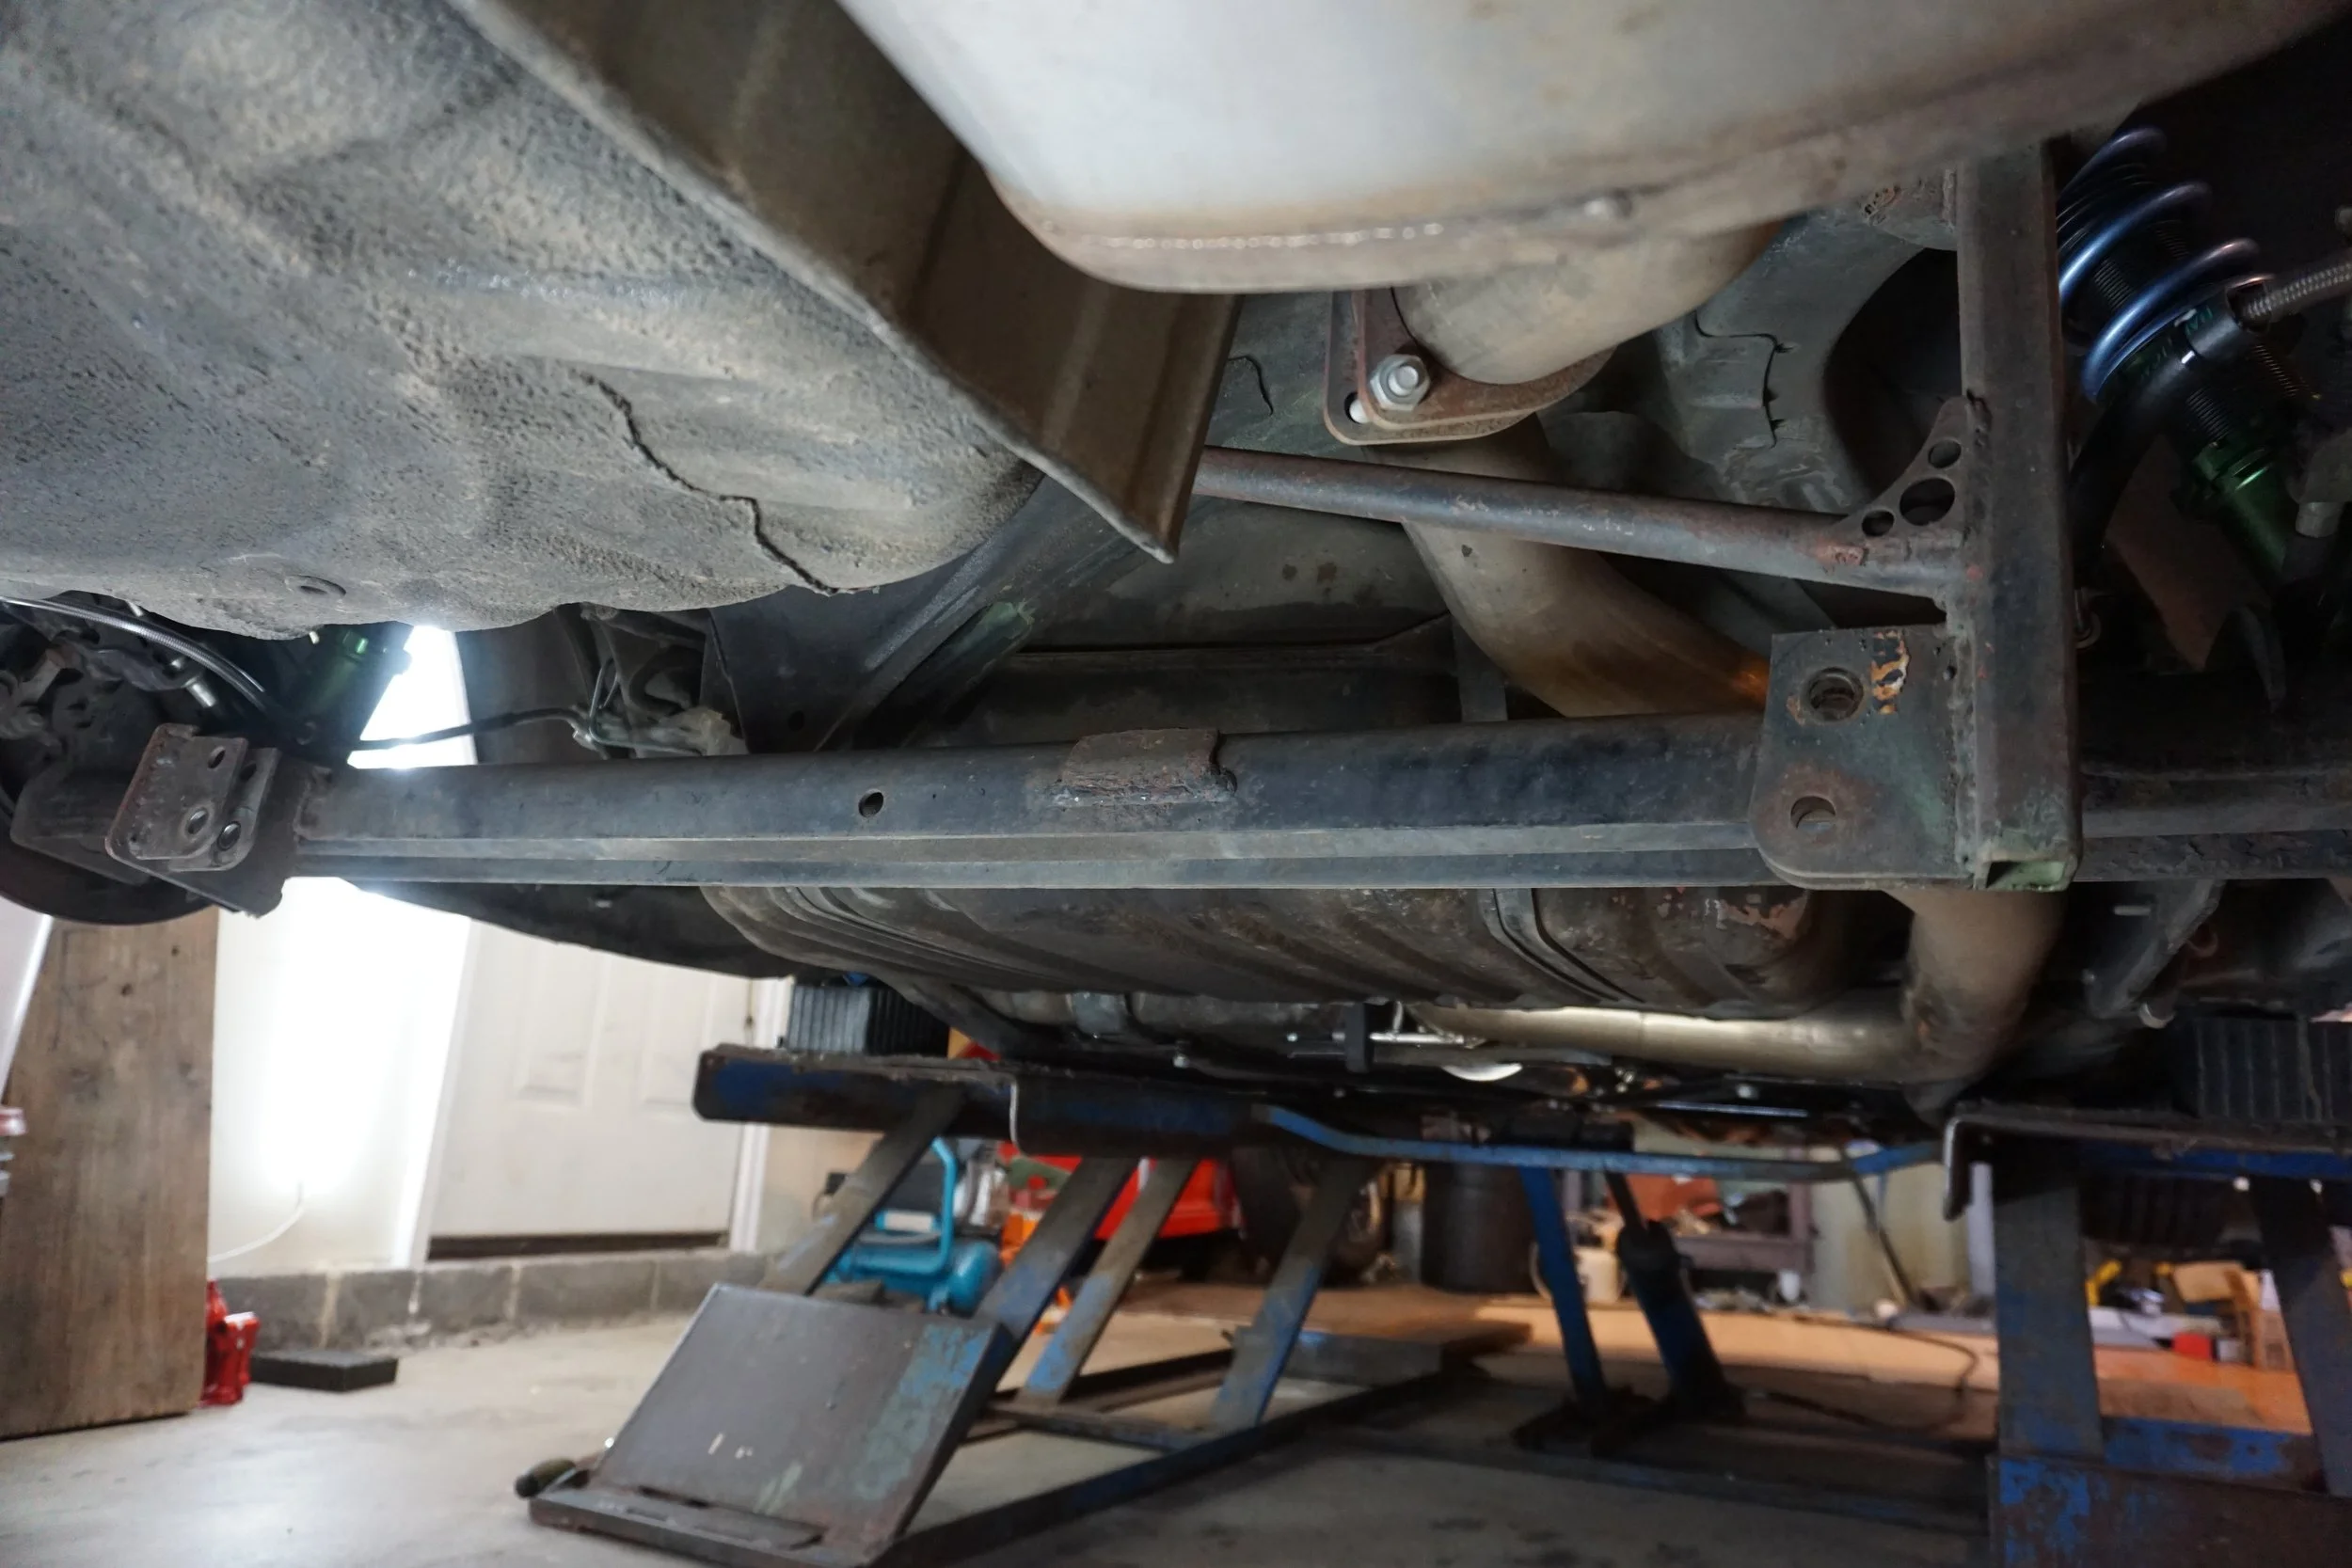
I plan on eventually pulling the whole rear beam from the car and sand blasting it, as there is surface rust and some pitting.
Anyways, back to the job at hand. Let's set this up! I had to disconnect the panhard rod, as it was directly in the way of the bottle jack, and I had to disconnect the rear shocks, as I needed the beam to droop a few inches so it would be lined up with the I beam. This meant the only things attaching the beam to the car were the front trailing arm bushings, so the beam was able to move around quite a bit, which I would later learn was not so great.

I covered up the chains as best I could with a few heavy carpets just in case they snapped.
And then I bent. Over and over again, taking time to measure the changes so I wouldn't bend it too far. But I was running into a problem: the beam was rotating upwards a bit as I pumped up the jack, leading to the jack eventually slipping off. Not only was this somewhat terrifying, as I was lying under the car working the jack, but it meant much of the force of the jack wasn't going into bending the beam. But I kept bending and taking measurements, and it appeared as if I was making progress. I'll skip over some details and just say I eventually stopped, and took the car in for another alignment, as the one I got two months ago (after installing the new coilovers and camber plates) was only a very partial alignment, just enough to even out the toe and make the car drive straight. But before I took the car in, I tested out the alignment plates and tried to get the front of the car close to what I want, to save time and expense when I was on the alignment rack.
Well, it turns out my home alignment was on point in terms of camber, as the shop only had to make a small adjustment on one side, the other was perfect. And in a welcome surprise from two months ago, my caster was perfectly even side to side, even if it wasn't quite as high as I had hoped it would be. They did have to adjust the toe quite a bit, because while my tools can tell me total toe, it can't tell me if the wheels are actually pointed straight. In the end, I walked away with the best alignment my car has ever seen. The most camber ever, the most caster ever (and also perfectly even for the first time), and my normal amount of toe out up front. But I was most interested to see what happened in the rear. Turns out I had gotten rid of 1/3 of my toe in, and I went from 0.42 total toe in to 0.28! The beam bending works!
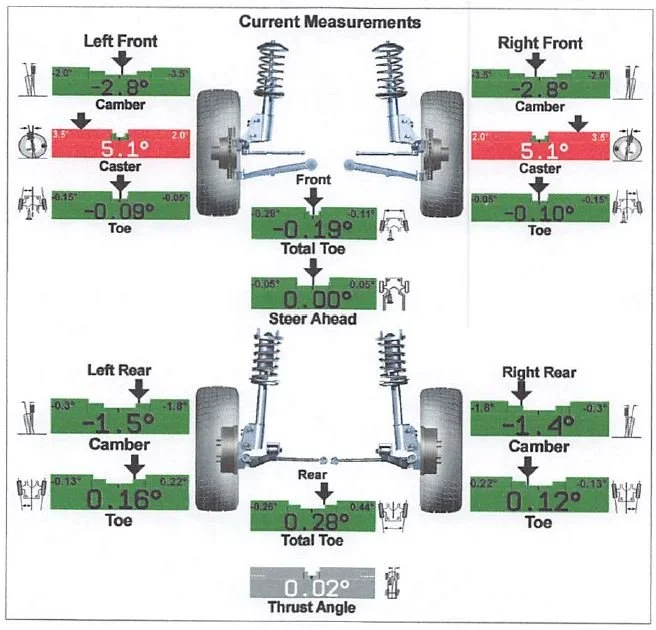
I was hoping to get 6* of caster up front, since I have both the added caster control arm bushings, plus the camber/caster plates, but 5.1* is still about 0.5* better than I had before, so I can't complain. Considering that these cars come with something like 2.8* from the factory, it's a very welcome improvement. So there's still more work to do on the rear beam, and Schmelly has an idea or two on how to keep the beam from rotating so much, so I'll be revisiting this in the future. But for now, the car feels great, and it performed very well at the last race.
Now, time for some other small things.
When I was working on the coilovers and camber plates, I realized that the ground cable I had running from the intake manifold to the shock tower probably wasn't actually doing anything, since I had it on top of my old FSTB bracket, so it wasn't really grounded to the chassis. I decided to make a new cable and give it a proper ground location on the body of the car, so I ground off some paint from lower down on the tower around an existing bolt hole and put it there. It could have been my imagination, but the car seemed to idle smoother after I did this.

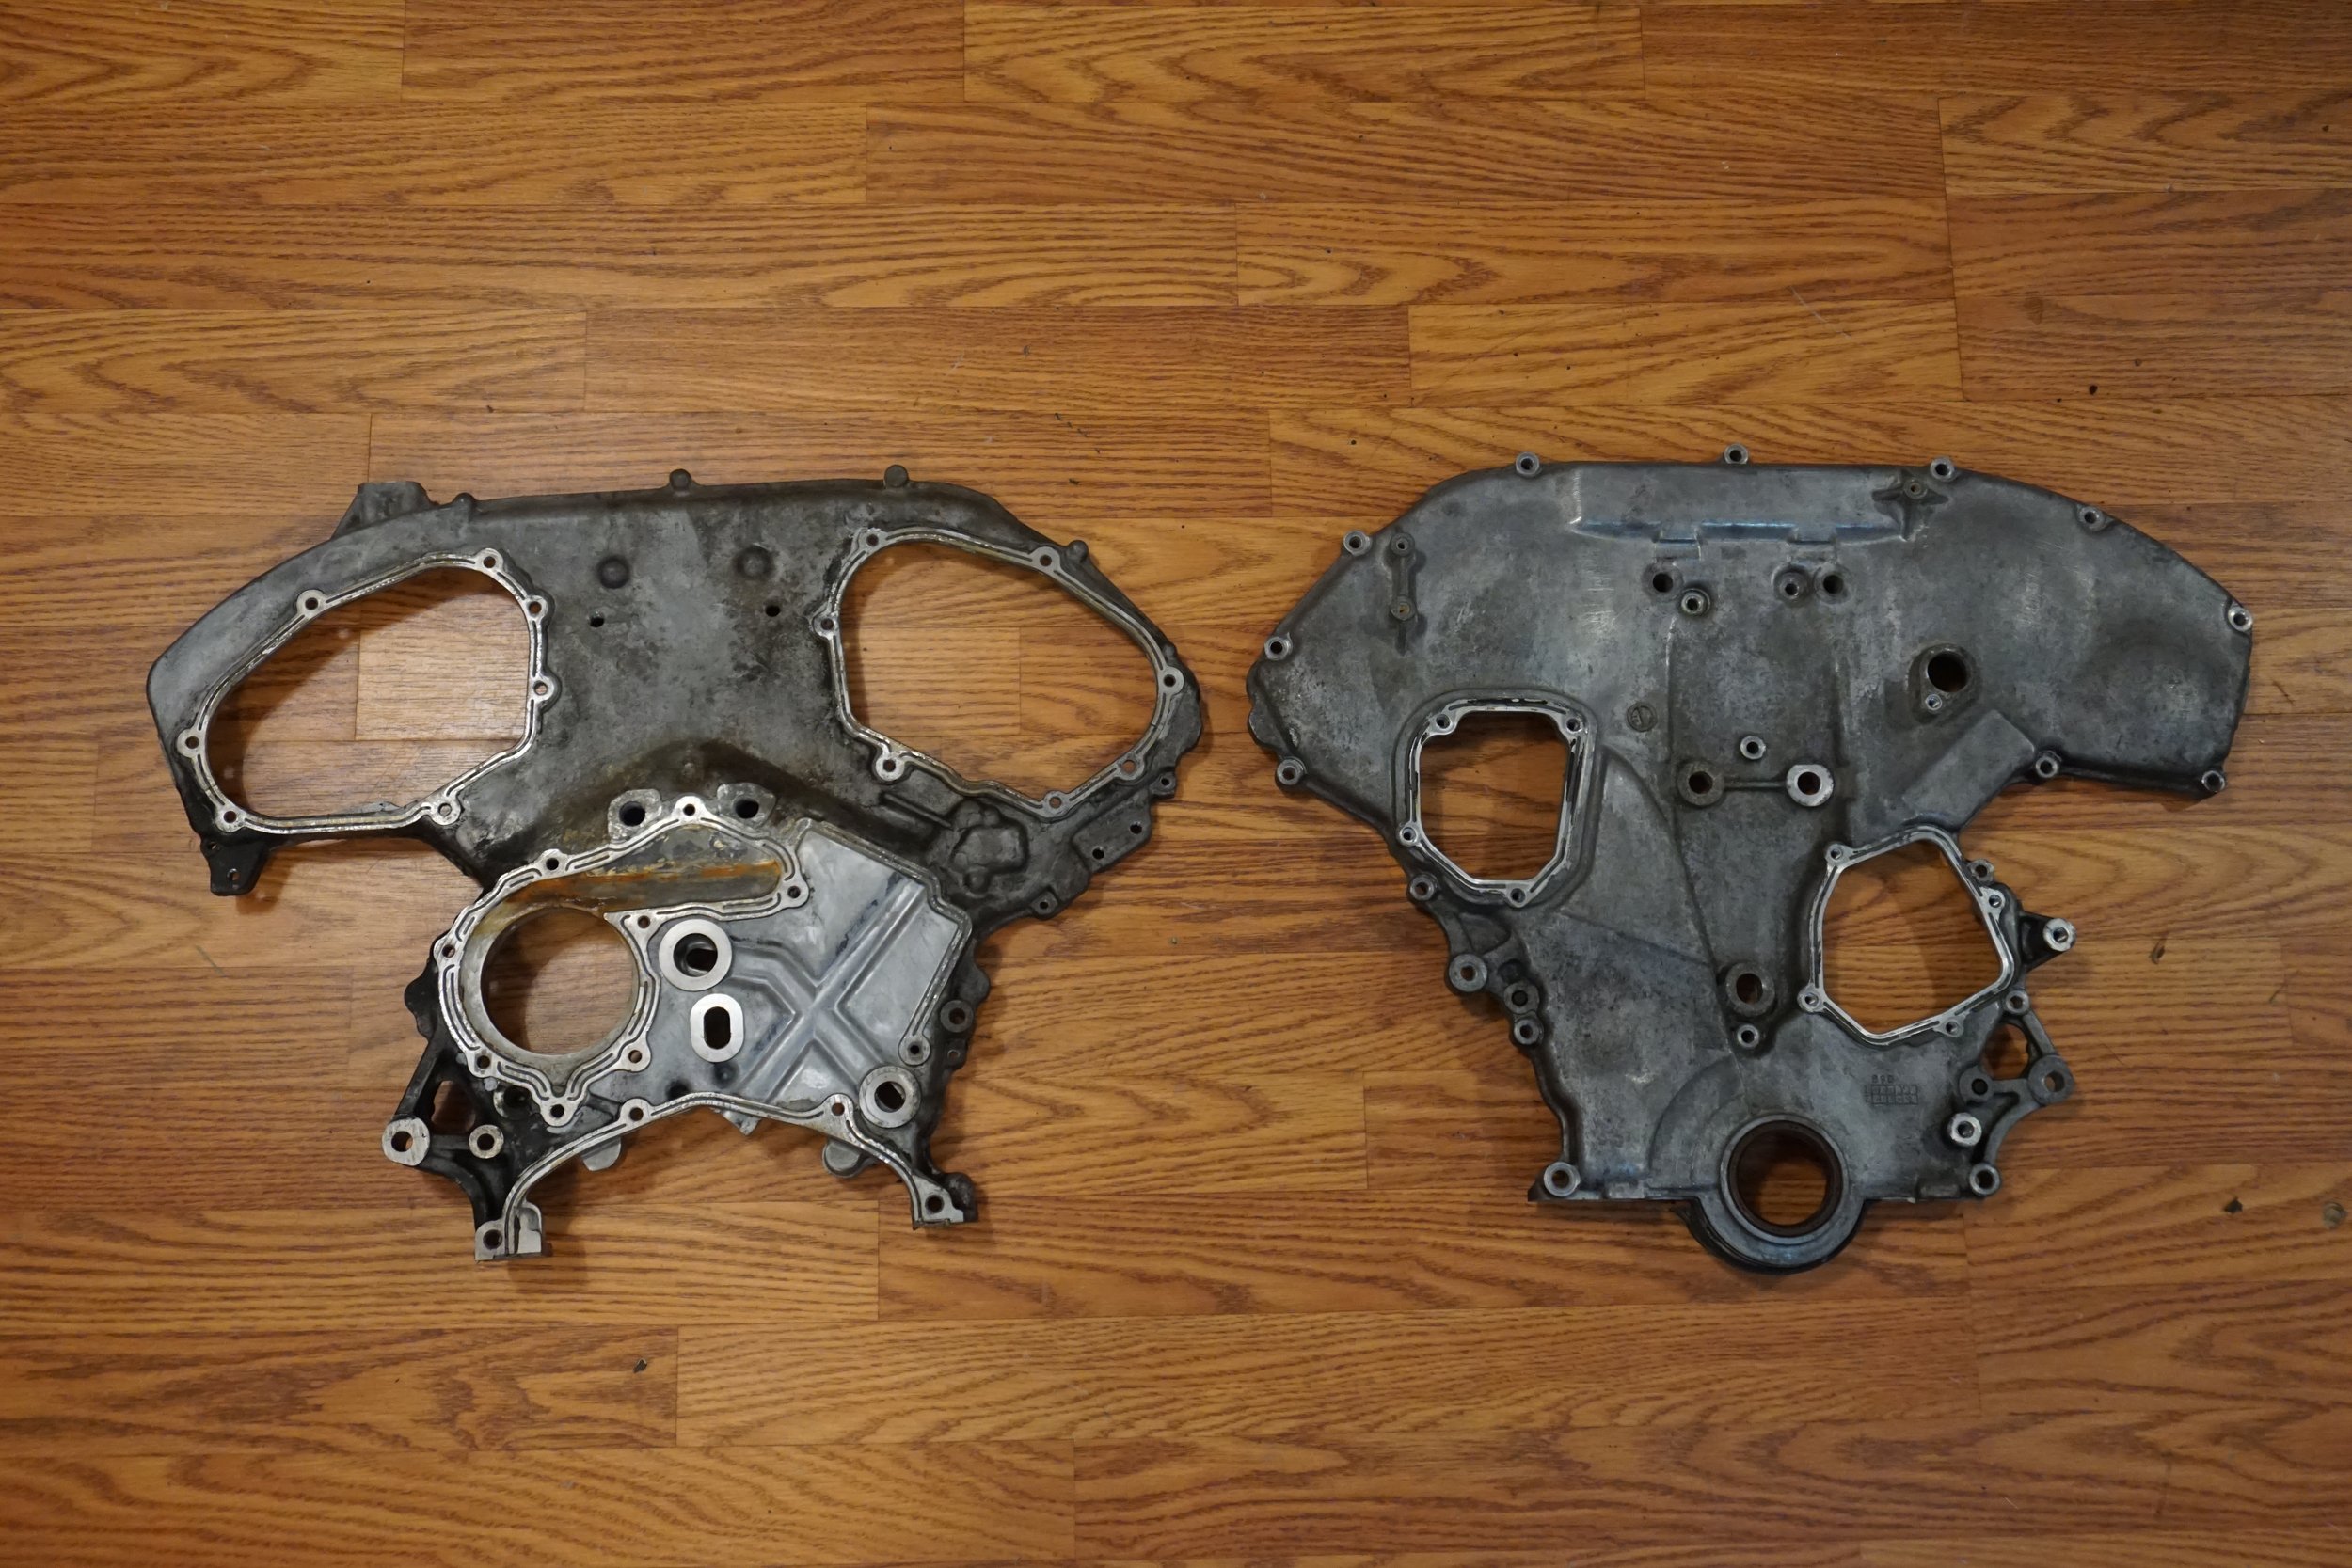
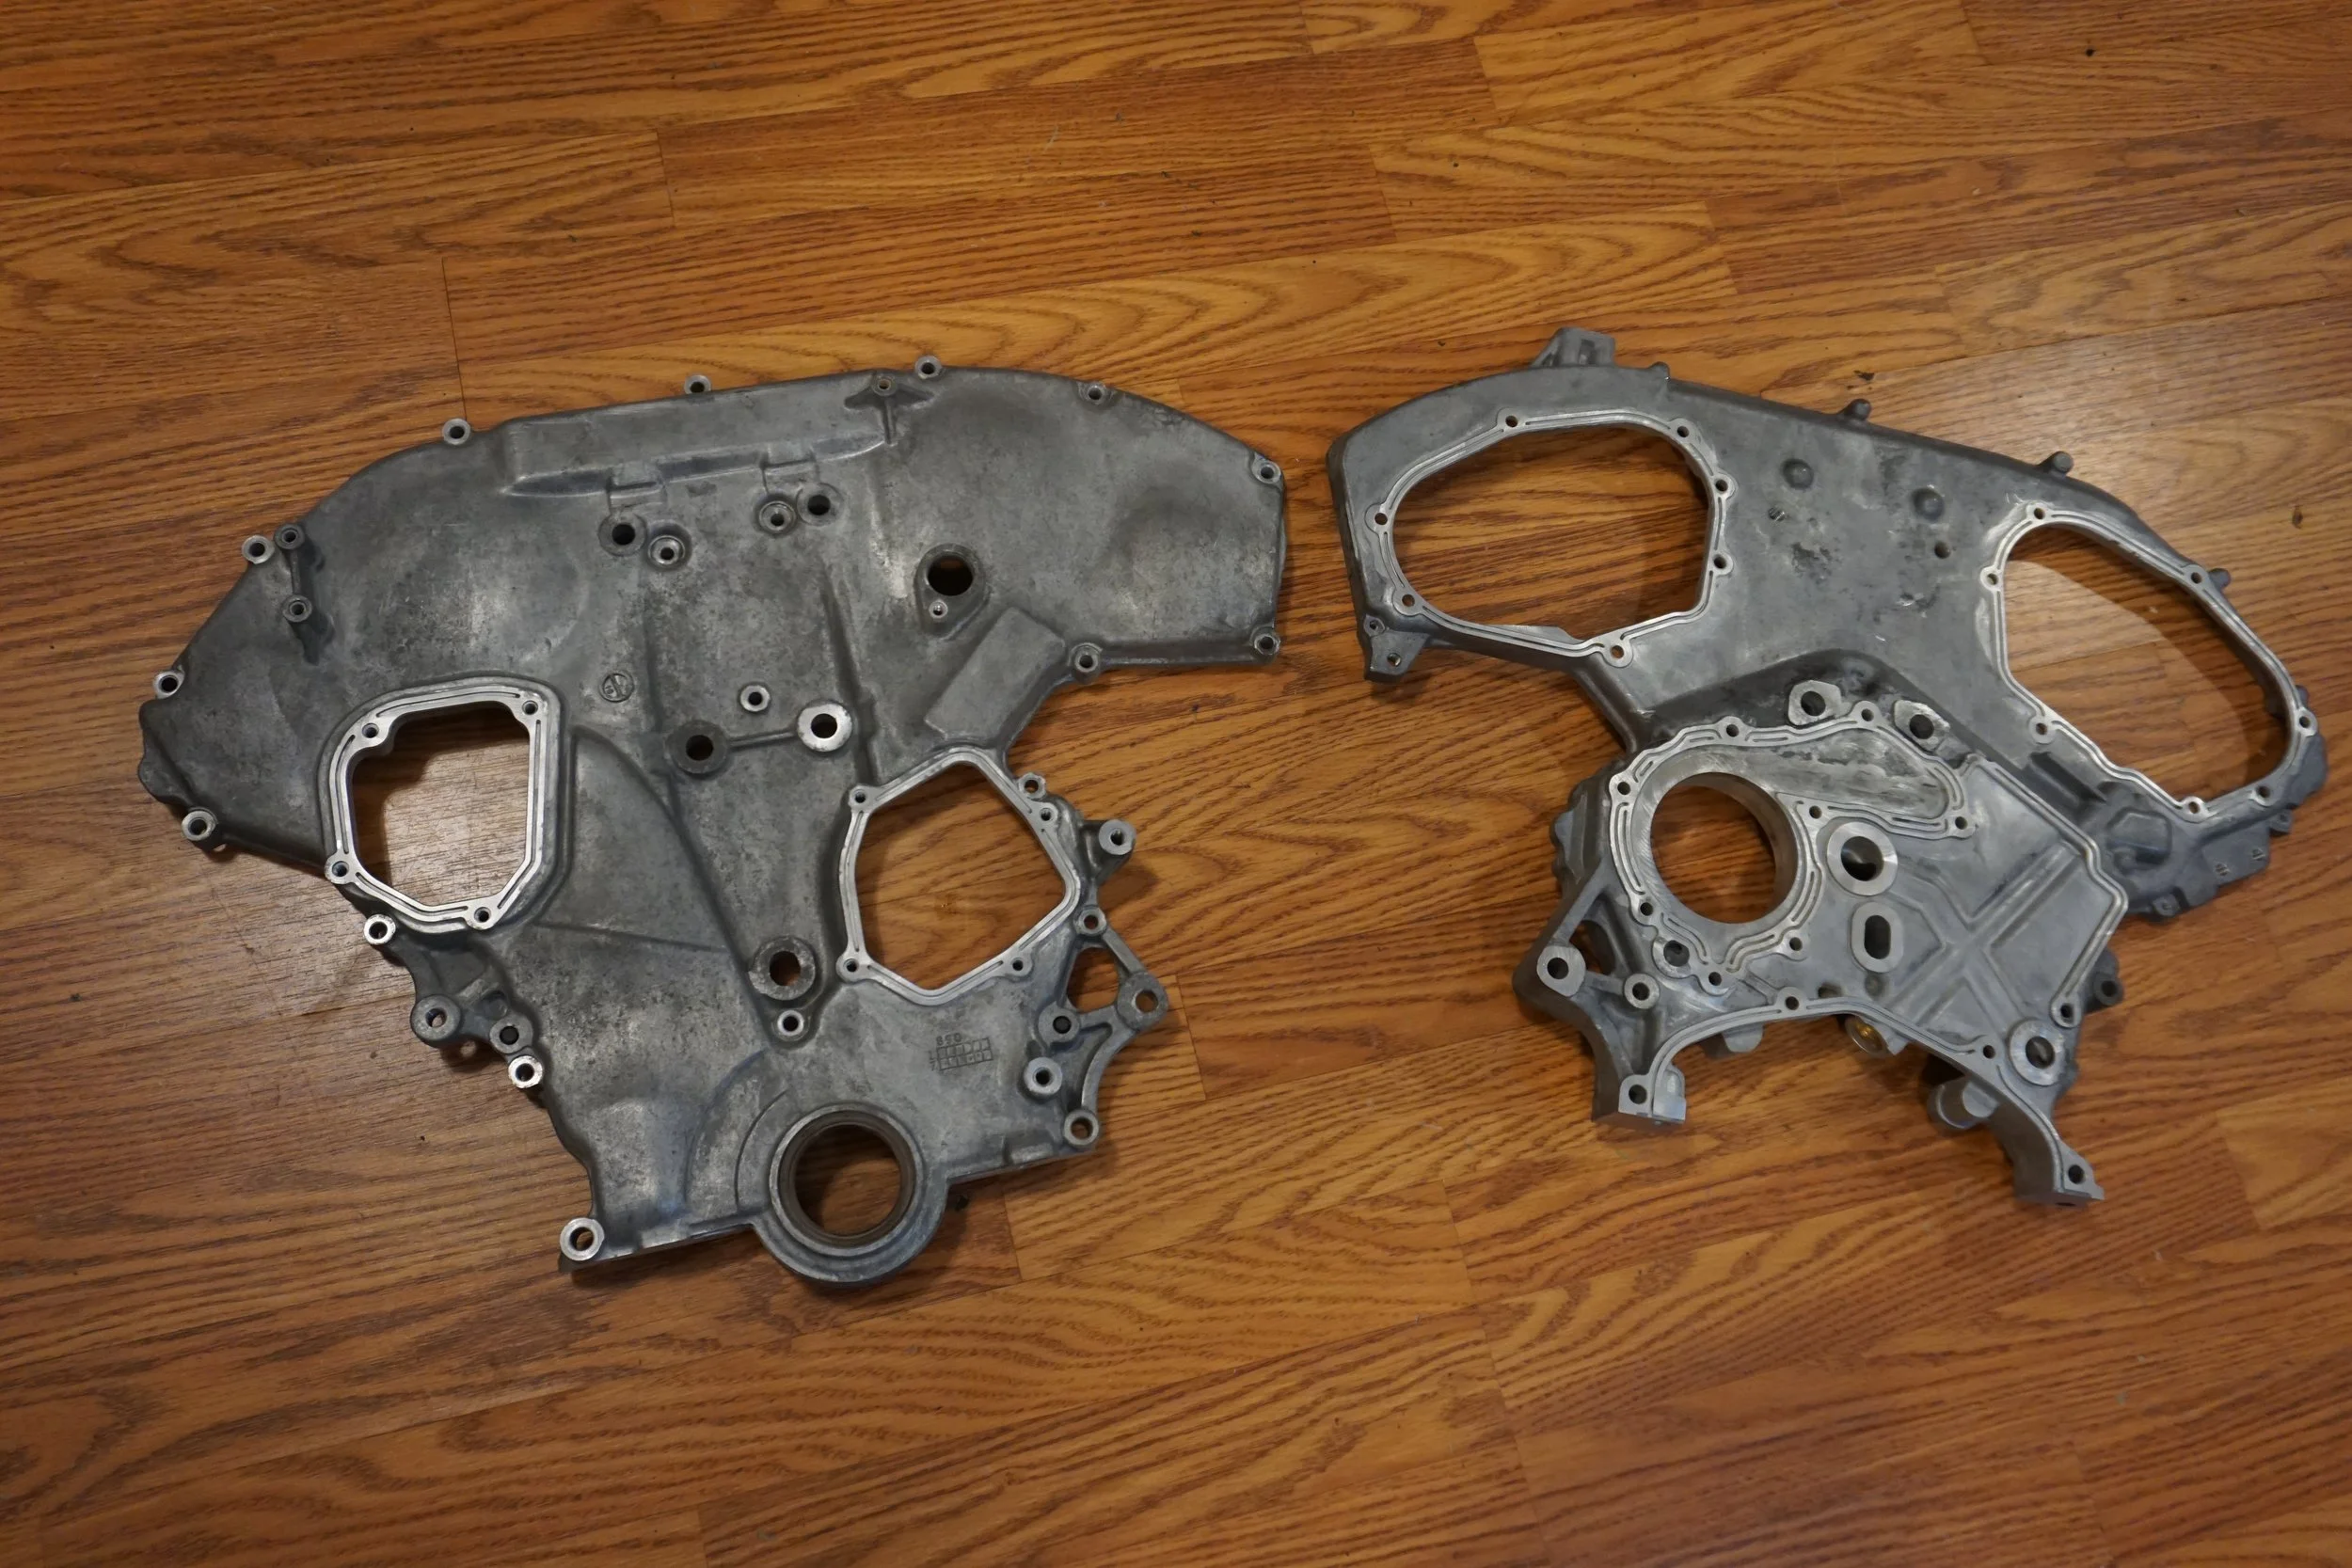
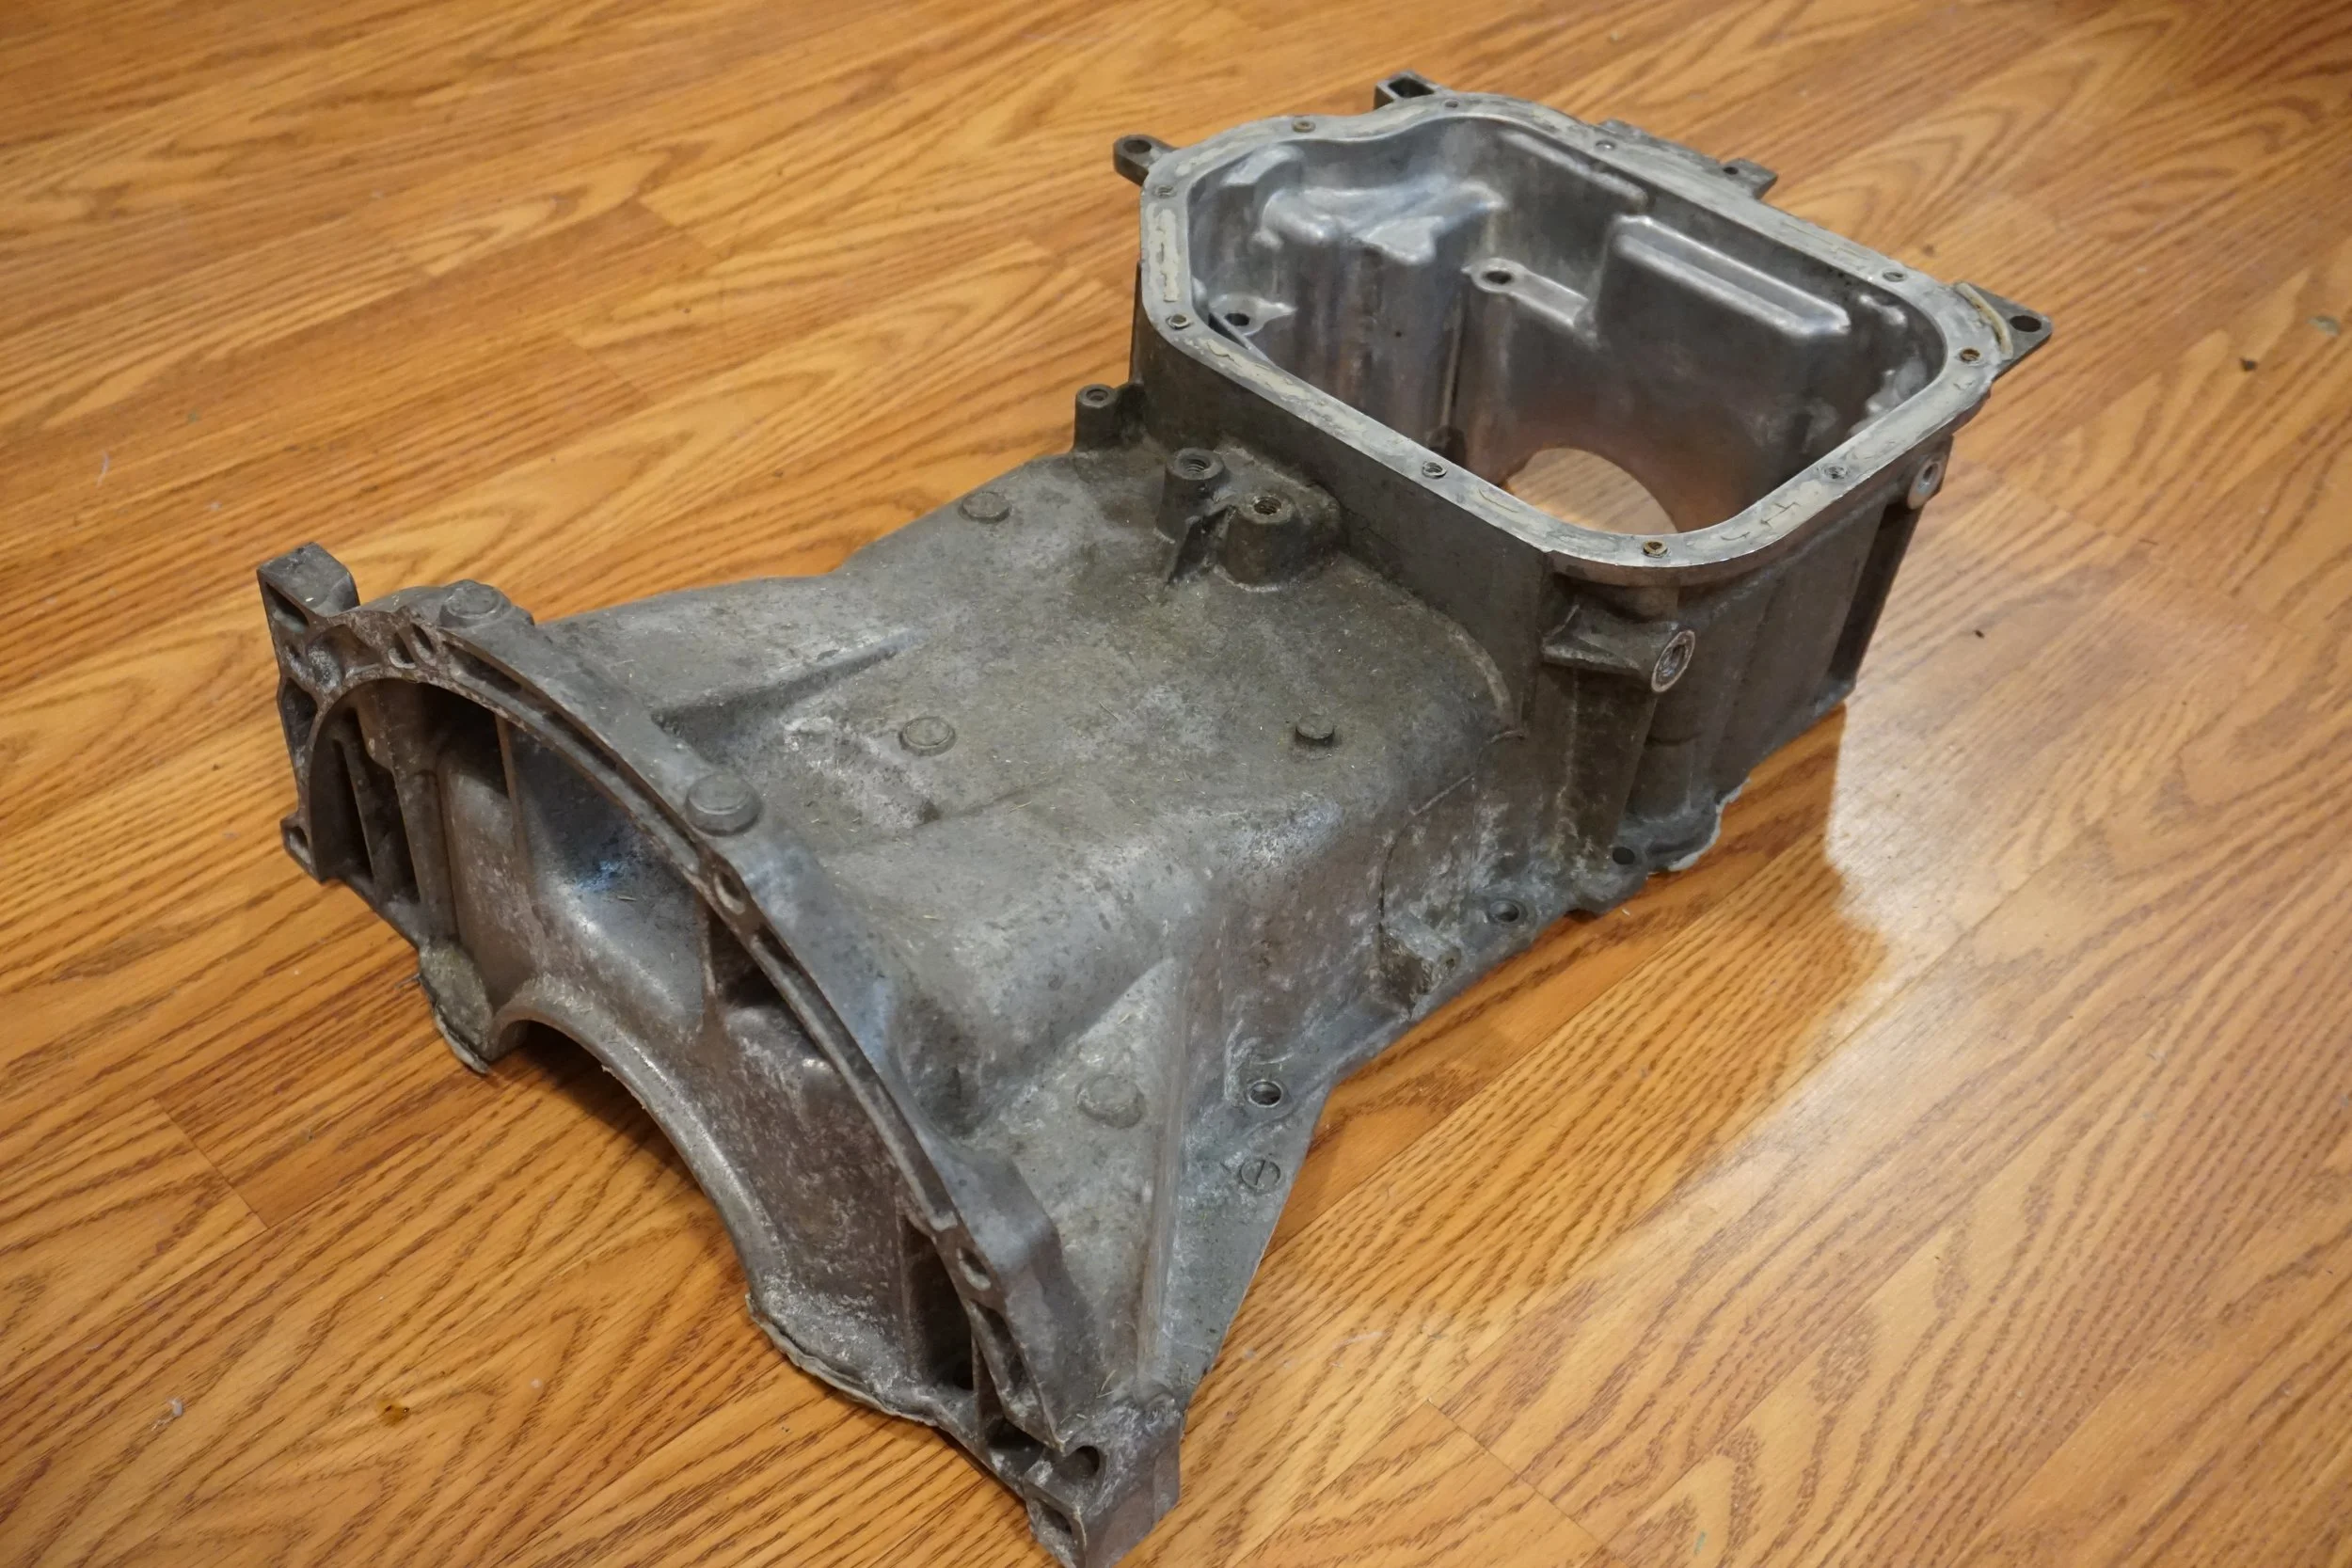
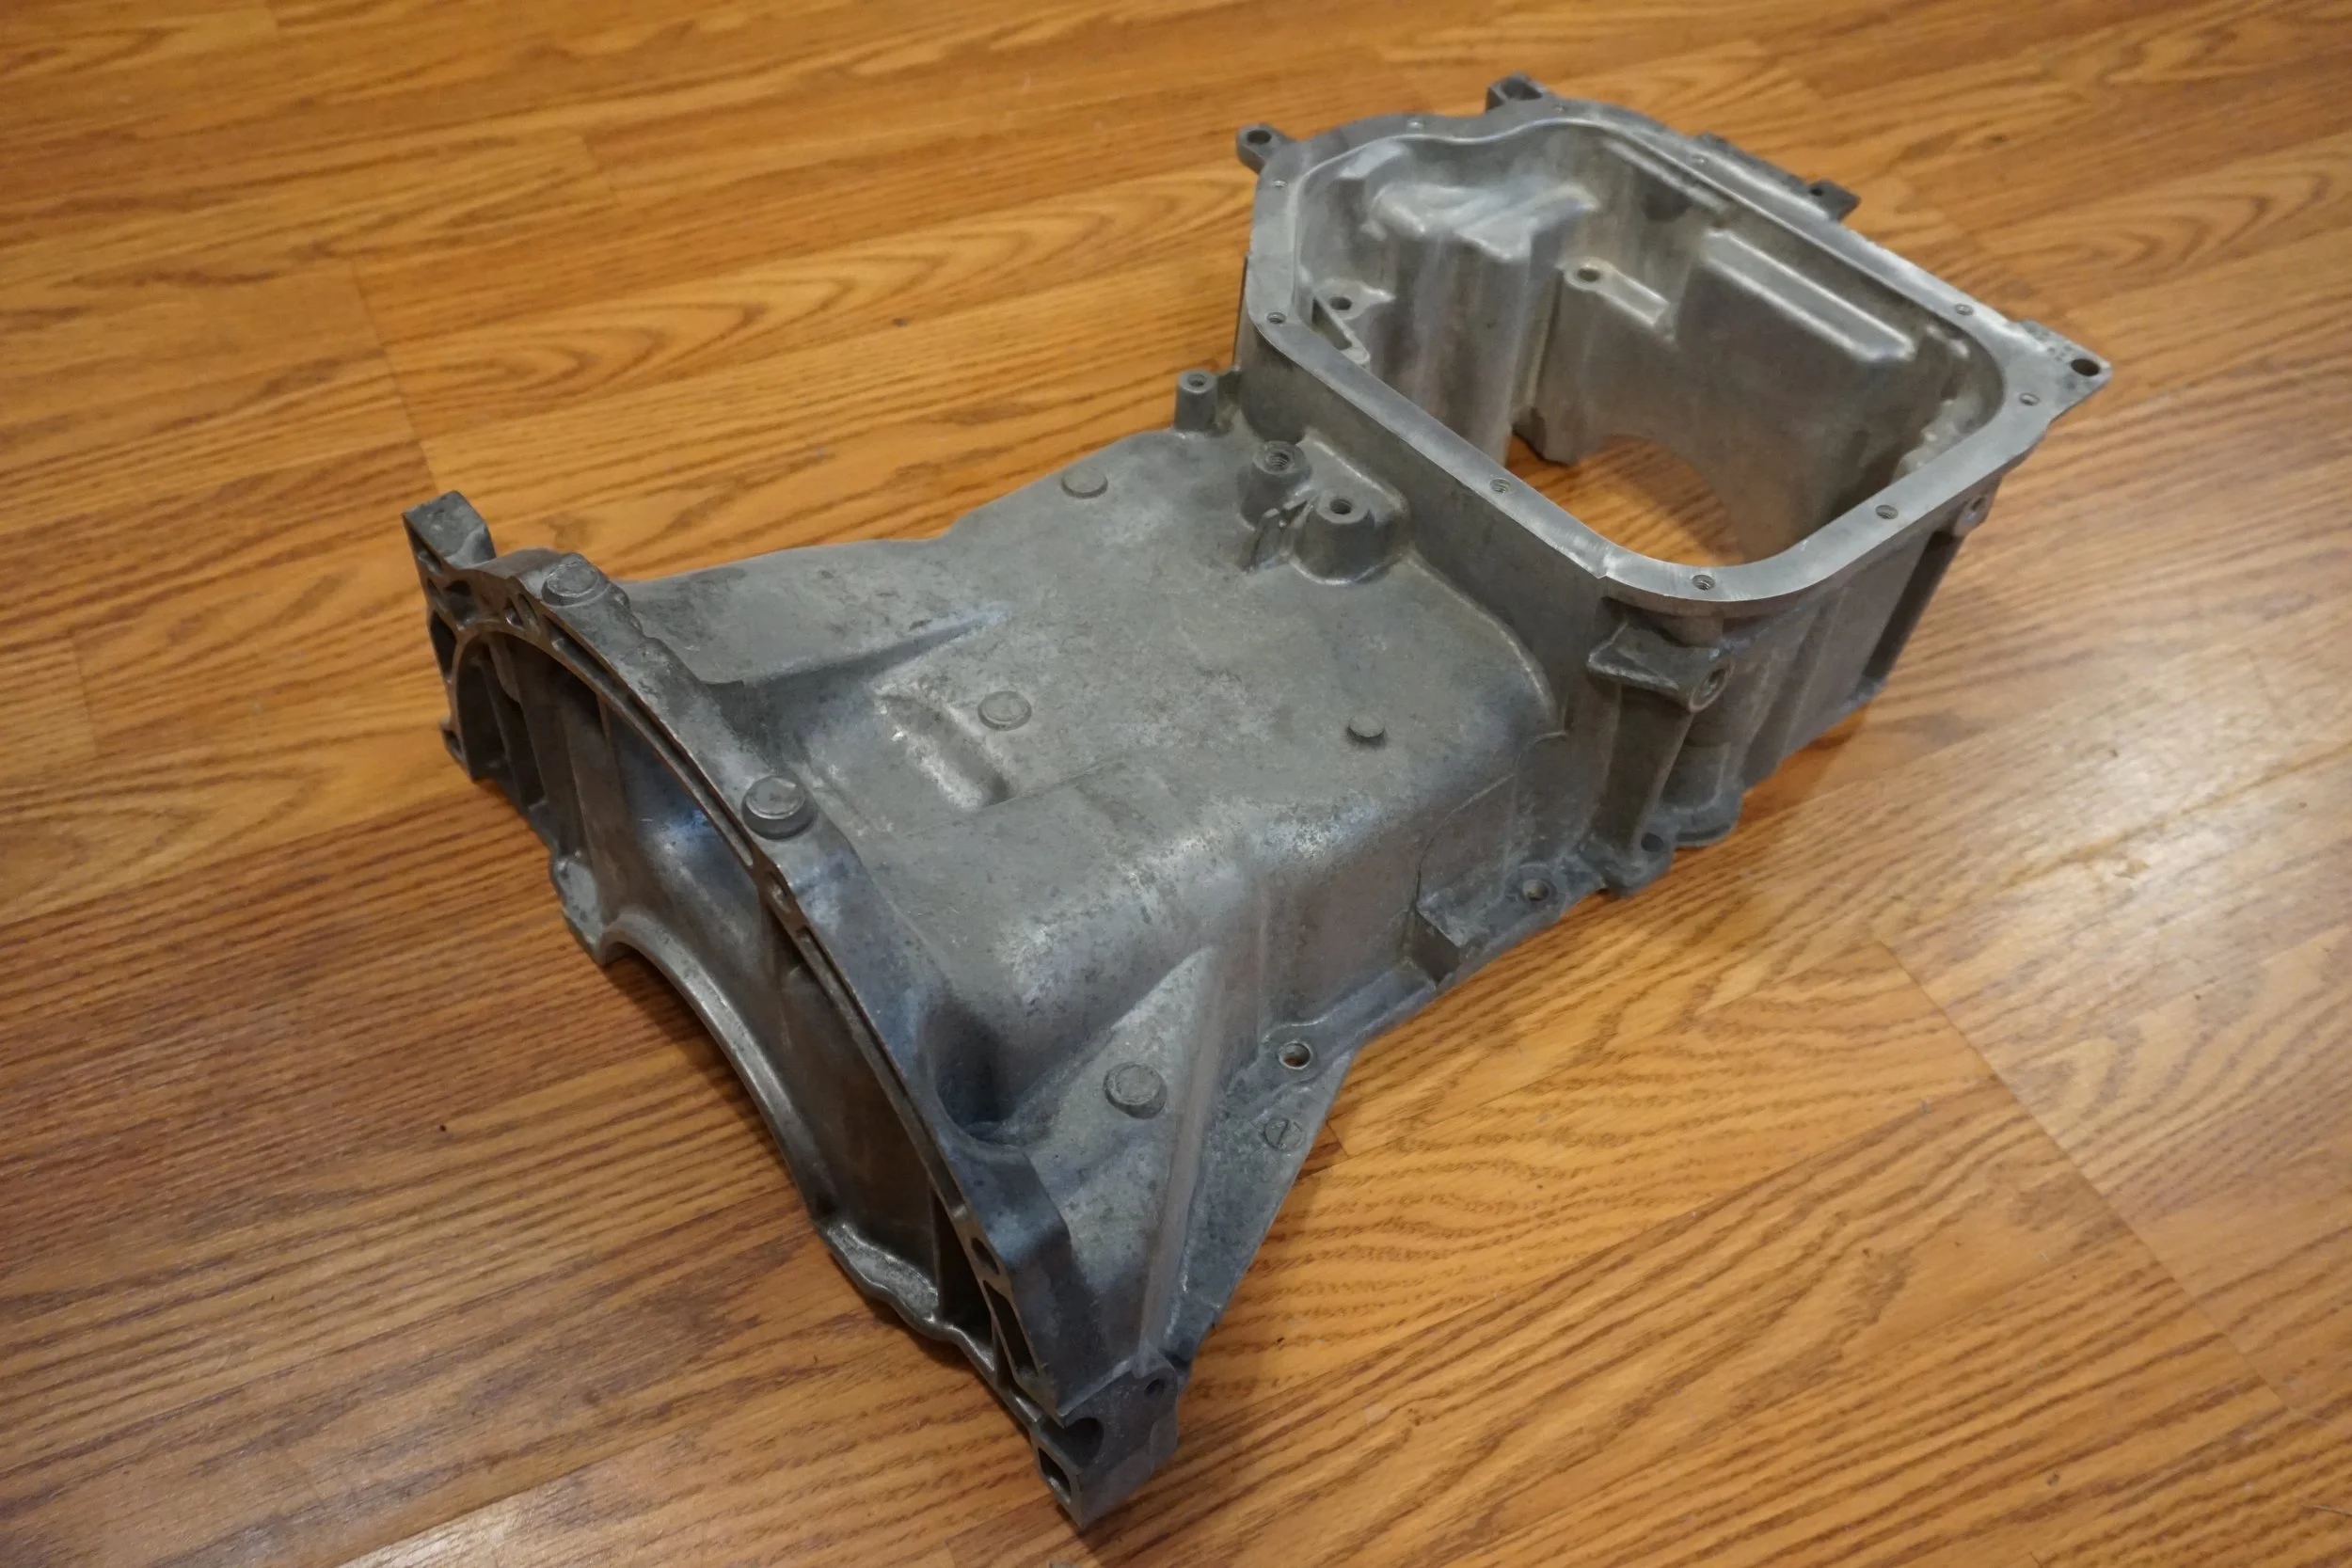
I also played around with my media blasting tank some more, this time using walnut shells as the media. In my extremely slow march to installing a 3rd gen 3.5, I wanted to clean up my old 3.0 timing covers and upper oil pan. Truth be told, I wasn't thrilled with the walnuts shells, and glass beads would have given me the finish I was looking for, but they're much harder to come by at a reasonable price. But still, I was able to clean everything up, which is better than nothing.
Racing results coming soon
I've wanted to have this done for close to 15 years now, but I wasn't about to drive out to California to have the original developer of the idea do the project, and the guy from the Sentra forum who used to travel and do it stopped doing that, so I pretty much gave up on the idea. I learned a year or two ago that 2J Racing had started to offer the service, so I thought about driving all the way down there again to have them do it. But that's a long drive, they charge like $500+ for the work, and they don't exactly have a great reputation at this point. I found a local race shop that was down to do the work and they're only an hour from me, but again, it was going to cost $600+ pretty easy. So in the end, I decided I would try to do it myself. What's the worst that could happen?
First, I needed the supplies to do the job. I found some super old pictures that showed how the guy in California did it to one of Mike Kojima's Sentras, so I knew I would need some strong chains, a bottle jack, and some sort of I beam. Working with schmellyfart, he developed some steel spacers/supports to fit inside the beam and around the inner torsion (?) bar, so that the outer upside down U structure wouldn't collapse/bend when force was applied with the jack and chains. The goal is to bend the inner torsion bar along with the outer structure. I then had to track down some sort of beam to serve as the strong base for the jack and chains, and it had to be much stronger than the rear beam on the car. Buying something long enough and strong enough new was going to be very expensive, so I looked for something on the used market. I got lucky and found the owner of a construction company an hour away from me who had a number of different beams for sale, and came home with this monstrosity for less than $100.
Here are the parts schmelly came up with, along with my cut up pizza pans to use as turn plates for doing alignment work.
Here's how they fit up in the beam. I placed two at the jack point, and two at each chain point.
And I bought a DIY alignment kit. Measuring toe is quick and easy!
I took my before measurements, and compared them to a recent alignment I got. The alignment printout showed I had 0.42* total toe in, or almost 3/16". My measurement showed 3/16", success!
Before I got started, I cut off the remaining bits of the OEM brackets for the Scott-Russel Linkage. I wanted to make sure those areas weren't any stronger/stiffer than the rest of the beam, so the beam could bend easily and evenly. I also just wanted to get rid of them since they appeared to be great at capturing debris and thus prone to rusting.
I plan on eventually pulling the whole rear beam from the car and sand blasting it, as there is surface rust and some pitting.
Anyways, back to the job at hand. Let's set this up! I had to disconnect the panhard rod, as it was directly in the way of the bottle jack, and I had to disconnect the rear shocks, as I needed the beam to droop a few inches so it would be lined up with the I beam. This meant the only things attaching the beam to the car were the front trailing arm bushings, so the beam was able to move around quite a bit, which I would later learn was not so great.
I covered up the chains as best I could with a few heavy carpets just in case they snapped.
And then I bent. Over and over again, taking time to measure the changes so I wouldn't bend it too far. But I was running into a problem: the beam was rotating upwards a bit as I pumped up the jack, leading to the jack eventually slipping off. Not only was this somewhat terrifying, as I was lying under the car working the jack, but it meant much of the force of the jack wasn't going into bending the beam. But I kept bending and taking measurements, and it appeared as if I was making progress. I'll skip over some details and just say I eventually stopped, and took the car in for another alignment, as the one I got two months ago (after installing the new coilovers and camber plates) was only a very partial alignment, just enough to even out the toe and make the car drive straight. But before I took the car in, I tested out the alignment plates and tried to get the front of the car close to what I want, to save time and expense when I was on the alignment rack.
Well, it turns out my home alignment was on point in terms of camber, as the shop only had to make a small adjustment on one side, the other was perfect. And in a welcome surprise from two months ago, my caster was perfectly even side to side, even if it wasn't quite as high as I had hoped it would be. They did have to adjust the toe quite a bit, because while my tools can tell me total toe, it can't tell me if the wheels are actually pointed straight. In the end, I walked away with the best alignment my car has ever seen. The most camber ever, the most caster ever (and also perfectly even for the first time), and my normal amount of toe out up front. But I was most interested to see what happened in the rear. Turns out I had gotten rid of 1/3 of my toe in, and I went from 0.42 total toe in to 0.28! The beam bending works!
I was hoping to get 6* of caster up front, since I have both the added caster control arm bushings, plus the camber/caster plates, but 5.1* is still about 0.5* better than I had before, so I can't complain. Considering that these cars come with something like 2.8* from the factory, it's a very welcome improvement. So there's still more work to do on the rear beam, and Schmelly has an idea or two on how to keep the beam from rotating so much, so I'll be revisiting this in the future. But for now, the car feels great, and it performed very well at the last race.
Now, time for some other small things.
When I was working on the coilovers and camber plates, I realized that the ground cable I had running from the intake manifold to the shock tower probably wasn't actually doing anything, since I had it on top of my old FSTB bracket, so it wasn't really grounded to the chassis. I decided to make a new cable and give it a proper ground location on the body of the car, so I ground off some paint from lower down on the tower around an existing bolt hole and put it there. It could have been my imagination, but the car seemed to idle smoother after I did this.
I also played around with my media blasting tank some more, this time using walnut shells as the media. In my extremely slow march to installing a 3rd gen 3.5, I wanted to clean up my old 3.0 timing covers and upper oil pan. Truth be told, I wasn't thrilled with the walnuts shells, and glass beads would have given me the finish I was looking for, but they're much harder to come by at a reasonable price. But still, I was able to clean everything up, which is better than nothing.
Racing results coming soon

Do you even sleep?! These are some serious projects. +1,000,000 fake internet points for the beam bending. That was something I fantasized about way back when too.
Did the bigger anti-sway bar work?
This looks like the MAFS connector you need. https://www.wiringspecialties.com/vh45-mafs-connector/
What is your media blaster?
Did the bigger anti-sway bar work?
This looks like the MAFS connector you need. https://www.wiringspecialties.com/vh45-mafs-connector/
What is your media blaster?
 Once I get the process dialed in on my car, I could bend your beam if you'd like.
To be honest, I've been disappointed in the seeming lack of results from the bigger FSB. The car does feel great when I'm on the track, but with so many recent changes, it's hard to pin it down to one thing. I was expecting it to be much more noticeable. I may drill another hole further in on the bar for the end links, which in theory should make it stiffer. We shall see.
This is the media blaster I got: But you will need a pretty hefty air compressor to use it efficiently. I've got an 80 gallon tank and it's rated for something like 19 SCFM. My go-to media for metal/rust is fine coal slag.
Yes, that's the connector I need! That's freaking awesome, thanks!
Wow, quite the accomplishment! I never got that far either, had purchased a spare beam but never got in on an Illinois Sentra bending party as that was right when the traveling option went bust. I mean I did the lightweight GXE bumper, chiseled out the sound deadening, lowered and lightend my battery up front, but what you've accomplished is on a whole other level. CONGRATS you fanatic.

I had the beam bending done on my first Maxima. I liked it as it made the car behave more like a rear wheel driver car. The rear would start sliding out when making turns.
Ferhan
Ferhan
Okay, I'm still behind on posting up racing results, but I just got done with a project on the M3 that I'm pretty proud of, so I'll do a (very) quick recap.
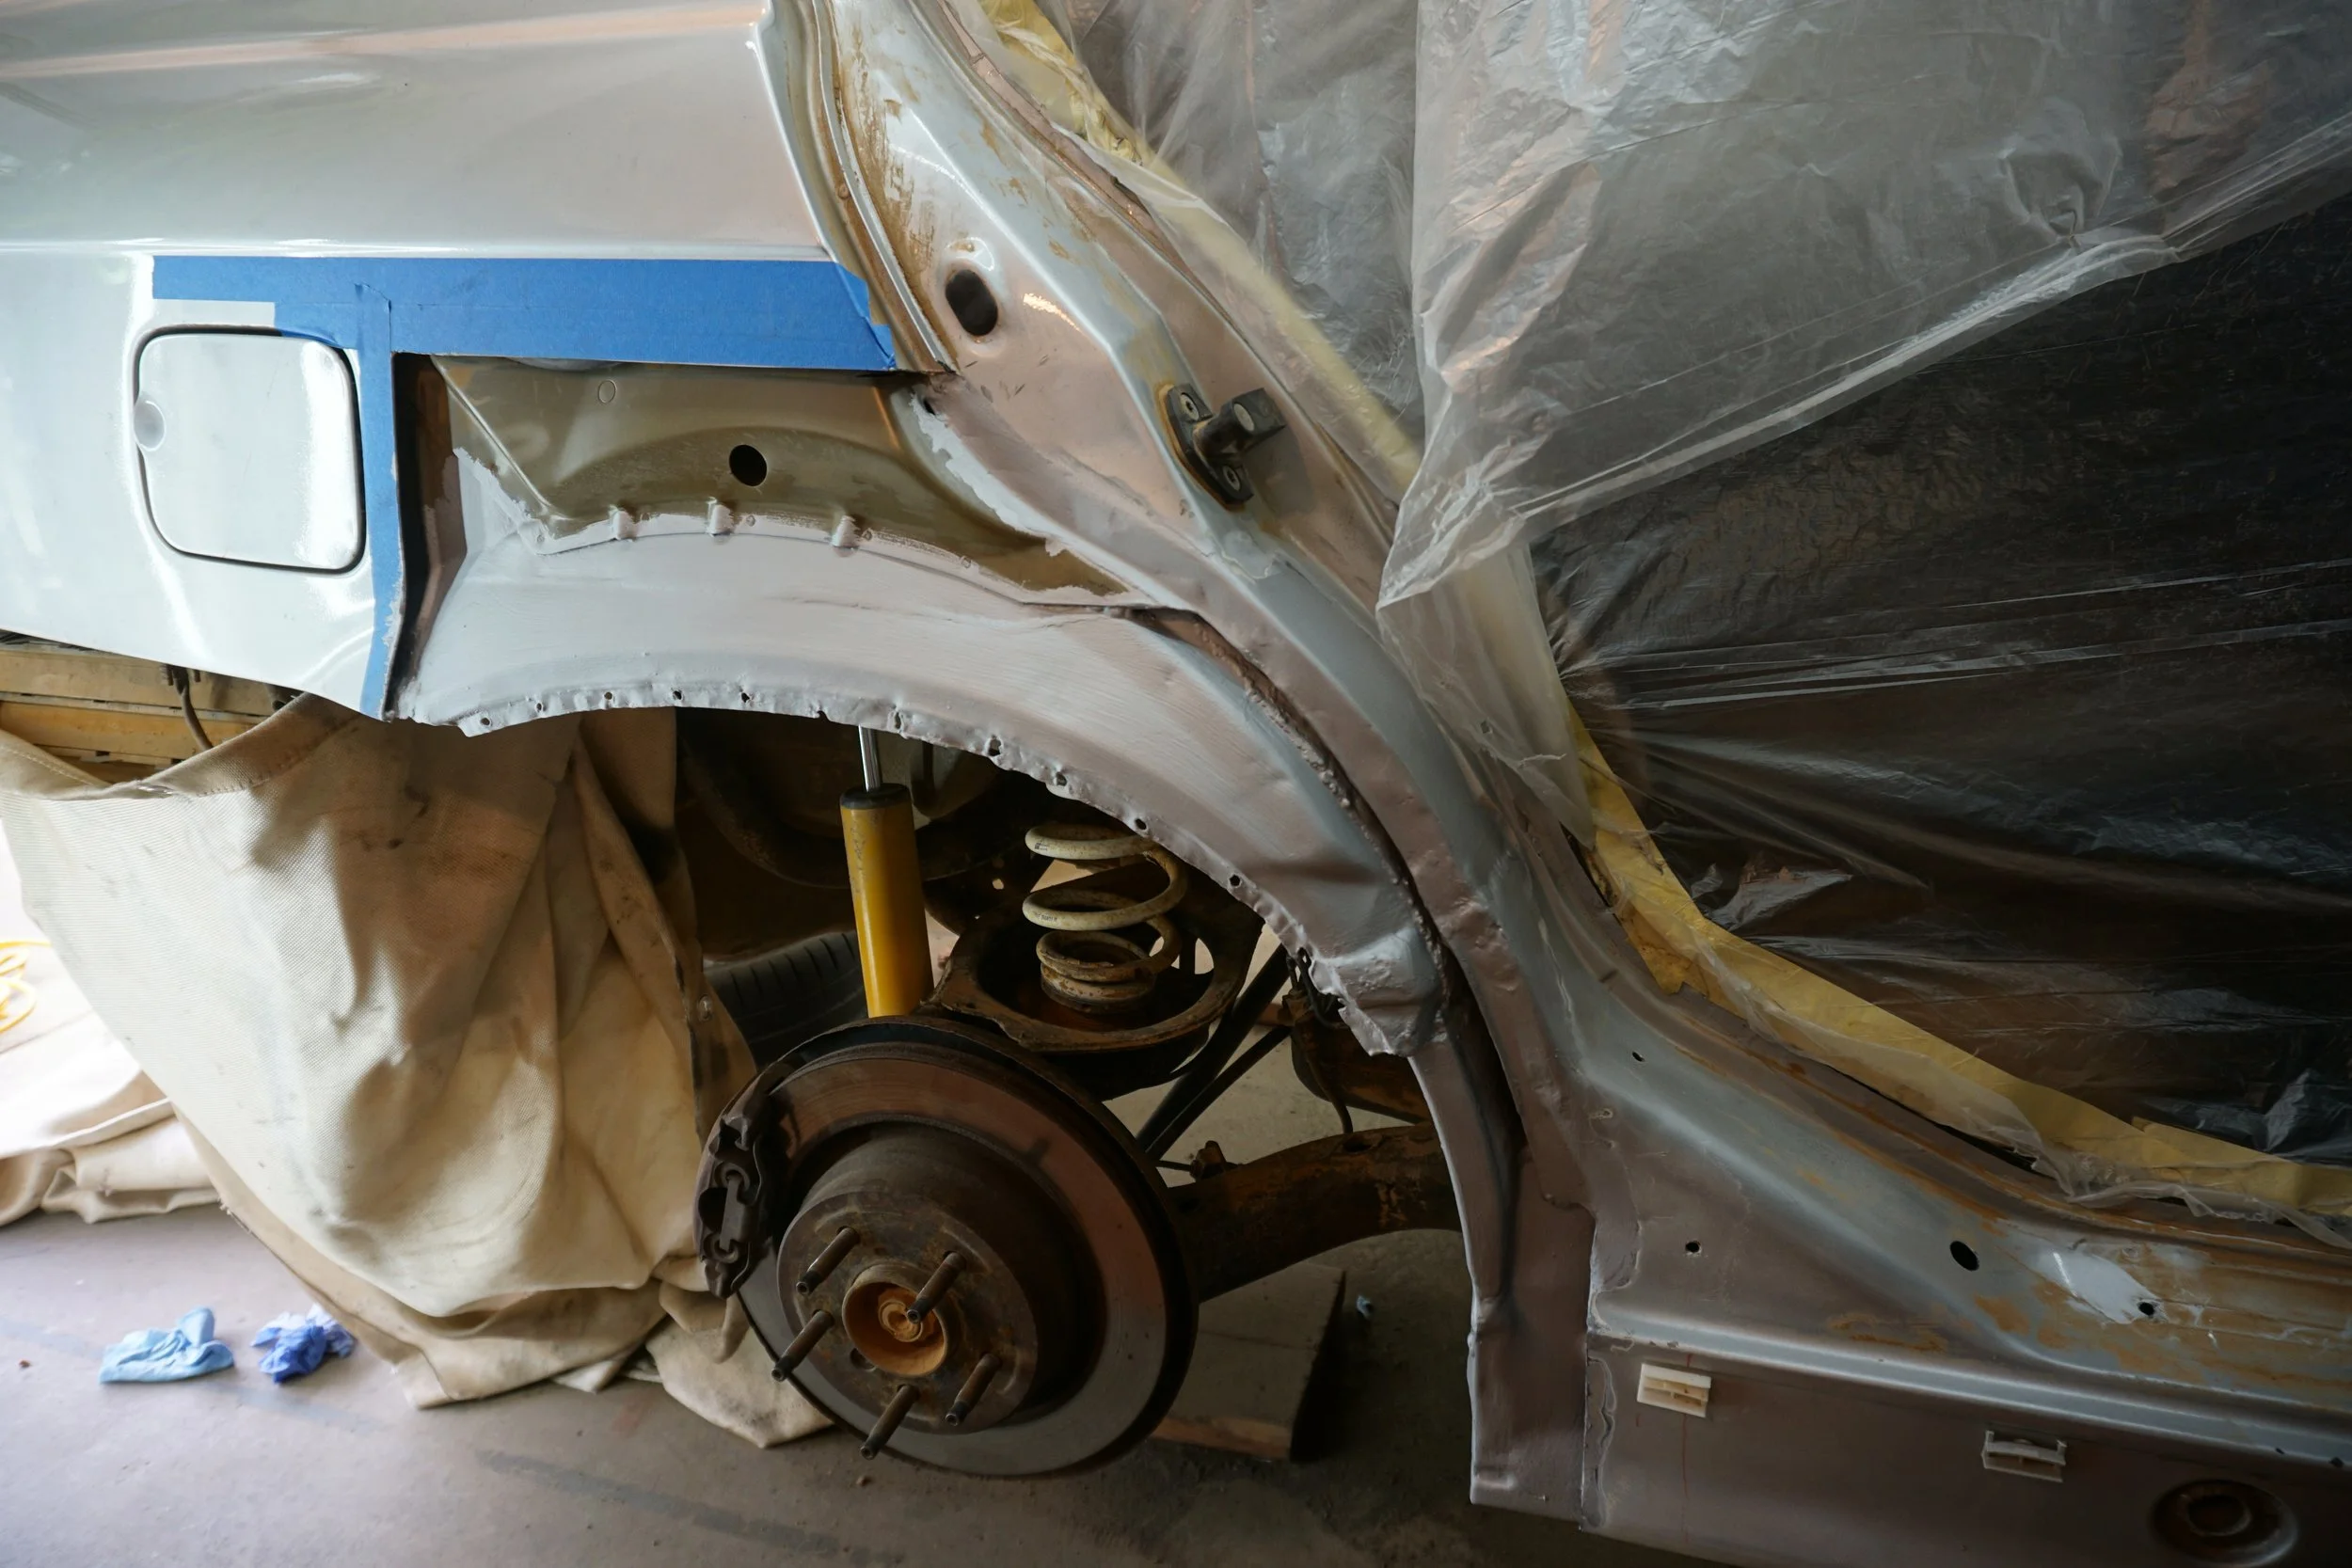
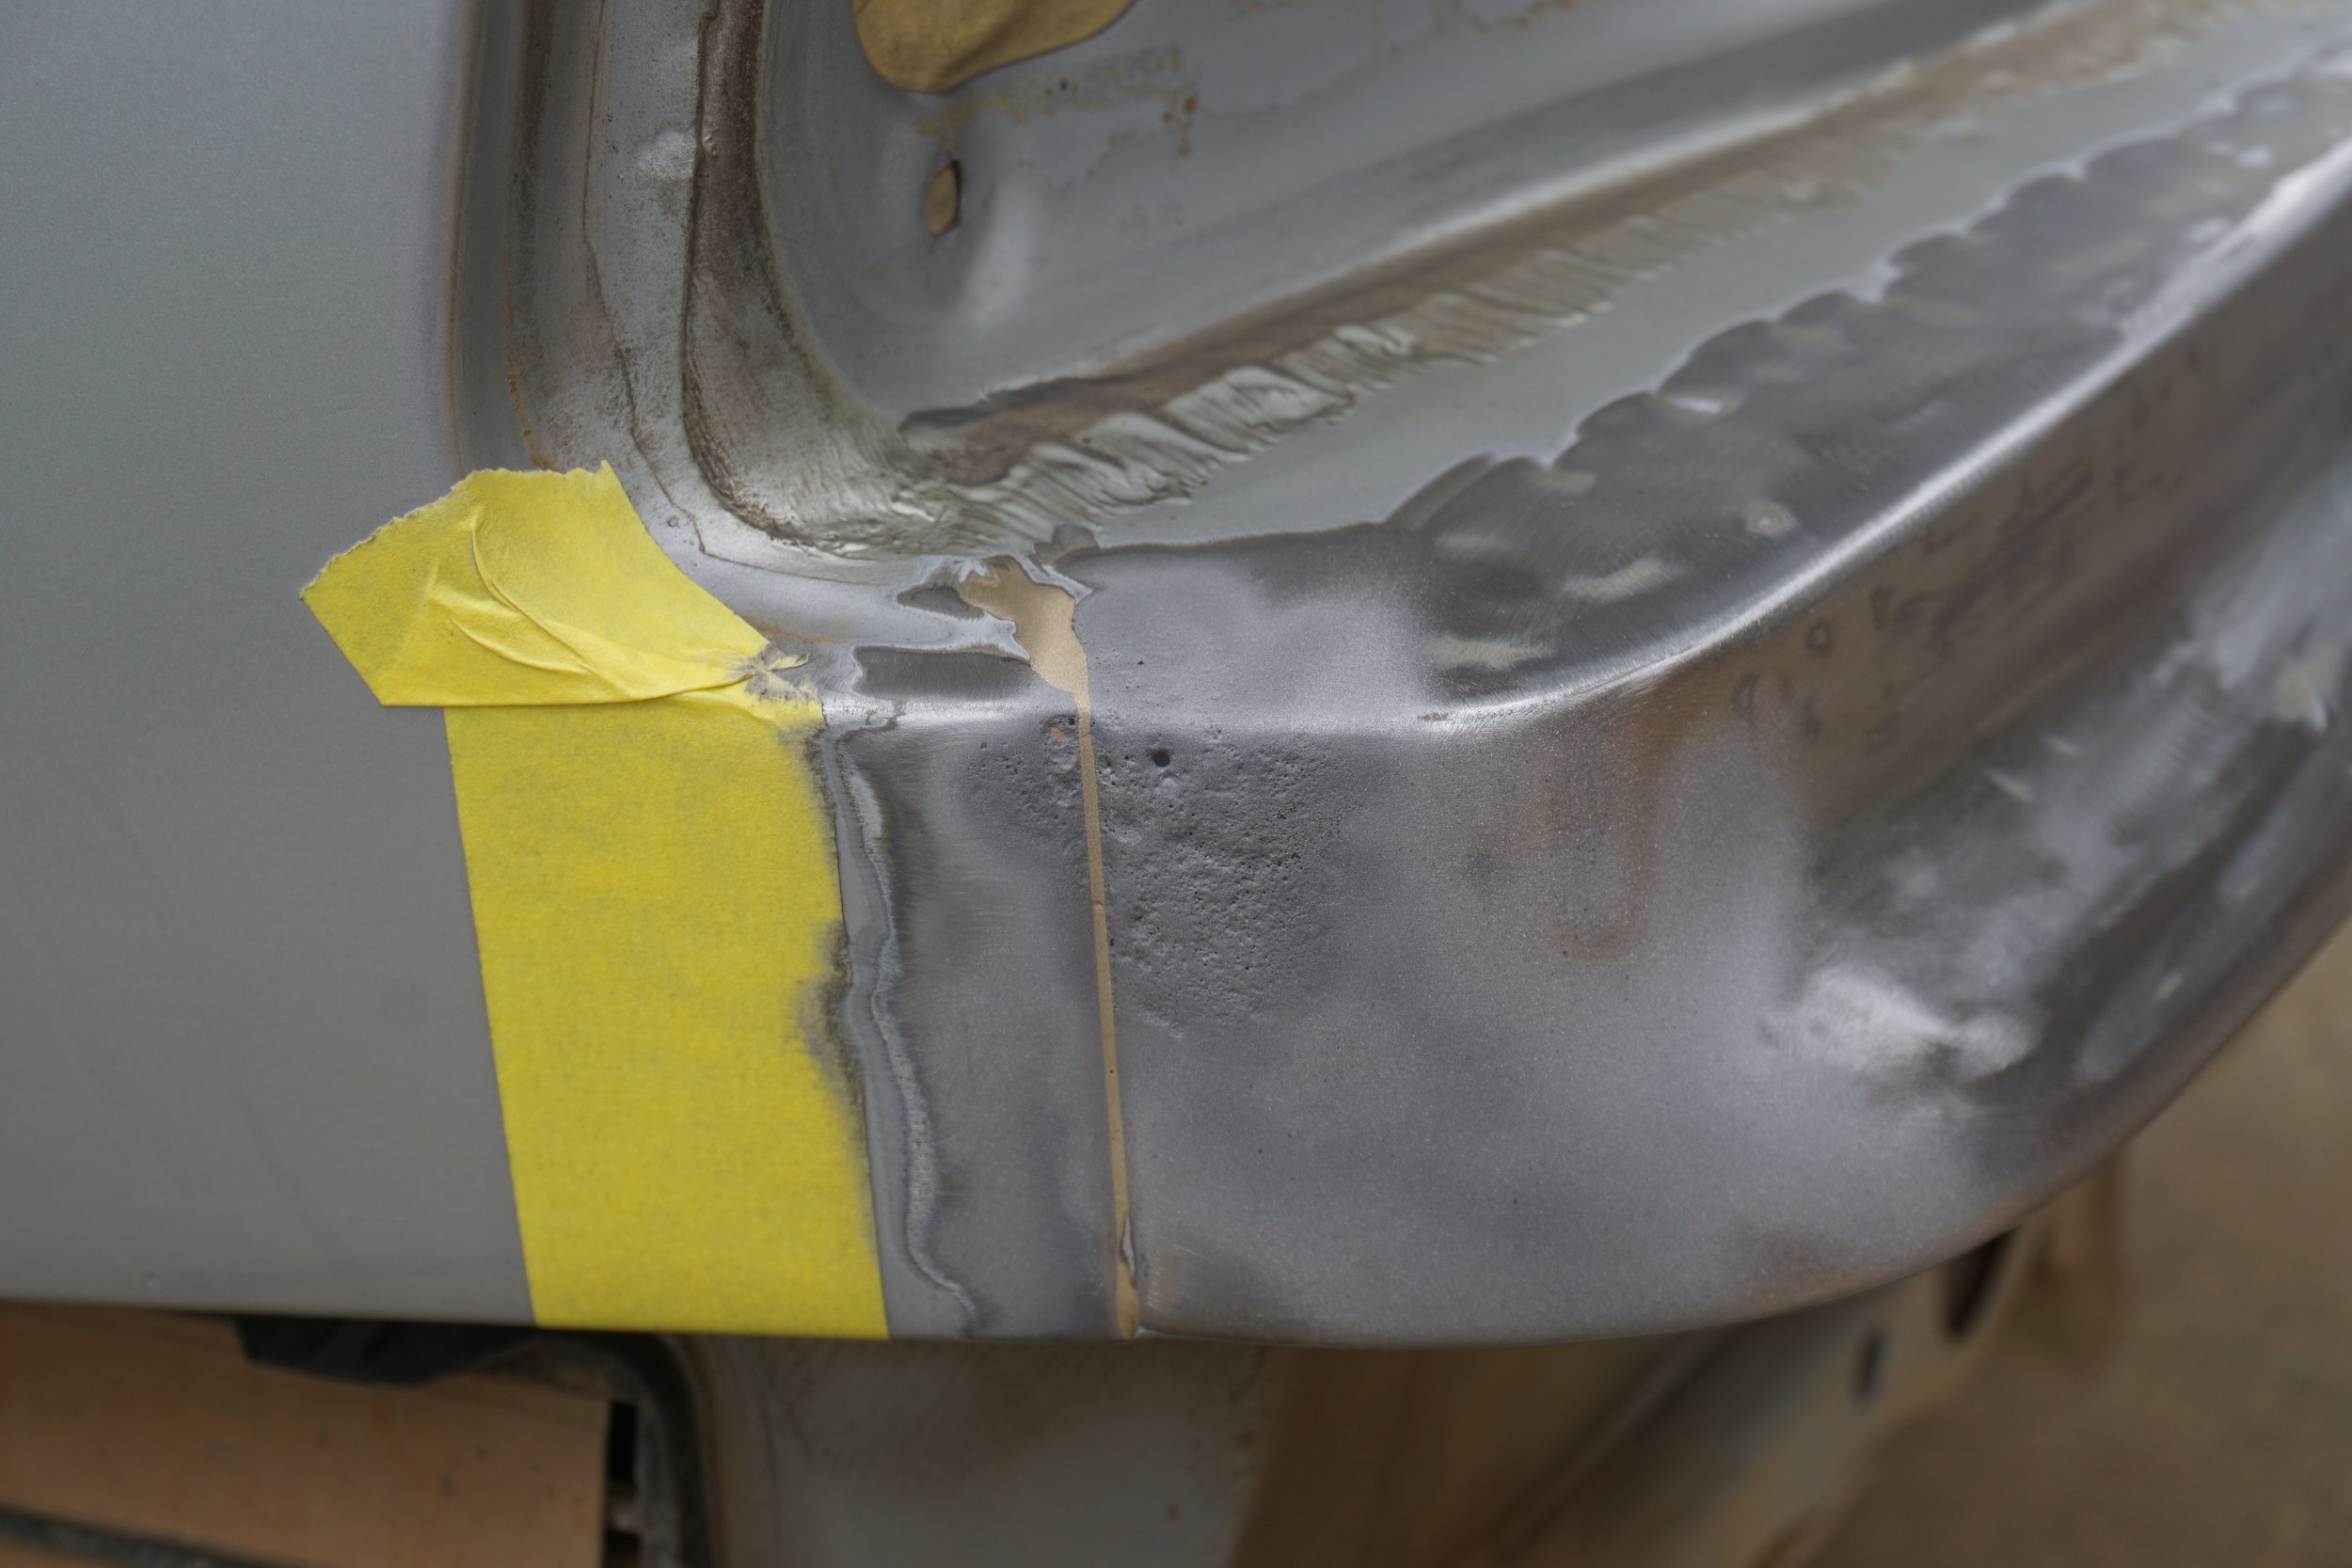
The PS rear quarter panel of the M3 was rusting pretty bad from an old accident that was never repaired properly. Three years ago I did a hack repair before I could weld or paint properly. Here's what it was looking like back then:

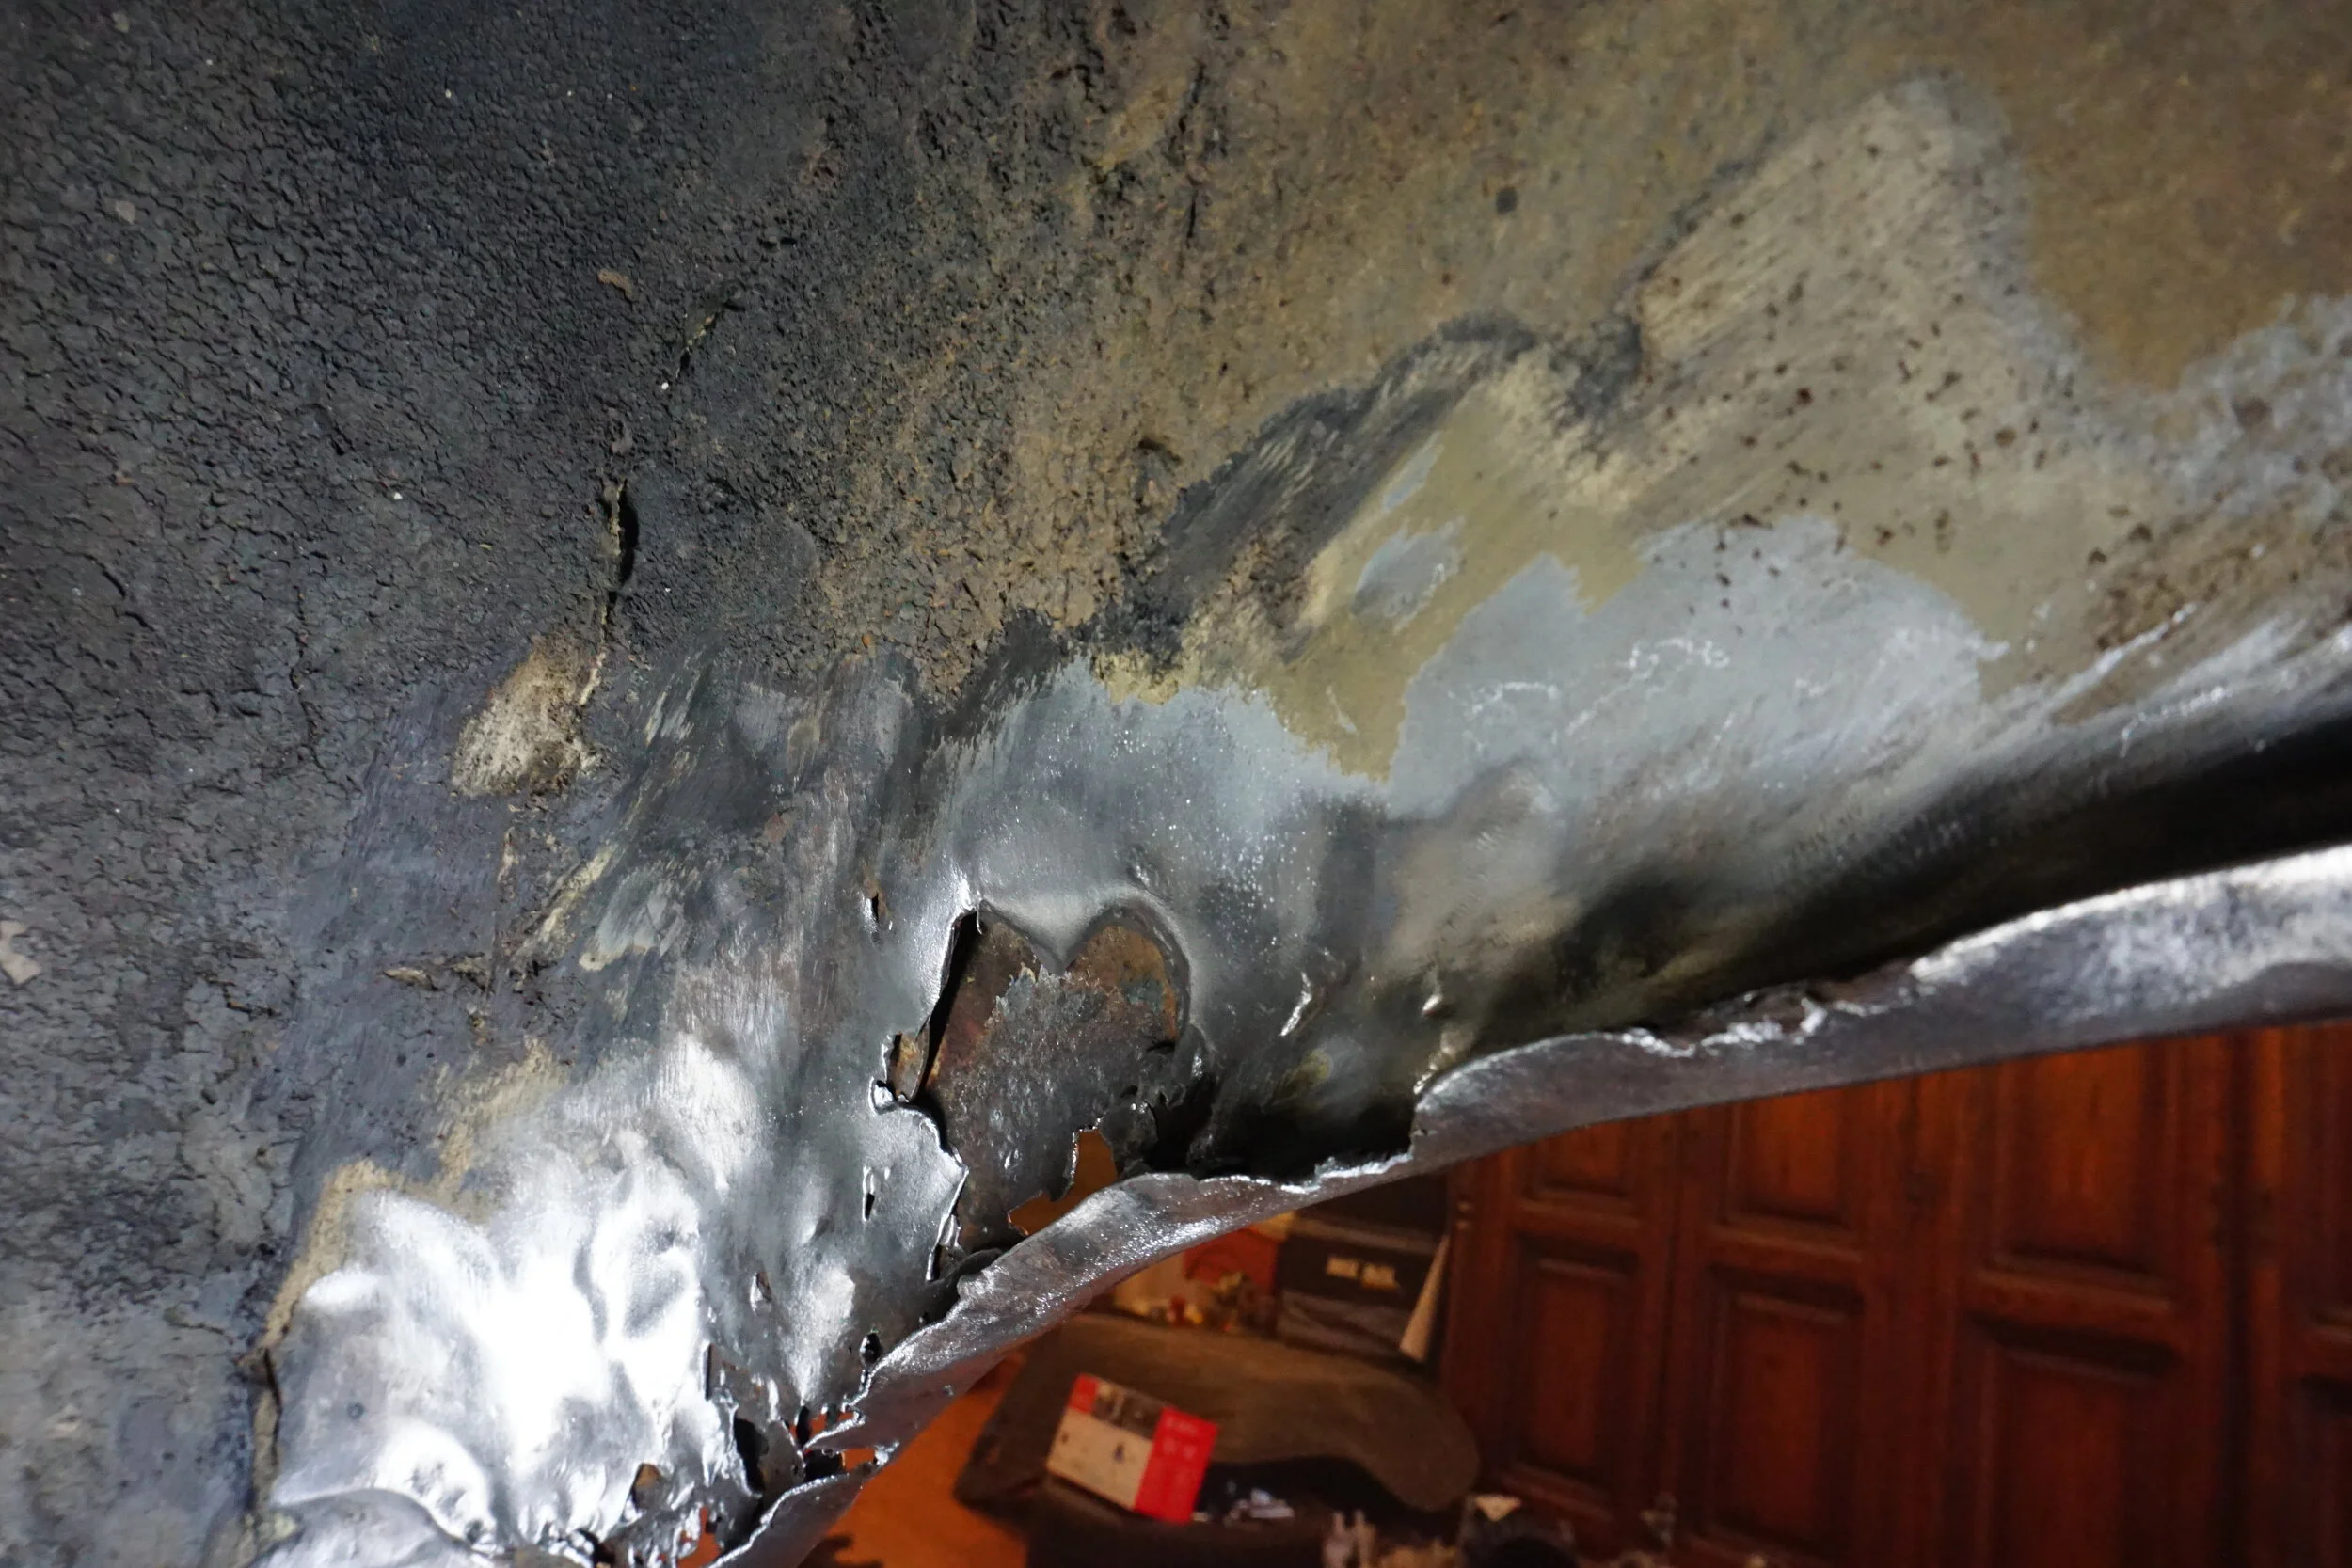
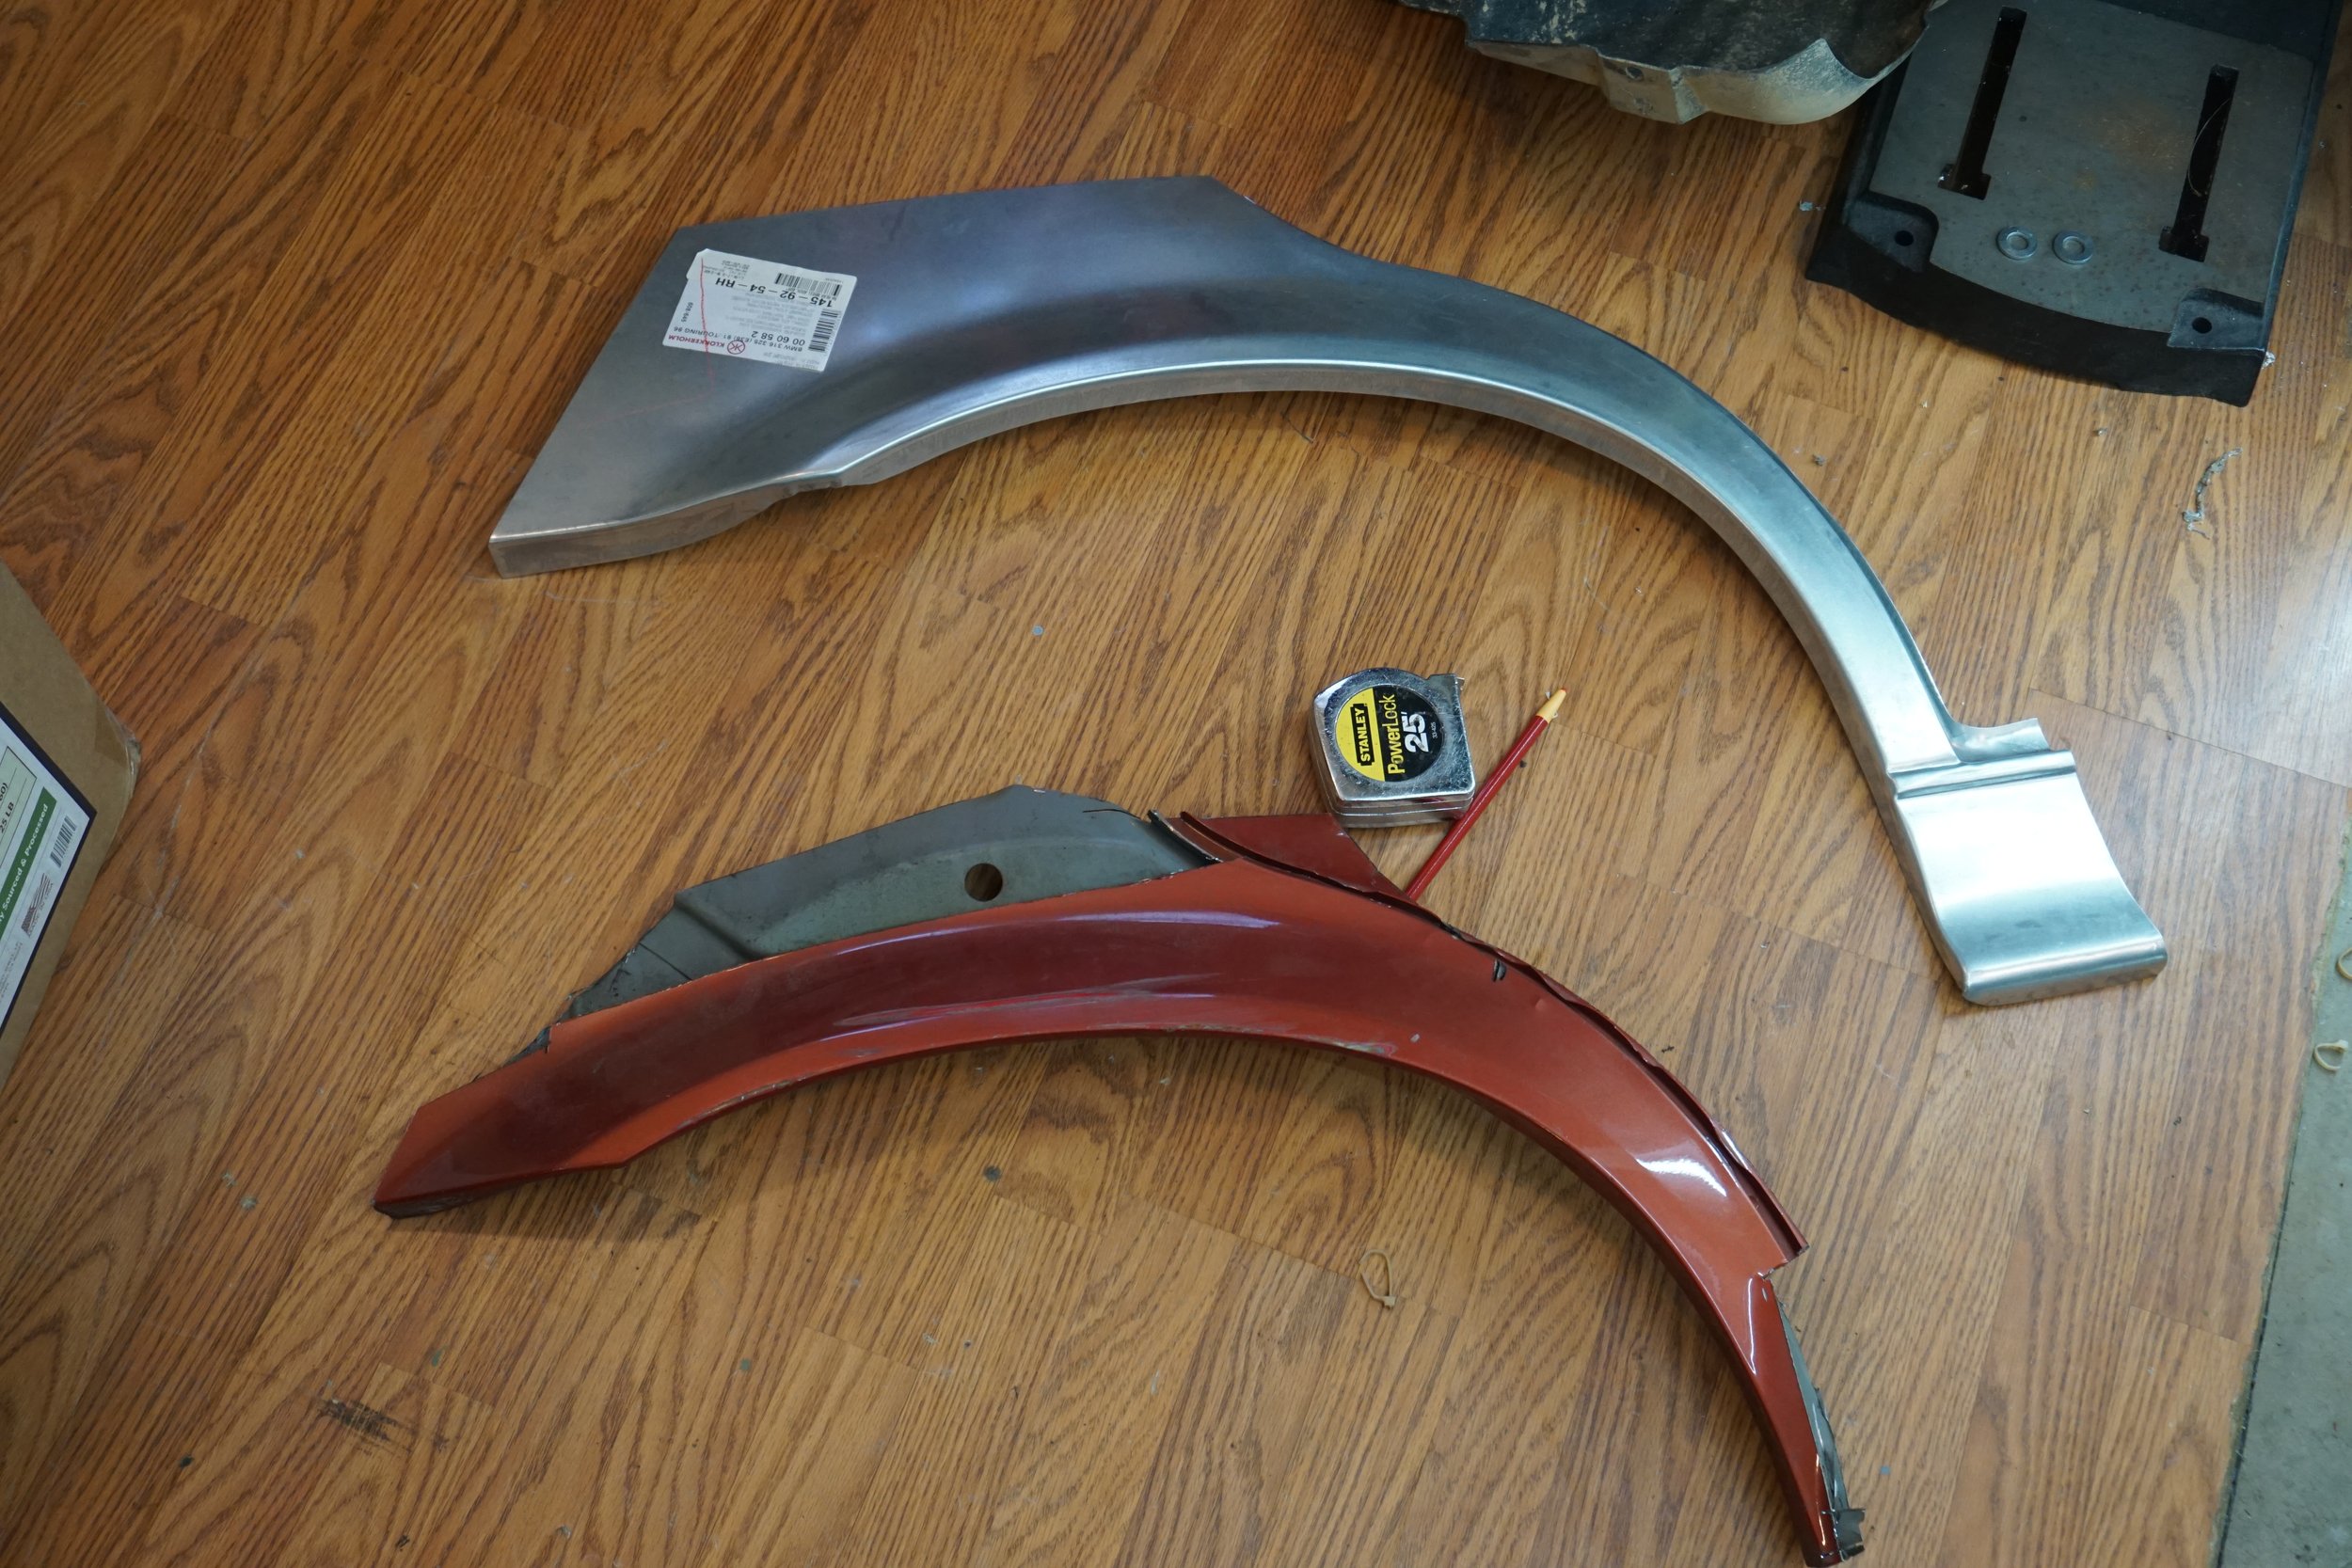
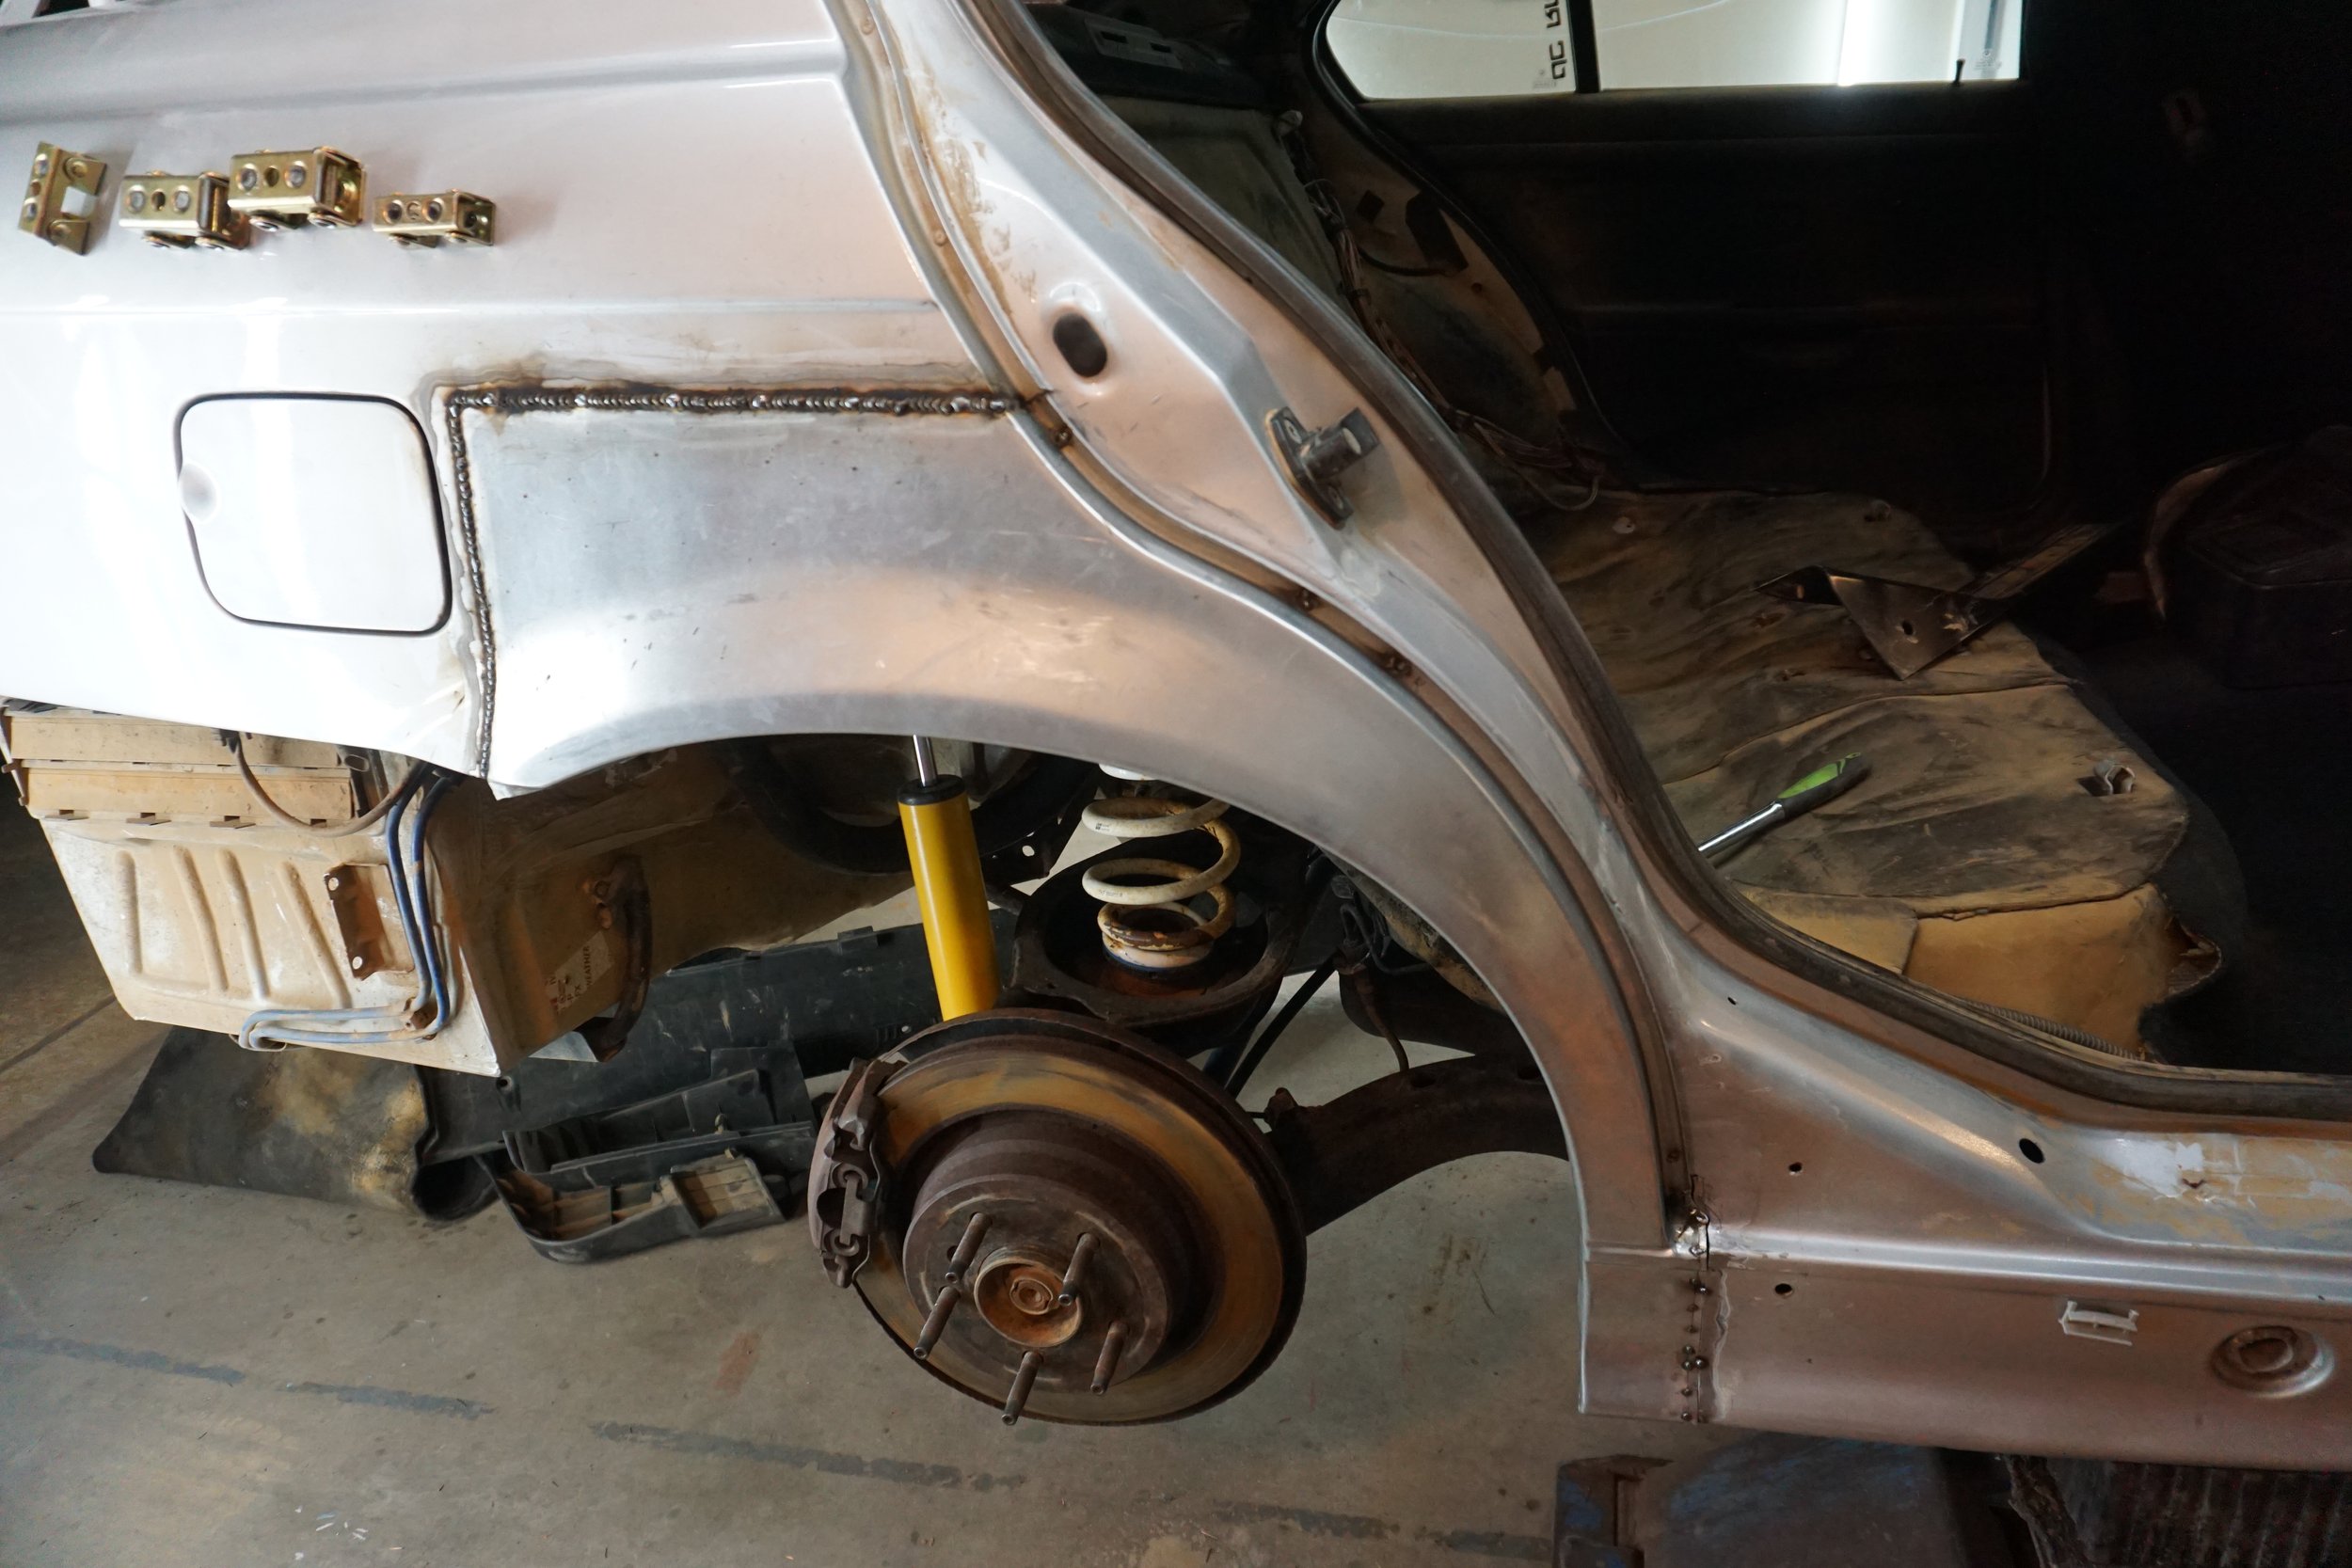
Well, my hack job lasted about three years, and the rust bubbles were starting to pop through again. I knew I needed to weld in fresh metal, so I bought a replacement outer piece and then found a local car being parted to get the inner piece from.
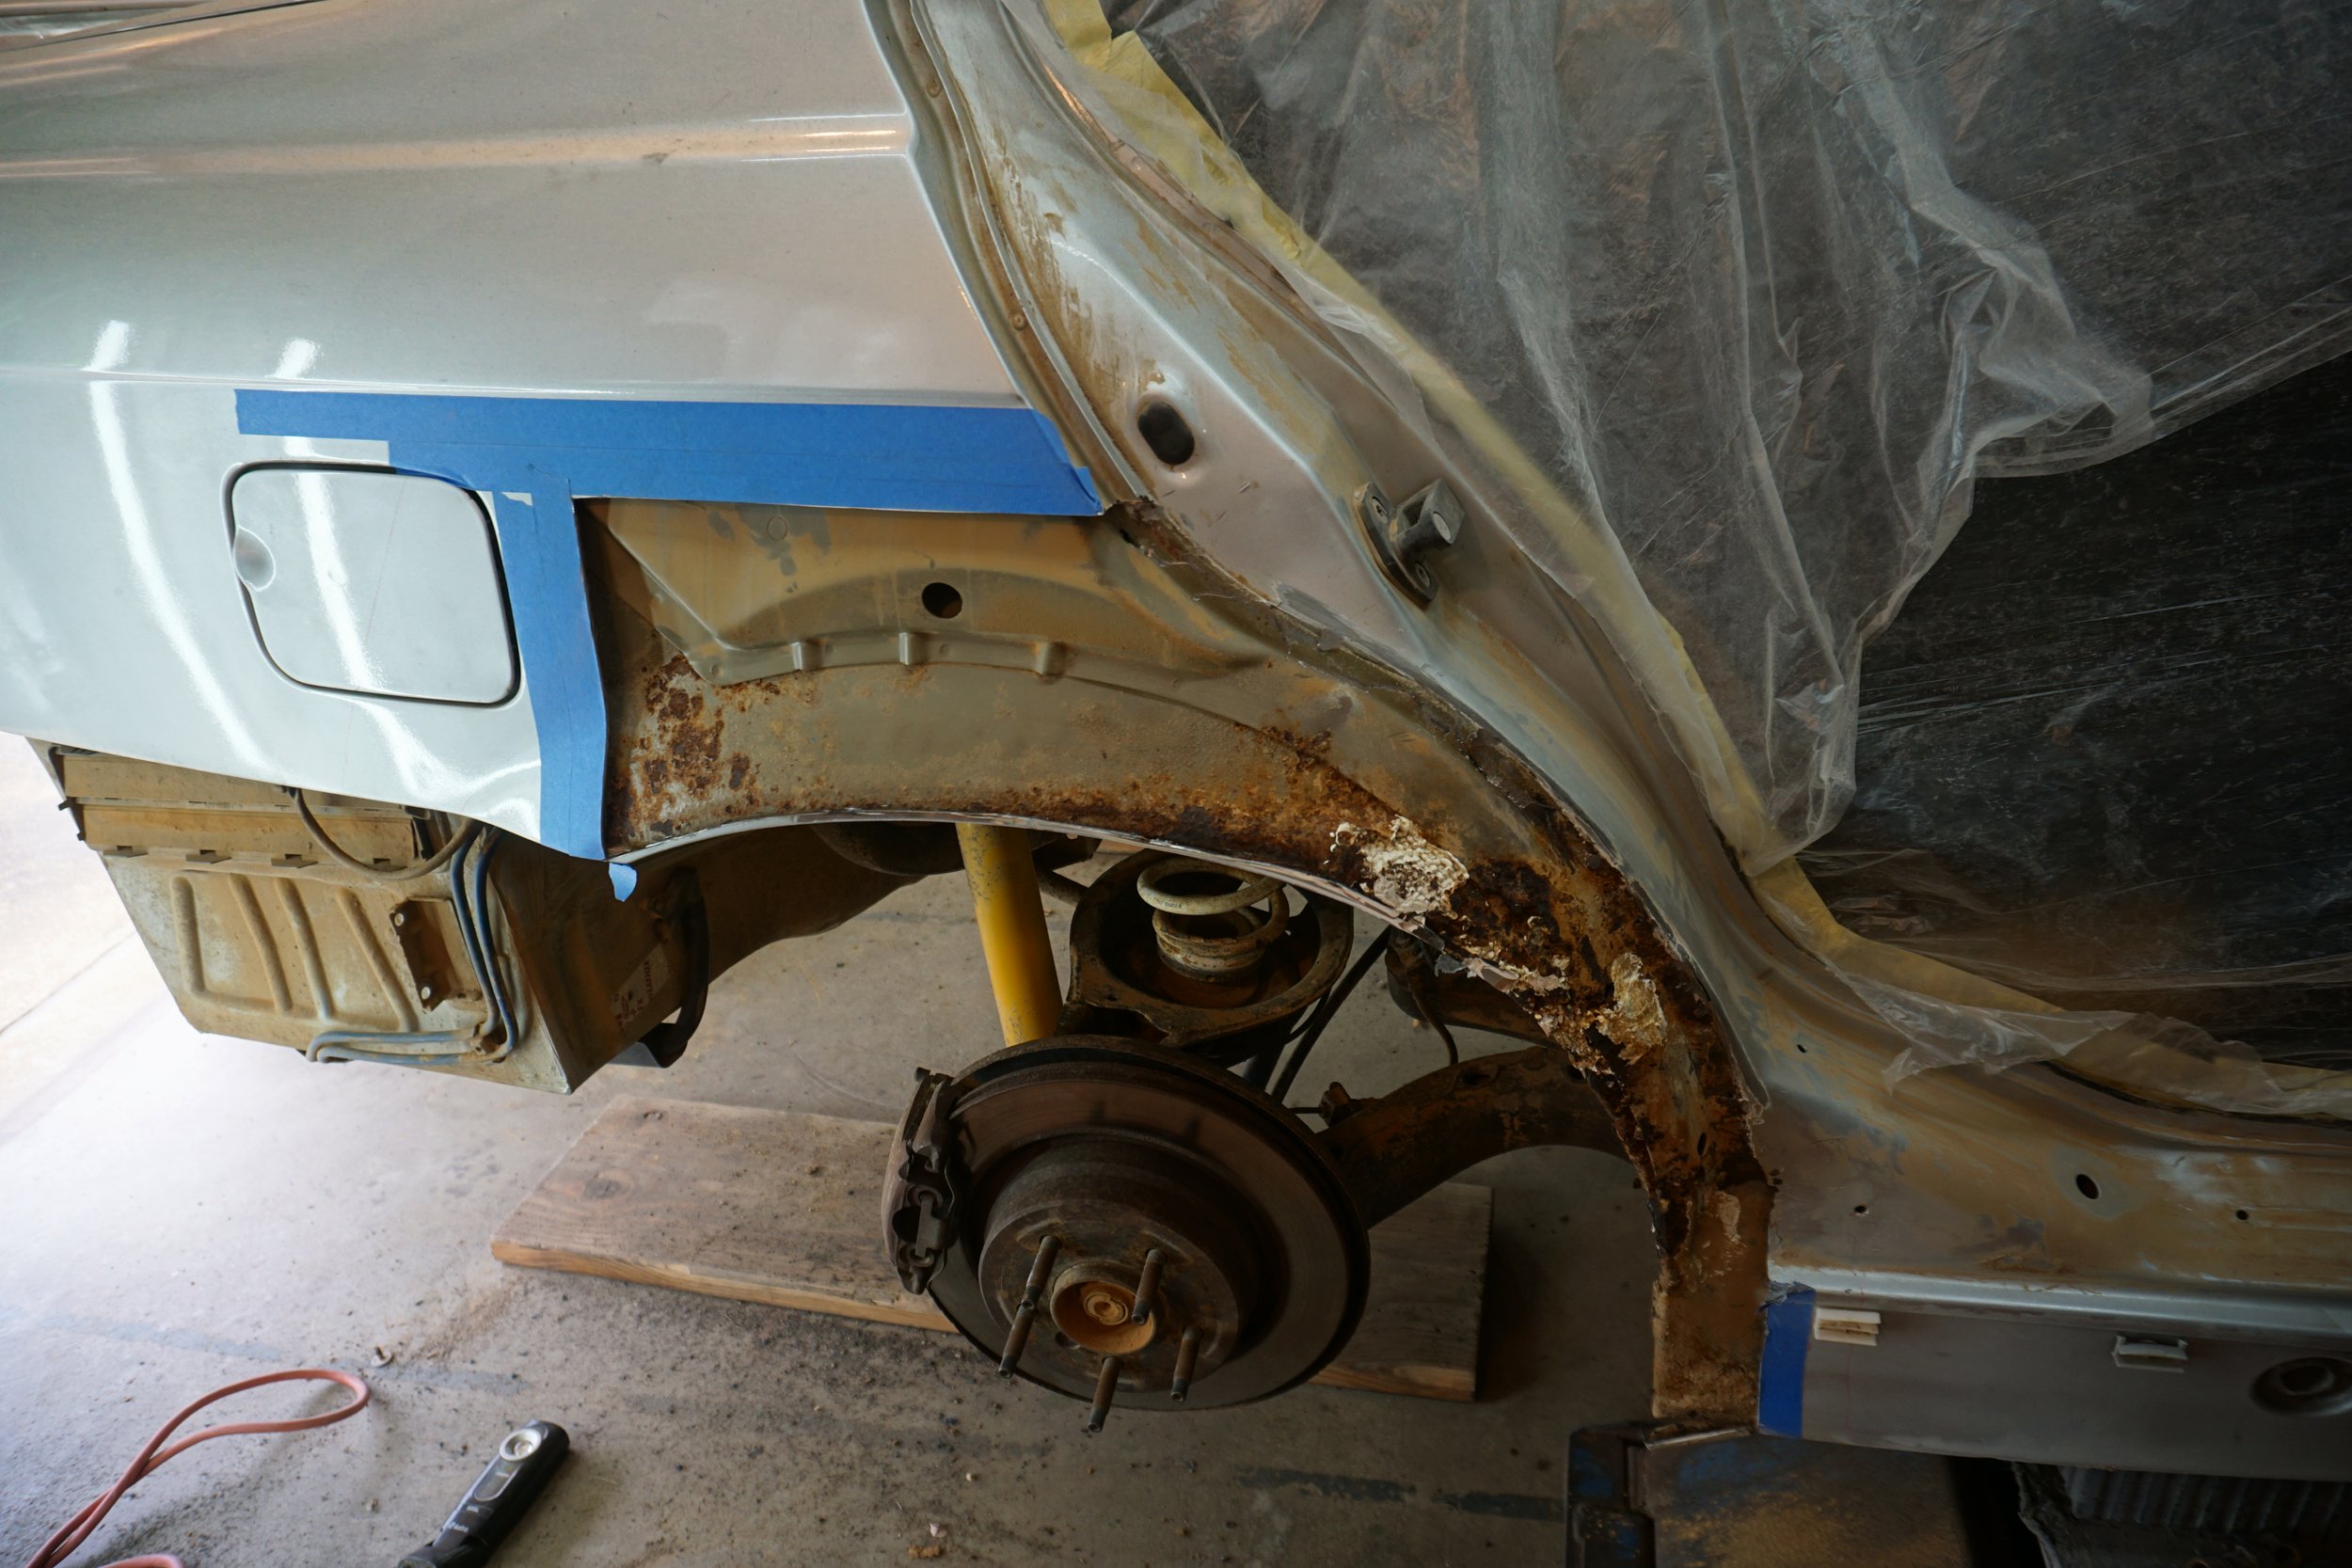
Things were looking pretty gnarly in there...
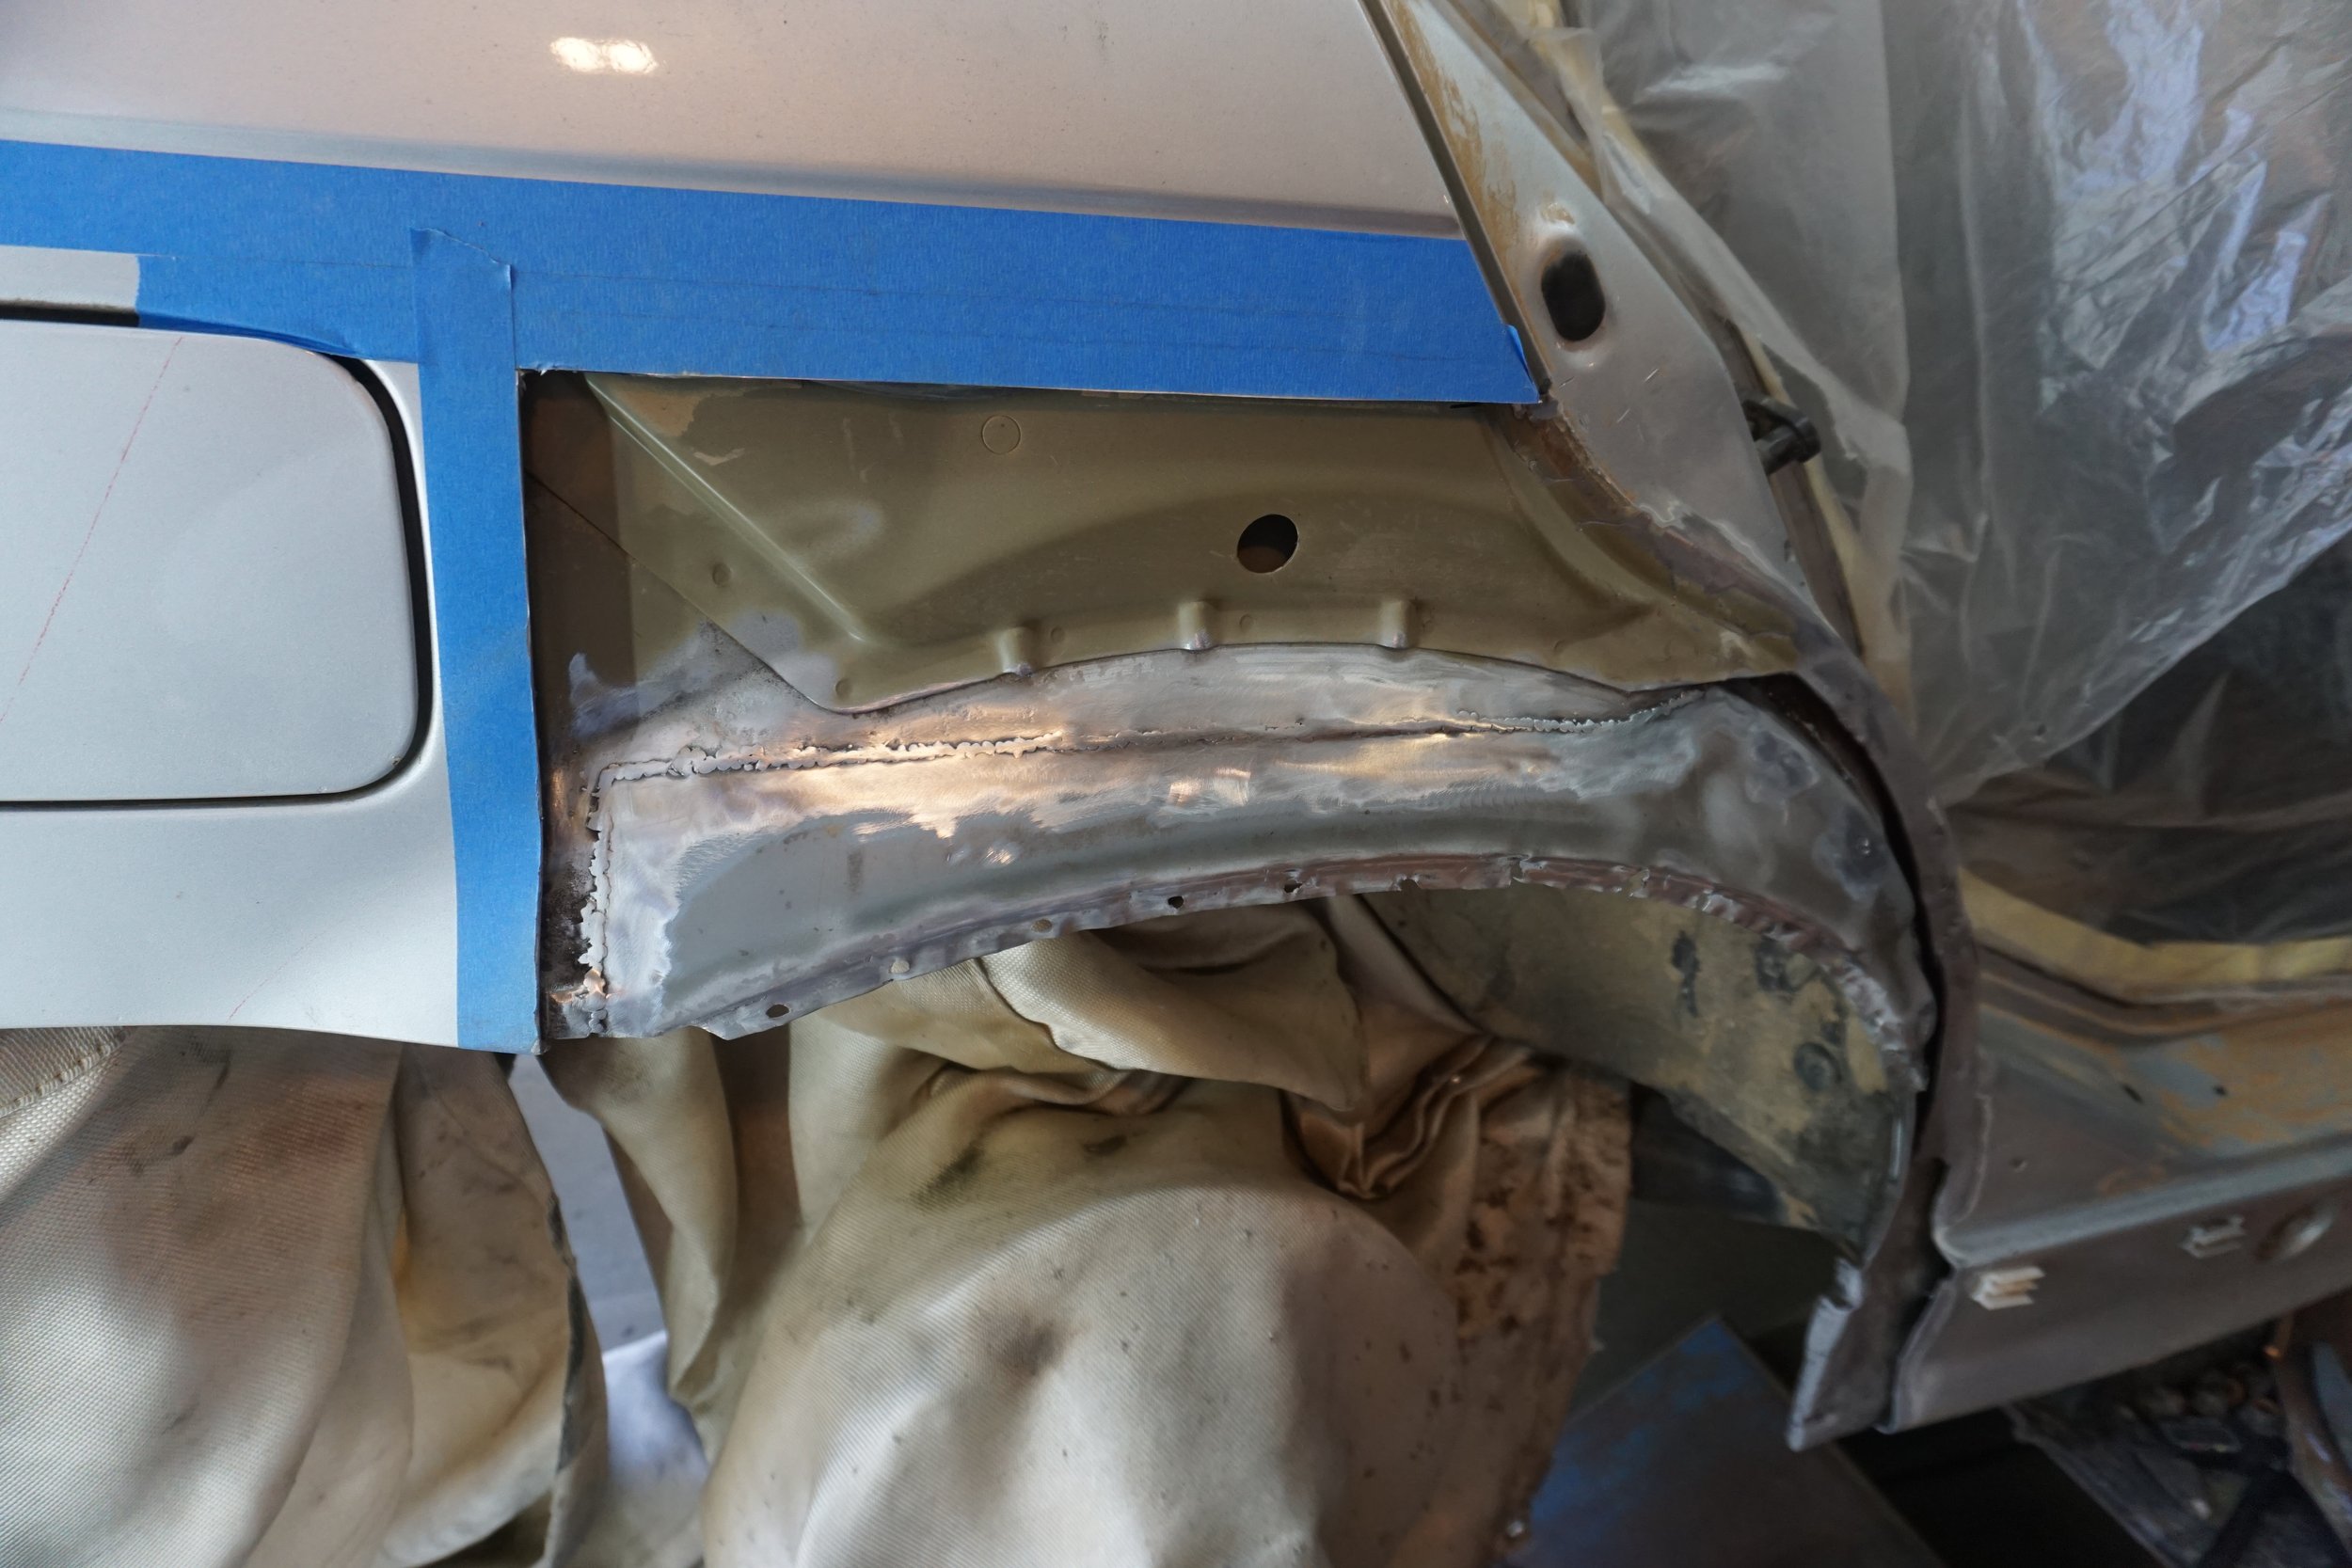
So I first welded in the "new" inner piece
And painted it with Mastercoat. NOTE: POR15 SUCKS, do not ever use POR15, it doesn't work. I'm so mad at myself for using it previously on my I30, I'll probably have to re-do all of that with Mastercoat eventually.
Skipping ahead many steps, I got the outer piece welded on. Getting it to line up with the door shut line and everything else was a big challenge.
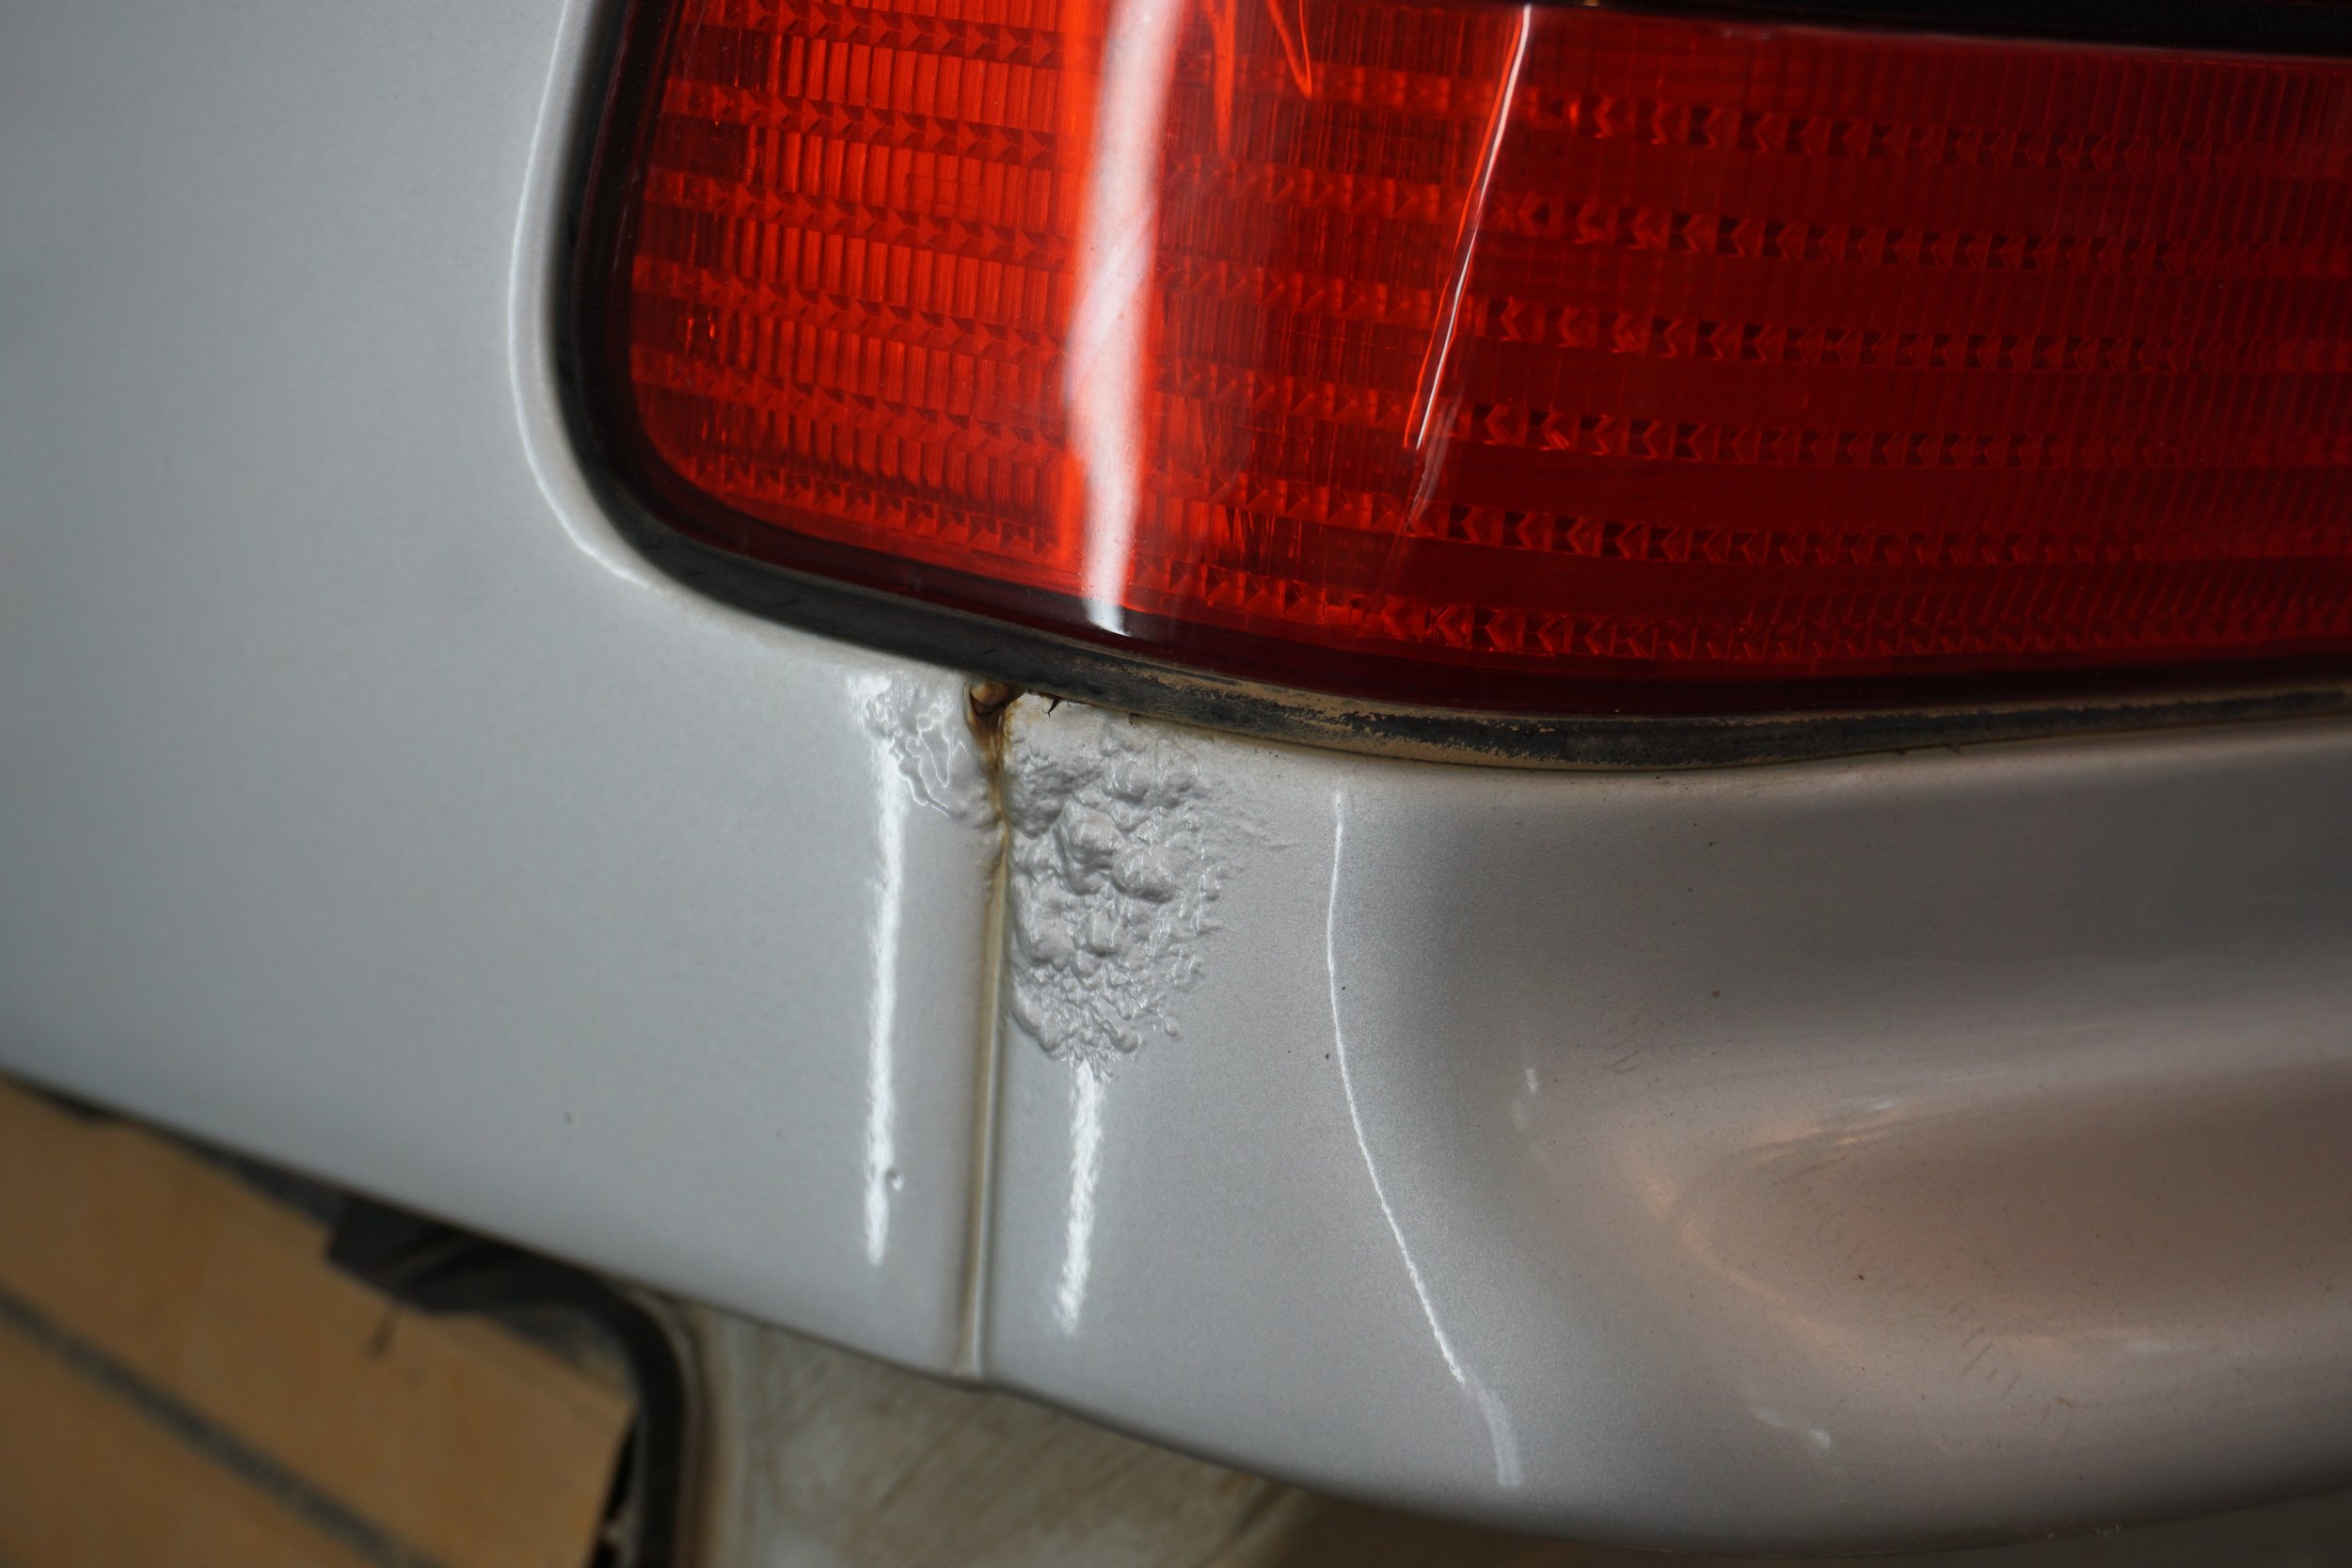
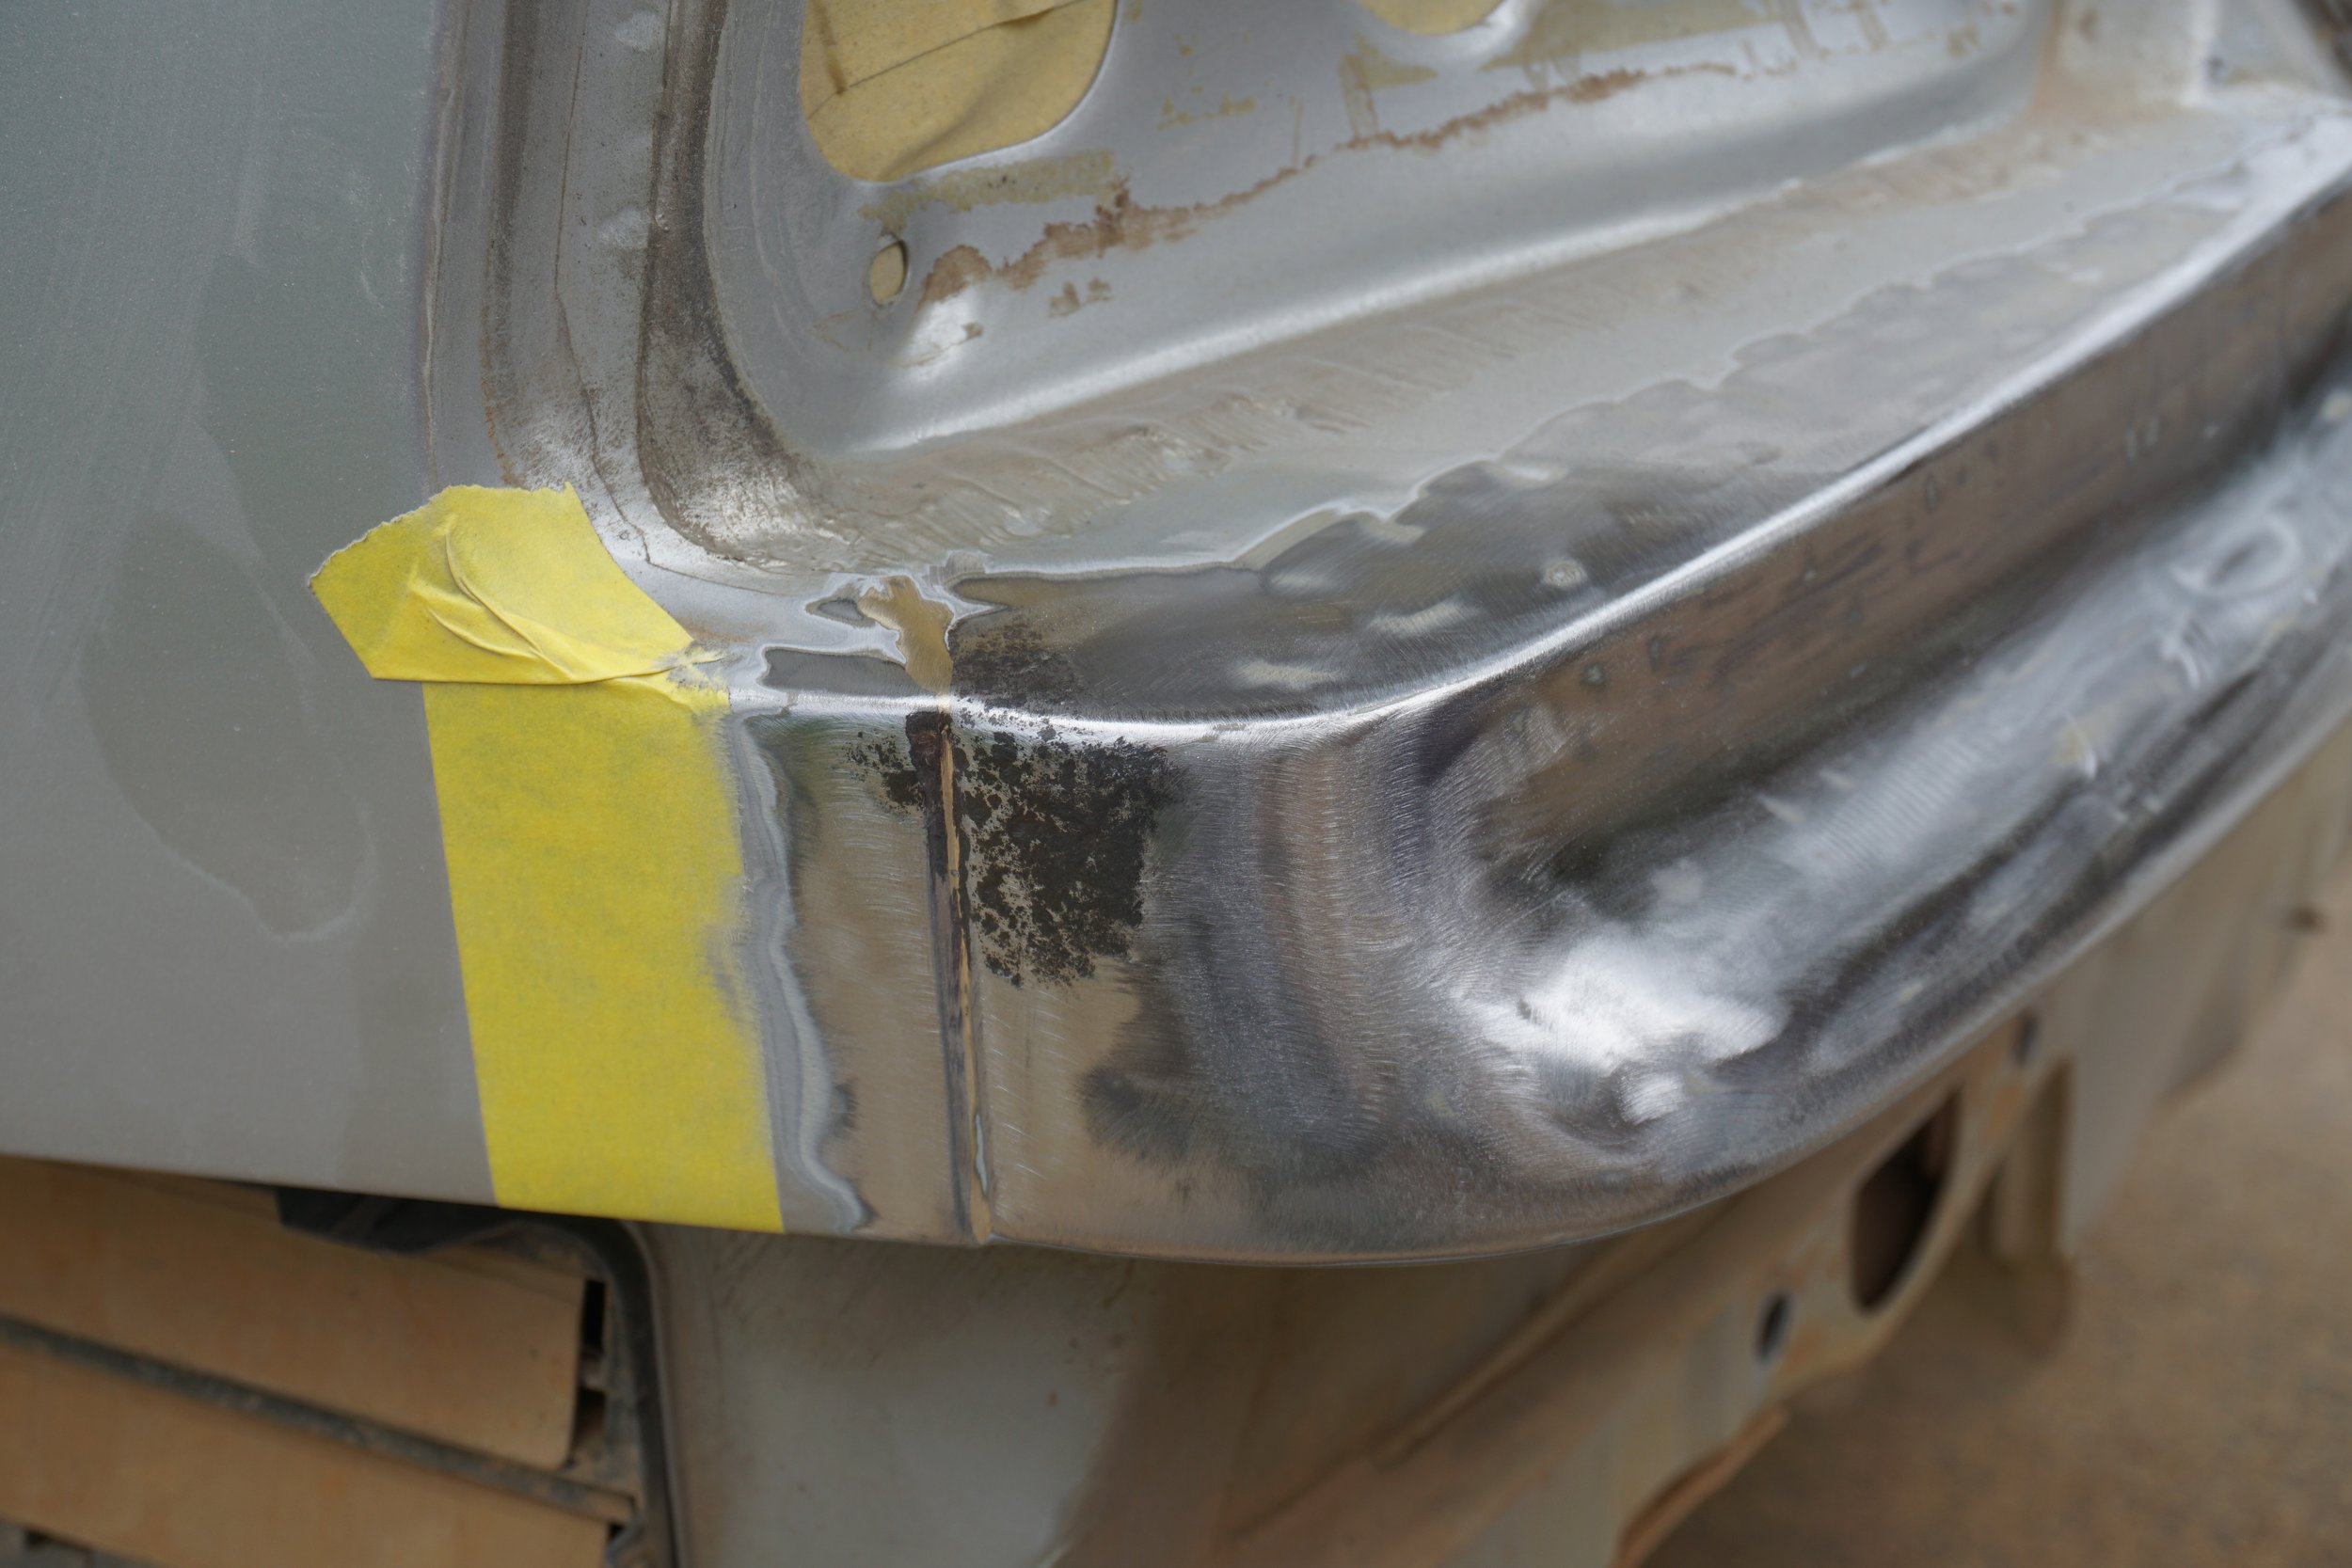
I got to use my blasting tank some more to get rid of some deep rust around one of the tail lights. It just goes into all the pits and blasts out all of the rust. It's awesome!
Got rid of the spoiler and welded up the holes:
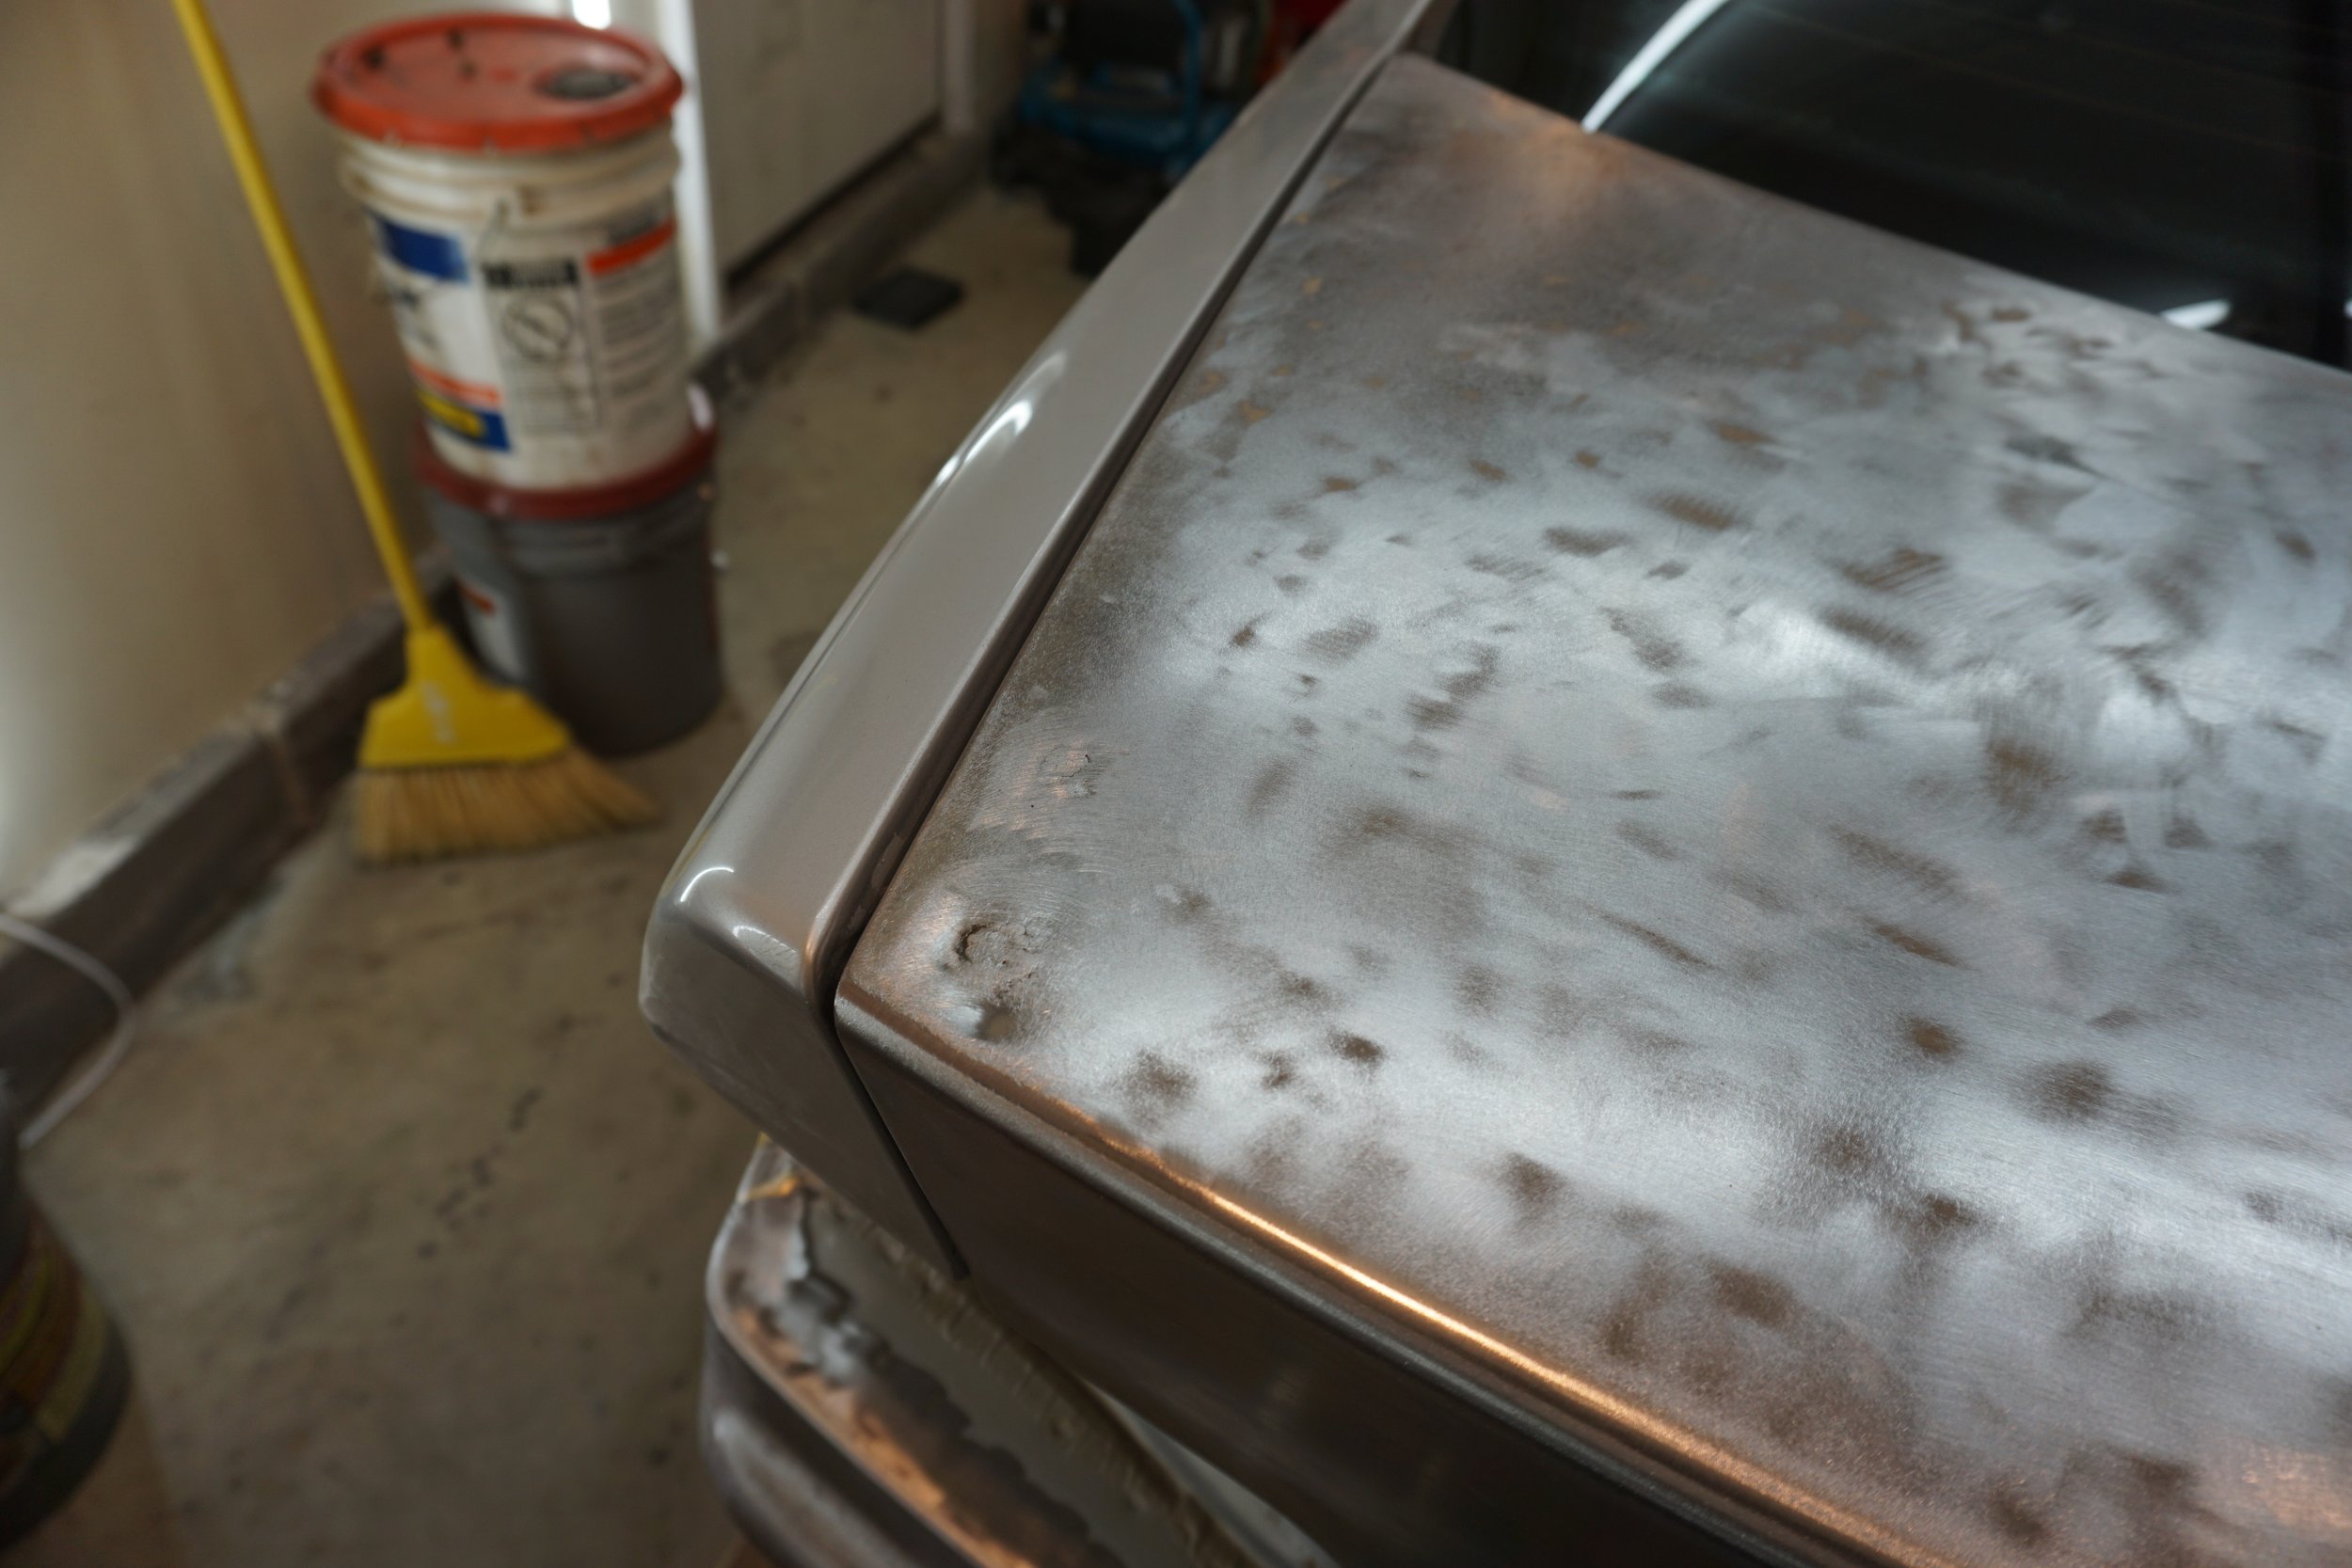
Epoxy primer, body filler, more epoxy, 2K, and then reduced epoxy as a sealer, sanded to 600 and ready for base coat.
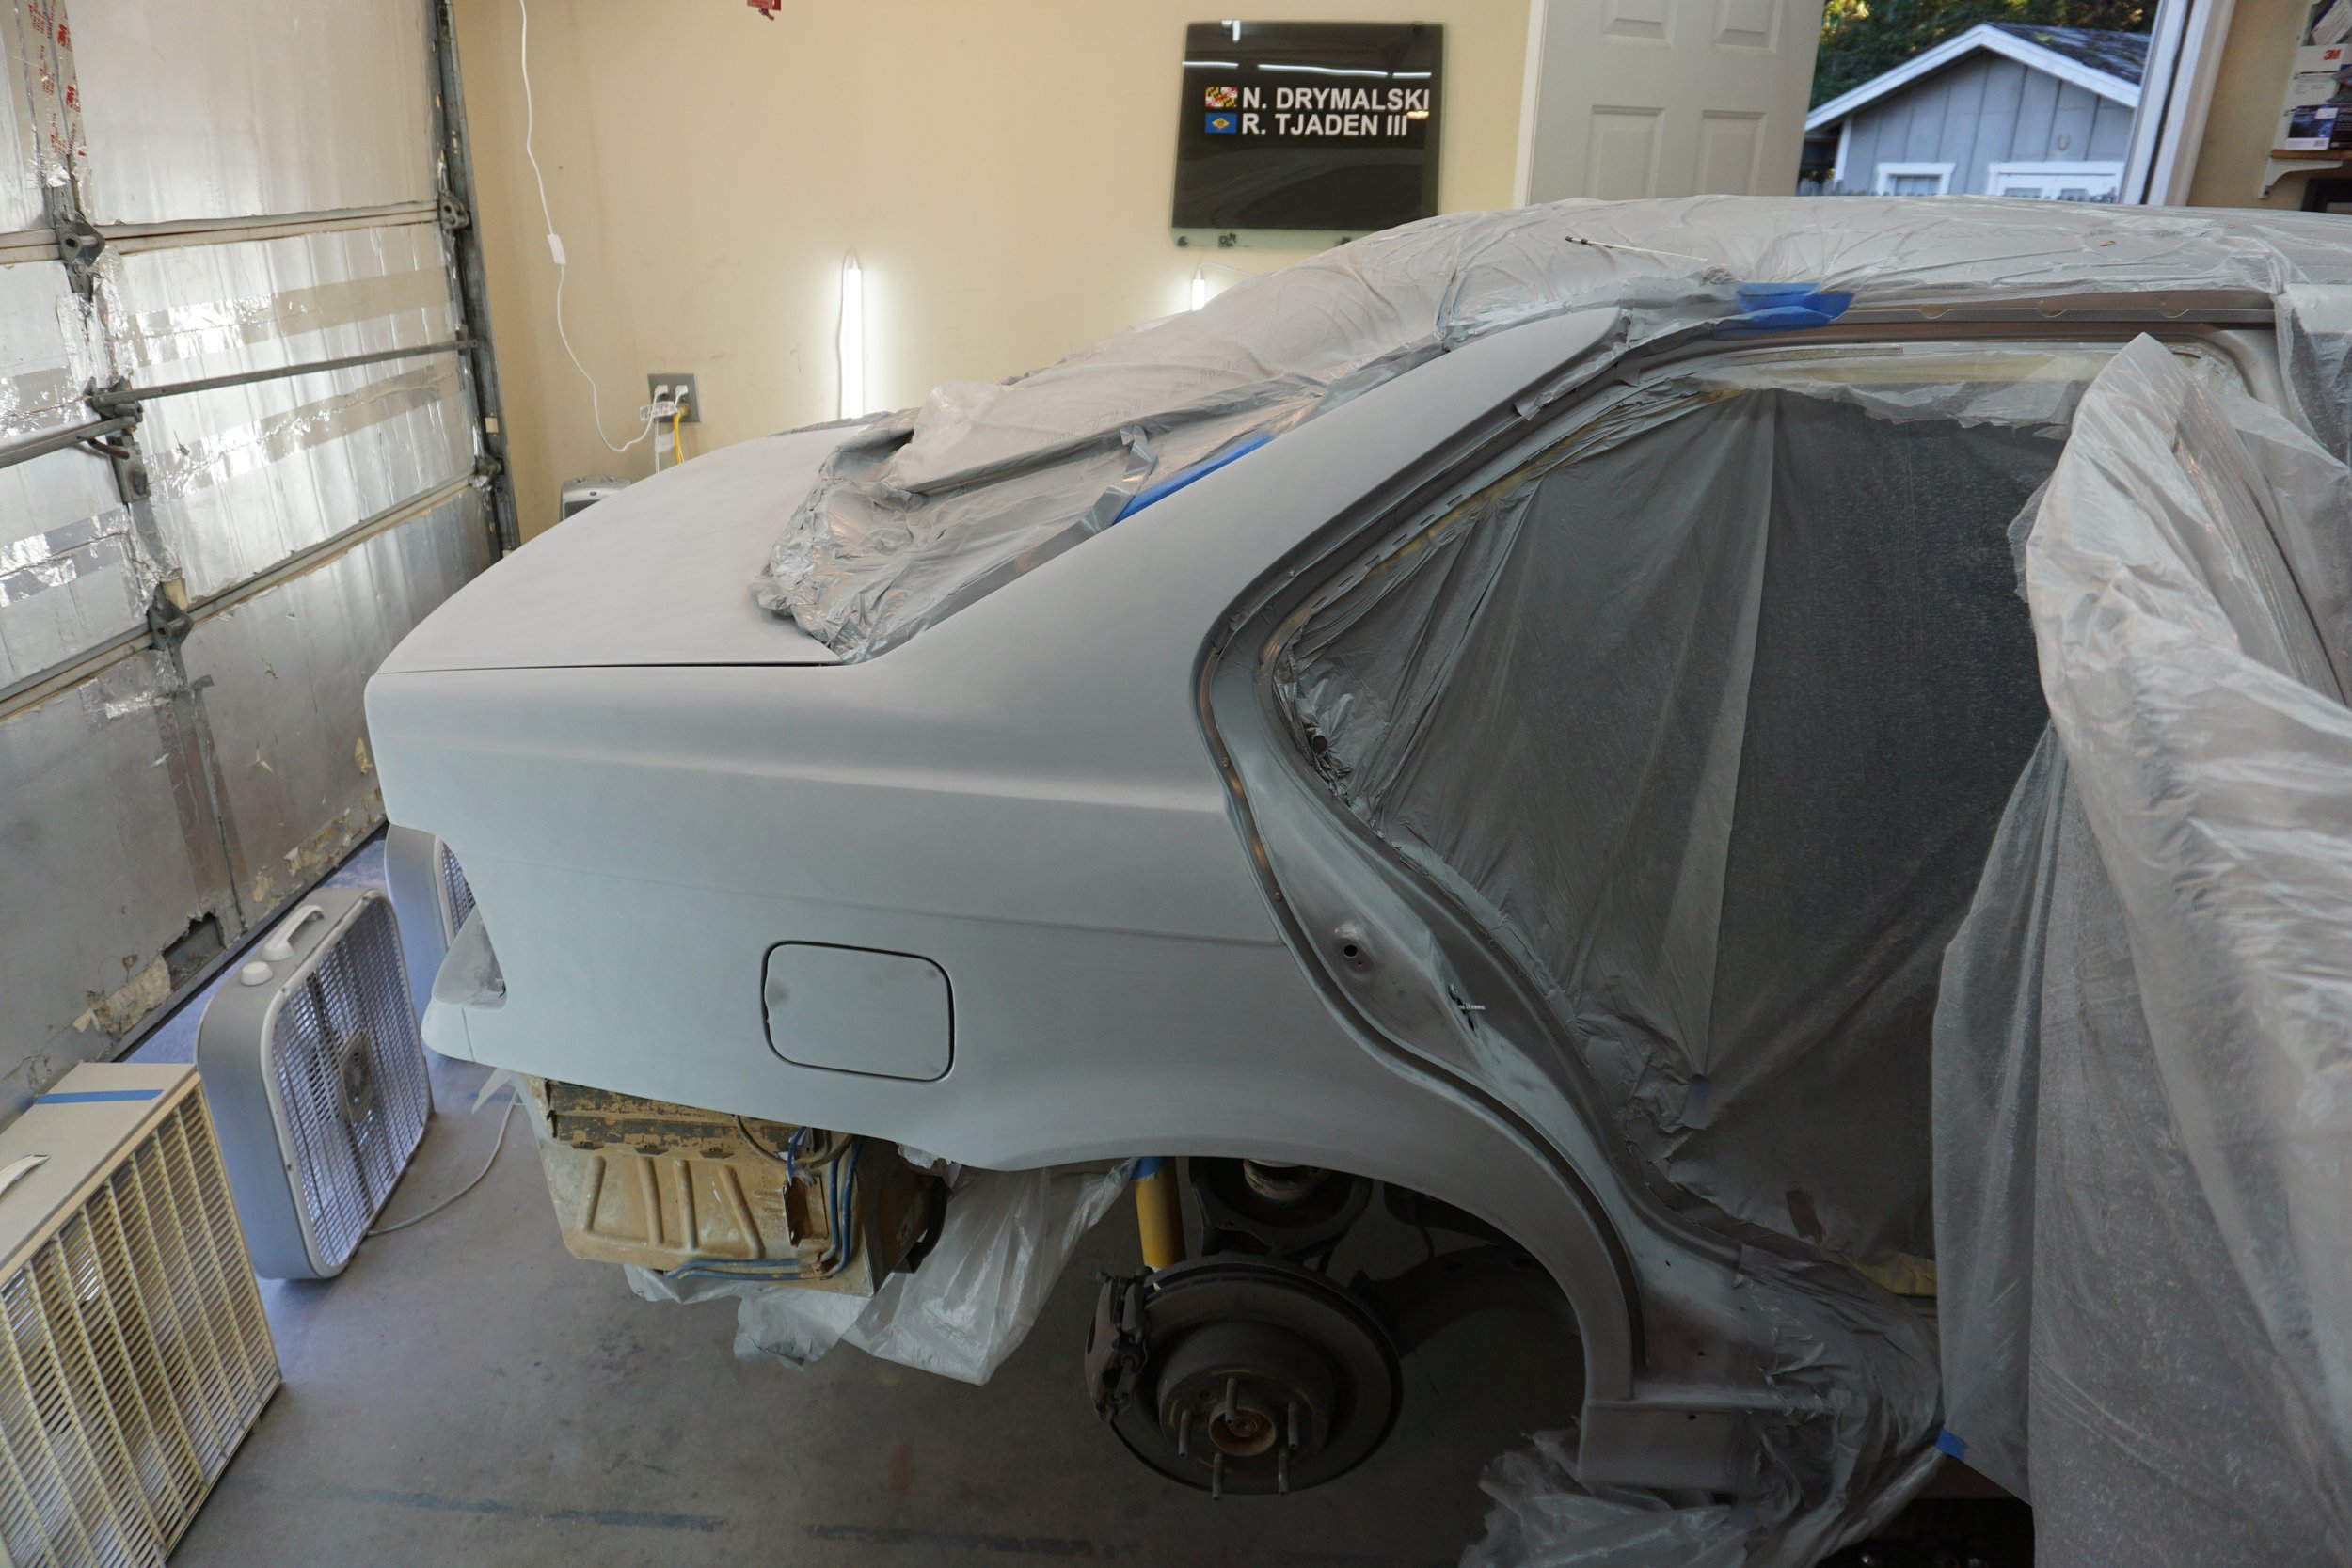
Base went on great
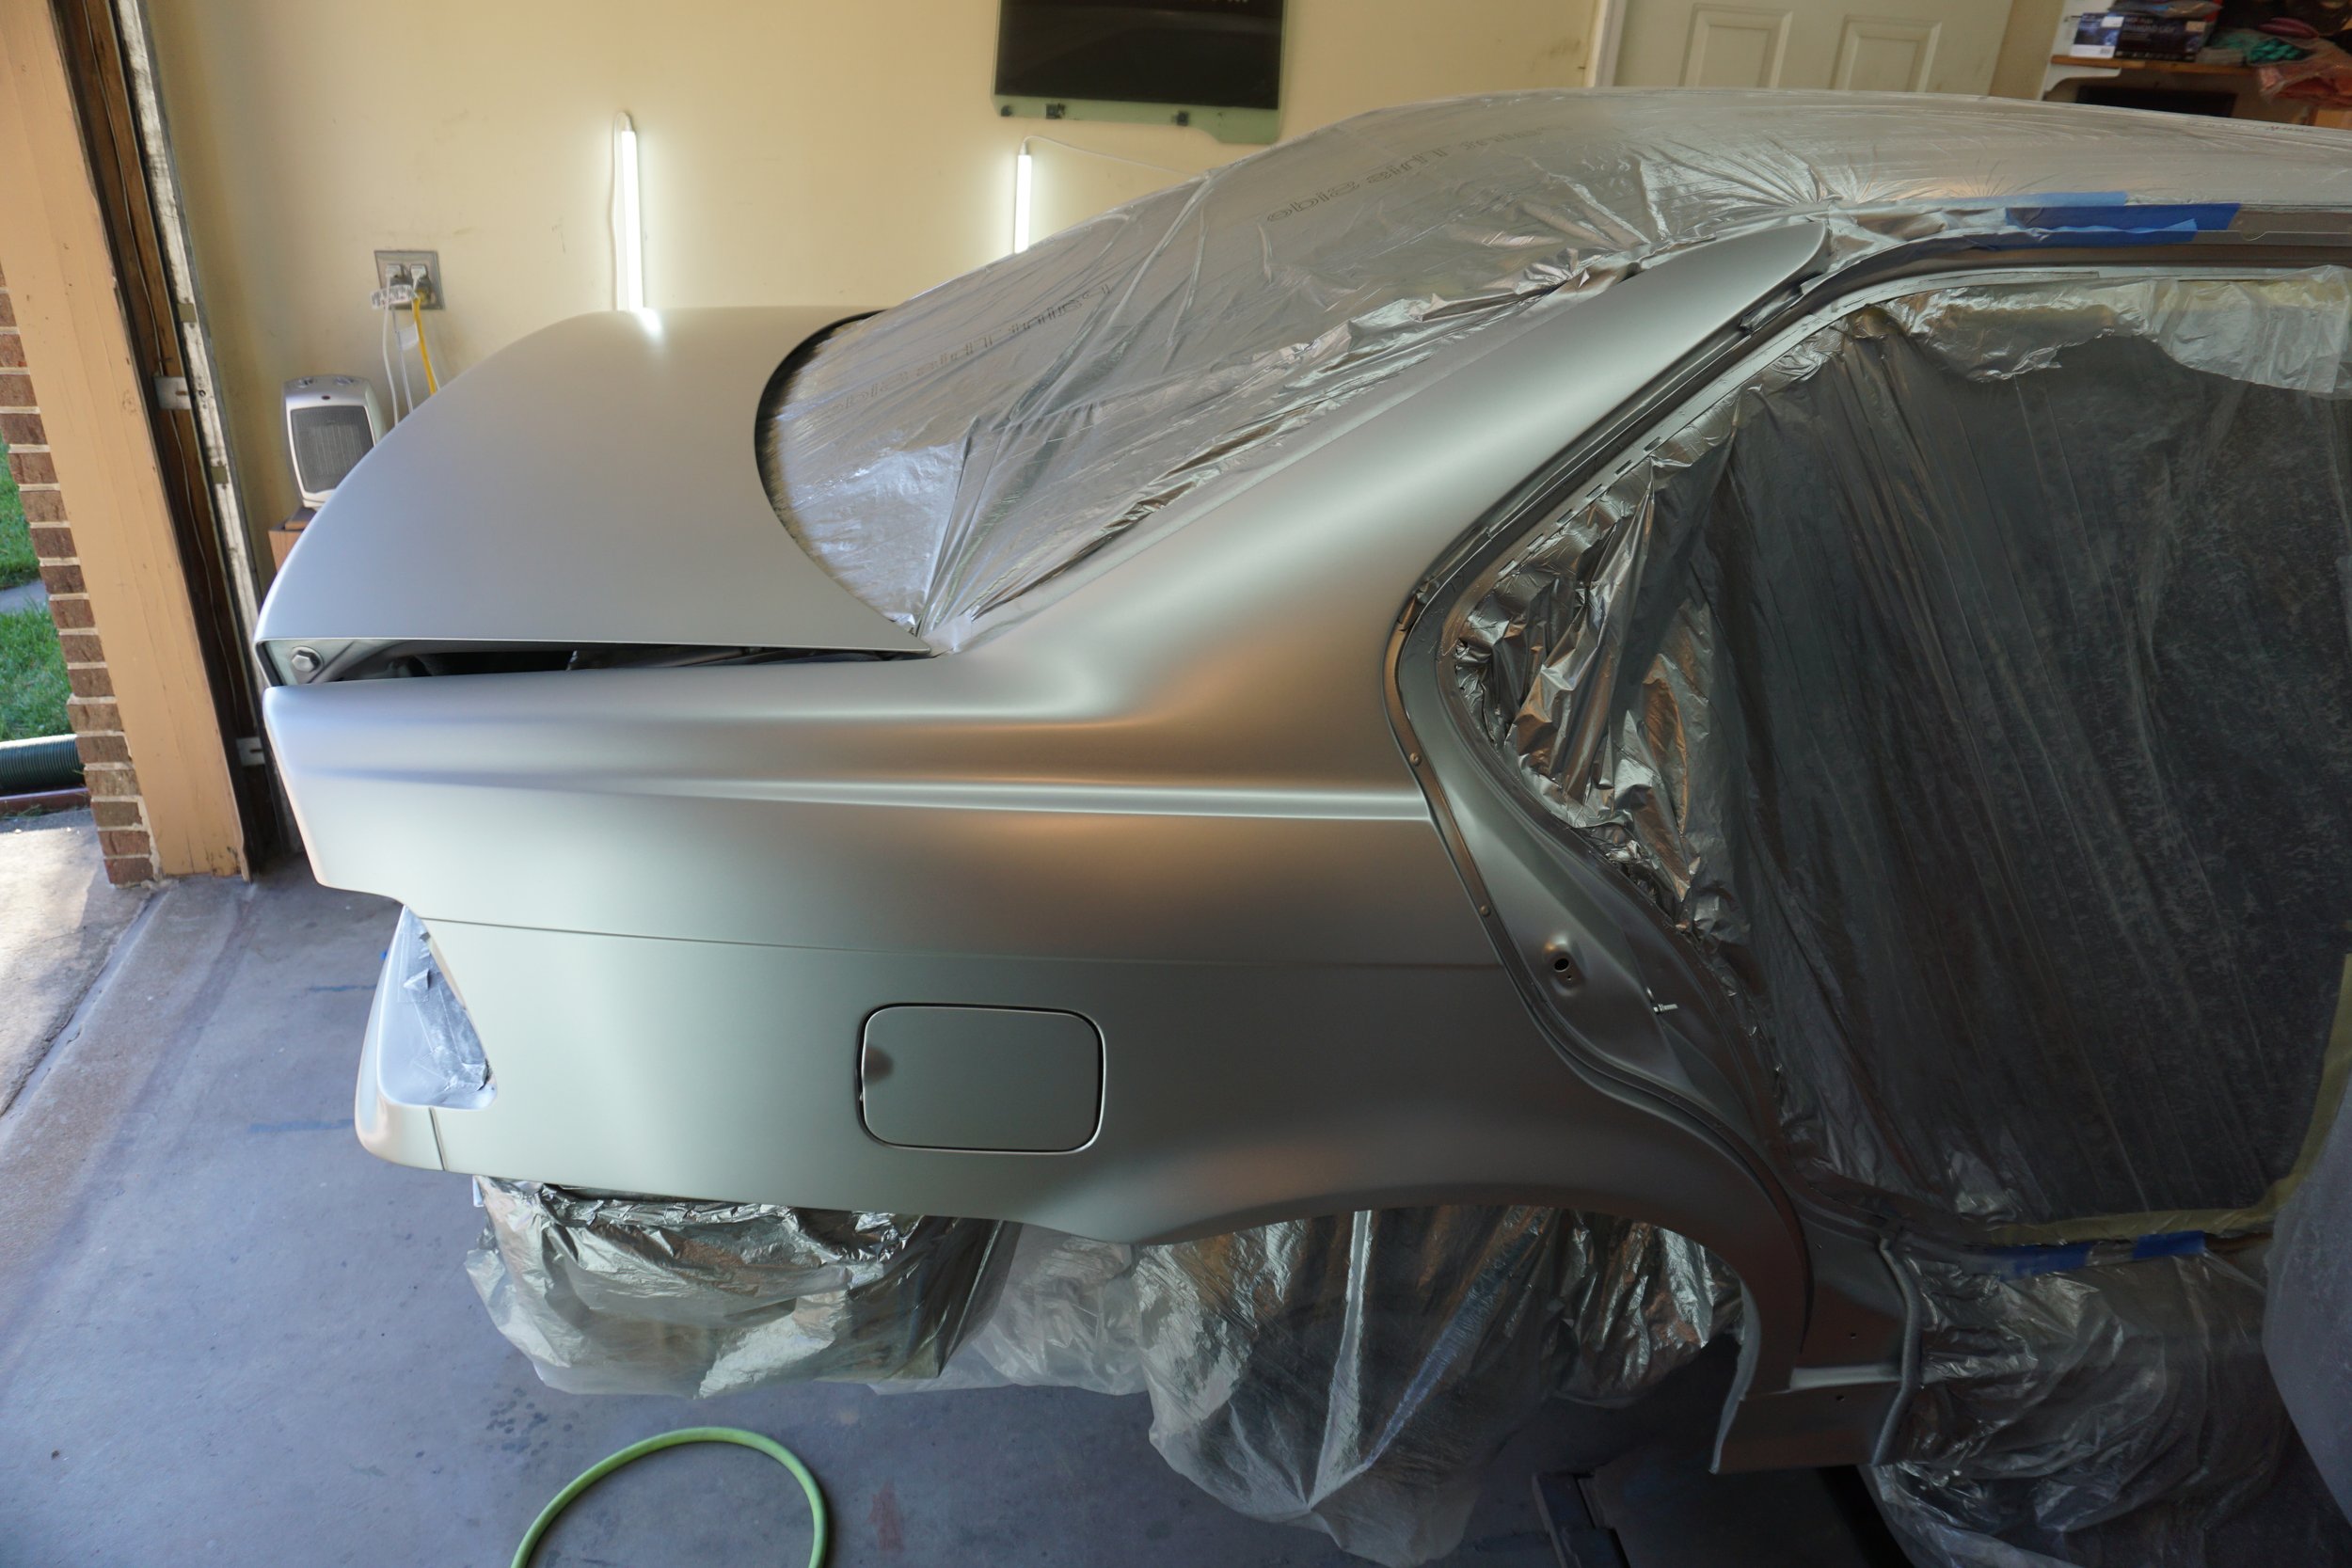
4 coats of clear didn't go on as smooth as I would have liked, but I can wet sand and polish it to my liking.
This will be good enough to tide me over for a few years until I can respray the whole car the factory Estoril Blue


This has all been practice for the work I need to do on the I30, which probably now won't happen until the spring since it seems the warm weather is all done for the year.
The PS rear quarter panel of the M3 was rusting pretty bad from an old accident that was never repaired properly. Three years ago I did a hack repair before I could weld or paint properly. Here's what it was looking like back then:
Well, my hack job lasted about three years, and the rust bubbles were starting to pop through again. I knew I needed to weld in fresh metal, so I bought a replacement outer piece and then found a local car being parted to get the inner piece from.
Things were looking pretty gnarly in there...
So I first welded in the "new" inner piece
And painted it with Mastercoat. NOTE: POR15 SUCKS, do not ever use POR15, it doesn't work. I'm so mad at myself for using it previously on my I30, I'll probably have to re-do all of that with Mastercoat eventually.
Skipping ahead many steps, I got the outer piece welded on. Getting it to line up with the door shut line and everything else was a big challenge.
I got to use my blasting tank some more to get rid of some deep rust around one of the tail lights. It just goes into all the pits and blasts out all of the rust. It's awesome!
Got rid of the spoiler and welded up the holes:
Epoxy primer, body filler, more epoxy, 2K, and then reduced epoxy as a sealer, sanded to 600 and ready for base coat.
Base went on great
4 coats of clear didn't go on as smooth as I would have liked, but I can wet sand and polish it to my liking.
This will be good enough to tide me over for a few years until I can respray the whole car the factory Estoril Blue
This has all been practice for the work I need to do on the I30, which probably now won't happen until the spring since it seems the warm weather is all done for the year.
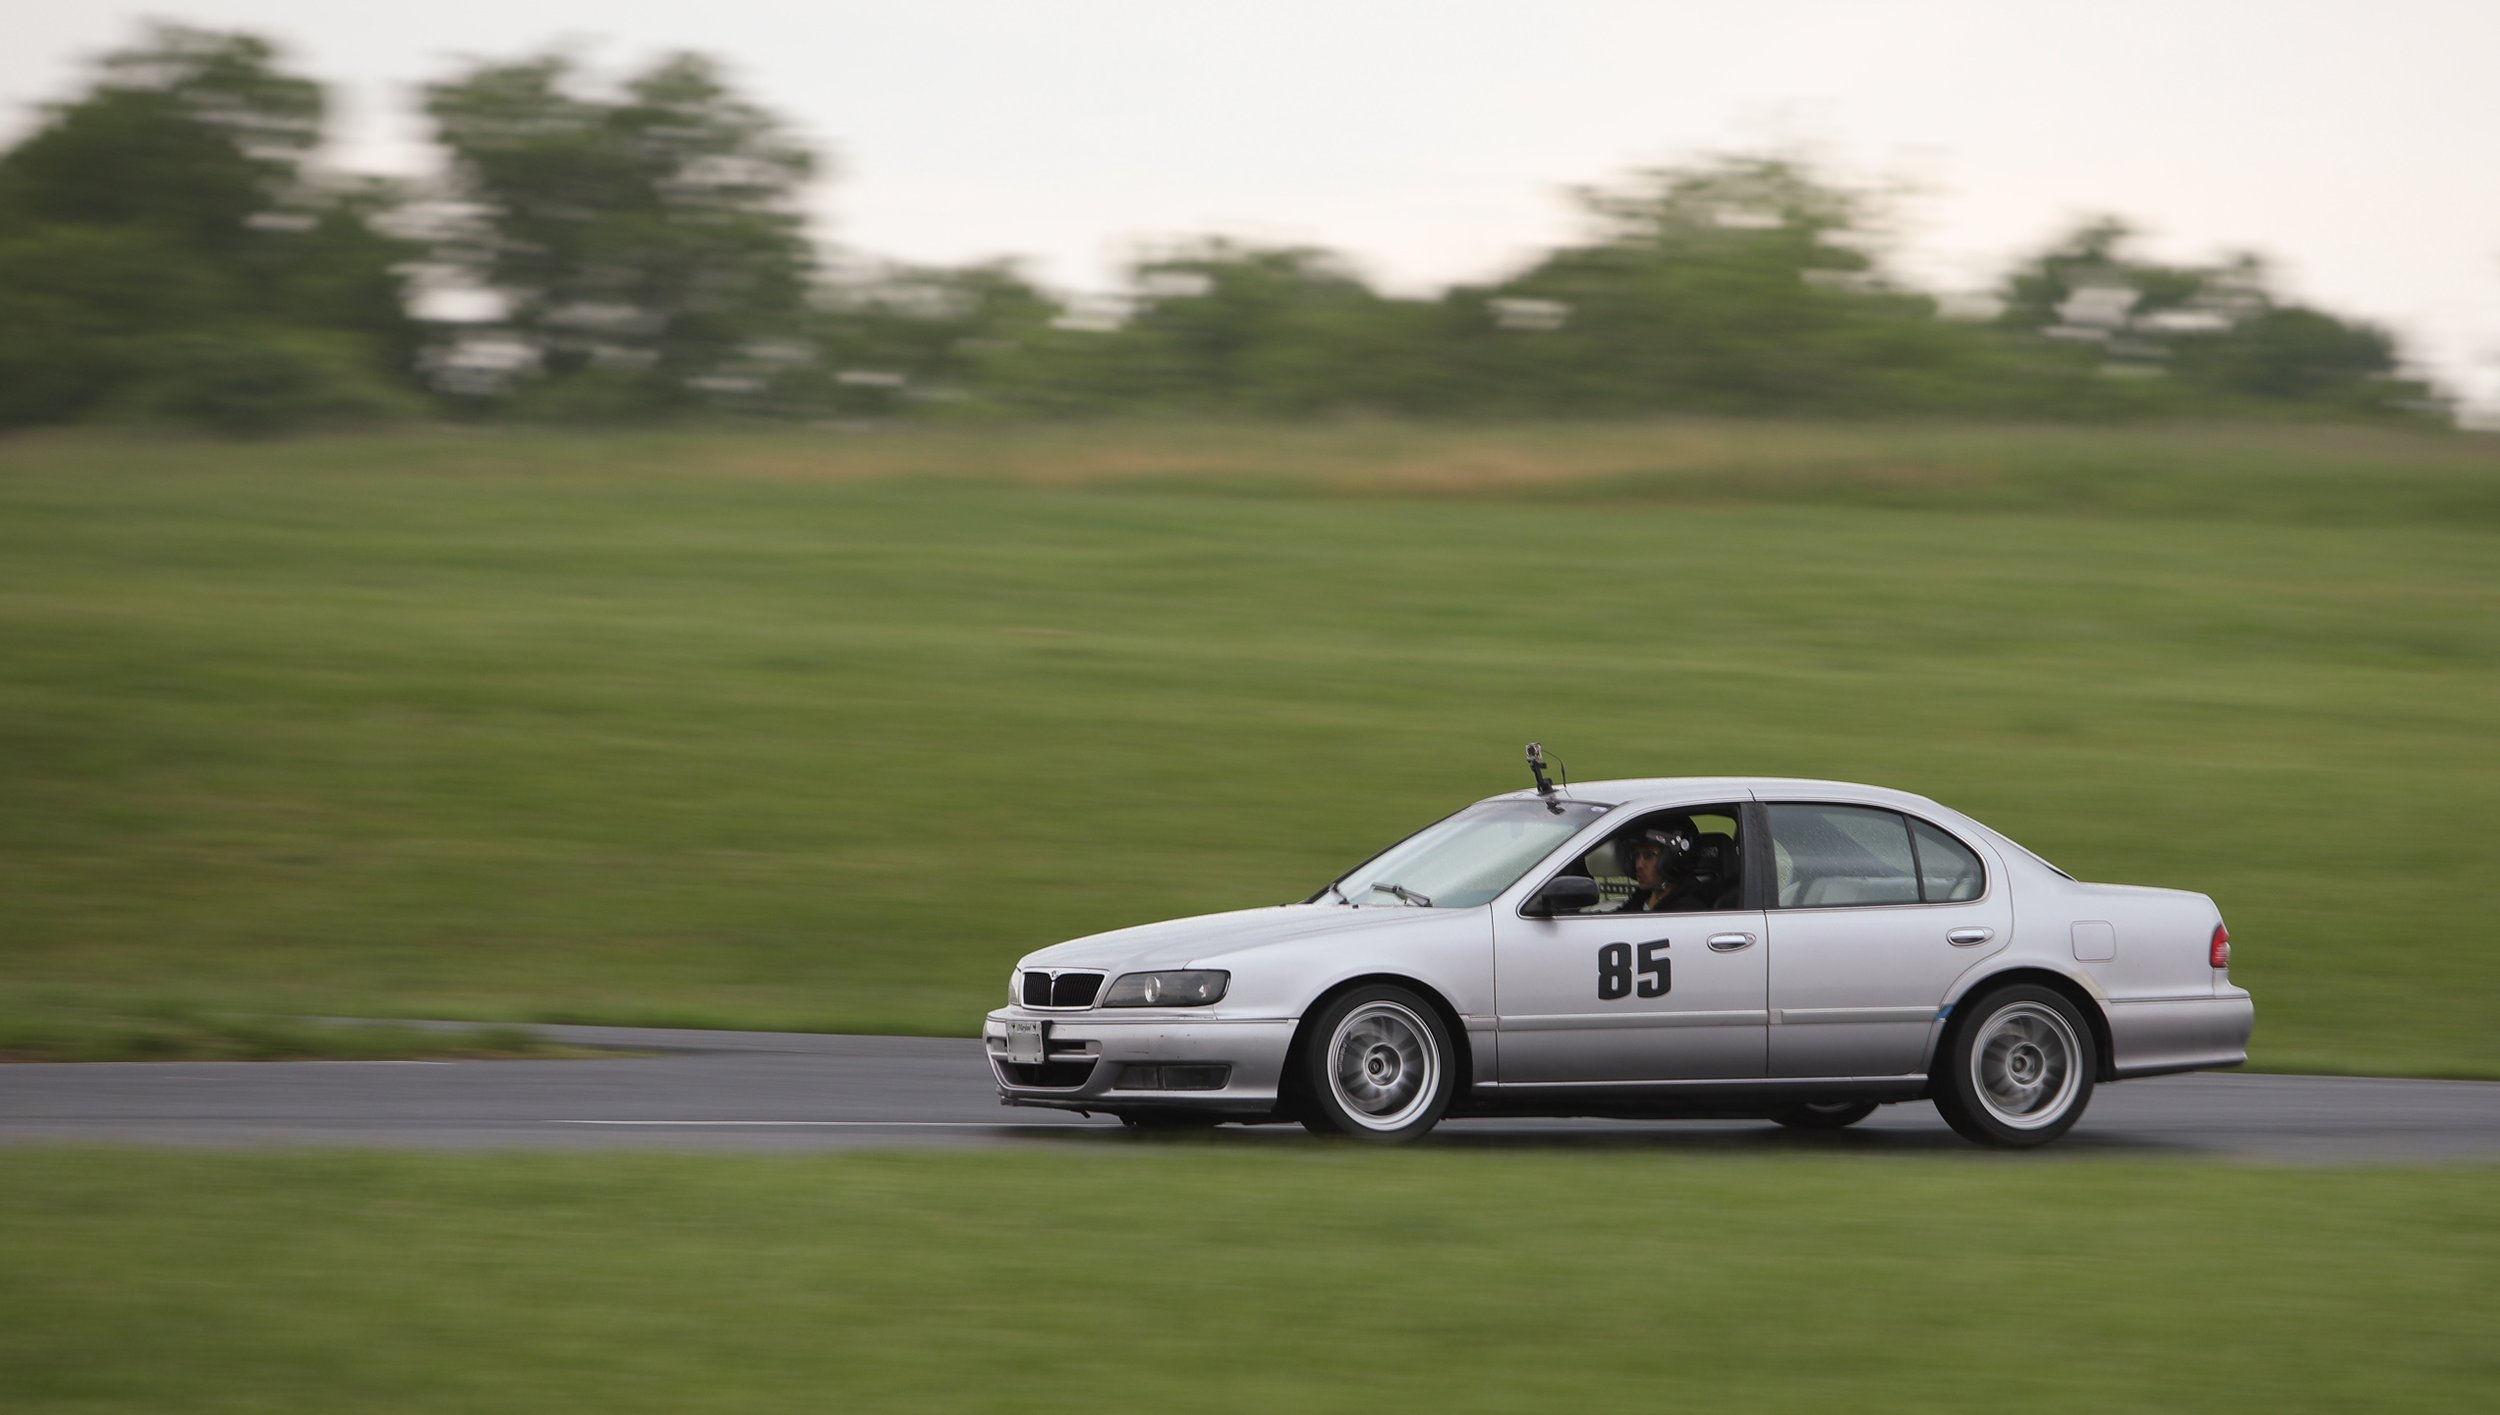
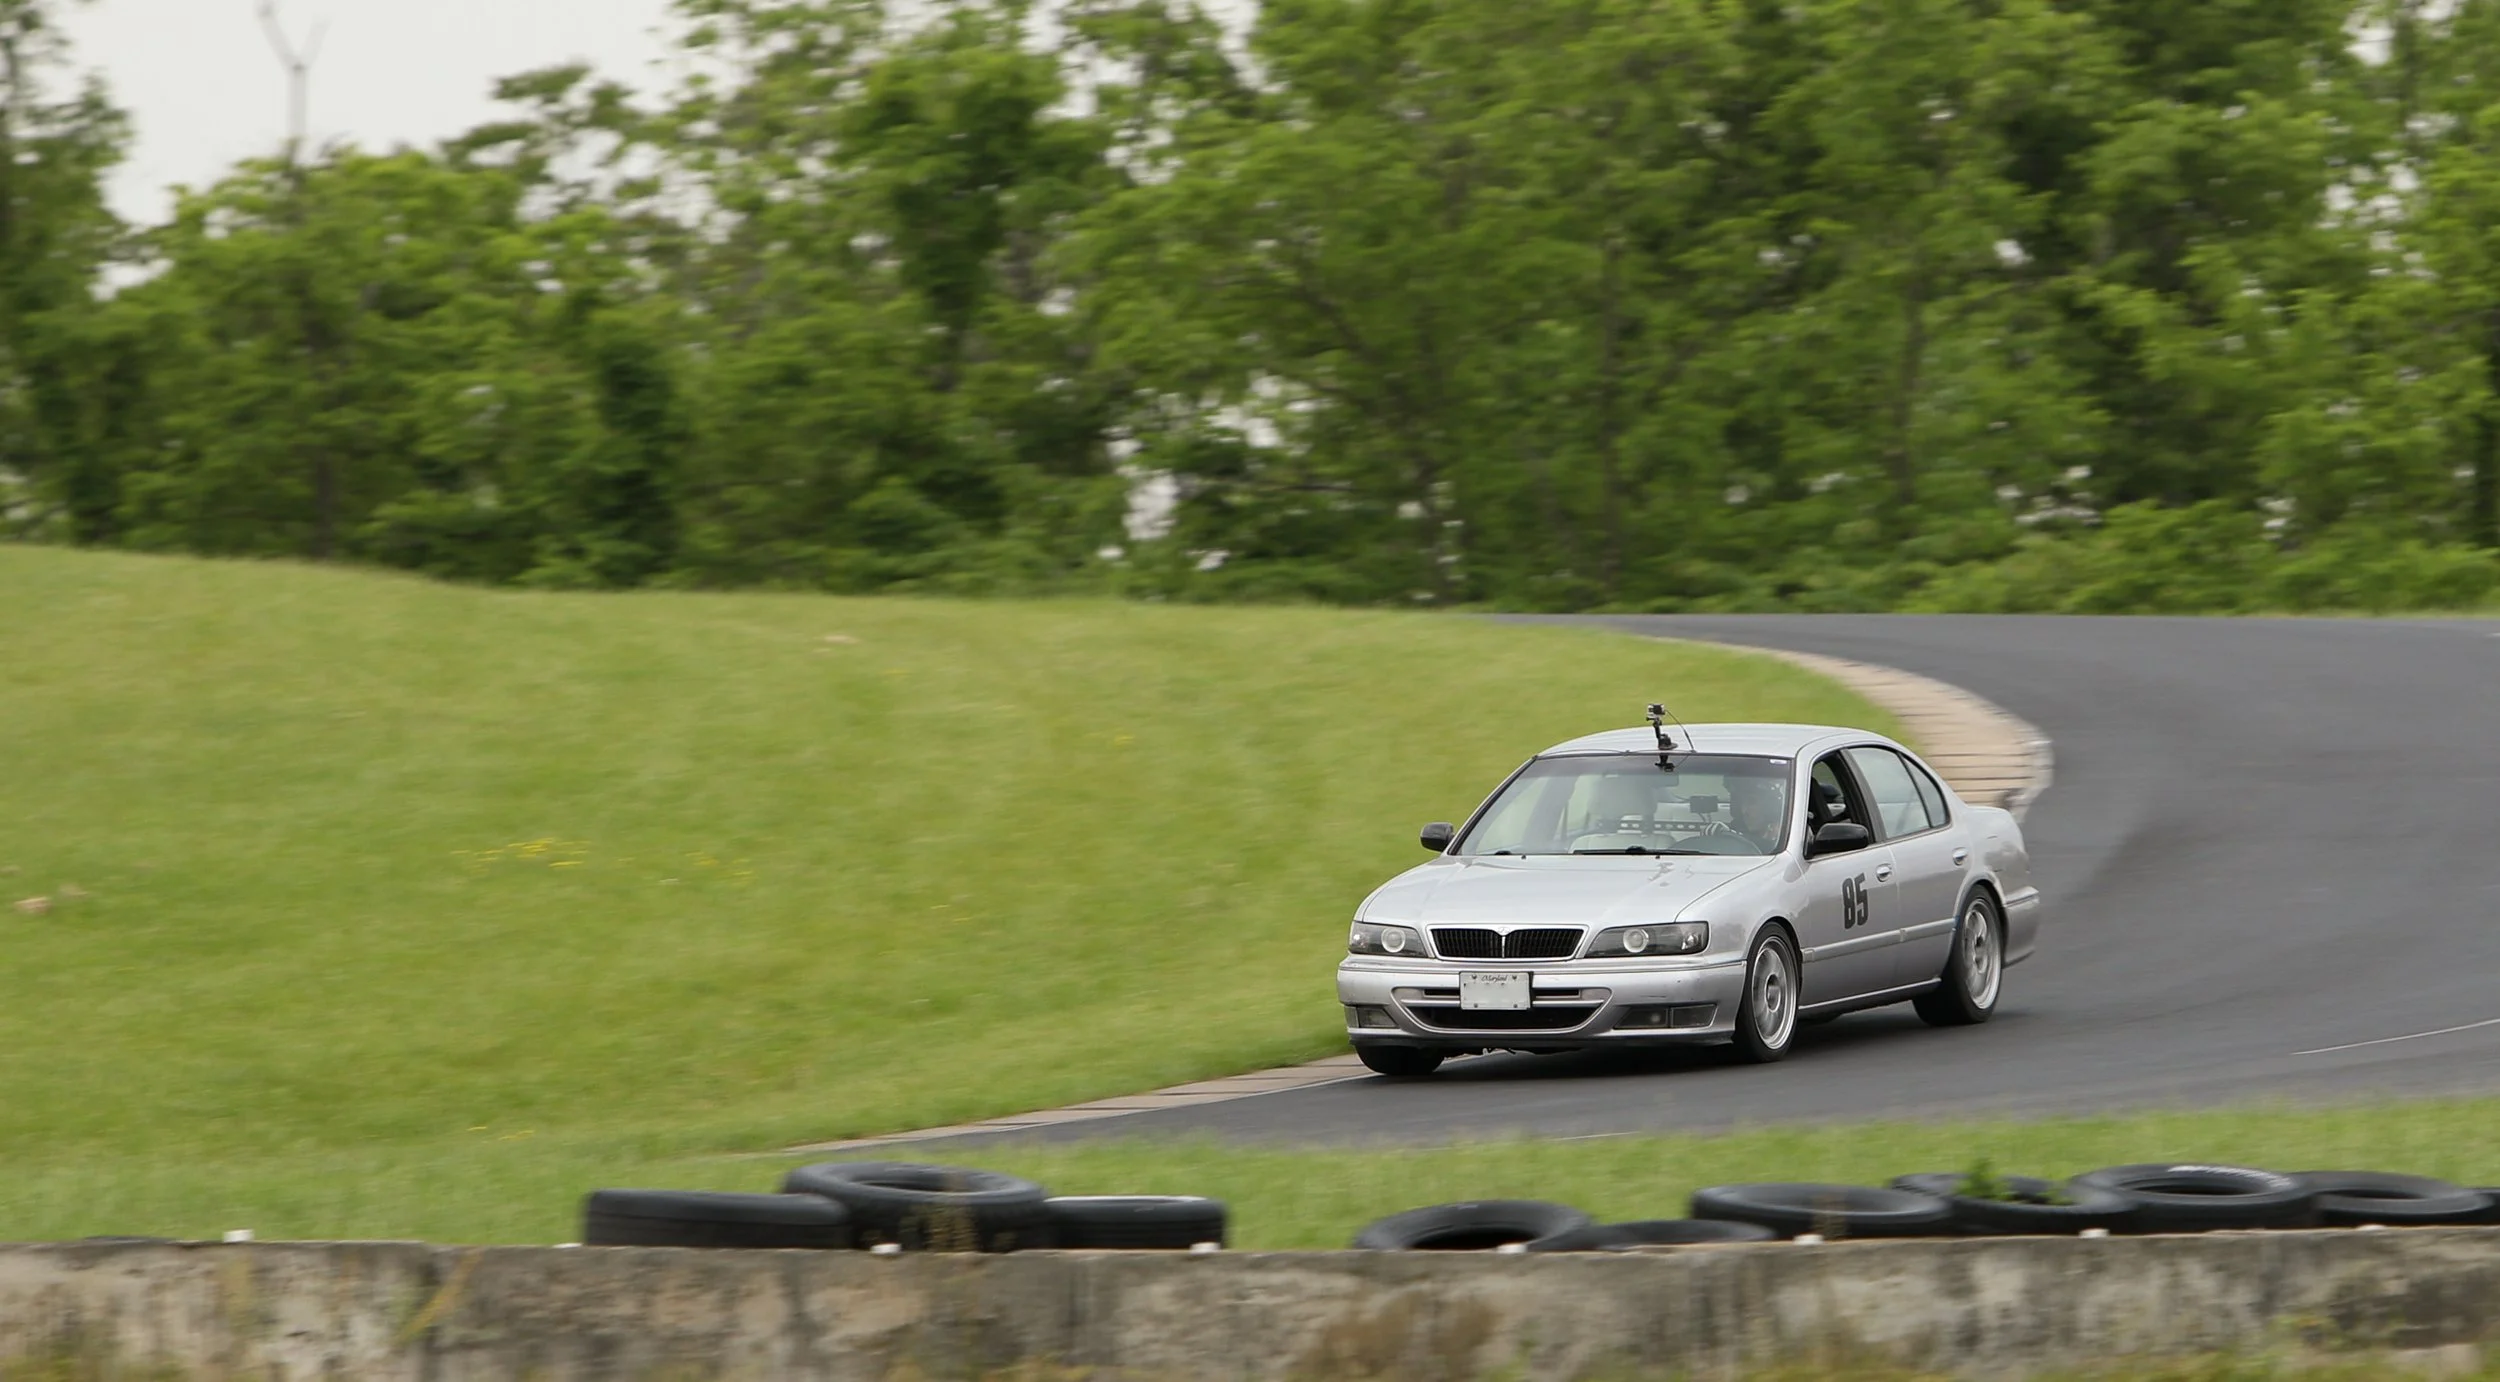
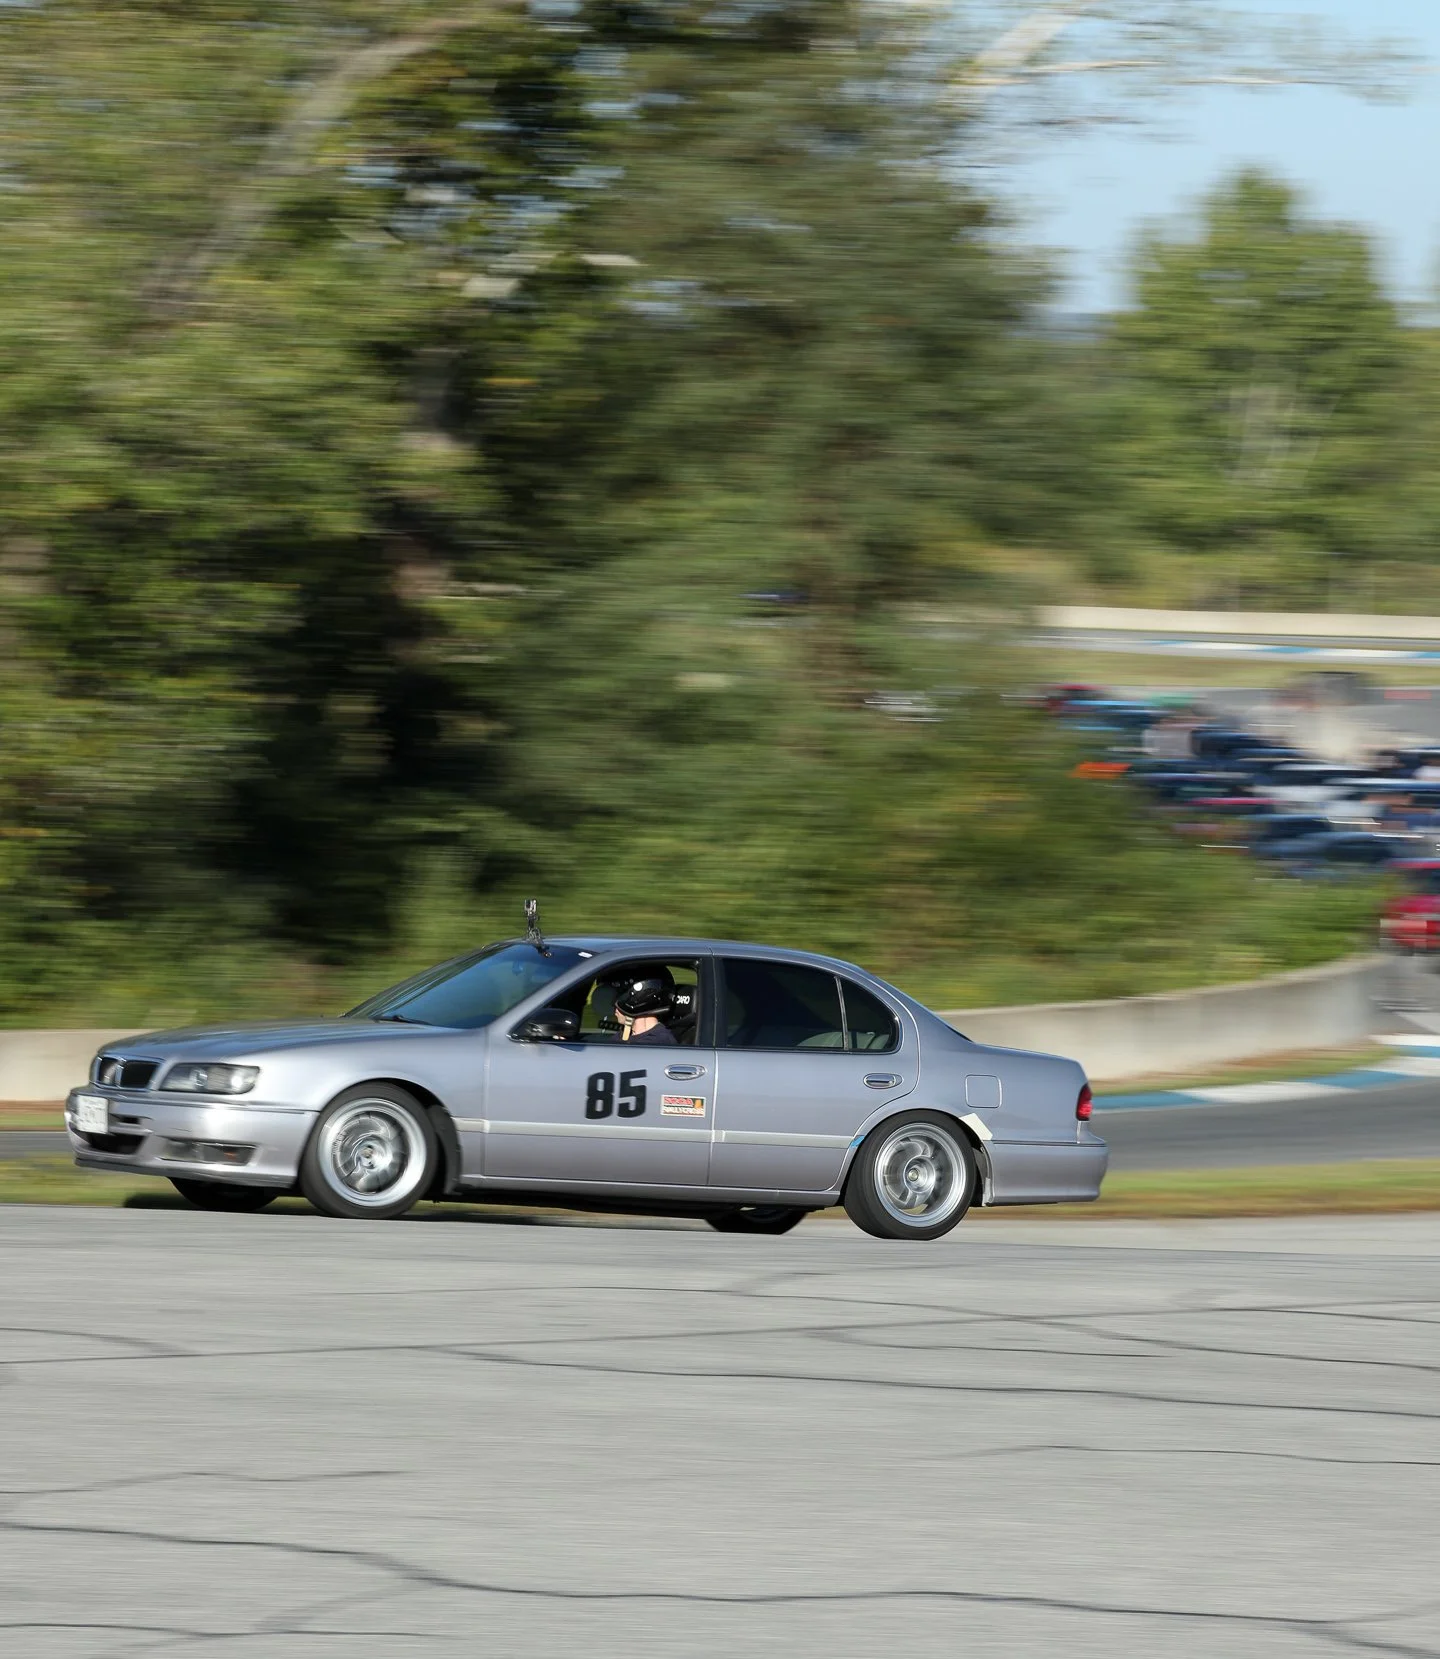
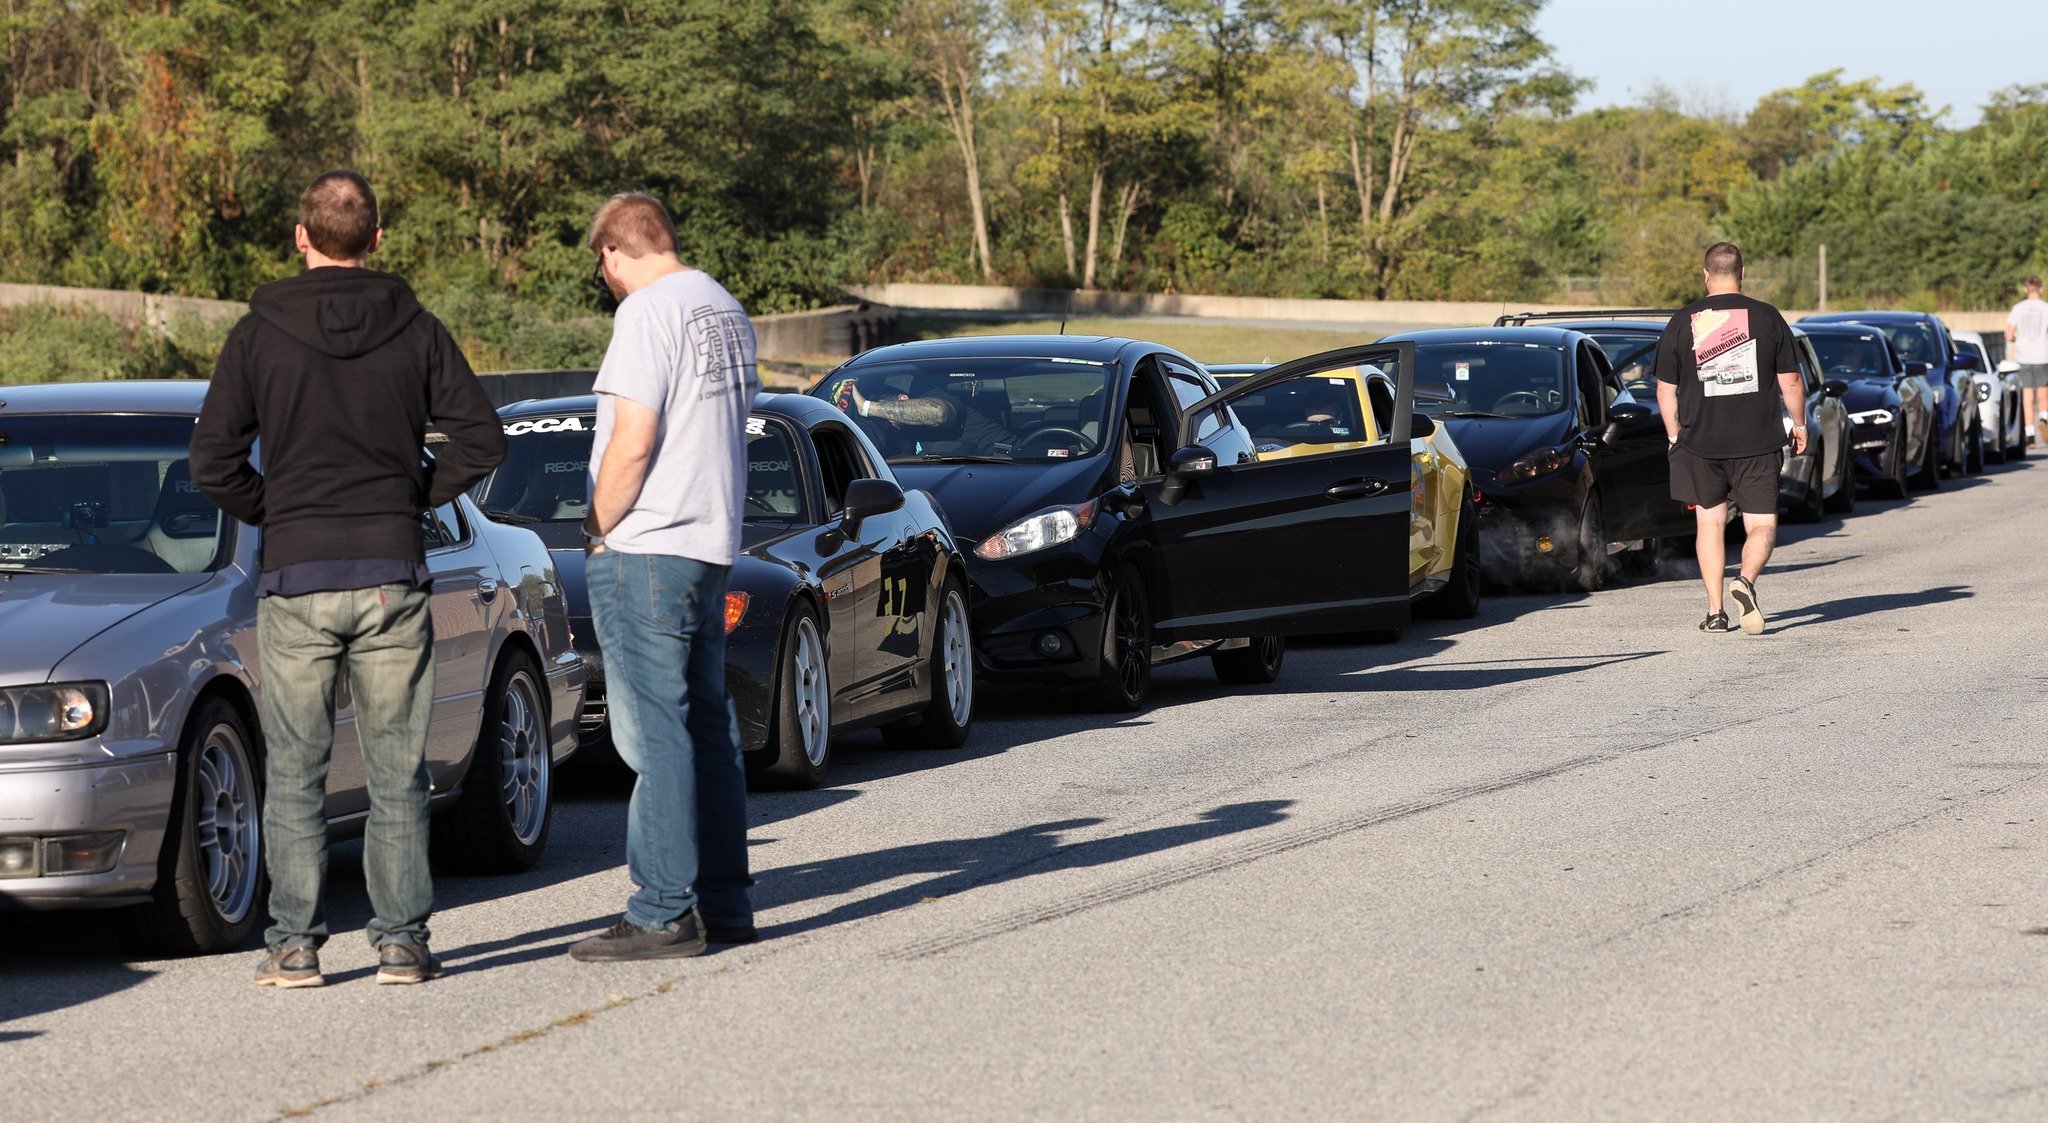
Time to catch up on some racing results!
The second of three summer trackcross events was held back in July. I had just finished up installing the FA coilovers and the day before the event I had an appointment scheduled to get my car aligned. But the shop didn't book enough time for my car, so all they were able to do was to get the toe straightened out, so my camber and caster were all over the place and far from ideal. At the event we ran a new and terrible layout which really ruined the flow of the course. We also had a new entrant in the SF2 class, a new Elantra N. Long story short, I came in third in both the morning and afternoon behind the Elantra and Al in his GTI. The car didn't feel terrible, but it also didn't feel dialed in. It didn't help that in the afternoon I dropped a wheel off course coming out of one of the stupid cut-throughs they decided to use, which knocked my alignment even further off and caused the steering wheel to get cocked to the left pretty bad. So yeah, not exactly a great day, and not worth making a video over.
As described above, the alignment was dialed in perfectly for the third and final event of the summer season. Unfortunately the Elantra N didn't come back, so I couldn't get a more accurate comparison between the two cars. The car felt great aside from the ongoing brake pad knock back issue. The layout of the track we used didn't have any sections for me to use 4th gear, which somewhat equalized things between the slower and faster cars. I beat Al and his GTI by a nice margin, and came in 12th of out 88 cars.
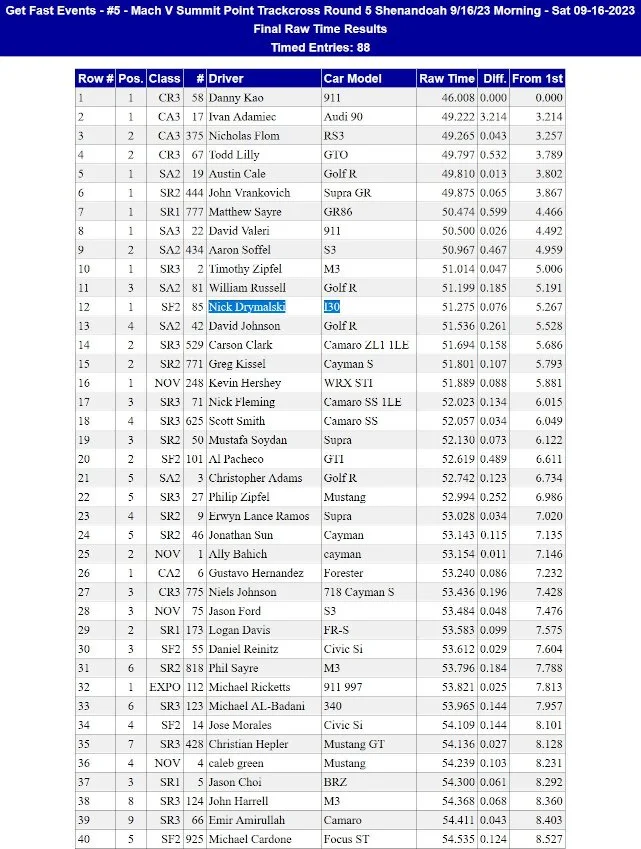
Hell, I beat a ZL1 1LE Camaro by over a second!
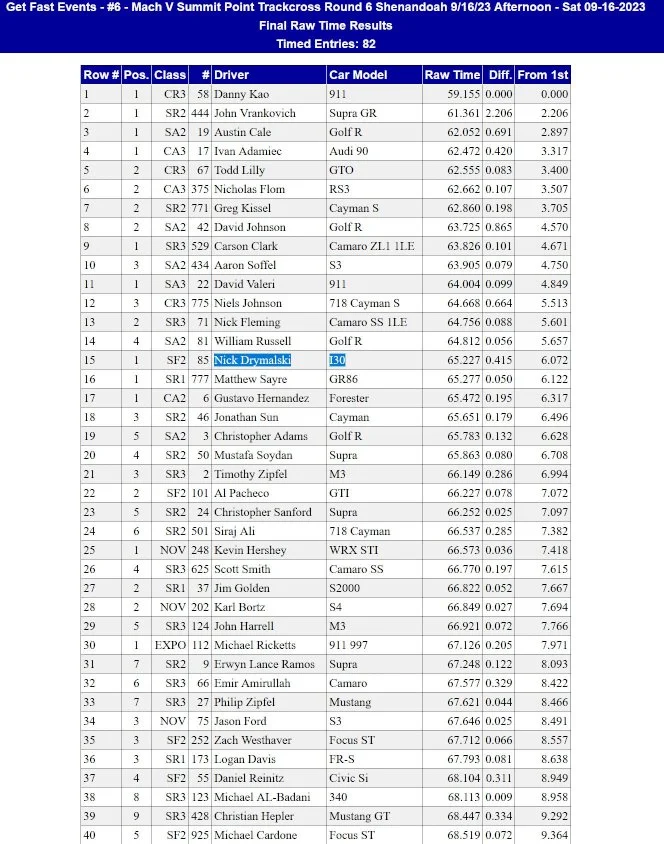
The course was flipped in the afternoon, and once again I took the win over Al in his GTI. I finished 15/82 overall, and won the championship for the summer season.
Check out the video!
Since then I did some research and determined I can install Wilwood knock back springs in my calipers without replacing the pistons, so I'm hoping to get that done before the first event of the winter season. I'm also still losing time to that very annoying stutter when I shift sometimes, which I know is costing me time out there. But if I get my braking issue fixed, which I think is possible, and I can improve the shifting problem, I should be close to breaking into the top 10 at these events. I'm still no closer to installing a 3rd gen 3.5 in the car, but that should certainly help too!
The second of three summer trackcross events was held back in July. I had just finished up installing the FA coilovers and the day before the event I had an appointment scheduled to get my car aligned. But the shop didn't book enough time for my car, so all they were able to do was to get the toe straightened out, so my camber and caster were all over the place and far from ideal. At the event we ran a new and terrible layout which really ruined the flow of the course. We also had a new entrant in the SF2 class, a new Elantra N. Long story short, I came in third in both the morning and afternoon behind the Elantra and Al in his GTI. The car didn't feel terrible, but it also didn't feel dialed in. It didn't help that in the afternoon I dropped a wheel off course coming out of one of the stupid cut-throughs they decided to use, which knocked my alignment even further off and caused the steering wheel to get cocked to the left pretty bad. So yeah, not exactly a great day, and not worth making a video over.
As described above, the alignment was dialed in perfectly for the third and final event of the summer season. Unfortunately the Elantra N didn't come back, so I couldn't get a more accurate comparison between the two cars. The car felt great aside from the ongoing brake pad knock back issue. The layout of the track we used didn't have any sections for me to use 4th gear, which somewhat equalized things between the slower and faster cars. I beat Al and his GTI by a nice margin, and came in 12th of out 88 cars.
Hell, I beat a ZL1 1LE Camaro by over a second!
The course was flipped in the afternoon, and once again I took the win over Al in his GTI. I finished 15/82 overall, and won the championship for the summer season.
Check out the video!
Since then I did some research and determined I can install Wilwood knock back springs in my calipers without replacing the pistons, so I'm hoping to get that done before the first event of the winter season. I'm also still losing time to that very annoying stutter when I shift sometimes, which I know is costing me time out there. But if I get my braking issue fixed, which I think is possible, and I can improve the shifting problem, I should be close to breaking into the top 10 at these events. I'm still no closer to installing a 3rd gen 3.5 in the car, but that should certainly help too!
Last edited by 95maxrider; Nov 21, 2023 at 03:18 PM.
Nothing wrong sharing video's of stupid errors or mechanical challenges, often those are more entertaining Oh, say hi to Logan Davis at the next event for me. He's coming out west here often to play in our larger events in IL, IN, and MO.
Oh, say hi to Logan Davis at the next event for me. He's coming out west here often to play in our larger events in IL, IN, and MO.
I've been dealing with an extremely annoying issue for a long time, so I finally made a thread about it instead of whining about it in this thread. If you have any ideas about what may be causing my problem with the car stuttering after quick shifts, please post up in my thread about the topic.
https://maxima.org/forums/general-ma...ml#post9256219
Thanks!
https://maxima.org/forums/general-ma...ml#post9256219
Thanks!
I've got a few little things I figured I'd post up while I prepare the video from the last race.
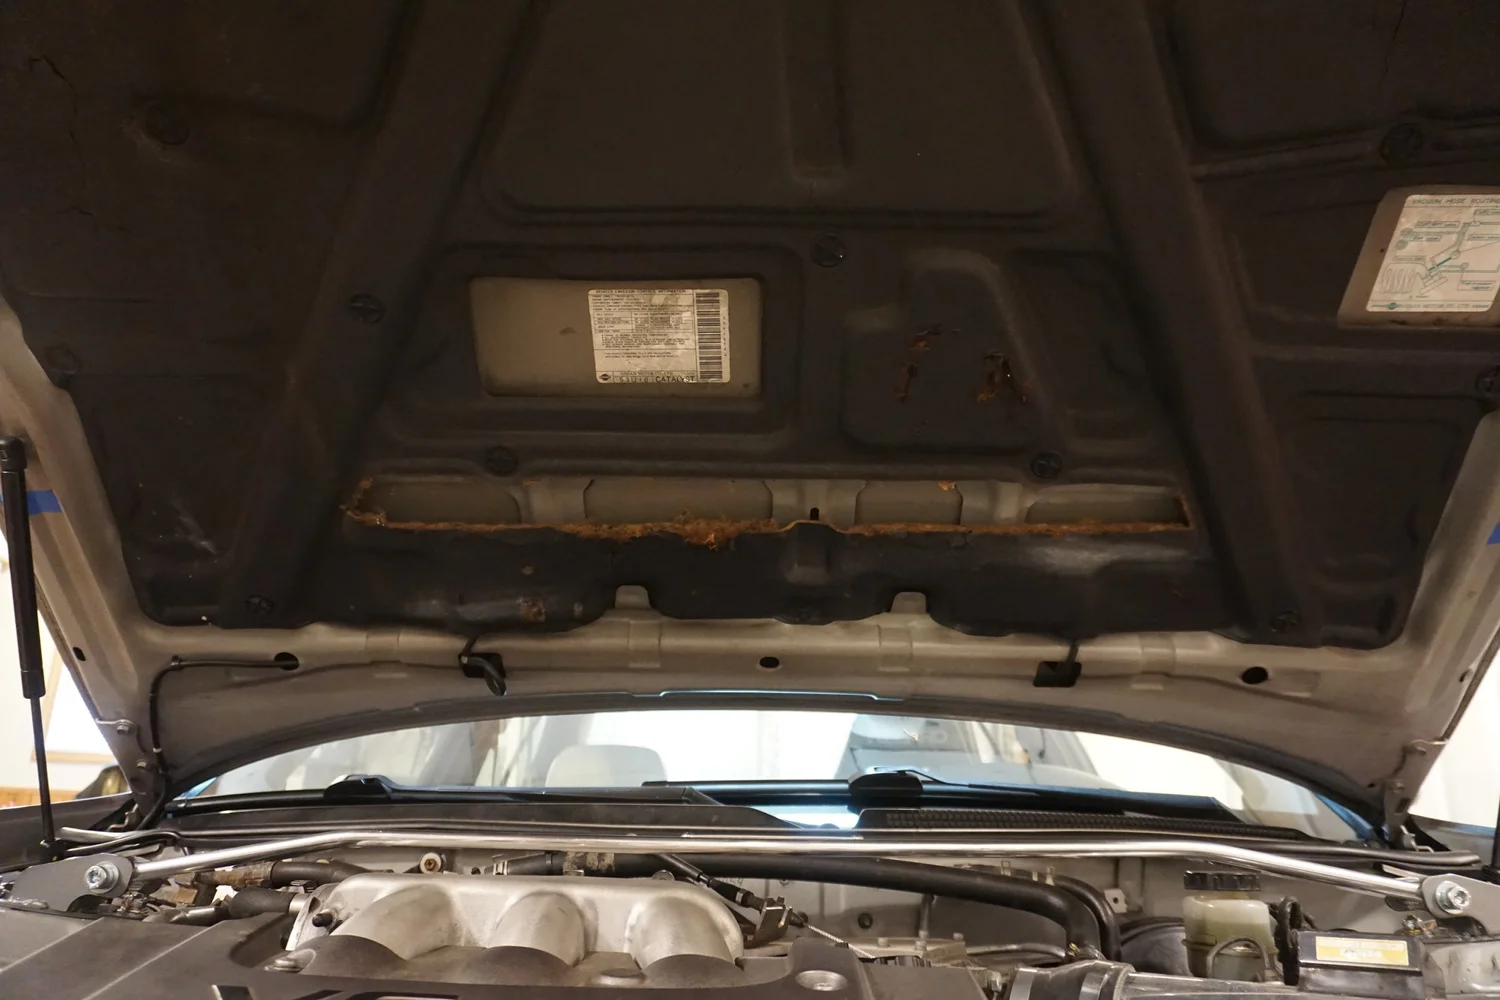
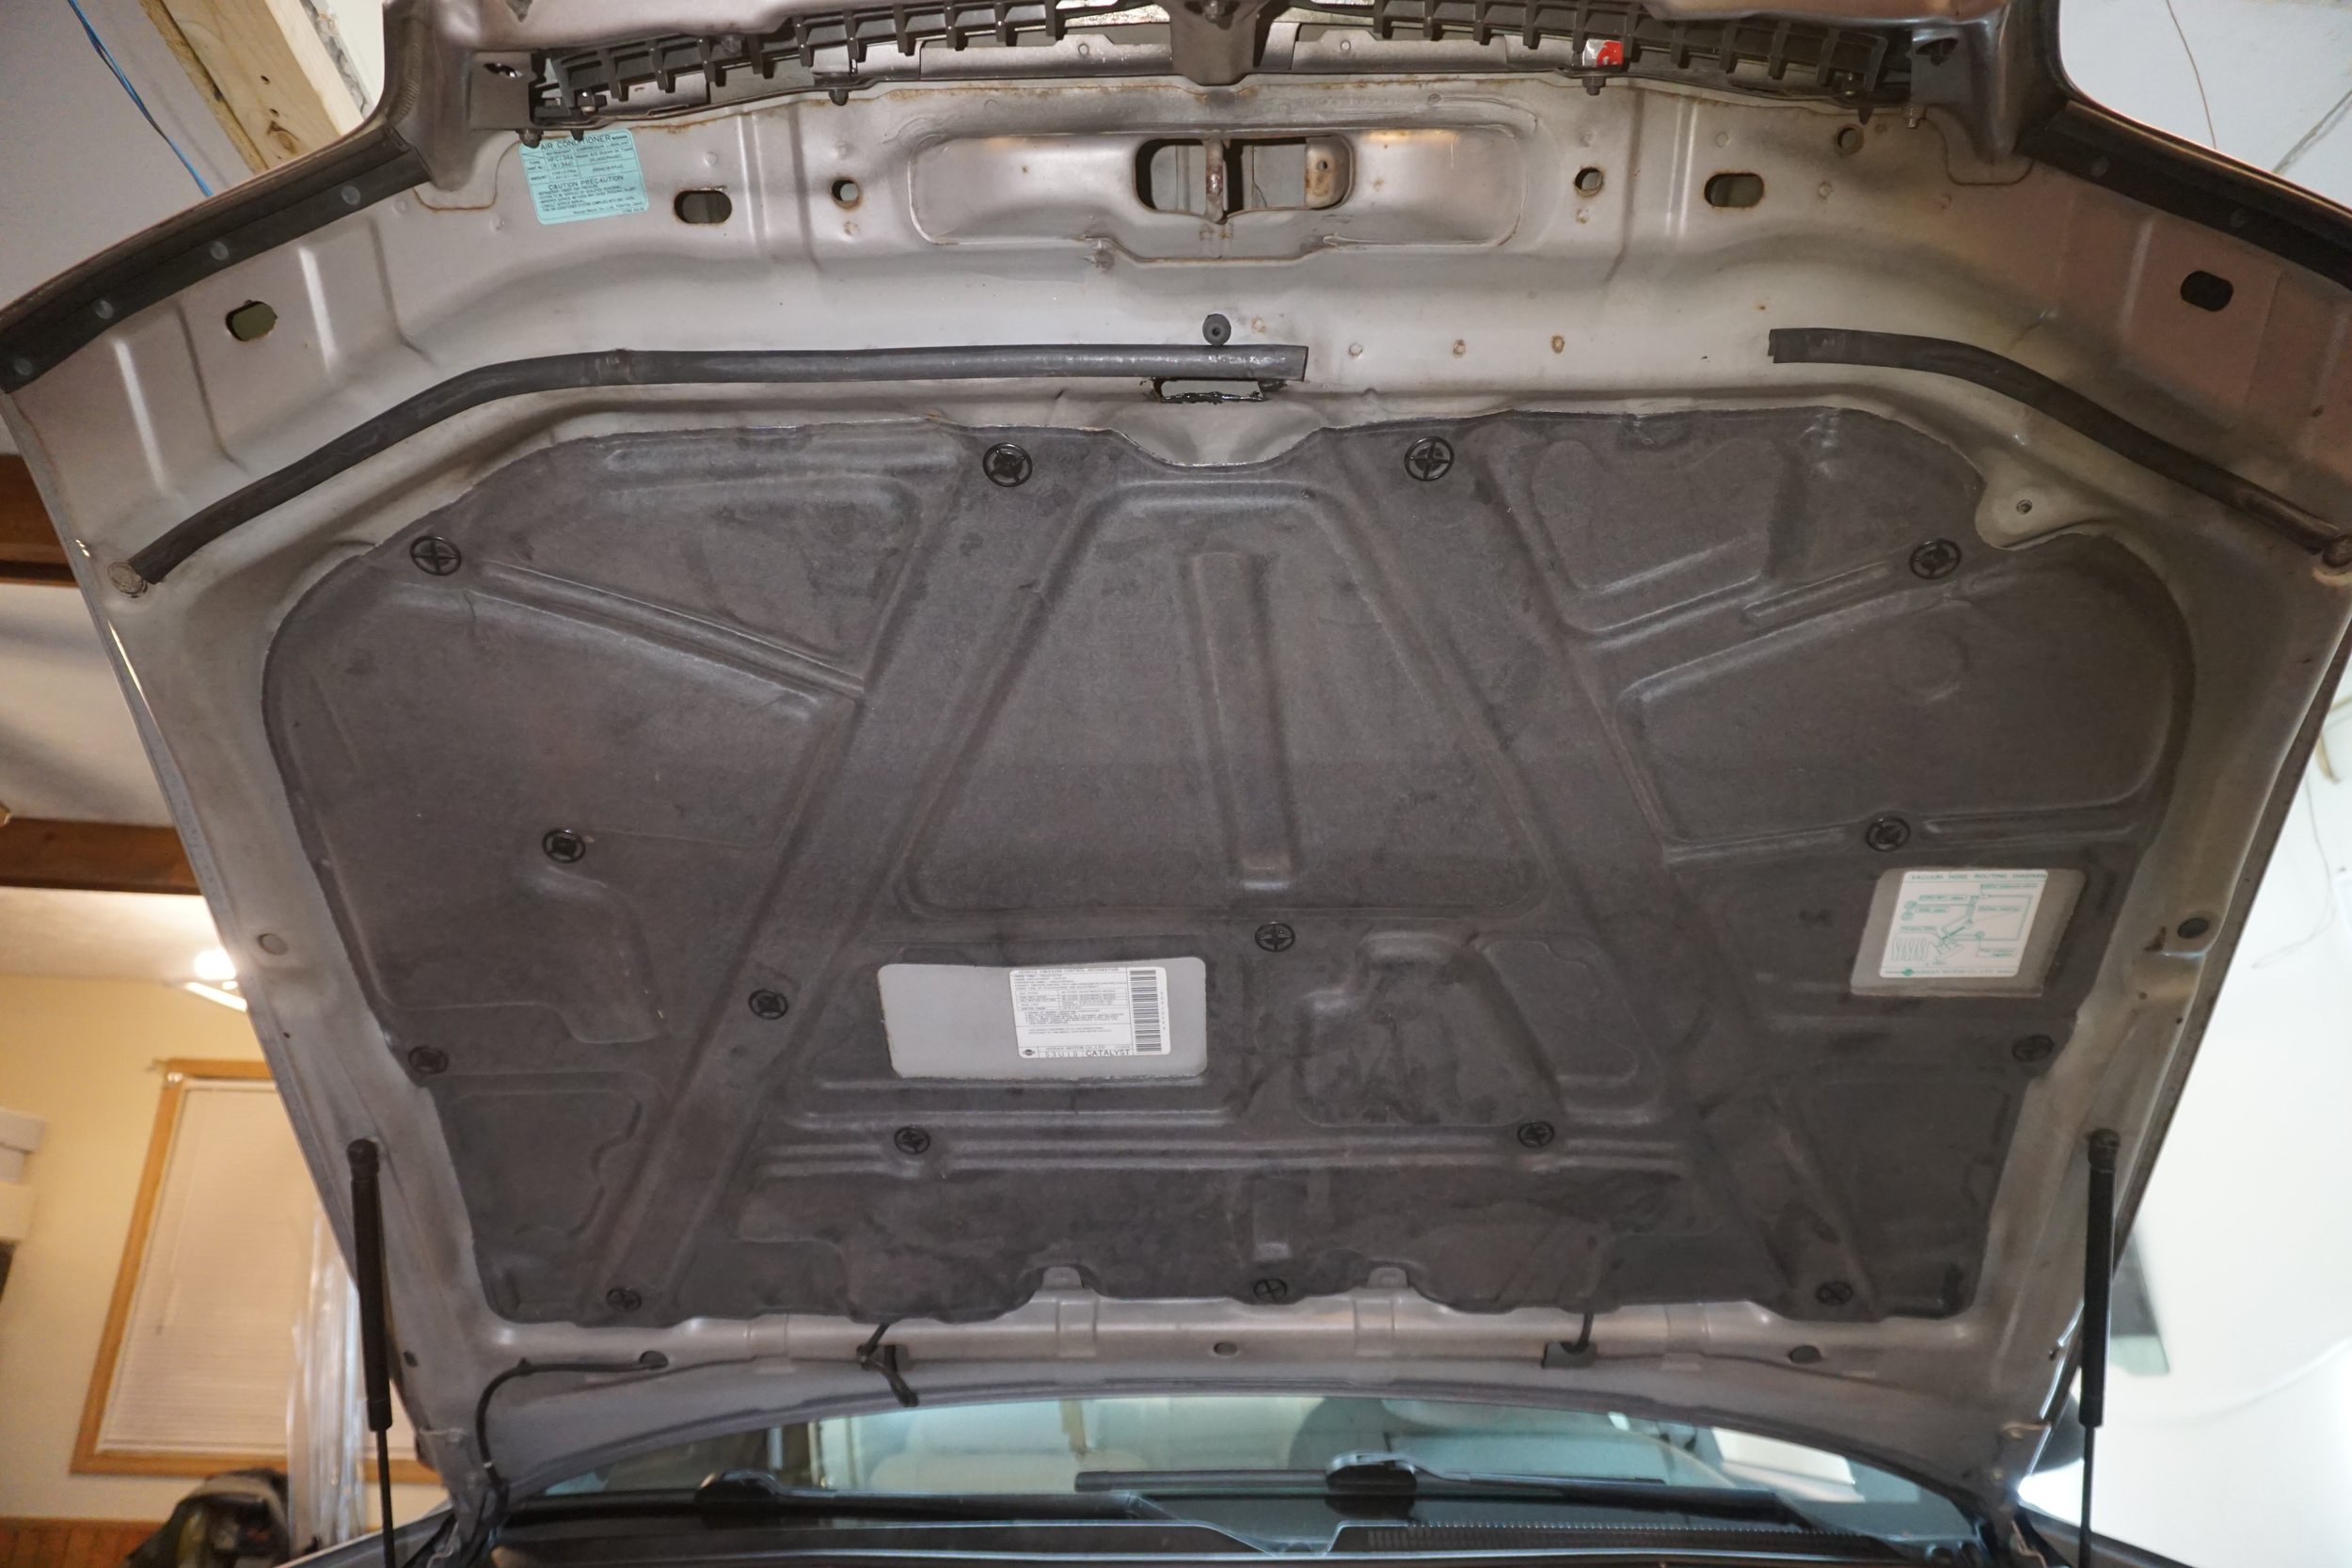
First up was some fresh under hood insulation. I was unhappy with how my recent trimming had turned out to get the FSTB to fit....
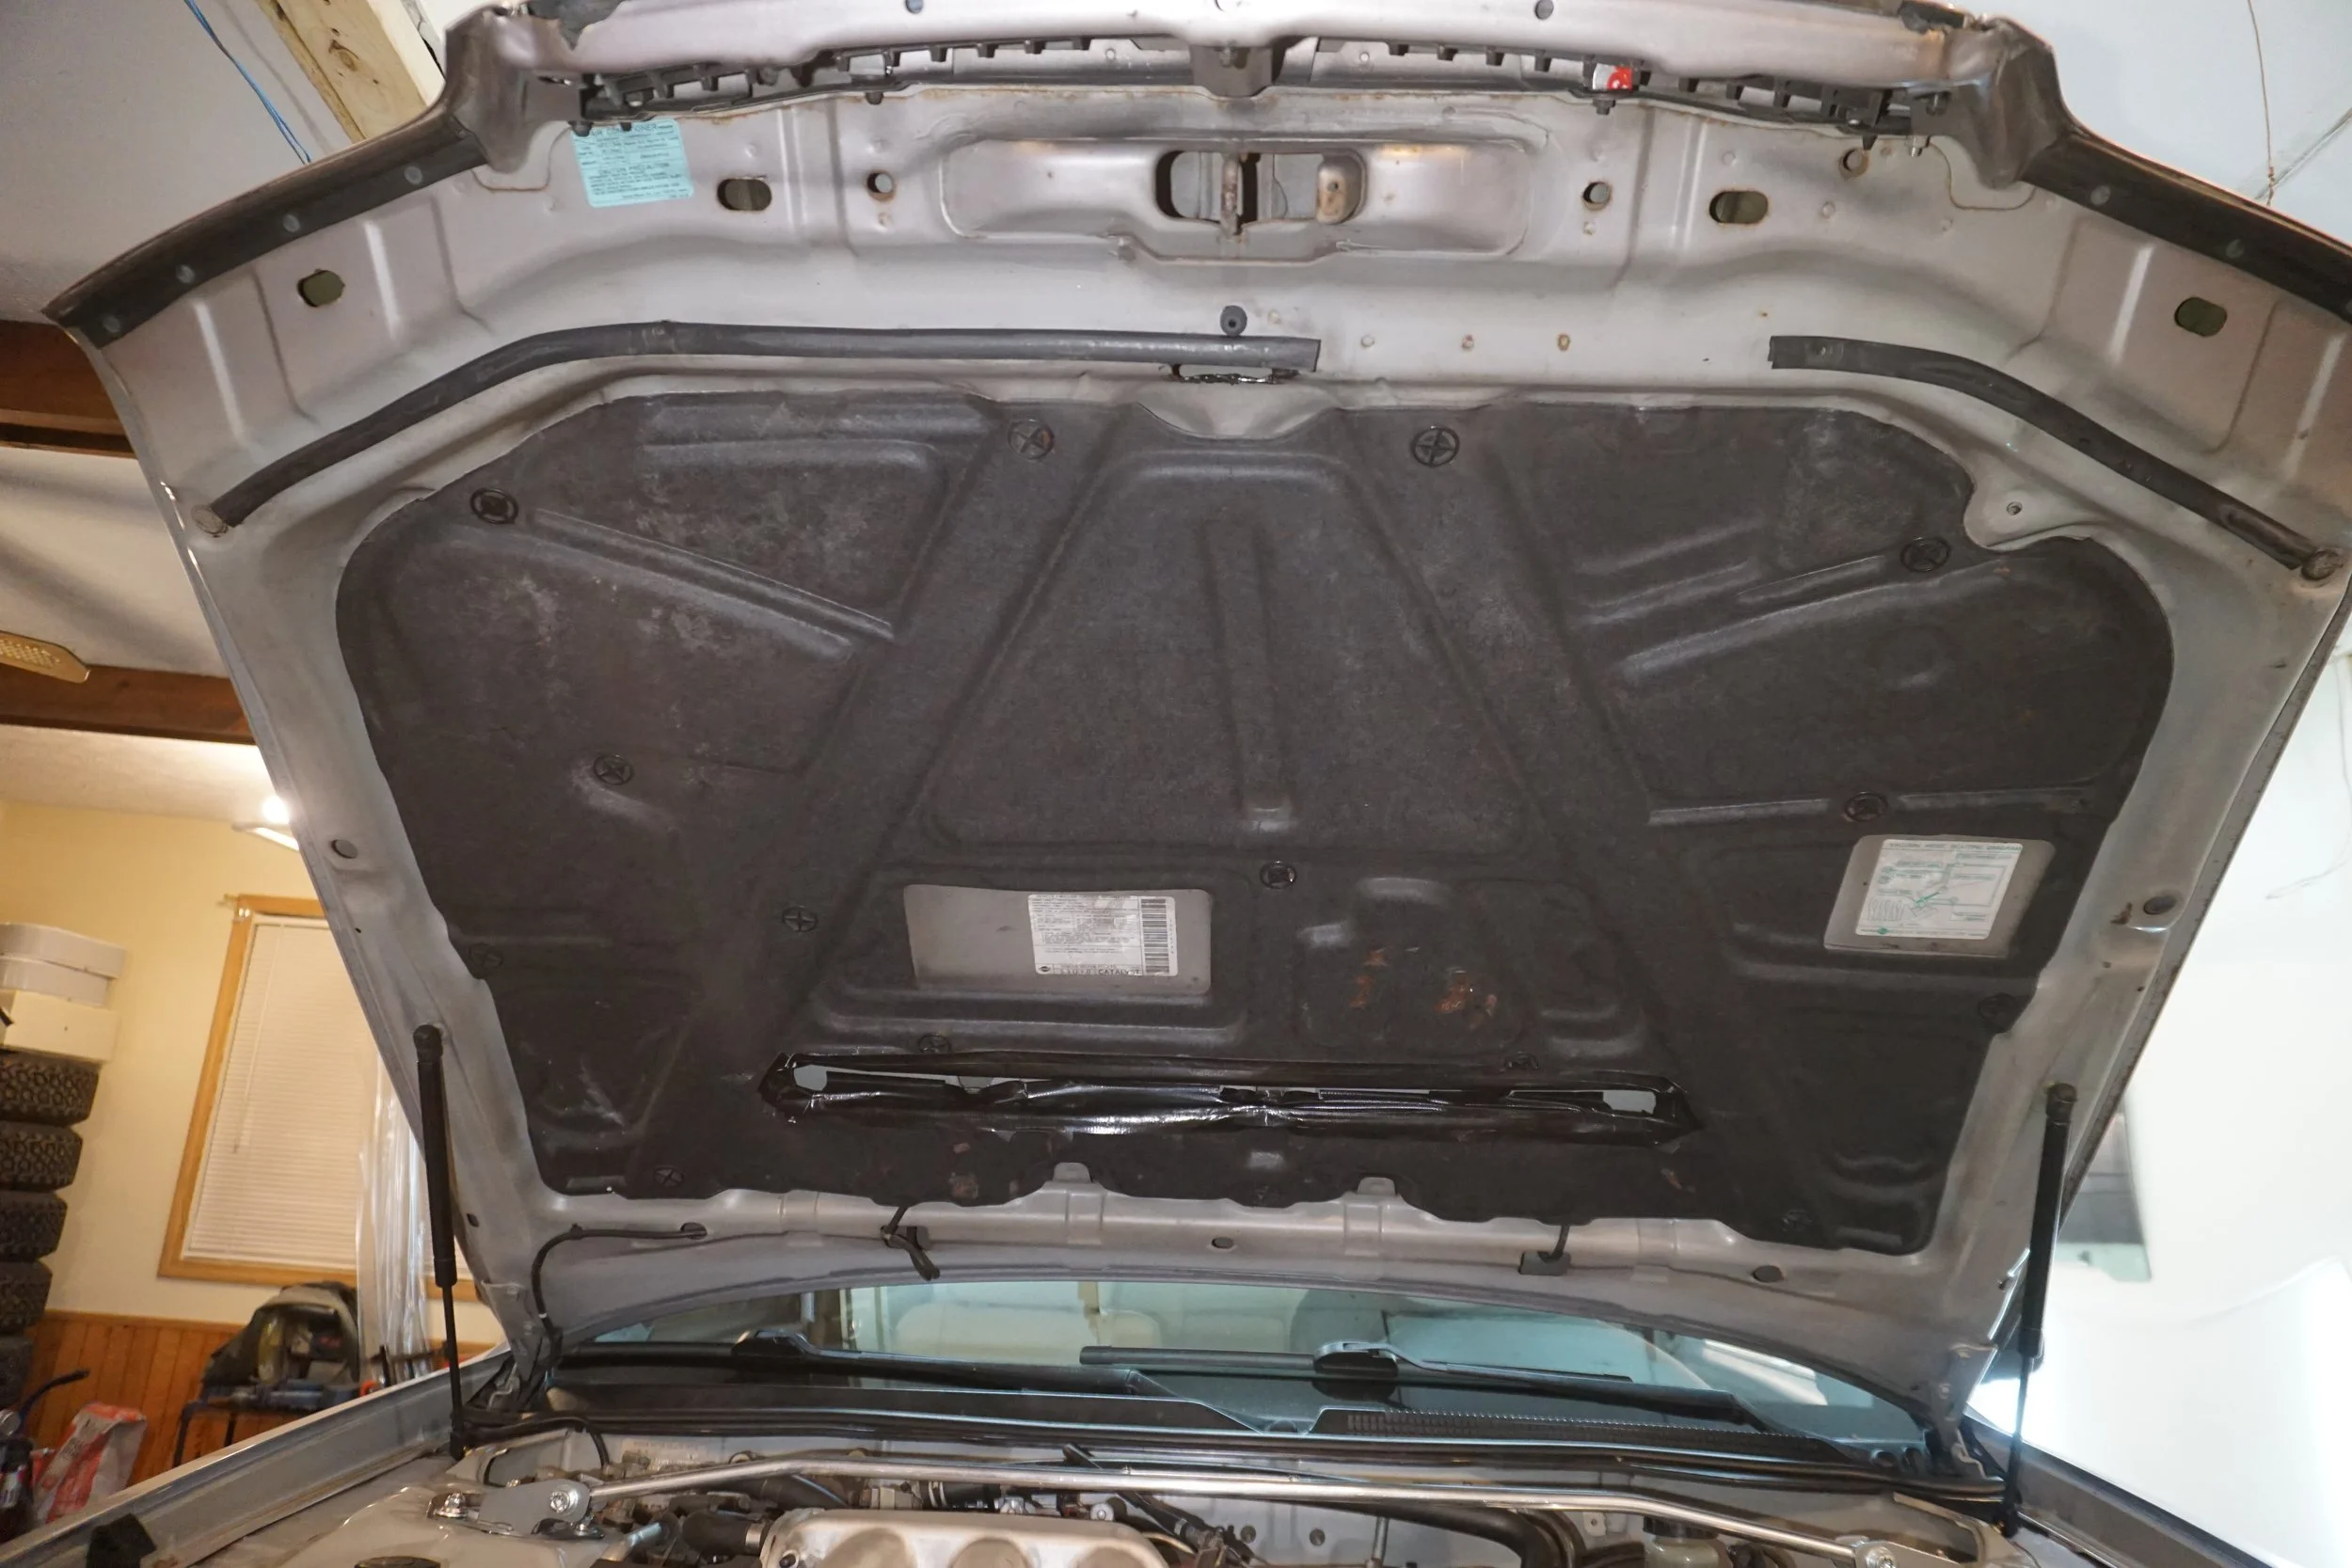
But with the metal on the hood trimmed, I figured I could probably run a normal insulator, so I grabbed one in good condition from a junkyard. My original one had been torn up in a few spots over the years, so this new one was a welcome upgrade.
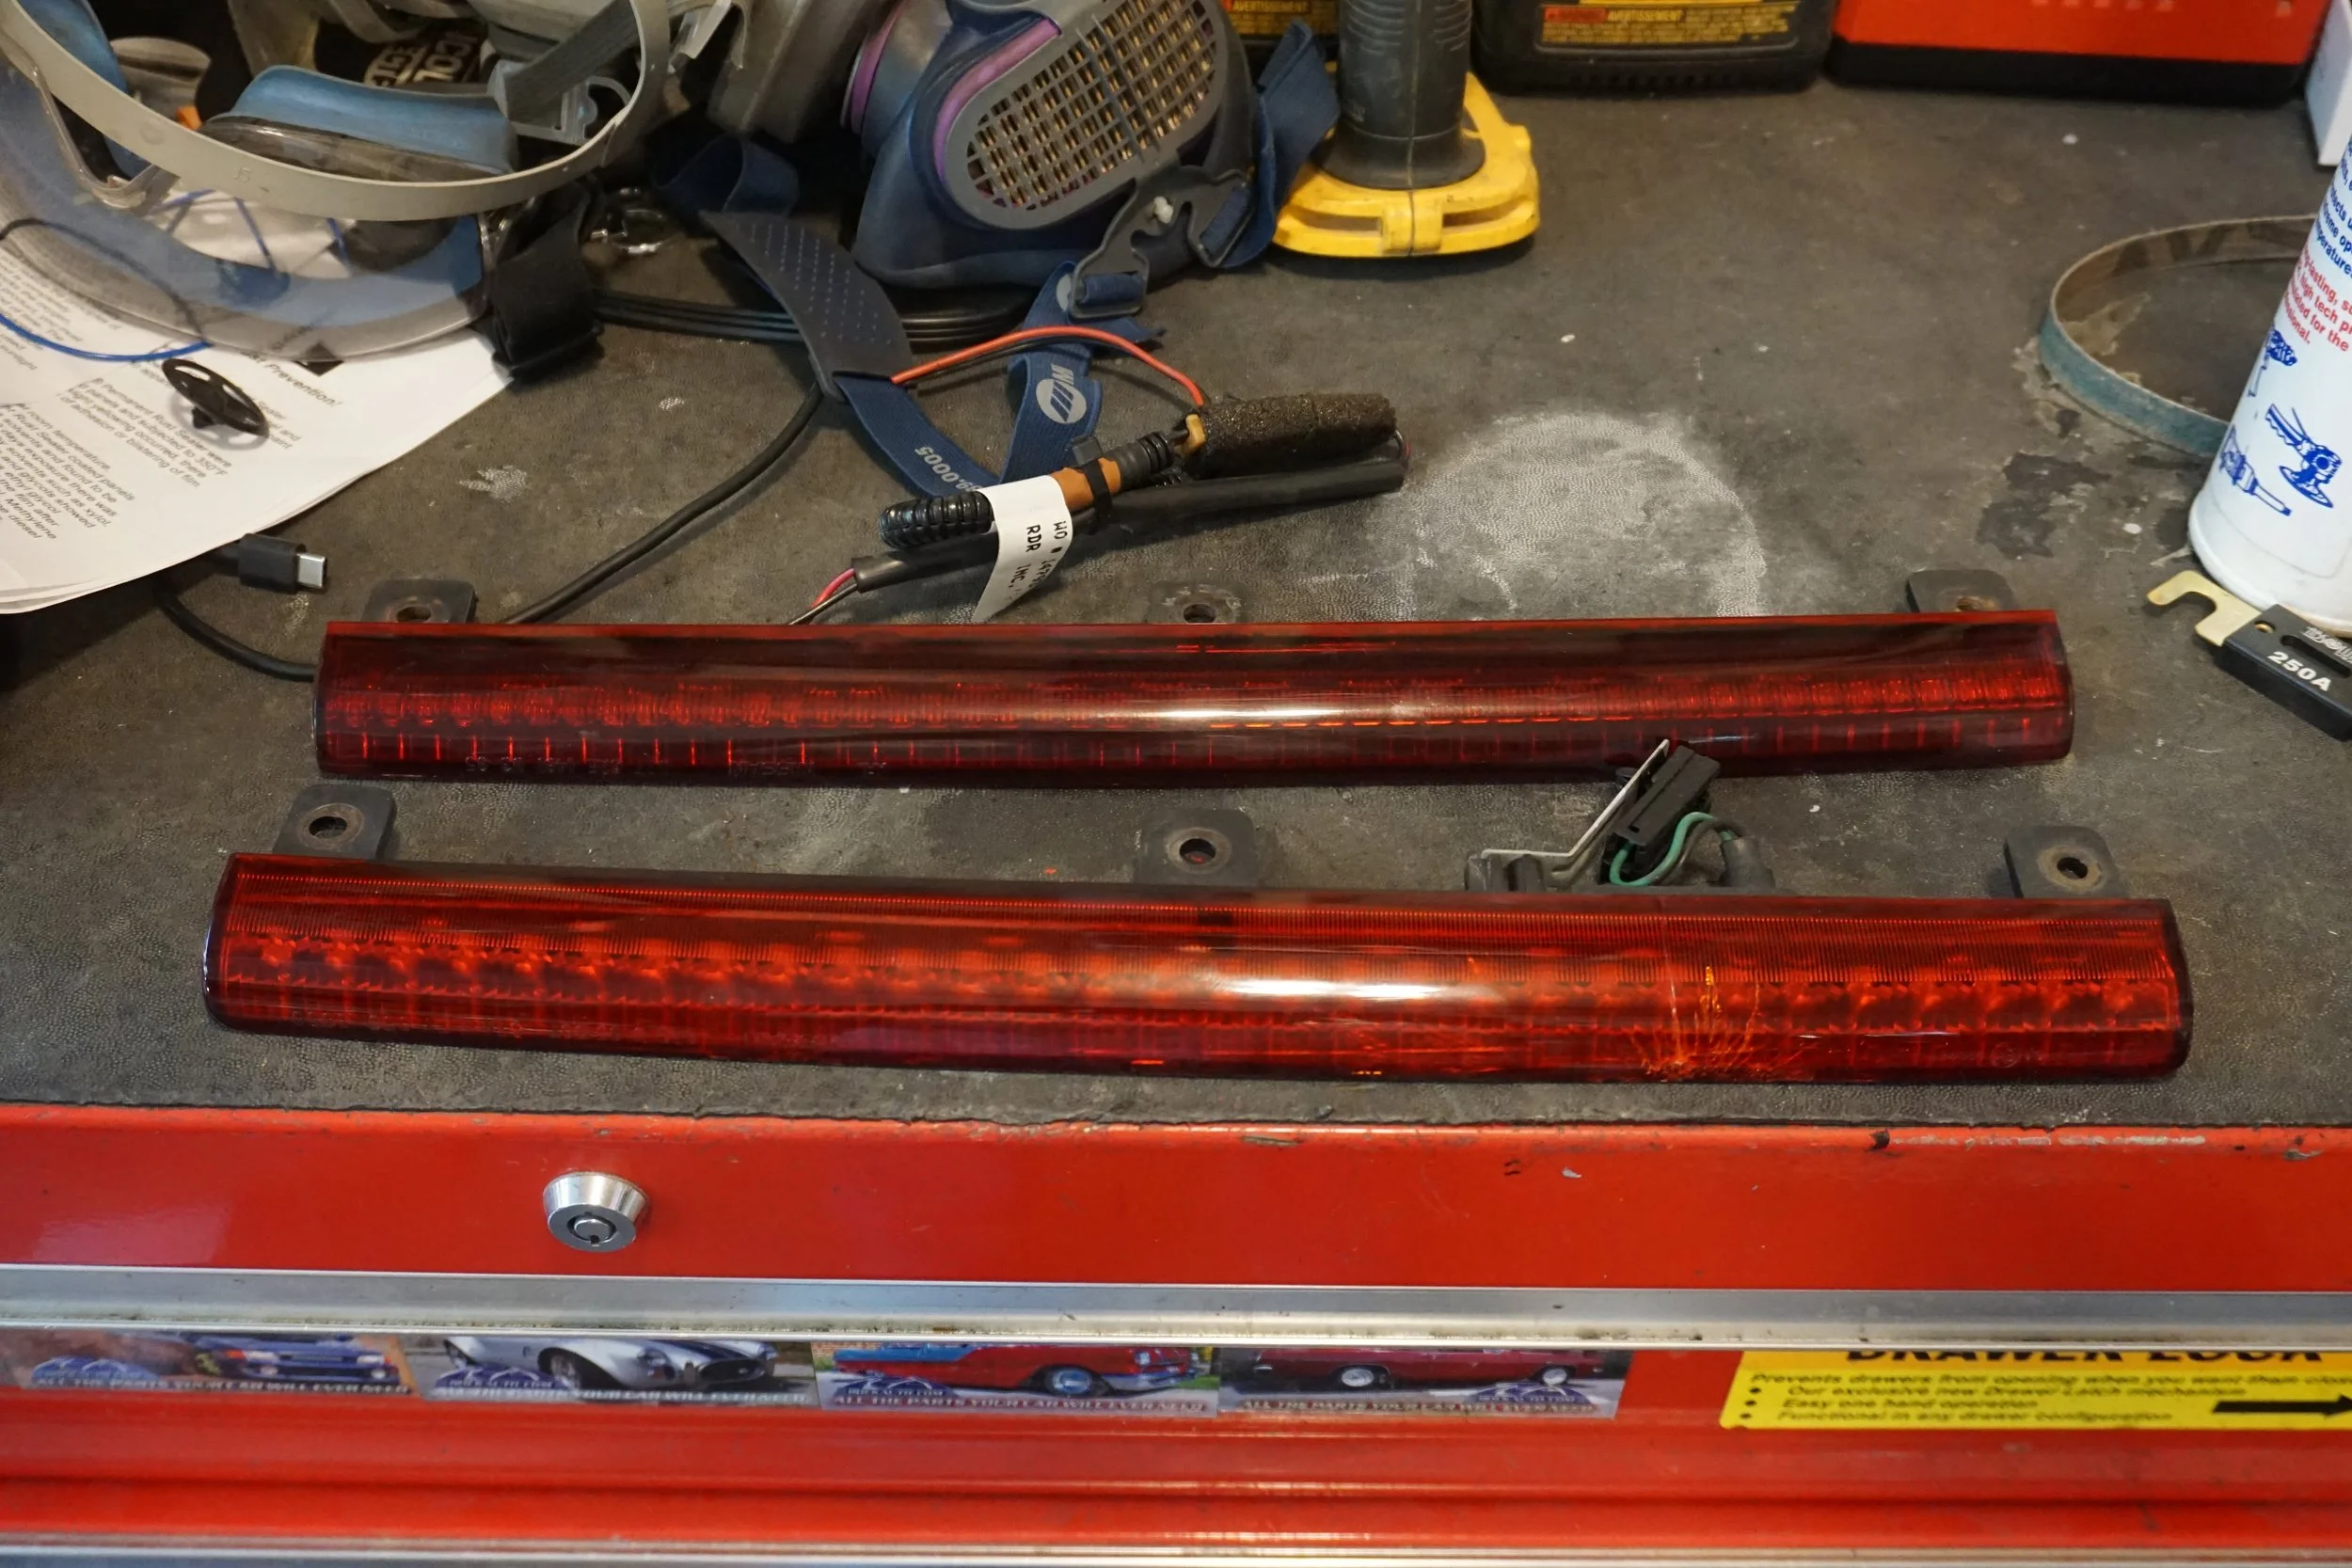
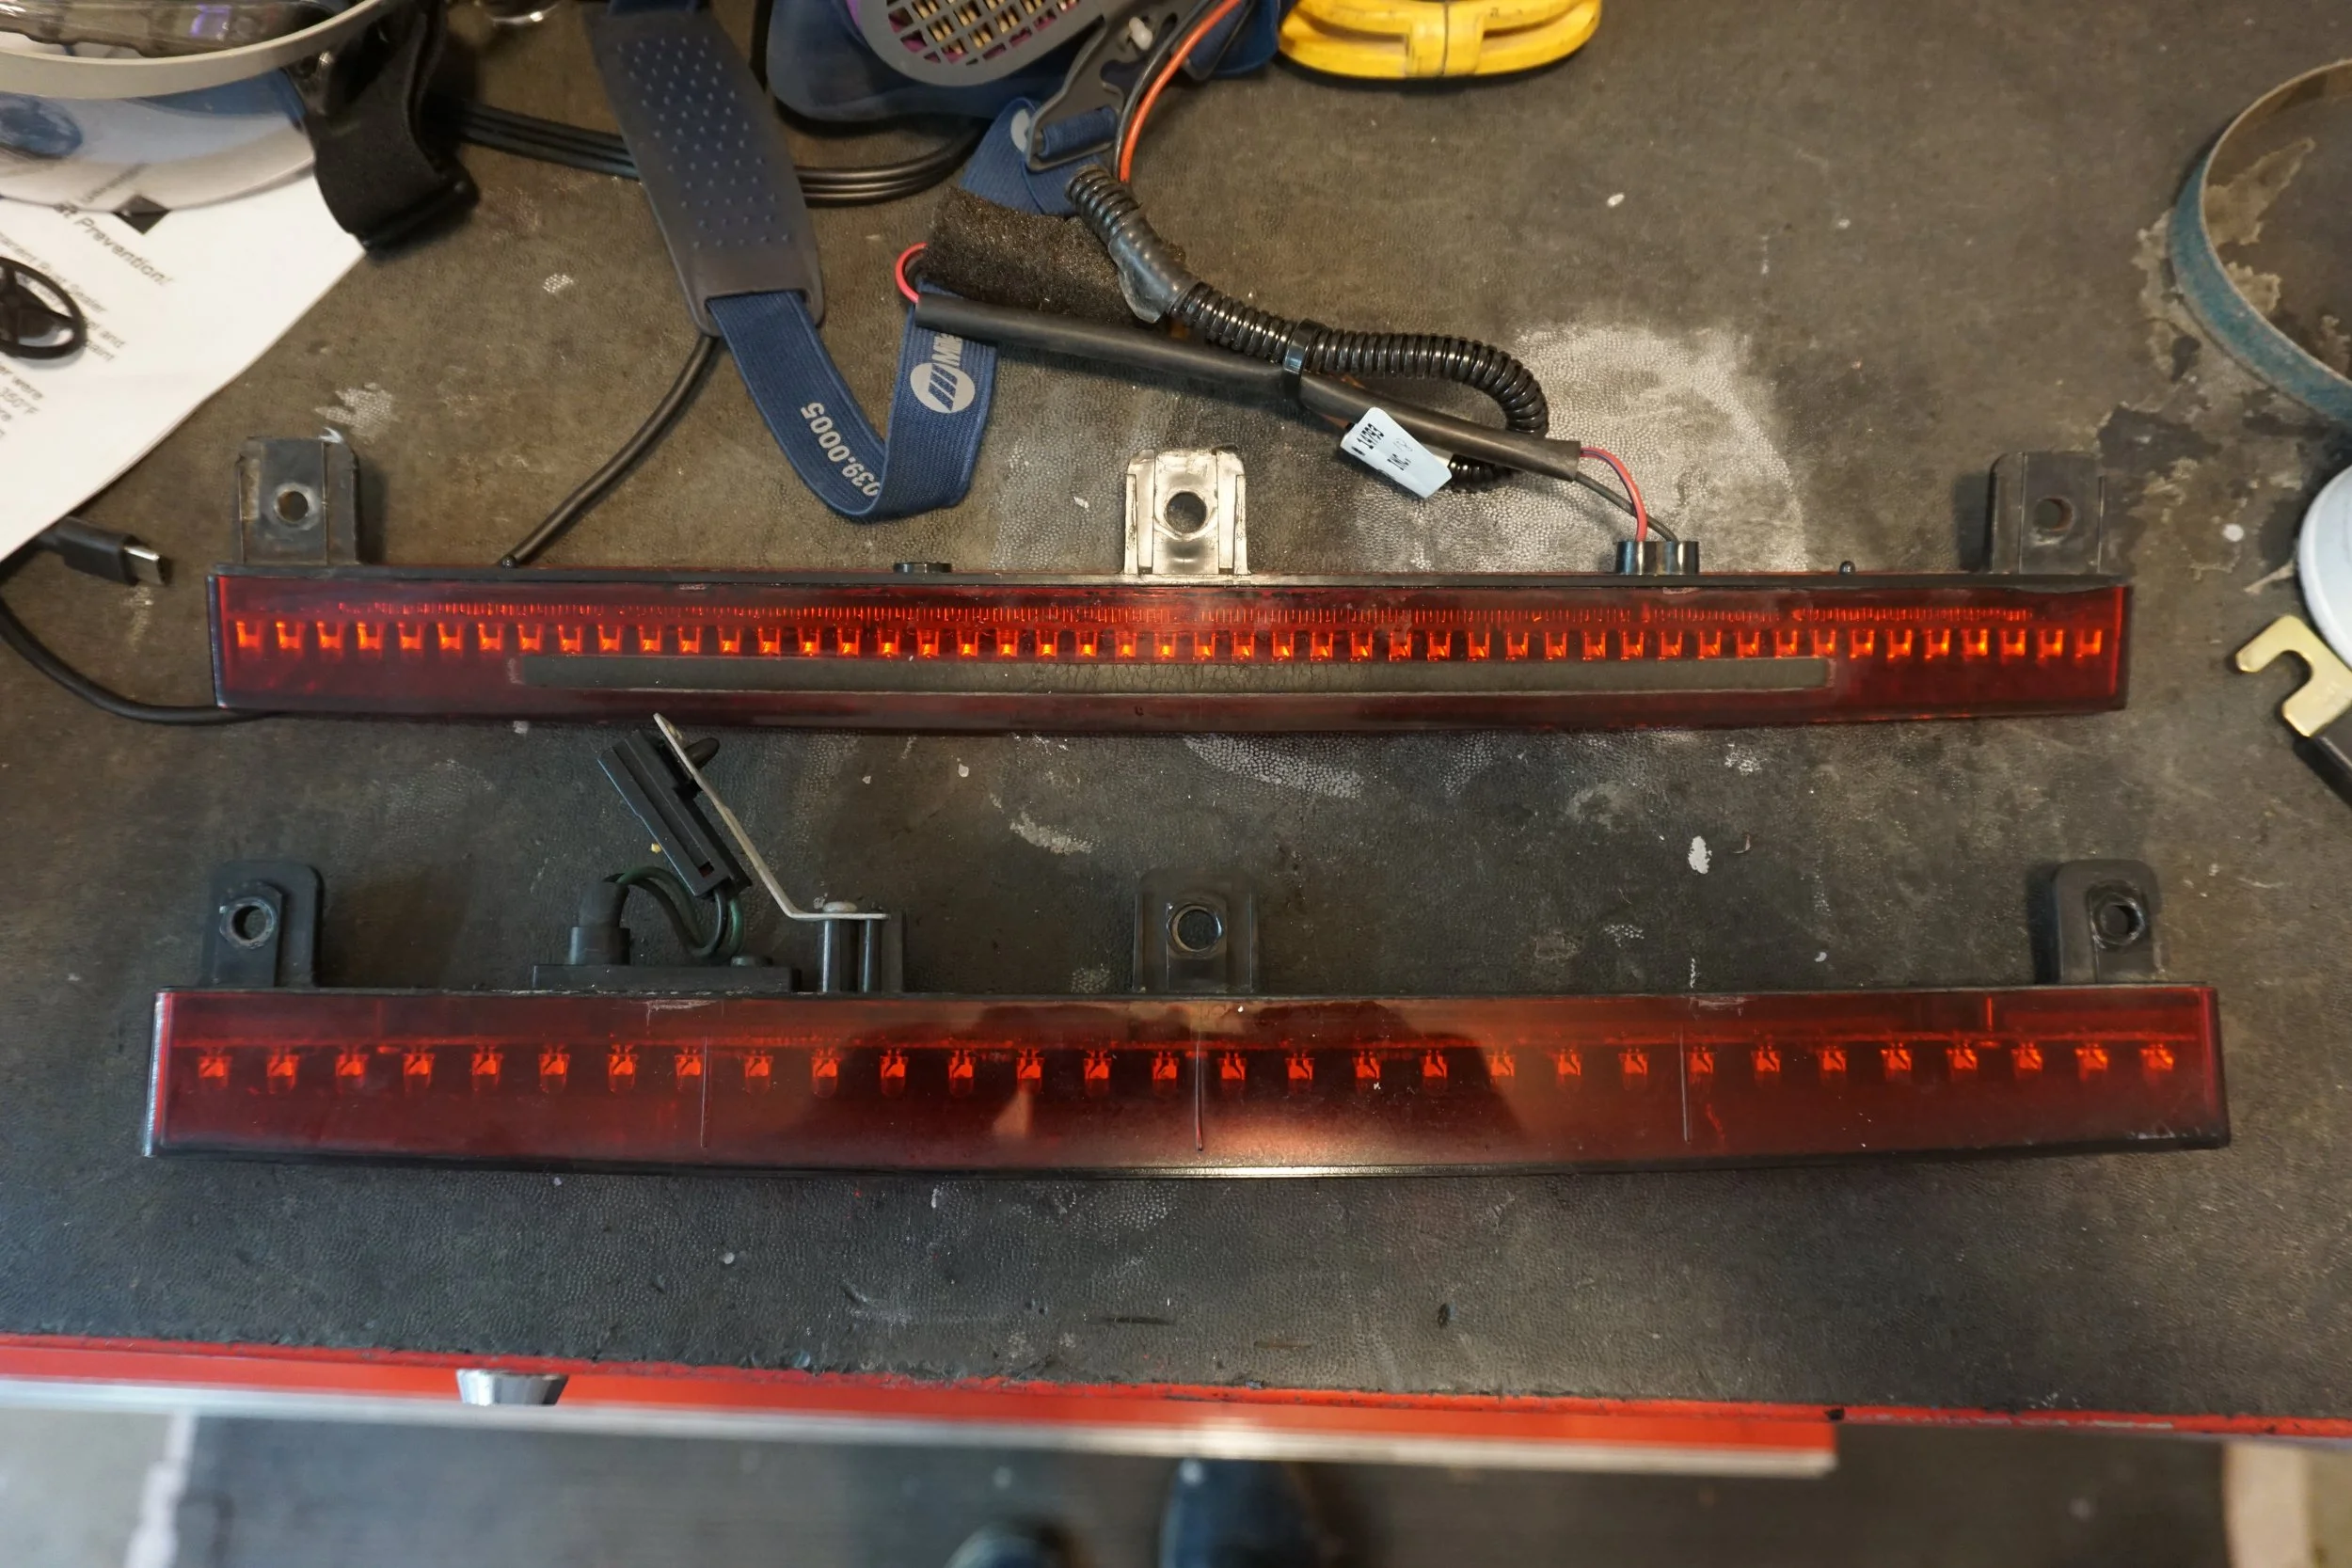
I also finally found a spoiler light in good condition at the yard, this time off a 97-99. It seems like it was slightly redesigned with a lot more LEDs and a darker finish to the plastic compared to the 95/96 ones. I really like it!
But more importantly, it was time to do something about the brake pad knock back I've been experiencing when racing. Sometimes the brake pedal would behave as you would expect, and sometimes there was a dead zone at the top of the travel that you would need to push through, or pump in advance to get the pads to sit where they're supposed to. And when you're braking from 100 mph and pointed at a wall, you really want to be able to trust your brakes to behave consistently. This was forcing me to brake really early when at the track in case the pads had gotten knocked back, slowing me down and endangering my safety. So I purchased a set of the right anti knock back springs from Wilwood with the hopes they would solve my problem. Apparently newer versions of my calipers come with the springs already installed, but my older calipers didn't. While I was going to be in there, I also wanted to replace the seals.
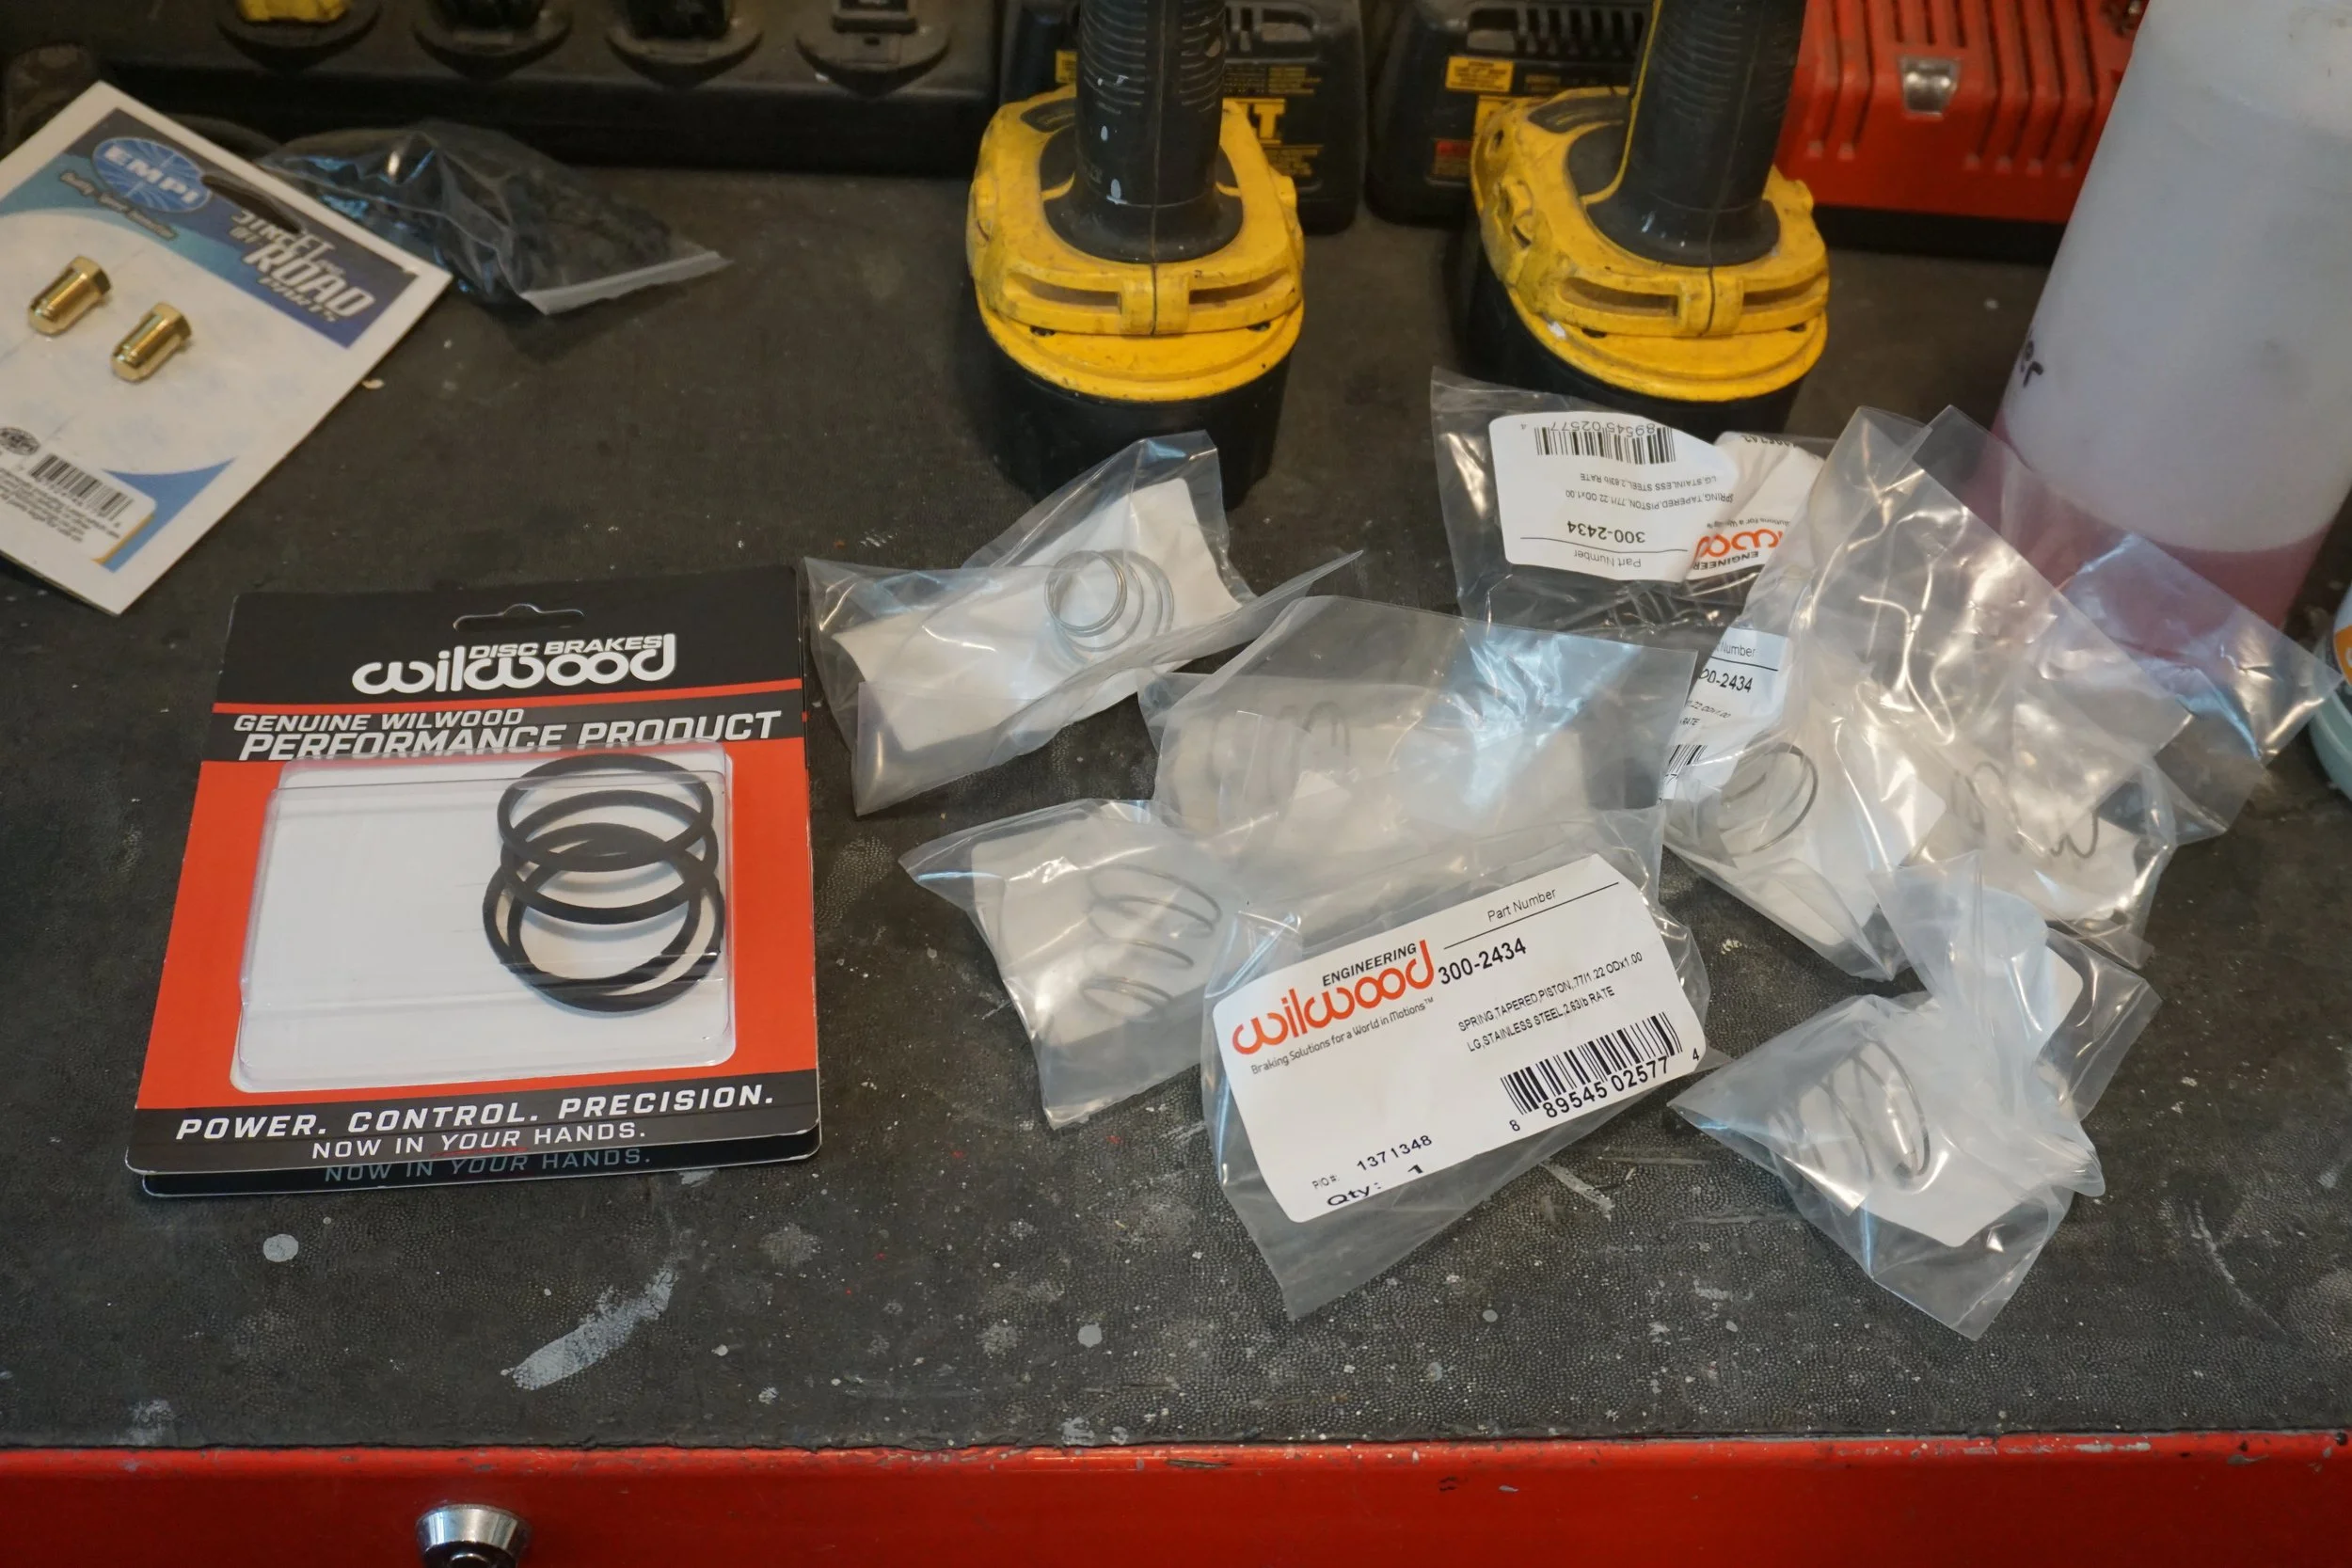
I popped this pistons out one by one and cleaned them up with a pad:
And reinstalled them with the springs and new seals. Knock back was never an issue on the street, so I wouldn't know if the problem was solved until I was on the track. Thankfully, a race was right around the corner....
First up was some fresh under hood insulation. I was unhappy with how my recent trimming had turned out to get the FSTB to fit....
But with the metal on the hood trimmed, I figured I could probably run a normal insulator, so I grabbed one in good condition from a junkyard. My original one had been torn up in a few spots over the years, so this new one was a welcome upgrade.
I also finally found a spoiler light in good condition at the yard, this time off a 97-99. It seems like it was slightly redesigned with a lot more LEDs and a darker finish to the plastic compared to the 95/96 ones. I really like it!
But more importantly, it was time to do something about the brake pad knock back I've been experiencing when racing. Sometimes the brake pedal would behave as you would expect, and sometimes there was a dead zone at the top of the travel that you would need to push through, or pump in advance to get the pads to sit where they're supposed to. And when you're braking from 100 mph and pointed at a wall, you really want to be able to trust your brakes to behave consistently. This was forcing me to brake really early when at the track in case the pads had gotten knocked back, slowing me down and endangering my safety. So I purchased a set of the right anti knock back springs from Wilwood with the hopes they would solve my problem. Apparently newer versions of my calipers come with the springs already installed, but my older calipers didn't. While I was going to be in there, I also wanted to replace the seals.
I popped this pistons out one by one and cleaned them up with a pad:
And reinstalled them with the springs and new seals. Knock back was never an issue on the street, so I wouldn't know if the problem was solved until I was on the track. Thankfully, a race was right around the corner....
Well, 5 months and 3 races later I'm way behind on everything. I've done a few small things since then.
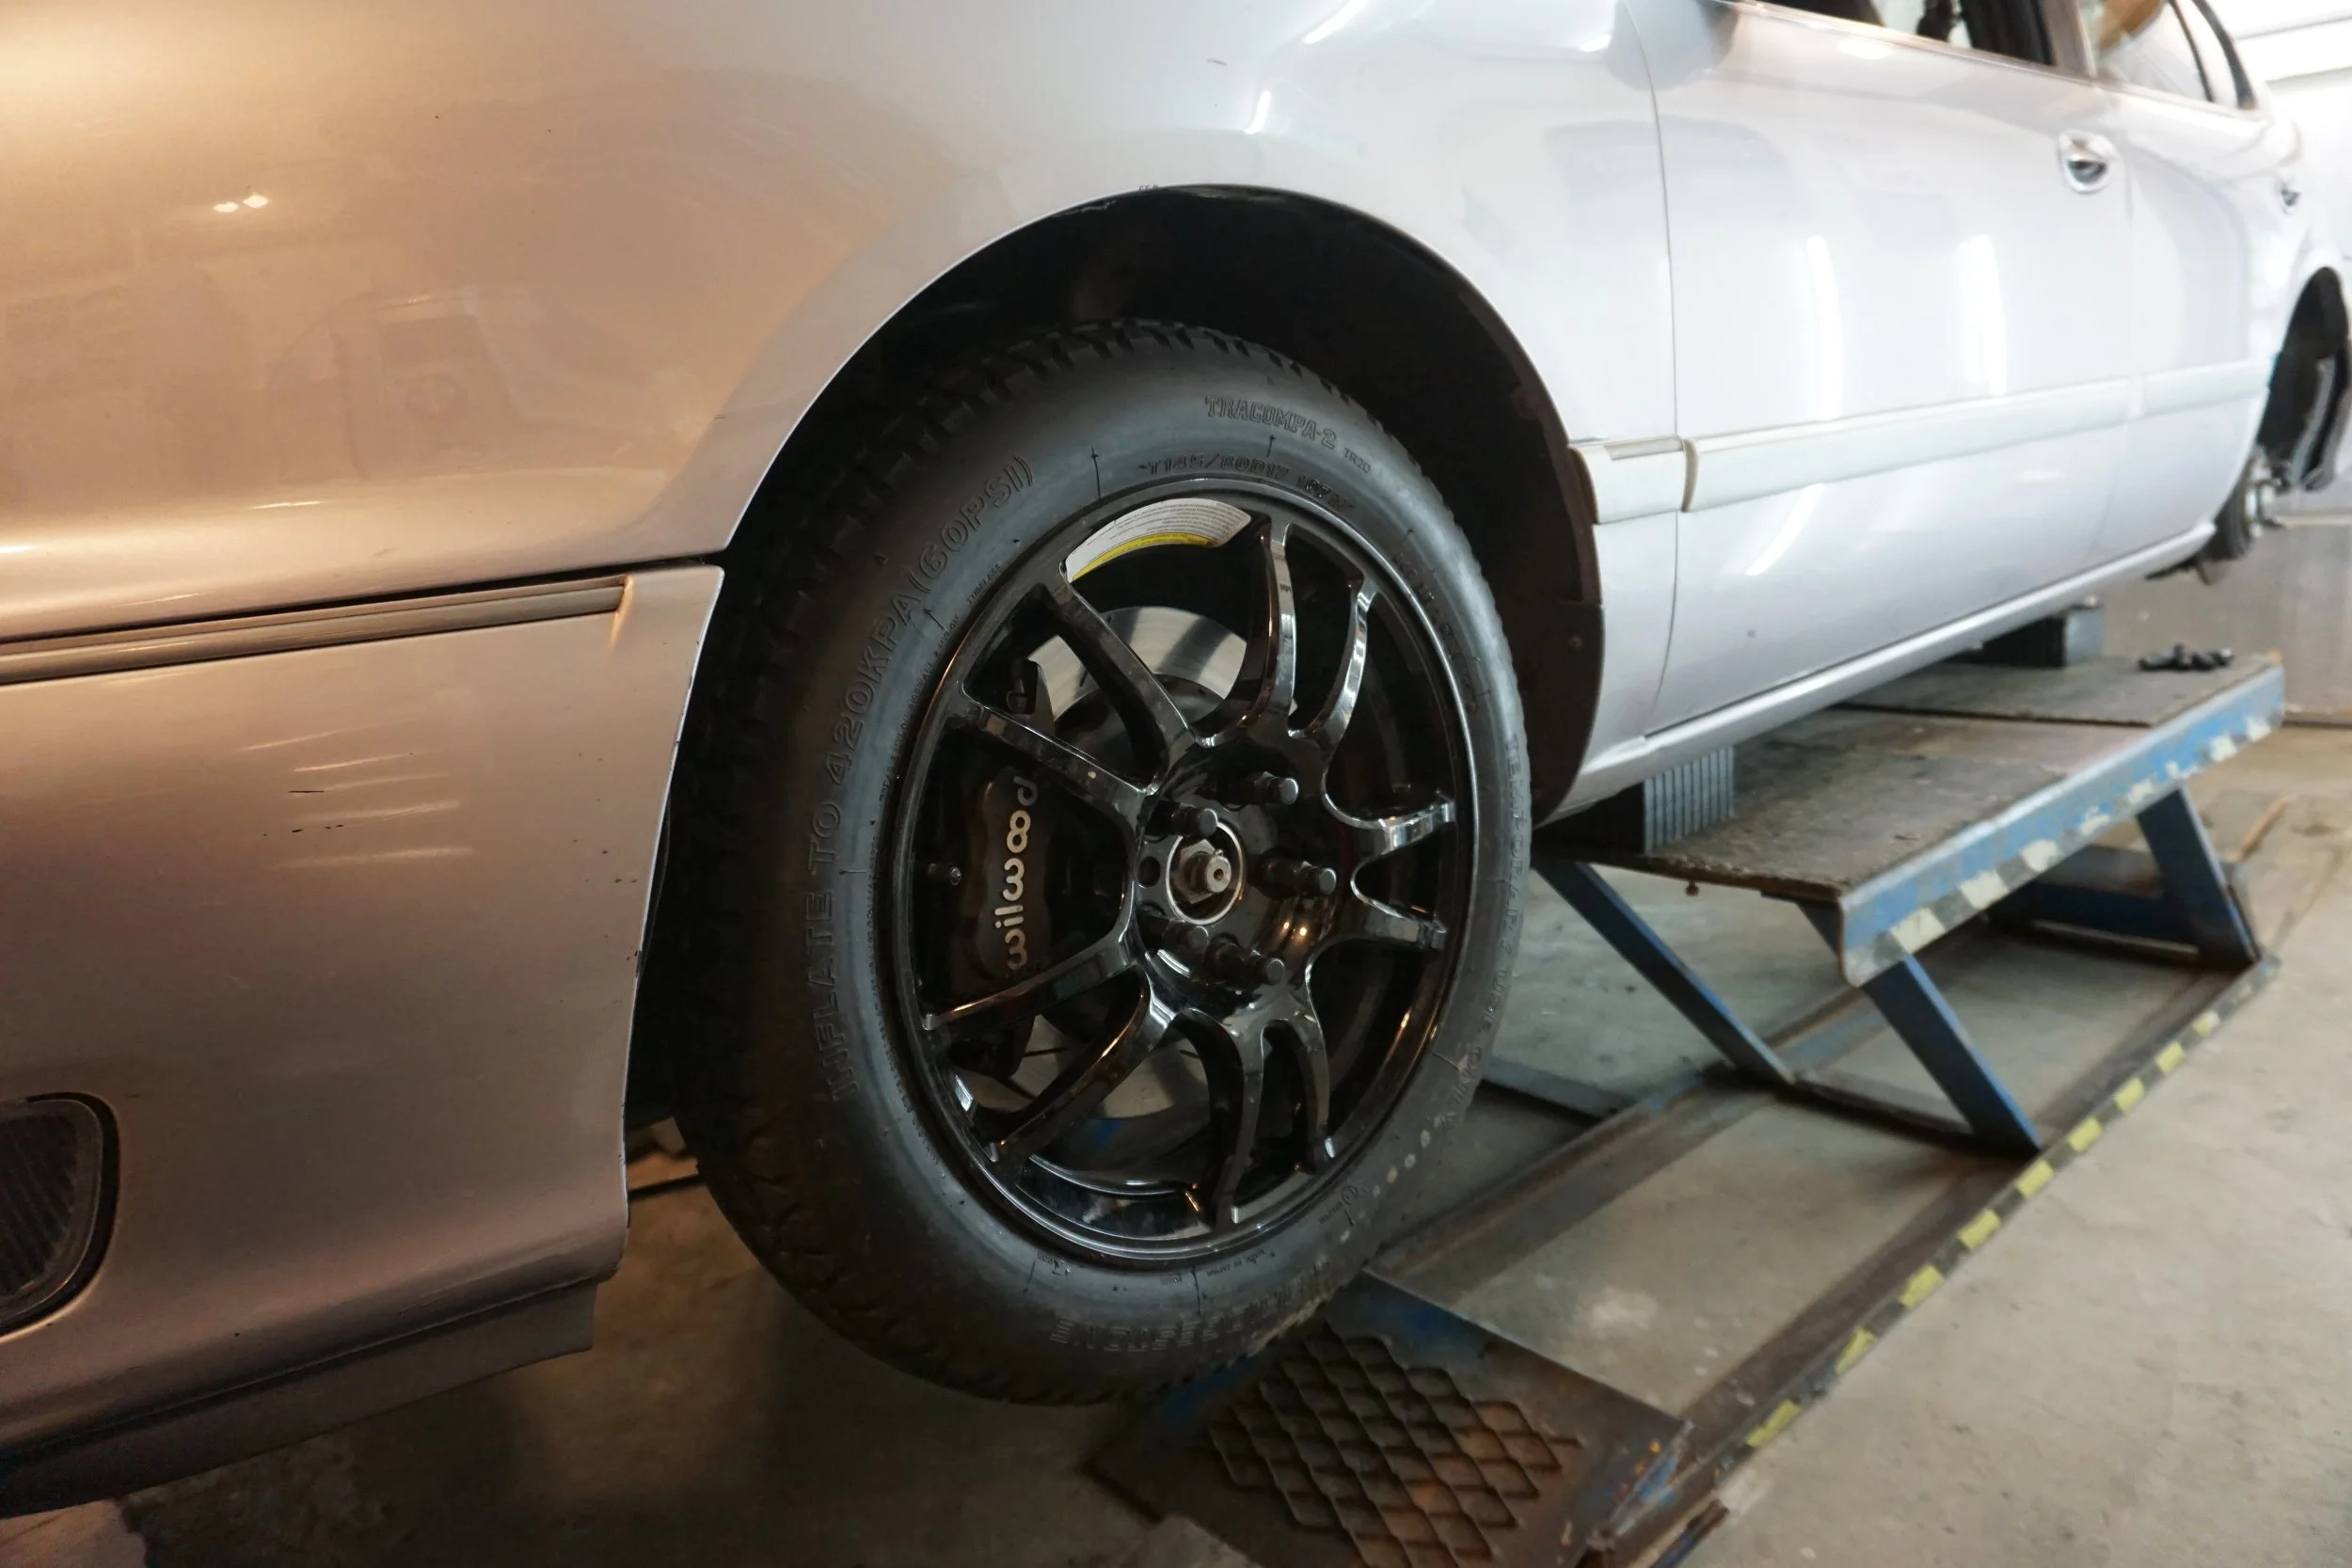
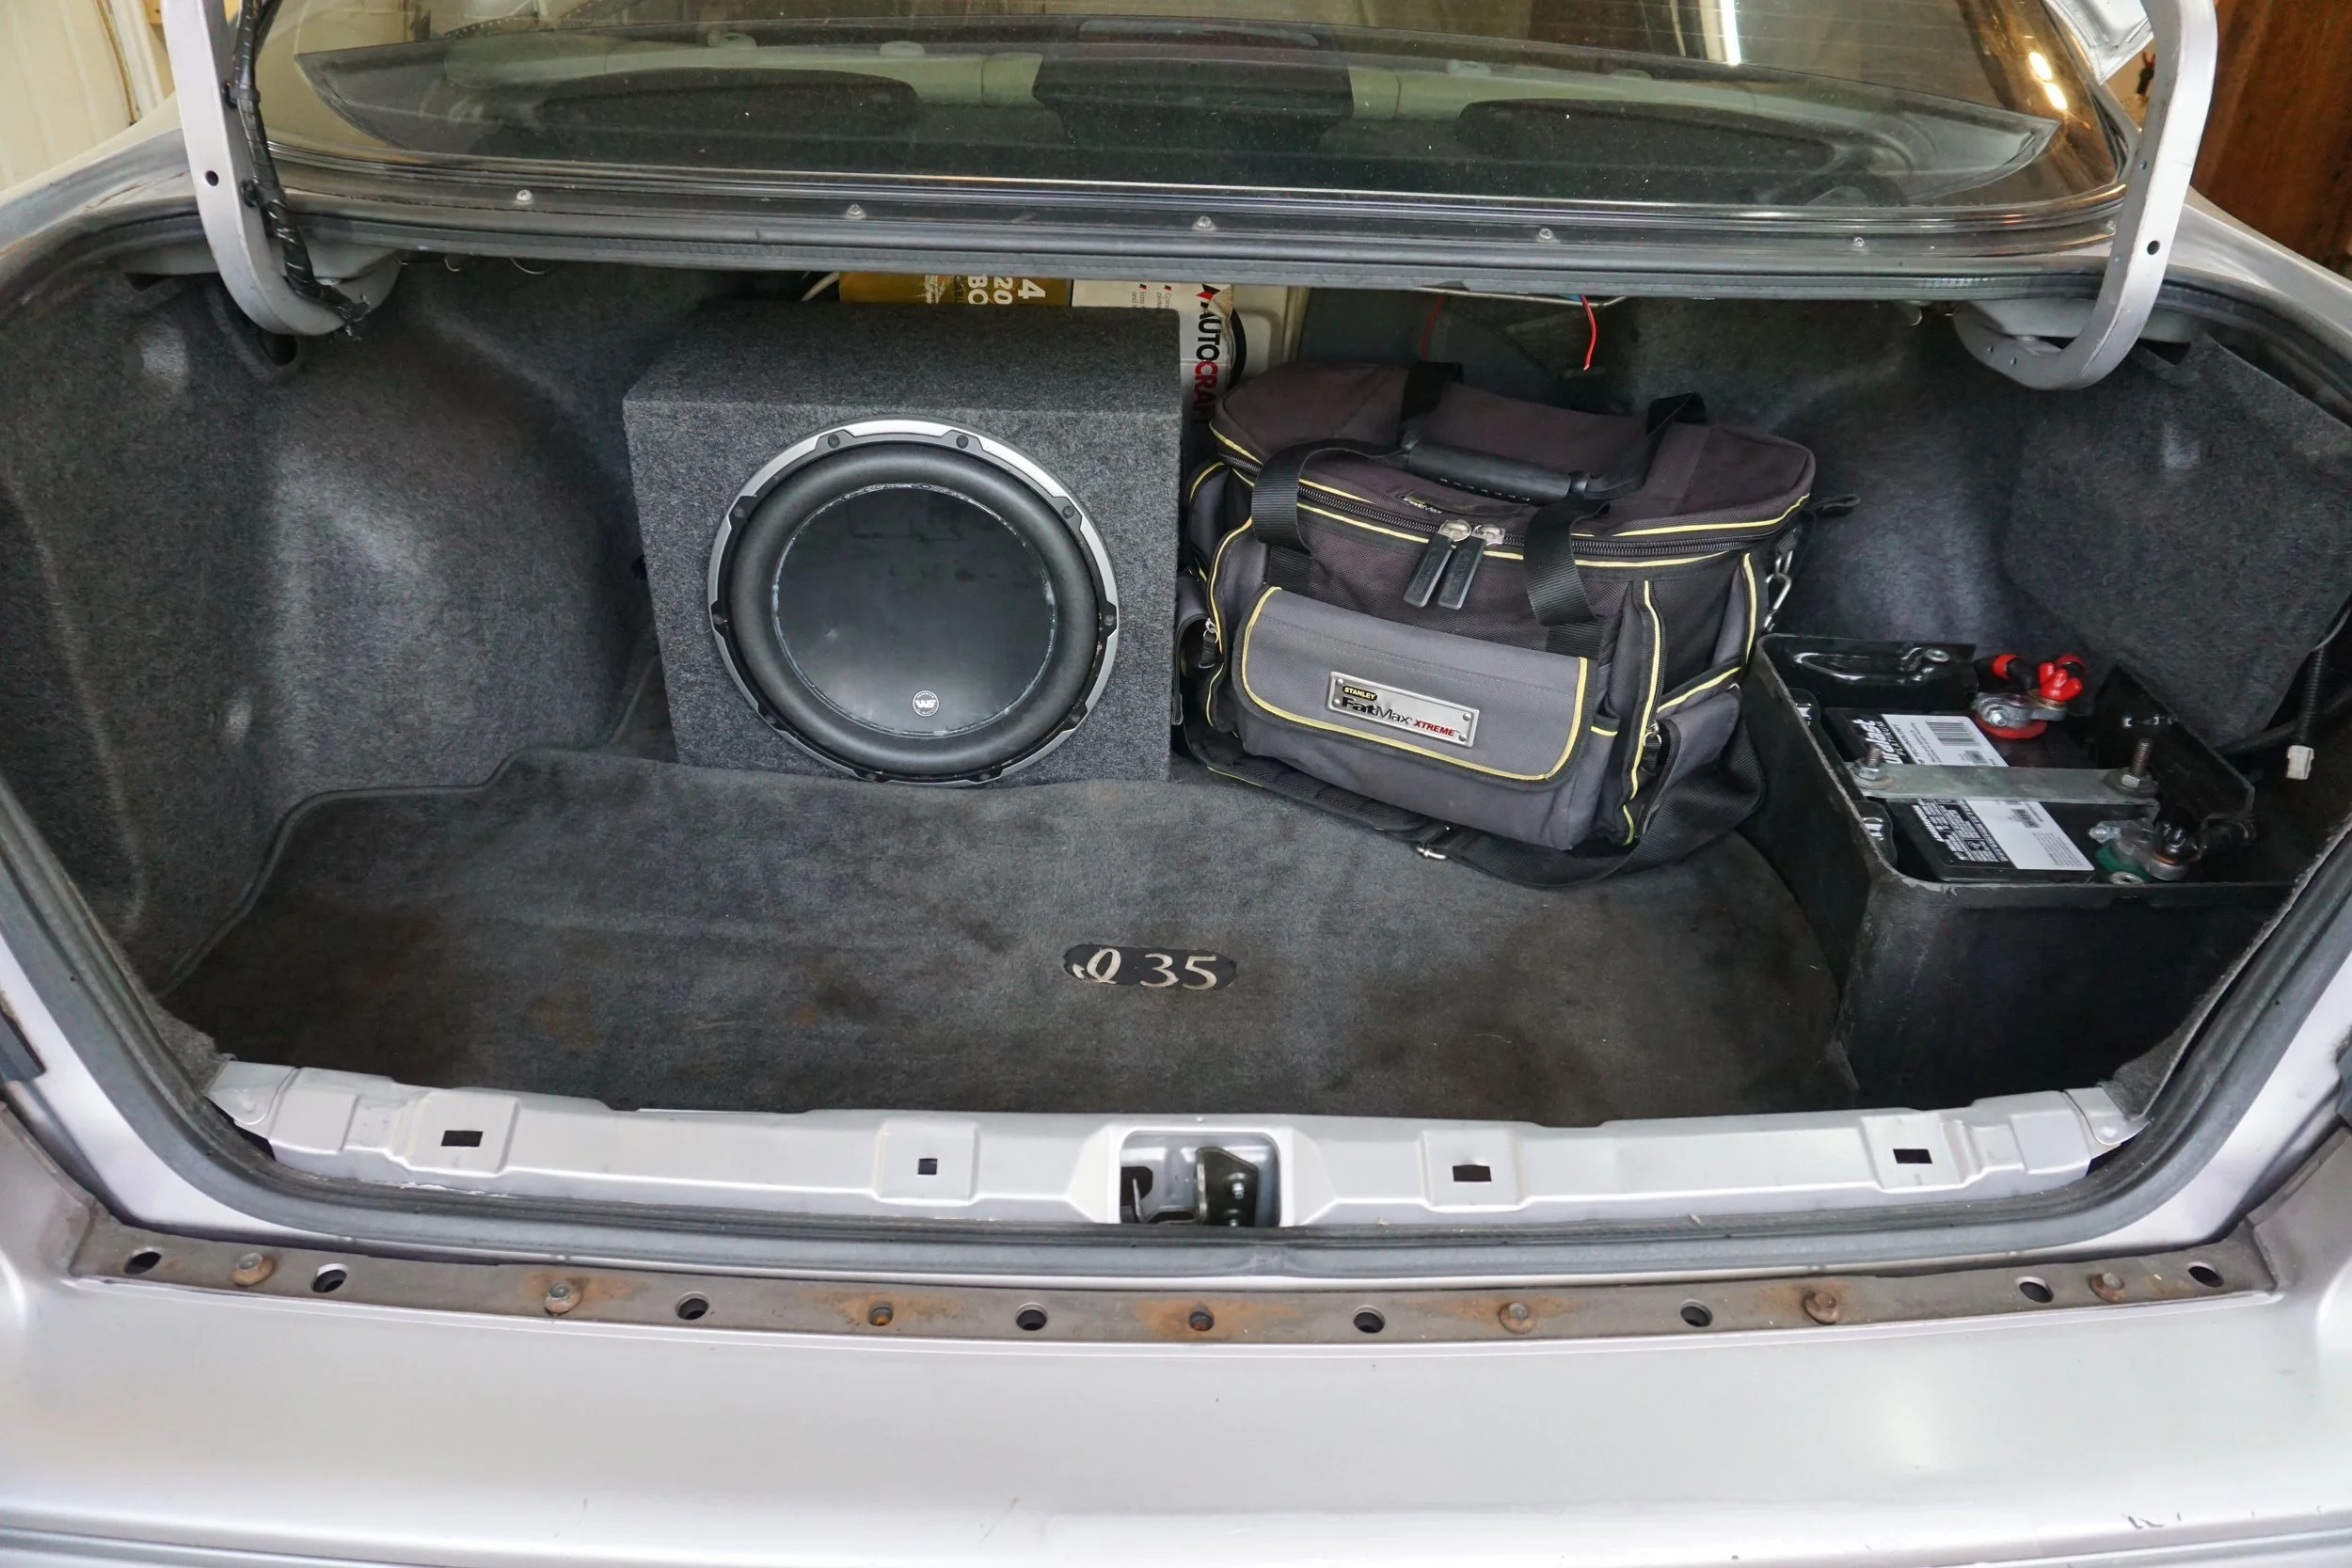
First up, I found a new and larger spare tire off a newer Infiniti at the junkyard. Last year I realized that the stock spare wouldn't even fit over my rear BBK, let along the fronts, so I wanted something a little more useful. Unfortunately the overall diameter of the new spare is about 2" taller, so although it clears the front brakes, I can't use it up there since it would kill the LSD.

It kinda fits in the trunk, but it doesn't sit all the way down. But it's good enough, it sure ain't going anywhere.
While I was back there, I wanted to make a new trunk floor, as my old one was warped, saggy, and just generally dumpy.
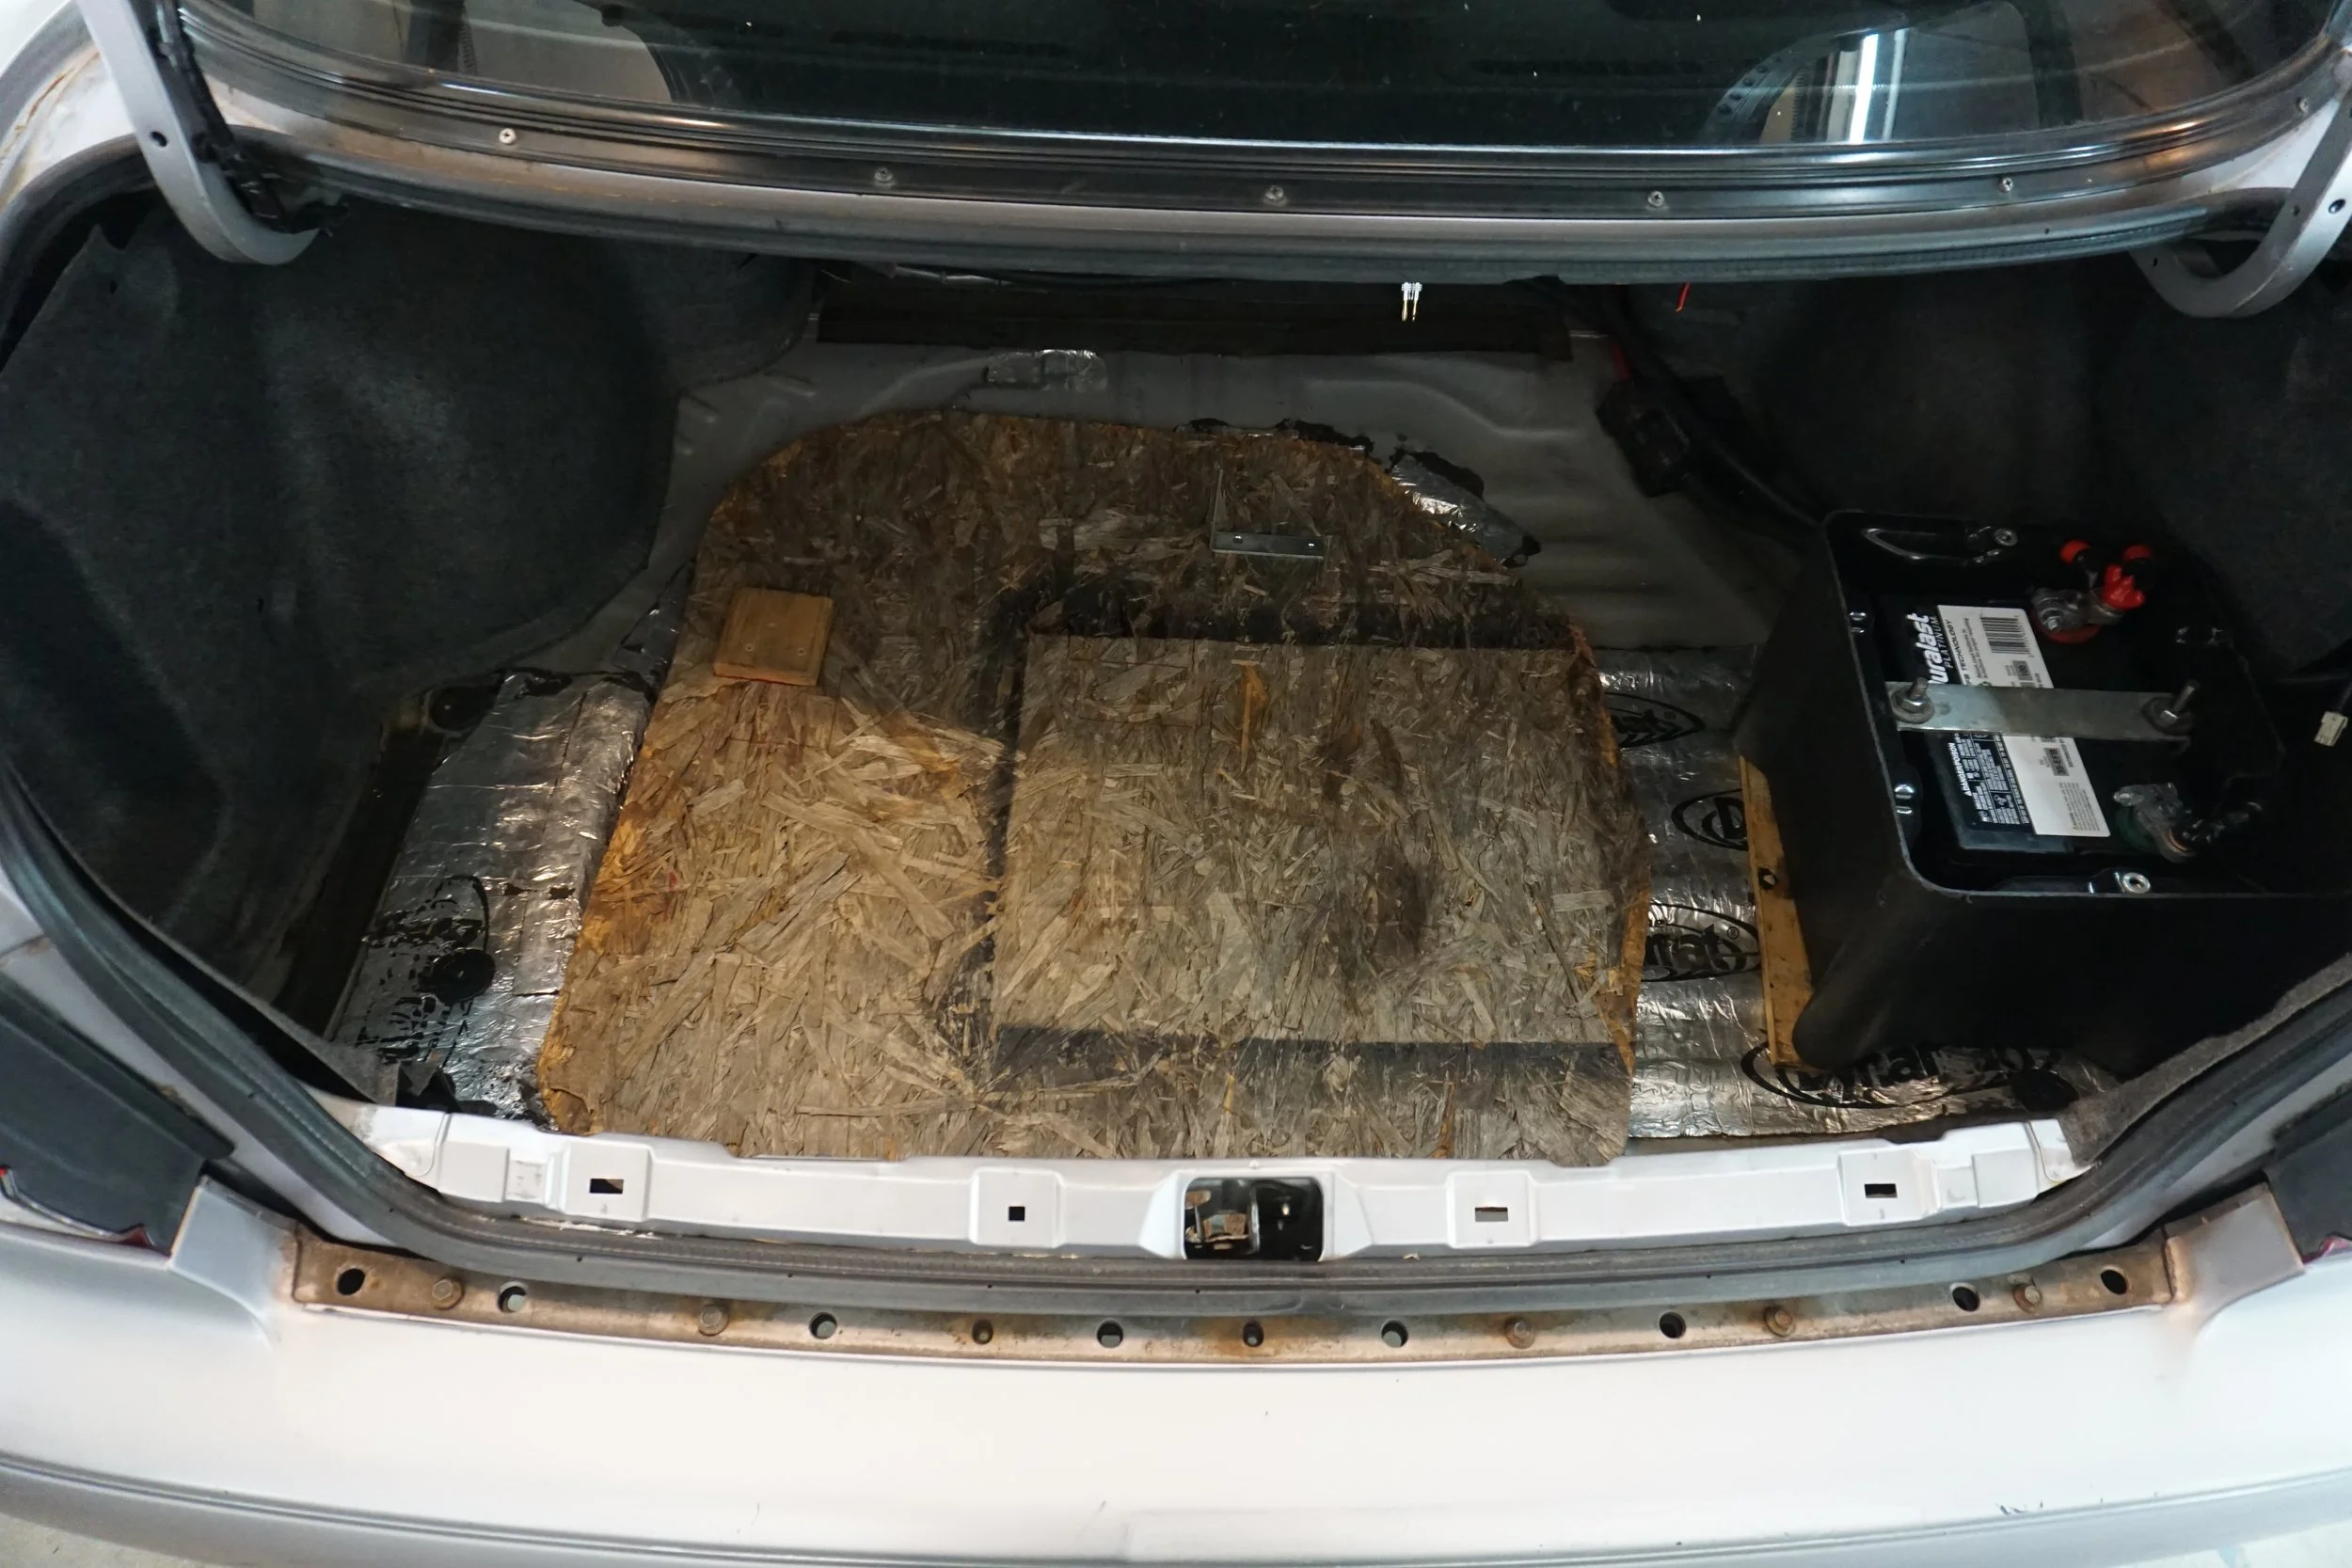
So I got some new heavy duty board and got busy.
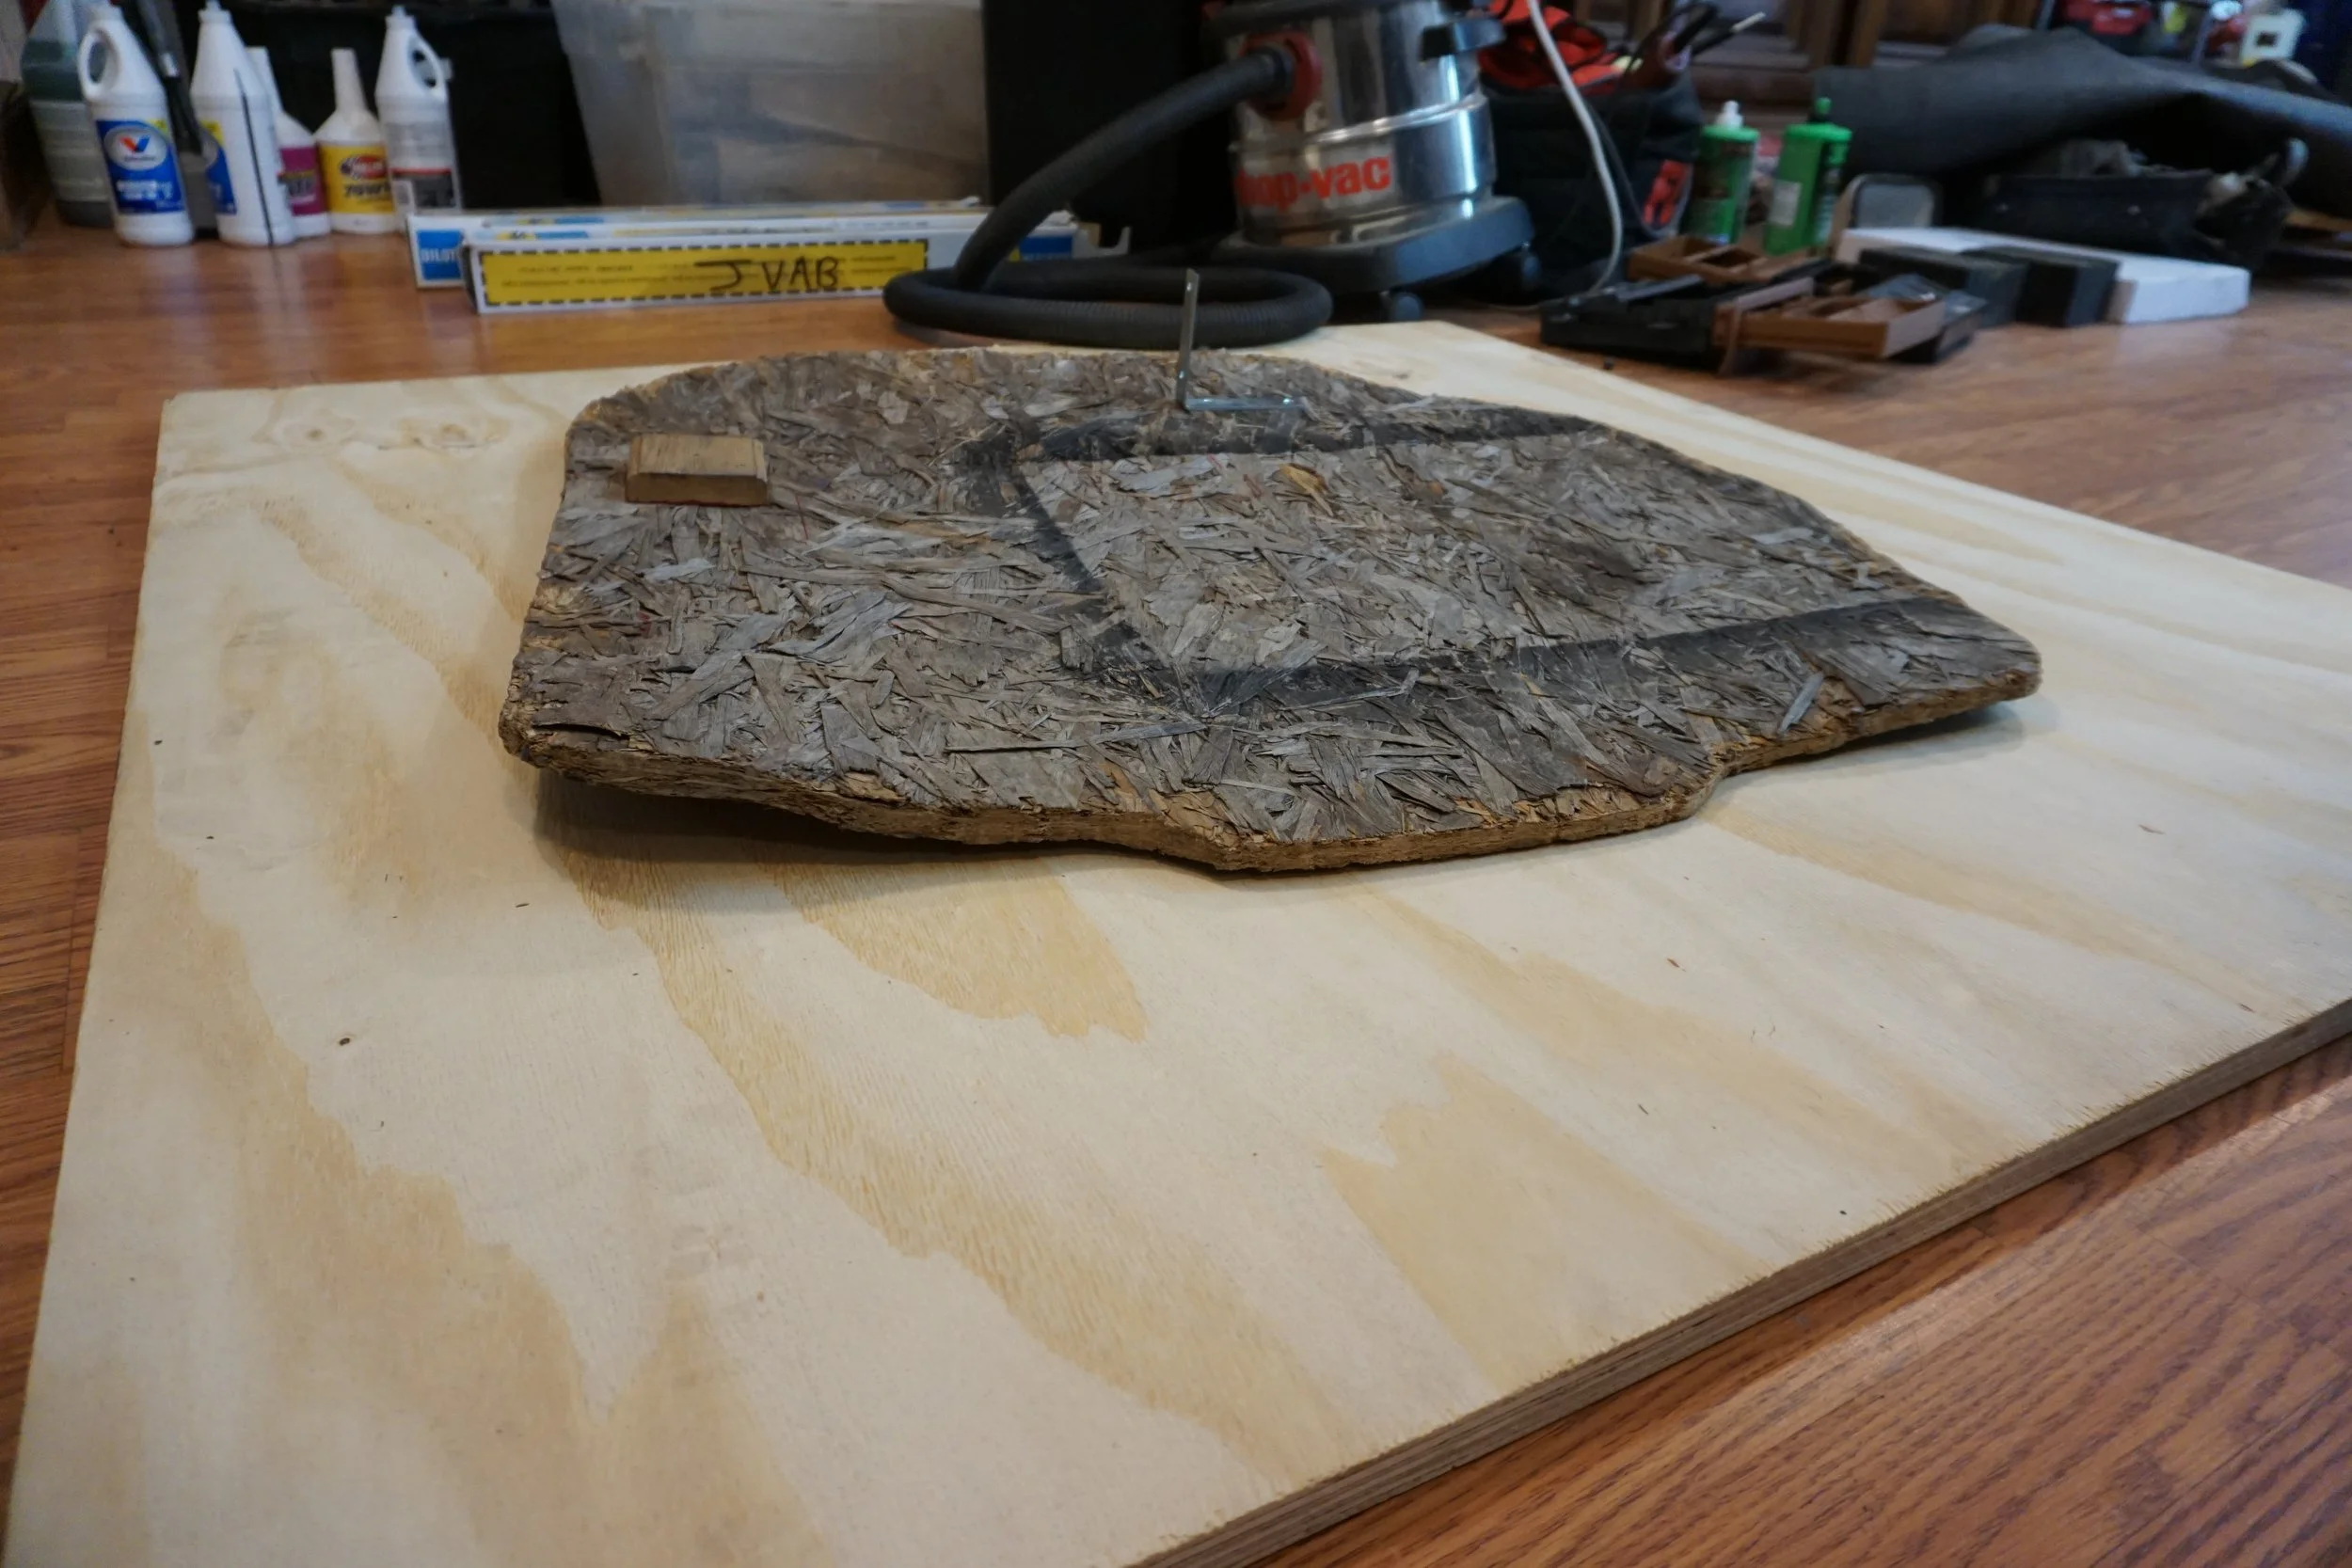
I wanted to make it as big as it could be, but since the trunk floor area is anything but flat, that took a bit of work. I added a support in the center as well so that it can't sag very much before touching the spare tire. Not that I think this material will ever sag!
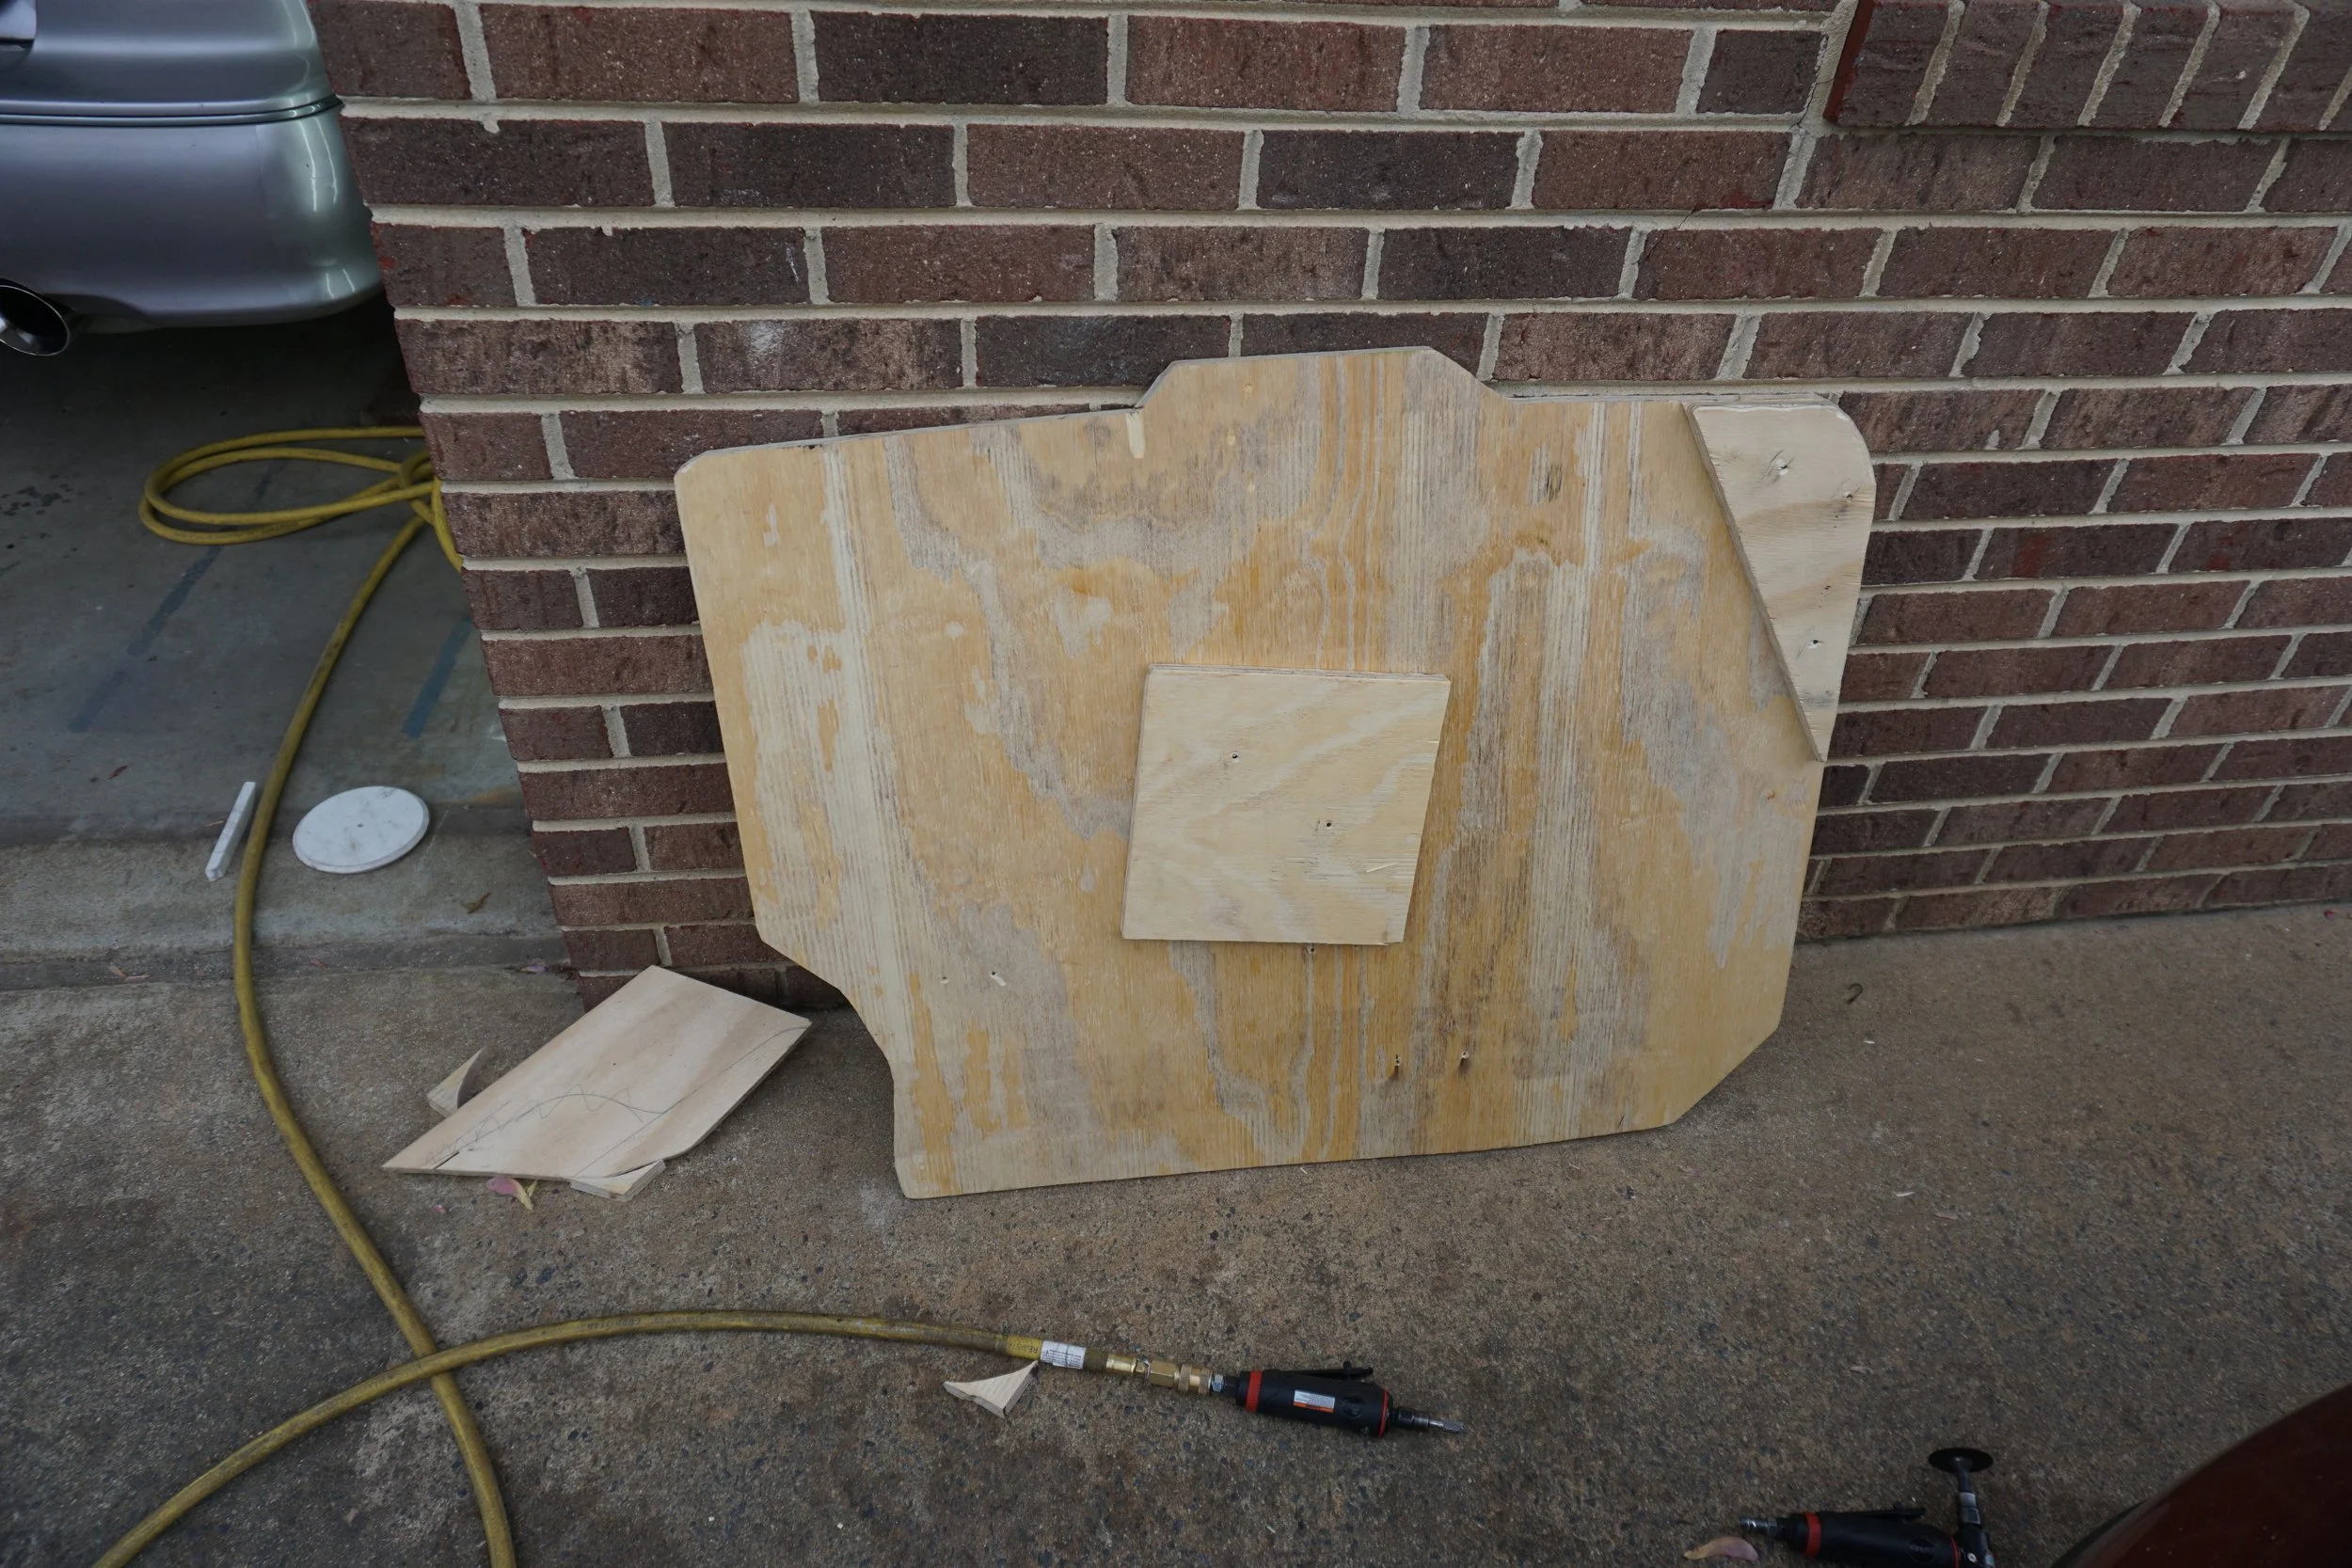
Installed the brackets for the sub box so it can't move around. You can see the shape and size of the original in pencil marks.
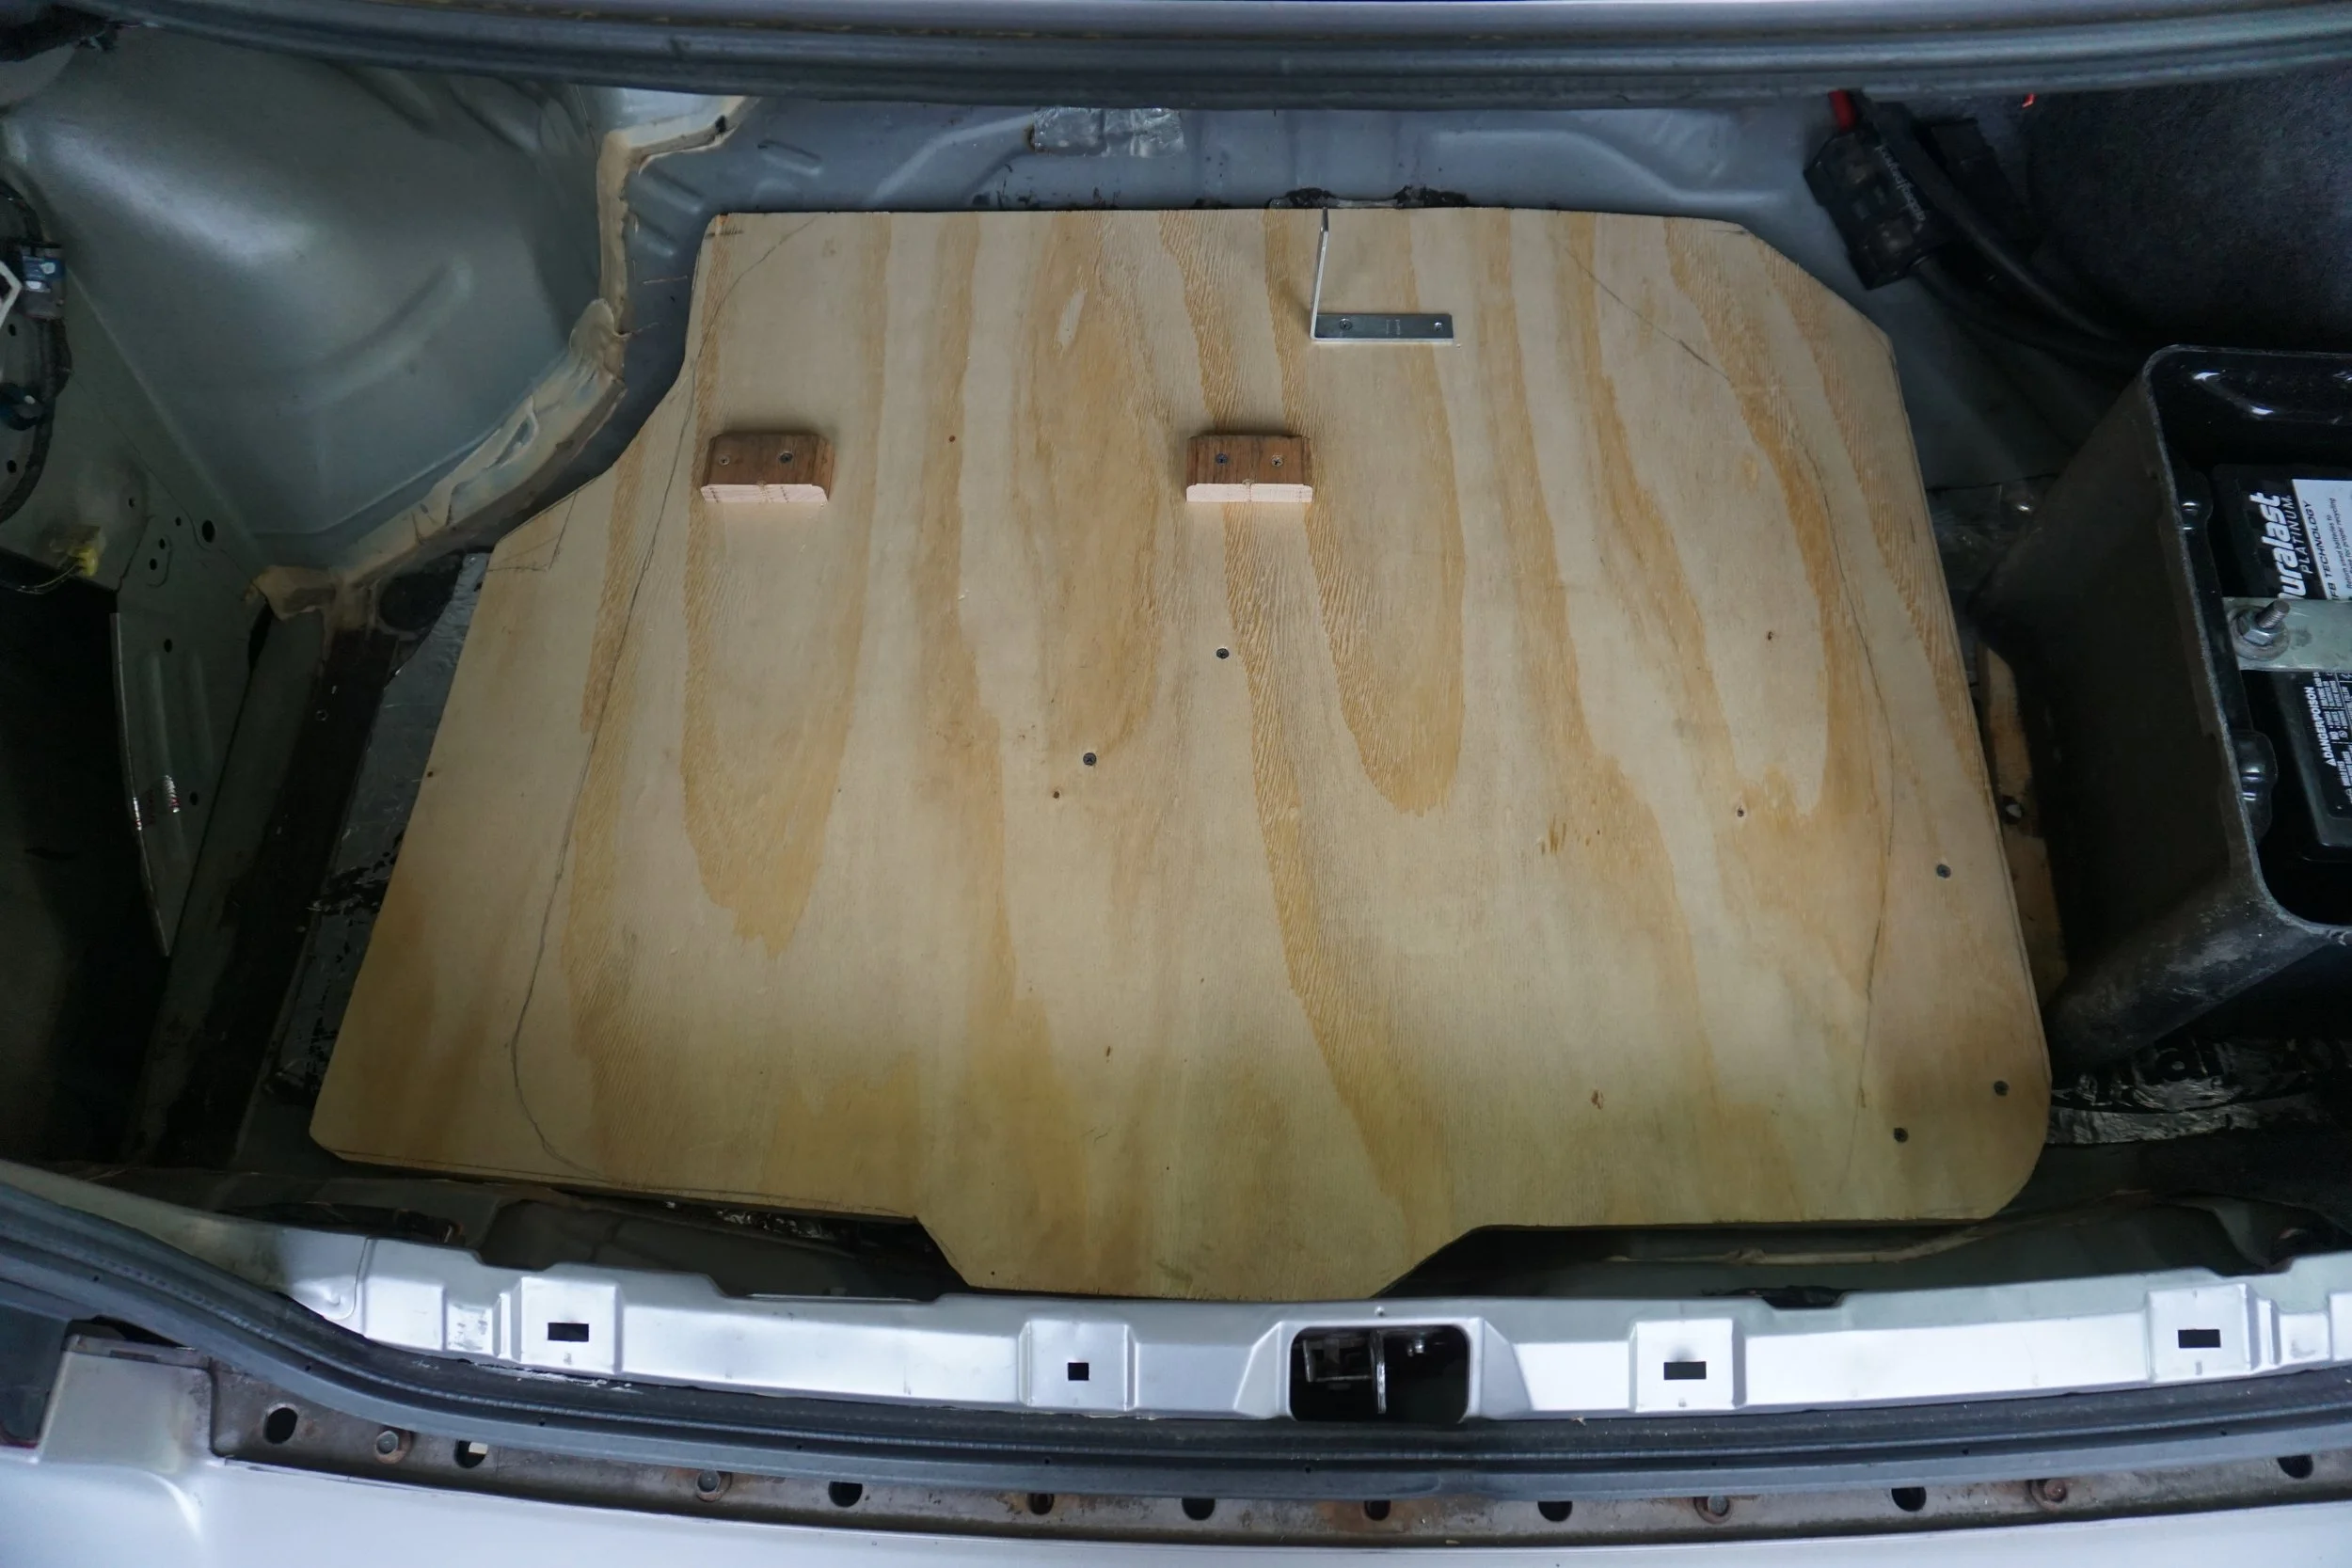
All done!
I also had to do some tweaking for the front Fortune Auto coilovers. After having my alignment slip twice after track sessions, I decided to "delete" the slotted portion of the upper bolt hole that could be used for camber adjustment. I had it lined up where I wanted it so the SAI was correct and the camber plates had adjustment room on either side, so I cut up some metal, made a really tight hole, and welded it up so it was no longer slotted:
Problem solved (I hope).
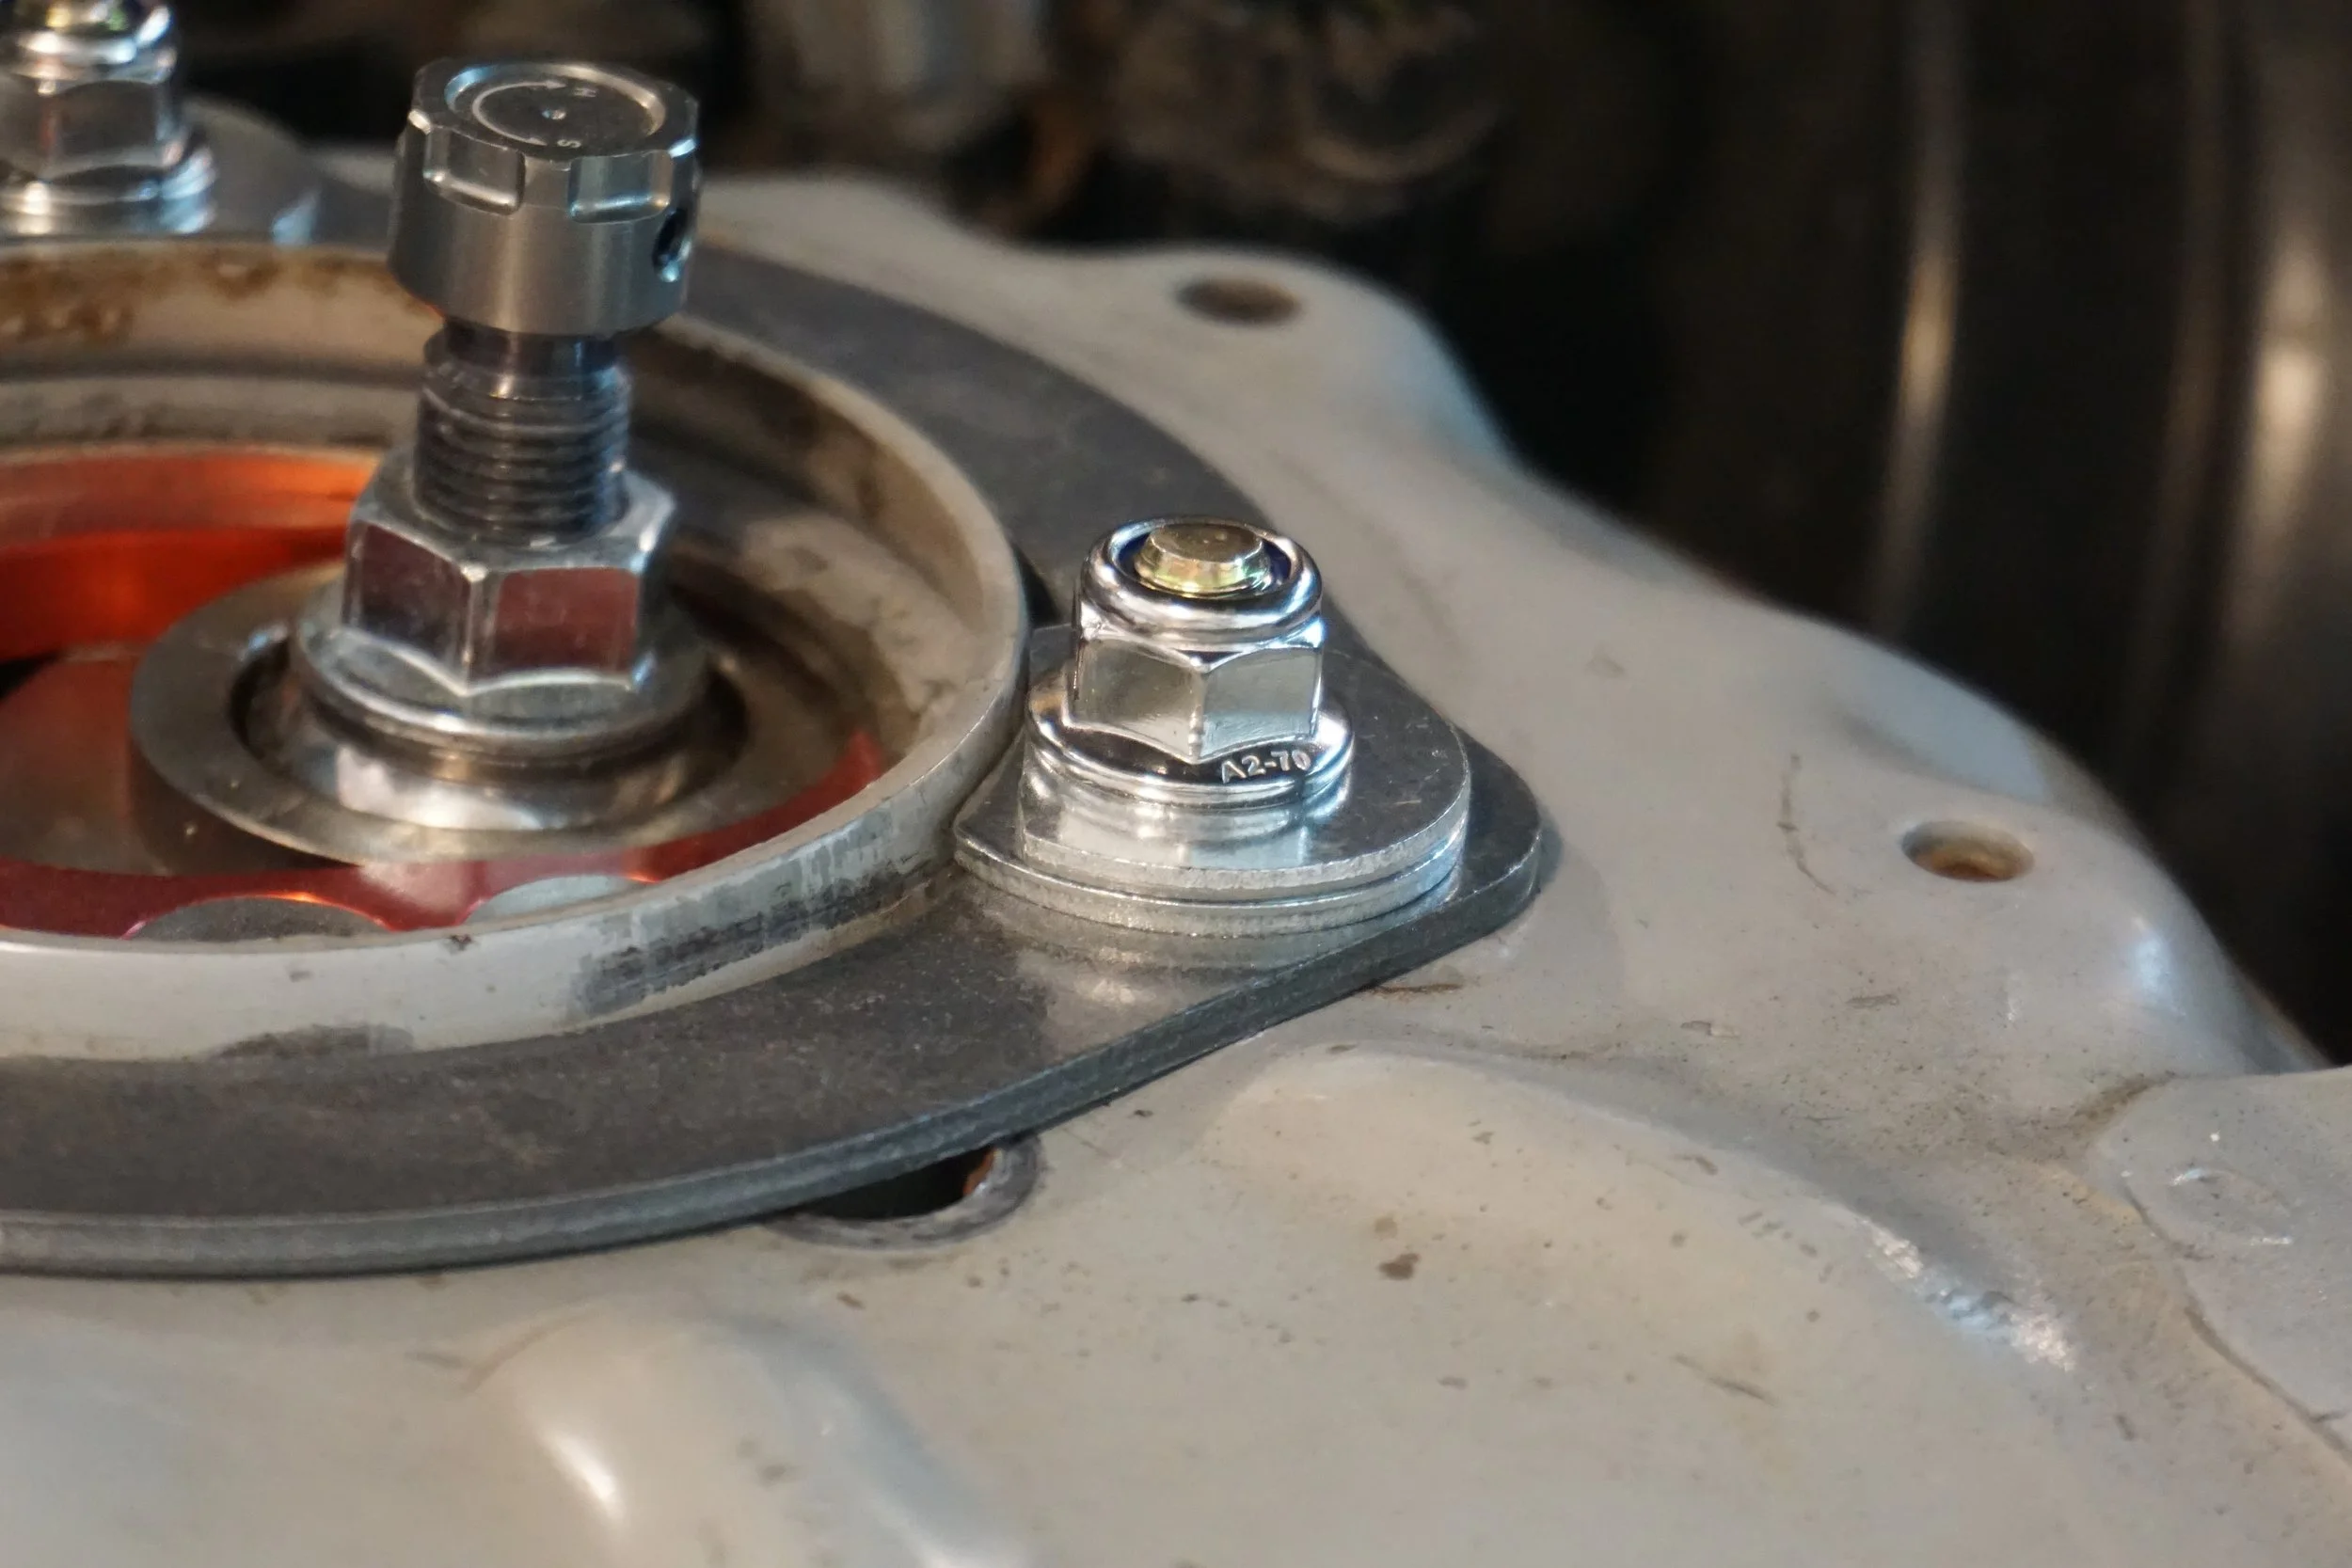
Next up were the camber plates. Due to the custom (hack) nature of running E46 camber plates, and the necessary redrilling of the shock tower and FSTB brackets, I was having some entirely expected problems with the washers and bolts that hold everything together:
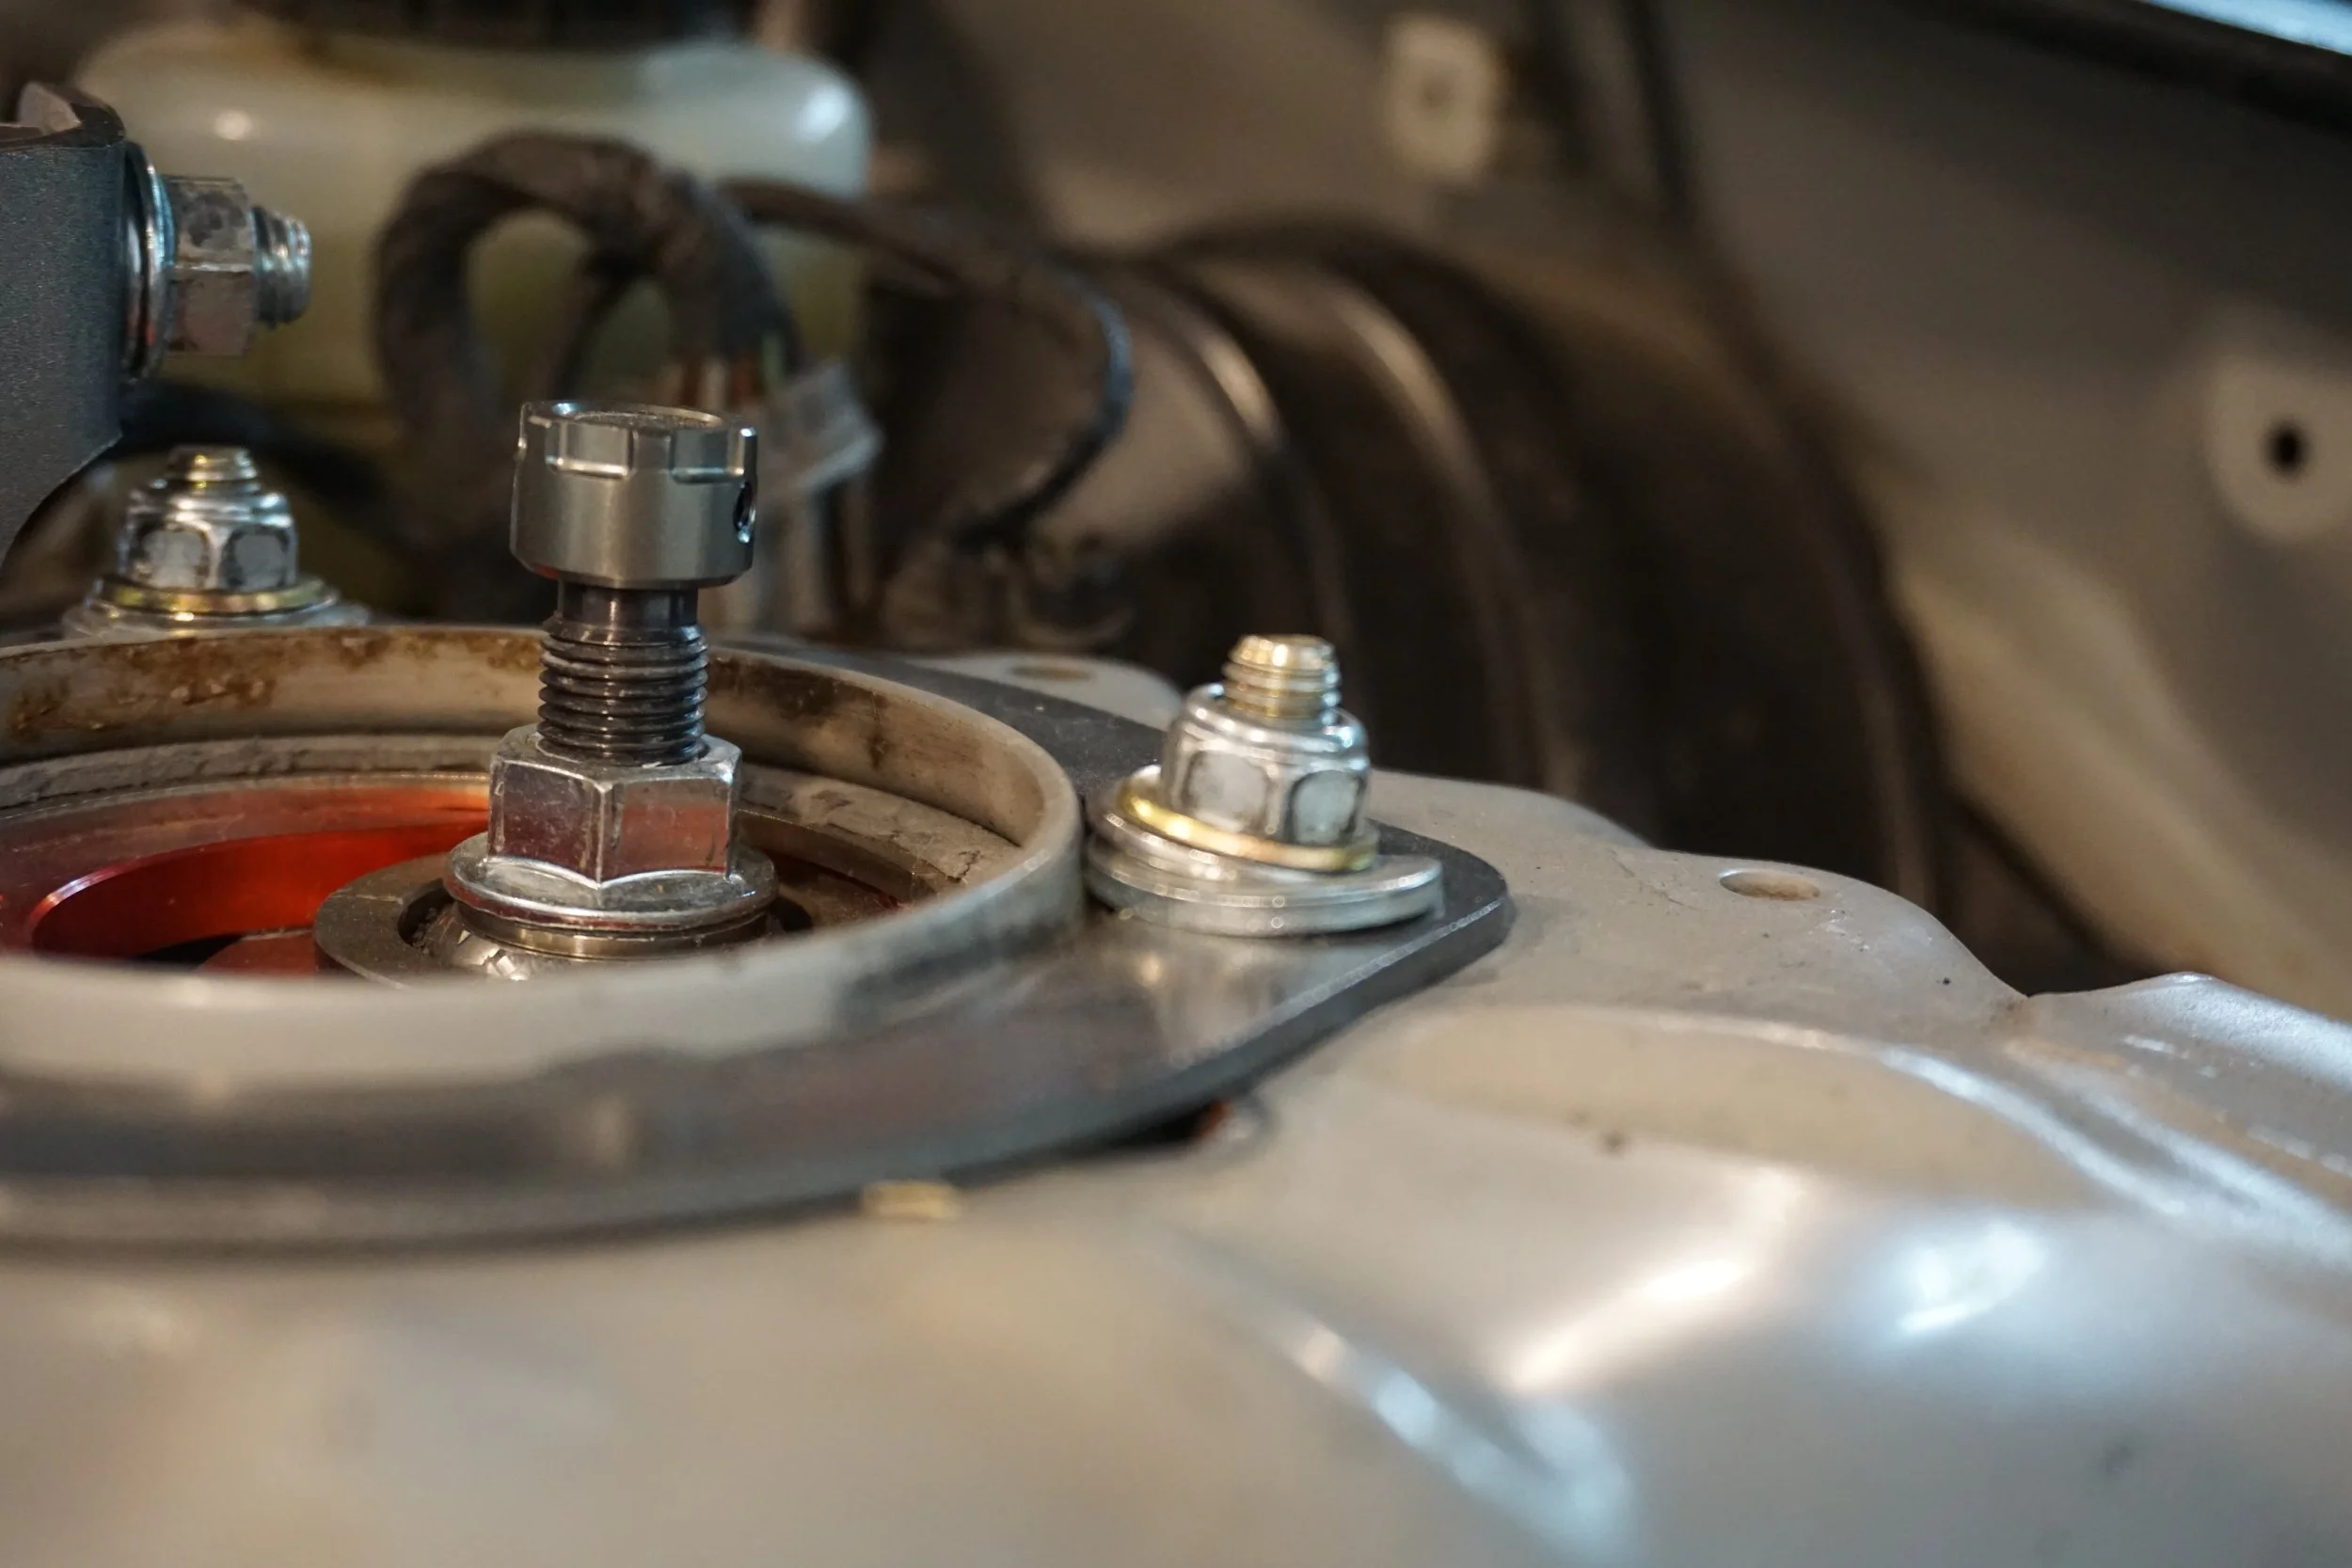
Yeah, because the holes had been hogged out, the washers were deforming, and my torque values were all jacked up. Add to that that I was using factory torque specs on the Vorshlag camber plates, which only should have about half the torque, and I stripped one of the studs on them and had to install new ones.
With some new appropriately sized washers, some nice lock nuts, new hardware from Vorshlag, and correct torque specs, I think these are finally done as correctly as I can for the moment.
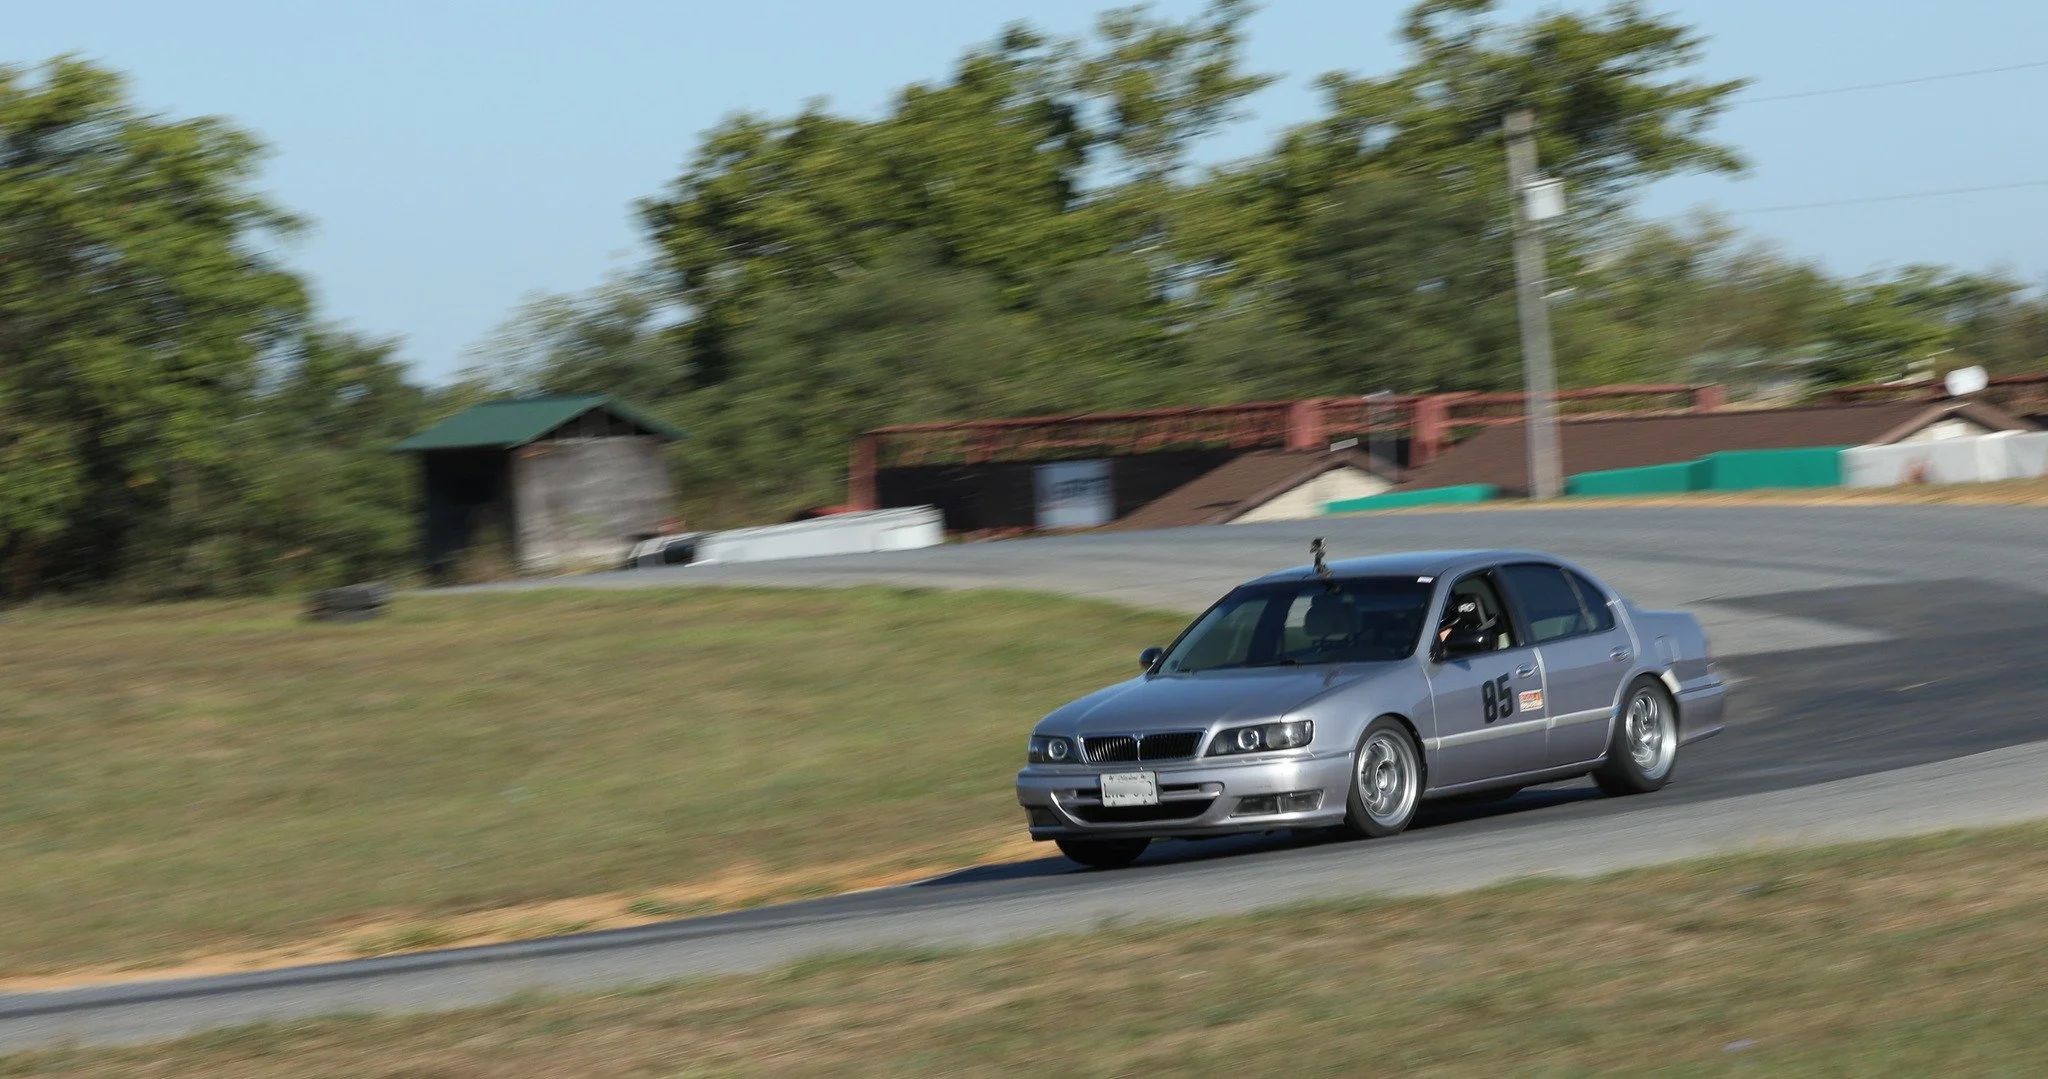
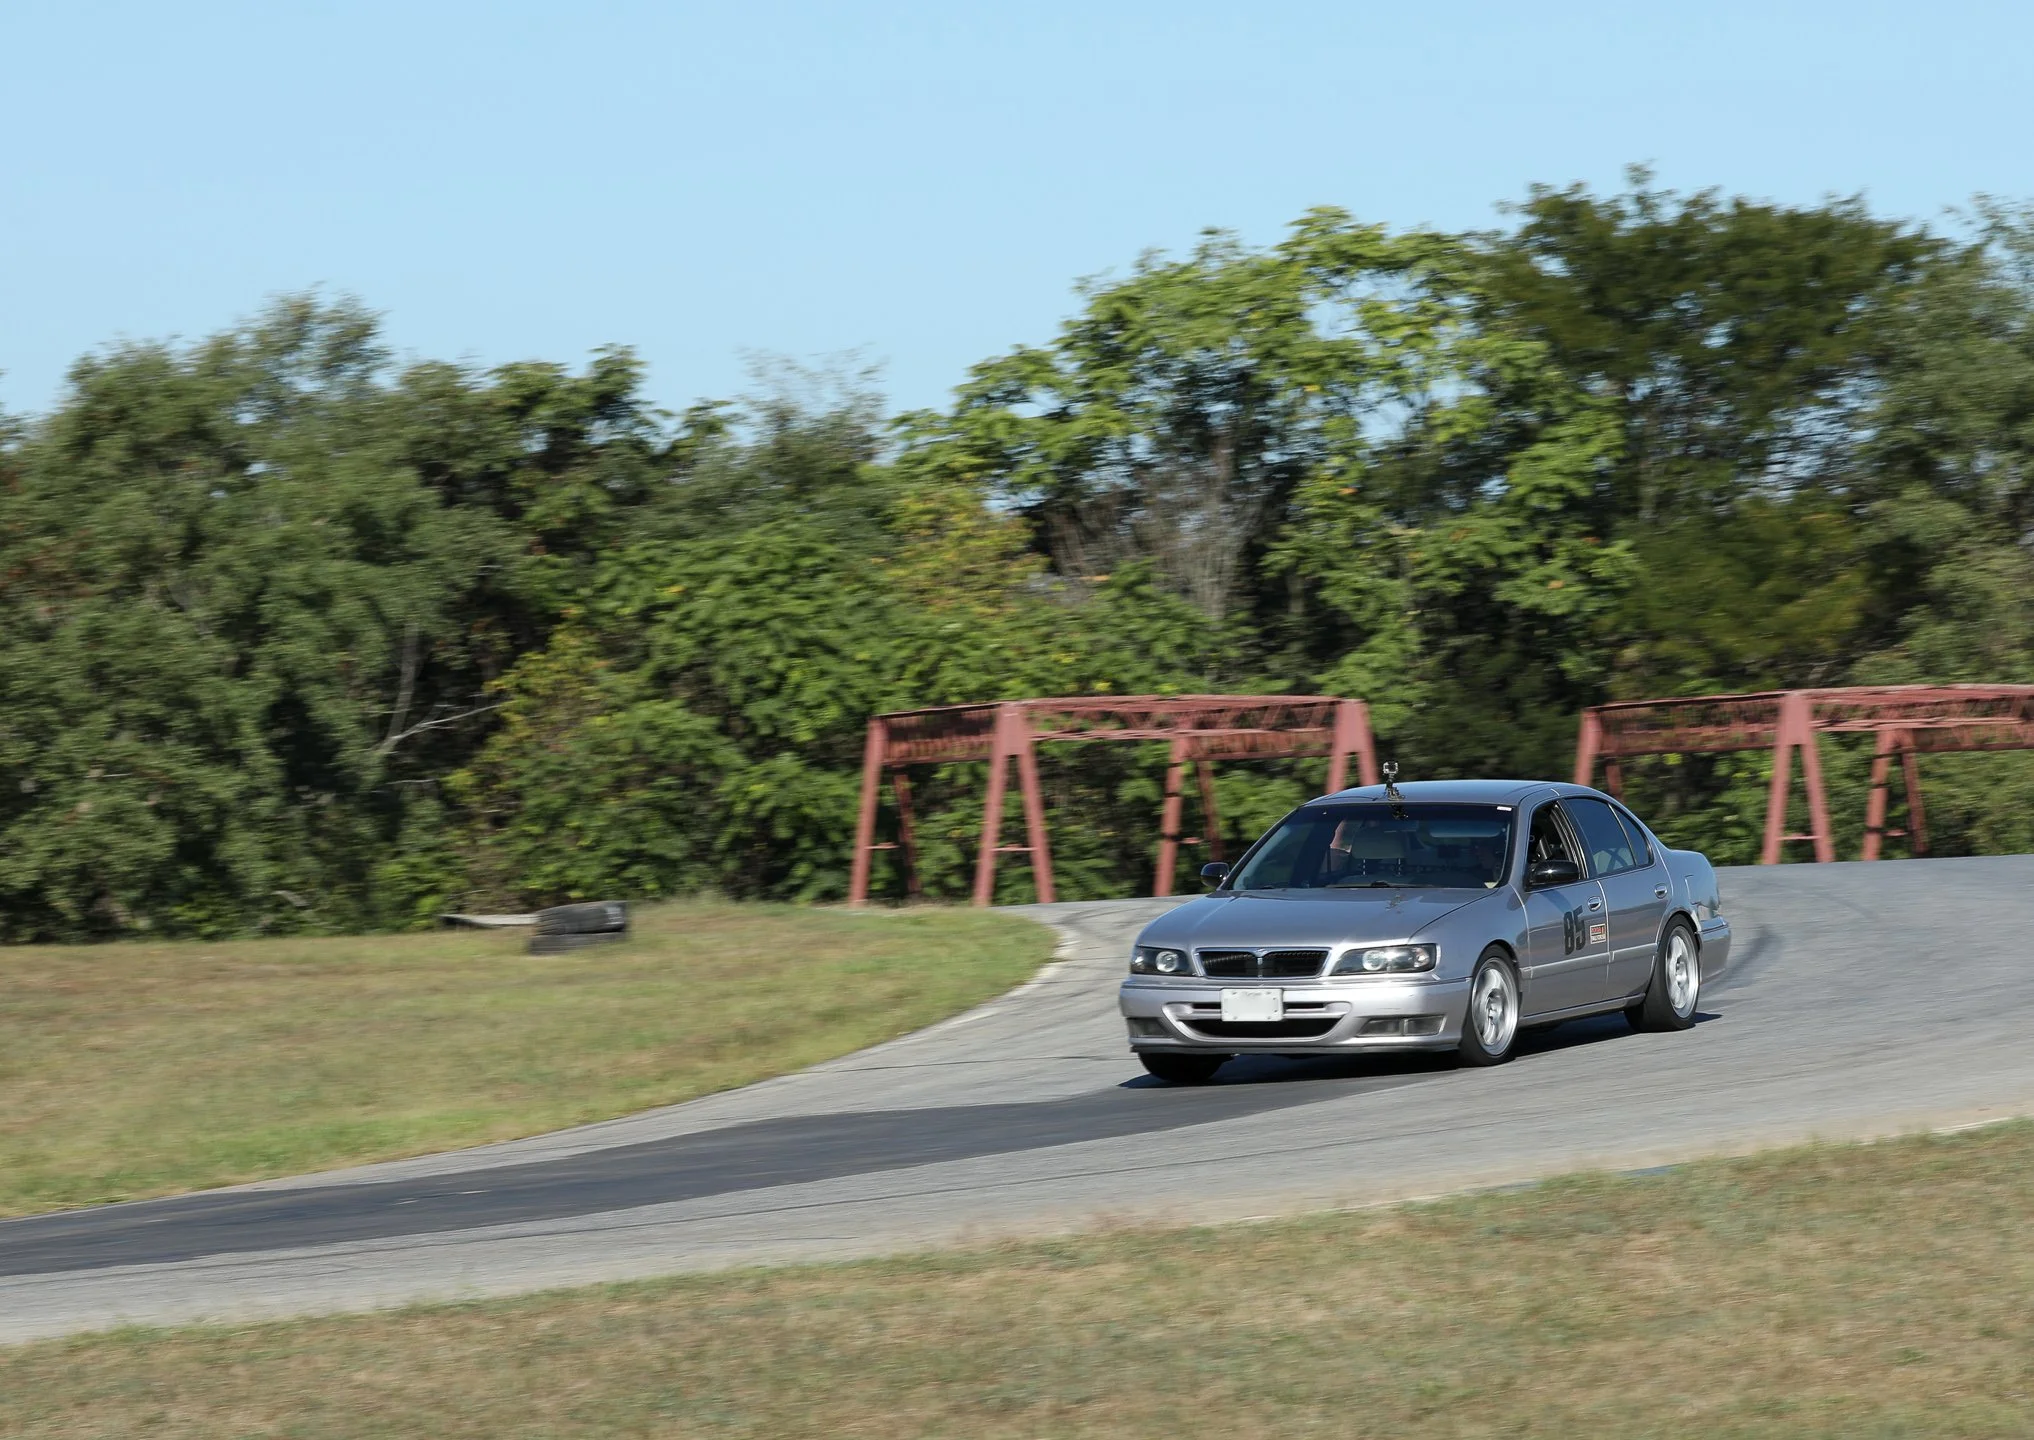
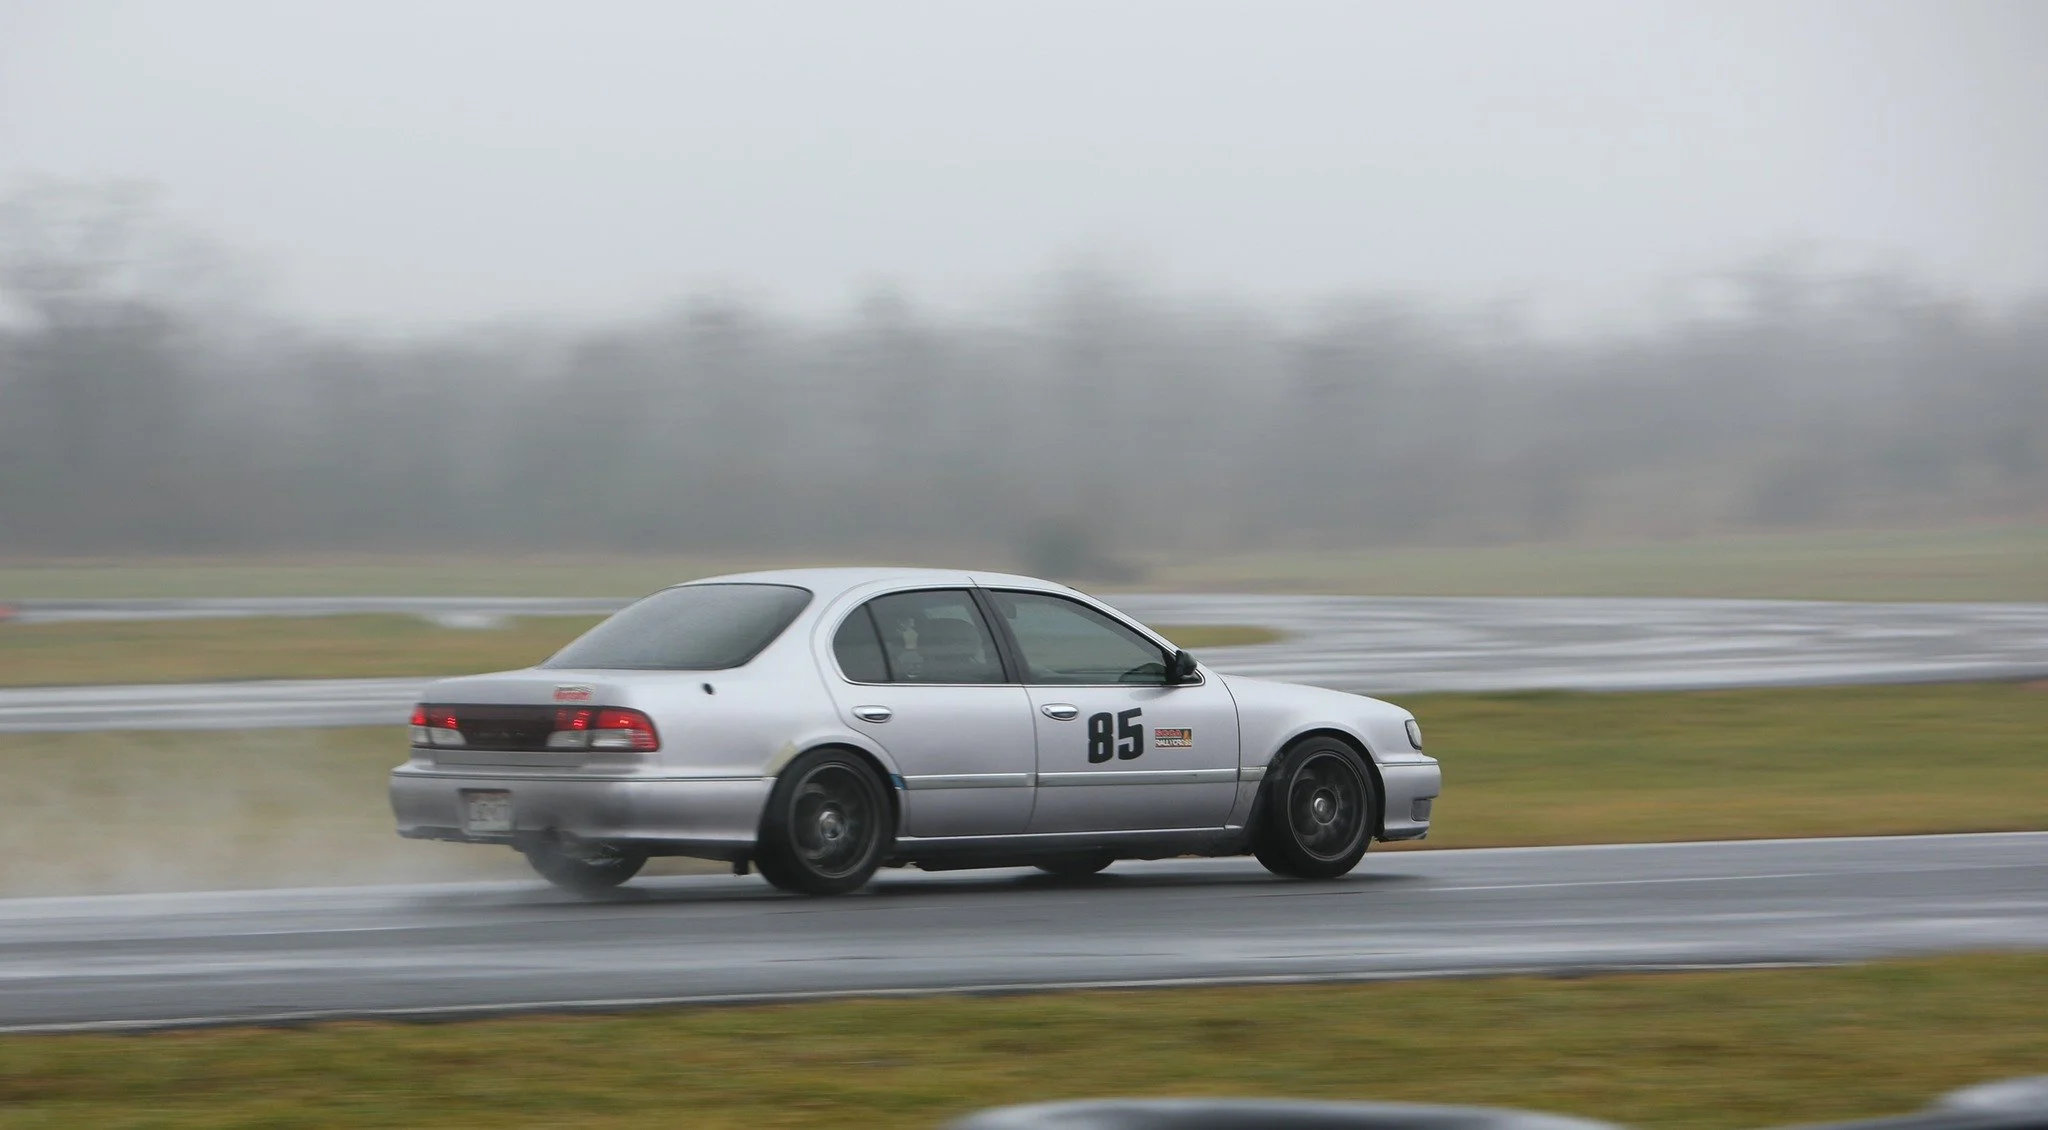
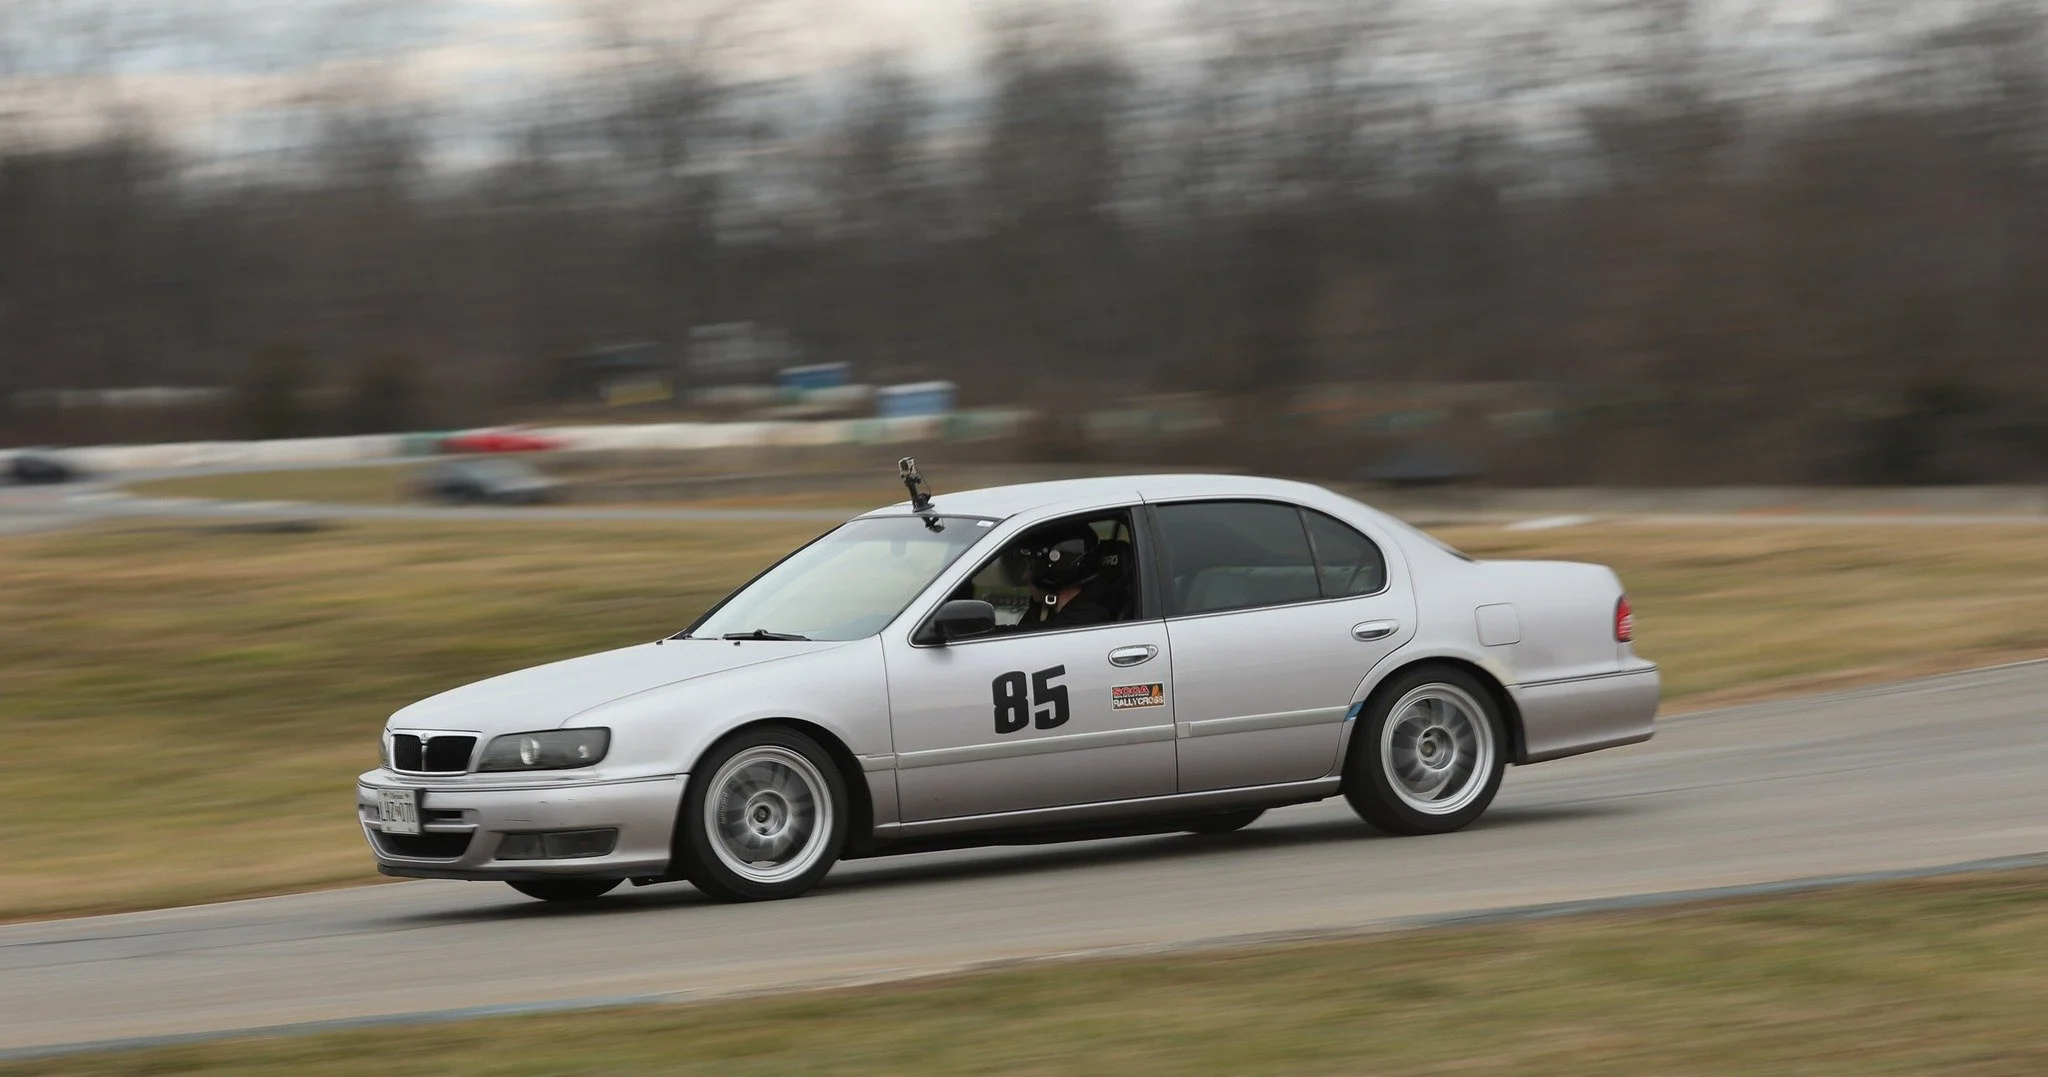
I don't have time to get to all of the racing results, but I did gather up a bunch of pics from over the last year or so, so enjoy those for now.


First up, I found a new and larger spare tire off a newer Infiniti at the junkyard. Last year I realized that the stock spare wouldn't even fit over my rear BBK, let along the fronts, so I wanted something a little more useful. Unfortunately the overall diameter of the new spare is about 2" taller, so although it clears the front brakes, I can't use it up there since it would kill the LSD.
It kinda fits in the trunk, but it doesn't sit all the way down. But it's good enough, it sure ain't going anywhere.
While I was back there, I wanted to make a new trunk floor, as my old one was warped, saggy, and just generally dumpy.
So I got some new heavy duty board and got busy.
I wanted to make it as big as it could be, but since the trunk floor area is anything but flat, that took a bit of work. I added a support in the center as well so that it can't sag very much before touching the spare tire. Not that I think this material will ever sag!
Installed the brackets for the sub box so it can't move around. You can see the shape and size of the original in pencil marks.
All done!
I also had to do some tweaking for the front Fortune Auto coilovers. After having my alignment slip twice after track sessions, I decided to "delete" the slotted portion of the upper bolt hole that could be used for camber adjustment. I had it lined up where I wanted it so the SAI was correct and the camber plates had adjustment room on either side, so I cut up some metal, made a really tight hole, and welded it up so it was no longer slotted:
Problem solved (I hope).
Next up were the camber plates. Due to the custom (hack) nature of running E46 camber plates, and the necessary redrilling of the shock tower and FSTB brackets, I was having some entirely expected problems with the washers and bolts that hold everything together:
Yeah, because the holes had been hogged out, the washers were deforming, and my torque values were all jacked up. Add to that that I was using factory torque specs on the Vorshlag camber plates, which only should have about half the torque, and I stripped one of the studs on them and had to install new ones.
With some new appropriately sized washers, some nice lock nuts, new hardware from Vorshlag, and correct torque specs, I think these are finally done as correctly as I can for the moment.
I don't have time to get to all of the racing results, but I did gather up a bunch of pics from over the last year or so, so enjoy those for now.

Newbie - Just Registered
Joined: Jun 2024
Posts: 7
I have one I'm wanting to replace or upgrade the spark plugs,coils, intake, exhaust. It's an older car and these things need replaced but I'm wanting to build it a better. Any info on where I can find quality parts and maybe show me yours. I want to build it nice but I haven't seen any of these modified. Barely can find info on them at all
Last edited by 95maxrider; Jun 24, 2024 at 10:24 AM.
I have one I'm wanting to replace or upgrade the spark plugs,coils, intake, exhaust. It's an older car and these things need replaced but I'm wanting to build it a better. Any info on where I can find quality parts and maybe show me yours. I want to build it nice but I haven't seen any of these modified. Barely can find info on them at all
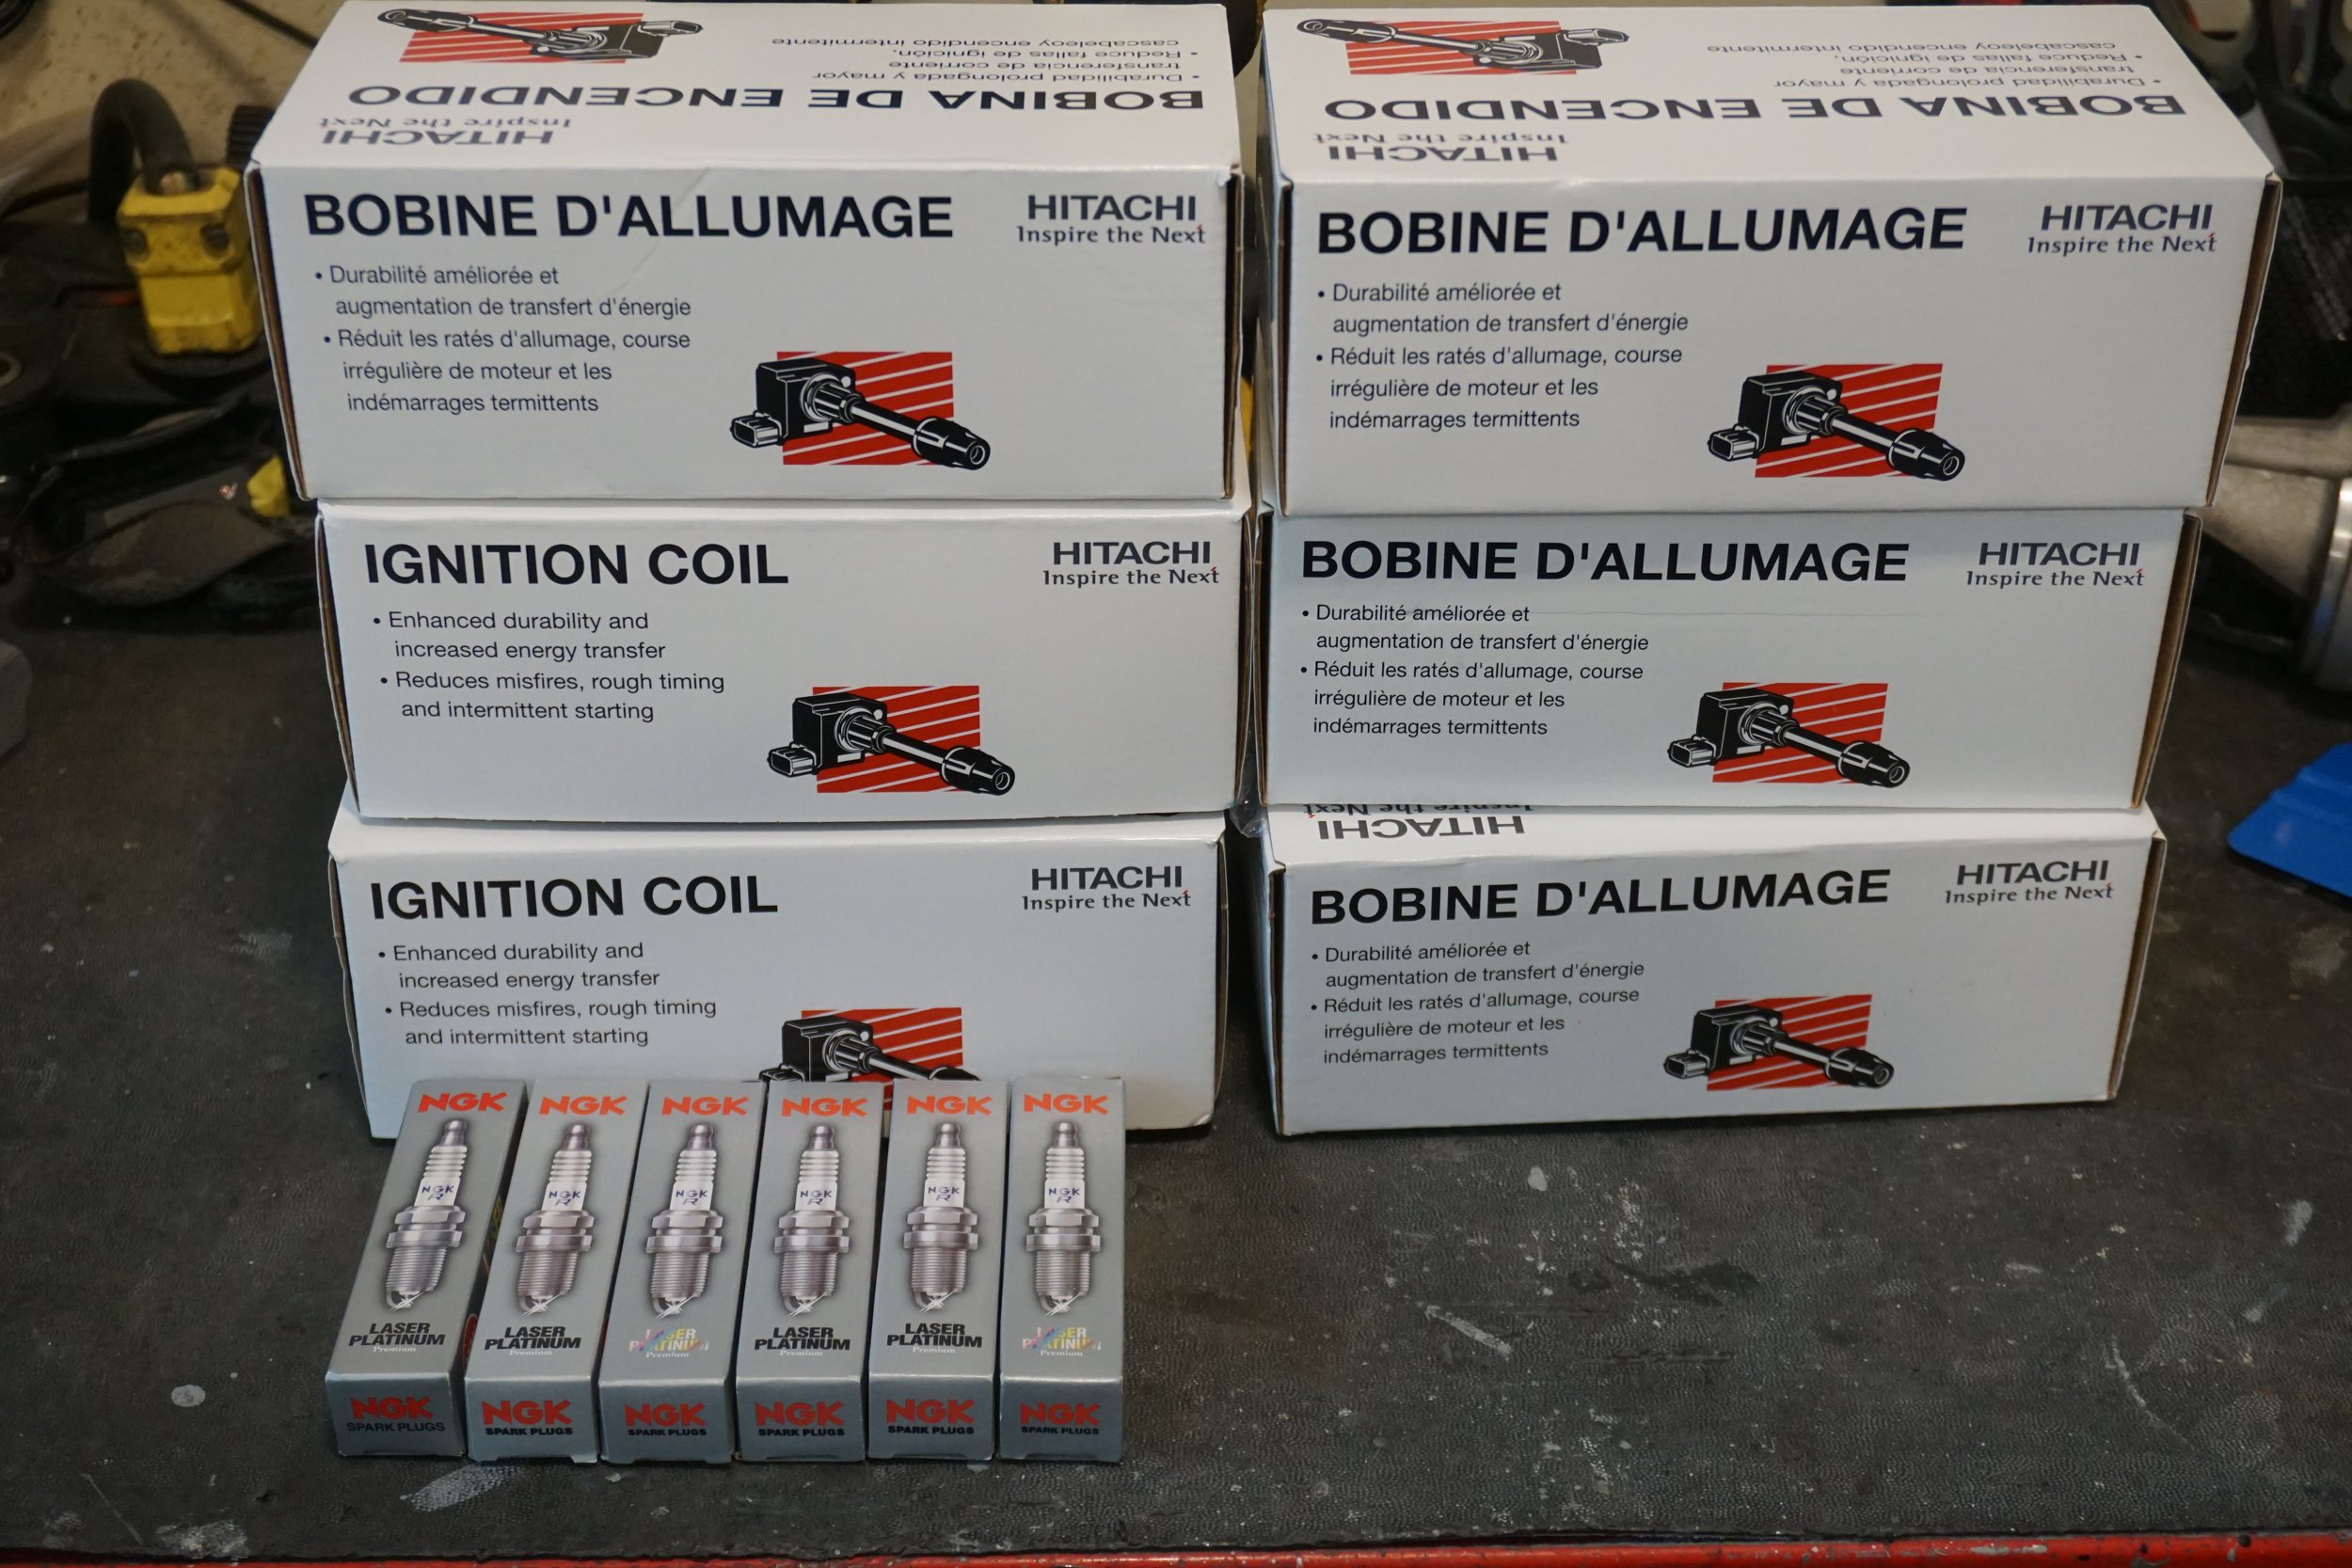
Coil packs- I picked up a set of Hitachis on RockAuto. Don't use coil packs if they aren't made in Japan.
As for mods....it's a losing battle. Very few companies make parts for us anymore, so most things will have to be found on the used market. The best bang for the buck used to be the Warpspeed y-pipe, which could get you up to 15 hp, but I'm not sure if they're available any more. If you want to see my parts, read through this whole thread, it should give you plenty of ideas.
At the last trackcross event the car threw a CEL for a cylinder 2 misfire, so I decided I may as well give it a tune up, since I have no idea how old certain things were. So I picked up a set of NGK 6240 Laser Platinum plugs and a set of Hitachi coil packs (made in Japan).
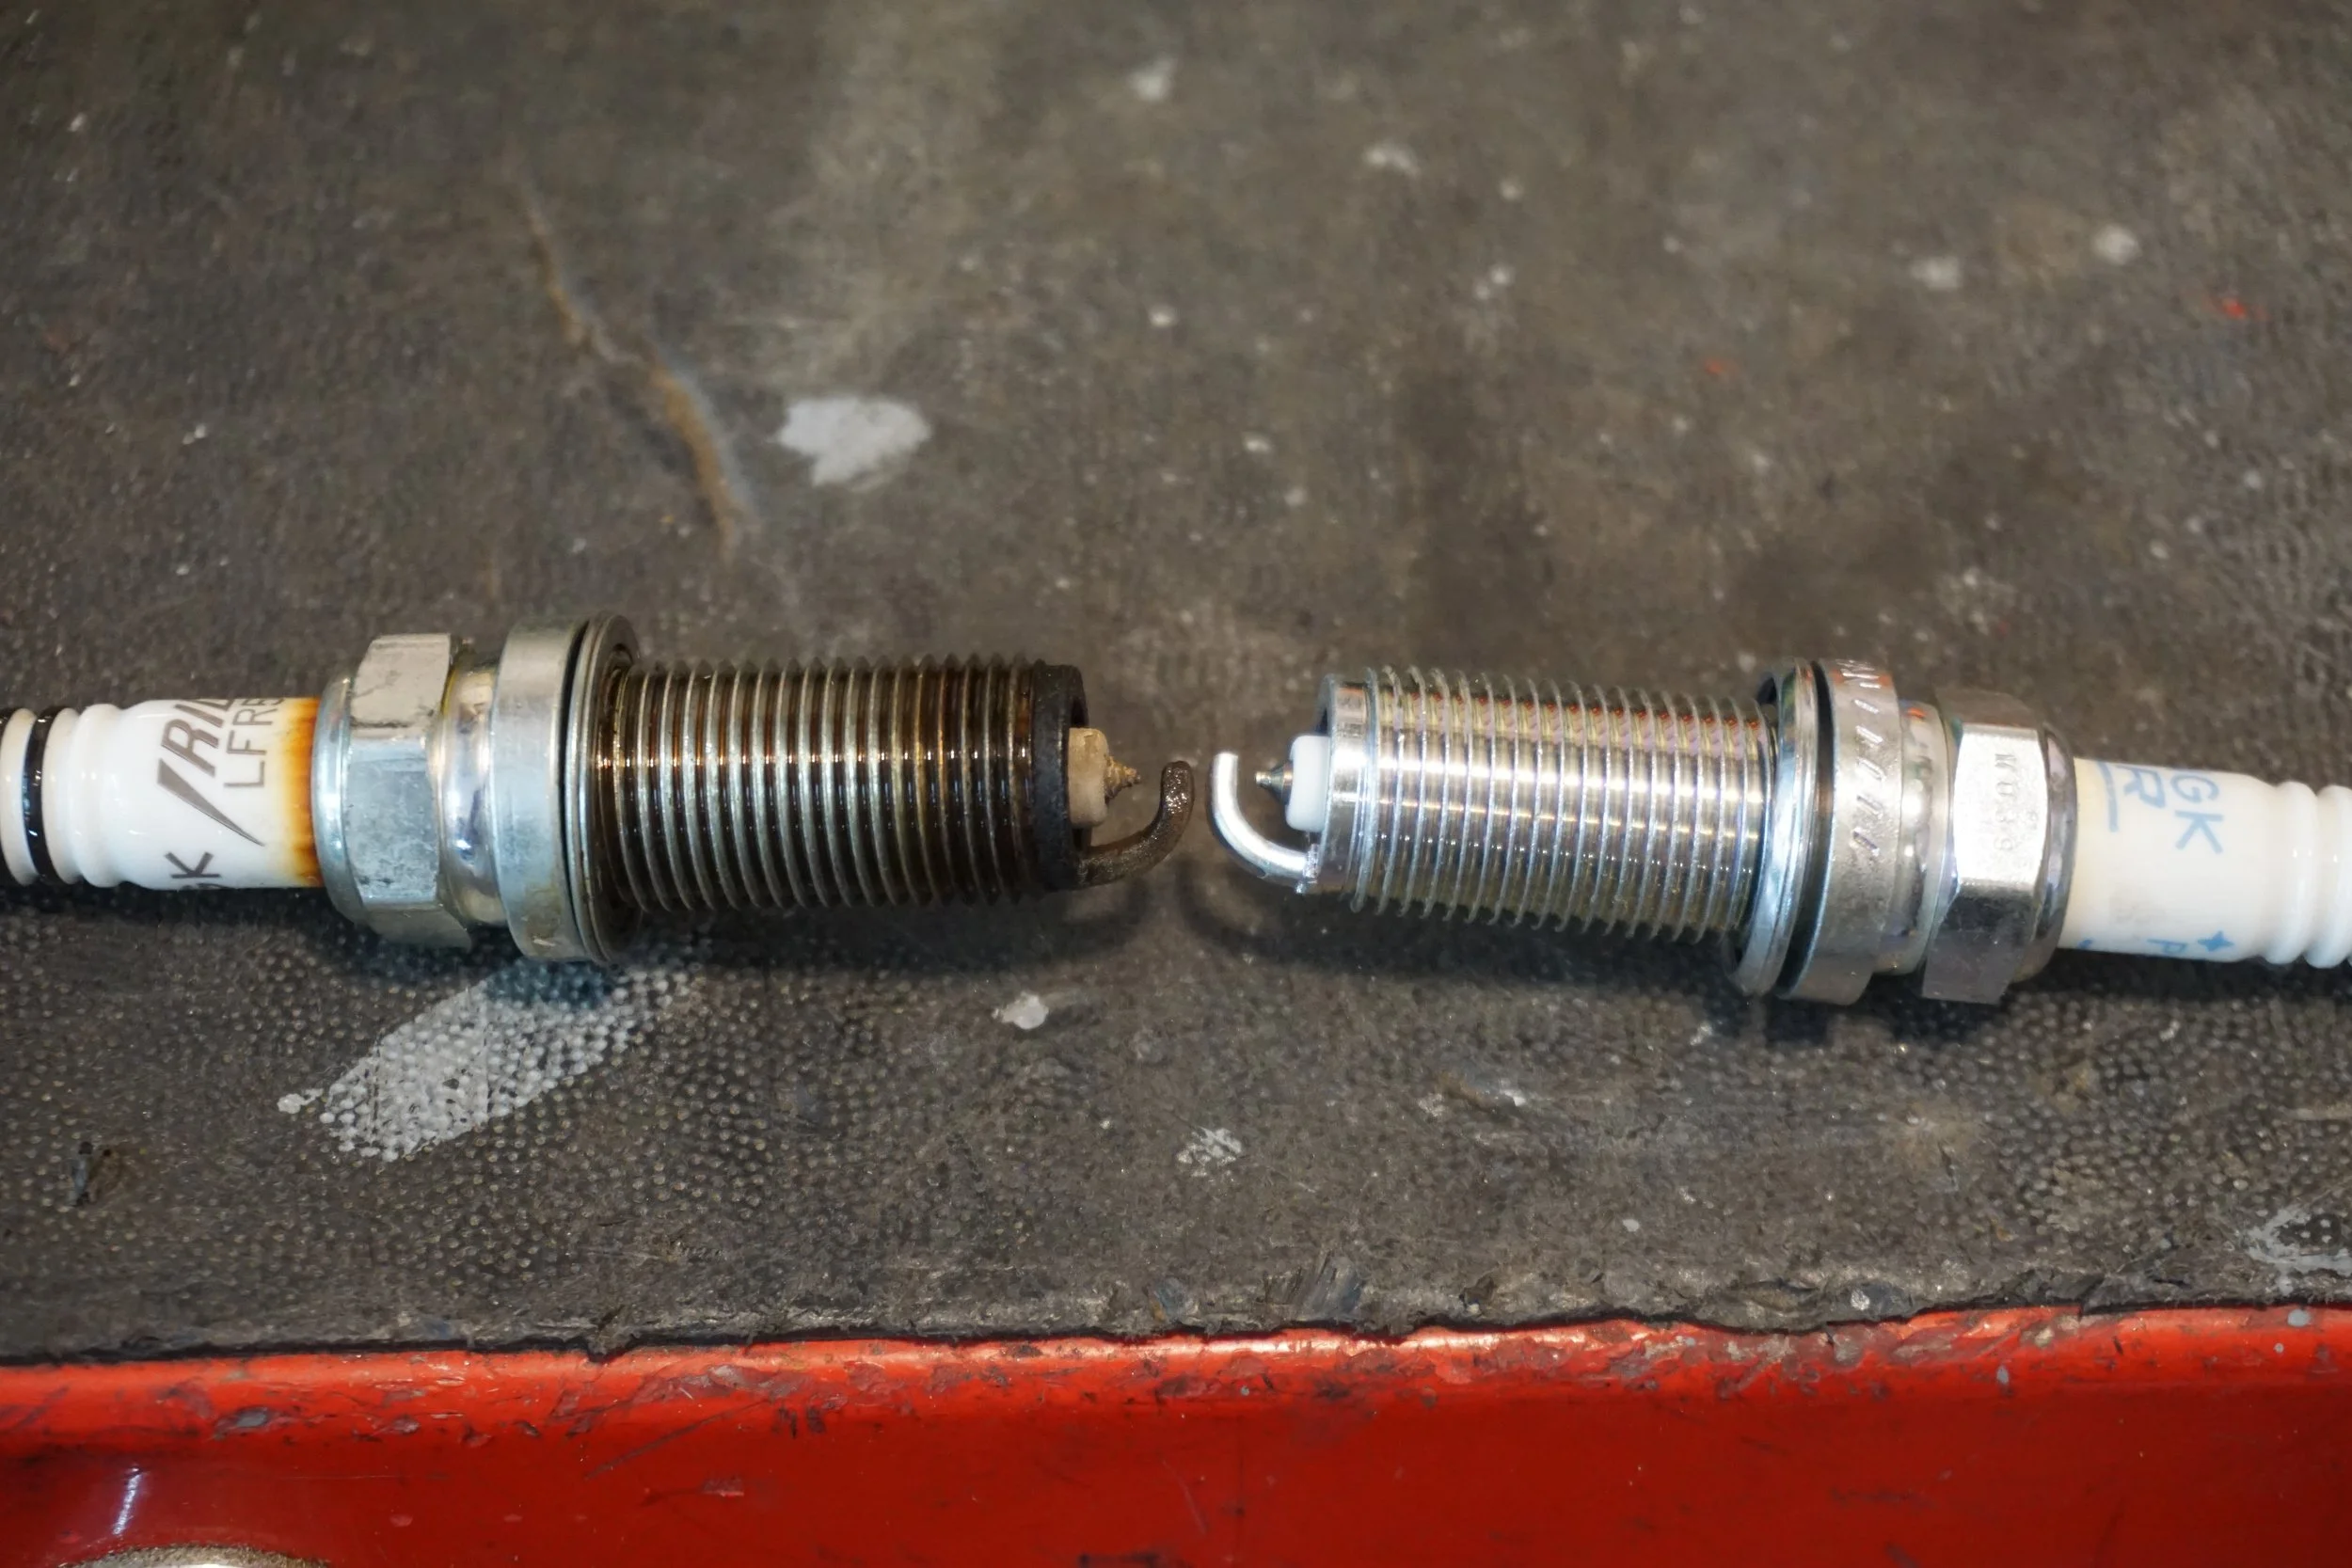
Found out that the front 3 plugs were a different type of NGK than the rear three, so I didn't have a matching set this whole time. This probably also meant the rear plugs were OLD. But they didn't look that bad, and the gaps hadn't opened up much compared to the new ones.
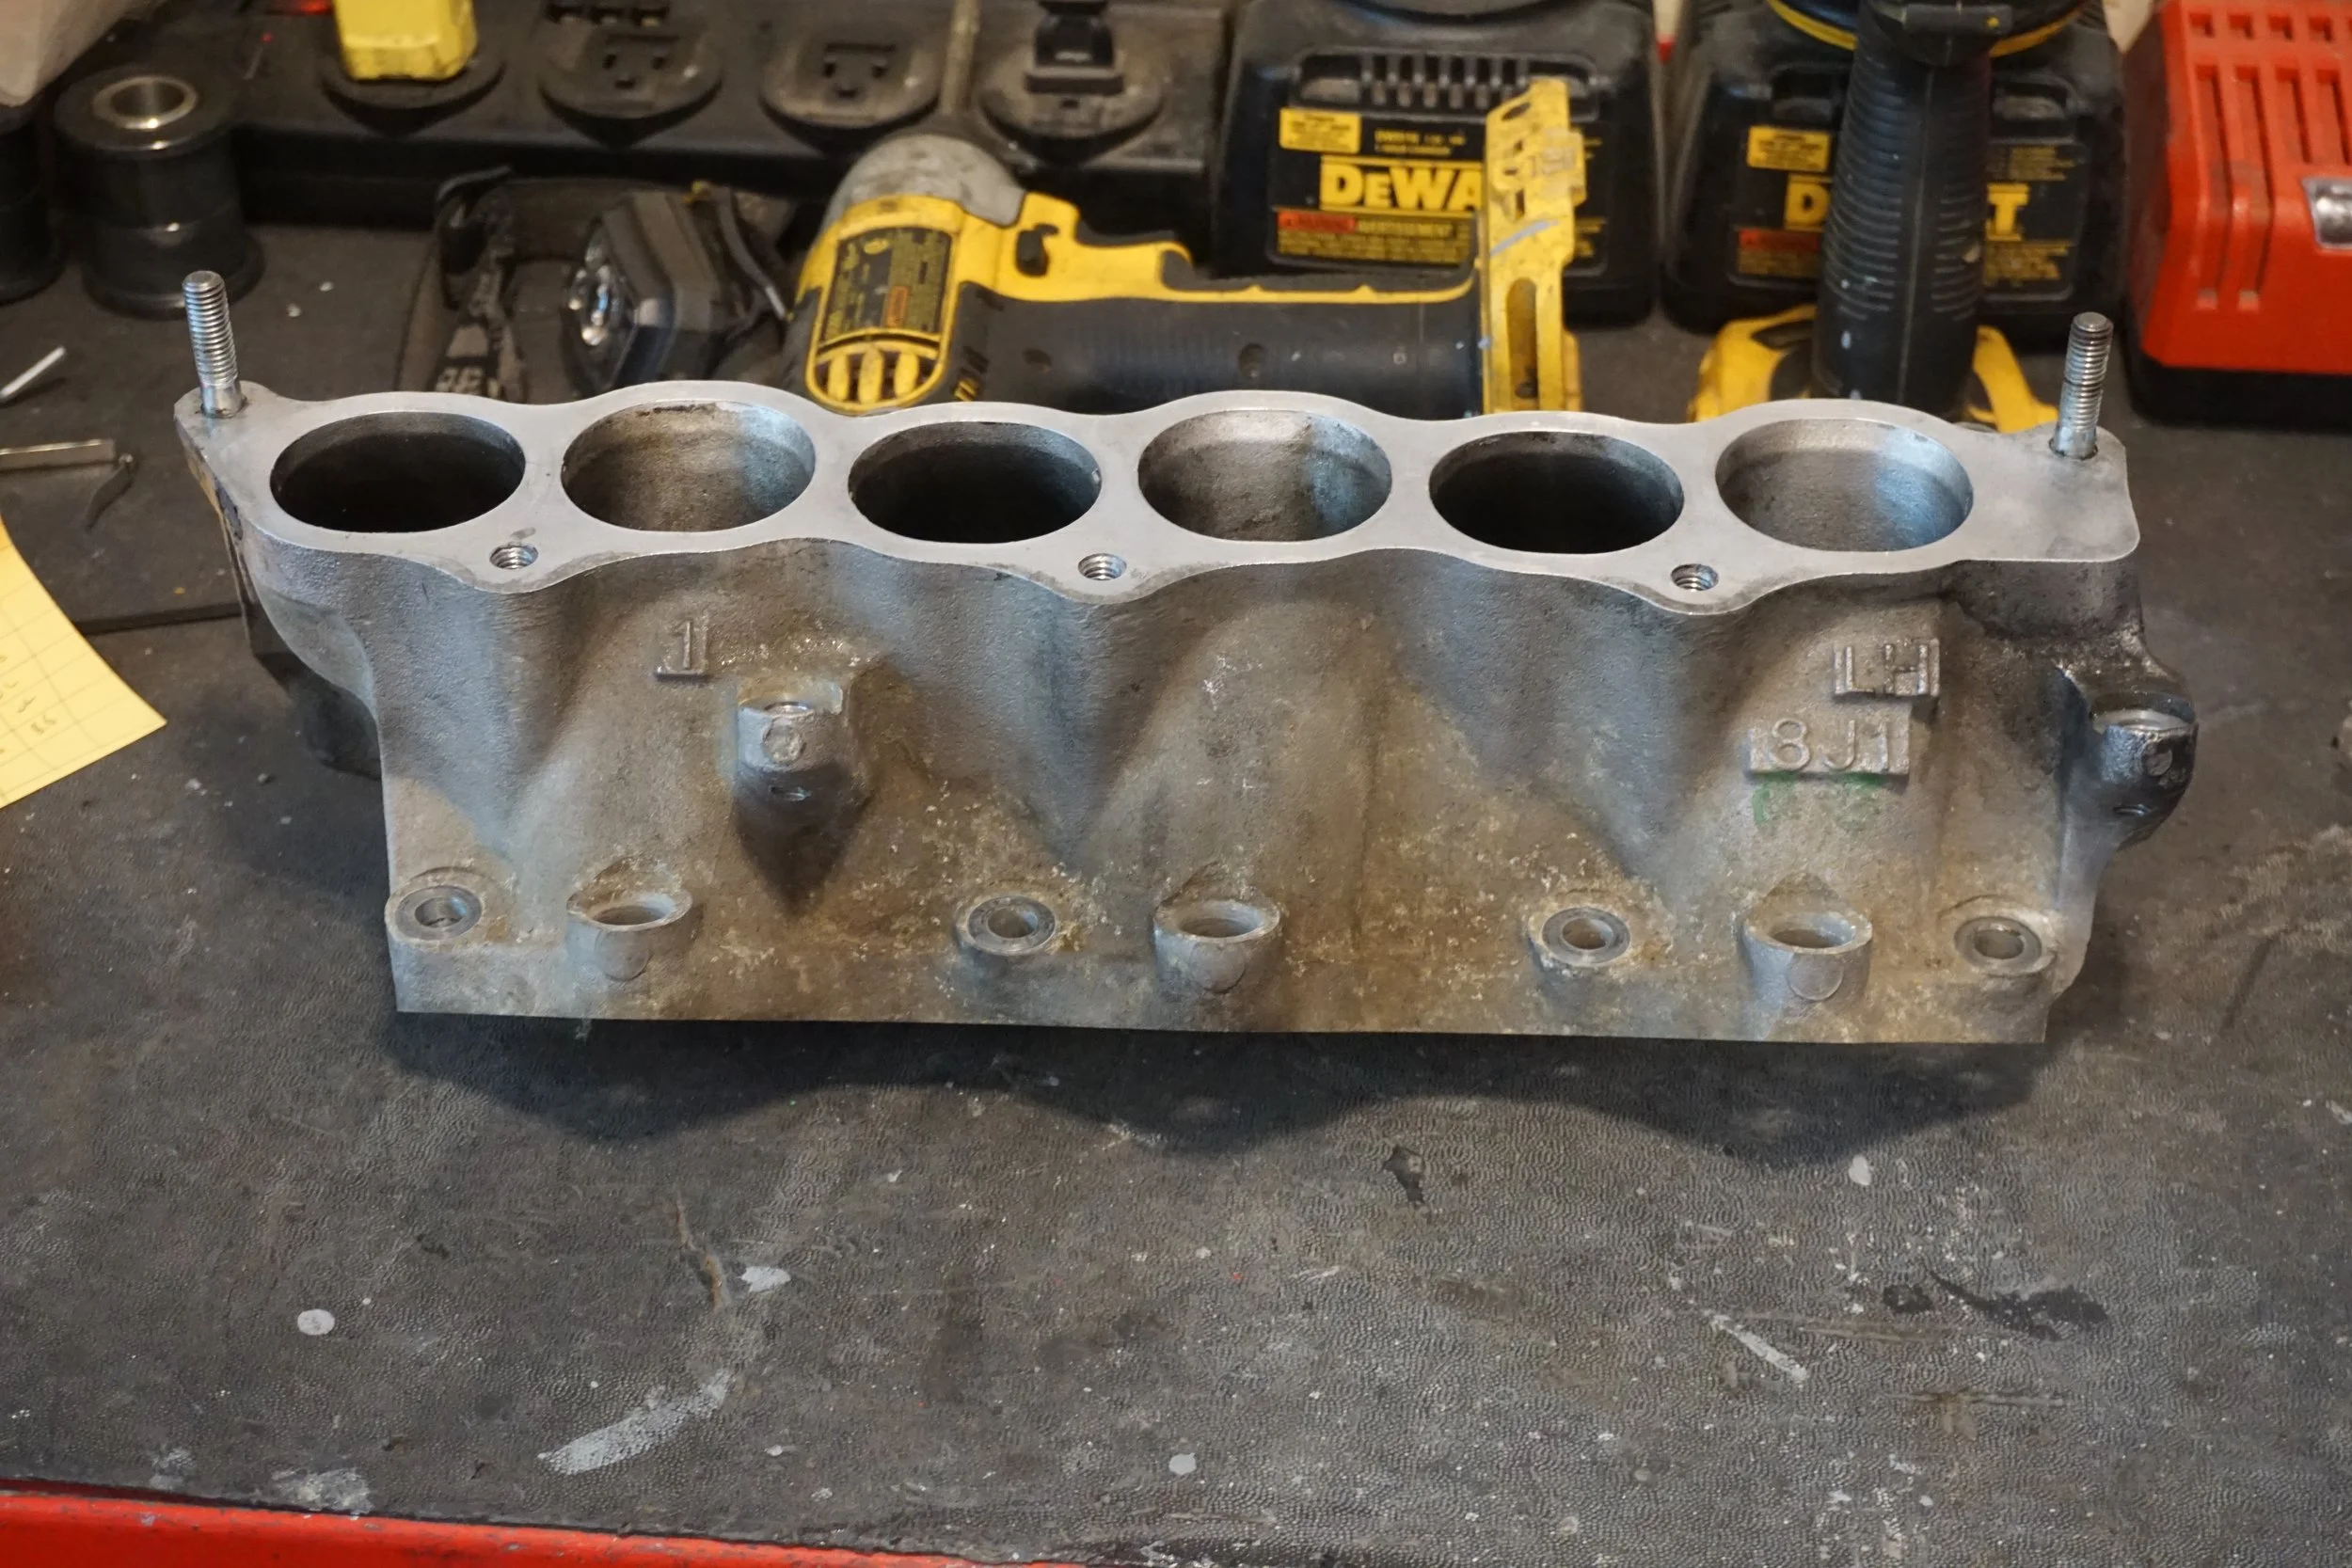
Taking things apart, it looked like I was a little overzealous with the RTV the last time I assembled the LIM with the NWP spacers:
It didn't look like it was actually blocking the spray from the fuel injector, but since I was already here, I figured I should re-do it. I sent out the fuel injectors to be cleaned and rebuilt, so I had some time anyways.
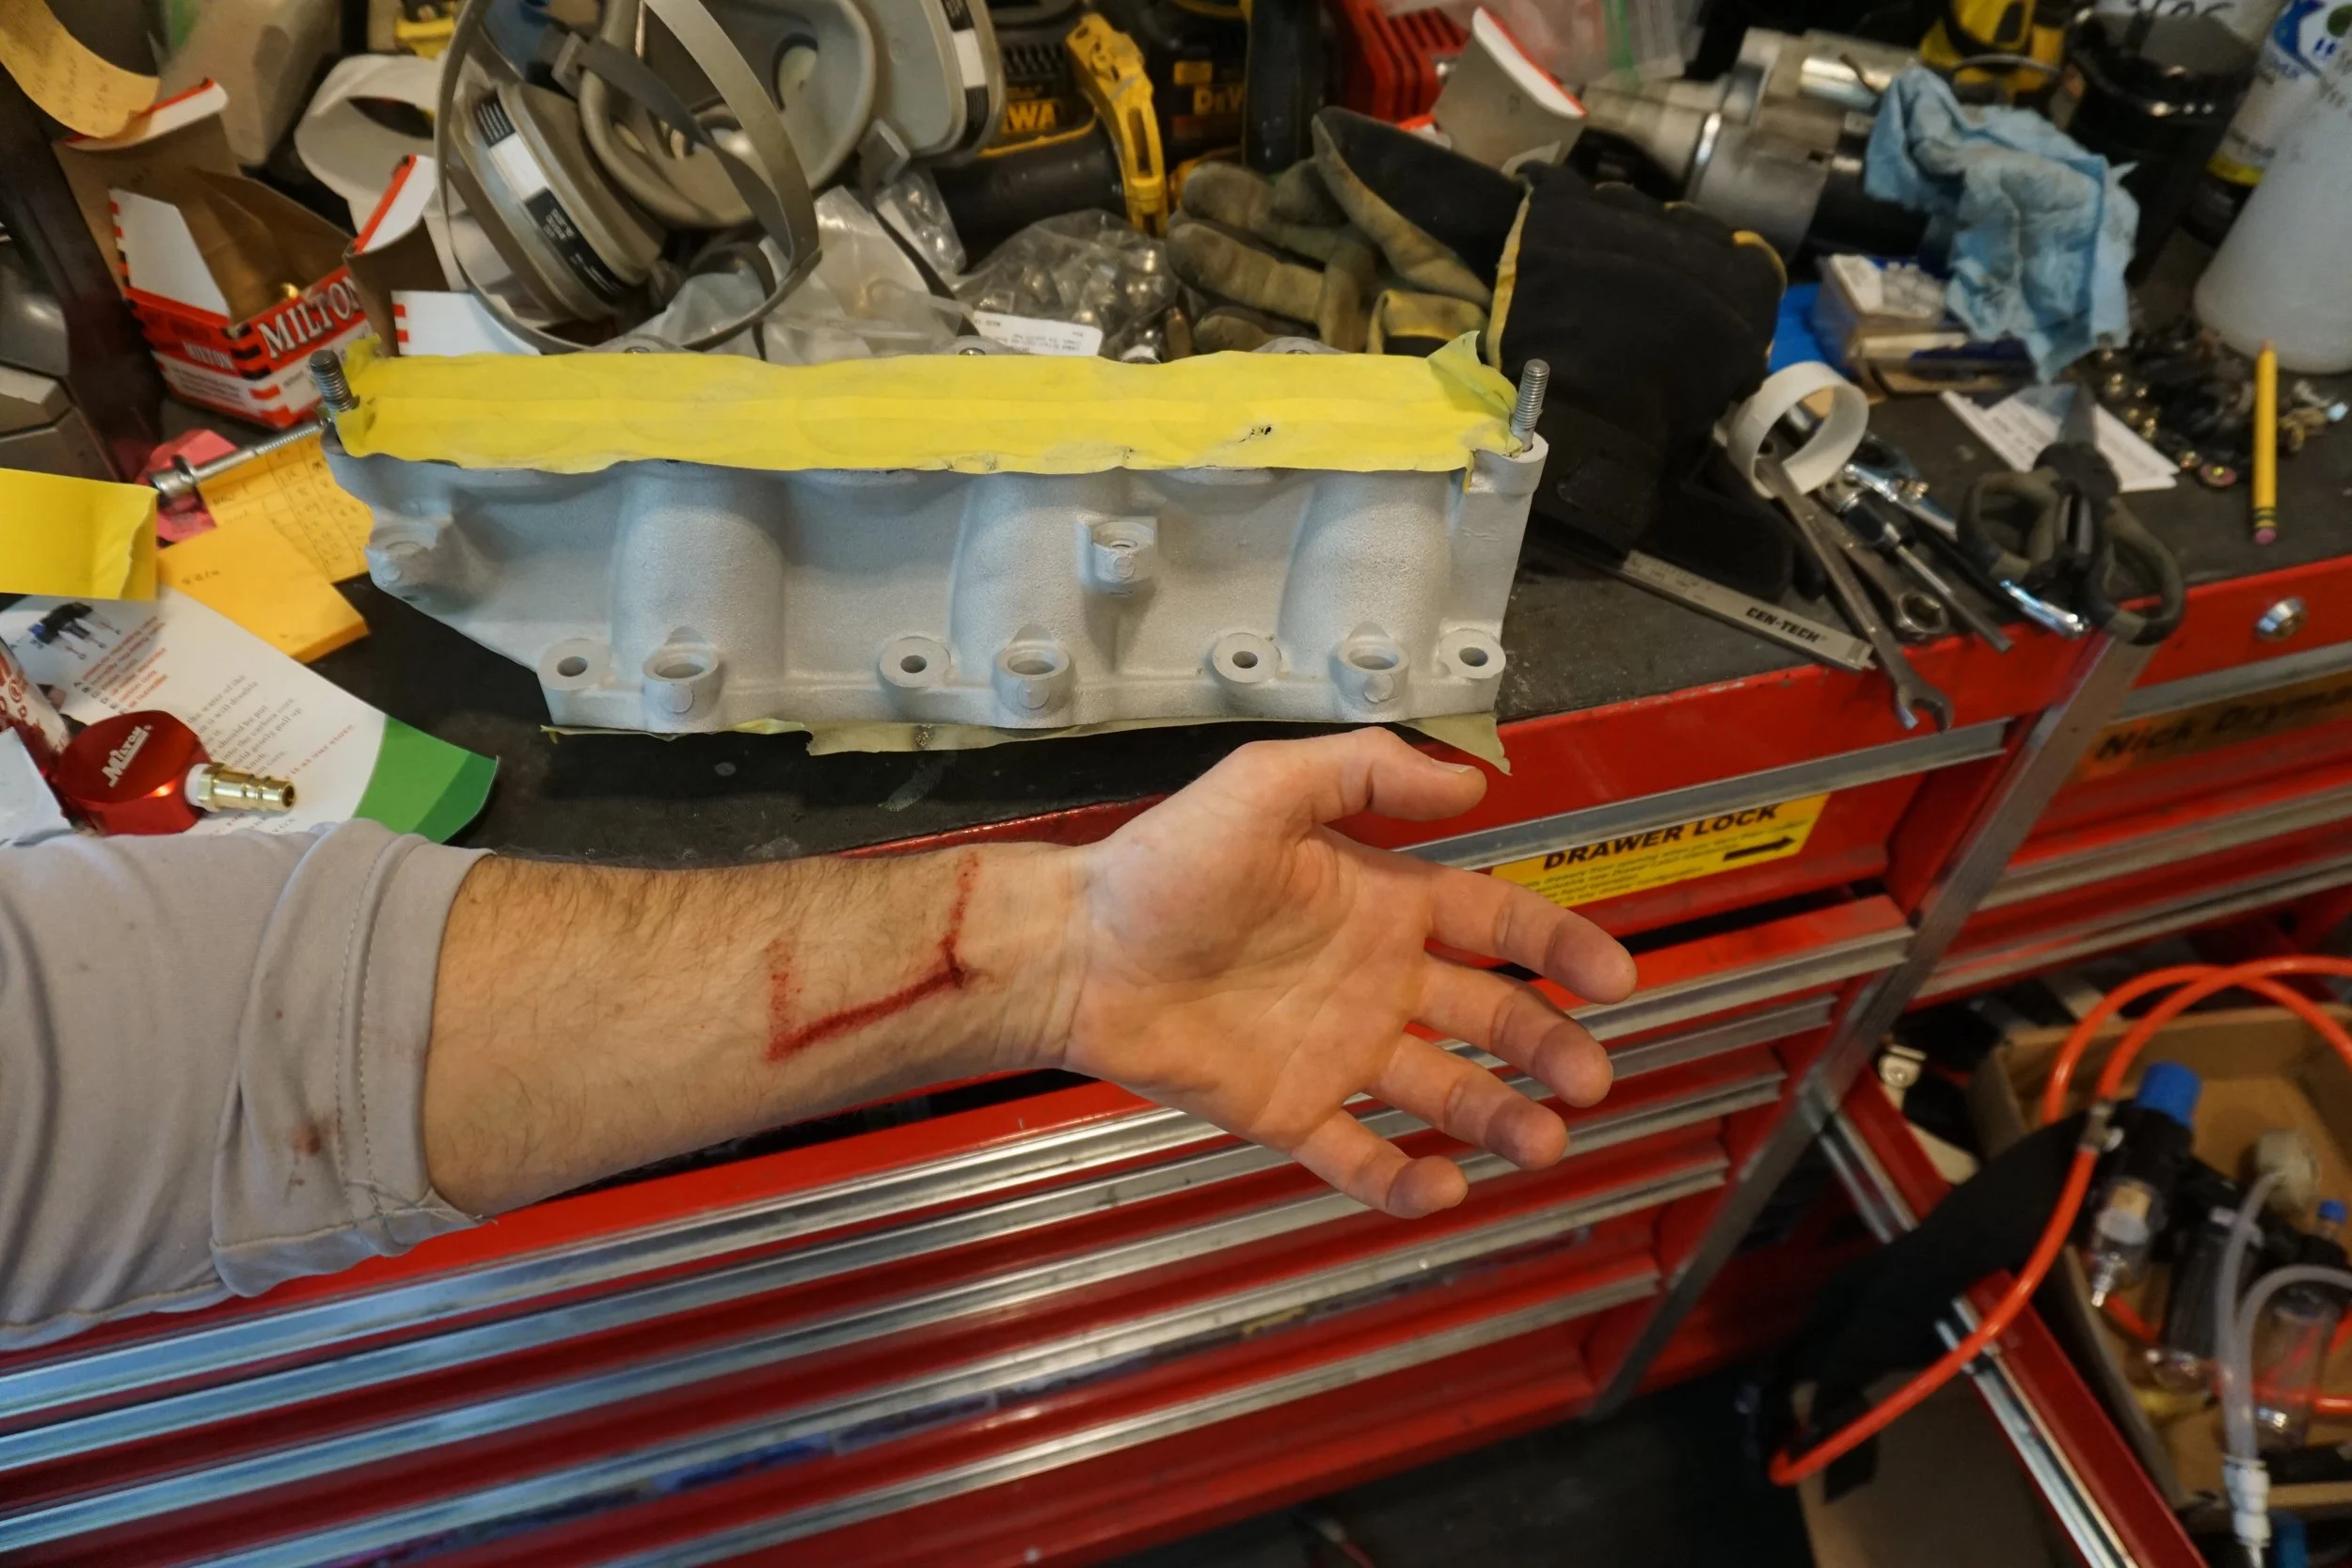
I decided to do something completely unnecessary and blast the LIM to clean it up.
Which led to a mishap with the blaster...ouch.
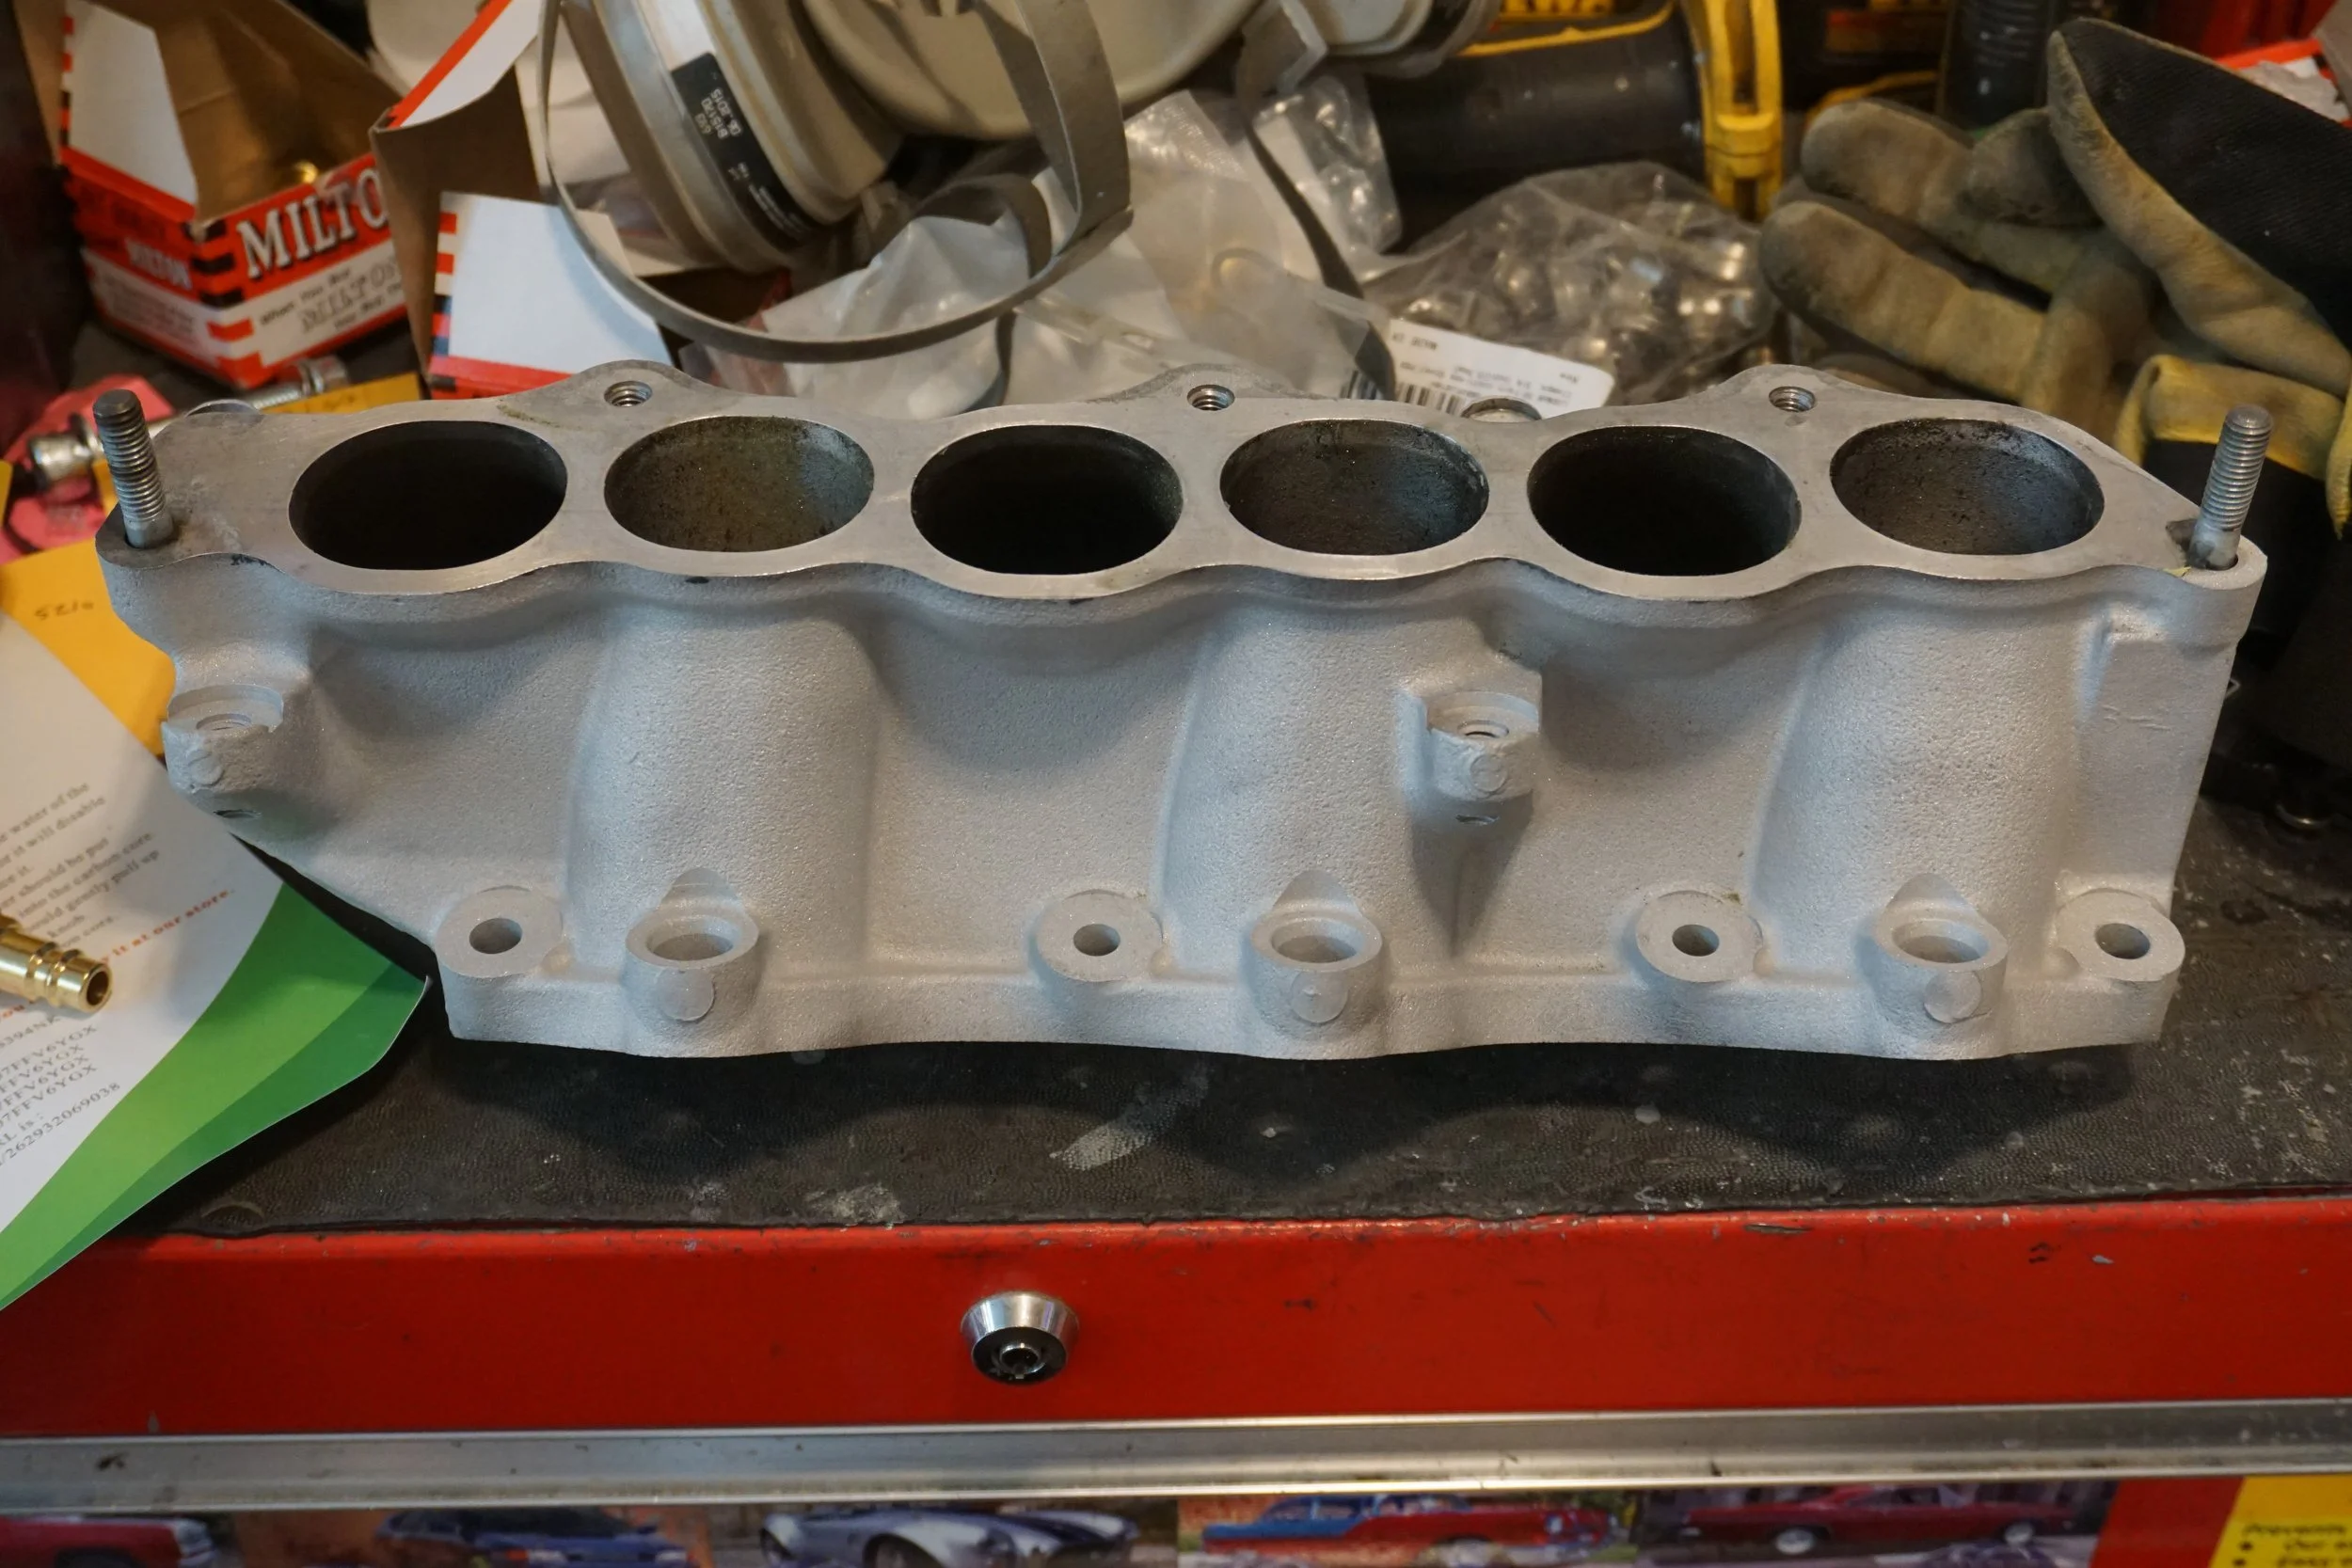
But eventually a clean LIM. The coal slag roughed up the surface more than I would have liked, but it's clean!
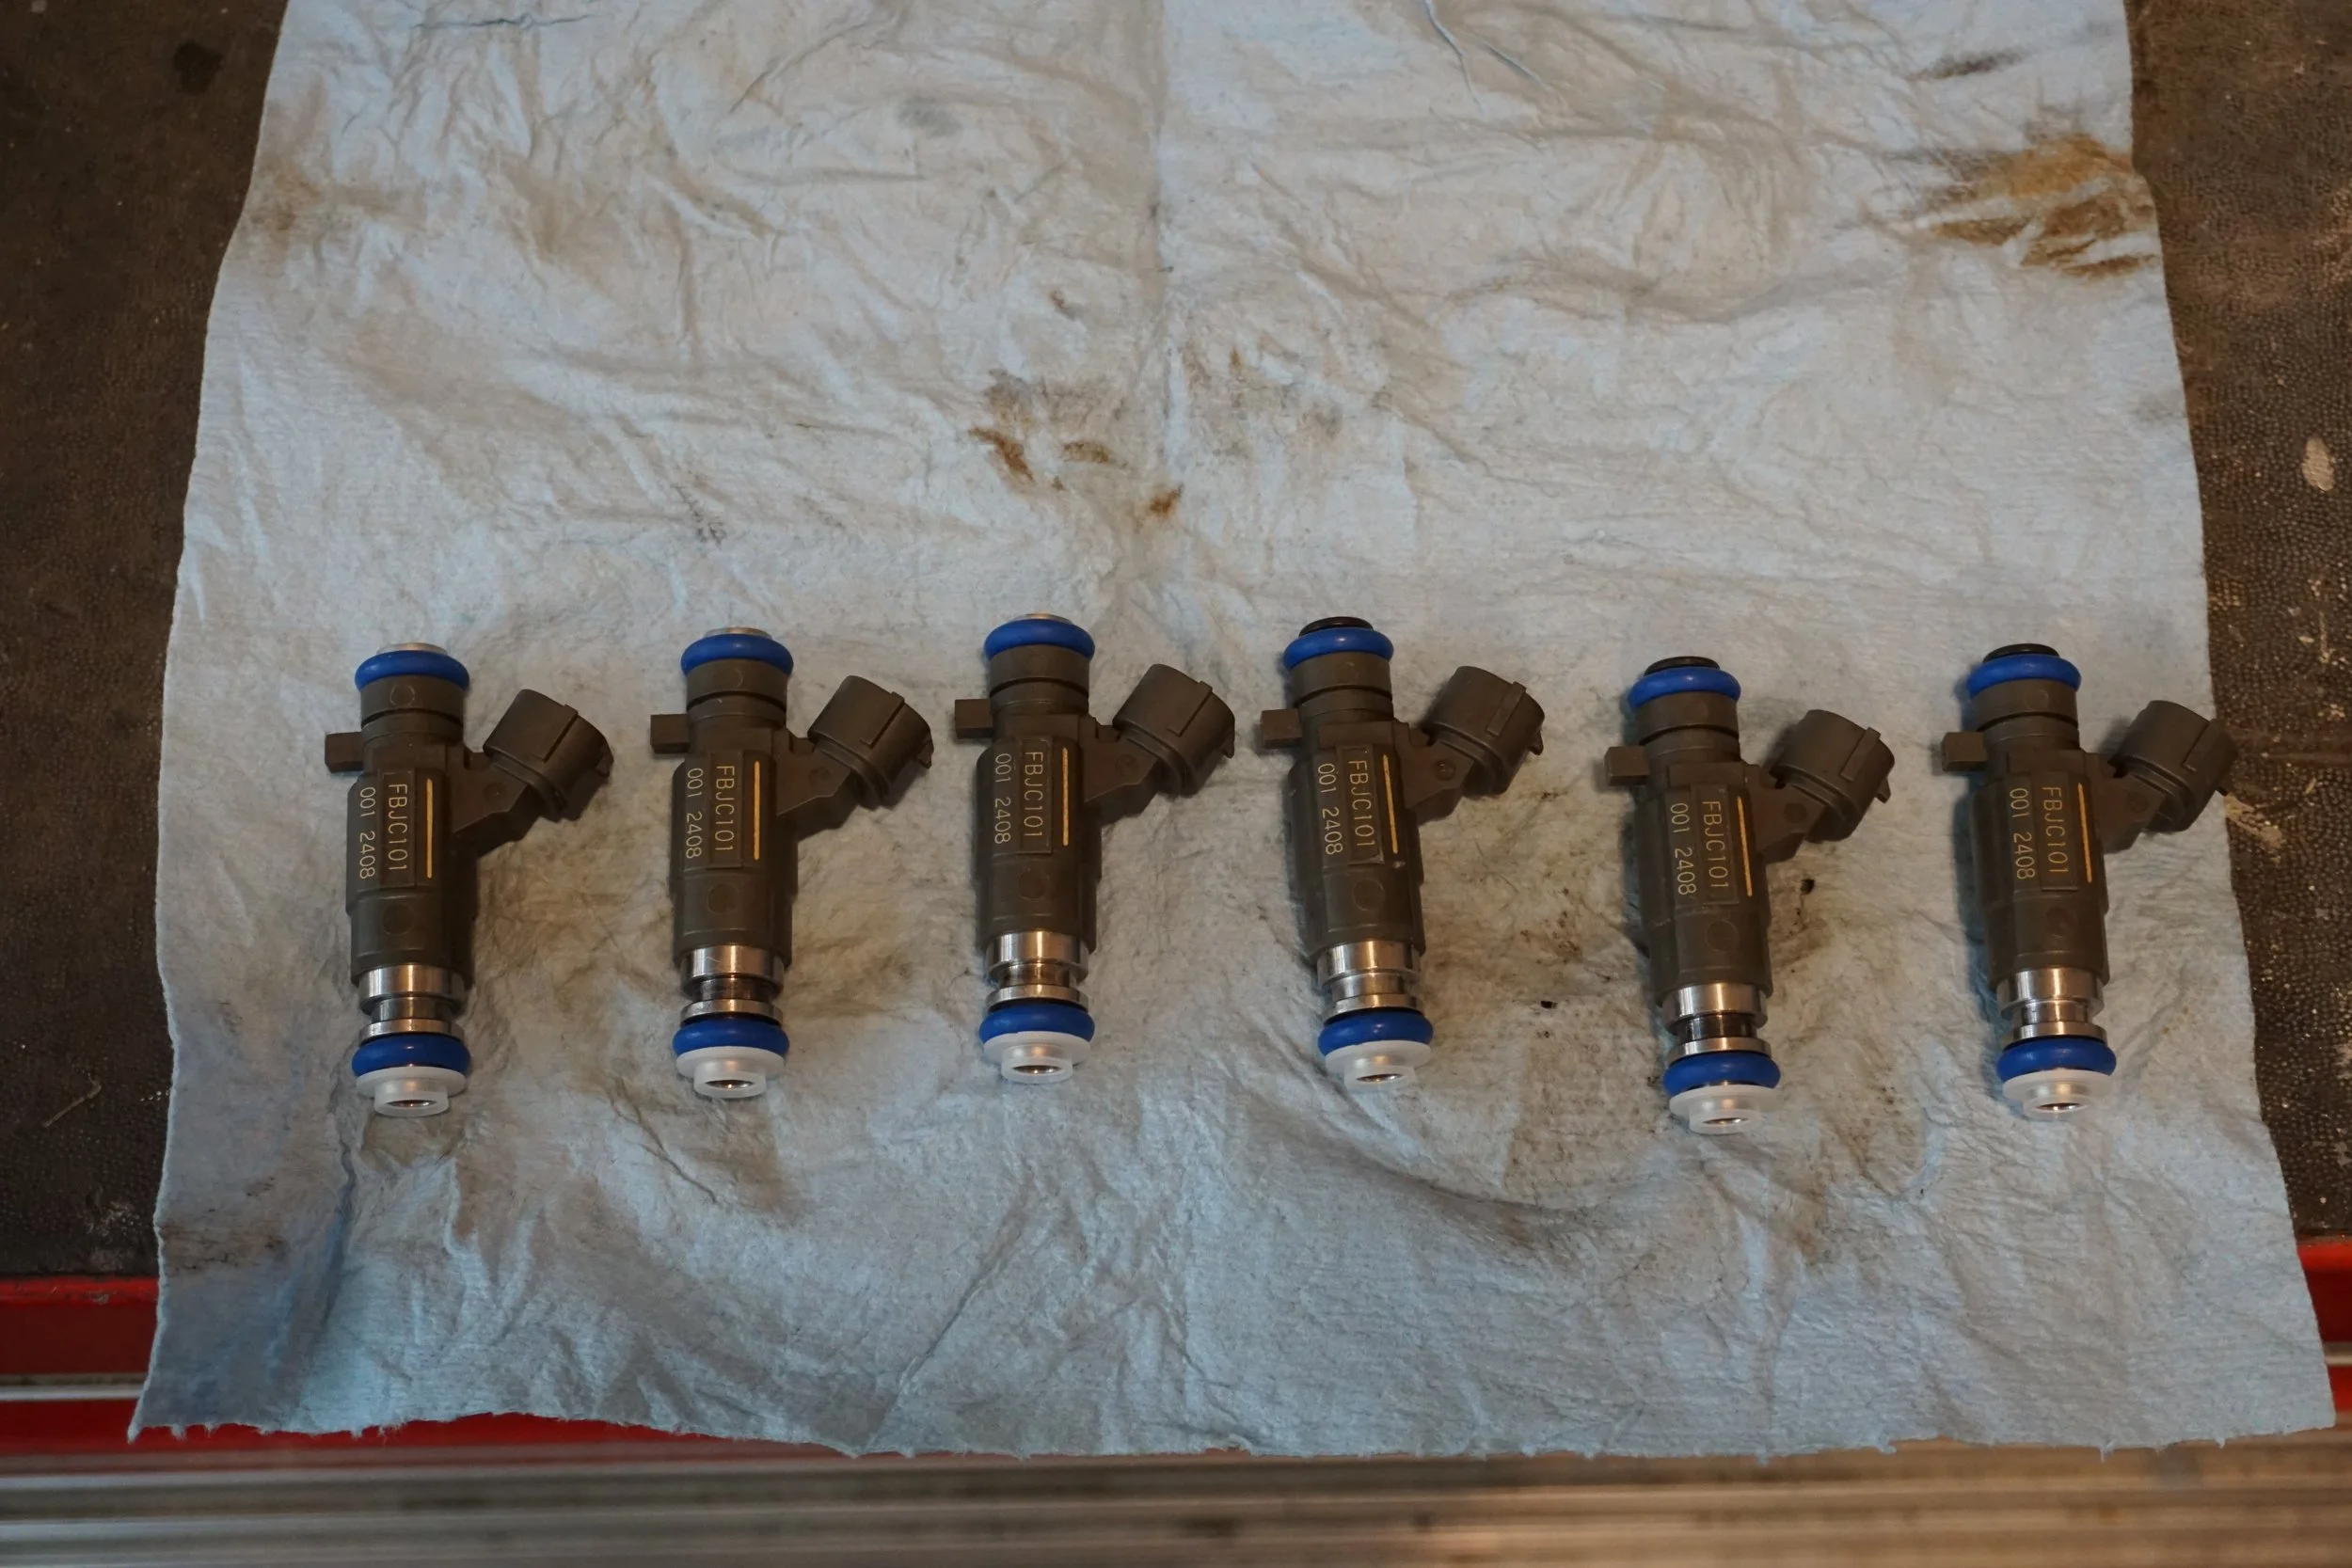
Got the injectors back looking nice and new. They tested well before the cleaning and rebuild, but he was still able to improve things a bit.
I got it all back together and kept the RTV nice and neat this time. Hopefully all that has solved the very intermittent misfire!
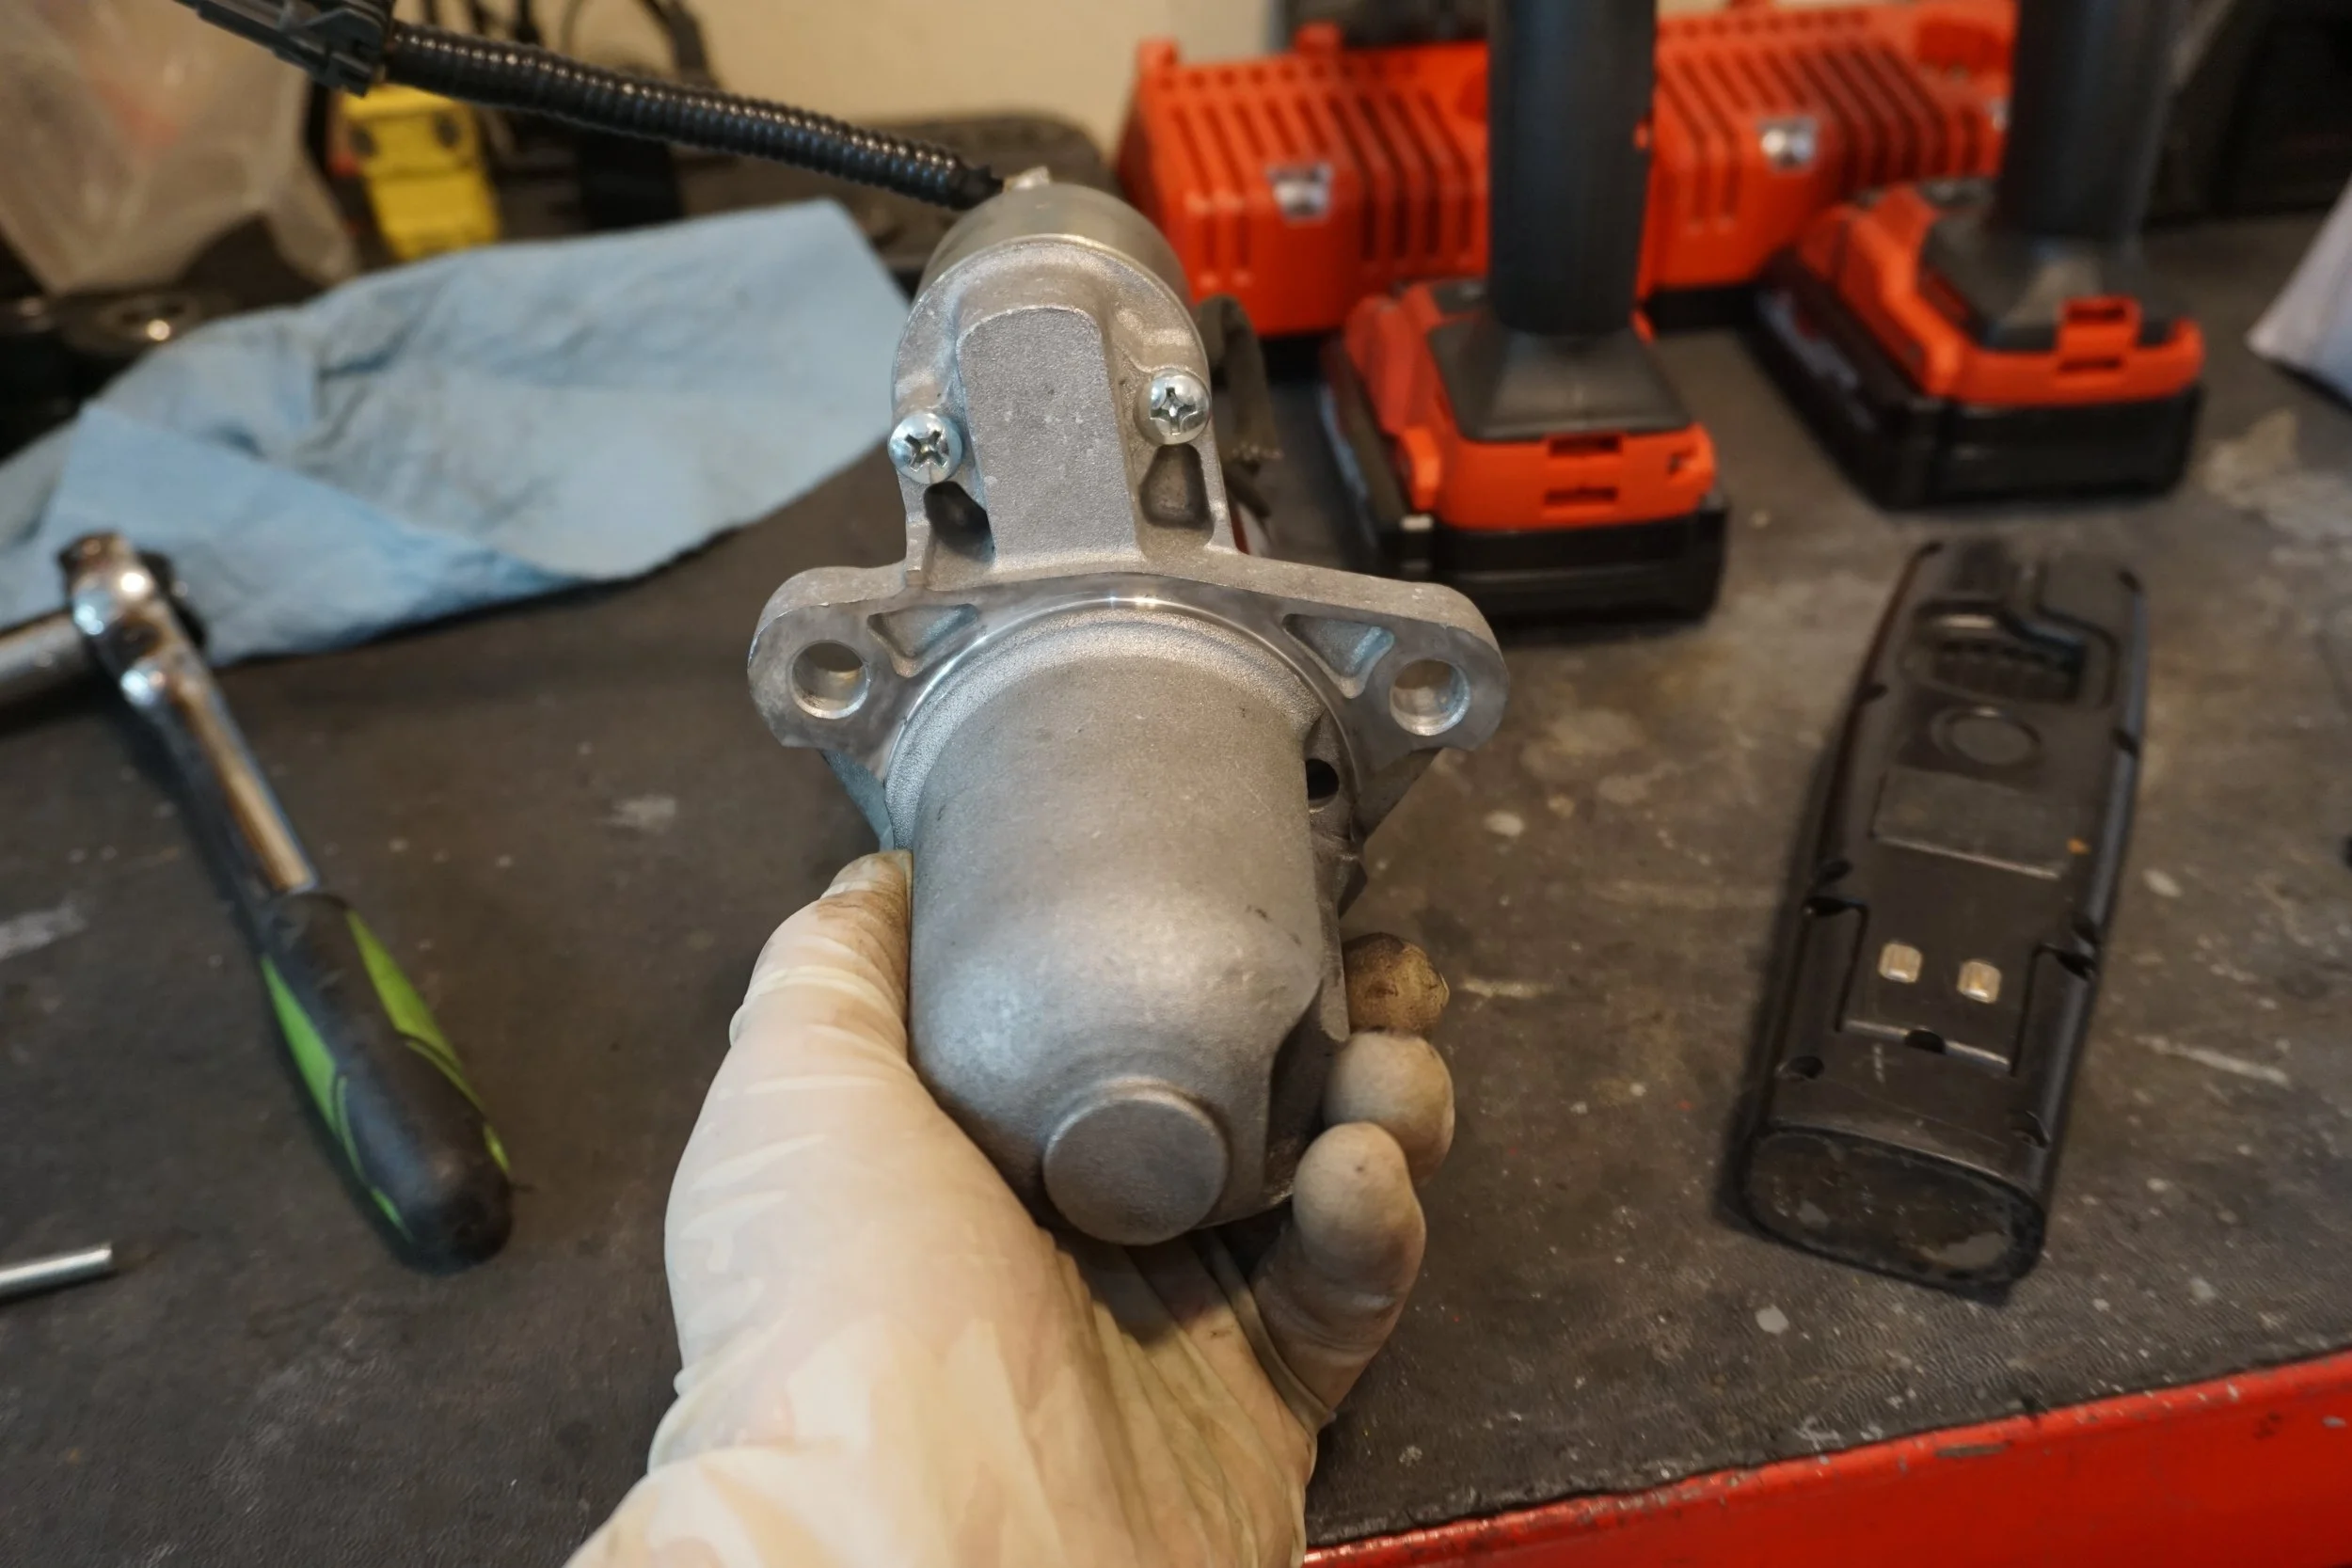
Then it was back to my nemesis: my intermittent no start problem. Last year I thought I had it fixed after I installed a new ignition switch, but it came back real bad about a month ago. When I tried to start the car, I would often just get a click from the starter, but no cranking. I decided to try out a different starter from the parts store, but it didn't change anything. Sometimes it would start up with my remote starter but not the key, and sometimes it would be the other way around. Since I'm so bad at electrical diagnostics, I decided to start by replacing two relays with new OEM parts: the anti-theft/start relay and the inhibit/clutch inter lock relay. No improvement there either. Crap. I also picked up another new OEM ignition switch, just in case.
I did some reading on the org and came across and old thread about ignition slop, but the pictures were broken. So I cut up a can:
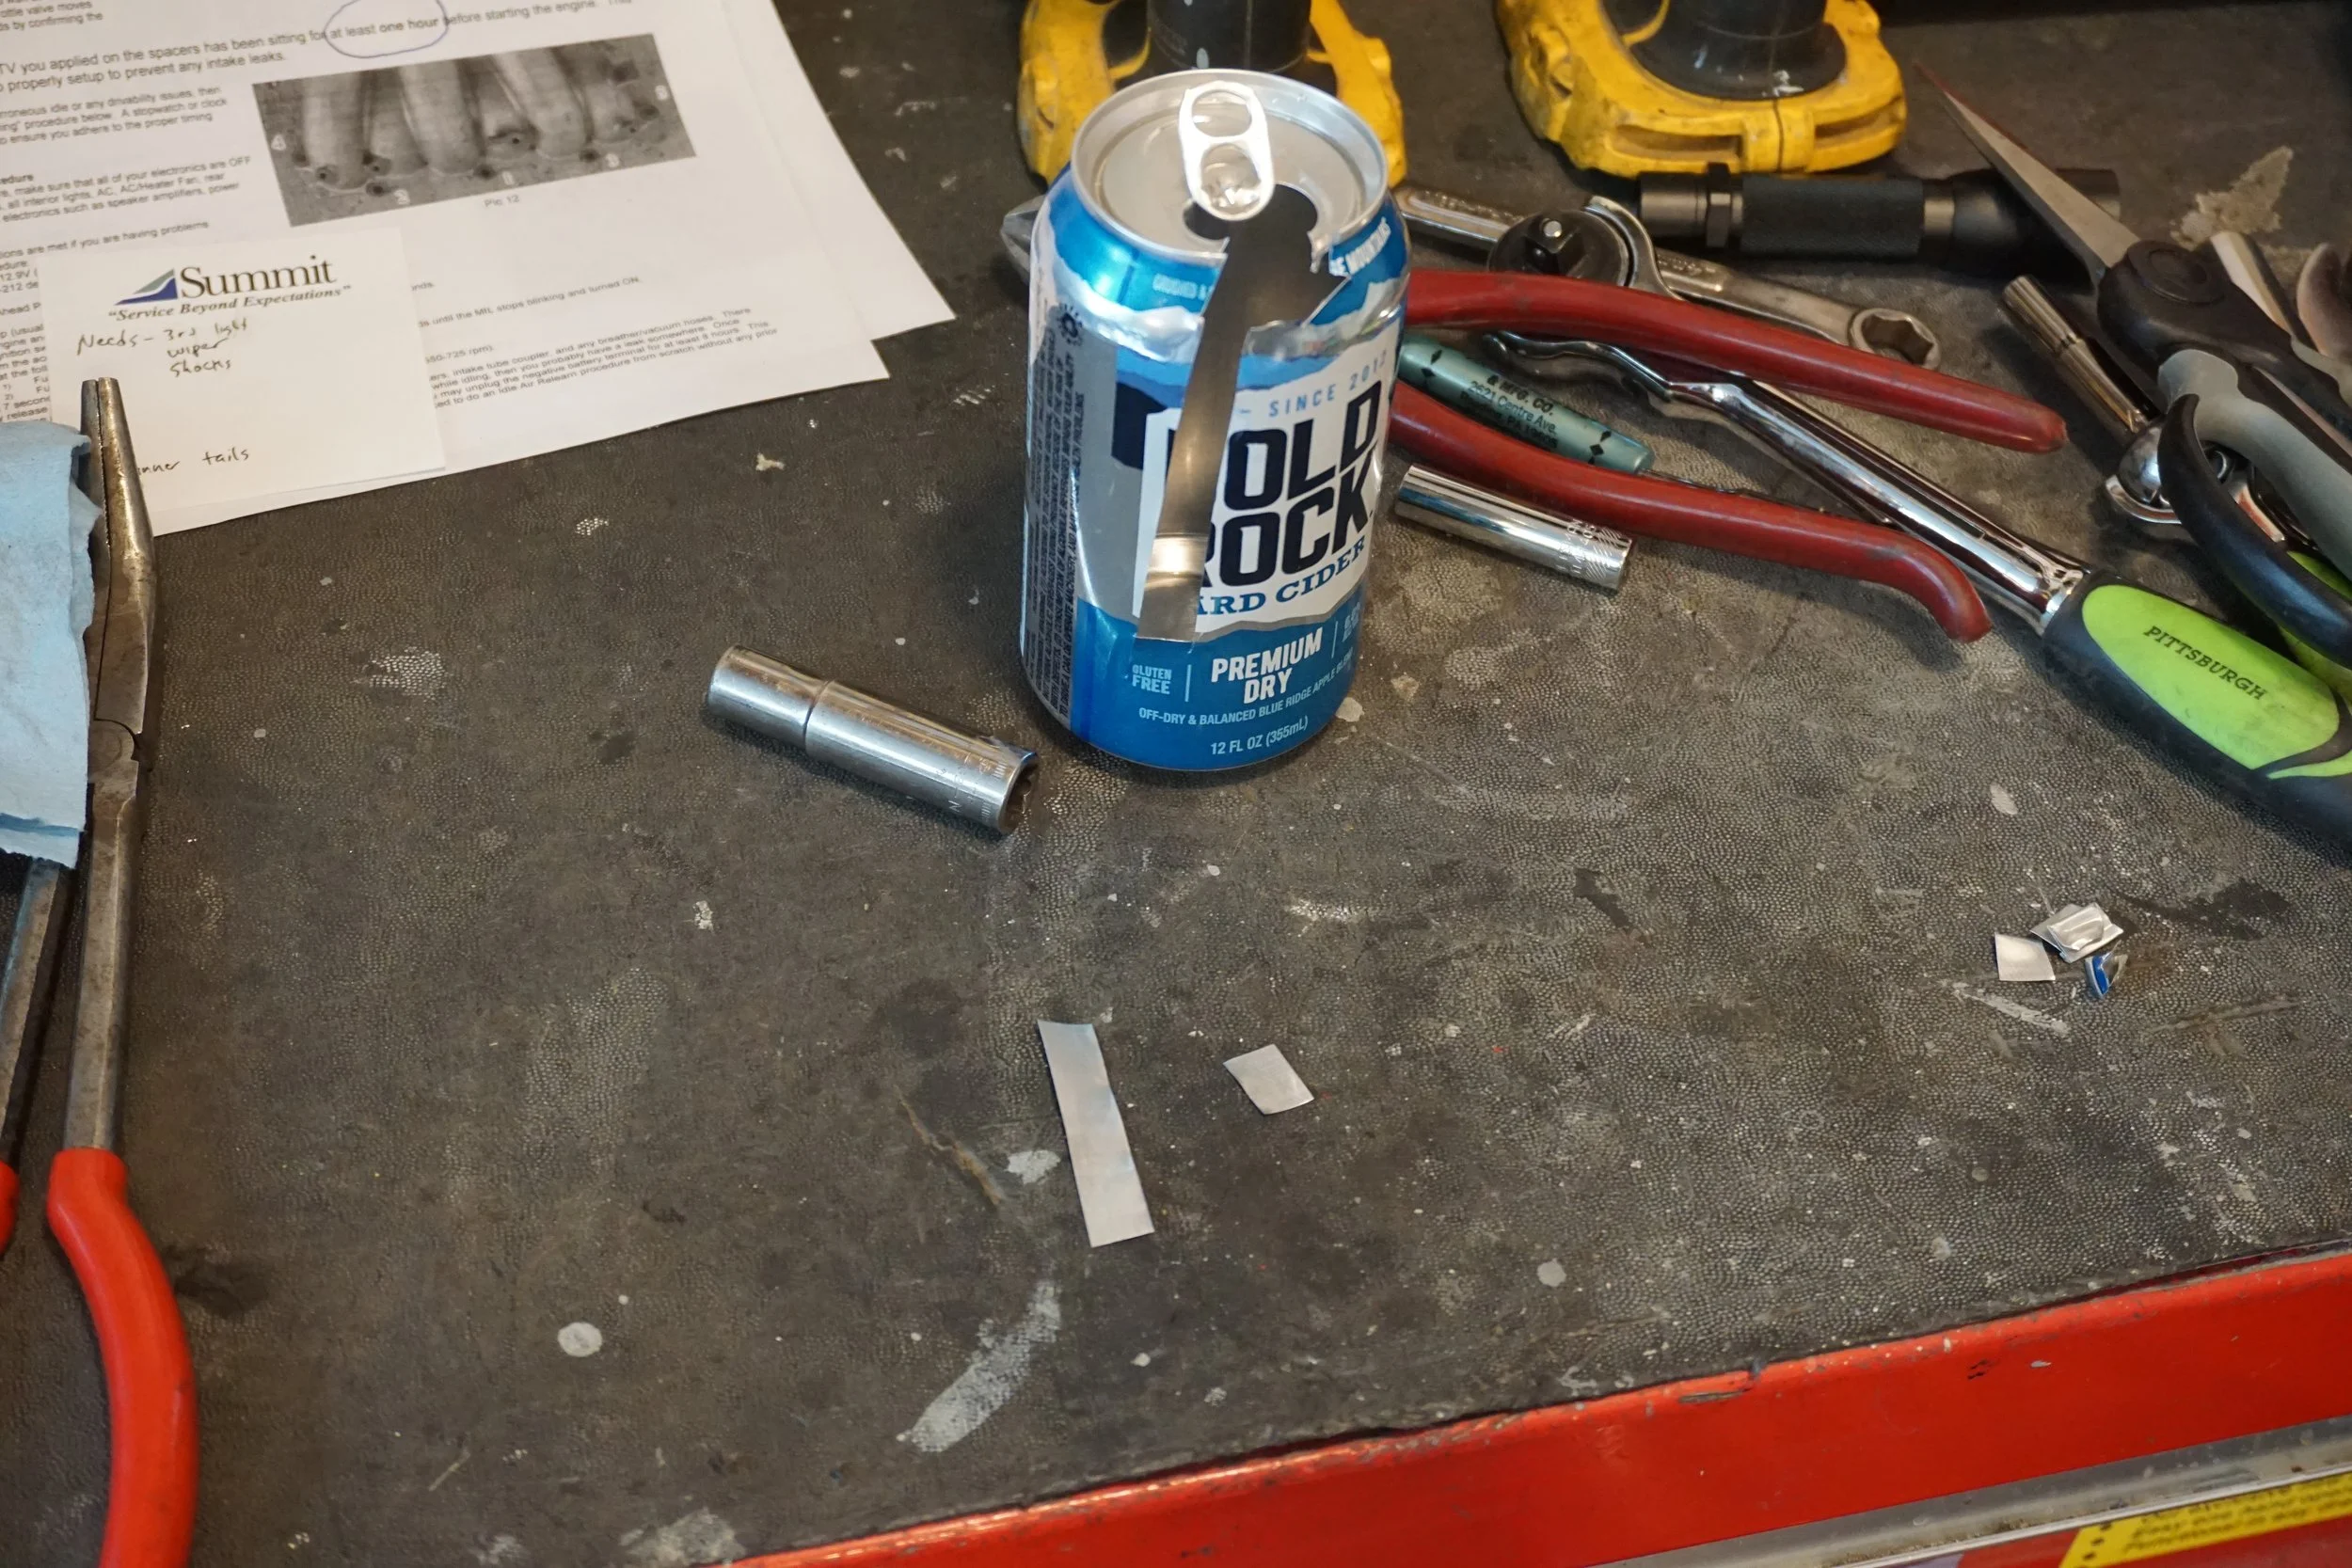
And made some thin slices I could use as shims. I then did some testing by trying to start the car with just a screw driver directly in the ignition switch, and it started up really strong every single time. This made me more confidant the problem was the interface between the key cylinder and the ignition switch.
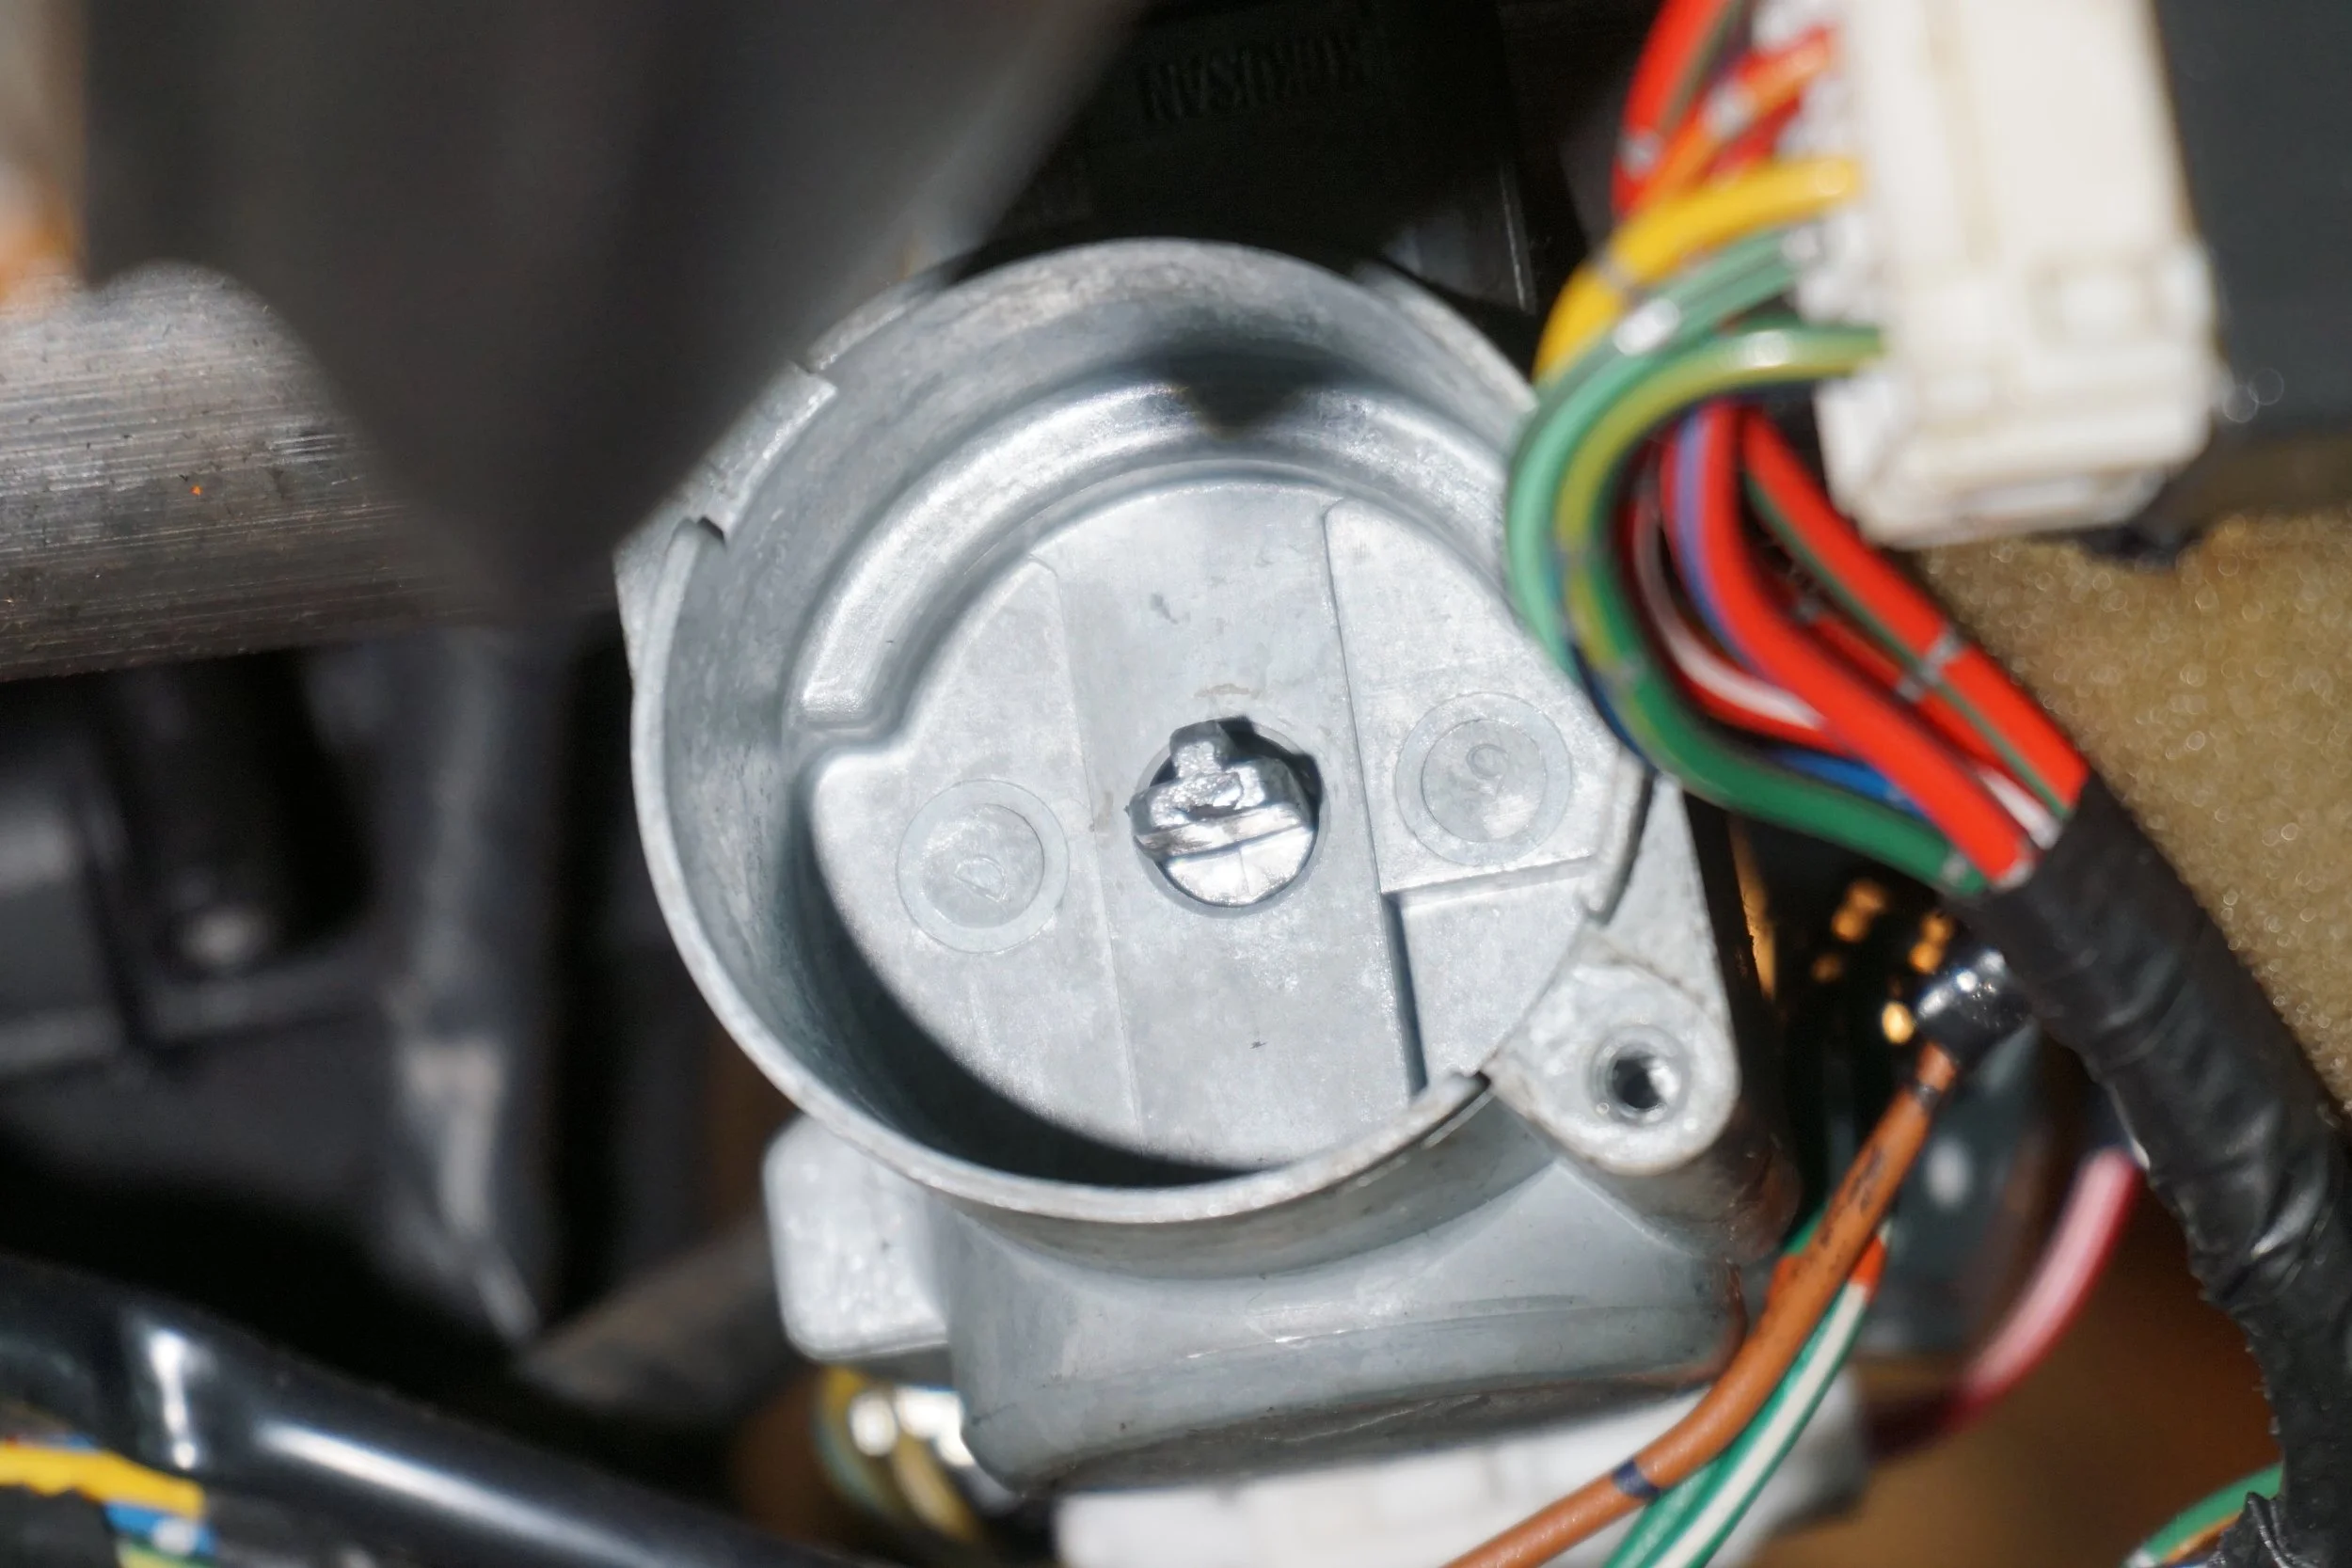
The T shaped rod coming from the back of key cylinder had quite a bit of lateral/vertical play, so I shimmed it all the way around so it stayed centered as it rotated. Some initial testing showed improvements, but it wasn't perfect. So I made a real thin shim and inserted it into the ignition switch itself (into the female T shape where it meets the key cylinder). Unfortunately I didn't take any pics, but I did make a video which I'll post up later. It's been almost a week now, and my intermittent starting problem has been 100% resolved! The key feels "tighter" when I rotate it now, and the action to start the car feels "strong", if that makes any sense. This is such a huge relief, since not being sure the car will start really makes you not want to drive the car.
To improve my odds even further, I cleaned up the mating surfaces between the starter and the transmission case, as some corrosion had started to form on both parts.
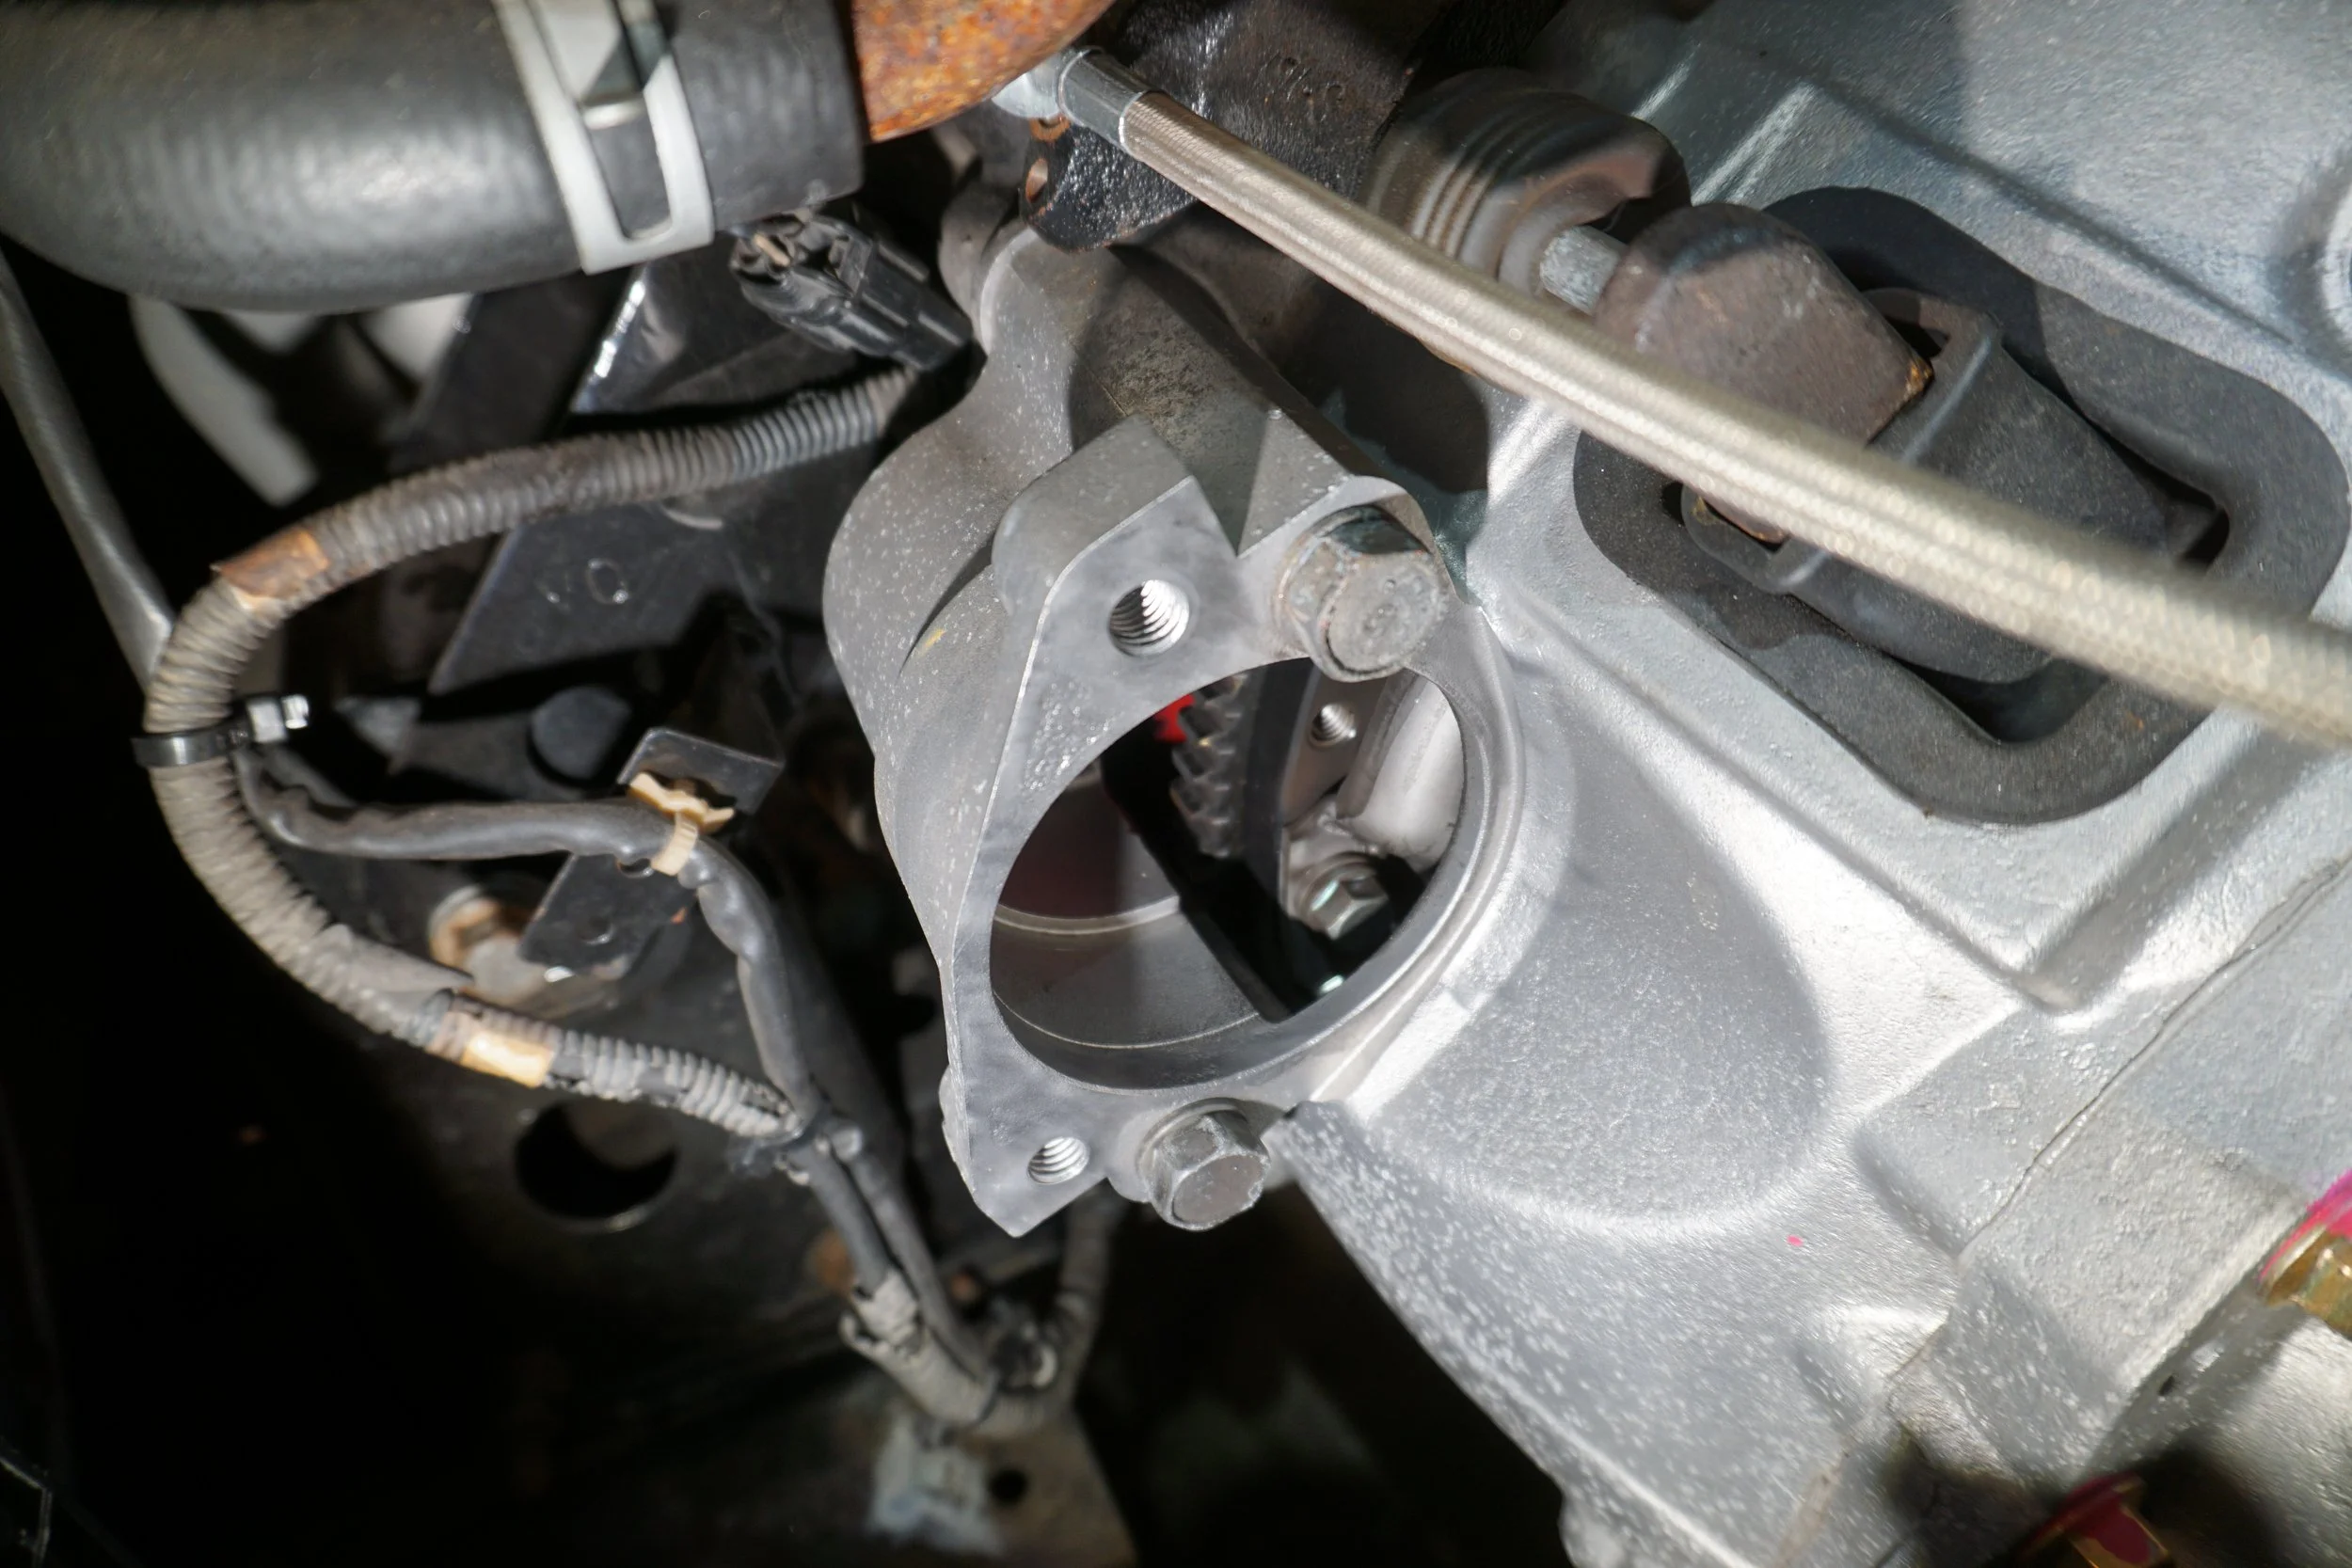
The car starts so well now, it's amazing!!
But I wasn't done. My brake pedal feel has been all over the place, and at the last trackcross it got scary in a few situations. It didn't feel quite like the pad knock pad (that was solved by the addition of knock back springs behind the pistons), almost like I had air in the lines. But then it would just go away my next run, so it was inconsistent. Not exactly what you want from your brakes. So I decided to try something weird I found on an S2000 forum:
https://www.s2ki.com/forums/s2000-un...-969691/page2/
Basically:Pump pedal 10x, hold, place metal or wooden rod against seat track and pin the brake pedal down. Leave it overnight.
It typically wants to be a good amount. About 80-95% of how hard you can push the pedal.
Disconnect battery to turn off brake lights.
So I got my bottle jack, a piece of wood, and some heavy stuff to hold it all in place, and let it sit overnight.

It's only been a few days, so I don't have enough experience to say definitely, but I think it has done something. It didn't give me a super firm 100% awesome pedal, but I haven't noticed it sink yet like it did sometimes before. I'll probably do another fluid flush, and then do it again. Oh how I wish this car had the rock-solid pedal feel of my bone-stock Miata, or even my wife's FX35!
That's all for now!
Found out that the front 3 plugs were a different type of NGK than the rear three, so I didn't have a matching set this whole time. This probably also meant the rear plugs were OLD. But they didn't look that bad, and the gaps hadn't opened up much compared to the new ones.
Taking things apart, it looked like I was a little overzealous with the RTV the last time I assembled the LIM with the NWP spacers:
It didn't look like it was actually blocking the spray from the fuel injector, but since I was already here, I figured I should re-do it. I sent out the fuel injectors to be cleaned and rebuilt, so I had some time anyways.
I decided to do something completely unnecessary and blast the LIM to clean it up.
Which led to a mishap with the blaster...ouch.
But eventually a clean LIM. The coal slag roughed up the surface more than I would have liked, but it's clean!
Got the injectors back looking nice and new. They tested well before the cleaning and rebuild, but he was still able to improve things a bit.
I got it all back together and kept the RTV nice and neat this time. Hopefully all that has solved the very intermittent misfire!
Then it was back to my nemesis: my intermittent no start problem. Last year I thought I had it fixed after I installed a new ignition switch, but it came back real bad about a month ago. When I tried to start the car, I would often just get a click from the starter, but no cranking. I decided to try out a different starter from the parts store, but it didn't change anything. Sometimes it would start up with my remote starter but not the key, and sometimes it would be the other way around. Since I'm so bad at electrical diagnostics, I decided to start by replacing two relays with new OEM parts: the anti-theft/start relay and the inhibit/clutch inter lock relay. No improvement there either. Crap. I also picked up another new OEM ignition switch, just in case.
I did some reading on the org and came across and old thread about ignition slop, but the pictures were broken. So I cut up a can:
And made some thin slices I could use as shims. I then did some testing by trying to start the car with just a screw driver directly in the ignition switch, and it started up really strong every single time. This made me more confidant the problem was the interface between the key cylinder and the ignition switch.
The T shaped rod coming from the back of key cylinder had quite a bit of lateral/vertical play, so I shimmed it all the way around so it stayed centered as it rotated. Some initial testing showed improvements, but it wasn't perfect. So I made a real thin shim and inserted it into the ignition switch itself (into the female T shape where it meets the key cylinder). Unfortunately I didn't take any pics, but I did make a video which I'll post up later. It's been almost a week now, and my intermittent starting problem has been 100% resolved! The key feels "tighter" when I rotate it now, and the action to start the car feels "strong", if that makes any sense. This is such a huge relief, since not being sure the car will start really makes you not want to drive the car.
To improve my odds even further, I cleaned up the mating surfaces between the starter and the transmission case, as some corrosion had started to form on both parts.
The car starts so well now, it's amazing!!
But I wasn't done. My brake pedal feel has been all over the place, and at the last trackcross it got scary in a few situations. It didn't feel quite like the pad knock pad (that was solved by the addition of knock back springs behind the pistons), almost like I had air in the lines. But then it would just go away my next run, so it was inconsistent. Not exactly what you want from your brakes. So I decided to try something weird I found on an S2000 forum:
https://www.s2ki.com/forums/s2000-un...-969691/page2/
Basically:Pump pedal 10x, hold, place metal or wooden rod against seat track and pin the brake pedal down. Leave it overnight.
It typically wants to be a good amount. About 80-95% of how hard you can push the pedal.
Disconnect battery to turn off brake lights.
So I got my bottle jack, a piece of wood, and some heavy stuff to hold it all in place, and let it sit overnight.
It's only been a few days, so I don't have enough experience to say definitely, but I think it has done something. It didn't give me a super firm 100% awesome pedal, but I haven't noticed it sink yet like it did sometimes before. I'll probably do another fluid flush, and then do it again. Oh how I wish this car had the rock-solid pedal feel of my bone-stock Miata, or even my wife's FX35!
That's all for now!
Last edited by 95maxrider; Jun 25, 2024 at 10:54 AM.
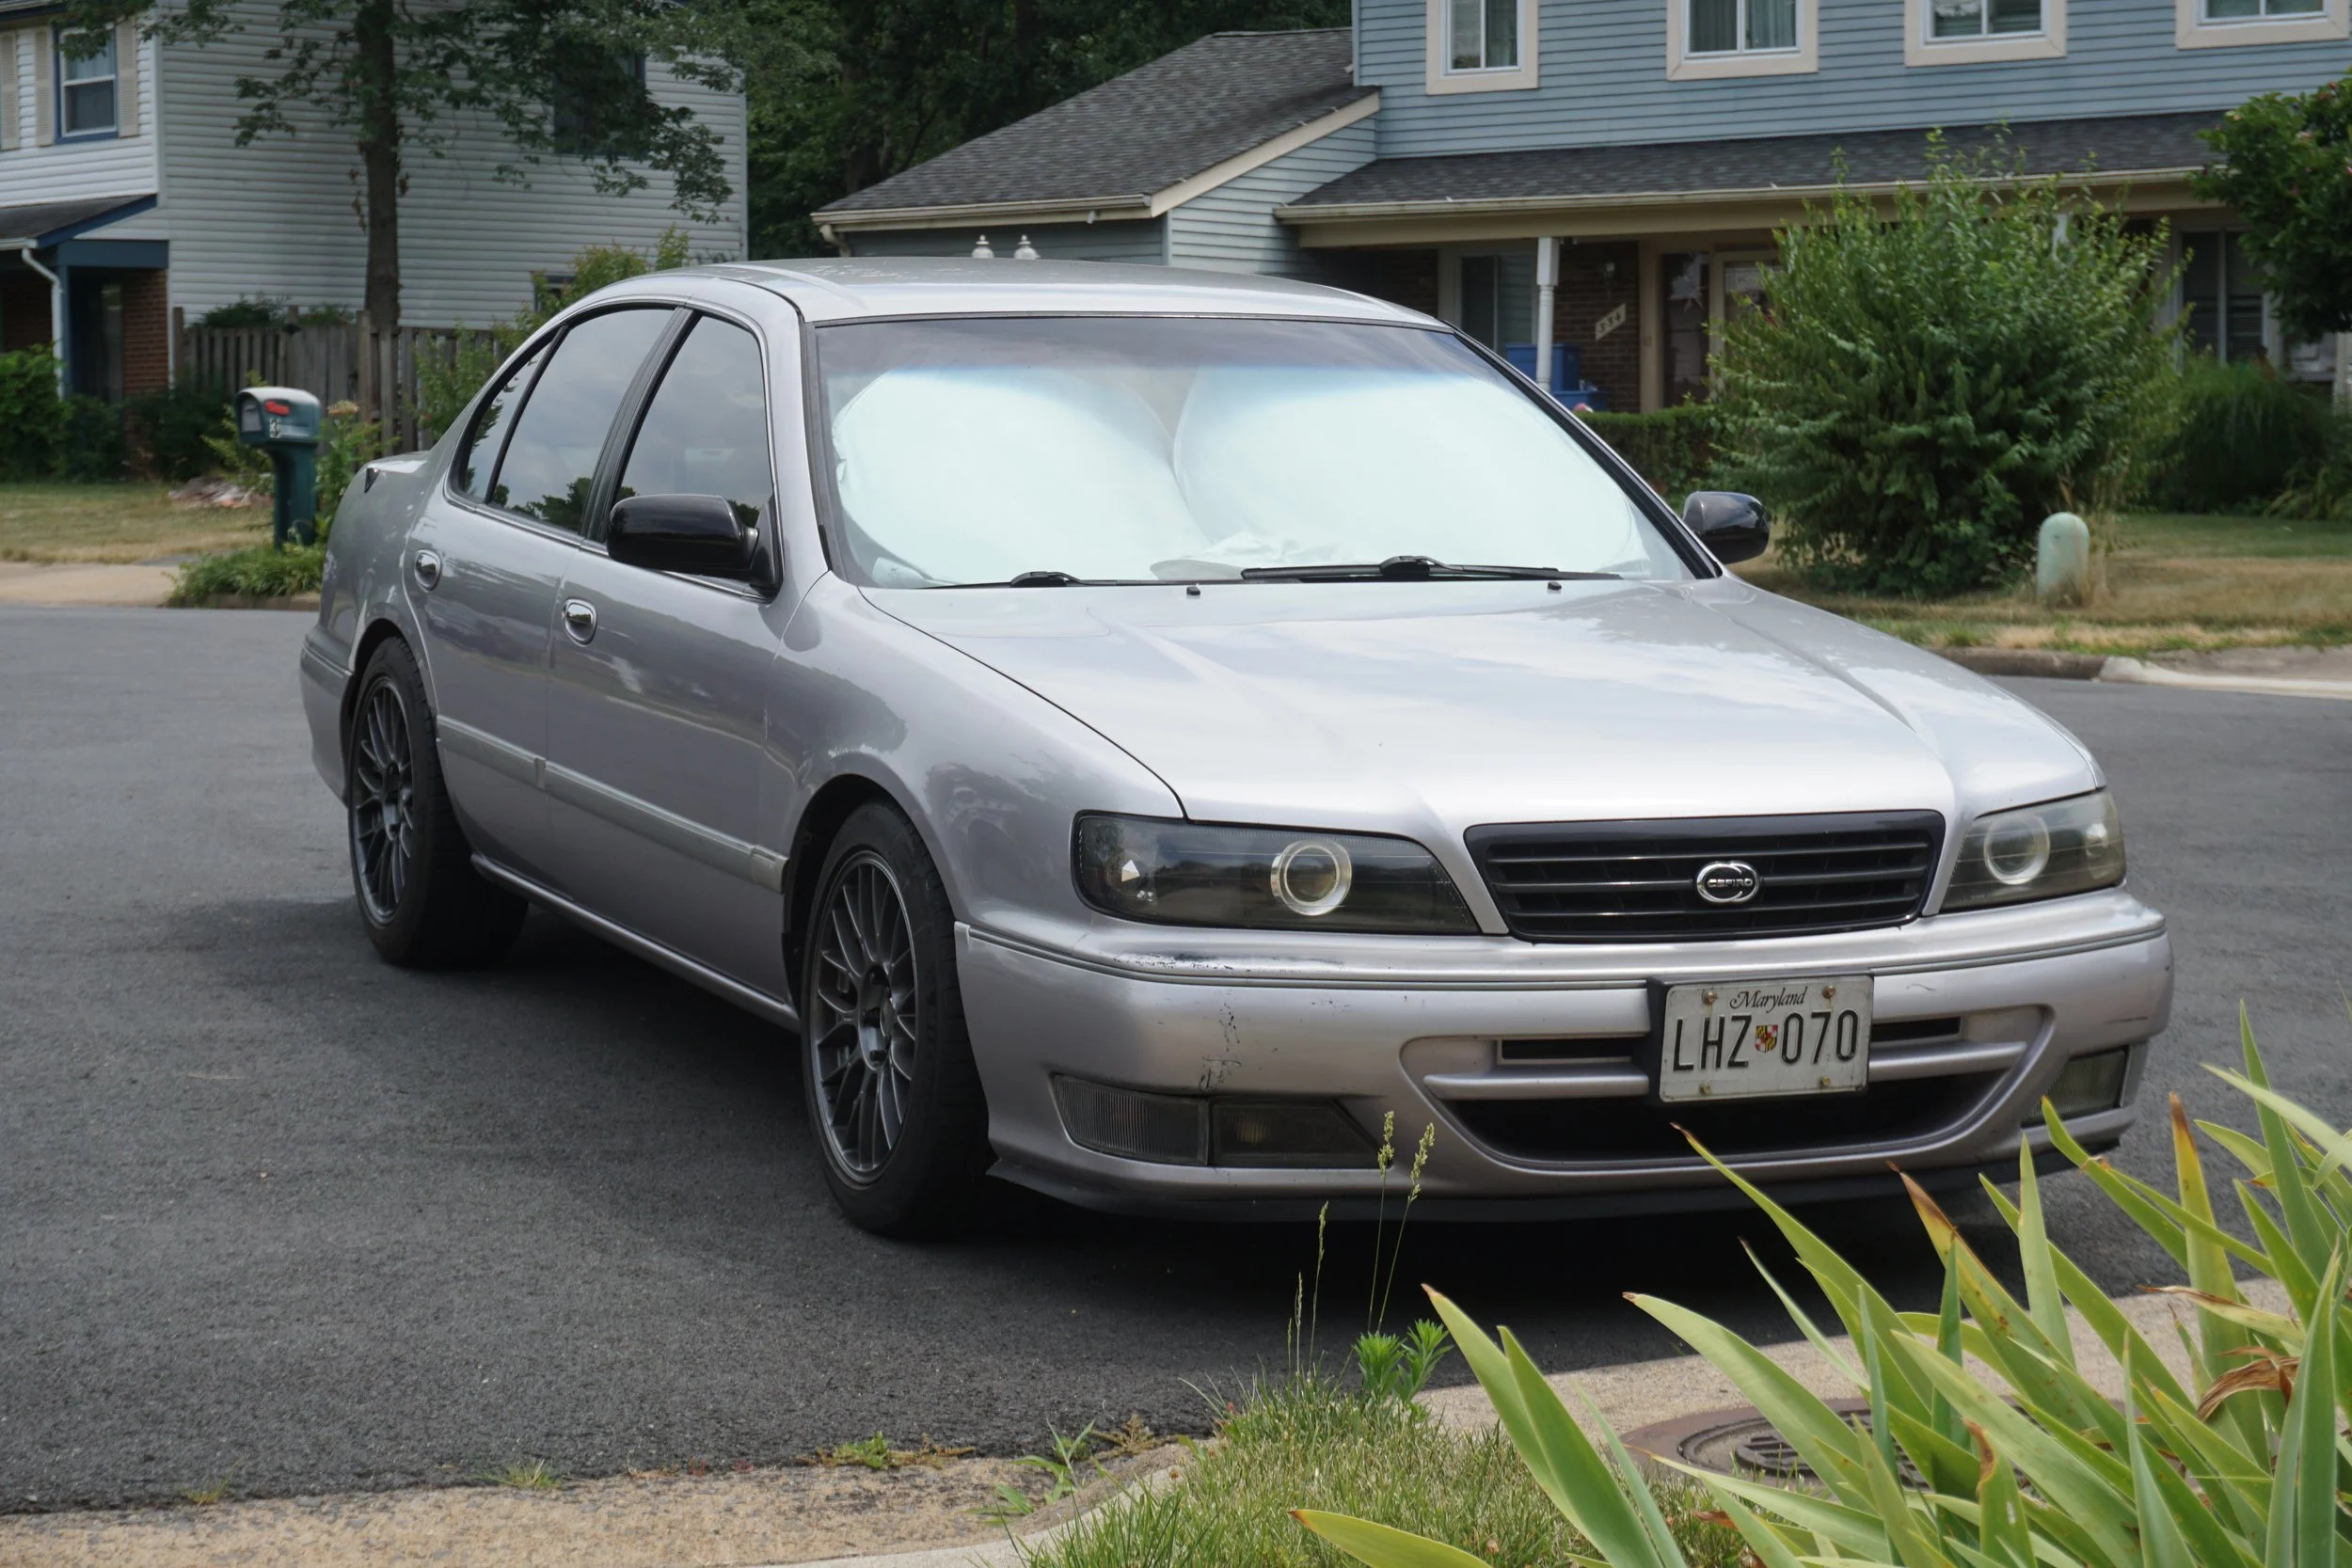
And just a couple other small things to add. I picked up a Cefiro grille from the Philippines, I kinda like it.
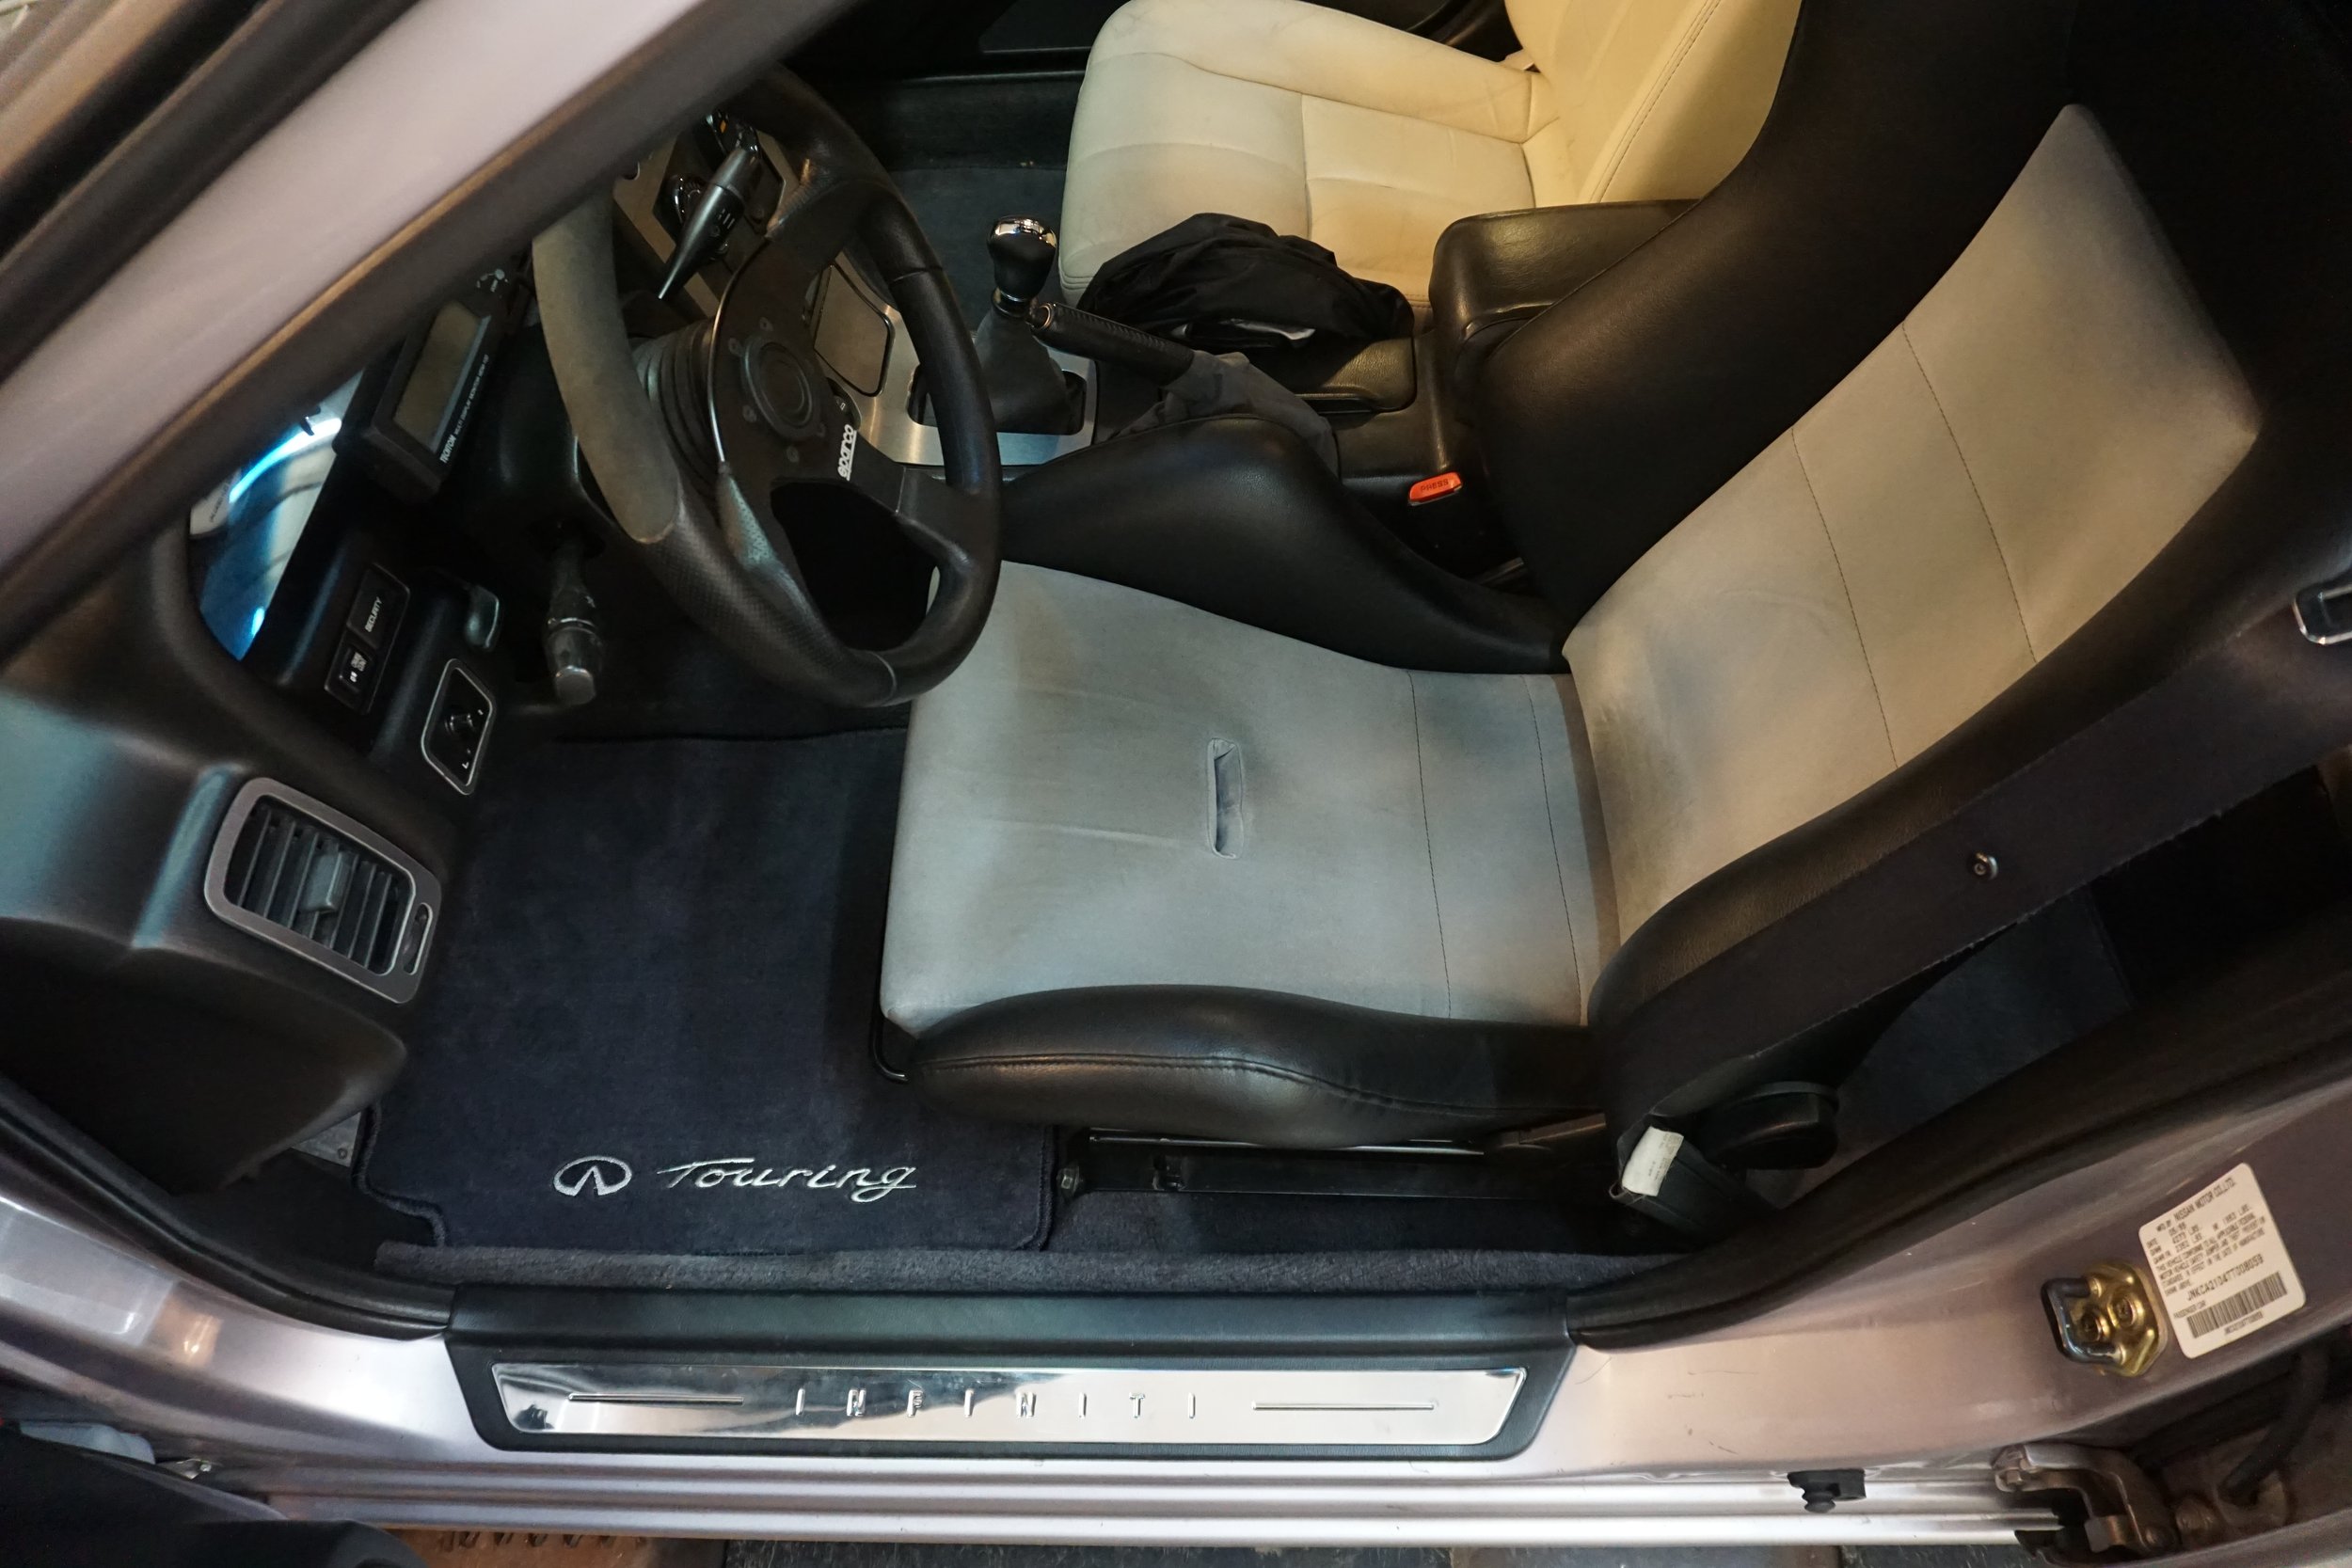
I've been looking to replace my floor mats for a while now, but haven't had much luck. I once found a DS mat from a Touring at the junkyard, but it was pretty beat up. I then found one in much better condition on Ebay, but it was just the one mat and not the set. My mat is starting to wear through, and this better Touring mat is in great shape.
I think I also solved the problem with my metal mesh lower grille. Even though I have to really cram in in between the bumper and the crash beam, it still somehow likes to fall out when I'm racing, which has been getting annoying.
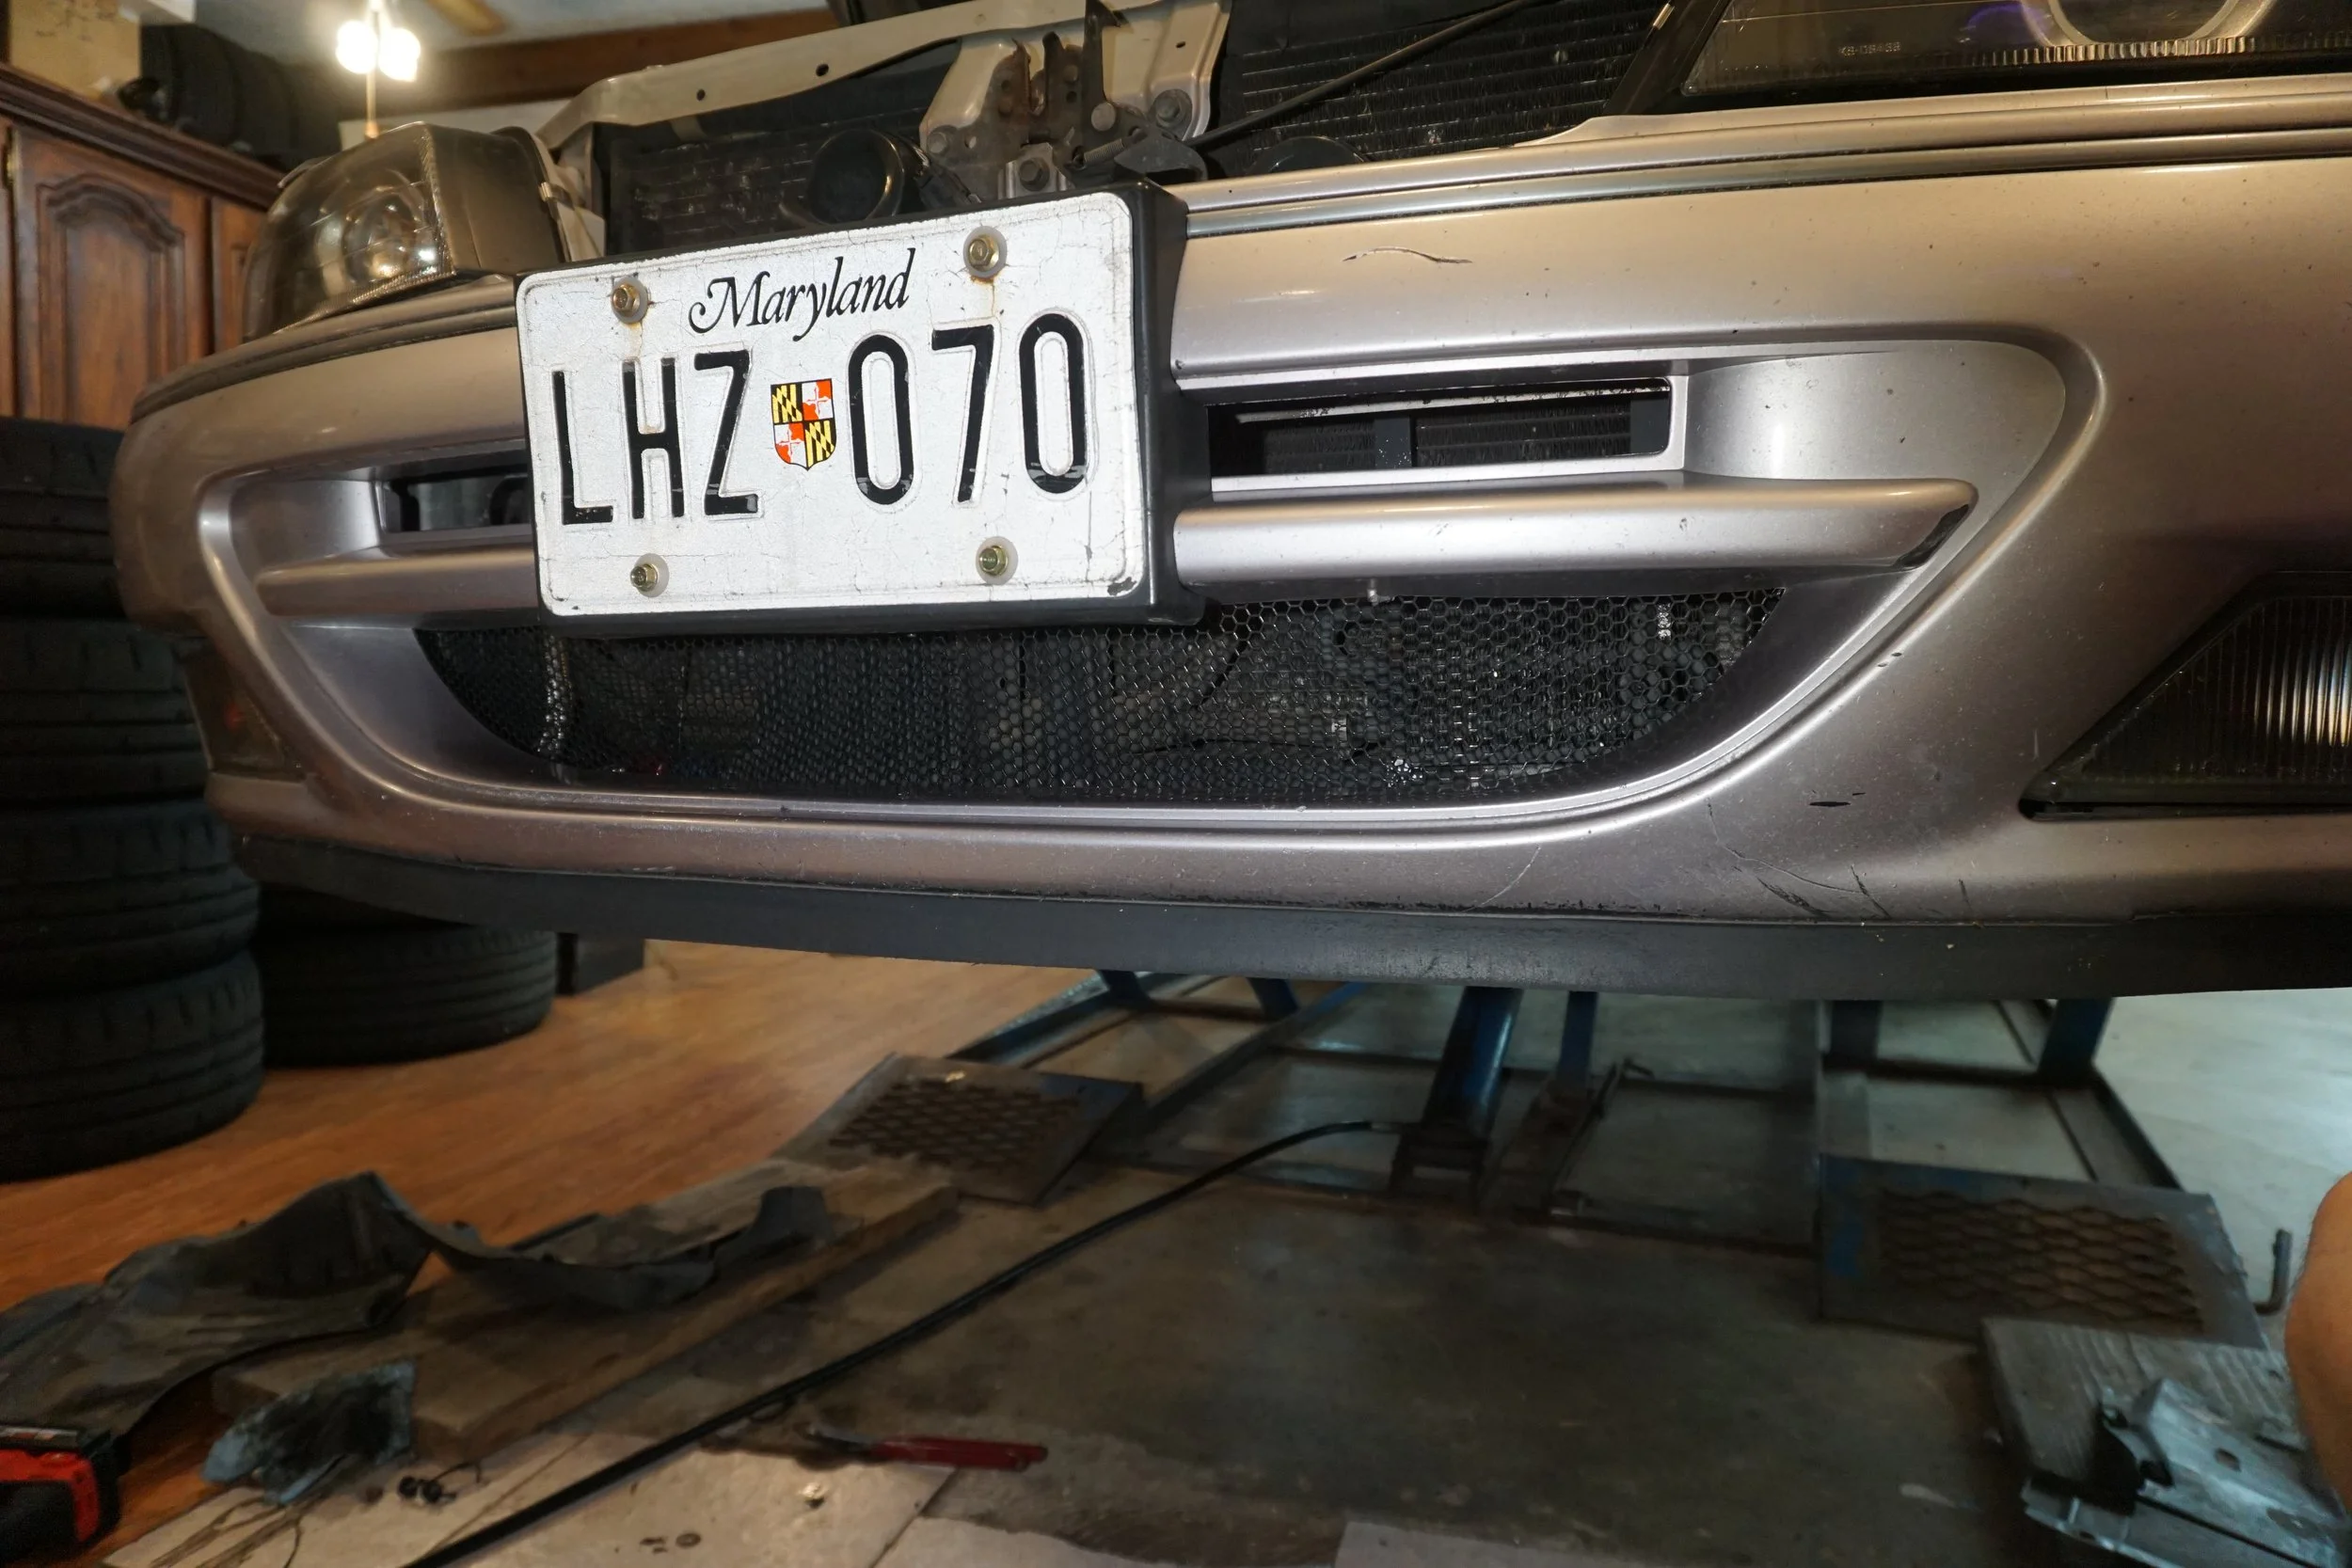
So I sat and looked at it until I had an idea. I used my dremel to make a little opening in the white foam in front of the crash beam, and then crammed a bolt and fender washer up there, stuck the bolt through a hole in the mesh, and then another fender washer and nut from below, sandwiching everything together.
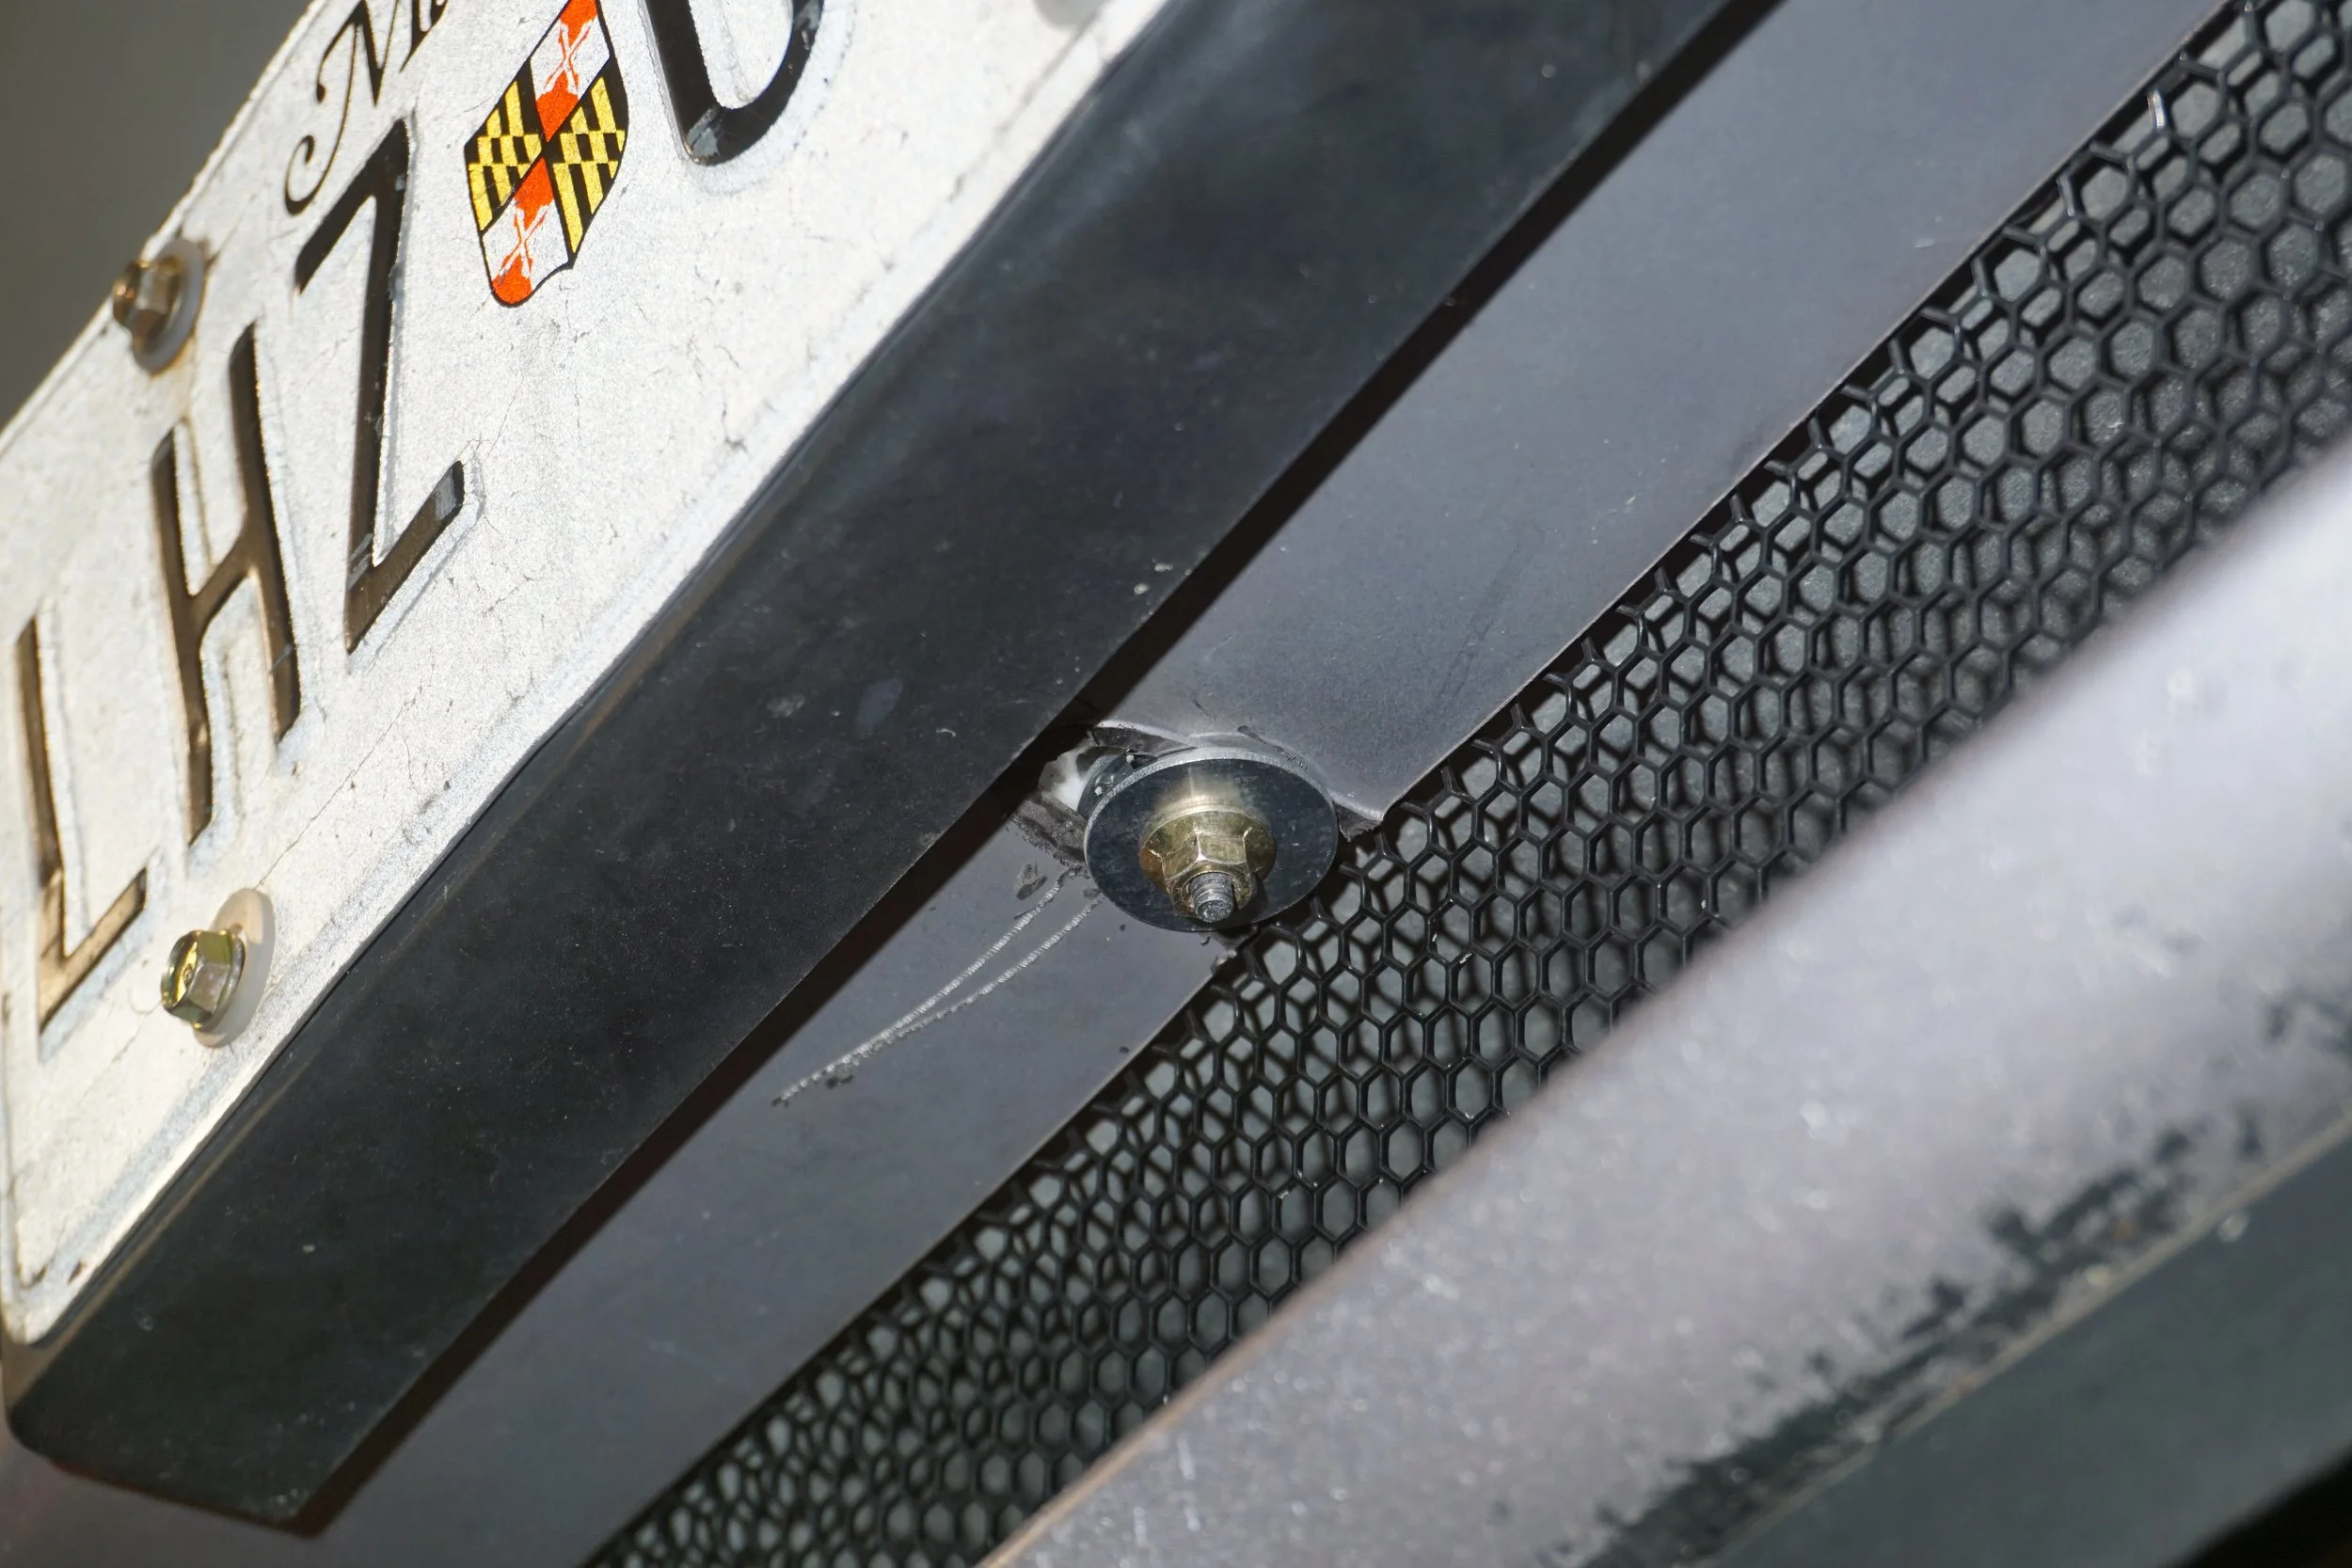
Problem solved, for now at least.
I've been looking to replace my floor mats for a while now, but haven't had much luck. I once found a DS mat from a Touring at the junkyard, but it was pretty beat up. I then found one in much better condition on Ebay, but it was just the one mat and not the set. My mat is starting to wear through, and this better Touring mat is in great shape.
I think I also solved the problem with my metal mesh lower grille. Even though I have to really cram in in between the bumper and the crash beam, it still somehow likes to fall out when I'm racing, which has been getting annoying.
So I sat and looked at it until I had an idea. I used my dremel to make a little opening in the white foam in front of the crash beam, and then crammed a bolt and fender washer up there, stuck the bolt through a hole in the mesh, and then another fender washer and nut from below, sandwiching everything together.
Problem solved, for now at least.
Last edited by 95maxrider; Jun 27, 2024 at 01:39 PM.

For anyone struggling to find things in this thread (like I do), here's an updated index from the last few years. The full thing is in the first post.
Page 18: August 2020 - March 2021
Making the lift safer
Subframe spacers/collars
Minor exhaust repair
New e-brake, gauge cluster cover
Trackcross event
Front subframe spacers and collars replacement
Cavity wax inside the rocker panels
Beginning of the 6 speed swap
Page 19: March 2021 - August 2021
Transmission disassembly
Junkyard parts
Subframe connector cleaning and painting
Center tunnel cleaning, POR15, and heat shields
White leather interior, cleaning
Giant rust repair project
Cefiro front bumper
Page 20: August 2021 - February 2022
Giant rust repair project
Eastwood Internal Frame Coating
White leather interior repair
Rolled rear fenders
Parts from junkyard and Amayama
Beginning of 3" exhaust project
Page 21: February 2022 - October 2022
3" exhaust project
Ignition switch
Minor repairs
Dyno results, 264 whp / 265 wtq
Subwoofer repair
Mesh lower grille
4" intake, Q45 MAF
Trackcross
Page 22: October 2022 - July 2023
Troubleshooting rough running/AFR issues (Q45 MAF wires)
New crank sensors
New AFPR
NISMO key
Trackcross
Playing with grilles
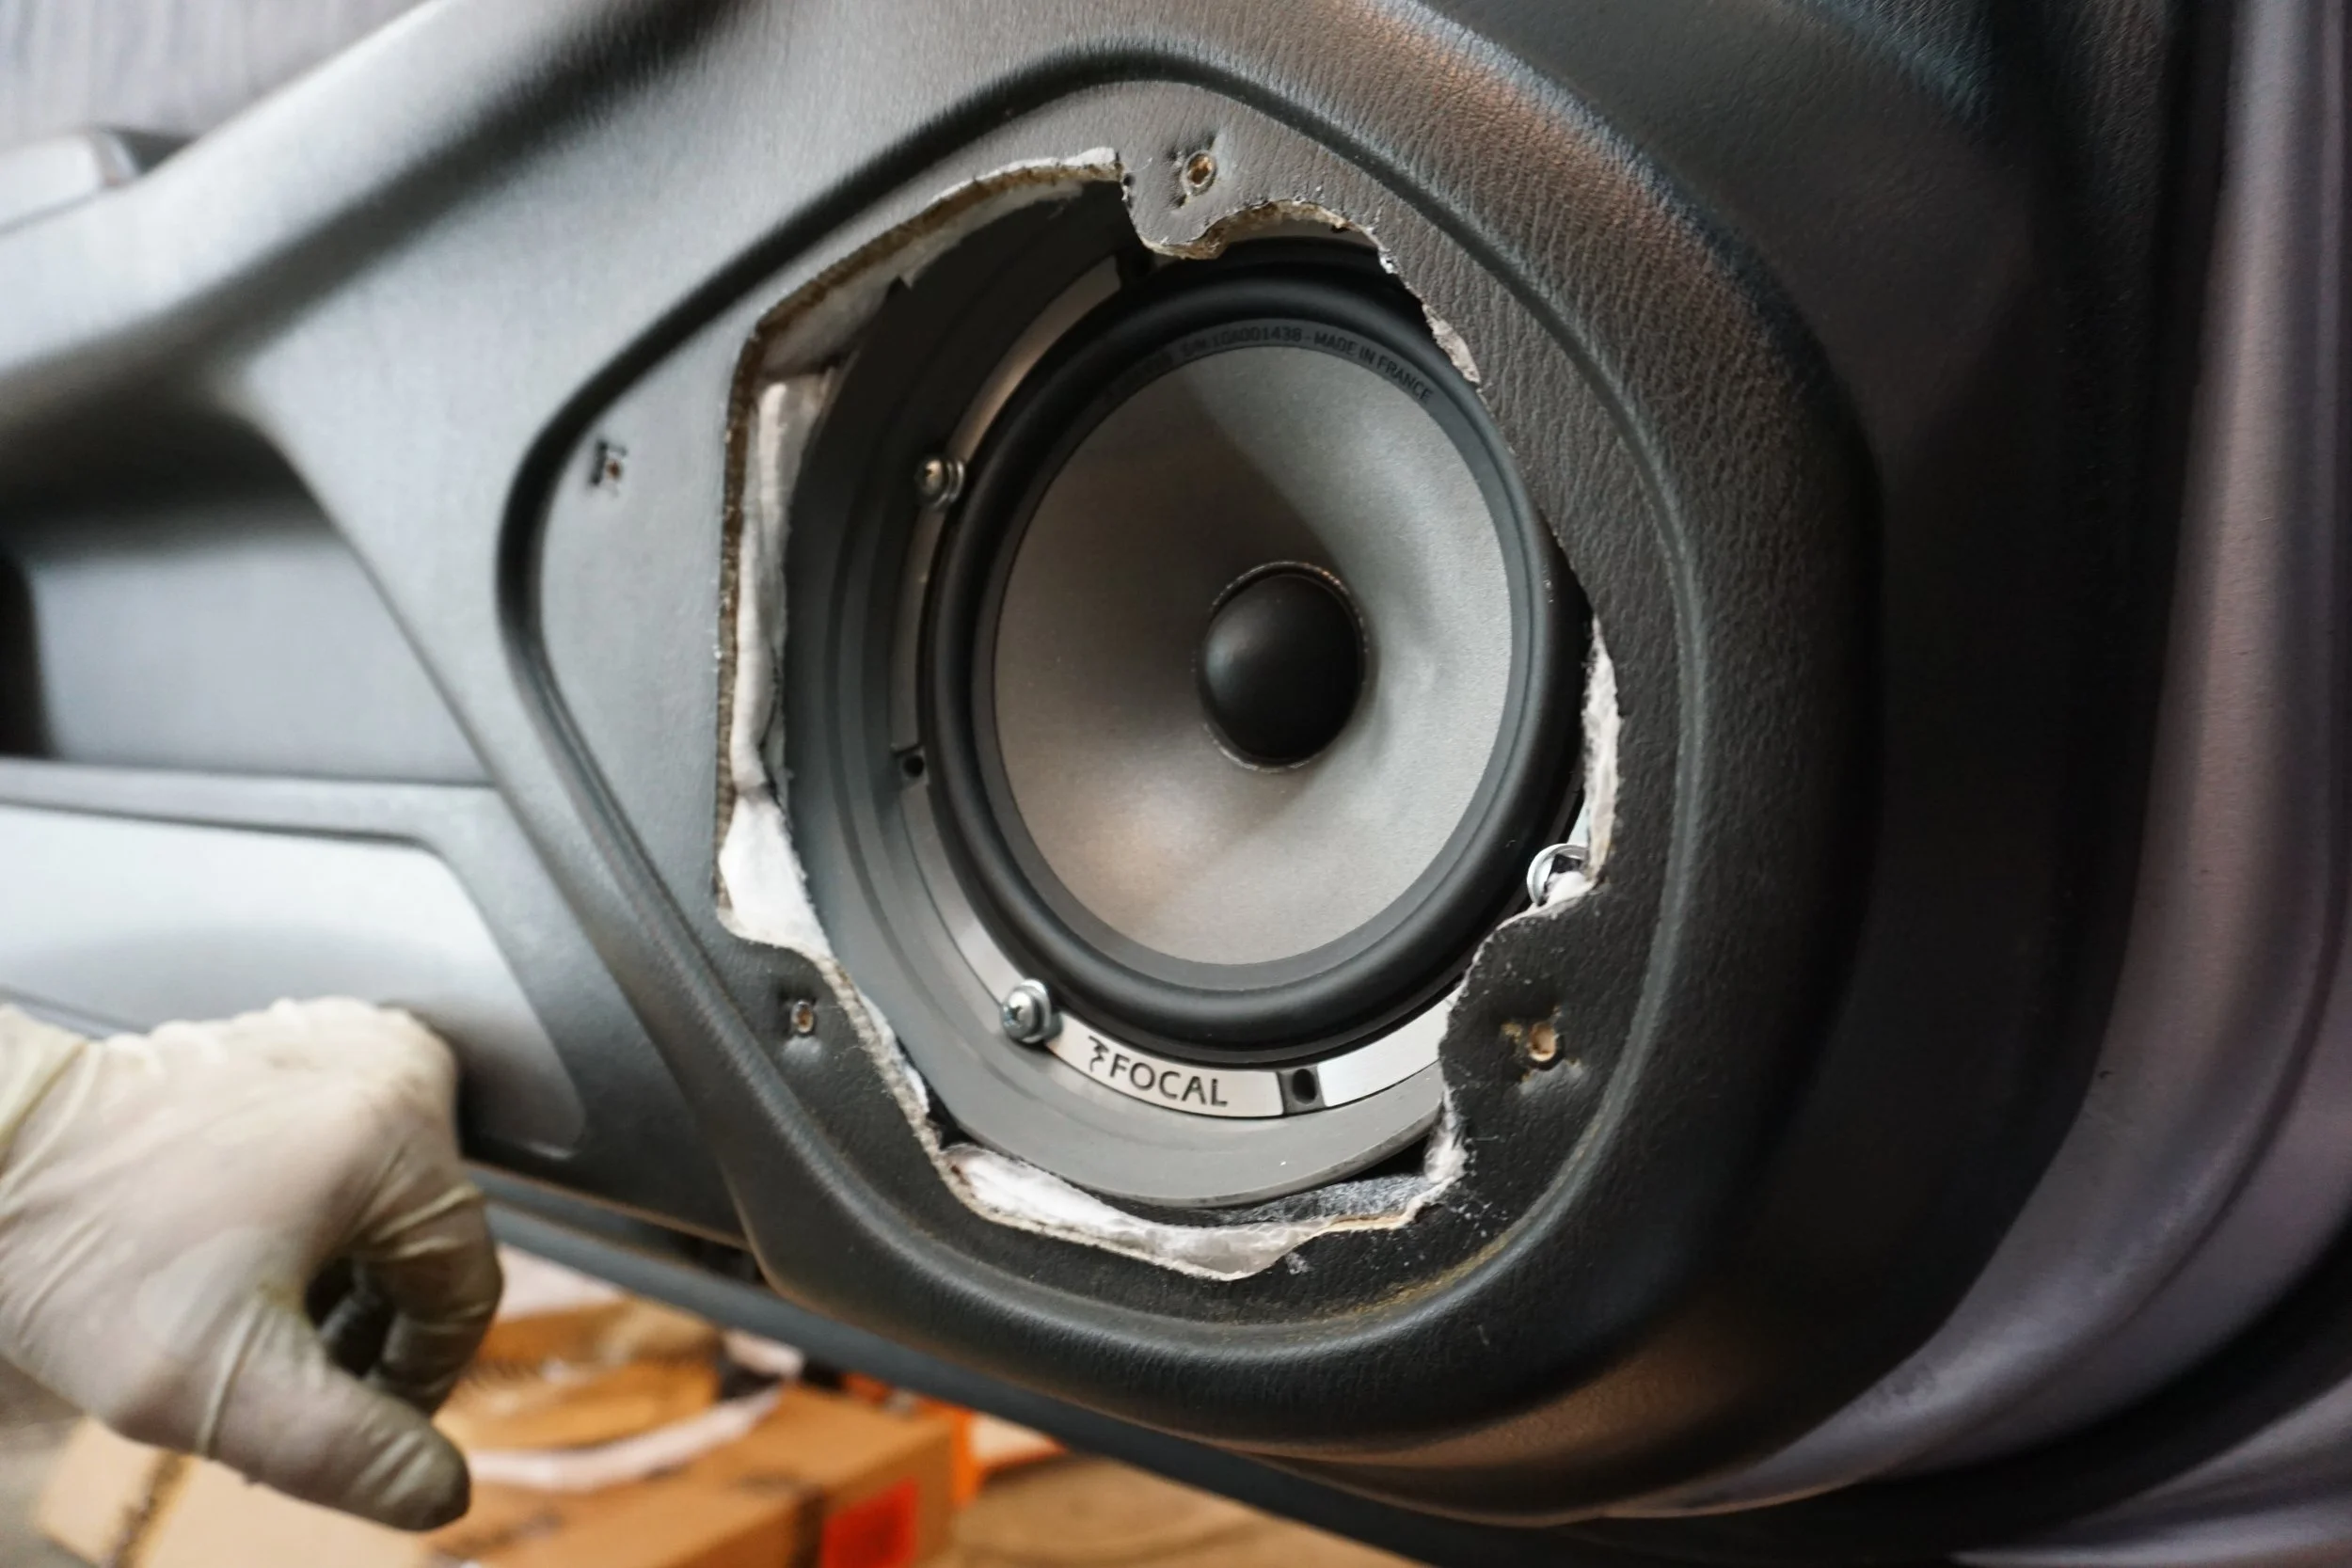
New rear speakers
Leatherique on my seats
White leather installed
Trimming shifter console
Axle replacement
New AEM WBO2 sensor/gauge
New ARP wheel studs and lug nuts
New front brakes
Trackcross
LCA bushings, new tires
Replacing small things
Info on 6 speed swap
5.5th gen FSB
Fortune Auto coilovers
Offset LCA bushings
Page 23: July 2023 -
LCA bushing heat sheild
5.5th gen FSTB
Fix of the Q45 MAF wiring problem
Custom SS brake lines
Bending the rear beam
Trackcross
Fresh hood insulation
Knock back springs in Wilwoods
Big spare tire
New trunk floor
Welding the coilovers
New coil packs, spark plugs, rebuilt/cleaned injectors
Fixing the intermittent click/no start problem for good
Cefiro grill
Page 18: August 2020 - March 2021
Making the lift safer
Subframe spacers/collars
Minor exhaust repair
New e-brake, gauge cluster cover
Trackcross event
Front subframe spacers and collars replacement
Cavity wax inside the rocker panels
Beginning of the 6 speed swap
Page 19: March 2021 - August 2021
Transmission disassembly
Junkyard parts
Subframe connector cleaning and painting
Center tunnel cleaning, POR15, and heat shields
White leather interior, cleaning
Giant rust repair project
Cefiro front bumper
Page 20: August 2021 - February 2022
Giant rust repair project
Eastwood Internal Frame Coating
White leather interior repair
Rolled rear fenders
Parts from junkyard and Amayama
Beginning of 3" exhaust project
Page 21: February 2022 - October 2022
3" exhaust project
Ignition switch
Minor repairs
Dyno results, 264 whp / 265 wtq
Subwoofer repair
Mesh lower grille
4" intake, Q45 MAF
Trackcross
Page 22: October 2022 - July 2023
Troubleshooting rough running/AFR issues (Q45 MAF wires)
New crank sensors
New AFPR
NISMO key
Trackcross
Playing with grilles
New rear speakers
Leatherique on my seats
White leather installed
Trimming shifter console
Axle replacement
New AEM WBO2 sensor/gauge
New ARP wheel studs and lug nuts
New front brakes
Trackcross
LCA bushings, new tires
Replacing small things
Info on 6 speed swap
5.5th gen FSB
Fortune Auto coilovers
Offset LCA bushings
Page 23: July 2023 -
LCA bushing heat sheild
5.5th gen FSTB
Fix of the Q45 MAF wiring problem
Custom SS brake lines
Bending the rear beam
Trackcross
Fresh hood insulation
Knock back springs in Wilwoods
Big spare tire
New trunk floor
Welding the coilovers
New coil packs, spark plugs, rebuilt/cleaned injectors
Fixing the intermittent click/no start problem for good
Cefiro grill
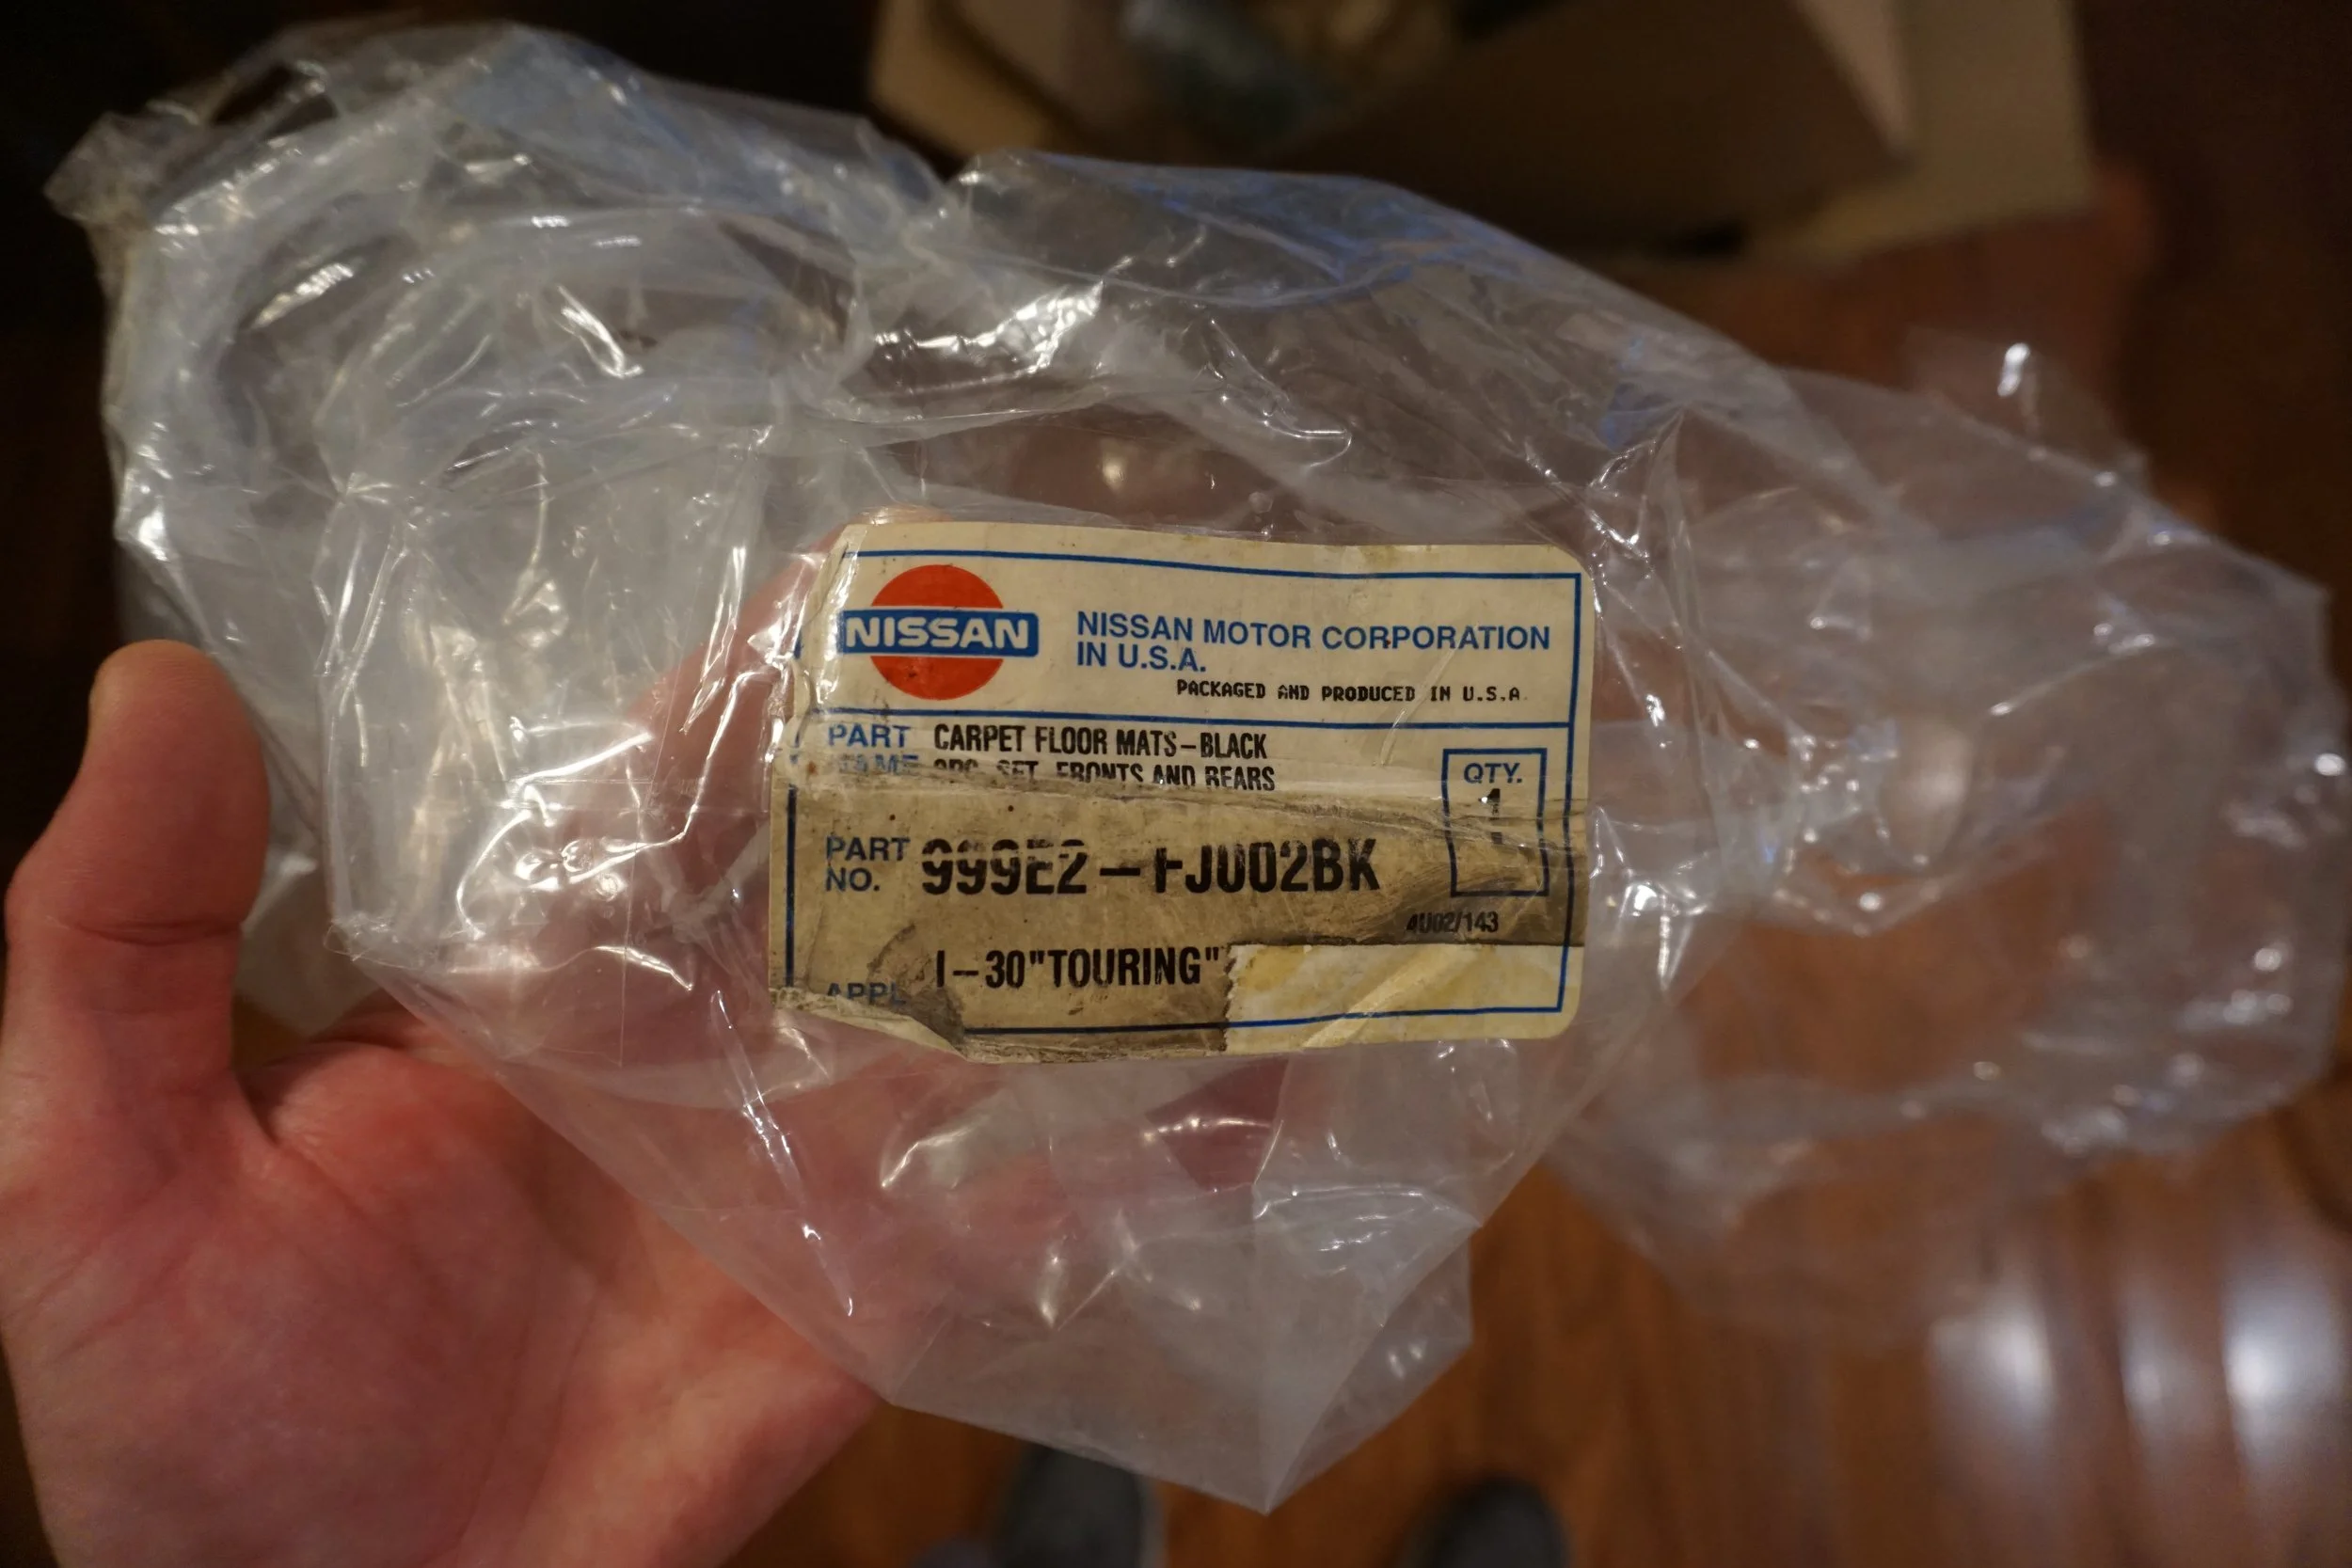
Remember how I said I had been looking for a set of floor mats for my car? A few years ago I called some dealerships looking for some new ones, but they said there were none in the country. Apparently I didn't think to ask for any parts numbers. Well, a few months ago I called again and got the part number; apparently a set has a single part number and you can't buy individual mats. So I got a PN for a black/gray set from a Touring edition, even though my car is a base I30. Hey, it's not like I stuck M badges onto a base 3 Series! I entered it into Google and got two results, one in Russian and one in Japanese. The link to the Russian site went nowhere, but the Japanese one took me to the Japanese Yahoo auction site, where I was greeted with pictures of pristine, brand new floor mats for an I30 Touring. They still had the freaking tag on them! What I30 floor mats were doing in Japan, I had no idea. It's not like the car was sold there. But I didn't care. I bought them, and patiently waited for them to arrive.
I have no idea how mats made in the USA made for a USDM car ended up in Japan. Look at that classic Nissan logo, these mats must be 25+ years old!
These are amazing
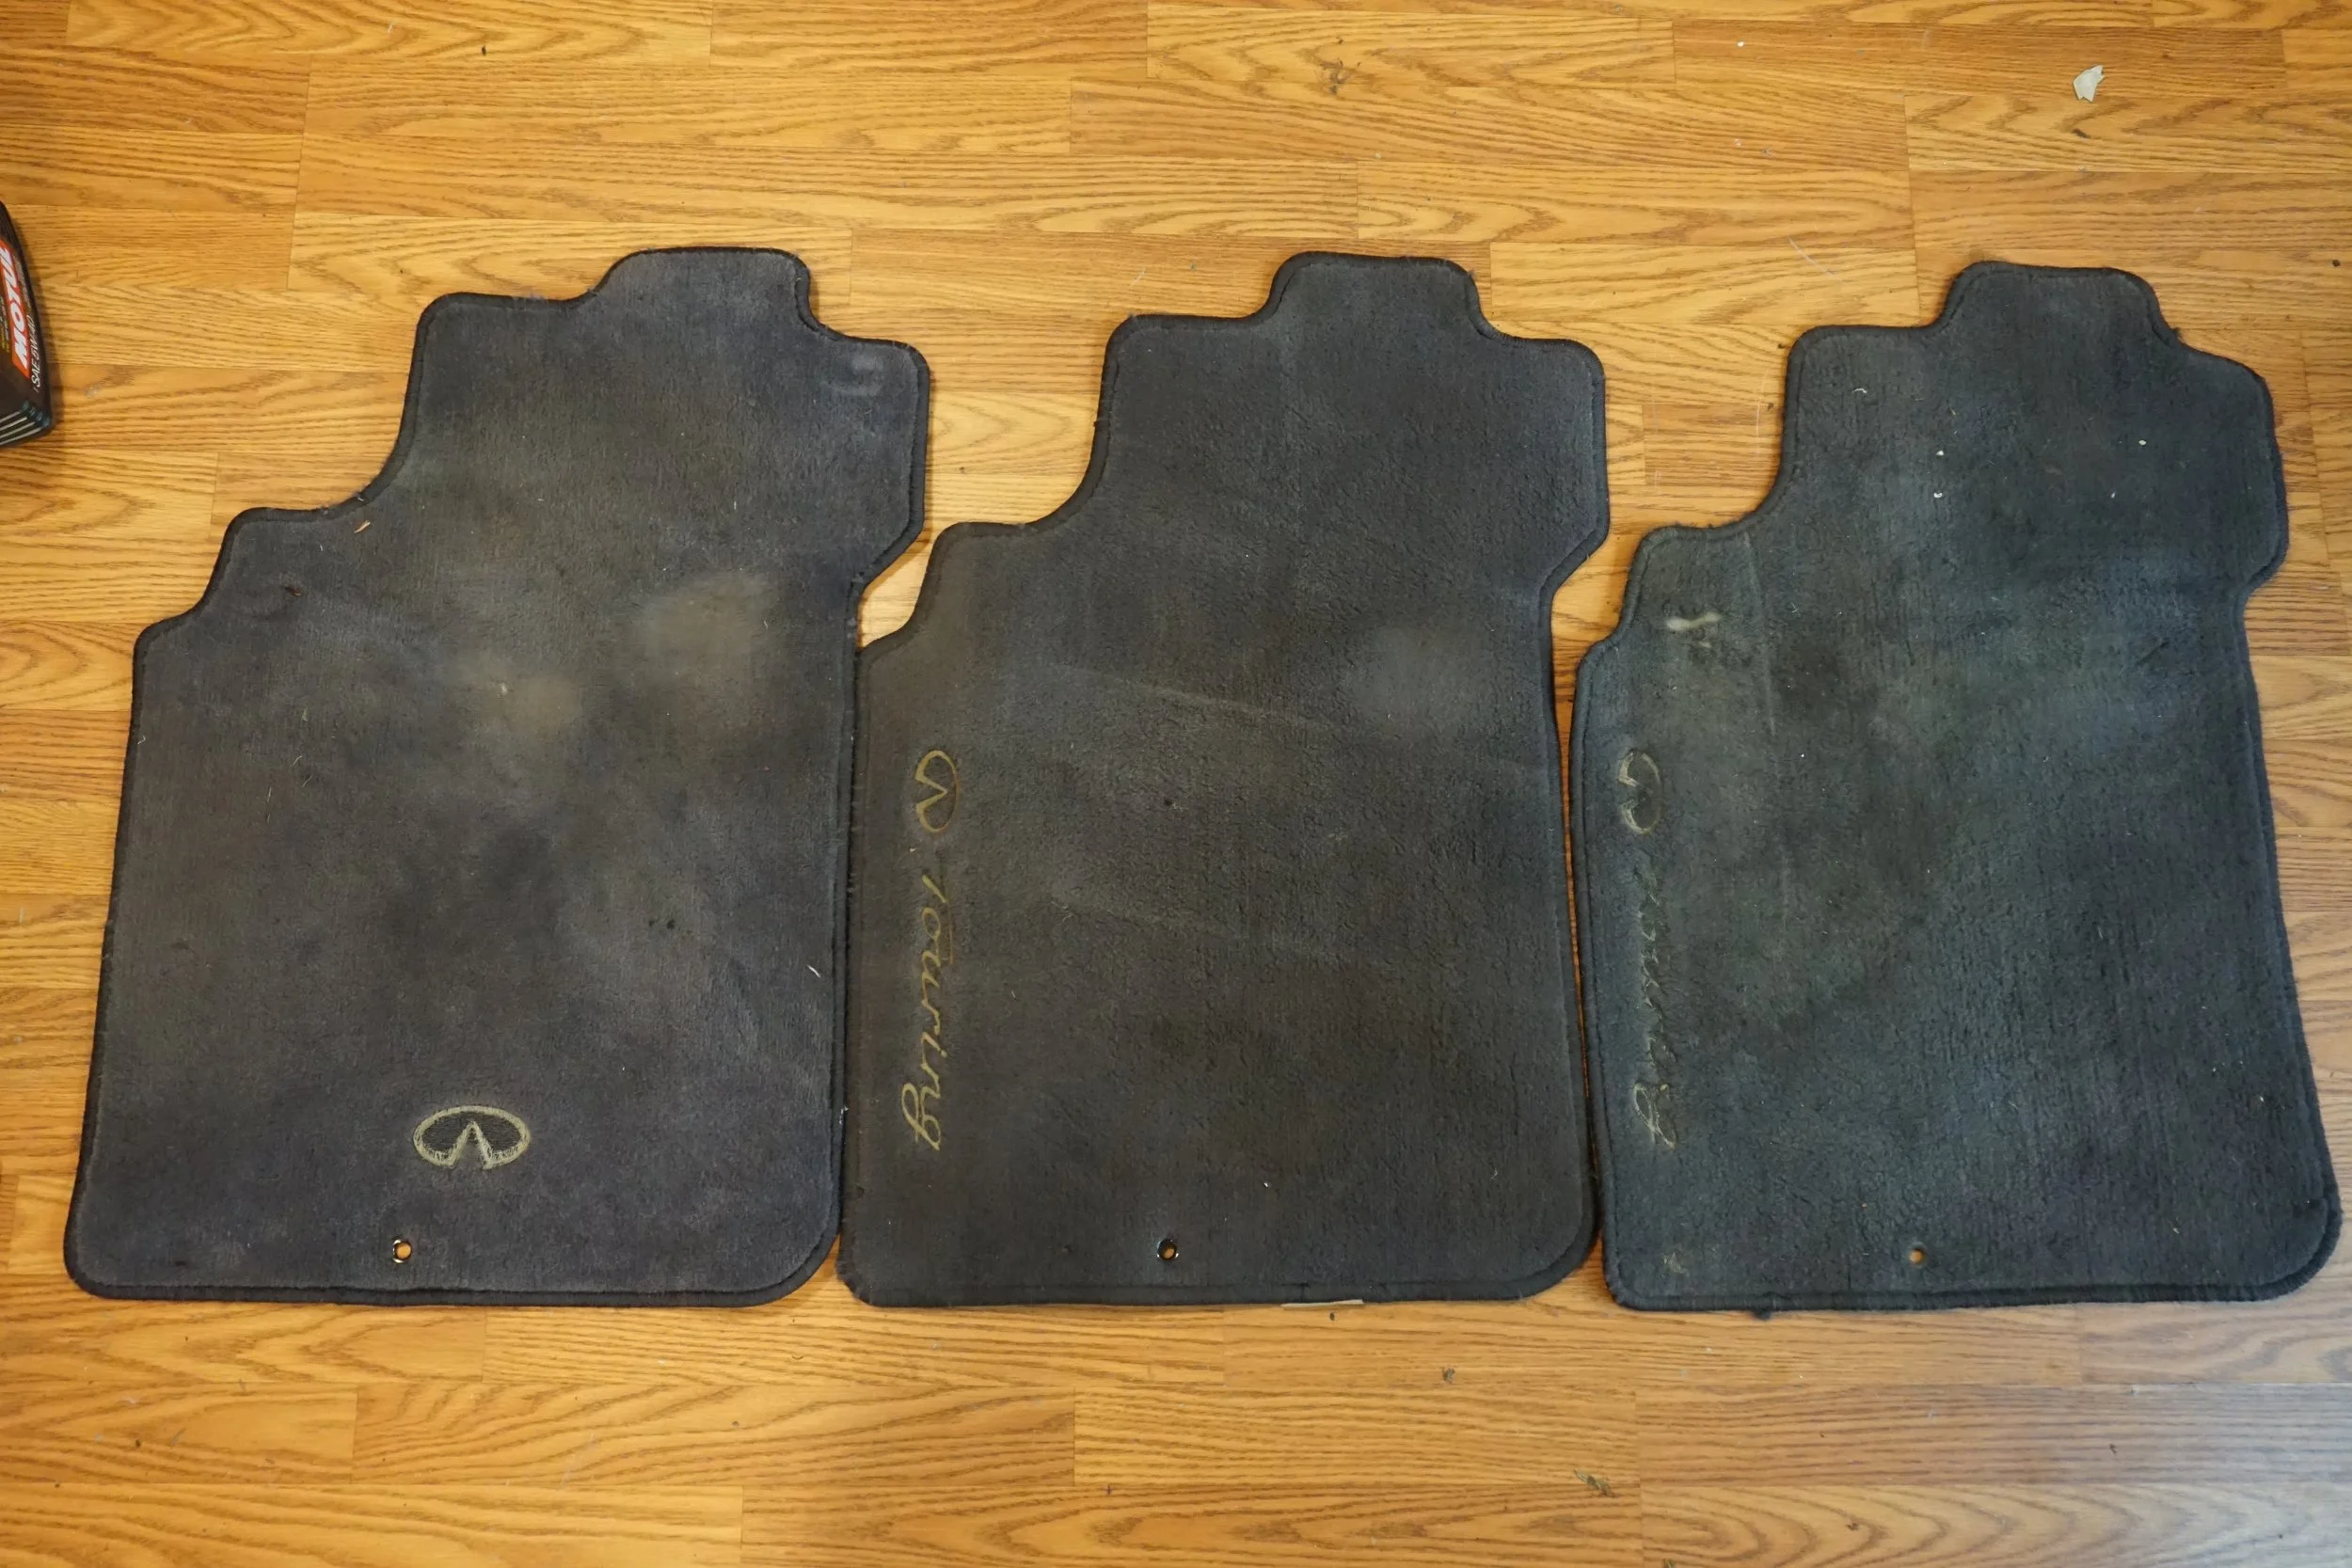
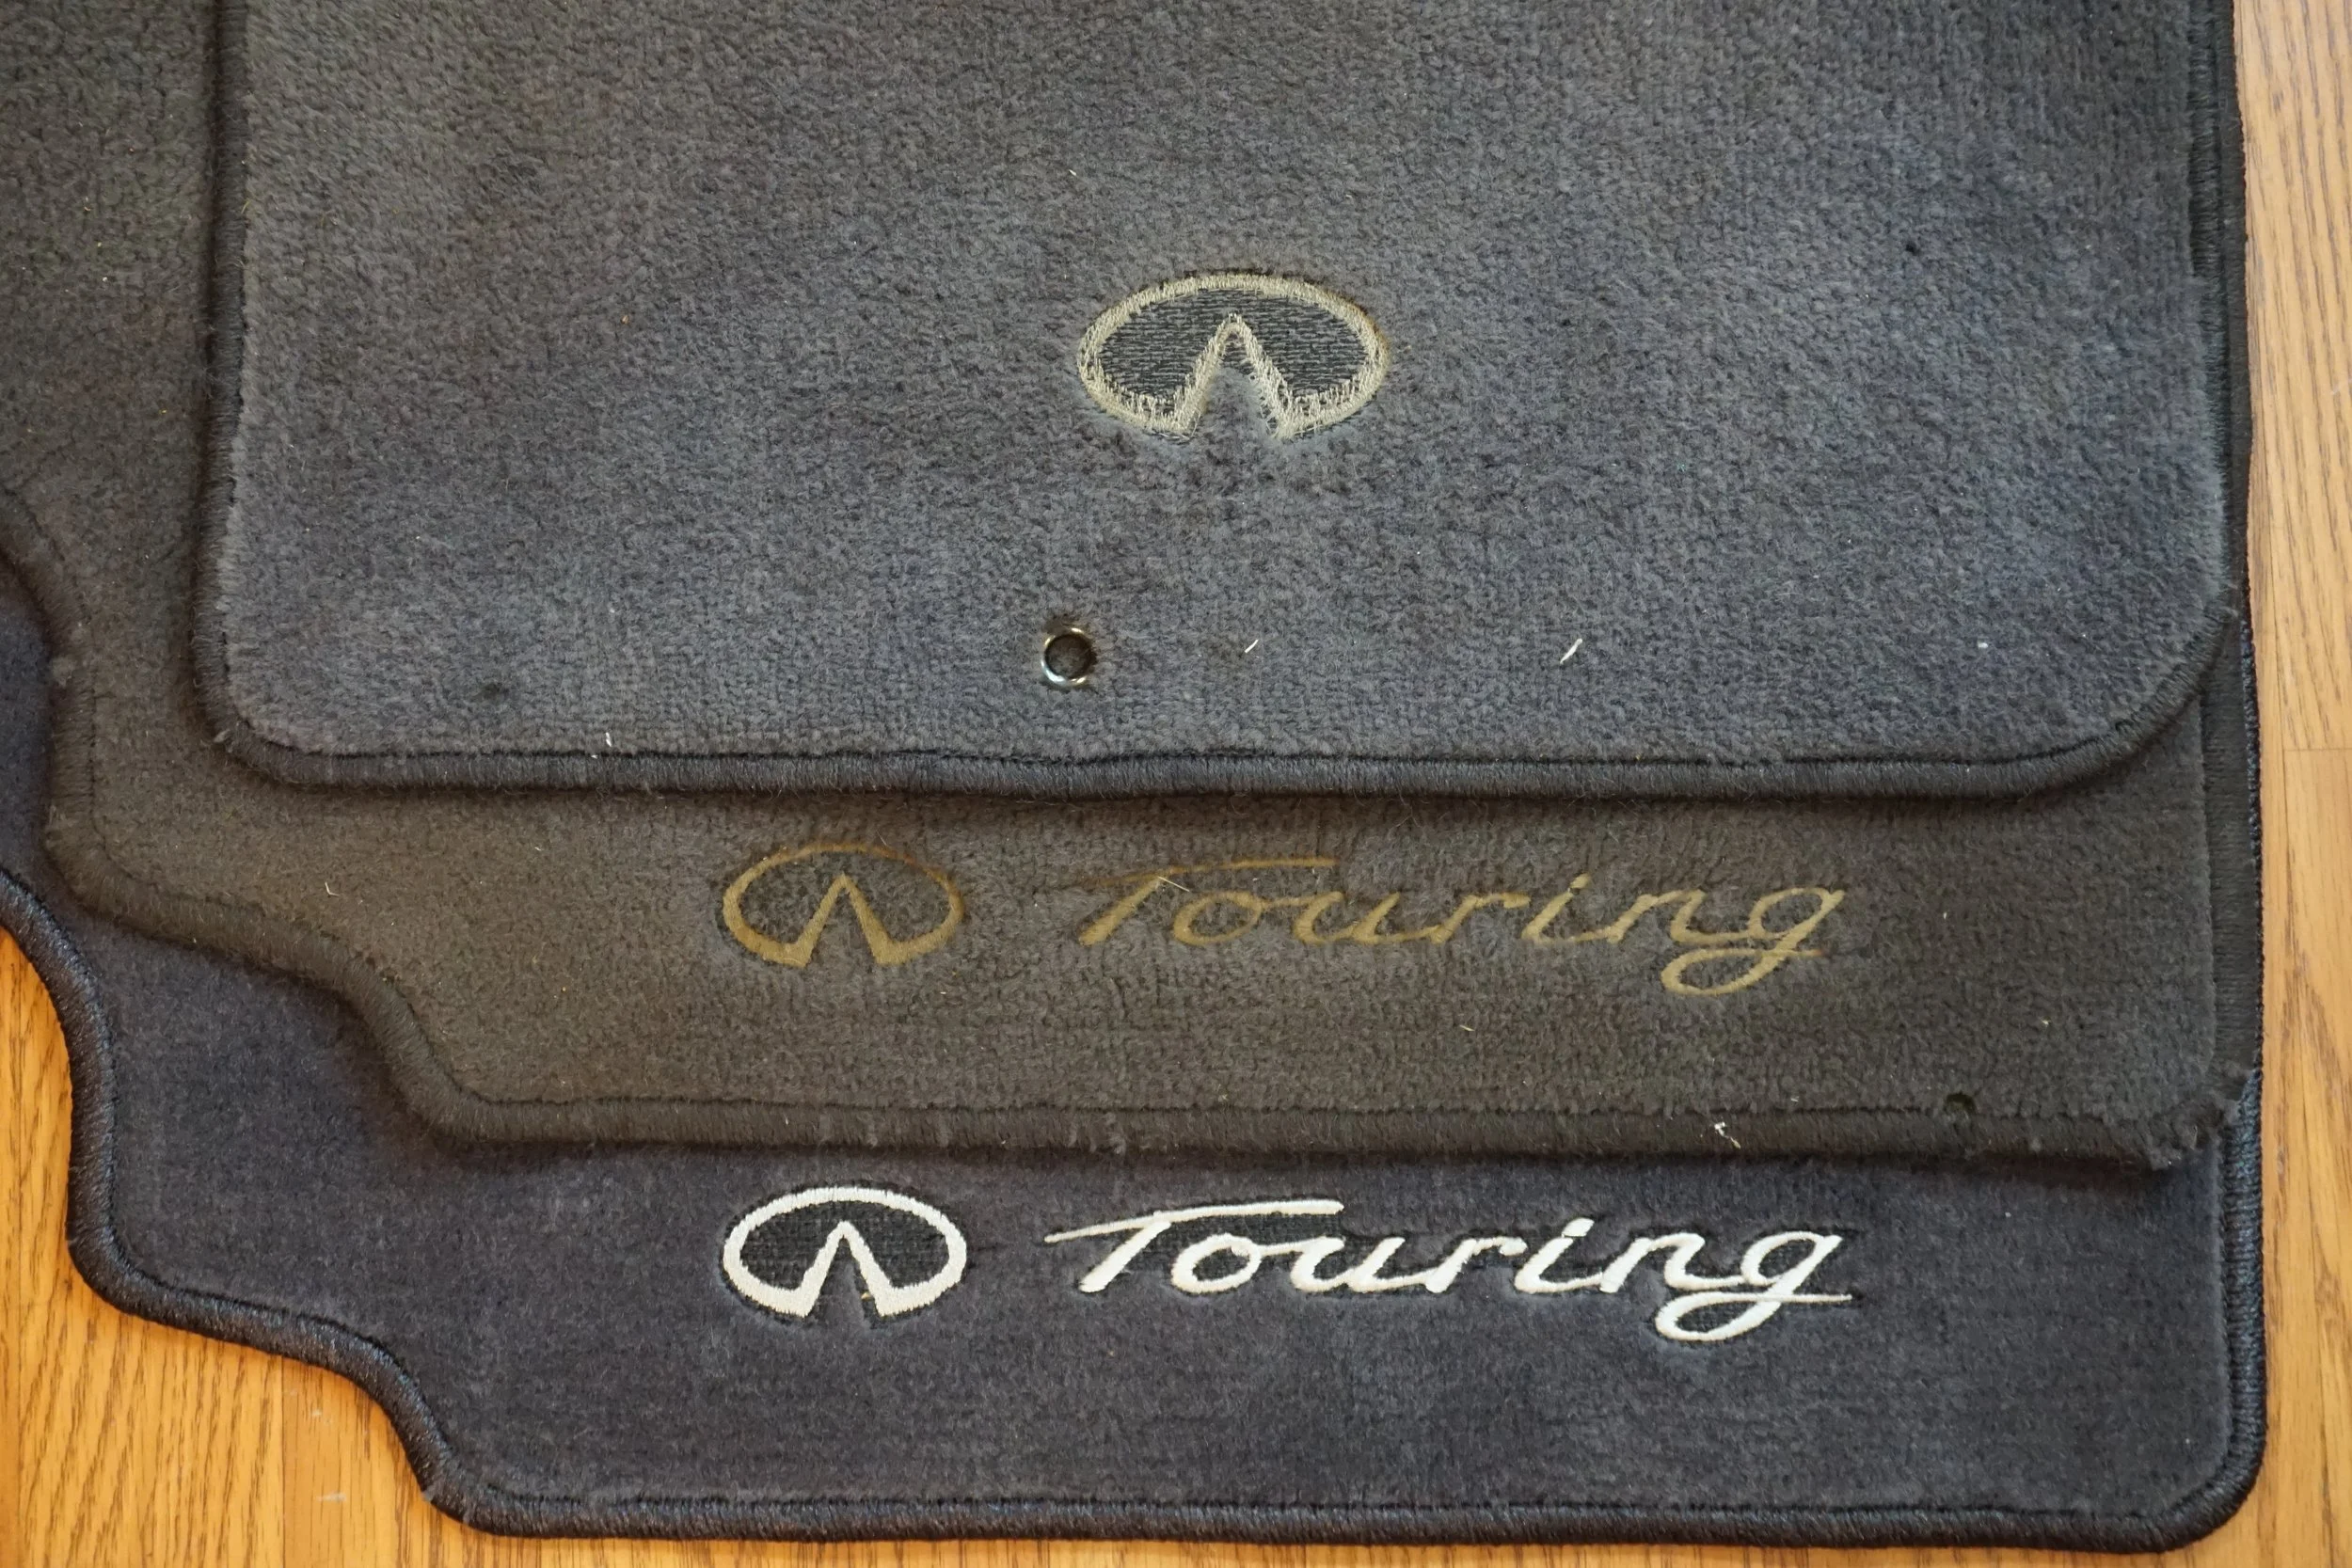
My non-Touring mat, the "good" used mat, and then the new one.
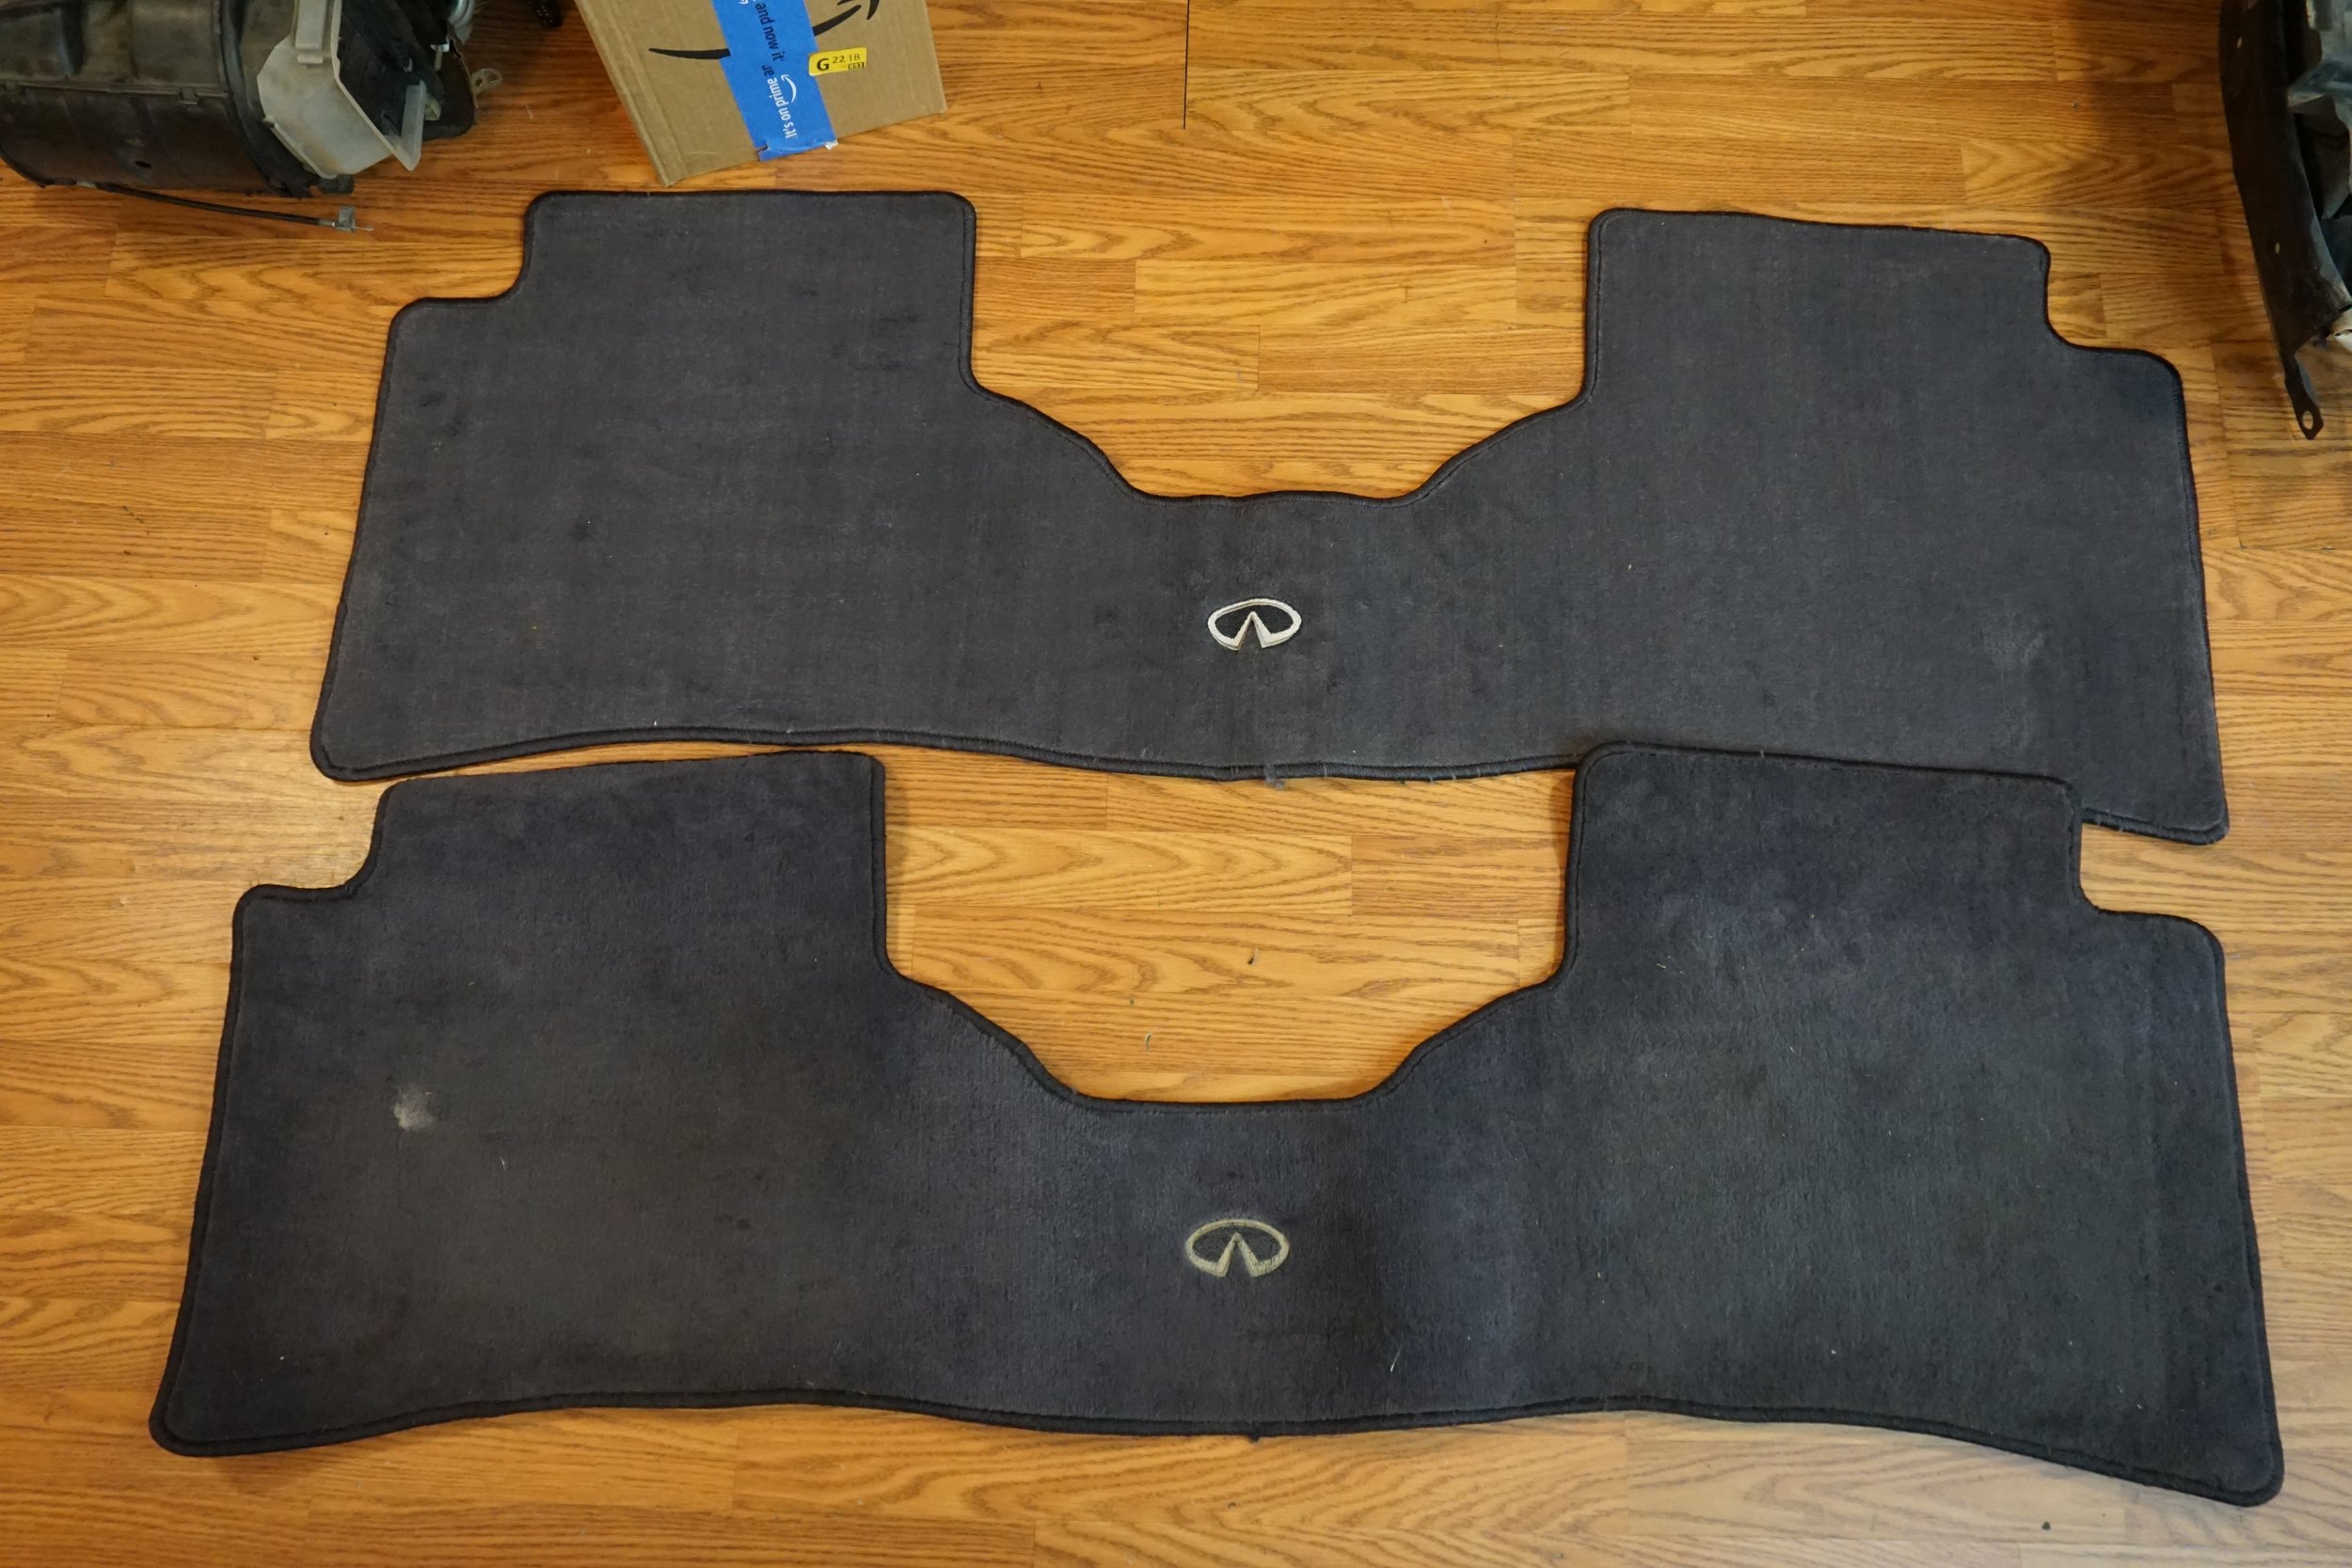
Old:
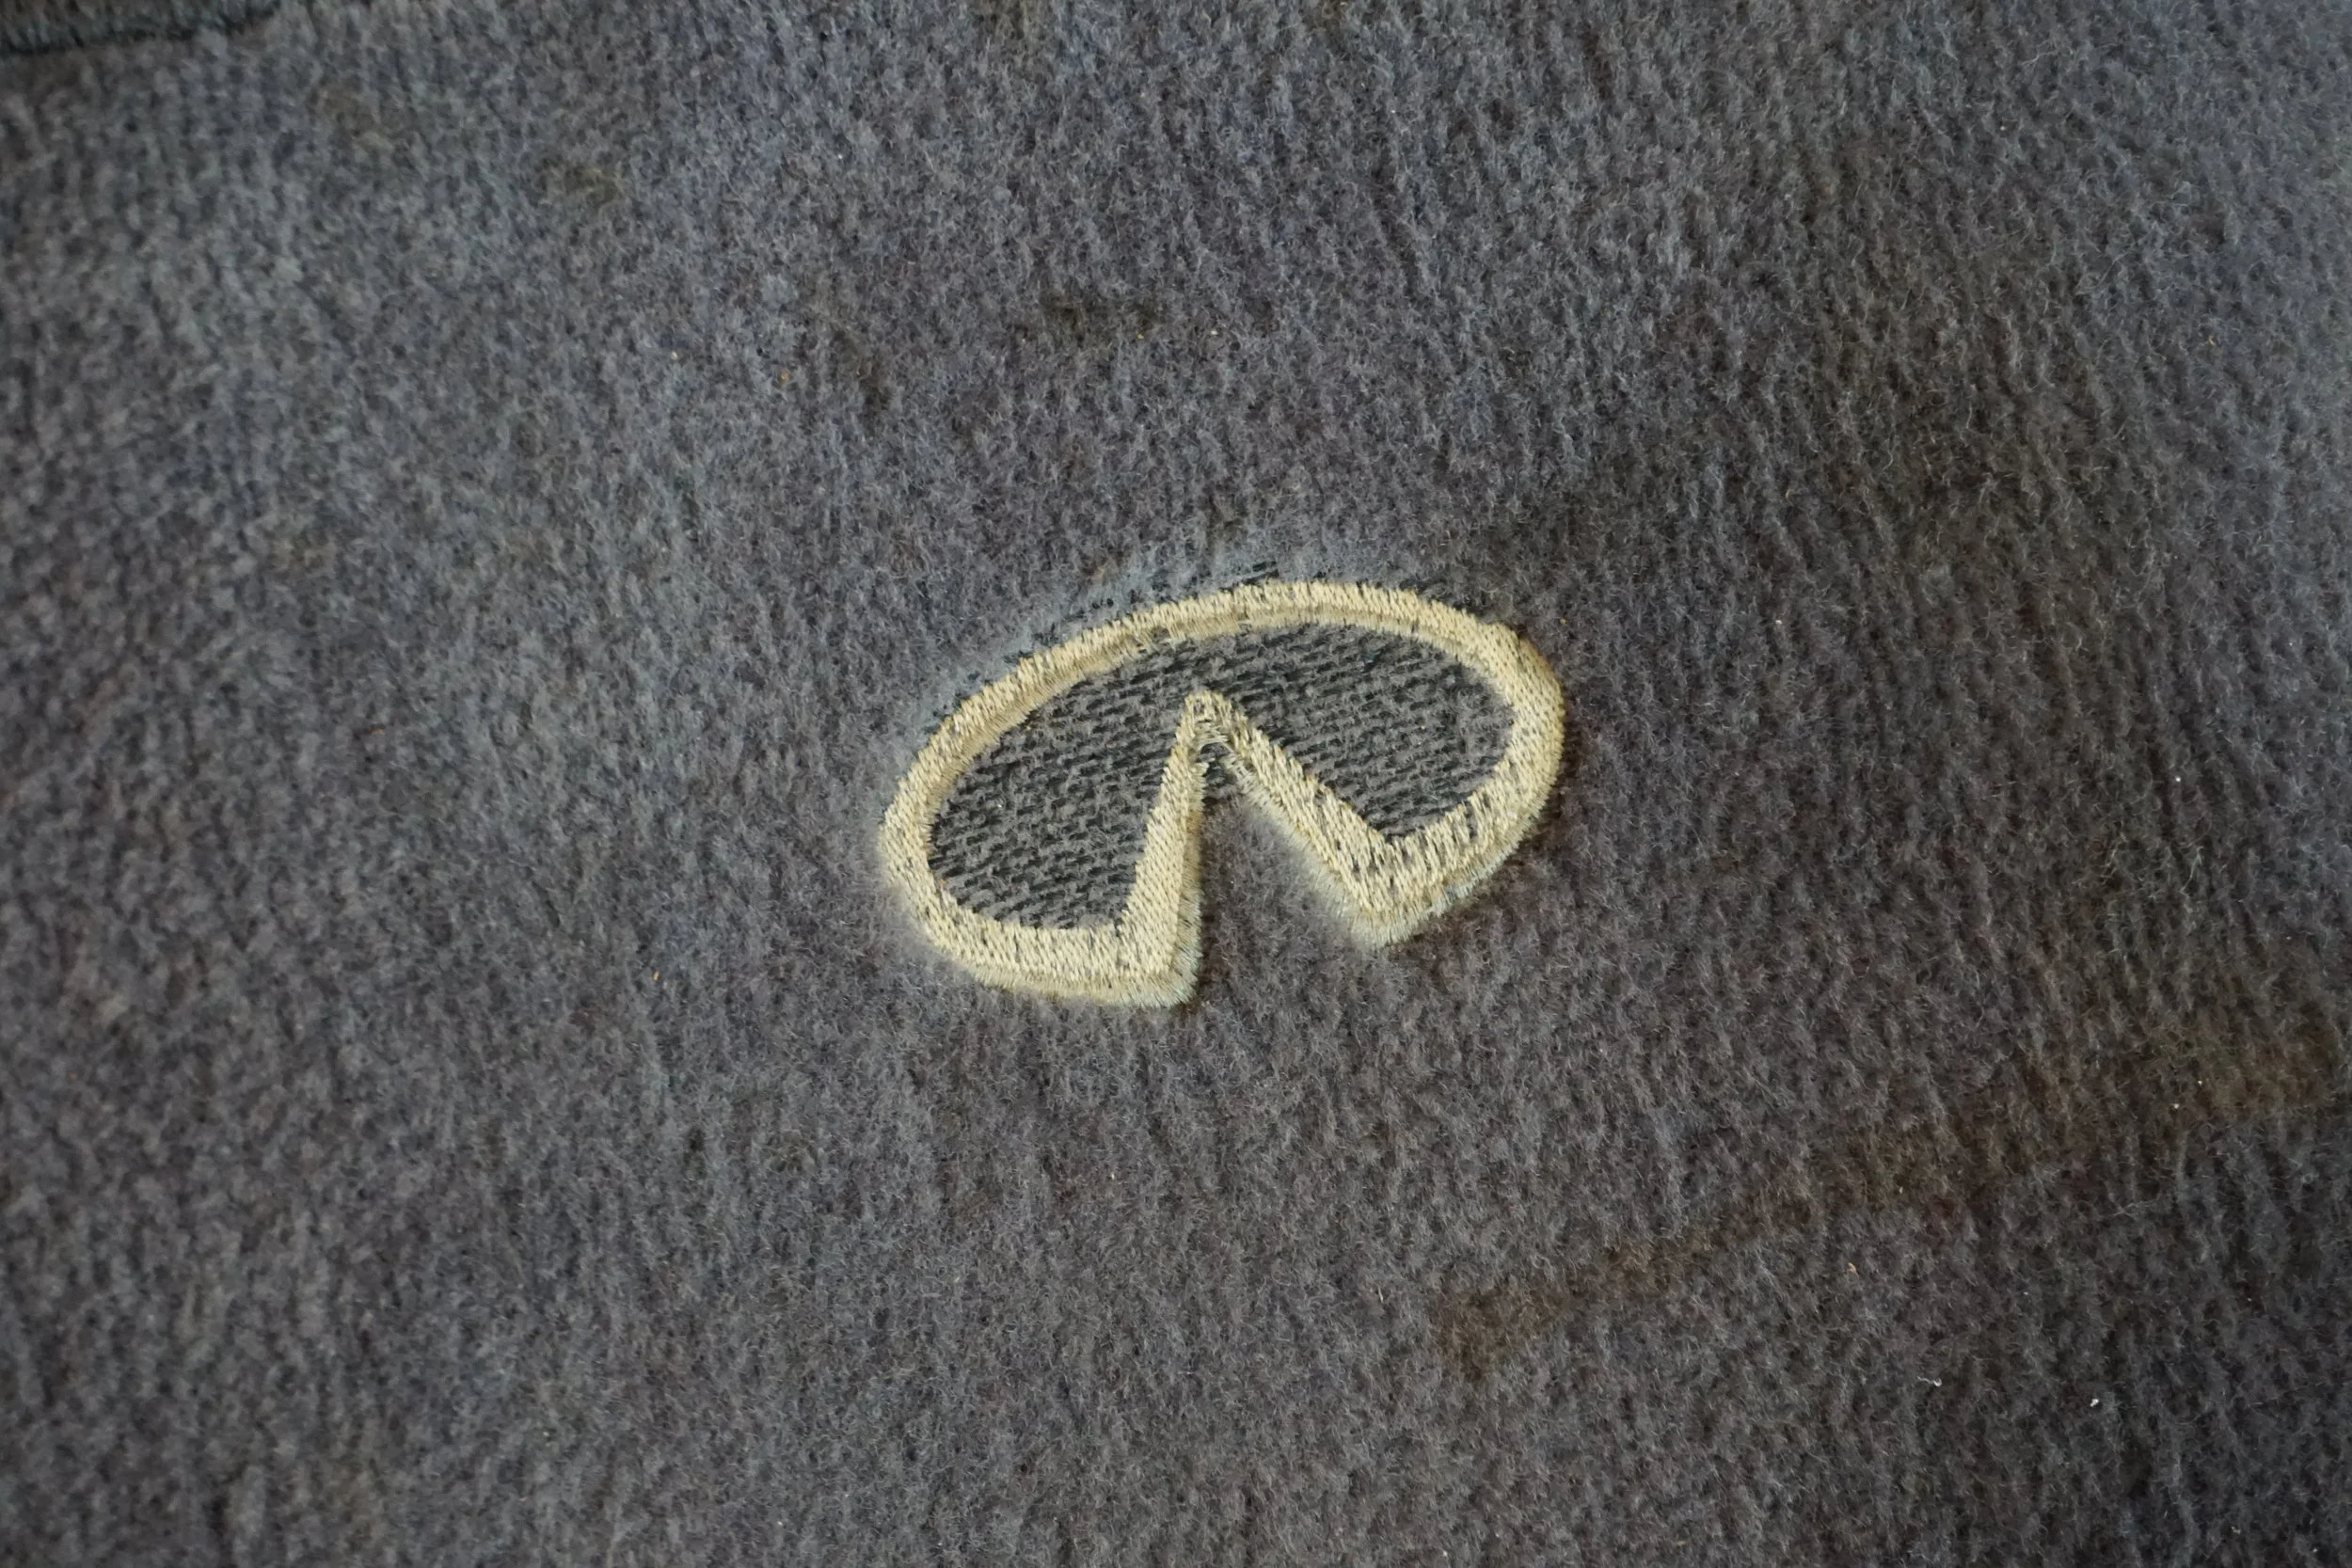
New:
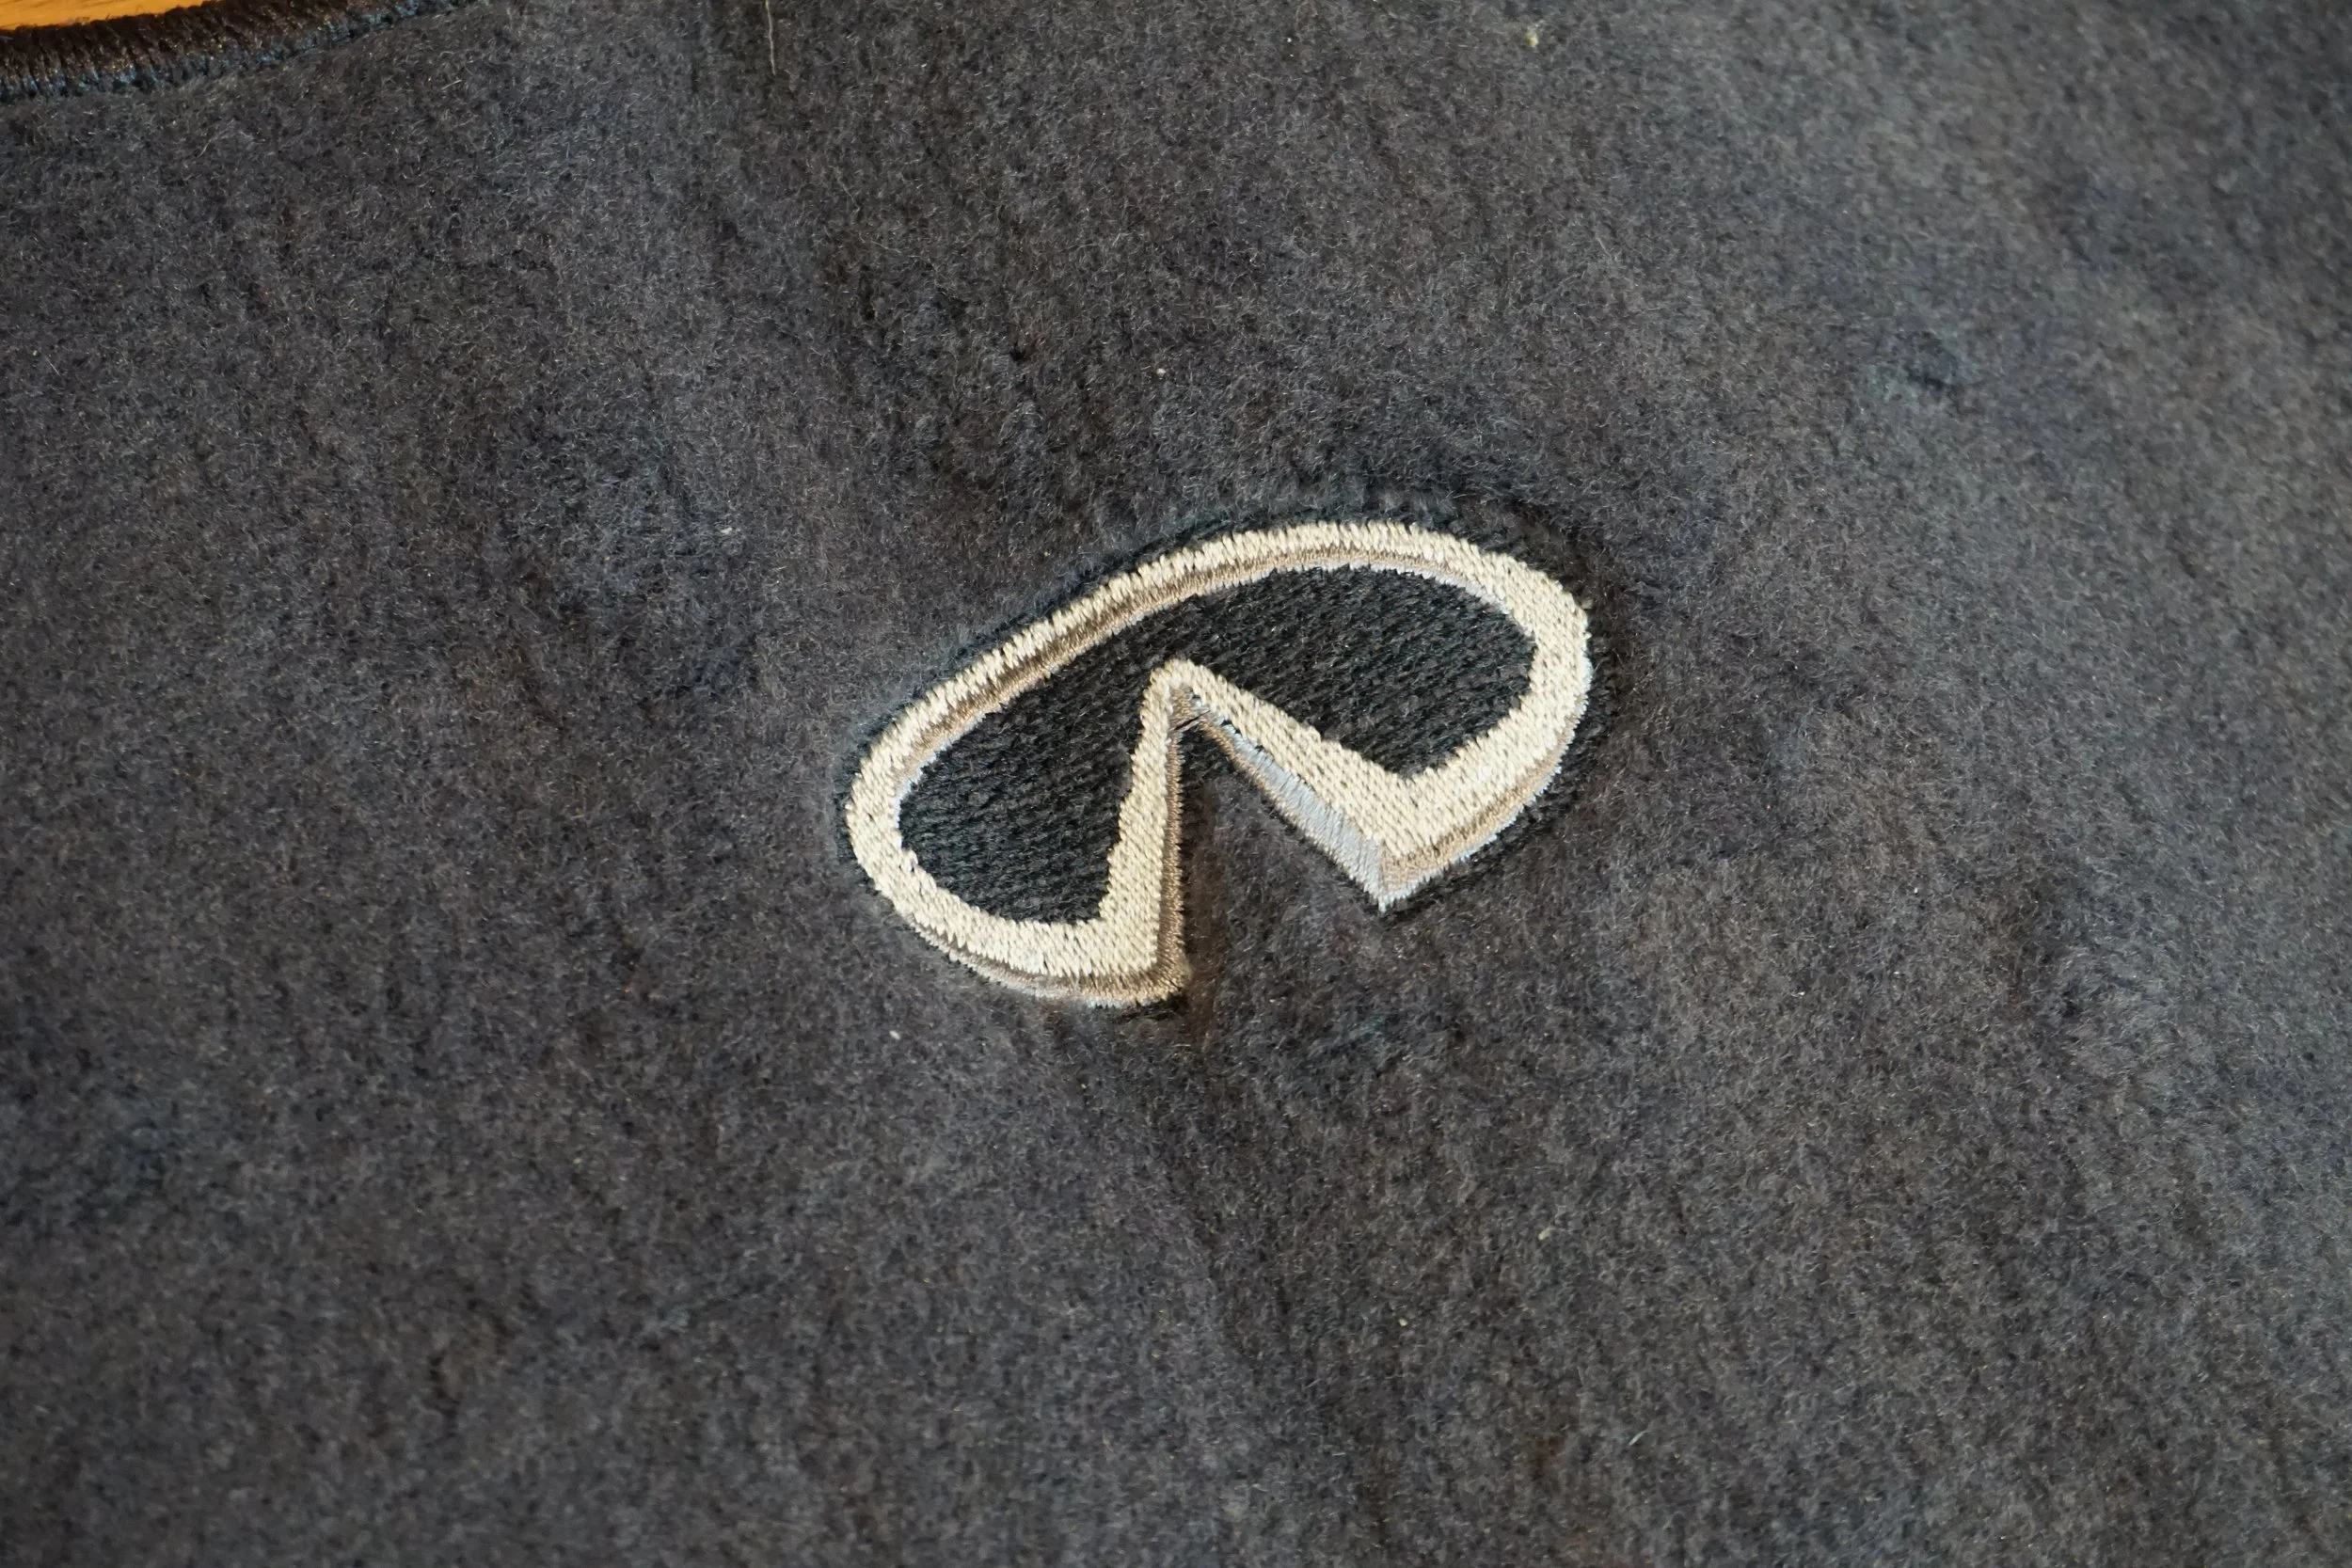
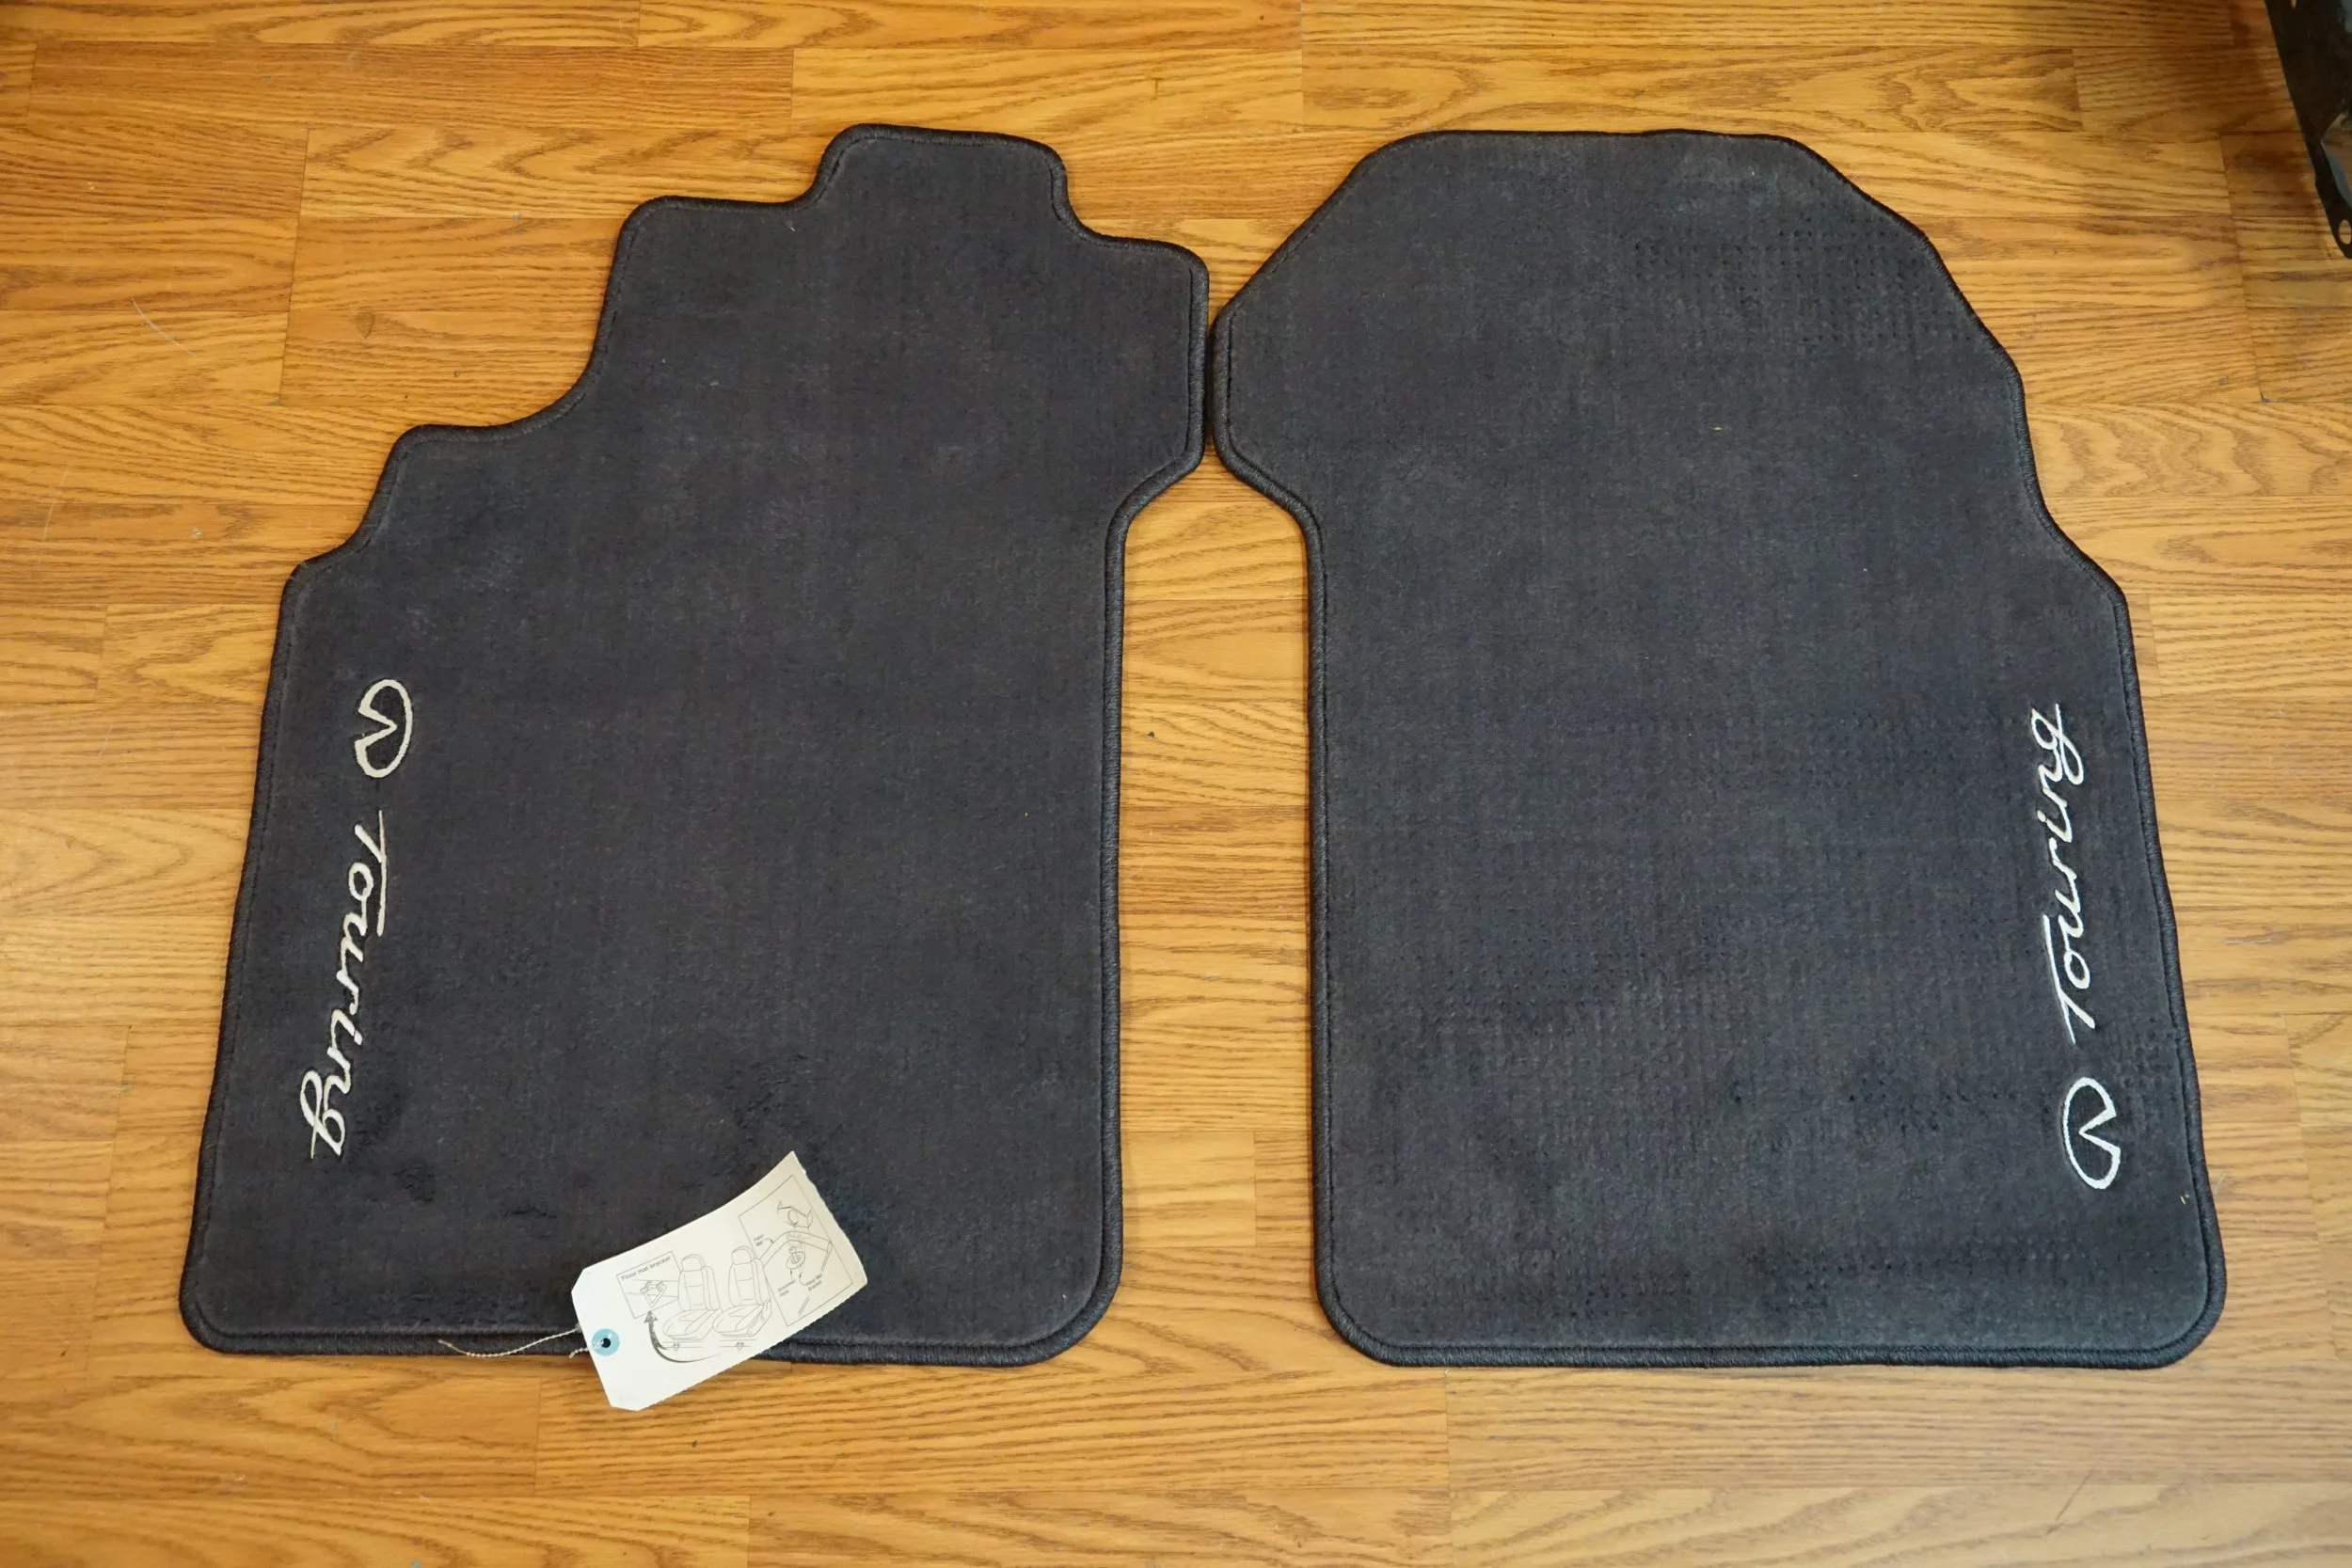
Look at the intricate stitching, making the logo look all 3D. It's glorious!
Finally!
Now if I could only get my hands on some new carpet....anyone have a part number?
I have no idea how mats made in the USA made for a USDM car ended up in Japan. Look at that classic Nissan logo, these mats must be 25+ years old!
These are amazing
My non-Touring mat, the "good" used mat, and then the new one.
Old:
New:
Look at the intricate stitching, making the logo look all 3D. It's glorious!
Finally!
Now if I could only get my hands on some new carpet....anyone have a part number?
Hey everyone, long time no updates!
I won the summer trackcross series, beating out Al in his powerful GTI, which I was very happy about. The weird braking issues have pretty much all been resolved, but the annoying shift stuttering still happens. Looks like I only uploaded one video to YouTube, enjoy!
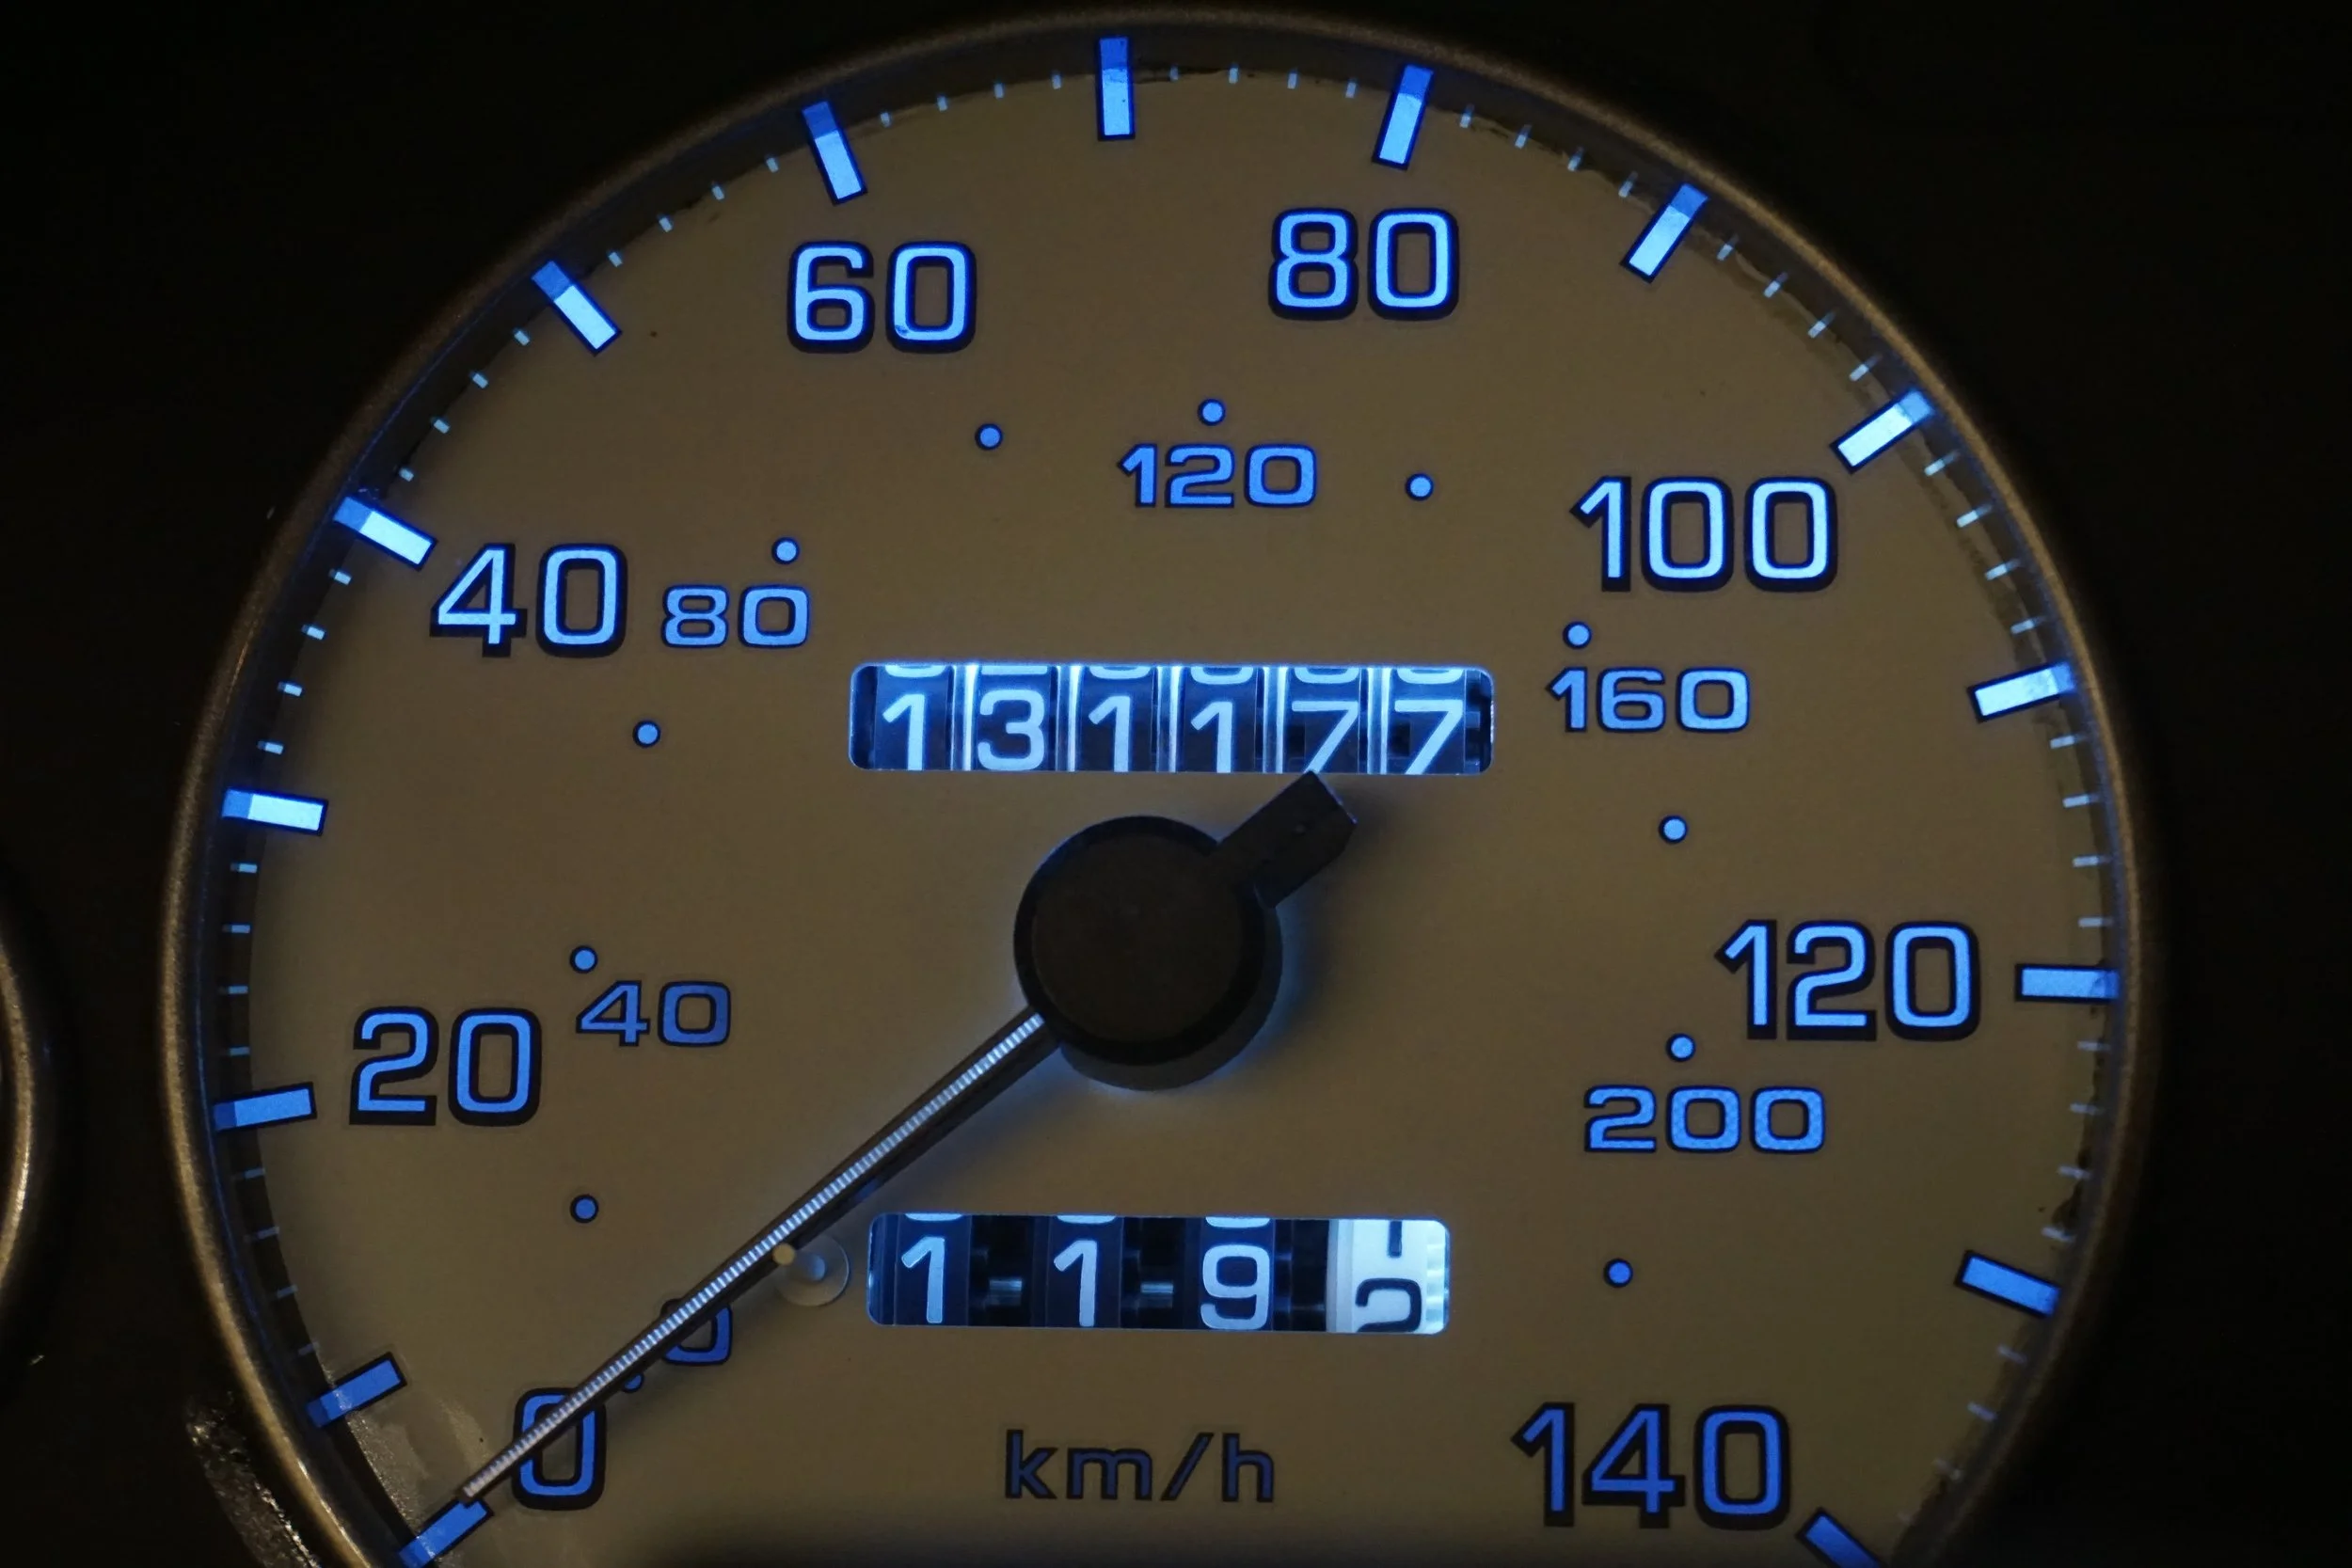
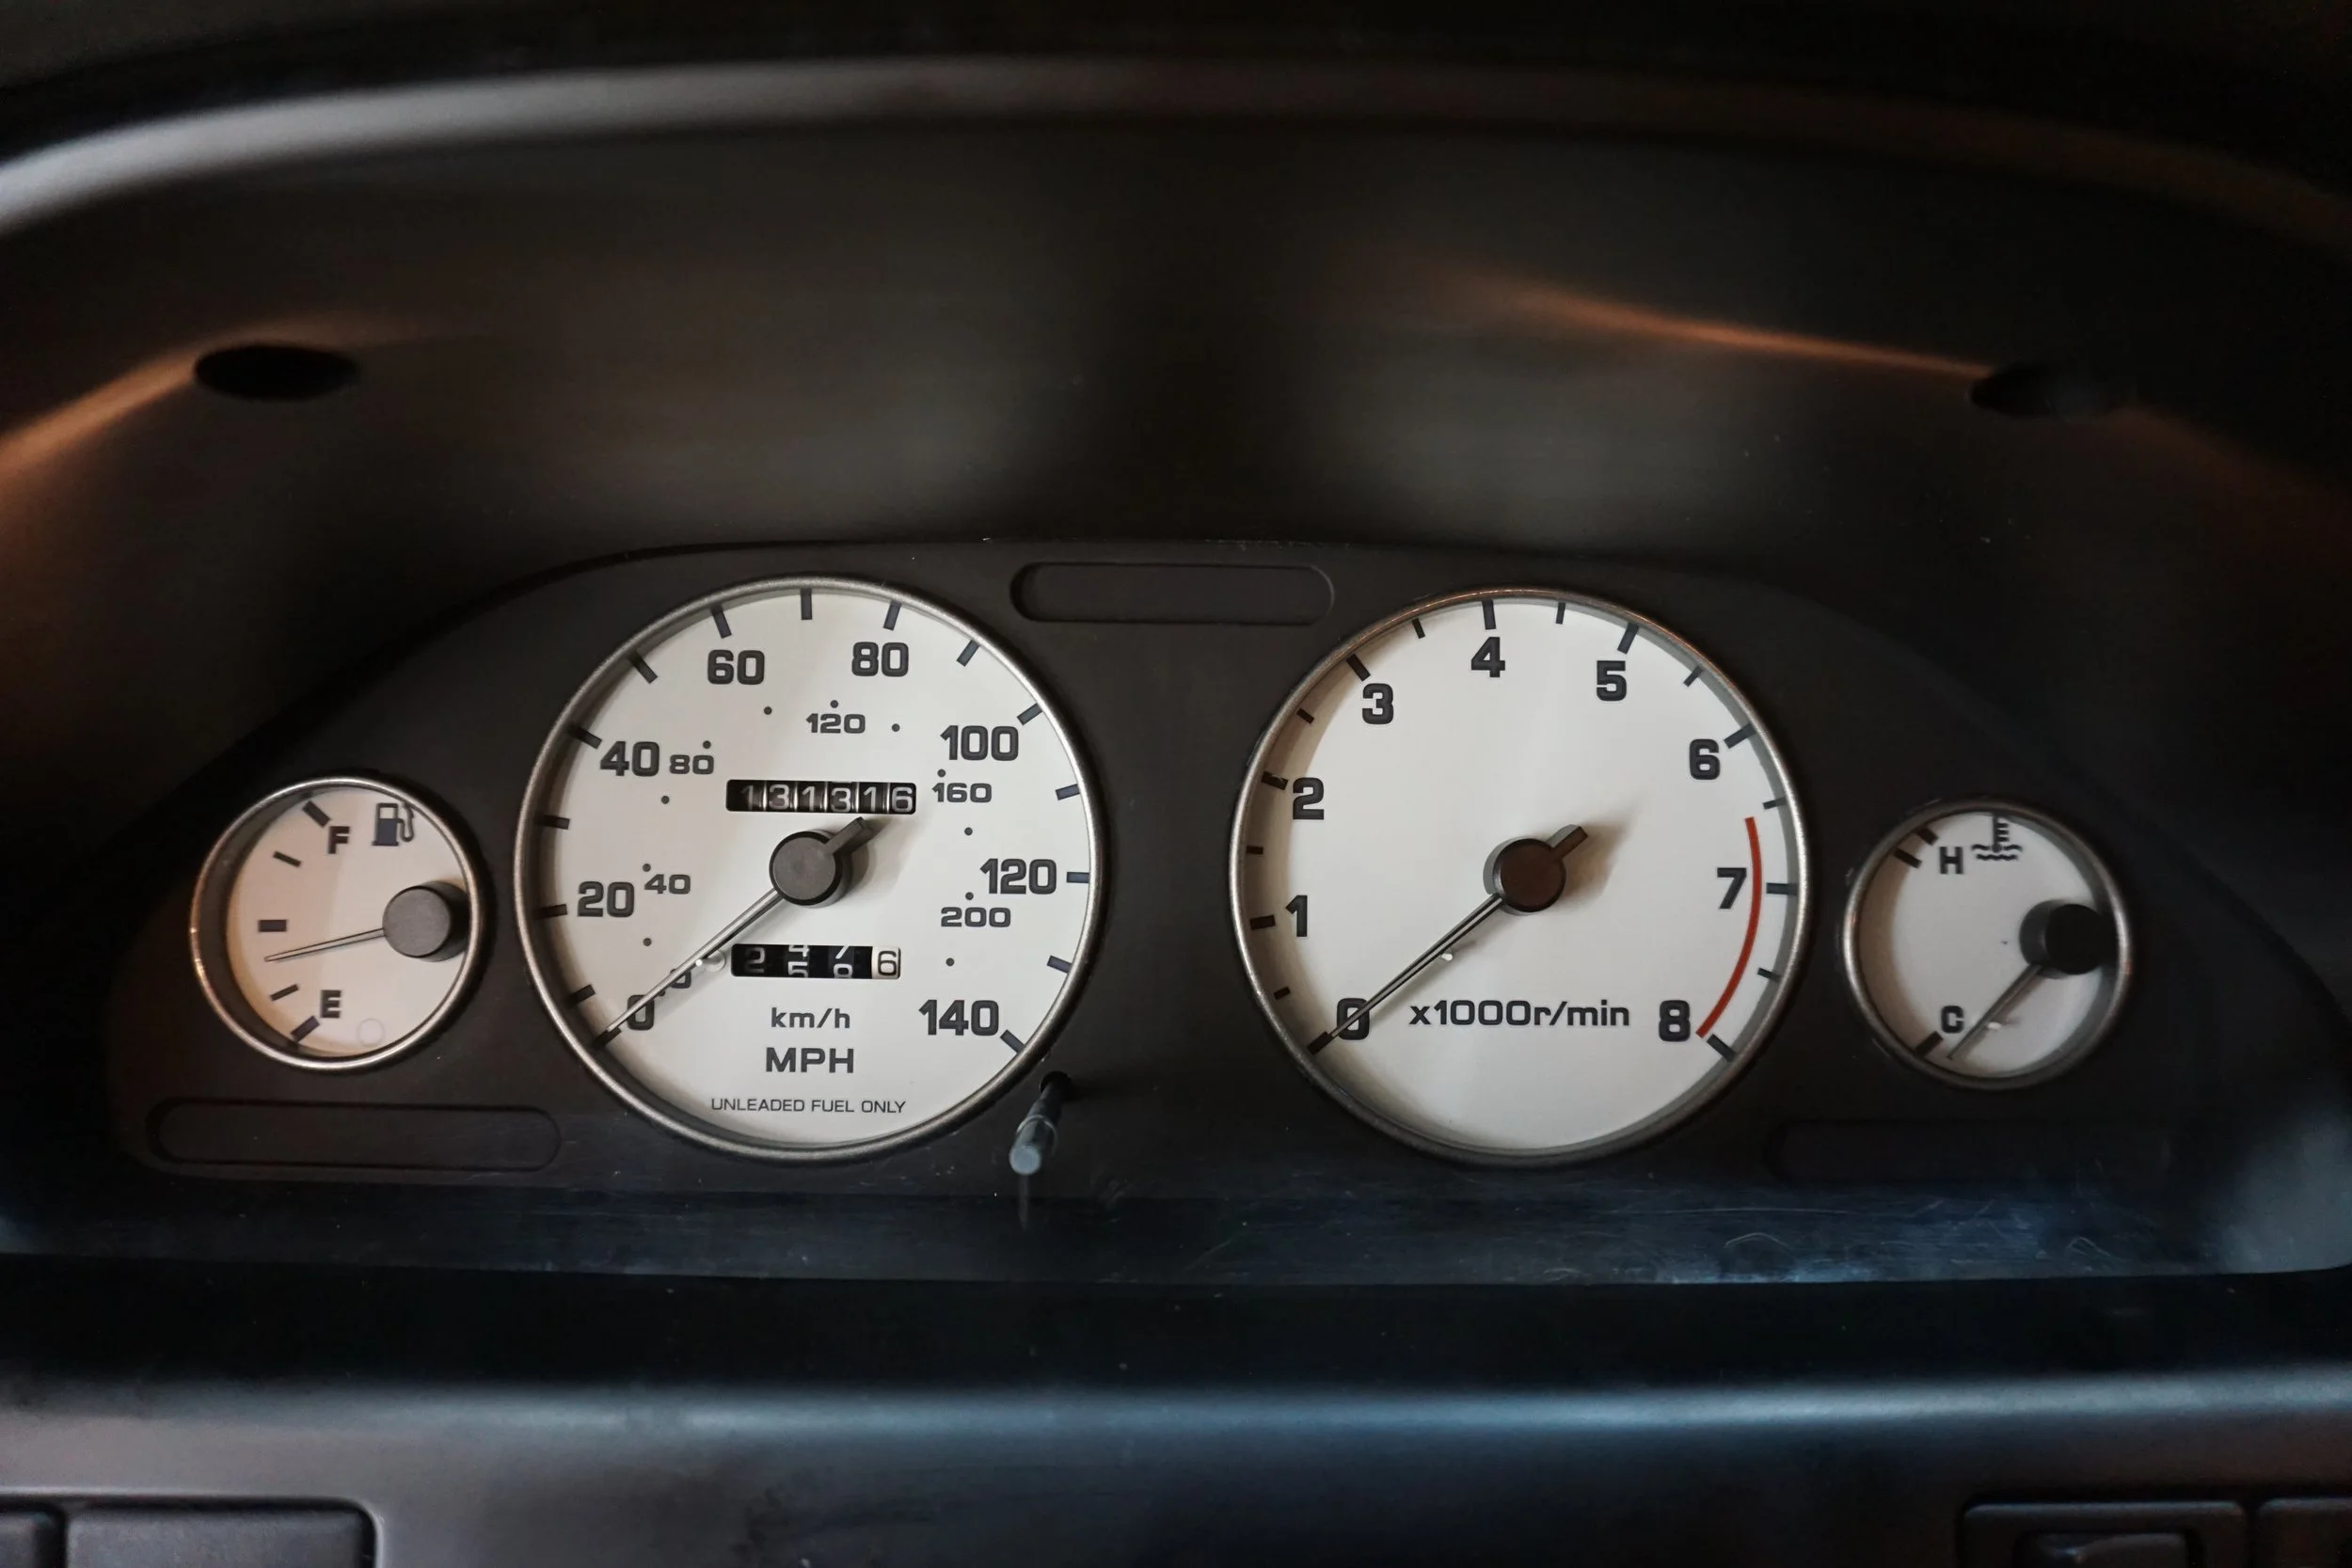
First up, some gauge cluster repairs. My tach started doing dumb things during the summer and eventually got stuck at over 8000 rpm.

I first got a replacement cluster on Ebay, but it too didn't work. I became worried there was something wrong with the wiring or ECU, so I tried my hand at repairing the tach motor assembly based on a thread here on the org. I installed all new caps in both tachs and reflowed the solder as best I could. One tach started working 50% of the time, but the other was still completely dead. At least it seems like the car is still providing a signal! So I got another cluster from Ebay, and this one worked great. While I was doing all of this, I replaced the LEDs, as one had died.
I also swapped around cluster parts between the three clusters to make one "good" cluster that had all parts in very good condition.
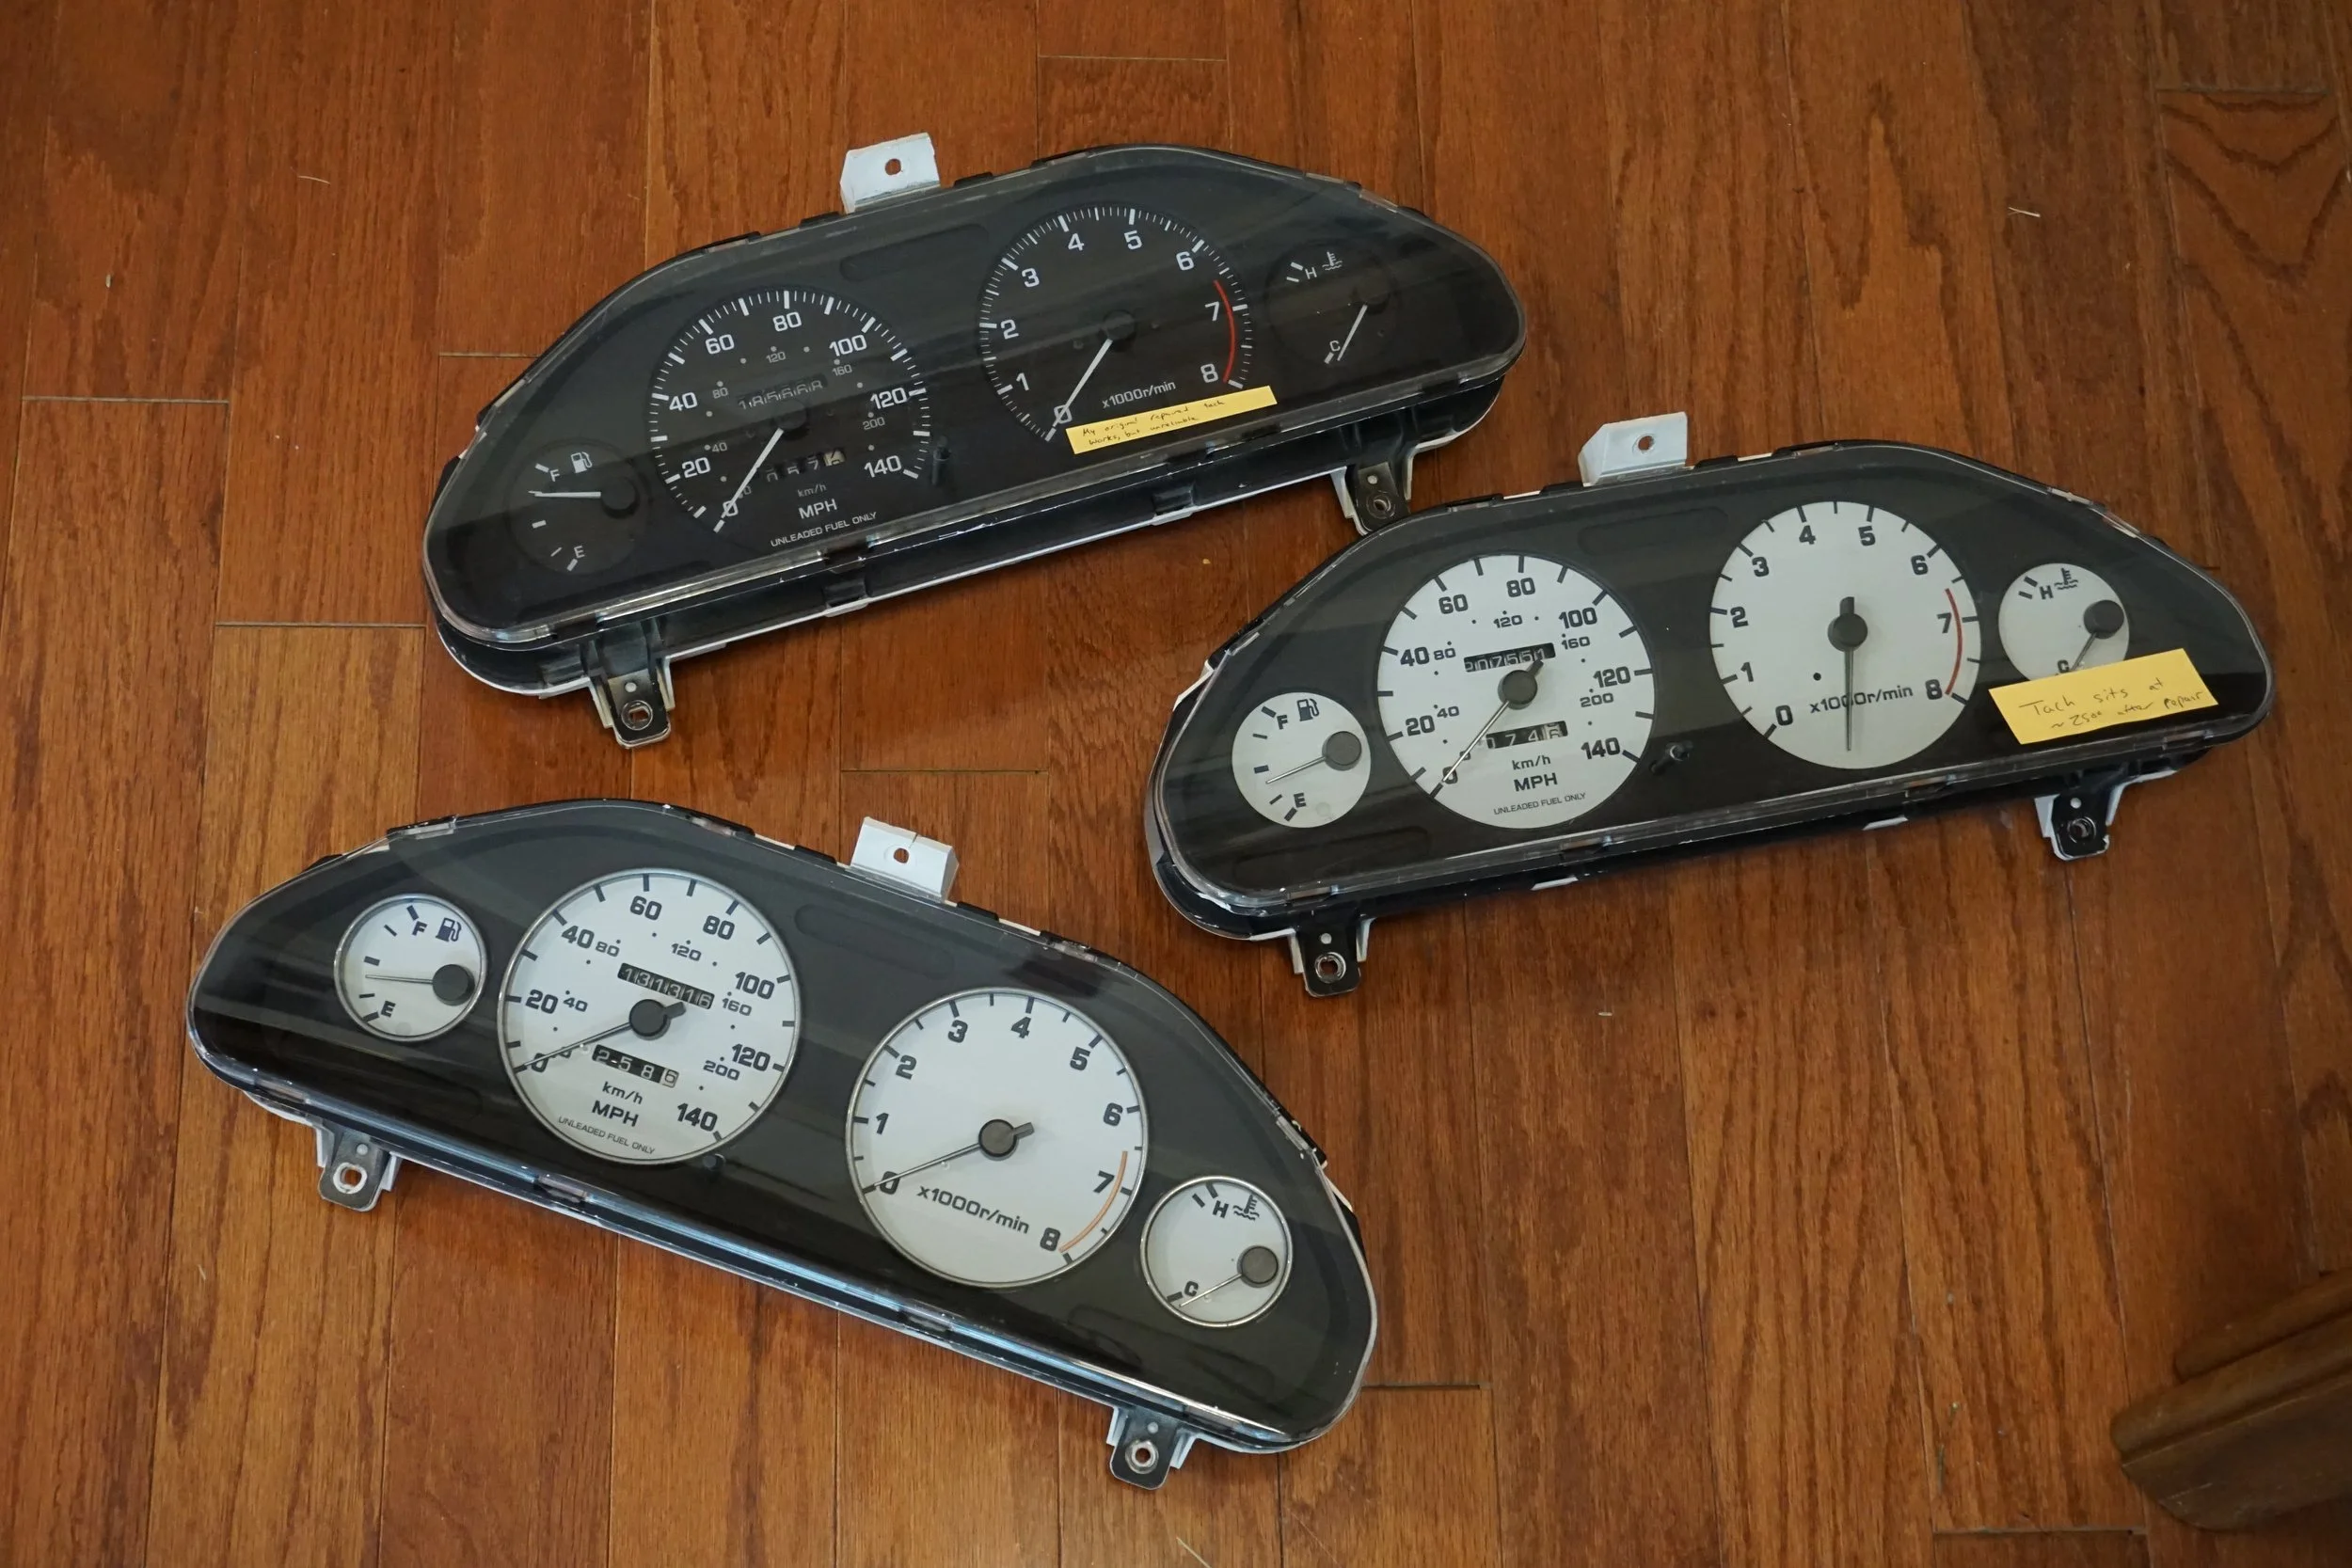
I sure do wish replacement tach motors weren't $400+!!
Once again, I didn't have time to paint any parts of the car this year. But I did at least do a little work on the replacement bumpers. First thing was to open up the opening for the muffler tips on the new bumper. My 3" exhaust sits a little right of center, as you can see in my current bumper:
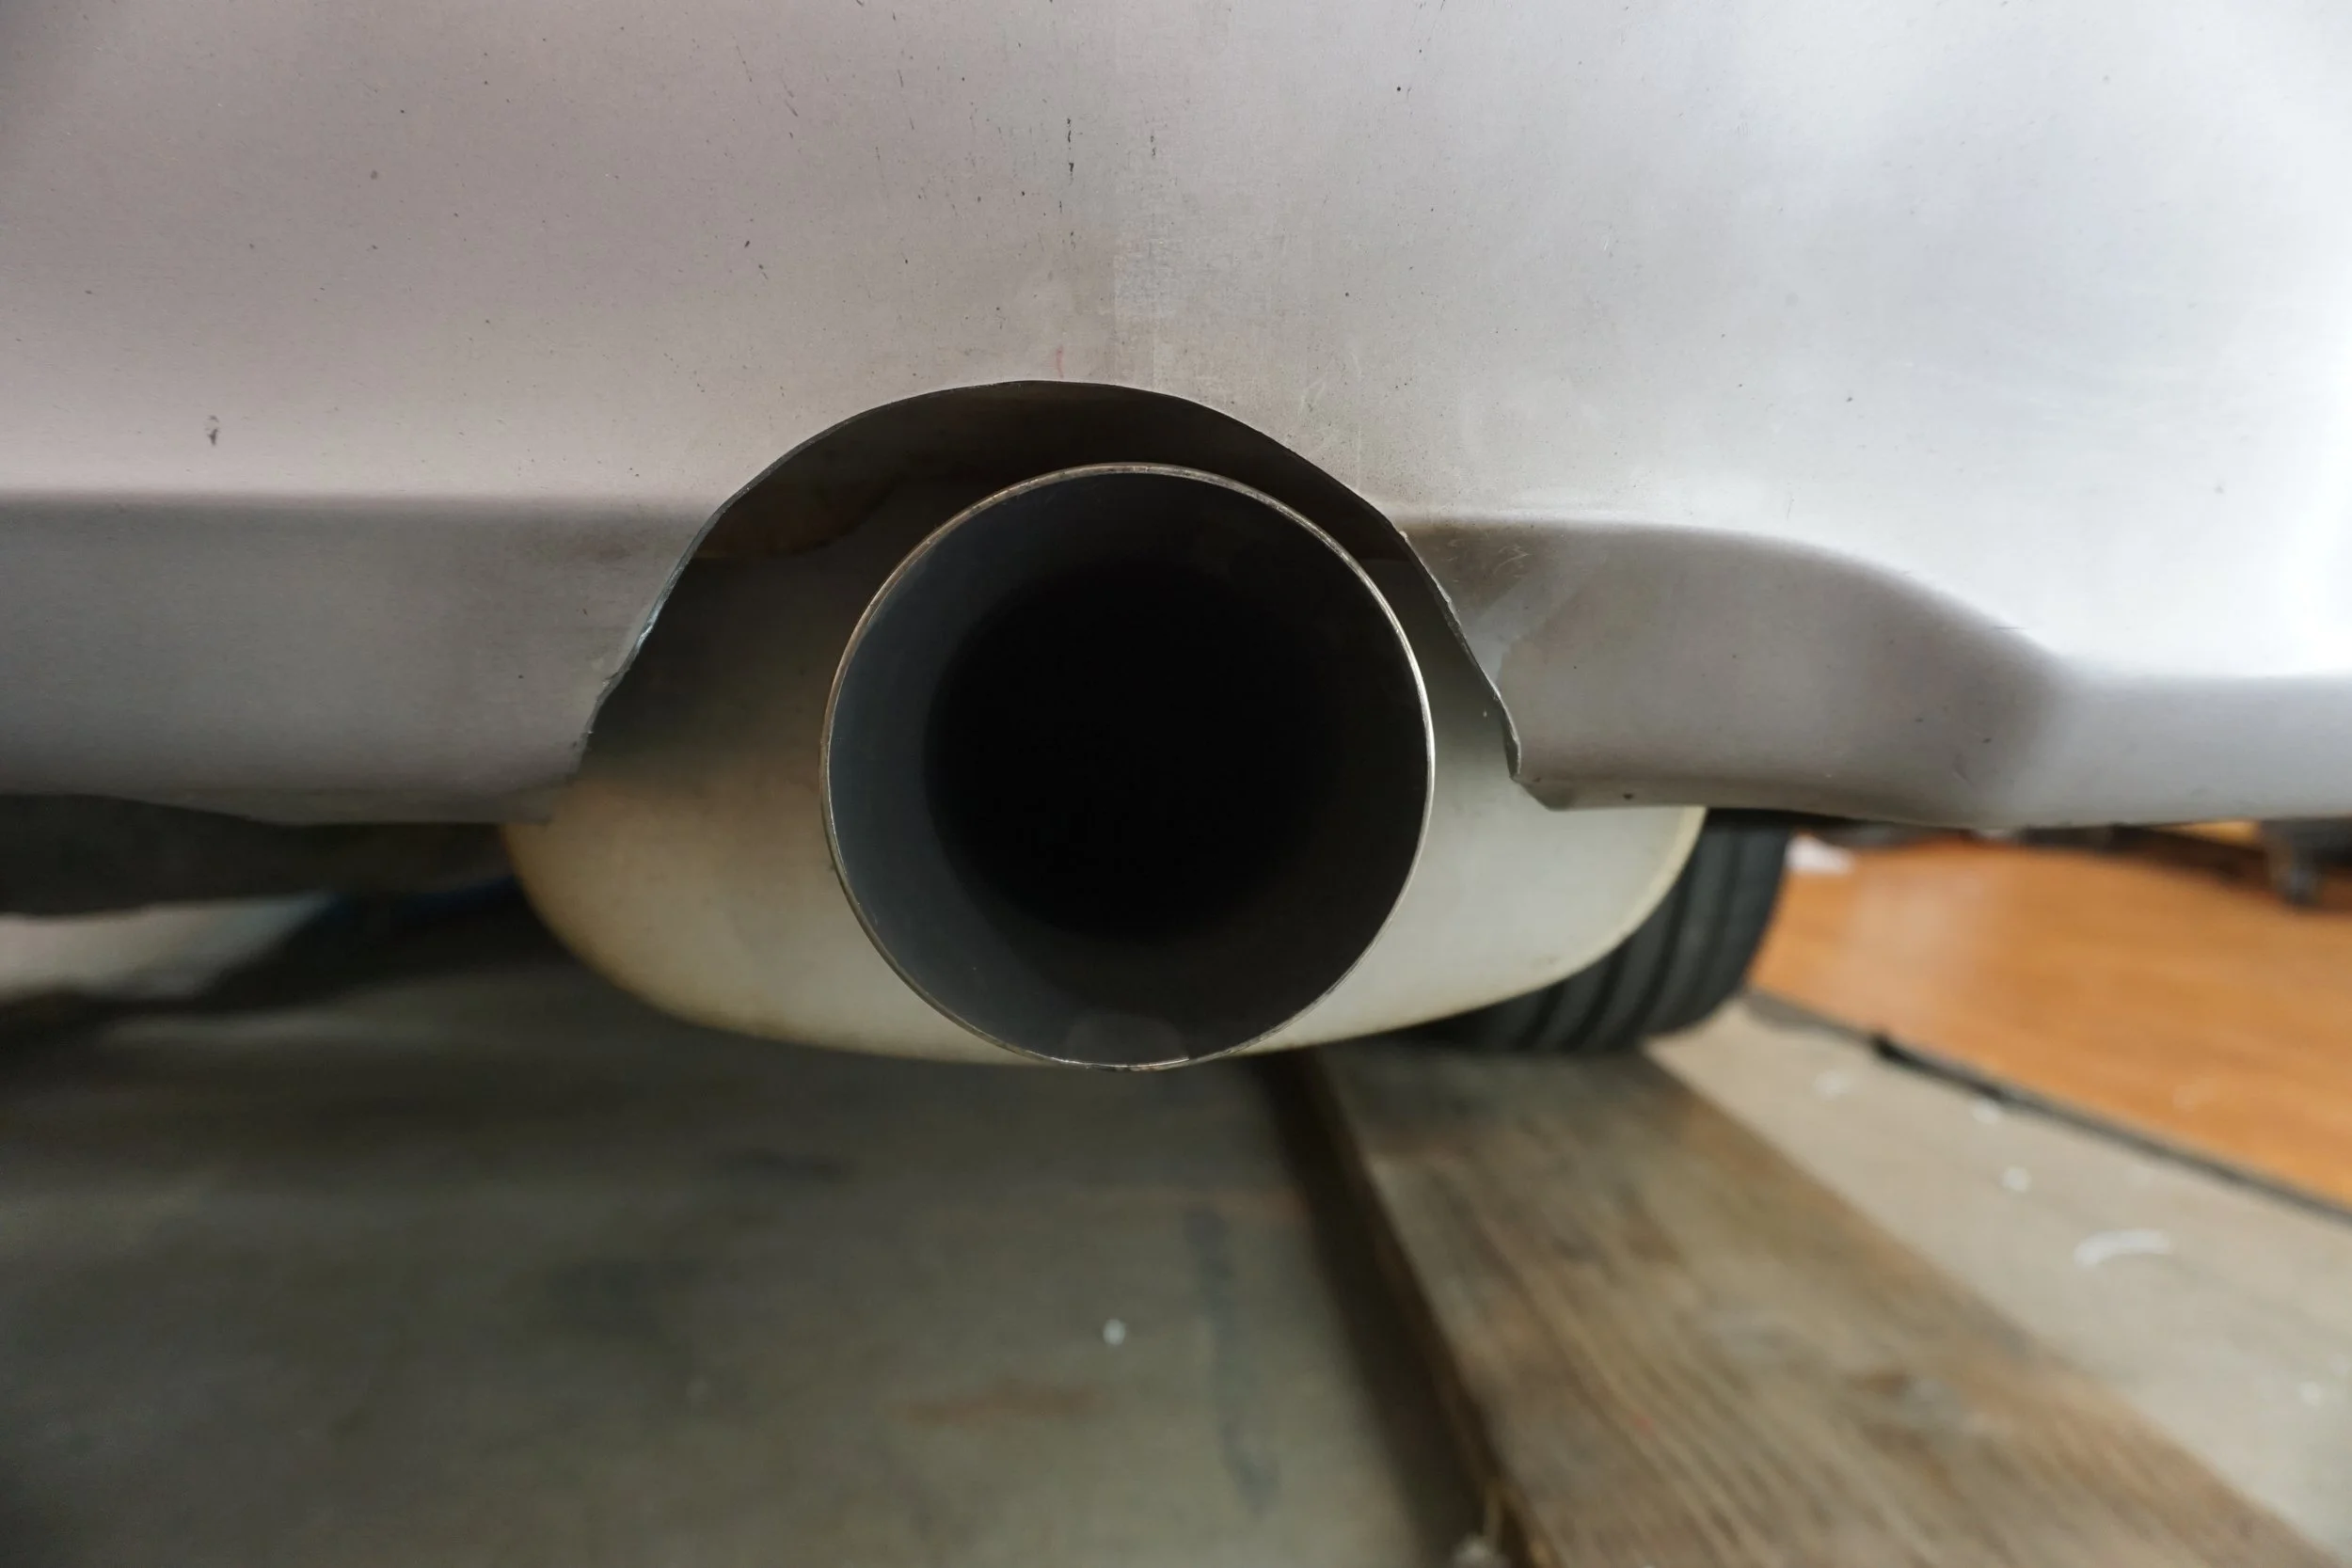
I wanted to tighten things up a bit and do my best to make it not so obvious, but I was only partially successful:

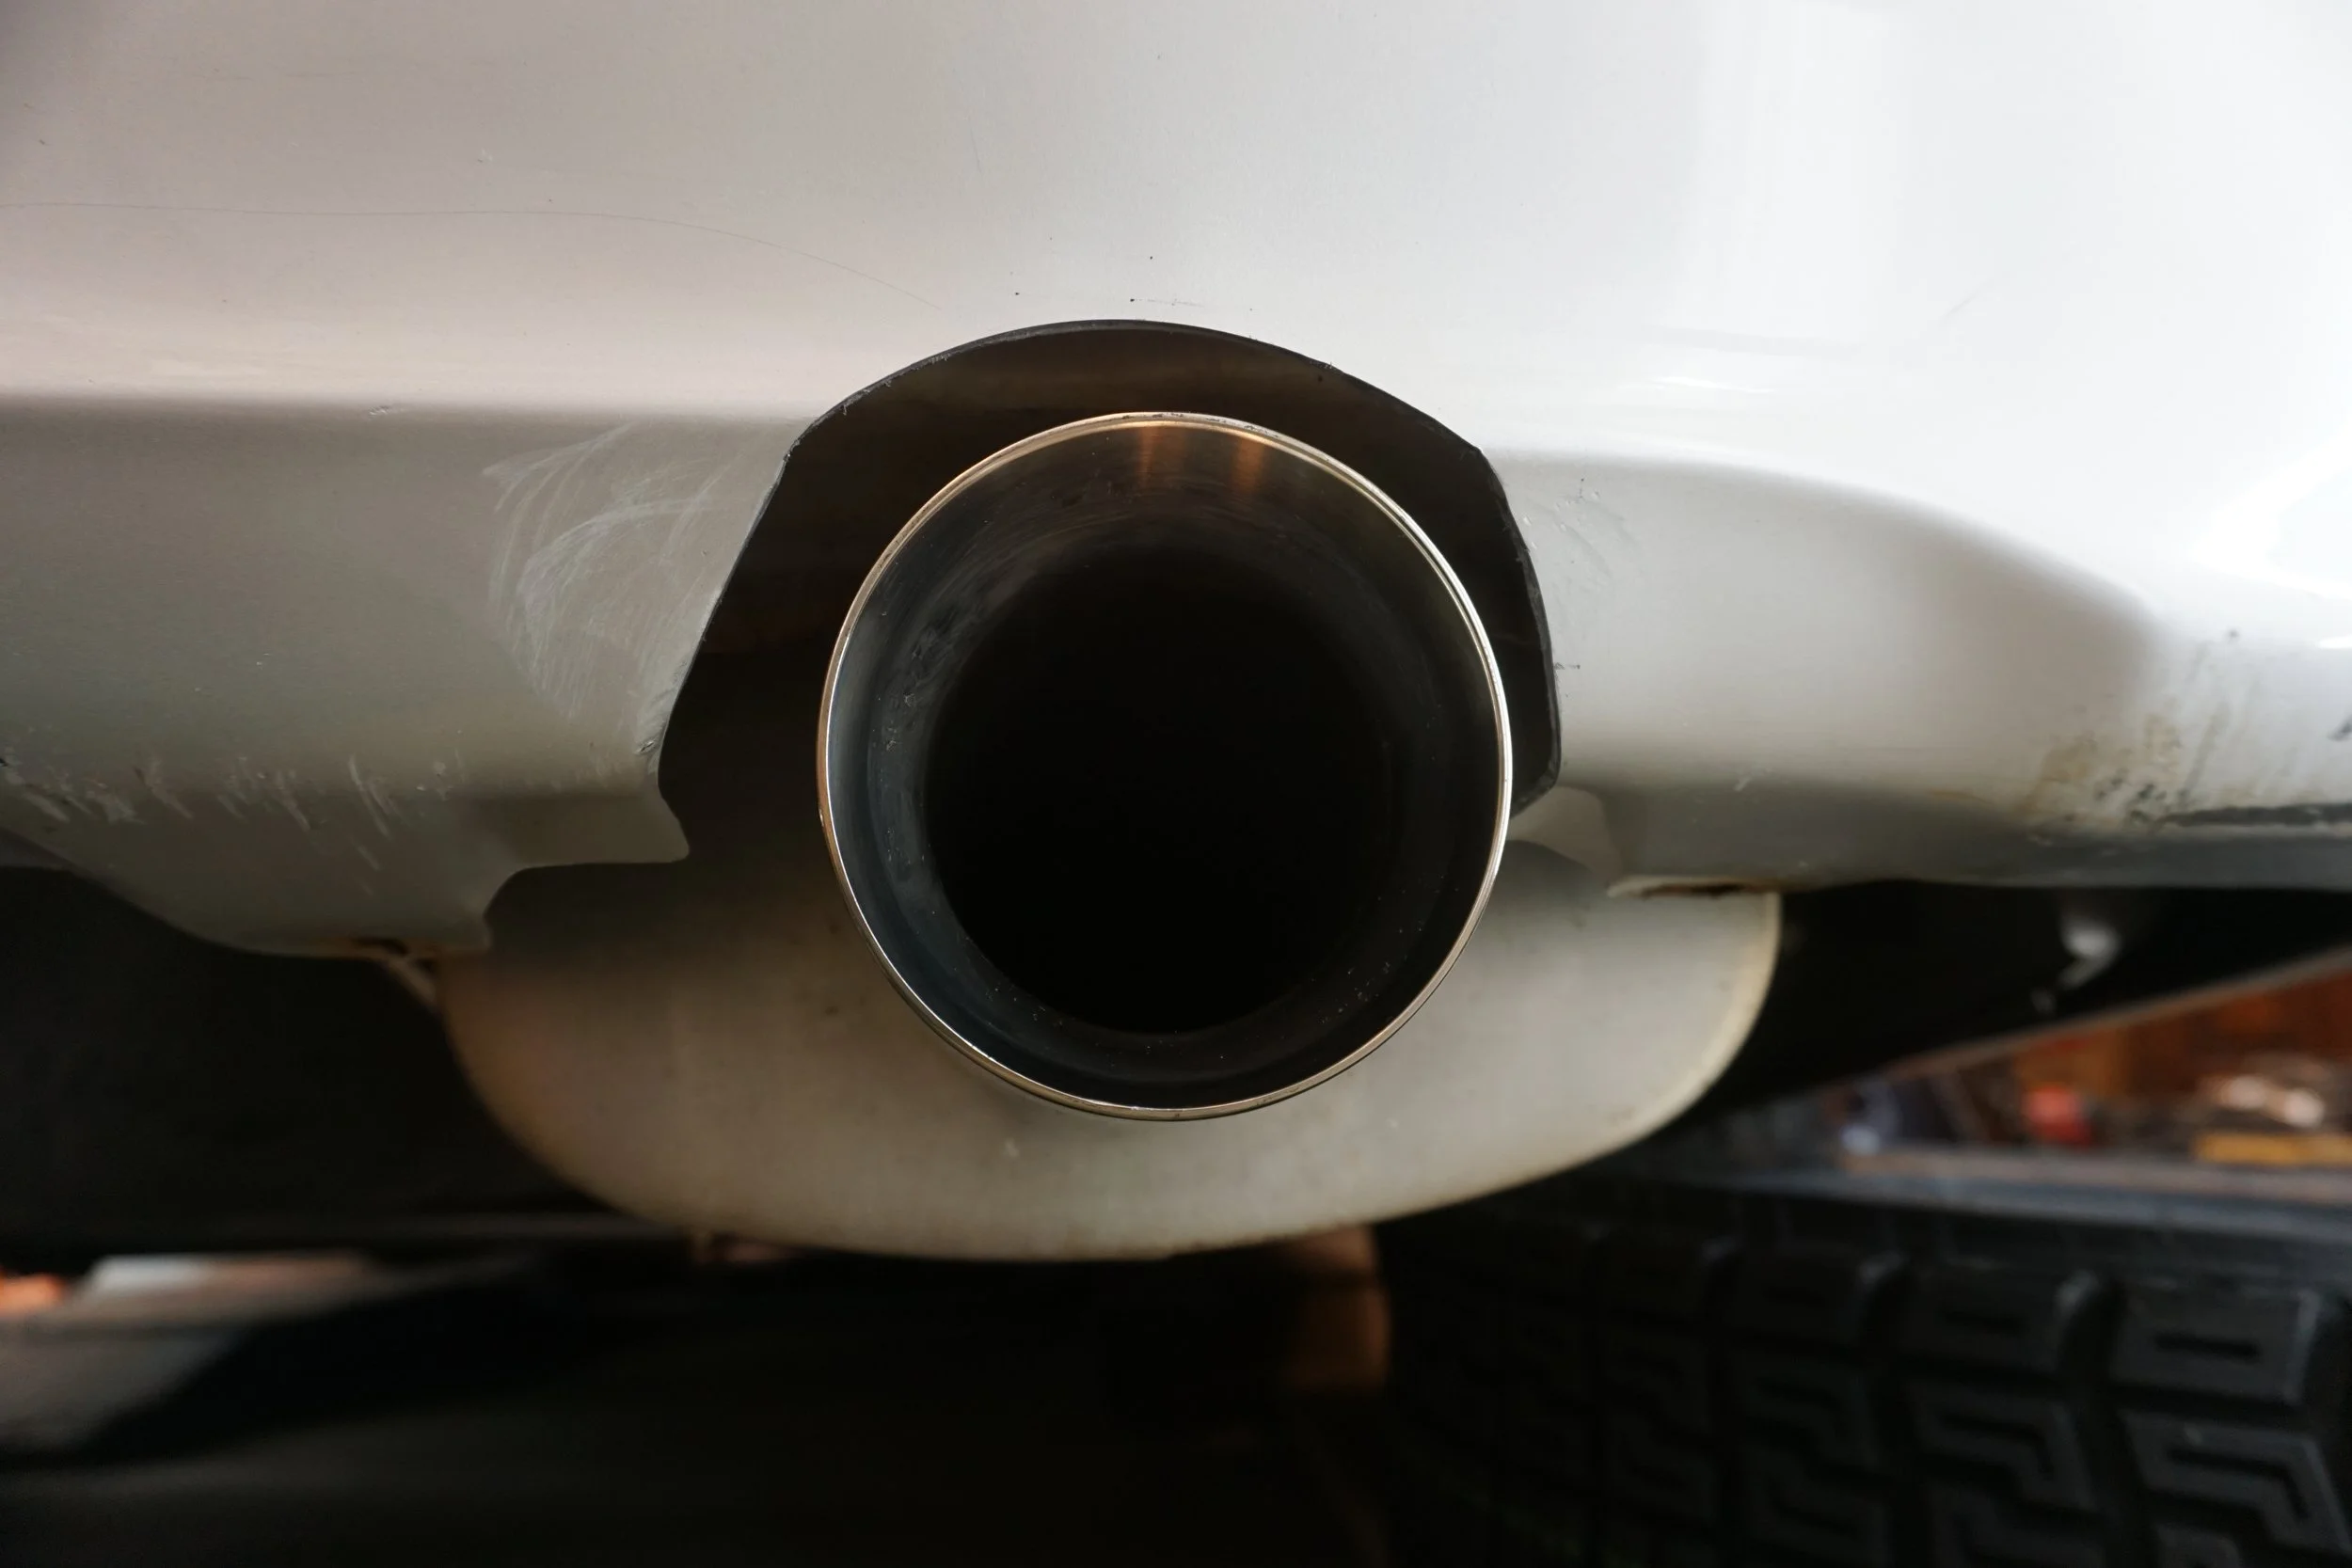
It's better, but not perfect.
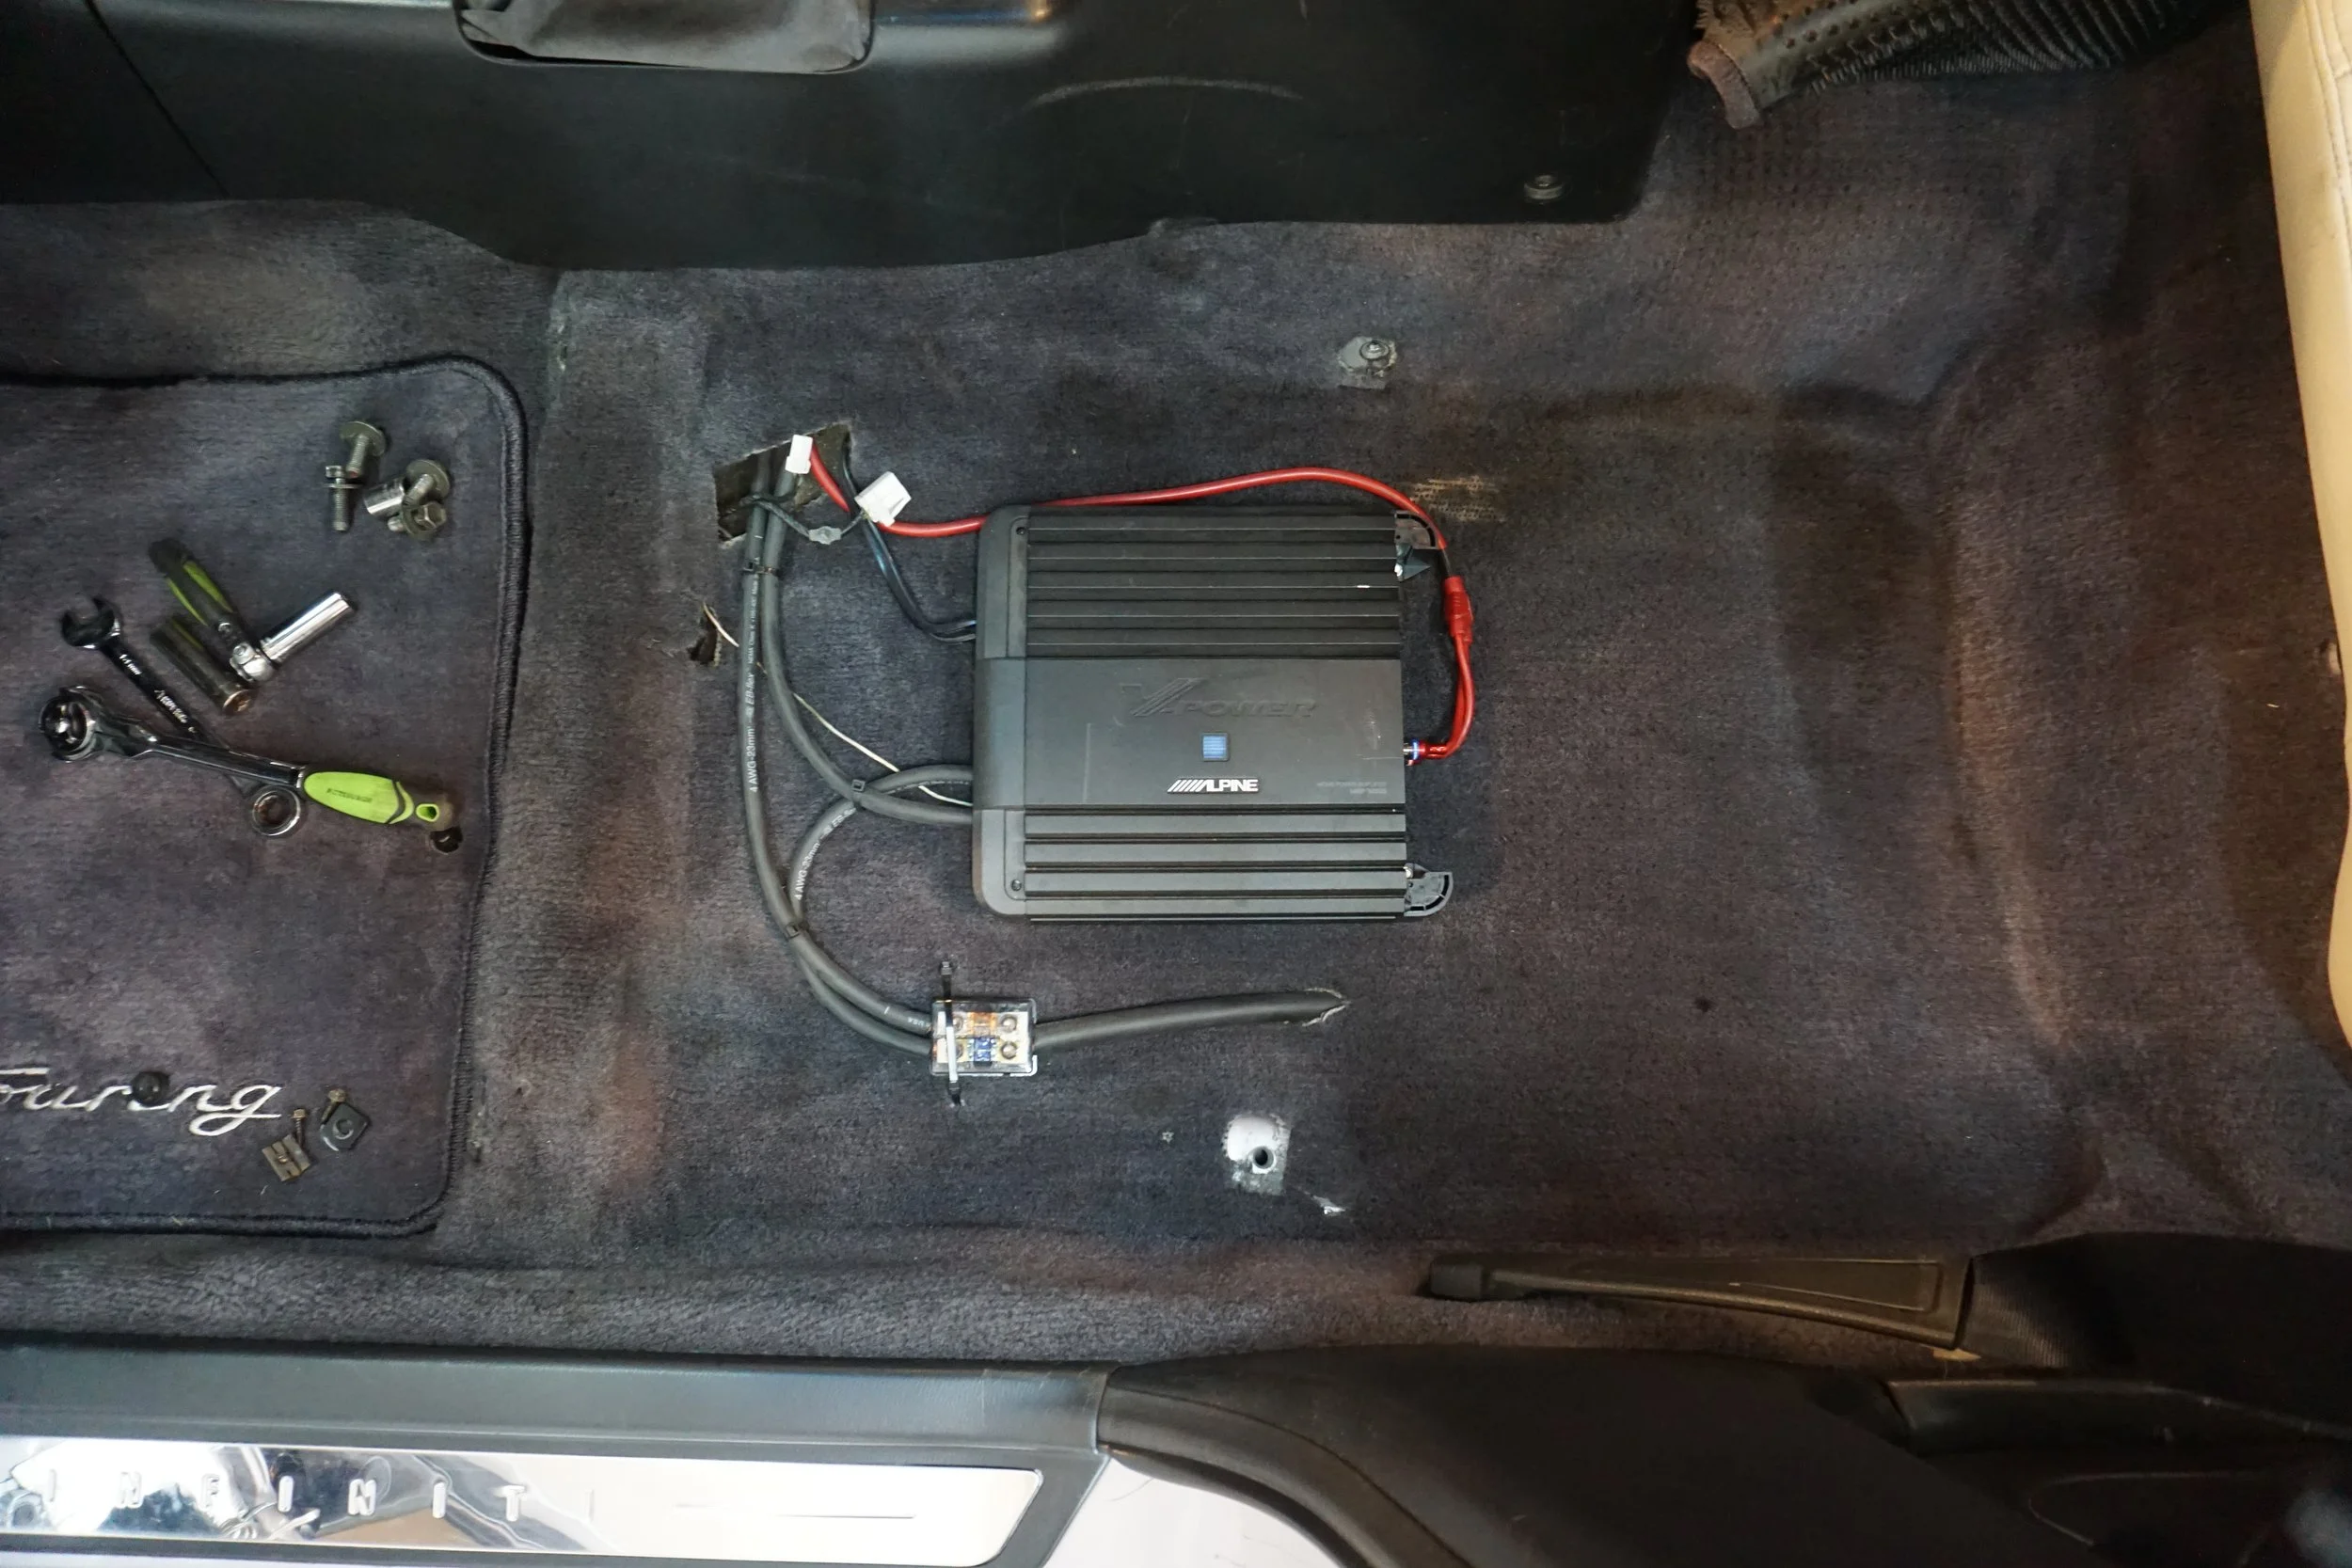
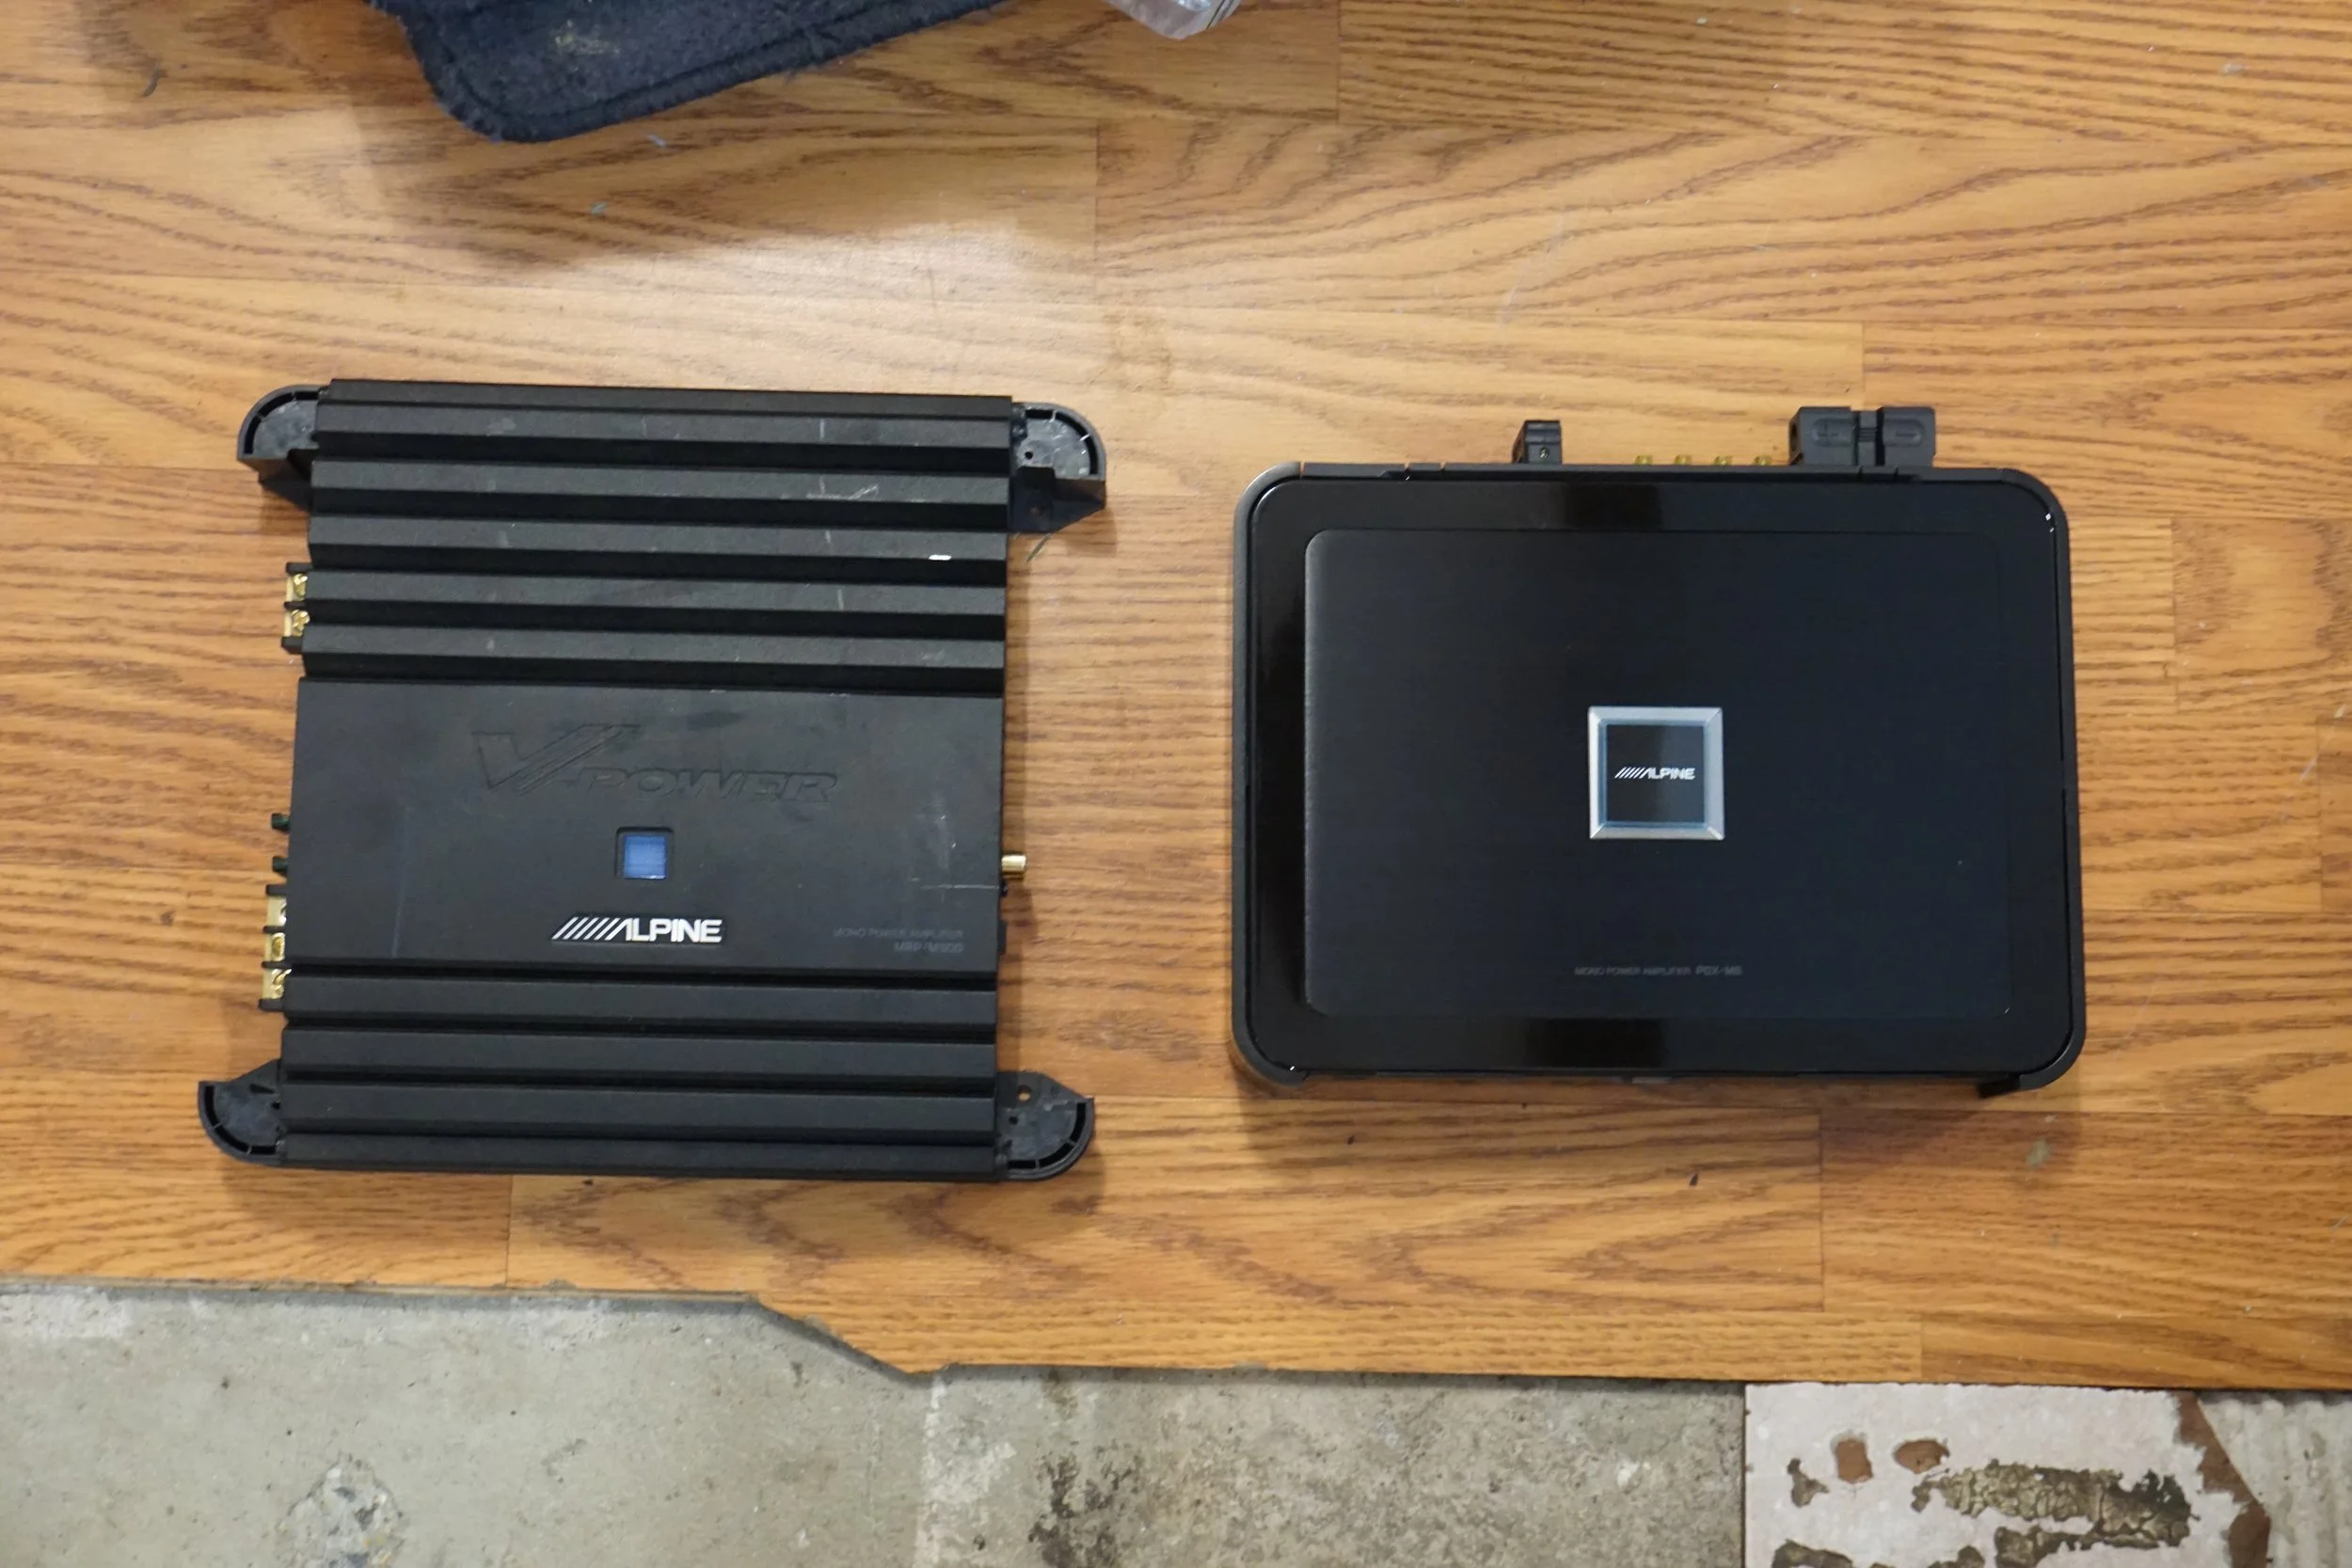
Next up was a stereo upgrade. I love stereo upgrades! I've come to really have a "thing" for a retired line of Alpine amps, the PDX F and M series. I started by replacing my more entry-level Alpine MRP-M500 sub amp (500w RMS) with the Alpine PDX-M6 which is rated at 600w RMS but the dyno sheet that came with the amp shows mine is actually putting out 640w.
Old amp:
Old vs new
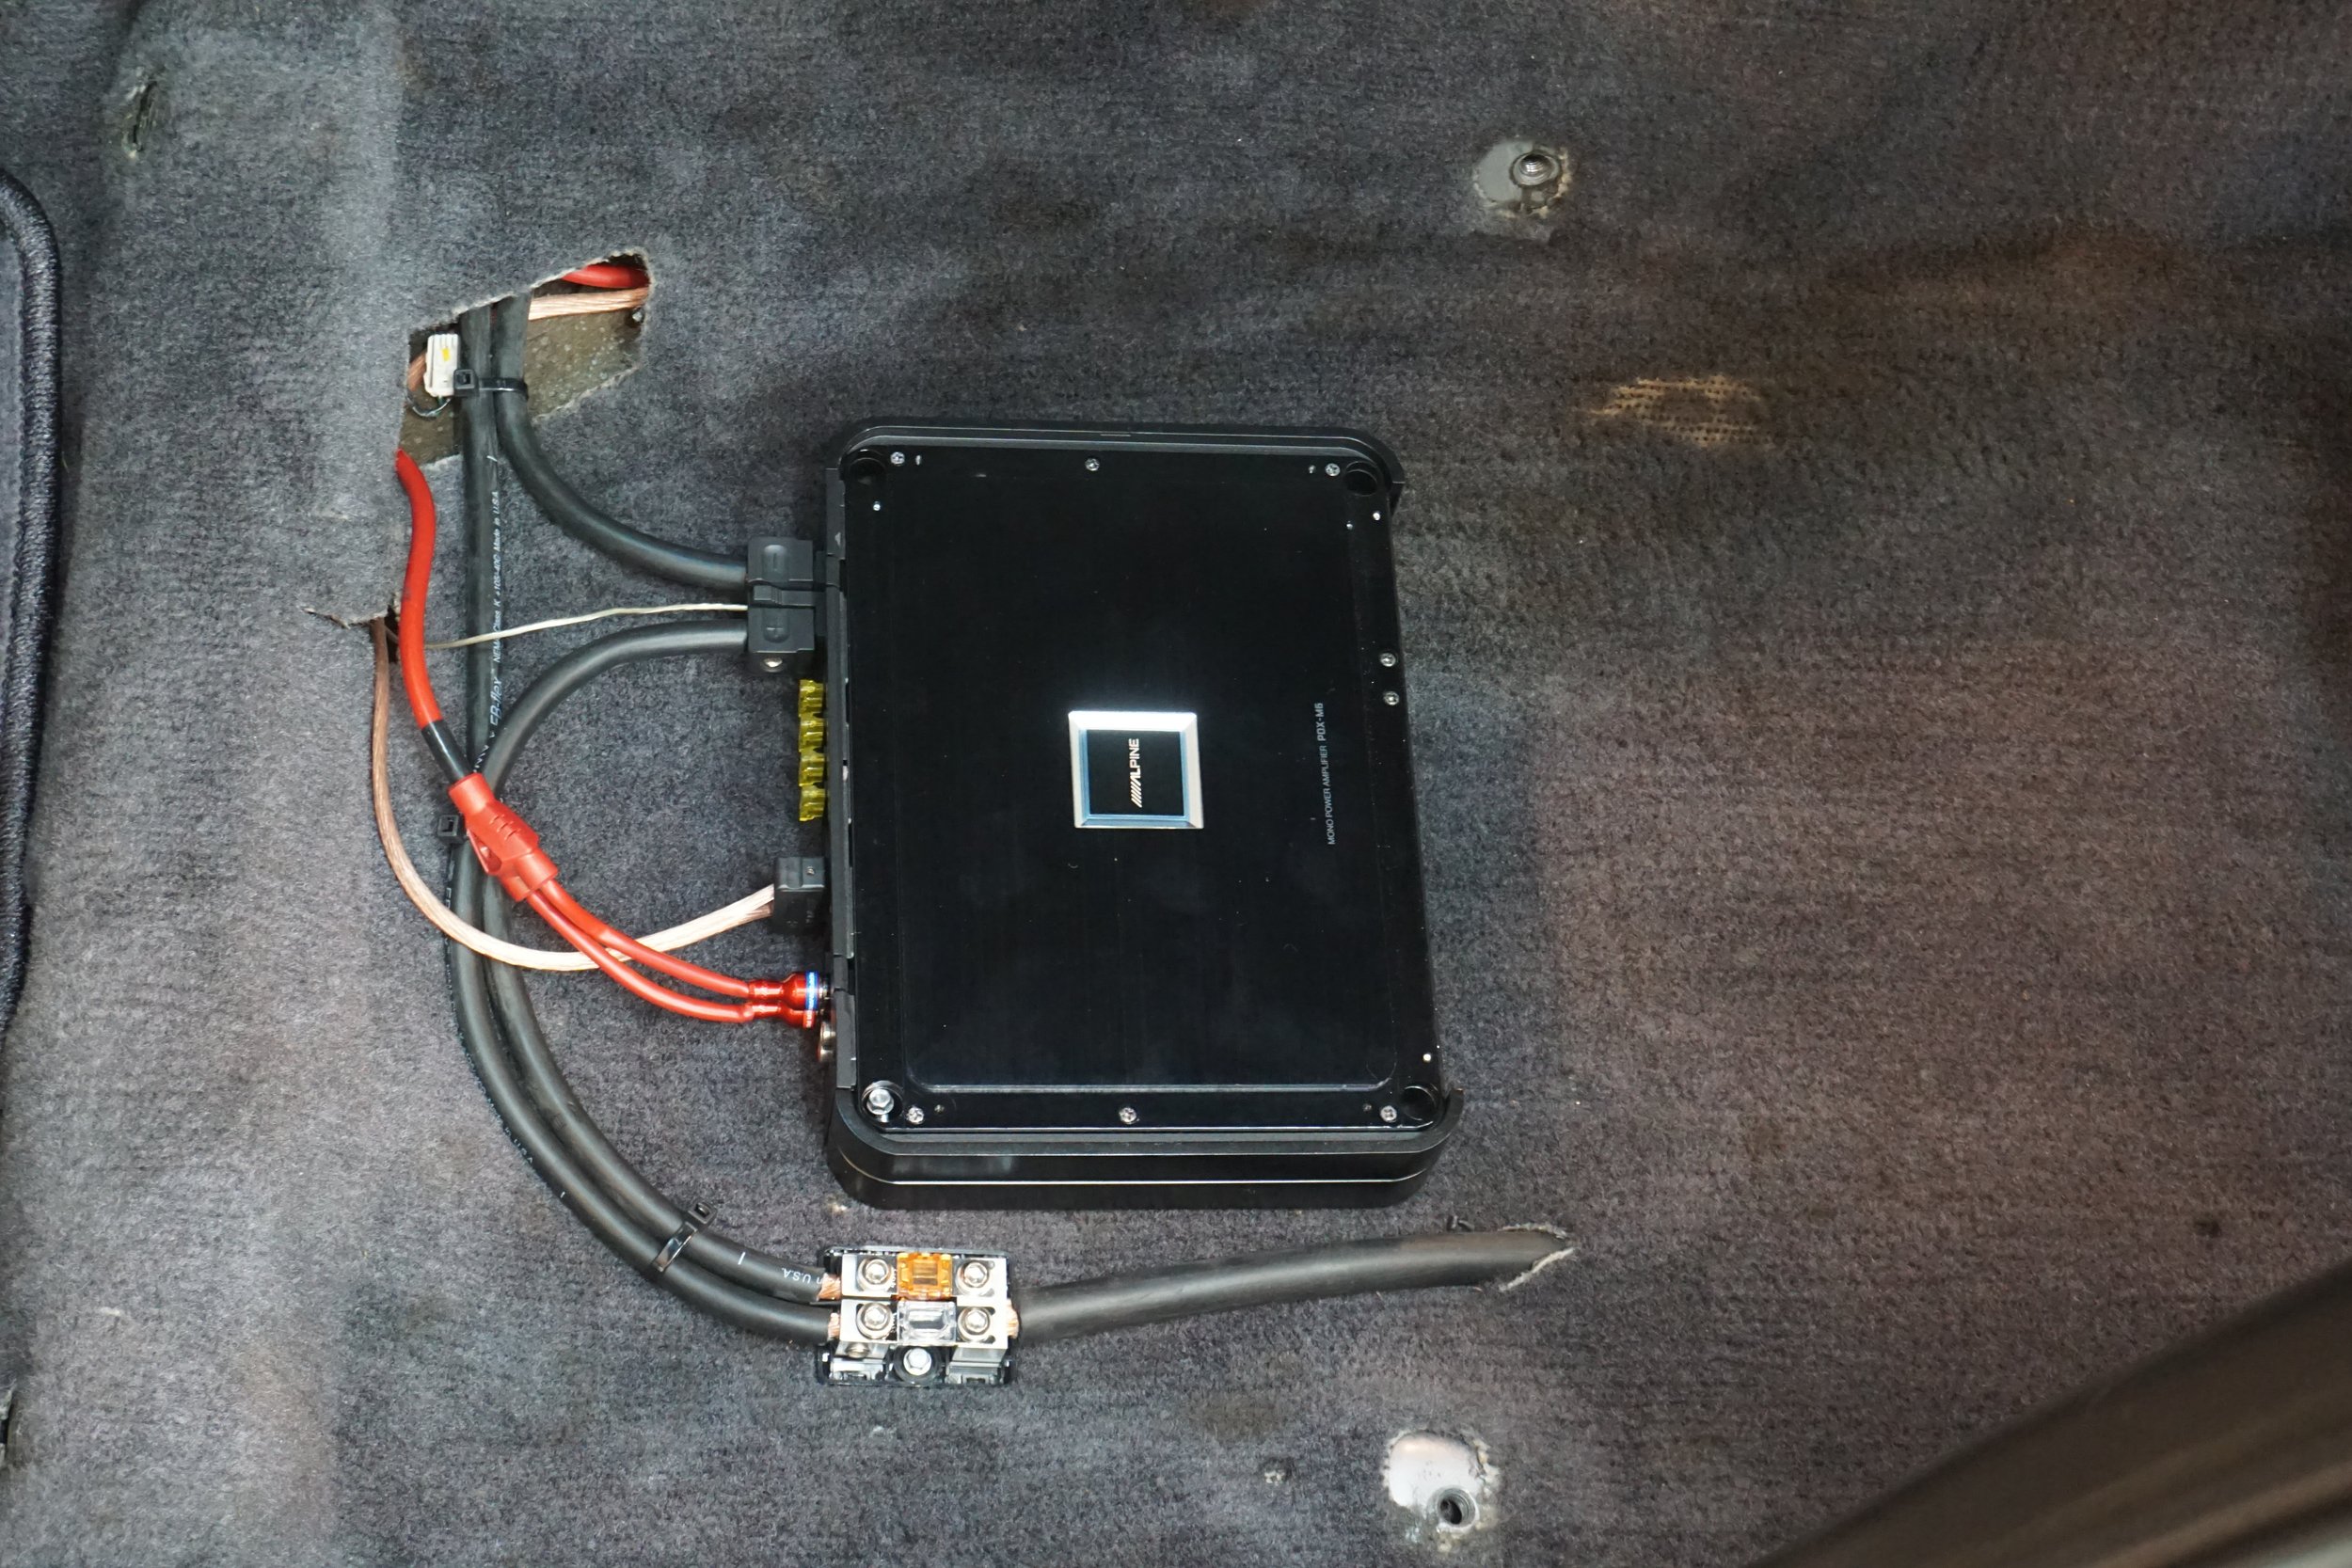
Installed, with new 12 AWG OFC wire going to the sub.
I've only driven the car a little bit since I installed it, but it sounds really nice.
I then wanted to make sure things were good at the sub box. The original tab style connectors did not inspire confidence (on the right) so I grafted in some nice big terminals (on the left)
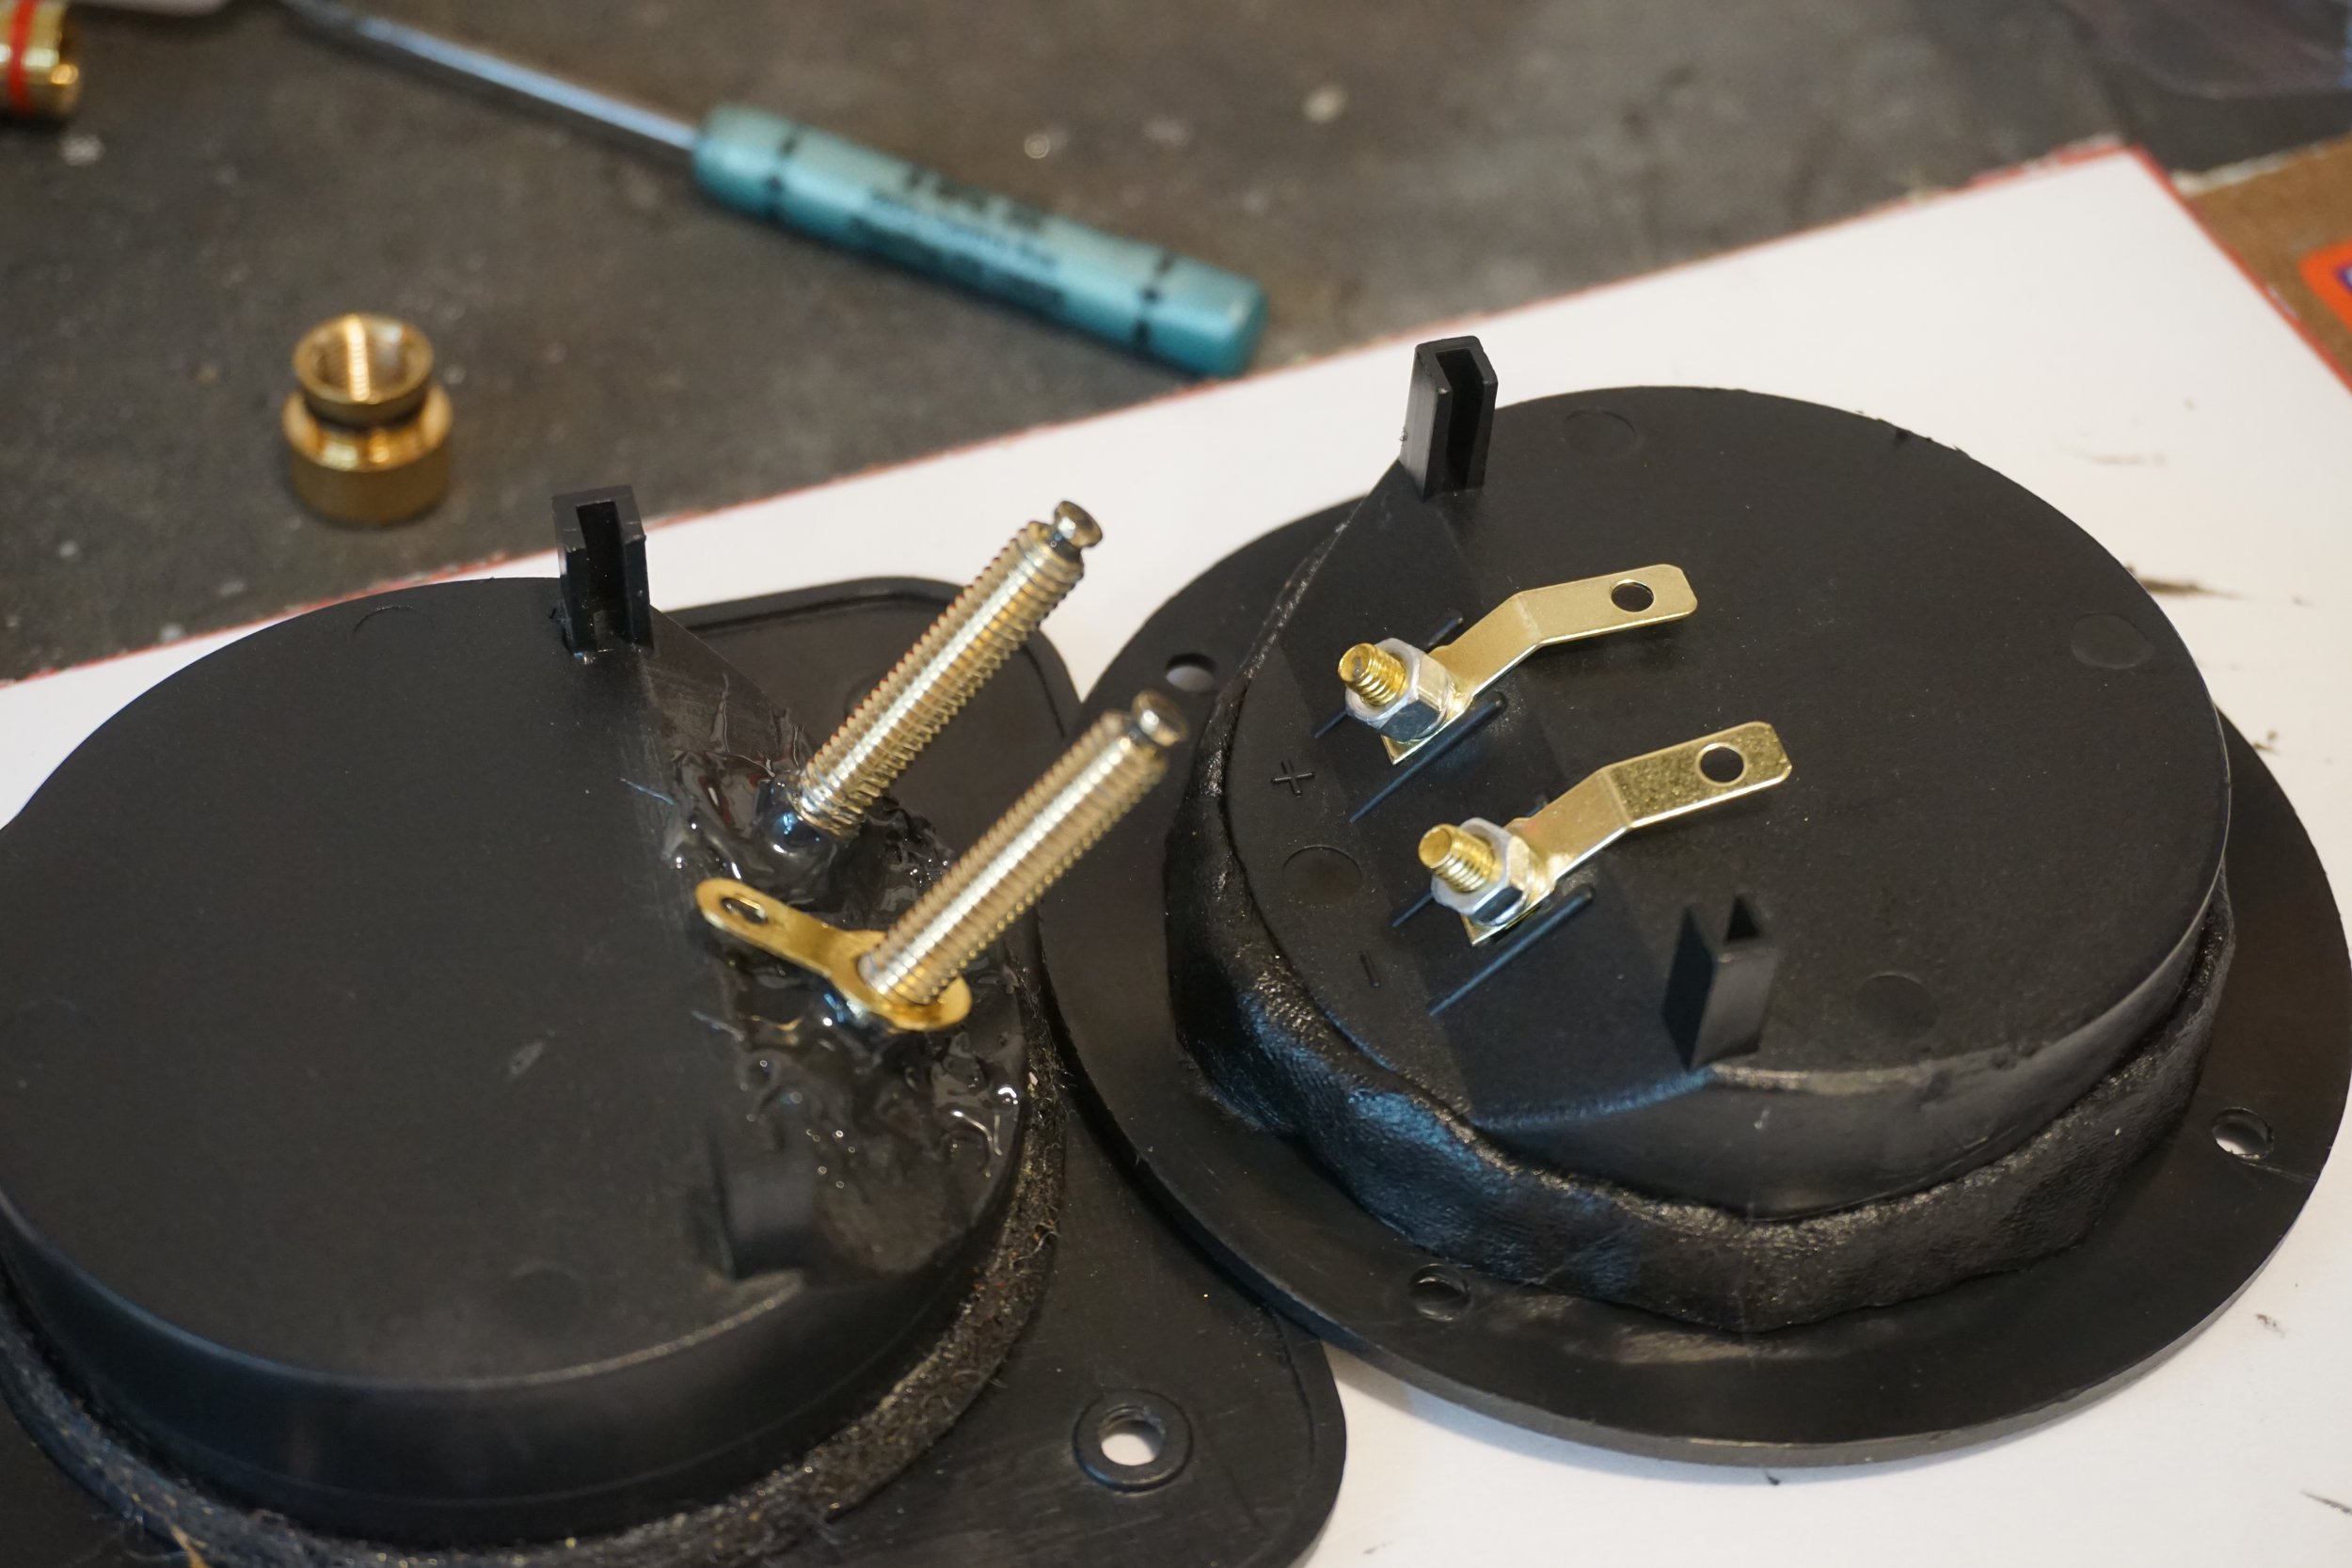
These connectors were so loose on the tab that they just slid right off. That's not a very good connection!
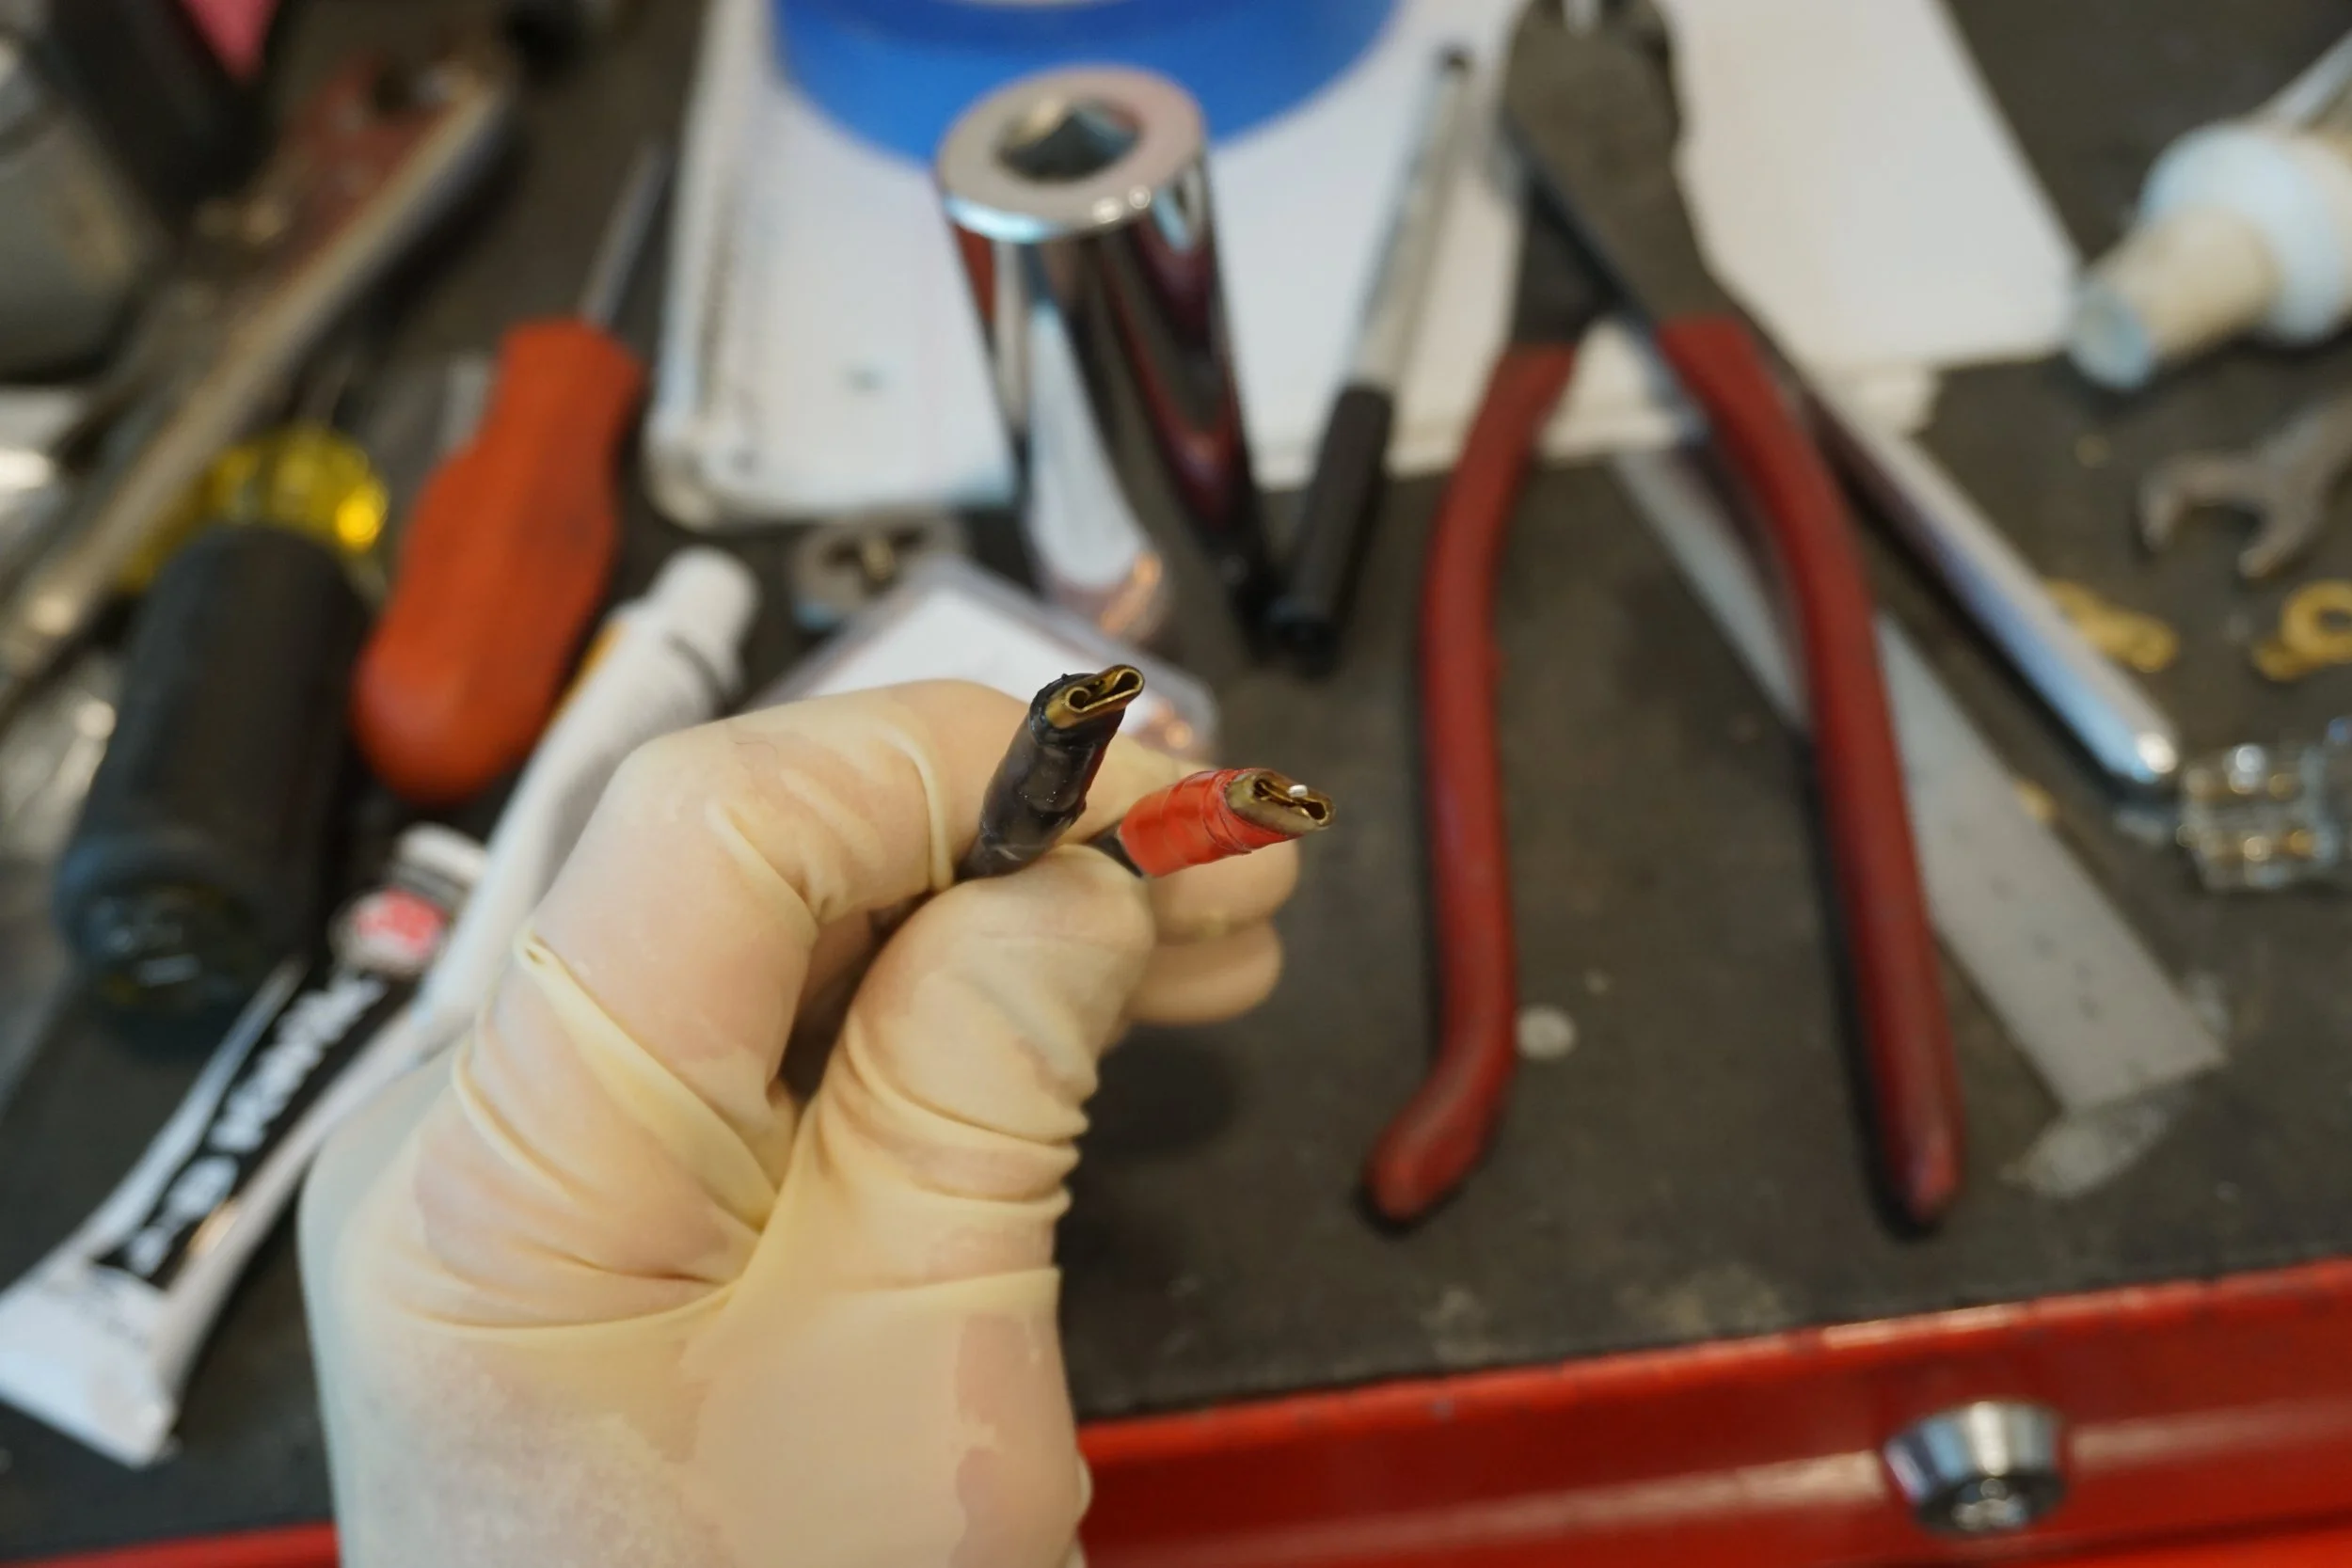
So I made something proper:
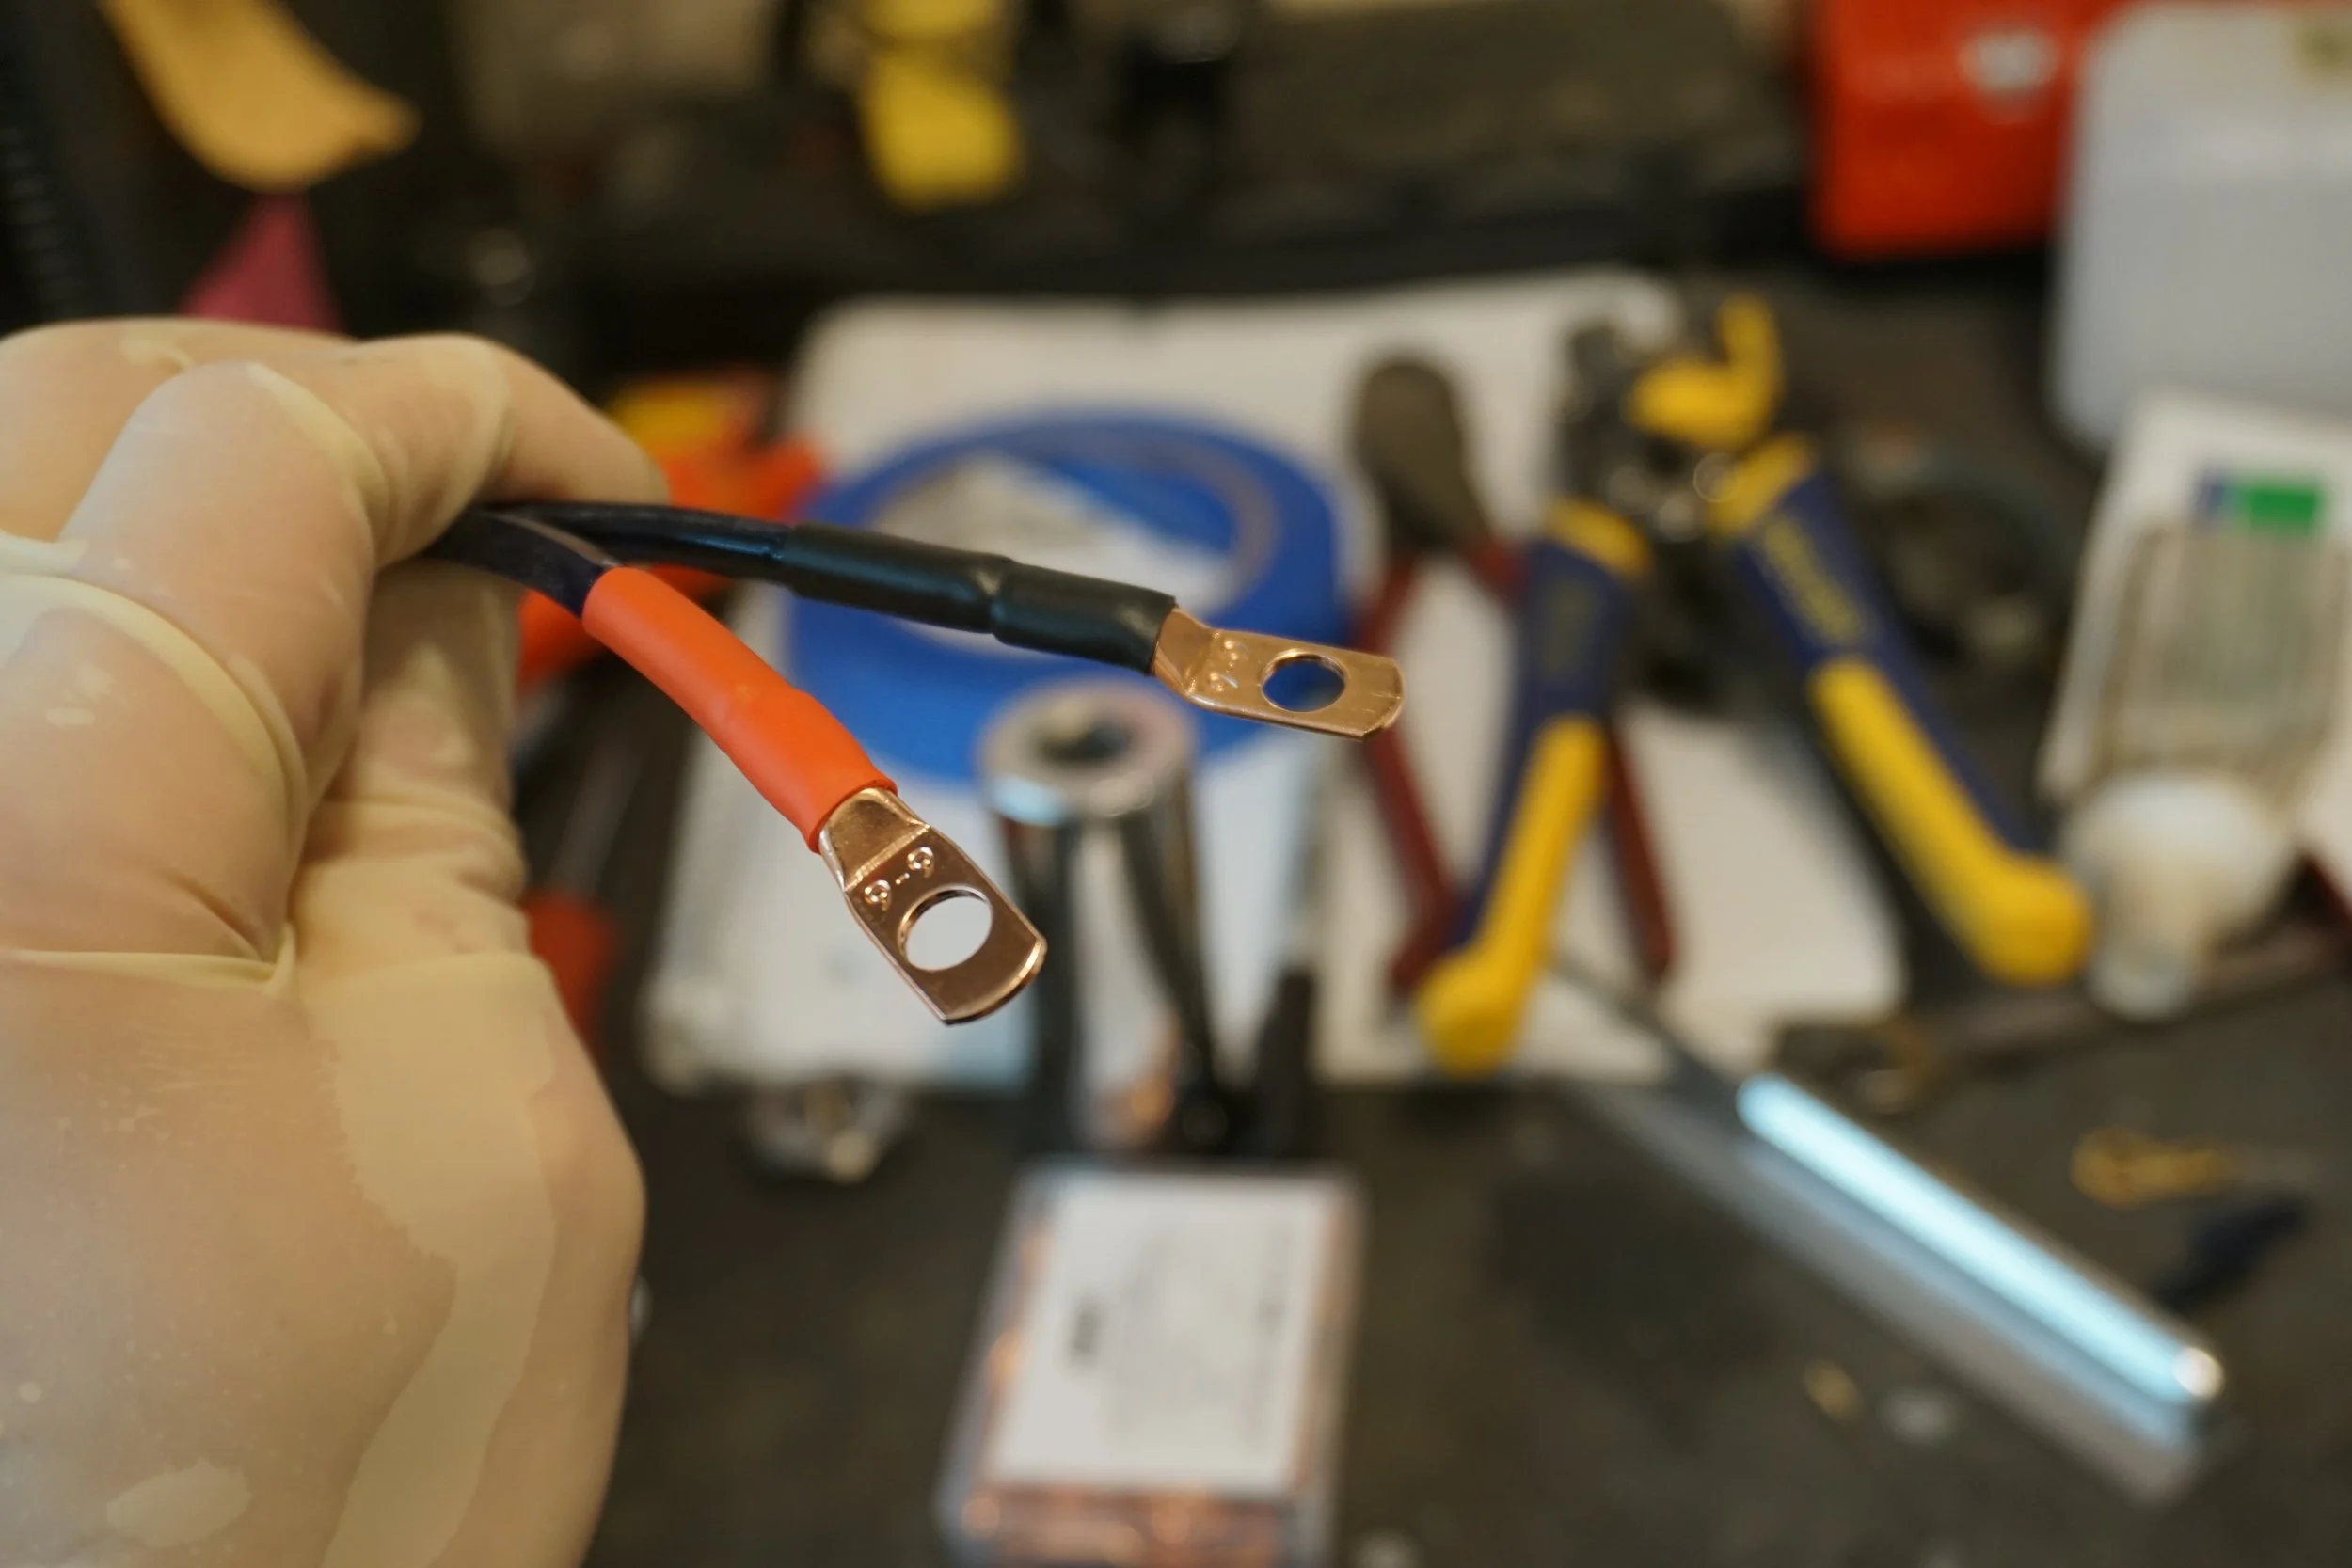
Now these guys aren't going anywhere!
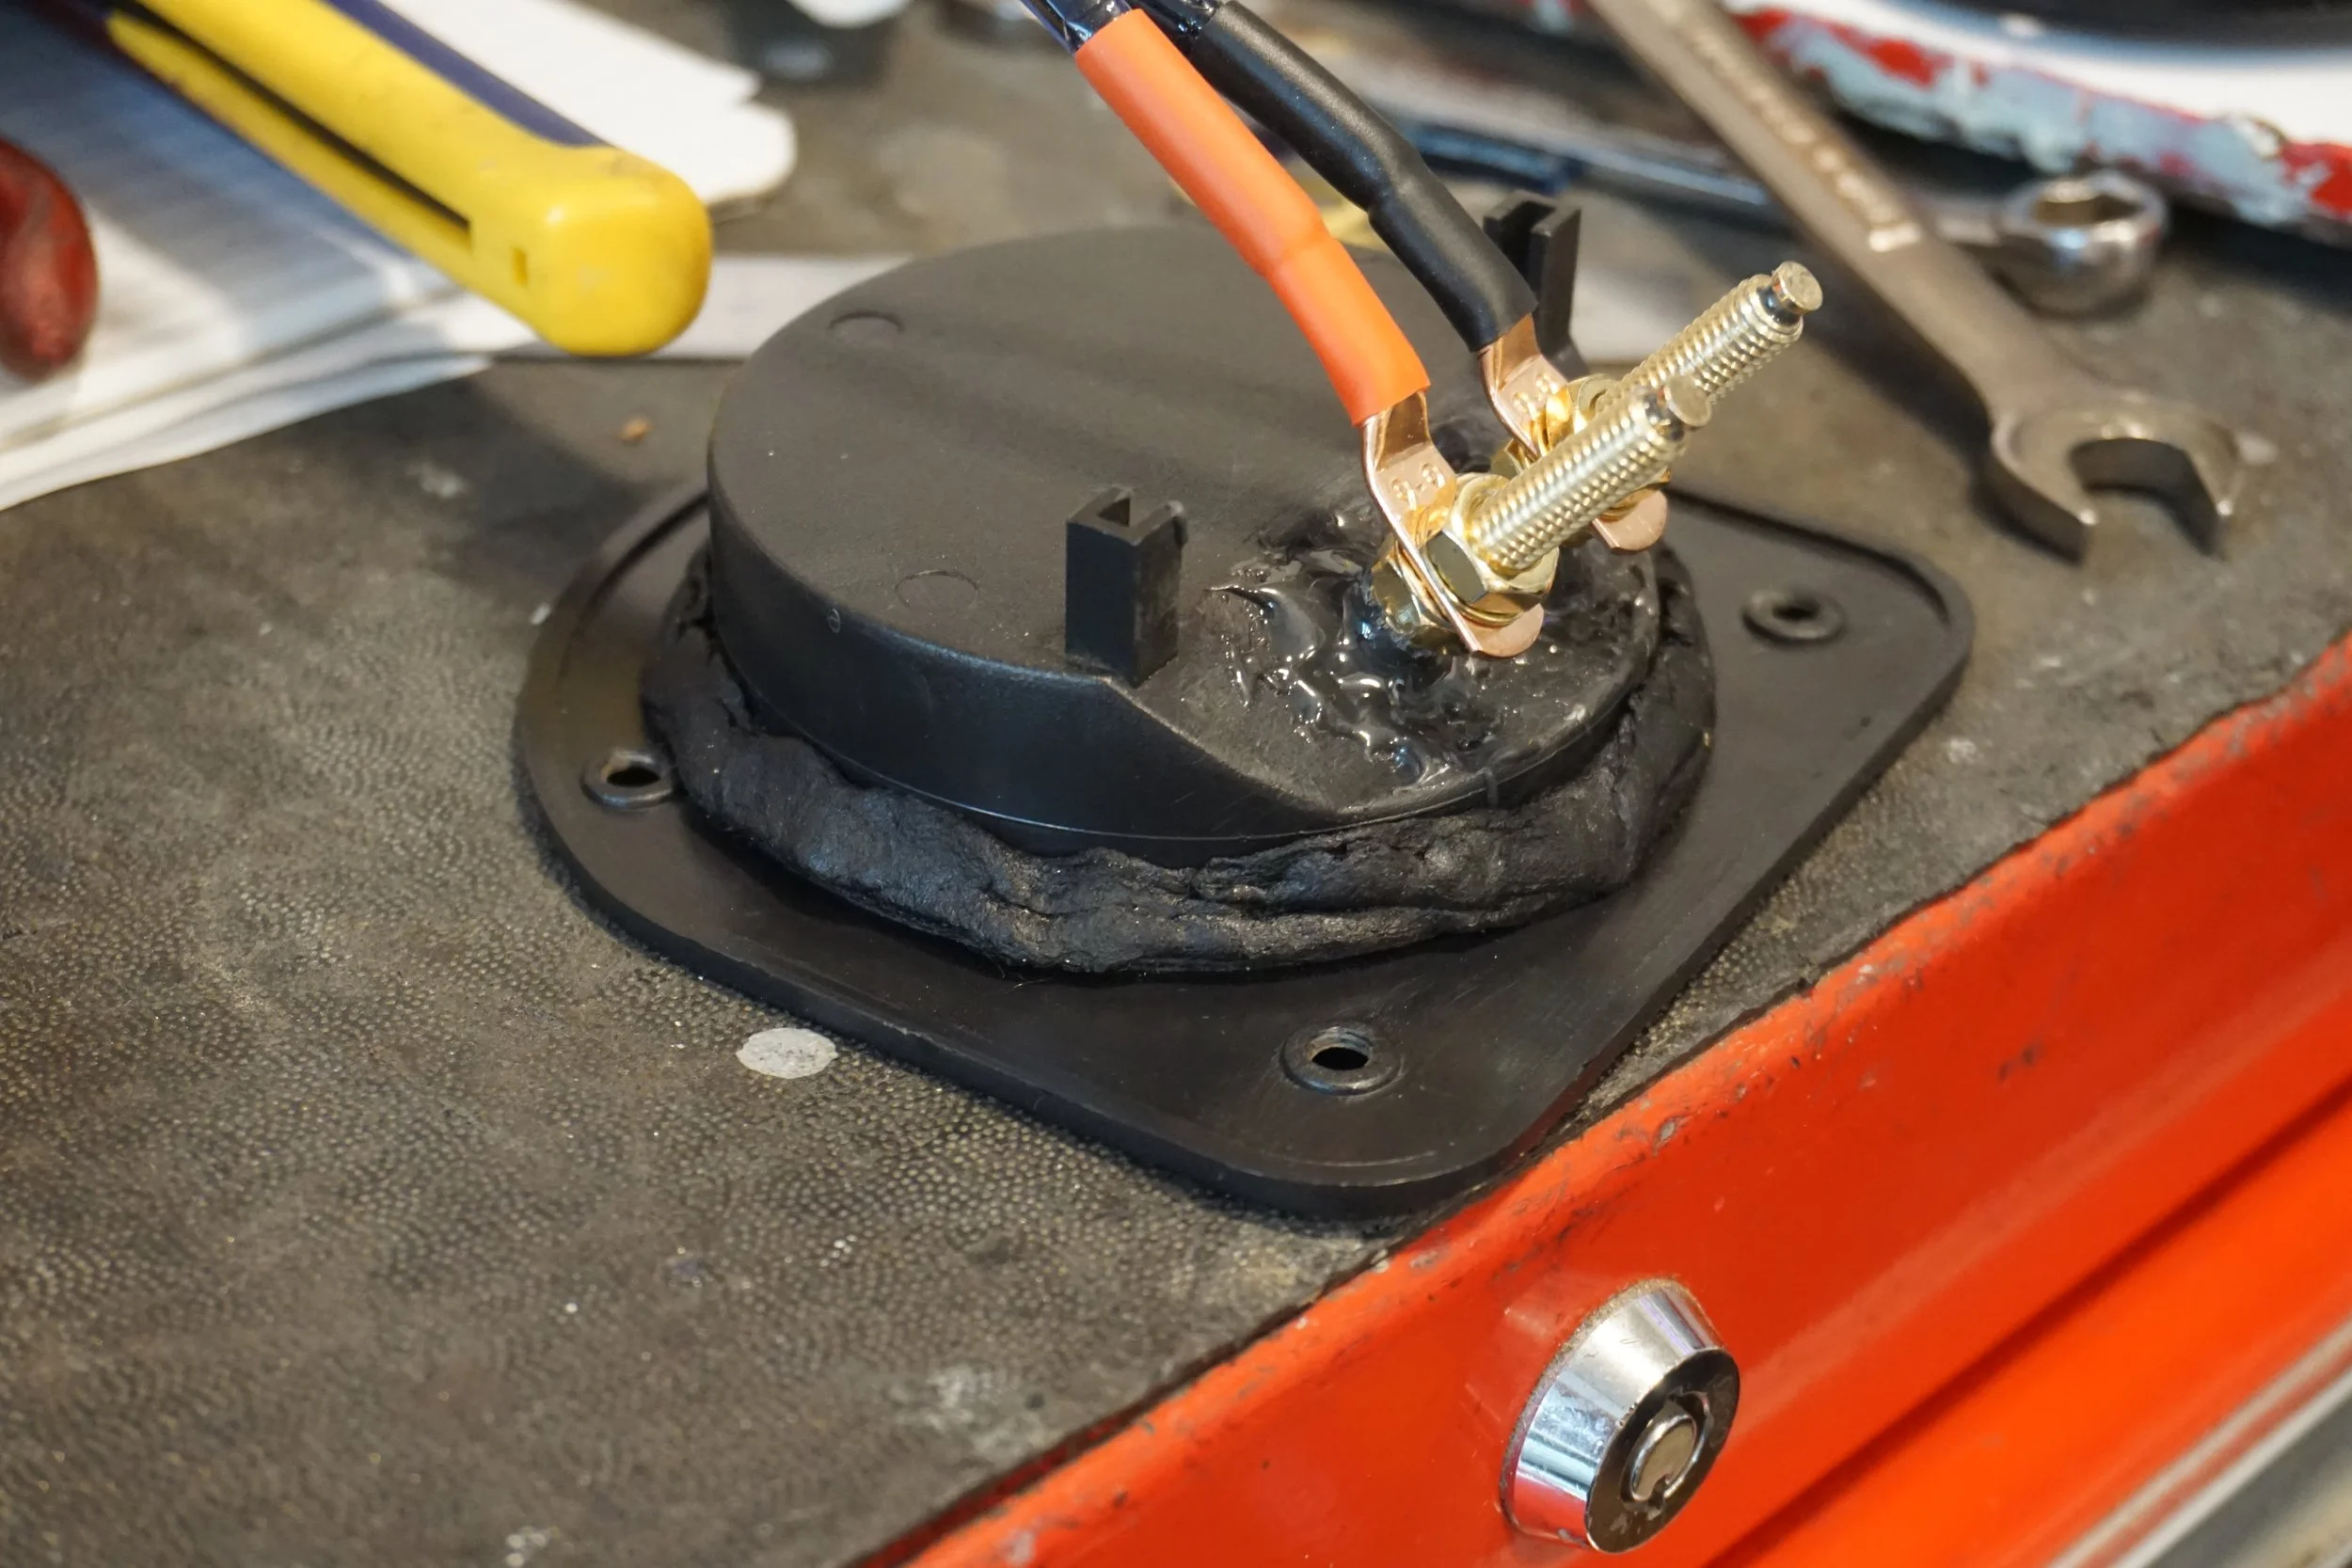
I also added a very unscientific amount of PolyFill to the box, since it was a tad undersized for the sub.
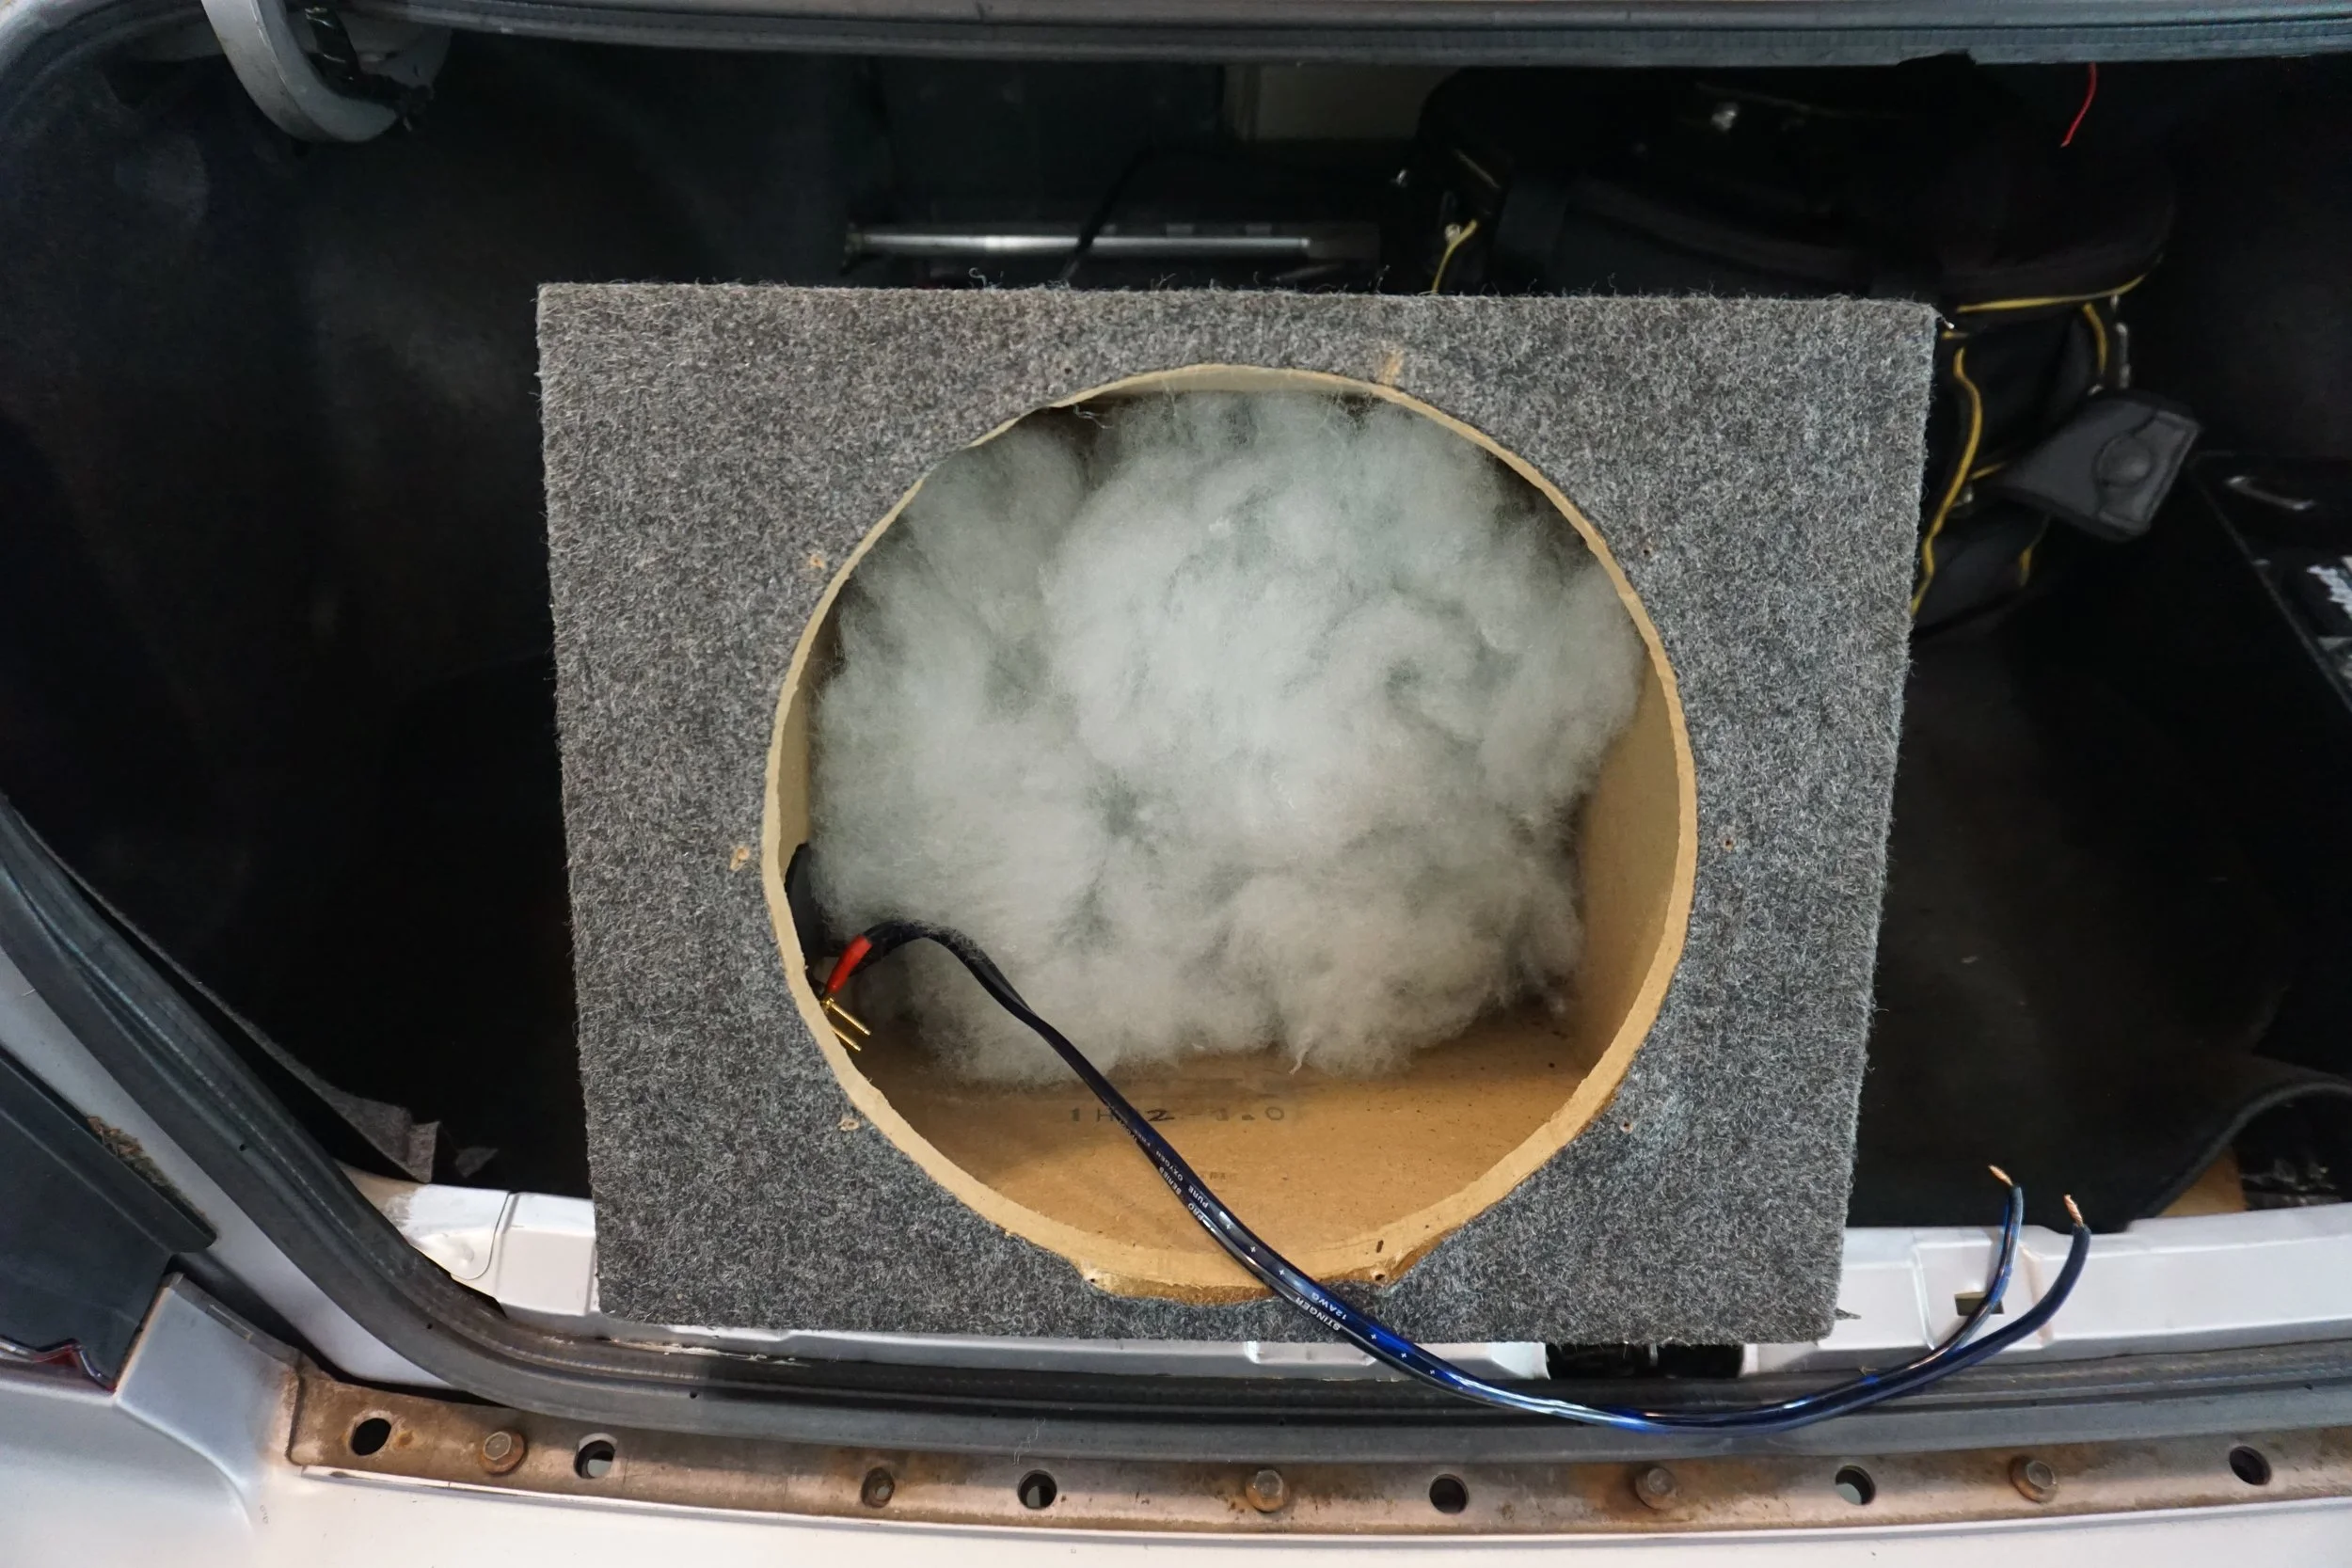
Some of the screw holes for the sub were no longer allowing the screws to get tight, so I drilled them out a bit, filled them in with some wood filler and installed some new screws. Now I can torque them all down nice and tight, hopefully providing a better seal.
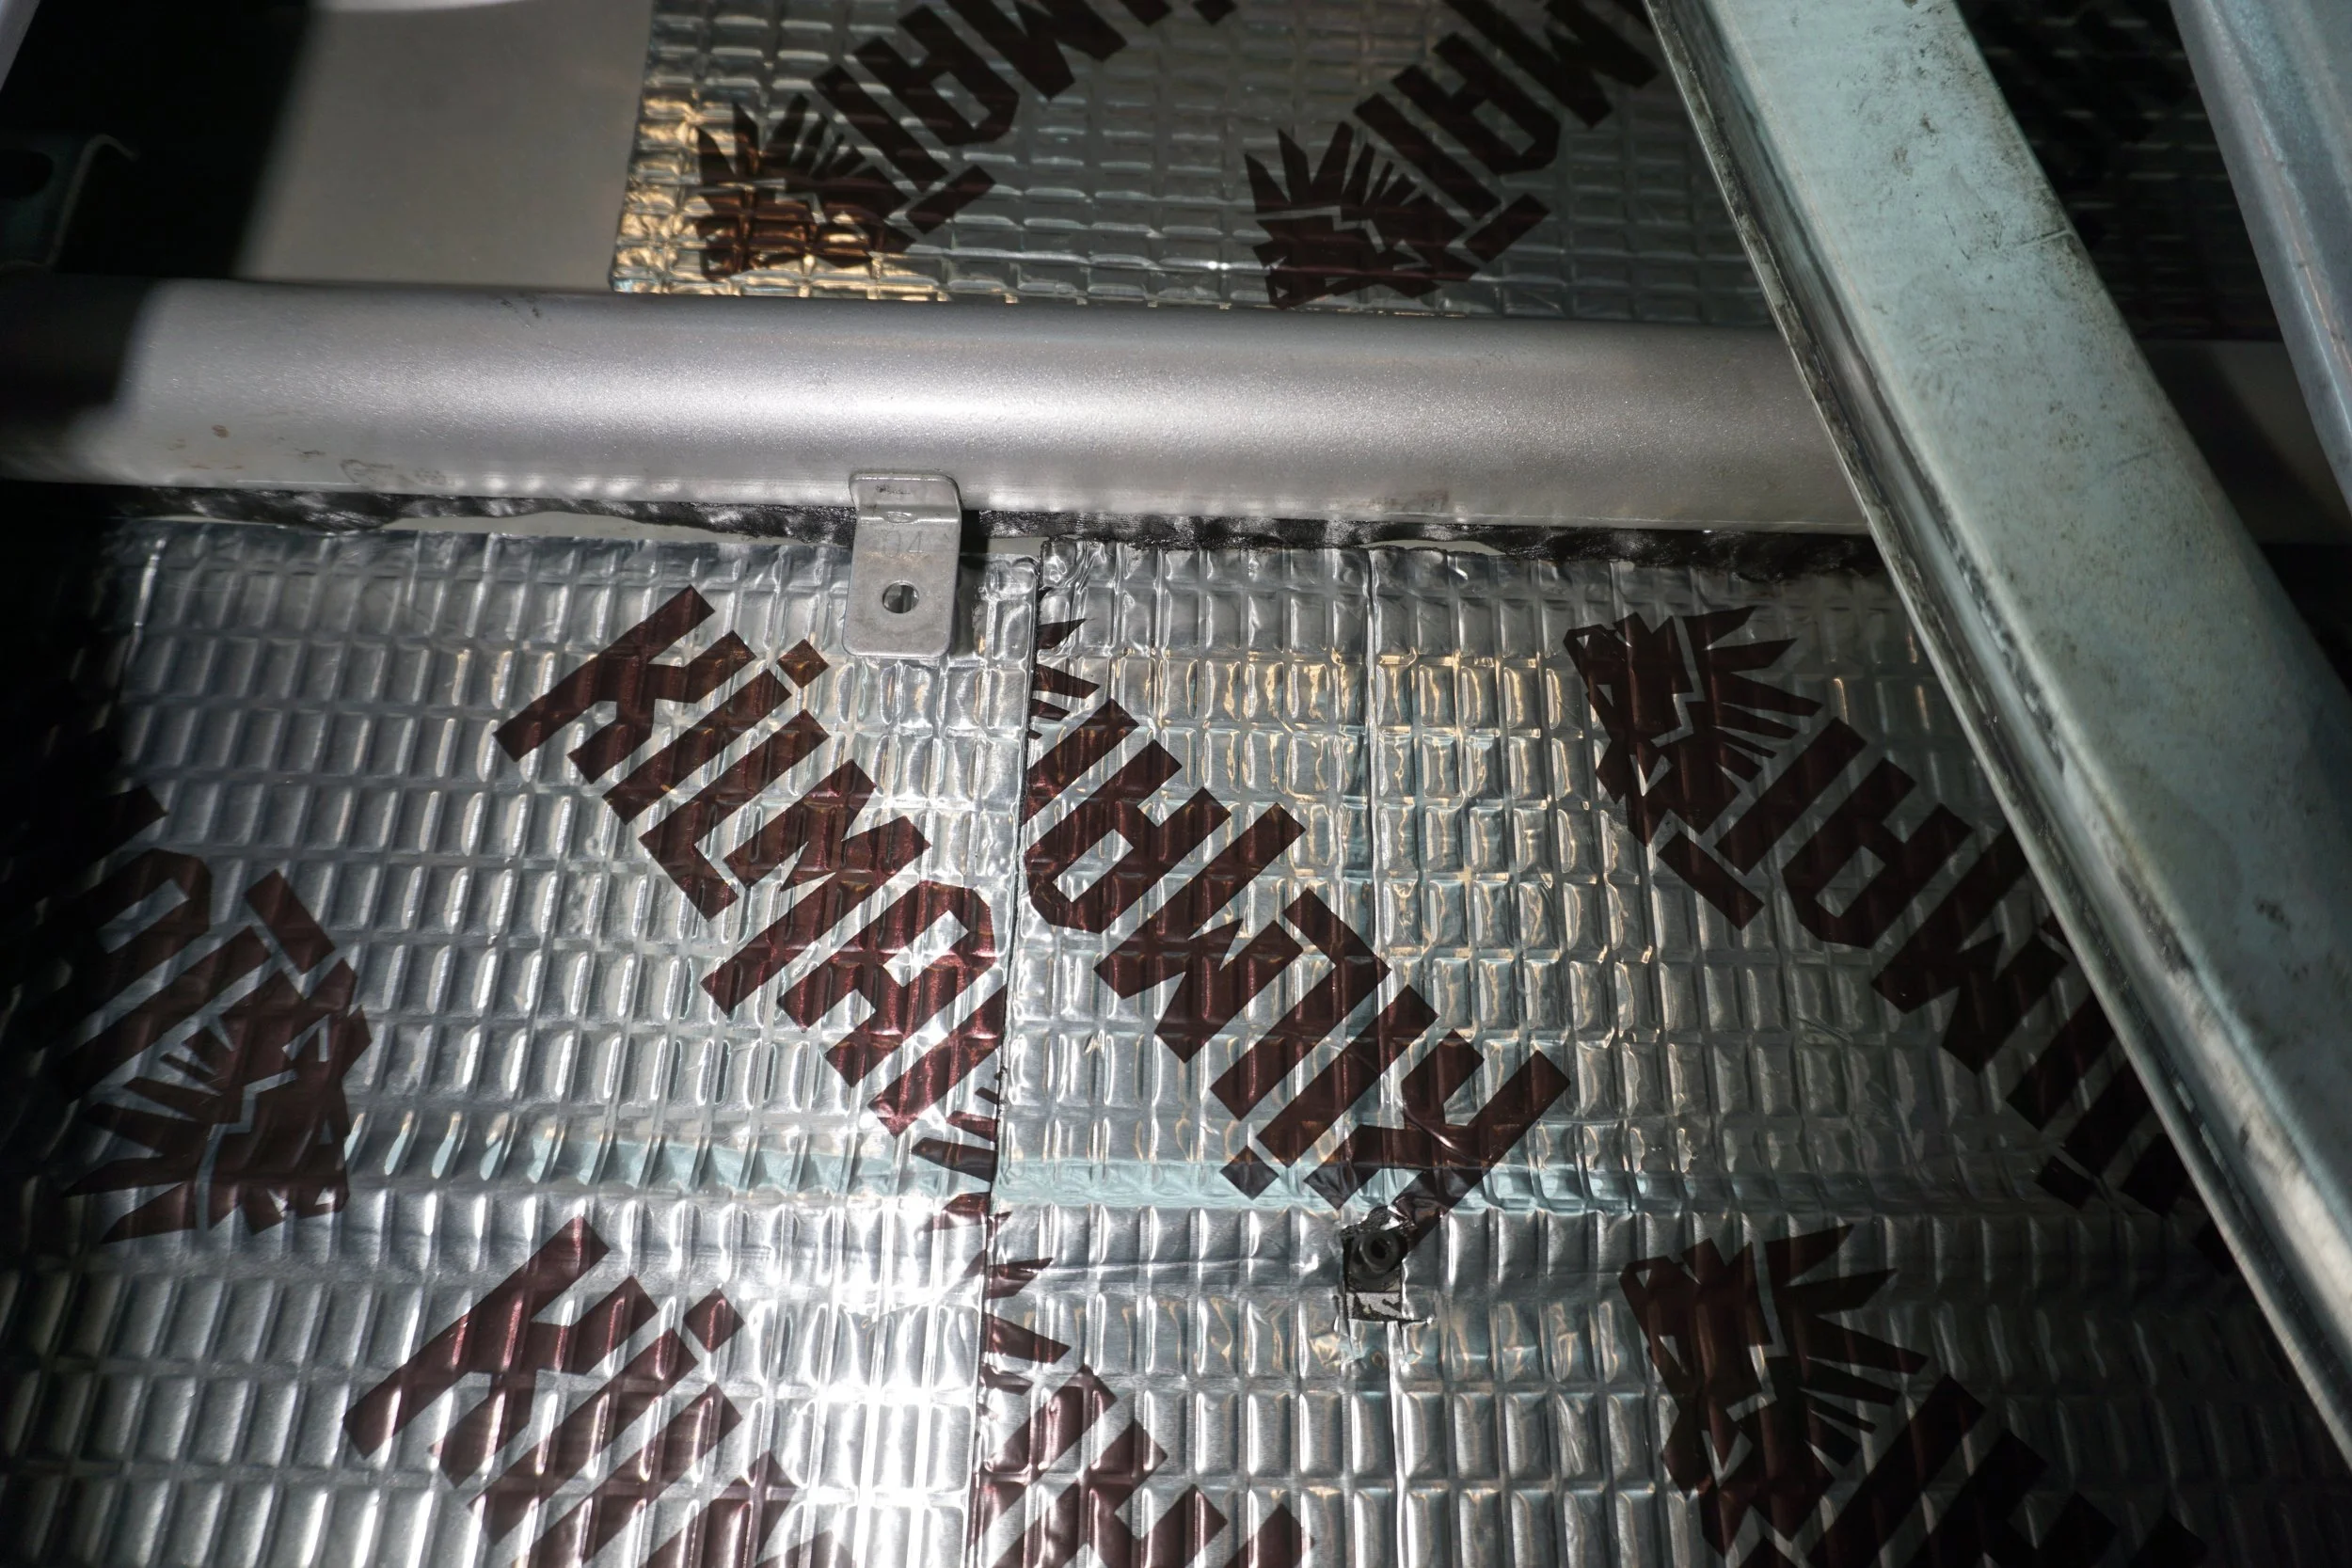
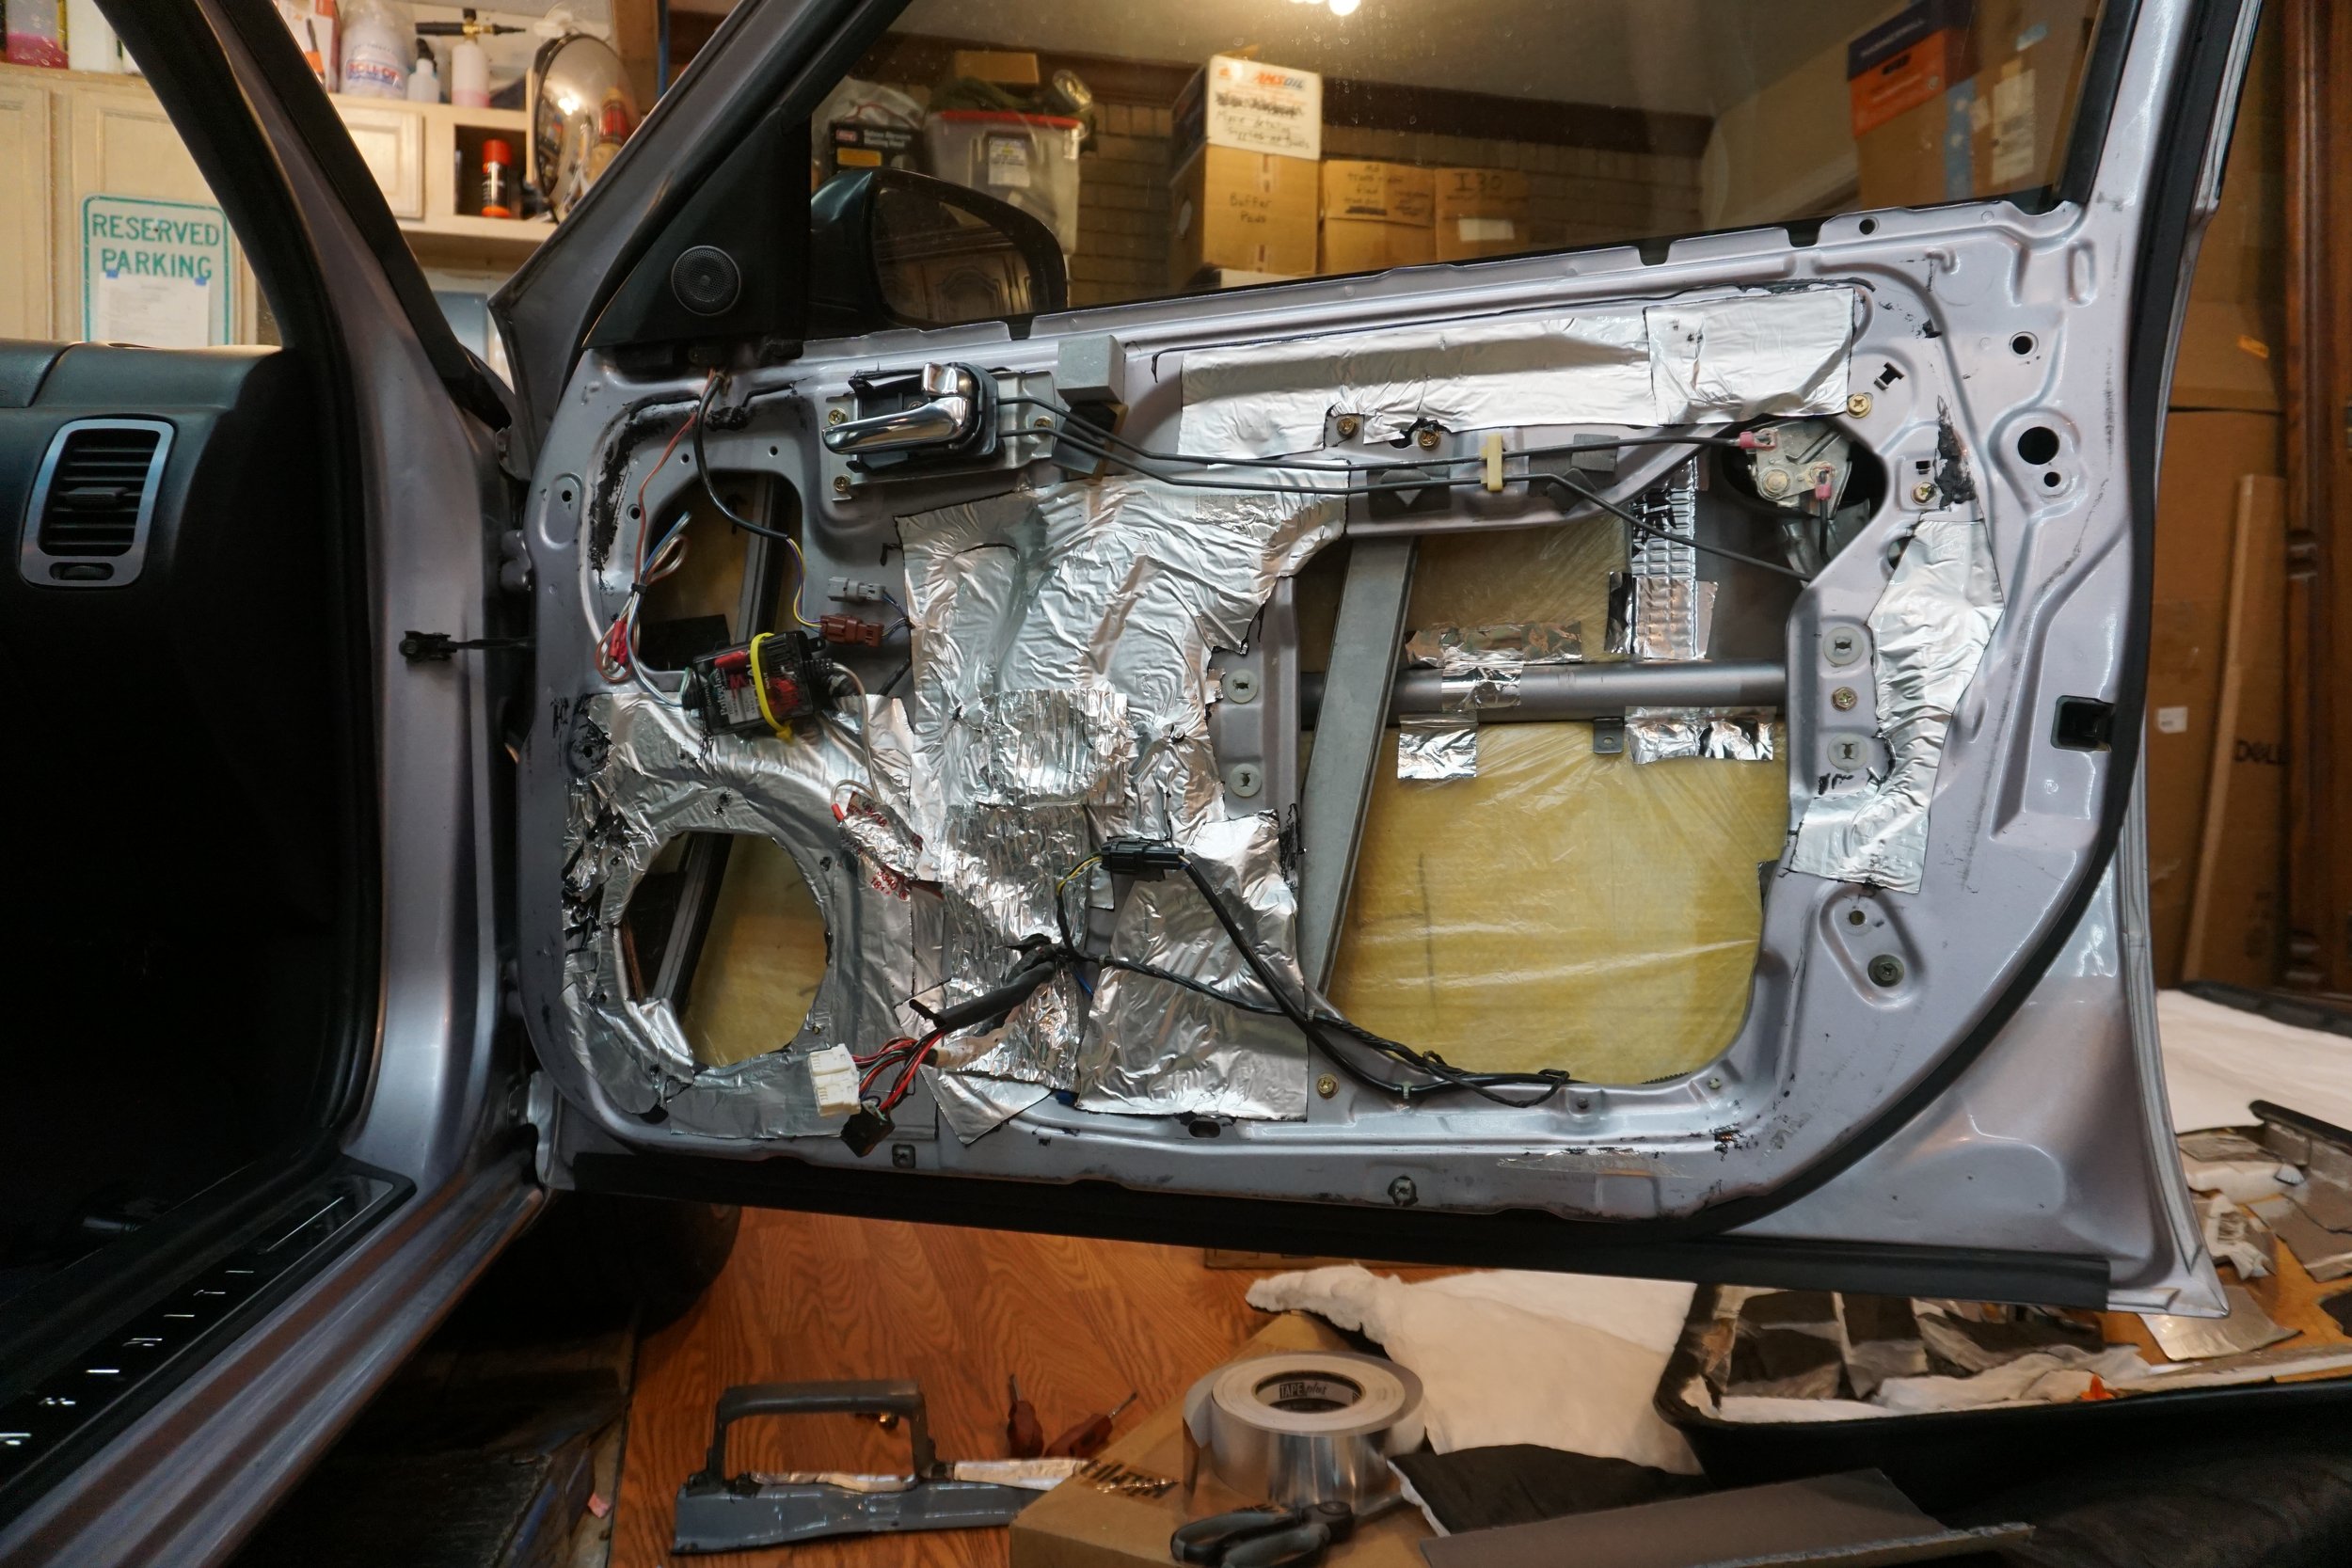
Now, on to the front doors. I have been chasing rattles in these doors for years, and only recently realized I could make the rattles disappear if I pressed the door glass outward. Not quite knowing what to do with that information, I decided to take some more conventional sound deadening steps in the hopes they would help. First up was some CLD on the outer door skin:
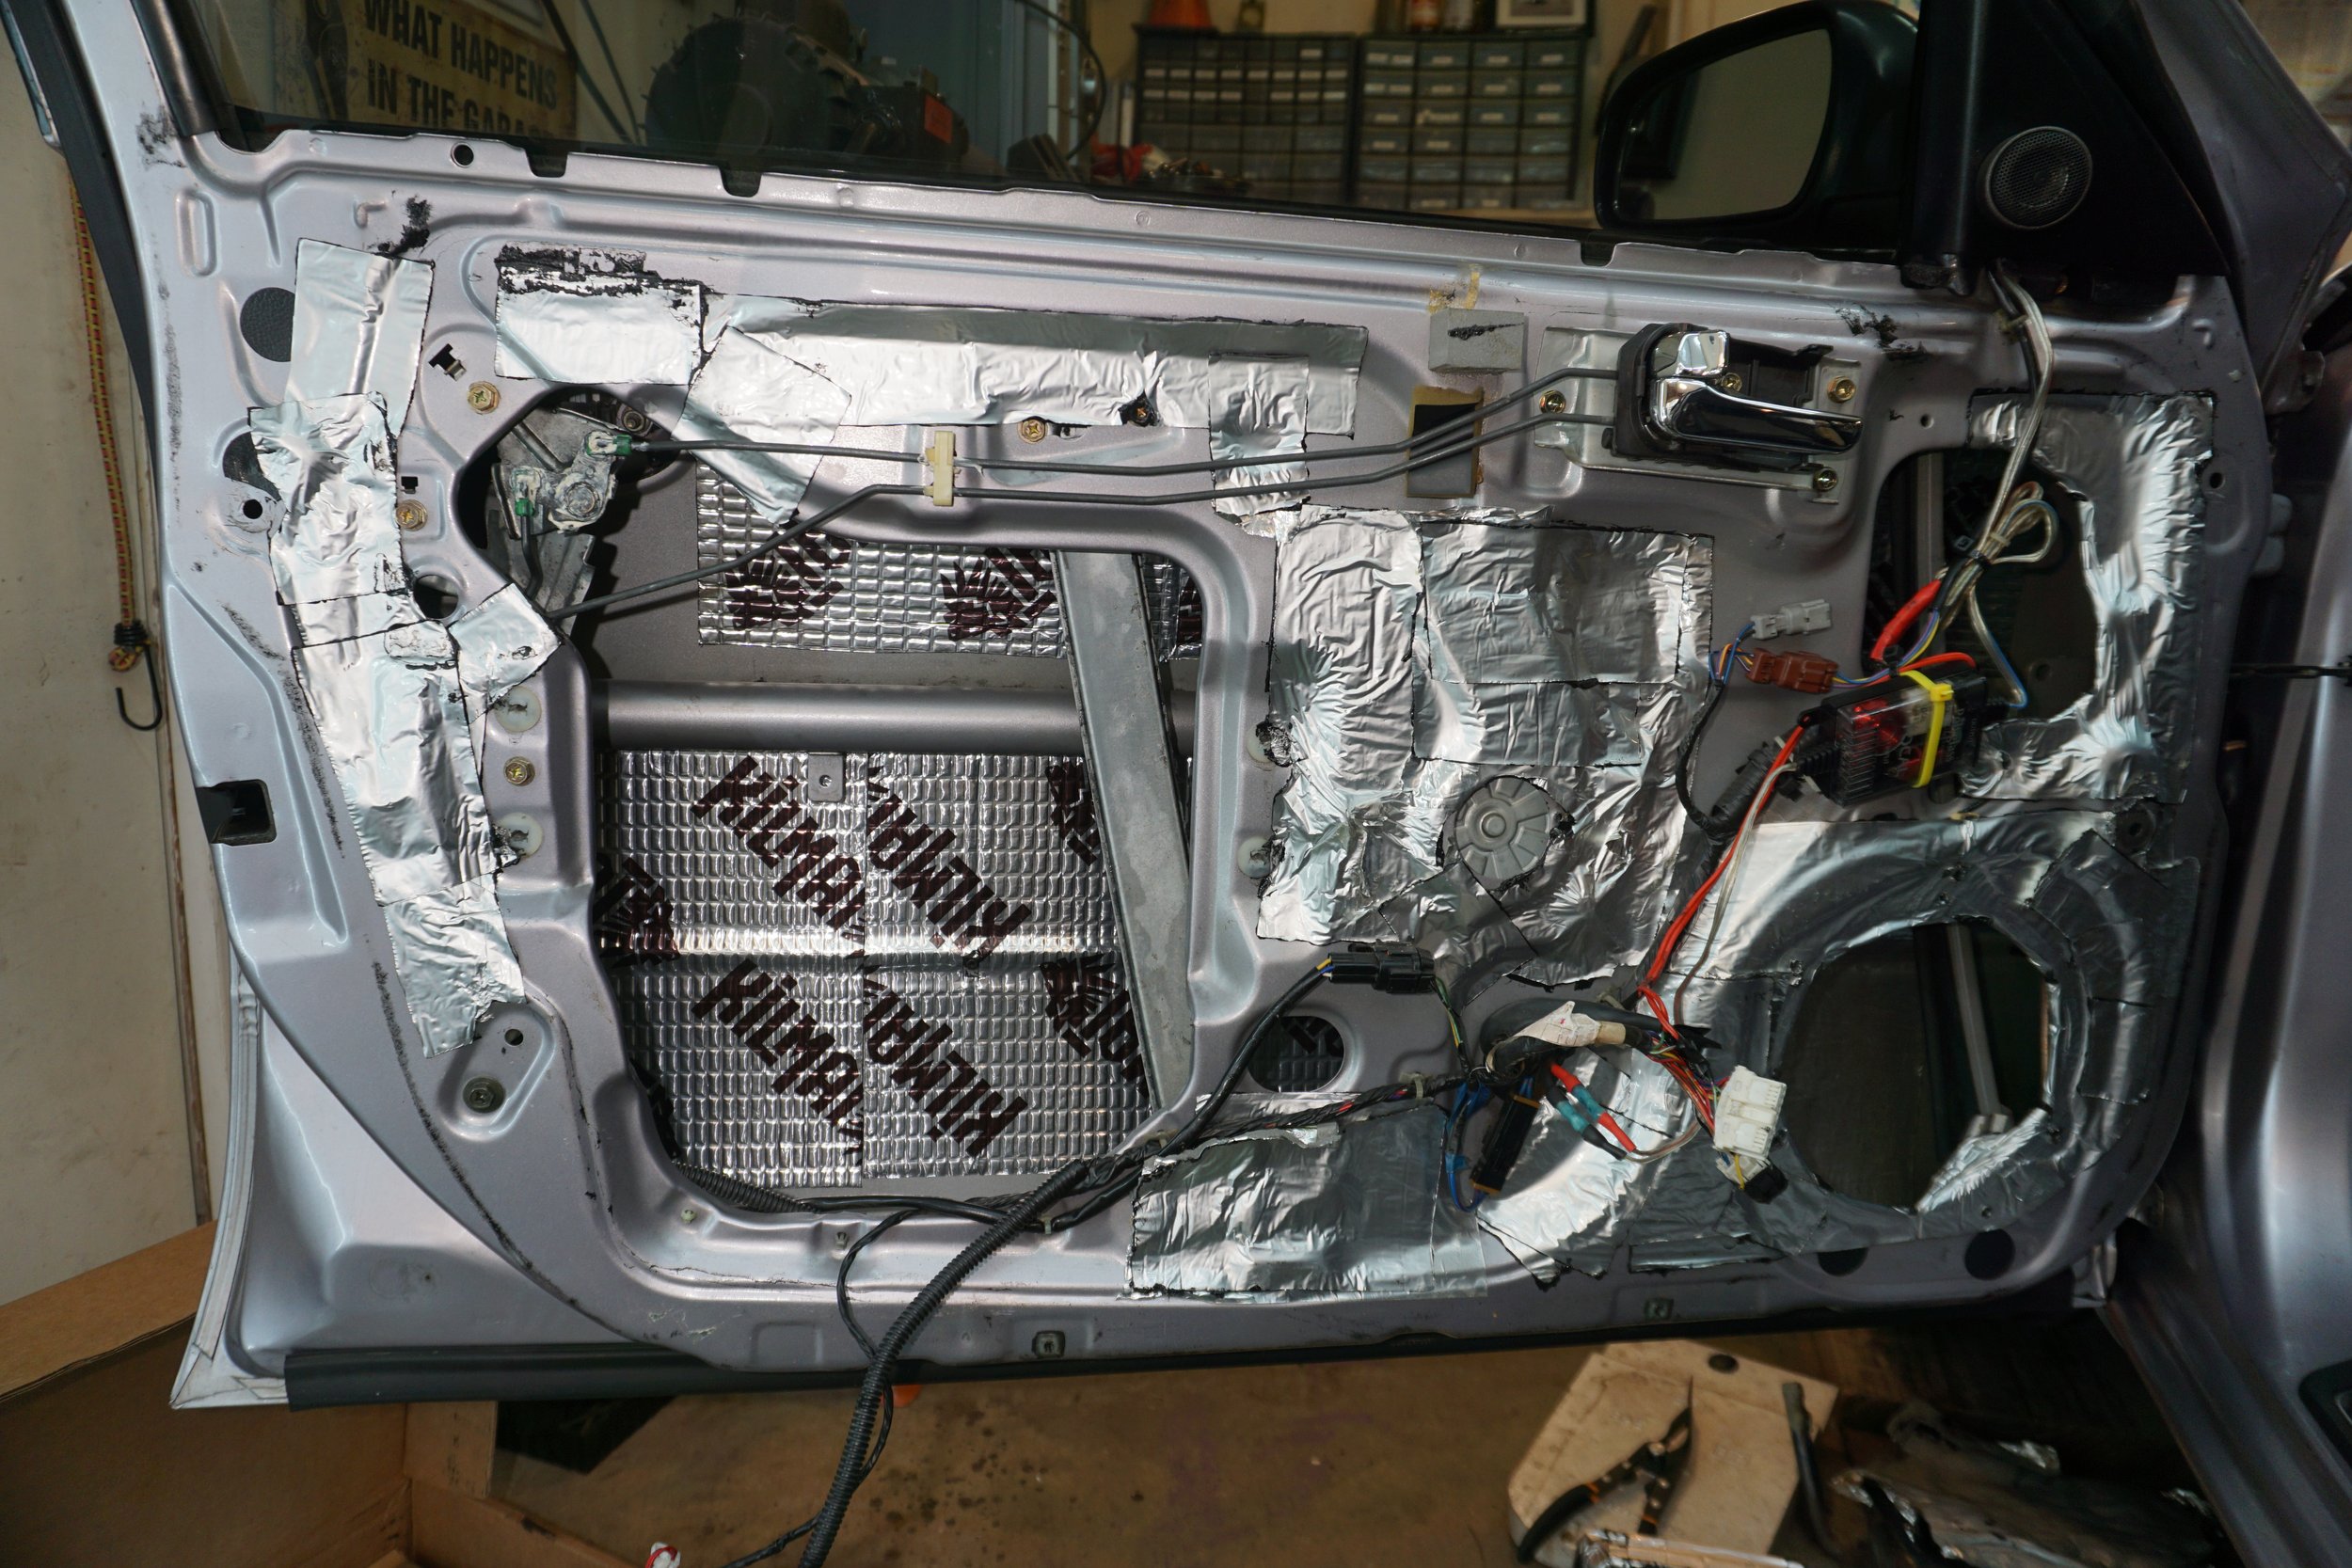
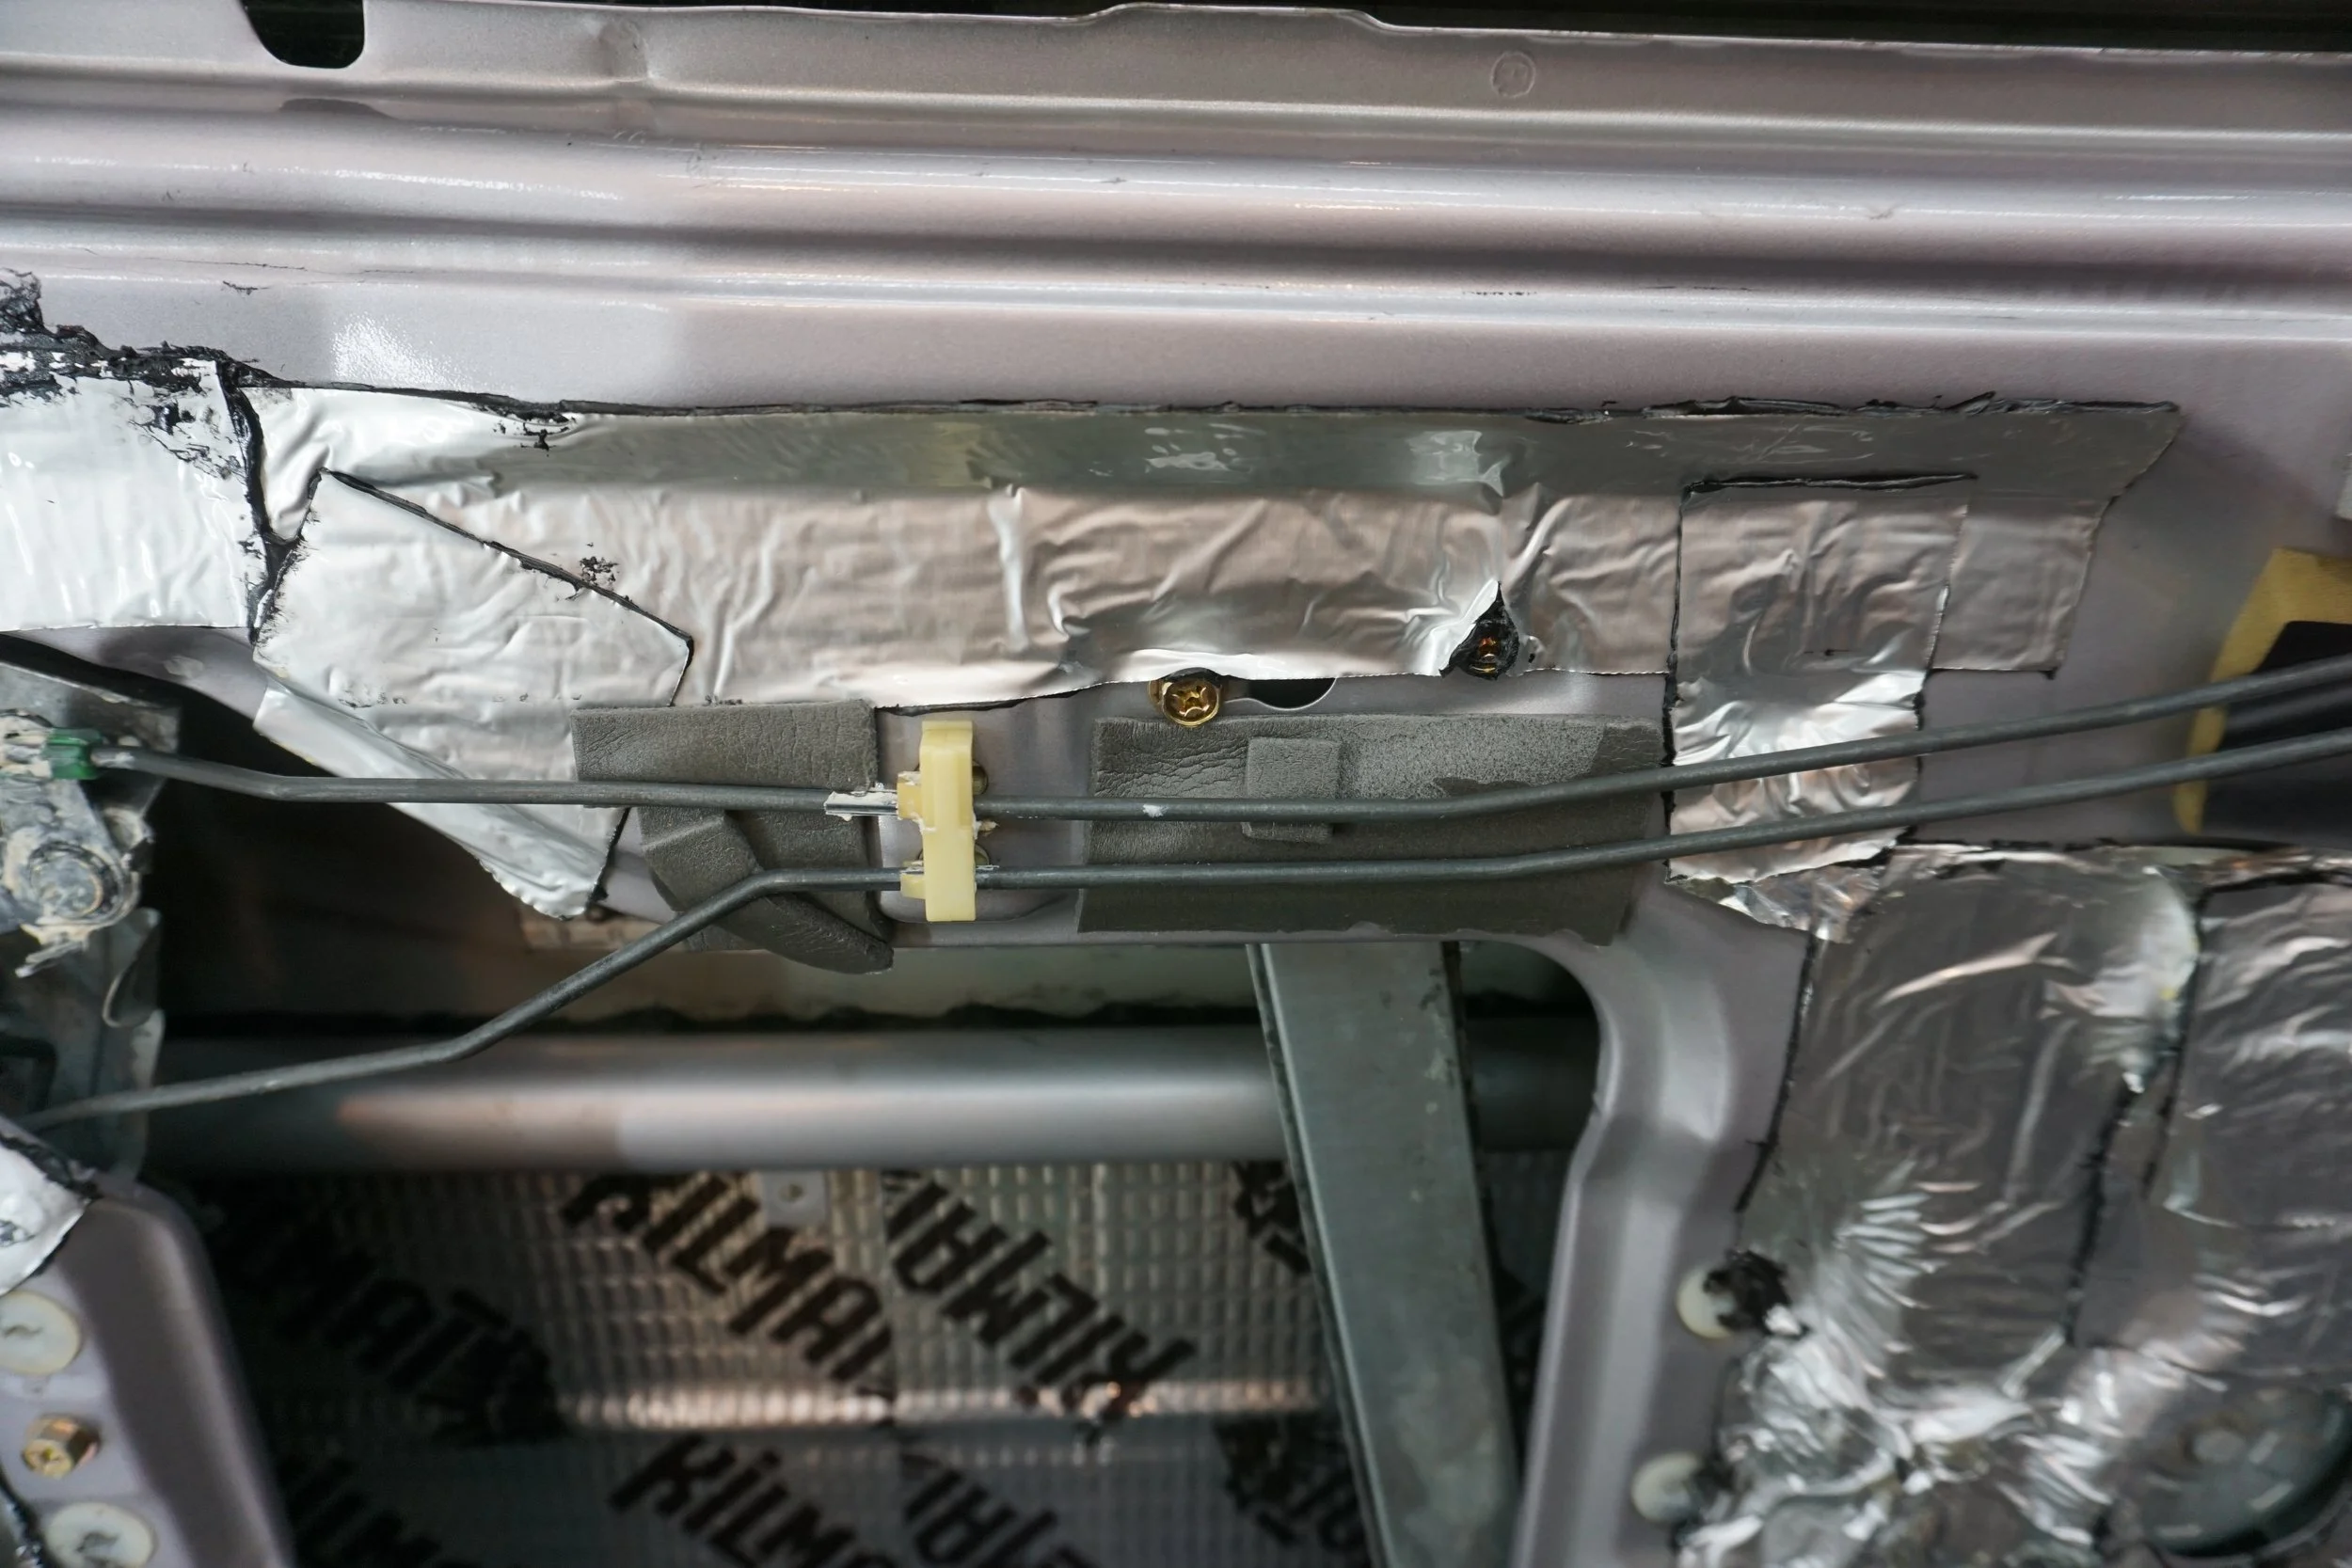
I then stuffed a bunch of butyl rope above and below the crash bar to provide better connection to the outer skin to make it more rigid and hopefully vibrate less.
I found the little bars for the handle pull also made some noises, so I stuffed some closed cell foam under them so they couldn't rattle.
To hopefully keep any sound waves from bouncing around inside the door panel and to direct them into the cabin, I glued a bunch of 3M Thinsulate around the speaker opening.
I won the summer trackcross series, beating out Al in his powerful GTI, which I was very happy about. The weird braking issues have pretty much all been resolved, but the annoying shift stuttering still happens. Looks like I only uploaded one video to YouTube, enjoy!
First up, some gauge cluster repairs. My tach started doing dumb things during the summer and eventually got stuck at over 8000 rpm.
I first got a replacement cluster on Ebay, but it too didn't work. I became worried there was something wrong with the wiring or ECU, so I tried my hand at repairing the tach motor assembly based on a thread here on the org. I installed all new caps in both tachs and reflowed the solder as best I could. One tach started working 50% of the time, but the other was still completely dead. At least it seems like the car is still providing a signal! So I got another cluster from Ebay, and this one worked great. While I was doing all of this, I replaced the LEDs, as one had died.
I also swapped around cluster parts between the three clusters to make one "good" cluster that had all parts in very good condition.
I sure do wish replacement tach motors weren't $400+!!
Once again, I didn't have time to paint any parts of the car this year. But I did at least do a little work on the replacement bumpers. First thing was to open up the opening for the muffler tips on the new bumper. My 3" exhaust sits a little right of center, as you can see in my current bumper:
I wanted to tighten things up a bit and do my best to make it not so obvious, but I was only partially successful:
It's better, but not perfect.
Next up was a stereo upgrade. I love stereo upgrades! I've come to really have a "thing" for a retired line of Alpine amps, the PDX F and M series. I started by replacing my more entry-level Alpine MRP-M500 sub amp (500w RMS) with the Alpine PDX-M6 which is rated at 600w RMS but the dyno sheet that came with the amp shows mine is actually putting out 640w.
Old amp:
Old vs new
Installed, with new 12 AWG OFC wire going to the sub.
I've only driven the car a little bit since I installed it, but it sounds really nice.
I then wanted to make sure things were good at the sub box. The original tab style connectors did not inspire confidence (on the right) so I grafted in some nice big terminals (on the left)
These connectors were so loose on the tab that they just slid right off. That's not a very good connection!
So I made something proper:
Now these guys aren't going anywhere!
I also added a very unscientific amount of PolyFill to the box, since it was a tad undersized for the sub.
Some of the screw holes for the sub were no longer allowing the screws to get tight, so I drilled them out a bit, filled them in with some wood filler and installed some new screws. Now I can torque them all down nice and tight, hopefully providing a better seal.
Now, on to the front doors. I have been chasing rattles in these doors for years, and only recently realized I could make the rattles disappear if I pressed the door glass outward. Not quite knowing what to do with that information, I decided to take some more conventional sound deadening steps in the hopes they would help. First up was some CLD on the outer door skin:
I then stuffed a bunch of butyl rope above and below the crash bar to provide better connection to the outer skin to make it more rigid and hopefully vibrate less.
I found the little bars for the handle pull also made some noises, so I stuffed some closed cell foam under them so they couldn't rattle.
To hopefully keep any sound waves from bouncing around inside the door panel and to direct them into the cabin, I glued a bunch of 3M Thinsulate around the speaker opening.
Last edited by 95maxrider; Apr 4, 2025 at 06:48 AM.
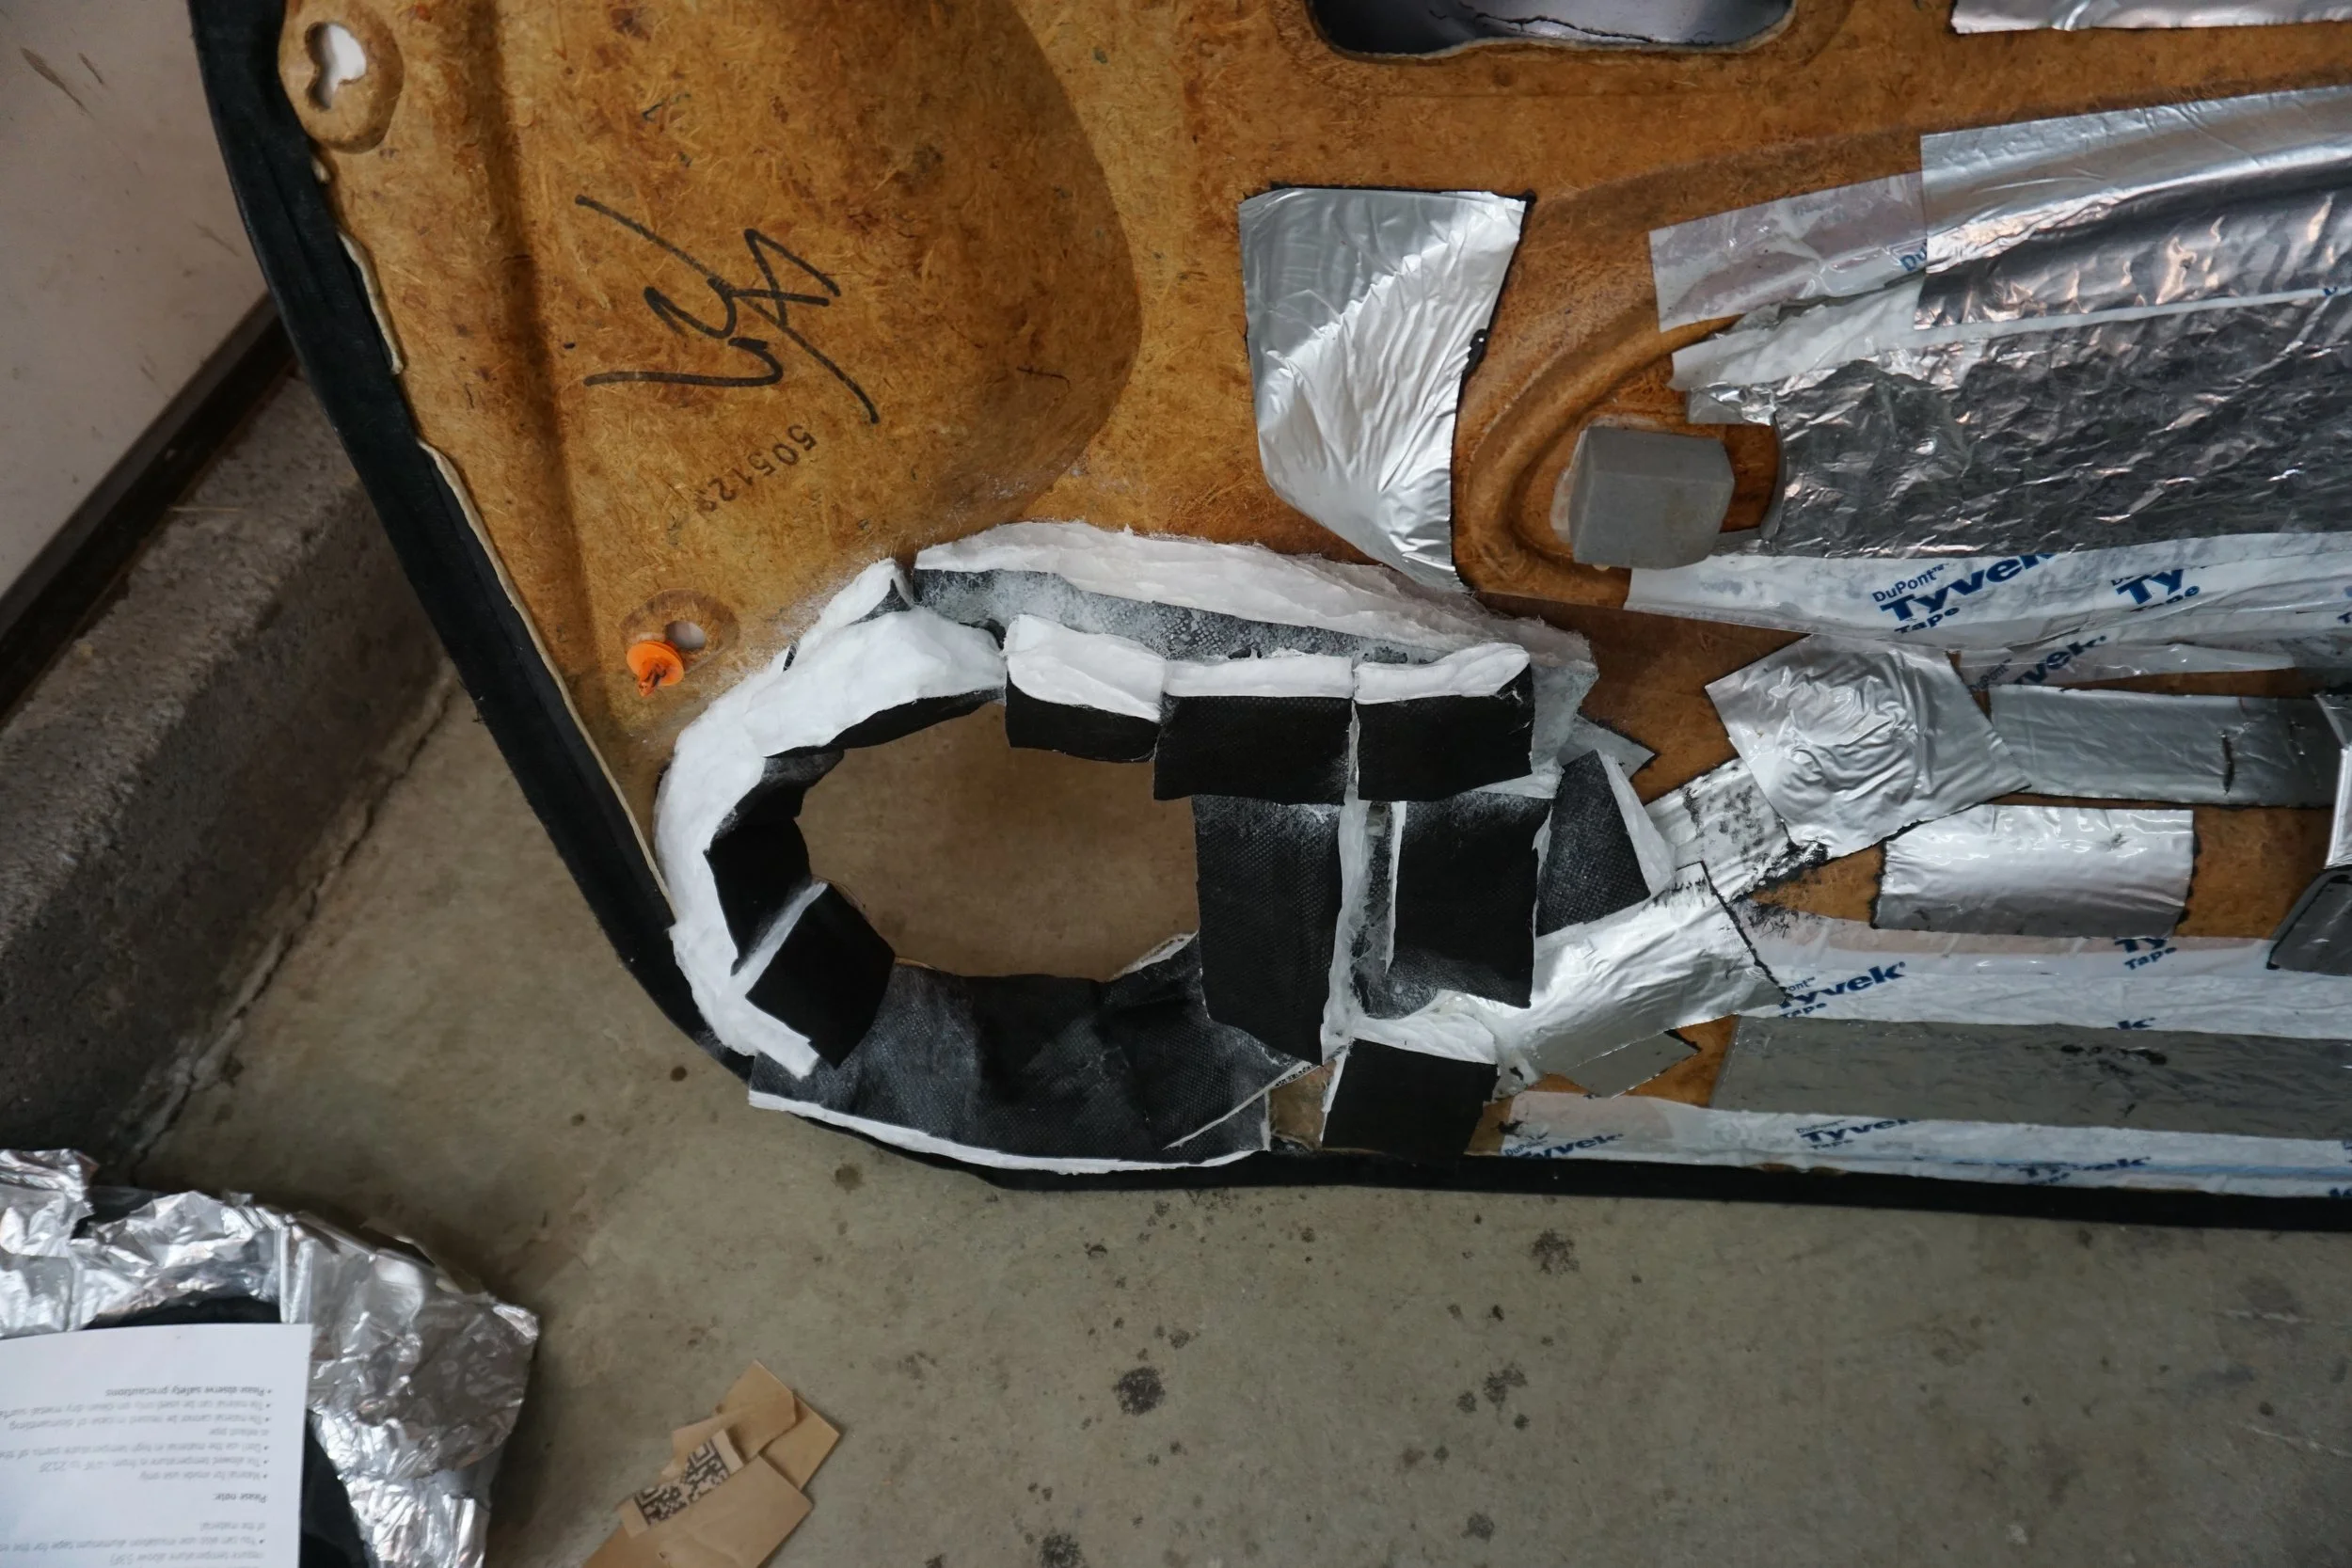
The final step was to cut up a bunch of 1" Owens Corning 703 fiberglass, wrap it in very thin plastic, and tape it to the outer door skin. This is what those sound absorber panels in recording studios are made of. The goal is to have it absorb the back waves from the speakers, preventing the waves from bouncing around inside the door and causing rattles, but they should also help absorb noises from outside the vehicle.
Unfortunately, not long after I did all this, the nut holding on the front control arm bushing decided to pop off, and due to working on a family member's vehicle, I haven't had a chance to fix or drive the I30 yet. But I'm hoping for some noticeable improvements from all that work!
Unfortunately, not long after I did all this, the nut holding on the front control arm bushing decided to pop off, and due to working on a family member's vehicle, I haven't had a chance to fix or drive the I30 yet. But I'm hoping for some noticeable improvements from all that work!


Jeez, has it really been almost a year since I did an update?!? I know I've been busy with other cars, but damn.
In no particular order....my alternator caught on fire over the summer! It was a hot and swampy DC afternoon, so the AC was cranking as was the stereo. I got home from work and parked in the driveway, and went in to get changed. A few minutes later there was some frantic ringing of the doorbell, so my wife ran down and answered. It was my neighbor, who said my car was on fire! I ran downstairs half dressed and grabbed two fire extinguishers (I knew one was probably bad, but I didn't know which one). I look at my car and there's smoke coming from under the hood, so I pop it and see my alternator is glowing red and smoking. The first fire extinguisher was a dud, but thankfully the second worked and put out the fire:
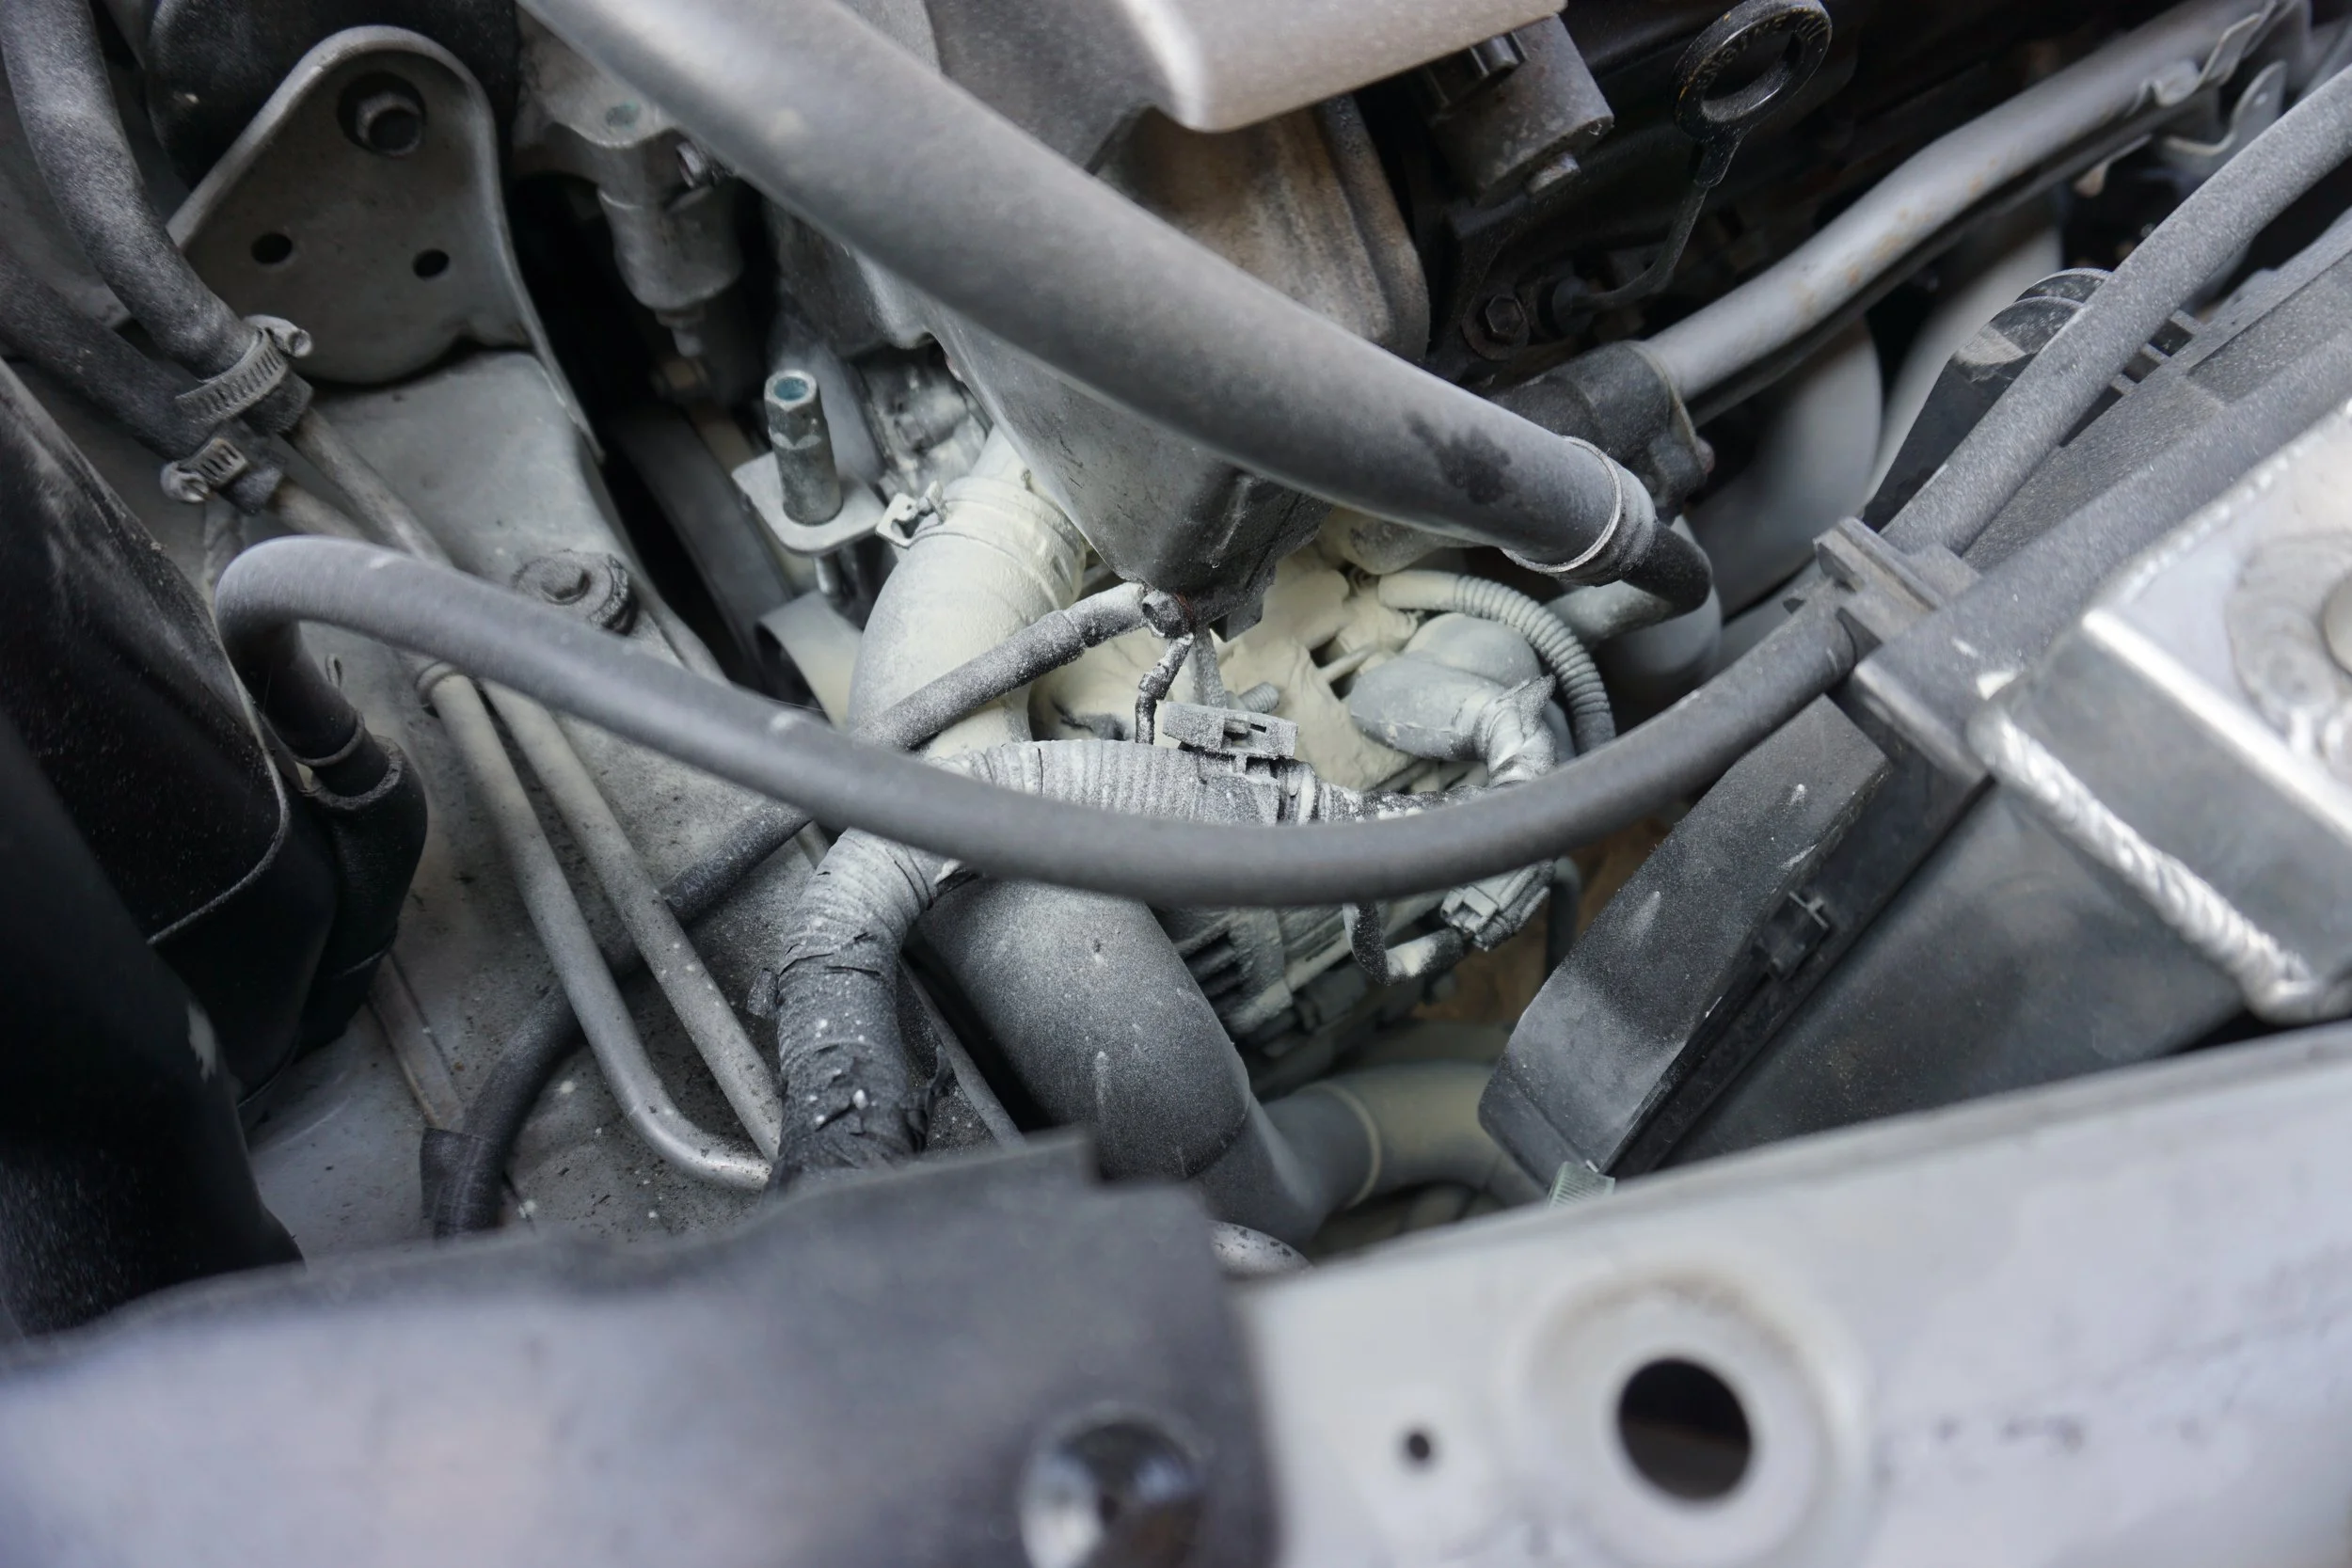
Holy moley did it smell bad! I disconnected the battery and took a closer look at it the next day. Thankfully the only damage was to the little wiring harness that goes to the alternator, and it was only singed. I shuddered to think what would have happened had my neighbor not been in his front yard at the time! My car would have just burned in my driveway and I would have been none the wiser. A terrifying thought.
I had been coveting an upgraded alternator for a while to make sure it can keep up with the stereo, so I finally had a good excuse to pull the trigger. I went with a 200a Singer alternator, as Singer has an amazing reputation. Mike's customer service was great, and once he built it, it actually tested out to be a 220a unit, so I got a little free upgrade. The alternator comes with a little wiring harness adapter, so it's plug and play.
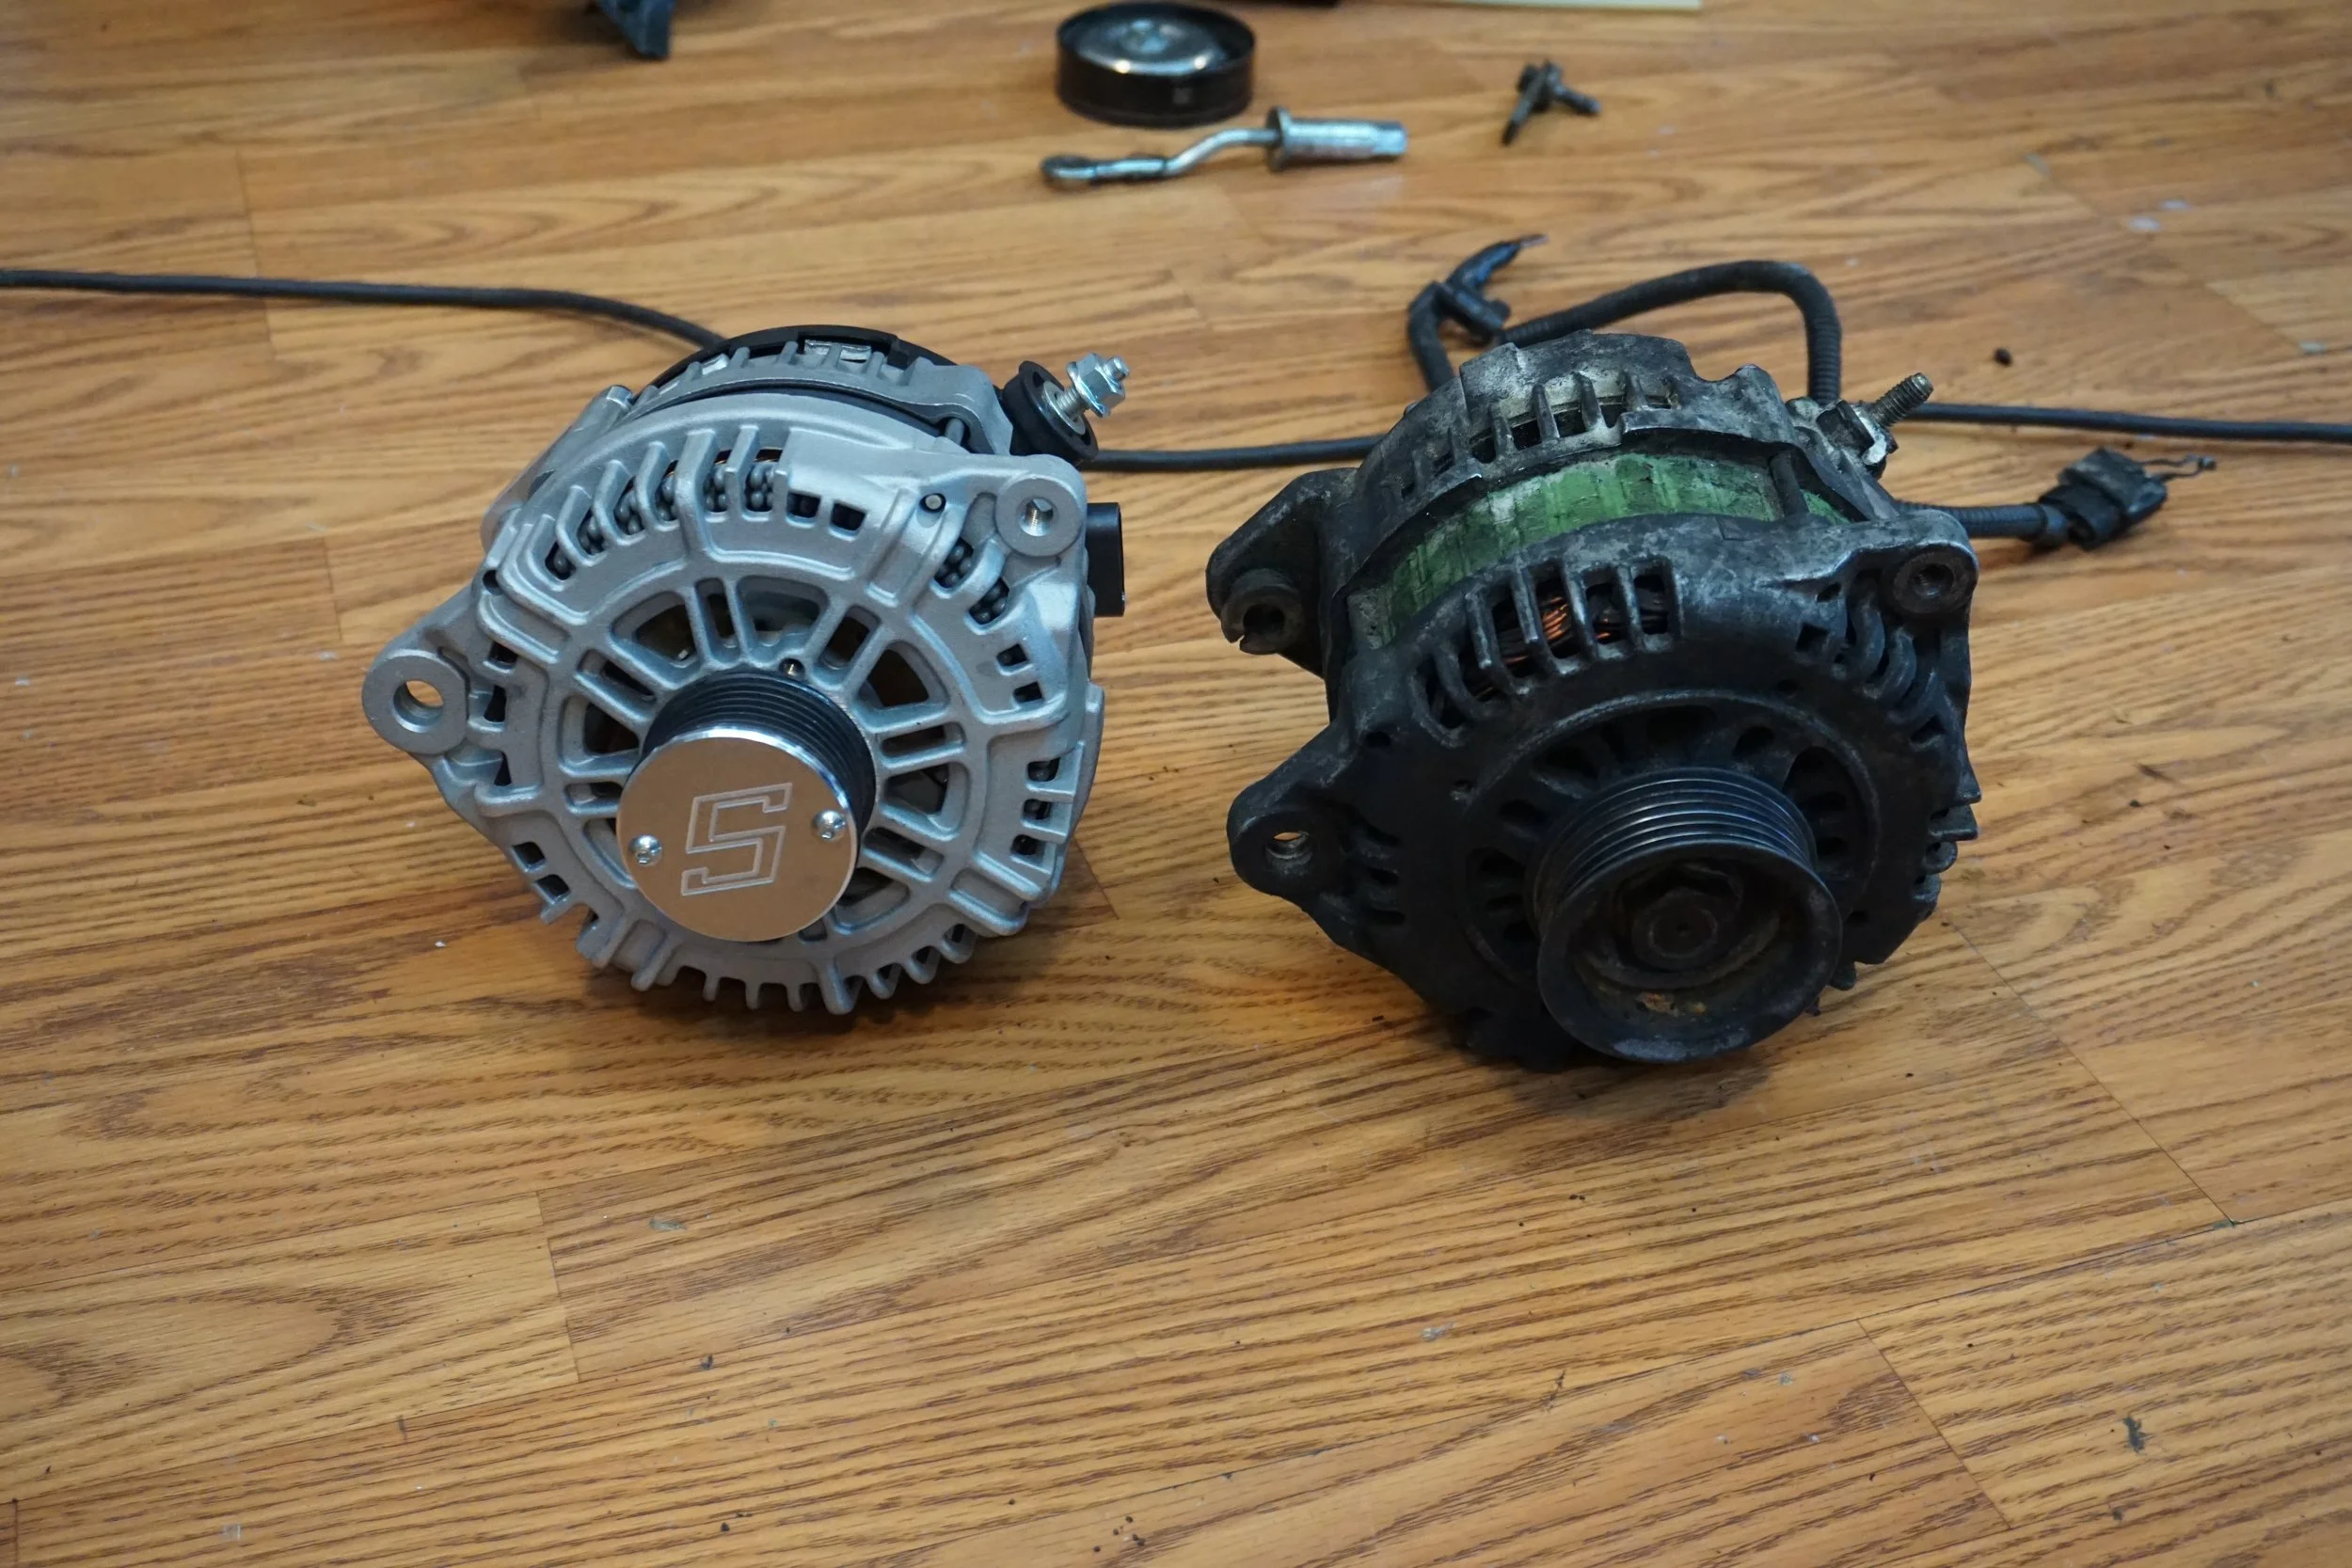
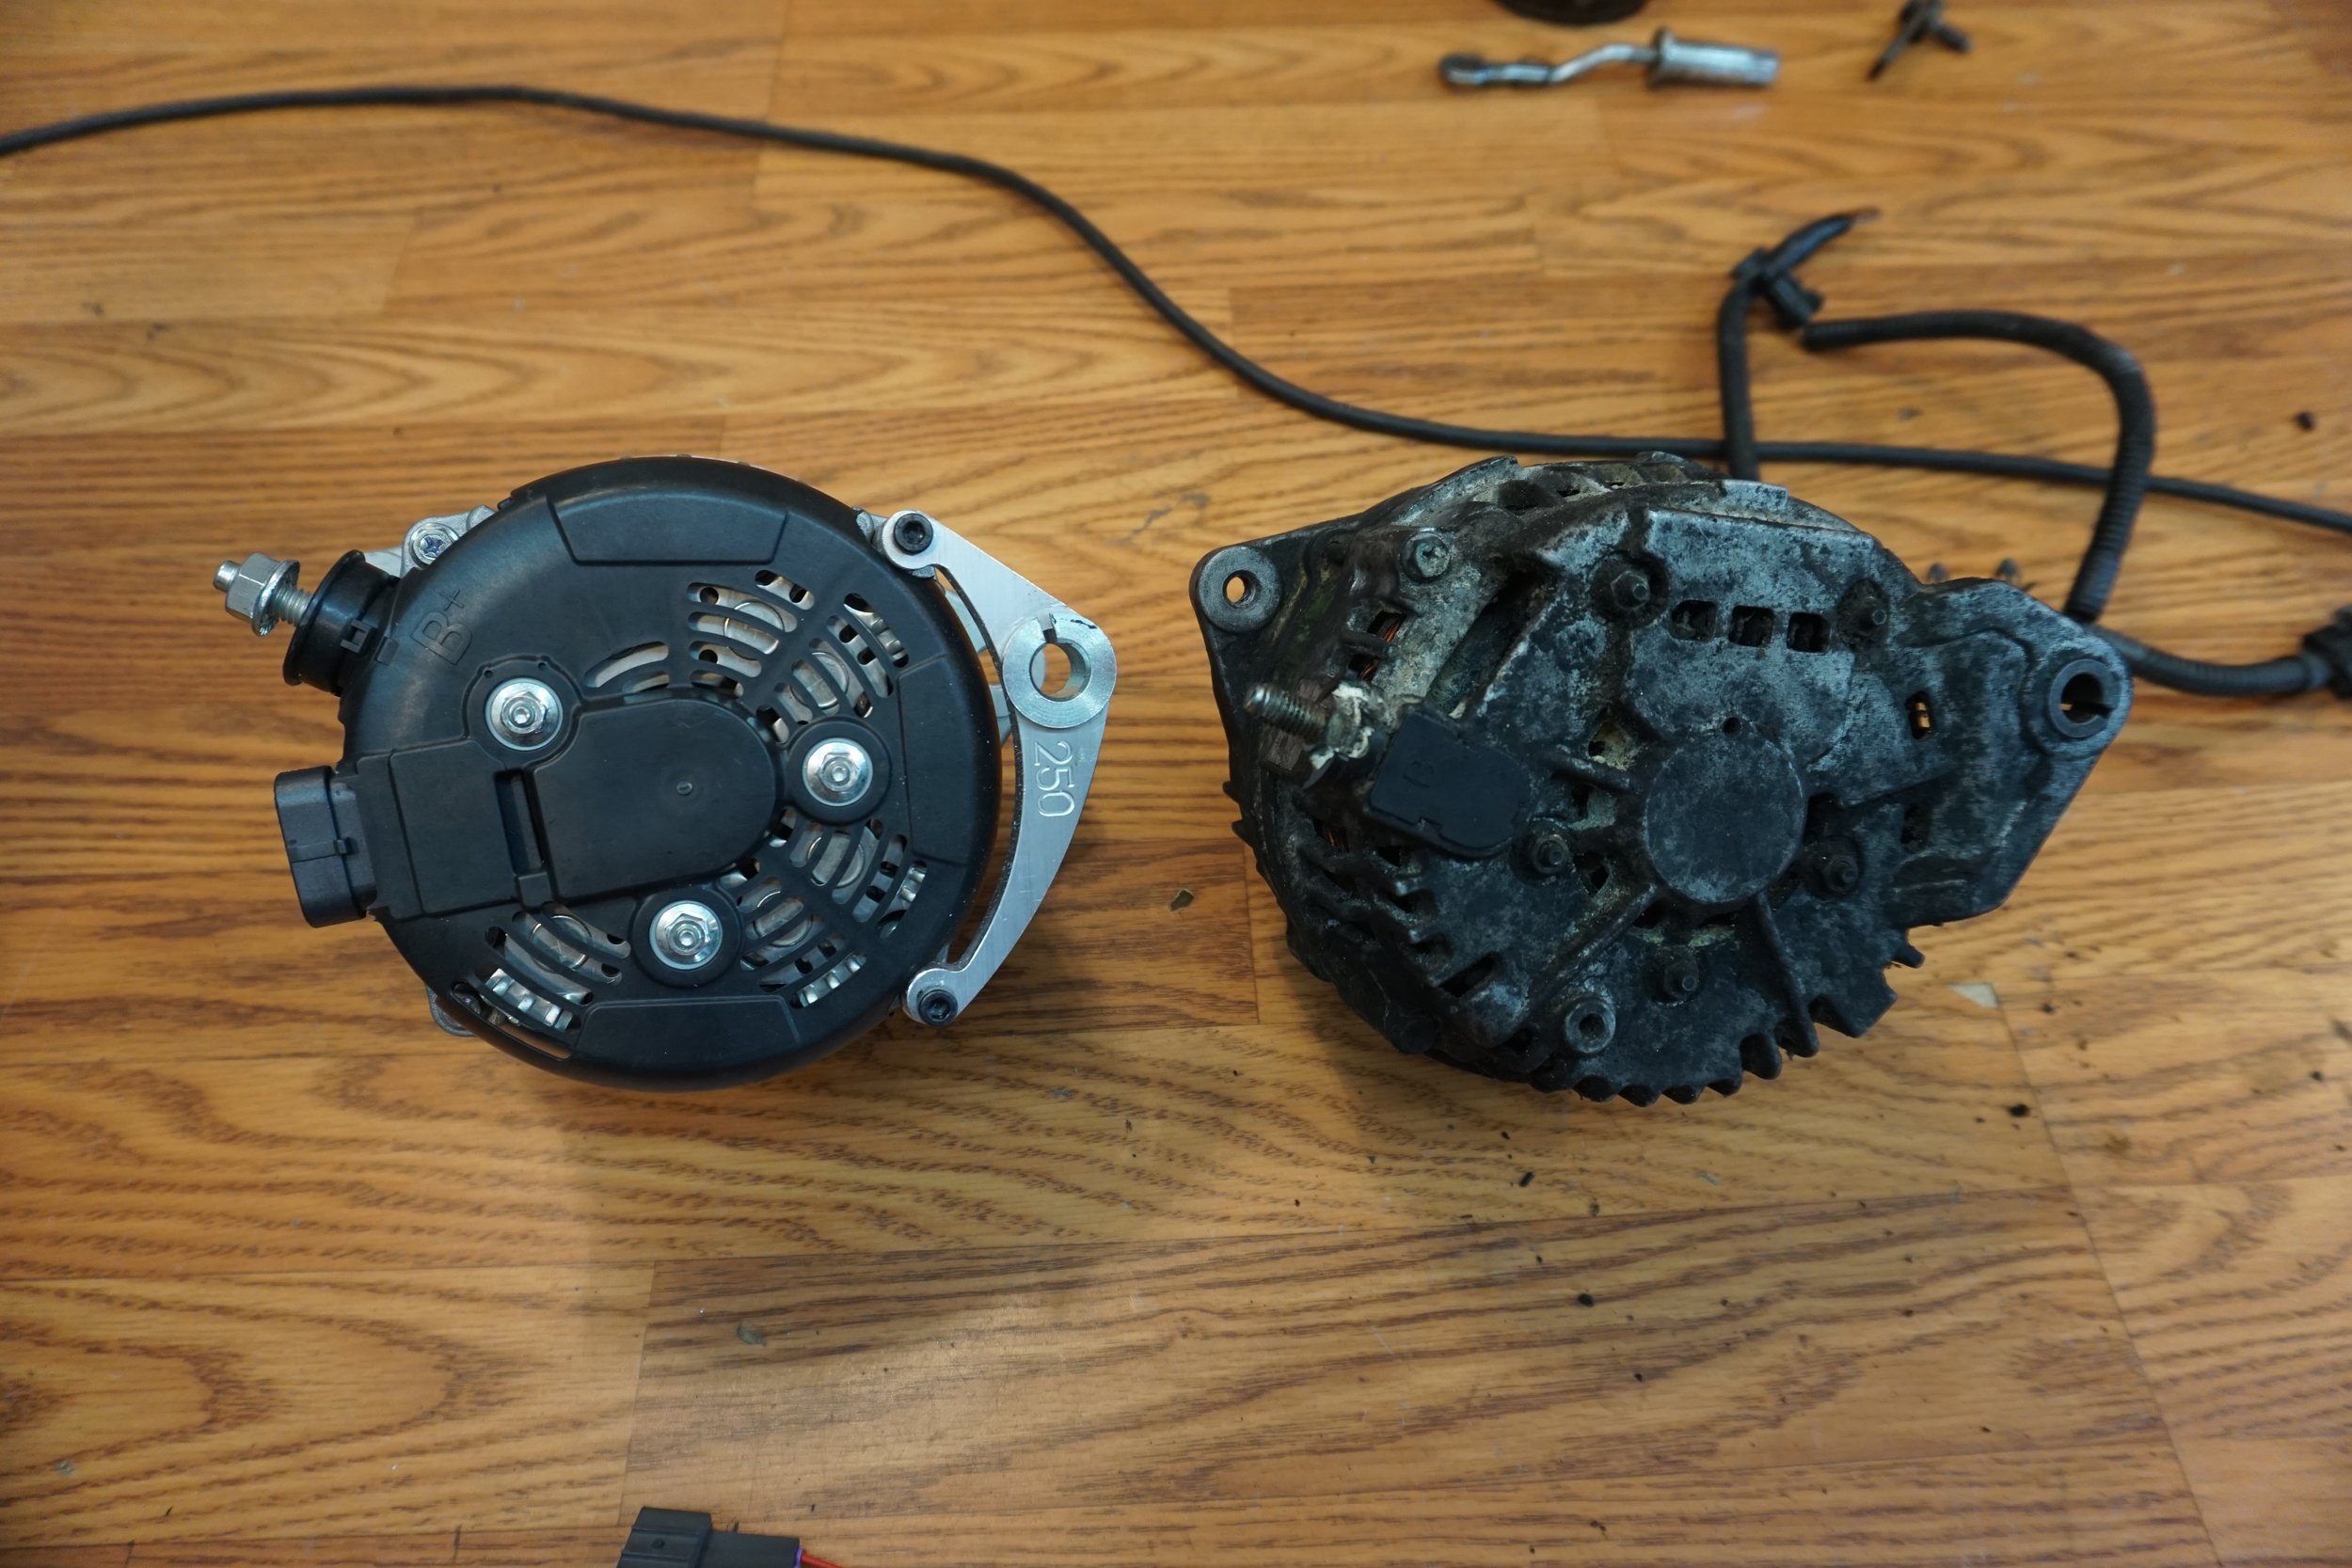
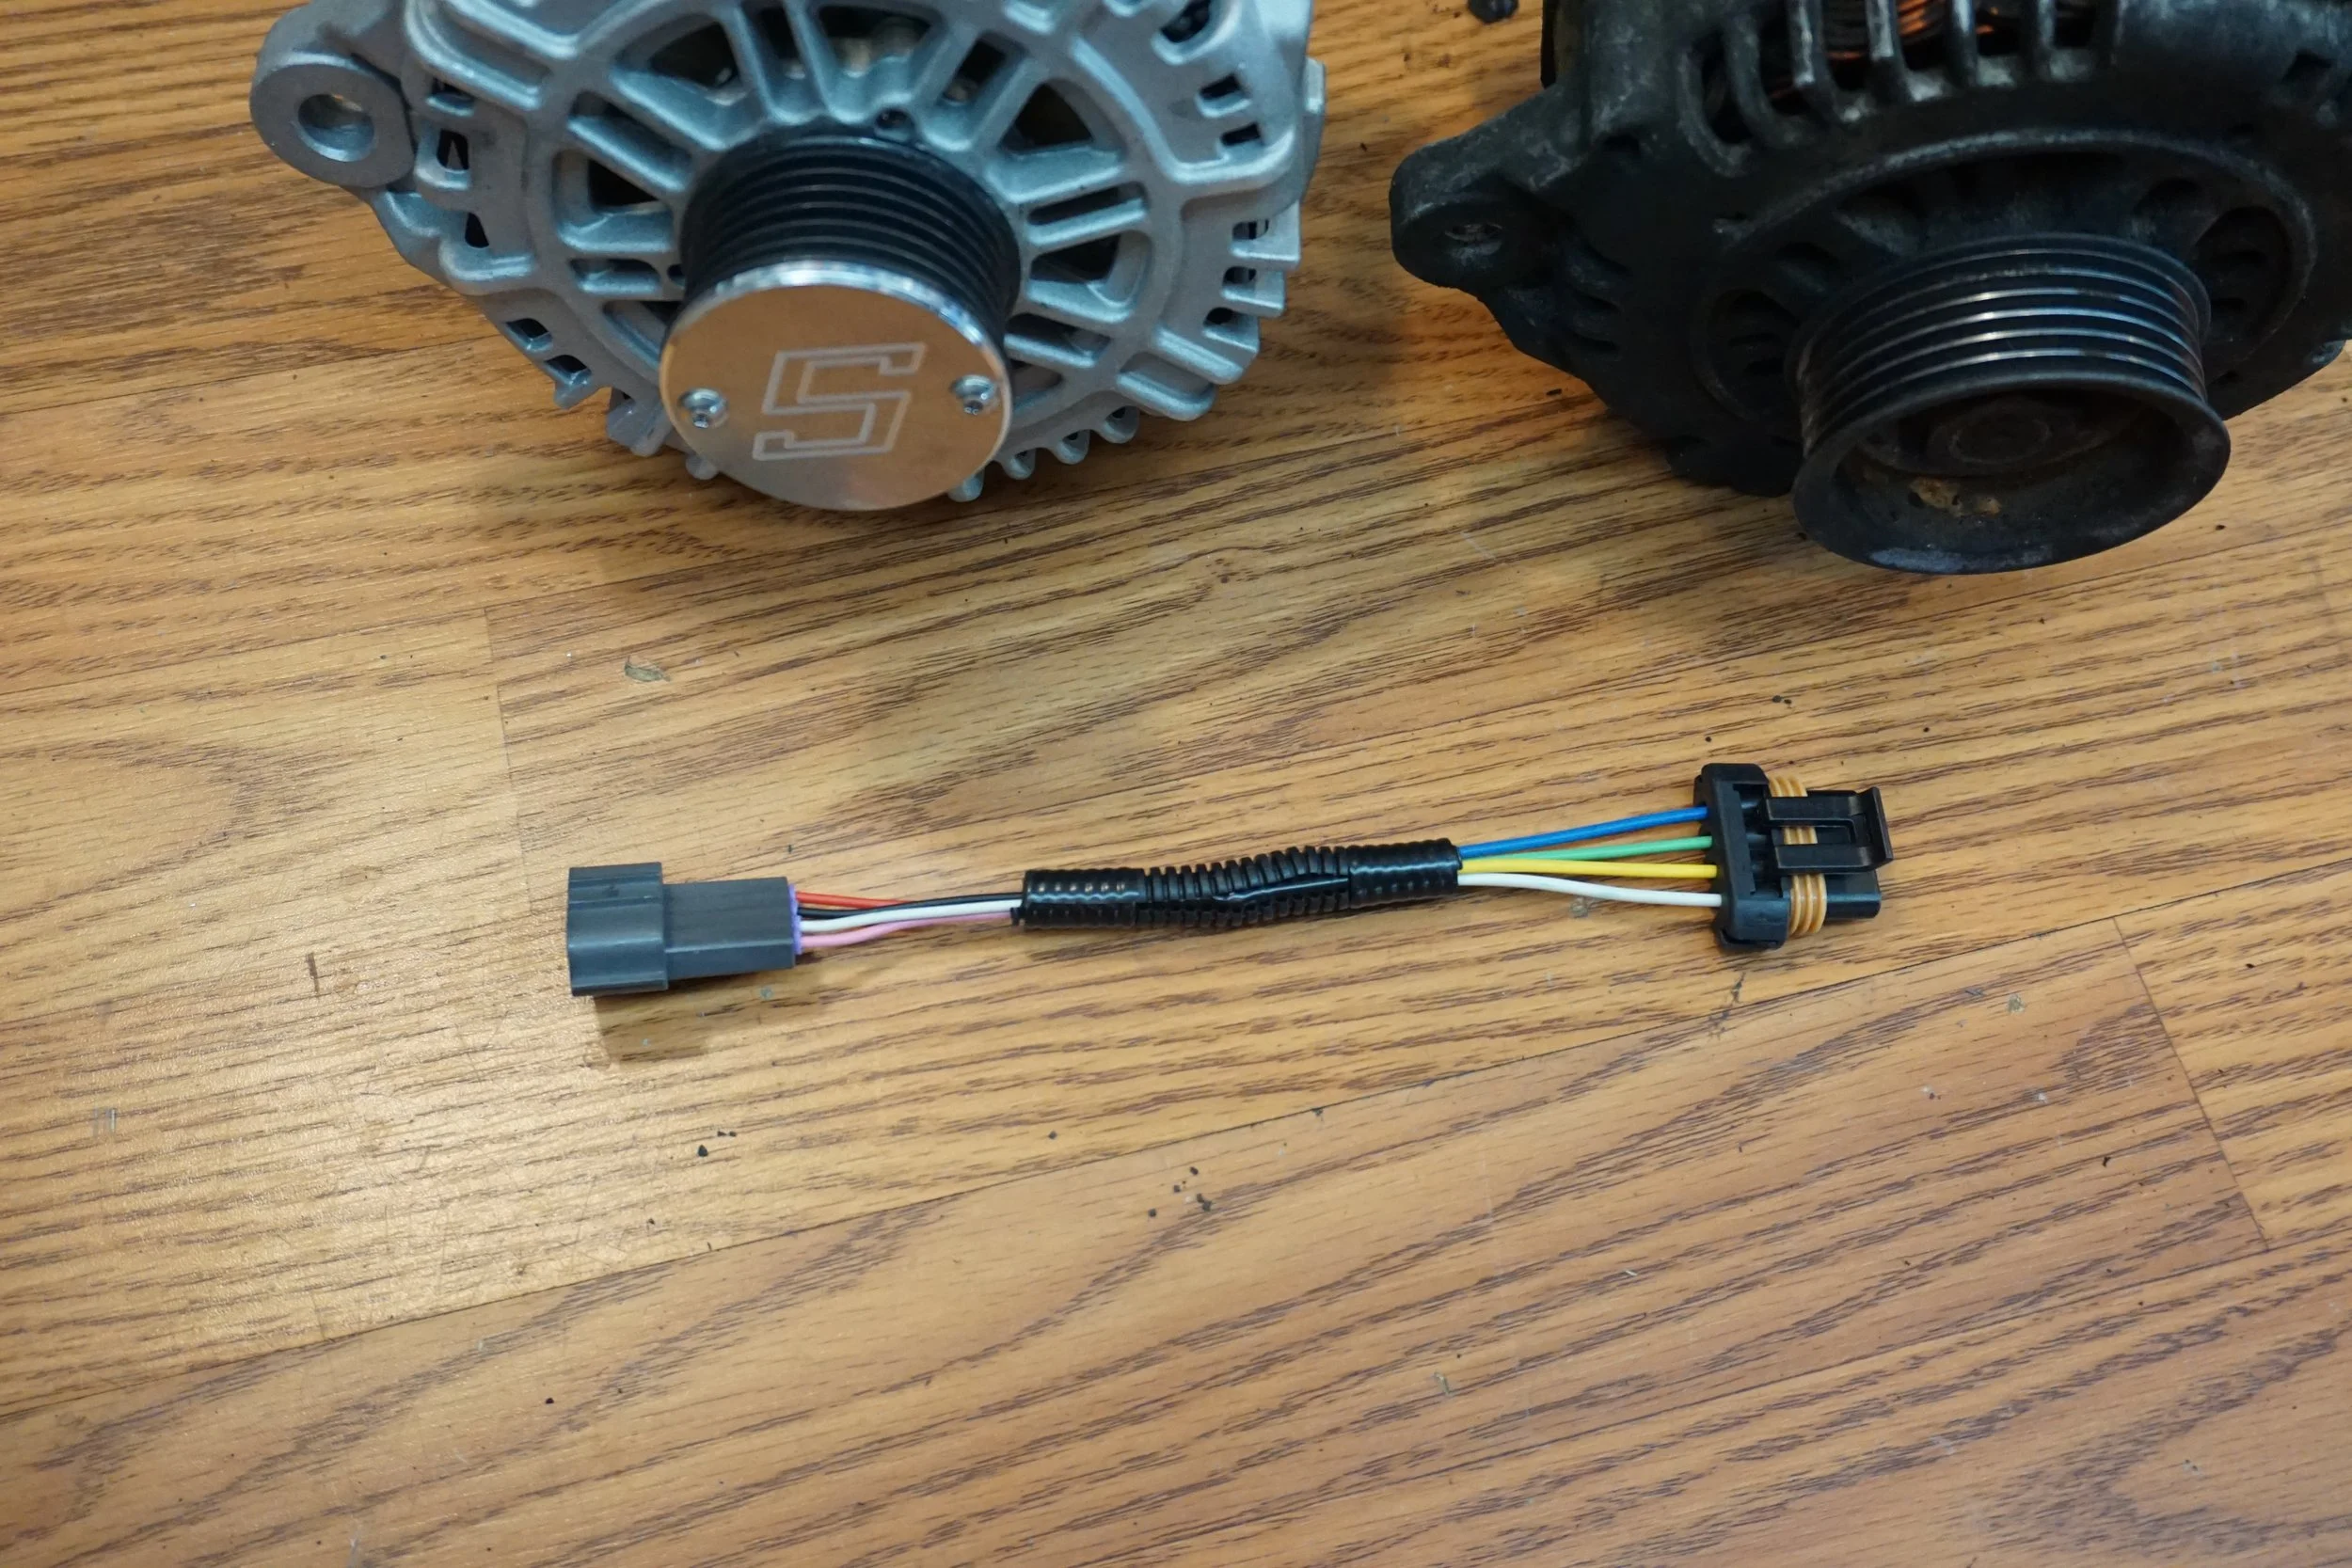
It's a beautiful thing!
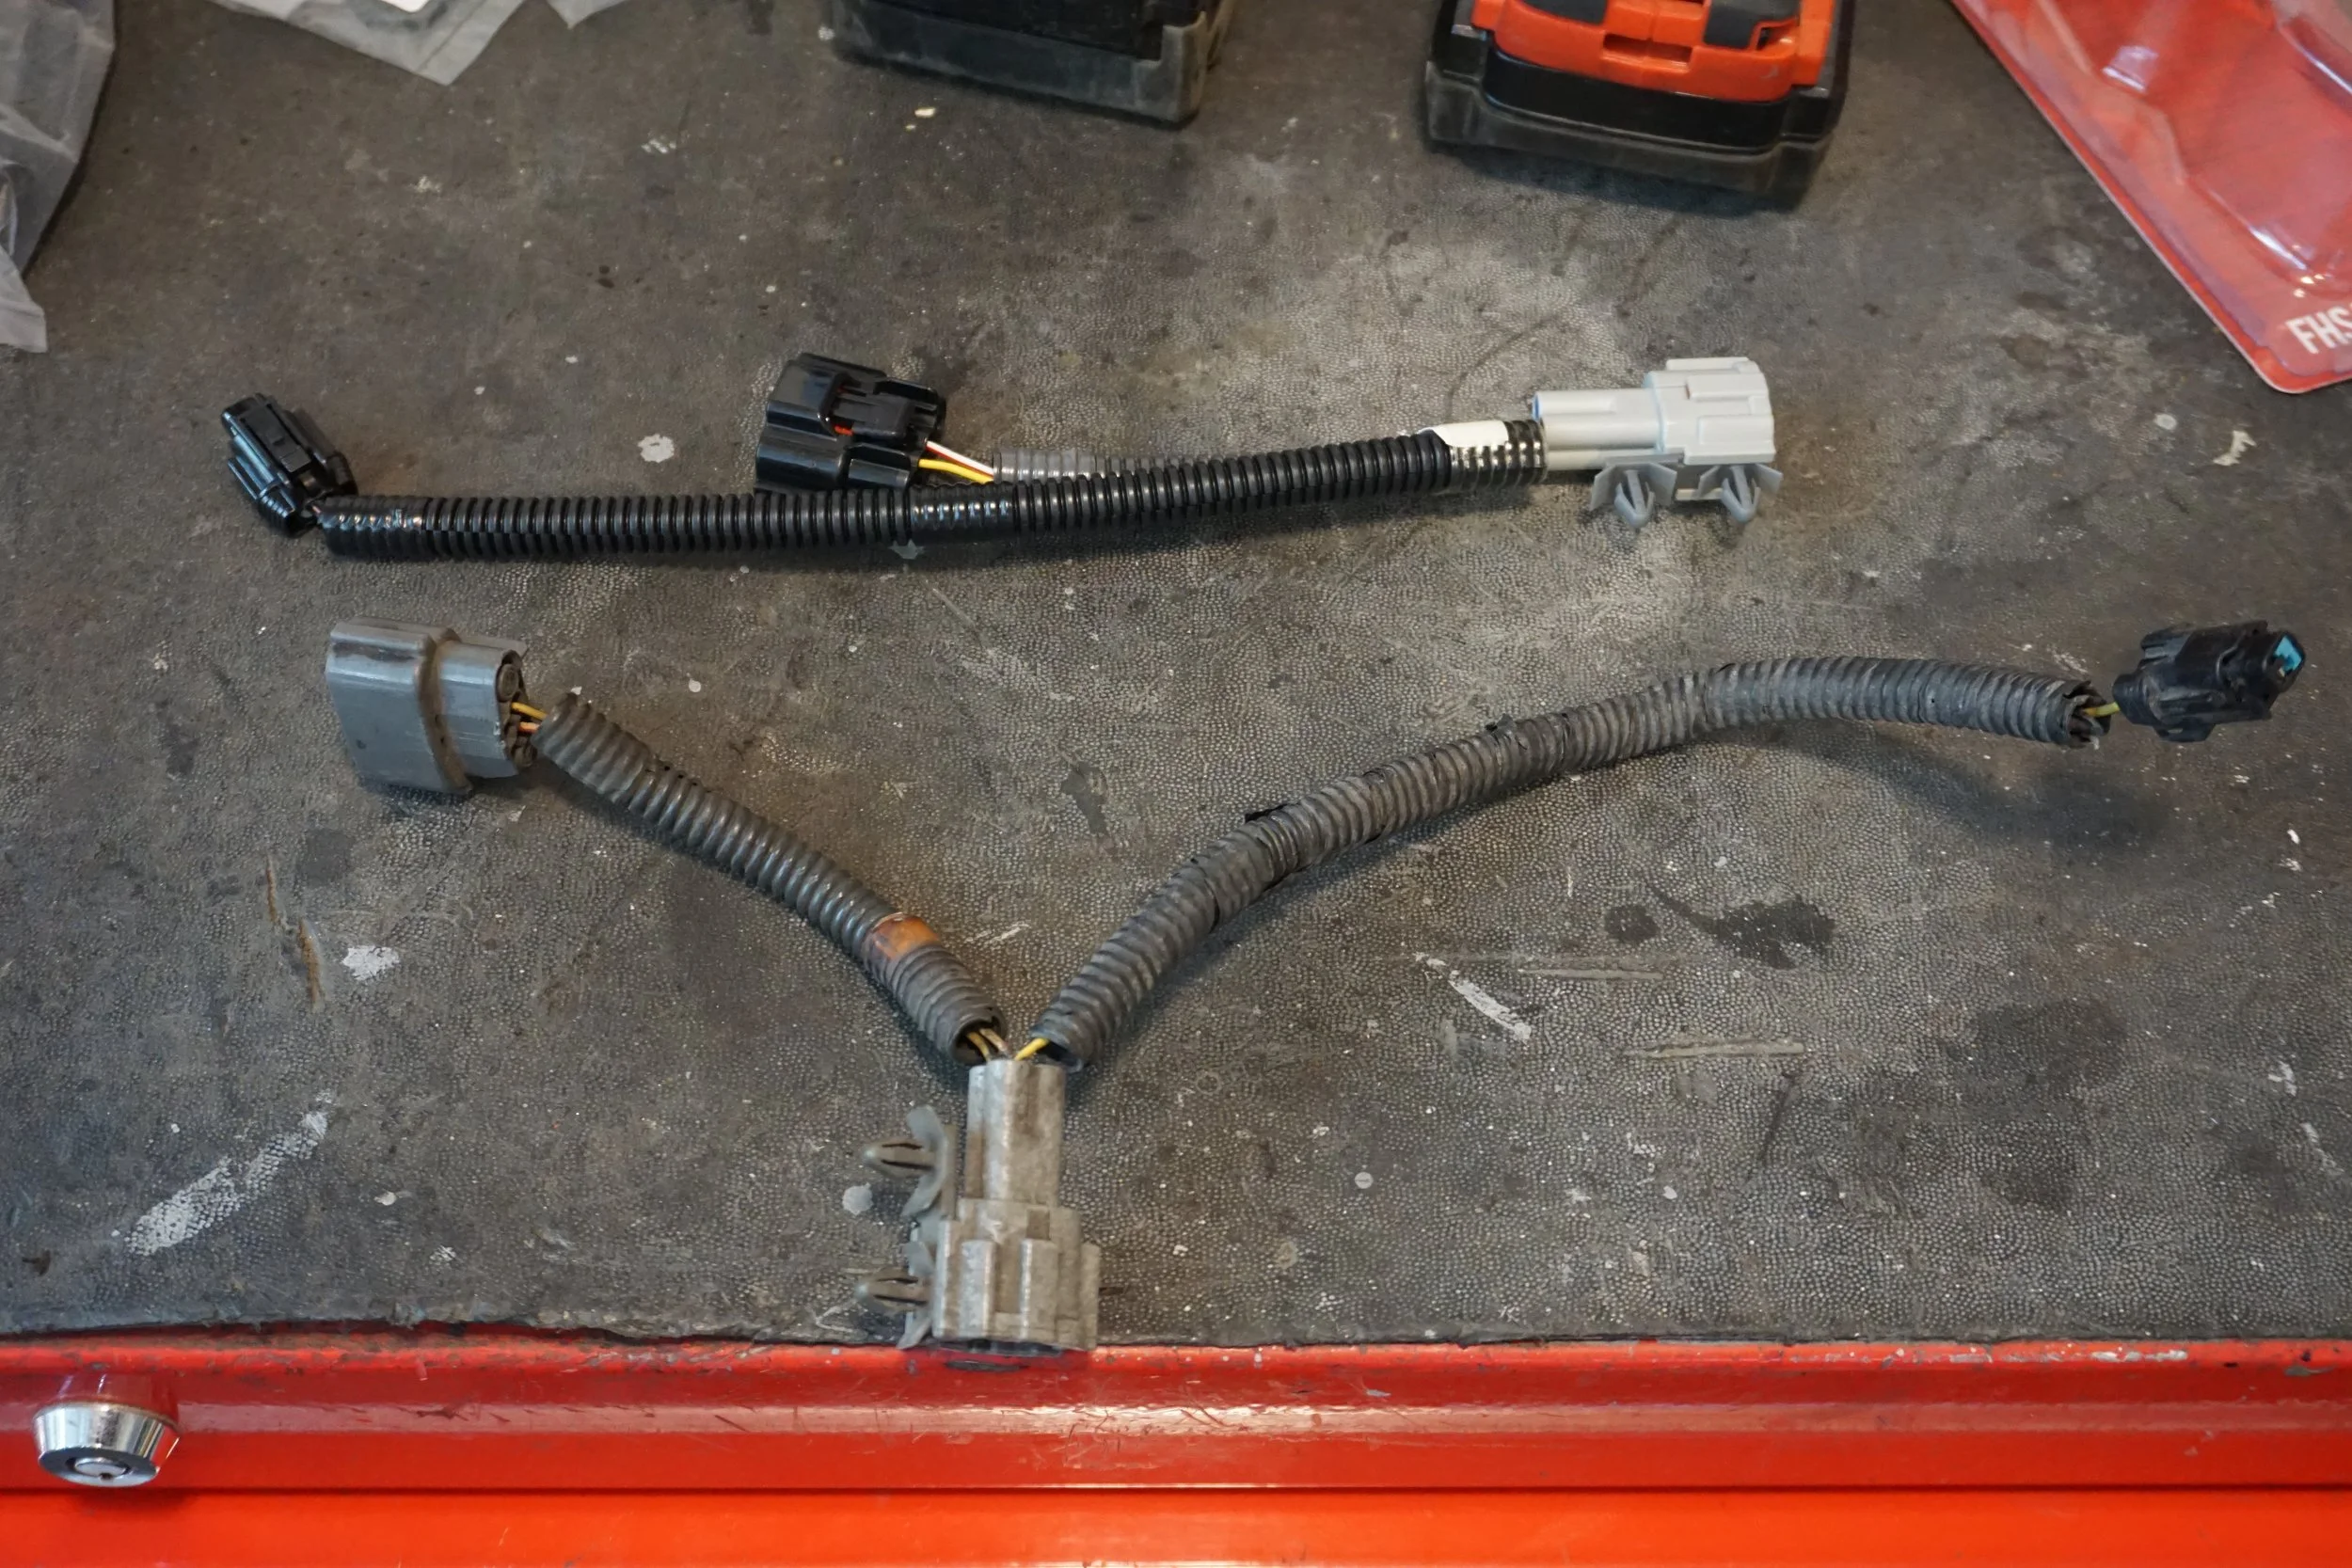
I was able to use the stock belt, but I really should find one that's a little smaller as the pulley is different than stock. I got a new alternator harness from Amayama:
Now, why did the alternator catch on fire? If I had to guess, I would say it's probably related to all of the oil that had been dripping on it for the last 10+ years. Since I'd rather not have my car catch on fire again, it was time to do some deferred maintenance. First up, was replacing the leaking VTC solenoid gasket:

I also scraped up old RTV in that area, cleaned the hell out of it, and laid down some fresh RTV.
Next up was a fresh OEM VC gasket:
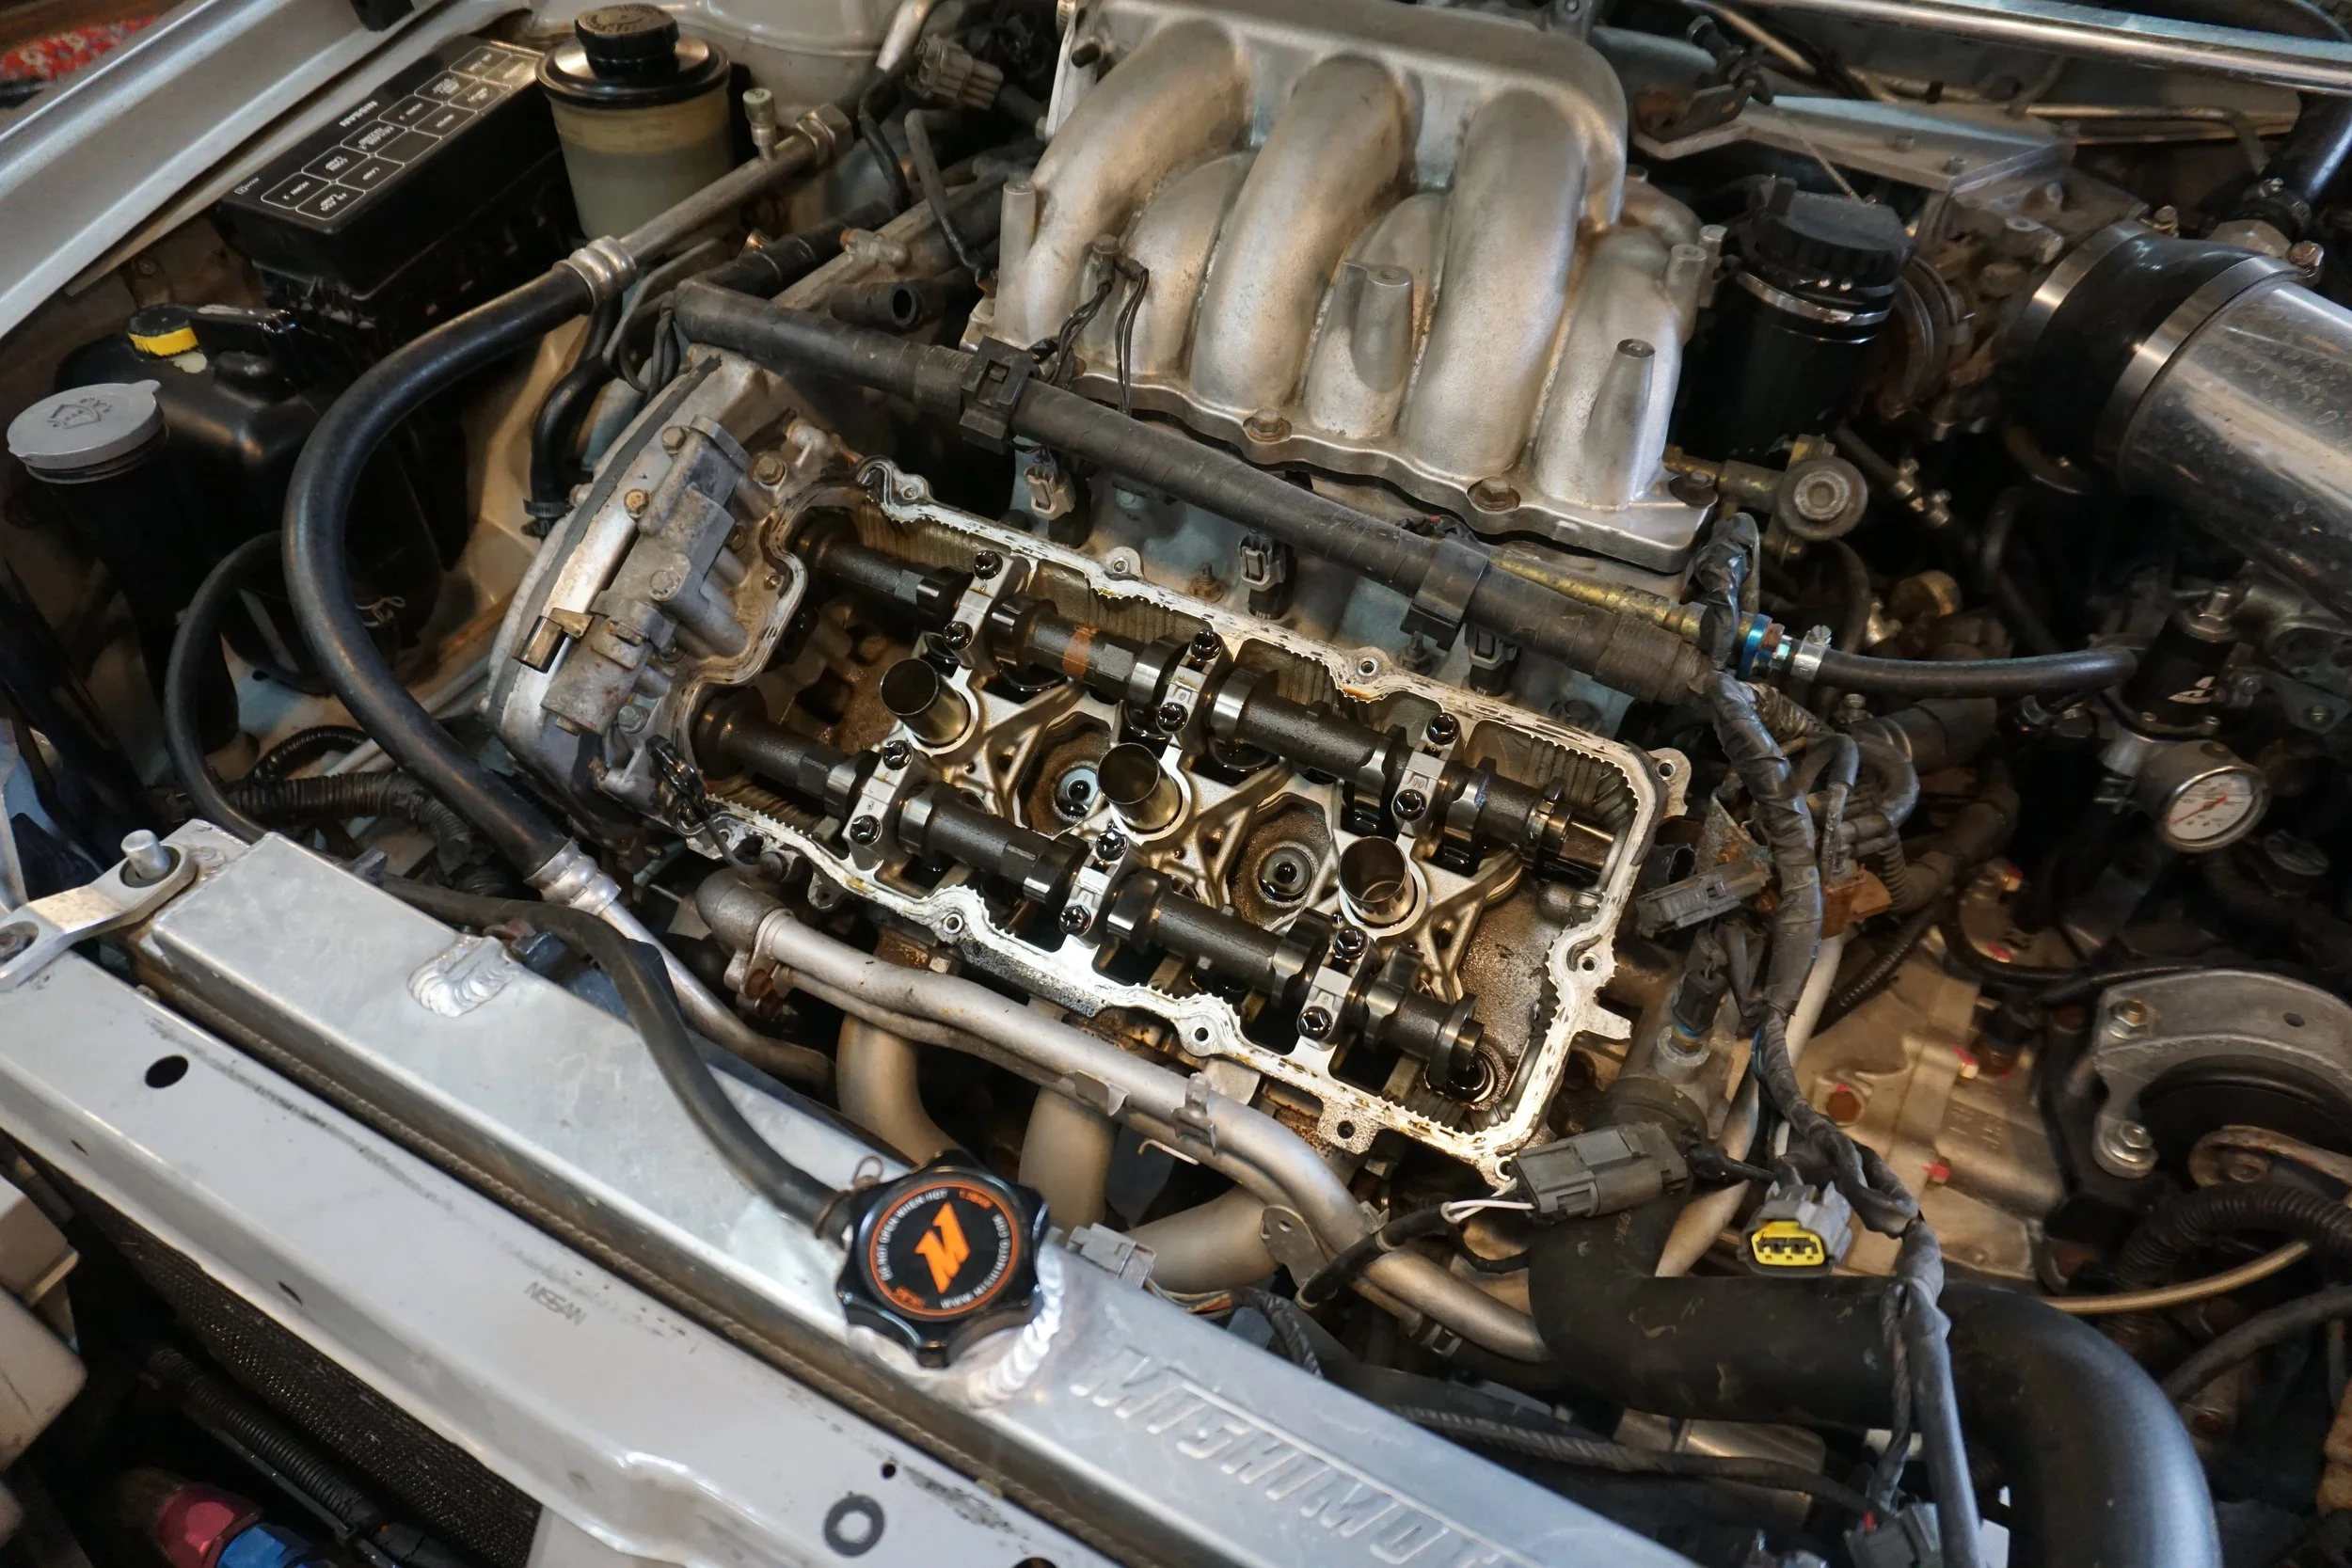
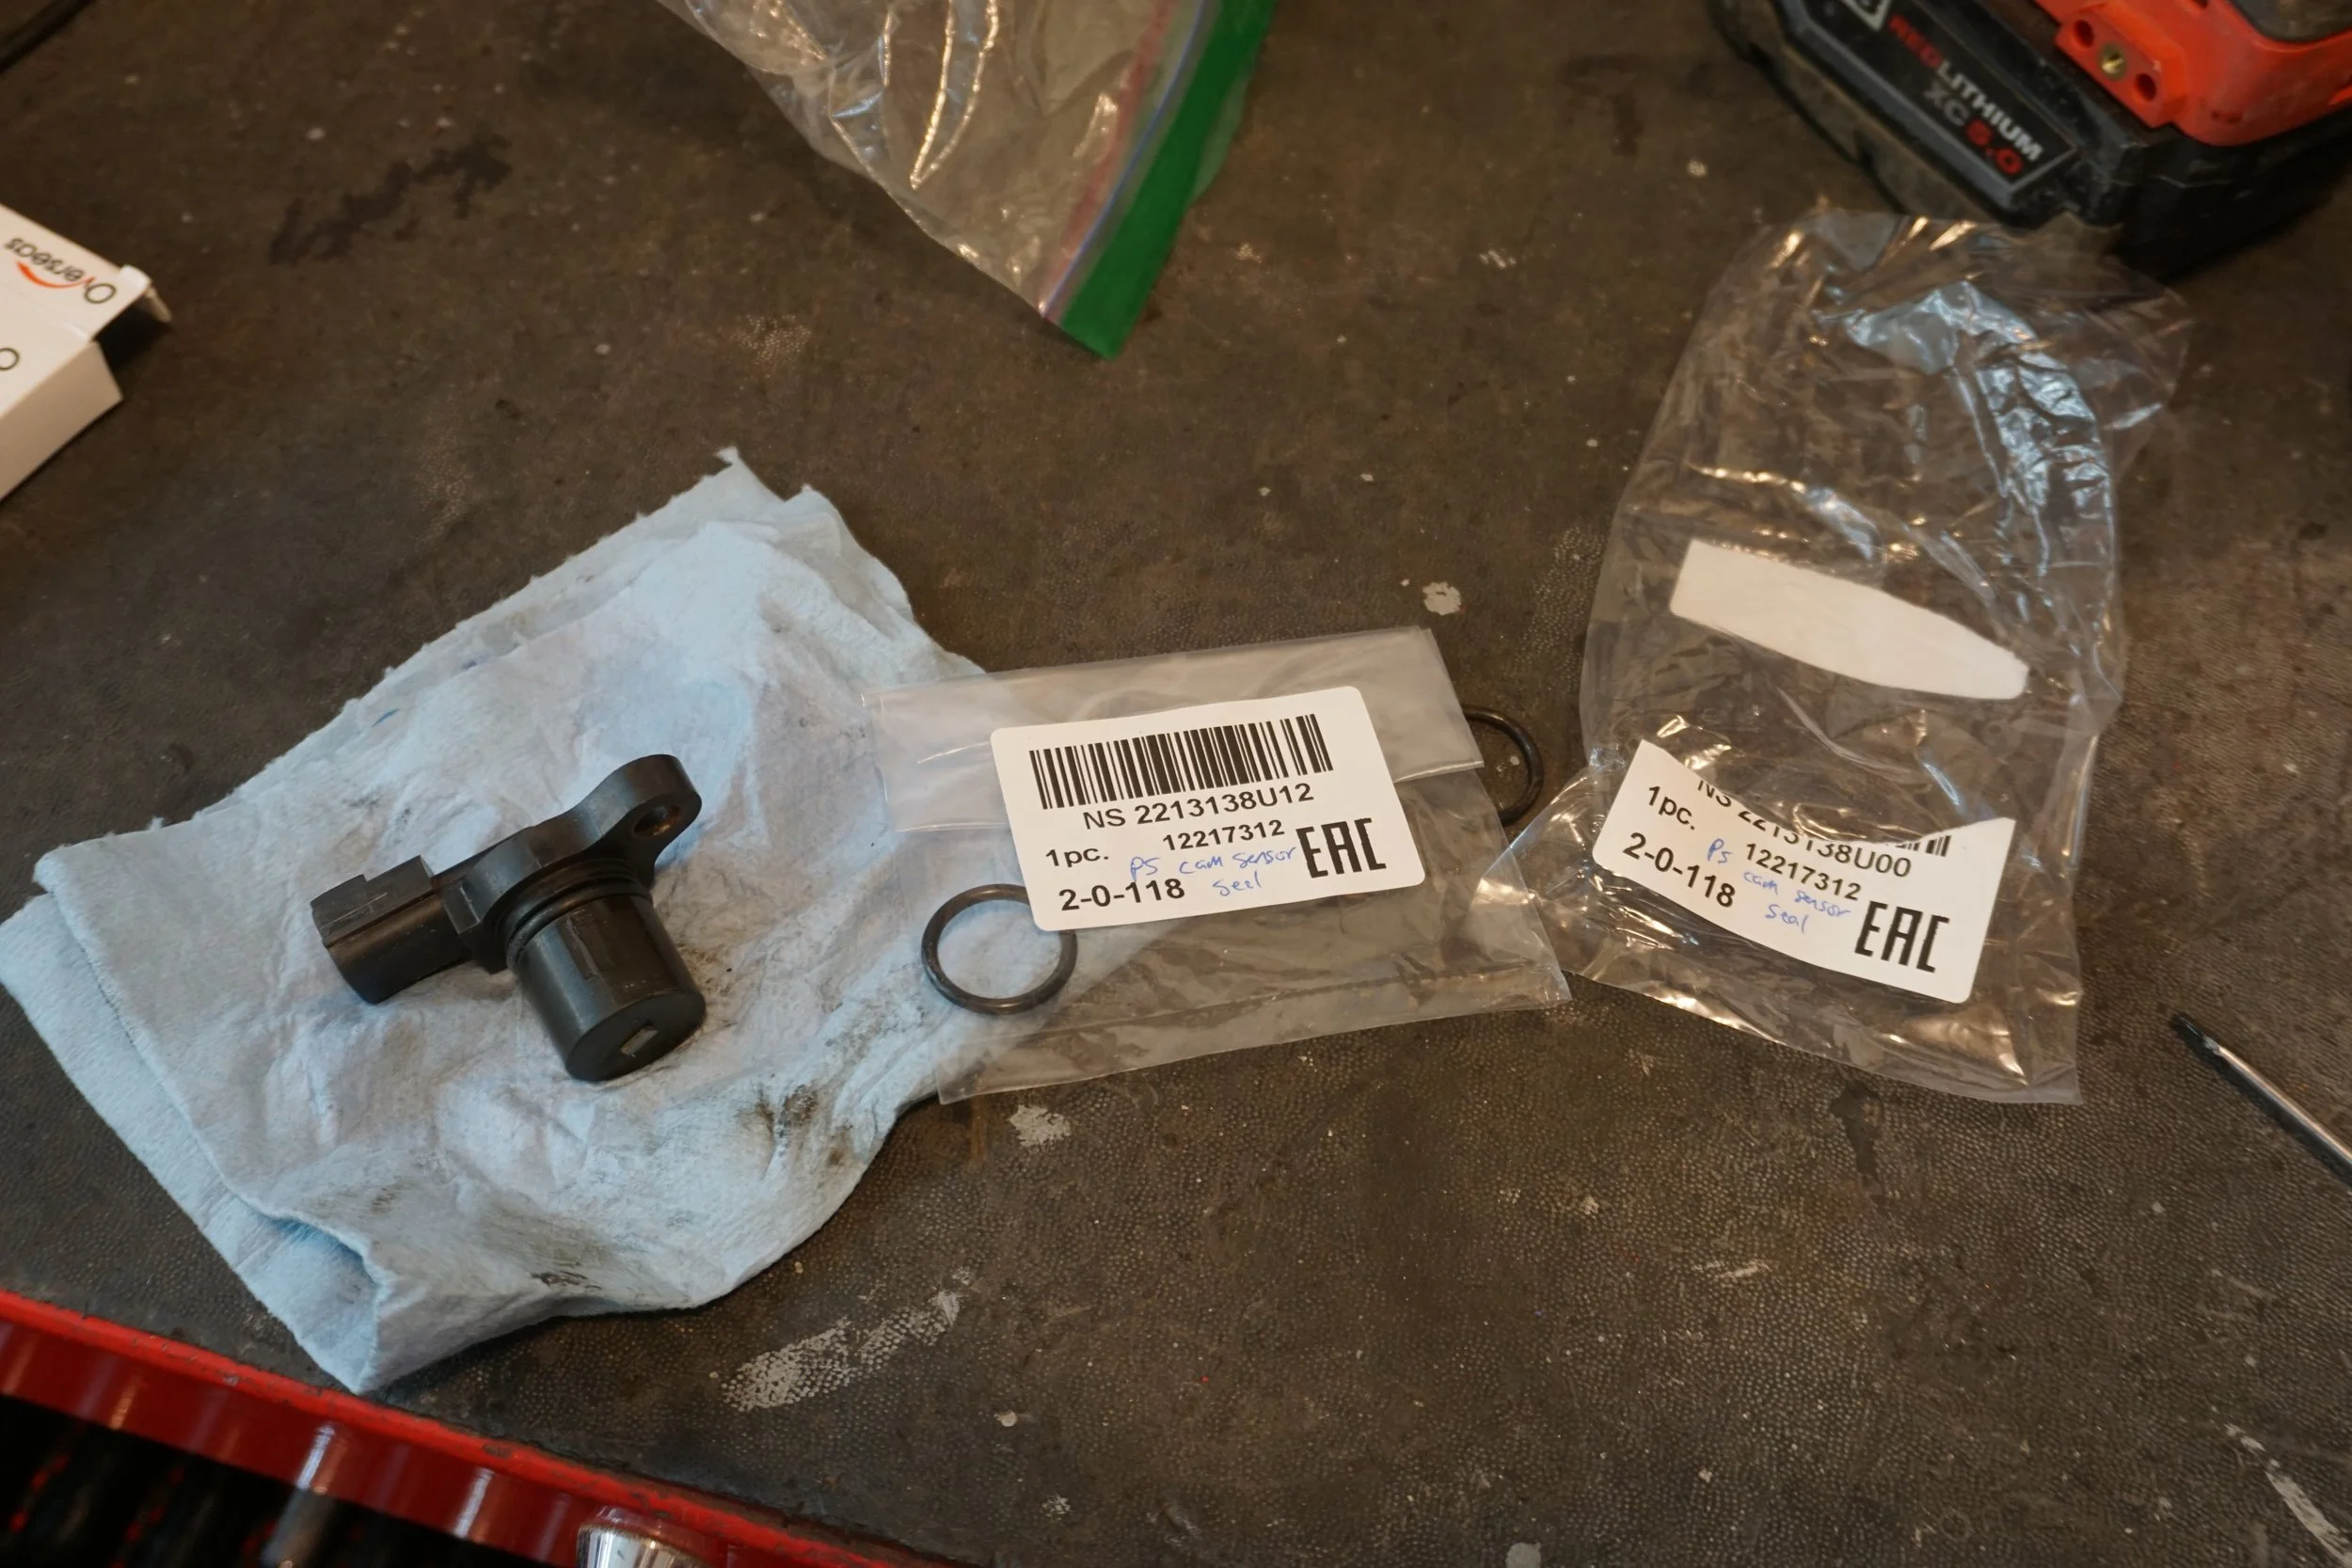
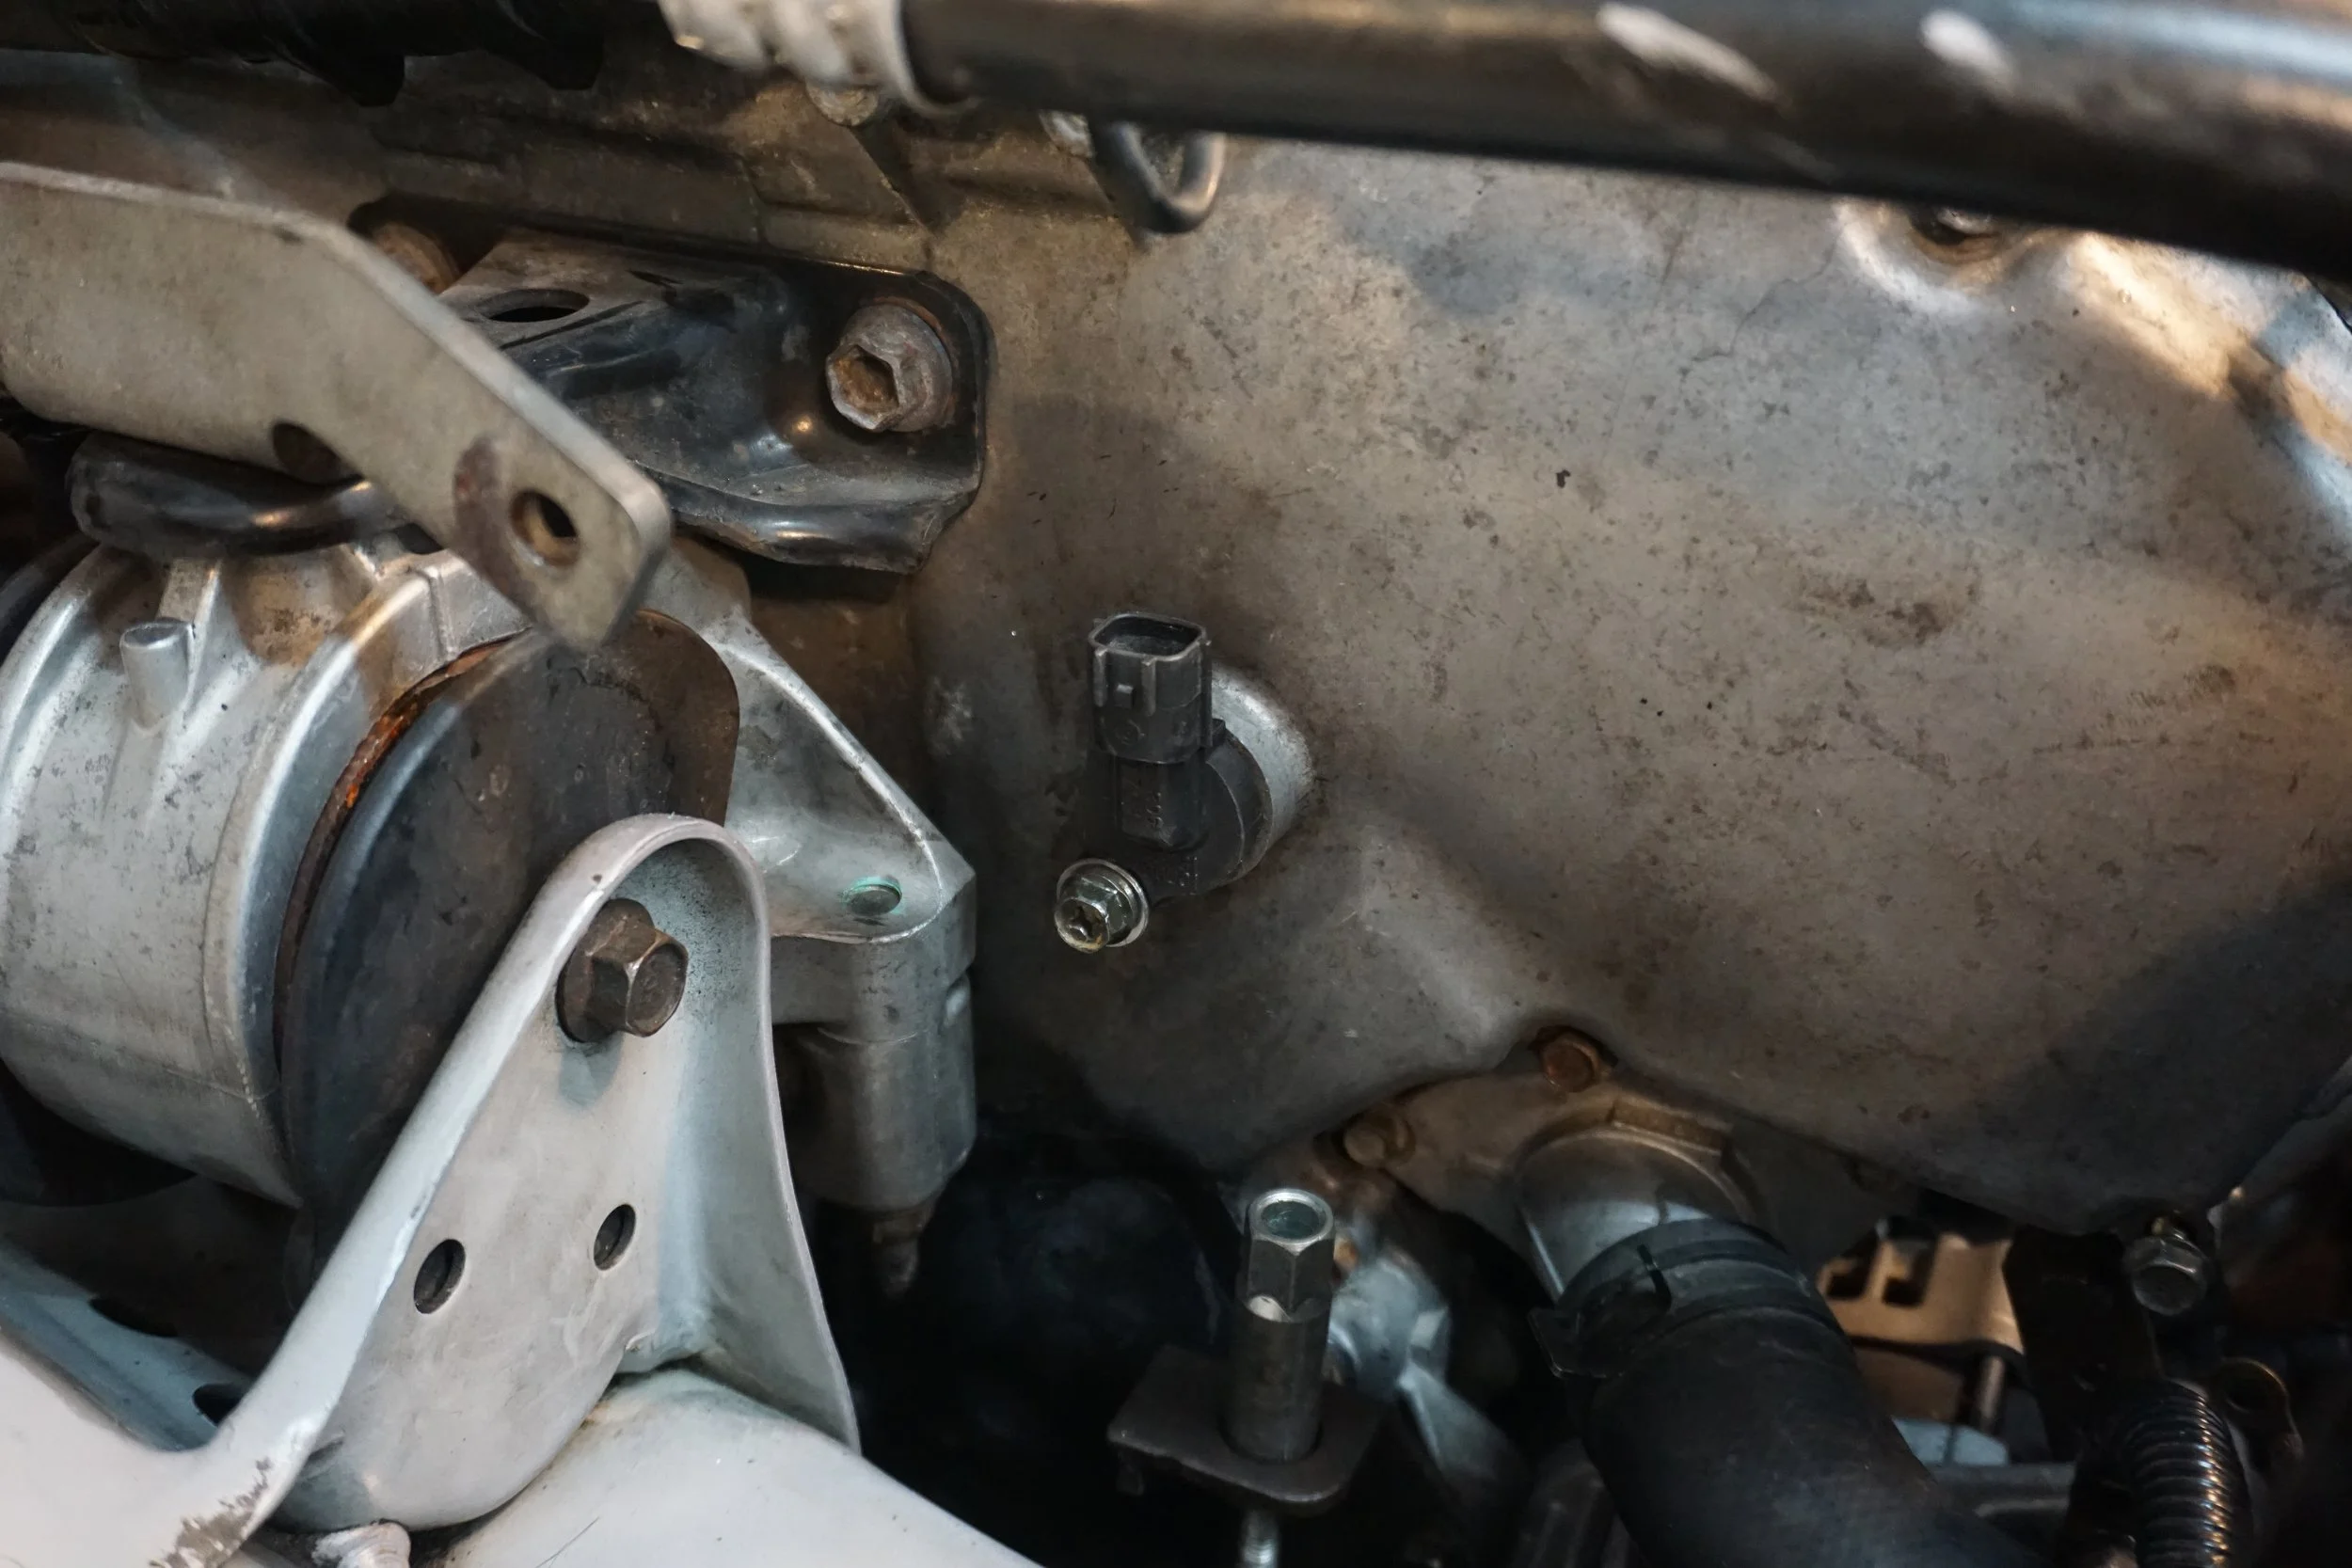
The cam sensor on the timing cover also looked like it was leaking, so I bought some new o-rings:
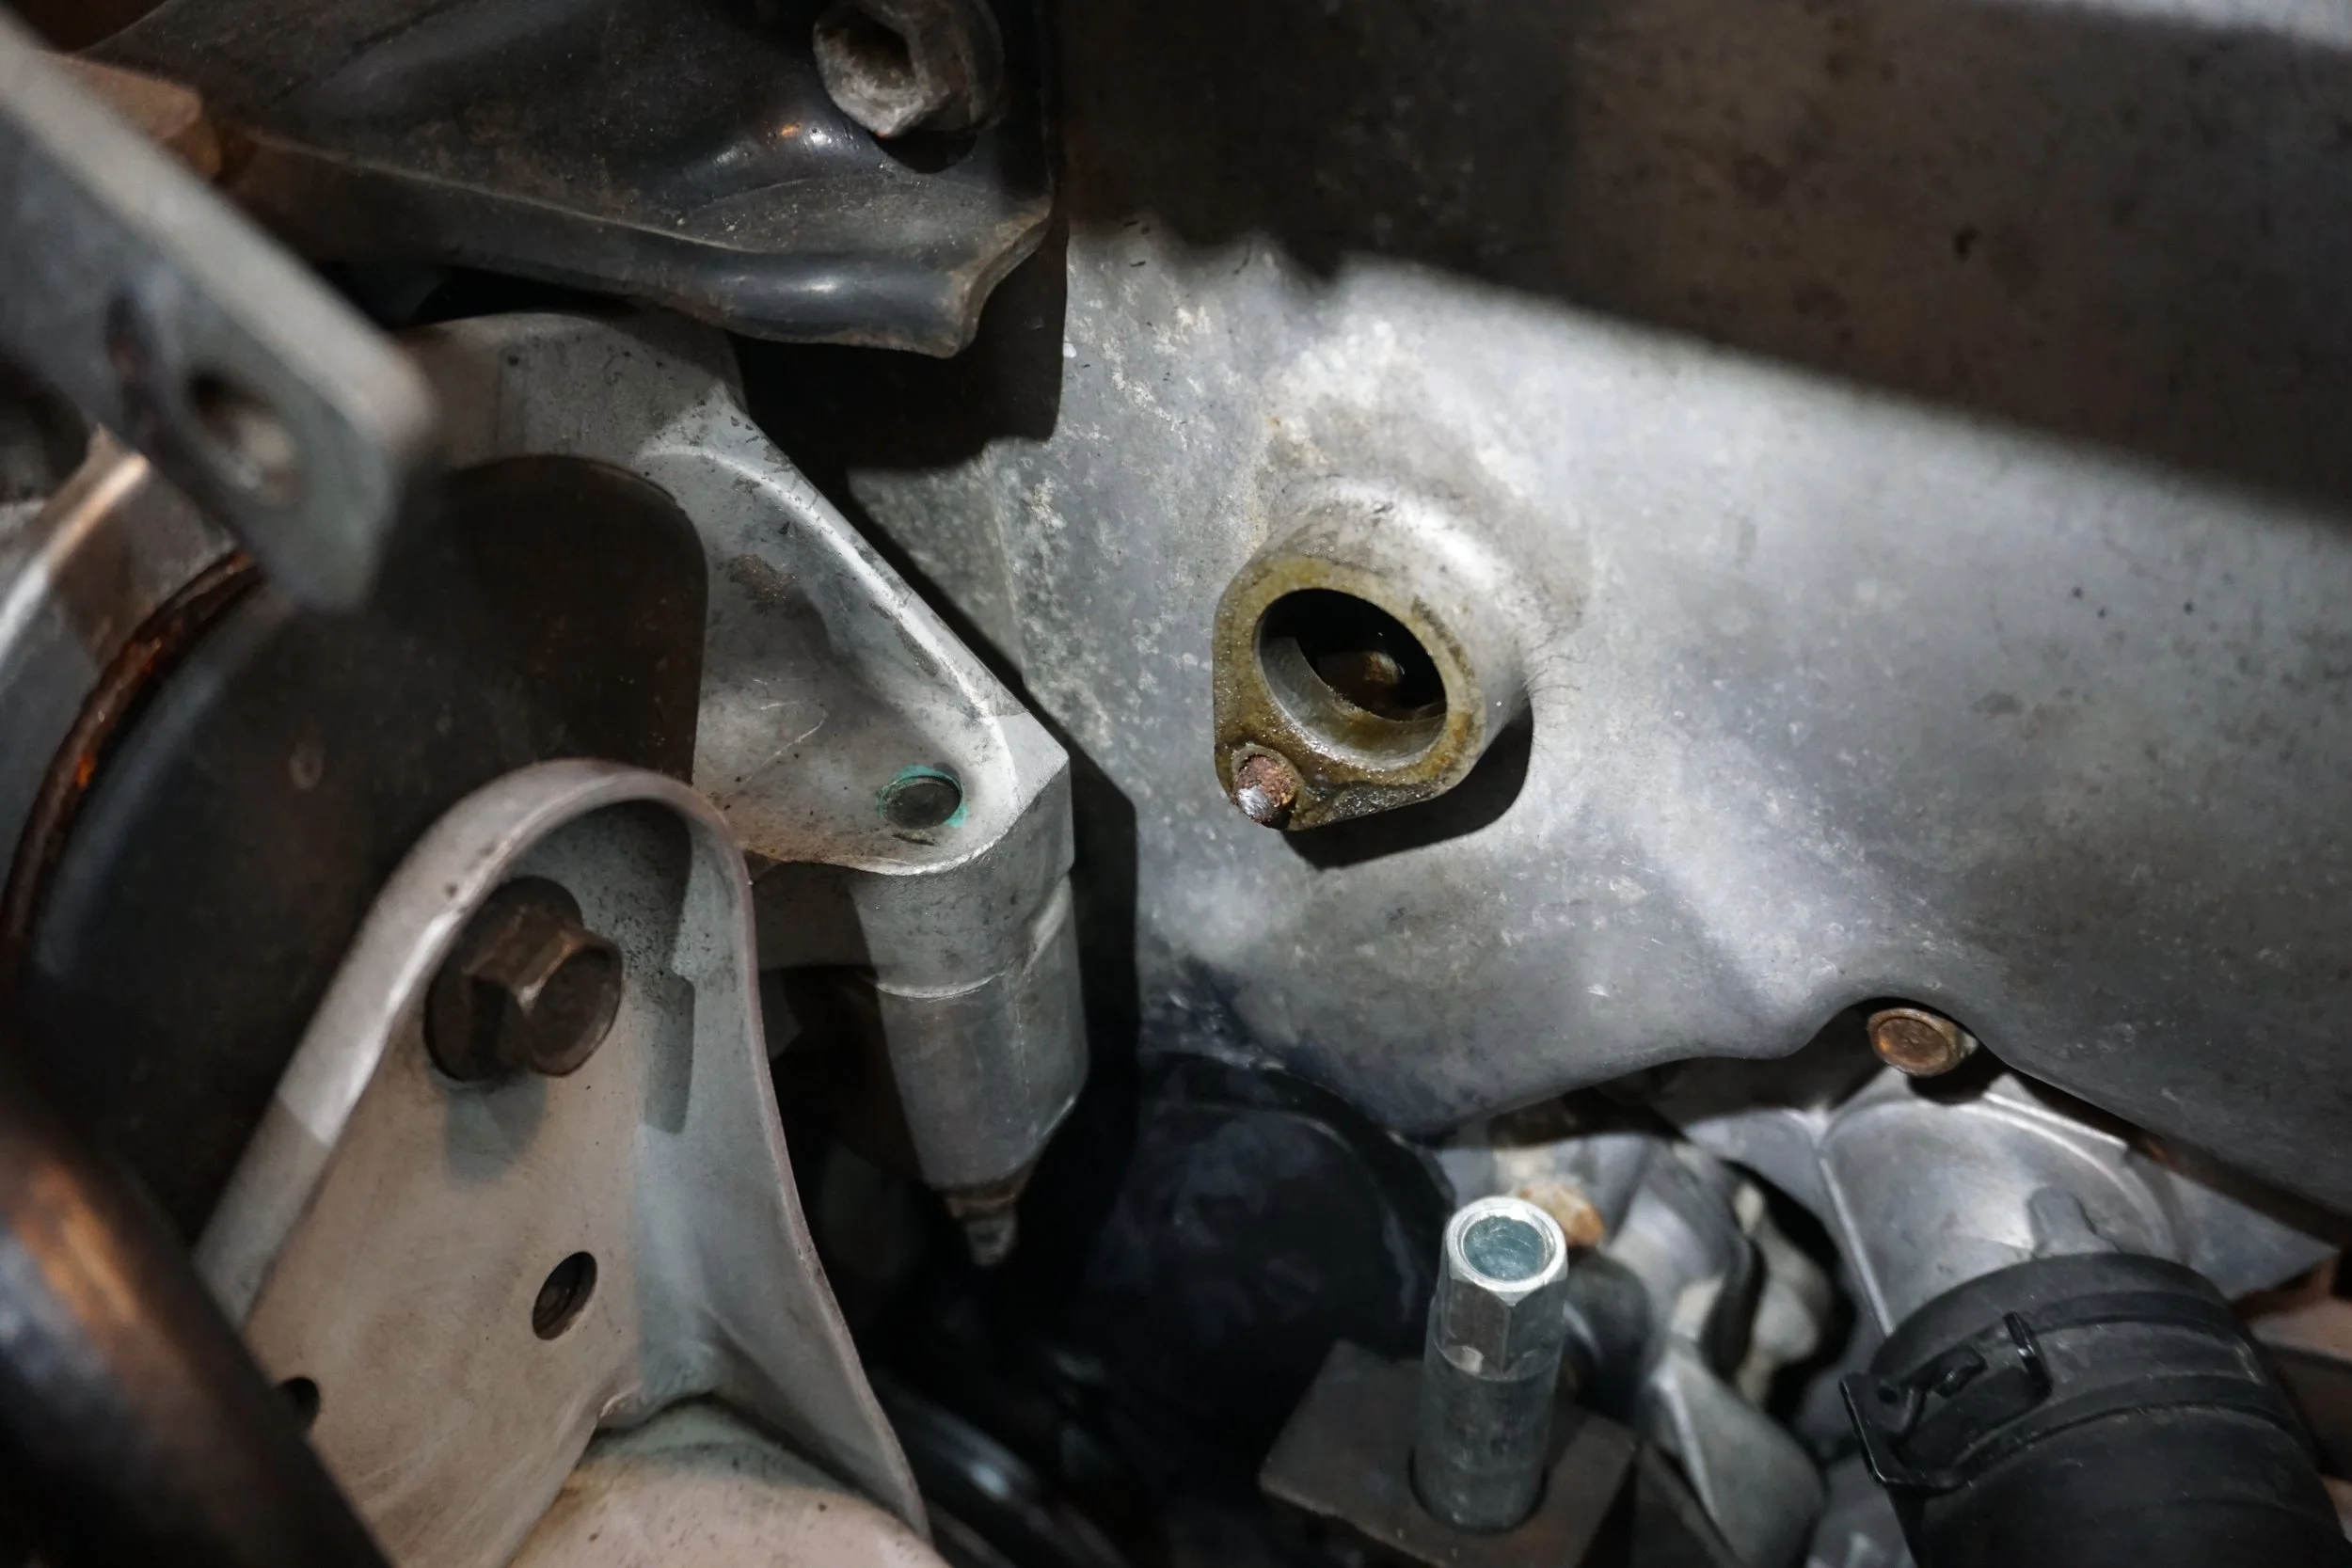
Only problem was the bolt snapped when I tried to remove it:
I tried welding a nut to it, but that just made it snap again.
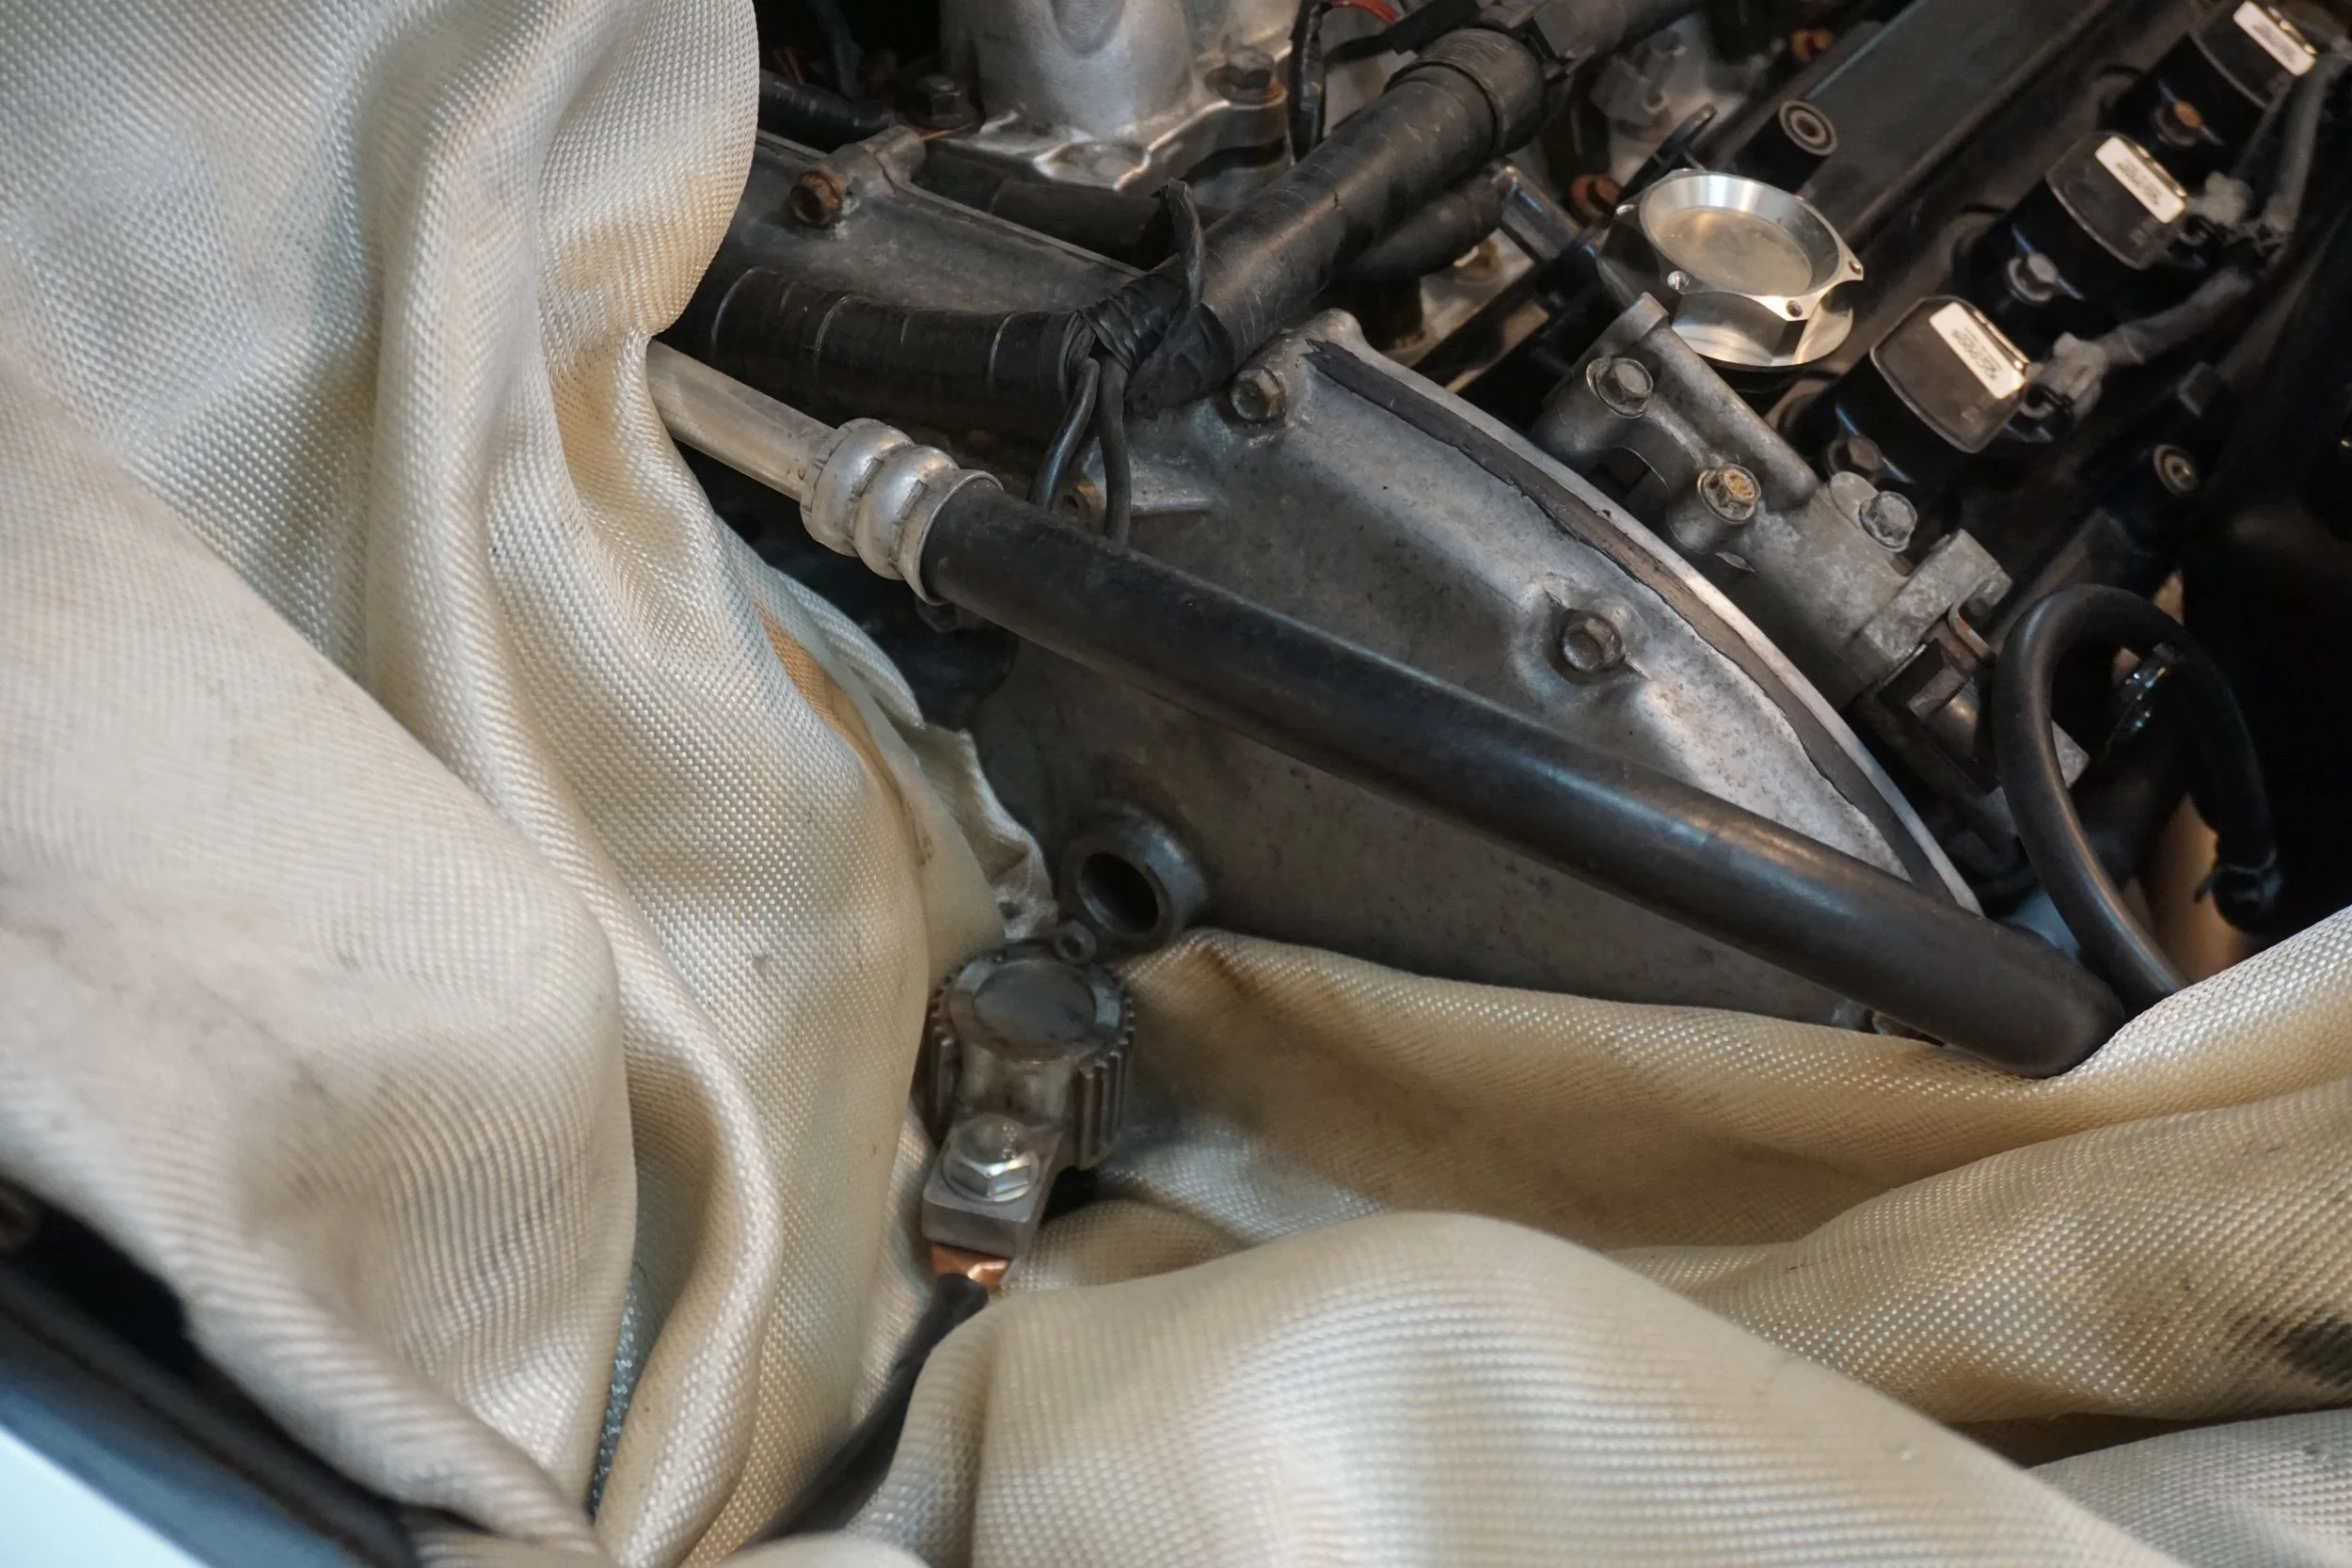
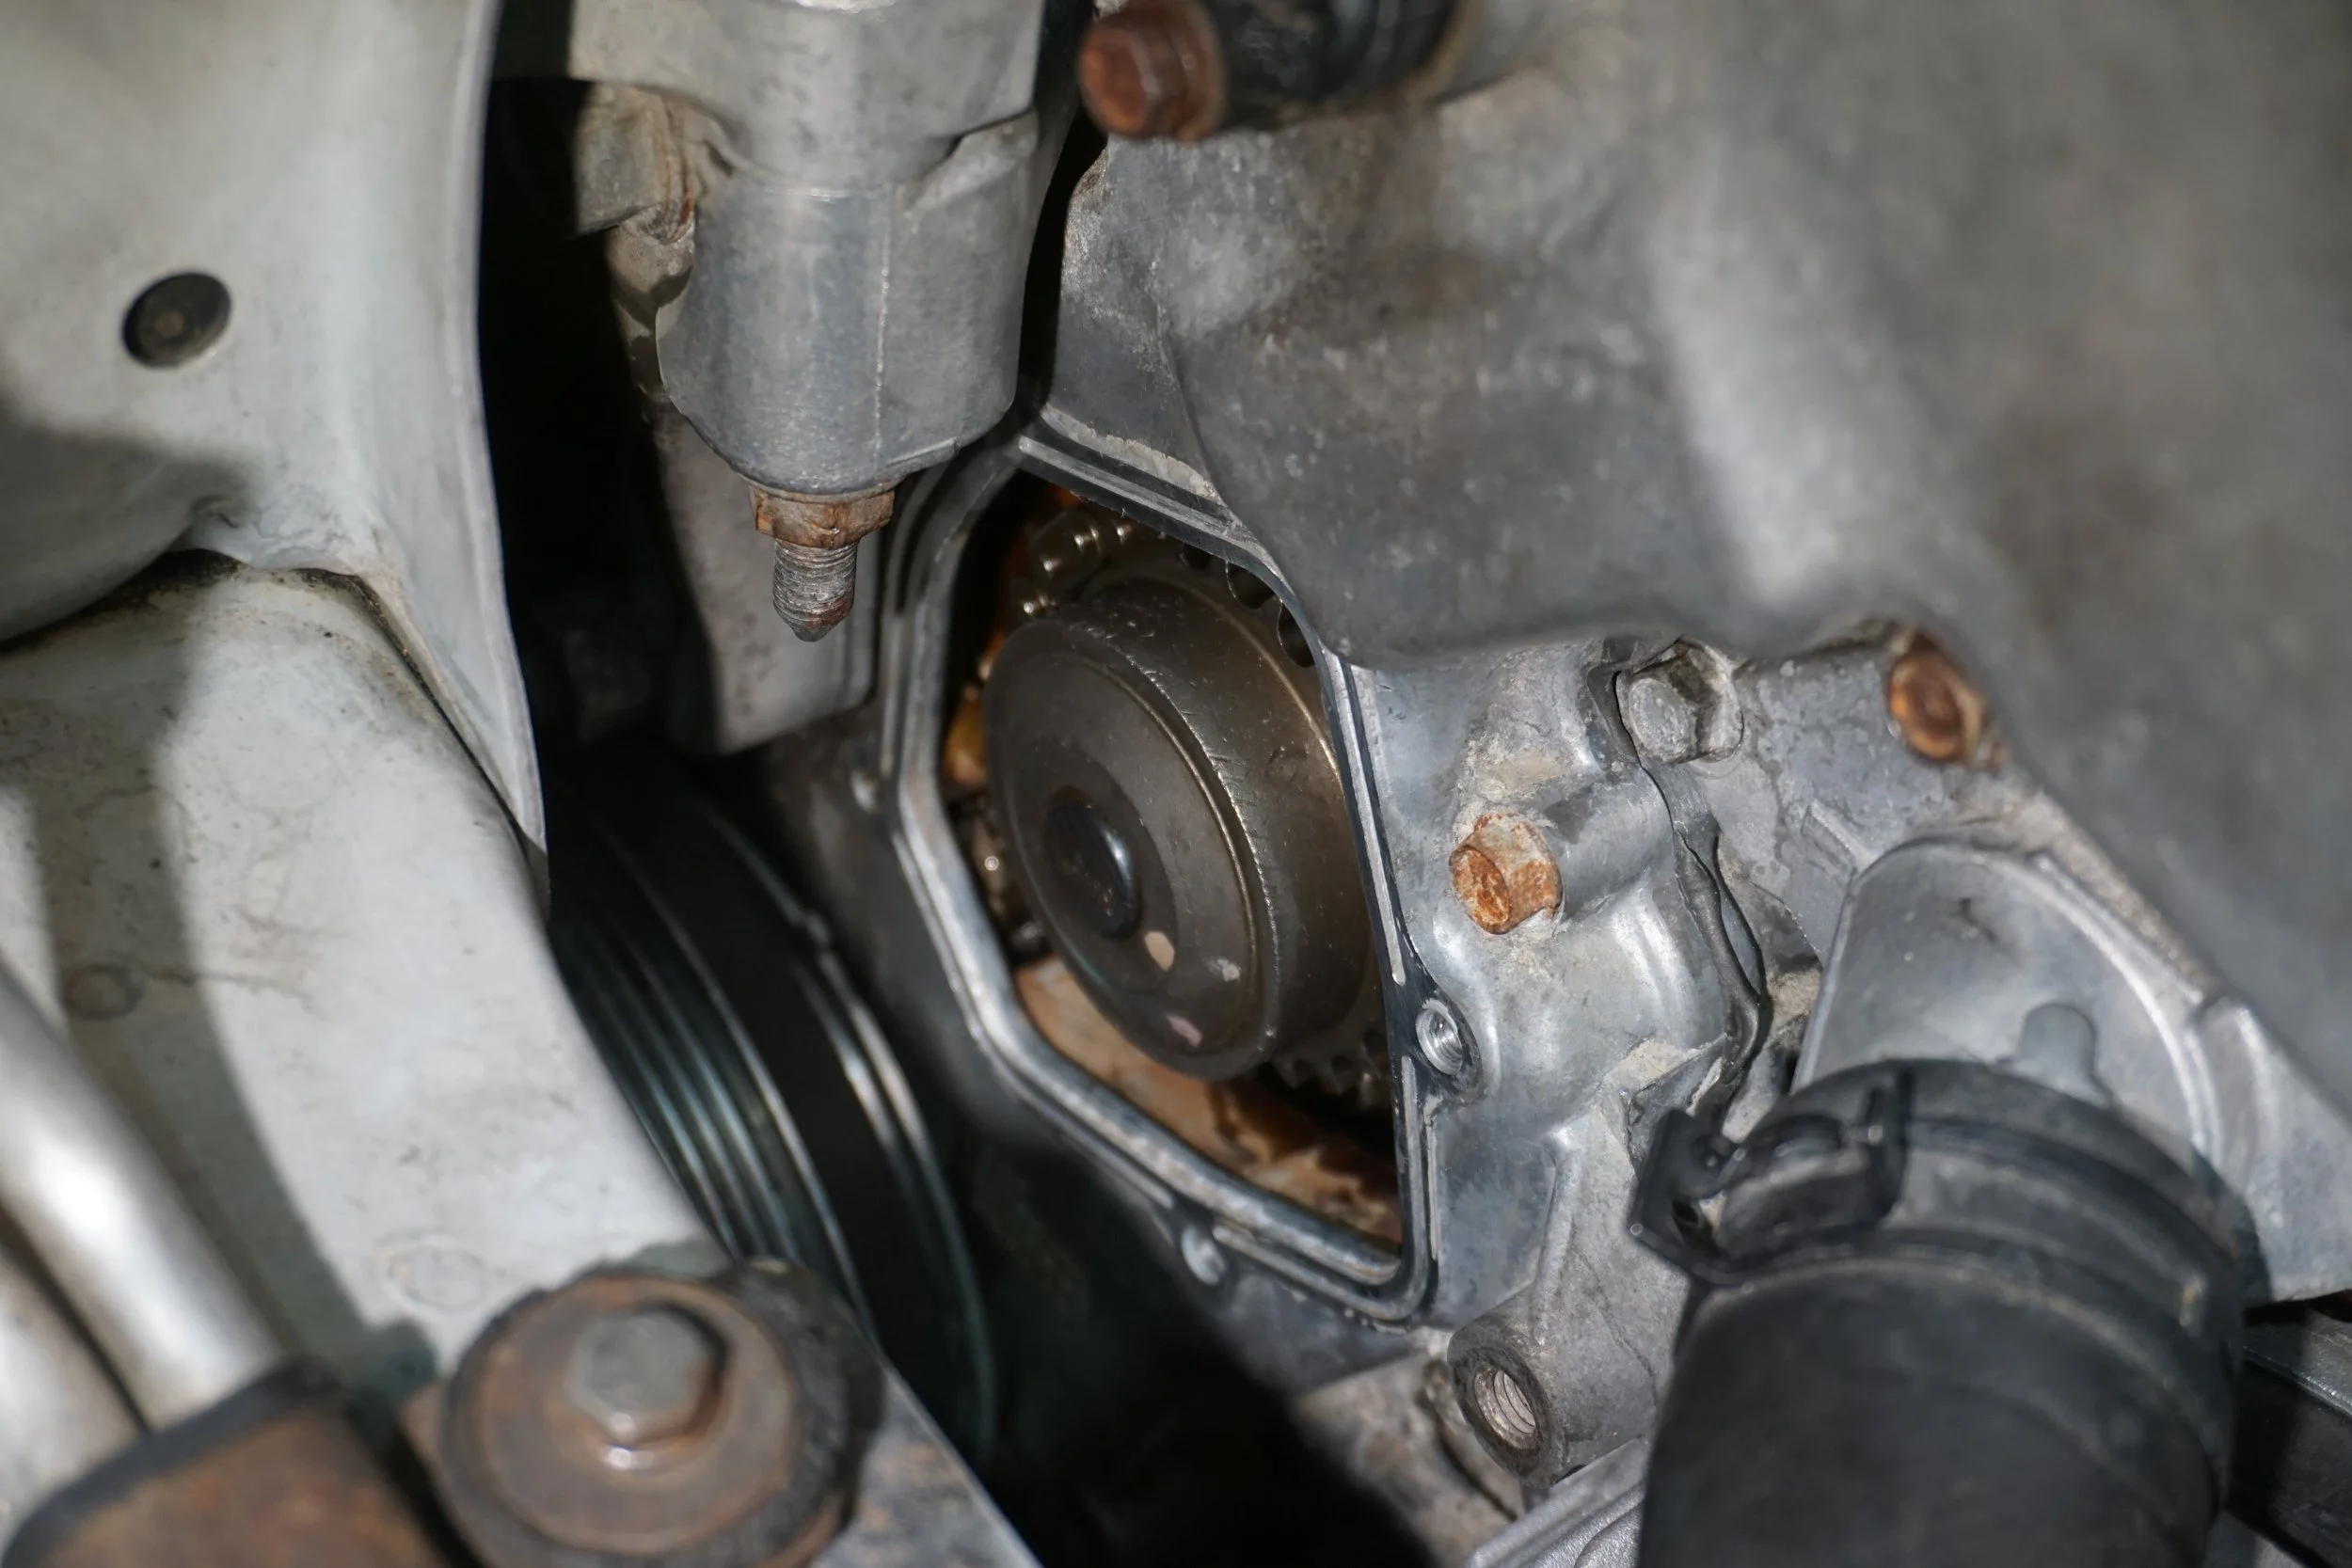
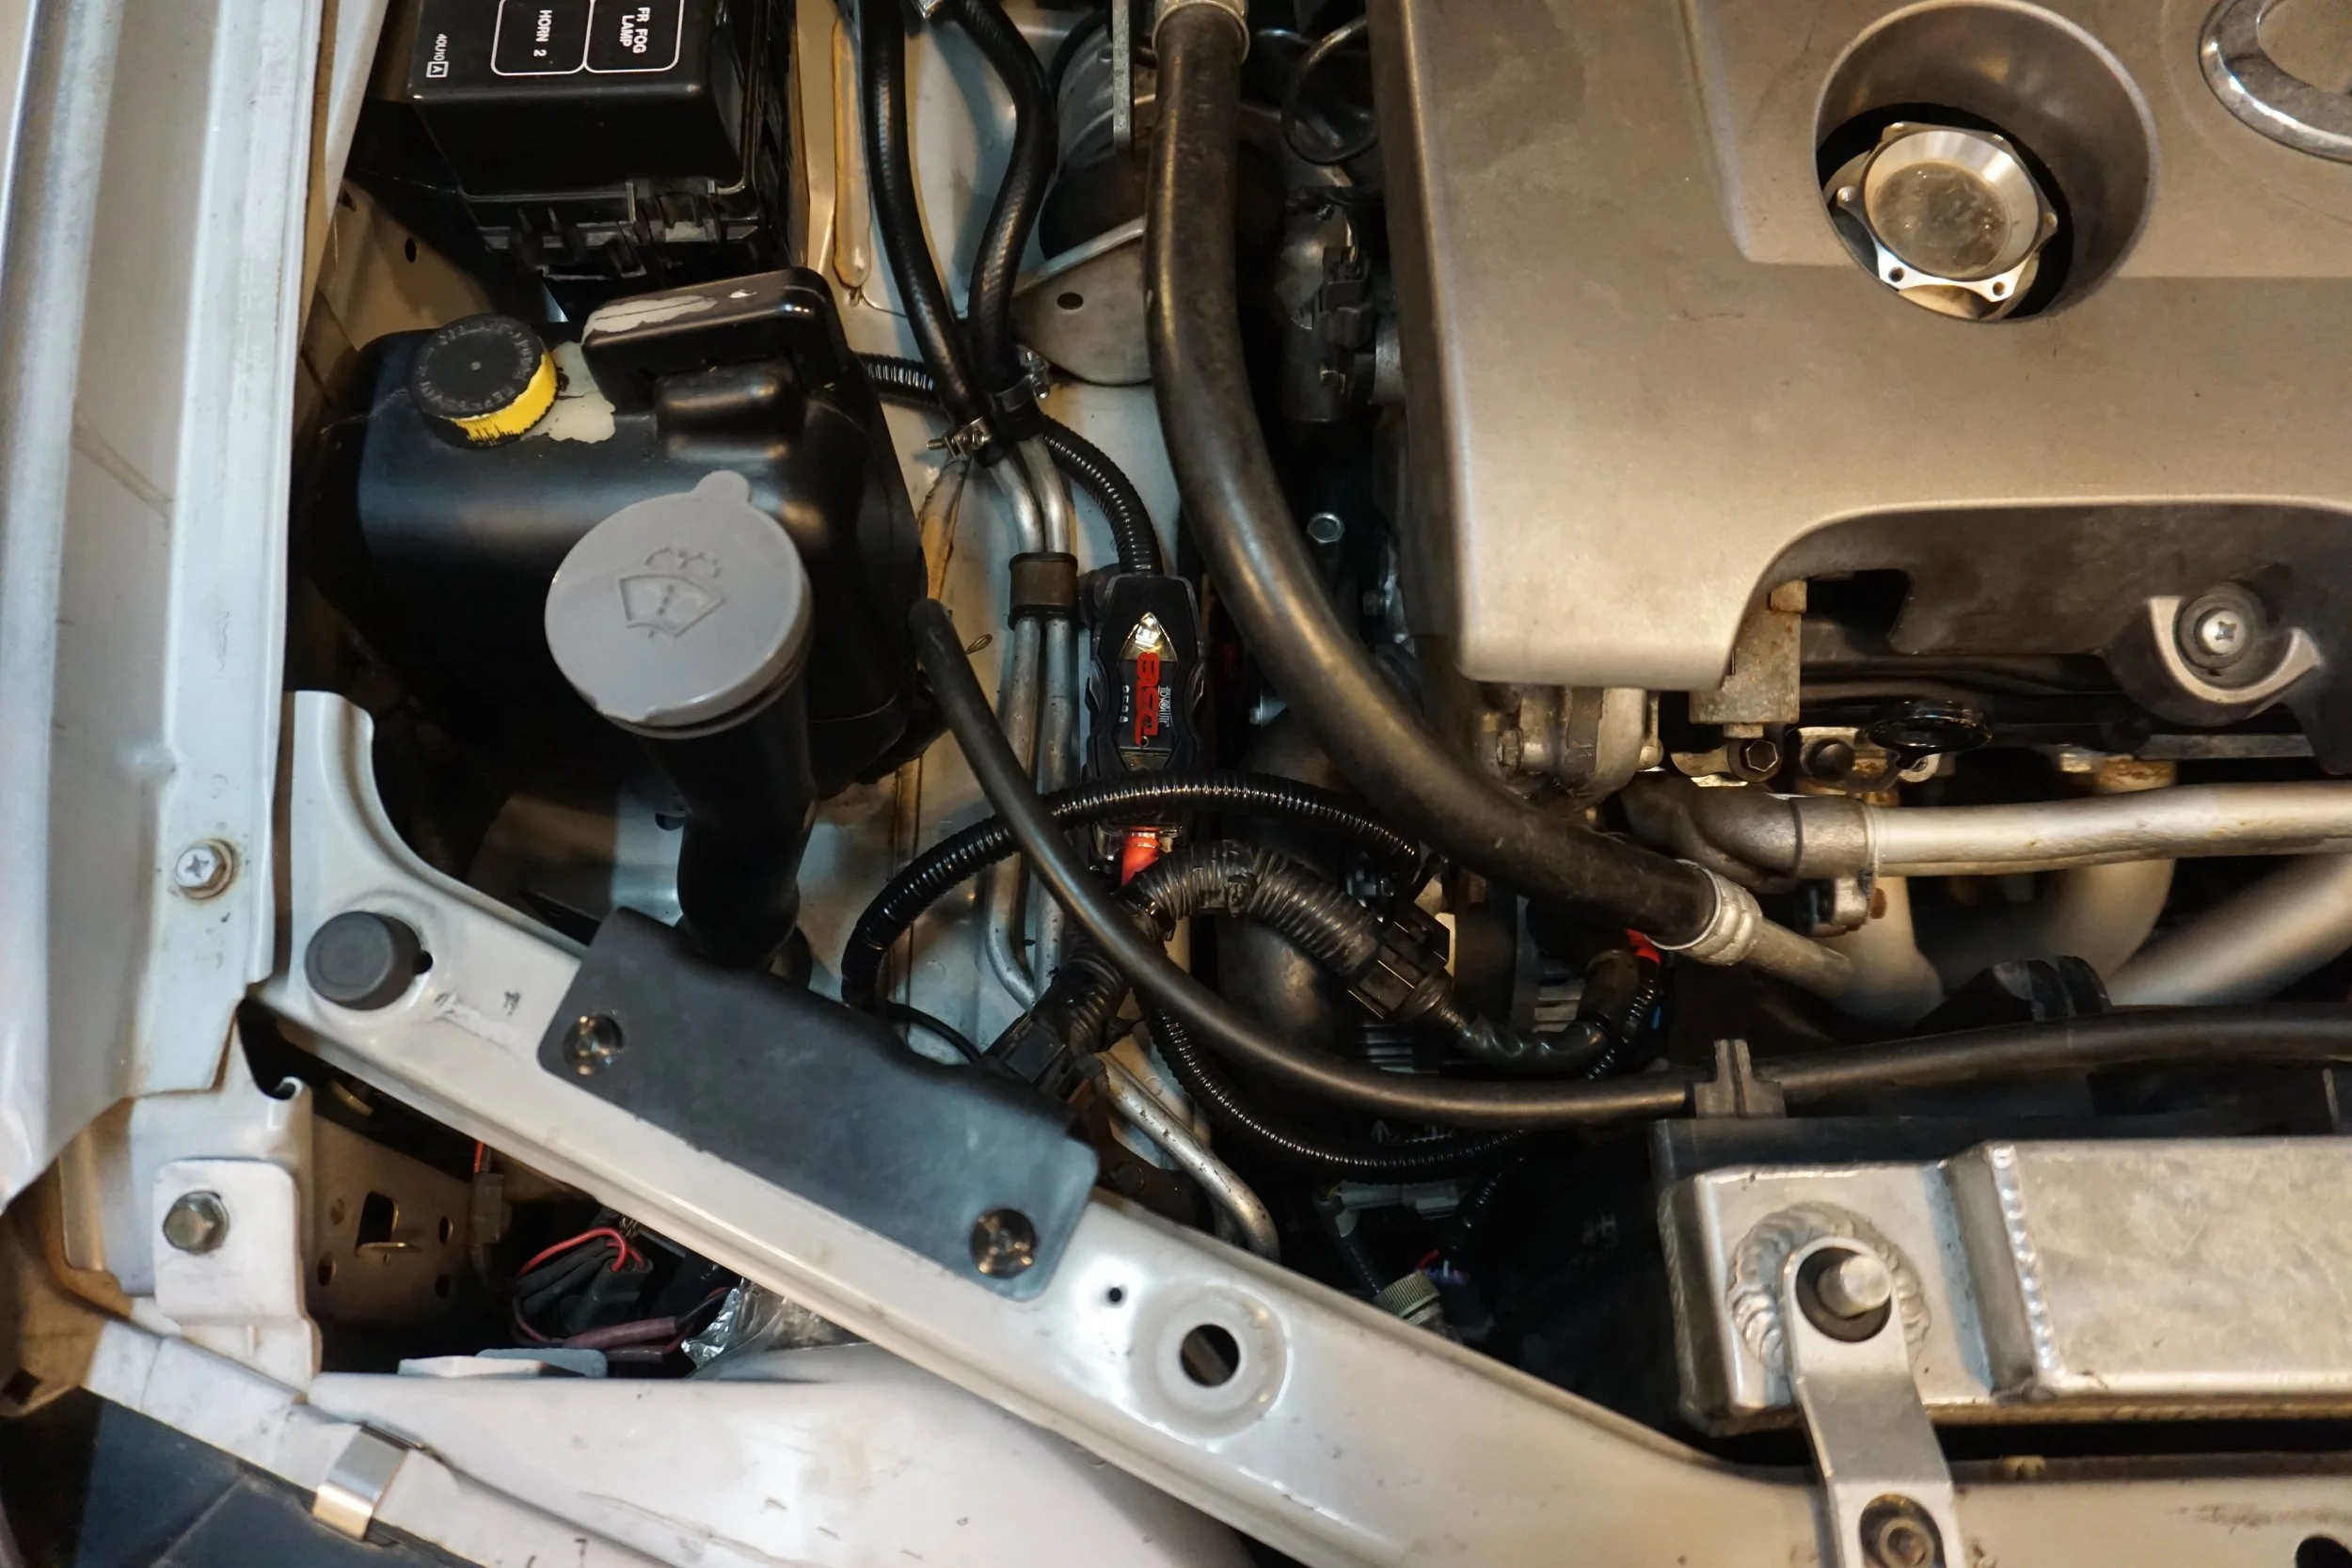
Only thing left was to try and drill it out and chase the threads. This meant getting the PS reservoir and lines out of the way. At least I was able to clean this area for maybe the first time ever!
Space was tight, and I wanted to make sure I was drilling nice and level. So I devised a new tool:
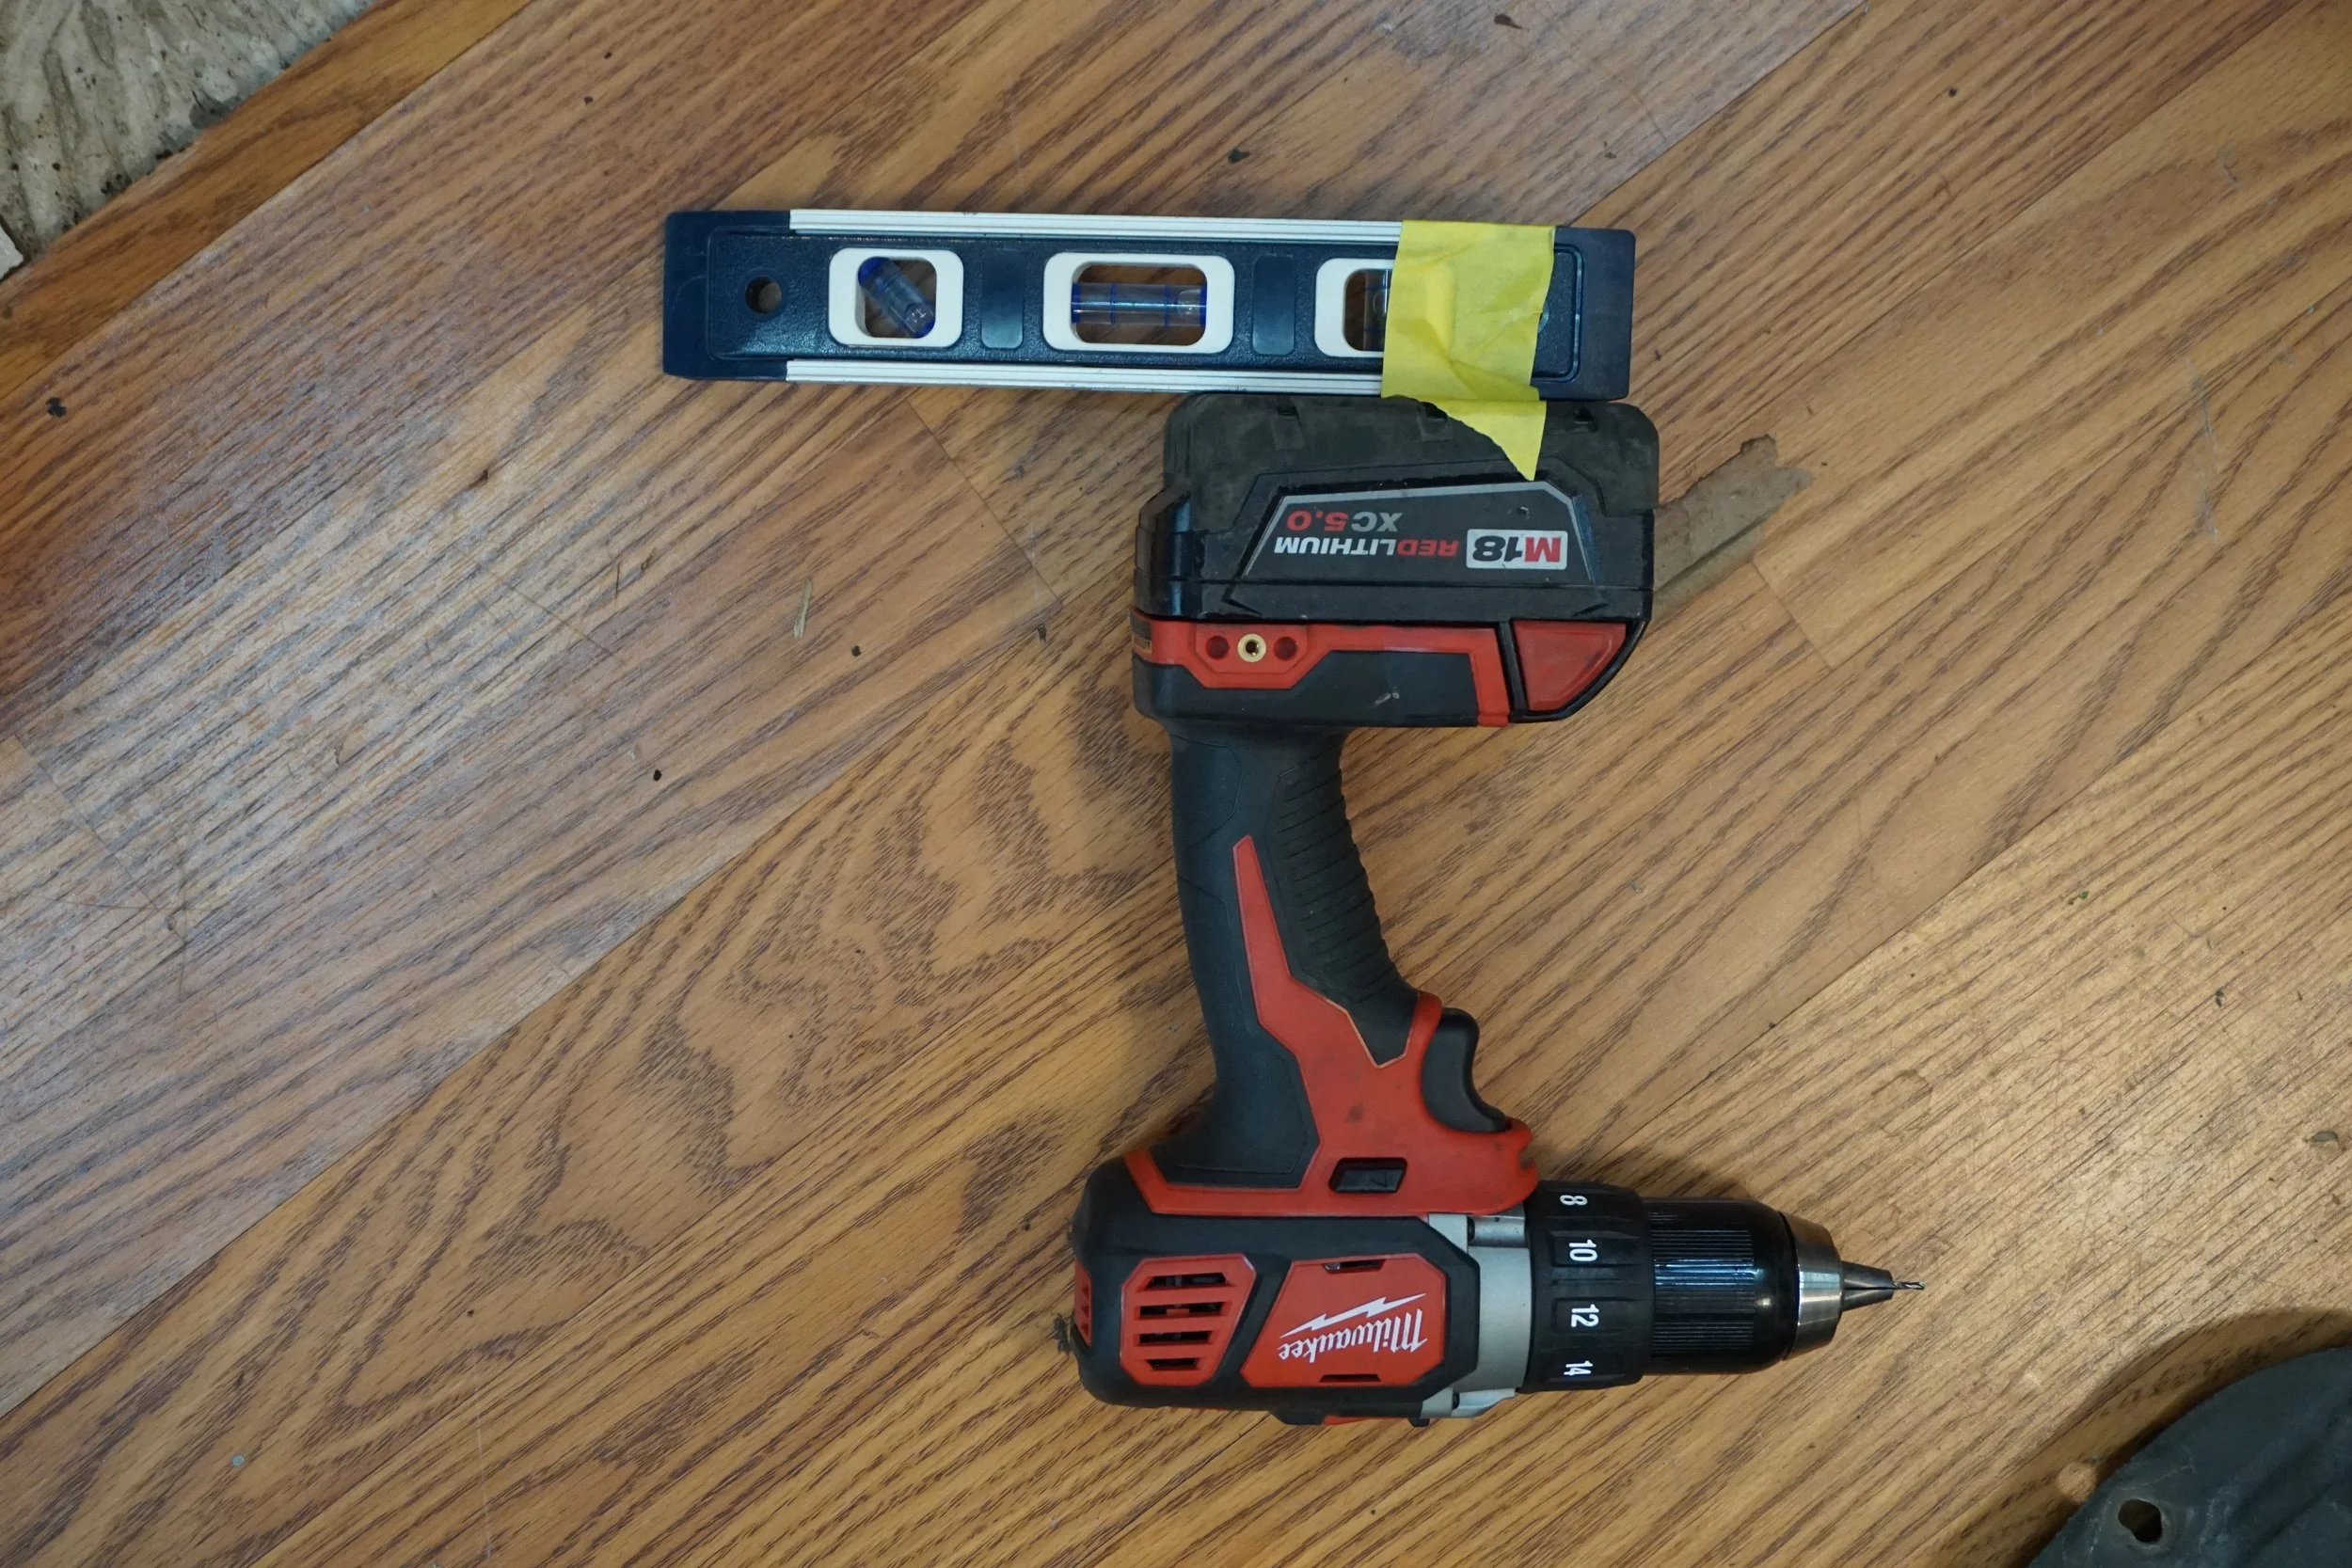
Eventually I got it good enough to reinstall that damn sensor.
And while I was in there, I cleaned up and resealed both of the plastic covers on the 3.0 timing cover. I have no idea what purpose these things serve.
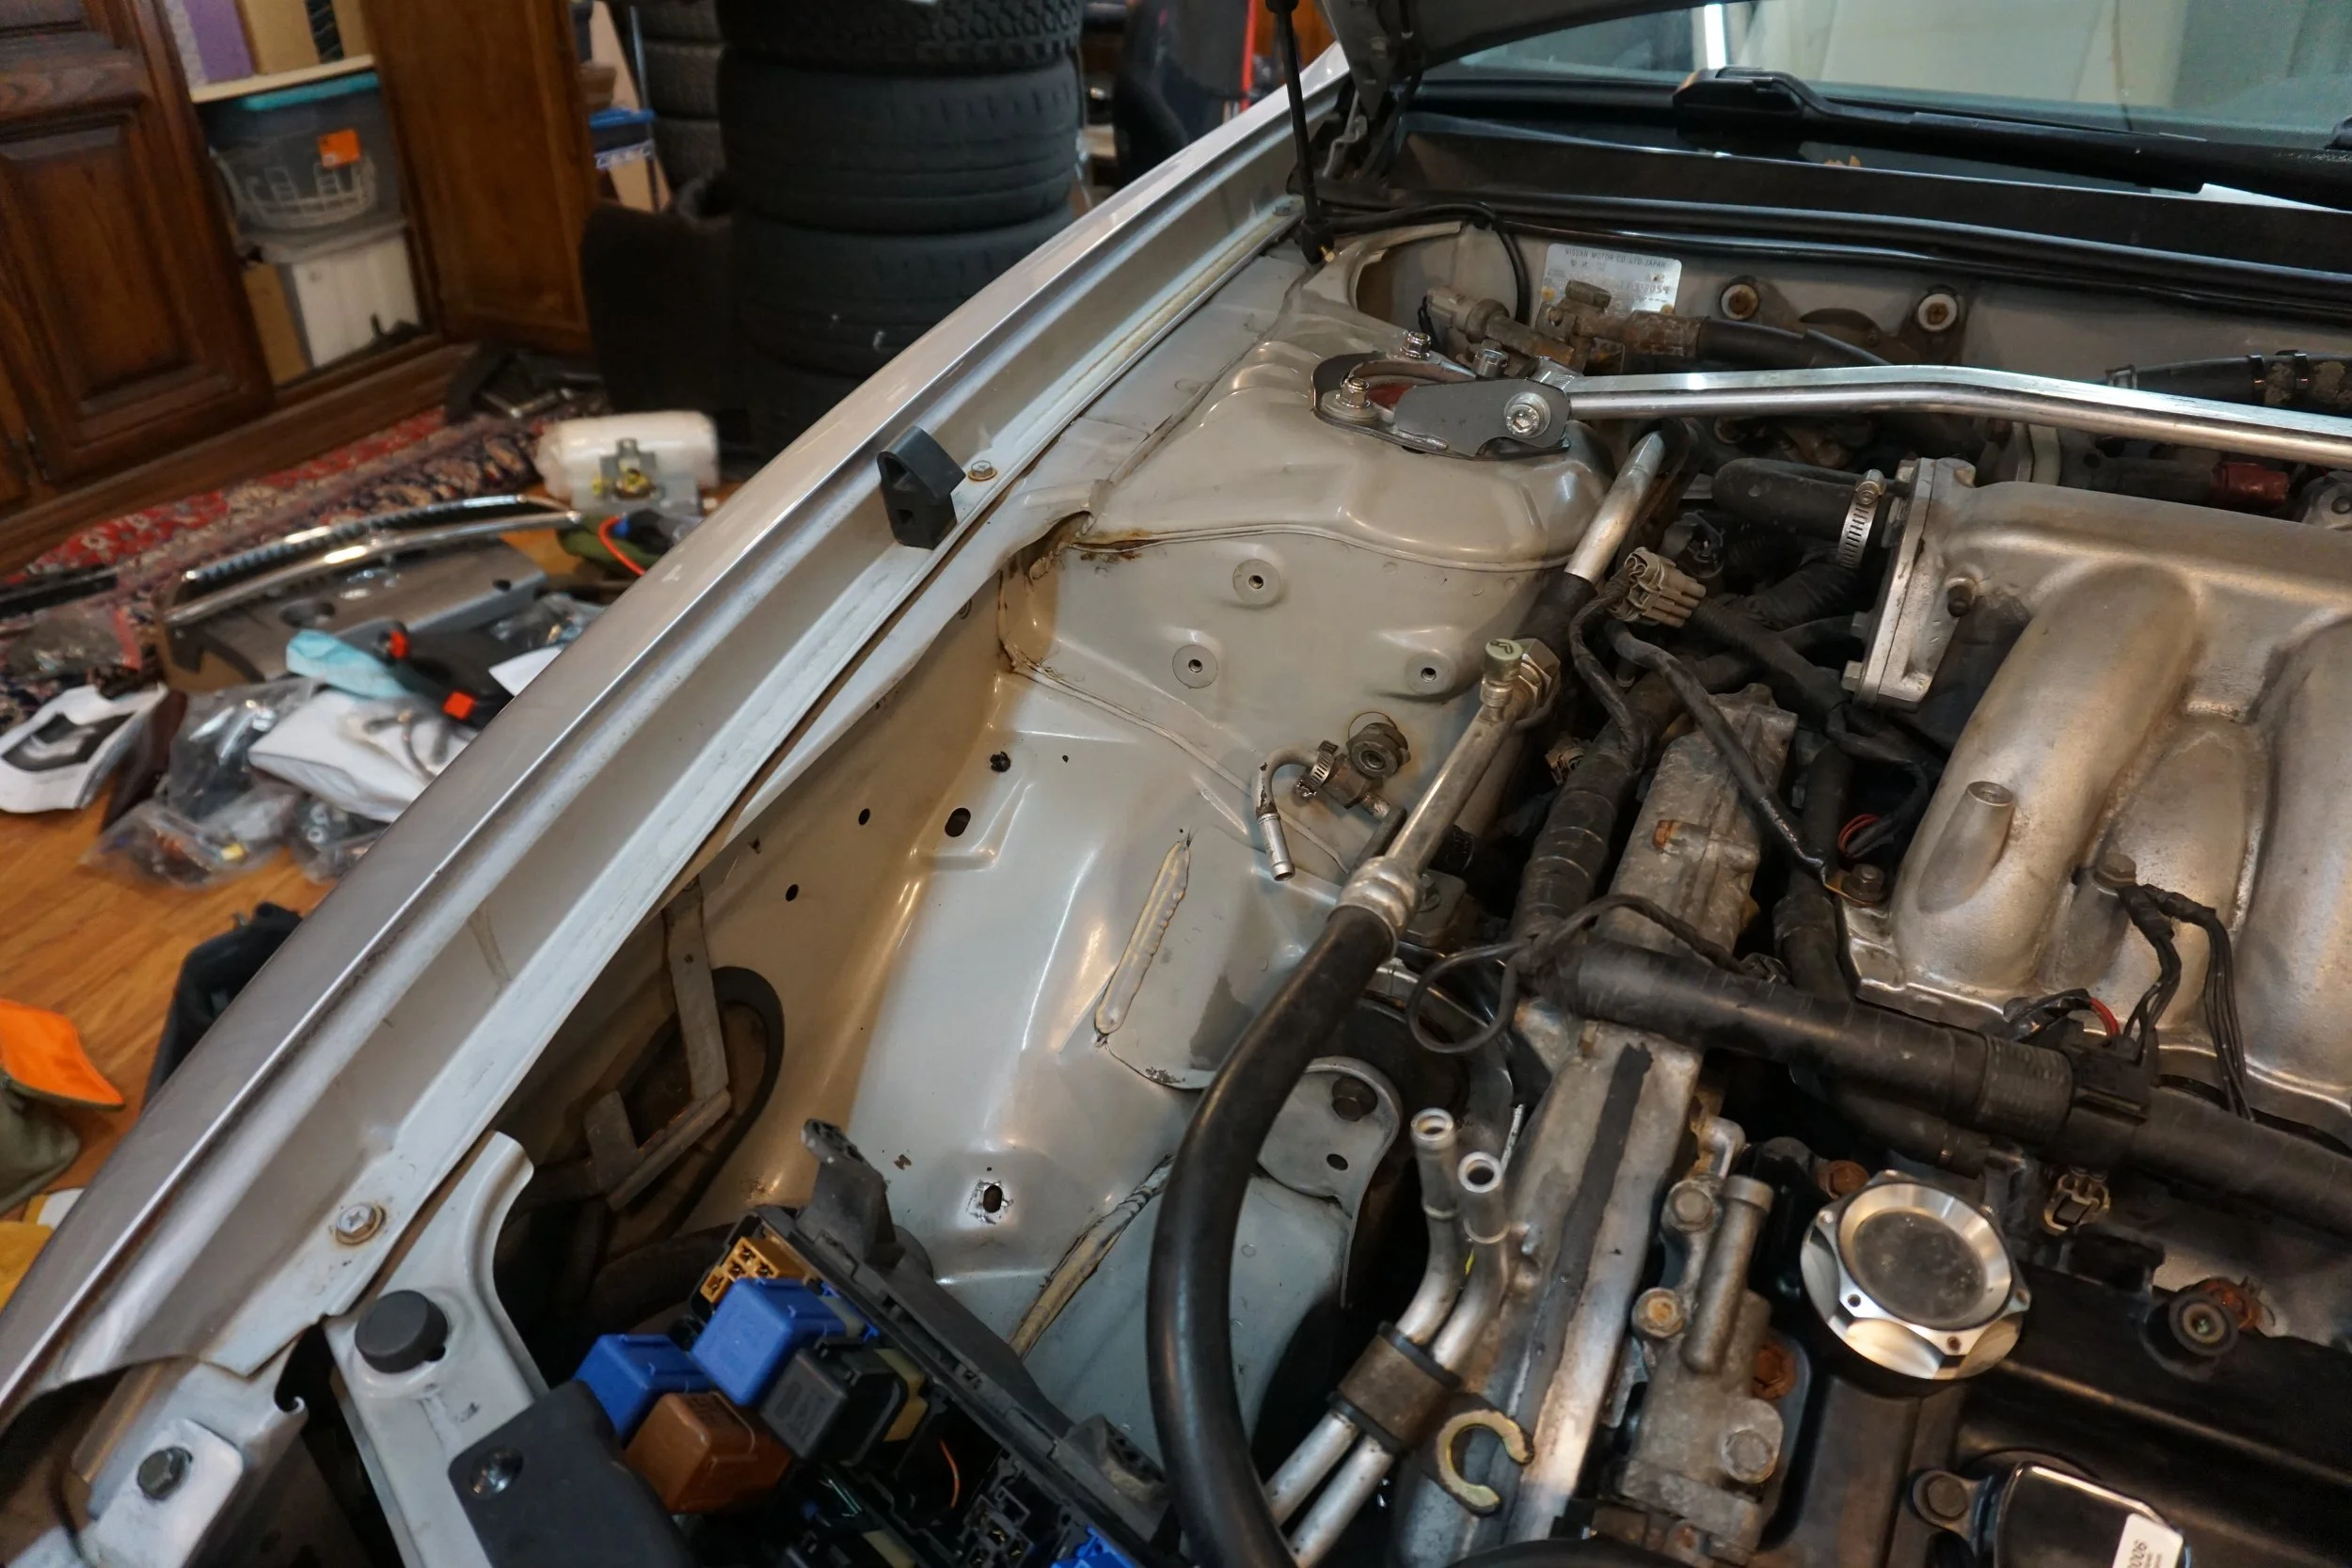
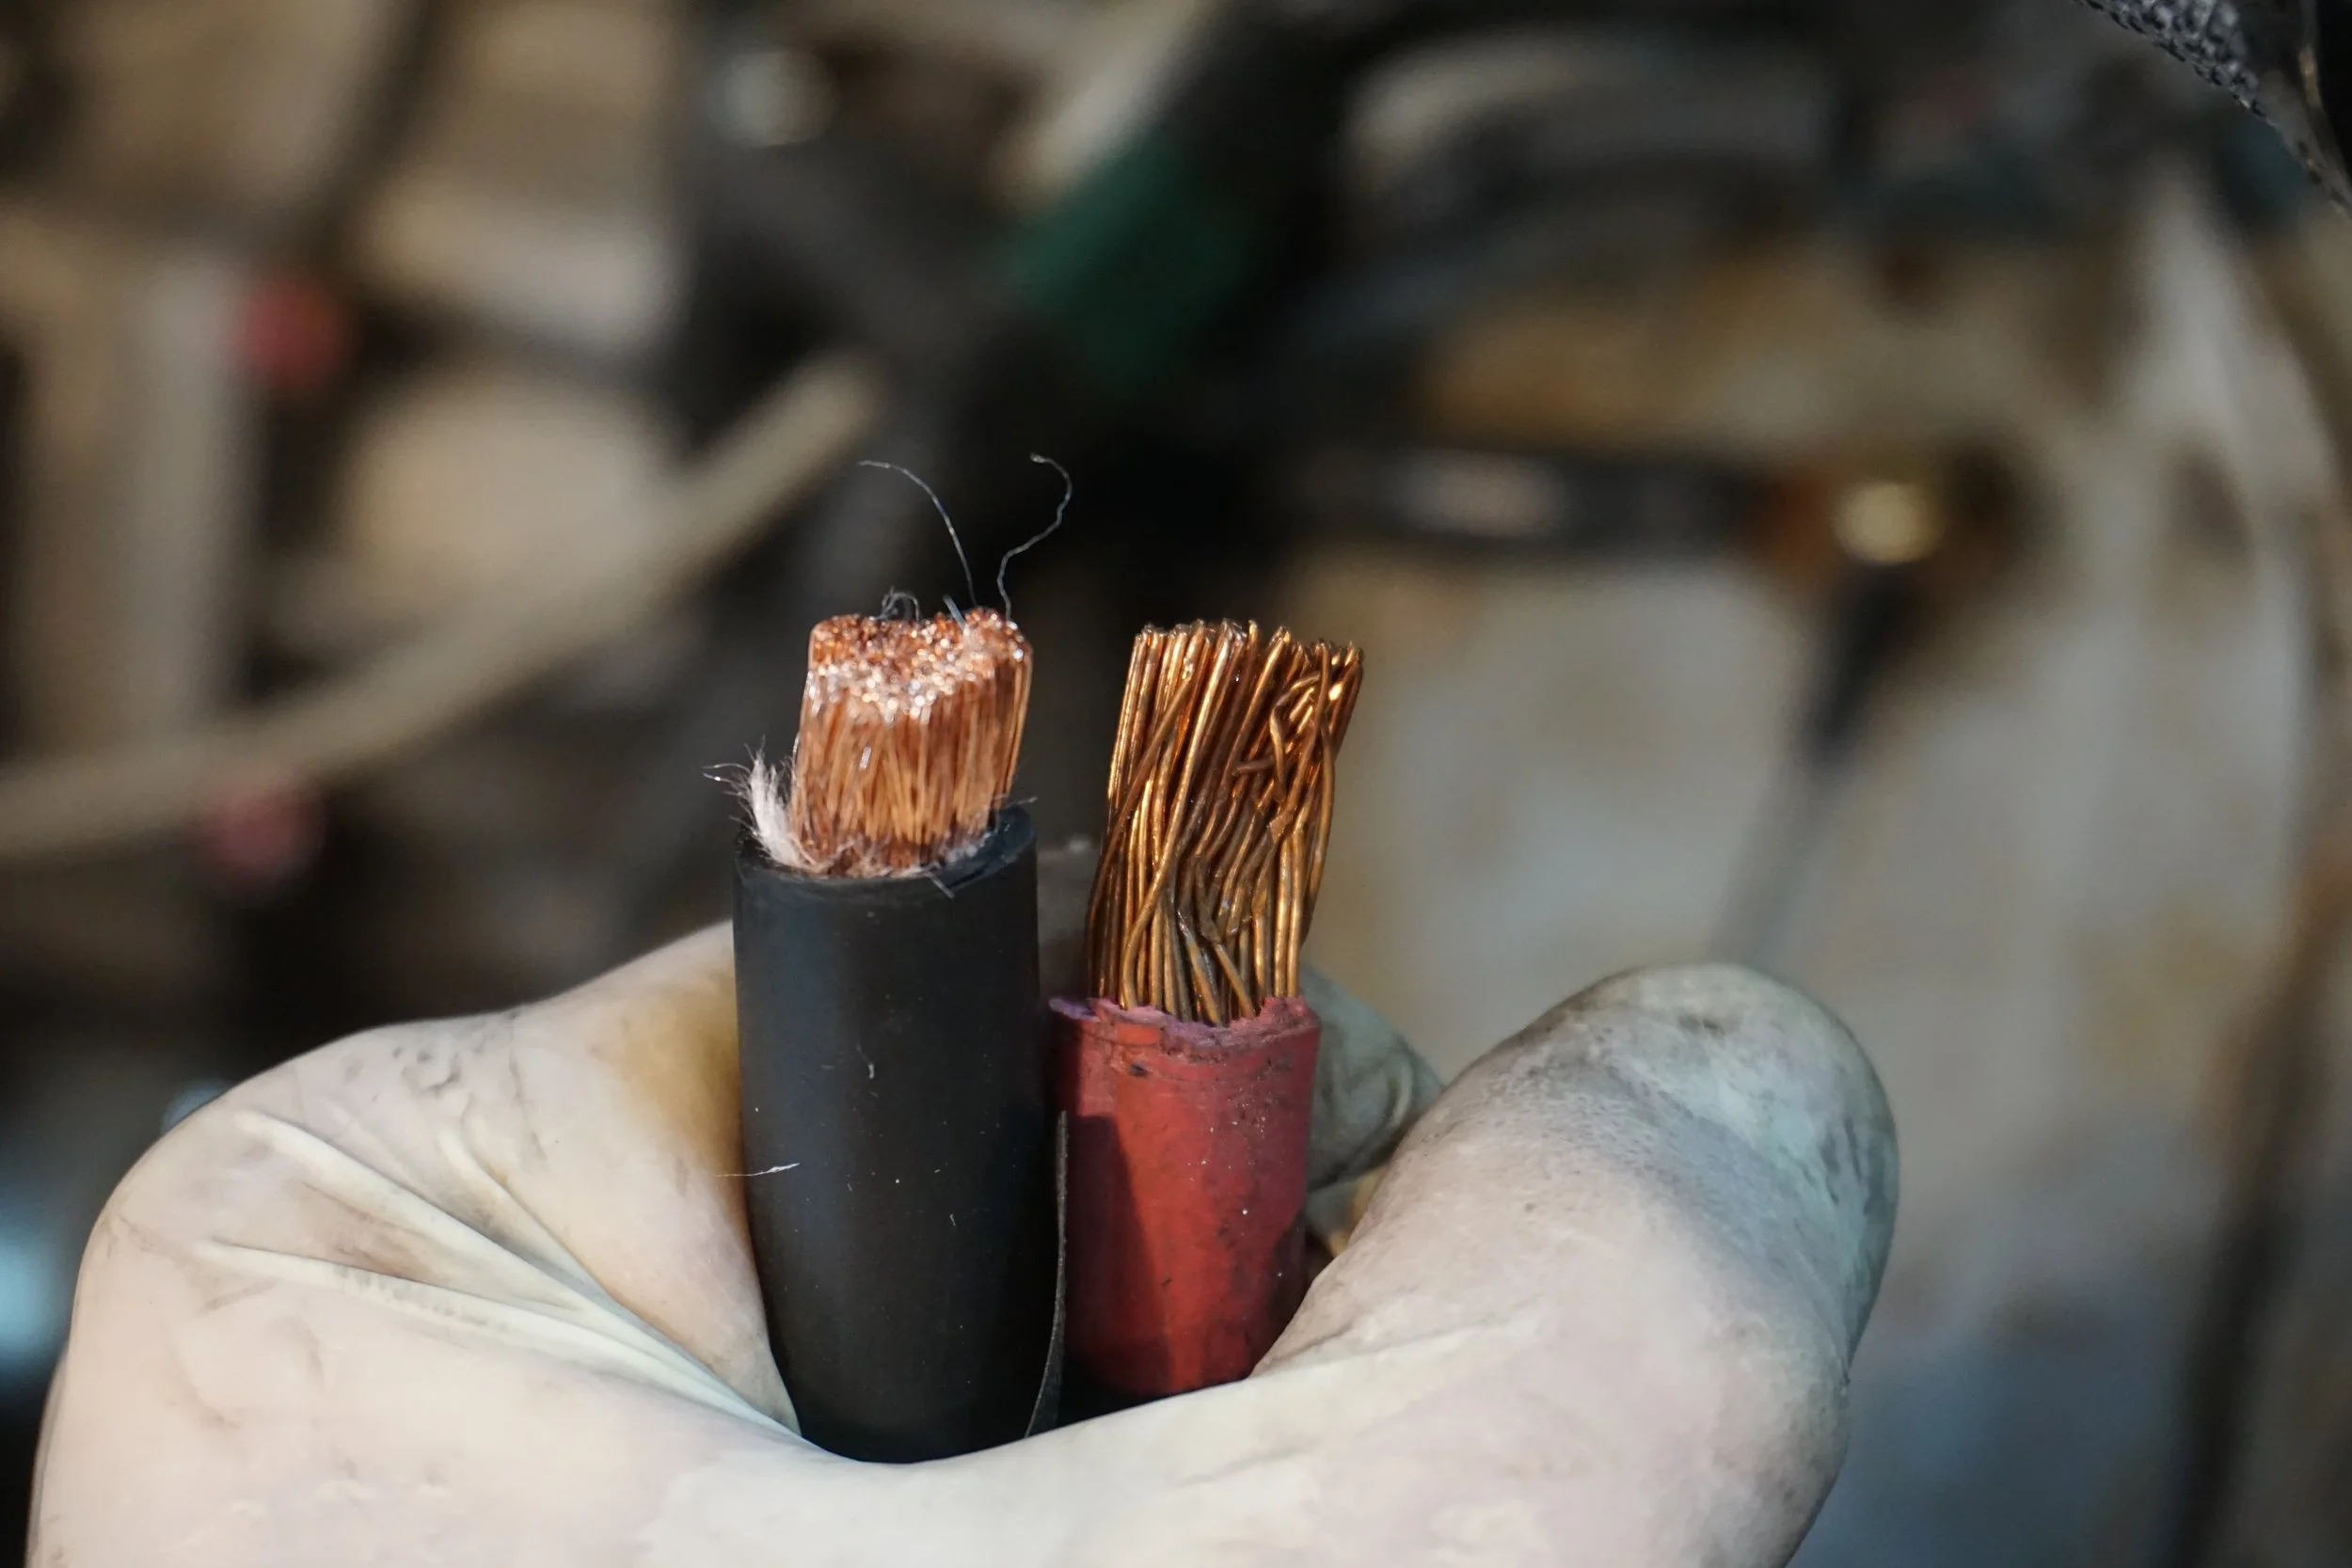
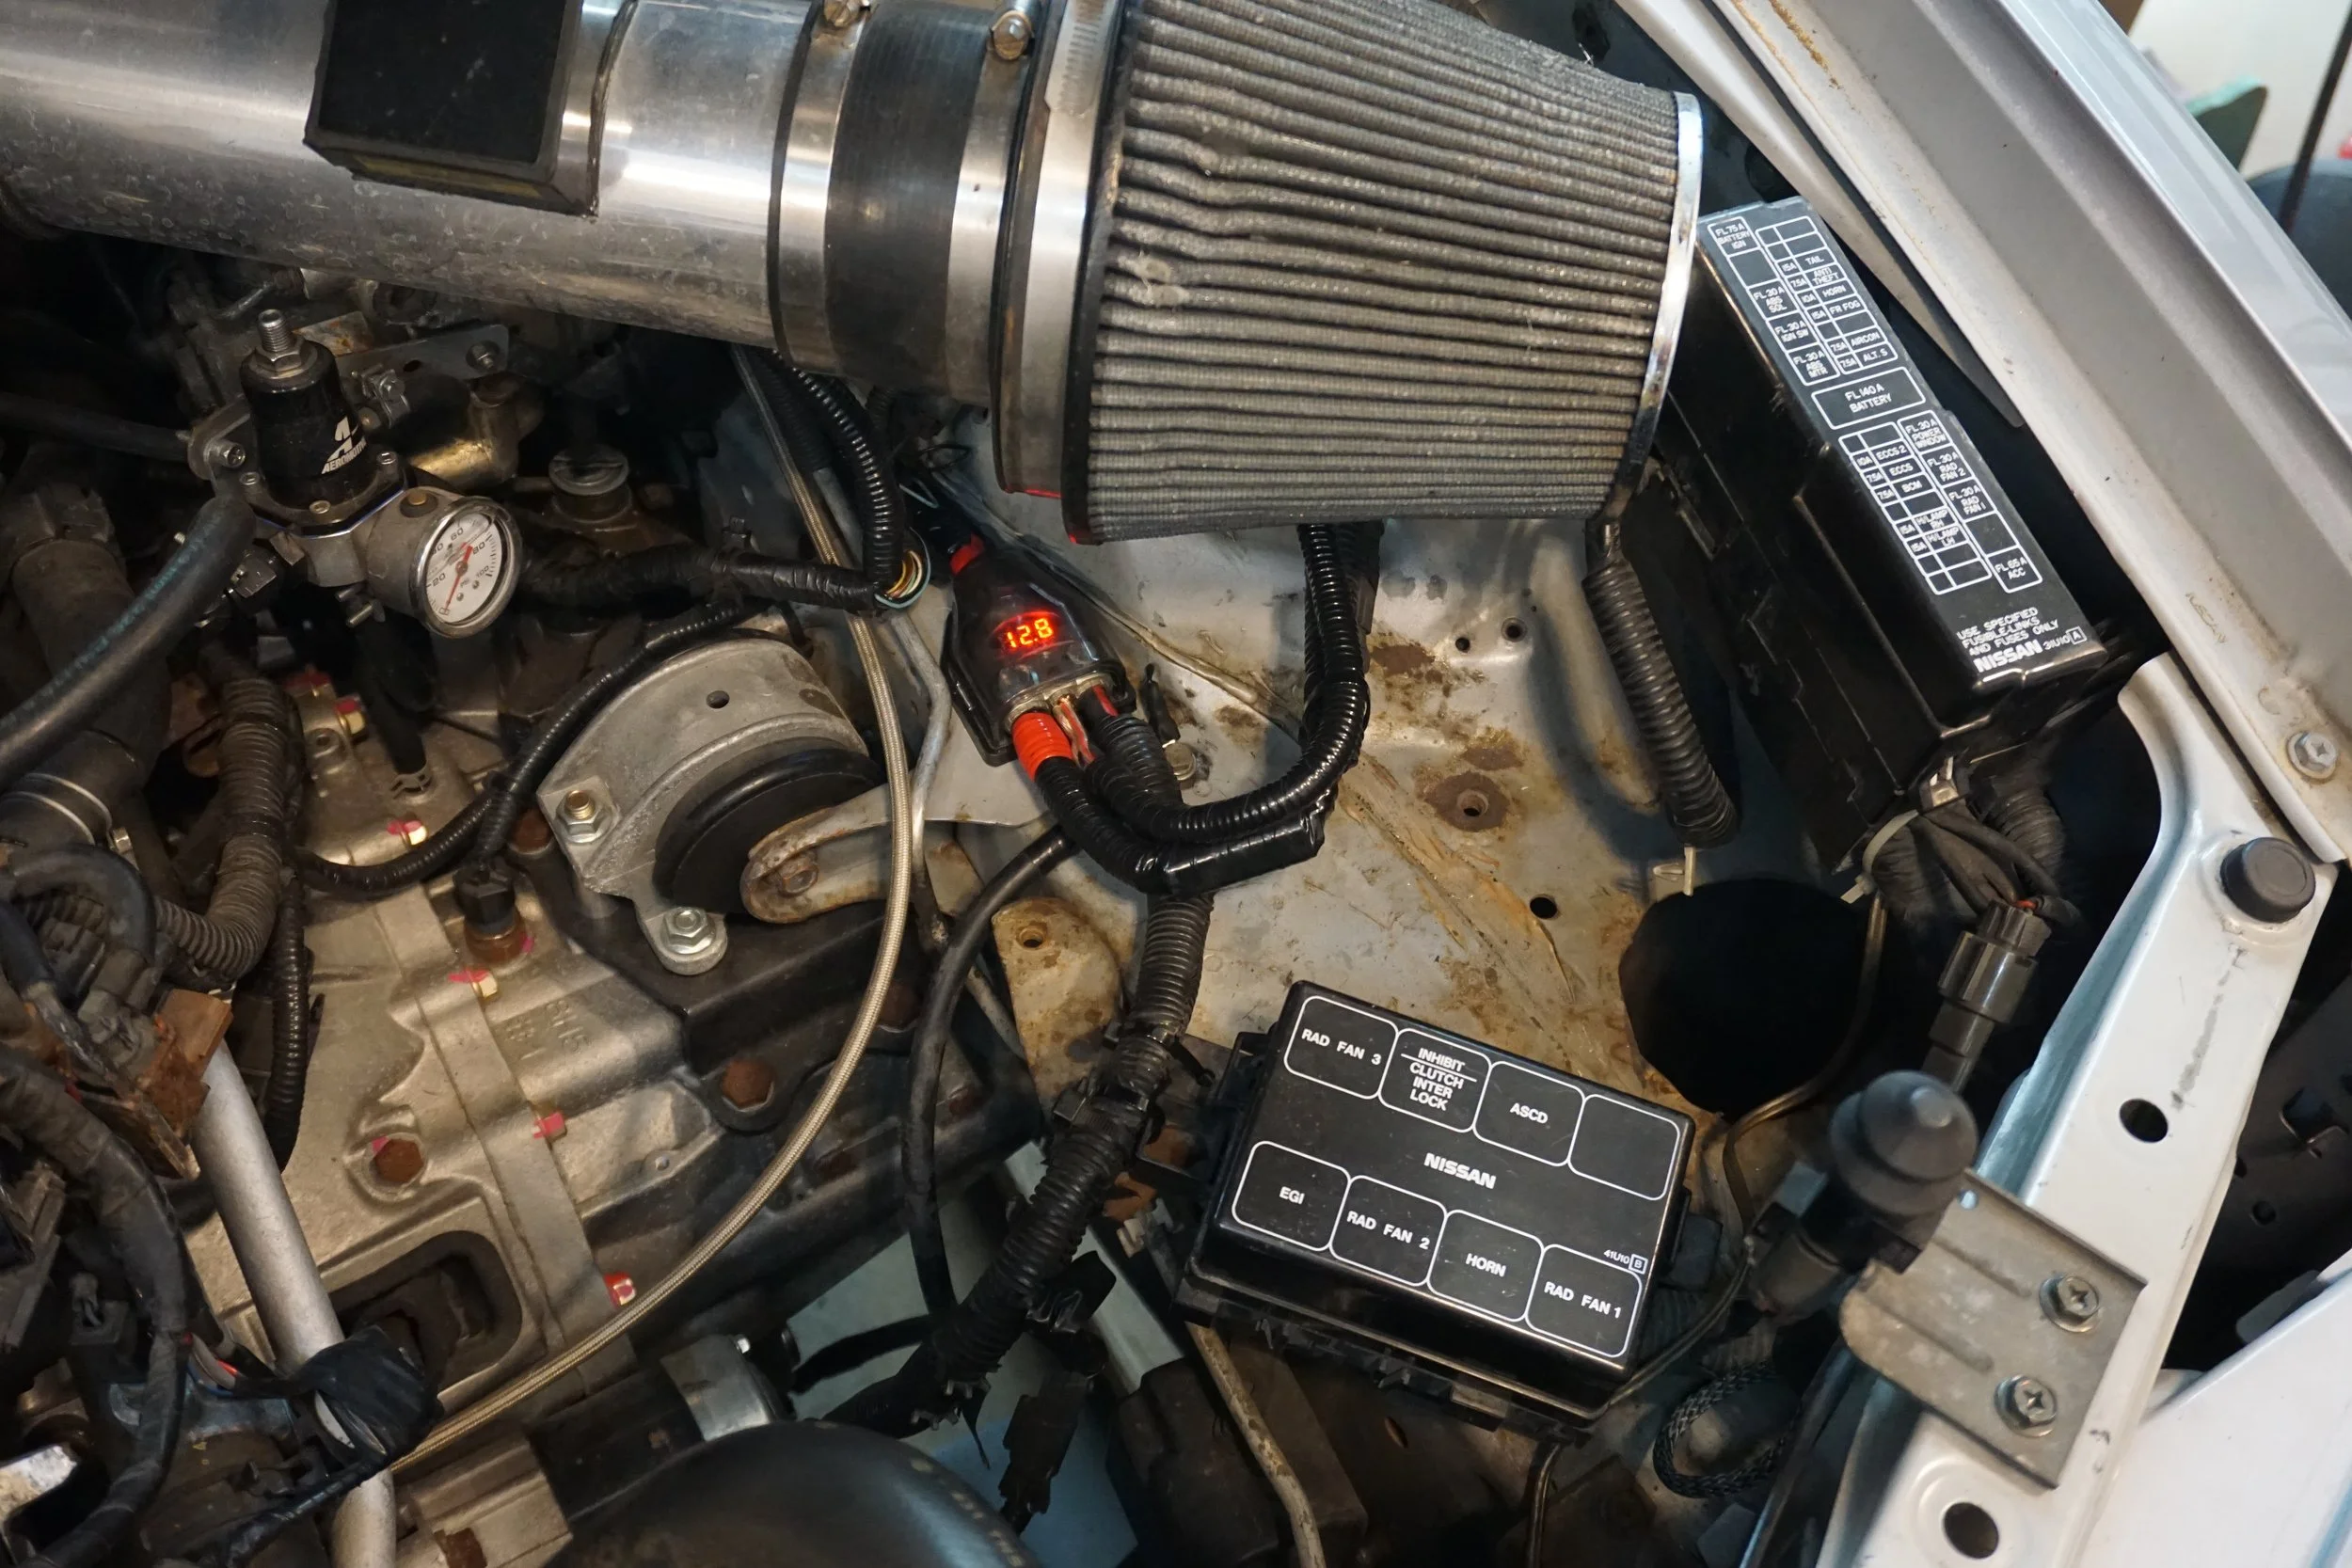
Then it was time to have a little fun with wiring upgrades. I've been wanting to replace the 1 gauge wire that runs from the battery in the trunk to the distribution block up front. It was a cheap wire, and I didn't love the way it was ran. It's the red wire at the bottom of this picture:
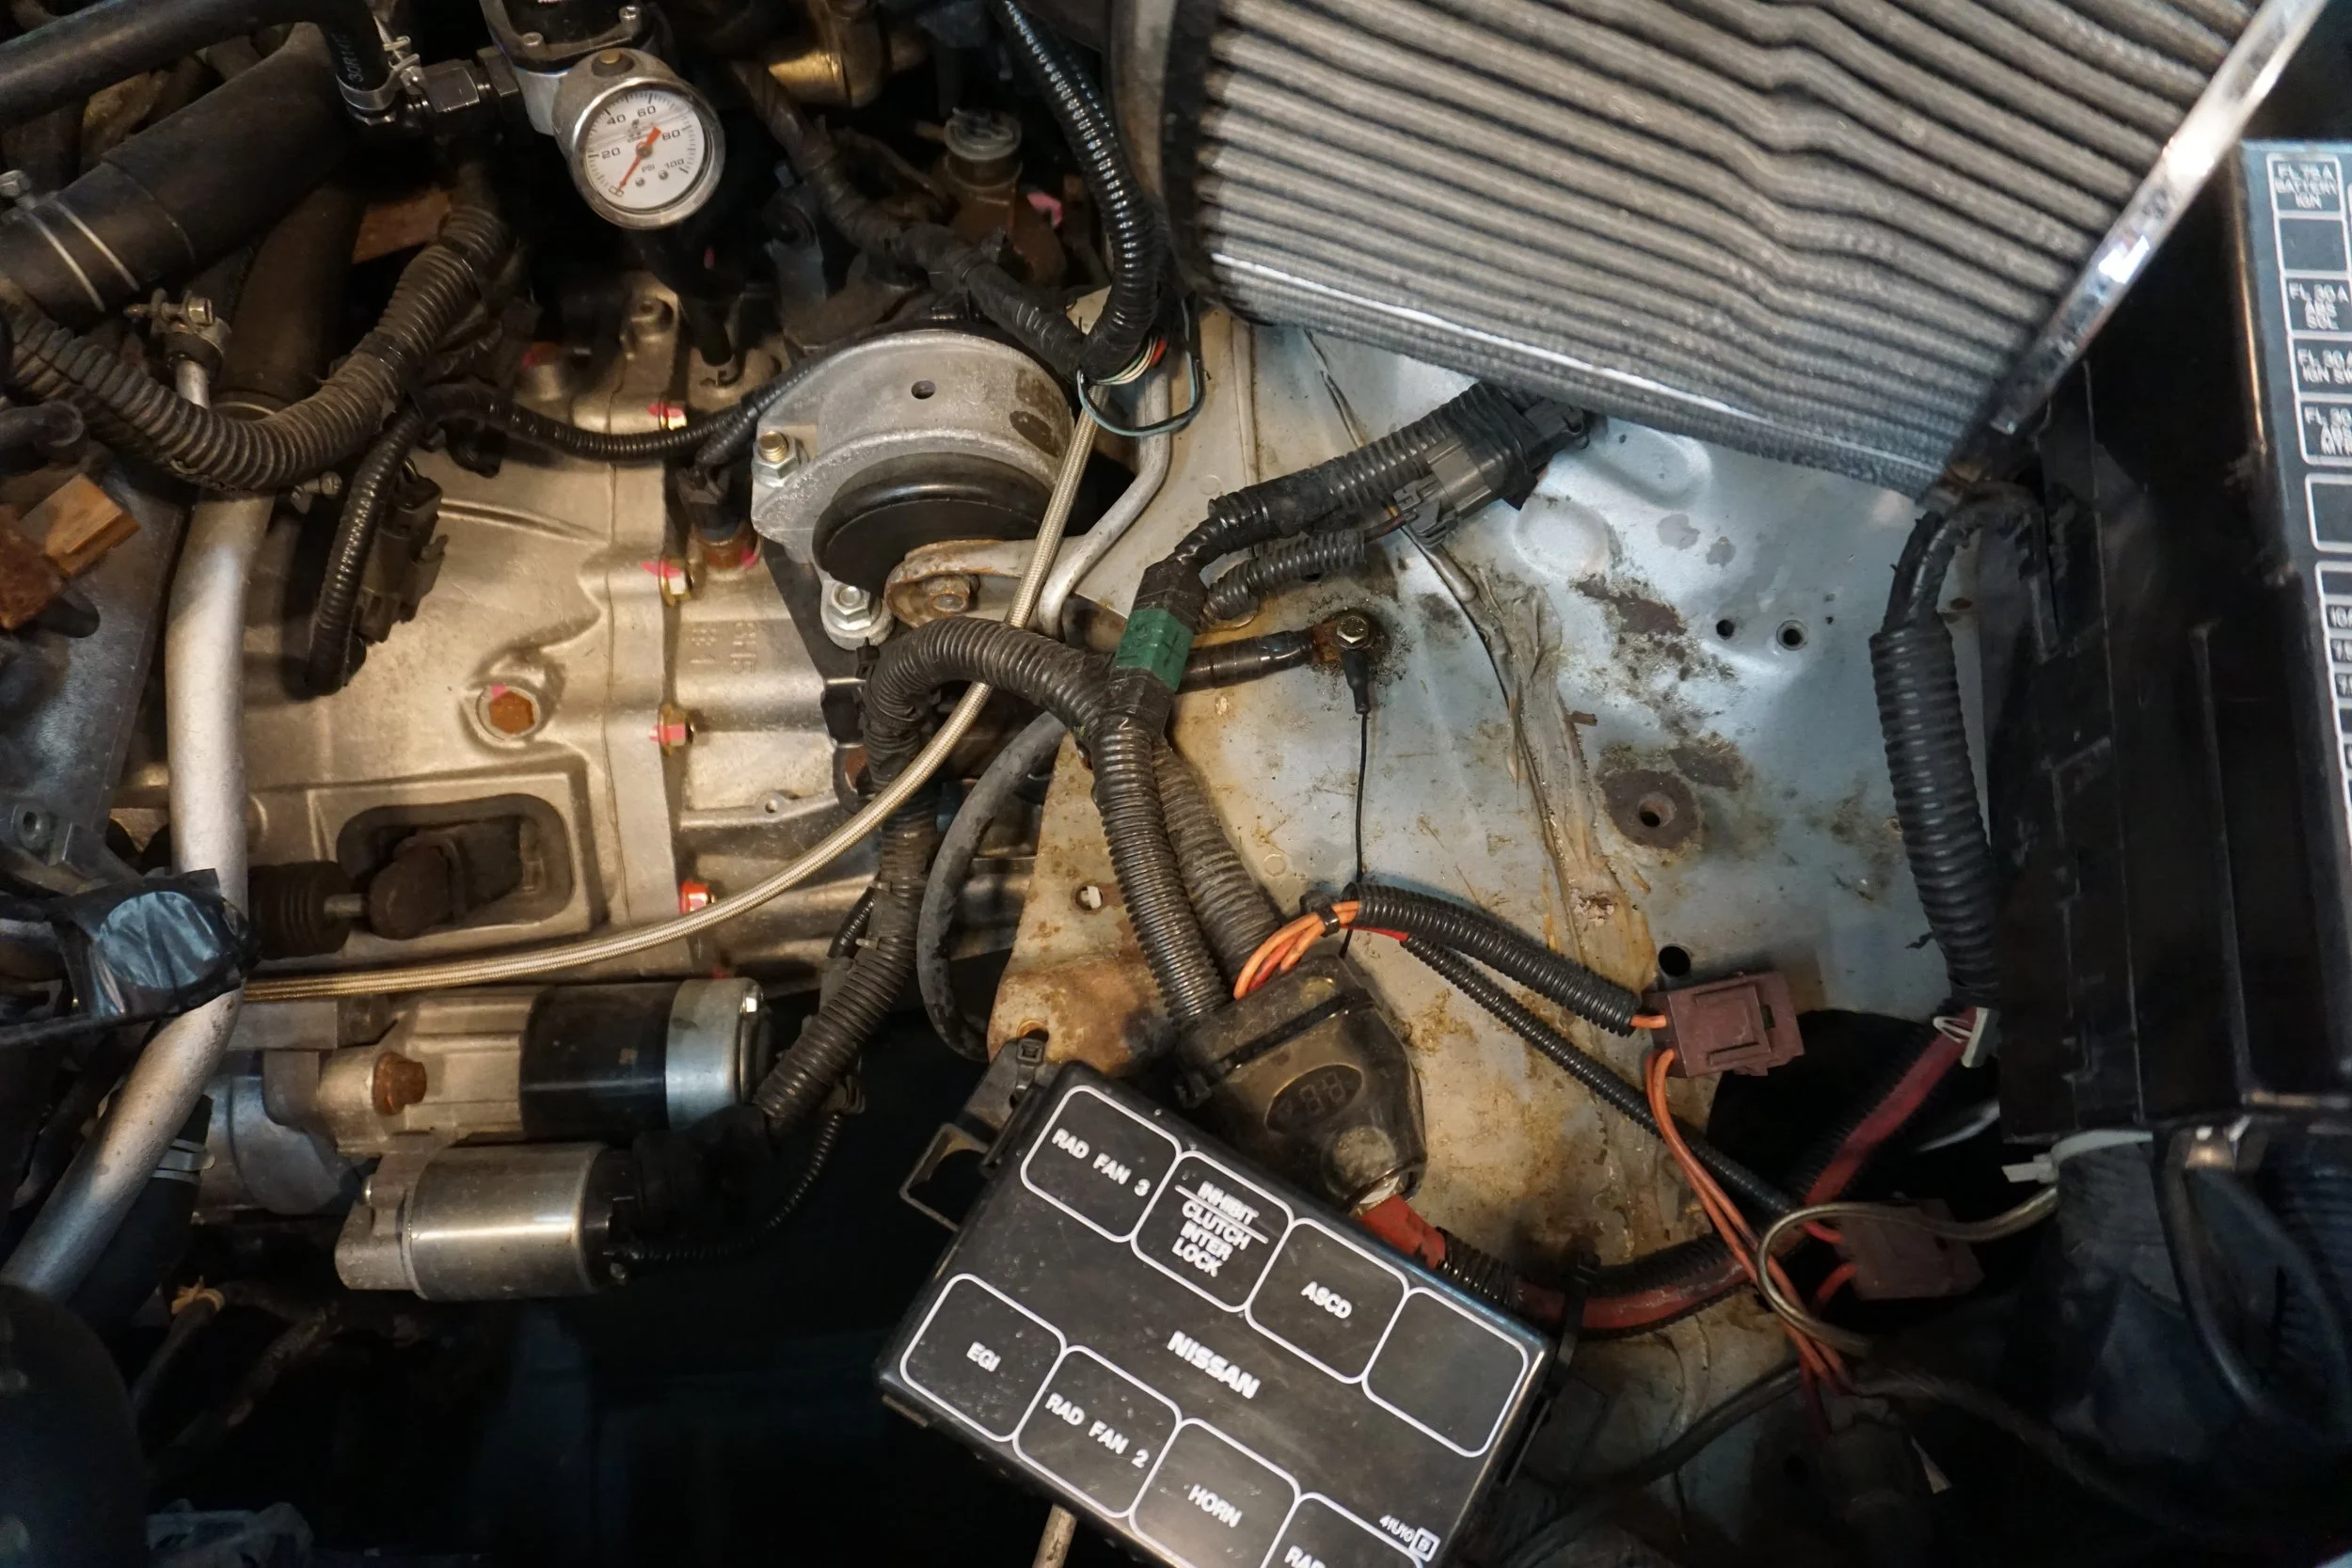
I also didn't like that the digital voltage display there was upside down when viewed from the front of the car, and wasn't secured to anything at all. Let's get rid of the old crappy 1 gauge wire with all of like 100 strands, and replace it with my favorite wire, EB Flex. Their 1 AWG wire is OFC and has something like 840 strands, more than any other brand I could find. It's super flexible, and I'm sure it can flow more current than the old wire.
I reused the old hole, but instead of running the wire up to the front of the car inside the fender, I ran it straight up and it comes out around the clutch master cylinder.
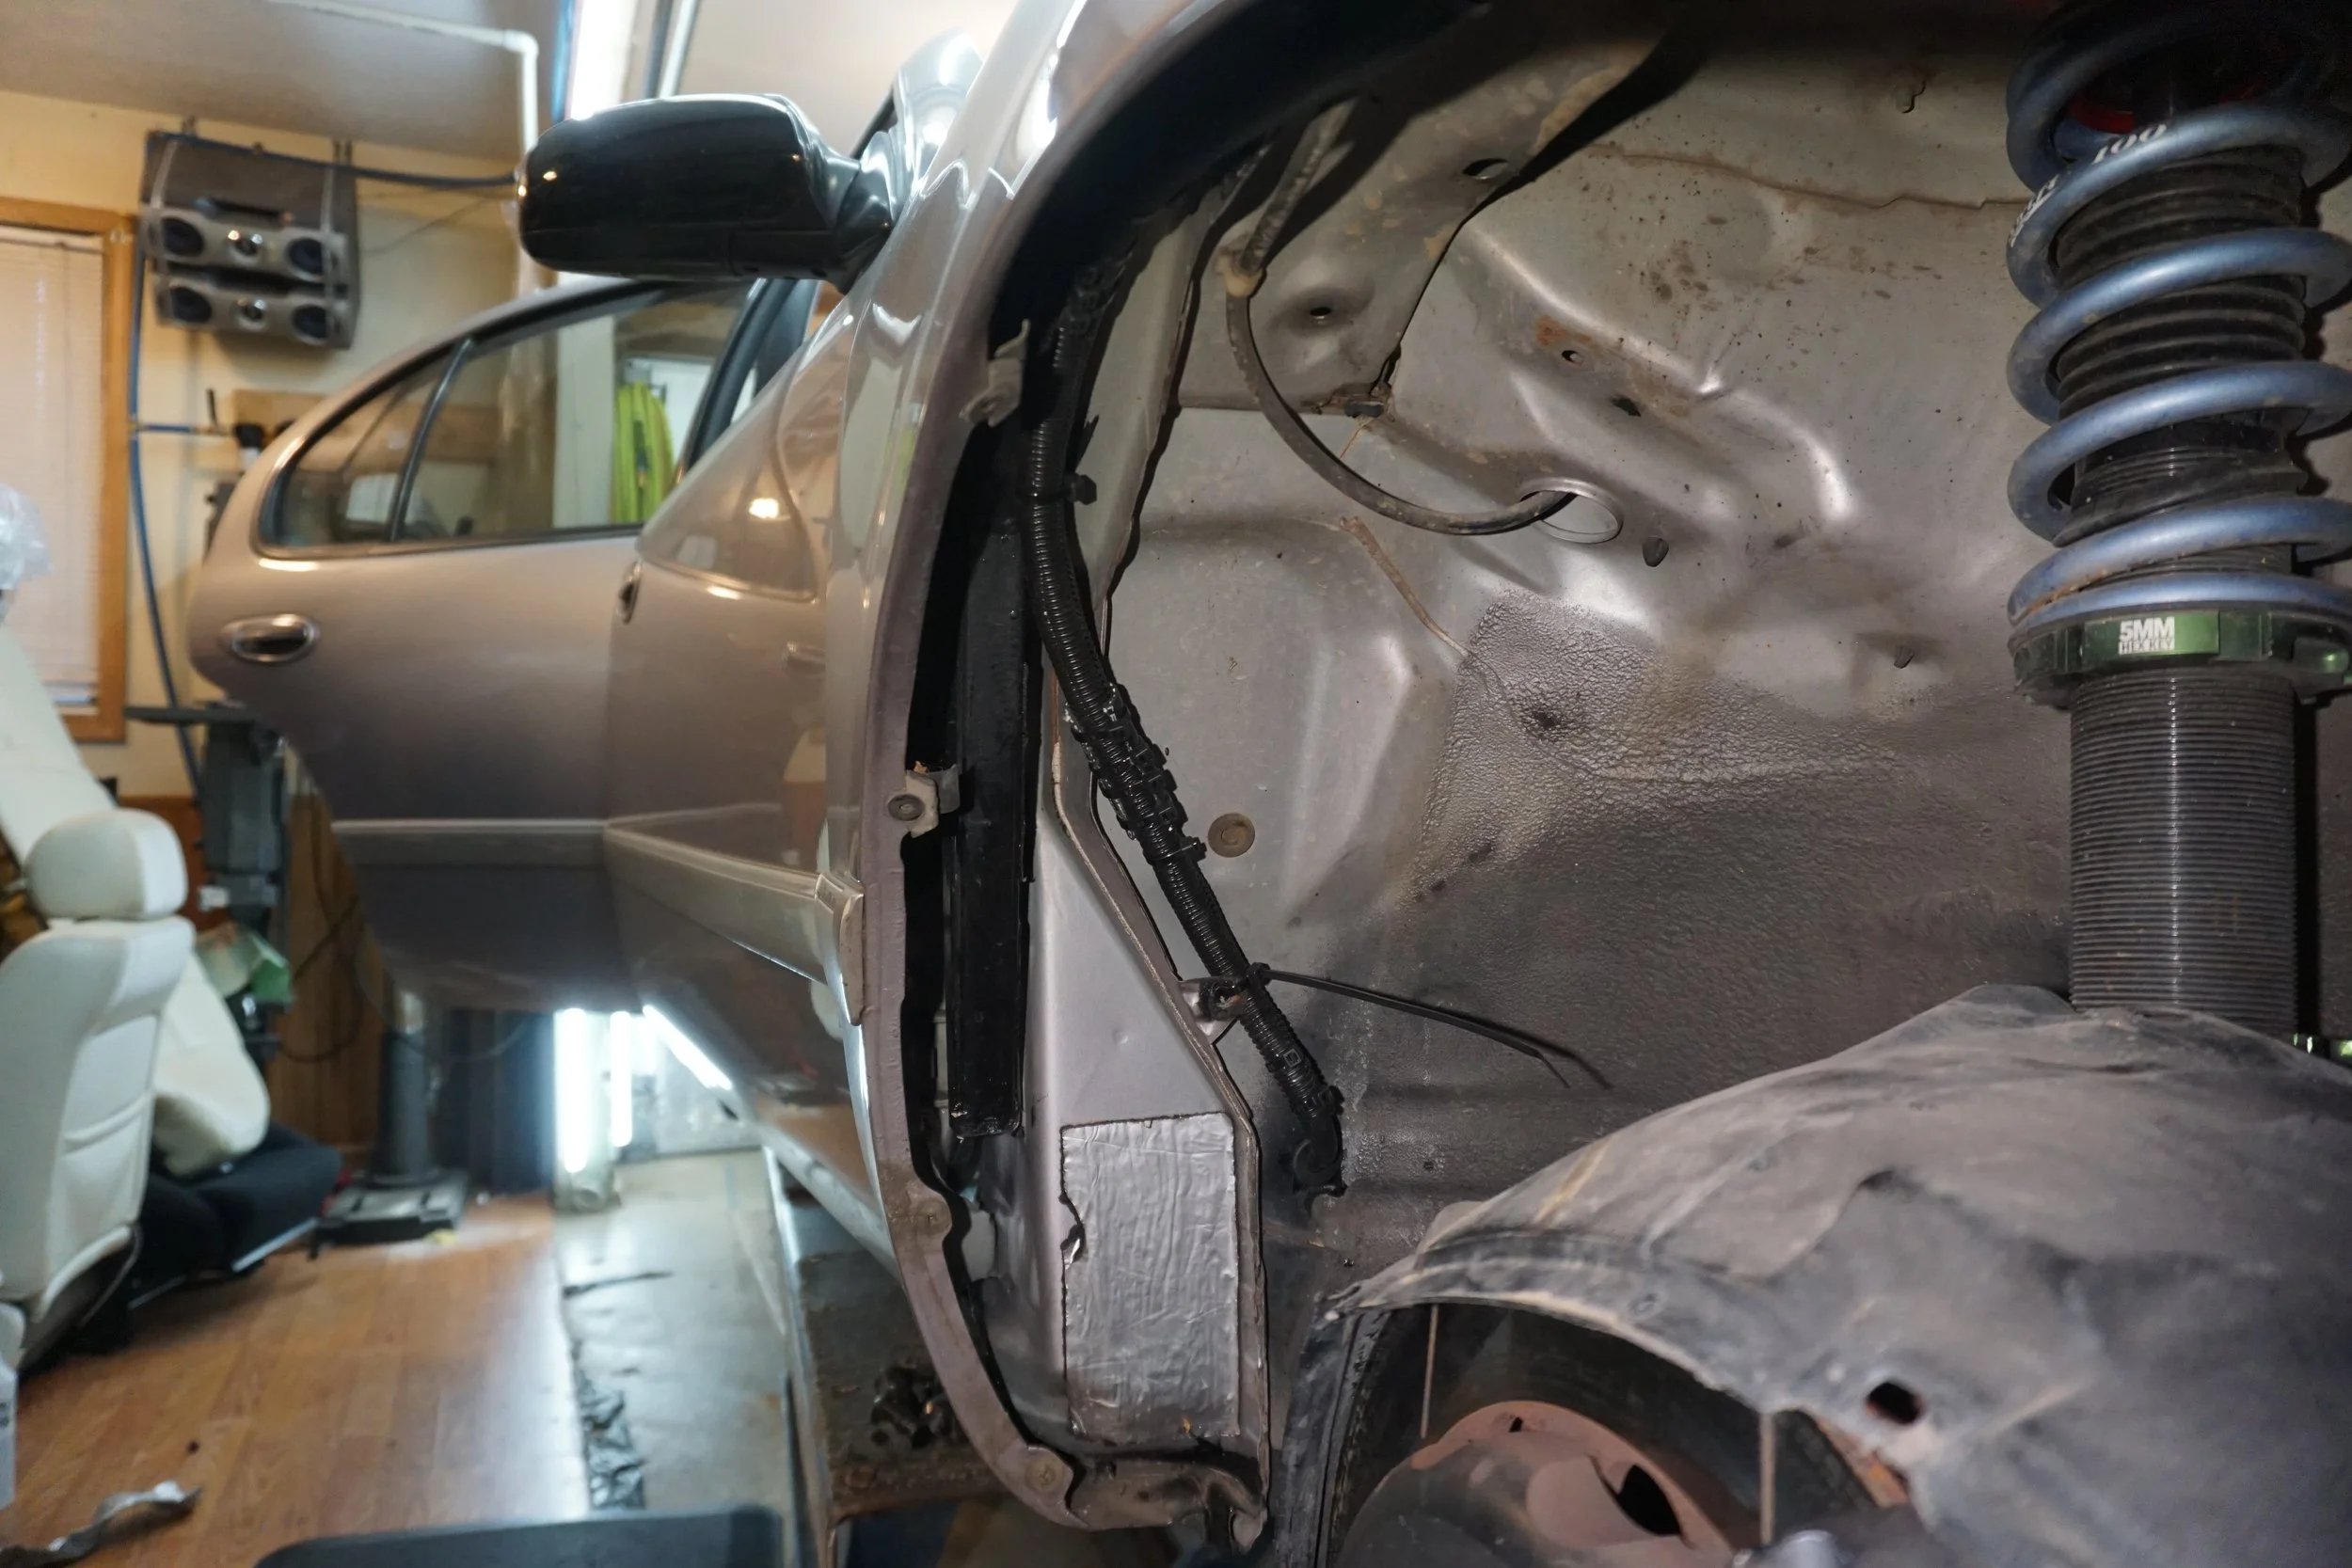
From there, it ducks down and runs alongside the DS strut tower, where it meets the distro block. This allows the distro block to sit in the correct orientation and be tucked out of the way. It's also held in place with a lot of HD double sided tape.
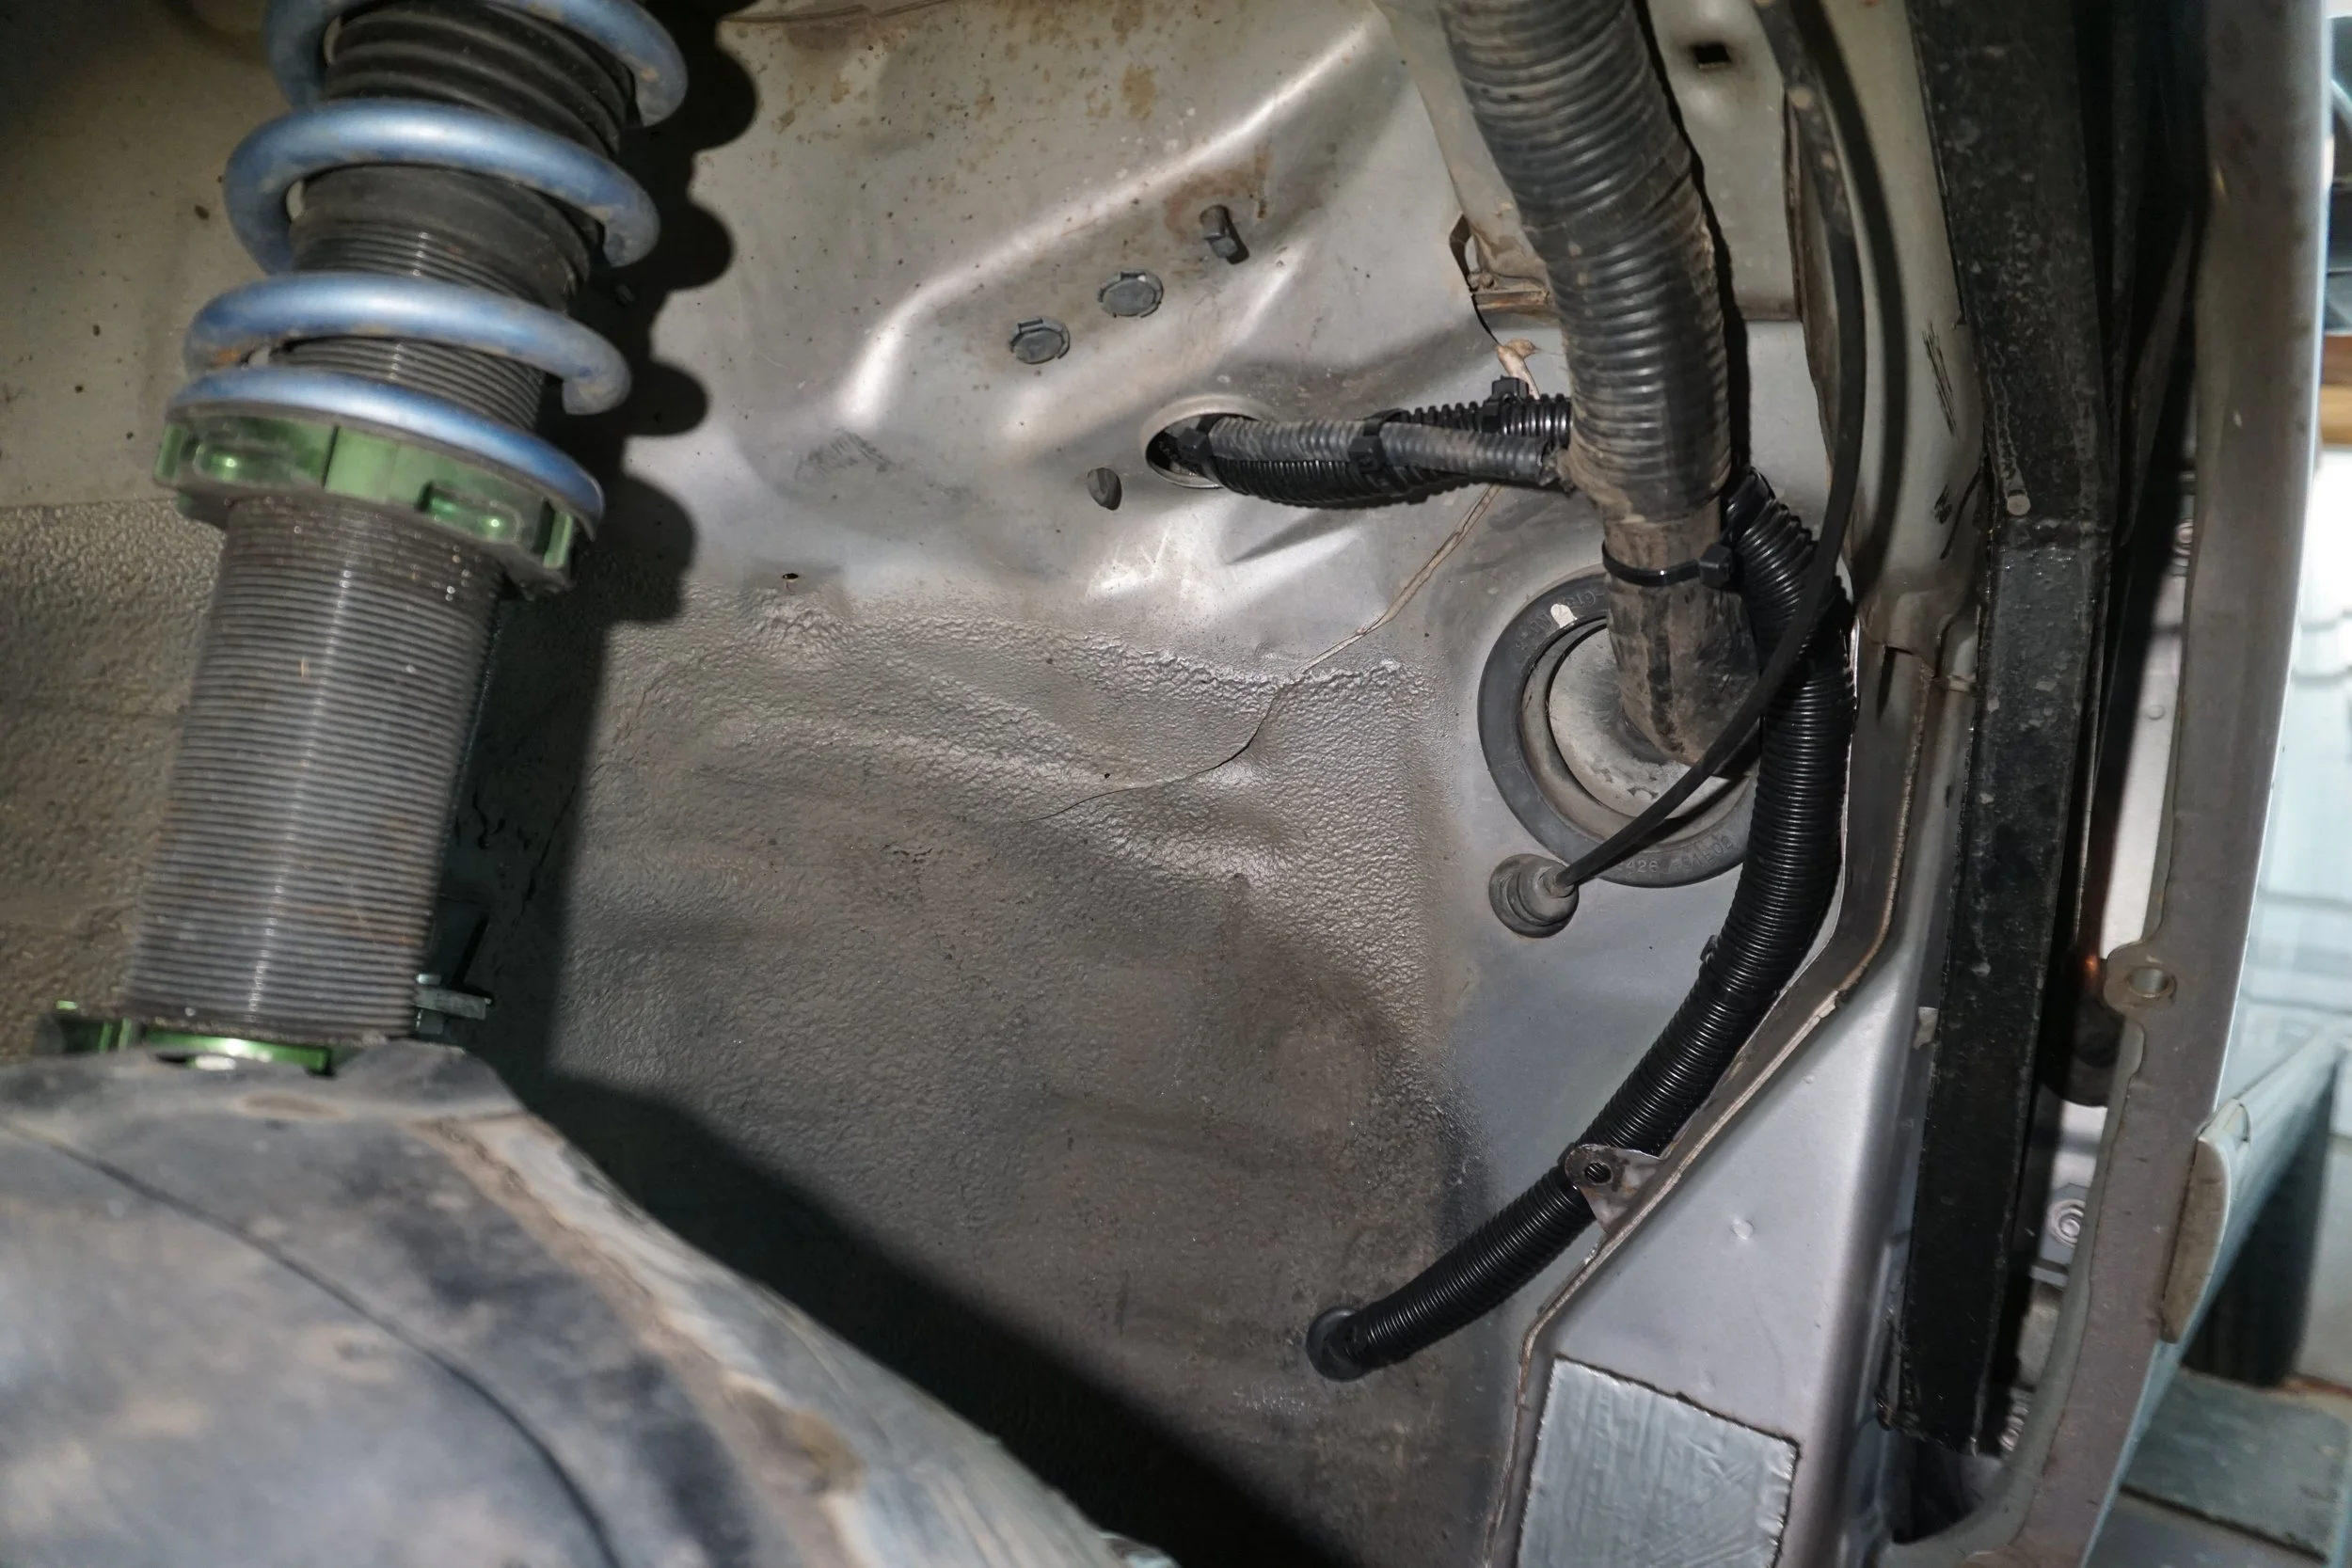
Then it was on to the next wire, the 4 AWG from the new 220a alternator + to the battery + in the trunk. This would complete my "Big 3" wiring upgrades, and is necessary with the extra capacity from the upgraded alternator. For reference, these car came with either 100a, 110a, or 125a alternators. Routing this wire proved to be tricky, but I decided to run it on the PS of the car, since that's where both the alternator and battery are. Just like the main battery wire on the DS, I drilled a hole on the PS for this one:
I made a nice little bracket for the fuse holder

In no particular order....my alternator caught on fire over the summer! It was a hot and swampy DC afternoon, so the AC was cranking as was the stereo. I got home from work and parked in the driveway, and went in to get changed. A few minutes later there was some frantic ringing of the doorbell, so my wife ran down and answered. It was my neighbor, who said my car was on fire! I ran downstairs half dressed and grabbed two fire extinguishers (I knew one was probably bad, but I didn't know which one). I look at my car and there's smoke coming from under the hood, so I pop it and see my alternator is glowing red and smoking. The first fire extinguisher was a dud, but thankfully the second worked and put out the fire:
Holy moley did it smell bad! I disconnected the battery and took a closer look at it the next day. Thankfully the only damage was to the little wiring harness that goes to the alternator, and it was only singed. I shuddered to think what would have happened had my neighbor not been in his front yard at the time! My car would have just burned in my driveway and I would have been none the wiser. A terrifying thought.
I had been coveting an upgraded alternator for a while to make sure it can keep up with the stereo, so I finally had a good excuse to pull the trigger. I went with a 200a Singer alternator, as Singer has an amazing reputation. Mike's customer service was great, and once he built it, it actually tested out to be a 220a unit, so I got a little free upgrade. The alternator comes with a little wiring harness adapter, so it's plug and play.
It's a beautiful thing!
I was able to use the stock belt, but I really should find one that's a little smaller as the pulley is different than stock. I got a new alternator harness from Amayama:
Now, why did the alternator catch on fire? If I had to guess, I would say it's probably related to all of the oil that had been dripping on it for the last 10+ years. Since I'd rather not have my car catch on fire again, it was time to do some deferred maintenance. First up, was replacing the leaking VTC solenoid gasket:
I also scraped up old RTV in that area, cleaned the hell out of it, and laid down some fresh RTV.
Next up was a fresh OEM VC gasket:
The cam sensor on the timing cover also looked like it was leaking, so I bought some new o-rings:
Only problem was the bolt snapped when I tried to remove it:
I tried welding a nut to it, but that just made it snap again.
Only thing left was to try and drill it out and chase the threads. This meant getting the PS reservoir and lines out of the way. At least I was able to clean this area for maybe the first time ever!
Space was tight, and I wanted to make sure I was drilling nice and level. So I devised a new tool:
Eventually I got it good enough to reinstall that damn sensor.
And while I was in there, I cleaned up and resealed both of the plastic covers on the 3.0 timing cover. I have no idea what purpose these things serve.
Then it was time to have a little fun with wiring upgrades. I've been wanting to replace the 1 gauge wire that runs from the battery in the trunk to the distribution block up front. It was a cheap wire, and I didn't love the way it was ran. It's the red wire at the bottom of this picture:
I also didn't like that the digital voltage display there was upside down when viewed from the front of the car, and wasn't secured to anything at all. Let's get rid of the old crappy 1 gauge wire with all of like 100 strands, and replace it with my favorite wire, EB Flex. Their 1 AWG wire is OFC and has something like 840 strands, more than any other brand I could find. It's super flexible, and I'm sure it can flow more current than the old wire.
I reused the old hole, but instead of running the wire up to the front of the car inside the fender, I ran it straight up and it comes out around the clutch master cylinder.
From there, it ducks down and runs alongside the DS strut tower, where it meets the distro block. This allows the distro block to sit in the correct orientation and be tucked out of the way. It's also held in place with a lot of HD double sided tape.
Then it was on to the next wire, the 4 AWG from the new 220a alternator + to the battery + in the trunk. This would complete my "Big 3" wiring upgrades, and is necessary with the extra capacity from the upgraded alternator. For reference, these car came with either 100a, 110a, or 125a alternators. Routing this wire proved to be tricky, but I decided to run it on the PS of the car, since that's where both the alternator and battery are. Just like the main battery wire on the DS, I drilled a hole on the PS for this one:
I made a nice little bracket for the fuse holder
Last edited by 95maxrider; Oct 17, 2025 at 02:13 PM.
It's tough to see through that mess of wires, but the 4 AWG wire goes from alternator +, to the 250a fuse, around the coolant overflow tank through the OEM hole in the fender that the factory wires go through. I also had to re-do the 4 AWG wire going from the alternator body to chassis ground.
I'm quite happy with the results, and hopefully this alternator can stay dry for a while!
========================================
Let's go further back in time and talk about control arm bushings, shall we? I was tired of blowing out my poly LCA bushings and was desperate for something better. I got to talking with Red Lion Racing on Facebook, and he said he could make delrin offset front bushings that would go well with my offset rear bushings. These guys:
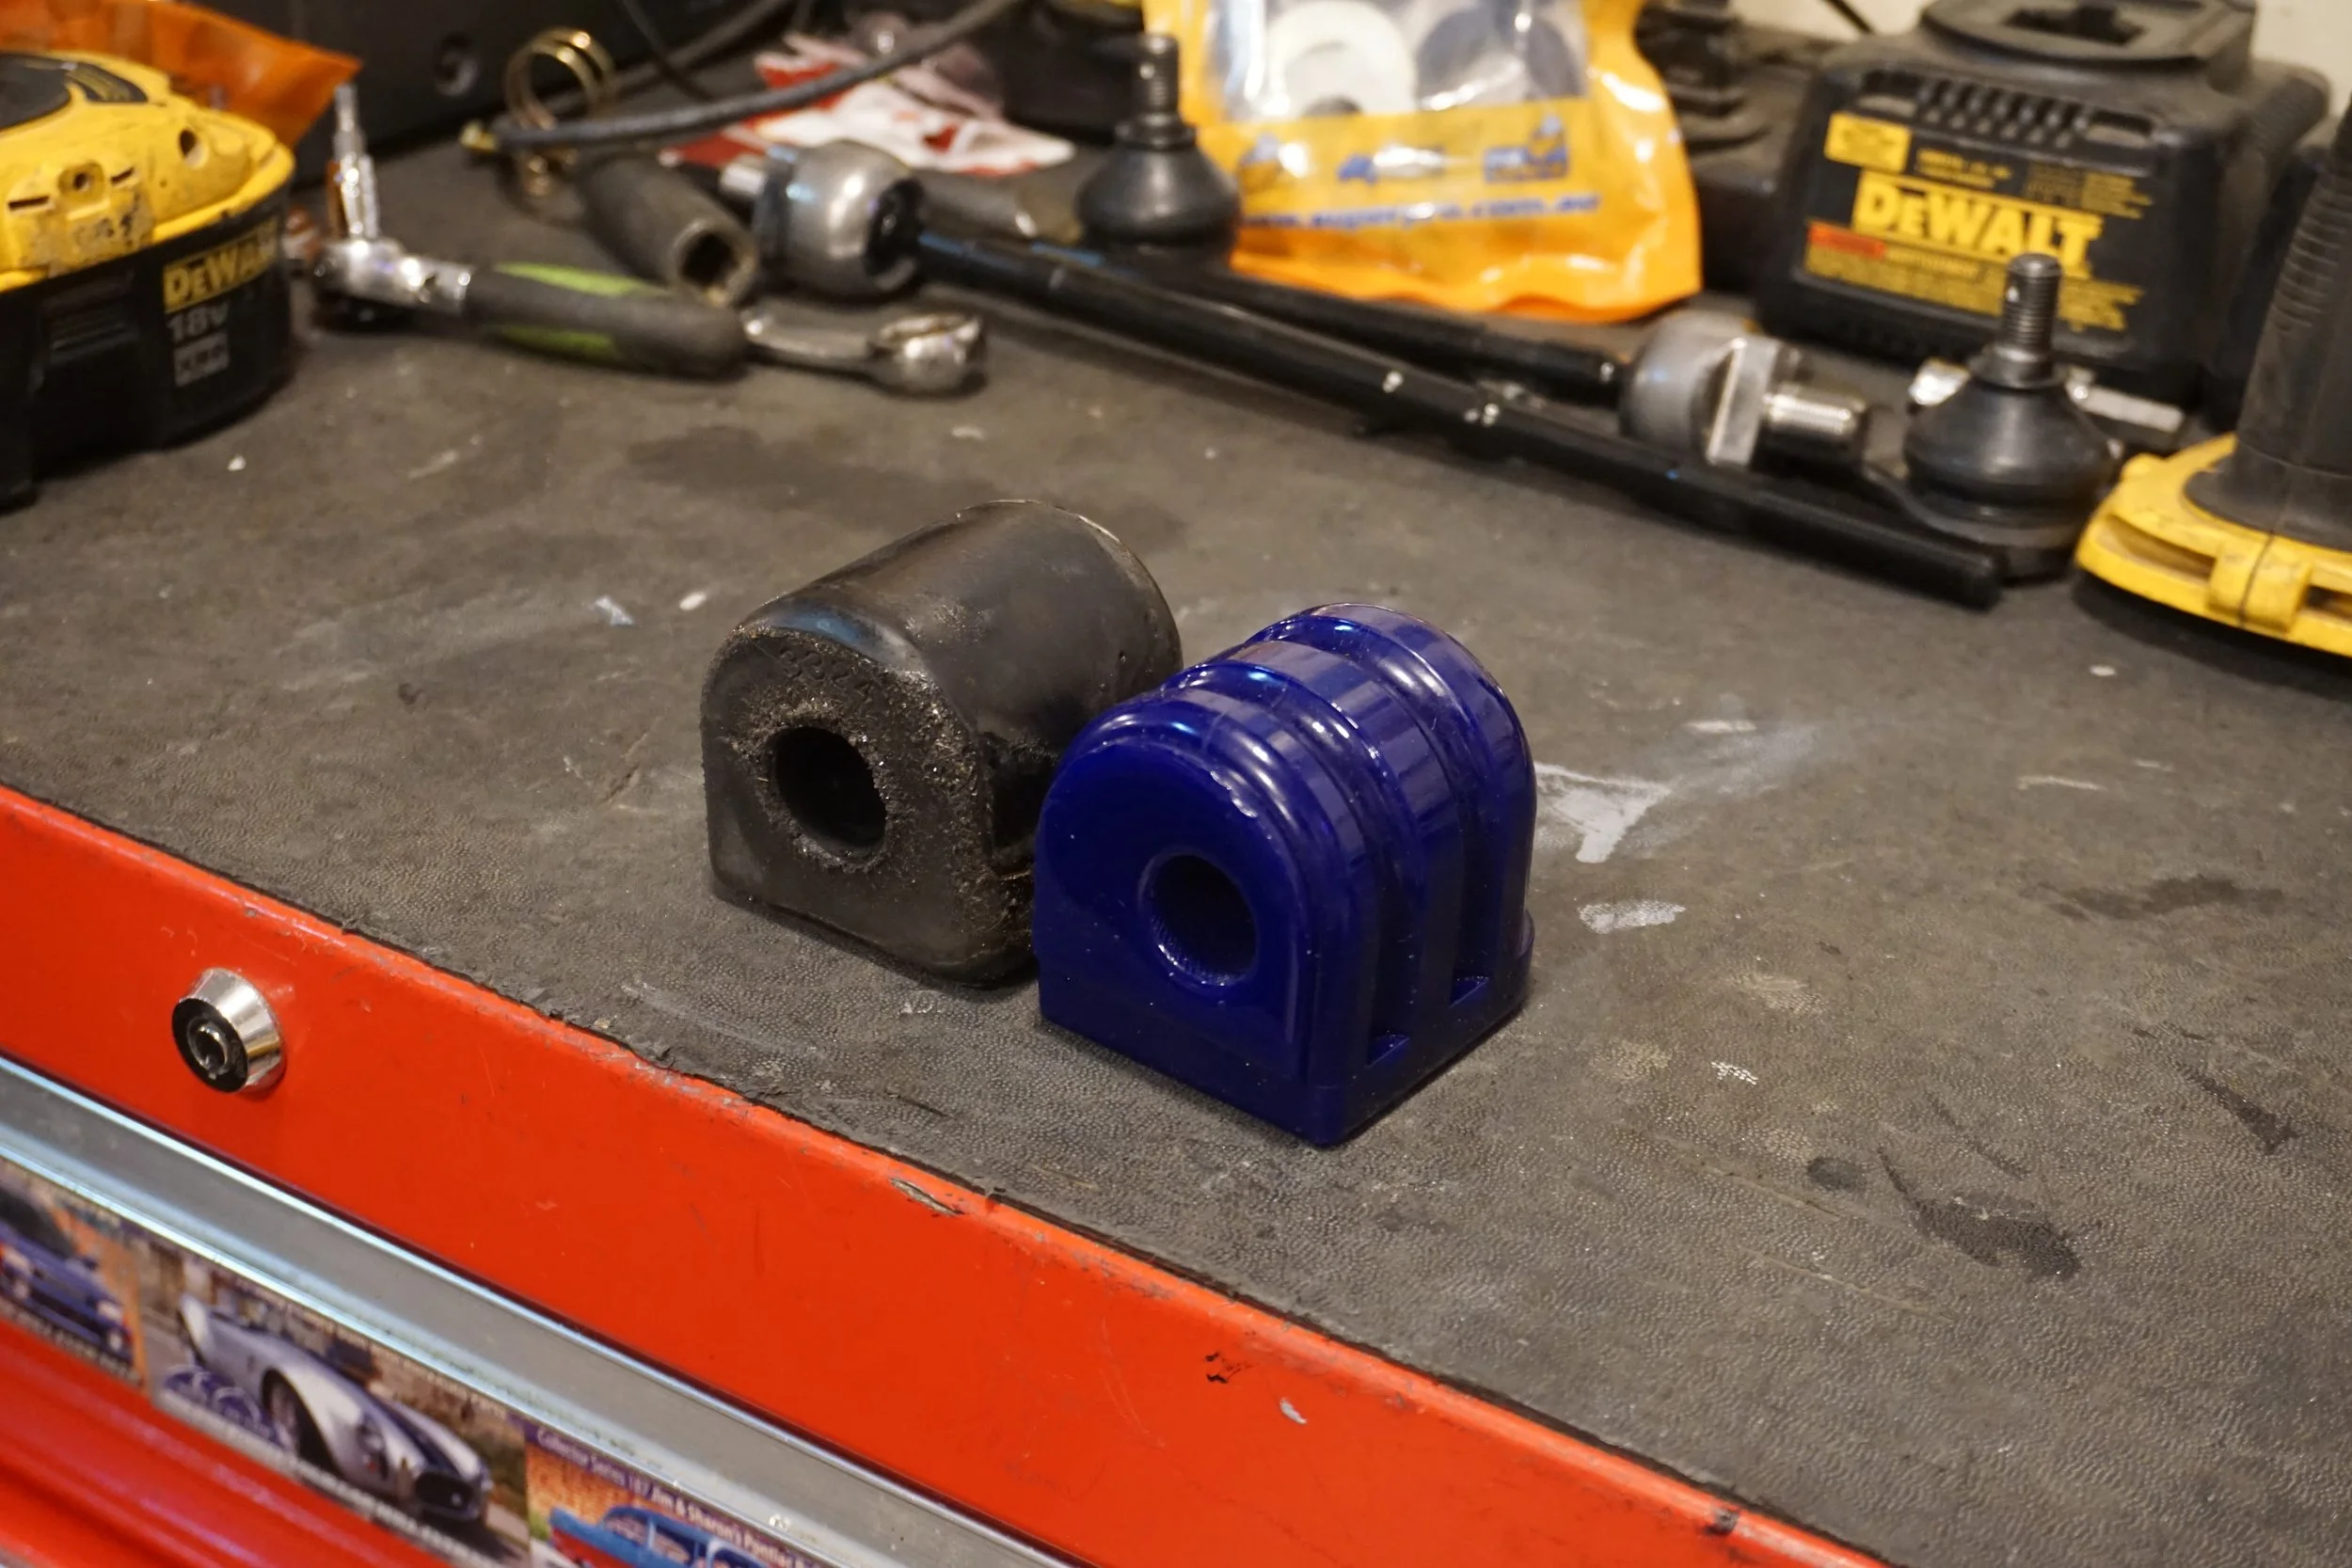
I figured this was a good idea, given that the offset rear bushings put the control arm at an outward angle, which was probably hastening the demise of the front bushings. So I bought a set from RLR:
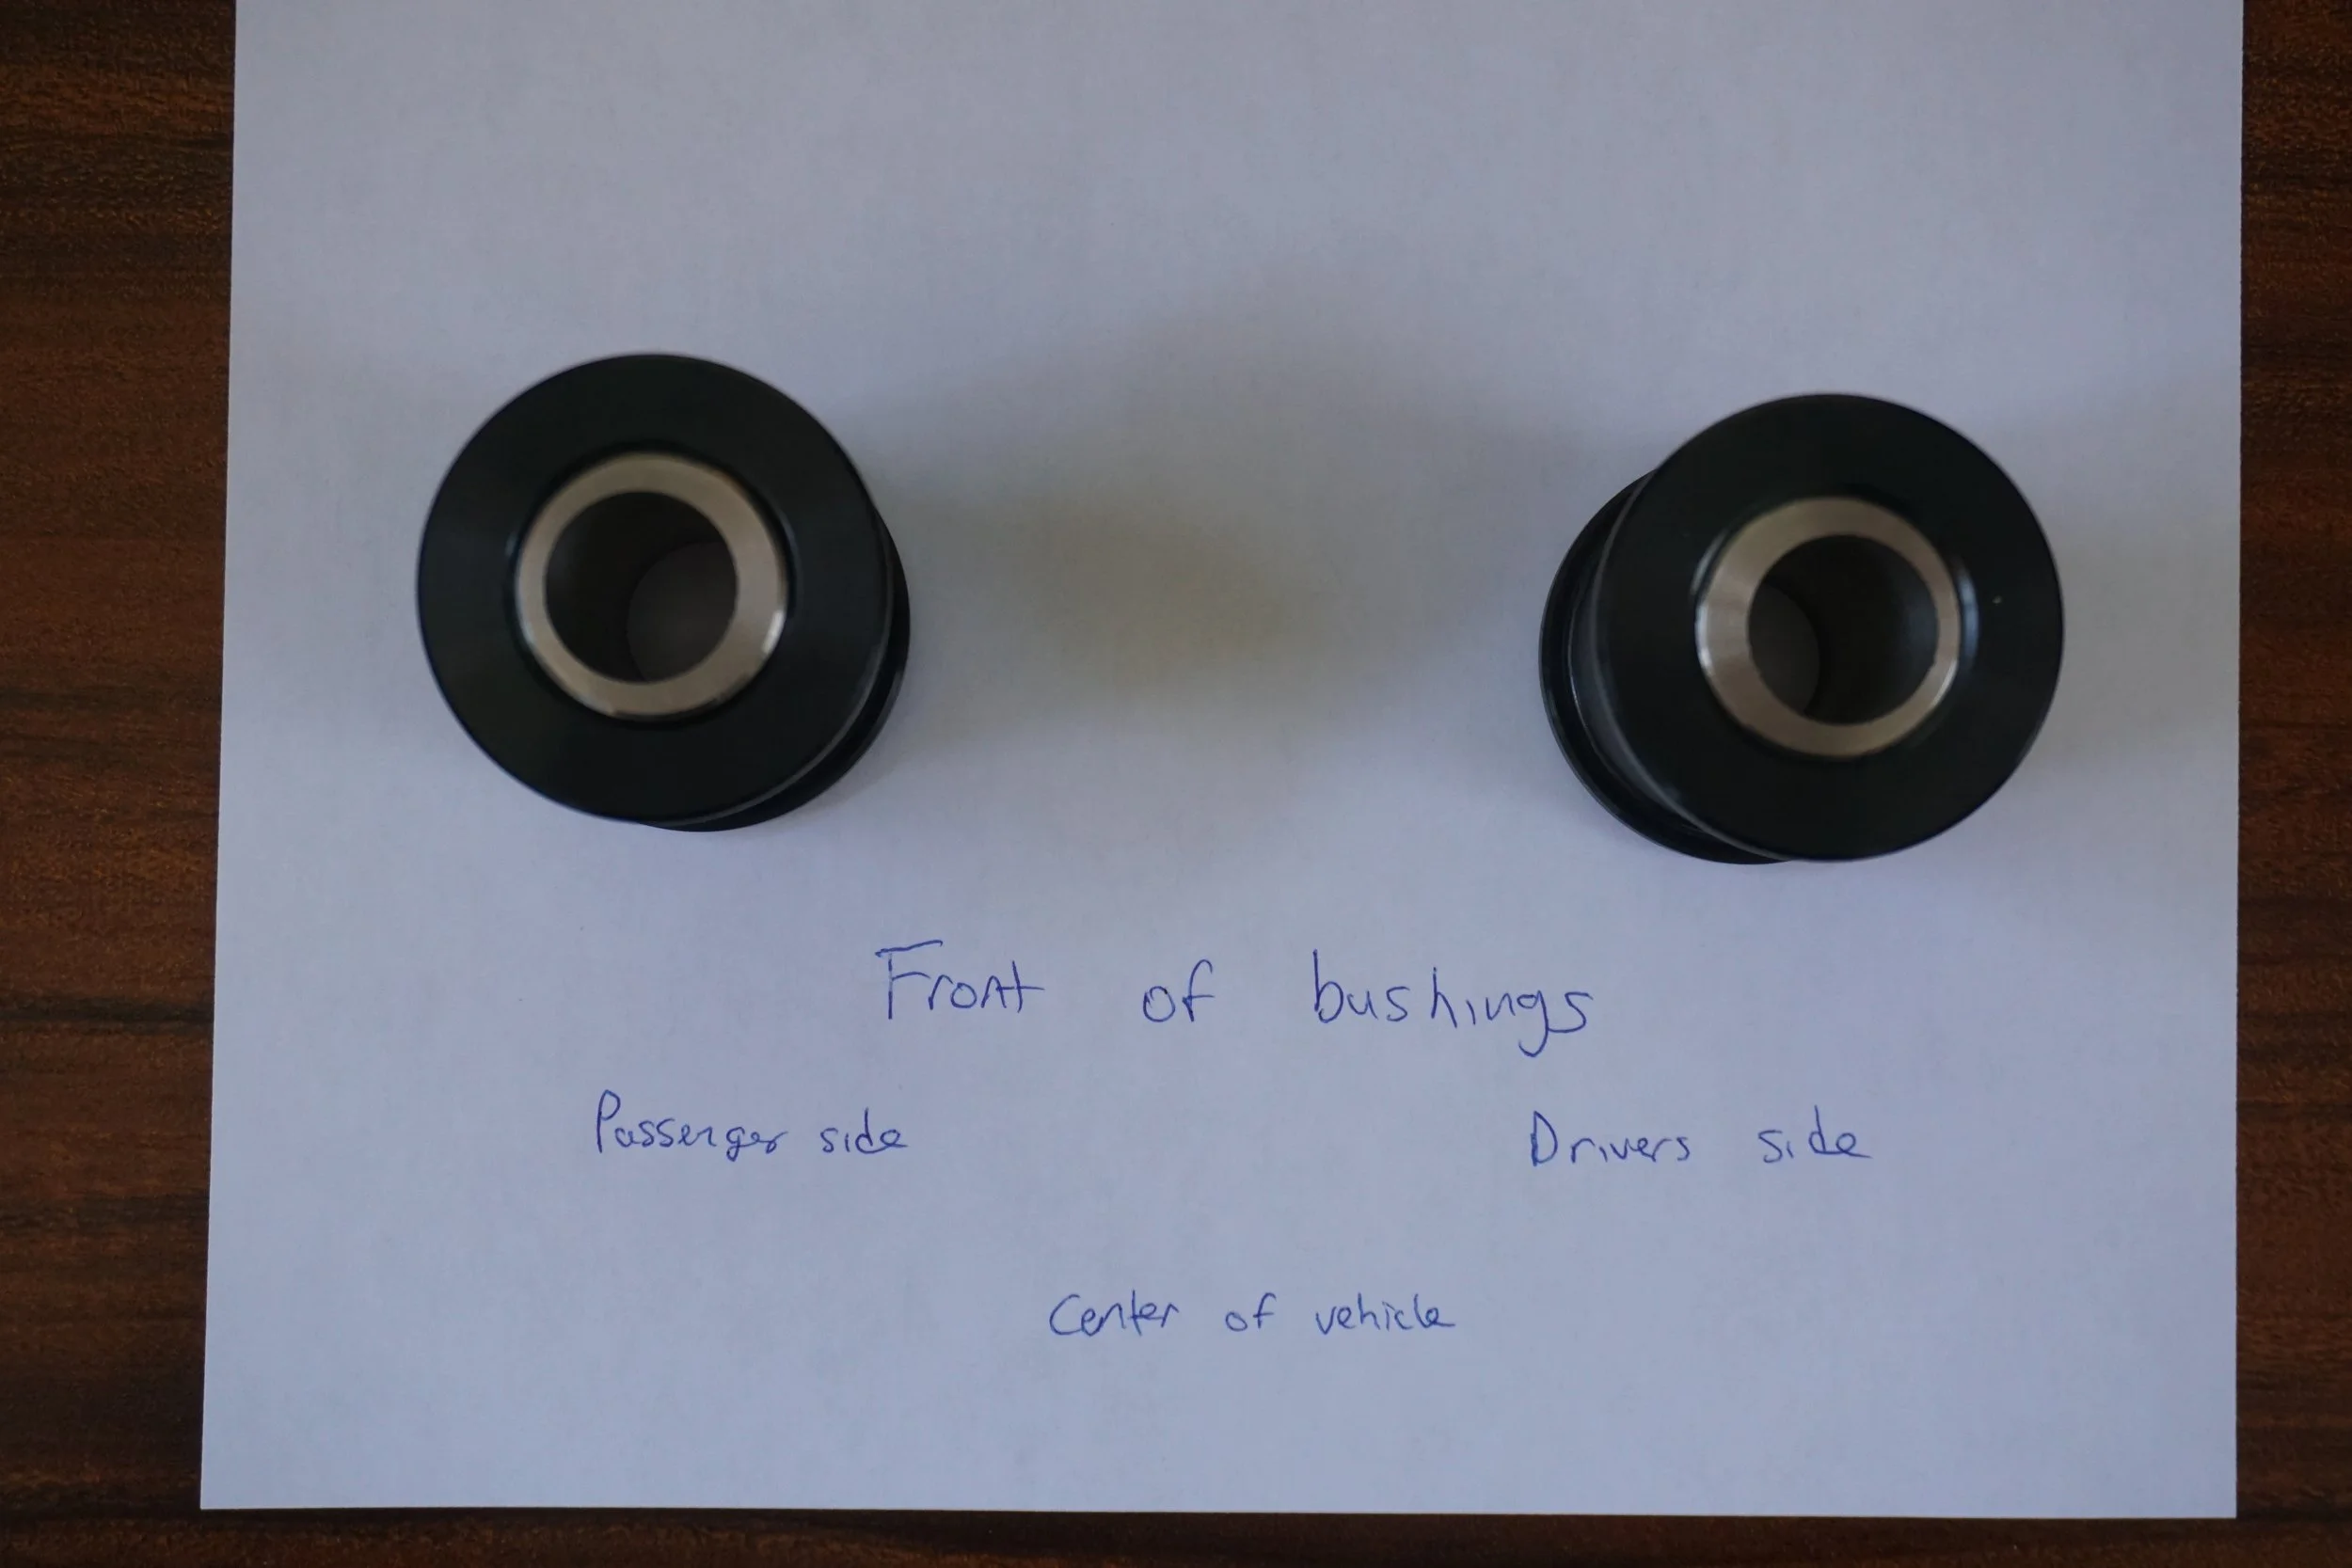
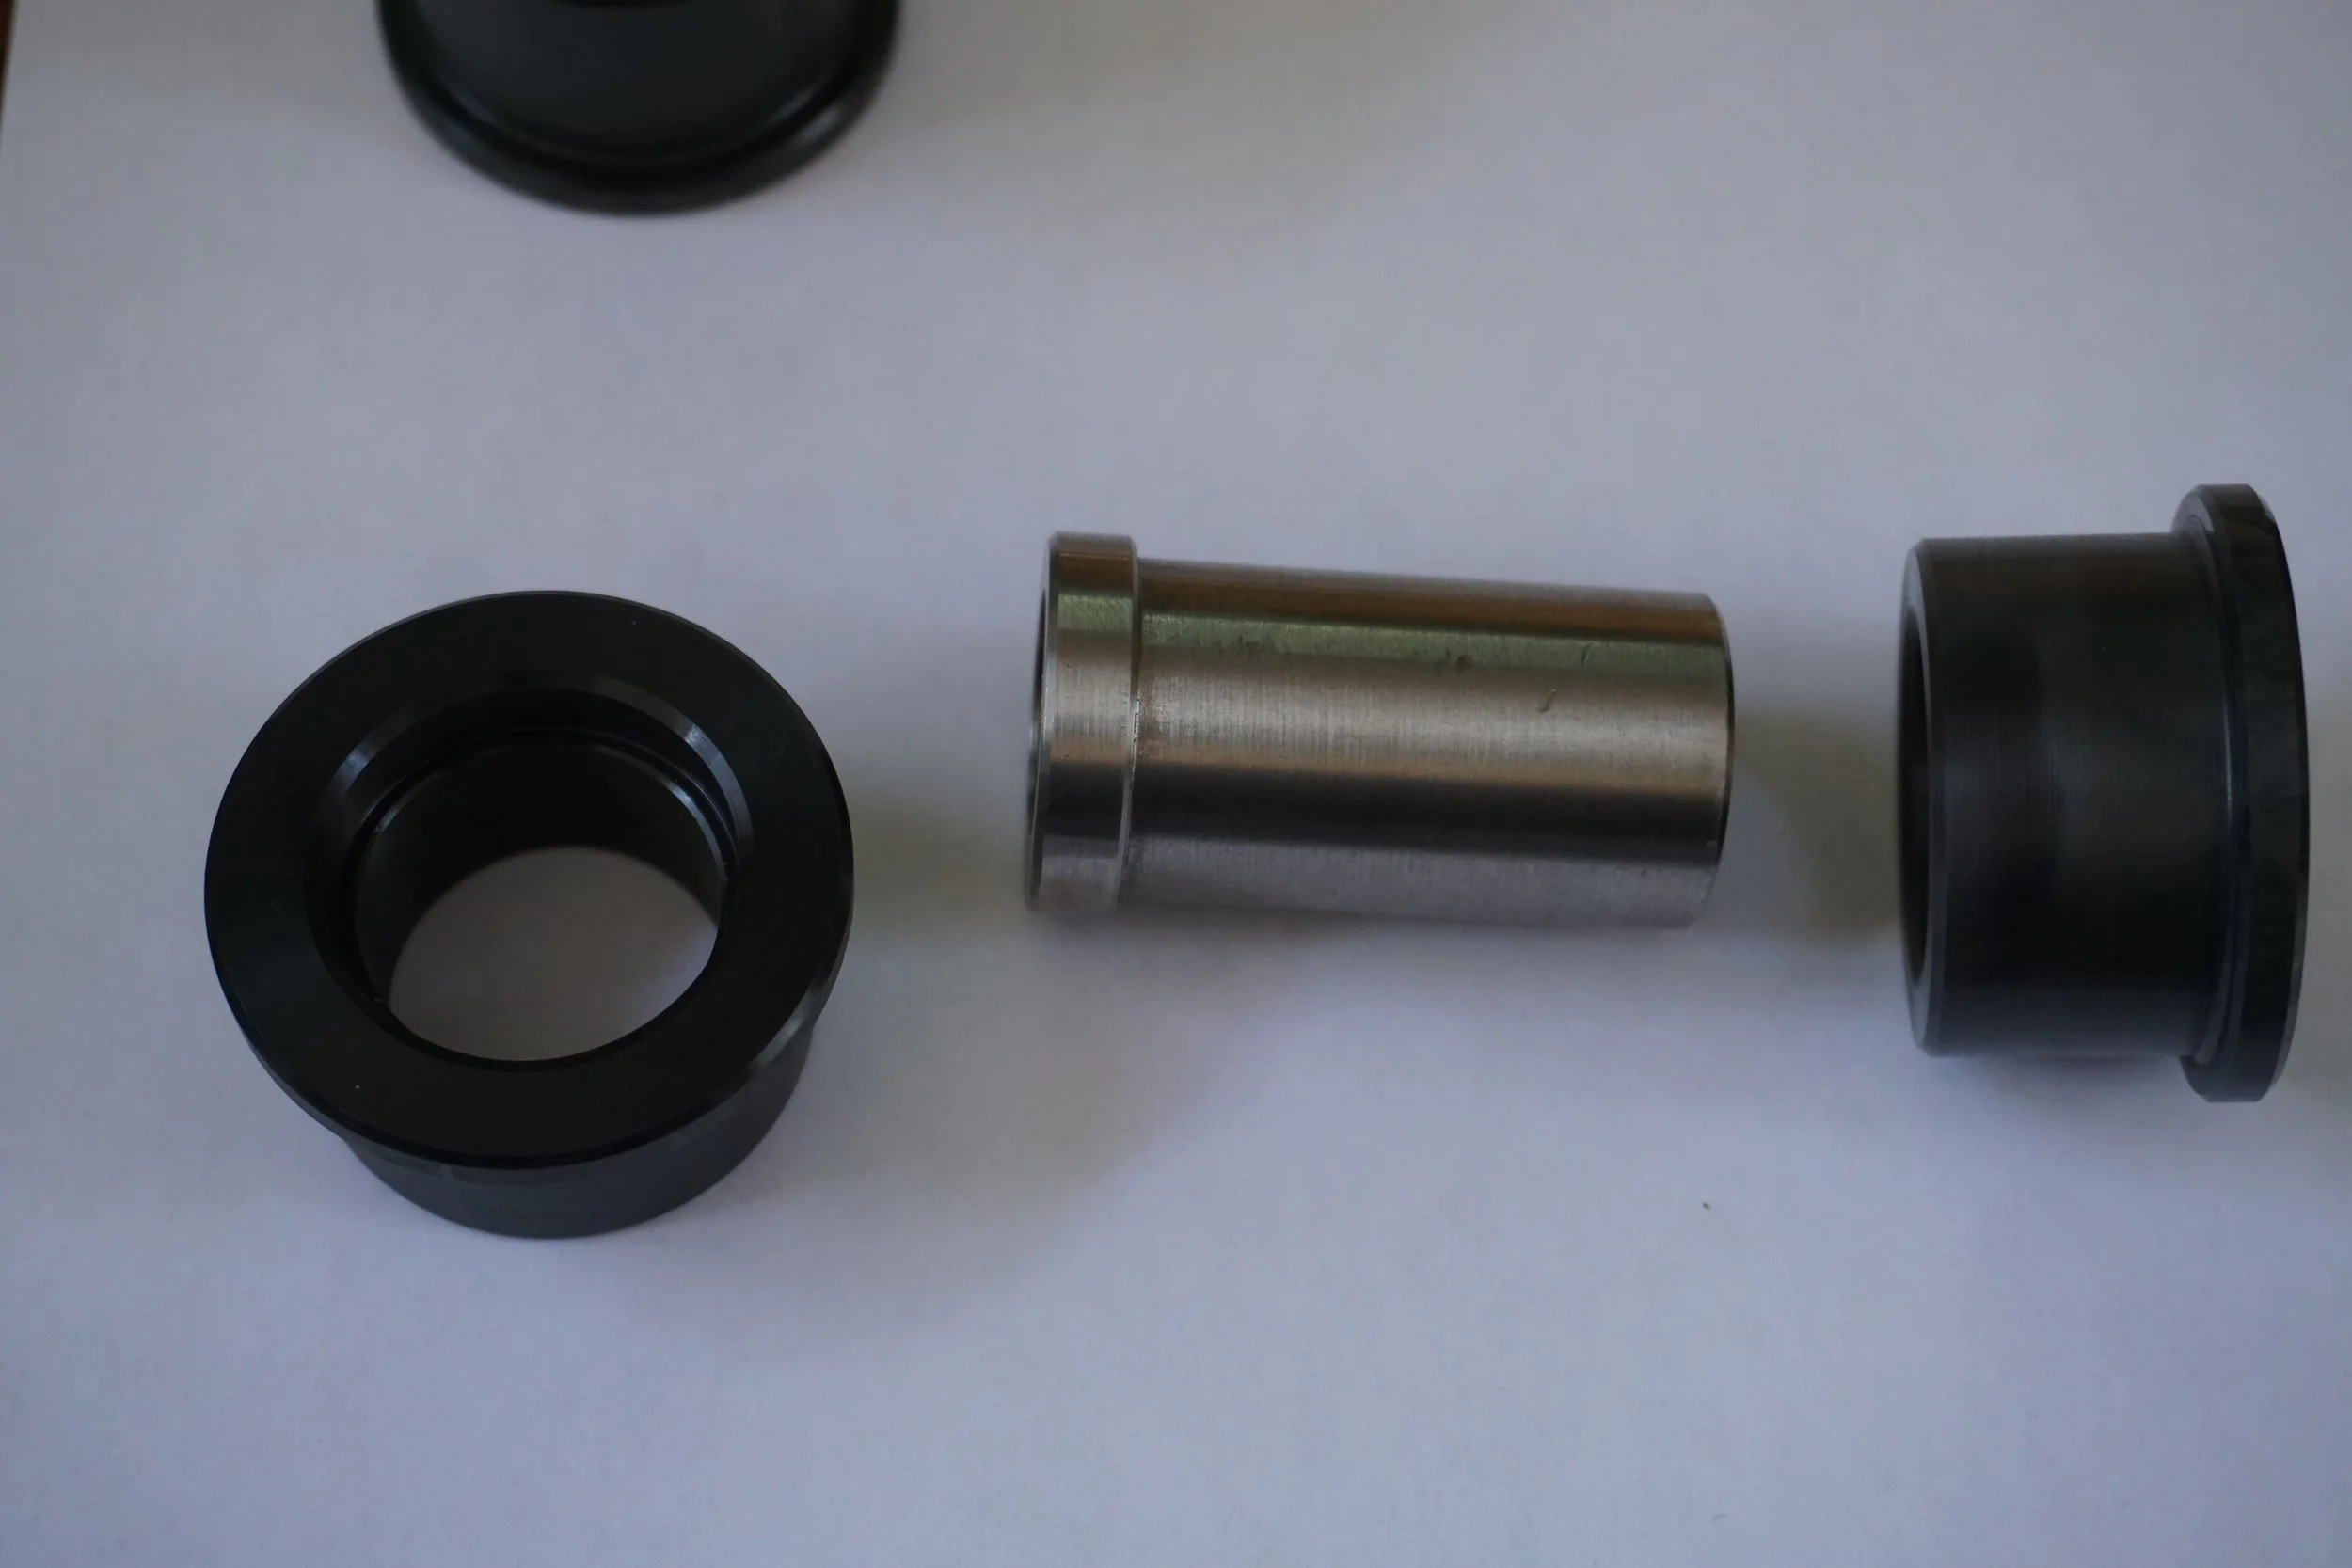
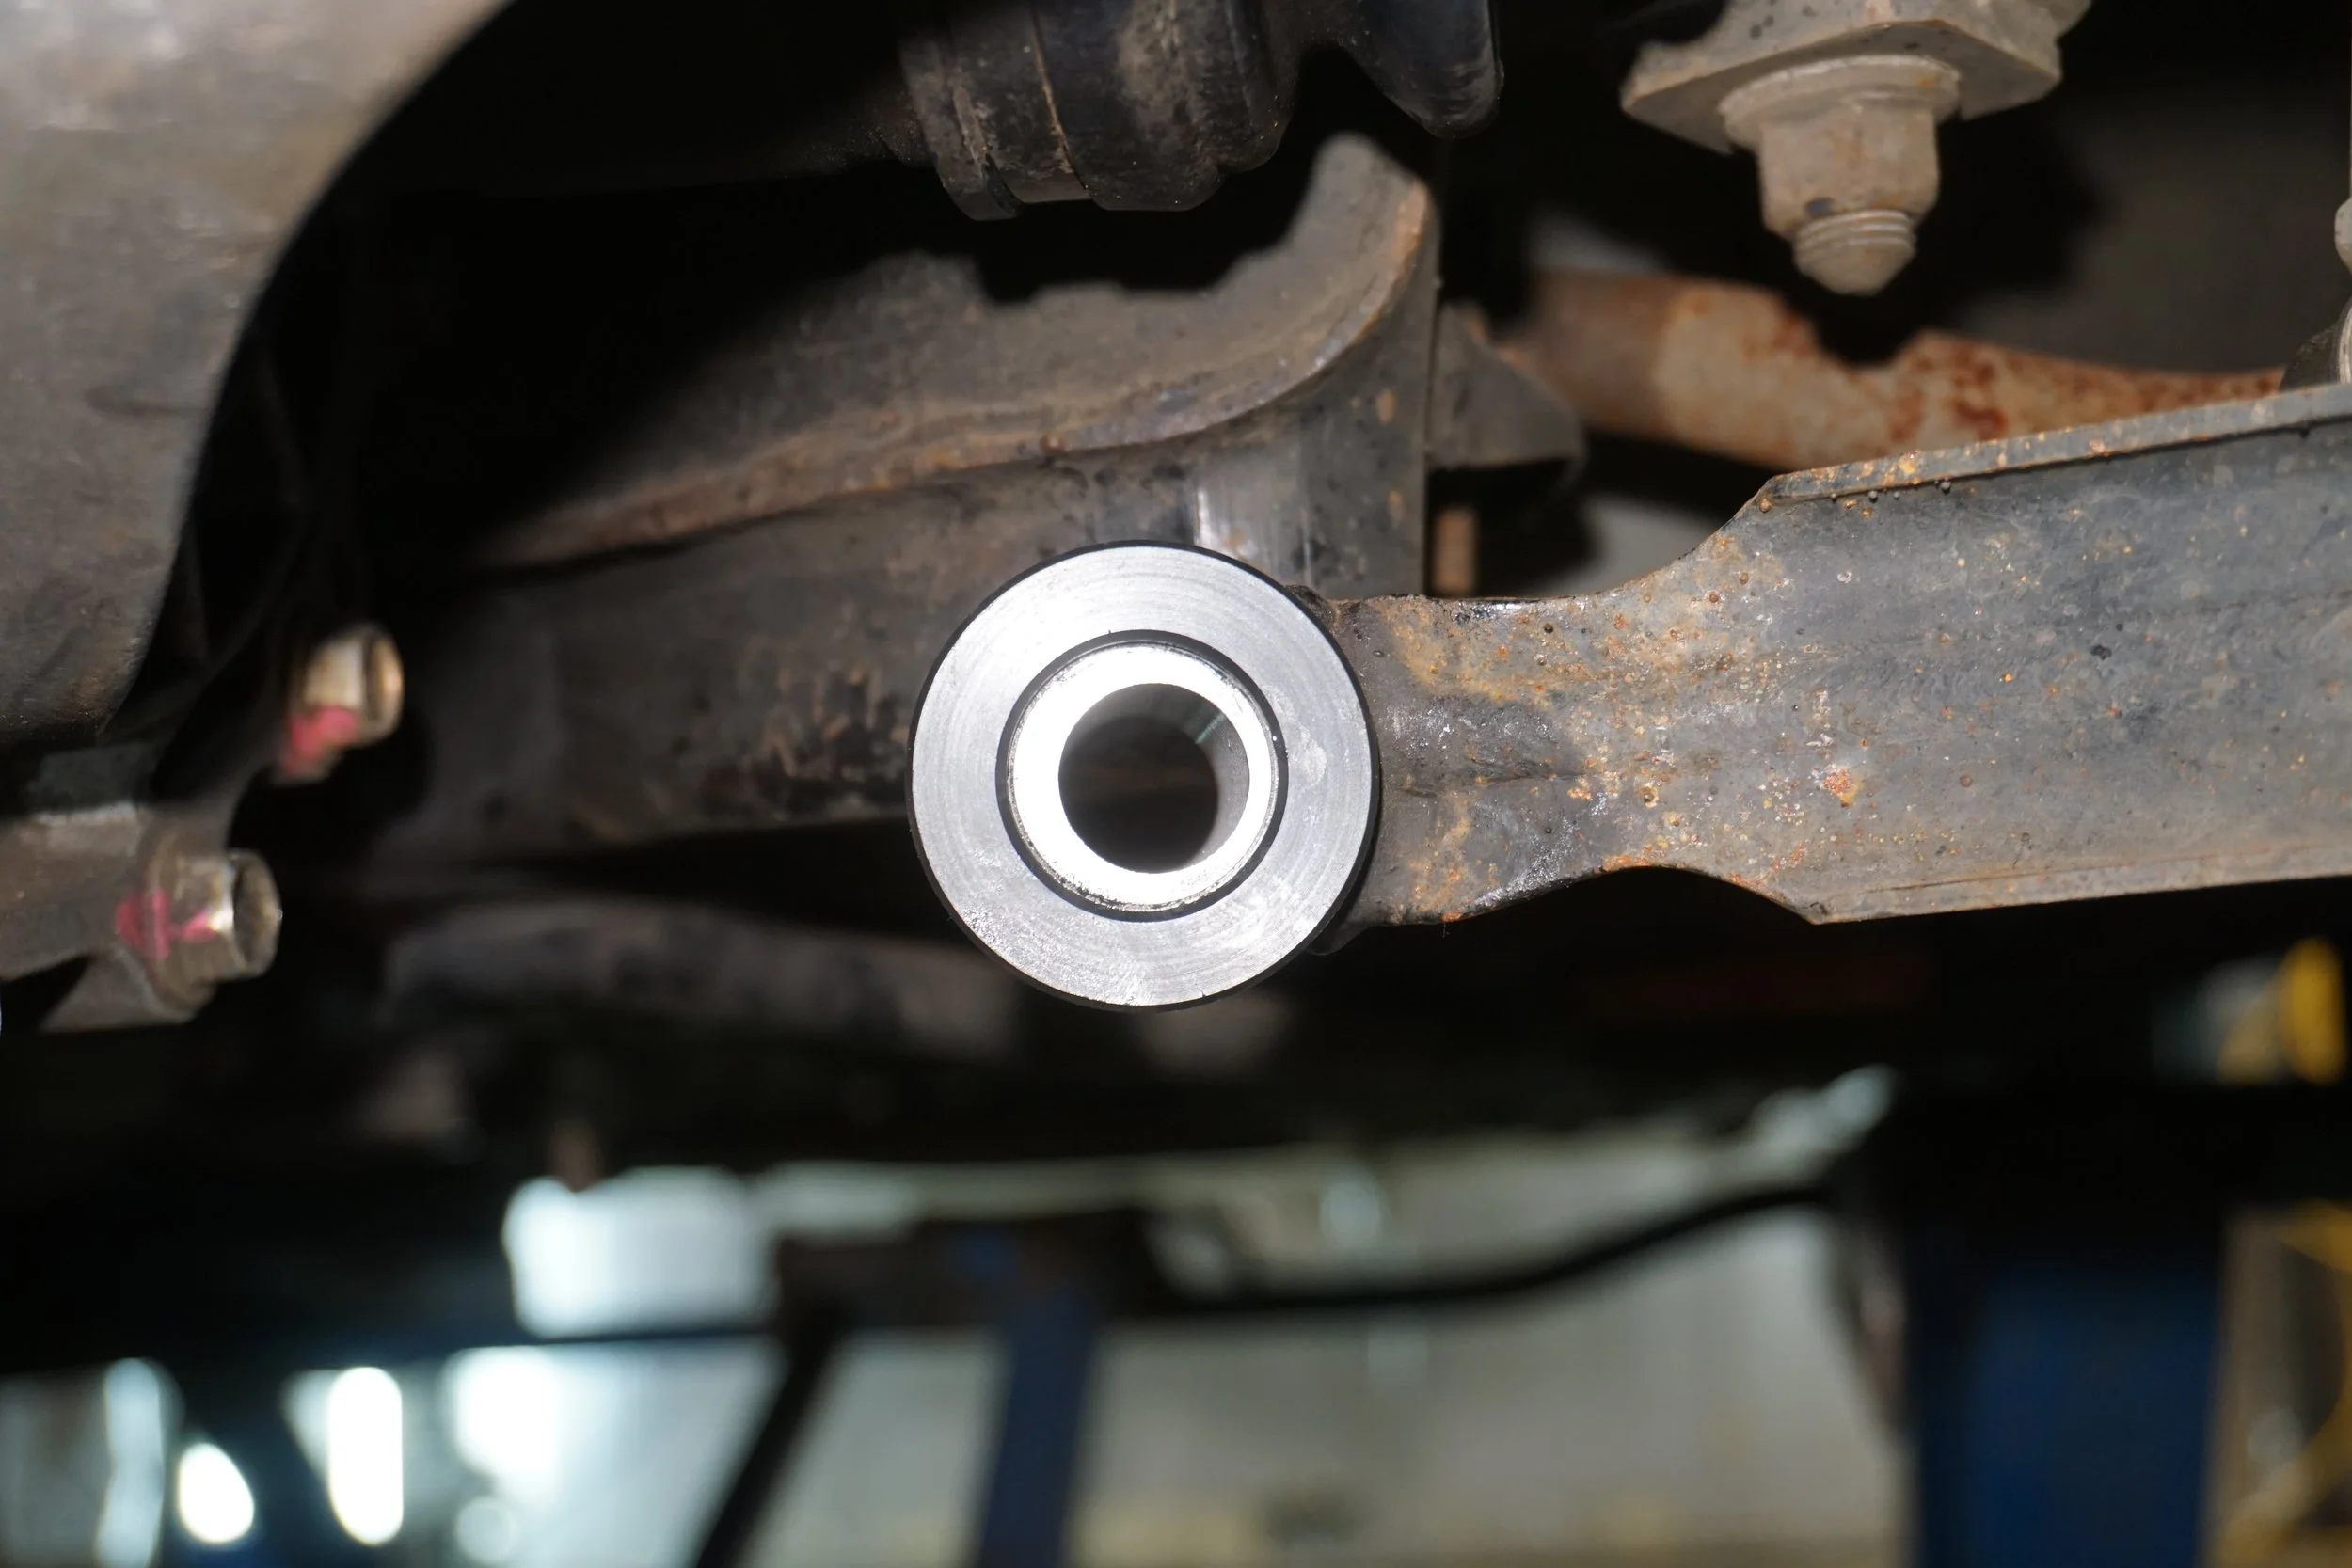
I had high hopes, but unfortunately the fitment wasn't exactly perfect in my Moog control arms. I trimmed things a bit, but in the end these things made popping sounds every time I got on the gas or brakes So I had to remove them and reinstall the poly bushings. I have some very interesting things in the works, but it's going to be a while until they're ready due to a big garage renovation I'm about to go through.
When I reinstalled the poly bushings, I installed fresh hardware
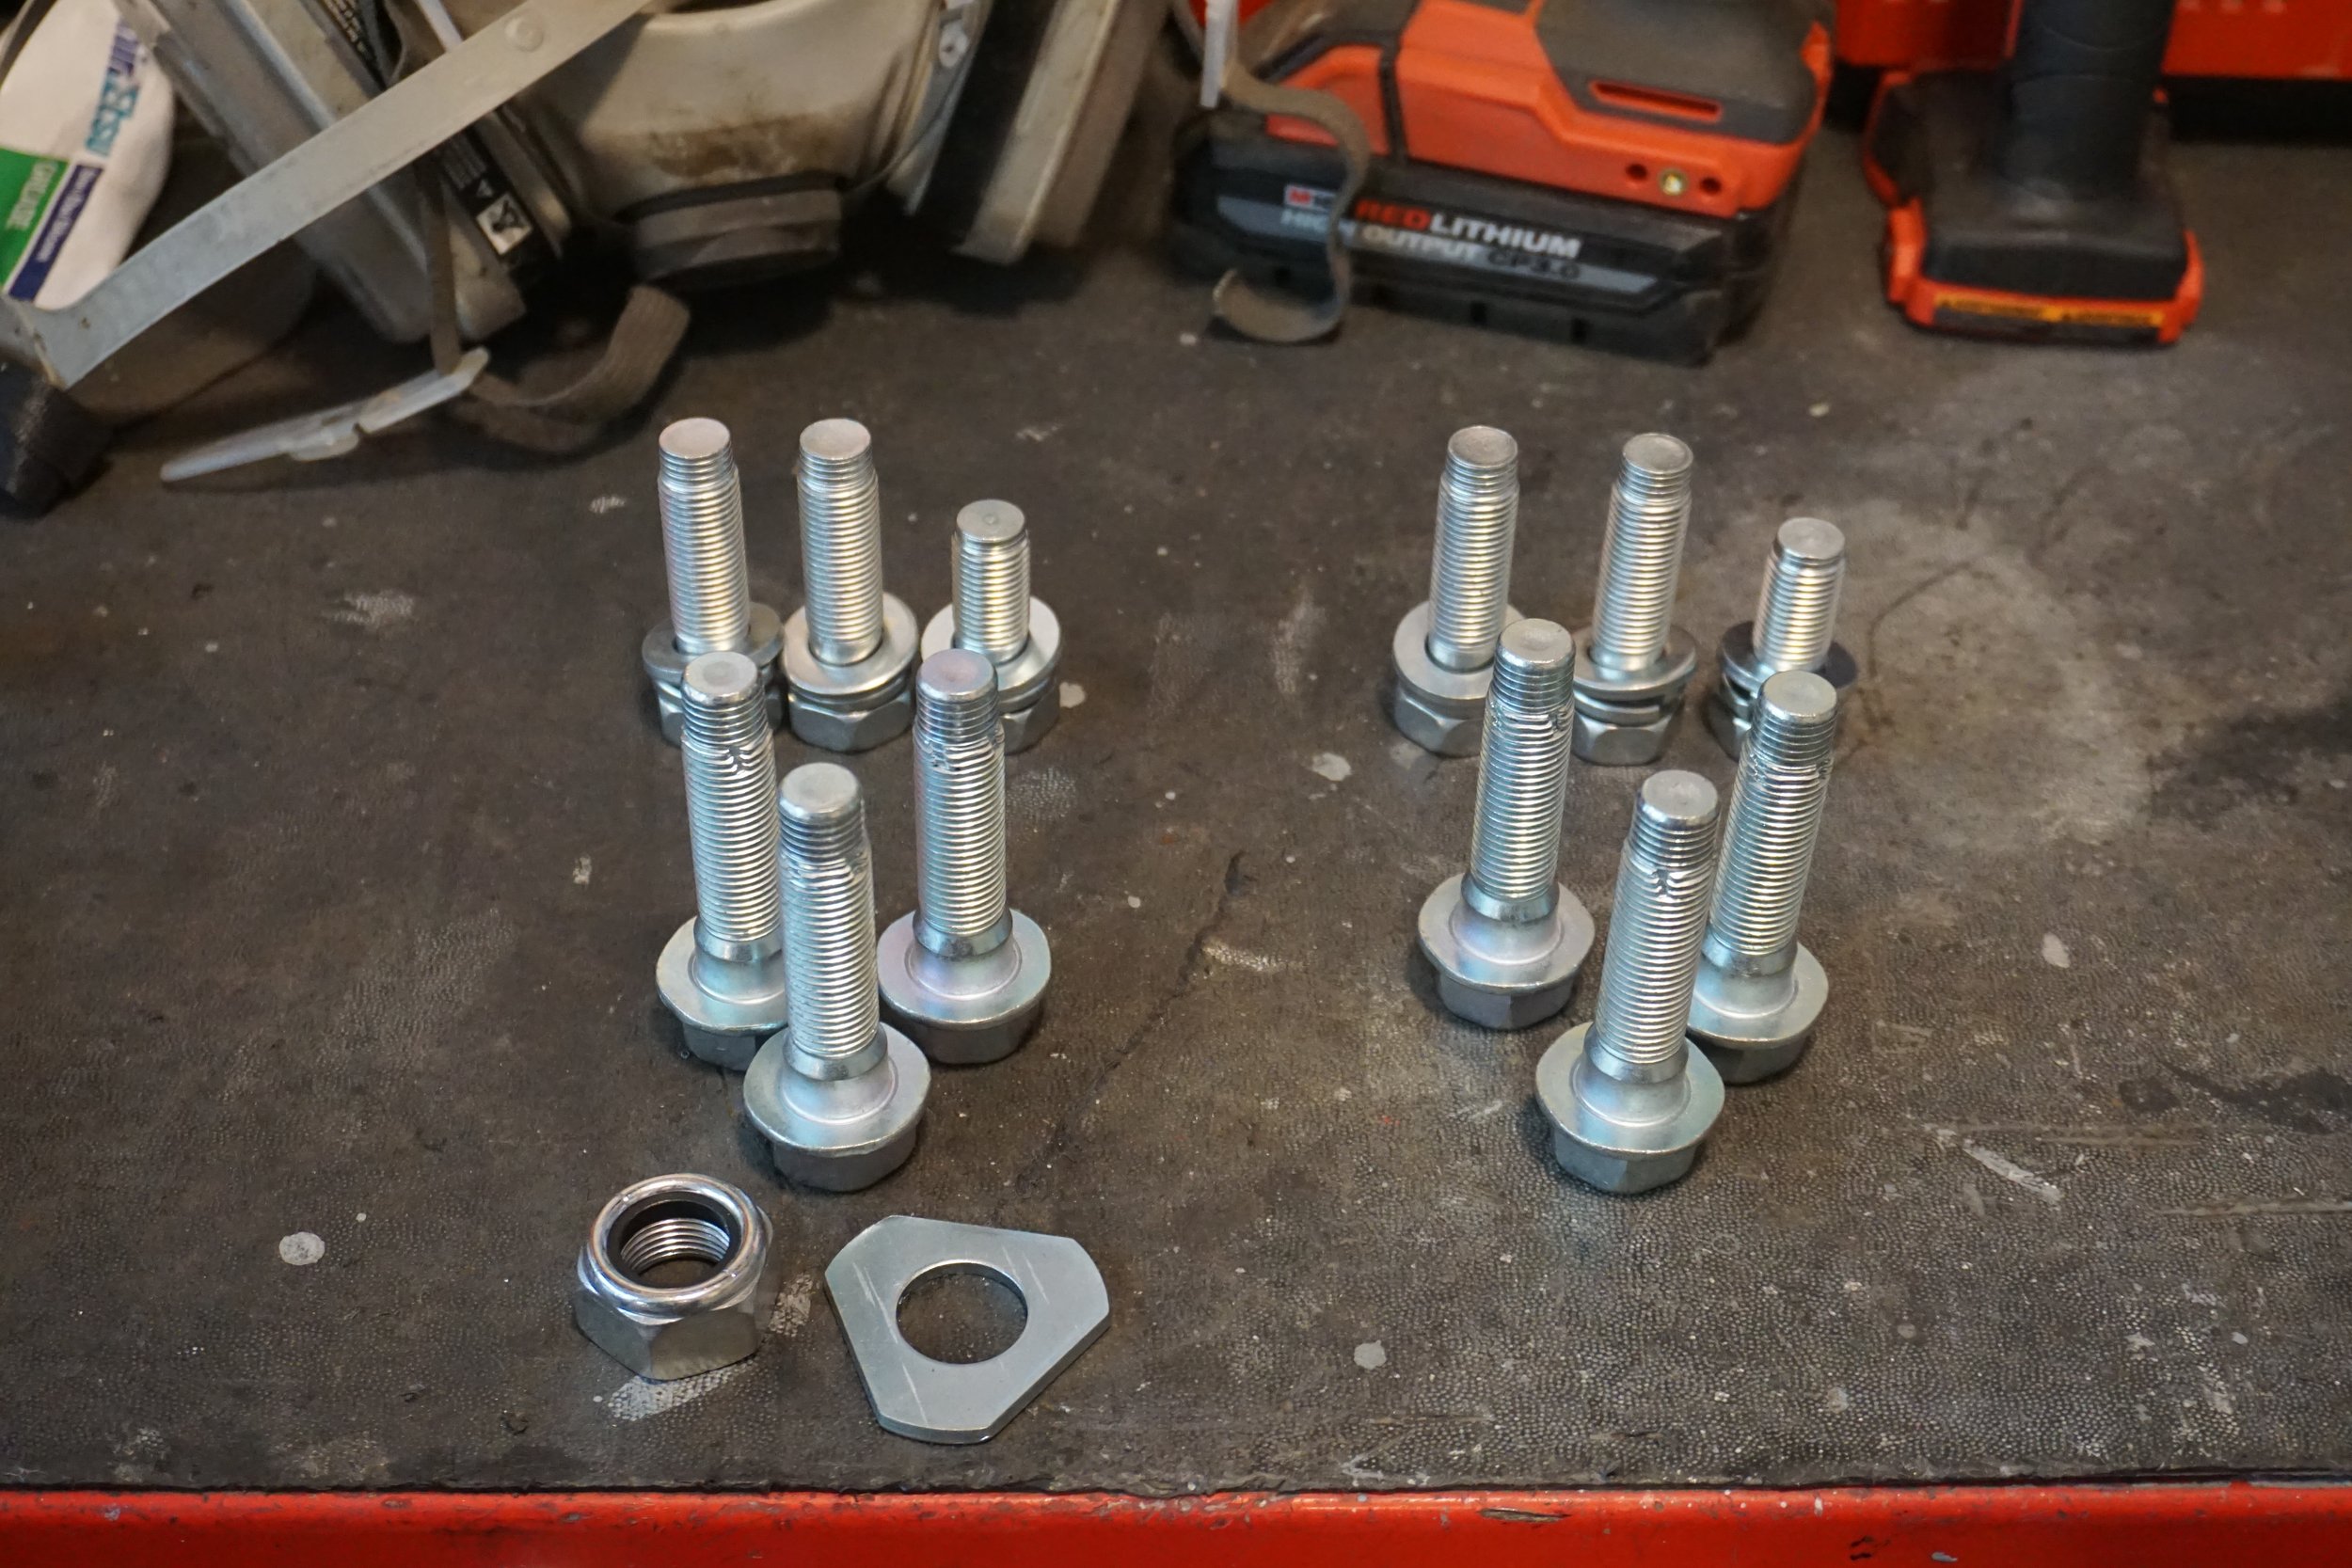
So nice
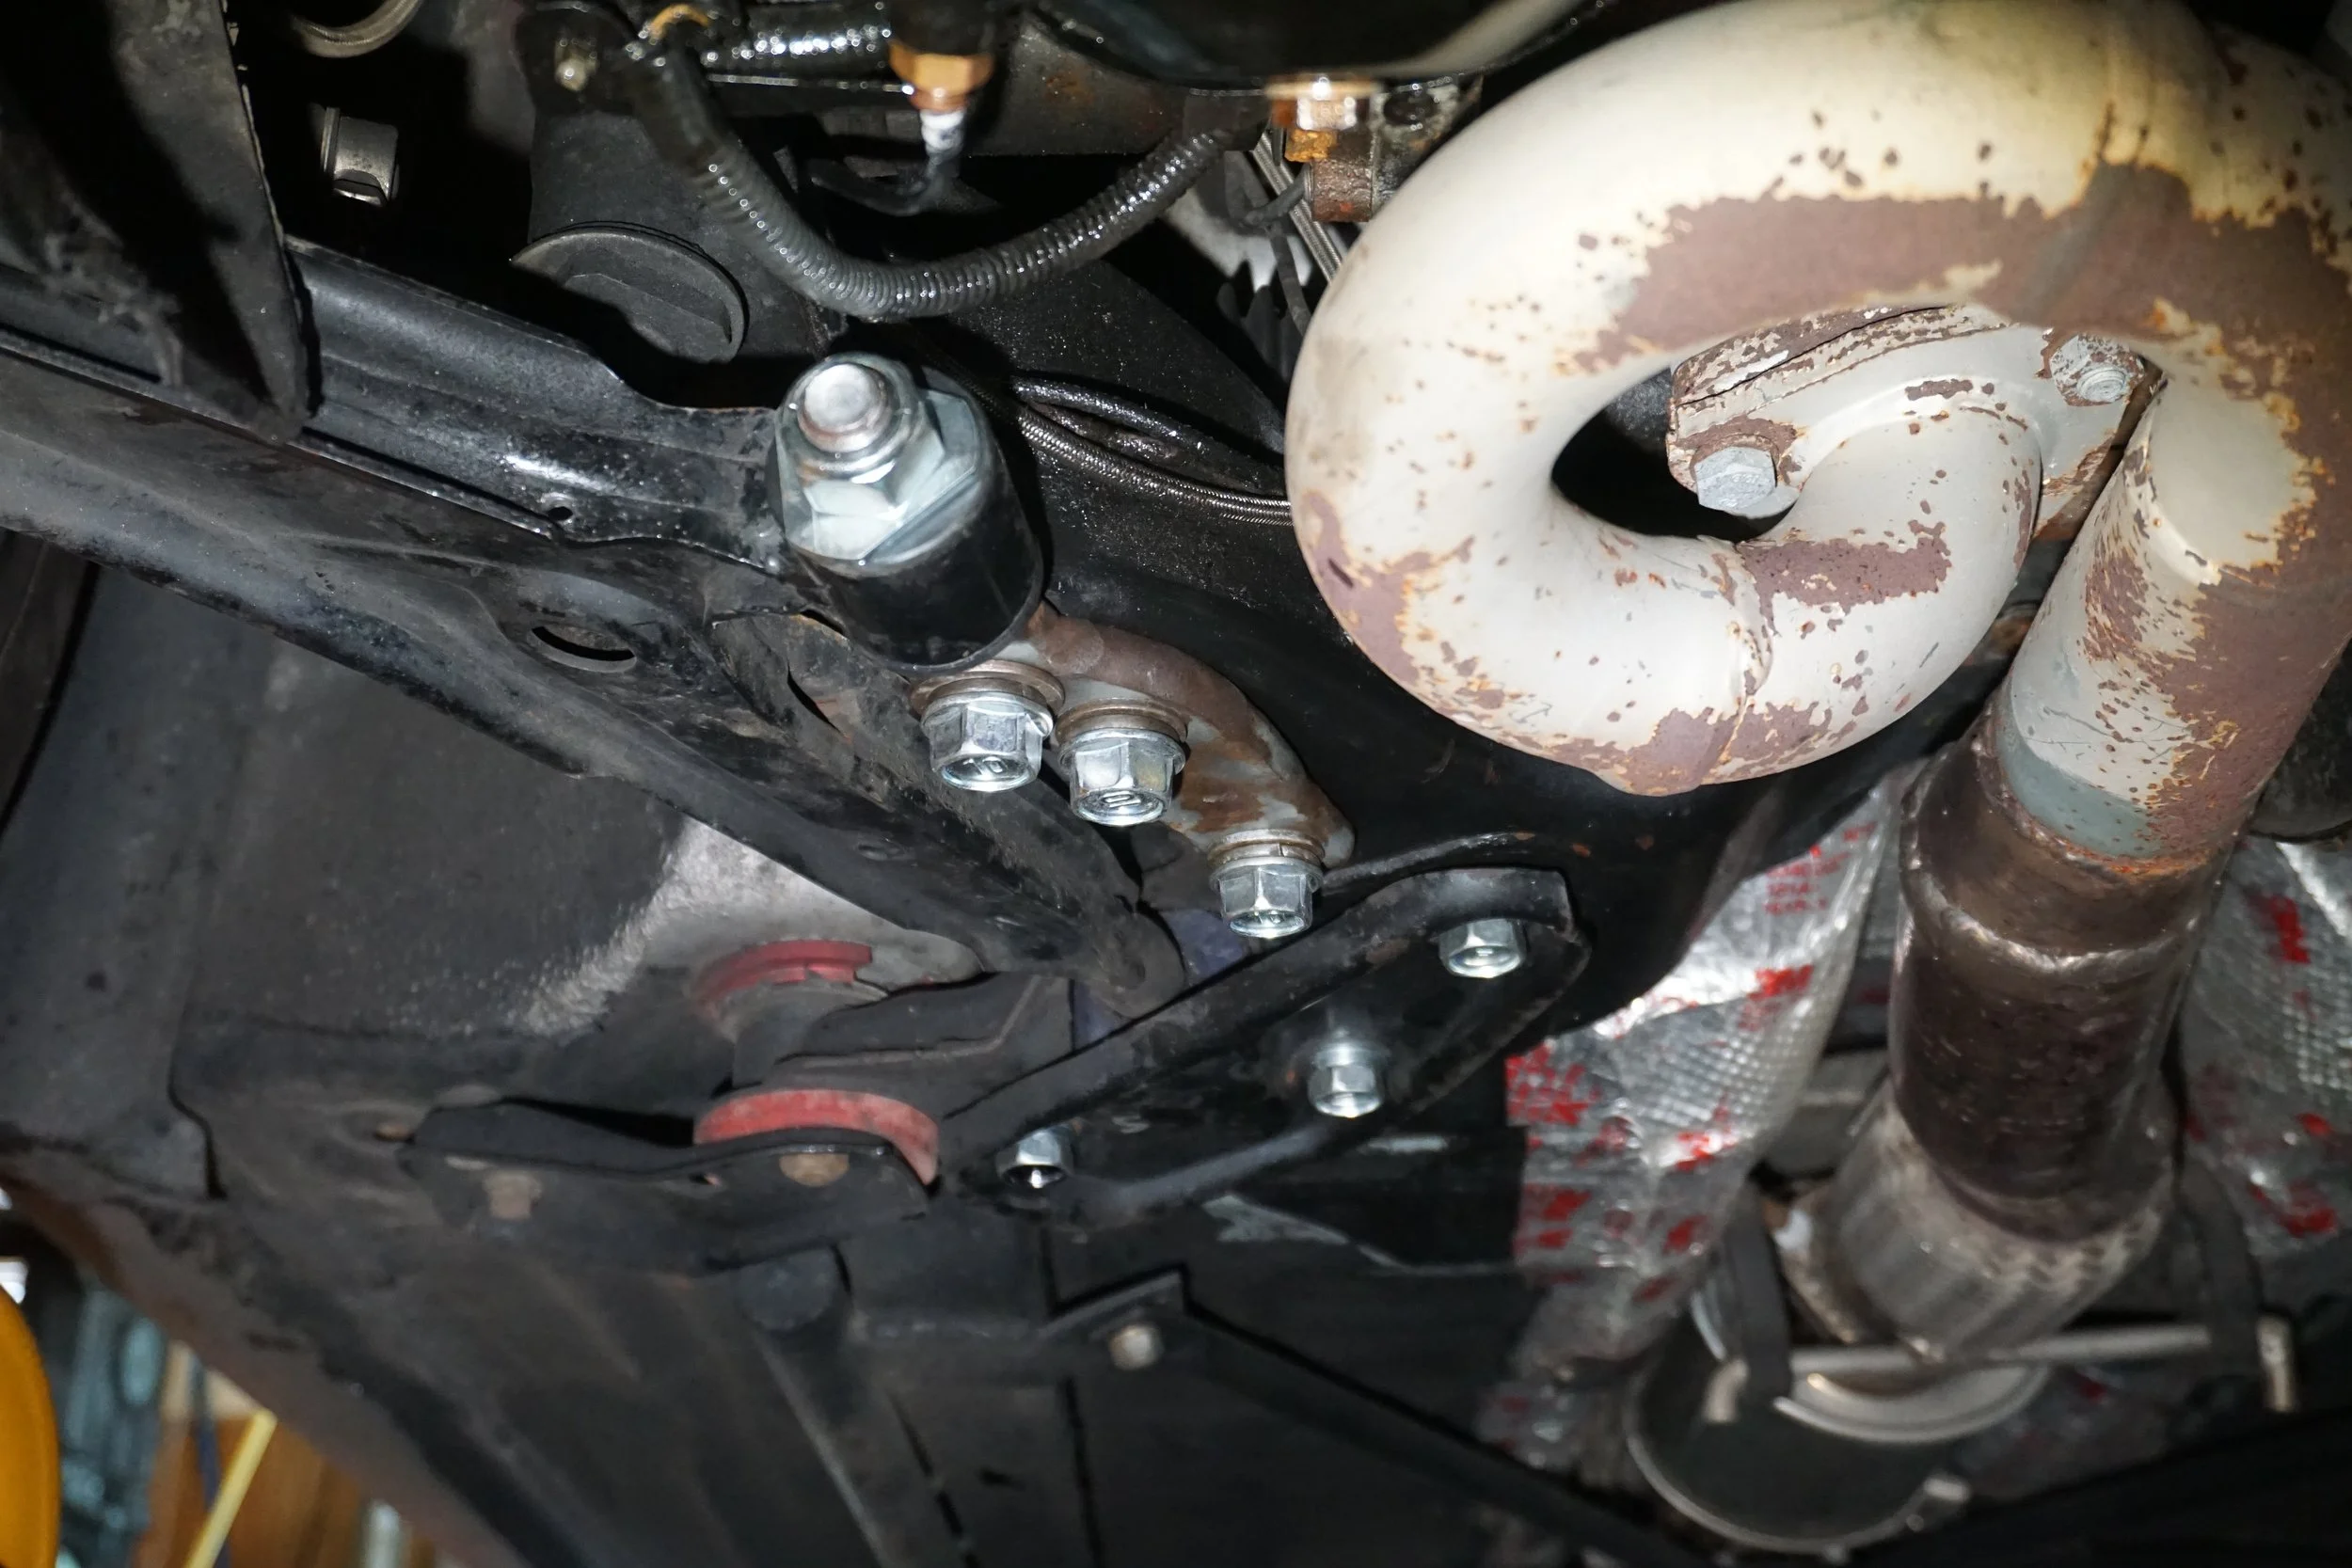
And with that, it was time for a fresh alignment, which meant another round of trying to bend the rear beam closer to 0 toe.
I picked up a set of rear struts from the junkyard, since their longer length would allow them to remain connected to the rear beam, while still allowing the beam to droop enough to meet up with my giant I beam and bottle jack.
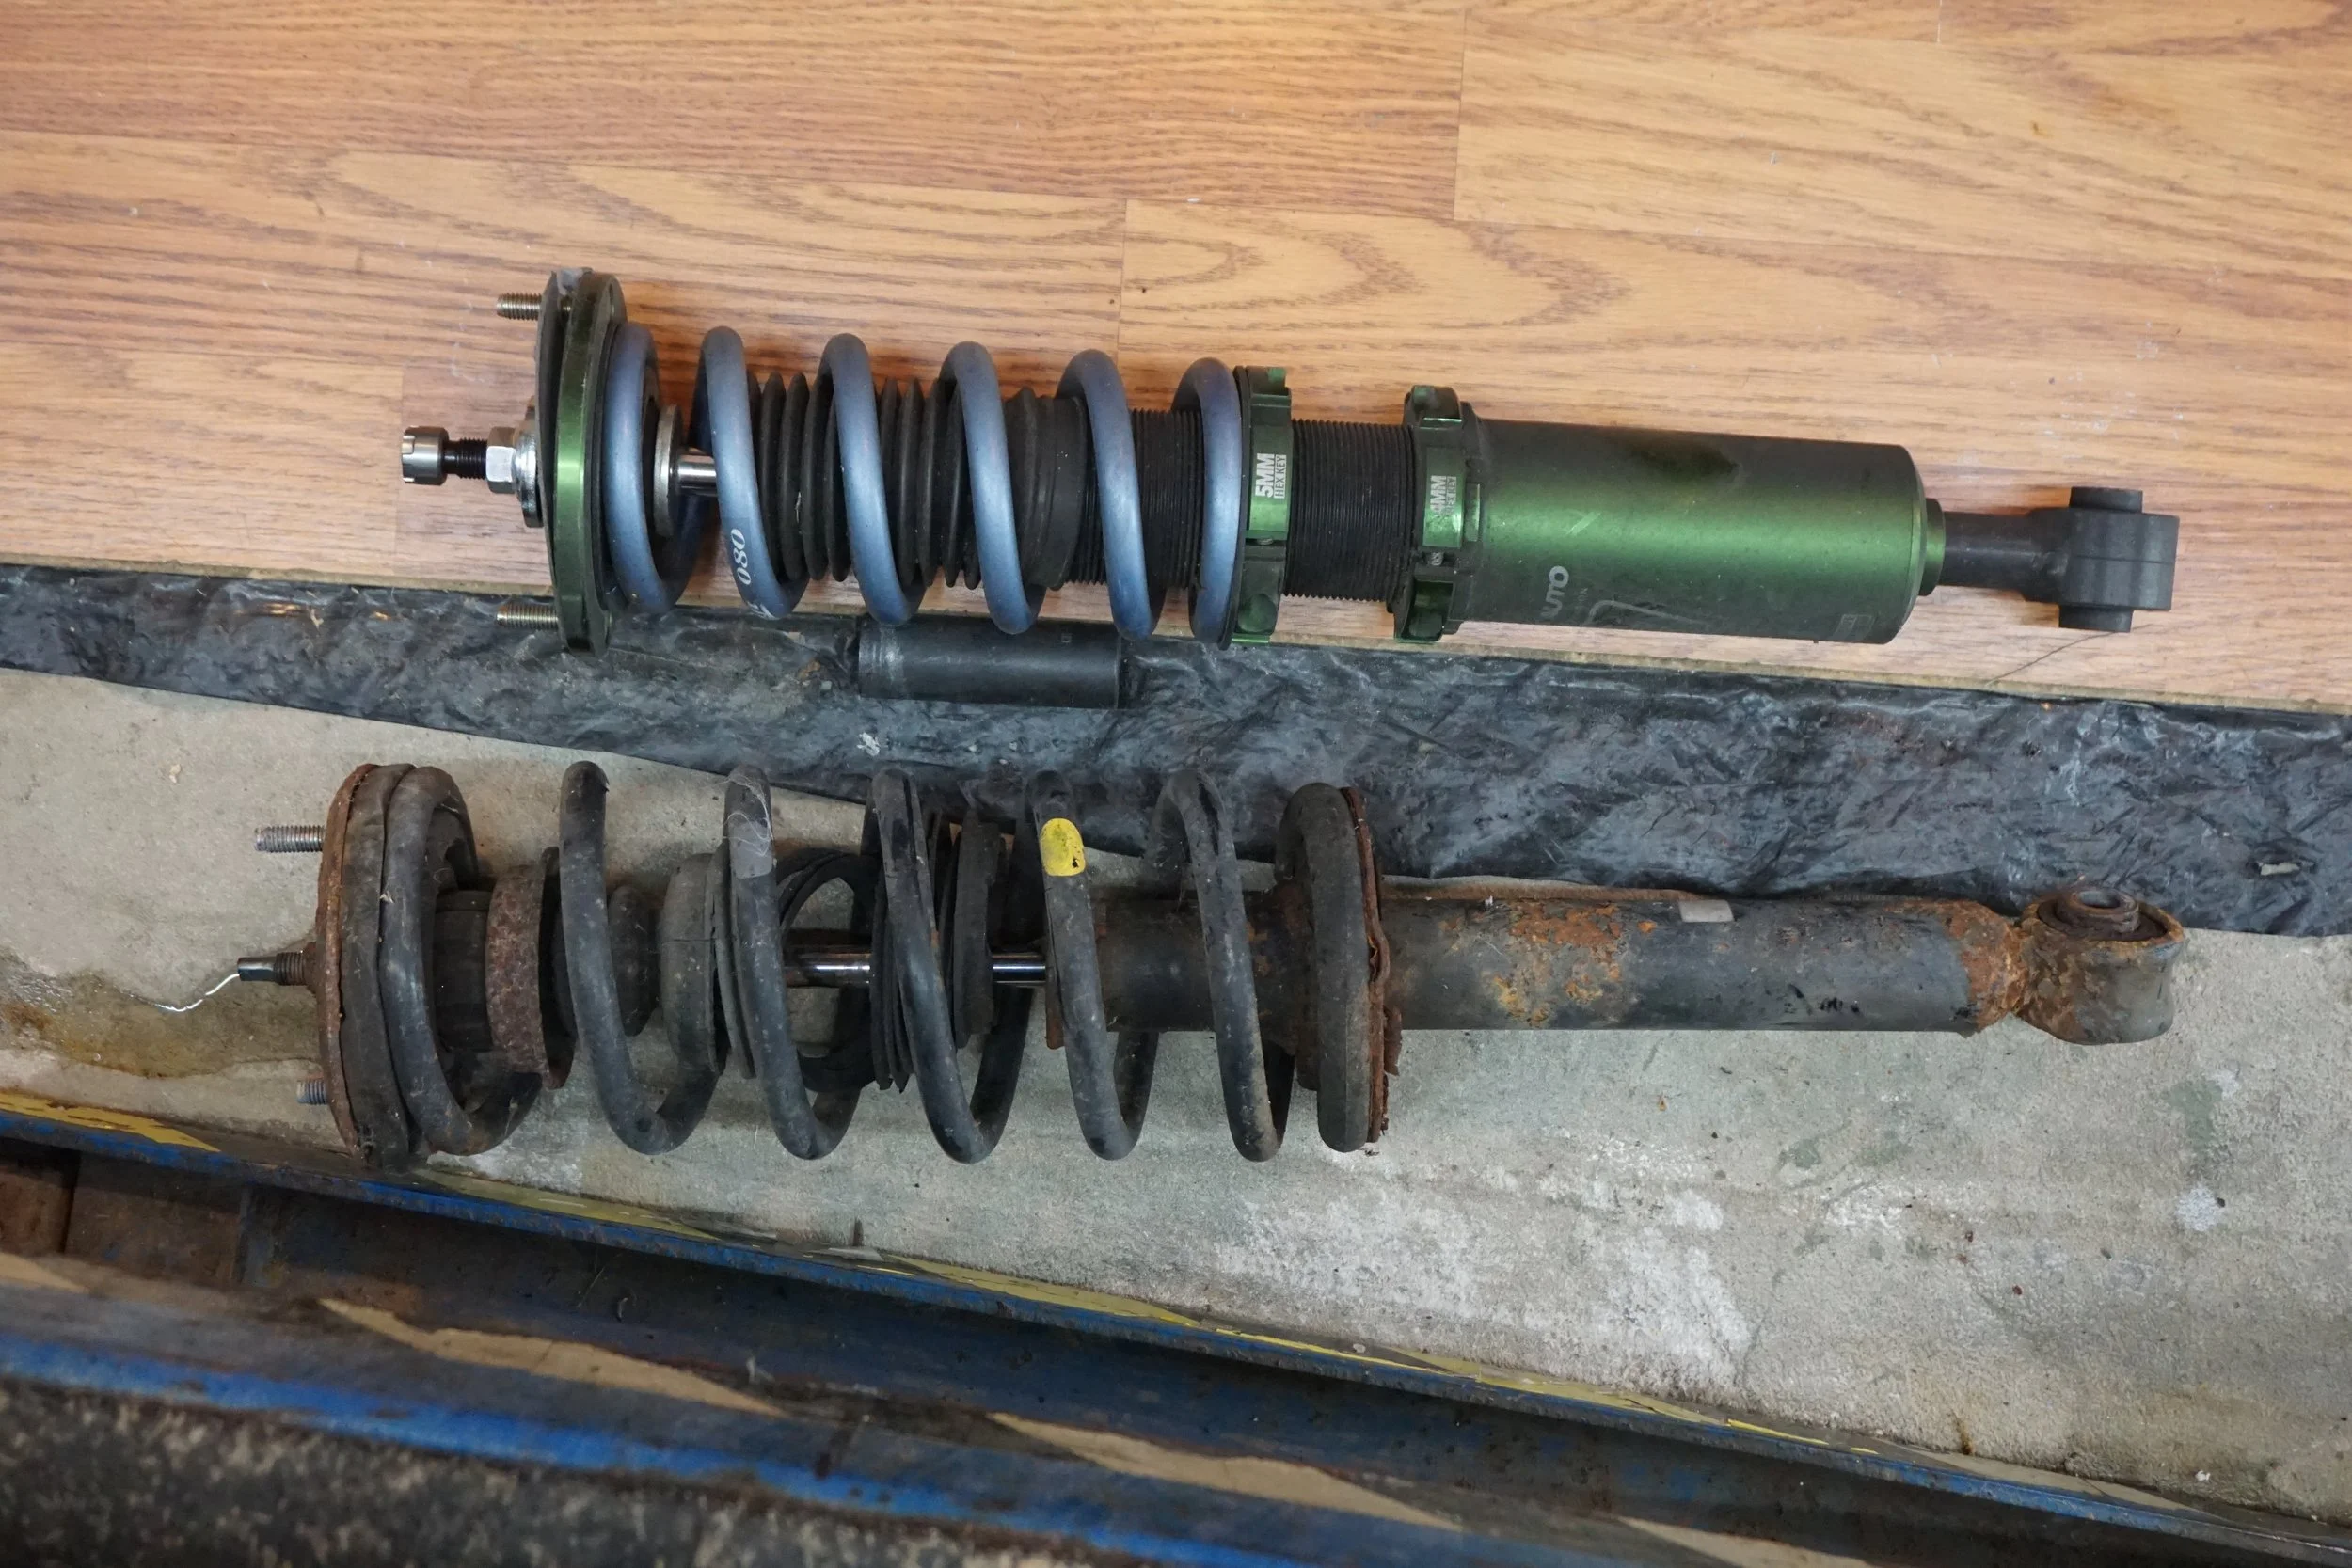
Having the struts connected really helped keep the beam from twisting as I applied pressure, which made the whole process a lot less stressful as I'm under there pumping the jack up.
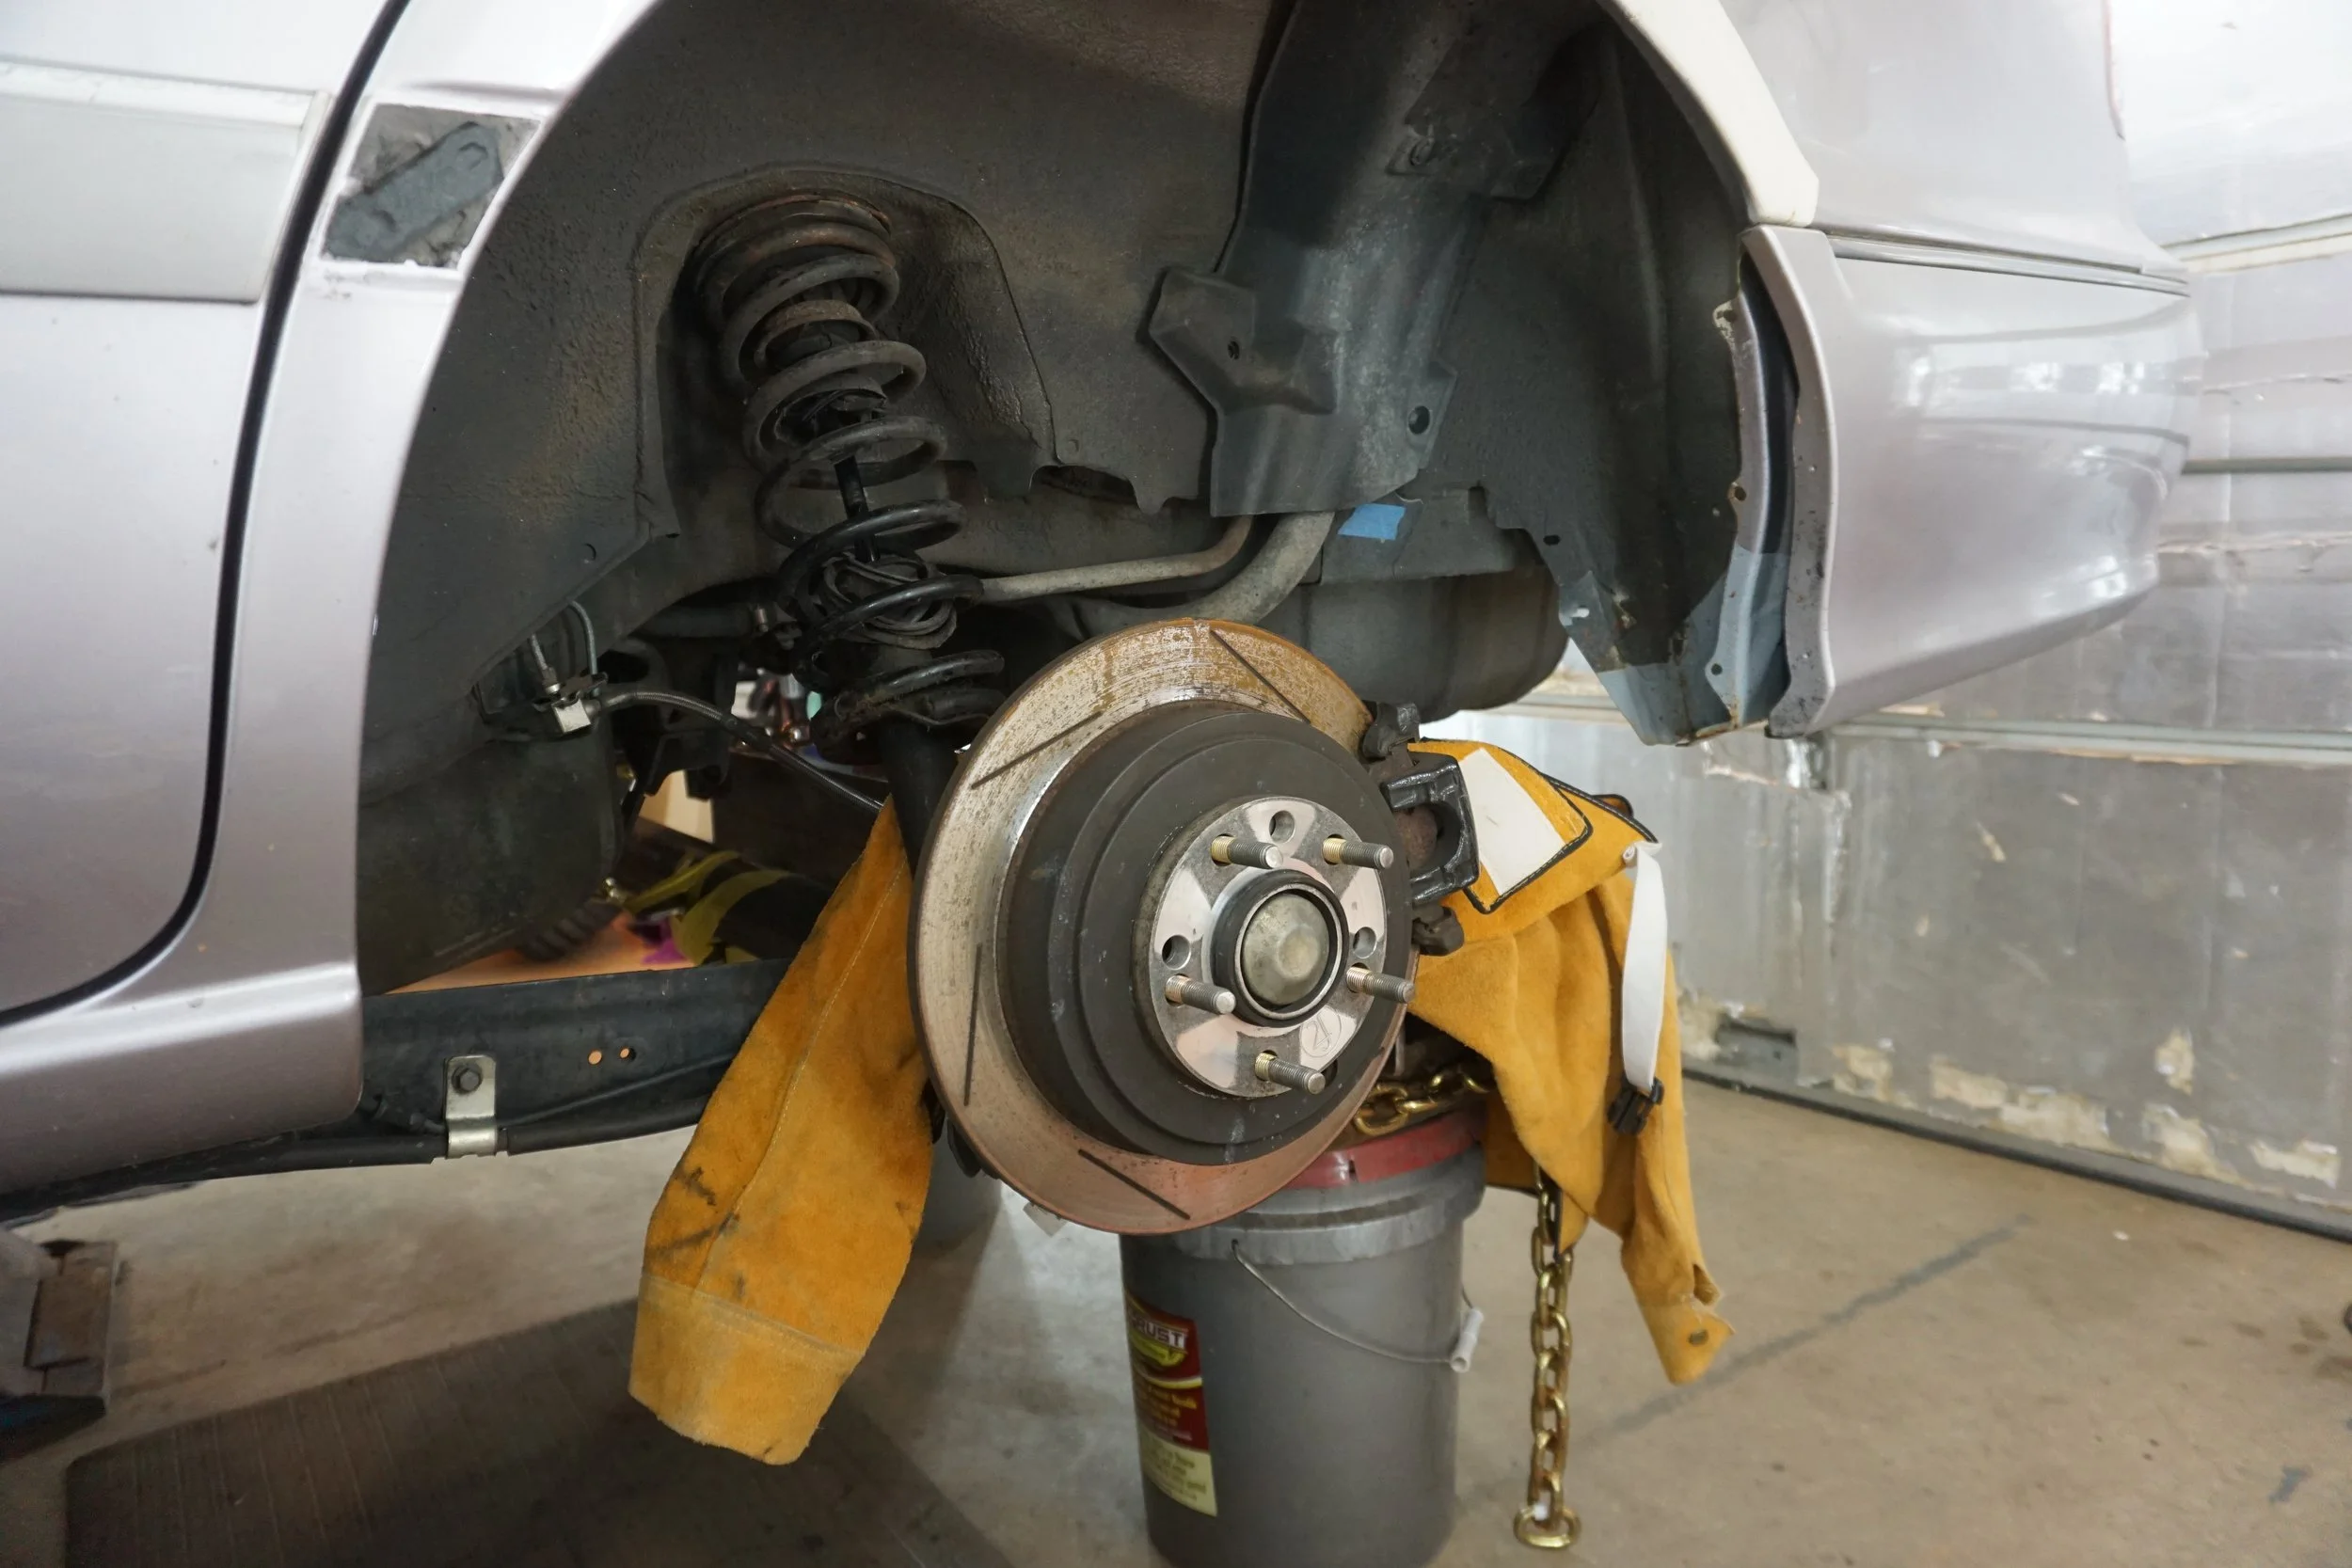
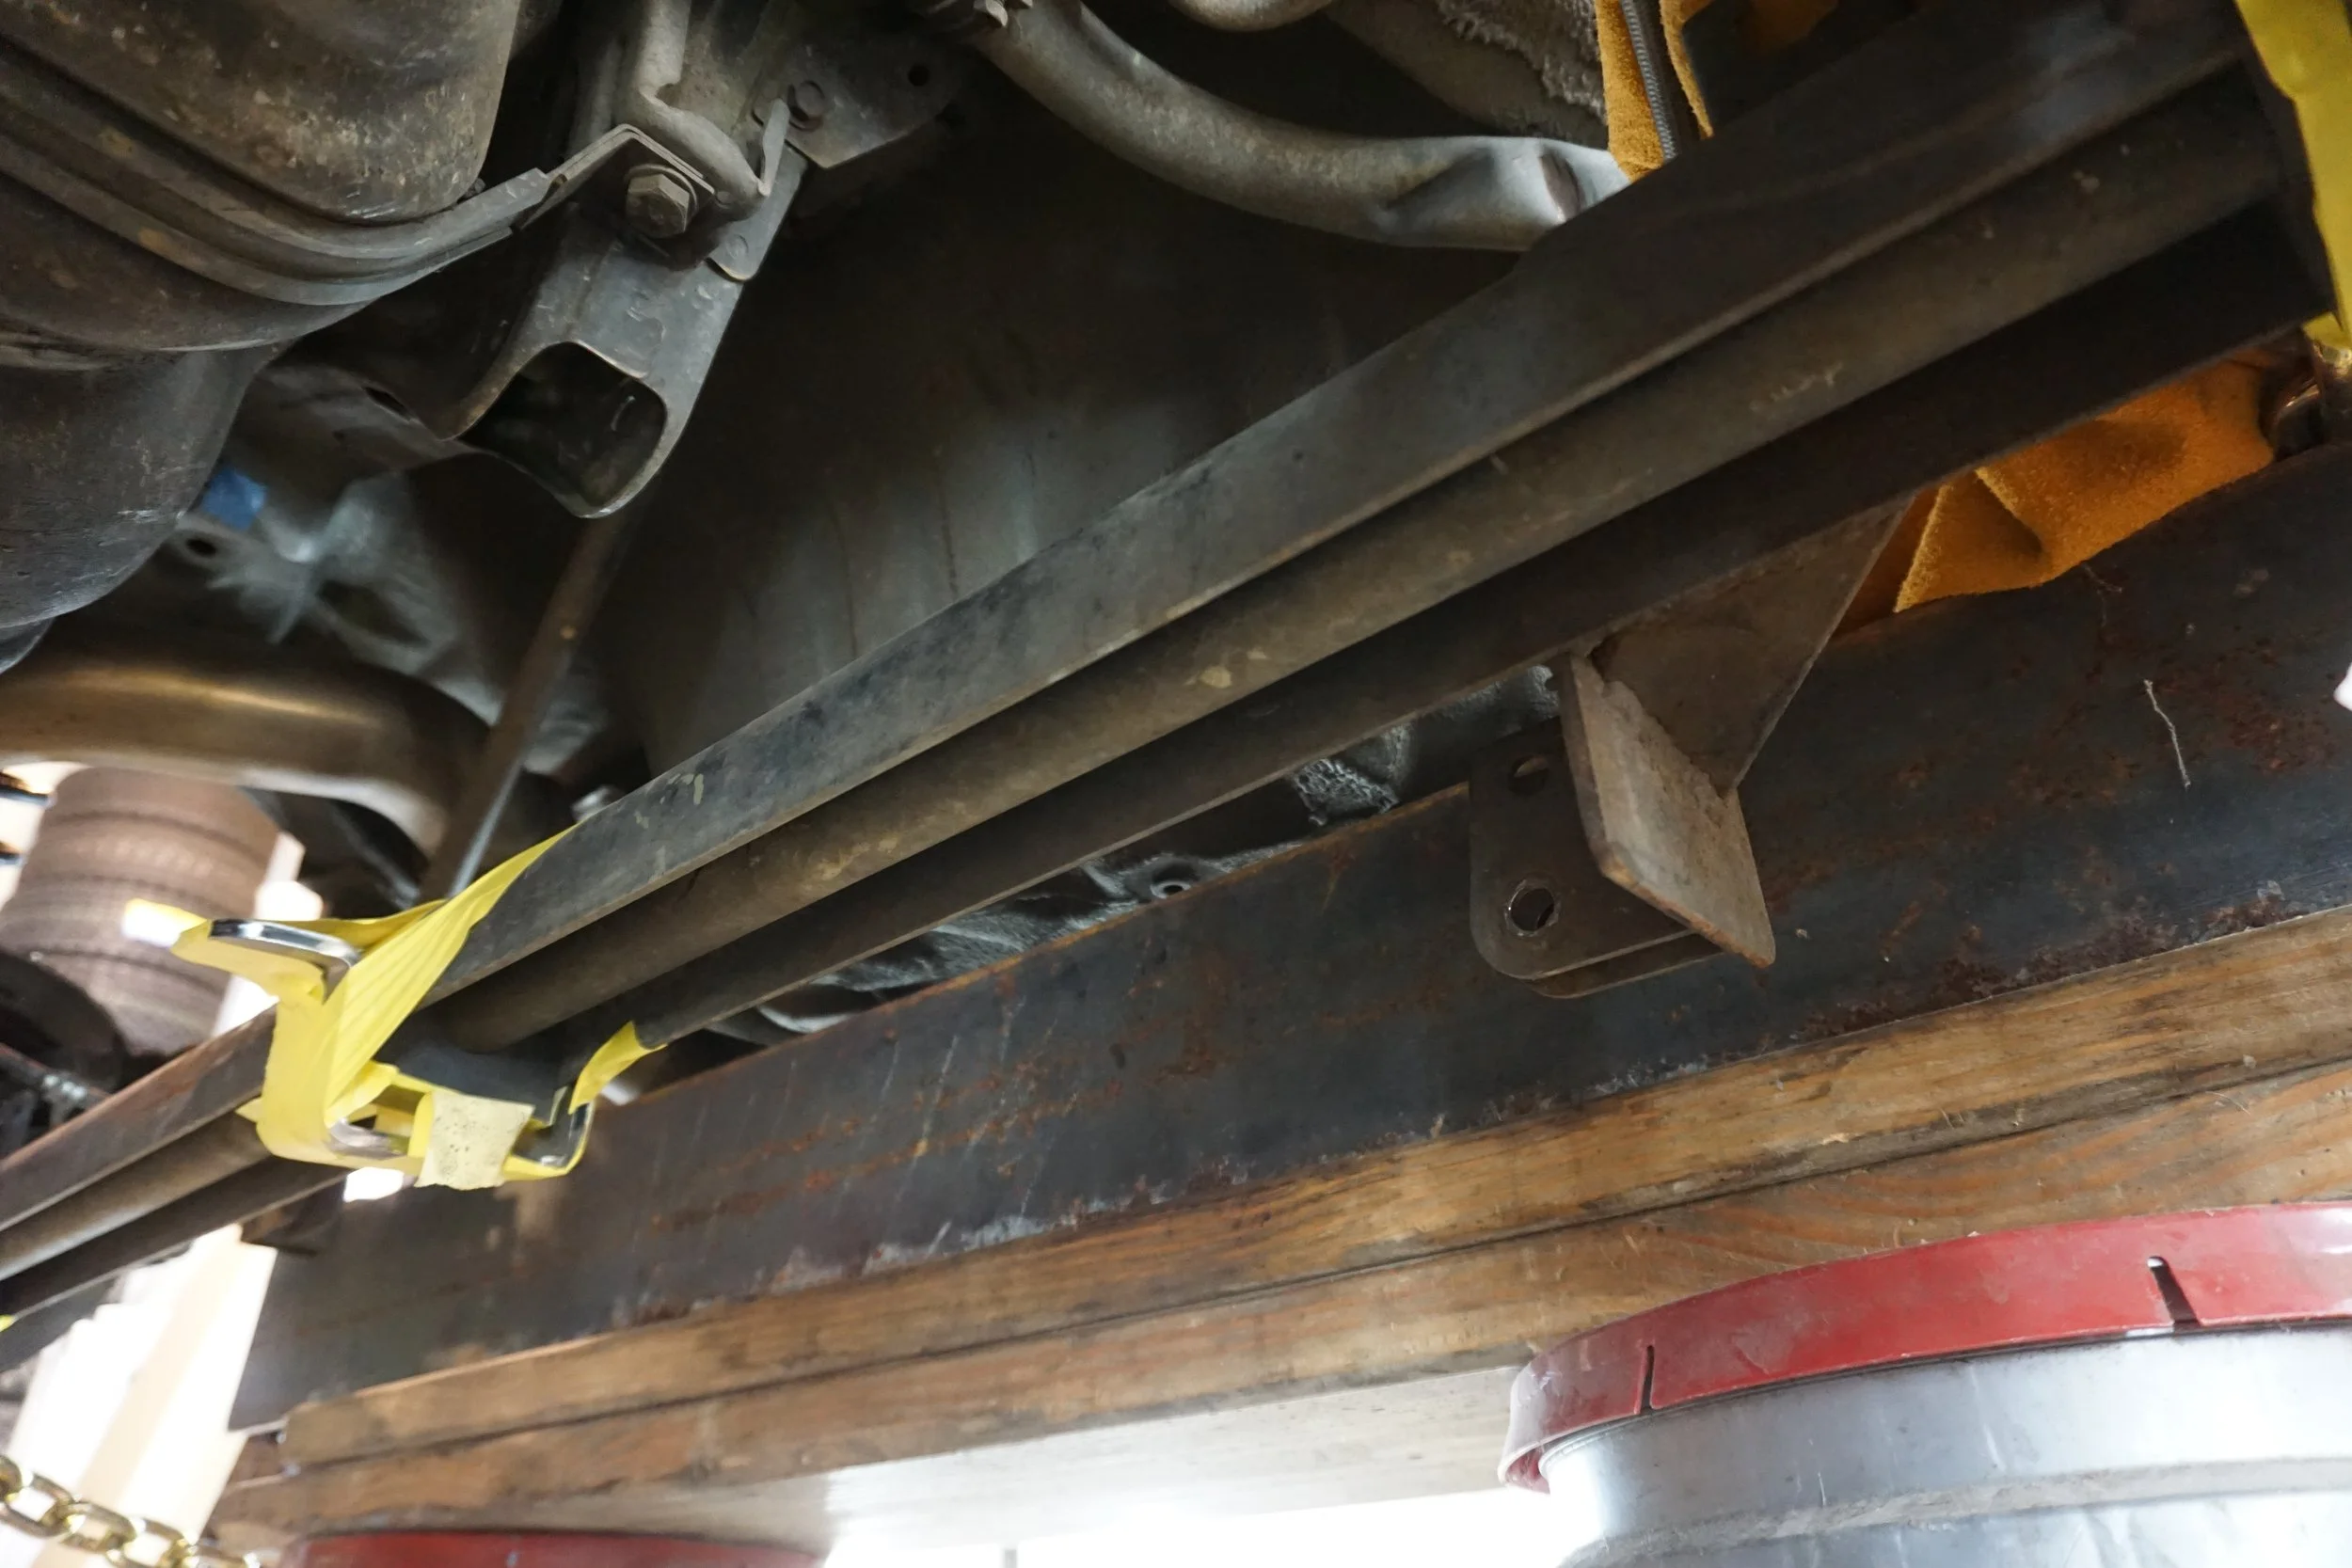
On the alignment rack I didn't quite get the results I was hoping for, only going from 0.28 toe in to 0.23. At the rate this beam bends, I'm going to have to do almost 200 more reps with the jack!
I'm quite happy with the results, and hopefully this alternator can stay dry for a while!
========================================
Let's go further back in time and talk about control arm bushings, shall we? I was tired of blowing out my poly LCA bushings and was desperate for something better. I got to talking with Red Lion Racing on Facebook, and he said he could make delrin offset front bushings that would go well with my offset rear bushings. These guys:
I figured this was a good idea, given that the offset rear bushings put the control arm at an outward angle, which was probably hastening the demise of the front bushings. So I bought a set from RLR:
I had high hopes, but unfortunately the fitment wasn't exactly perfect in my Moog control arms. I trimmed things a bit, but in the end these things made popping sounds every time I got on the gas or brakes
So I had to remove them and reinstall the poly bushings. I have some very interesting things in the works, but it's going to be a while until they're ready due to a big garage renovation I'm about to go through.When I reinstalled the poly bushings, I installed fresh hardware
So nice
And with that, it was time for a fresh alignment, which meant another round of trying to bend the rear beam closer to 0 toe.
I picked up a set of rear struts from the junkyard, since their longer length would allow them to remain connected to the rear beam, while still allowing the beam to droop enough to meet up with my giant I beam and bottle jack.
Having the struts connected really helped keep the beam from twisting as I applied pressure, which made the whole process a lot less stressful as I'm under there pumping the jack up.
On the alignment rack I didn't quite get the results I was hoping for, only going from 0.28 toe in to 0.23. At the rate this beam bends, I'm going to have to do almost 200 more reps with the jack!
Last edited by 95maxrider; Oct 17, 2025 at 02:30 PM.