2000 Maxima Curt Tow Hitch install and review.
 08-21-2016, 06:23 PM
#1

2000 Maxima Curt Tow Hitch install and review.
Wanted to sell the Max for a small truck and after debating for several weeks, I've decided to install a tow hitch instead. Its the best of both worlds, you've got to keep the max and able to tow a fold-able 4X8 Harbor Freight trailer. I've decided to go with Curt since I was pretty happy with it on my Sienna.
Got the Tow Hitch from the Curt re seller at Ebay, it is a Curt Class 2 Trailer Hitch & Wiring Euro kit w/ 1-7/8" Ball complete with the euro ball.
Installing the tow hitch requires removal of the 2 tow hooks and use the weld nuts to mount the tow hitch and drill a third hole on the right side. Should be straight forward....
I was excited to get this done in an hour or so, instead it became a whole weekend project
First issue:
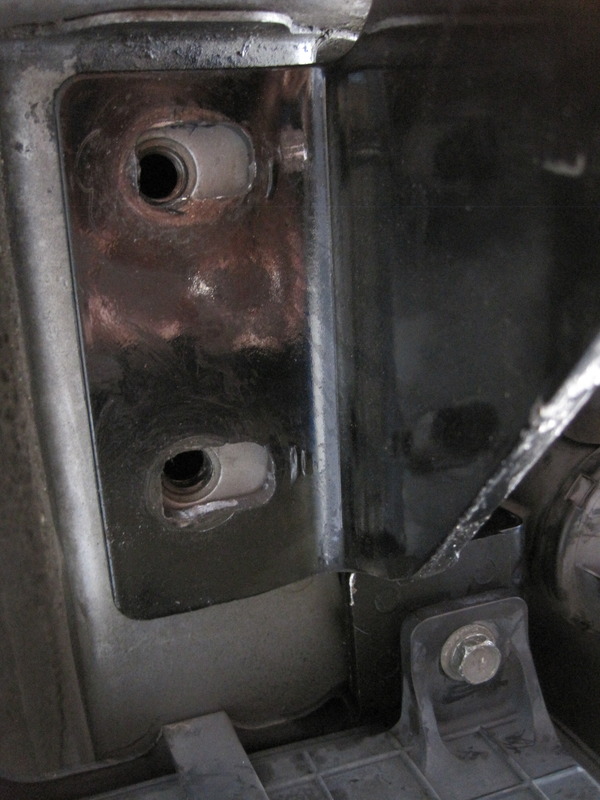
The left side of the hitch mounting tabs has 2 tabs, about 120 degree from each other. Each tab has 2 mounting holes which, should, match the OEM tow hook mounting weld nut.
When fitting the hitch, the bottom tab mounting holes were not line up with the OEM tow hook mounting weld nuts. So, I thought, maybe the tabs are bent during shipping. Box was pristine, the tabs looked as straight as it can be, so I'd figure maybe the OEM tow hook location were off...unlikely...but maybe.
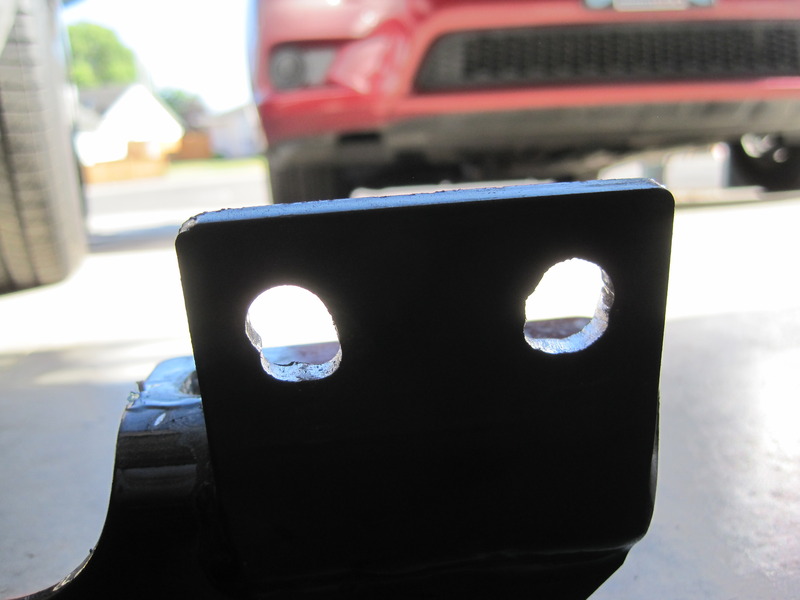
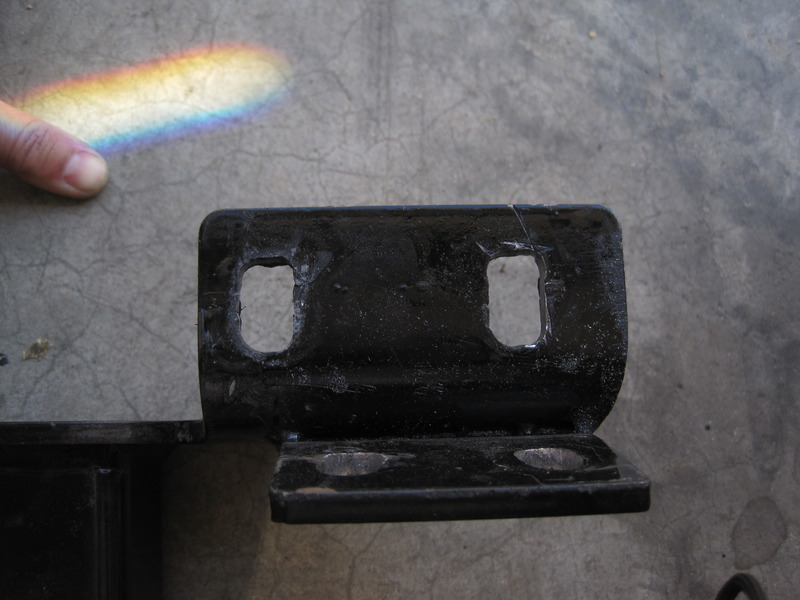
Anyway, I've decided to elongate the holes to fit them to the chassis. This is 1/4" thick steel and its tough to fit this massive weldment on any milling machine. So, I used Files and after several hours I have these.
Since the left bottom tab mounting holes are now shifted, the tab that is 120 degree will need spacers to sit flush. well in turned out that the holes weren't lining up either. No problem we got that taken care off.
At this point, I was like lets mount this thing....till the second issue showed up
Second issue:
I torqued this to 48 ft-lb per instruction and it stripped the weld nut. So, I proceed with care and even cleaned the weld nuts with acetone and air dry. The weld nut was clean and the bolts that came out had small surface white rust which is understandable for 16 years old car. So I torqued the second bolt to 48, and stripped again. This time I throughly pissed
Upon the inspection, the bolt that came with it showed some deformation also.
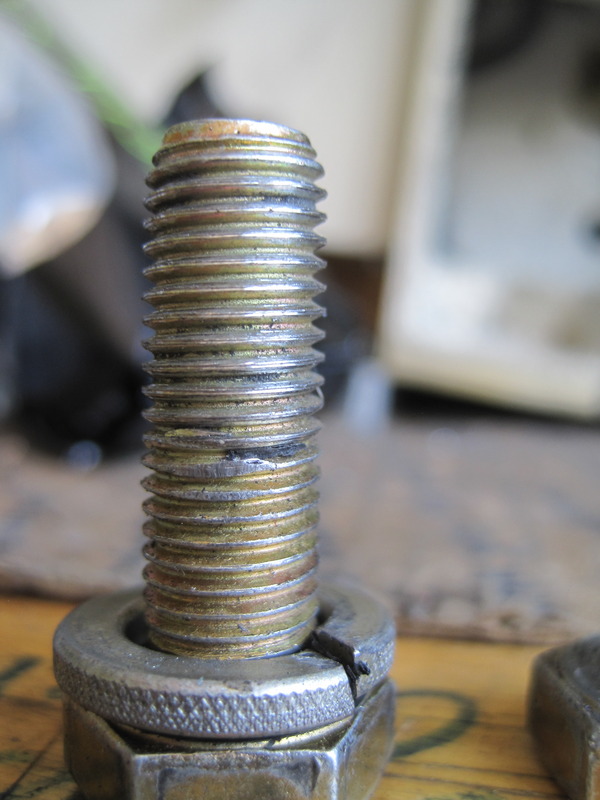
Here the weld nut threads remnants are in the bolt threads.
So, now the work has began. I was contemplating doing the nut insert, weld the whole damn thing to the chassis solid, opening up the stripped threads to next bigger size, or drill clearance holes and run the bolt and nut thru it. I've decided to drill ALL holes and run 10.9 grade bolt and nut thru it.
To do this I first have to remove the tail lights, rear bumper, the bumper re-enforcement, and the re-enforcement mounting. Visit FSM to do this, it took me 30 minutes to do this.
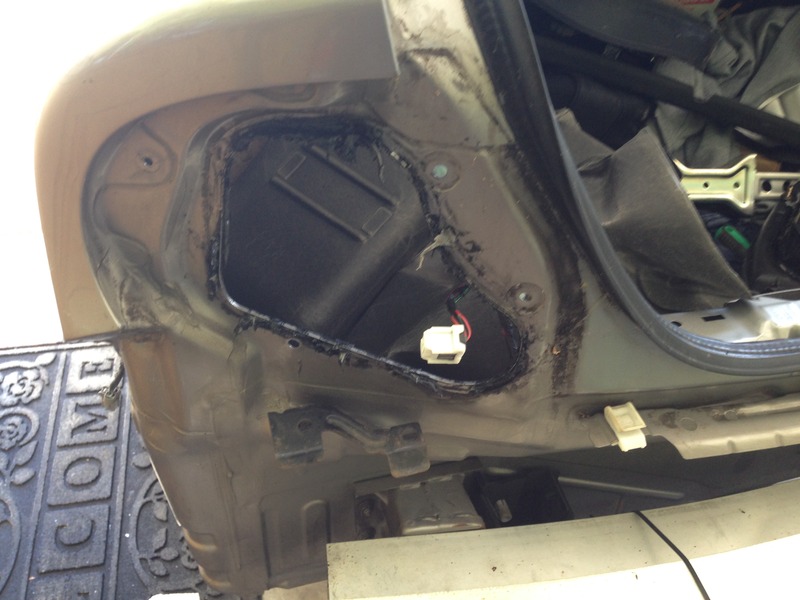
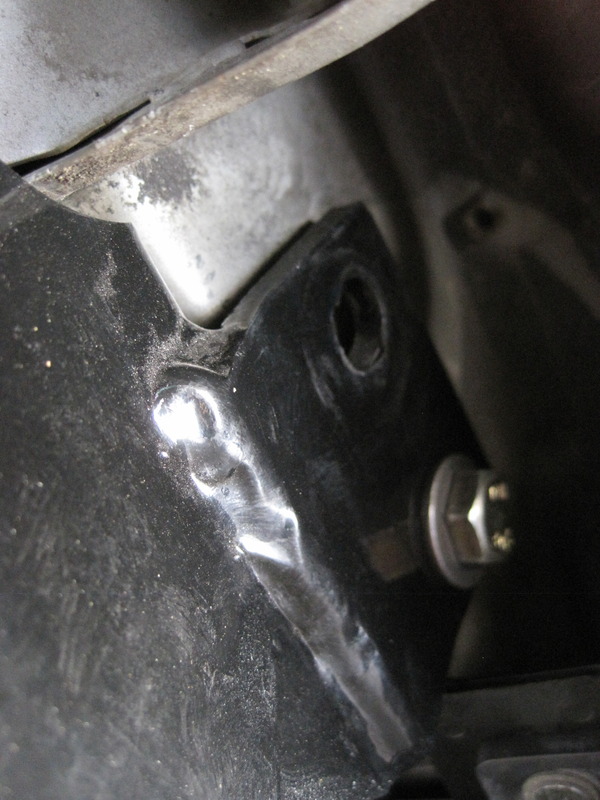
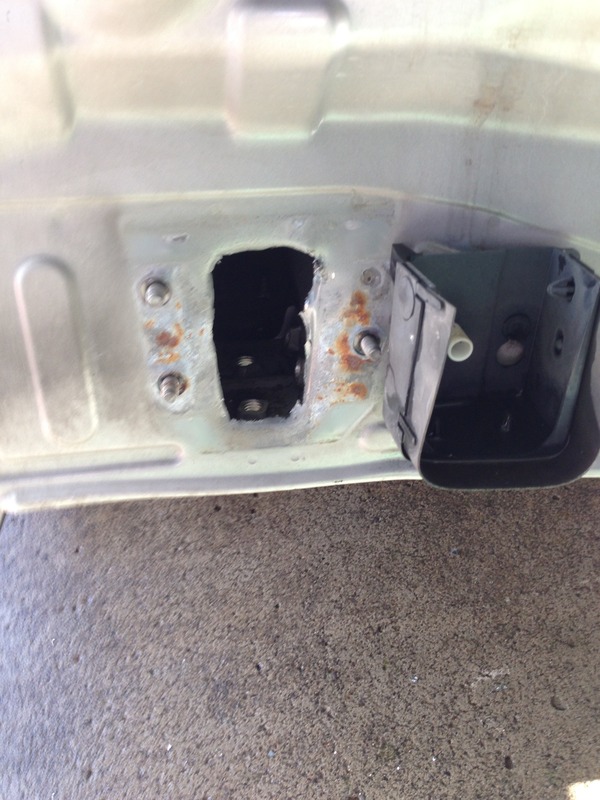
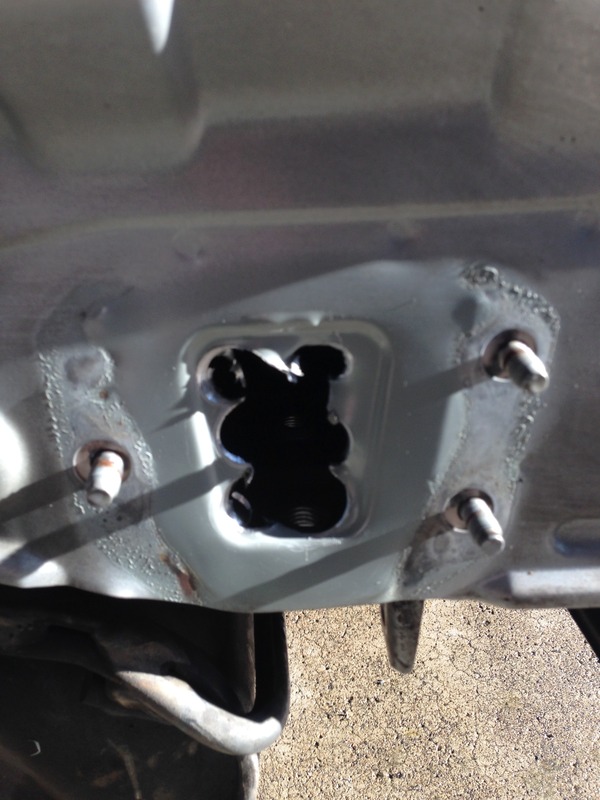
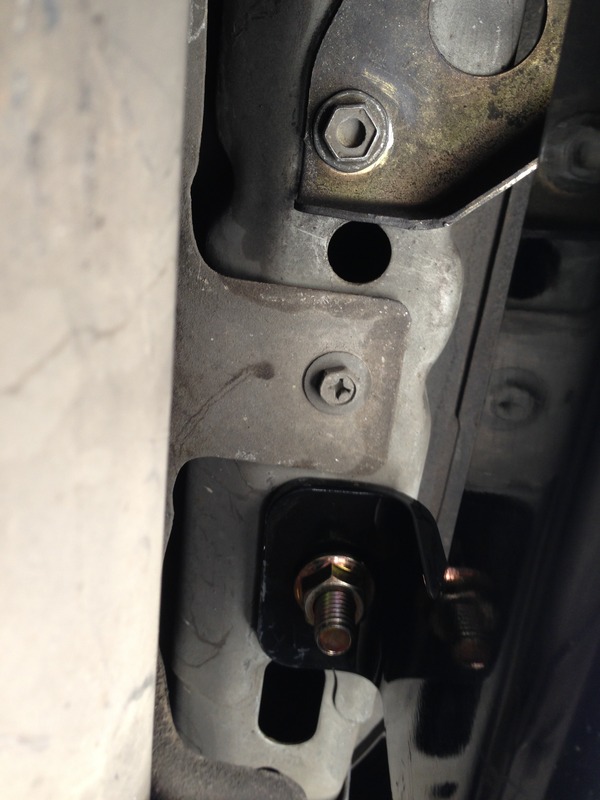
So, to get access to the OEM weld nuts, I had to make an opening on the sheet metal that cover the frame rail.
Got the Tow Hitch from the Curt re seller at Ebay, it is a Curt Class 2 Trailer Hitch & Wiring Euro kit w/ 1-7/8" Ball complete with the euro ball.
Installing the tow hitch requires removal of the 2 tow hooks and use the weld nuts to mount the tow hitch and drill a third hole on the right side. Should be straight forward....
I was excited to get this done in an hour or so, instead it became a whole weekend project
First issue:
The left side of the hitch mounting tabs has 2 tabs, about 120 degree from each other. Each tab has 2 mounting holes which, should, match the OEM tow hook mounting weld nut.
When fitting the hitch, the bottom tab mounting holes were not line up with the OEM tow hook mounting weld nuts. So, I thought, maybe the tabs are bent during shipping. Box was pristine, the tabs looked as straight as it can be, so I'd figure maybe the OEM tow hook location were off...unlikely...but maybe.
Anyway, I've decided to elongate the holes to fit them to the chassis. This is 1/4" thick steel and its tough to fit this massive weldment on any milling machine. So, I used Files and after several hours I have these.
Since the left bottom tab mounting holes are now shifted, the tab that is 120 degree will need spacers to sit flush. well in turned out that the holes weren't lining up either. No problem we got that taken care off.
At this point, I was like lets mount this thing....till the second issue showed up
Second issue:
I torqued this to 48 ft-lb per instruction and it stripped the weld nut. So, I proceed with care and even cleaned the weld nuts with acetone and air dry. The weld nut was clean and the bolts that came out had small surface white rust which is understandable for 16 years old car. So I torqued the second bolt to 48, and stripped again. This time I throughly pissed
Upon the inspection, the bolt that came with it showed some deformation also.
Here the weld nut threads remnants are in the bolt threads.
So, now the work has began. I was contemplating doing the nut insert, weld the whole damn thing to the chassis solid, opening up the stripped threads to next bigger size, or drill clearance holes and run the bolt and nut thru it. I've decided to drill ALL holes and run 10.9 grade bolt and nut thru it.
To do this I first have to remove the tail lights, rear bumper, the bumper re-enforcement, and the re-enforcement mounting. Visit FSM to do this, it took me 30 minutes to do this.
So, to get access to the OEM weld nuts, I had to make an opening on the sheet metal that cover the frame rail.
Last edited by Genes1s; 08-21-2016 at 06:56 PM.
 08-21-2016, 06:49 PM
#2
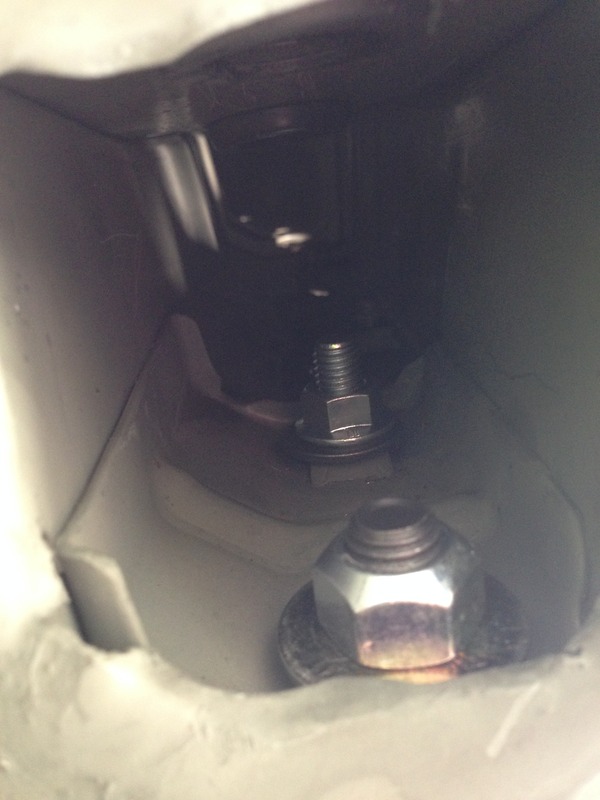
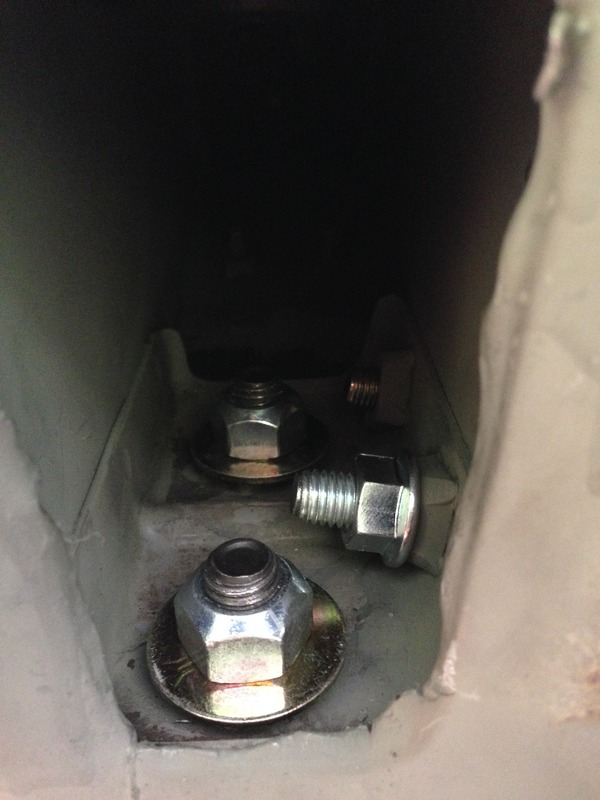
After breaking all the sharp edges and spray anti rust primer on them, I was able to install the bots and nuts and torqued it properly. The connection joints are solid now
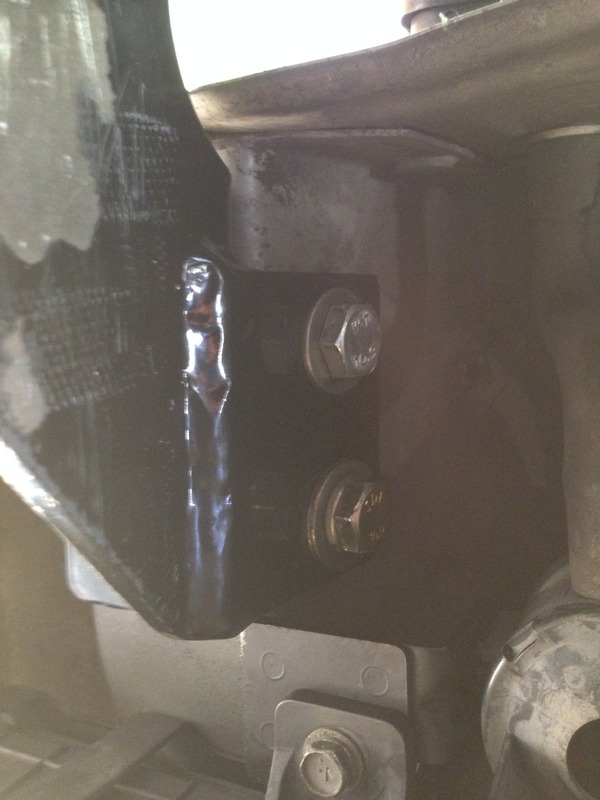
Had to drill a third hole for the right side tab mounting and fished the supplied anchored bolt. Surprisingly this has no issue with thread stripping.
Lesson learned.
Measure, measure, and measure again before ordering part even if all the part number and compatibility chart says no problem. I contacted both Ebay and Curt about this. Ebay says that in order to return, there is 50% charge for restocking fee since I modify the item. Contacted Curt direct and they said that this can happen if the tabs are bent during shipping and handling, not a chance since the box was pristine and I took the same amount of material to shift the mounting holes. Bending the tab means that the holes would need different amount of material to be taken off.
About the stripped threads, there is a chance that the weld nut was weaken to due its age, but I'm not so sure this was the root cause of why the threads were stripped.
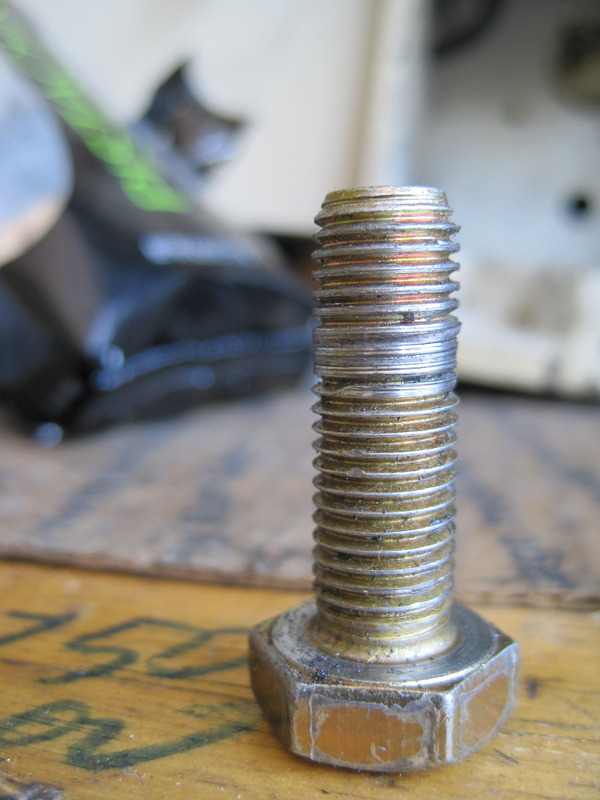
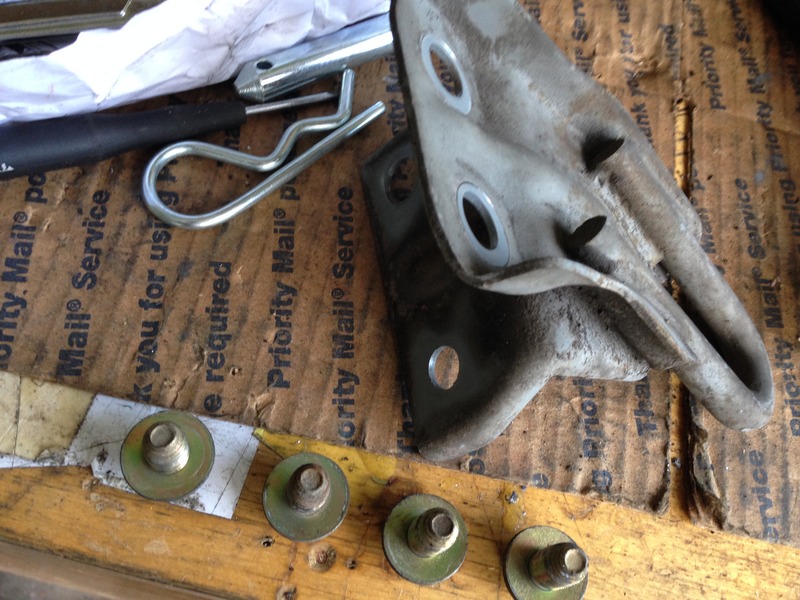
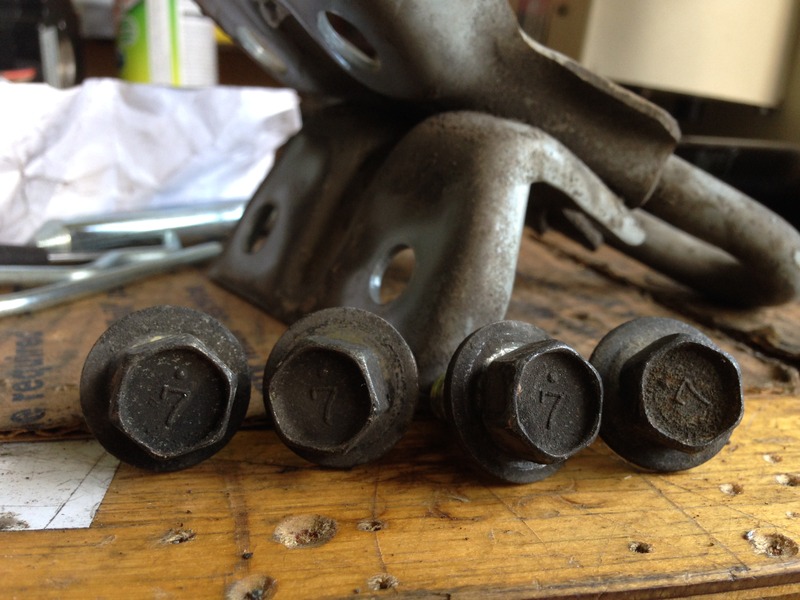
The M10 OEM bolts that came off the OEM tow hook mounting were in pretty good condition with minor white rust on the surface.
Had to drill a third hole for the right side tab mounting and fished the supplied anchored bolt. Surprisingly this has no issue with thread stripping.
Lesson learned.
Measure, measure, and measure again before ordering part even if all the part number and compatibility chart says no problem. I contacted both Ebay and Curt about this. Ebay says that in order to return, there is 50% charge for restocking fee since I modify the item. Contacted Curt direct and they said that this can happen if the tabs are bent during shipping and handling, not a chance since the box was pristine and I took the same amount of material to shift the mounting holes. Bending the tab means that the holes would need different amount of material to be taken off.
About the stripped threads, there is a chance that the weld nut was weaken to due its age, but I'm not so sure this was the root cause of why the threads were stripped.
The M10 OEM bolts that came off the OEM tow hook mounting were in pretty good condition with minor white rust on the surface.
Last edited by Genes1s; 08-21-2016 at 07:30 PM.
08-21-2016, 07:29 PM
#3
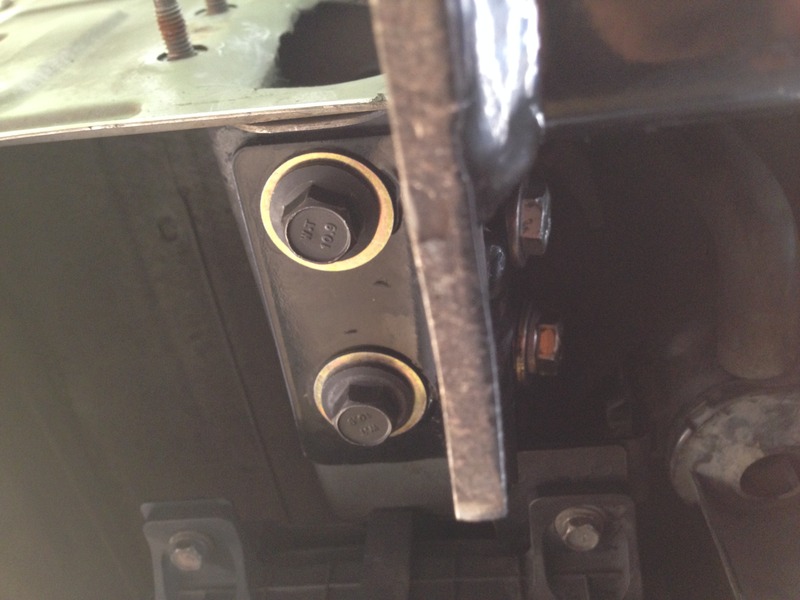
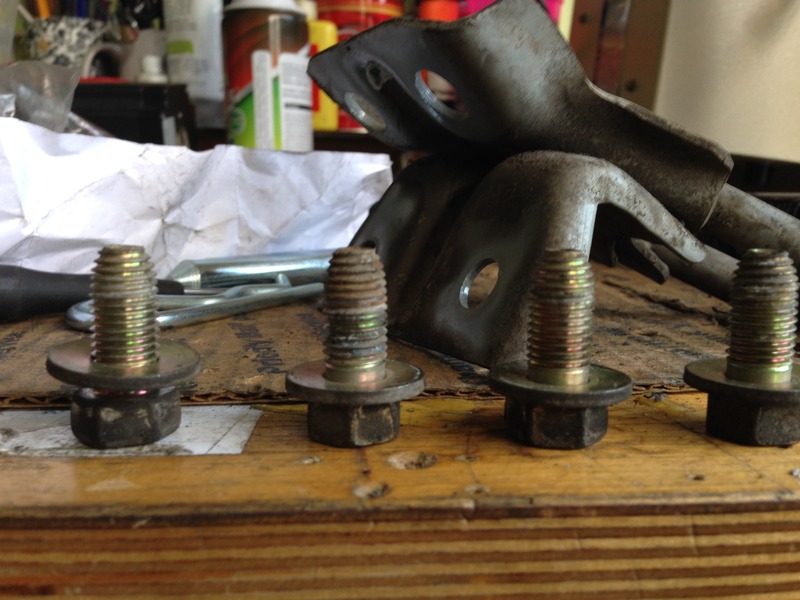
The bolts says "7" on them, so If they are class 7, the FSM indicated that the torque value is 30-32 ft-lbf (depending on if they are fine or coarse threads). Can anyone confirm of this? if this is true than the 48 ft-lbf that the Curt Installation mentioned is way too high.
Finish product.
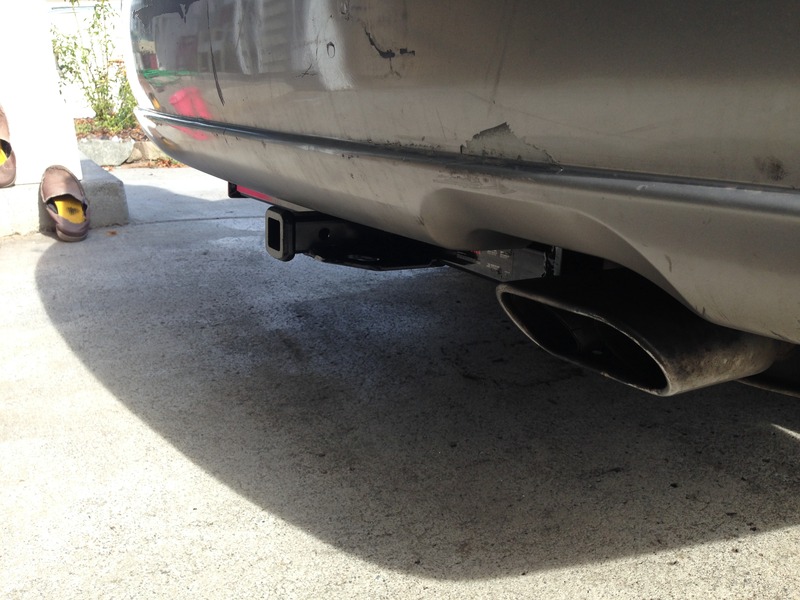
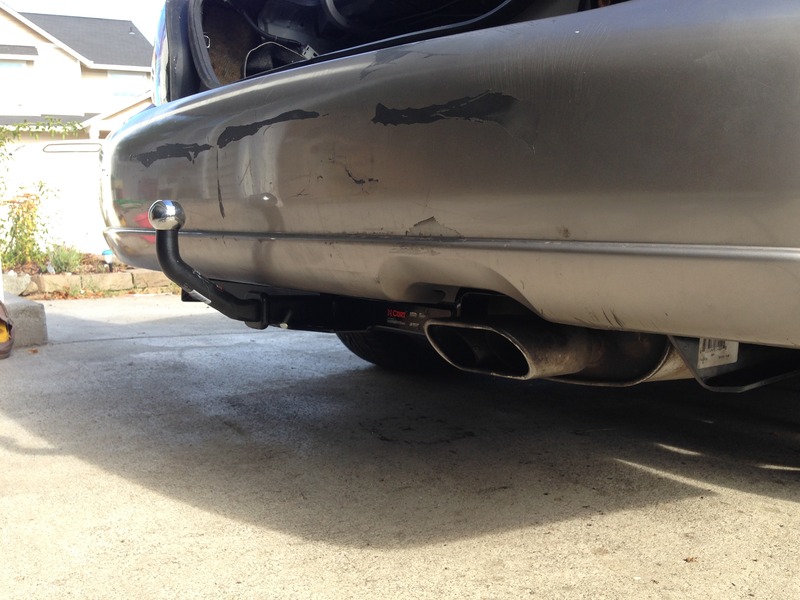
Finish product.
Last edited by Genes1s; 08-21-2016 at 07:32 PM.

 08-27-2016, 09:52 PM
#5


Thread
Thread Starter
Forum
Replies
Last Post
Ben2003GLE
5th Generation Maxima (2000-2003)
25
03-09-2016 06:08 PM