
Turbo VG swapped stanza


Thread Starter
Member
Joined: Oct 2016
Posts: 286
this article covers the topic pretty well: https://motoiq.com/the-ultimate-guid...eer-toe-steer/
Last edited by Nate Boslet; Jun 12, 2022 at 07:47 PM.
Thread Starter
Member
Joined: Oct 2016
Posts: 286
been a lot longer than i was expecting, but this has been a nightmare, literally every step of the way ive had something set me back but the WALBRO 450 install is finally done. i already replaced the stock pump a while ago with the 255 which was probably already plenty of fuel for what im doing but this pump was pretty cheap so if i have to replace i always try to upgrade while im at it so that was the starting point.basically just spliced the pump into the stock wiring, nothing fancy, all of the oem stuff was left alone, all of that is changing, but the functionality will be identical.
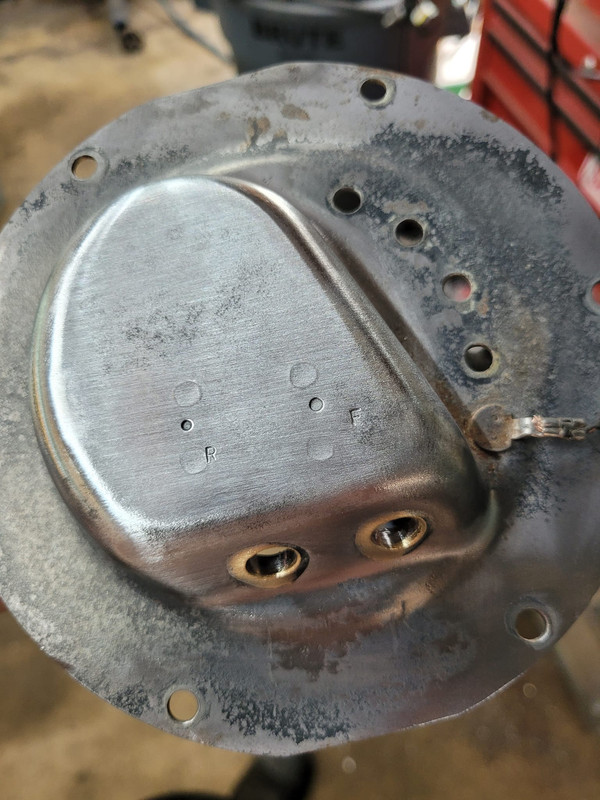
stripped and cleaned the metal parts to prep for welding
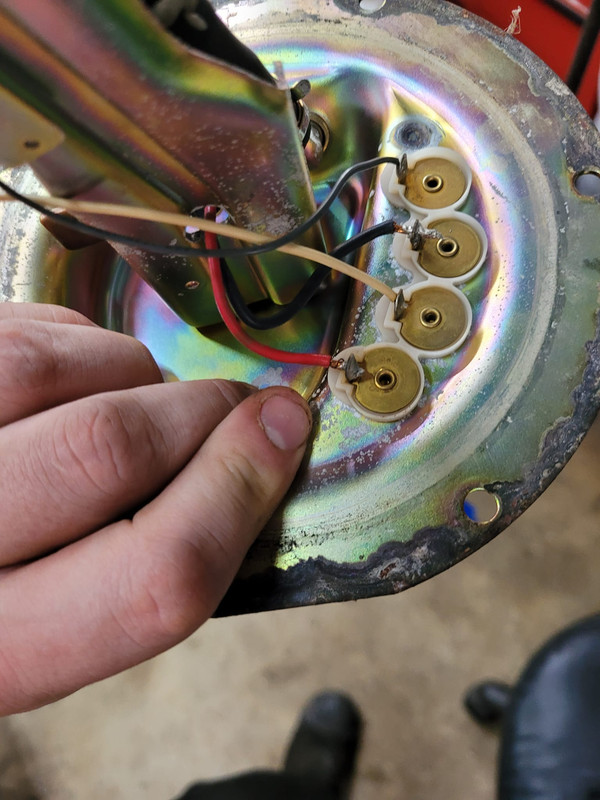
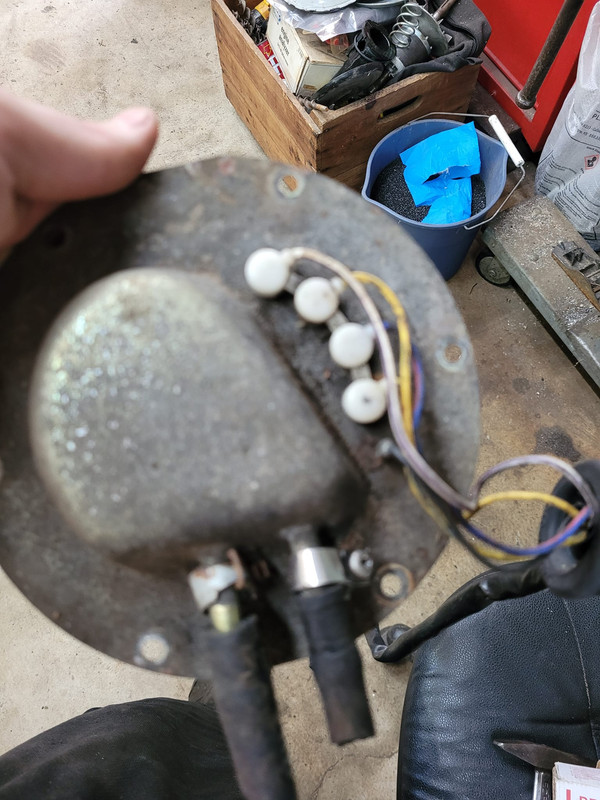
plugged up the old holes, replaced the old style connectors with this fancy bulkhead plug
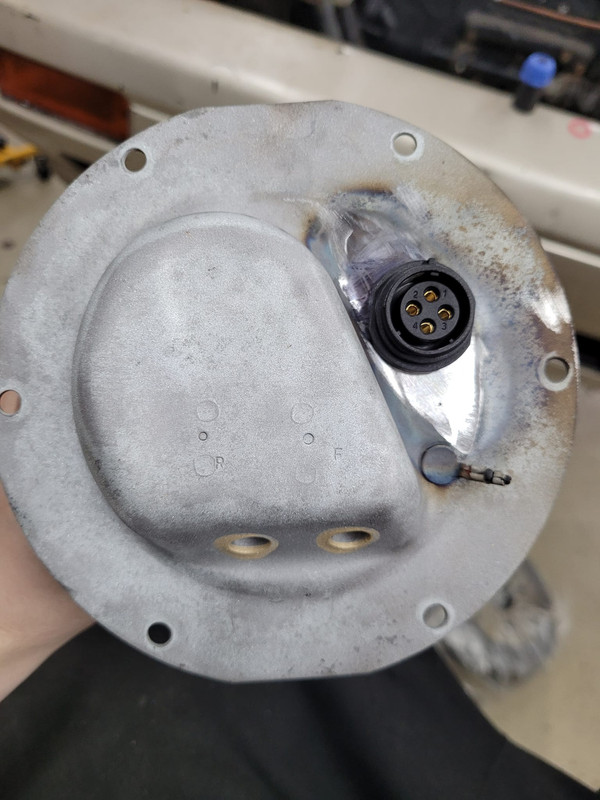
youll notice the ground tab was left on, originally i was going to try to pry open the crimp and recrimp on a ground but i ended up relocating it to one of the bolt holes which you will see later.
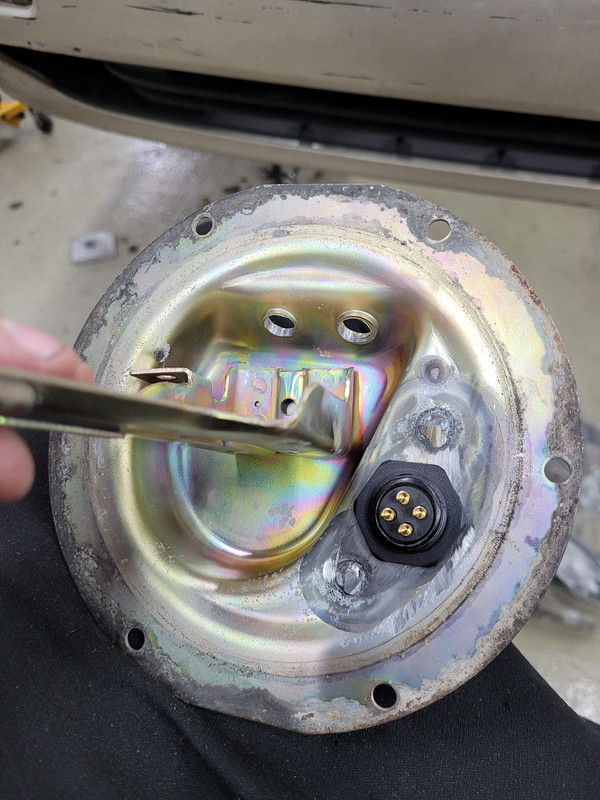
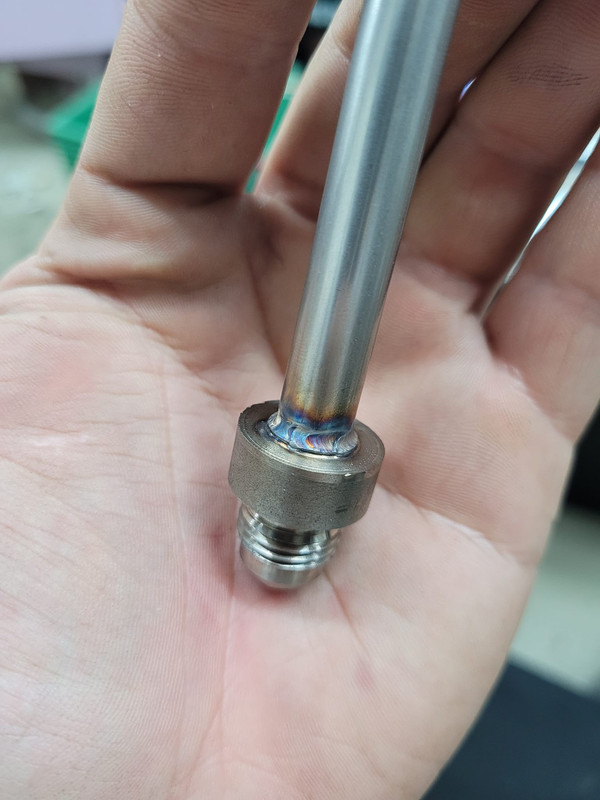
first somewhat major setback happened here with these lines, i couldnt find stainless 3/8ths tubing anywhere so i tried some regular steel brake line thinking it should be fine its going to be in the tank anyway nothing has ever really corroded in there in my builds but when i went to weld it the stuff just completely disintegrated and leaked like crazy so i had to machine everything back and undo it all and THEN spend 30 dollars on a single piece of 2 foot long stainless tubing to try again
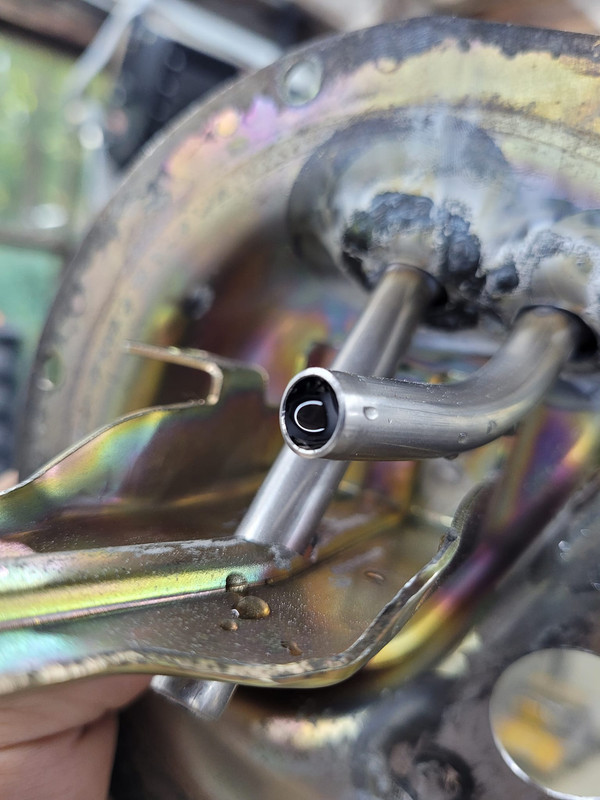
which worked! stainless is not as hard to weld to itself, so this little fusion weld sealed up fine and holds pressure.
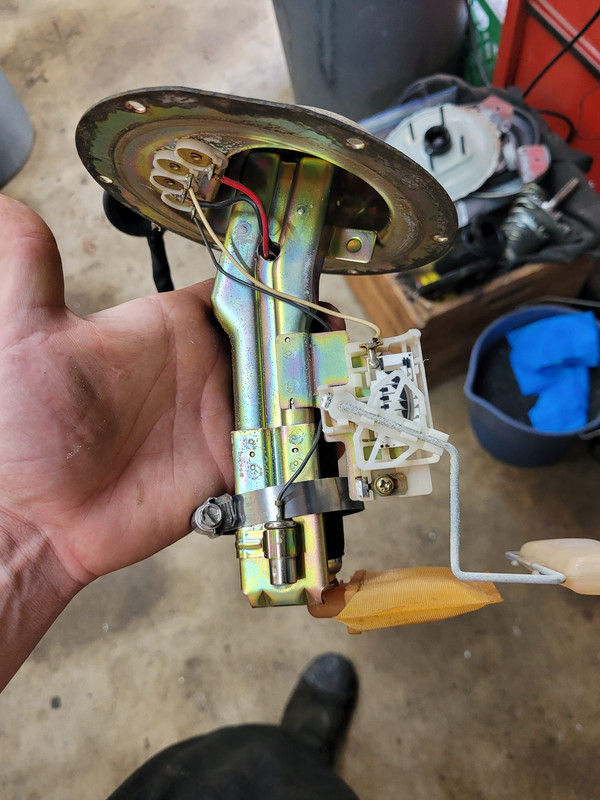
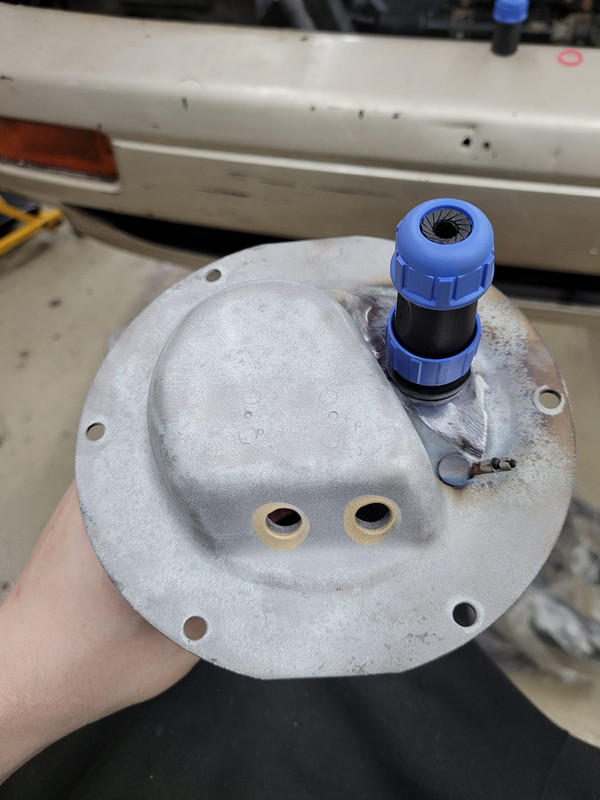
once all the welding was done i powdercoated the top part so it wouldnt rust and then i had to relocate the little bracket that holds on the gas light which was a little annoying but that wasnt that big of a deal, i wired everything up to the plug and assembled everything.
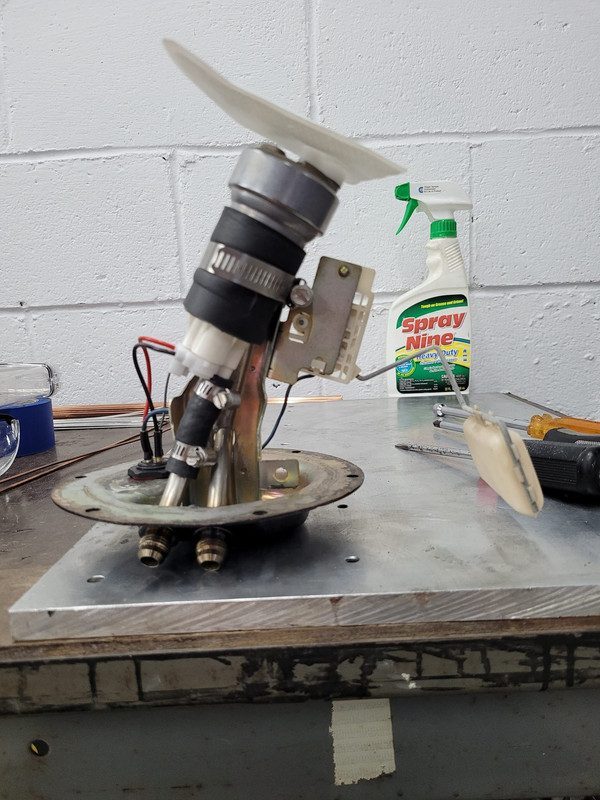
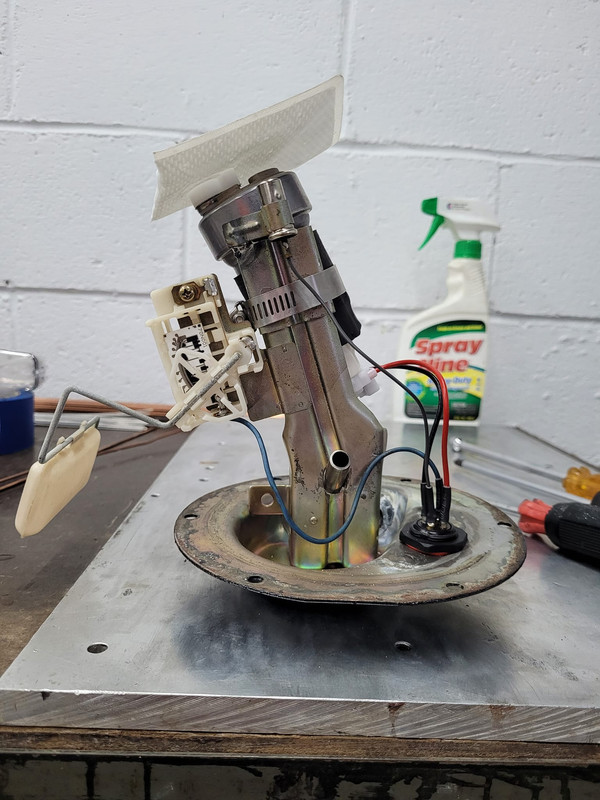
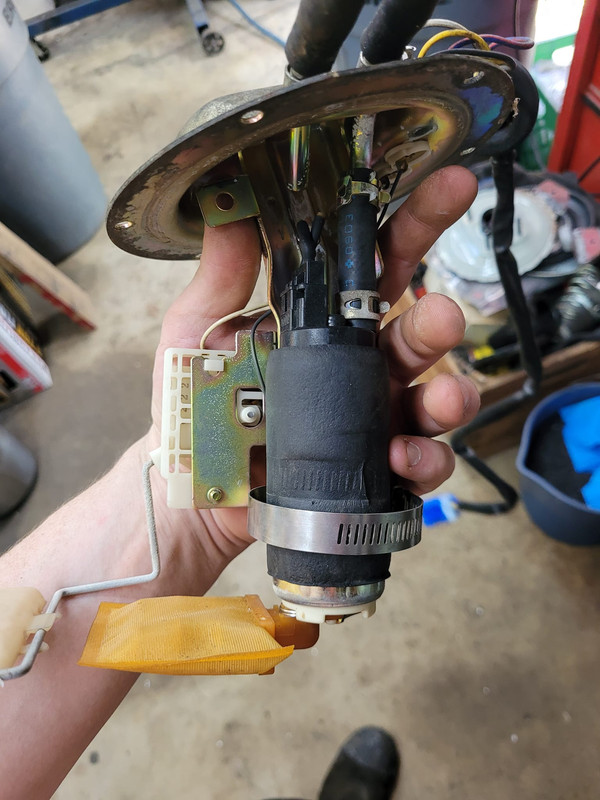
and here it is installed in the tank. the sock basically touches the bottom of the tank without being pressed against it, which was harder to achieve than before, this pump is much bigger than the 255.

now i just need to run my lines which is going to take some cutting under the rear seat so thats the next step, im also going to wire the pump to a relay so instead of the mega powering the pump across the entire car, the pump will get its juice from the battery in the trunk through some 12 gauge wire the power wire that was supplying the pump will now simply close the relay. the stock wire would definitely not hold up from what ive read. the tank would be in the car but the other major issue ive had is the filler neck hoses, i ordered one, they sent me the wrong one, i sent it back, ordered another one from a different place, and that one was what i asked for but MY measurement was wrong, so now i need to order a 3rd one lol so i should have the correct stuff soon and then the tank will be back in the car, i can finally put the rear suspension back in and get the car back on the ground and bleed the brakes! then i am planning on sealing up the engine bay, power washing it all real good so its clean and then moving onto the motor mounts.
stripped and cleaned the metal parts to prep for welding
plugged up the old holes, replaced the old style connectors with this fancy bulkhead plug
youll notice the ground tab was left on, originally i was going to try to pry open the crimp and recrimp on a ground but i ended up relocating it to one of the bolt holes which you will see later.
first somewhat major setback happened here with these lines, i couldnt find stainless 3/8ths tubing anywhere so i tried some regular steel brake line thinking it should be fine its going to be in the tank anyway nothing has ever really corroded in there in my builds but when i went to weld it the stuff just completely disintegrated and leaked like crazy so i had to machine everything back and undo it all and THEN spend 30 dollars on a single piece of 2 foot long stainless tubing to try again
which worked! stainless is not as hard to weld to itself, so this little fusion weld sealed up fine and holds pressure.
once all the welding was done i powdercoated the top part so it wouldnt rust and then i had to relocate the little bracket that holds on the gas light which was a little annoying but that wasnt that big of a deal, i wired everything up to the plug and assembled everything.
and here it is installed in the tank. the sock basically touches the bottom of the tank without being pressed against it, which was harder to achieve than before, this pump is much bigger than the 255.
now i just need to run my lines which is going to take some cutting under the rear seat so thats the next step, im also going to wire the pump to a relay so instead of the mega powering the pump across the entire car, the pump will get its juice from the battery in the trunk through some 12 gauge wire the power wire that was supplying the pump will now simply close the relay. the stock wire would definitely not hold up from what ive read. the tank would be in the car but the other major issue ive had is the filler neck hoses, i ordered one, they sent me the wrong one, i sent it back, ordered another one from a different place, and that one was what i asked for but MY measurement was wrong, so now i need to order a 3rd one lol so i should have the correct stuff soon and then the tank will be back in the car, i can finally put the rear suspension back in and get the car back on the ground and bleed the brakes! then i am planning on sealing up the engine bay, power washing it all real good so its clean and then moving onto the motor mounts.
Last edited by Nate Boslet; Aug 12, 2022 at 07:07 PM.
Thread Starter
Member
Joined: Oct 2016
Posts: 286
Does anyone have any opinions about the color of the turbos compressor housing and the timing covers on front of the engine?
ive been pretty much using cadillac grey for everything but i feel like its gonna be a little much if its the only color i use. i can use as many different colors as i want really, i was also thinking of doing the transmission case while its apart if it will fit in my oven and im pretty sure it will. i also want to do something with the block and the heads just to protect them but im not going to be powder coating them so color ideas for those are also welcome.
ive been pretty much using cadillac grey for everything but i feel like its gonna be a little much if its the only color i use. i can use as many different colors as i want really, i was also thinking of doing the transmission case while its apart if it will fit in my oven and im pretty sure it will. i also want to do something with the block and the heads just to protect them but im not going to be powder coating them so color ideas for those are also welcome.
Thread Starter
Member
Joined: Oct 2016
Posts: 286
i know ive been gone for over a year, but ive been working on the car this whole time, probably more consistently than ever before in this thread lol i just keep getting so stuck in work mode i forget to take progress pics so im just gonna try to slam the entire year into this one post. sorry if yall prefer the more granular stuff i was doing before, its been a weird and really difficult year tbh but ive made a ton of progress, way more than i can go over but here goes
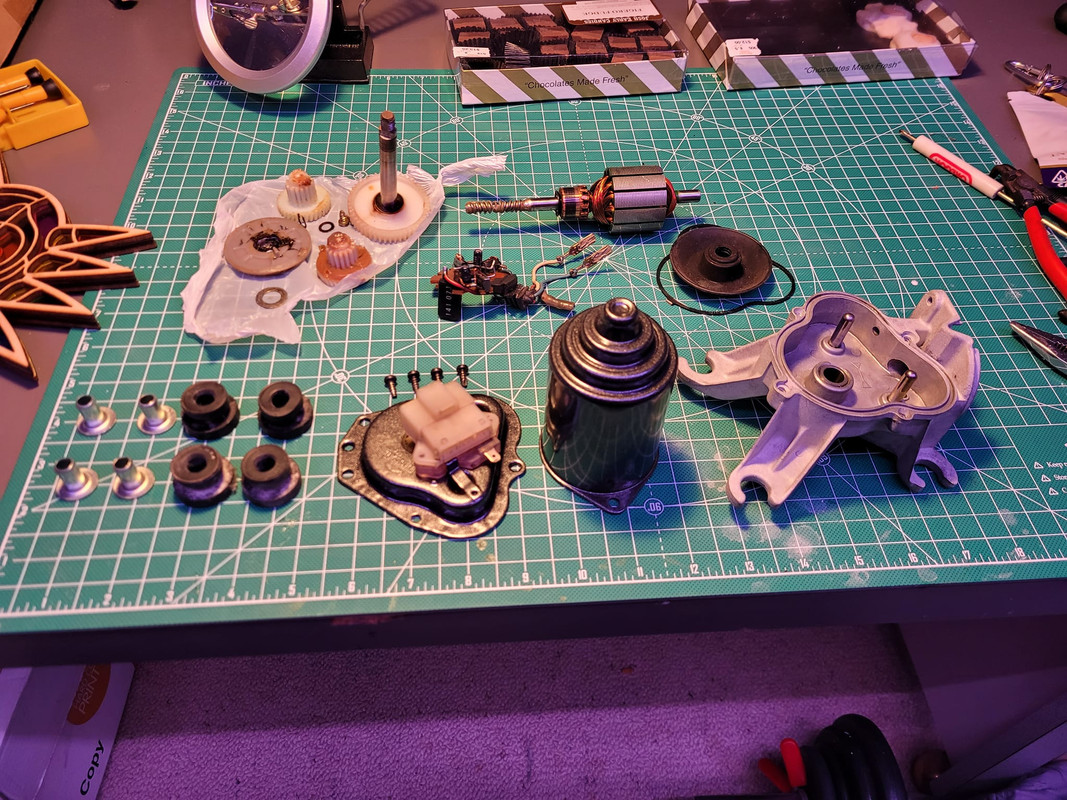
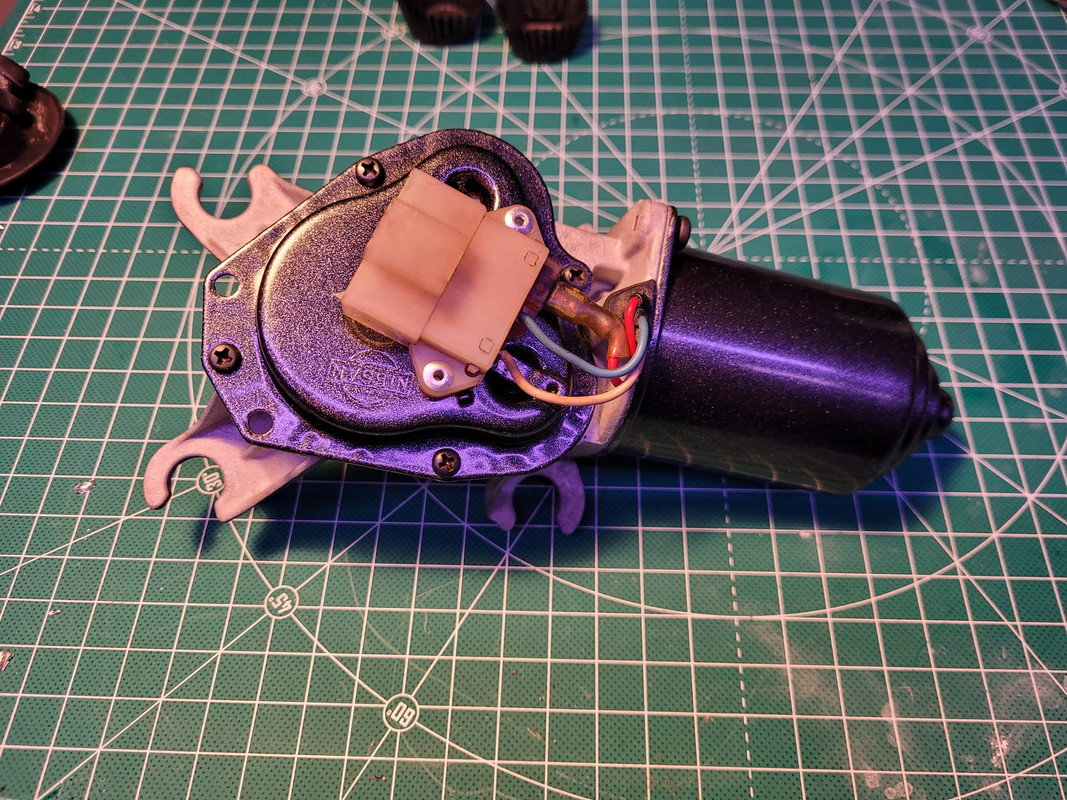
the major elevation of my standards started with the wiper motor, i knew in the moment if i went through with completely restomodding my windshield wiper things were probably getting out of hand, after a few literal days i YOLOd my way into taking it completely apart, sandblasted and cleaned everything as best as i could and powder coated the steel parts and then reassembled it. it honestly didnt take that long so the lesson i learned was if the opportunity presents itself ill do this to literally everything i touch.
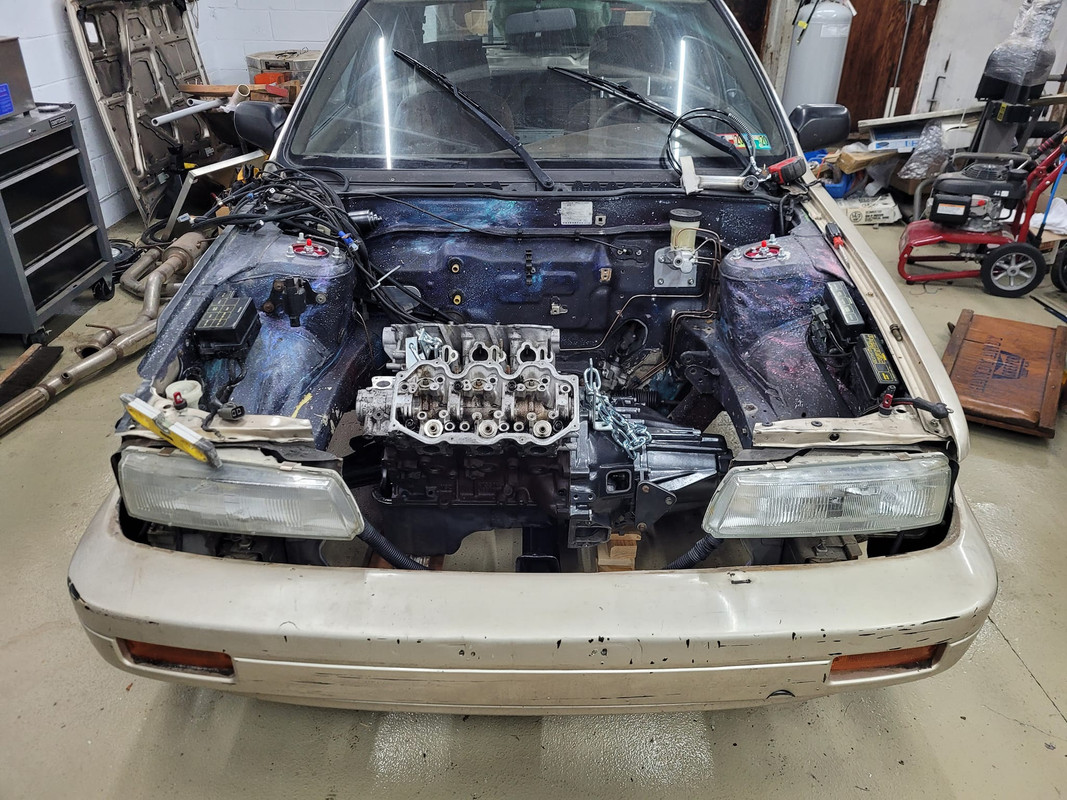
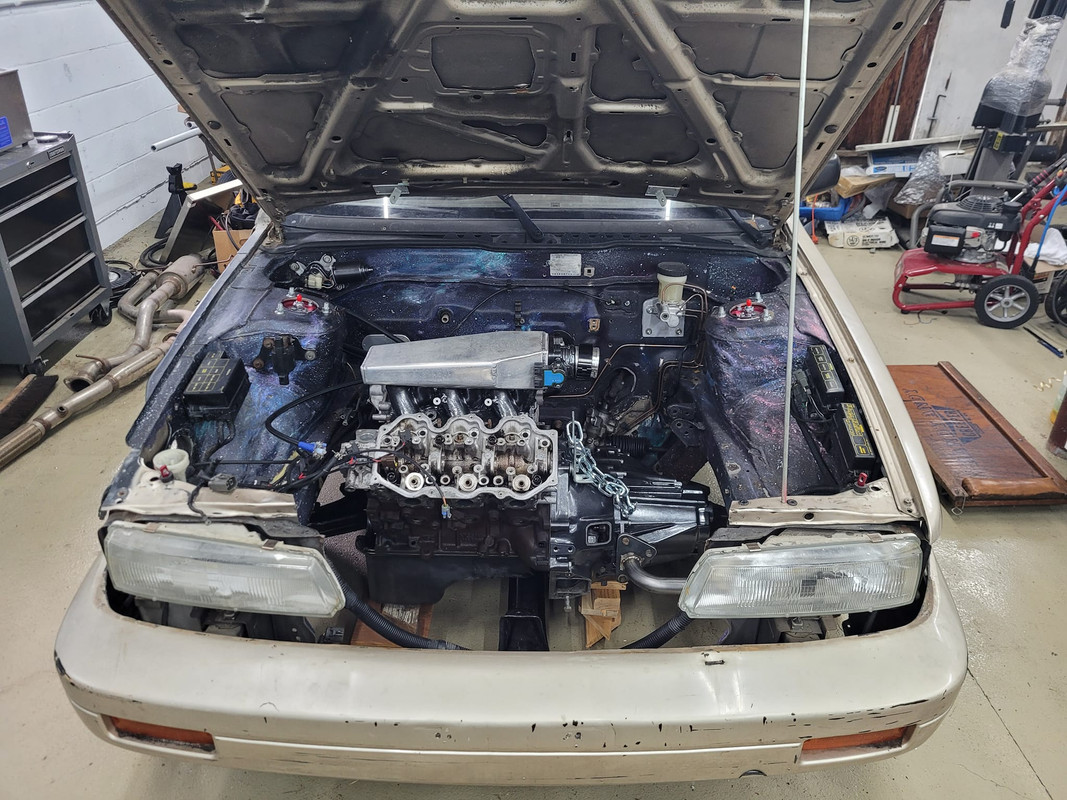
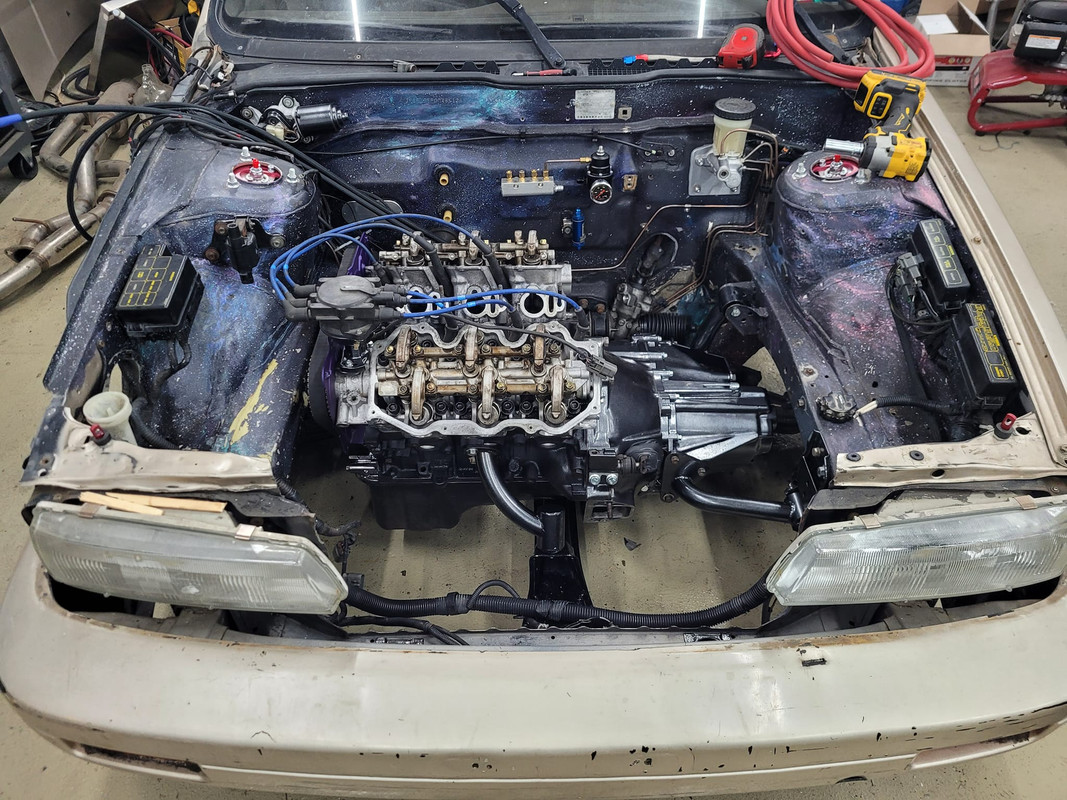
this is just the block, heads and transmission slapped together to mockup the mounts, i got the car in the air and leveled it all out, then i leveled the engine and got it square and i made all the mounts and powder coated those too
here is the front trans mount that i actually ended up having to remake cause it hit the starter lol but it held things in place while i made the other ones.
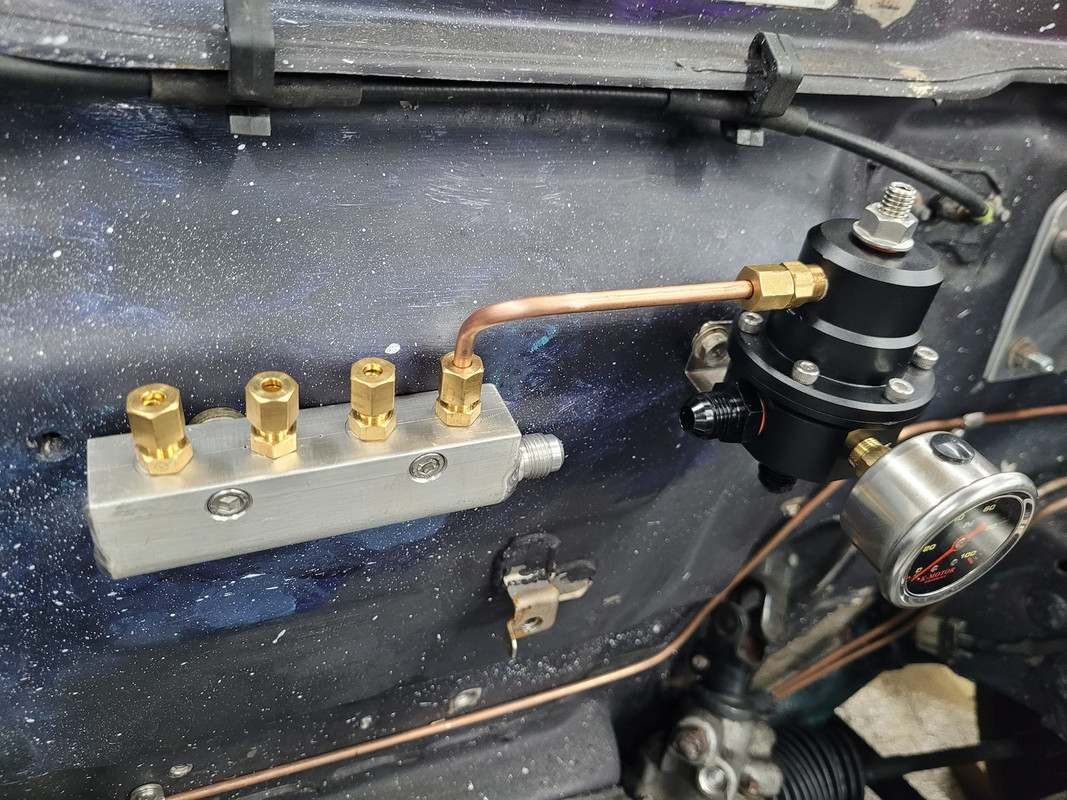
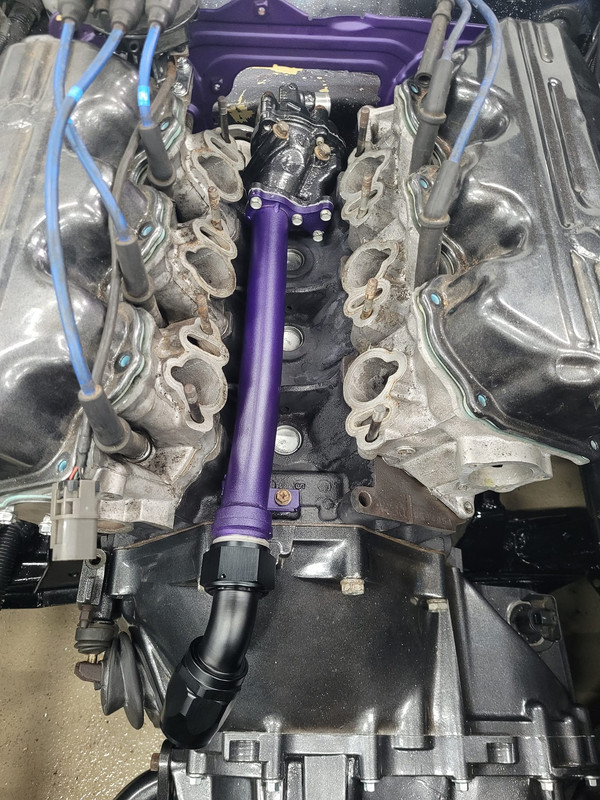
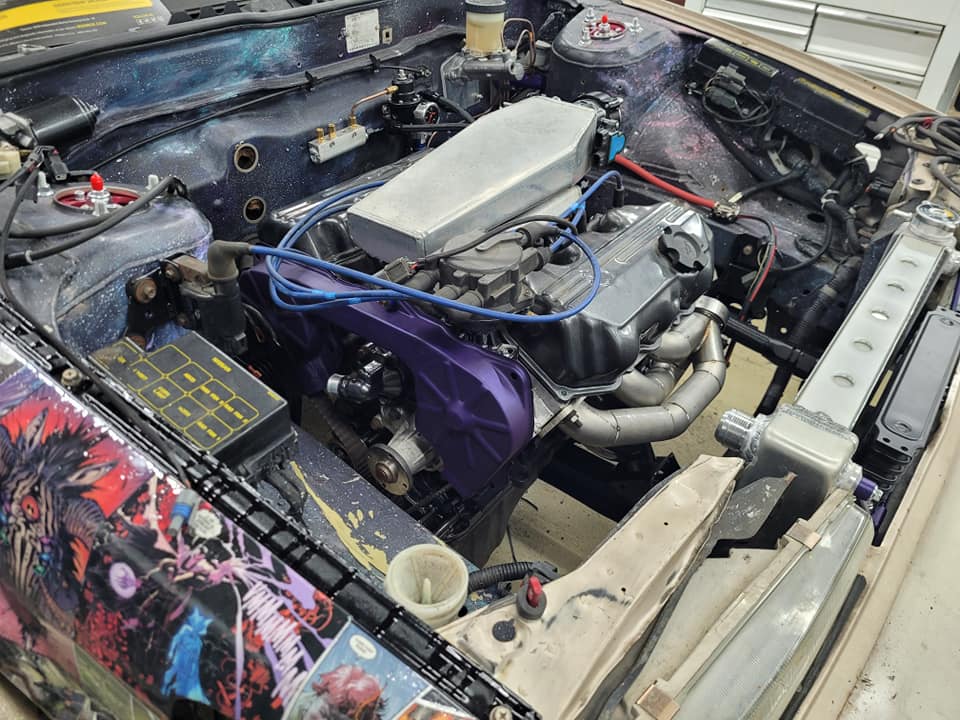
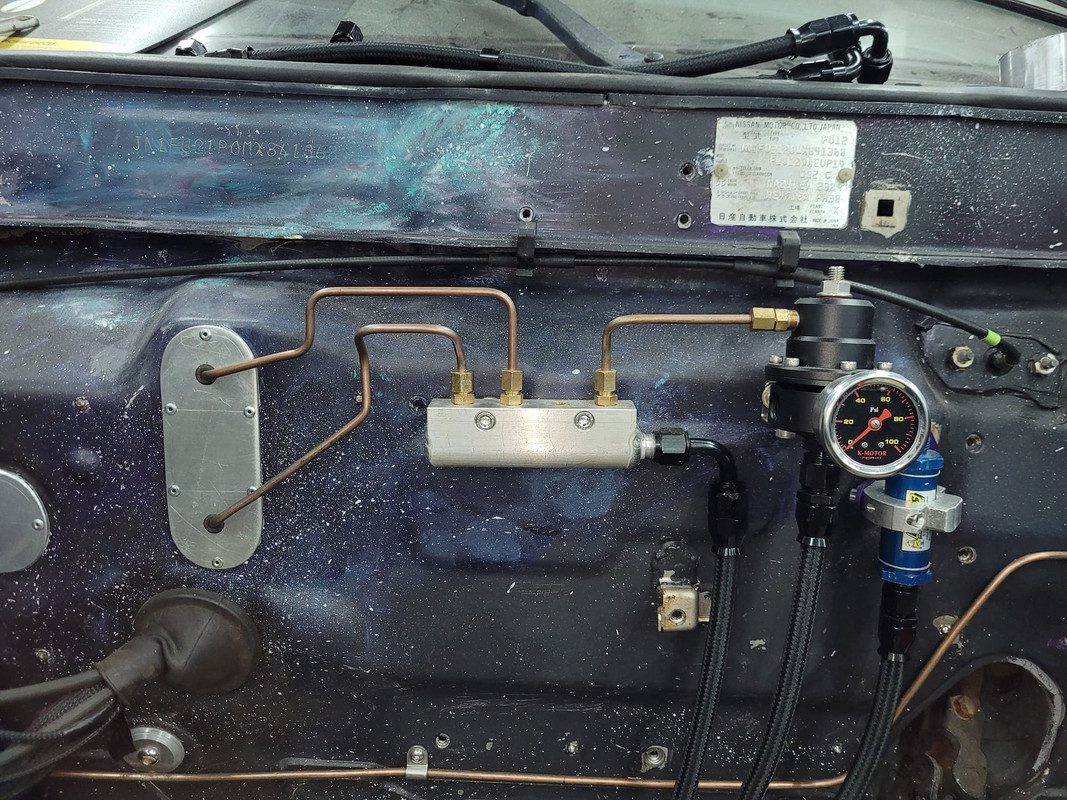
this was the concept for my vacuum lines, im doing everything in brake line and these compression fittings, the firewall is going to handle the FPR, the boost gauge, the climate control line and the Map sensor from this vacuum manifold that will have a line run to the intake, then off of the intake ill run a line to the BOV and the wastegate/boost controller, however that works out, ill probably document that more later but this is where its at right now i just couldnt wait to do this lol
here is the new rear trans mount which is essentially the same as the old one but a little nicer and stronger.

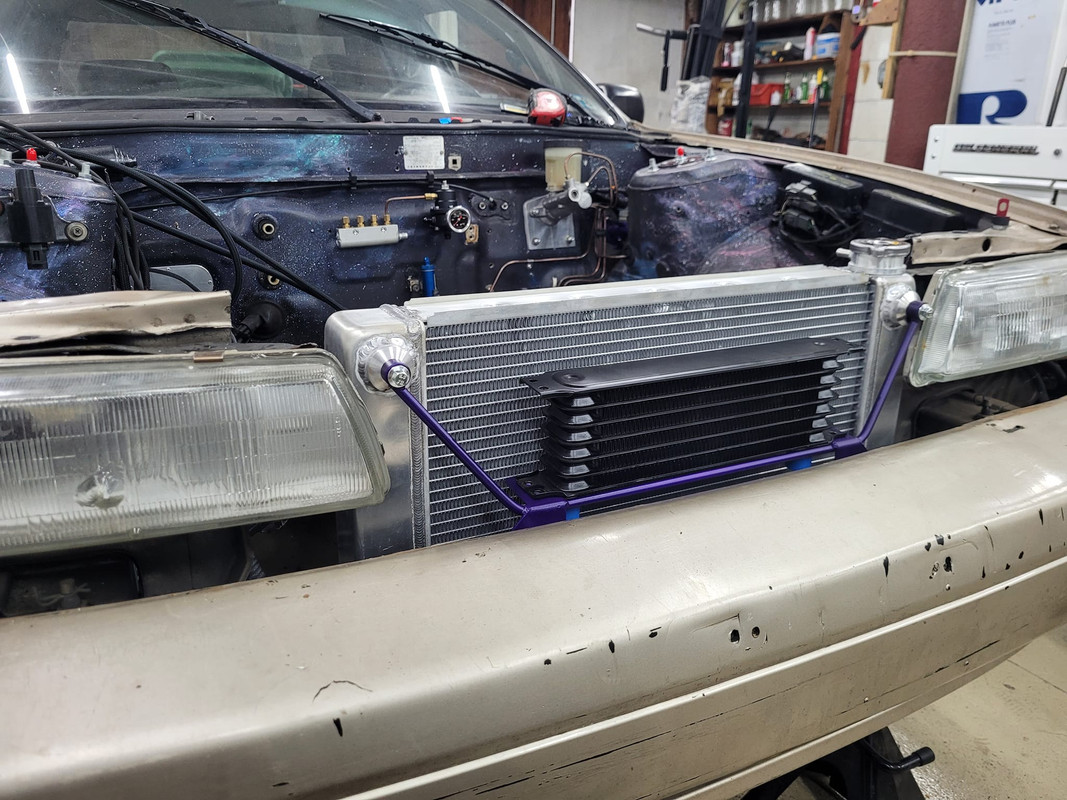
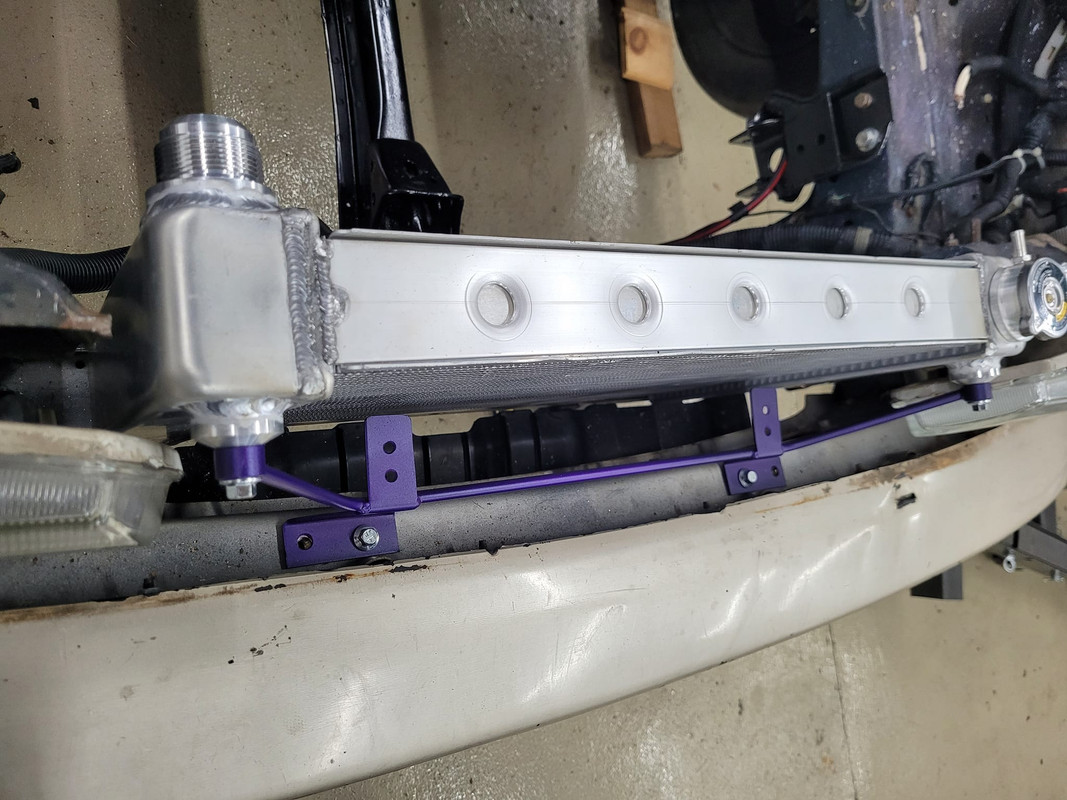
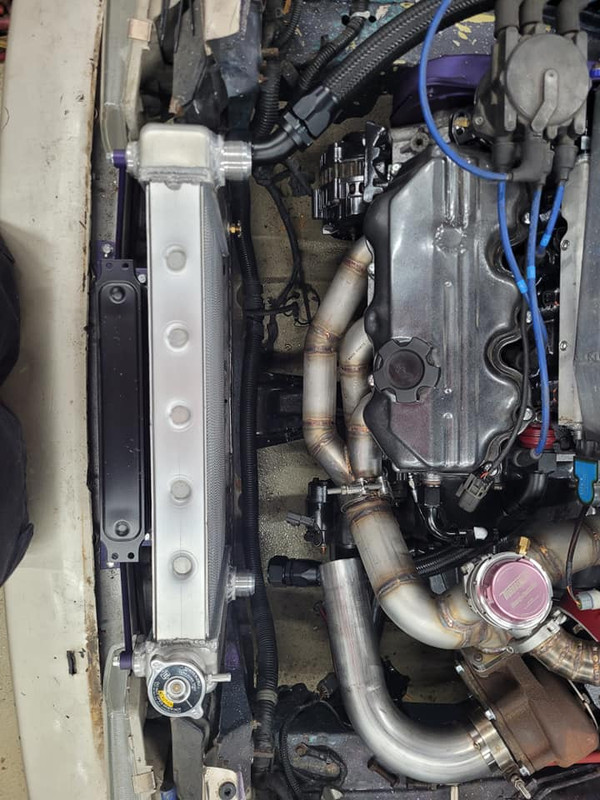
here is the beautiful radiator/oil cooler mount. i dont think the chicken wire grill i made with the cadillac emblem is going to fit over this but i am absolutely going to try lol really clinging to the sleeper aesthetic
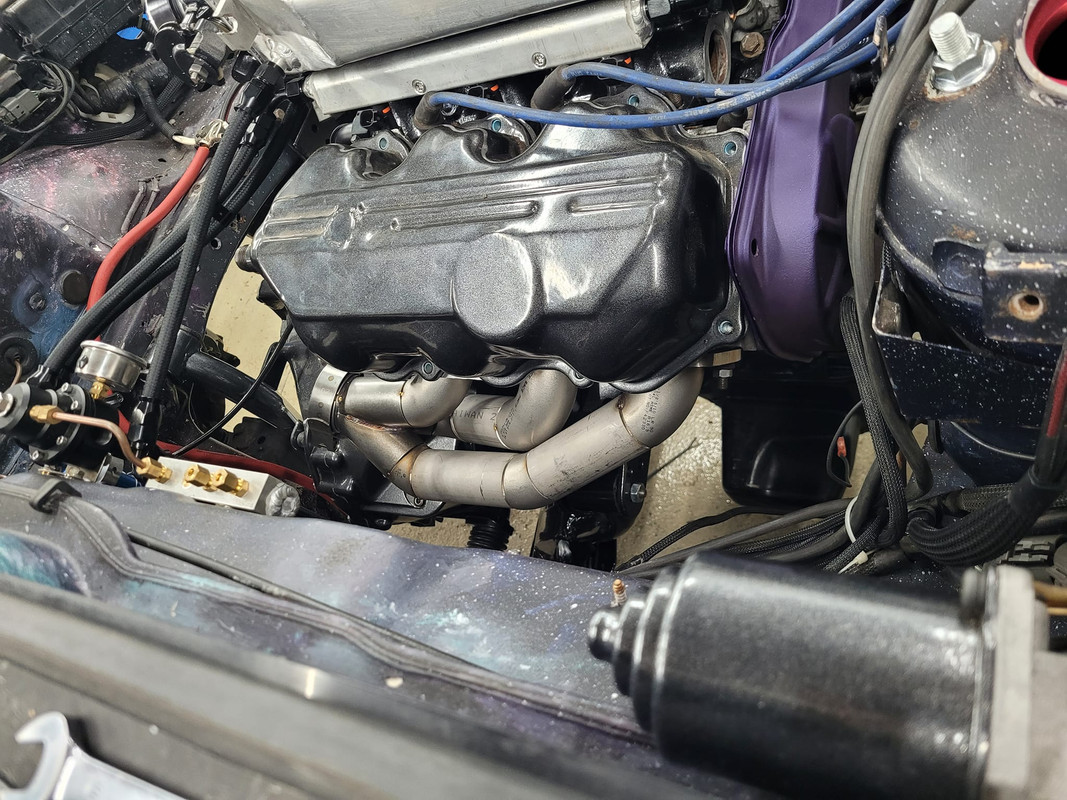
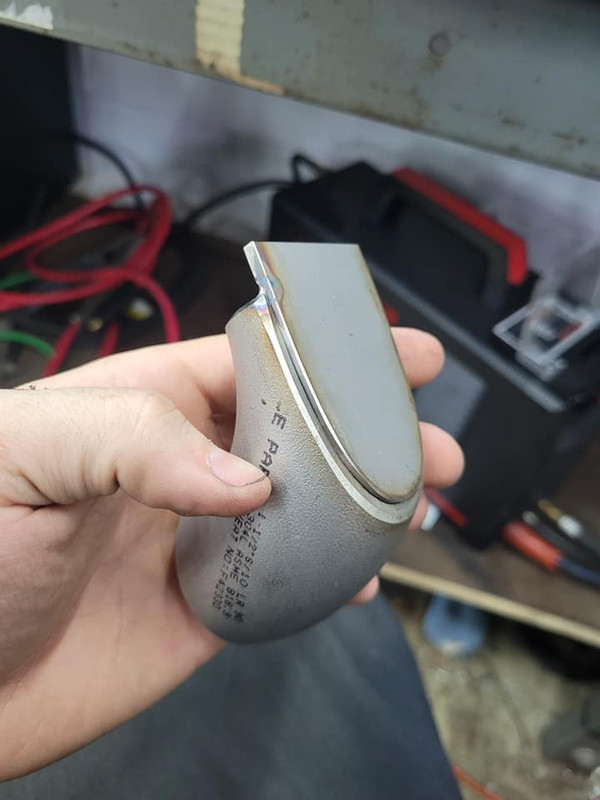
i completely rebuilt and assembled the engine, new bearings and rings, all new gaskets, i lightly ported the exhaust runners in the heads to fit the flanges i made for the turbo headers but thats basically it, its the same as it was before but way cleaner and probably assembled properly
20AN radiator lines, im gonna make the lower one tomorrow.

lower coolant housing all powder coated and modified.
the turbo headers are next, probably going to start on them in a few weeks cause i have to make a jig for making the collectors and i feel like thats going to be a nightmare cause i already tried like 2 years ago and it was just really not as simple as i expected so we will see but thats basically it i think, once the headers are in and the turbo is plumbed up and the exhaust is made and the new battery cable is run and the fuel pump is wired and probably about 160 other things im not remembering are done all i plan on doing is plugging the harness i am hoping i made right the first time in and running the car.
i was saying it will probably be another year or two but i think if i keep up progress and we dont have like an insane amount of snow, the car will probably be running in a few months. obviously that means its going to be another year, but it feels realistically possible that its less than that lol
ill try to take more pictures as i do stuff without slowing down, i just finished the shifter linkage today, theres so much little stuff that doesnt feel worth documenting but then it will end up being a big change so i need to strike a balance i guess. anyway, just letting yall know im still alive and working on the car.
the major elevation of my standards started with the wiper motor, i knew in the moment if i went through with completely restomodding my windshield wiper things were probably getting out of hand, after a few literal days i YOLOd my way into taking it completely apart, sandblasted and cleaned everything as best as i could and powder coated the steel parts and then reassembled it. it honestly didnt take that long so the lesson i learned was if the opportunity presents itself ill do this to literally everything i touch.
this is just the block, heads and transmission slapped together to mockup the mounts, i got the car in the air and leveled it all out, then i leveled the engine and got it square and i made all the mounts and powder coated those too
here is the front trans mount that i actually ended up having to remake cause it hit the starter lol but it held things in place while i made the other ones.
this was the concept for my vacuum lines, im doing everything in brake line and these compression fittings, the firewall is going to handle the FPR, the boost gauge, the climate control line and the Map sensor from this vacuum manifold that will have a line run to the intake, then off of the intake ill run a line to the BOV and the wastegate/boost controller, however that works out, ill probably document that more later but this is where its at right now i just couldnt wait to do this lol
here is the new rear trans mount which is essentially the same as the old one but a little nicer and stronger.
here is the beautiful radiator/oil cooler mount. i dont think the chicken wire grill i made with the cadillac emblem is going to fit over this but i am absolutely going to try lol really clinging to the sleeper aesthetic
i completely rebuilt and assembled the engine, new bearings and rings, all new gaskets, i lightly ported the exhaust runners in the heads to fit the flanges i made for the turbo headers but thats basically it, its the same as it was before but way cleaner and probably assembled properly
20AN radiator lines, im gonna make the lower one tomorrow.
lower coolant housing all powder coated and modified.
the turbo headers are next, probably going to start on them in a few weeks cause i have to make a jig for making the collectors and i feel like thats going to be a nightmare cause i already tried like 2 years ago and it was just really not as simple as i expected so we will see but thats basically it i think, once the headers are in and the turbo is plumbed up and the exhaust is made and the new battery cable is run and the fuel pump is wired and probably about 160 other things im not remembering are done all i plan on doing is plugging the harness i am hoping i made right the first time in and running the car.
i was saying it will probably be another year or two but i think if i keep up progress and we dont have like an insane amount of snow, the car will probably be running in a few months. obviously that means its going to be another year, but it feels realistically possible that its less than that lol
ill try to take more pictures as i do stuff without slowing down, i just finished the shifter linkage today, theres so much little stuff that doesnt feel worth documenting but then it will end up being a big change so i need to strike a balance i guess. anyway, just letting yall know im still alive and working on the car.

Thread Starter
Member
Joined: Oct 2016
Posts: 286
i dont have much to update, i dont think much has changed with the car since the last update other than the headers are fully tacked up and i started working on locating the turbo but a second project sort of fell into my lap and thats taken priority for the time being so the stanza is on the backburner at the moment.
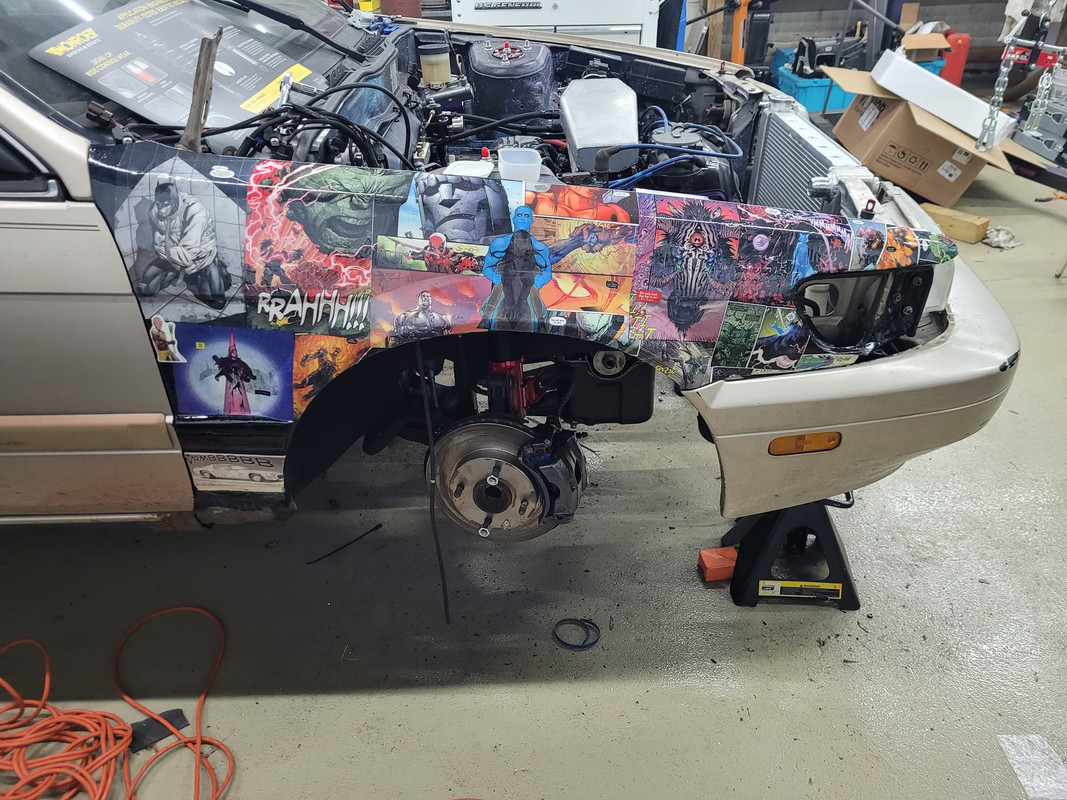
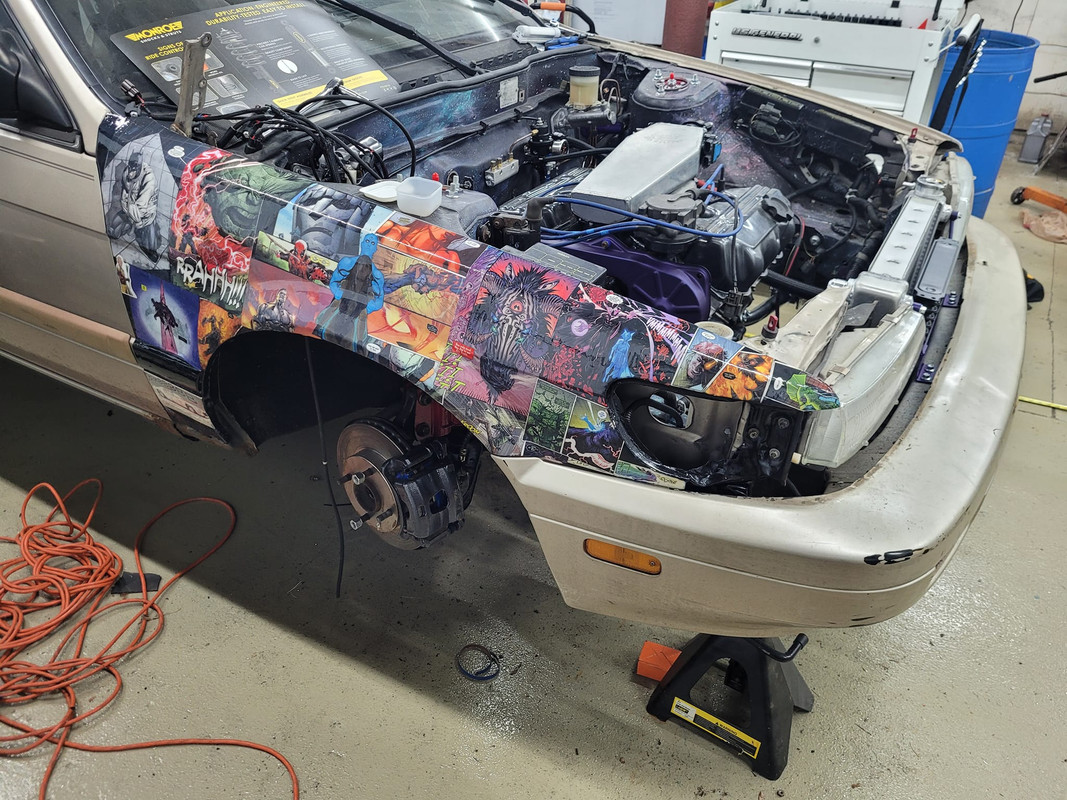
but. i wasnt really planning on doing too much to this other vehicle, basically all i wanted was a new daily and im hoping to just turn it into that and then be back to working on the stanza in the next few months. i still have no doubt the stanza will be running and driving by summertime. also, i redid the comic book pages on the fender for the third and hopefully final time, i actually did it right lol i used mod podge to stick the pages and seal them so they dont just soak up the top coat and then i used a marine grade, UV resistant resin. west systems. it was expensive lol but i think it was worth it. you cant really tell from the pictures but the fender looks like its dipped in glass, its not perfectly smooth but it is extremely clear.
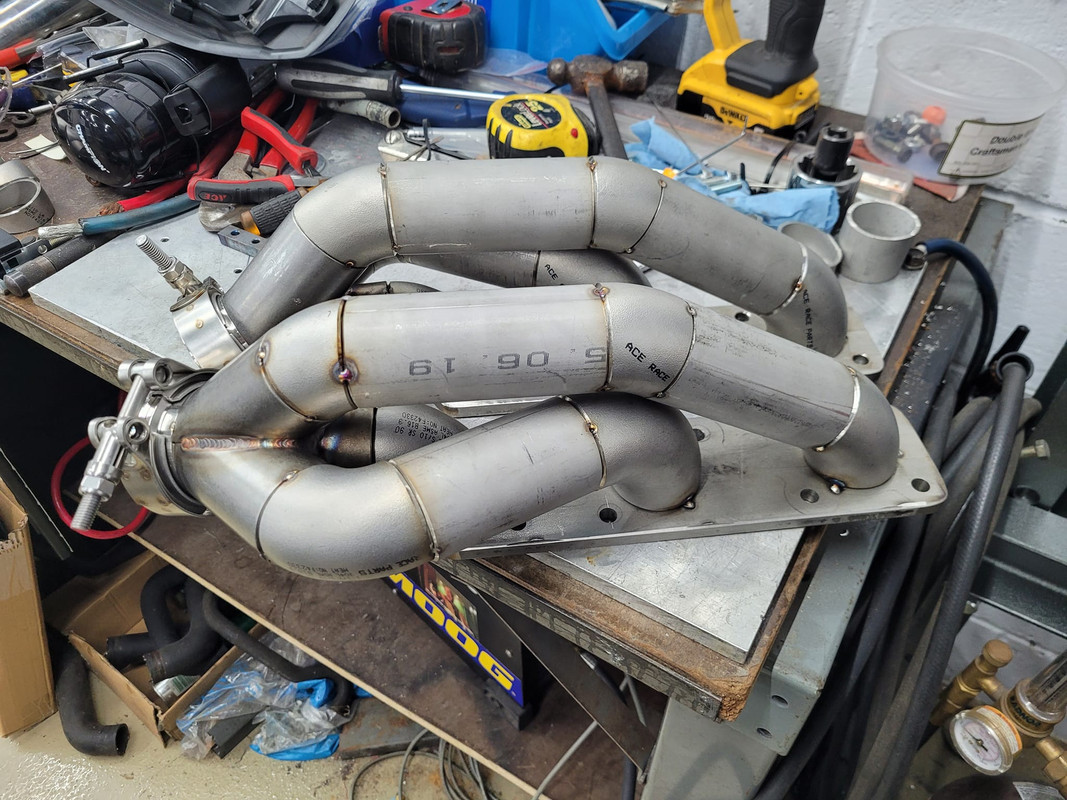
here are the headers as i left them. i got a dual port regulator for my tig welder so i can purge them and refilled the bottle so if i do run into any downtime i will probably do that.

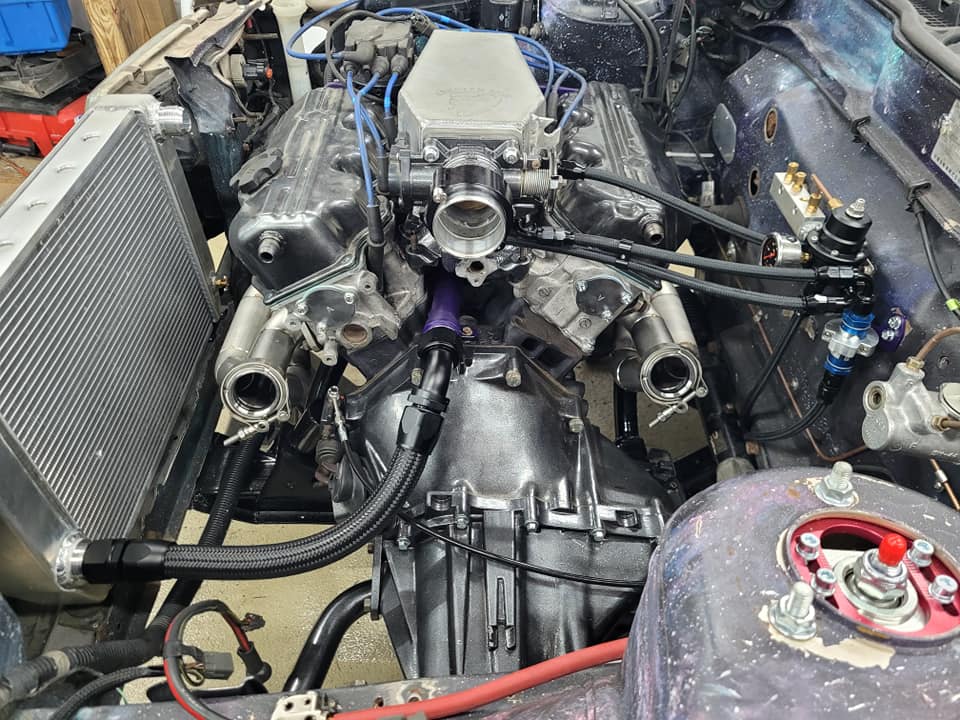
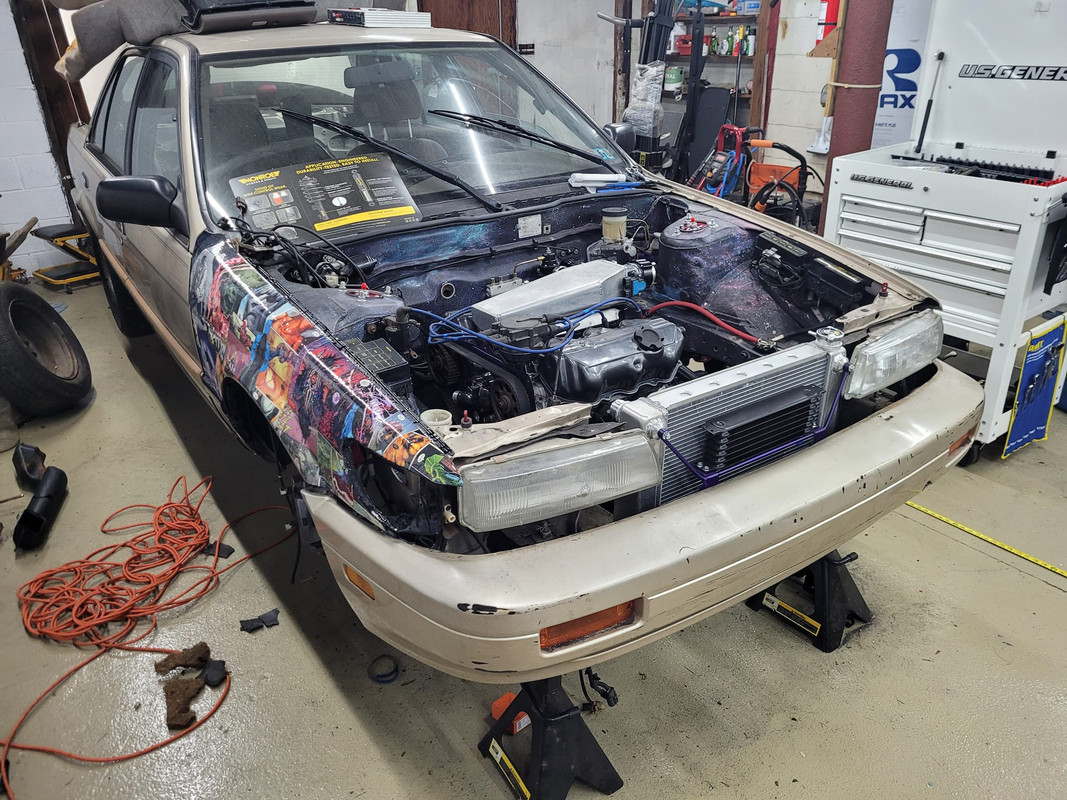
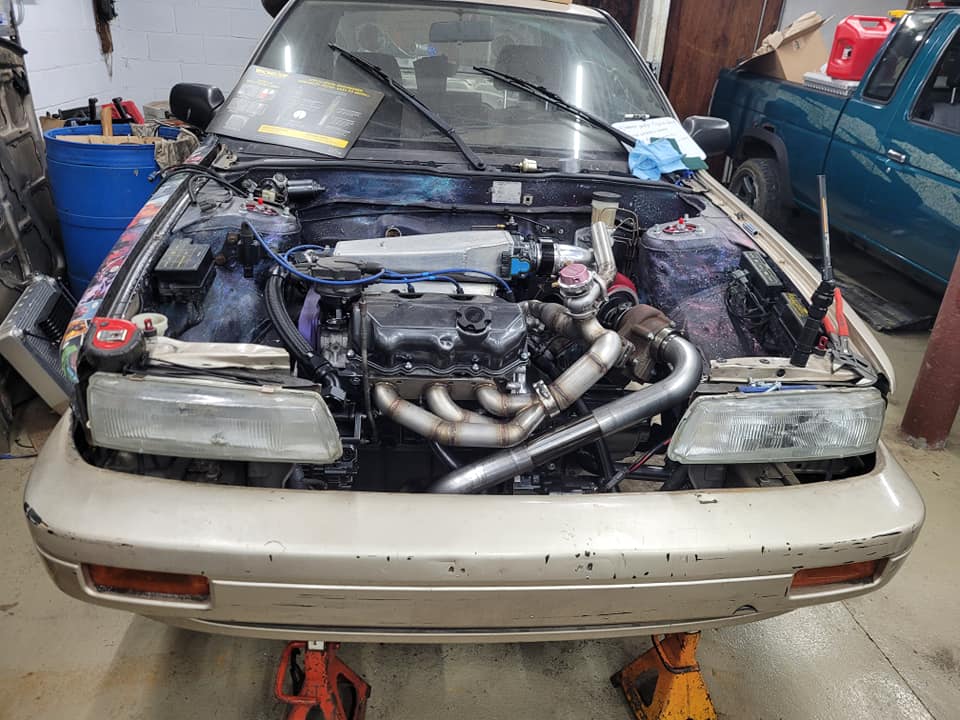
and this is where the stanza is sitting right now, i kind of just slapped together some stuff to mock up the turbo roughly where i want it to figure out how im going to do stuff, one little movement can change like 30 other things so i was going to spend a lot of time on this regardless but im sure once im sure it can physically work and the ypipe is holding stuff in place the rest of this stuff will get done quickly. i also got a big *** belt grinder just for the headers and it has been a game changer for the space.
no clue when the next update will be, could be february, could be june lol idk but its coming.
but. i wasnt really planning on doing too much to this other vehicle, basically all i wanted was a new daily and im hoping to just turn it into that and then be back to working on the stanza in the next few months. i still have no doubt the stanza will be running and driving by summertime. also, i redid the comic book pages on the fender for the third and hopefully final time, i actually did it right lol i used mod podge to stick the pages and seal them so they dont just soak up the top coat and then i used a marine grade, UV resistant resin. west systems. it was expensive lol but i think it was worth it. you cant really tell from the pictures but the fender looks like its dipped in glass, its not perfectly smooth but it is extremely clear.
here are the headers as i left them. i got a dual port regulator for my tig welder so i can purge them and refilled the bottle so if i do run into any downtime i will probably do that.
and this is where the stanza is sitting right now, i kind of just slapped together some stuff to mock up the turbo roughly where i want it to figure out how im going to do stuff, one little movement can change like 30 other things so i was going to spend a lot of time on this regardless but im sure once im sure it can physically work and the ypipe is holding stuff in place the rest of this stuff will get done quickly. i also got a big *** belt grinder just for the headers and it has been a game changer for the space.
no clue when the next update will be, could be february, could be june lol idk but its coming.

Thread Starter
Member
Joined: Oct 2016
Posts: 286
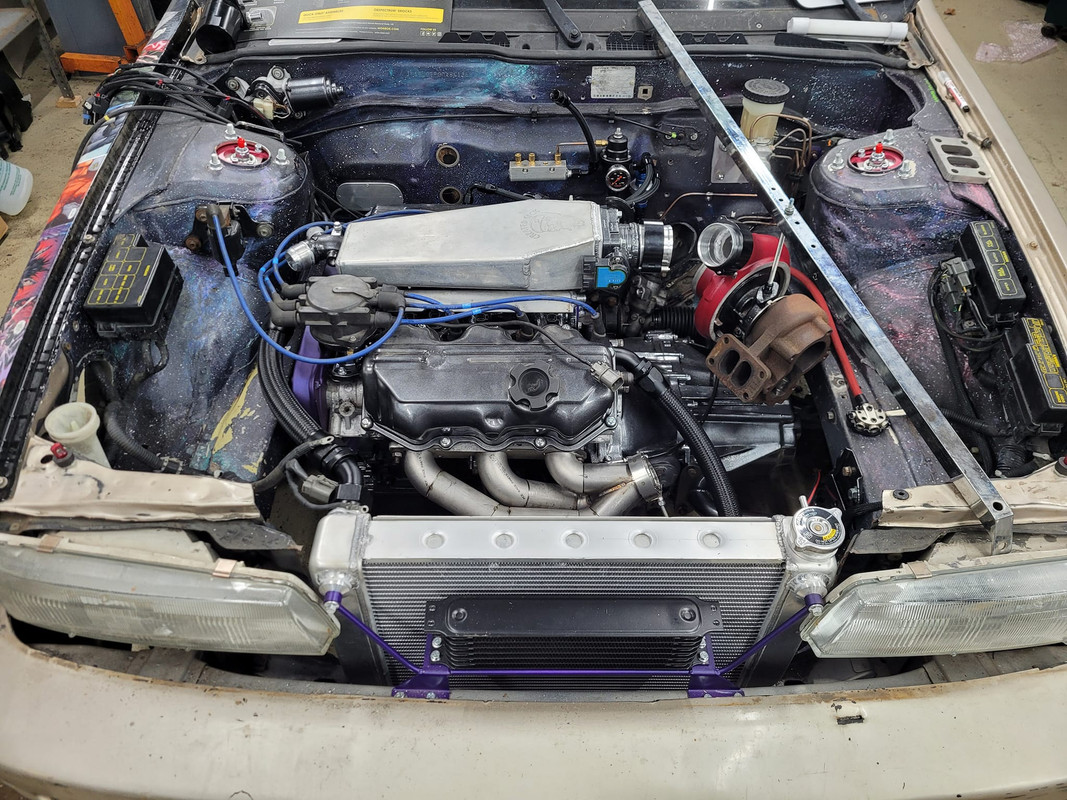
for the record, my new project has been running since june.... but that could have its own thread. the headers and ypipe are done, the exhaust is essentially the last thing i wanna get sorted before i pull the engine back out for the hopefully last time for a long time, so the car could be running very soon. that could mean anything given my record here lol
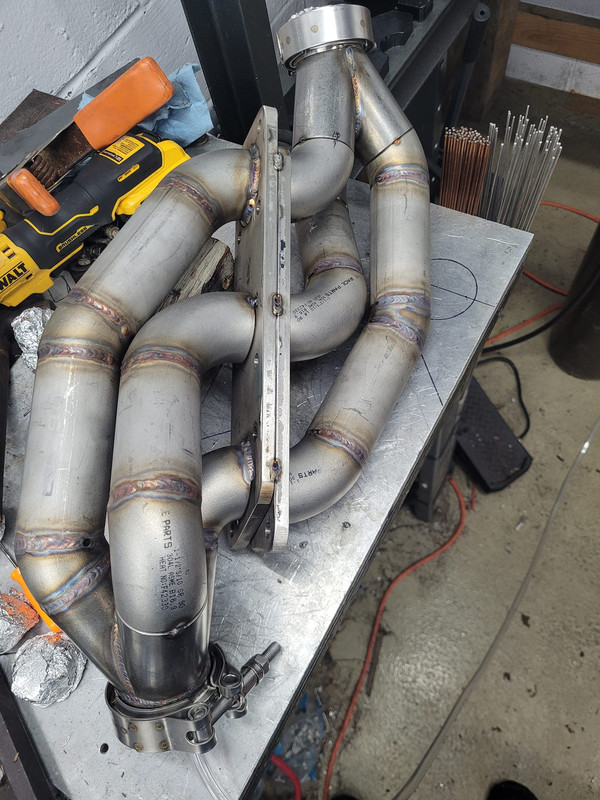
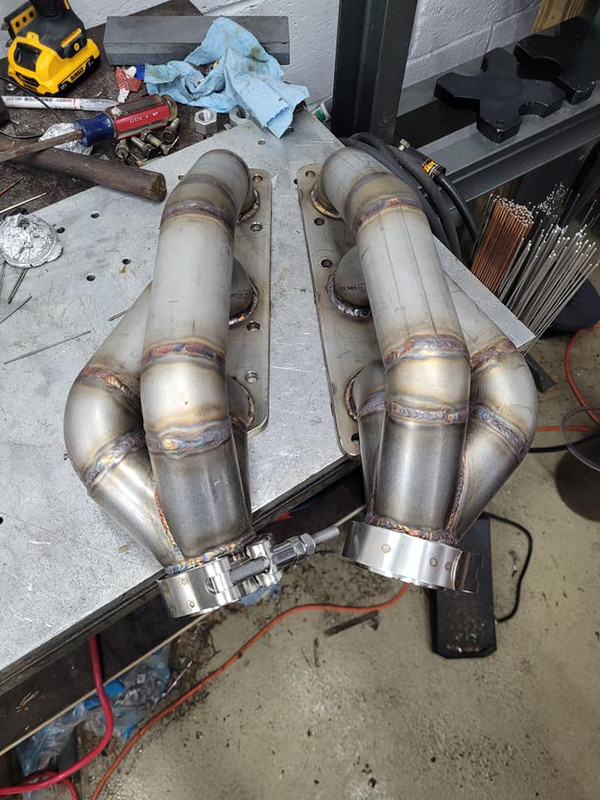
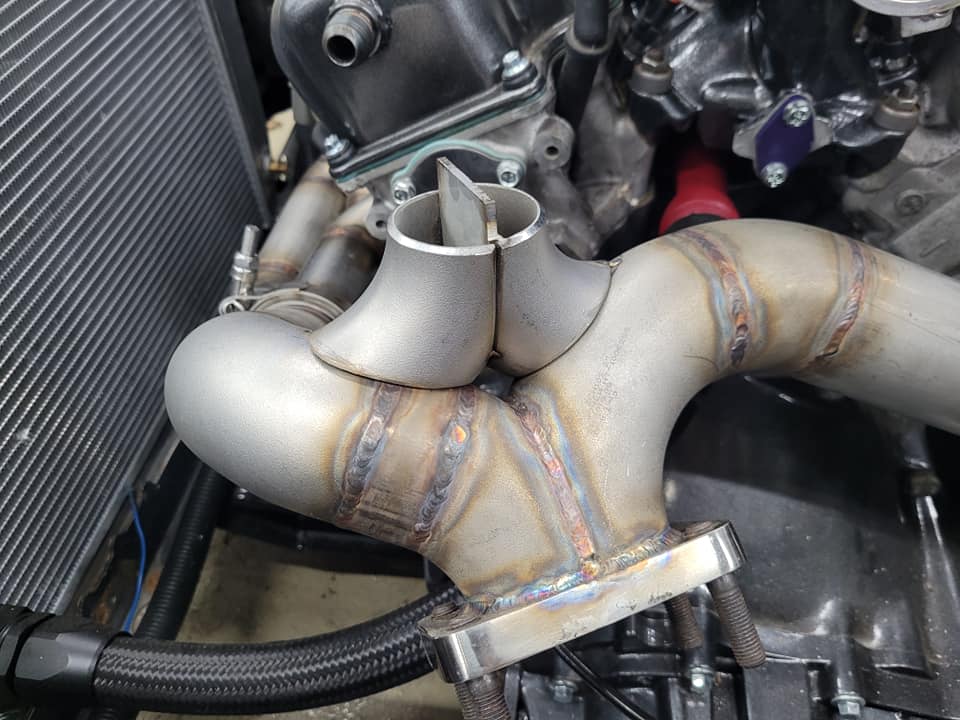
wastegate is also divided for twin scroll.
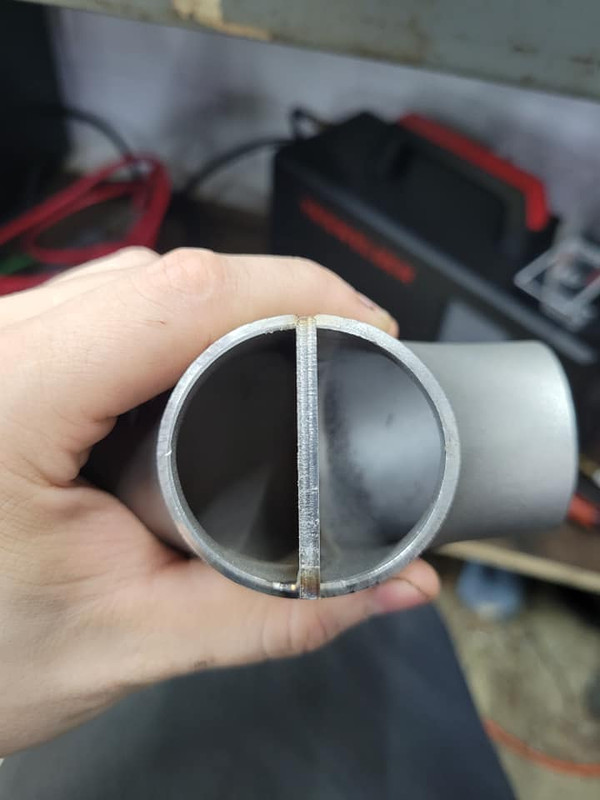
obviously the ypipe is dvided, this is how i did it.
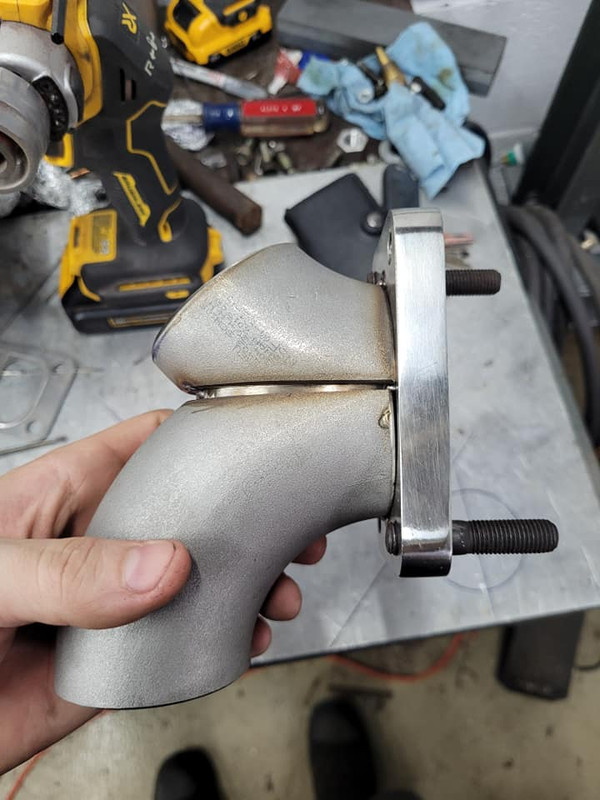
i actually made the intake pipe twice, i didnt plan on making it twice but i did do this first because it was easy and it would keep the turbo somewhat in place vs. just letting it flop around on the hanger. i also made a little bracket for the bottom at one point but that came off once the ypipe was done.
this baffle thing was not made for schedule 10, its made for tubing, it was a huge pain to weld and definitely has a bunch of pinholes in it and therefore leaks, honestly i might just get rid of it and put pipe back in its place unless i can find a different baffle but for now its just gonna stay like this.
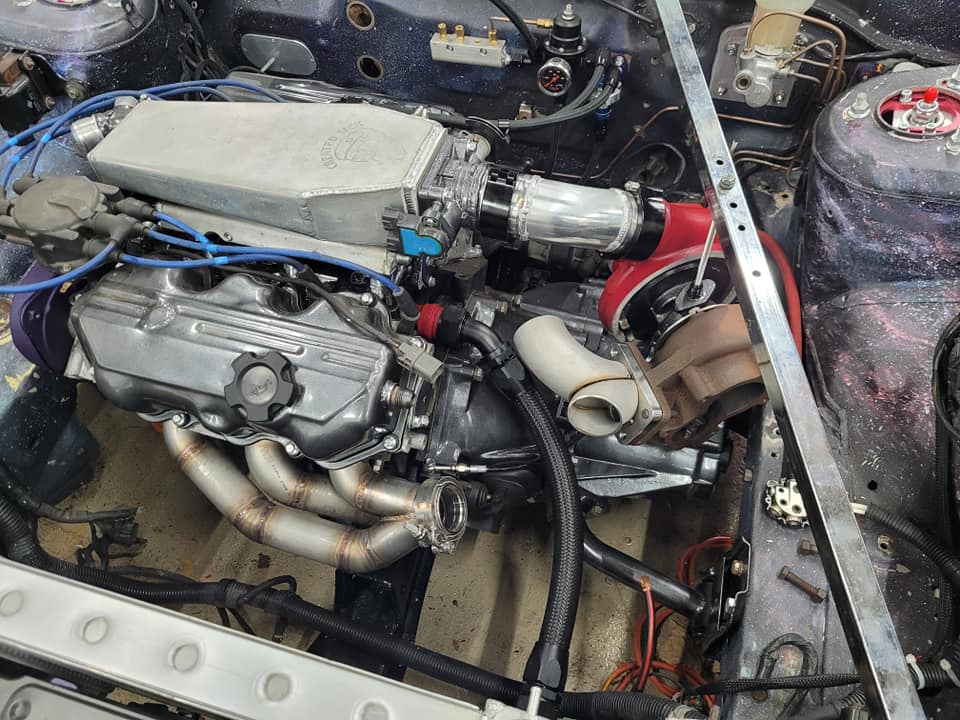
i spent 3 hours fitting this up to this point, didnt like exactly where it was and spent another 2 getting it to lean back more lol
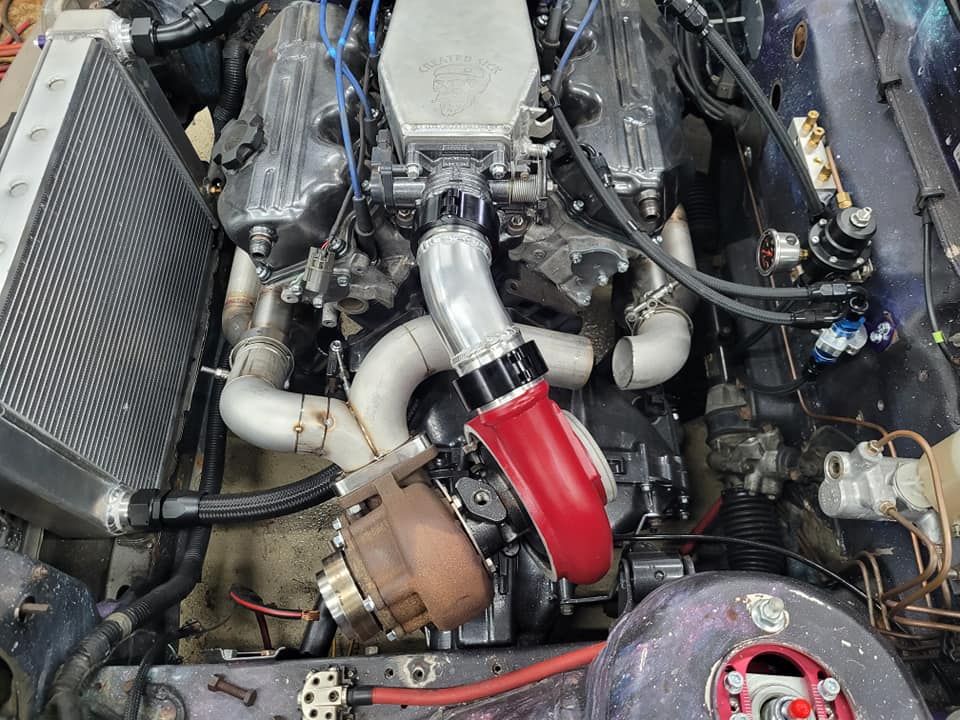
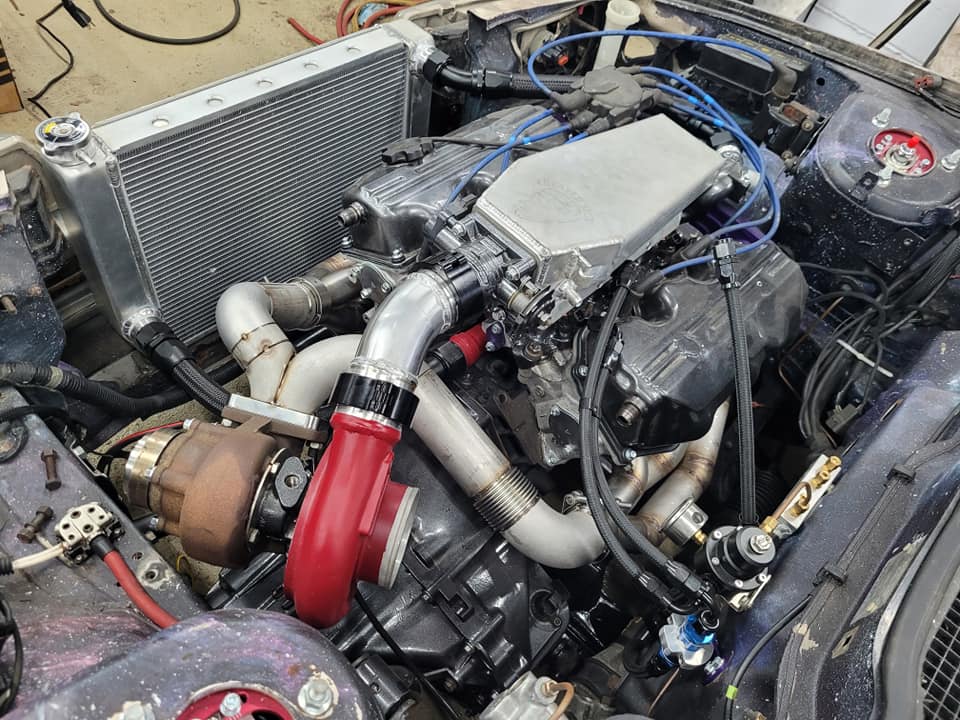
this is intake version 2 with the IAT sensor done, i am planning on adding a BOV to the back side of it but for now im keeping it as simple as possible without one, wastegate is closer than i would like to that sensor but it should be fine.

there is plenty of space for the Efan, not pictured here because the clips that hold it in look like a one time use type of thing.
this is where im at currently, i put half the exhaust back in so i can build the downpipe back to it, i actually ended up putting the muffler that was in the stanza on the truck so i had to get a new muffler and its kinda weird but i cant wait to hear it, like i said as soon as the exhaust is done ill move on to pulling the motor and trans back out, getting the clutch and flywheel installed, running the oil relocation kit, the other vacuum lines, the other blockoff plate for the firewall, and whatever other little things i have left to take care of and then hopefully ill be ready to start it up.
wastegate is also divided for twin scroll.
obviously the ypipe is dvided, this is how i did it.
i actually made the intake pipe twice, i didnt plan on making it twice but i did do this first because it was easy and it would keep the turbo somewhat in place vs. just letting it flop around on the hanger. i also made a little bracket for the bottom at one point but that came off once the ypipe was done.
this baffle thing was not made for schedule 10, its made for tubing, it was a huge pain to weld and definitely has a bunch of pinholes in it and therefore leaks, honestly i might just get rid of it and put pipe back in its place unless i can find a different baffle but for now its just gonna stay like this.
i spent 3 hours fitting this up to this point, didnt like exactly where it was and spent another 2 getting it to lean back more lol
this is intake version 2 with the IAT sensor done, i am planning on adding a BOV to the back side of it but for now im keeping it as simple as possible without one, wastegate is closer than i would like to that sensor but it should be fine.
there is plenty of space for the Efan, not pictured here because the clips that hold it in look like a one time use type of thing.
this is where im at currently, i put half the exhaust back in so i can build the downpipe back to it, i actually ended up putting the muffler that was in the stanza on the truck so i had to get a new muffler and its kinda weird but i cant wait to hear it, like i said as soon as the exhaust is done ill move on to pulling the motor and trans back out, getting the clutch and flywheel installed, running the oil relocation kit, the other vacuum lines, the other blockoff plate for the firewall, and whatever other little things i have left to take care of and then hopefully ill be ready to start it up.
Thread Starter
Member
Joined: Oct 2016
Posts: 286
many things have transpired. the exhaust is done.
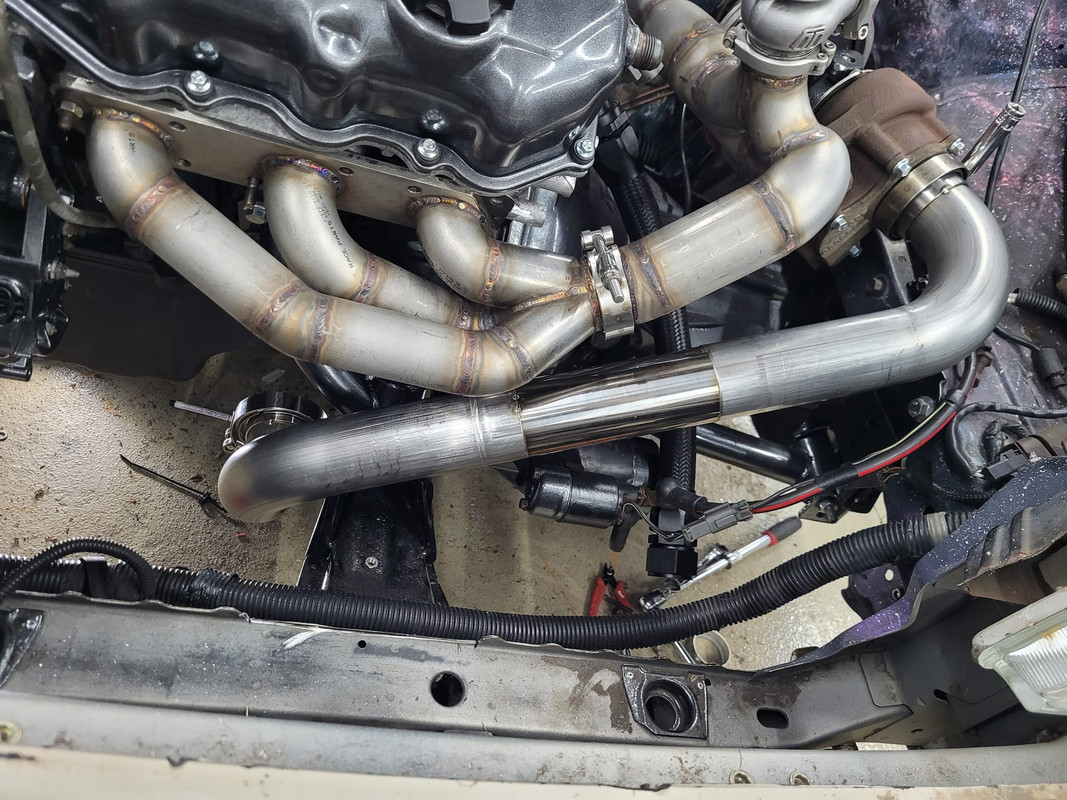
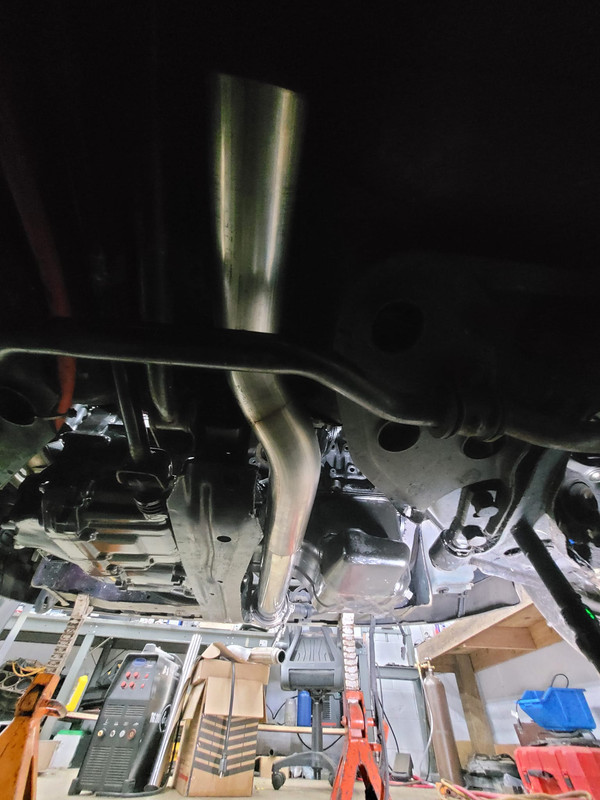
i spent a bunch of money on actually good materials, i ordered a super cheap kit but the bends in it were so bad i returned it and spent a bunch more on professional grade stuff that was actually made with a mandrel bender that kept the tubing round so i could actually have a decent end result and im happy with that decision cause the exhaust is actually nice. at least until it connects to the honda catback which honestly is still not terrible.
i actually mounted the muffler i bought but completely forgot to get pictures of it, ill show it when i take another video of the car running to show how the car sounds so you cant tell by these pictures but the *entire* exhaust is 100% done. all the hangers are done, everything is mounted, welded, its got a flex pipe and everything. its beautiful.
literally the day after i finished tacking the exhaust together and was sure it was going to fit i pulled the motor lol i put this plate on the firewall to cover the AC holes and then i ran these vacuum lines through it for the boost gauge and the MAP sensor in the MS1. i made these lines 4 times before i was happy with them.
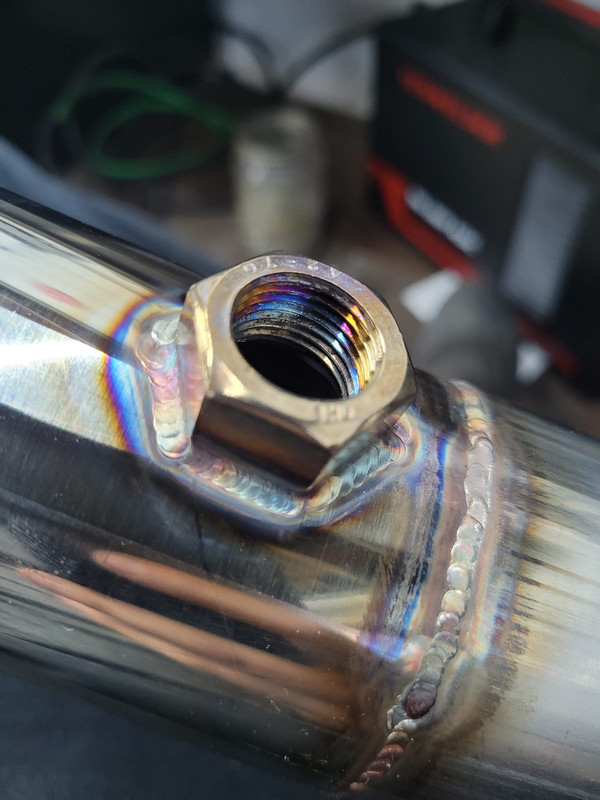
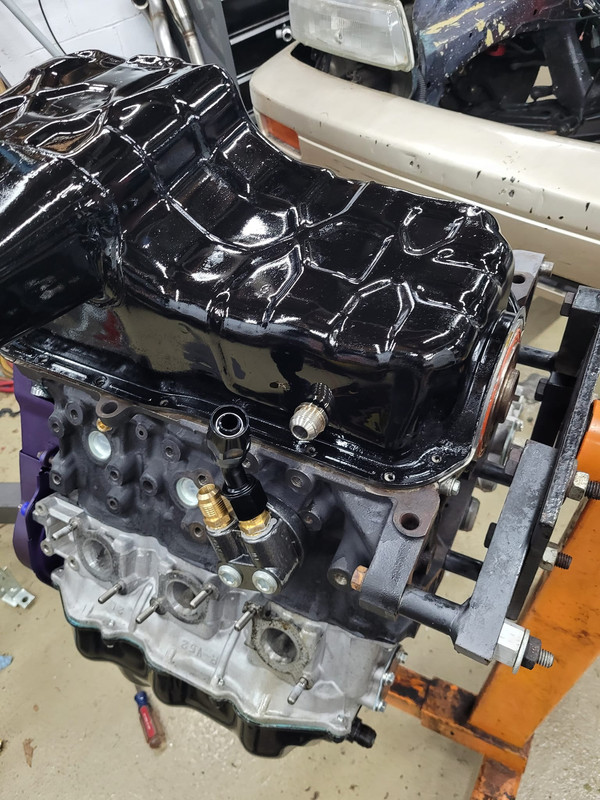
while the motor was out i added the drain bung to the oil pan and installed the titanium exhaust studs, i also had to reclock the oil filter adapter again and install that since it cant come on or off with the motor mount attached.
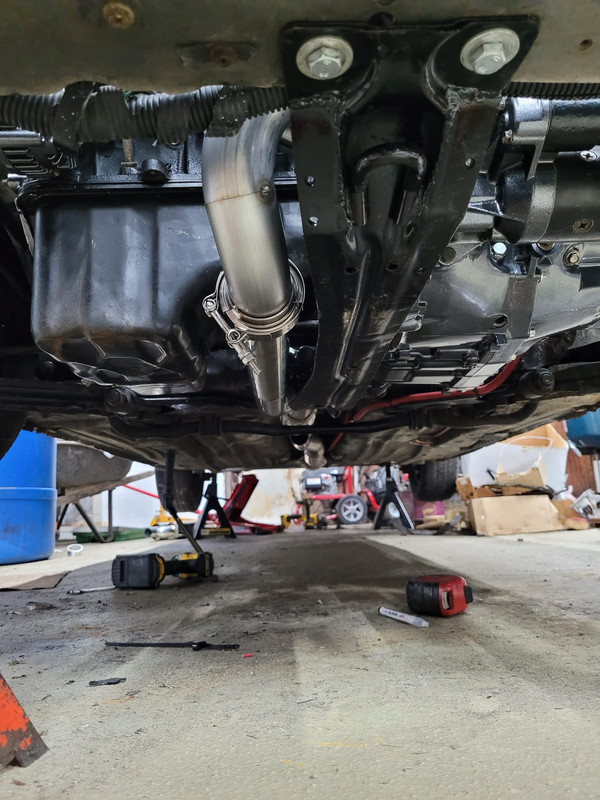
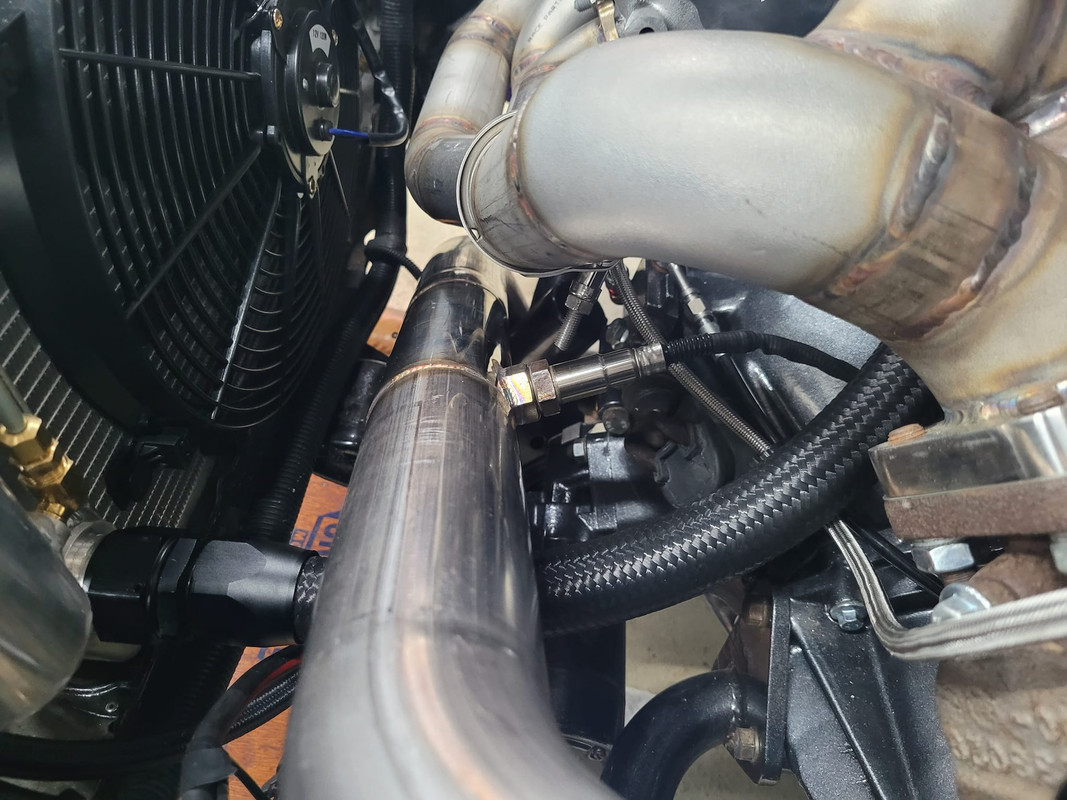
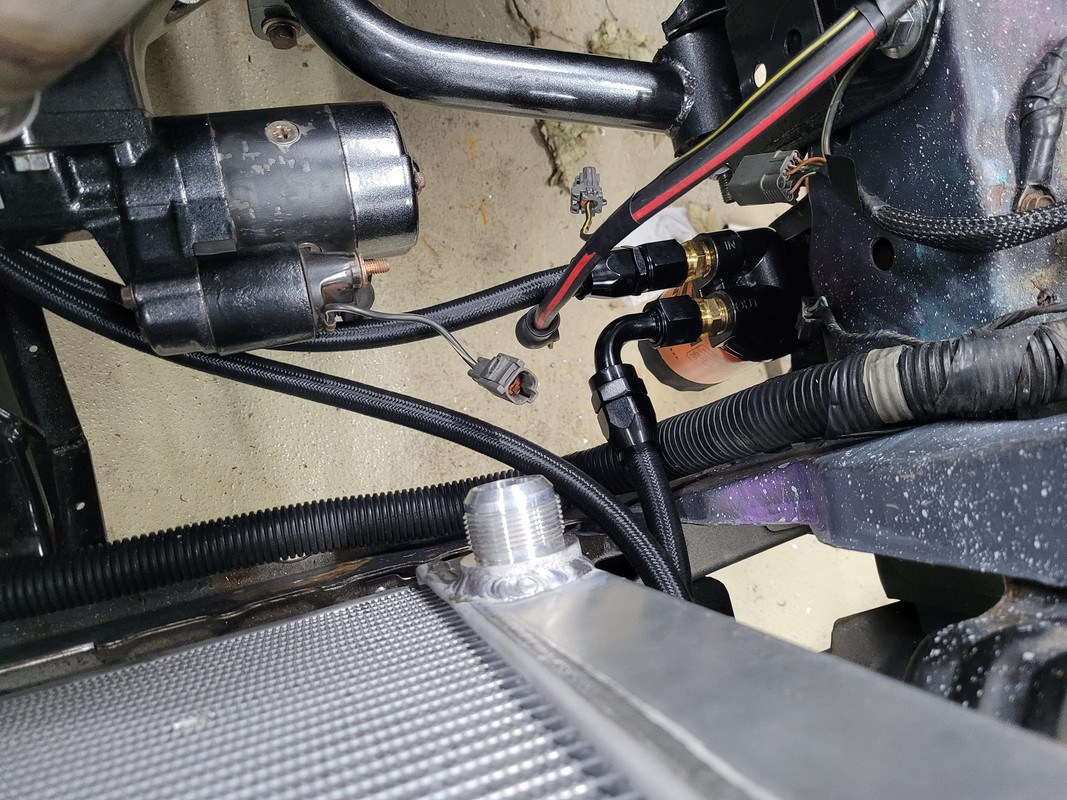
heres a shot of how all of that stuff shares space lol its pretty tight back here especially with the axle running right by it, but im really happy with how it turned out.
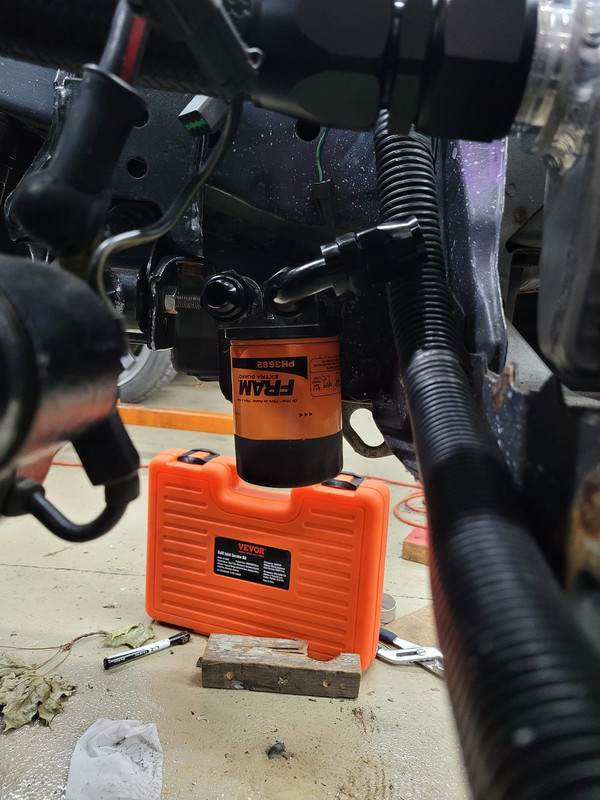
here is the filter block, i do not have the ground clearance i thought i did, the tires need air and i might lift the front up some more but i might either move the filter block up higher or make a little shield for it, the last thing i want is to hit a rock or pothole or some **** and lose all my oil.
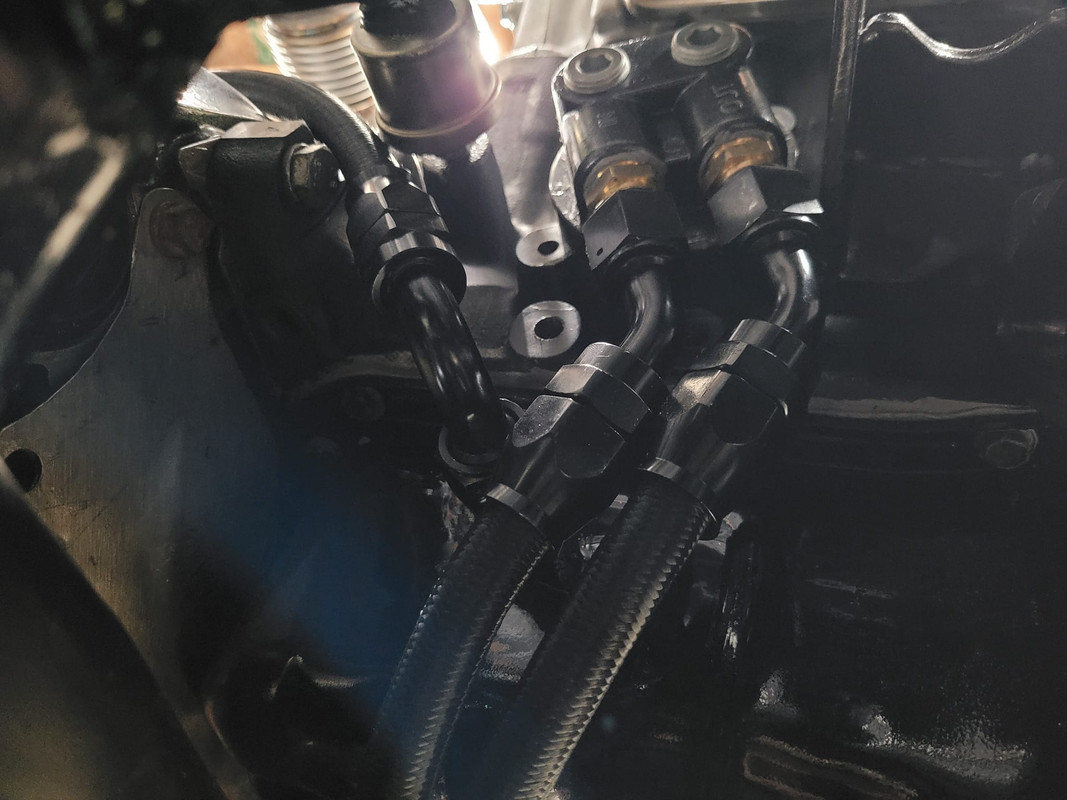
here are the oil lines run
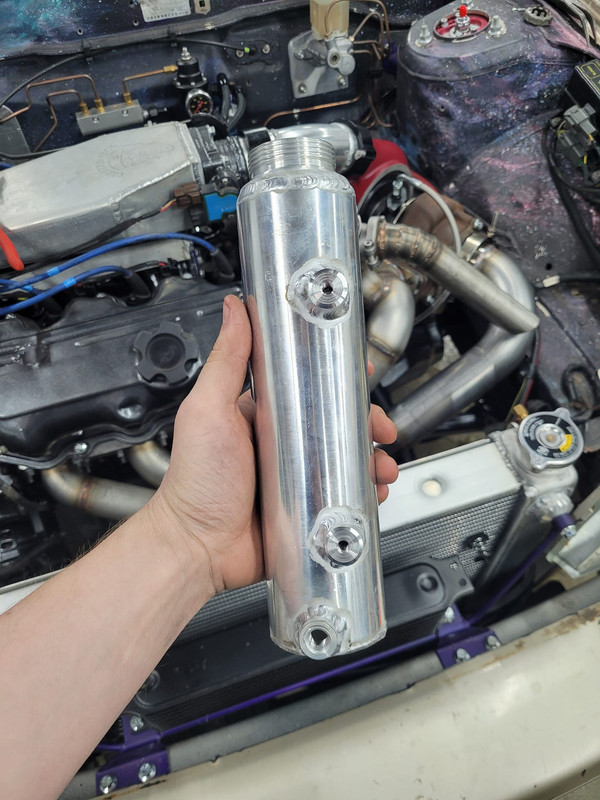
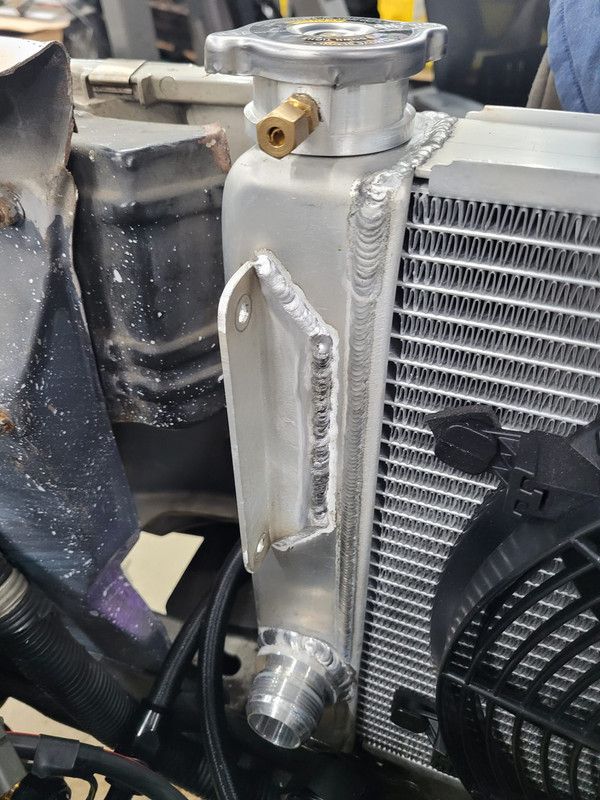
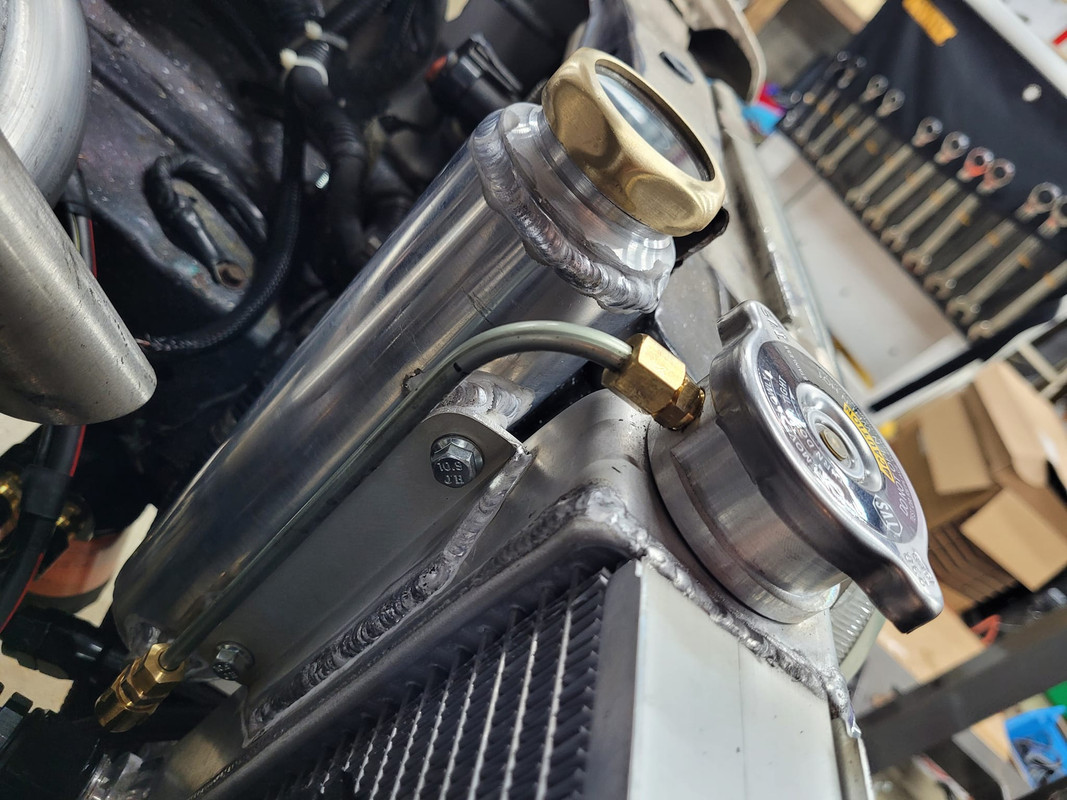
here is the coolant expansion tank, i found some random *** metal cap lying around, i think it might have been for some kind of welding gauge, i was able to turn the threads on my lathe for the top of the tank and then just cut a little plexiglass disc for the top. i know this needs a vent, ill probably just drill a tiny hole right below the cap for that so if it over fills it will spray out the front of the car lol
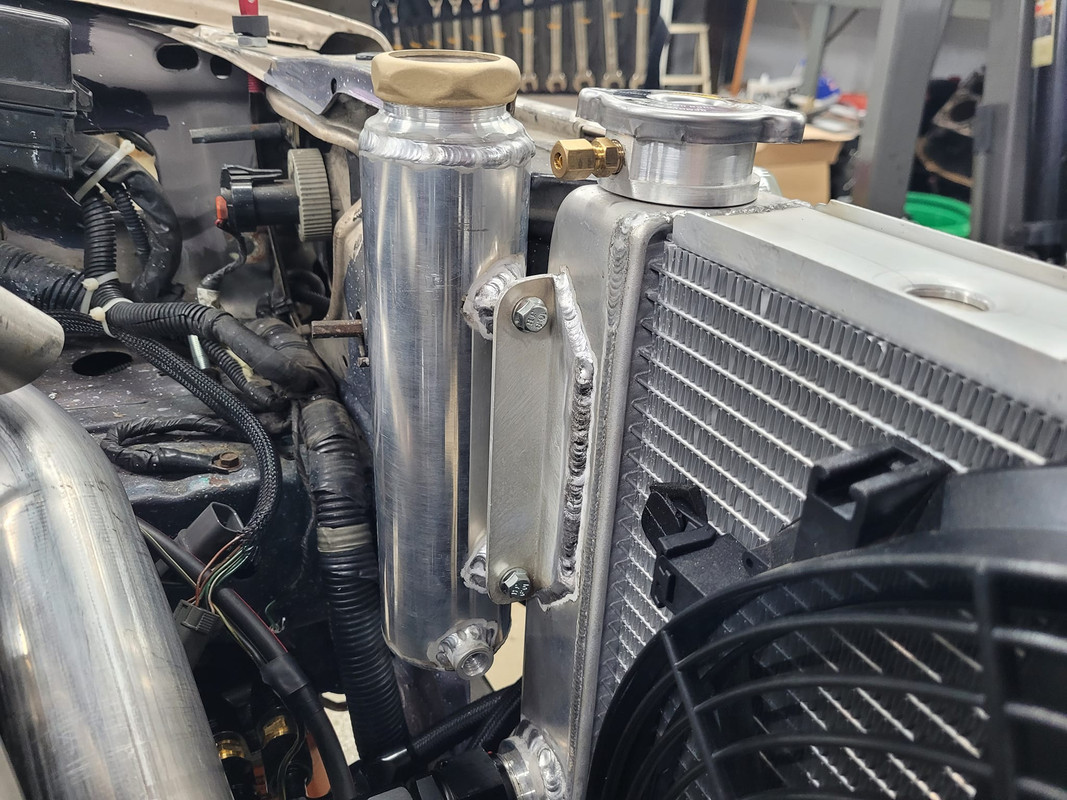
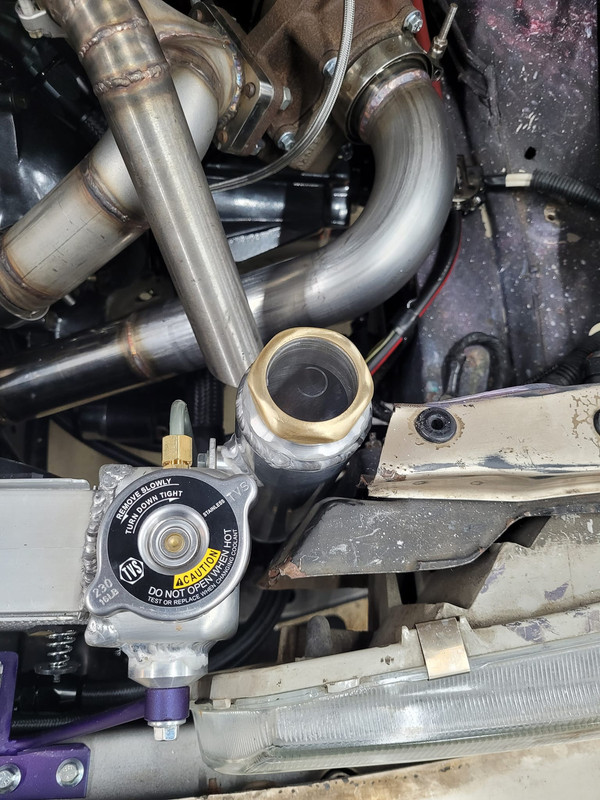
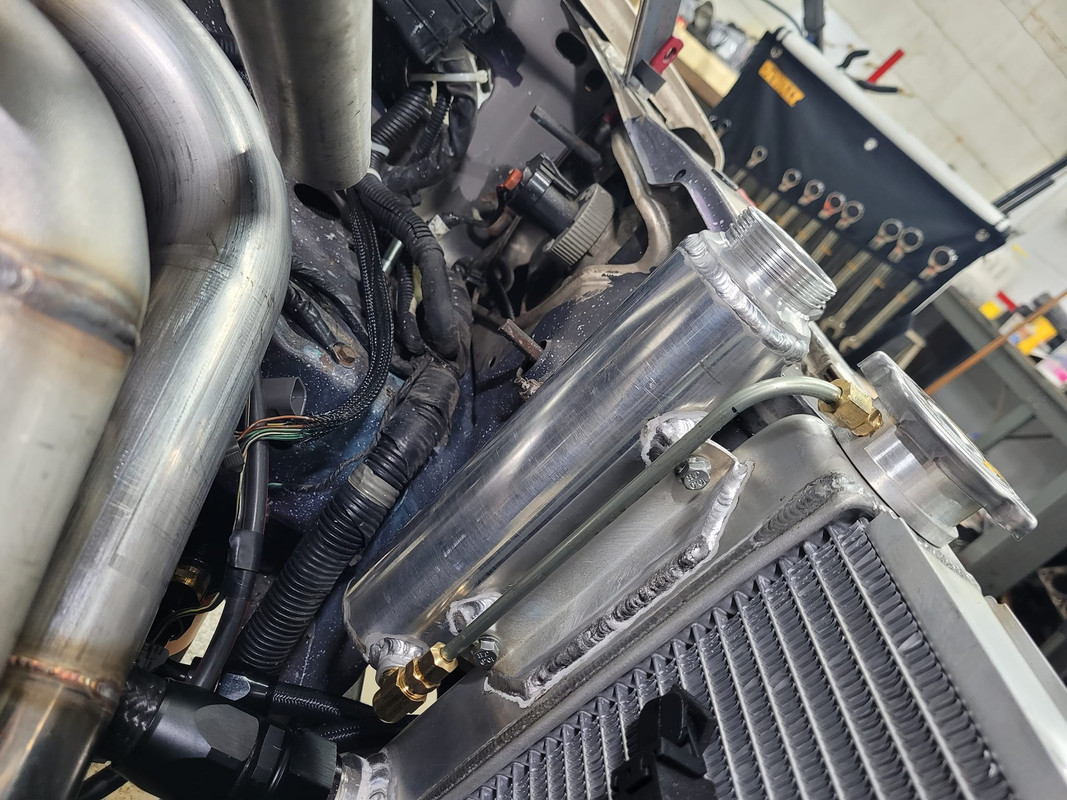
this hardline was a vacuum line from the hardbody i just happened to cut off and it was the right size so that worked out.
and then i got some oil for the engine and the transmission and a new battery and started it and it runs.
i forgot to put a gasket on the throttle body, so that had a huge air leak and the wastegate was also loose and the lifters need to bleed in which i will do once it has coolant but it sounds healthy and runs good, the timing is definitely also off but thats all easy stuff. ill definitely try to drive it soon. it also leaks oil from the oil filter block and the turbo drain which is annoying but should also be easy to fix but otherwise it seems like its in good shape, good oil pressure, no major bad noises. will update again soon hopefully.
i spent a bunch of money on actually good materials, i ordered a super cheap kit but the bends in it were so bad i returned it and spent a bunch more on professional grade stuff that was actually made with a mandrel bender that kept the tubing round so i could actually have a decent end result and im happy with that decision cause the exhaust is actually nice. at least until it connects to the honda catback which honestly is still not terrible.
i actually mounted the muffler i bought but completely forgot to get pictures of it, ill show it when i take another video of the car running to show how the car sounds so you cant tell by these pictures but the *entire* exhaust is 100% done. all the hangers are done, everything is mounted, welded, its got a flex pipe and everything. its beautiful.
literally the day after i finished tacking the exhaust together and was sure it was going to fit i pulled the motor lol i put this plate on the firewall to cover the AC holes and then i ran these vacuum lines through it for the boost gauge and the MAP sensor in the MS1. i made these lines 4 times before i was happy with them.
while the motor was out i added the drain bung to the oil pan and installed the titanium exhaust studs, i also had to reclock the oil filter adapter again and install that since it cant come on or off with the motor mount attached.
heres a shot of how all of that stuff shares space lol its pretty tight back here especially with the axle running right by it, but im really happy with how it turned out.
here is the filter block, i do not have the ground clearance i thought i did, the tires need air and i might lift the front up some more but i might either move the filter block up higher or make a little shield for it, the last thing i want is to hit a rock or pothole or some **** and lose all my oil.
here are the oil lines run
here is the coolant expansion tank, i found some random *** metal cap lying around, i think it might have been for some kind of welding gauge, i was able to turn the threads on my lathe for the top of the tank and then just cut a little plexiglass disc for the top. i know this needs a vent, ill probably just drill a tiny hole right below the cap for that so if it over fills it will spray out the front of the car lol
this hardline was a vacuum line from the hardbody i just happened to cut off and it was the right size so that worked out.
and then i got some oil for the engine and the transmission and a new battery and started it and it runs.
i forgot to put a gasket on the throttle body, so that had a huge air leak and the wastegate was also loose and the lifters need to bleed in which i will do once it has coolant but it sounds healthy and runs good, the timing is definitely also off but thats all easy stuff. ill definitely try to drive it soon. it also leaks oil from the oil filter block and the turbo drain which is annoying but should also be easy to fix but otherwise it seems like its in good shape, good oil pressure, no major bad noises. will update again soon hopefully.

Thread
Thread Starter
Forum
Replies
Last Post
Nate Boslet
1st & 2nd Generation Maxima (1981-1984 and 1985-1988)
6
Feb 25, 2017 04:12 PM