
5th Gen: What did you do to your 5th Gen today?


Senior Member
Joined: Jun 2012
Posts: 499
From: Dallas, TX
Walked by as the sunlight hit and died a little. My paint has gone to sh*t. I spend hours wet sanding scratches out of my moms camaro and doing a full detail. It responds so well, polishes back to perfection and looked beautiful afterwards. I go and try and scratch remove and polish my car and it just fukcs everything up and adds scratches. Lord help me I can't stand bad paint. It literally kills me.


Thread Starter
Senior Member
Joined: Sep 2012
Posts: 315
From: Vancouver, Canada
My Original point for the bigger wheels was that with bigger wheels, you get bigger tires. RWD cars this applies even more. getting 17x8 or larger is uncommon. 18x8 is almost a standard and going up from there is even more so. If you want to run a 275 or something like that you want a larger rims for more tire and it means you can runs a low profile tire that is stiffer on the side wall, hence better performace.
In terms or econamical vs performance yes the smaller the performance goes down and eco goes up. There are also so many other factors involved like the tire itself etc. But if you think about keep the same total circumference of the tire/wheel wit the same width you can see how when you move up in wheel size, the performance goes up
say start with
225/55/16
225/45/17
225/35/18
So the 16 will have a larger width of side wall, will be more comfortable, move up to 17 and you are loosing comfort for performance, and then even more so with an 18. the other thing is like i said before in terms of the wheels itsself. 16" rims are usually 7-7.5 wide and 17's are usually 7-8 and 18's are usually 8-9. Hence being able to use a wider and wider tire as you move up in size. YES there are wider smaller rims hence why I said USUALLY.
It really comes down to personal preference, and yes looks too

Senior Member
Joined: May 2013
Posts: 1,440
From: Snakeden Branch, VA
Yup, you pretty much summed it up right there ^^^^ lots of variables on the wheels/tires.
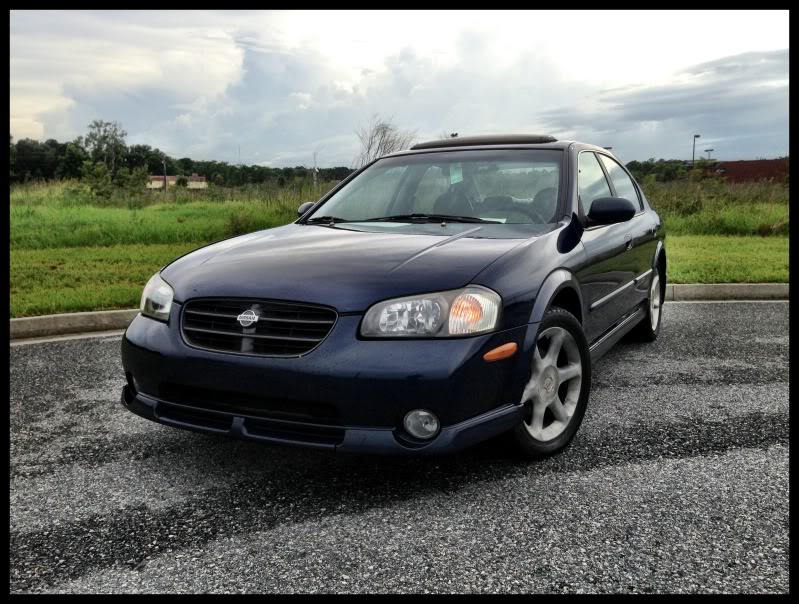
Here is something I just did though, and there is a thread somewhere that talks about a DIY style lower valance grille, but I believe you guys might like this even more:

Here is what it looks like from a little farther away, it's really hard to see once you get any farther.

There's an up close shot of the valance grille. Looks really good and makes the front of the car look 10x better. Best part is, no need for zip-ties or any other crap to attach it at all.
Wondering how I did that? Nice, clean, and professional.
And BTW, it's plastic so there is no worry of rusting to be had. And it's not even attached on the bottom, so if anything hits it the thing can bend back freely and snap right back in place.
Here is something I just did though, and there is a thread somewhere that talks about a DIY style lower valance grille, but I believe you guys might like this even more:
Here is what it looks like from a little farther away, it's really hard to see once you get any farther.
There's an up close shot of the valance grille. Looks really good and makes the front of the car look 10x better. Best part is, no need for zip-ties or any other crap to attach it at all.
Wondering how I did that? Nice, clean, and professional.
And BTW, it's plastic so there is no worry of rusting to be had. And it's not even attached on the bottom, so if anything hits it the thing can bend back freely and snap right back in place.
Thread Starter
Senior Member
Joined: Sep 2012
Posts: 315
From: Vancouver, Canada
Yup, you pretty much summed it up right there ^^^^ lots of variables on the wheels/tires.
Here is something I just did though, and there is a thread somewhere that talks about a DIY style lower valance grille, but I believe you guys might like this even more:
Here is what it looks like from a little farther away, it's really hard to see once you get any farther.
There's an up close shot of the valance grille. Looks really good and makes the front of the car look 10x better. Best part is, no need for zip-ties or any other crap to attach it at all.
Wondering how I did that? Nice, clean, and professional.
And BTW, it's plastic so there is no worry of rusting to be had. And it's not even attached on the bottom, so if anything hits it the thing can bend back freely and snap right back in place.
Senior Member
Joined: May 2013
Posts: 1,440
From: Snakeden Branch, VA

")
Considering some might actually find this useful... I don't have any idea whether or not this has been found before, or mentioned before but...
5th gen lower valance opening has a perfect size slit that runs along the very top of the opening @ the front of the bumper (on the inside of the hole), once you insert your mesh grille in there you can just slide it upwards right into that slit perfectly, just like installing a screen door.
It fits like that slit was made for this exact mod, holds great, no zip-ties, etc. And since it's free hanging on the bottom that leaves it all the room it needs to flex in case it gets hit while driving.
Once the mesh is slid all the way into the opening on top, it will just hold in place perfectly and give you plenty of room to work with underneath to even it out and make it straight, then simply move it down and align with the bottom of the hole and done.
Last edited by D.Stillwell; Jun 20, 2013 at 02:39 PM.
Thread Starter
Senior Member
Joined: Sep 2012
Posts: 315
From: Vancouver, Canada
Did you buy the mesh specific for that application or is it like mesh for something completely different and you just made it so size?? I have seen lots of them for 350z's and other cars...

Easily the best feeling! My brakes were effed before this. So much wobble and vibration. Brembo blanks had so many heat spots when I took them off, it was a joke. I was able to drive how I like to today without worrying about slowing down and my car falling apart. Really like how the bigger rotors fill up the wheel. Wish there was something to do about the rears, but they still look good at least.
As far as the dusting, it's been minimal, and I was doing some spirited driving today. I feel like they cant be any worse than the EBC RedStuff that I had on before. All in all, this was easily the best mod that I have done to my car. Next up is the ValveBody, but for now it's the 6th Gen BBK FTW


Last edited by D Moolah; Jun 20, 2013 at 07:38 PM.

I too have Hawk HPS pads all around. Appears to be minimal dusting. But, I have darker rims so it wouldn't show as much. I can't say any dirtiness of my rims is attributed to dusting. Pads are quite and I use significantly less peddle pressure to stop.
Thread Starter
Senior Member
Joined: Sep 2012
Posts: 315
From: Vancouver, Canada
I run Hawk HPS pads and Brembo blanks, which I think in my opinion is the best "economical" choice available. Great stopping power for normal driving. Decent in spirited driving. Its not quite enough for what I am looking for because I really like the spirited driving and I am just now considering what brake option I am going to go, but I think for daily driving its probably the best. Akebono pads are also a good option.
Hawks and these ABT rotors I got seem like a good set up so far. Mind you its only been a couple of days, but there has been no noise, pedal feels amazing, and barely requires any effort to slow down. Came down from 110 no problems, no fade or shimmy in the steering wheel. It's hard to emphasize how good it feels compared to the previous set up unless you actually put them on and see for yourself. The 6th Gen brakes in general that is


Senior Member
Joined: May 2013
Posts: 1,440
From: Snakeden Branch, VA
Installed FSTB

But even more importantly, no more crap looking rusty coolant pipes (marked in red on the pic). I see those all the time when looking at a stock 5th gen engine bay but not on mine, not anymore.
But even more importantly, no more crap looking rusty coolant pipes (marked in red on the pic). I see those all the time when looking at a stock 5th gen engine bay
but not on mine, not anymore.


Newbie - Just Registered
Joined: Jun 2013
Posts: 11
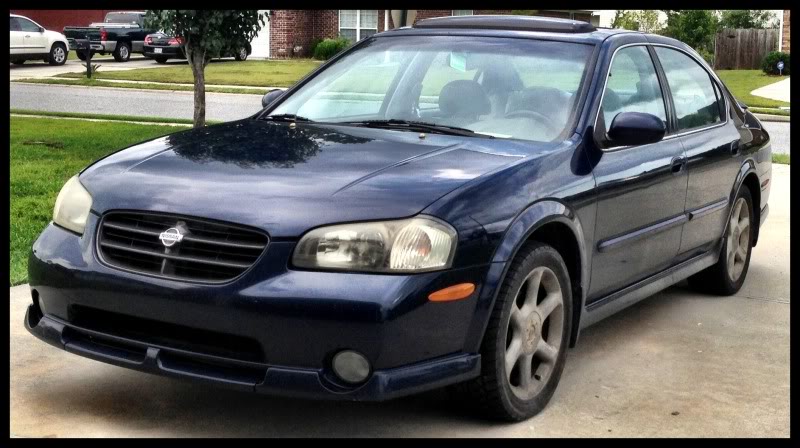
Wet sanded, compounded, & waxed the headlights & fog lights. I wish I had a good before picture, but this is all I have. You can especially tell on the passengers headlight. The car will be getting a full detail this week too.
Senior Member
Joined: May 2013
Posts: 1,440
From: Snakeden Branch, VA
New e-manage ultimate. 
I've been working with it for about a week now, and the deed has been done (for now).
After the tune, finally walked my friend's 04 TL last night. Before the tune, it was dead even with the winner being whoever got the better launch.
Not anymore, my car just slowly walks away now throughout the whole RPM range. And that was in drive, if I manual shifted it would be a real downer for him (new redline @ 6800).
Of course once he lost the excuses of "Oh I didn't get any traction" came in, it was raining when we did the run. But of course, I lost traction as well, and I knew damn well we were both flooring it dead even. He later called me and was STILL in disbelief.
There is simply NO WAY he could ever believe that my vq30 beat his Acura, he was stunned and I mean he was literally stunned.
Long story short, now he wants NOTHING to do with his TL and wants to get rid of it for a 5.5gen 6MT. Of course, this is after me explaining to him all about why the Maxima is better and how the 5.5 6MT is way faster. It's so funny, now he MUST have the 6MT so he can whoop on my car again since his TL isn't able to anymore.
Newbie - Just Registered
Joined: Jun 2013
Posts: 11
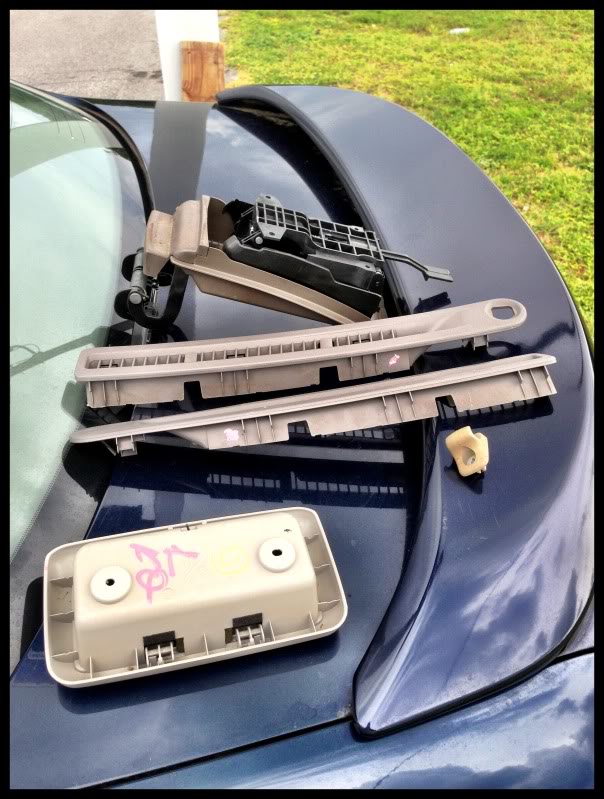
I finally found some Maximas at a junkyard and I was able to get all the interior pieces needed to fix everything that was broken when I got the car. Center console hinge system, front defroster vents, sunglasses holder, & visor clip. Scored everything for $35!

Junior Member
Joined: Jan 2013
Posts: 83
From: Miami, FL
Replaced the cabin air filter, which still had the original one (mind you I have an 03 SE). The a/c works so much better now. Also reinstalled the front engine bottom shields. I just bought this Max 5 months ago, and I have been fixing her up little by little.

Senior Member
Joined: May 2013
Posts: 1,440
From: Snakeden Branch, VA
Washed and waxed w/ my own mix of Caranuba solutions. A once per week treatment, sometimes without washing or using water at all but just waxing w/ caranuba works wonders, keeps the paint shiny and new at all times.


 POST OF THE MONTH!

Senior Member
Joined: Nov 2004
Posts: 605
From: St. Charles, MO
i thought stock lights had a theft deterrent bar with 2 bolts hidden behind the bumper cover...
I wasn't aware of this until I watched a youtube video on it- what gives?
Like I said I didn't even know about this until this morning. Do only certain years have this? Or did this dude just take out something he shouldn't have?
Thanks in advance
I wasn't aware of this until I watched a youtube video on it- what gives?
Like I said I didn't even know about this until this morning. Do only certain years have this? Or did this dude just take out something he shouldn't have?
Thanks in advance
Last edited by 95VQ30; Jul 5, 2013 at 11:49 AM.
Try and take one out and see if it comes. I think that was an optional kit that you could purchase and have installed at the dealer because there were a lot of thefts of these headlights.
I'm in Canada and I haven't heard of anyone that has run across this kit here.
I'm in Canada and I haven't heard of anyone that has run across this kit here.

Installed a 6th gen CAI today. This is a cheapy ($60) with my Apexi pop charger on it. The bracket floating around was bothering me, so I ended up rigging a new fender bracket to secure it. Since this was successful I'm planning on getting a single piece CAI like the DC Sports or AEM (should be interesting moddifying the MAF block on them though). For those that are interested, I followed this write-up for the battery relocate: http://forums.maxima.org/5th-generat...ir-intake.html


Finally had some free time so decided to install my poly upper motor mounts (THANKS knight_yyz!), took a bit longer than I expected and only got the passenger side done before dark. I wasn't really expecting much improvement, especially since I already have the ES lower mounts. But let me tell you, even with just the passenger side done, WORLDS better. I don't know how much wheel hop was improved, I didn't get on it that much. But shifting?? The notchiness is finally GONE. I did the ES bushing kit, and it was an improvement, but now it shifts like a brand new car. If hasn't started another group buy, get him on it.
Oh, I also got my vinyl decals from erty67. Beautiful work. They look great!
The Shift_ decal was a custom size, I may have to order another one though. It's centered well enough but a gust of wind caught it just as I was about to lay it down. So it's at a slight angle. :-\ It's off by less than a quarter inch so we'll see how much it bothers me over the next few days.


The Shift_ decal was a custom size, I may have to order another one though. It's centered well enough but a gust of wind caught it just as I was about to lay it down. So it's at a slight angle. :-\ It's off by less than a quarter inch so we'll see how much it bothers me over the next few days.

I uhhhh, added one suction cupped window shade to each of the rear windows to deflect the sun from my daughter's car seat.
Yup, it was an exciting one. I'm expecting a solid 10-15 hp gain and a 2-3 mpg increase.
Yup, it was an exciting one. I'm expecting a solid 10-15 hp gain and a 2-3 mpg increase.