
My Massive I30 Revival and Build Thread


In anticipation of making my "custom" 6 speed with the Spec V 4.4 FD and HLSD with Maxima gears and case (I have absolutely no idea what I'm doing), I decided it would be wise to practice on an old dead 5 speed I've had lying around. I didn't have a good reason for keeping it since most of the stuff inside is shot, but it finally has a purpose and I'm happy I kept it.
Popped it open (Quaife had already been removed)

Got the shafts out without too much fuss and measured the gear end play according to the FSM.


-----Gear-----------------------------Spec----------------------------------My Results
3rd input gear --- 0.23 - 0.42mm / 0.0091 - 0.0169" --- 0.038mm / 0.0015" (Way too small!)
4th input gear --- 0.25 - 0.55mm / 0.0098 - 0.0217" --- 1.575mm / 0.062" (Way too big!)
Check out my pictures and see if I'm doing this right. How could the results possibly be off by this much? Is this something I'll need to be mindful of when doing the 6 speed? As in, when pressing on 3rd gear over 2nd, should I be measuring the end play as I'm using the shop press? To me, this input shaft seems like 3rd was pressed on too hard/far, and either 4th was pressed on too far, or 5th wasn't pressed on far enough. Am I thinking about this correctly?
I bought this set of two smaller bearing pullers (middle size not shown), but in the end didn't use them since it seemed like my big ones were able to get a better hold of the gears and bearings. So I used the big ones with my shop press exclusively.

Here I am separating 5th from 4th. I wasn't sure what the proper way to use the bearing separator was. Sometimes it seemed best to have the beveled/curved part under the gear I was pressing off, and other times it seemed like having the separator upside down was better. Is anyone able to explain how and when I should orient it?

I got the input shaft separated, but I did crack a tooth on 4th gear as I was removing 5th. This goes back to not knowing the best way to use the separator.

The only part I didn't know what to do with was the front bearing. I don't see a way to get the separator in between the inner race and (1st?) gear. Is this just one of the ones that needs to be cut off with a dremel?

I then tried to measure the baulk ring clearance per the FSM:

Like so:

But again, the results were out of spec. For 5th gear my clearance was over 1.5mm (too big and out of spec) and 4th was 1.34mm (just barely in spec), when specs are between 1 - 1.35mm. It says the wear limit is 0.7mm, which is the opposite direction of what mine appear to be going on. How does this work? Am I doing this correctly?
Anyways, I then put it all back together. The first time I pressed on the synchro for 3rd too far, which made it so 3rd wouldn't spin more than 20* or so, and I pressed 5th too far down onto 4th, so while 4th would spin freely, 5th didn't spin at all. So I took it all back apart again and reassembled it, being careful about when I stopped the press, and this time everything seemed to work as it should. I just now realized I should go back and re-measure the gear end play and see how it changed.
When pressing it back together, I had the bearing separator under 2nd gear, since that's a part of the shaft, but I chipped a tooth on it when I pressed the synchro too hard onto 3rd, and another when I pressed 5th too hard onto 4th. Is there anything I can do to lessen the chance that I do this to the 6 speed? I considered putting some PVC between the bottom of 2nd gear and the bearing separator. I feel like the PVC (I have 1/2" and 3/4") would cushion 2nd gear, but it could also fail spectacularly and break lots of things with little warning. Any tips on this would be greatly appreciated. Maybe I'll experiment on this 5 speed a few more times.

Next up is the output shaft, and then bearing races. Woo hoo!
Popped it open (Quaife had already been removed)
Got the shafts out without too much fuss and measured the gear end play according to the FSM.
-----Gear-----------------------------Spec----------------------------------My Results
3rd input gear --- 0.23 - 0.42mm / 0.0091 - 0.0169" --- 0.038mm / 0.0015" (Way too small!)
4th input gear --- 0.25 - 0.55mm / 0.0098 - 0.0217" --- 1.575mm / 0.062" (Way too big!)
Check out my pictures and see if I'm doing this right. How could the results possibly be off by this much? Is this something I'll need to be mindful of when doing the 6 speed? As in, when pressing on 3rd gear over 2nd, should I be measuring the end play as I'm using the shop press? To me, this input shaft seems like 3rd was pressed on too hard/far, and either 4th was pressed on too far, or 5th wasn't pressed on far enough. Am I thinking about this correctly?
I bought this set of two smaller bearing pullers (middle size not shown), but in the end didn't use them since it seemed like my big ones were able to get a better hold of the gears and bearings. So I used the big ones with my shop press exclusively.
Here I am separating 5th from 4th. I wasn't sure what the proper way to use the bearing separator was. Sometimes it seemed best to have the beveled/curved part under the gear I was pressing off, and other times it seemed like having the separator upside down was better. Is anyone able to explain how and when I should orient it?
I got the input shaft separated, but I did crack a tooth on 4th gear as I was removing 5th. This goes back to not knowing the best way to use the separator.
The only part I didn't know what to do with was the front bearing. I don't see a way to get the separator in between the inner race and (1st?) gear. Is this just one of the ones that needs to be cut off with a dremel?
I then tried to measure the baulk ring clearance per the FSM:
Like so:
But again, the results were out of spec. For 5th gear my clearance was over 1.5mm (too big and out of spec) and 4th was 1.34mm (just barely in spec), when specs are between 1 - 1.35mm. It says the wear limit is 0.7mm, which is the opposite direction of what mine appear to be going on. How does this work? Am I doing this correctly?
Anyways, I then put it all back together. The first time I pressed on the synchro for 3rd too far, which made it so 3rd wouldn't spin more than 20* or so, and I pressed 5th too far down onto 4th, so while 4th would spin freely, 5th didn't spin at all. So I took it all back apart again and reassembled it, being careful about when I stopped the press, and this time everything seemed to work as it should. I just now realized I should go back and re-measure the gear end play and see how it changed.
When pressing it back together, I had the bearing separator under 2nd gear, since that's a part of the shaft, but I chipped a tooth on it when I pressed the synchro too hard onto 3rd, and another when I pressed 5th too hard onto 4th. Is there anything I can do to lessen the chance that I do this to the 6 speed? I considered putting some PVC between the bottom of 2nd gear and the bearing separator. I feel like the PVC (I have 1/2" and 3/4") would cushion 2nd gear, but it could also fail spectacularly and break lots of things with little warning. Any tips on this would be greatly appreciated. Maybe I'll experiment on this 5 speed a few more times.
Next up is the output shaft, and then bearing races. Woo hoo!
Last edited by 95maxrider; Mar 1, 2021 at 05:33 PM.
So I've been busy installing the 6 speed out of a 6th gen, and I finally drove it today! It was a long process, and I was super excited to feel what proper gearing felt like. The car started right up, schmelly's timing ring works! Back it out of the driveway and start driving around the neighborhood in case something goes sideways. Shift into first, and pedal pressure is the same as my old DE-K clutch setup, nice and light. I can kind of notice the lightweight JWT flywheel, but it's not too bad. Shift into second gear, not bad, but not quite as buttery as my 5 speed. Shift into third gear, and.....nothing. Huh, that's weird. Shift into 4th, 5th, and 6th and all is well. Shift back to third, and nothing. The shifter goes in like normal, there's no grinding, but there's just nothing there. Nothing. So after all that, I really just installed another 5 speed. Good times!
Last edited by 95maxrider; Mar 26, 2021 at 03:54 AM.


So, before I go into all the details of the 6 speed swap, I need to get back to practicing rebuilding my old dead 5 speed in anticipation of putting together the "custom" 6 speed. I left off with having disassembled and reassembled the input shaft, having chipped a few teeth on different gears due to doing some things incorrectly. I learned some lessons from that and was able to disassemble and reassemble the main shaft without chipping any teeth. I then moved on to seeing if I could remove the races from the case, since I'm pretty sure I'm going to have to re-shim things when I put the 6 speed together. I quickly learned that none of my tools were capable of removing the races.
My 3 jaw puller was too fat to get under the lip:

And neither of these other semi-related tools were of any help:


Reading the FSM I also realized I will need a dial indicator to measure things. I'm not sure how exactly it's supposed to be used, but it keeps talking about one, so it must be important. I that gets pretty good reviews. Does anyone know if this will actually do what I need it to do?
I then started looking for something that could remove the races, and came up with . It looks promising, can anyone provide input? Also, what exactly is needed to reinstall the races? Is necessary?
Calling all Nealocs, calling all Nealocs!
My 3 jaw puller was too fat to get under the lip:
And neither of these other semi-related tools were of any help:
Reading the FSM I also realized I will need a dial indicator to measure things. I'm not sure how exactly it's supposed to be used, but it keeps talking about one, so it must be important. I that gets pretty good reviews. Does anyone know if this will actually do what I need it to do?
I then started looking for something that could remove the races, and came up with . It looks promising, can anyone provide input? Also, what exactly is needed to reinstall the races? Is necessary?
Calling all Nealocs, calling all Nealocs!

The 6mt doesn't have a race for the input shaft. The bearing is pressed onto the shaft and comes out when you pull both shafts. You're left with just the hole there.
The only races you need to worry about are the diff races.
I'll measure this and see if any of them fit when I'm out at my shop tomm, that way you won't have to worry about making a "travis diff bearing race puller" tool.
The only races you need to worry about are the diff races.
I'll measure this and see if any of them fit when I'm out at my shop tomm, that way you won't have to worry about making a "travis diff bearing race puller" tool.
Last edited by aackshun; Mar 28, 2021 at 05:47 PM.
I promise I'll post up everything about the 6 speed swap, but that's going to take a long time to write up, so let's catch up on some easy stuff. So I have all the parts ready to put together my 3" SS exhaust. It will have the largest resonators and muffler physically possible in this chassis (at least when combined with stage 2 SFCs). Here's an example of how it will compare to the current 2.5" setup.

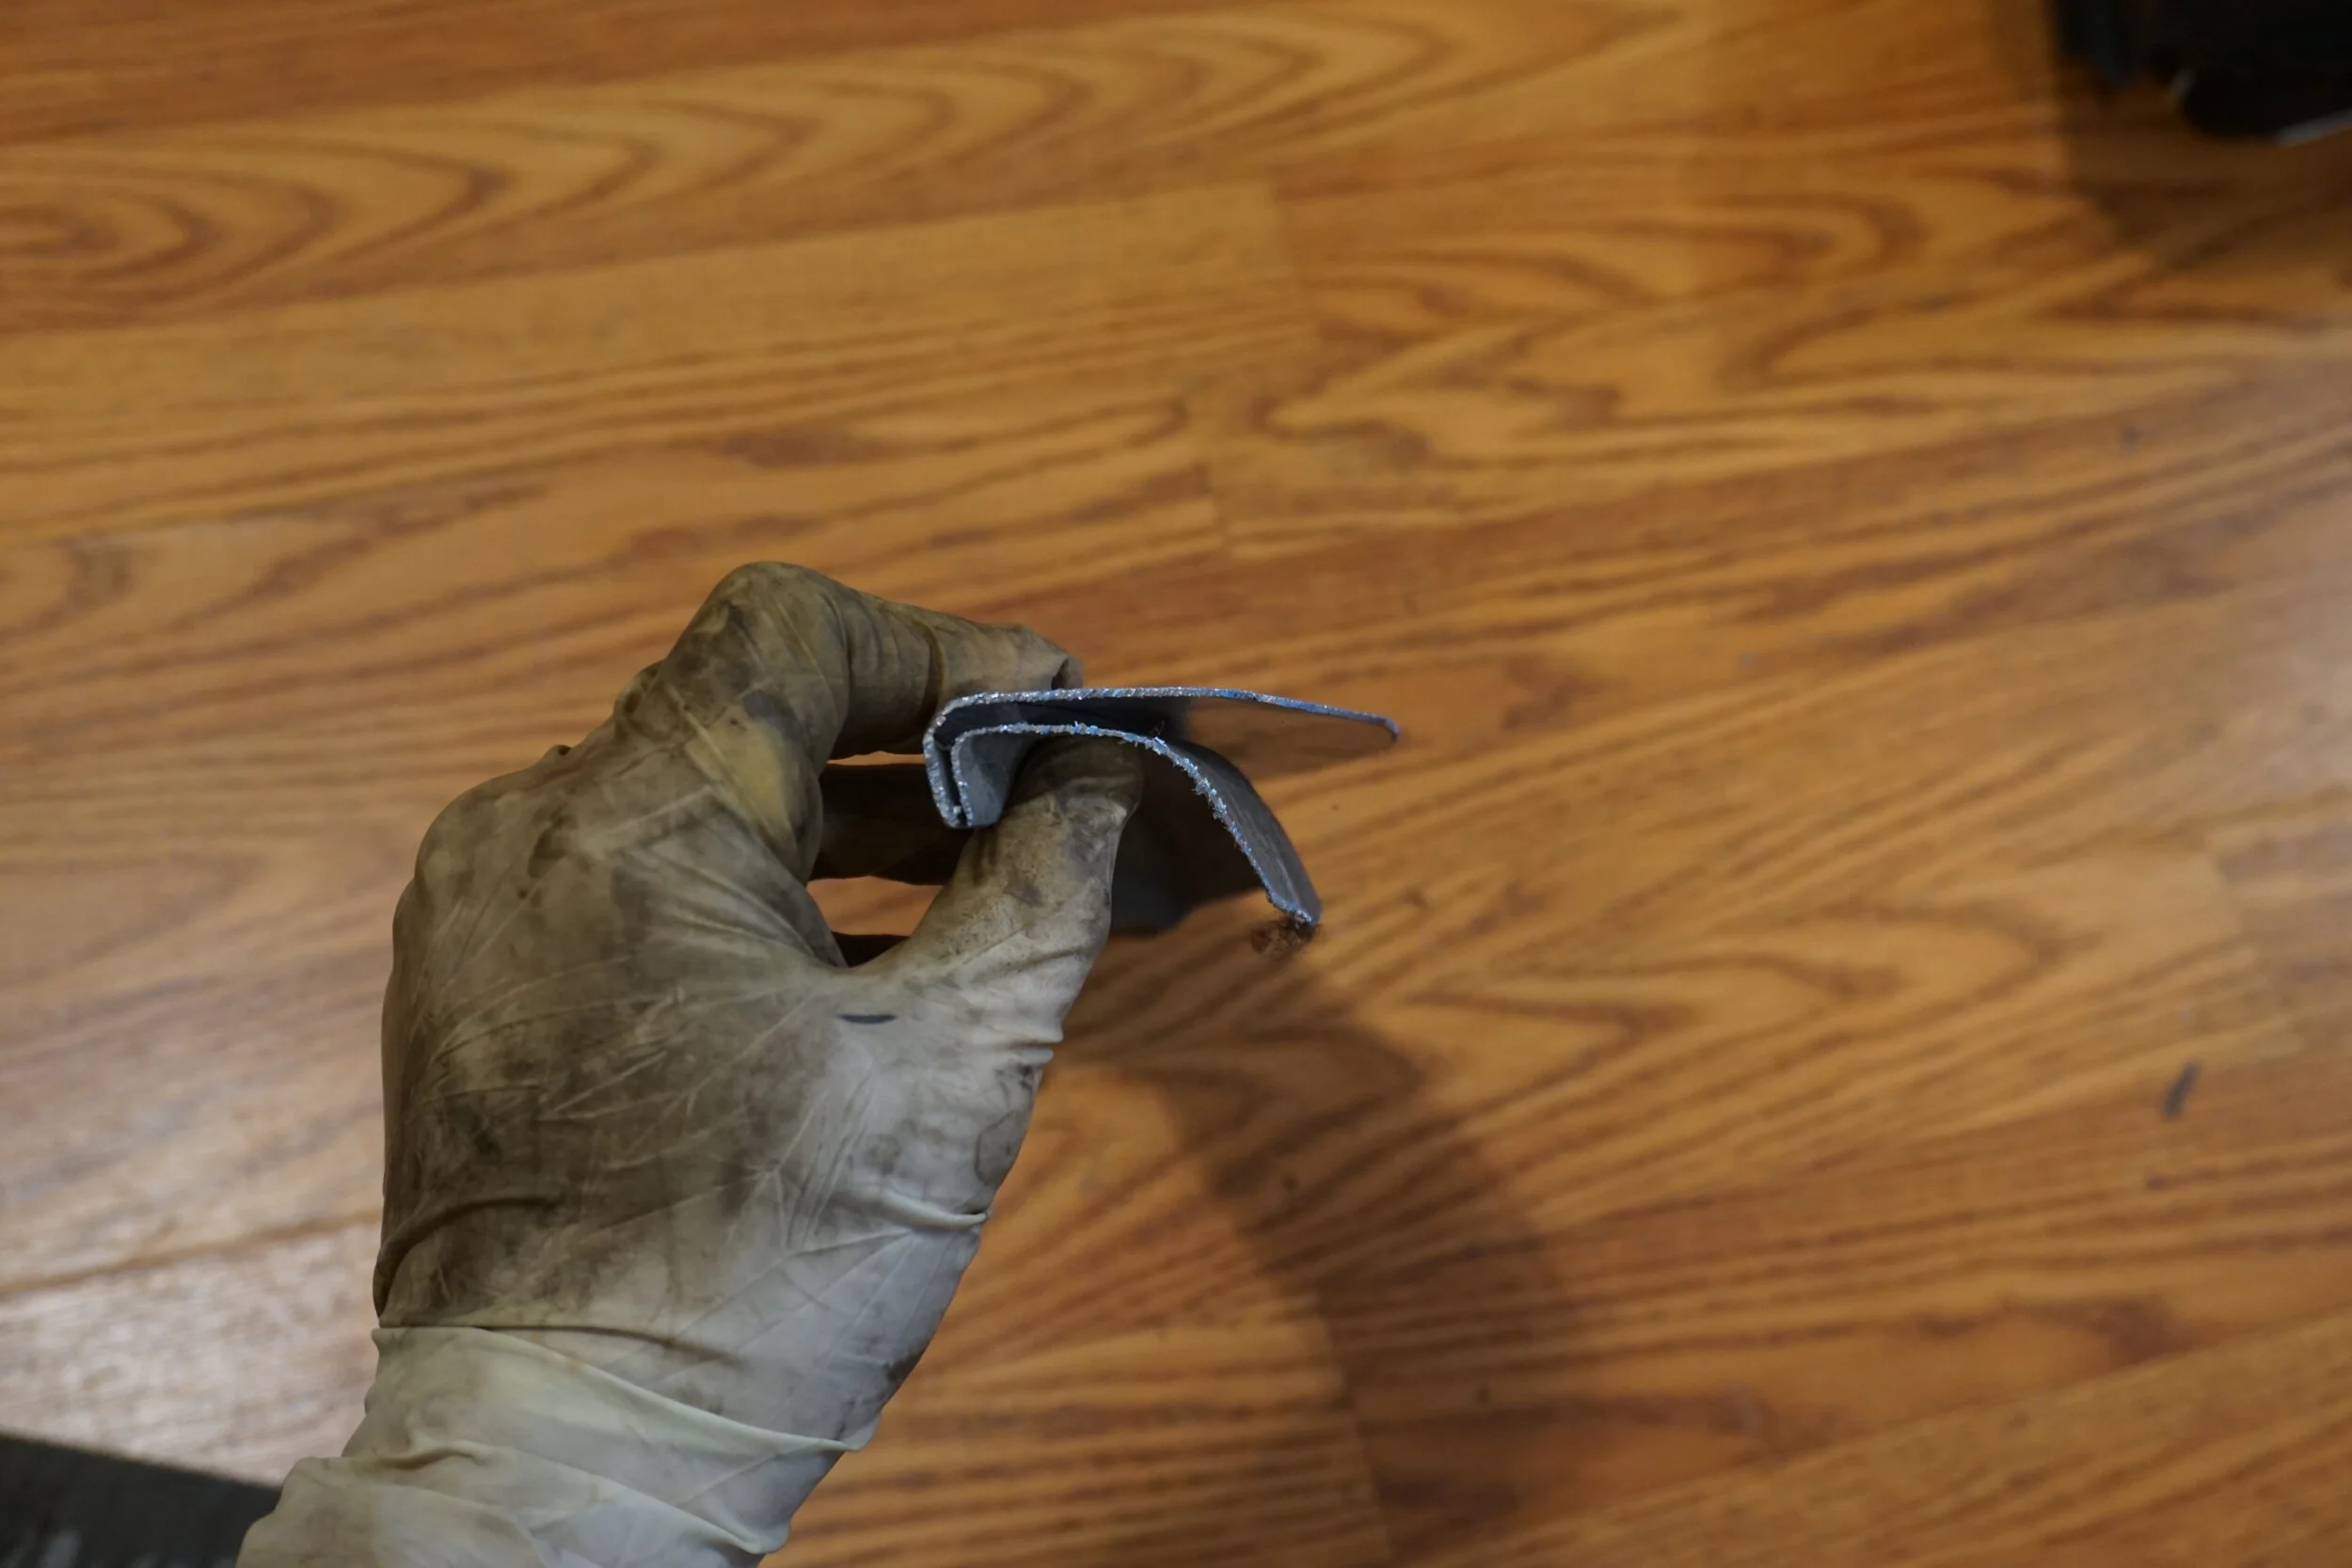
To get some practice welding on SS (I'm a complete noob at welding, period) I decided to try something I saw on youtube. I will note that I went against Mike's advice and got a lined flex section from Vibrant, but I went high their high-end one that's built for FI applications, so hopefully it stays together. The original lined flex section in the Cattman headers is still perfect after like 15 years. I'm hoping what I did to it will help it be that little bit more robust.

Welded the inner liner, flex weave, and end cap together:

And ground them down...messily

But the bulk of the project is waiting for me to complete another project, which I'm not getting into right now.
Next up is progress on my "custom" 4.4 FD 6 speed. The lack of third gear in my installed/spare 6th gen trans has moved up the urgency on getting the 4.4 trans put together. After struggling to reassemble the 5 speed properly, and knowing even more struggles would lie ahead when I needed to shim things properly, I decided to press the easy button and send it out to a shop to do it for me. They're the guys who built my VLSD trans up with detailed and shot peened gears. To save on shipping costs and labor, I wanted to get the input/output shafts out of the 2002 Spec-V trans so I didn't have to ship the entire transmission to them. So I got busy with disassembly. It's amazing how easy it is to disassemble a transmission when you haven't the slightest intention of reassembling it!

Except disaster struck when I counted the teeth of the end of the output shaft where it meshes with the diff. A 4.4 trans should have 14 teeth, a 4.1 should have 15, and a 3.8 should have 16. Well, this trans, which was supposedly from a 2002 (the only year to get the 4.4) has 15 teeth, and is actually a 4.1.

Well f%ck me sideways! I tried to verify this earlier by checking the VIN tag on it, only to find this trans didn't have a VIN tag. Well, at least I got some spare bearings and an HLSD out of it. Maybe I'll just drop this gear set and diff in my 6th gen trans, and say to hell with clearances, since it will just be a spare. Now I have to try and find another 02 trans, and hope it still has a VIN tag on it so I can verify before I buy.
To get some practice welding on SS (I'm a complete noob at welding, period) I decided to try something I saw on youtube. I will note that I went against Mike's advice and got a lined flex section from Vibrant, but I went high their high-end one that's built for FI applications, so hopefully it stays together. The original lined flex section in the Cattman headers is still perfect after like 15 years. I'm hoping what I did to it will help it be that little bit more robust.
Welded the inner liner, flex weave, and end cap together:
And ground them down...messily
But the bulk of the project is waiting for me to complete another project, which I'm not getting into right now.
Next up is progress on my "custom" 4.4 FD 6 speed. The lack of third gear in my installed/spare 6th gen trans has moved up the urgency on getting the 4.4 trans put together. After struggling to reassemble the 5 speed properly, and knowing even more struggles would lie ahead when I needed to shim things properly, I decided to press the easy button and send it out to a shop to do it for me. They're the guys who built my VLSD trans up with detailed and shot peened gears. To save on shipping costs and labor, I wanted to get the input/output shafts out of the 2002 Spec-V trans so I didn't have to ship the entire transmission to them. So I got busy with disassembly. It's amazing how easy it is to disassemble a transmission when you haven't the slightest intention of reassembling it!
Except disaster struck when I counted the teeth of the end of the output shaft where it meshes with the diff. A 4.4 trans should have 14 teeth, a 4.1 should have 15, and a 3.8 should have 16. Well, this trans, which was supposedly from a 2002 (the only year to get the 4.4) has 15 teeth, and is actually a 4.1.
Well f%ck me sideways! I tried to verify this earlier by checking the VIN tag on it, only to find this trans didn't have a VIN tag. Well, at least I got some spare bearings and an HLSD out of it. Maybe I'll just drop this gear set and diff in my 6th gen trans, and say to hell with clearances, since it will just be a spare. Now I have to try and find another 02 trans, and hope it still has a VIN tag on it so I can verify before I buy.
Last edited by 95maxrider; Apr 18, 2021 at 03:44 AM.

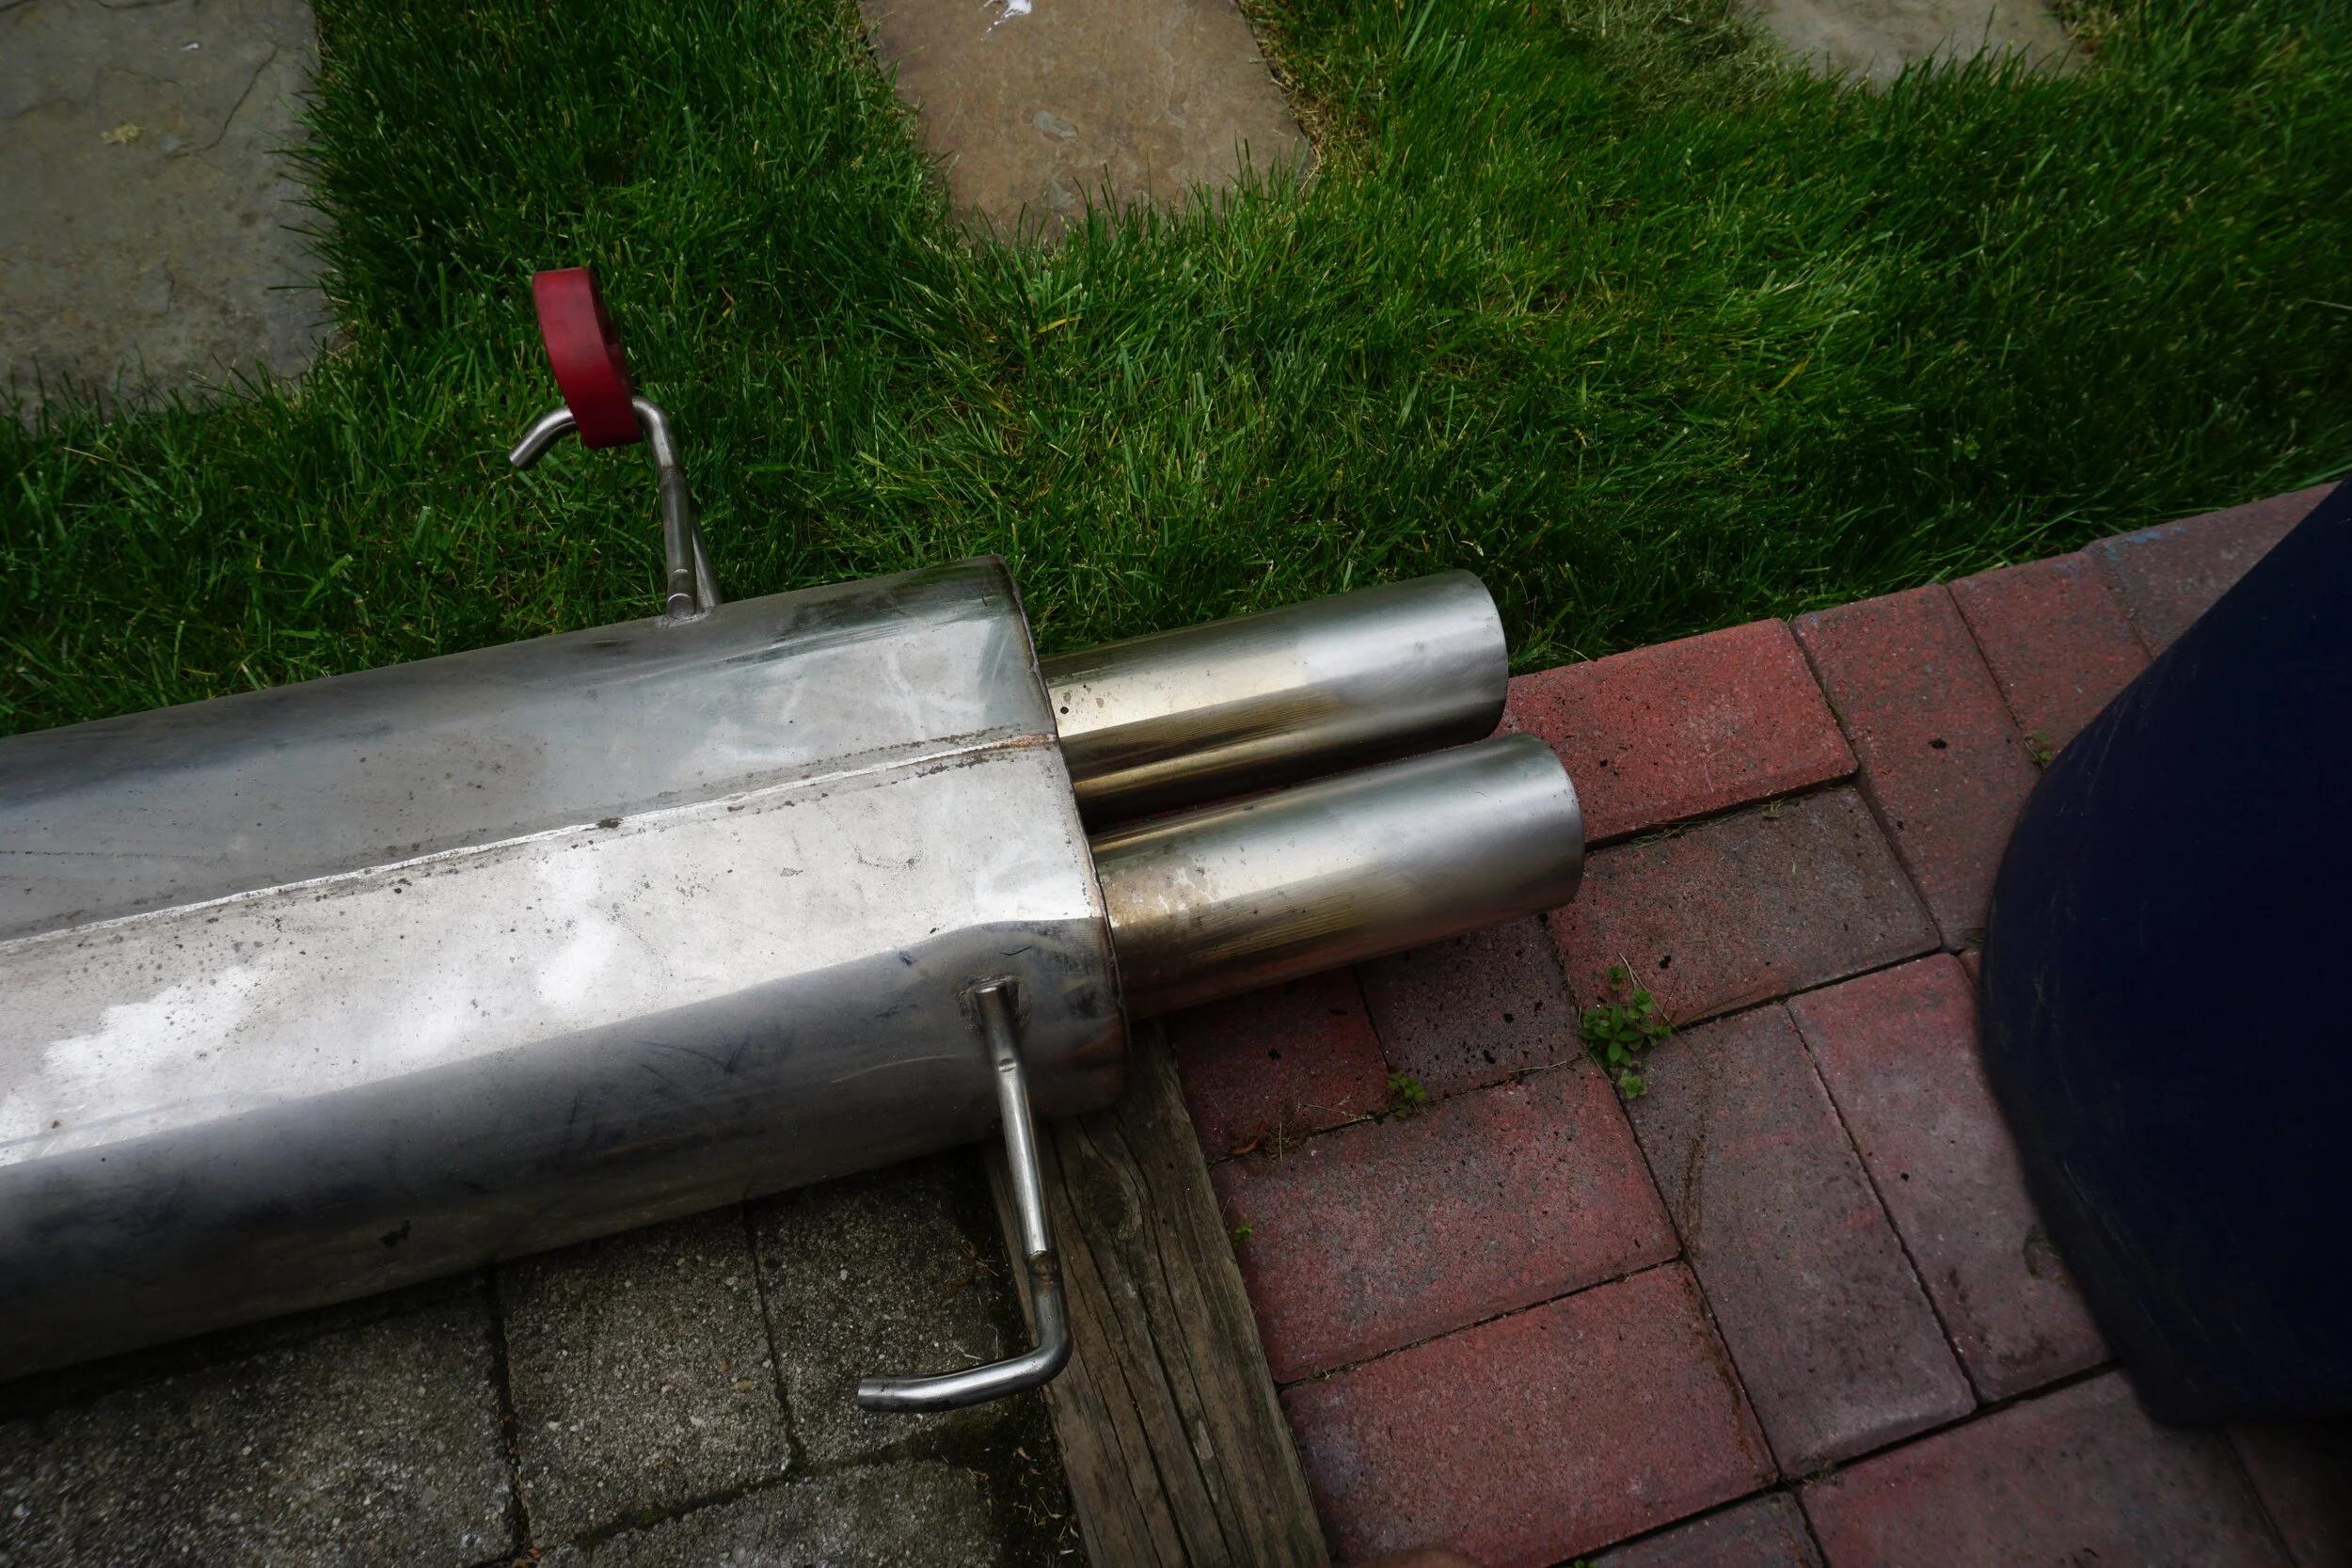
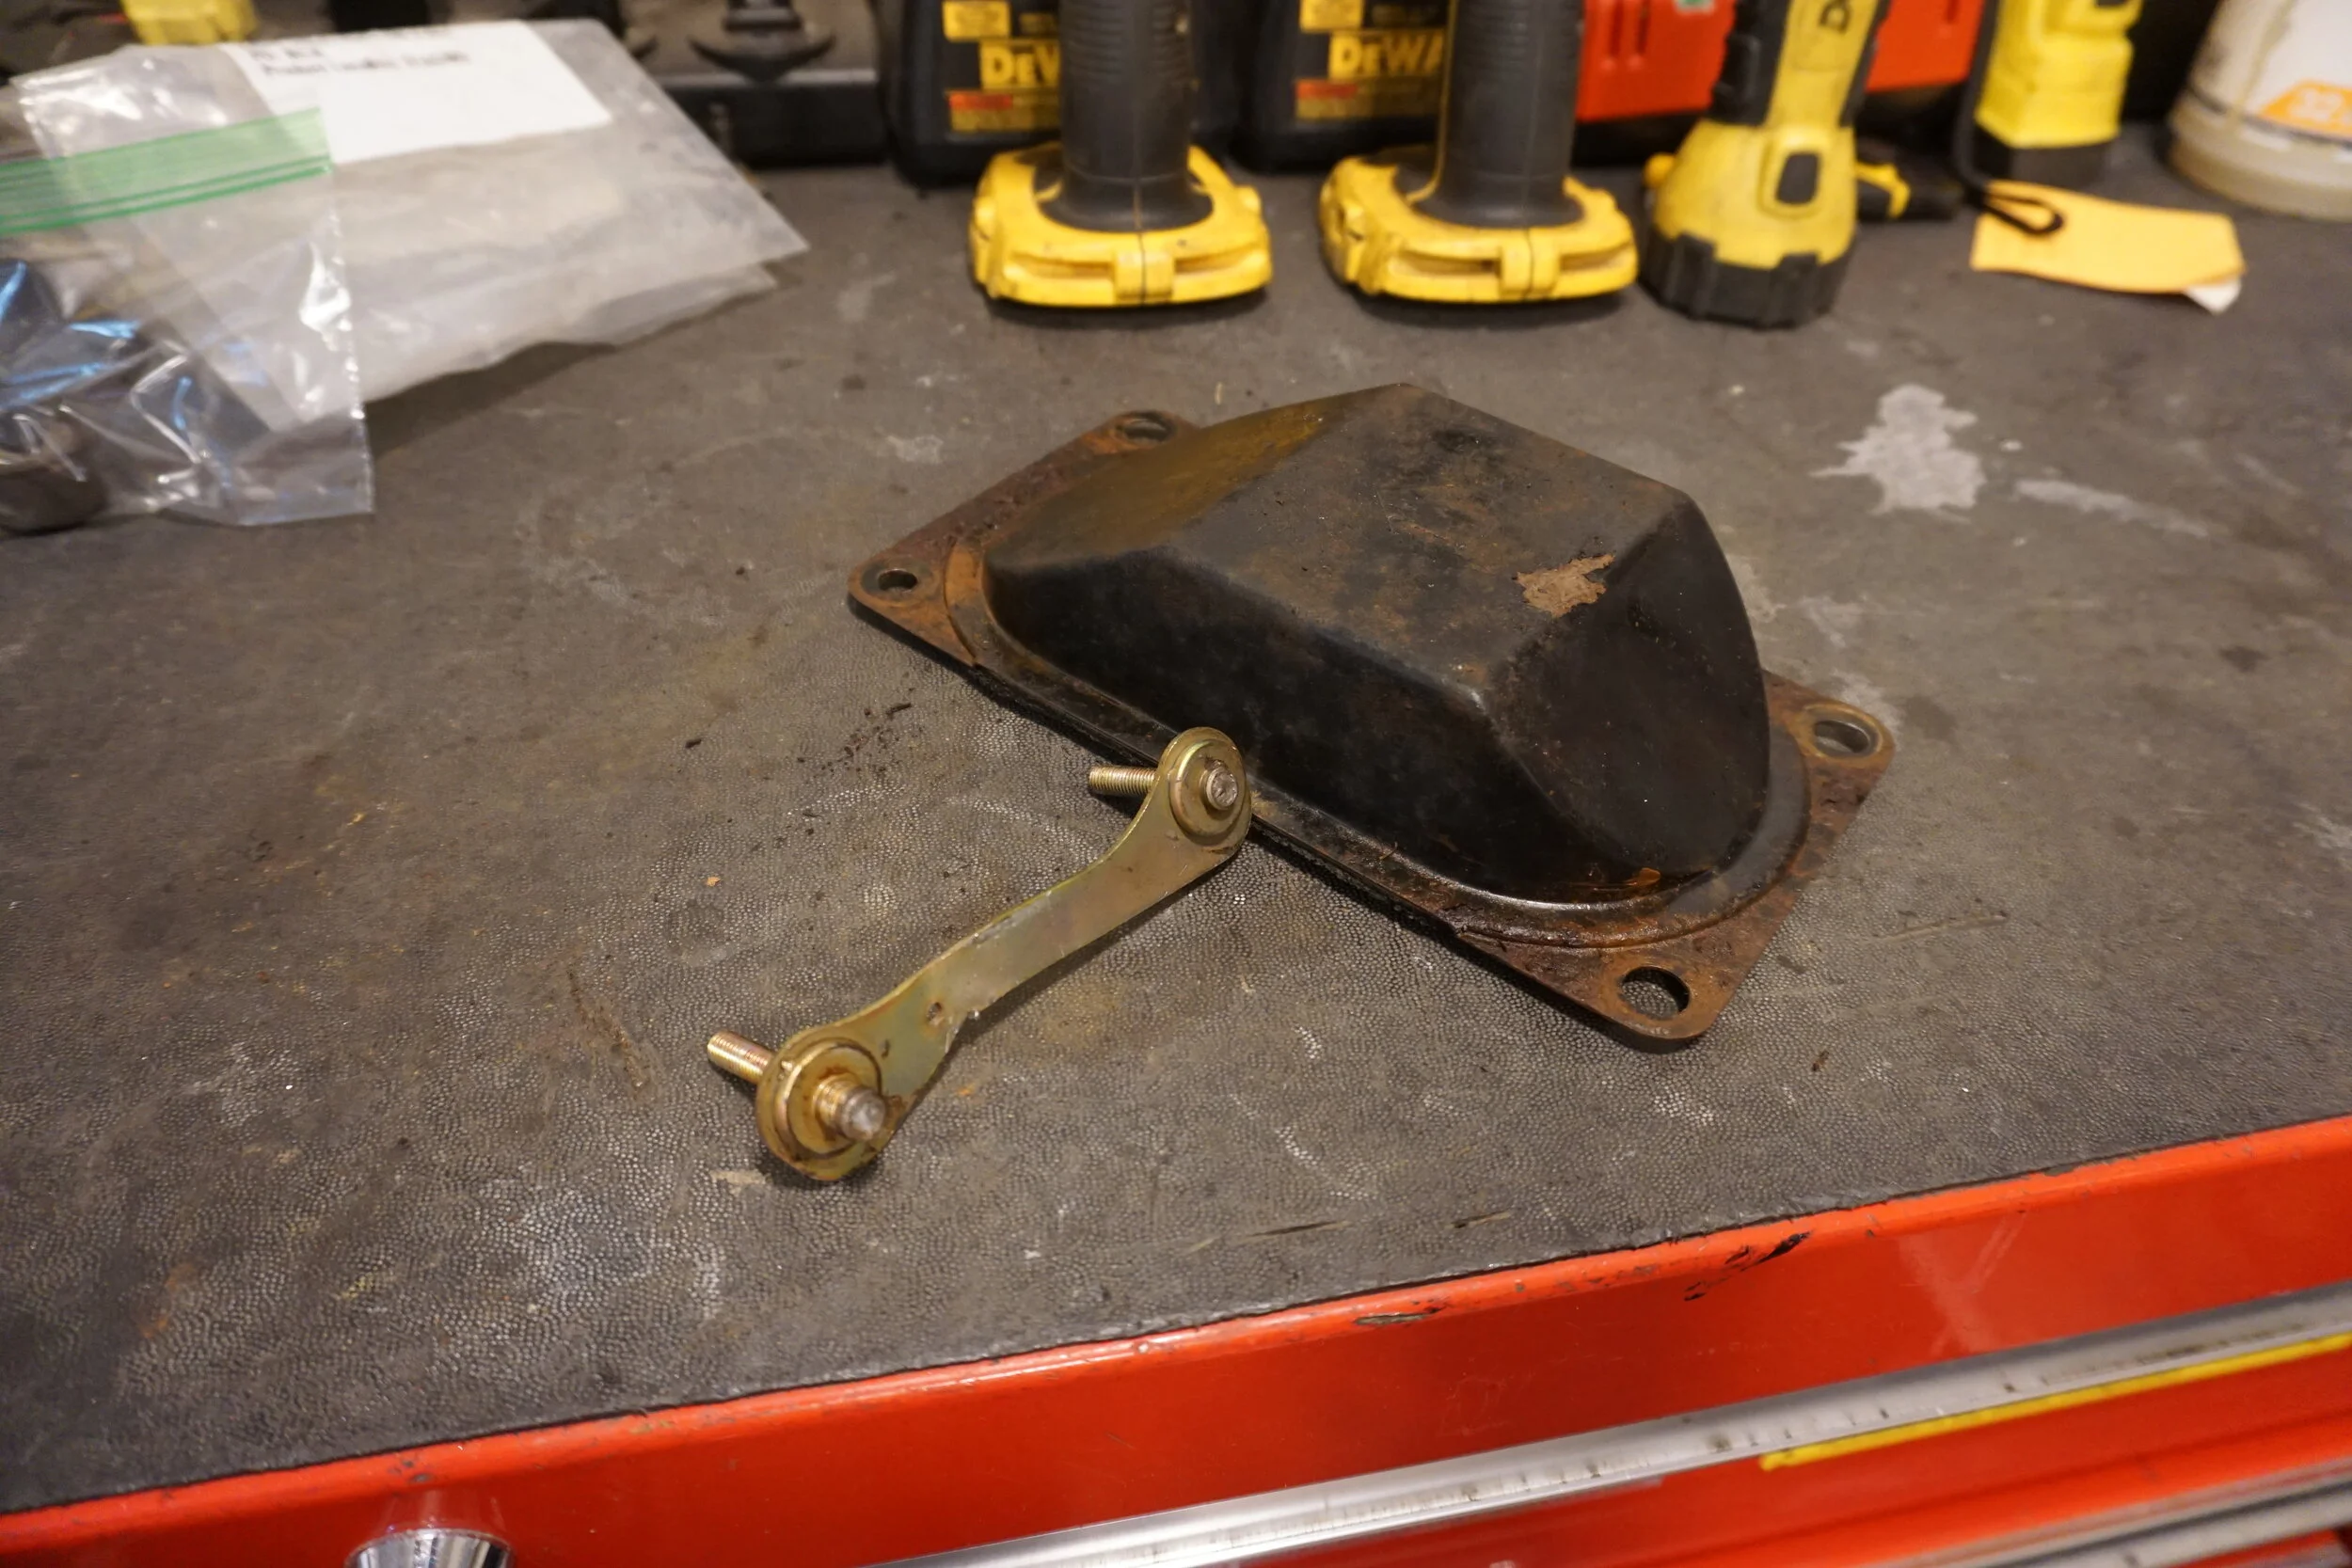
Time for a little update before I get into the bigger project. First up, my current Cattman muffler. I love the big dual 3" tips, but they are way bigger than my bumper was intended to fit. Add to that fitment may be a little different between a Maxima and the I30, and my muffler tips have been in close contact with my bumper since it was installed a few years ago. While working on a larger project I had the whole exhaust off the car and was reminded of the consequences of hot metal touching plastic:

Yeah, the muffler kind of made room for itself over the years by melting my bumper, and that bumper was now baked onto the tips. Even though the muffler won't be on the car for very long due to the upcoming 3" project, I wanted to clean things up a bit. So I got out my heat gun and something to scrape the goo off with, and cleaned things up with some Roloc pads.
I'll probably polish the whole thing before I put it up for sale, but for now, this is good enough. I then moved on to the cutout for the tips in the bumper. Basically, it had been melted into the shape of the tips, and looked pretty crummy with the muffler not hiding things. I didn't get any good before pics, but I started trying to make the cutout shape a little smoother/more natural while also giving the tips a few mm of breathing room. Cue the dremel and files...

With the muffler reinstalled there is a mm or two of space between the tips and the bumper, so hopefully the melting days are behind me.
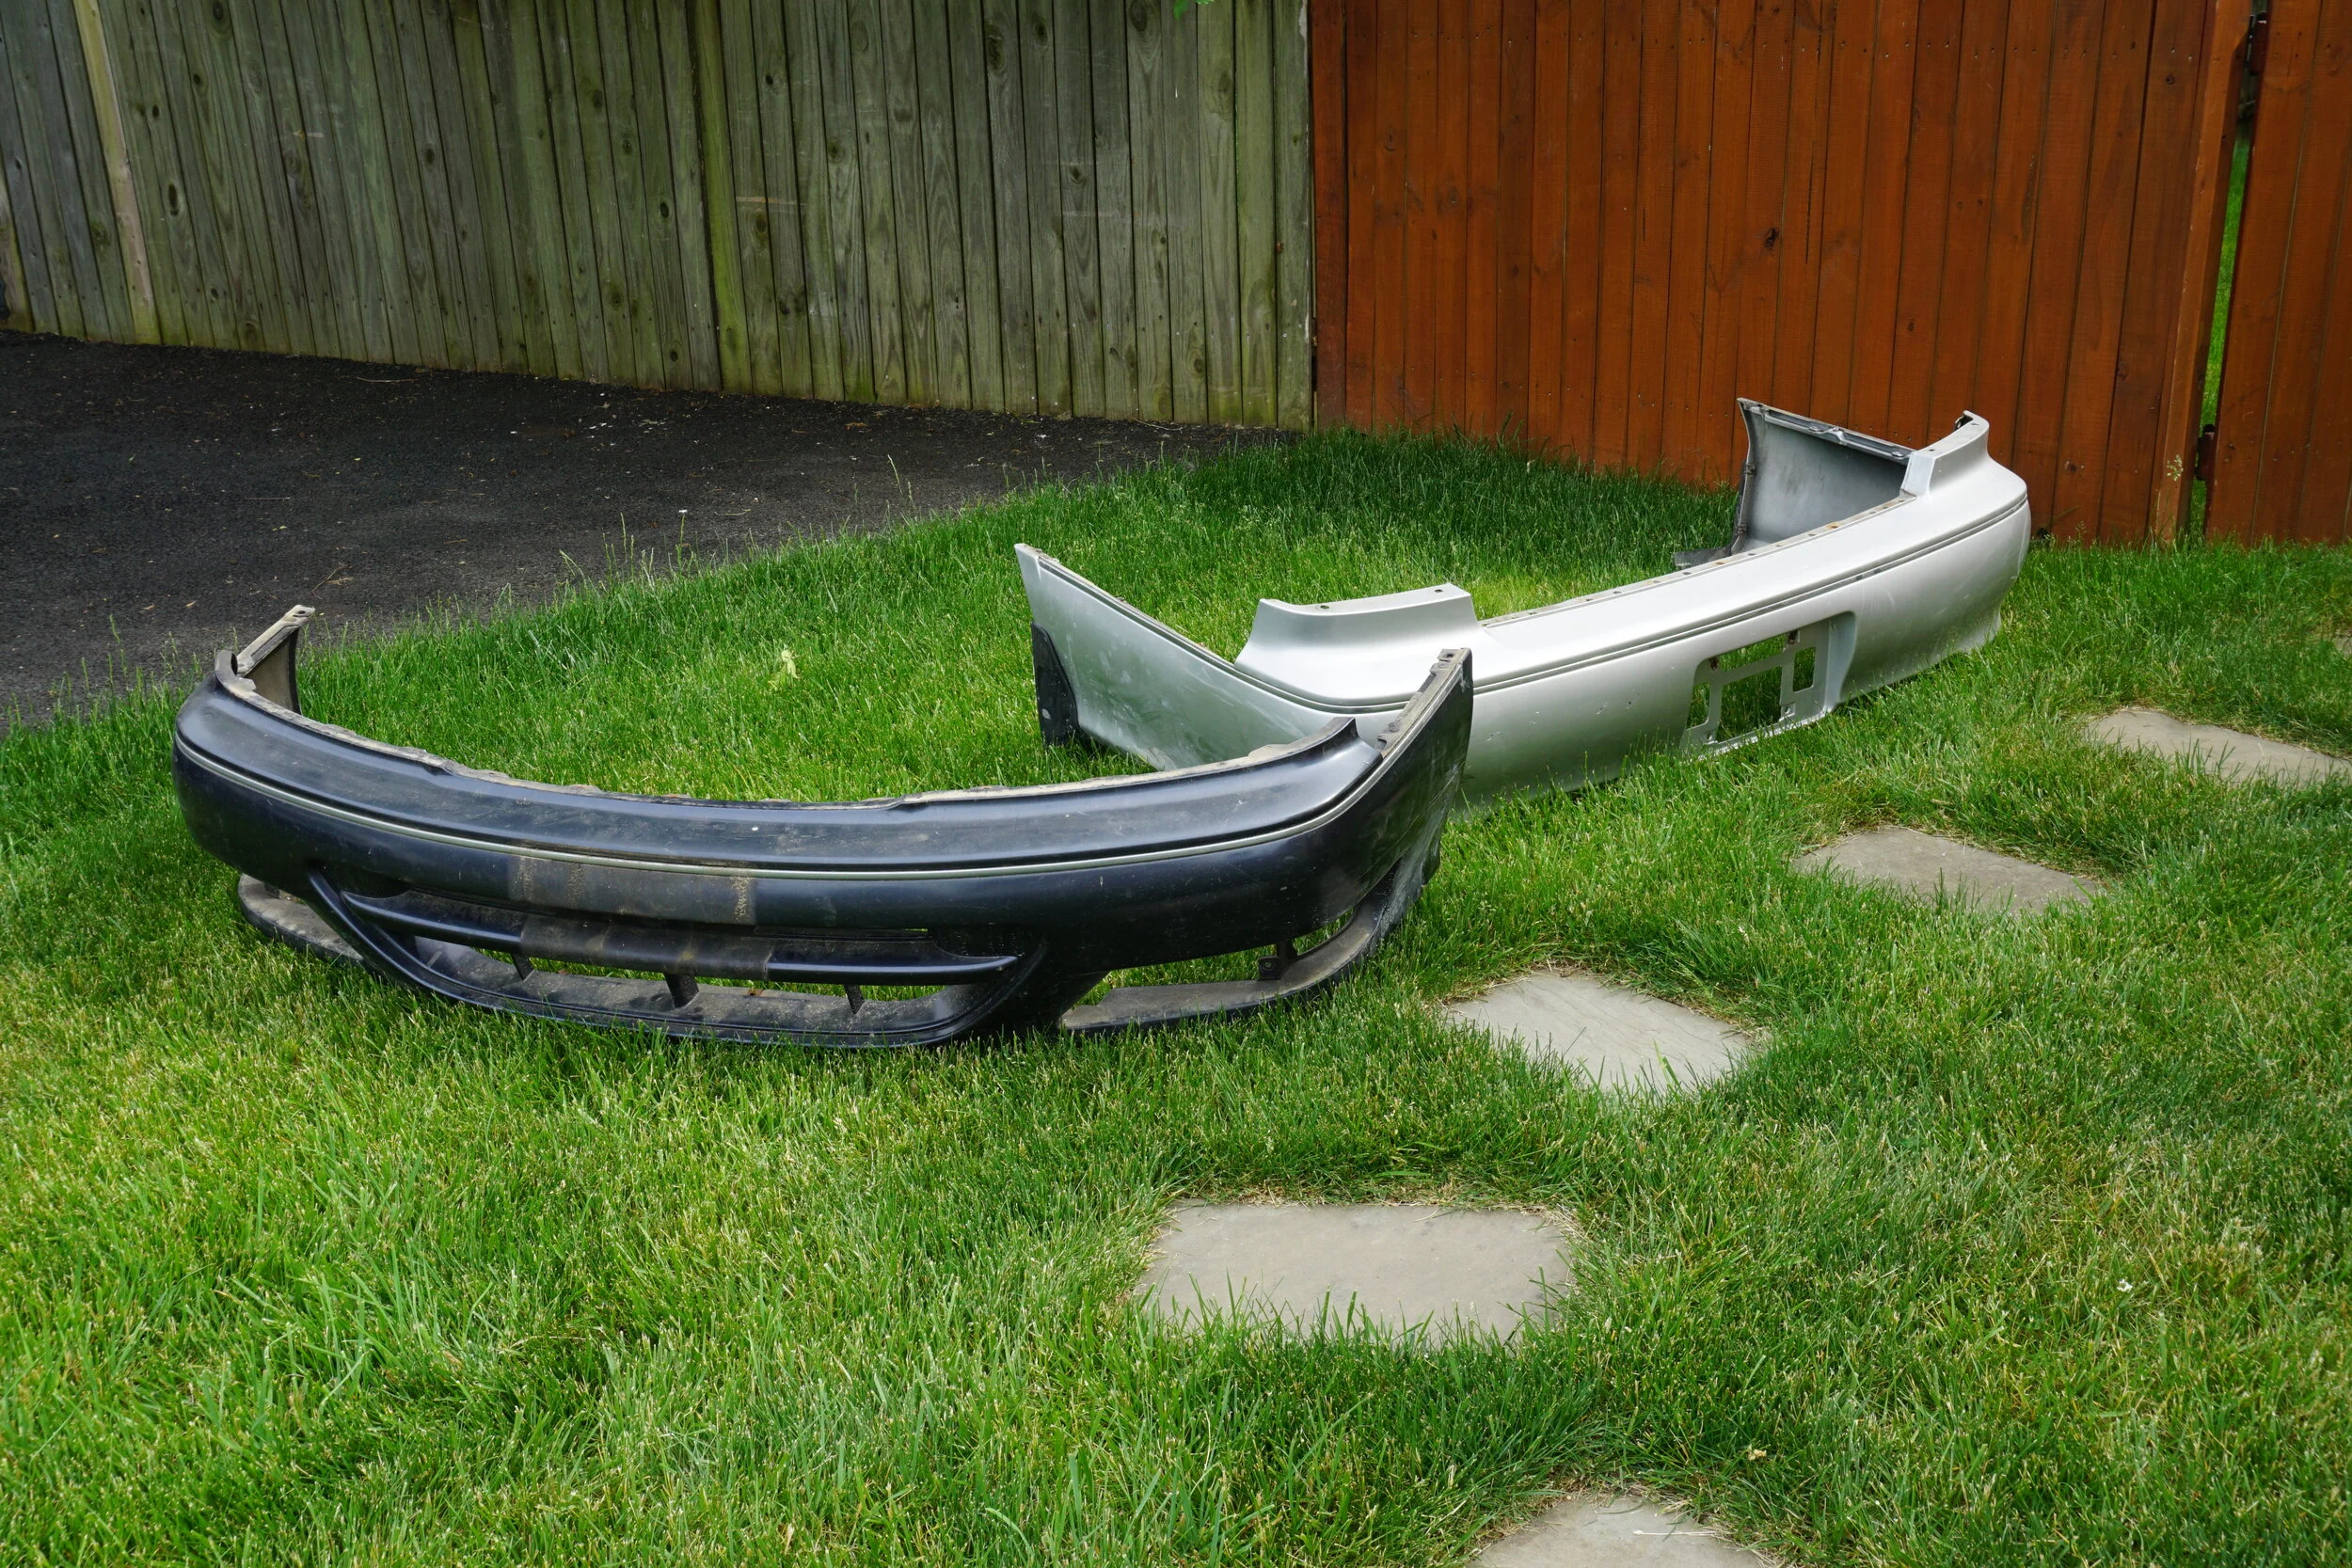
I then made a day of running around junkyards grabbing parts for the cars. I found a couple I30s that were in great condition so I got a bunch of parts off them. A '94 Q45 had also just entered the lot, so I wanted some things off of that. Here's what I got:
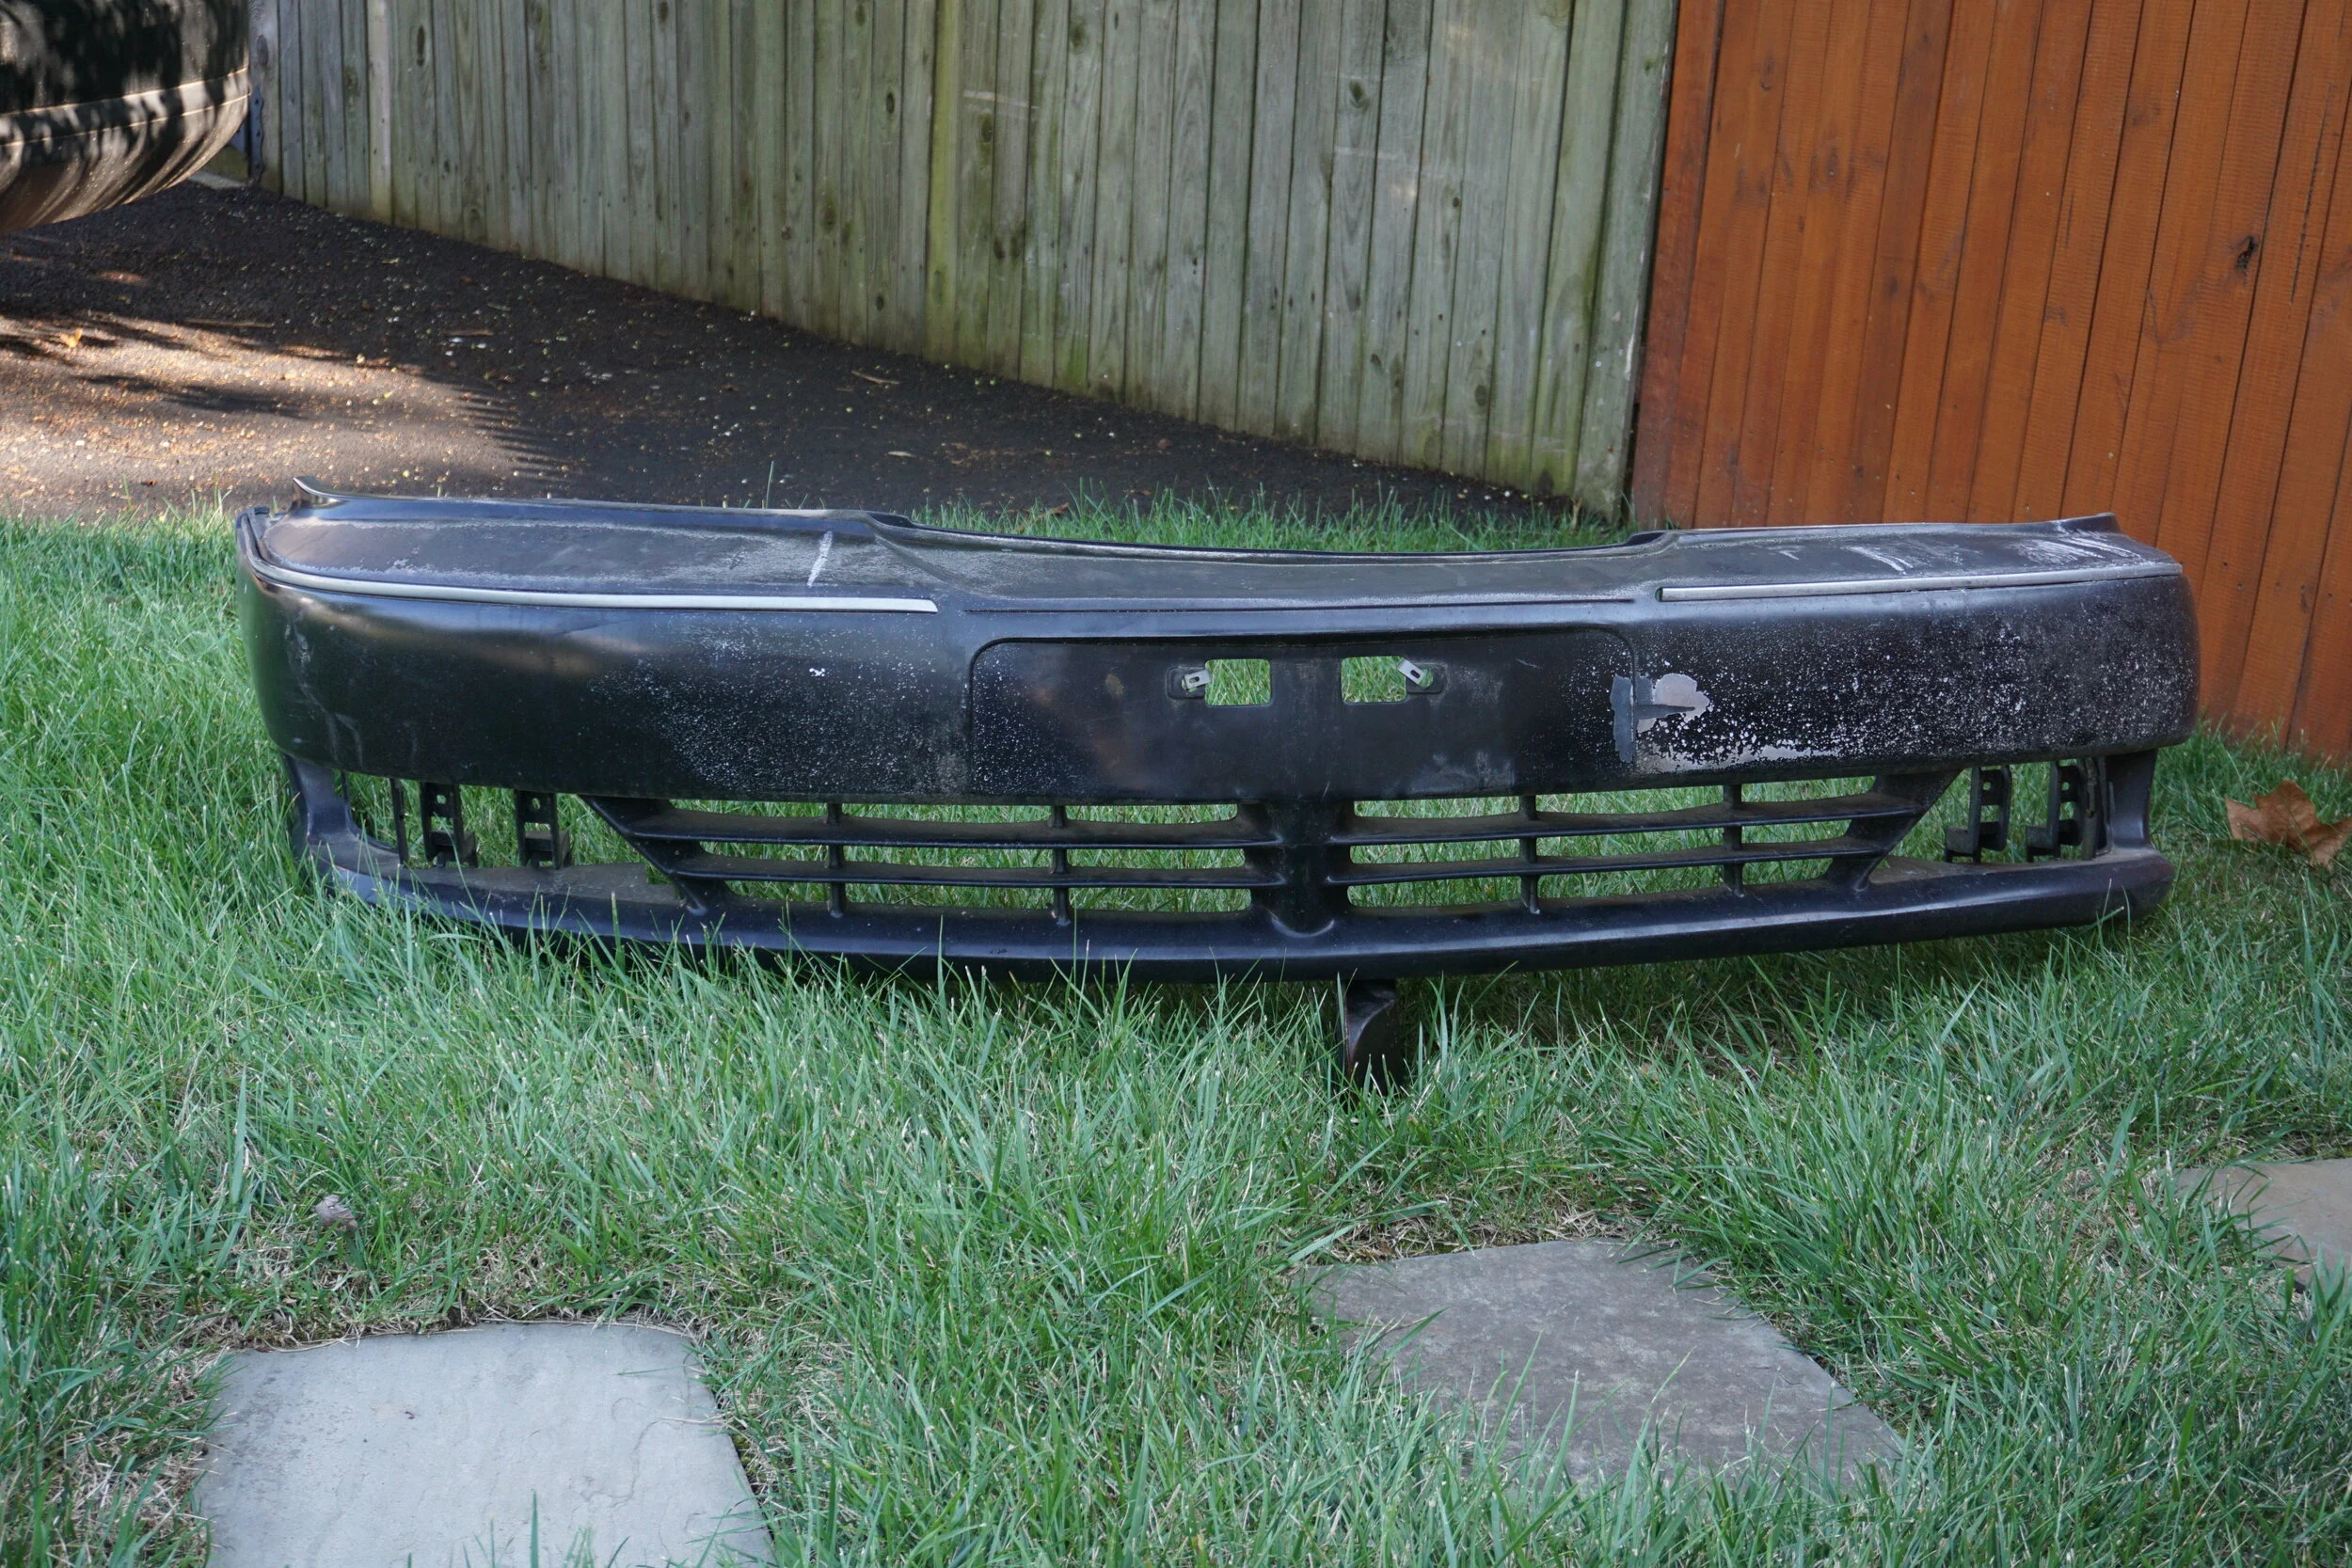
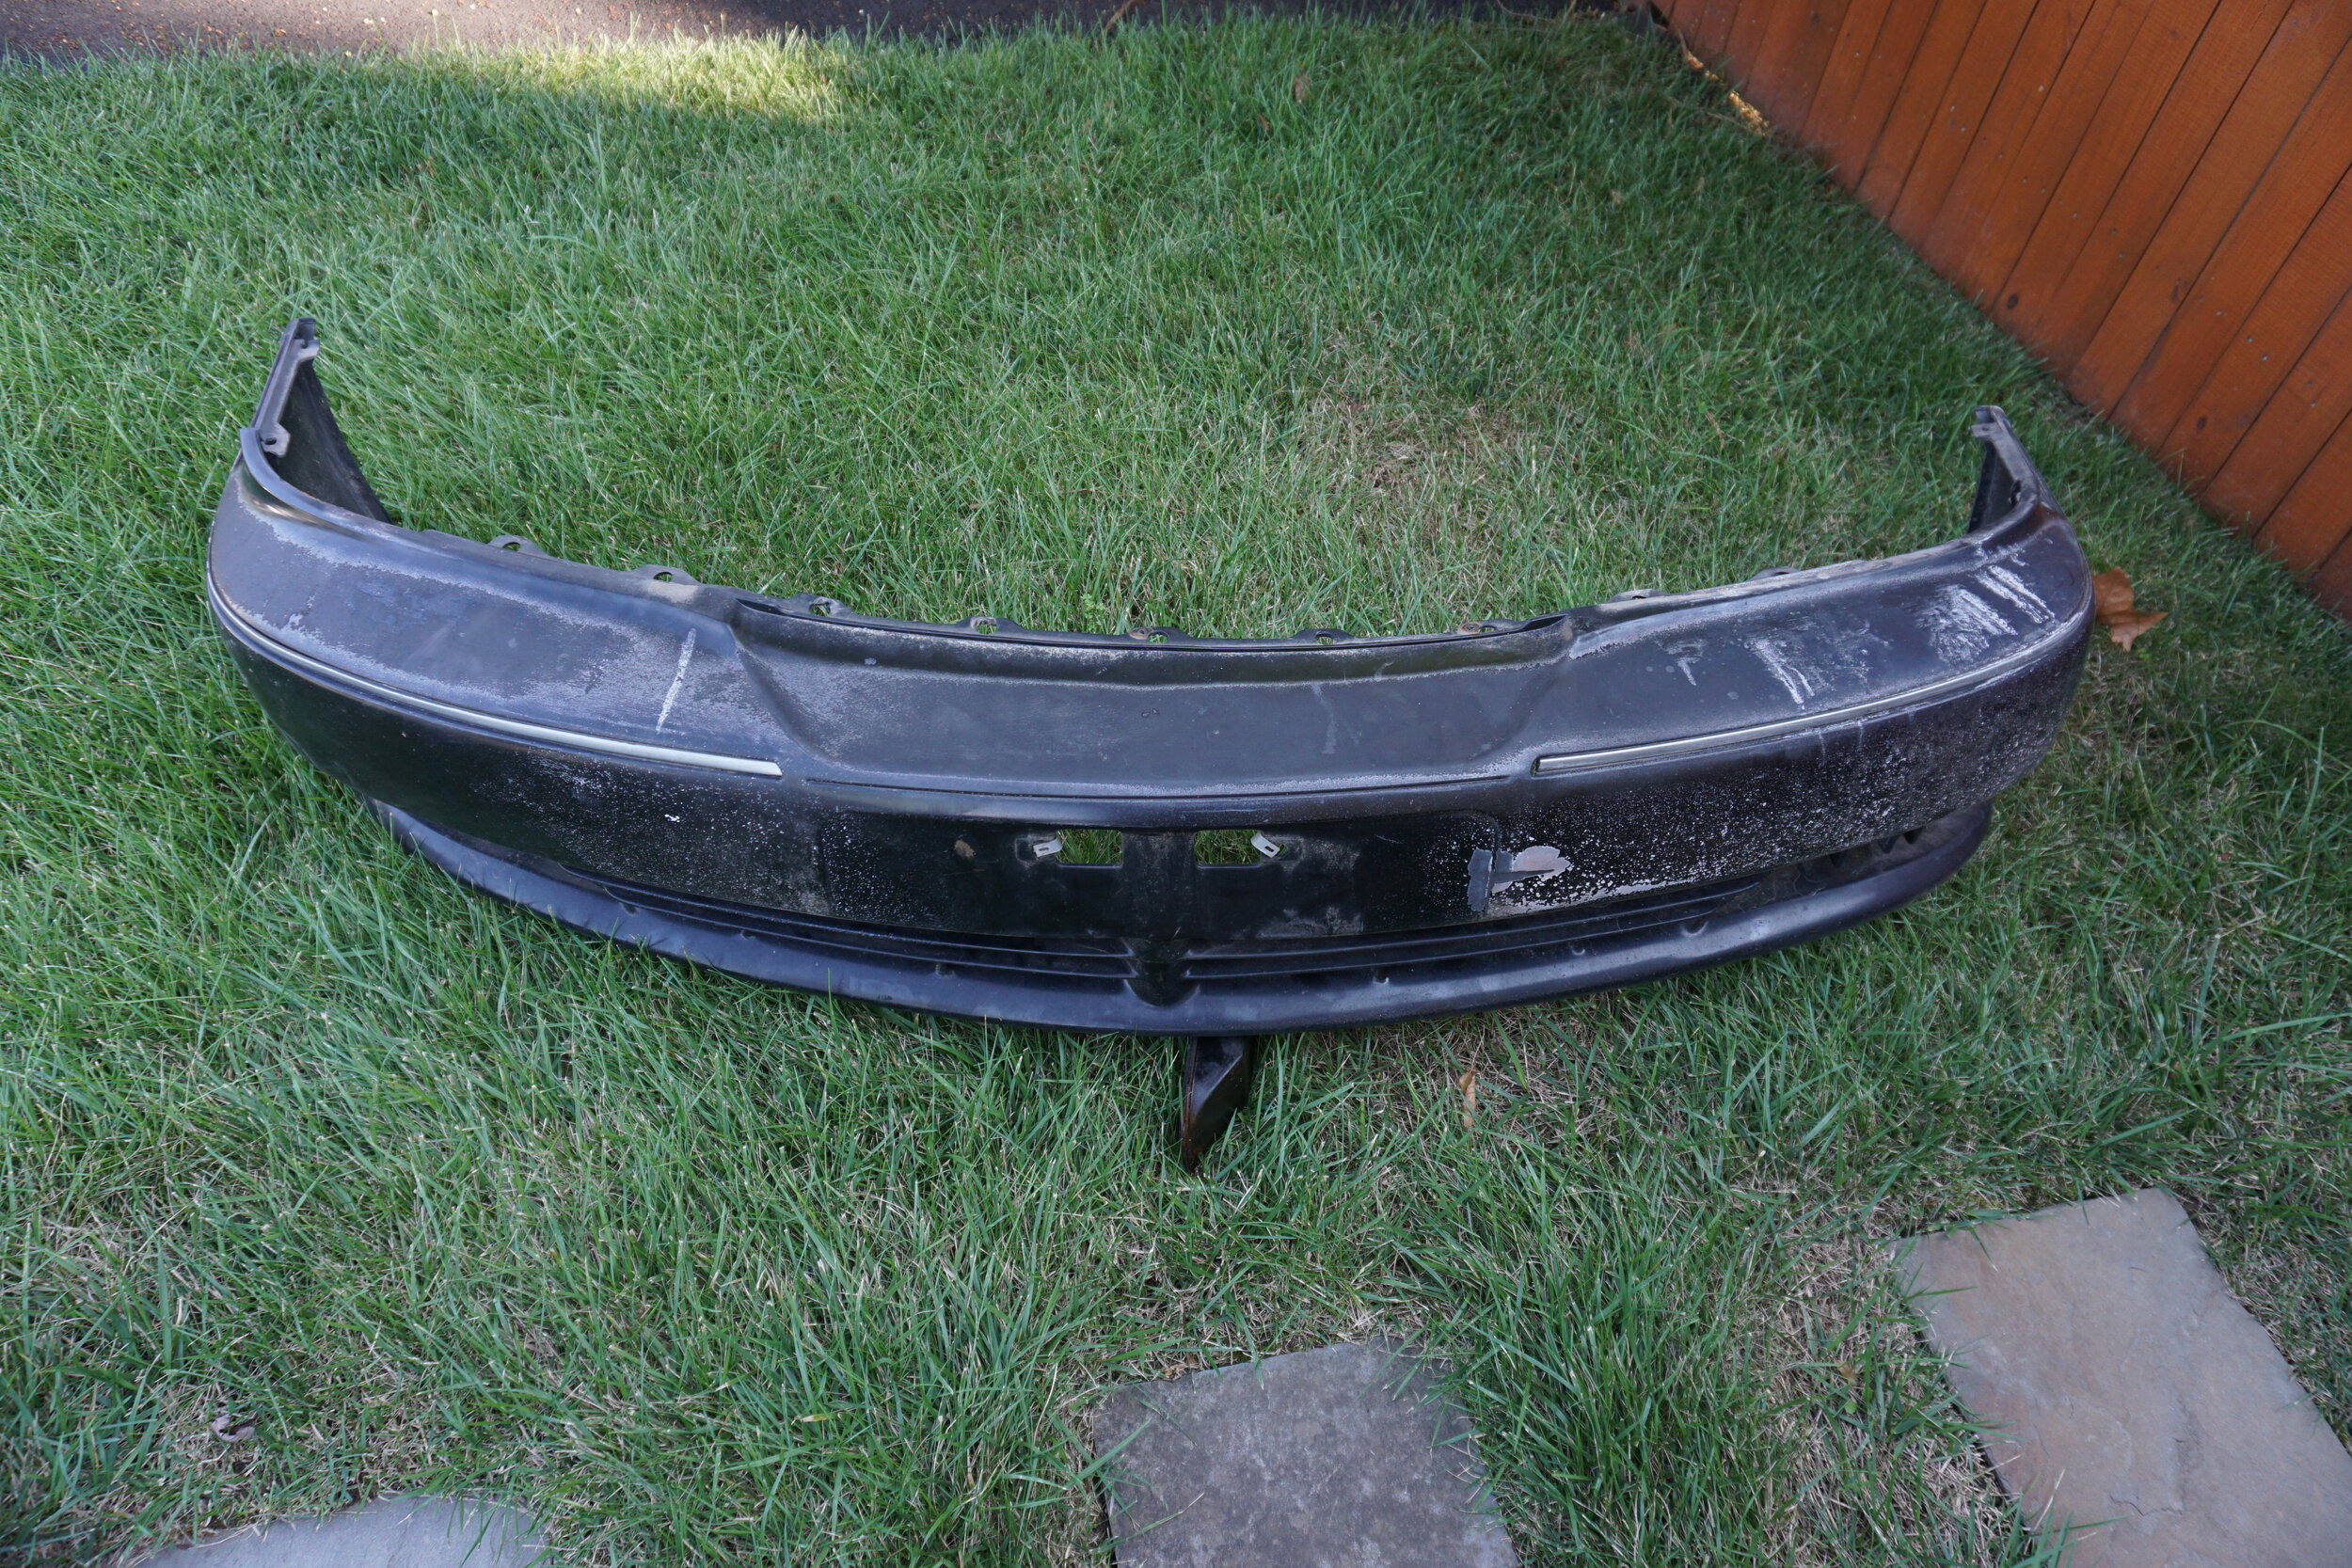
Pristine (but dirty) front and rear bumpers. My bumpers have been smushed and gouged over the years, and would require quite a bit of body work before I paint them (they need it). These are in great shape, and even the chrome trim line is intact and in better condition than mine.
90mm Q45 throttle body (these cost insane amounts of money online!), fancy Q45 clock (no idea what I'm gonna do with it), mint condition black leather e-brakes, and mint condition fuzzy A and B pillars that match my car. I was super proud that I was able to remove these without cracking any of the brittle plastic. Use of multiple plastic pry tools is a must, can't do it by hand. Unfortunately I wasn't so lucky with the C pillars and those started to crack when I tried to remove them.
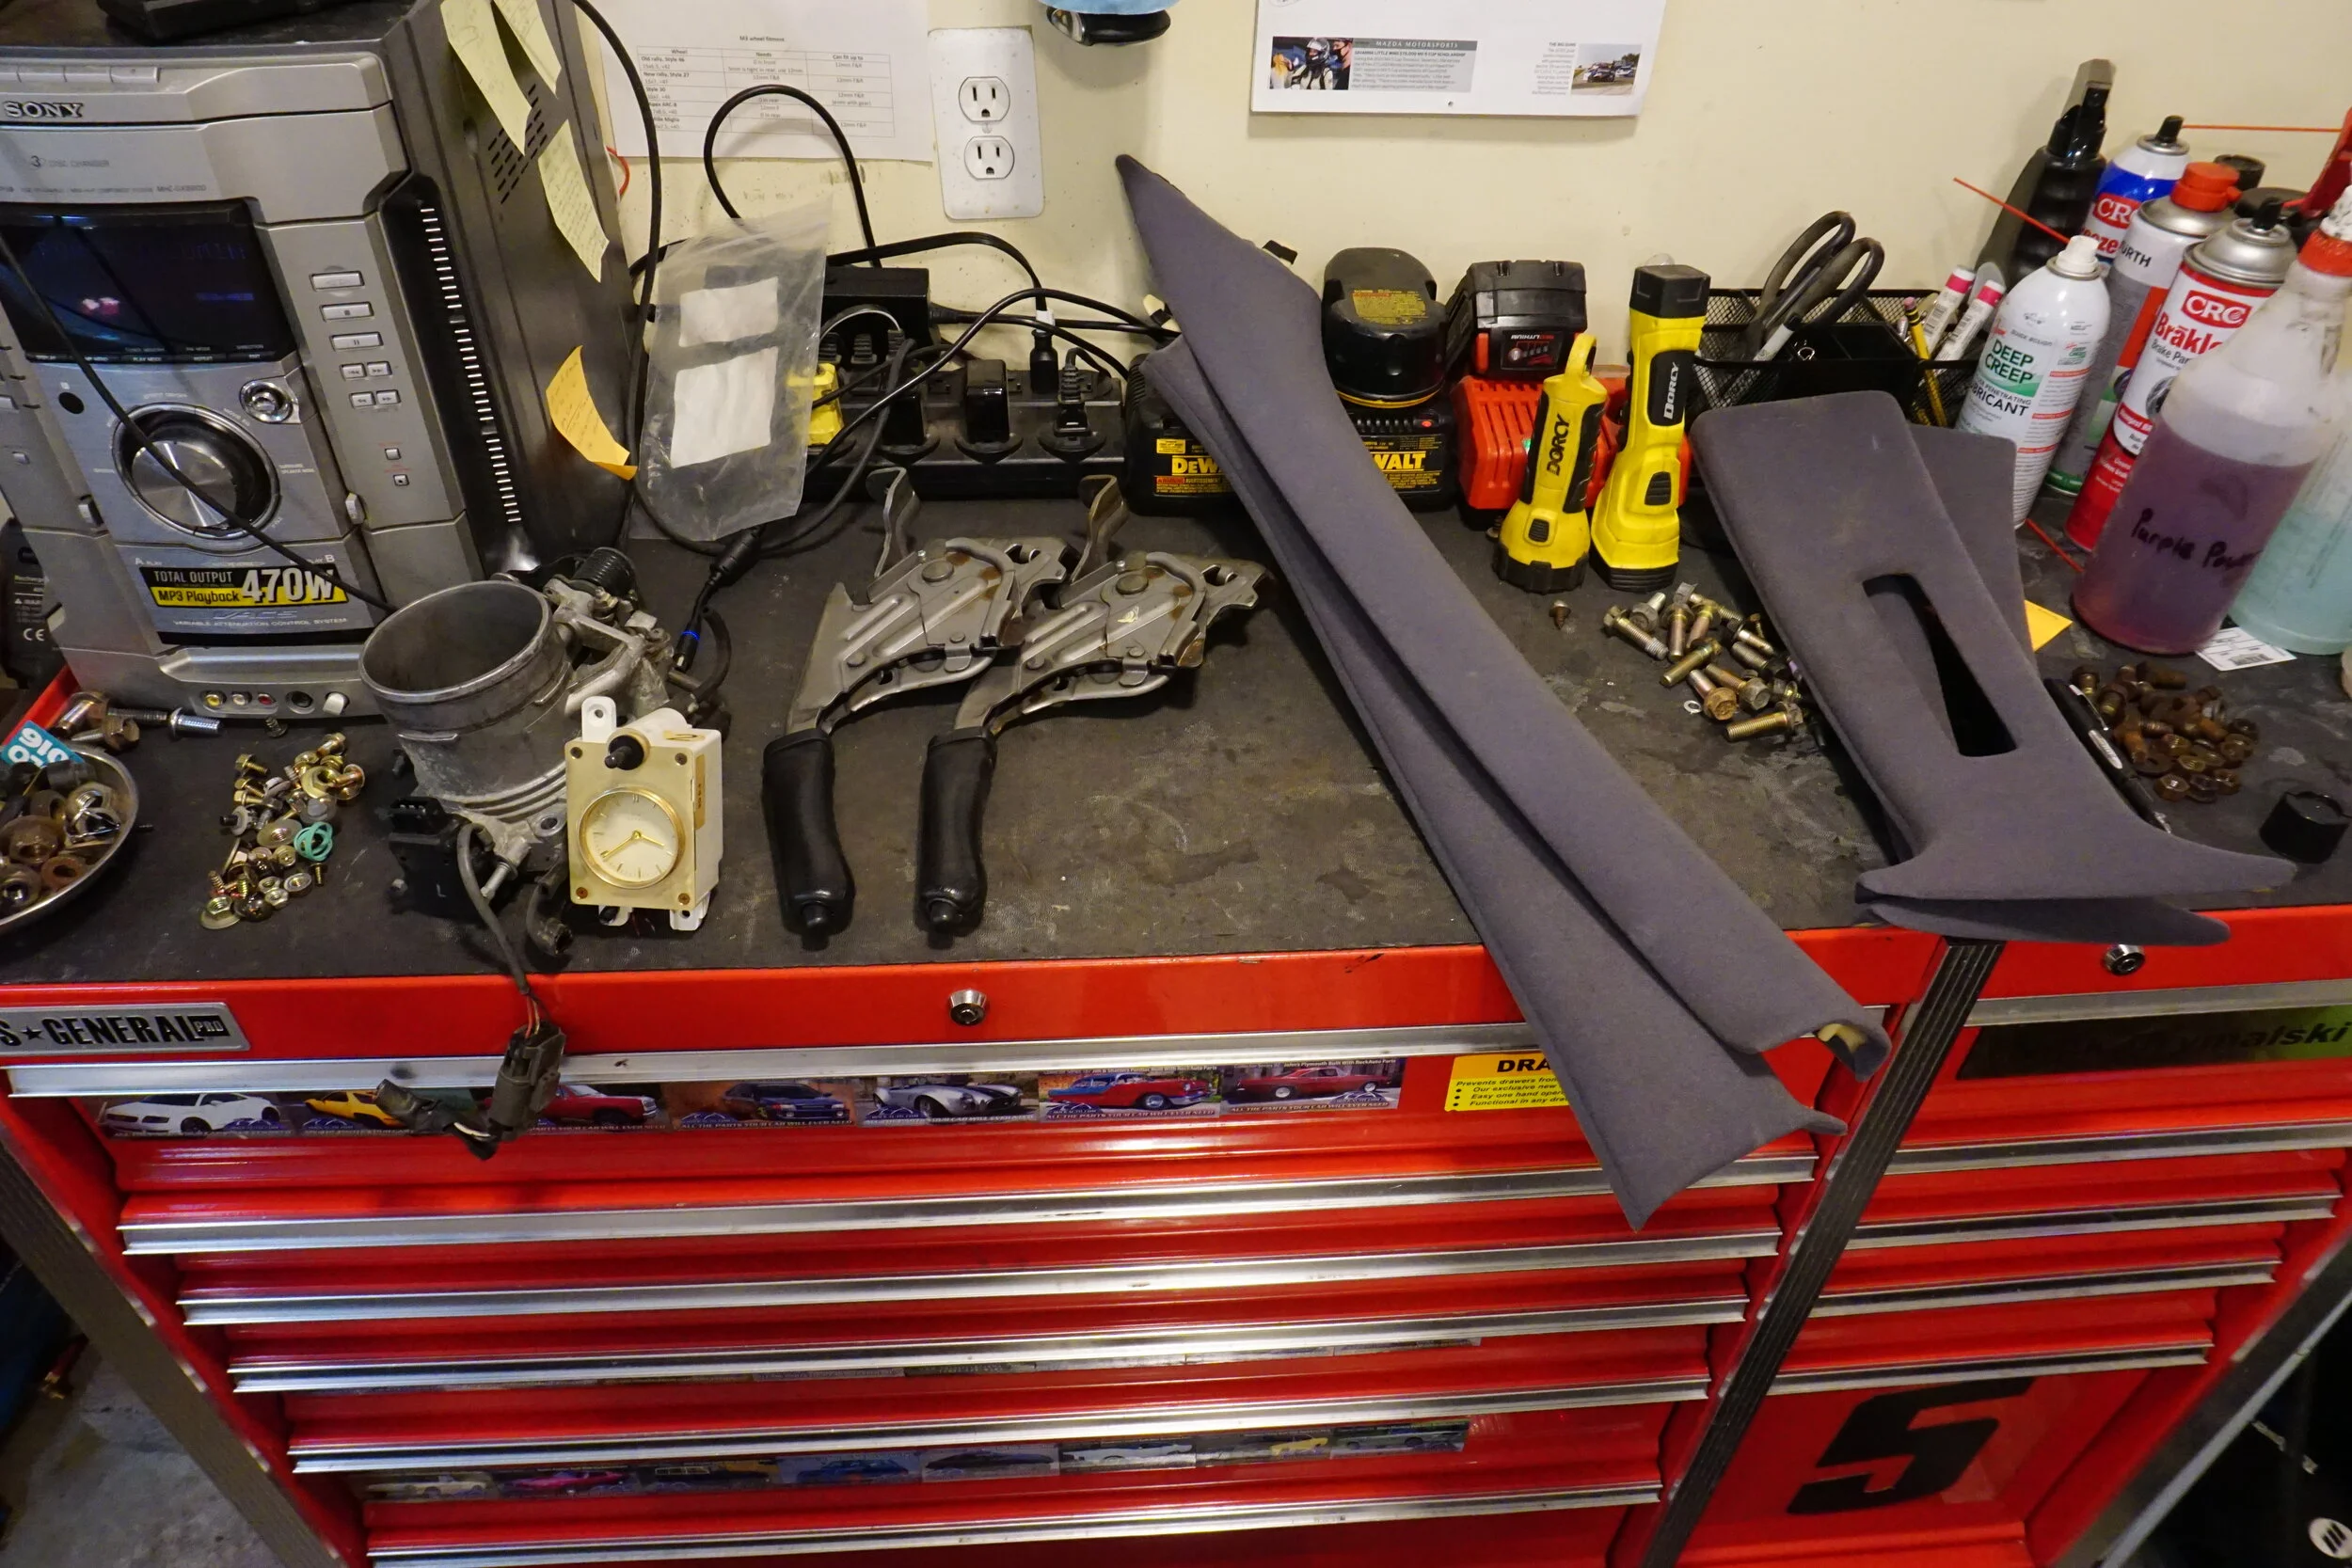
Also: grille in good condition, center 98-99 tail light that isn't separating at the top (which means I won't have to use a heat gun to smush it back together), and the door trim pieces off a silver 99 (different silver than my car). Some of my trim pieces are in rough shape, and these appear to be very similar in color to mine, so I may throw them on since they're in better shape. Also, other random junk.
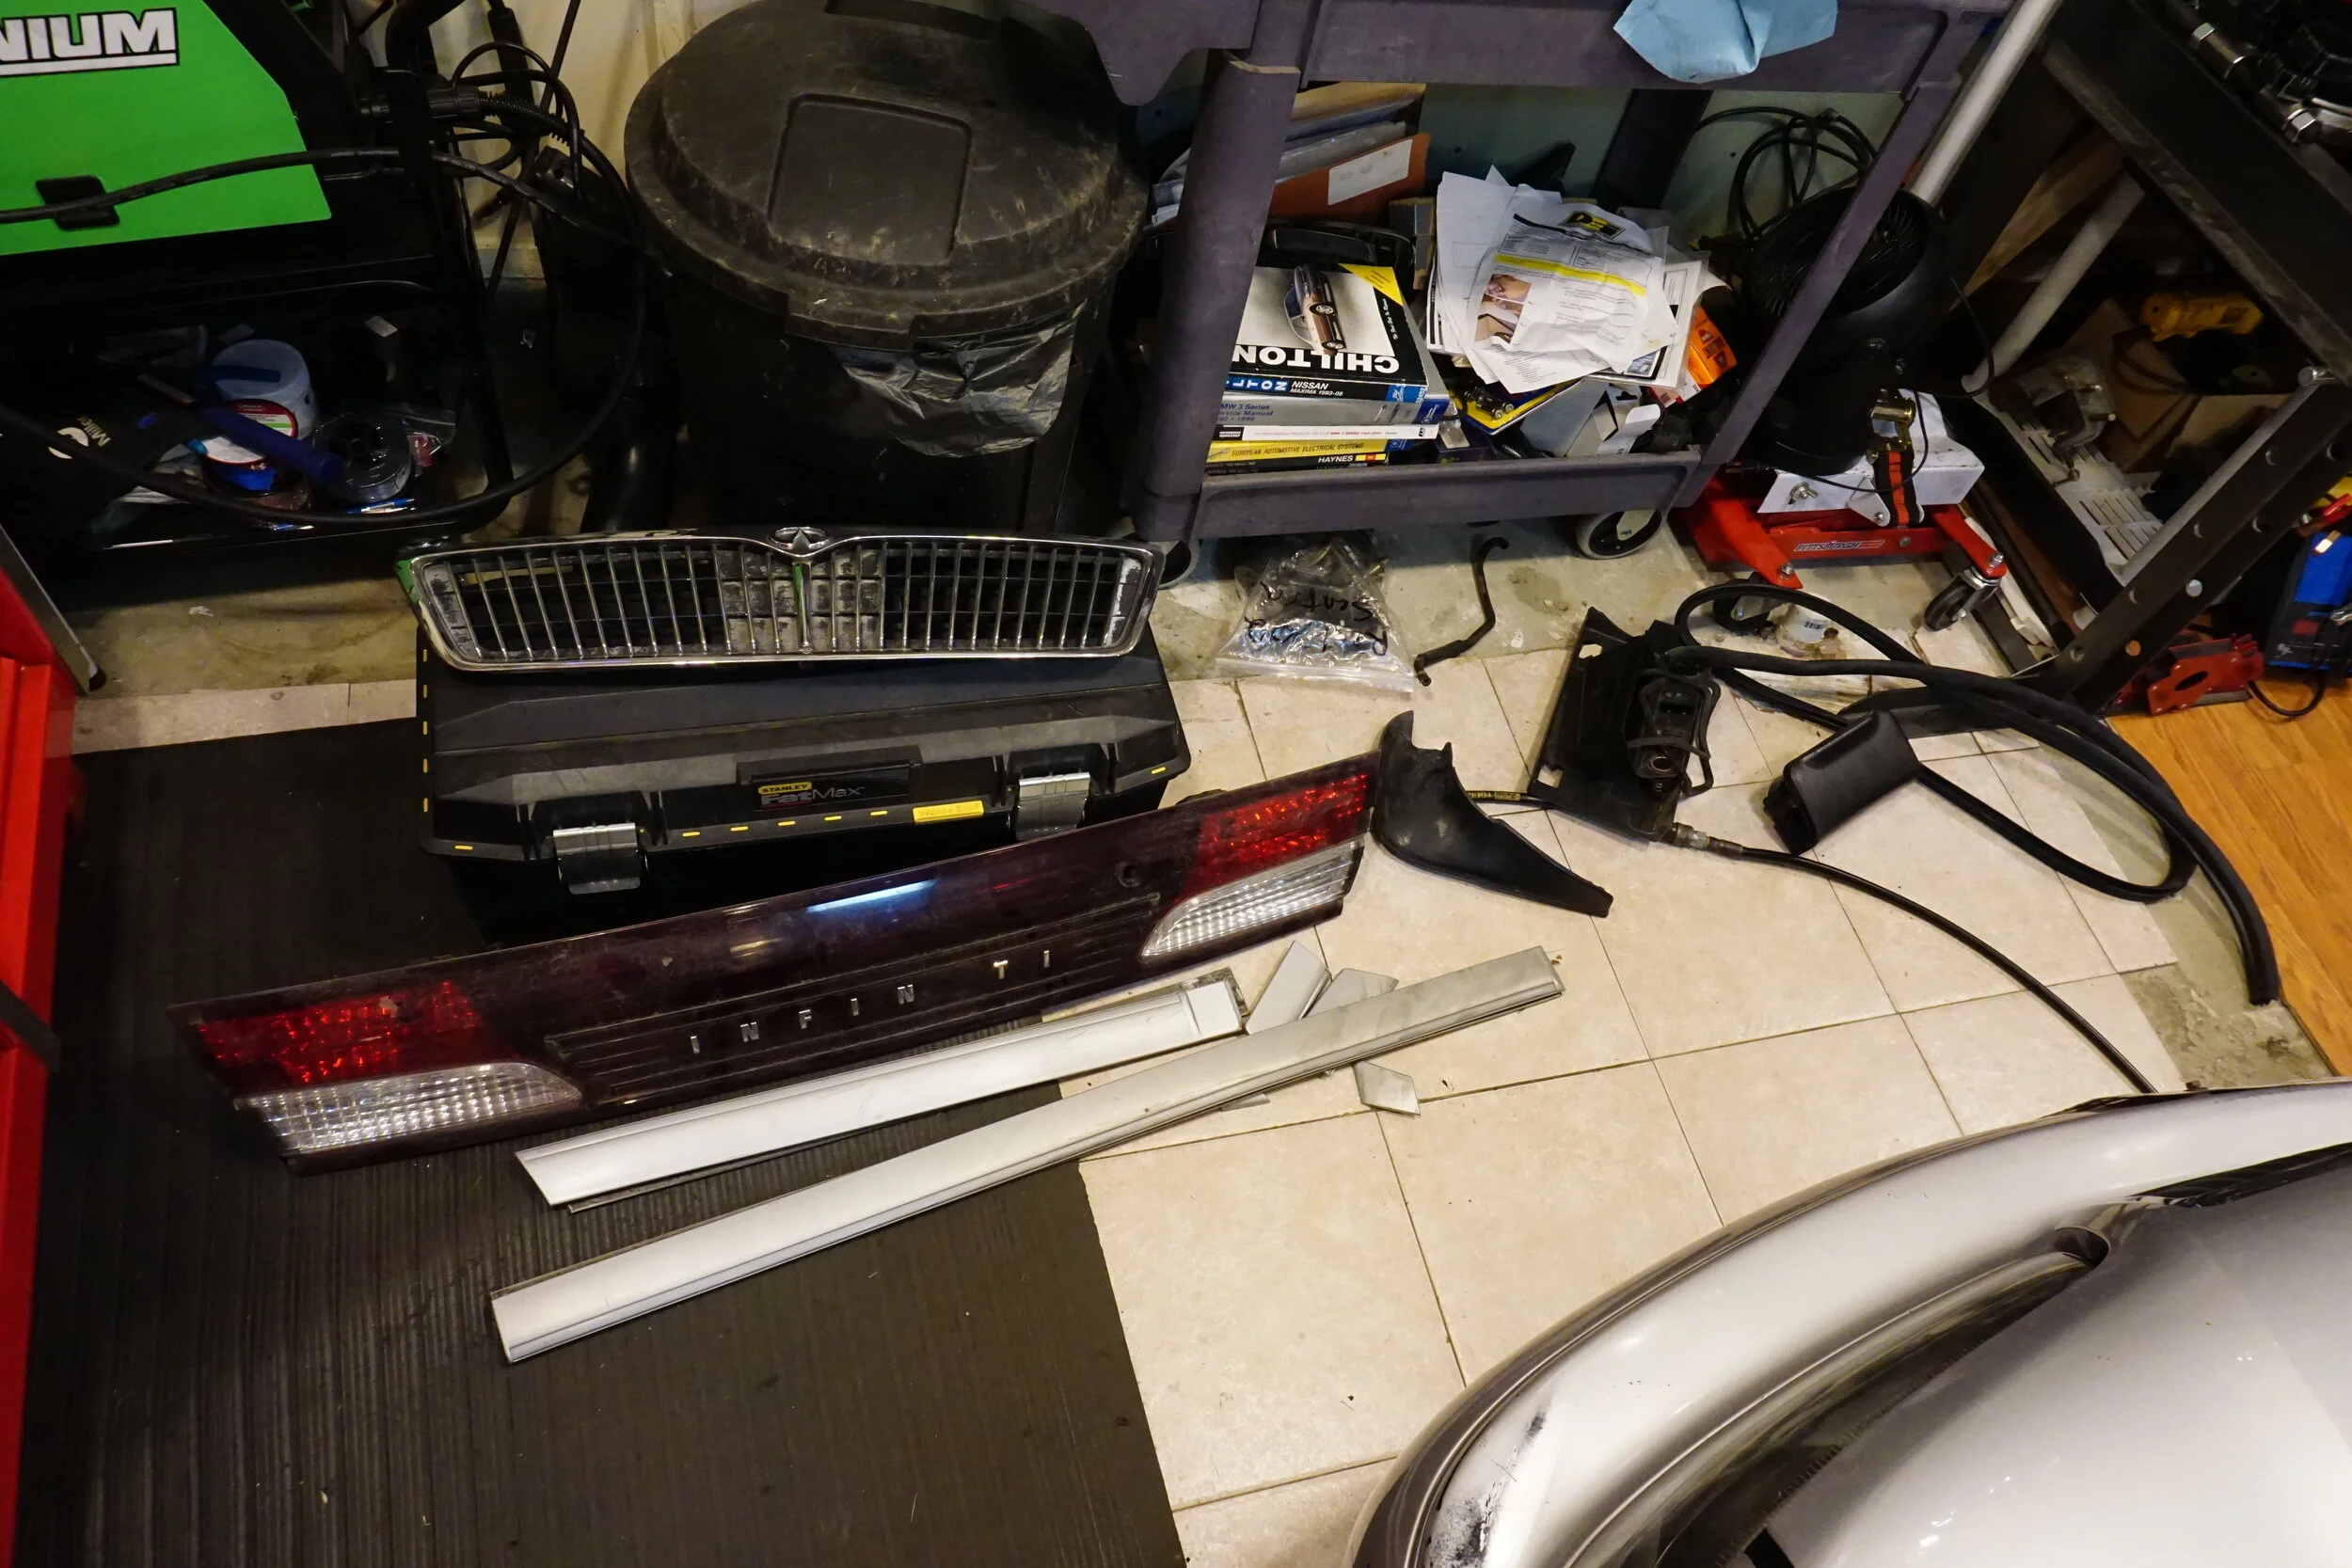
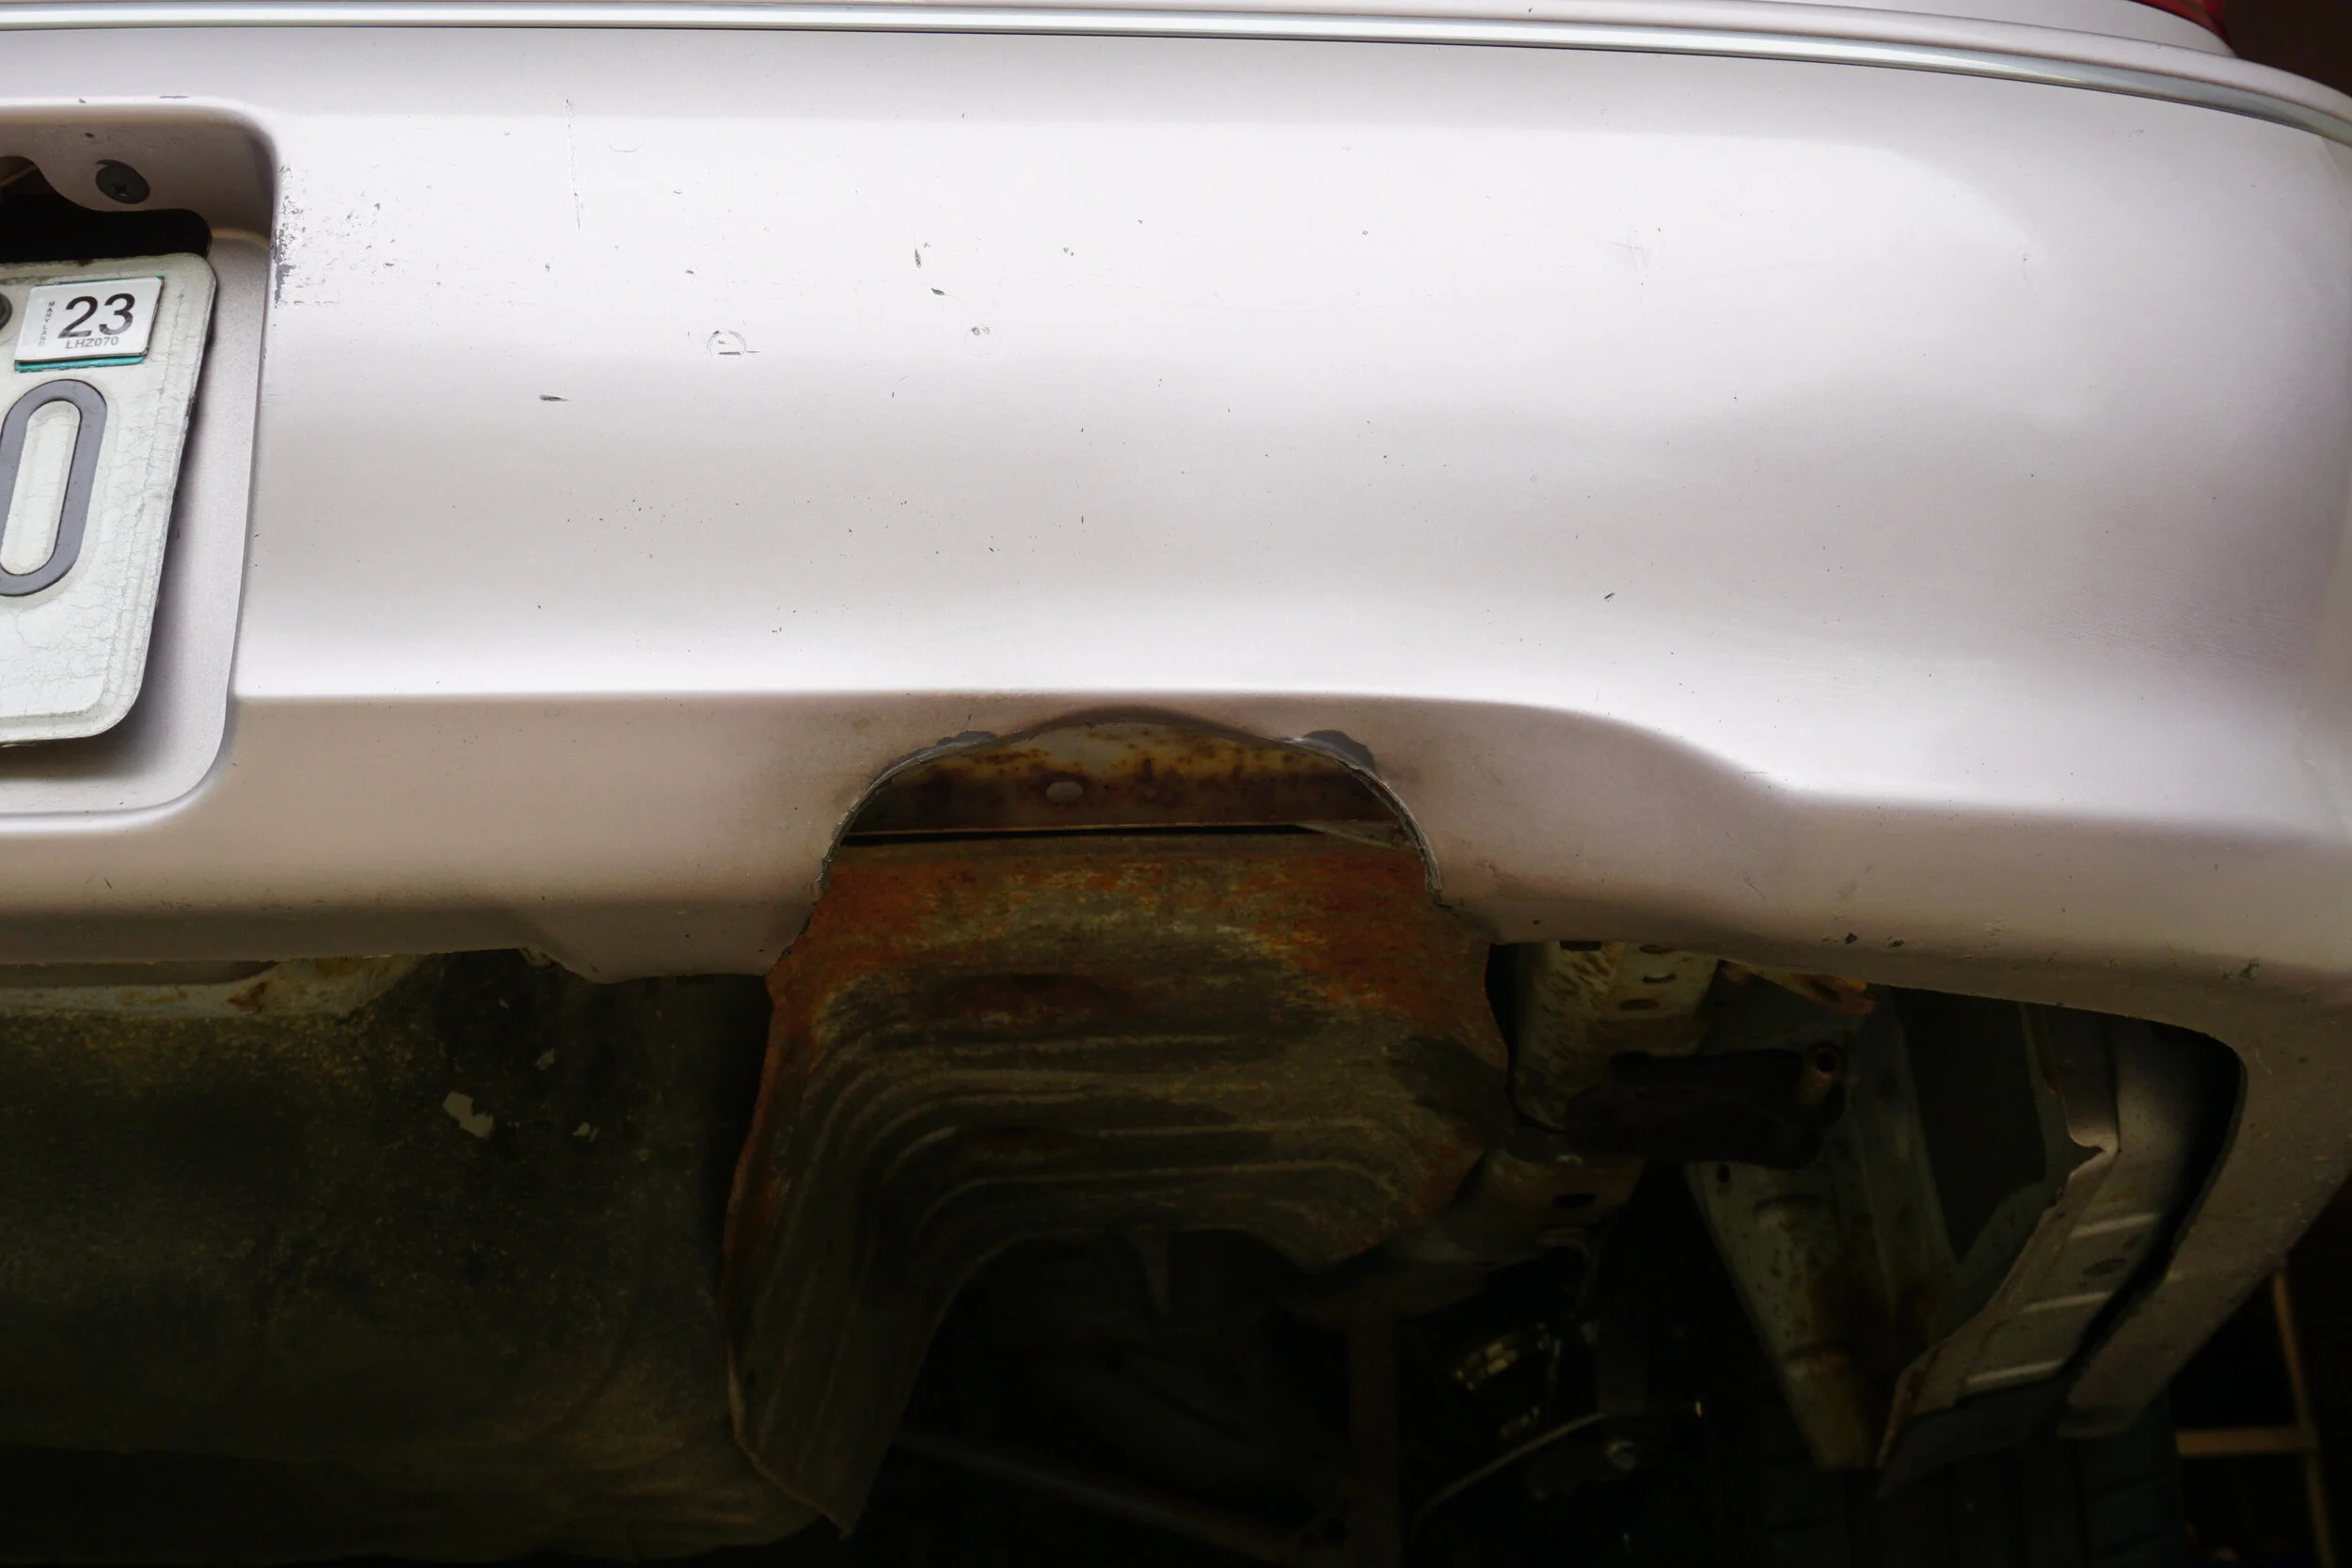
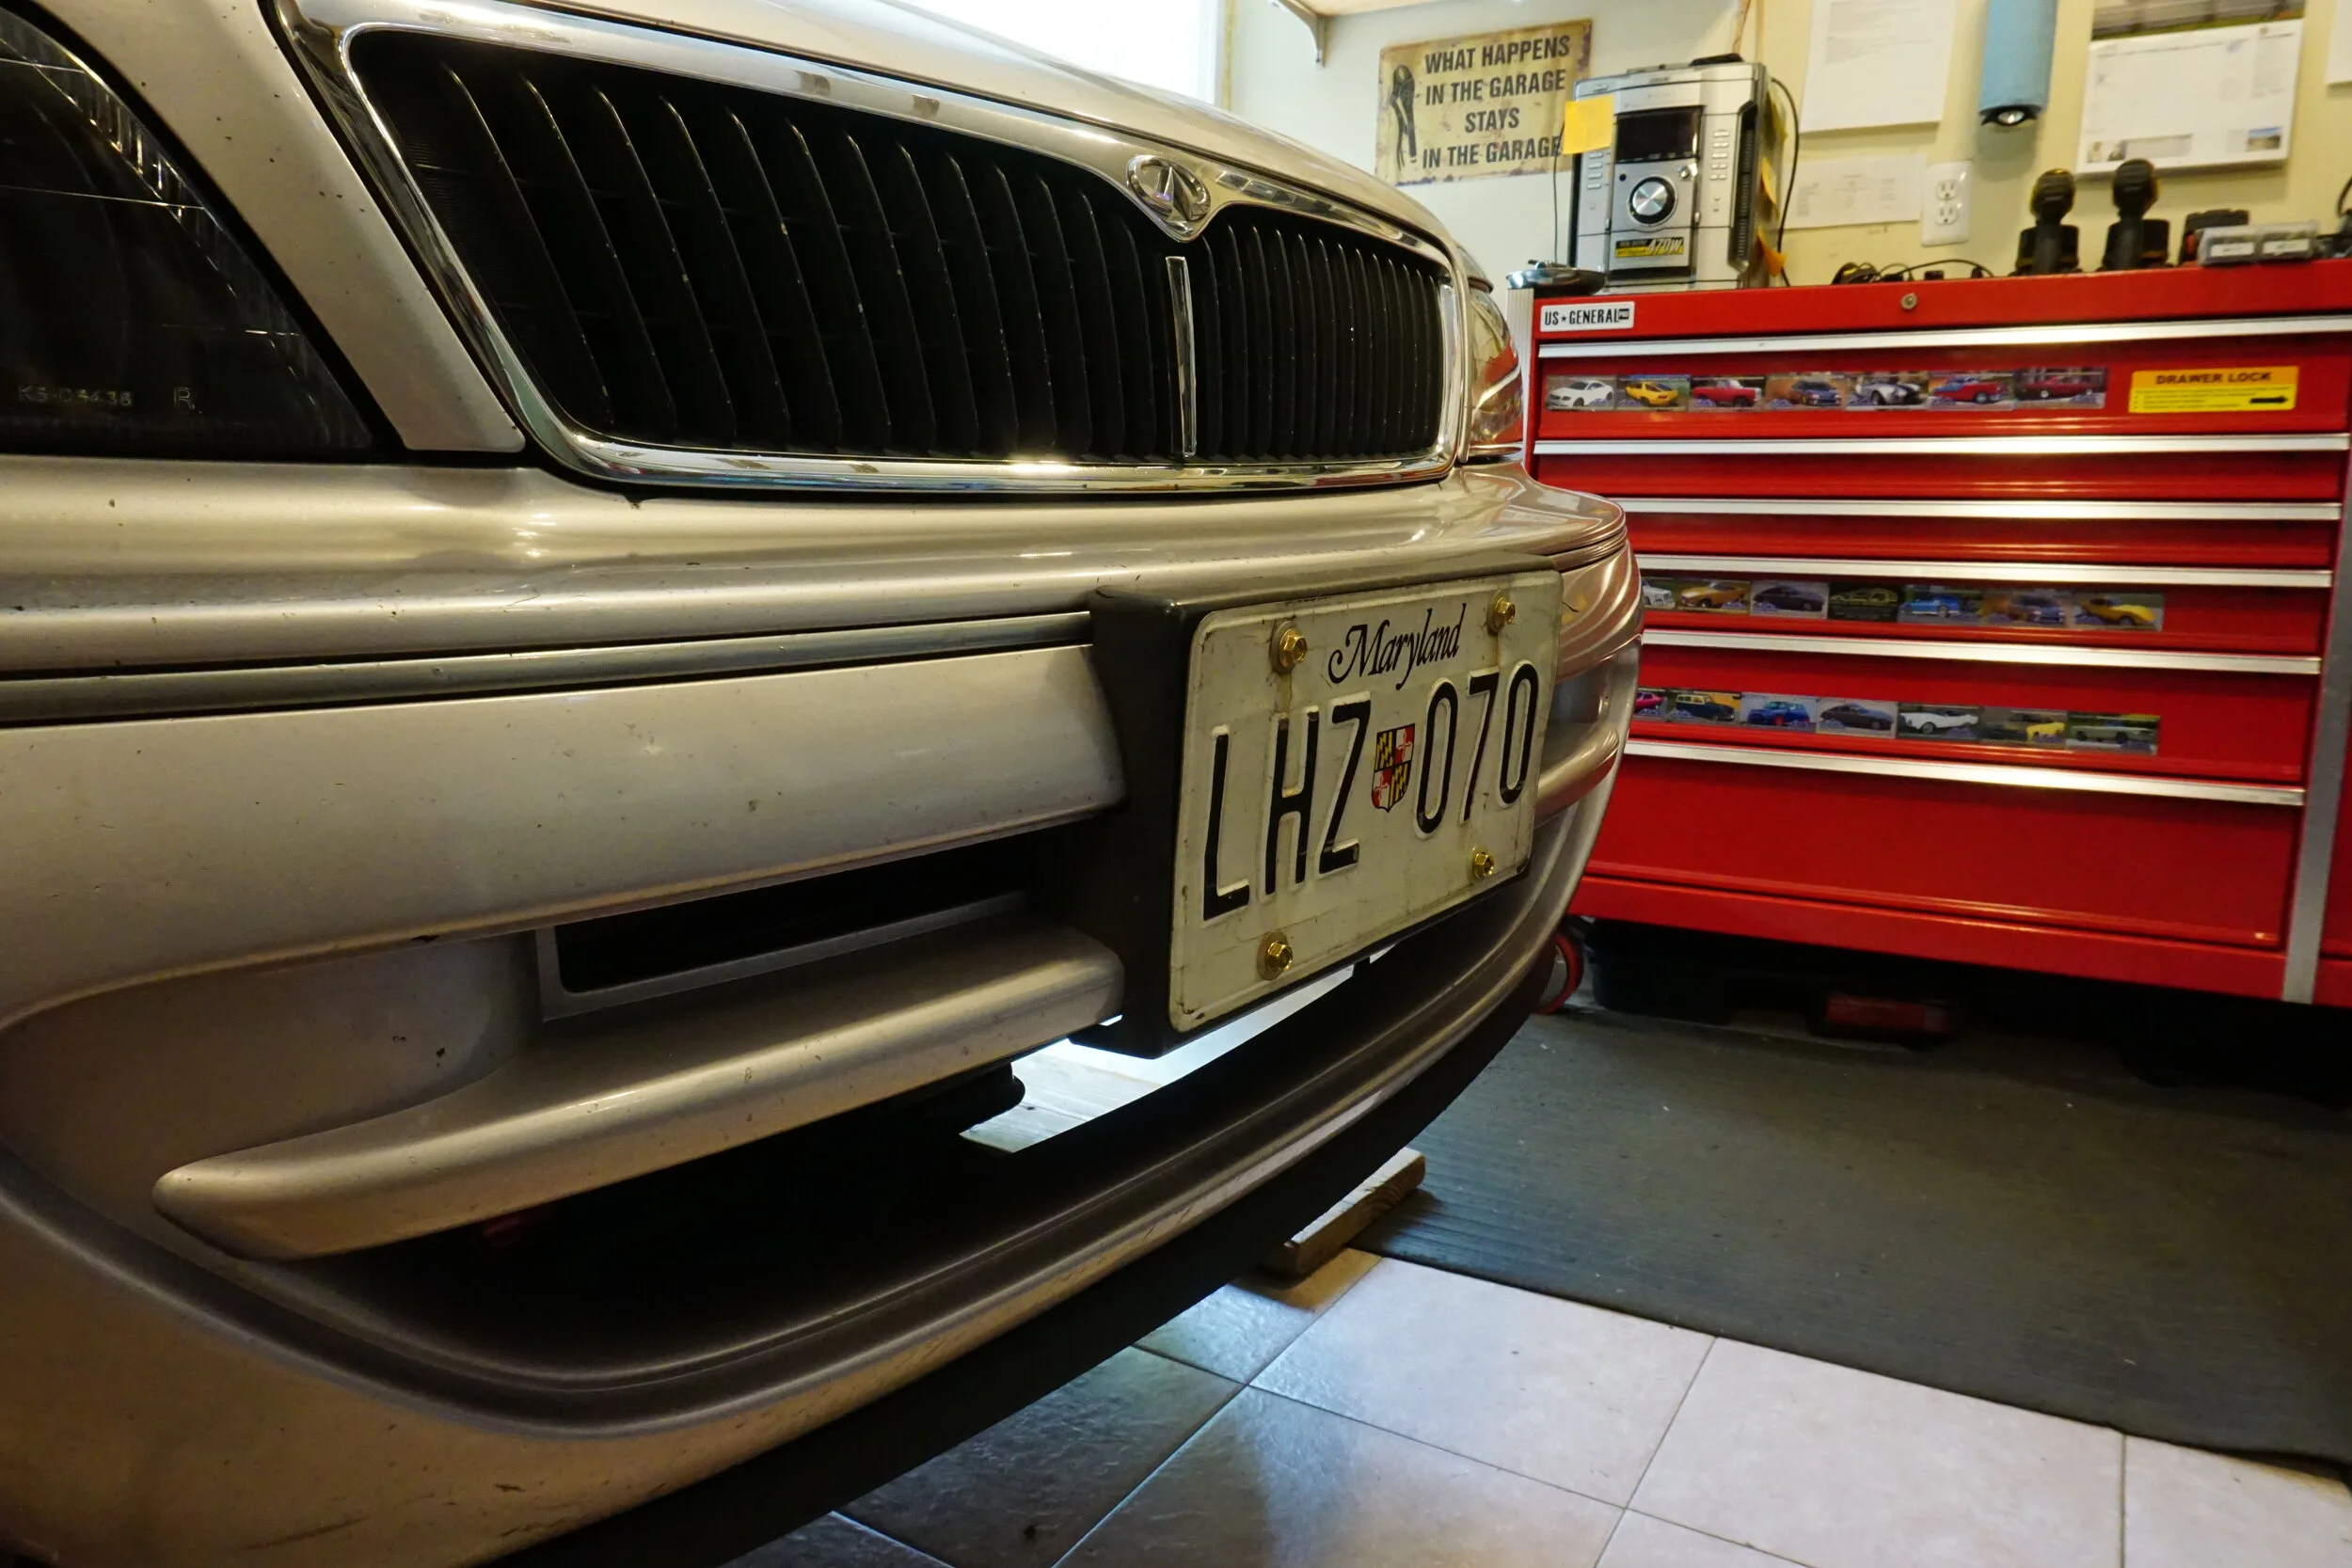
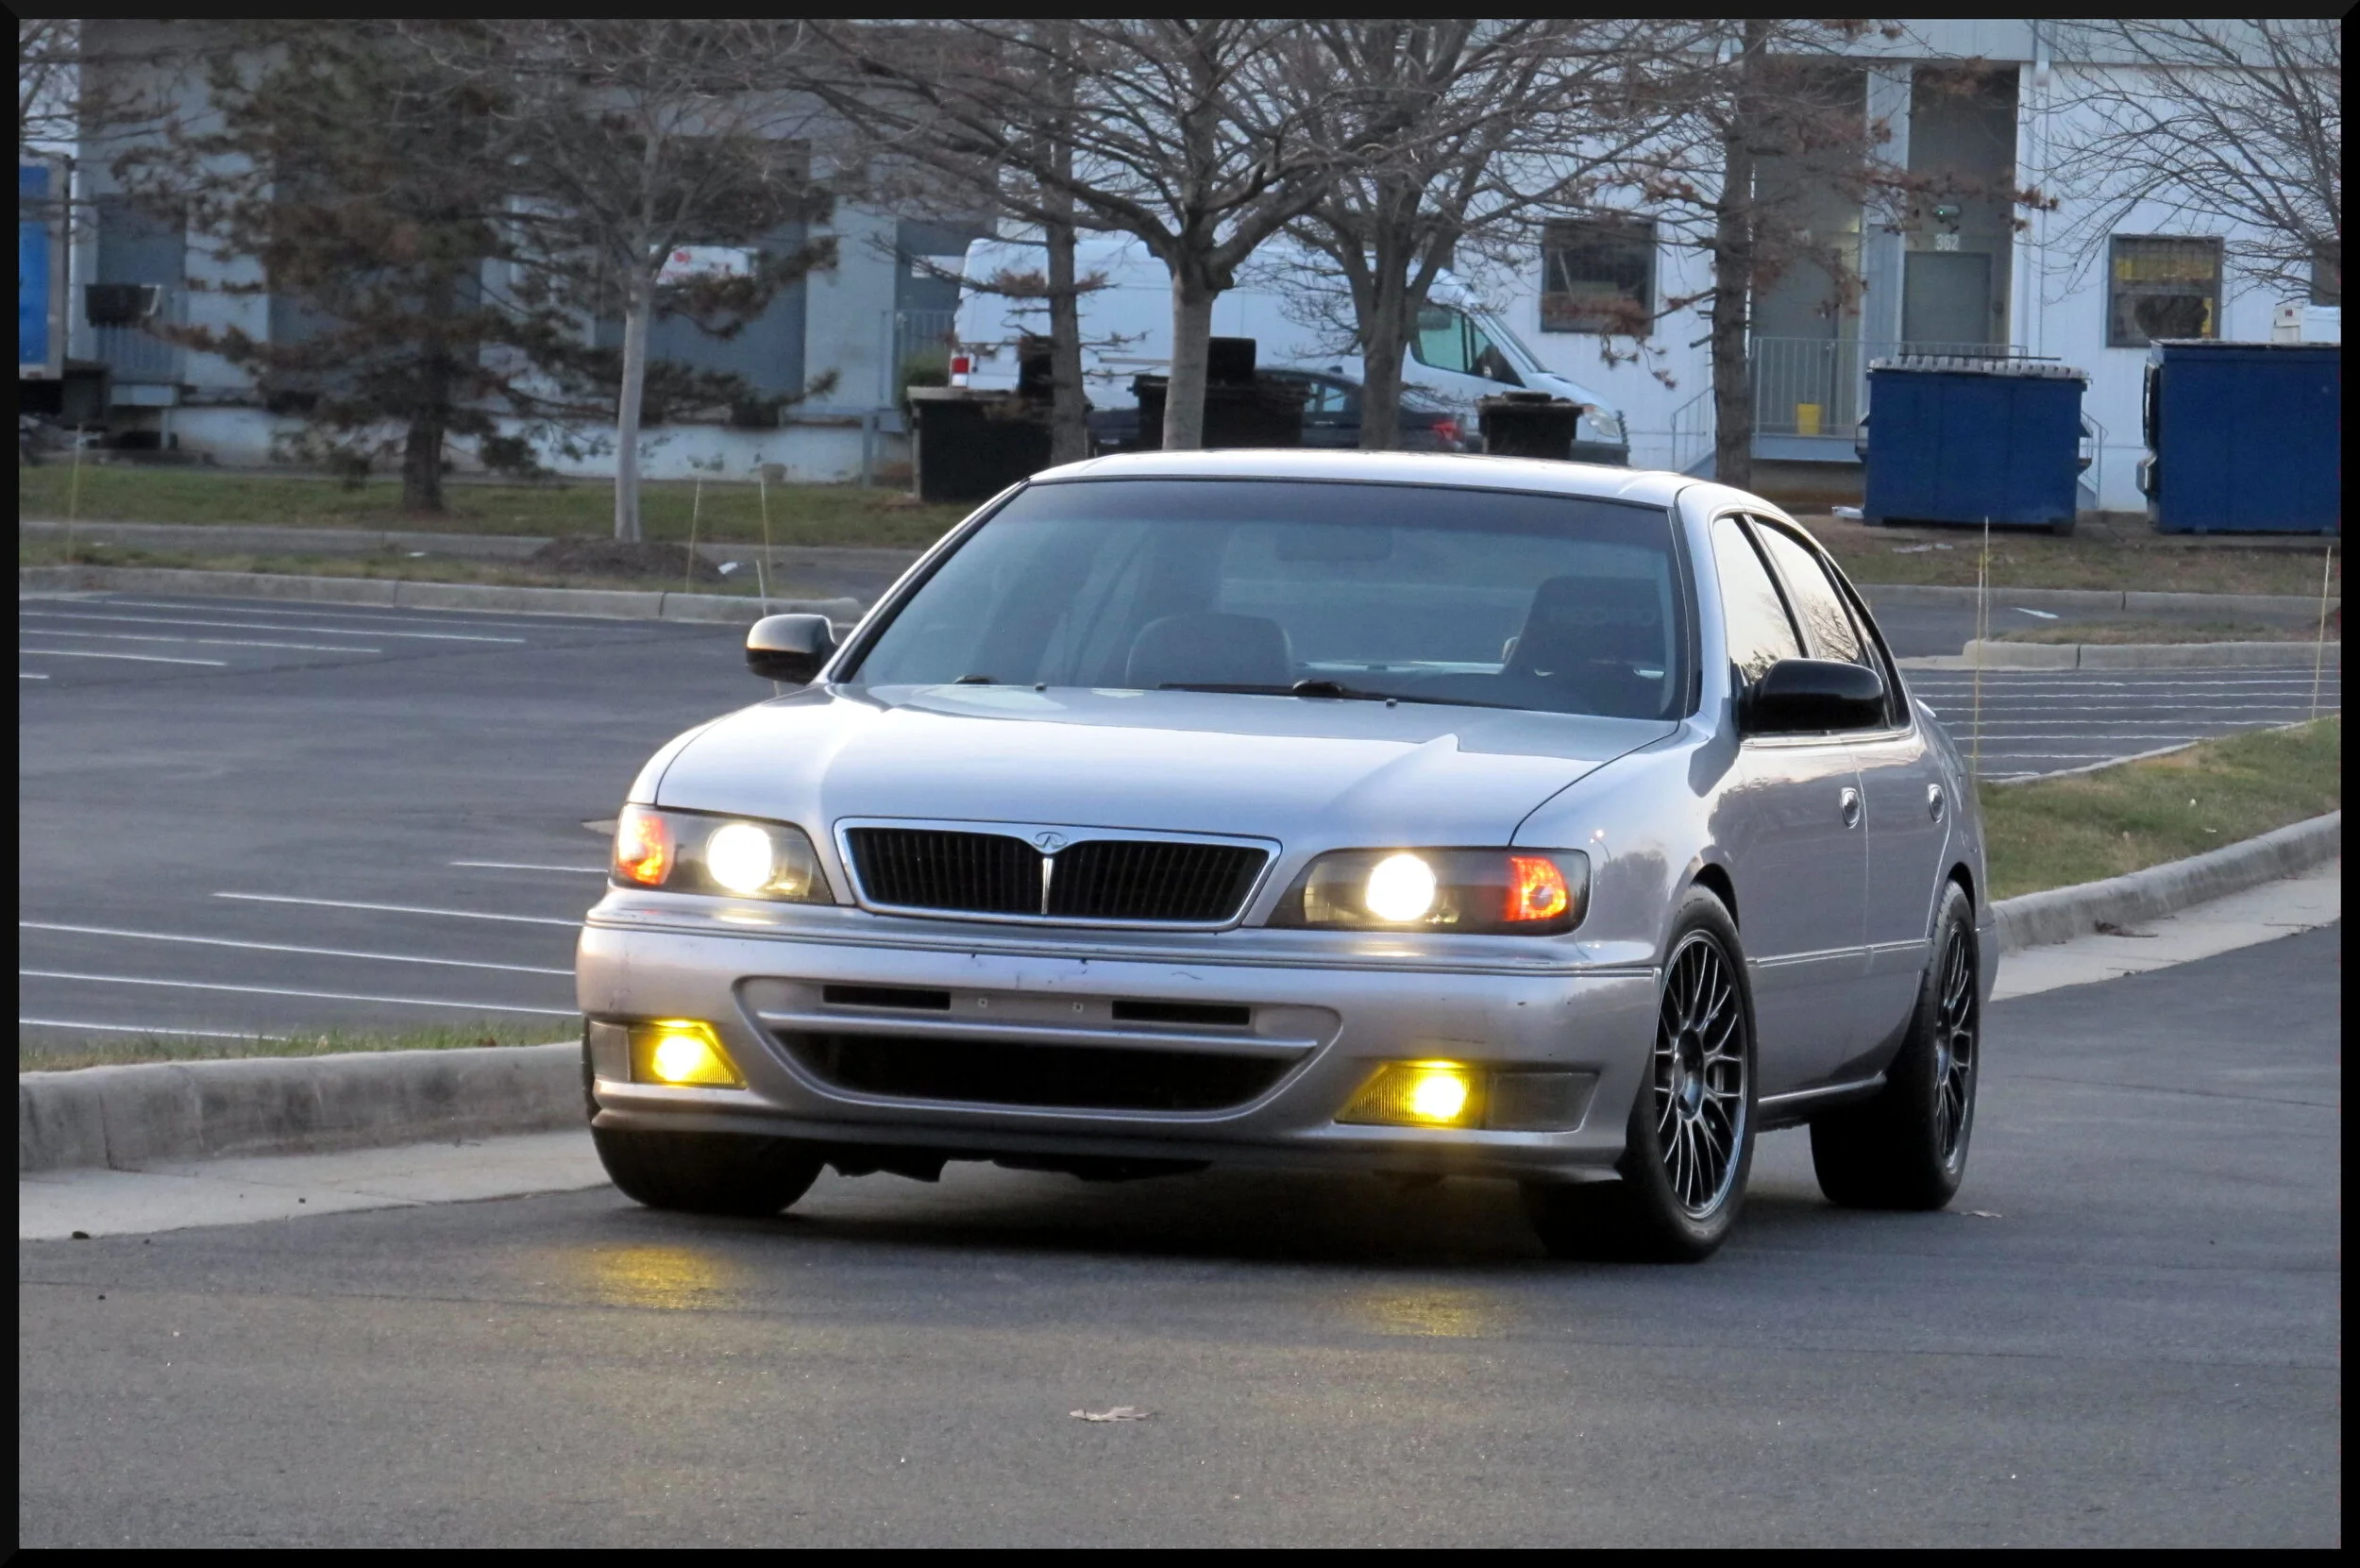
The front bumper I got came with the license plate holder in good condition, so I installed it on my car. For the longest time I wasn't even aware that this was a thing, but when I saw one I knew my current "screw it to the bumper" method just wasn't going to cut it any longer. So on it went.
Old:
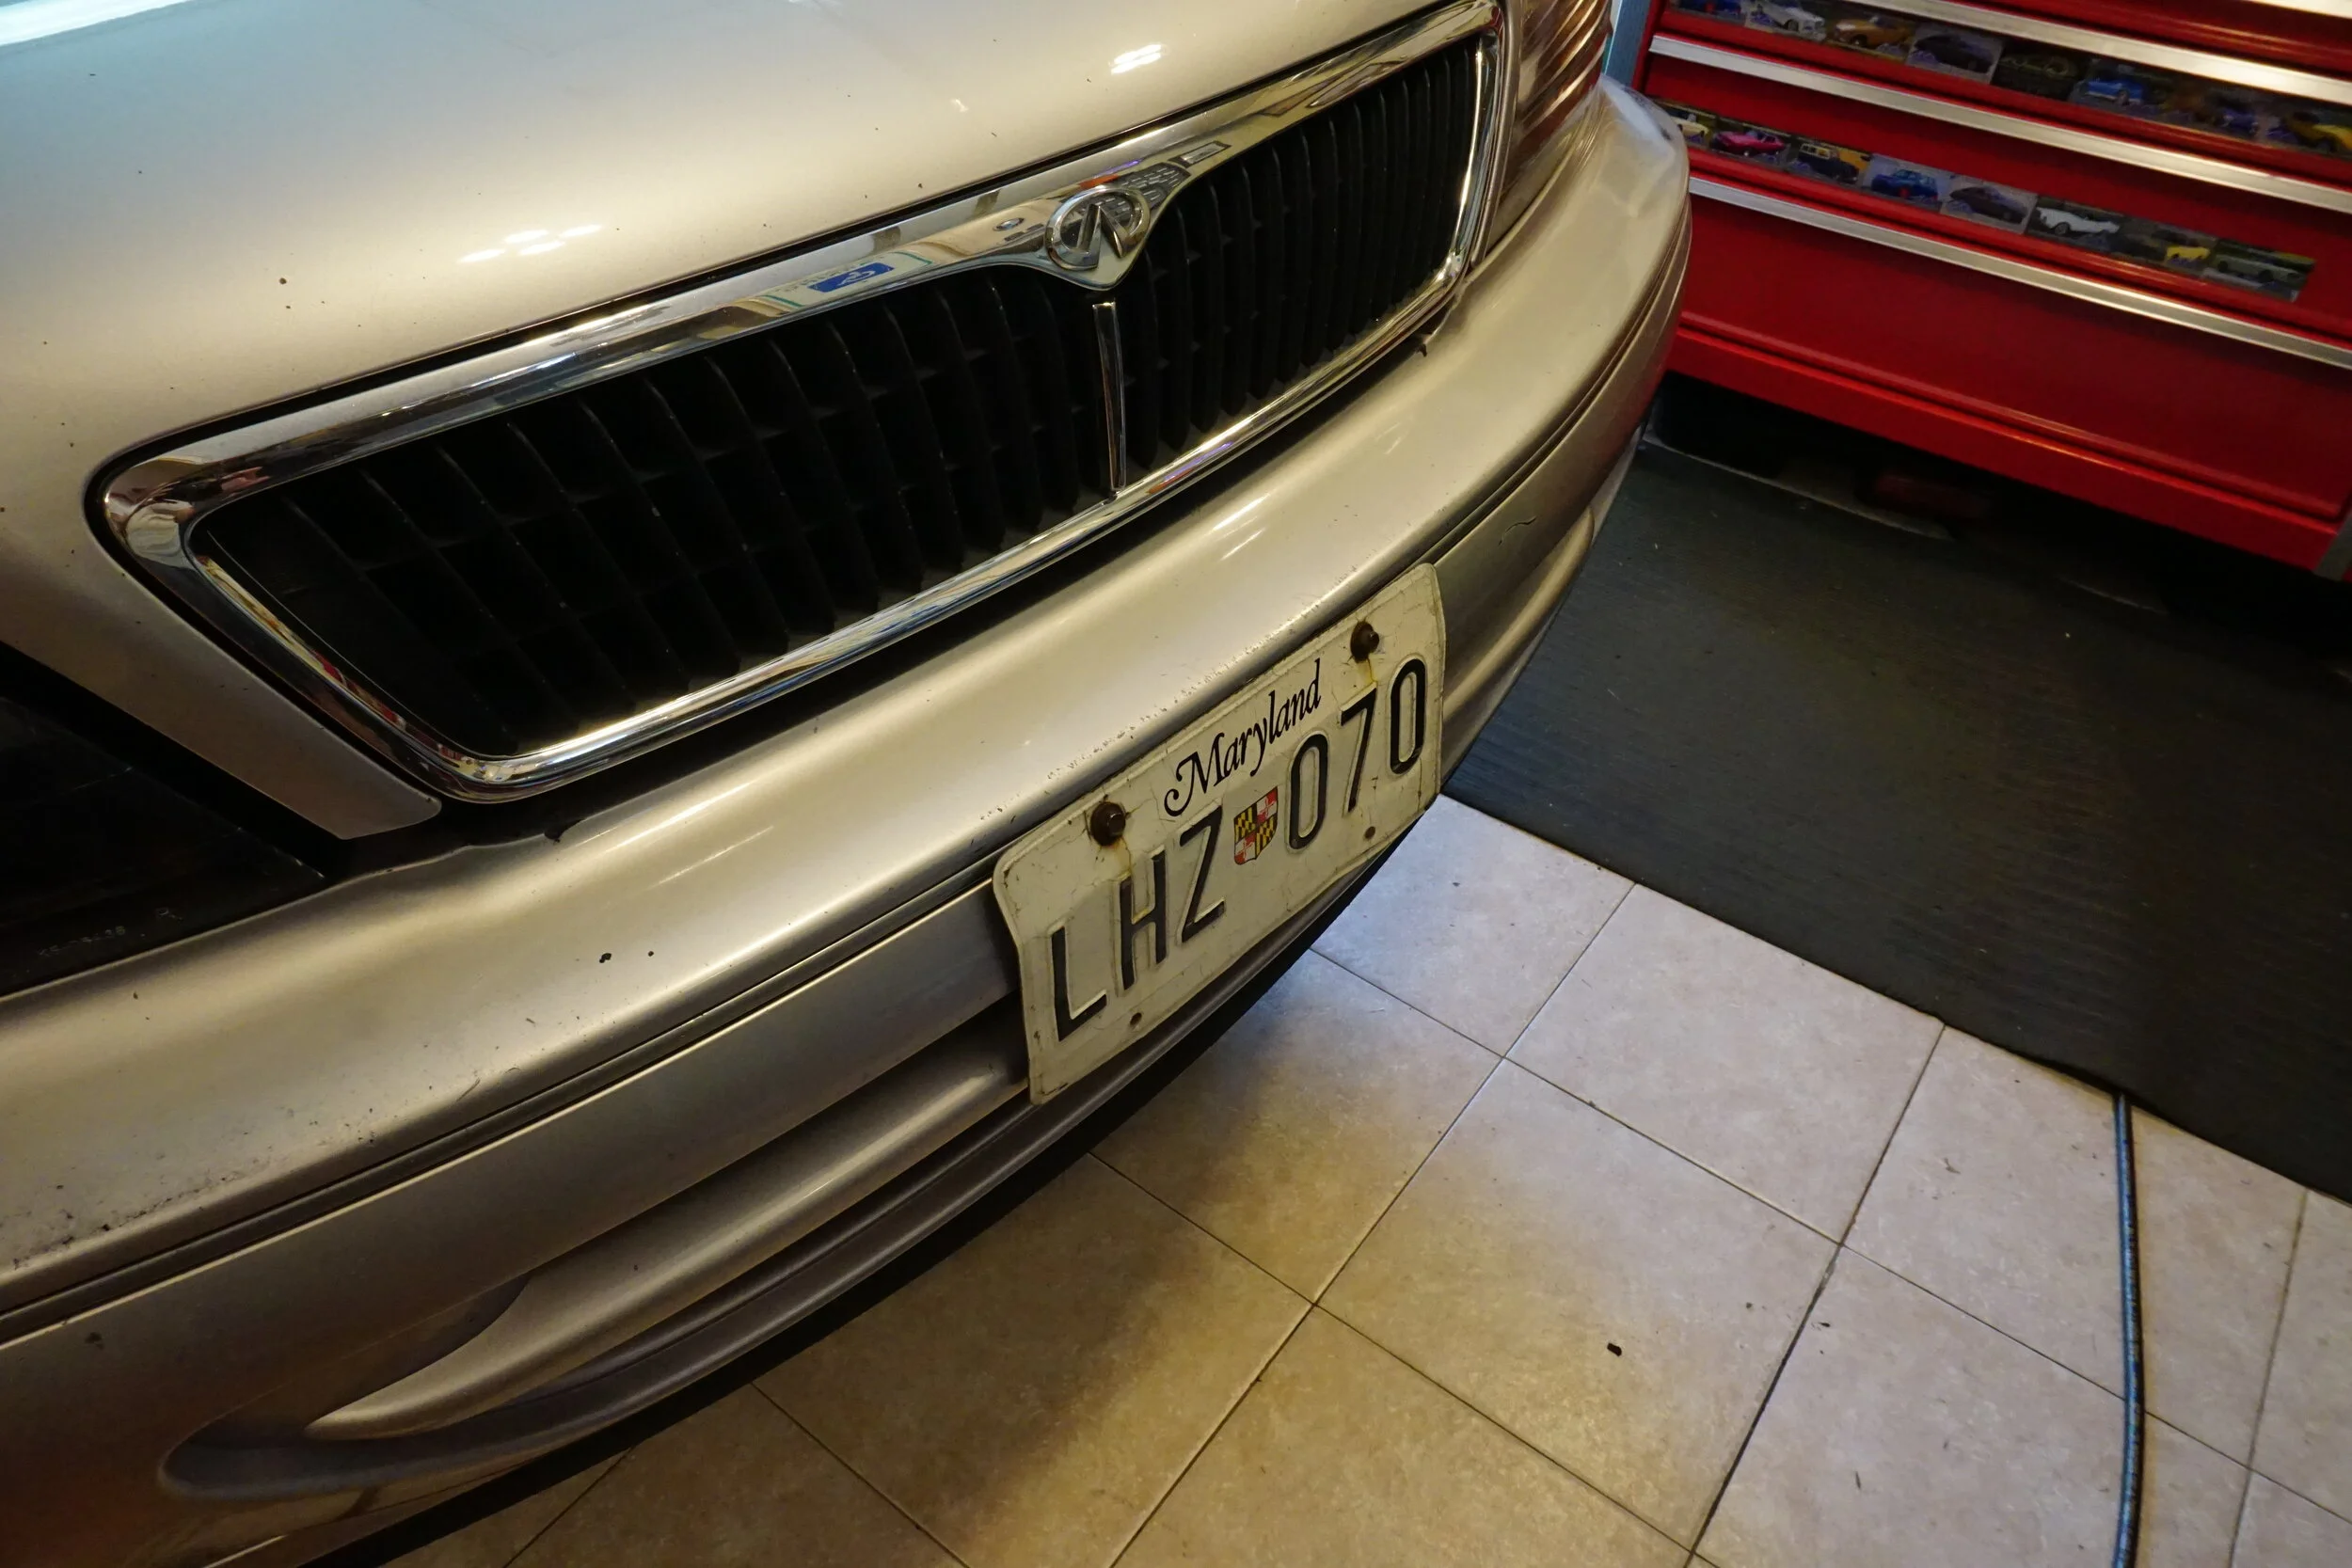
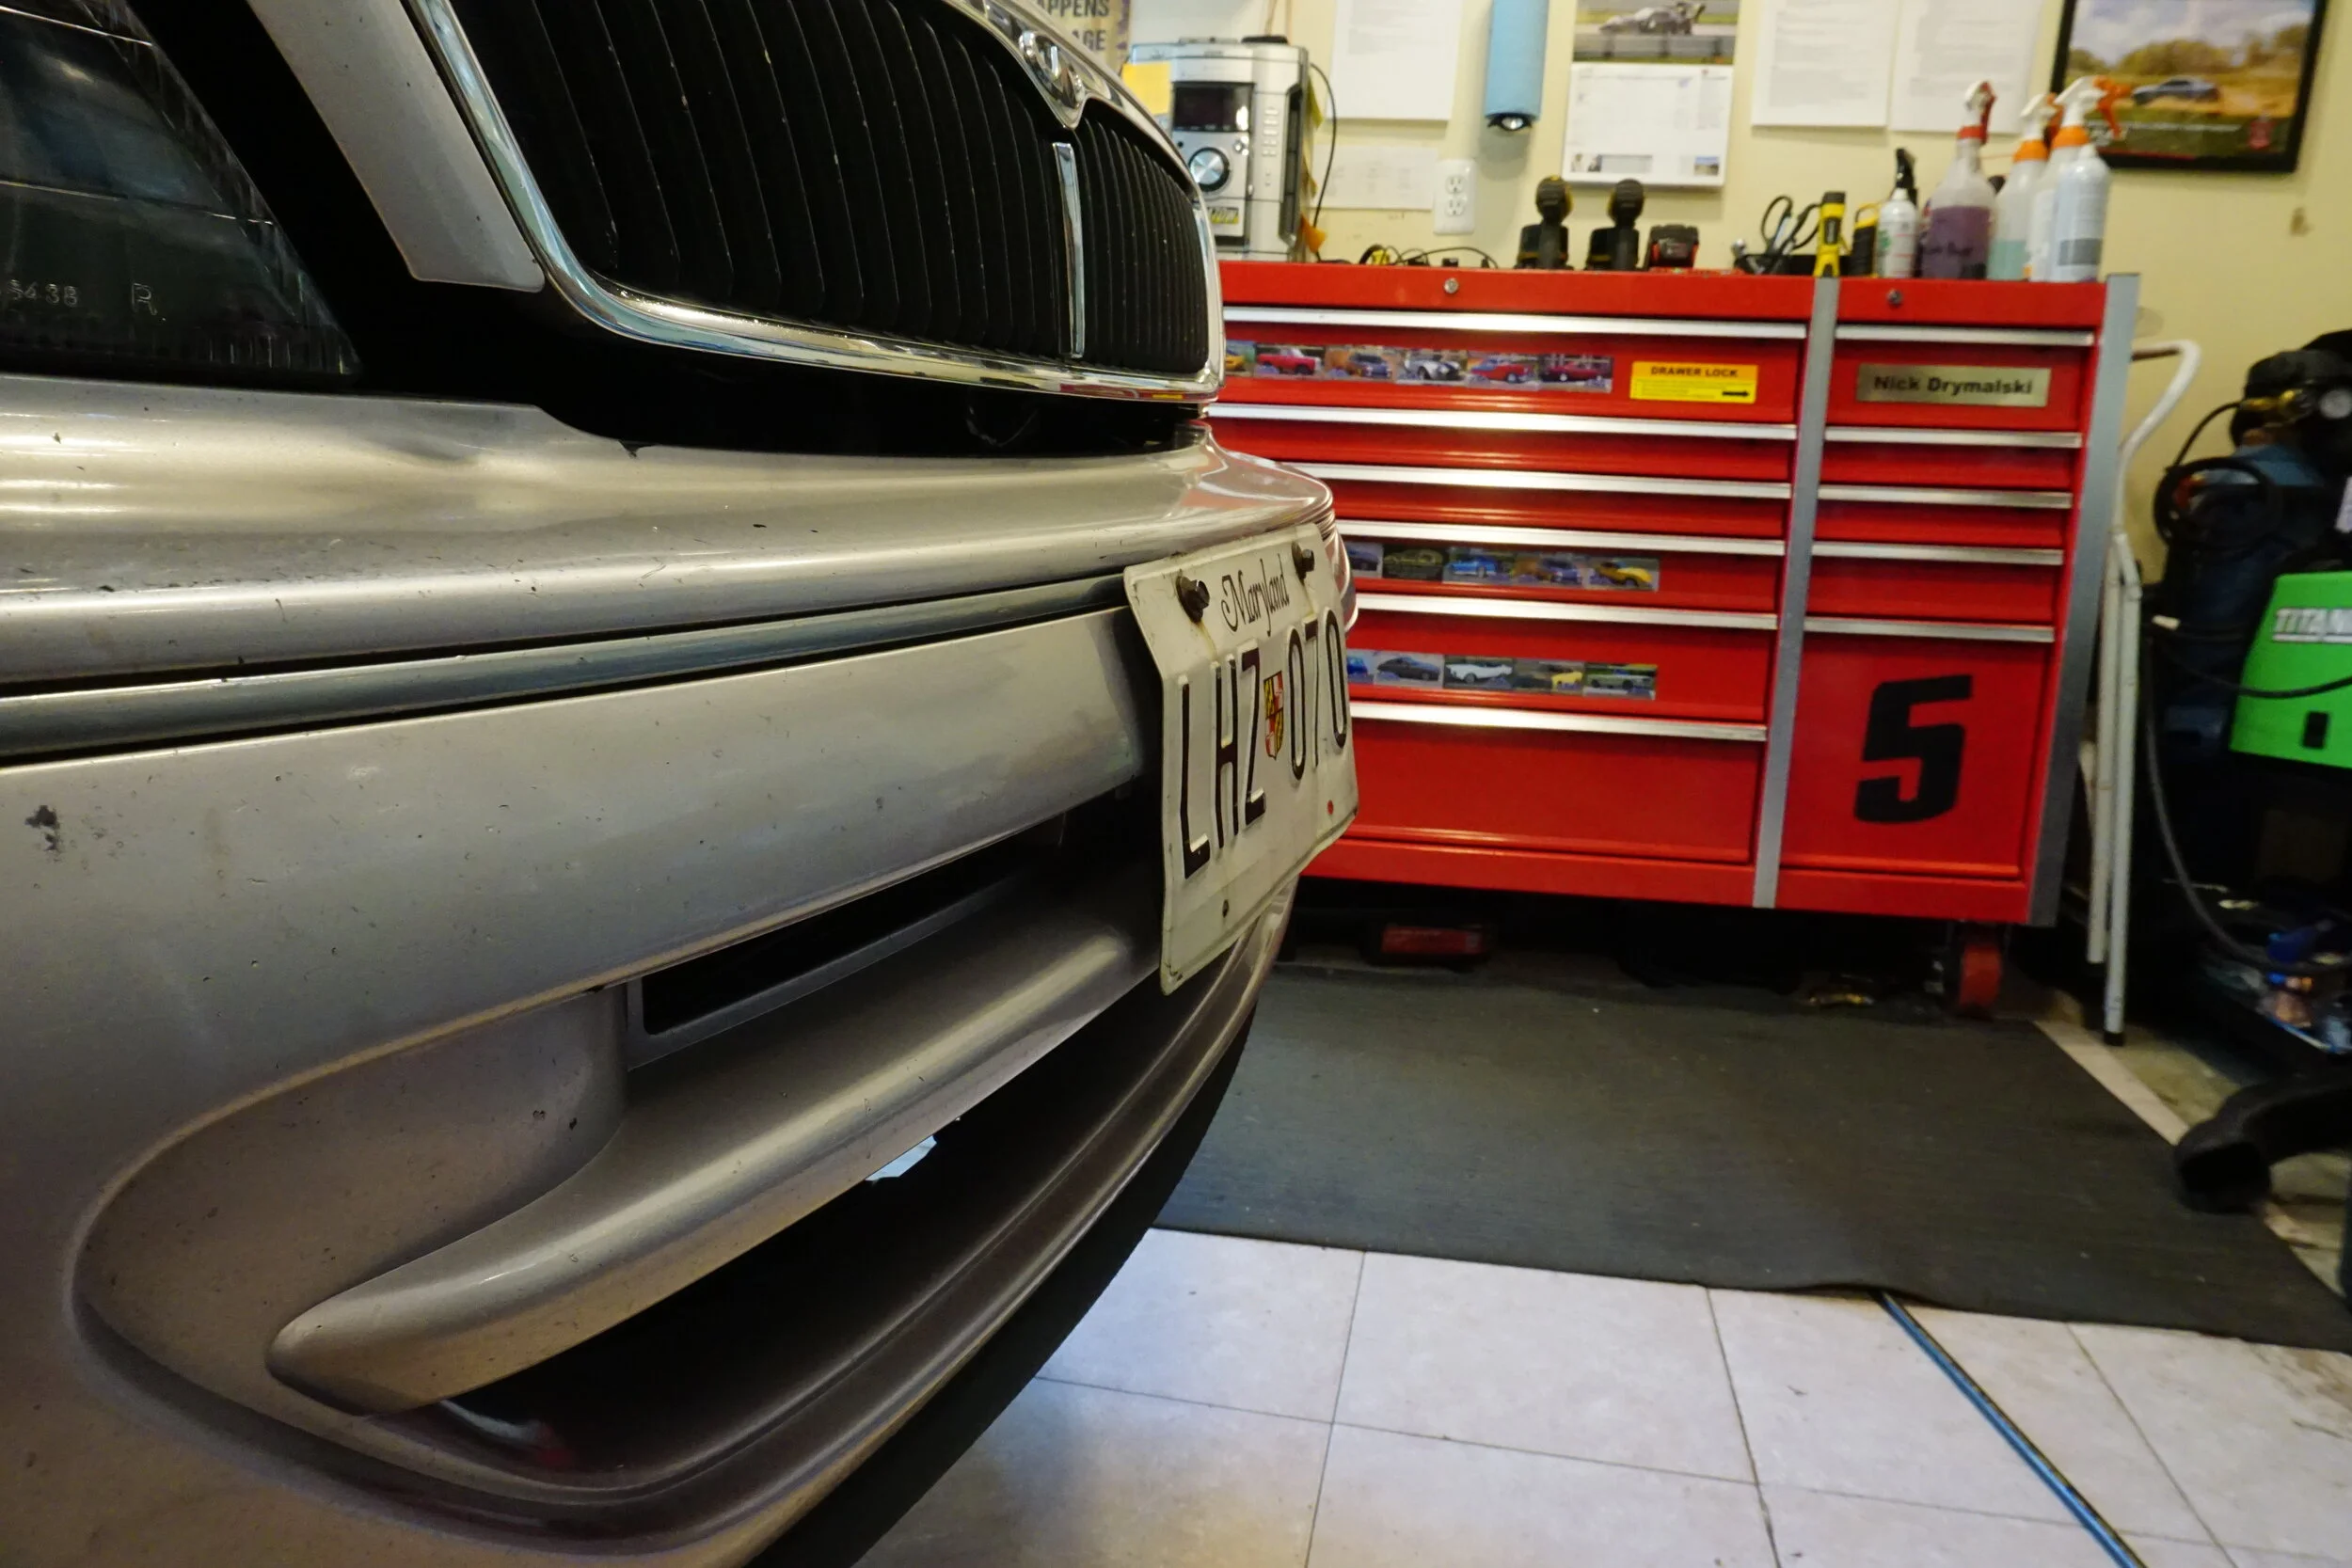
New:
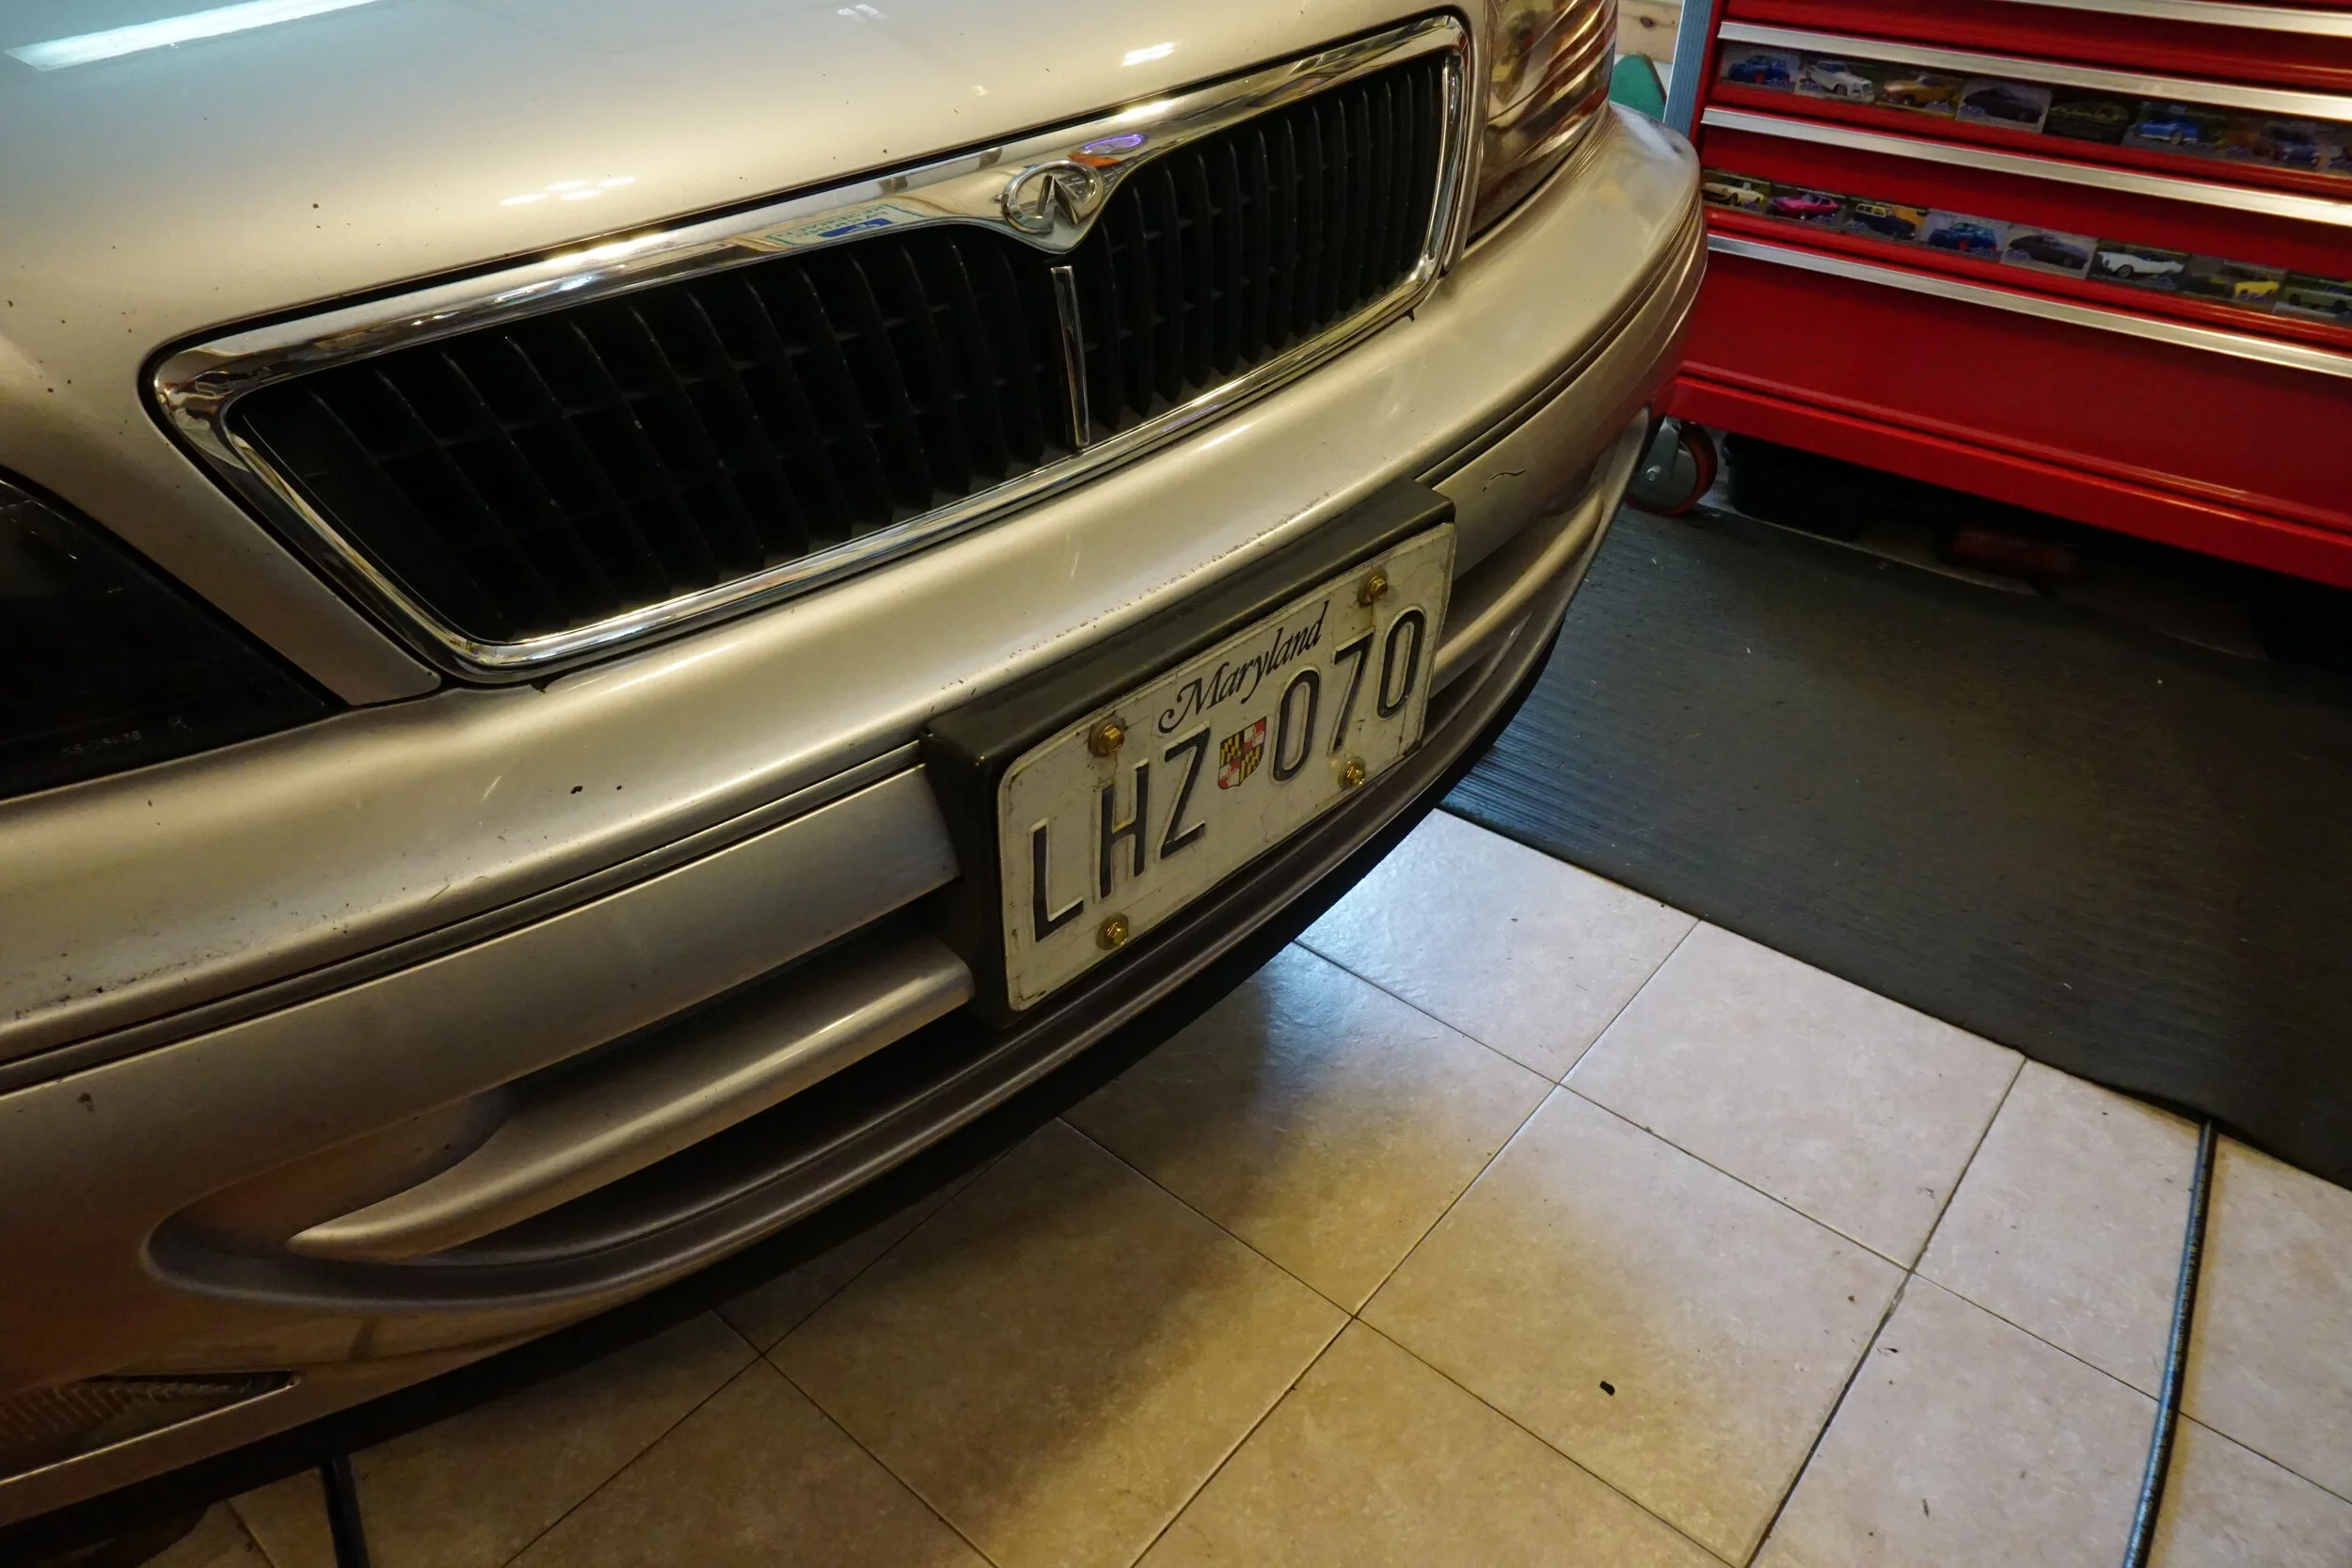
That's all for now, I'll try to post up more later.
Yeah, the muffler kind of made room for itself over the years by melting my bumper, and that bumper was now baked onto the tips. Even though the muffler won't be on the car for very long due to the upcoming 3" project, I wanted to clean things up a bit. So I got out my heat gun and something to scrape the goo off with, and cleaned things up with some Roloc pads.
I'll probably polish the whole thing before I put it up for sale, but for now, this is good enough. I then moved on to the cutout for the tips in the bumper. Basically, it had been melted into the shape of the tips, and looked pretty crummy with the muffler not hiding things. I didn't get any good before pics, but I started trying to make the cutout shape a little smoother/more natural while also giving the tips a few mm of breathing room. Cue the dremel and files...
With the muffler reinstalled there is a mm or two of space between the tips and the bumper, so hopefully the melting days are behind me.
I then made a day of running around junkyards grabbing parts for the cars. I found a couple I30s that were in great condition so I got a bunch of parts off them. A '94 Q45 had also just entered the lot, so I wanted some things off of that. Here's what I got:
Pristine (but dirty) front and rear bumpers. My bumpers have been smushed and gouged over the years, and would require quite a bit of body work before I paint them (they need it). These are in great shape, and even the chrome trim line is intact and in better condition than mine.
90mm Q45 throttle body (these cost insane amounts of money online!), fancy Q45 clock (no idea what I'm gonna do with it), mint condition black leather e-brakes, and mint condition fuzzy A and B pillars that match my car. I was super proud that I was able to remove these without cracking any of the brittle plastic. Use of multiple plastic pry tools is a must, can't do it by hand. Unfortunately I wasn't so lucky with the C pillars and those started to crack when I tried to remove them.
Also: grille in good condition, center 98-99 tail light that isn't separating at the top (which means I won't have to use a heat gun to smush it back together), and the door trim pieces off a silver 99 (different silver than my car). Some of my trim pieces are in rough shape, and these appear to be very similar in color to mine, so I may throw them on since they're in better shape. Also, other random junk.
The front bumper I got came with the license plate holder in good condition, so I installed it on my car. For the longest time I wasn't even aware that this was a thing, but when I saw one I knew my current "screw it to the bumper" method just wasn't going to cut it any longer. So on it went.
Old:
New:
That's all for now, I'll try to post up more later.
I wouldn't even mind buying some of these things brand new, but a lot of things just aren't available anymore. And in the case of things like bumpers, OEM fitment is king.
Do you have one btw? I sold mine thinking I'd never need it and now here we are with the invention of Holley manifolds and race car builds 😭
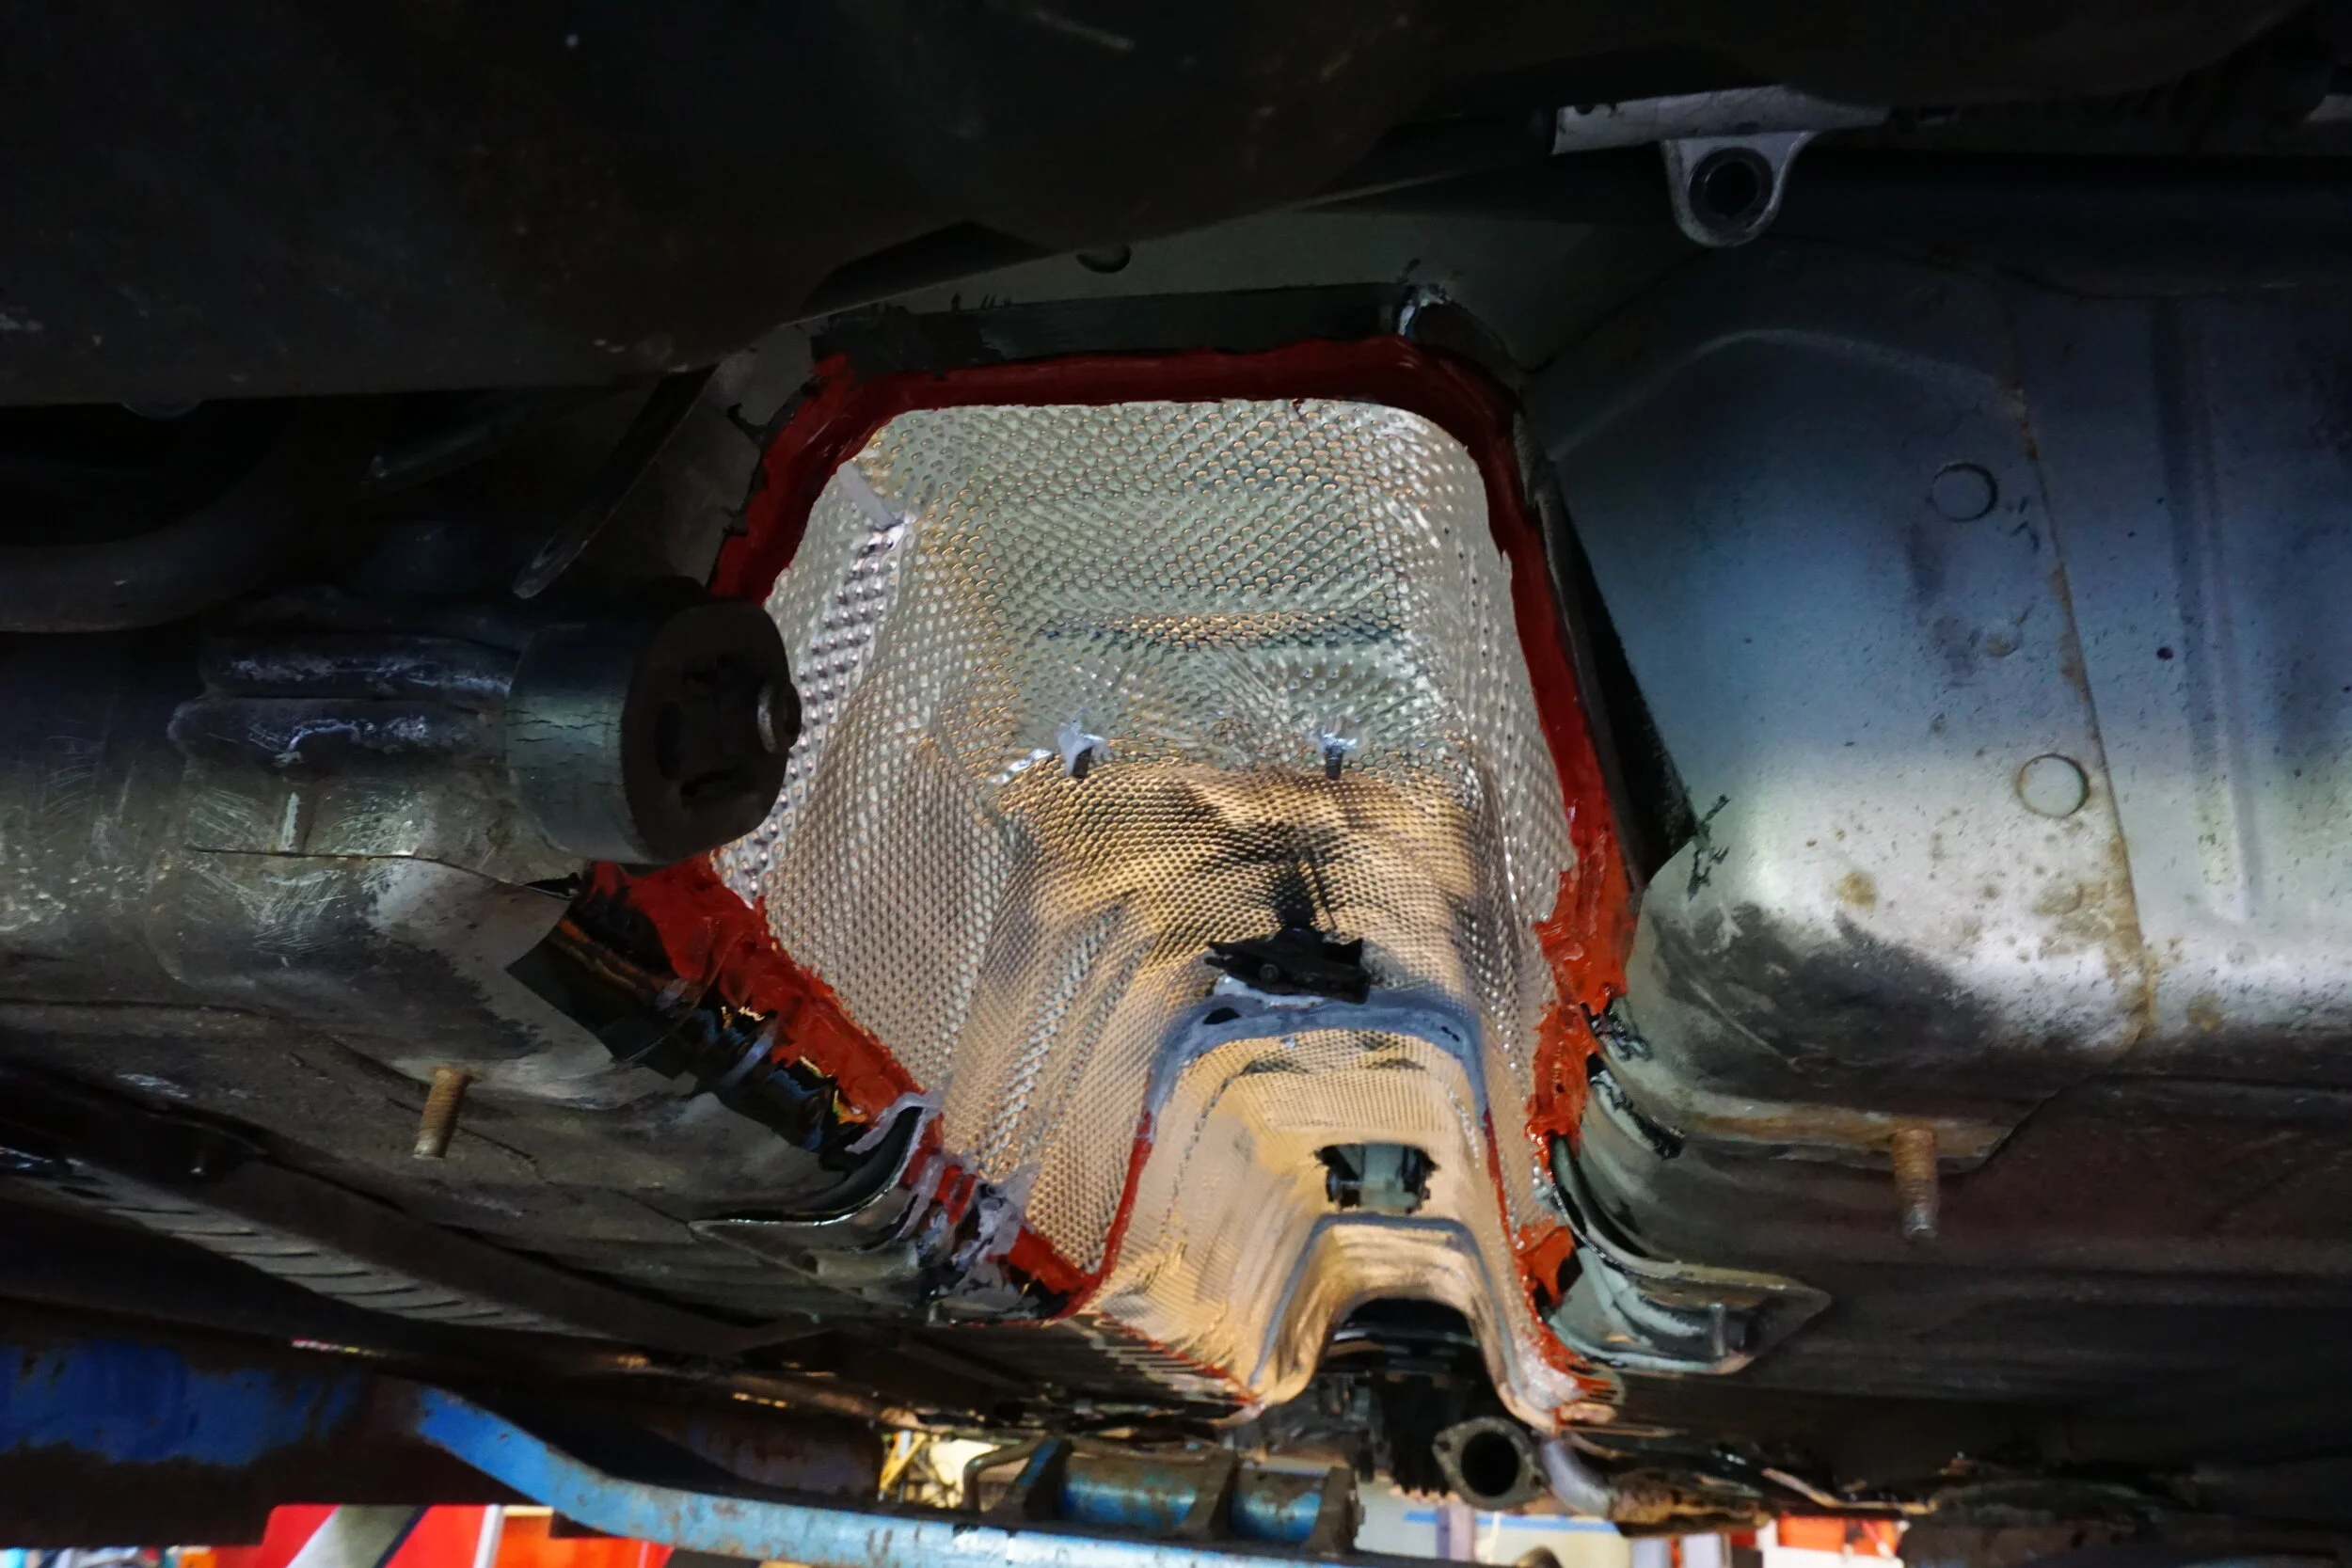
Like I mentioned earlier, I will eventually build a 3" exhaust, using very large resonators and mufflers. When I did a test fit it was obvious clearance around the parts was going to be very tight, and I thought it sure would be nice if my rusty old heat shields weren't in the way and inevitably rattling against it. So I picked up a large roll of Design Engineering Floor & Tunnel Shield II and got busy. This turned out to be quite the endeavor, and I'm not sure so far if it was worth it. But I won't really know until the 3" is on the car. I'm guessing it will help keep exhaust noise out of the cabin, in addition to preventing heat from getting in, since it has a nice fiberglass layer that should act as a gap between the heavy aluminum cover and the body of the car.
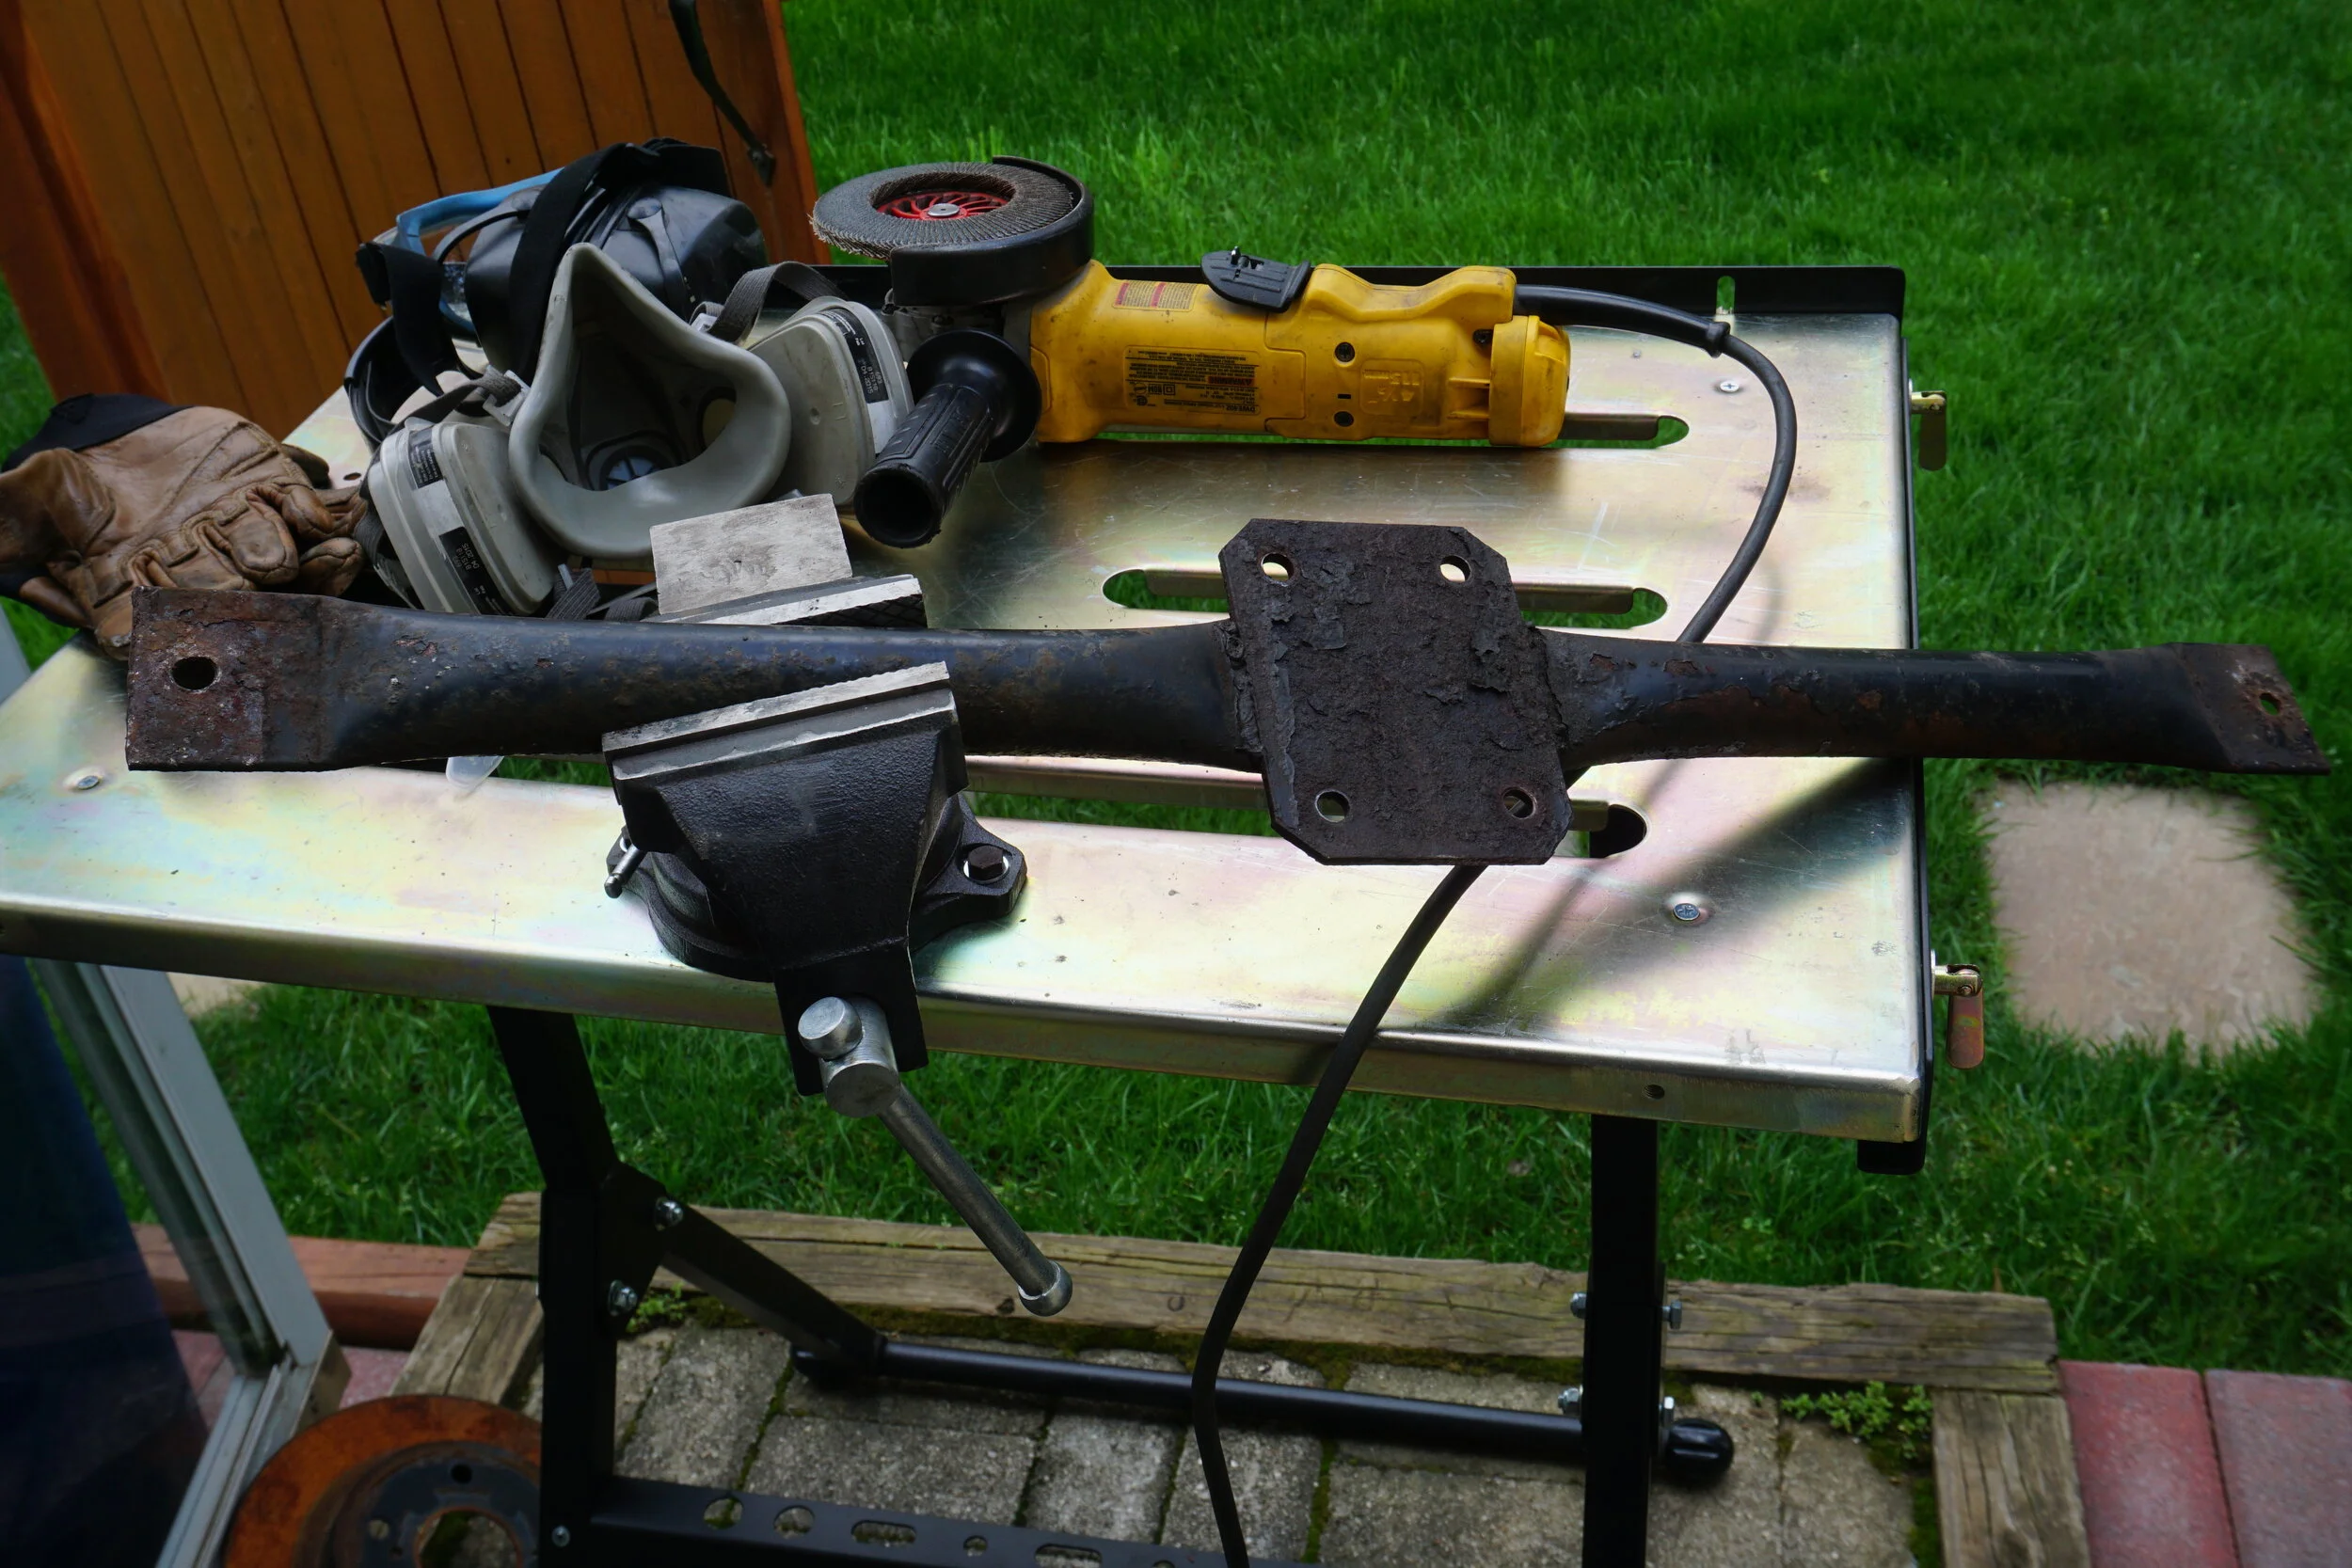
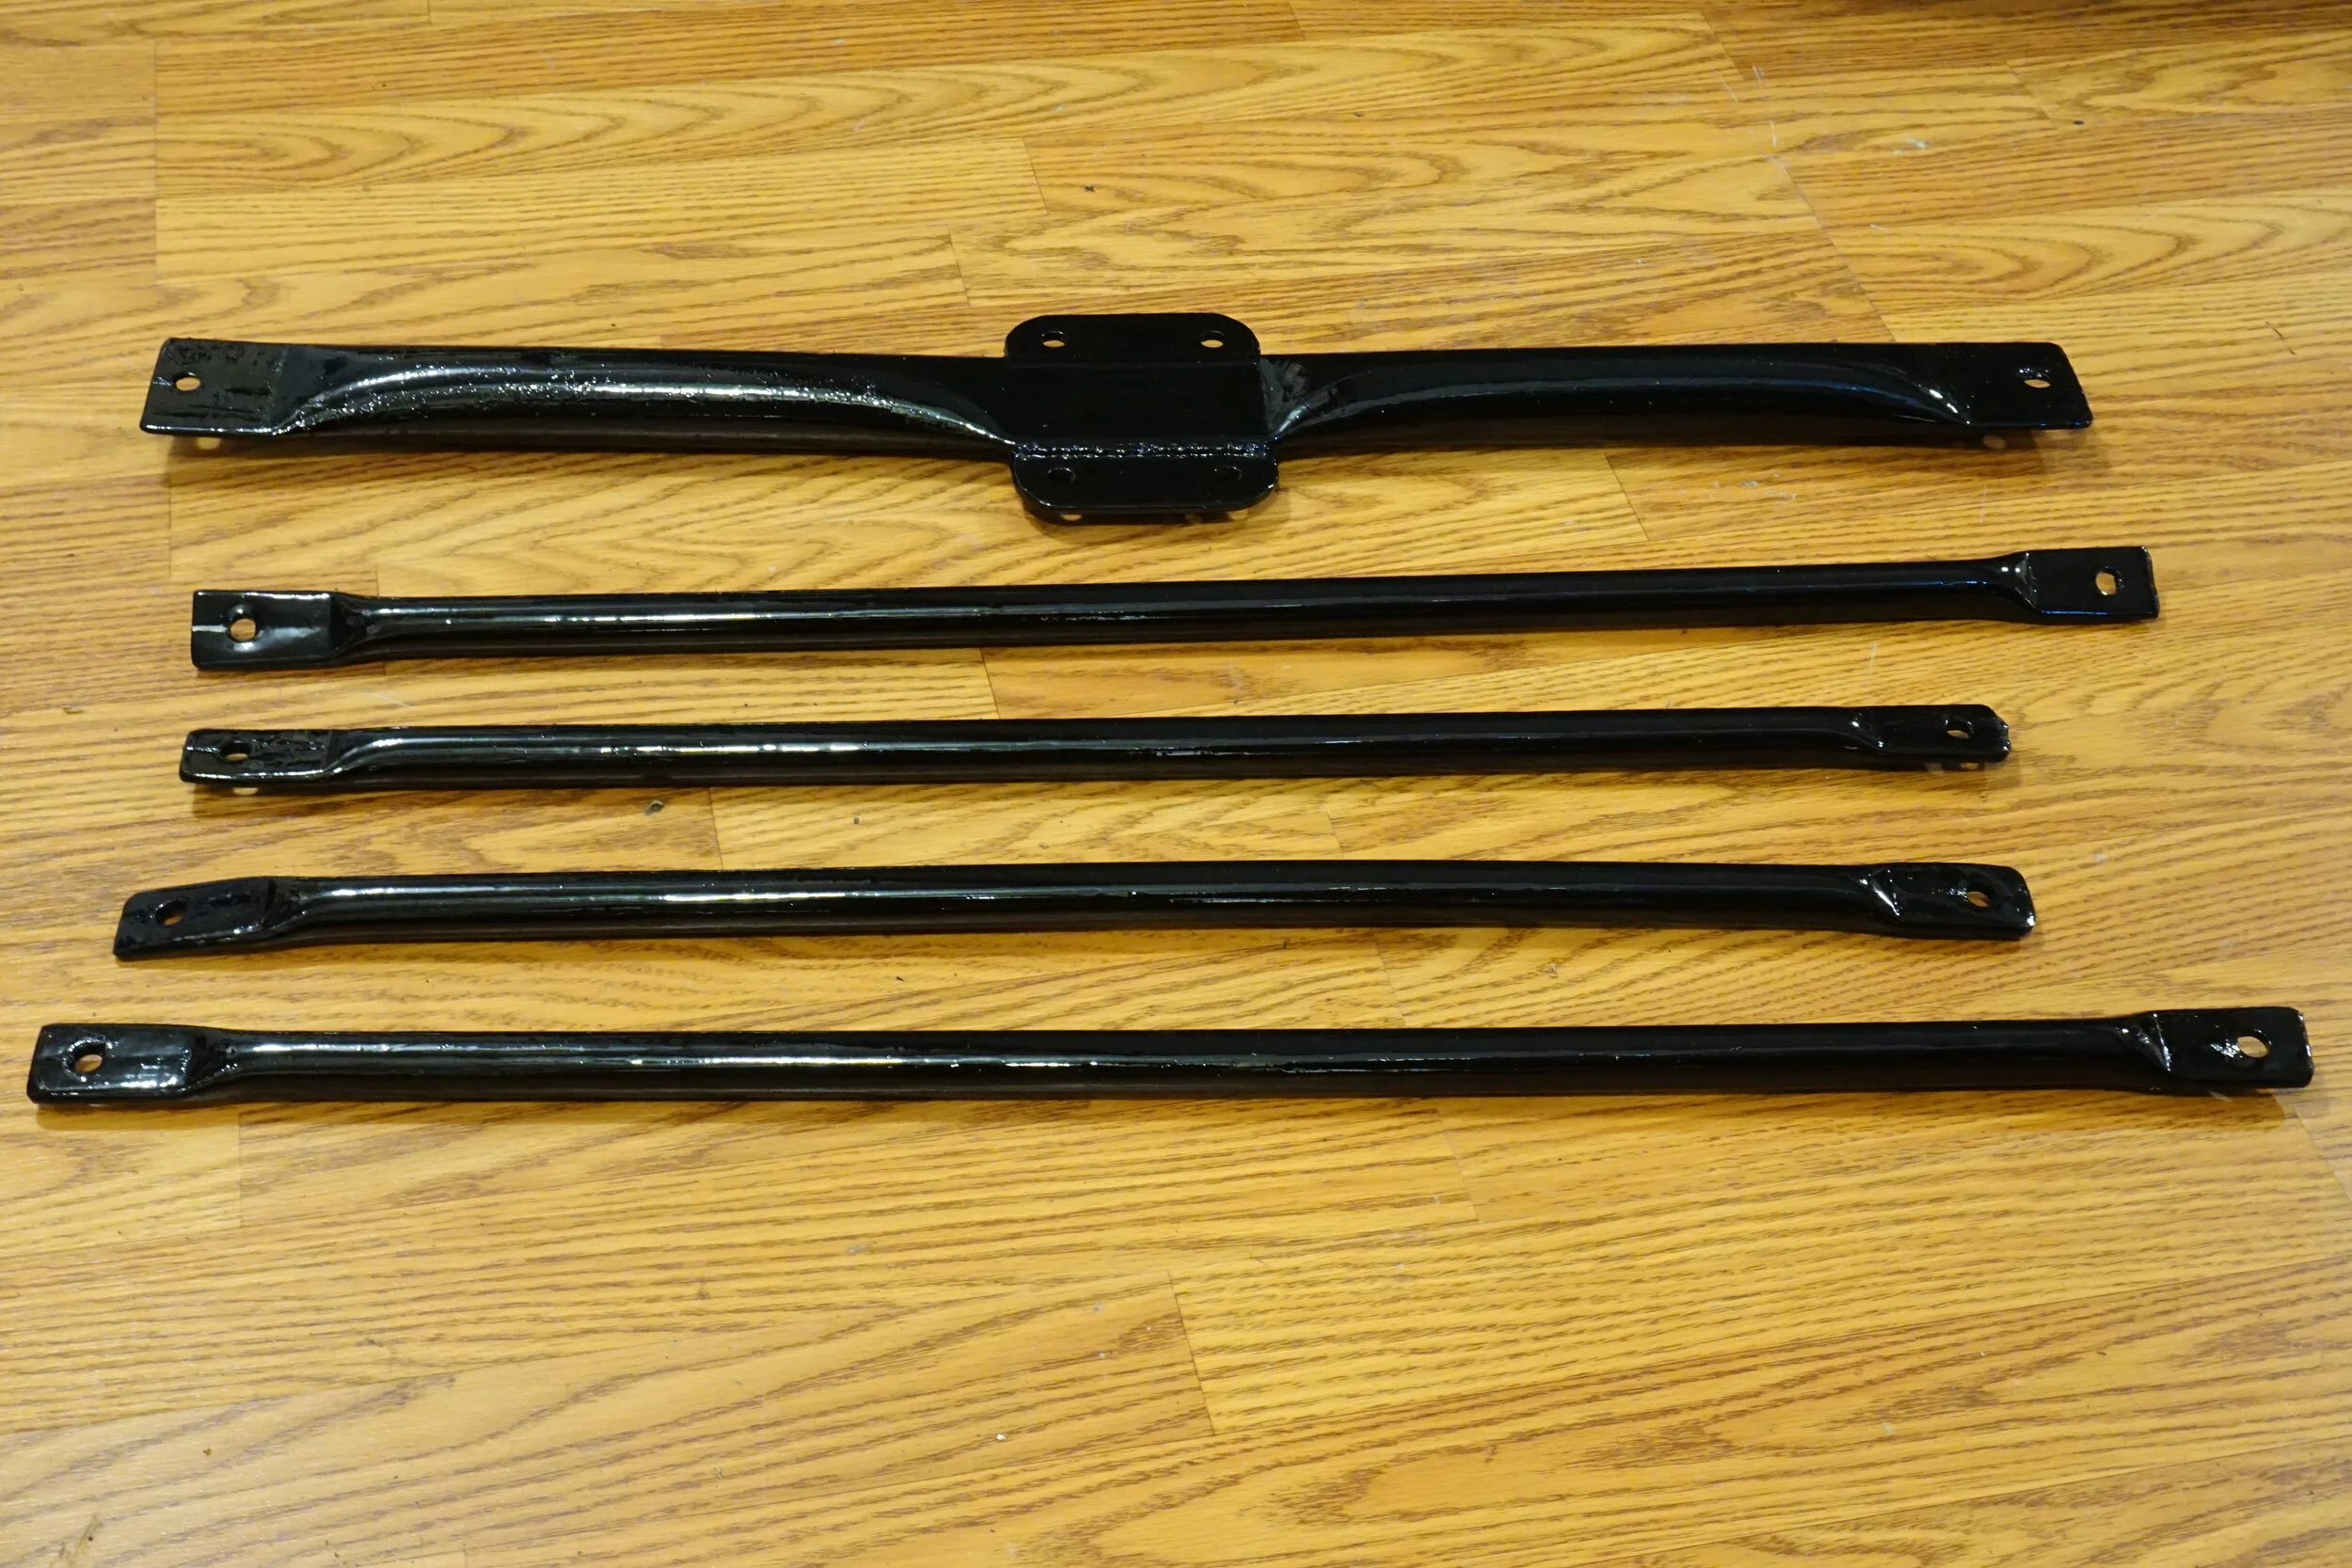
First I had to remove my subframe connectors. Why are they called subframe connectors when they don't touch any subframe, btw? They should really be called unibody reinforcement bars, or something. They've been on the car since 2003, and have held up really well, all things considered. Most of the paint was still intact, and the rust was only on the surface.
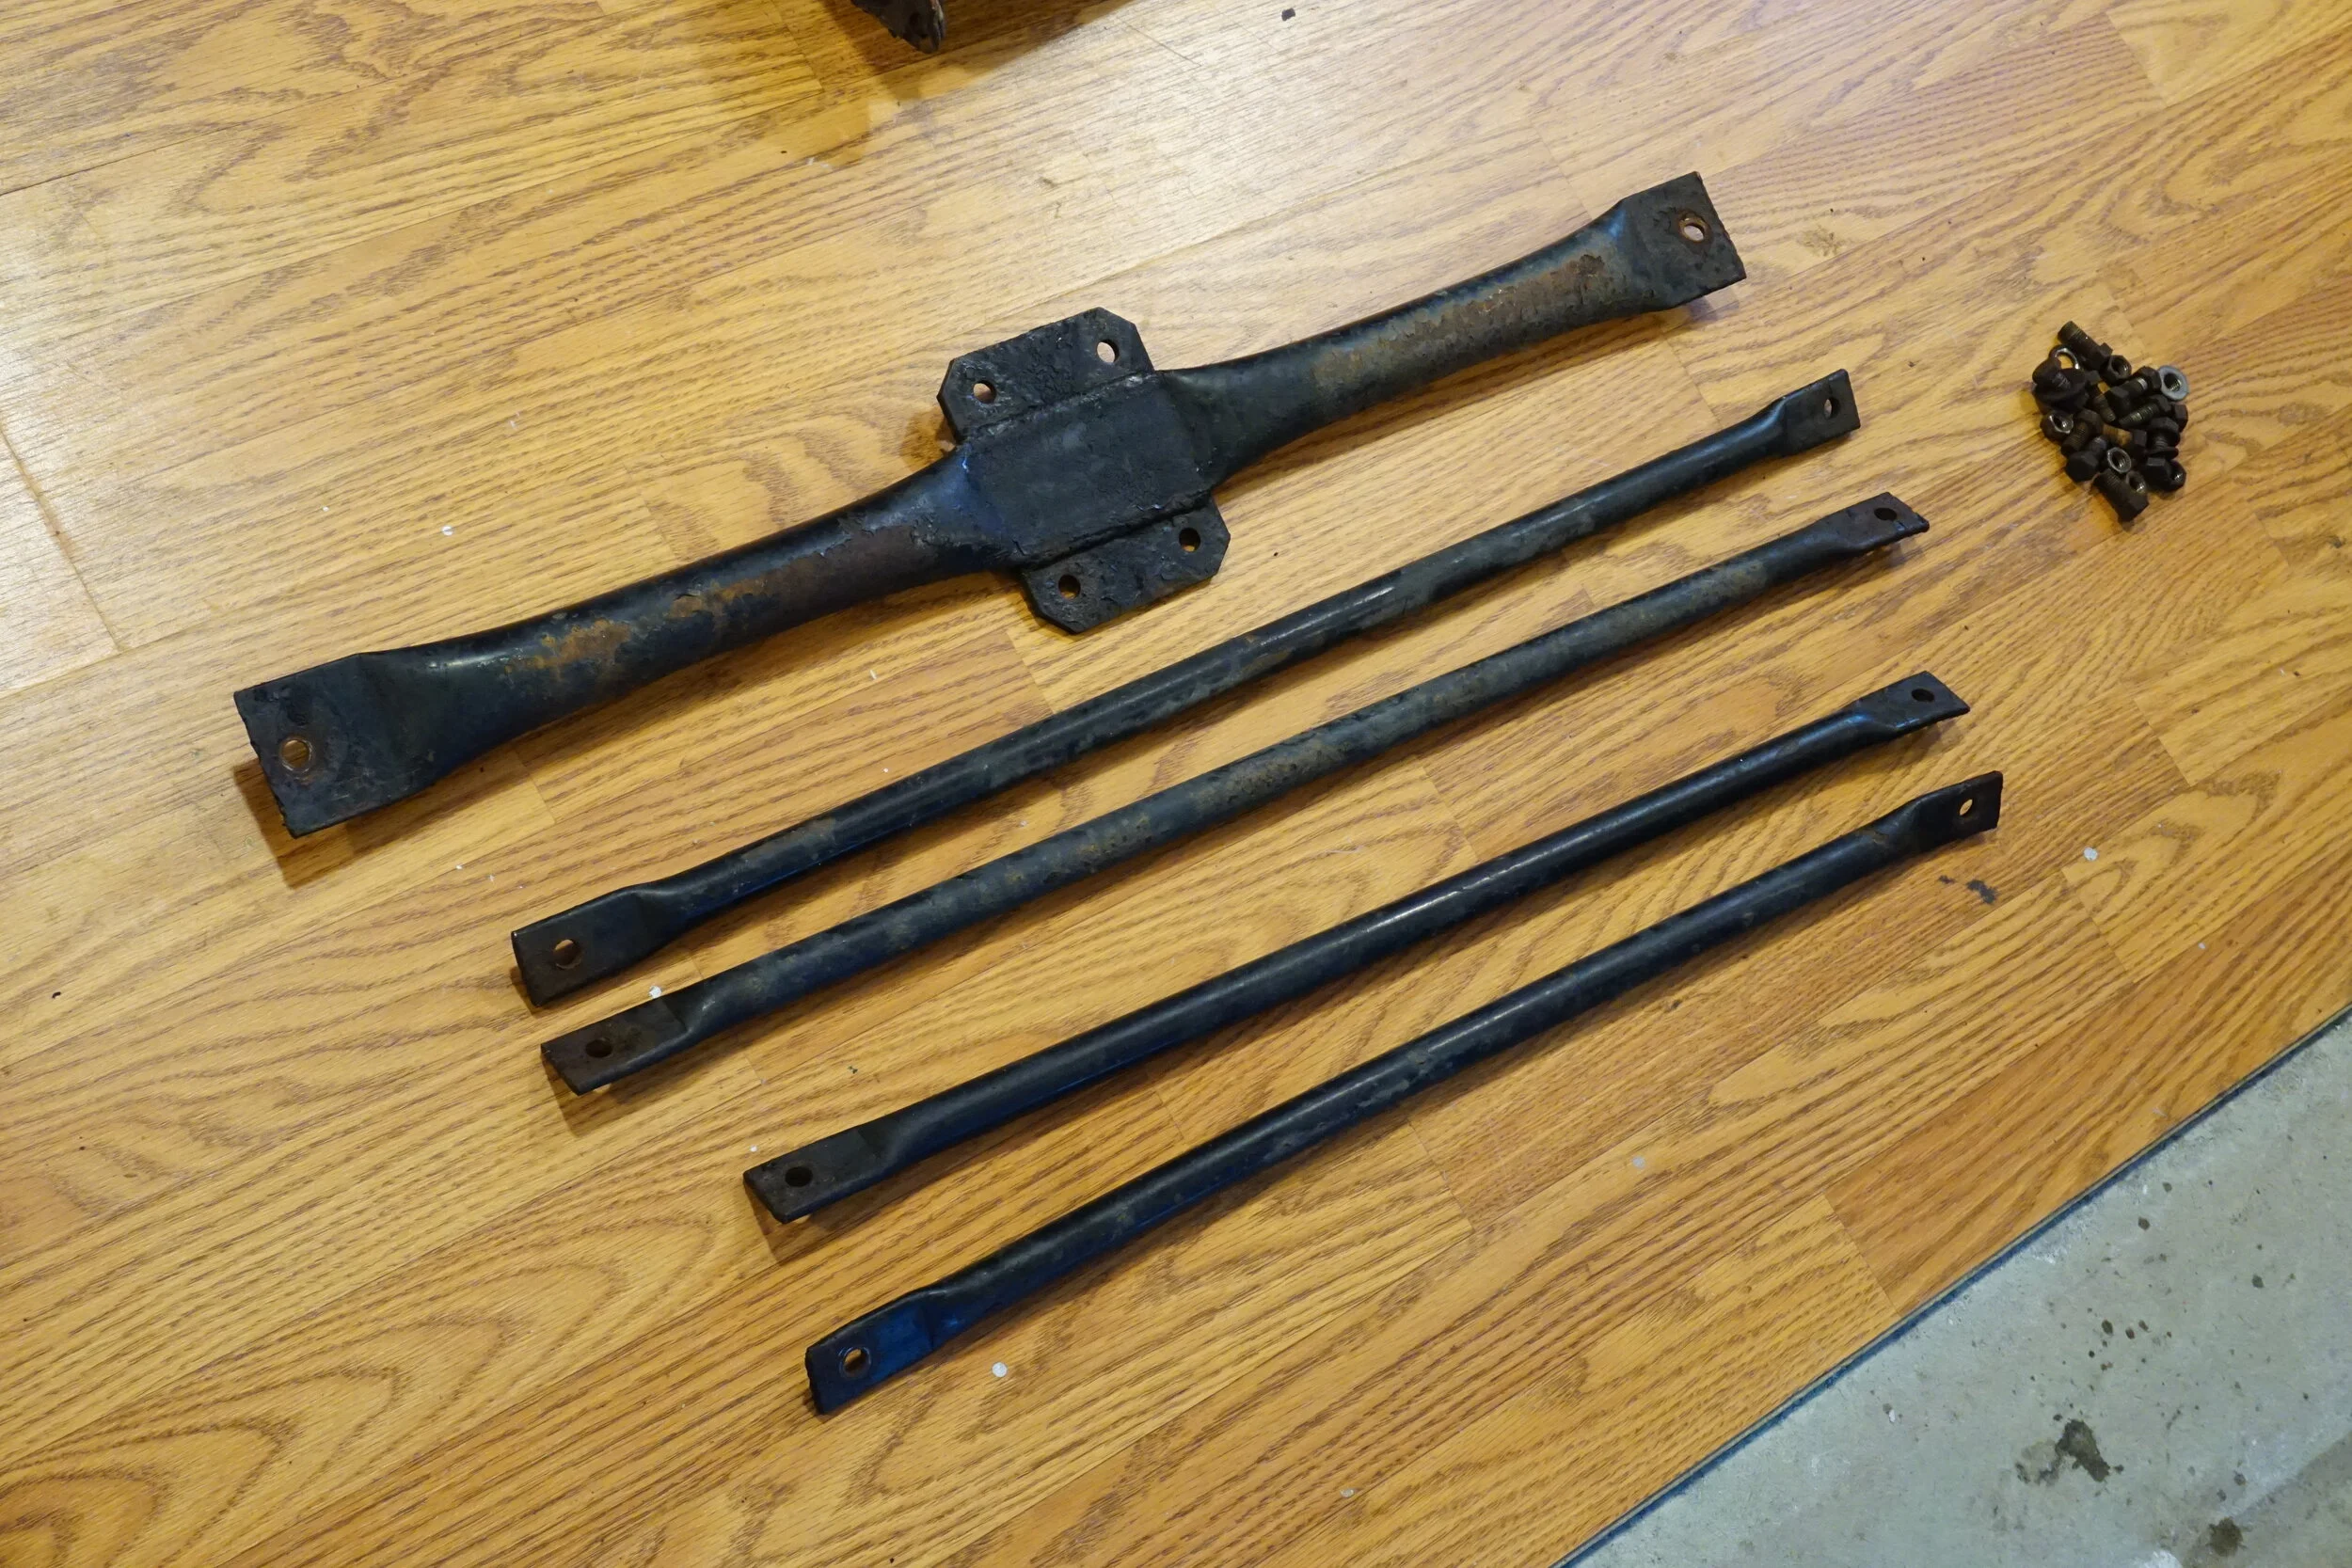
But still, this seemed like a good time to make them look all pretty, because you know it's super important for things on the bottom of your car to look nice! So I got out the angle grinder and took them down to bare metal.
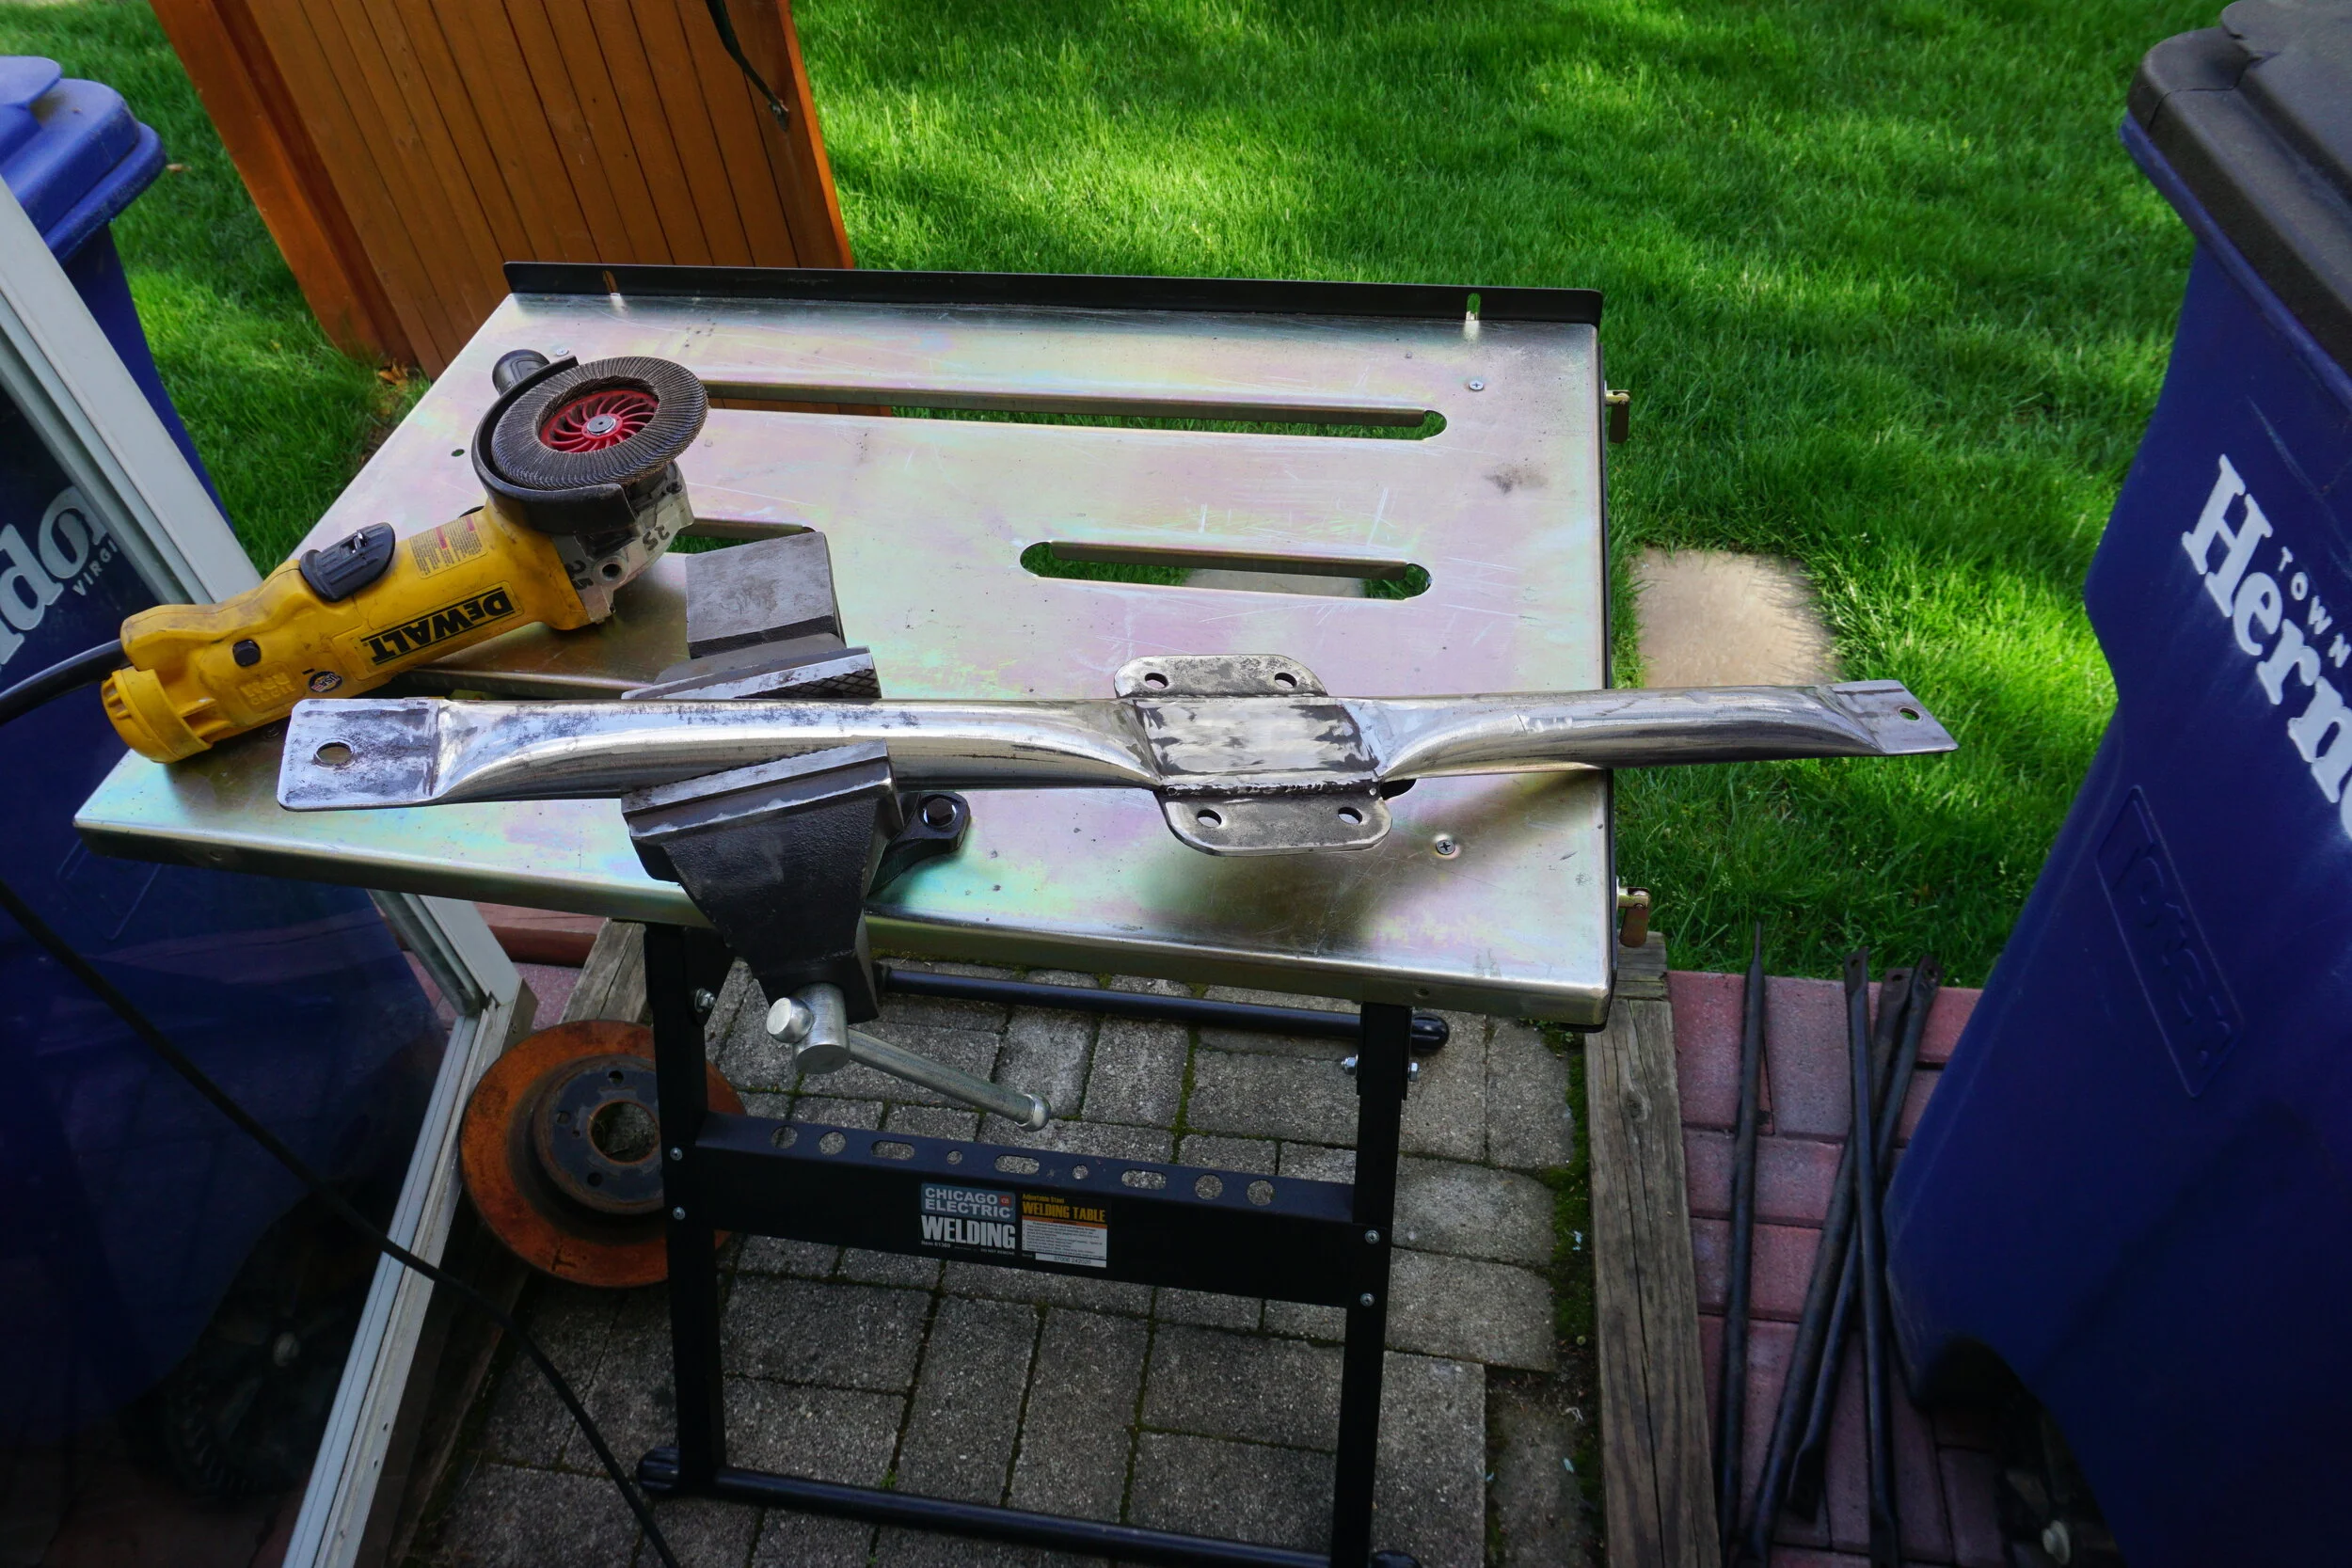
They then took a nice long bath in some Evapo-Rust, and got the full POR15 treatment.
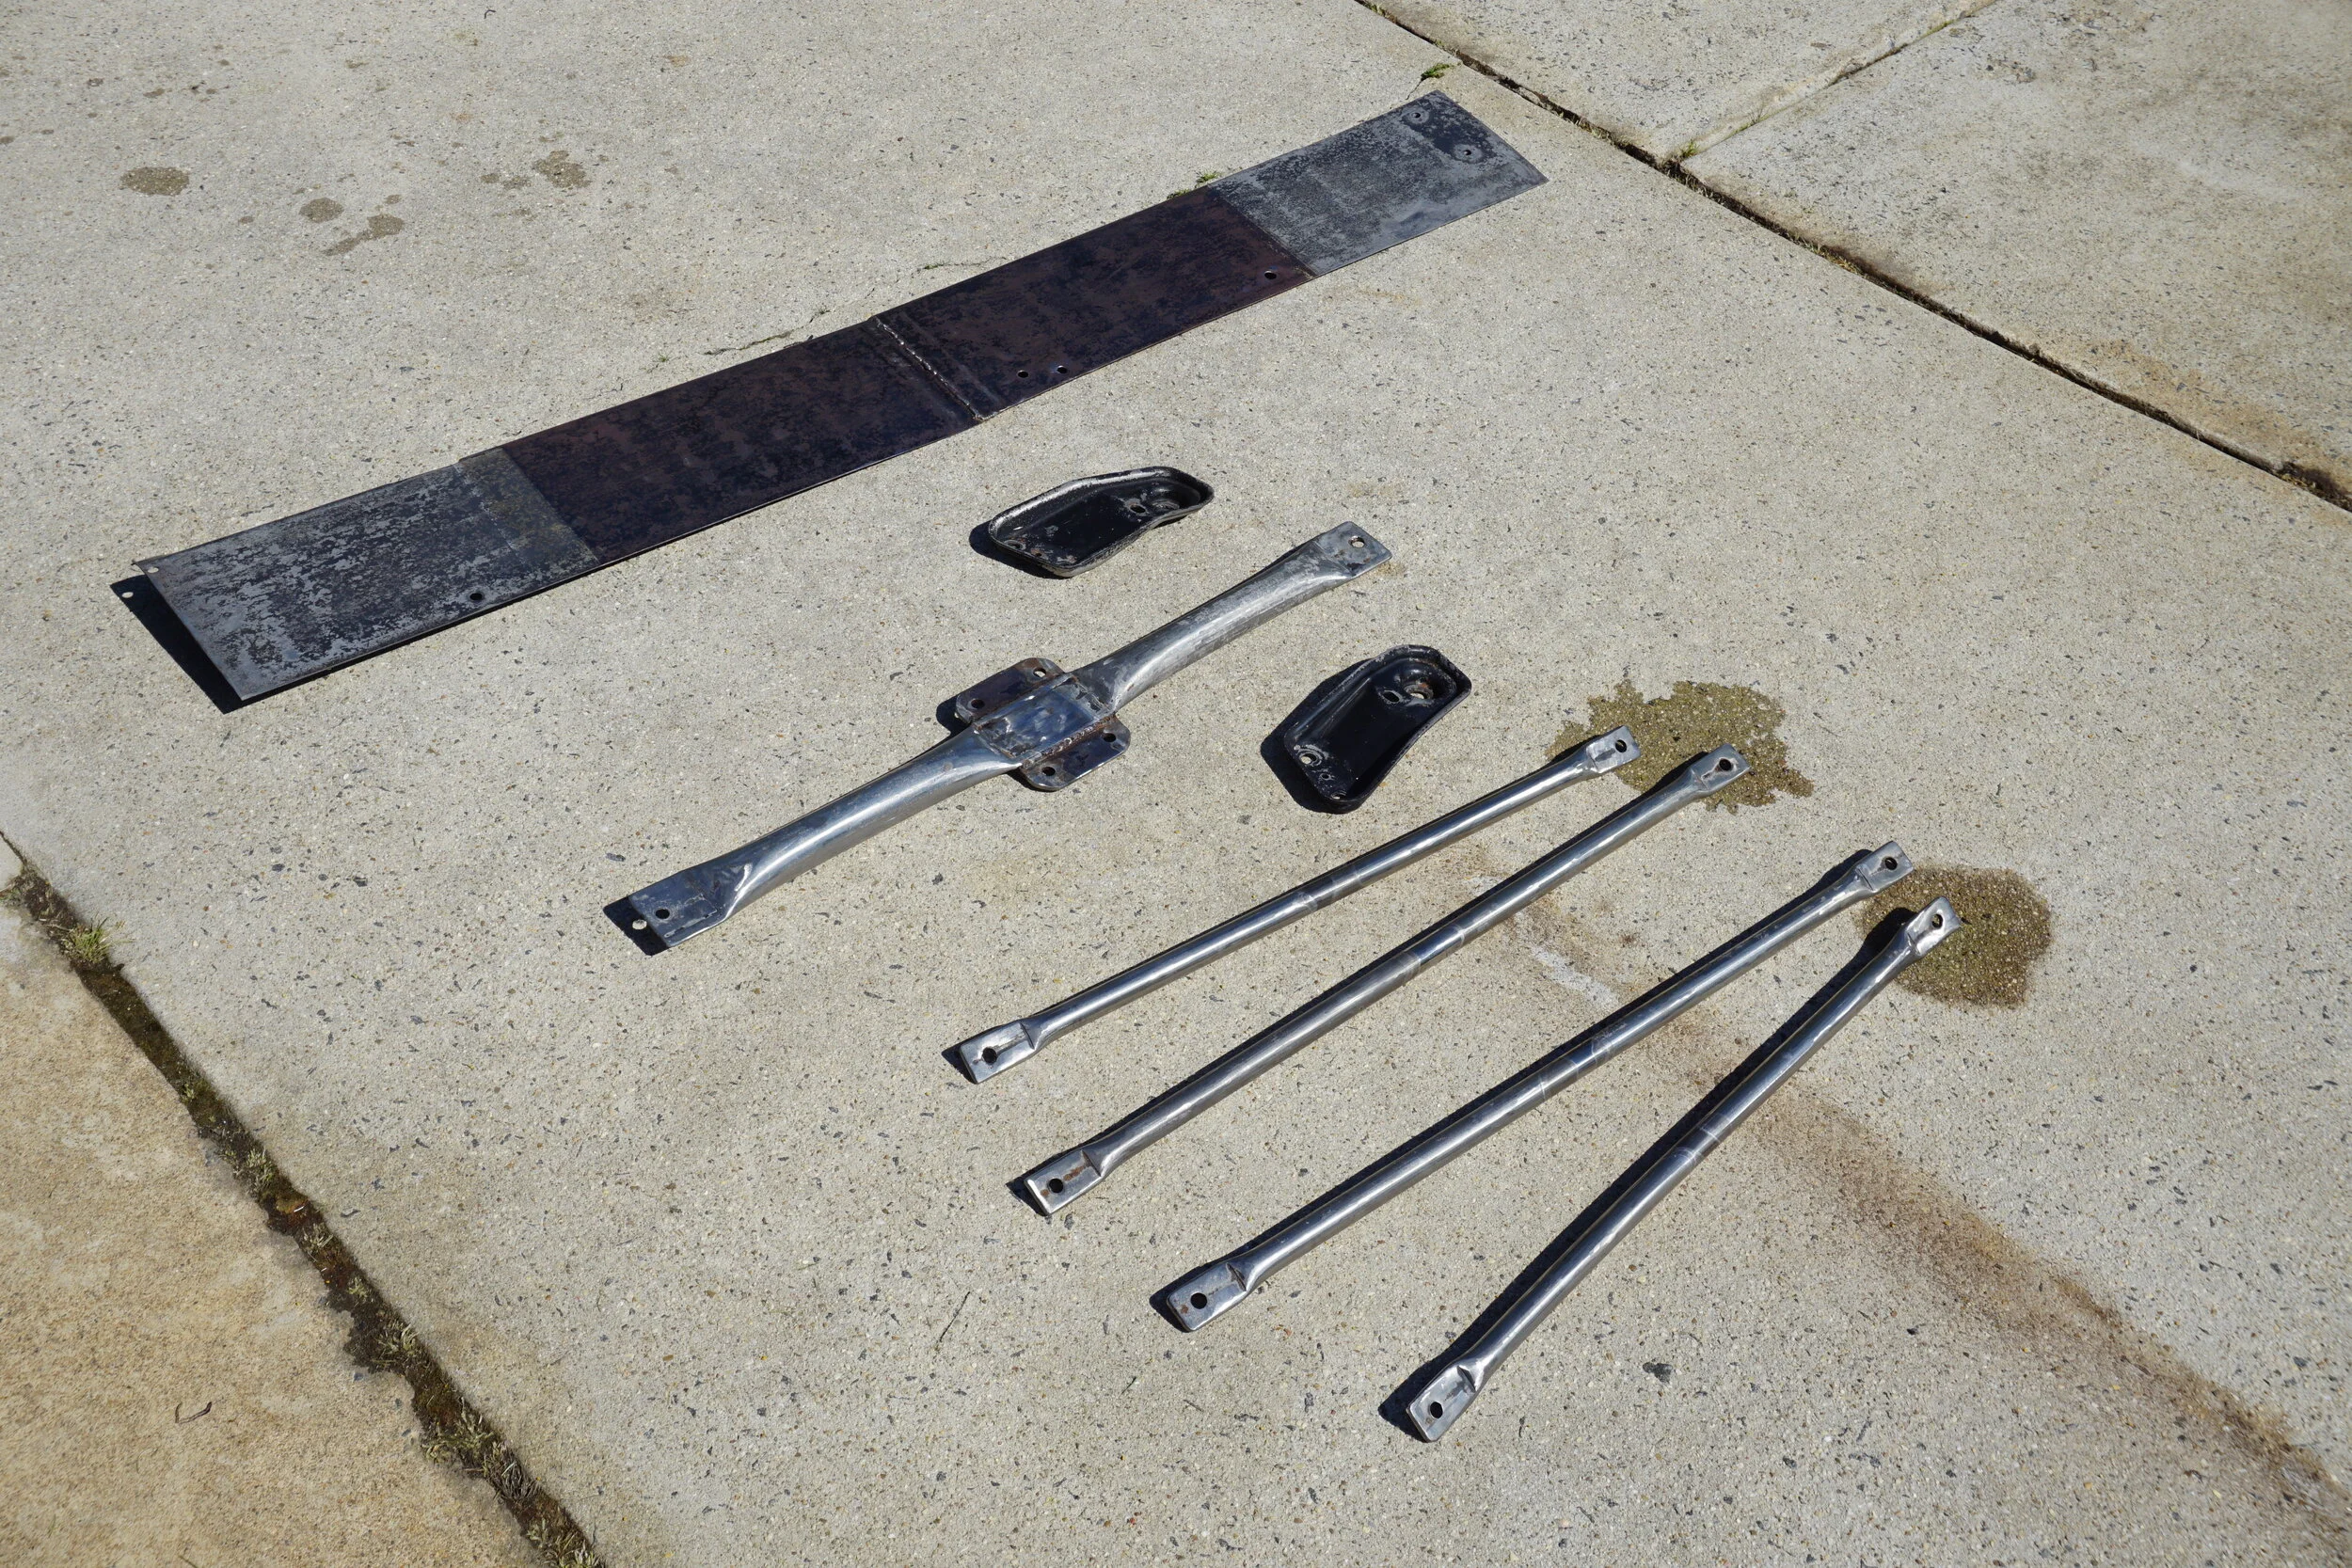
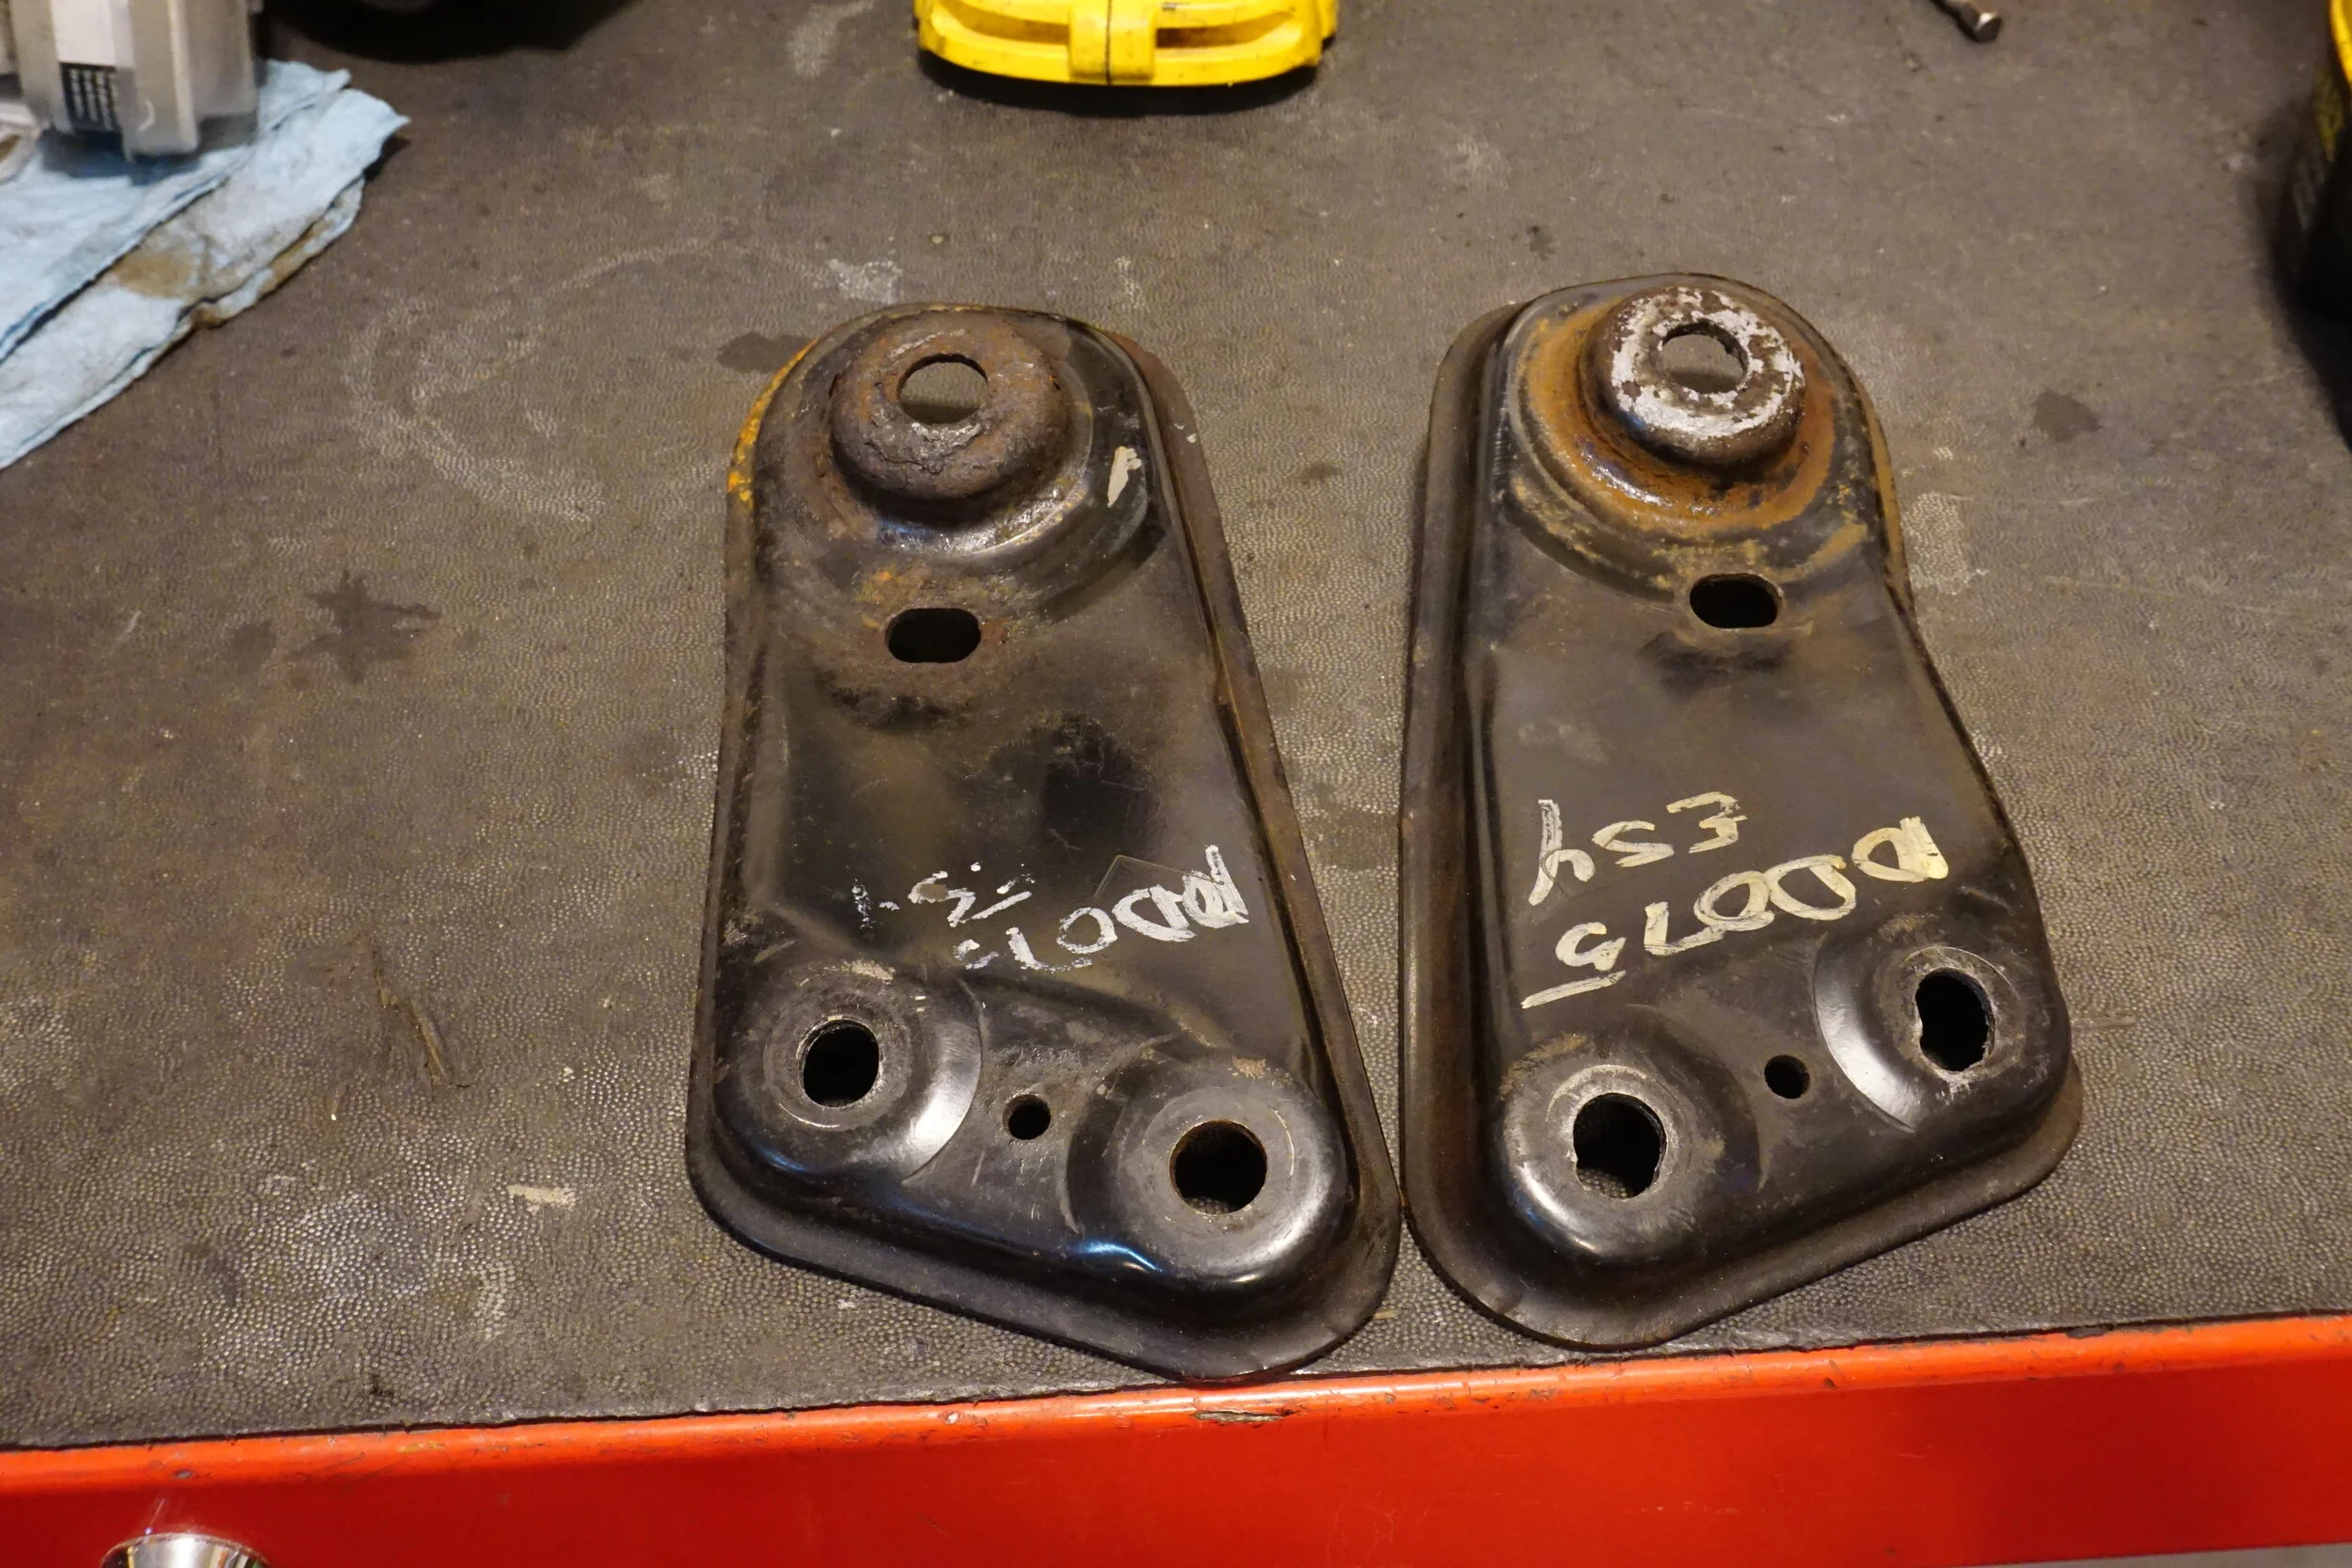
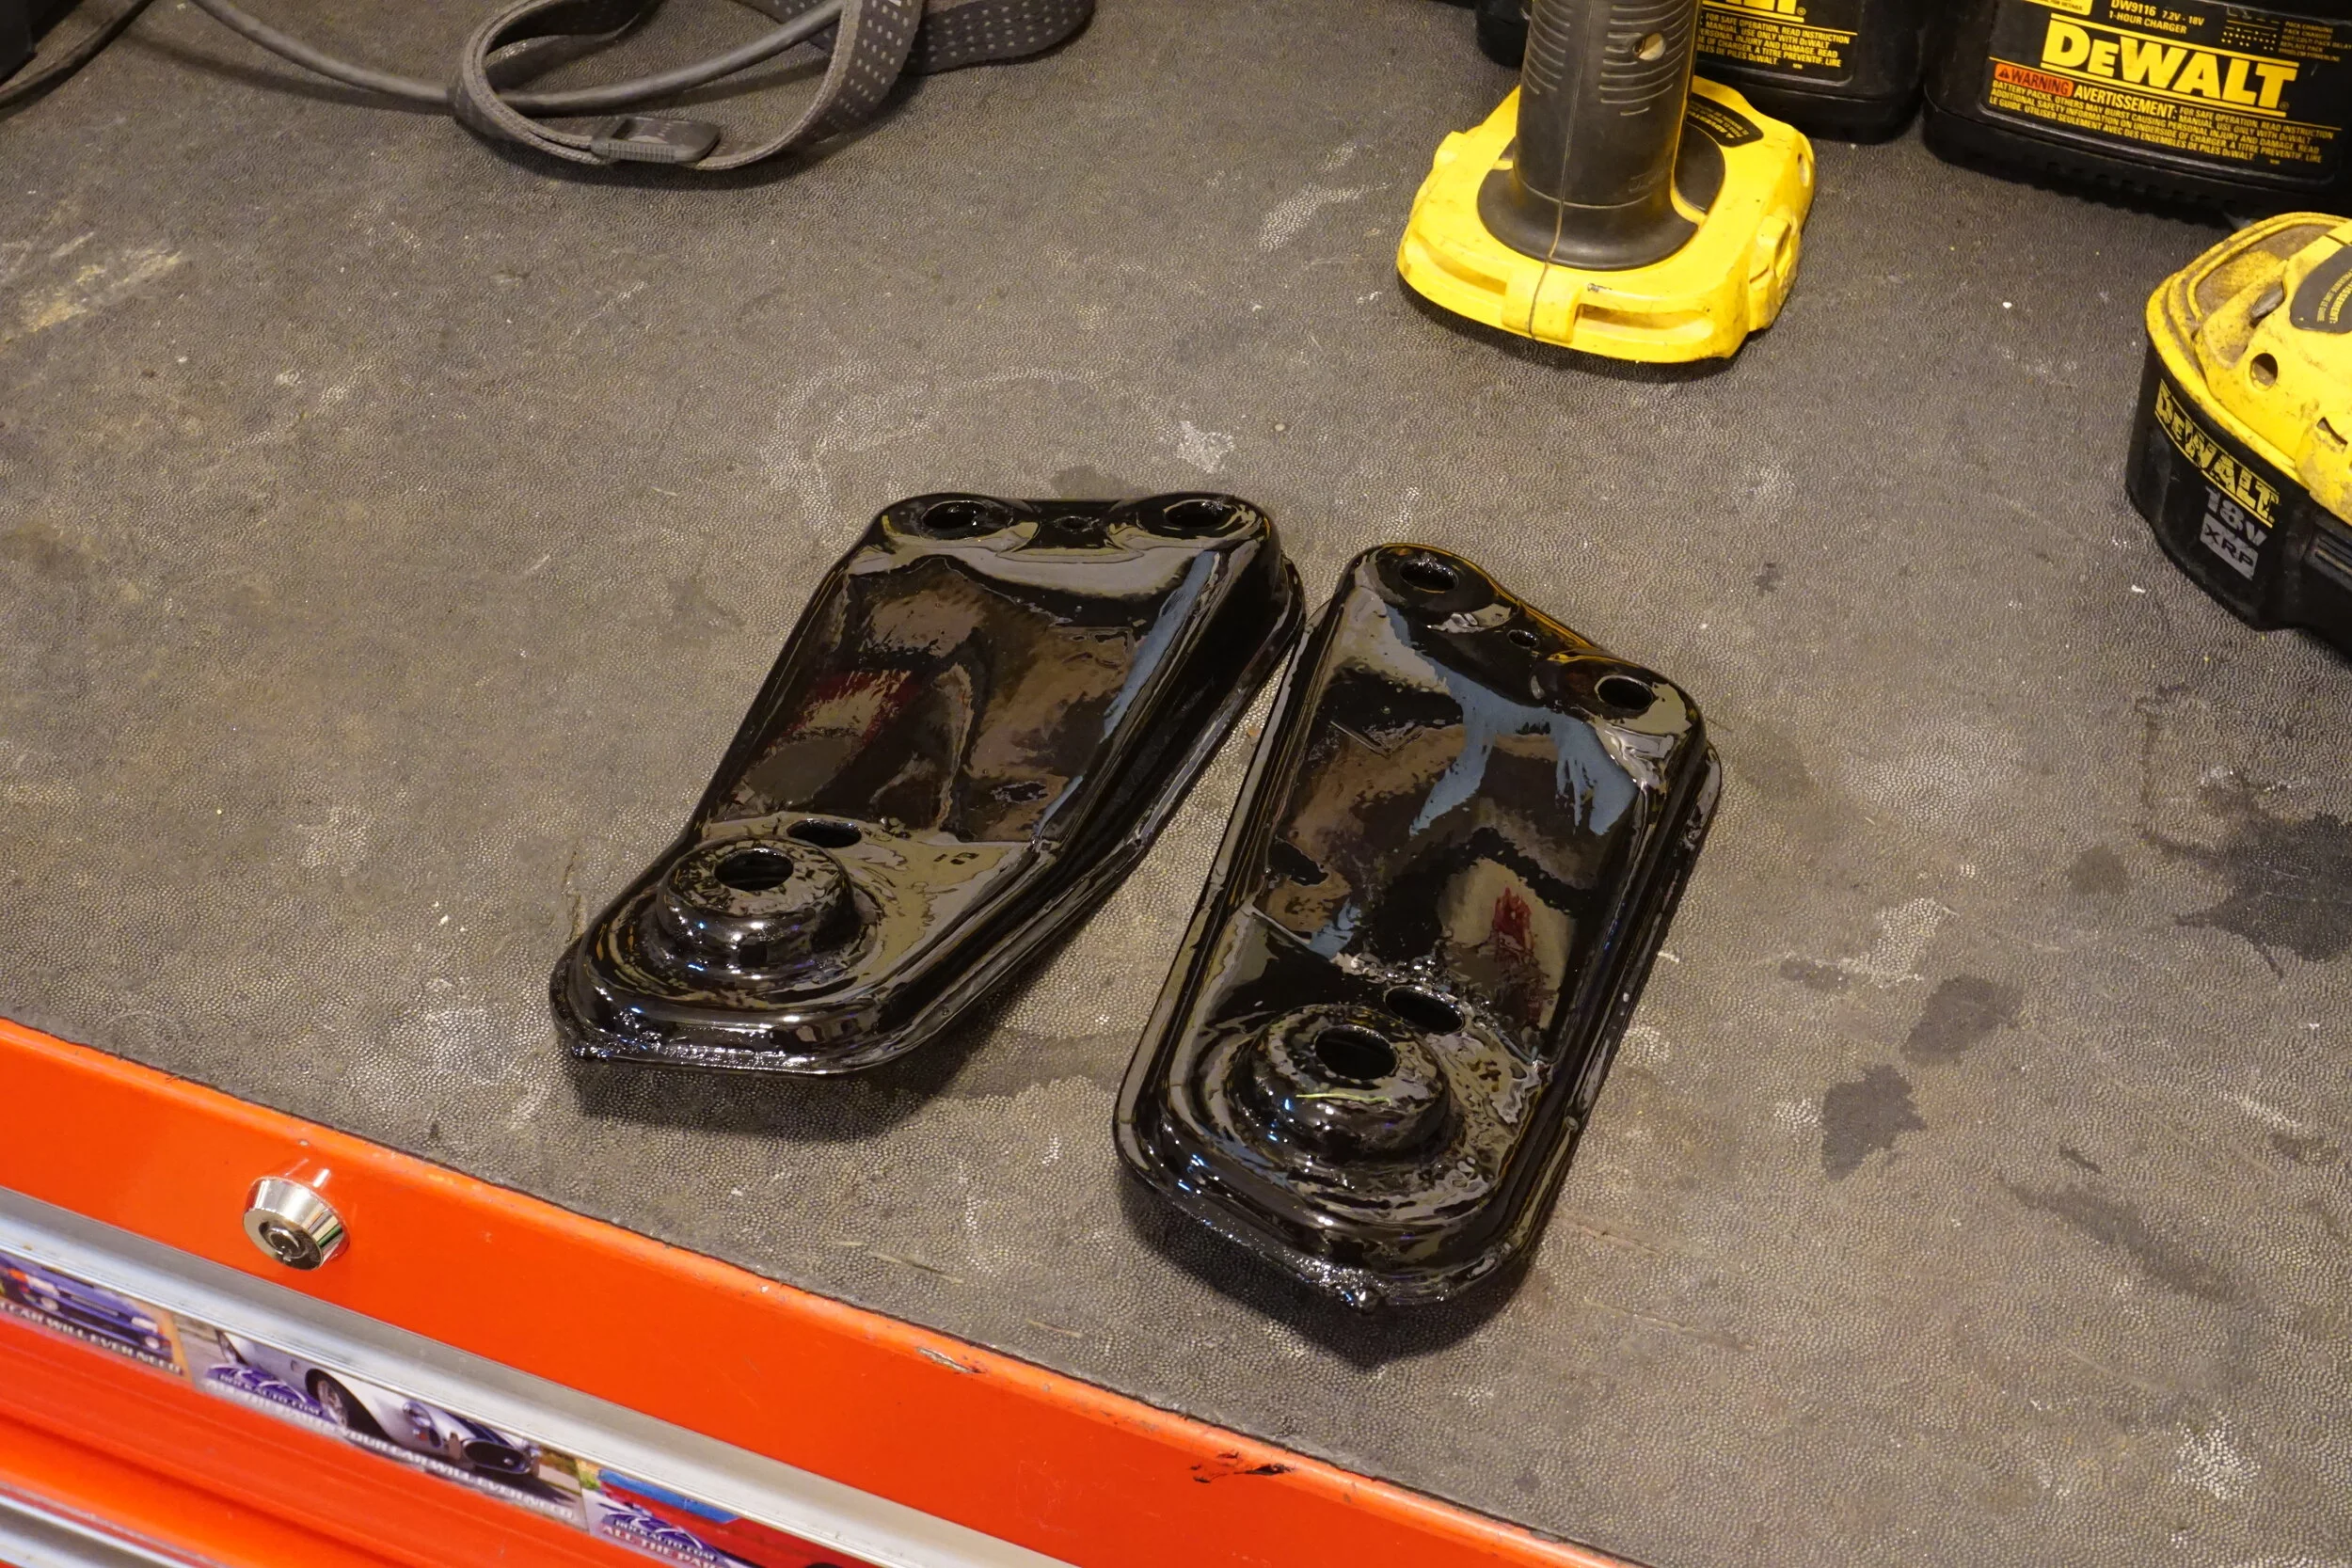
The SE reinforcement plates got the same treatment.
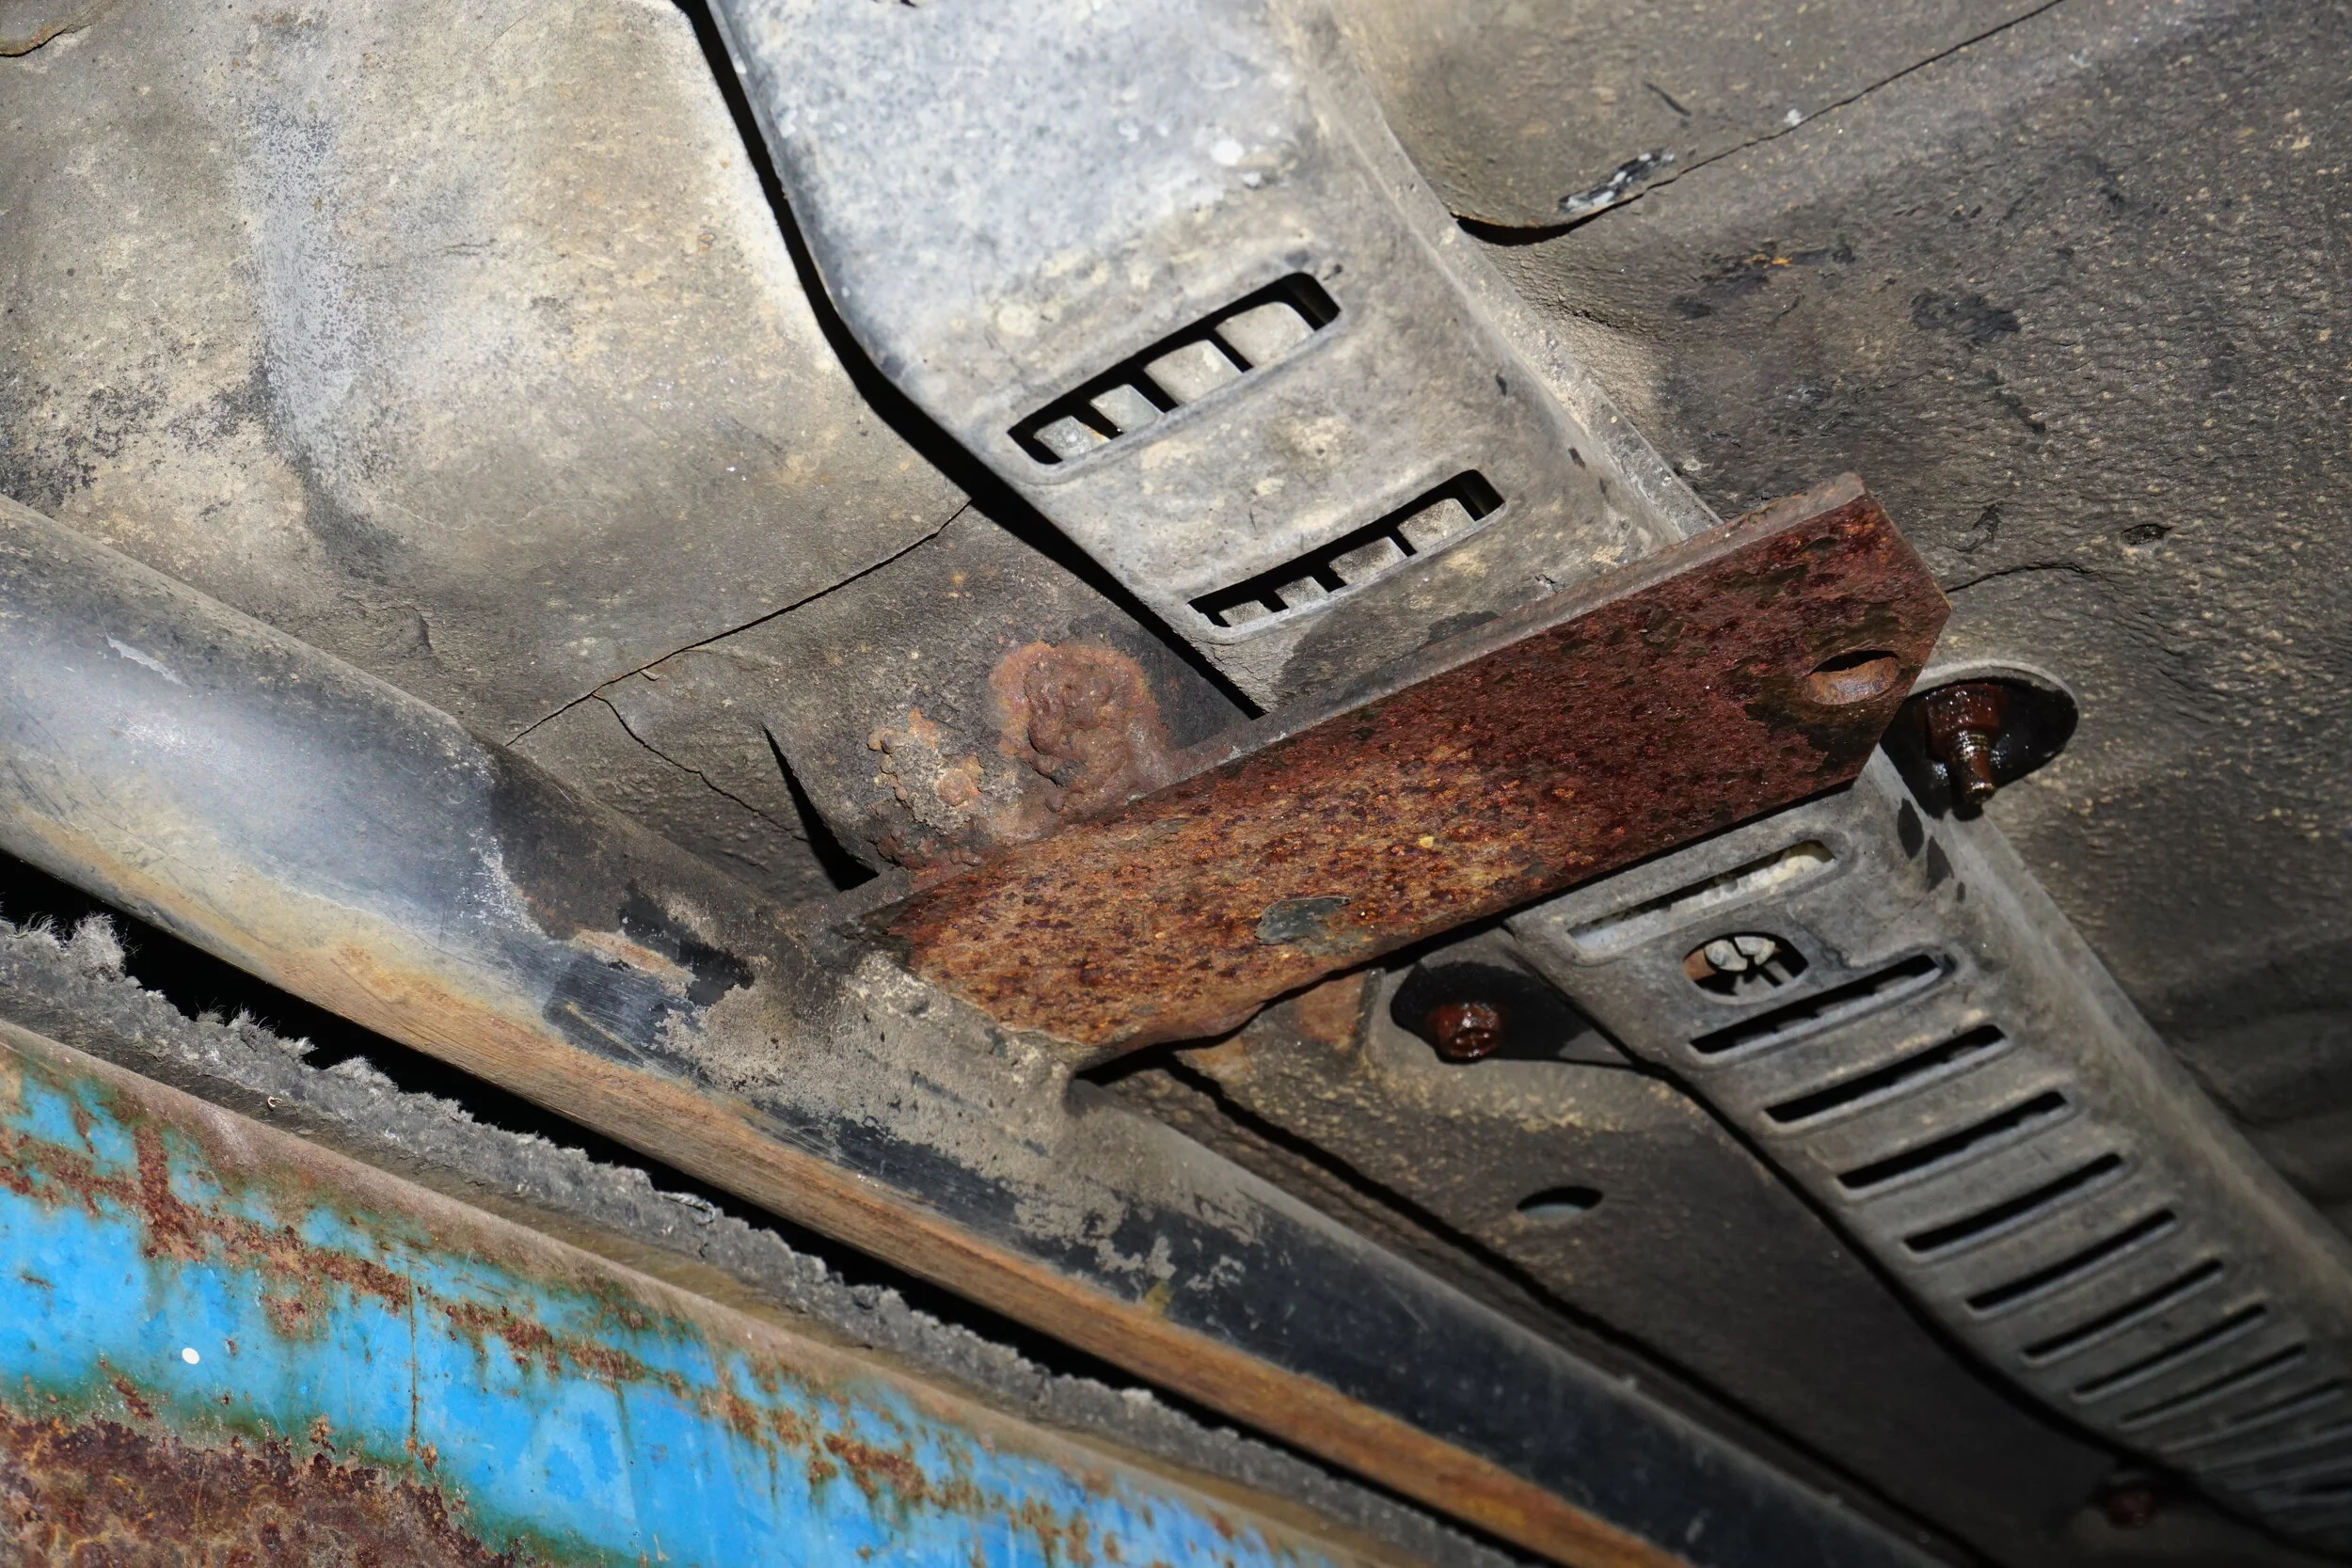
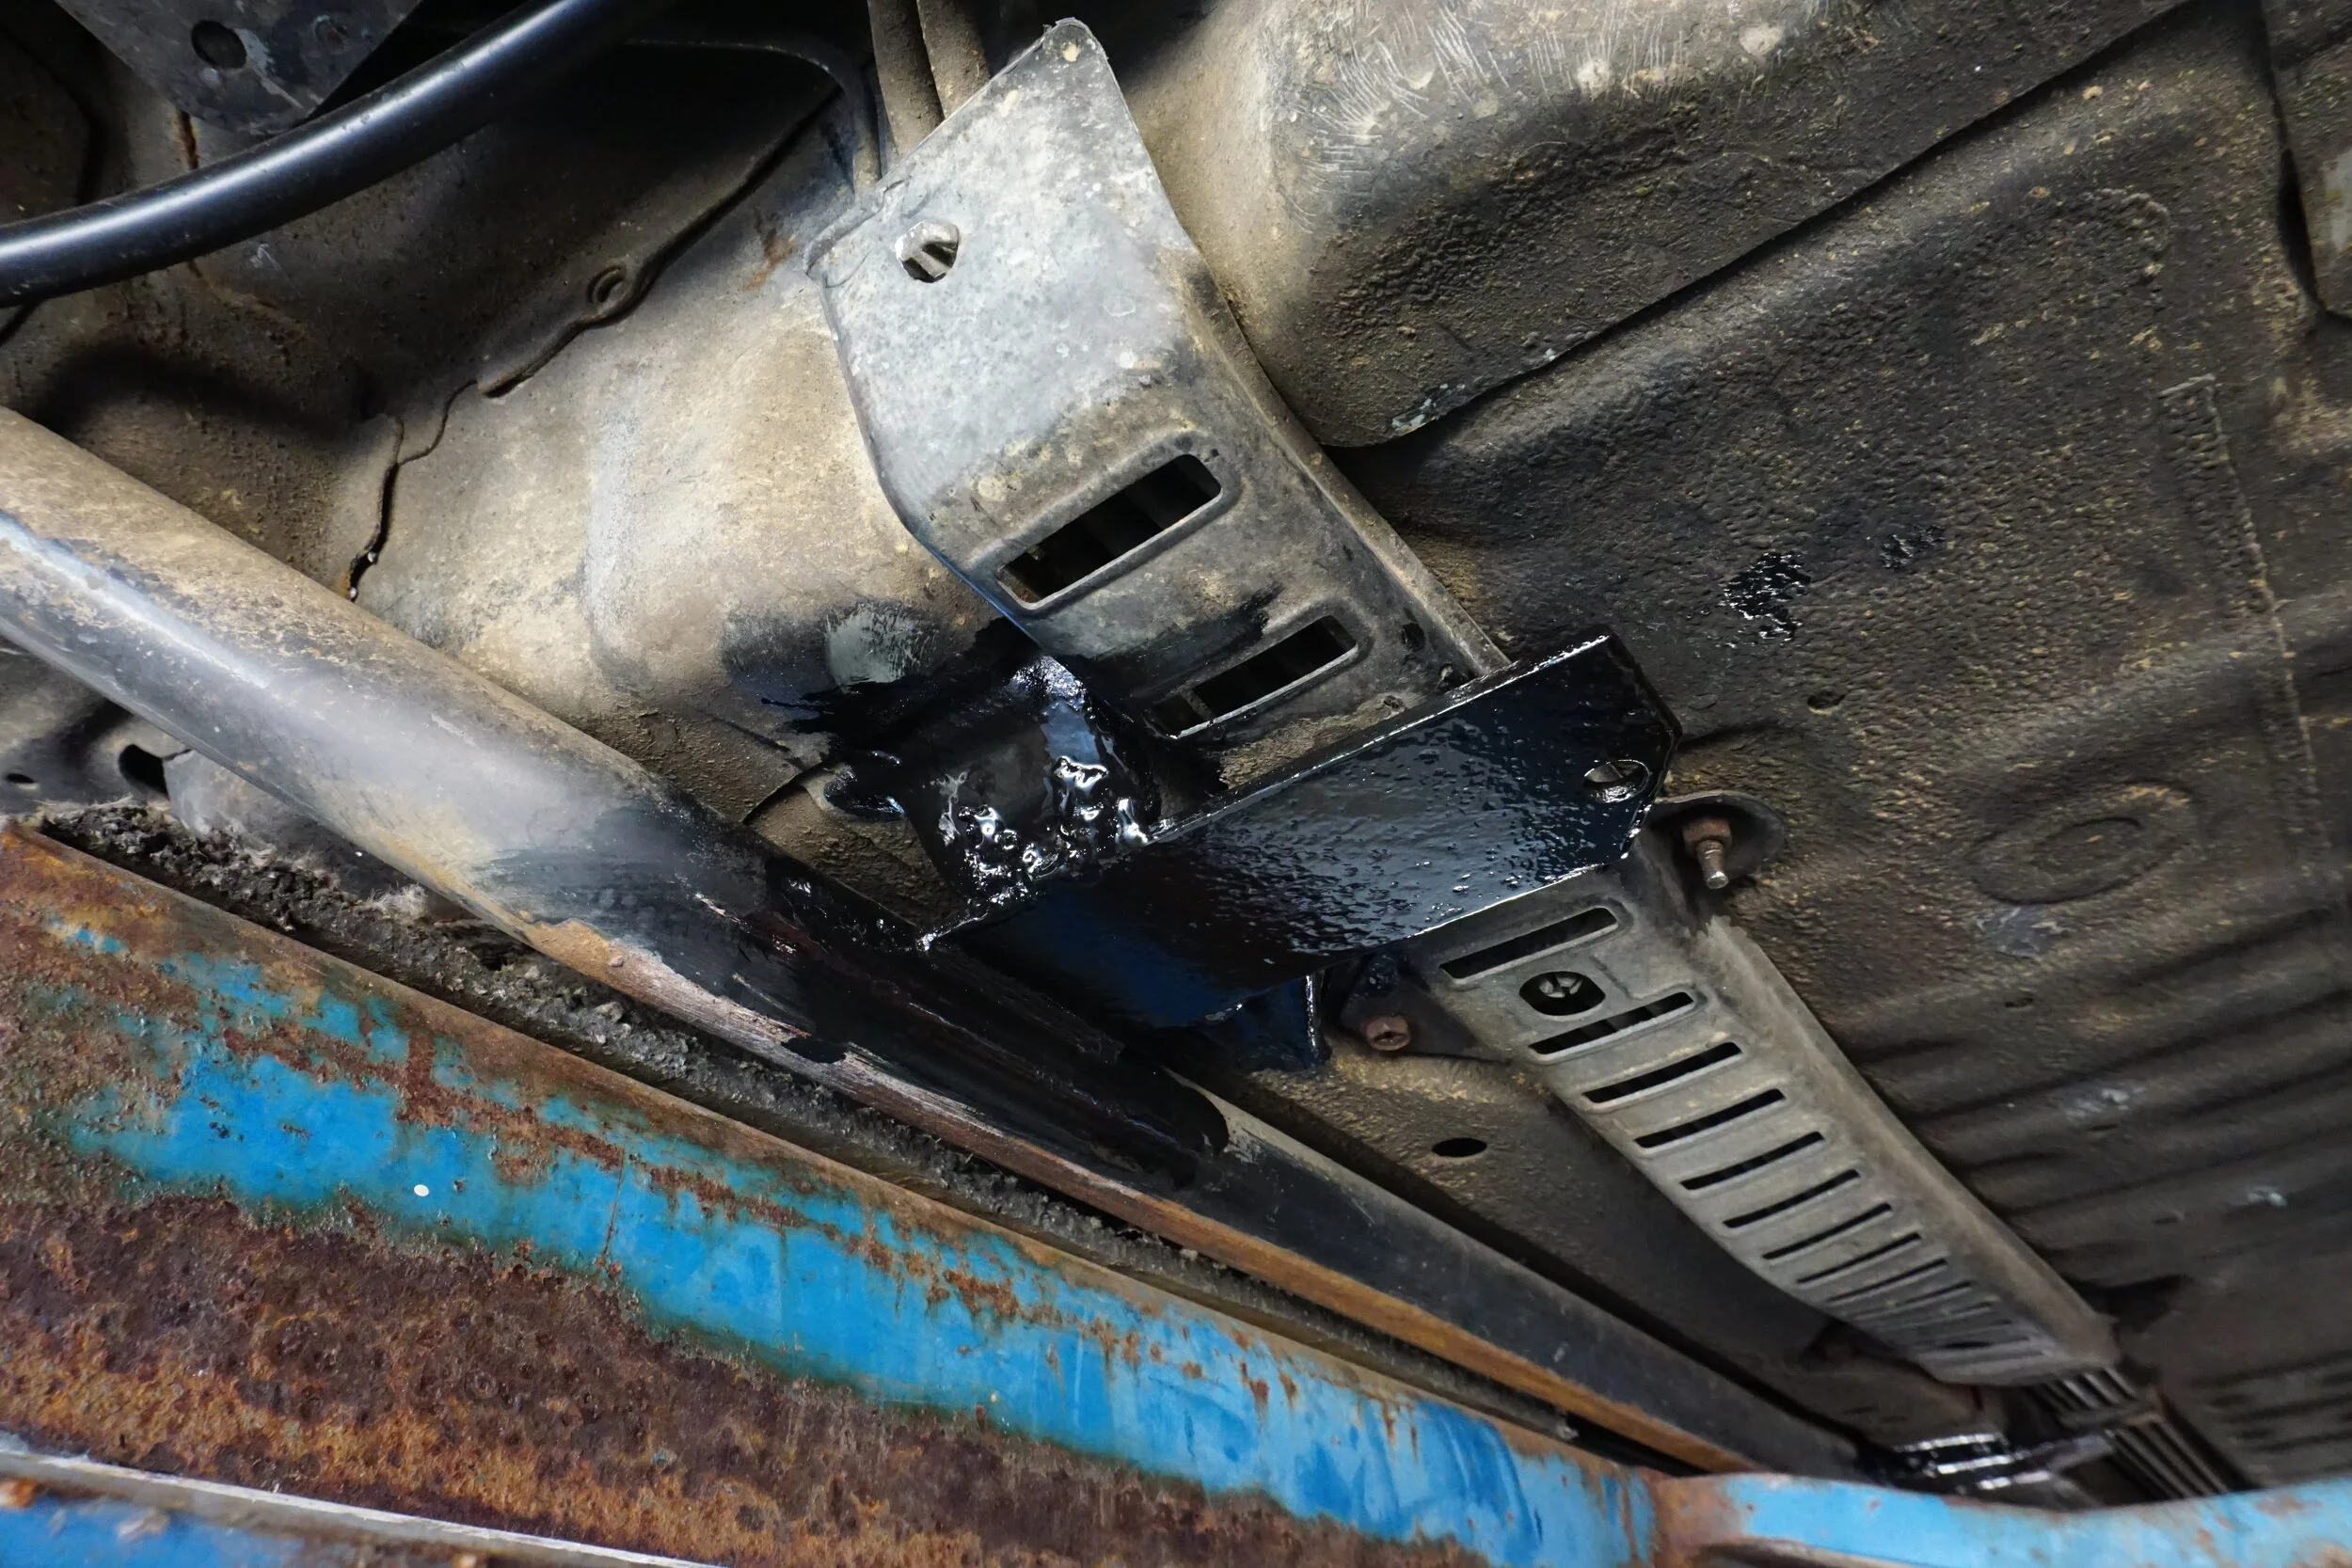
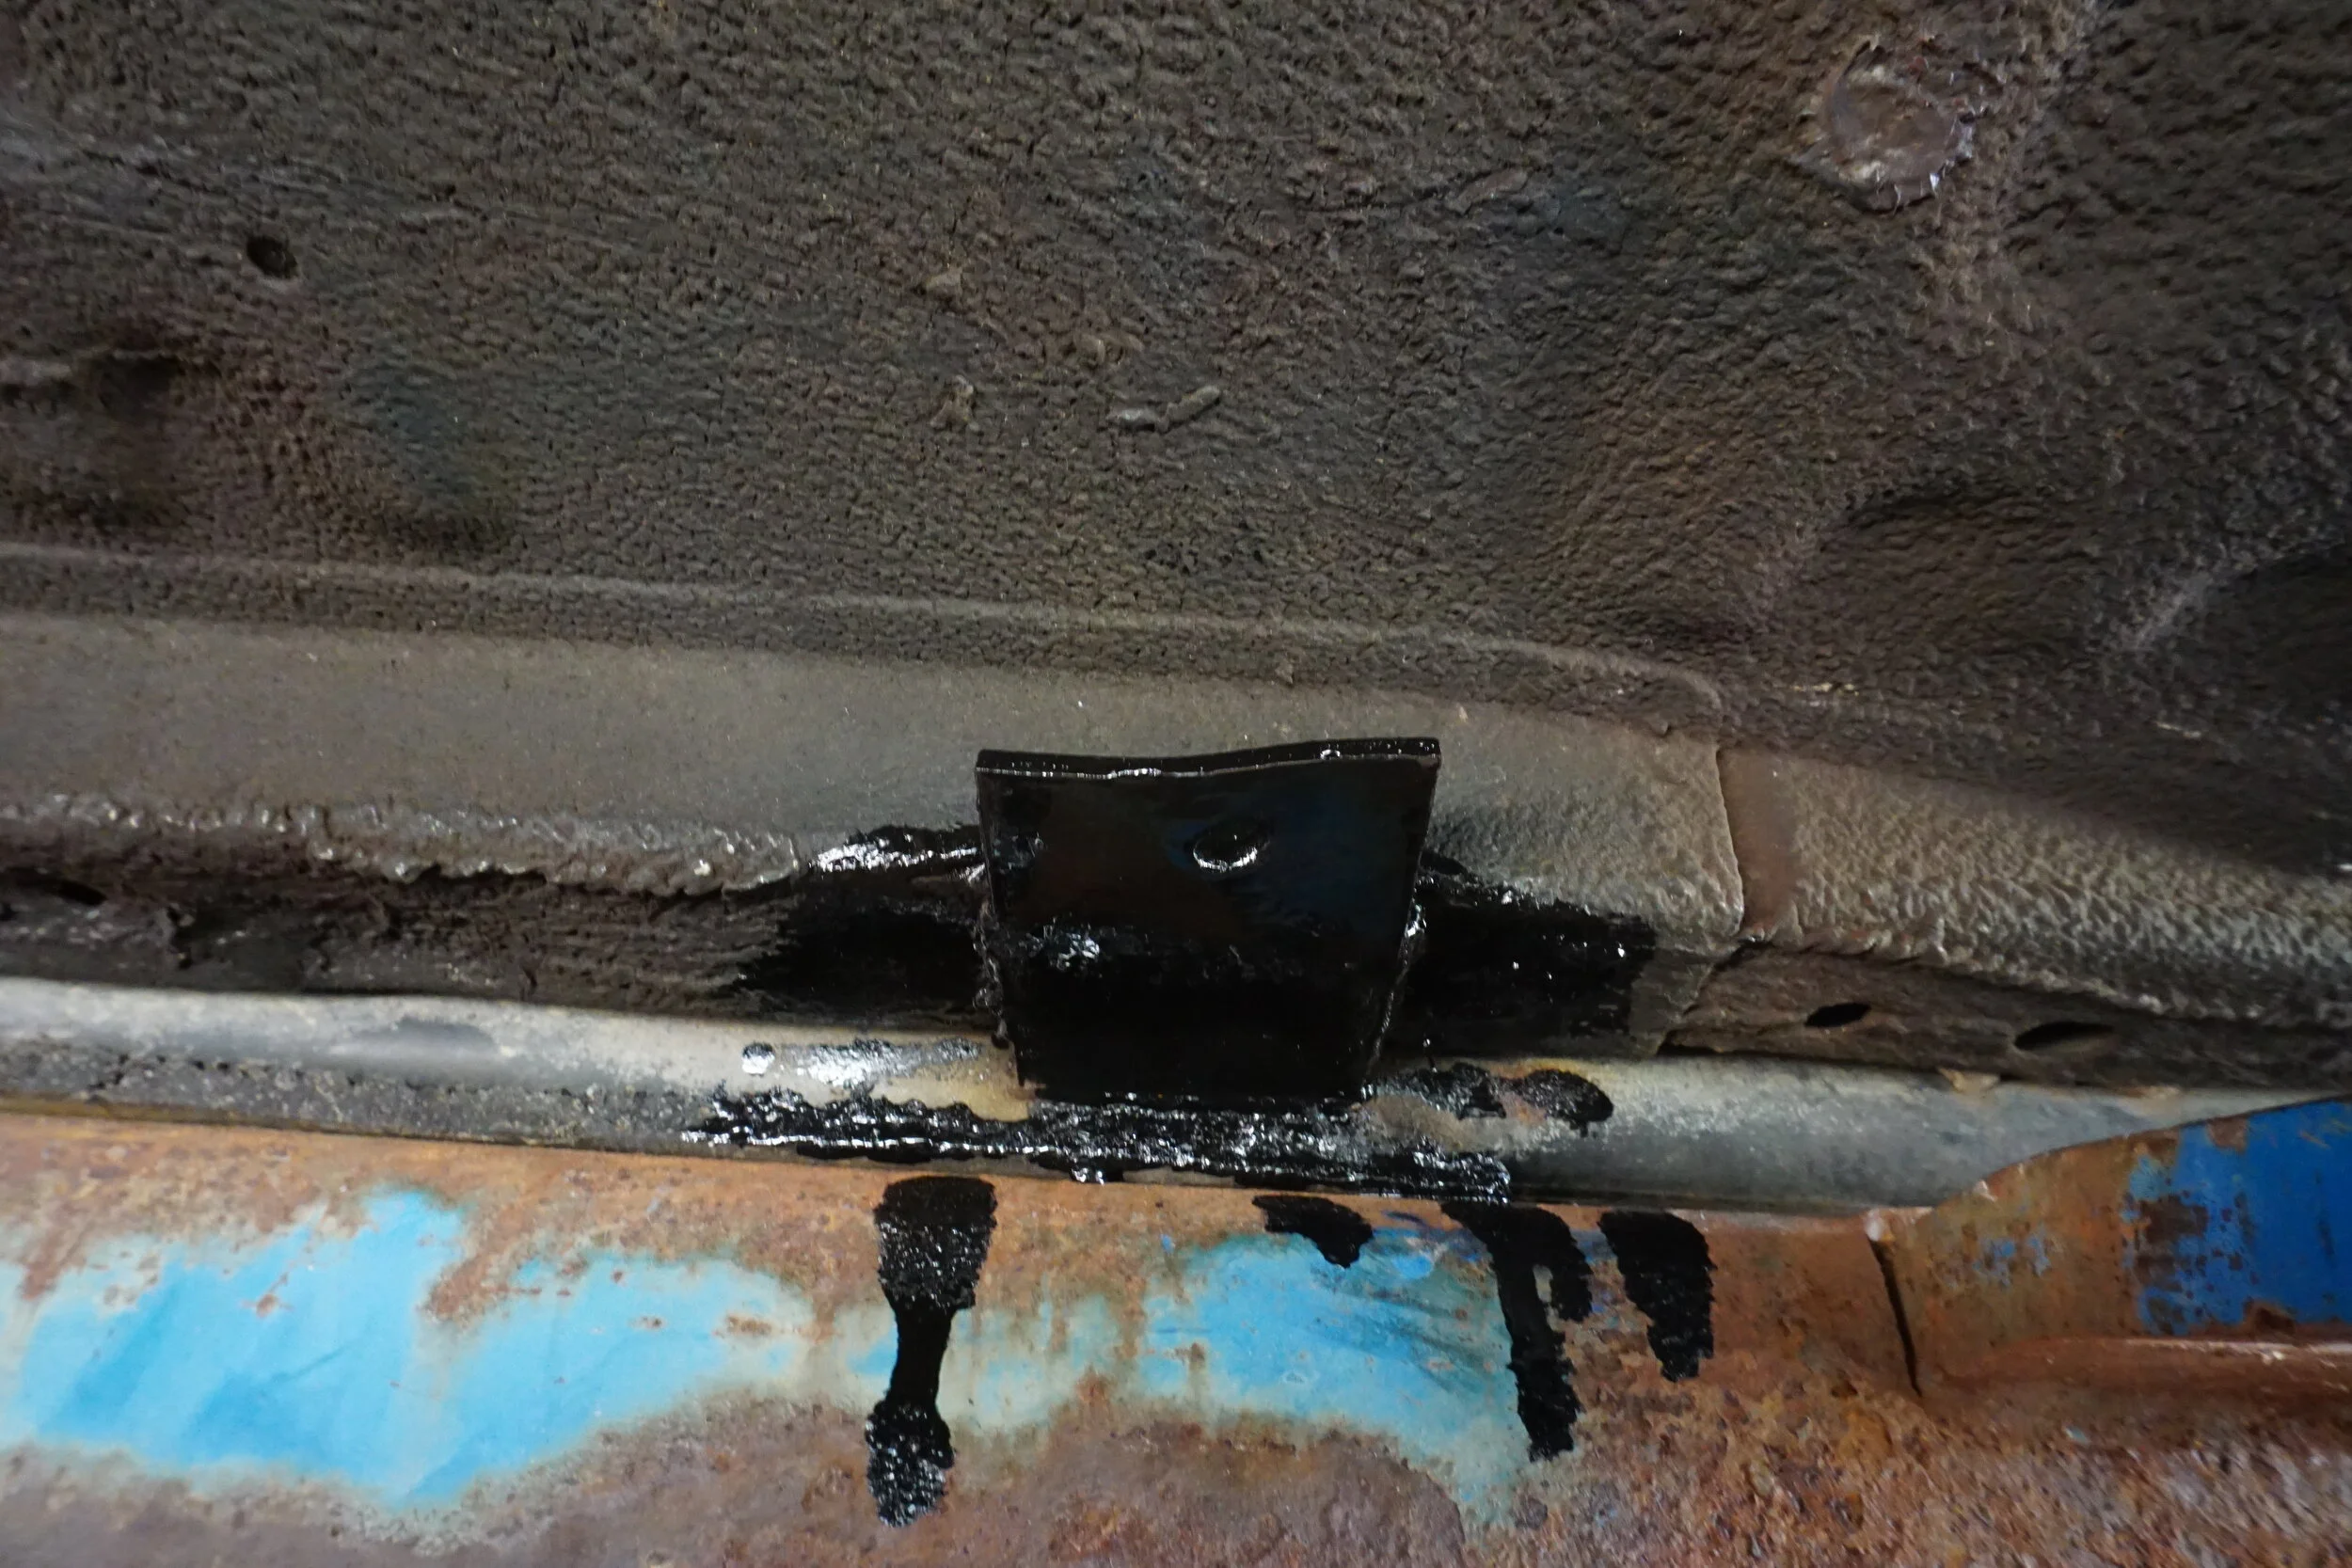
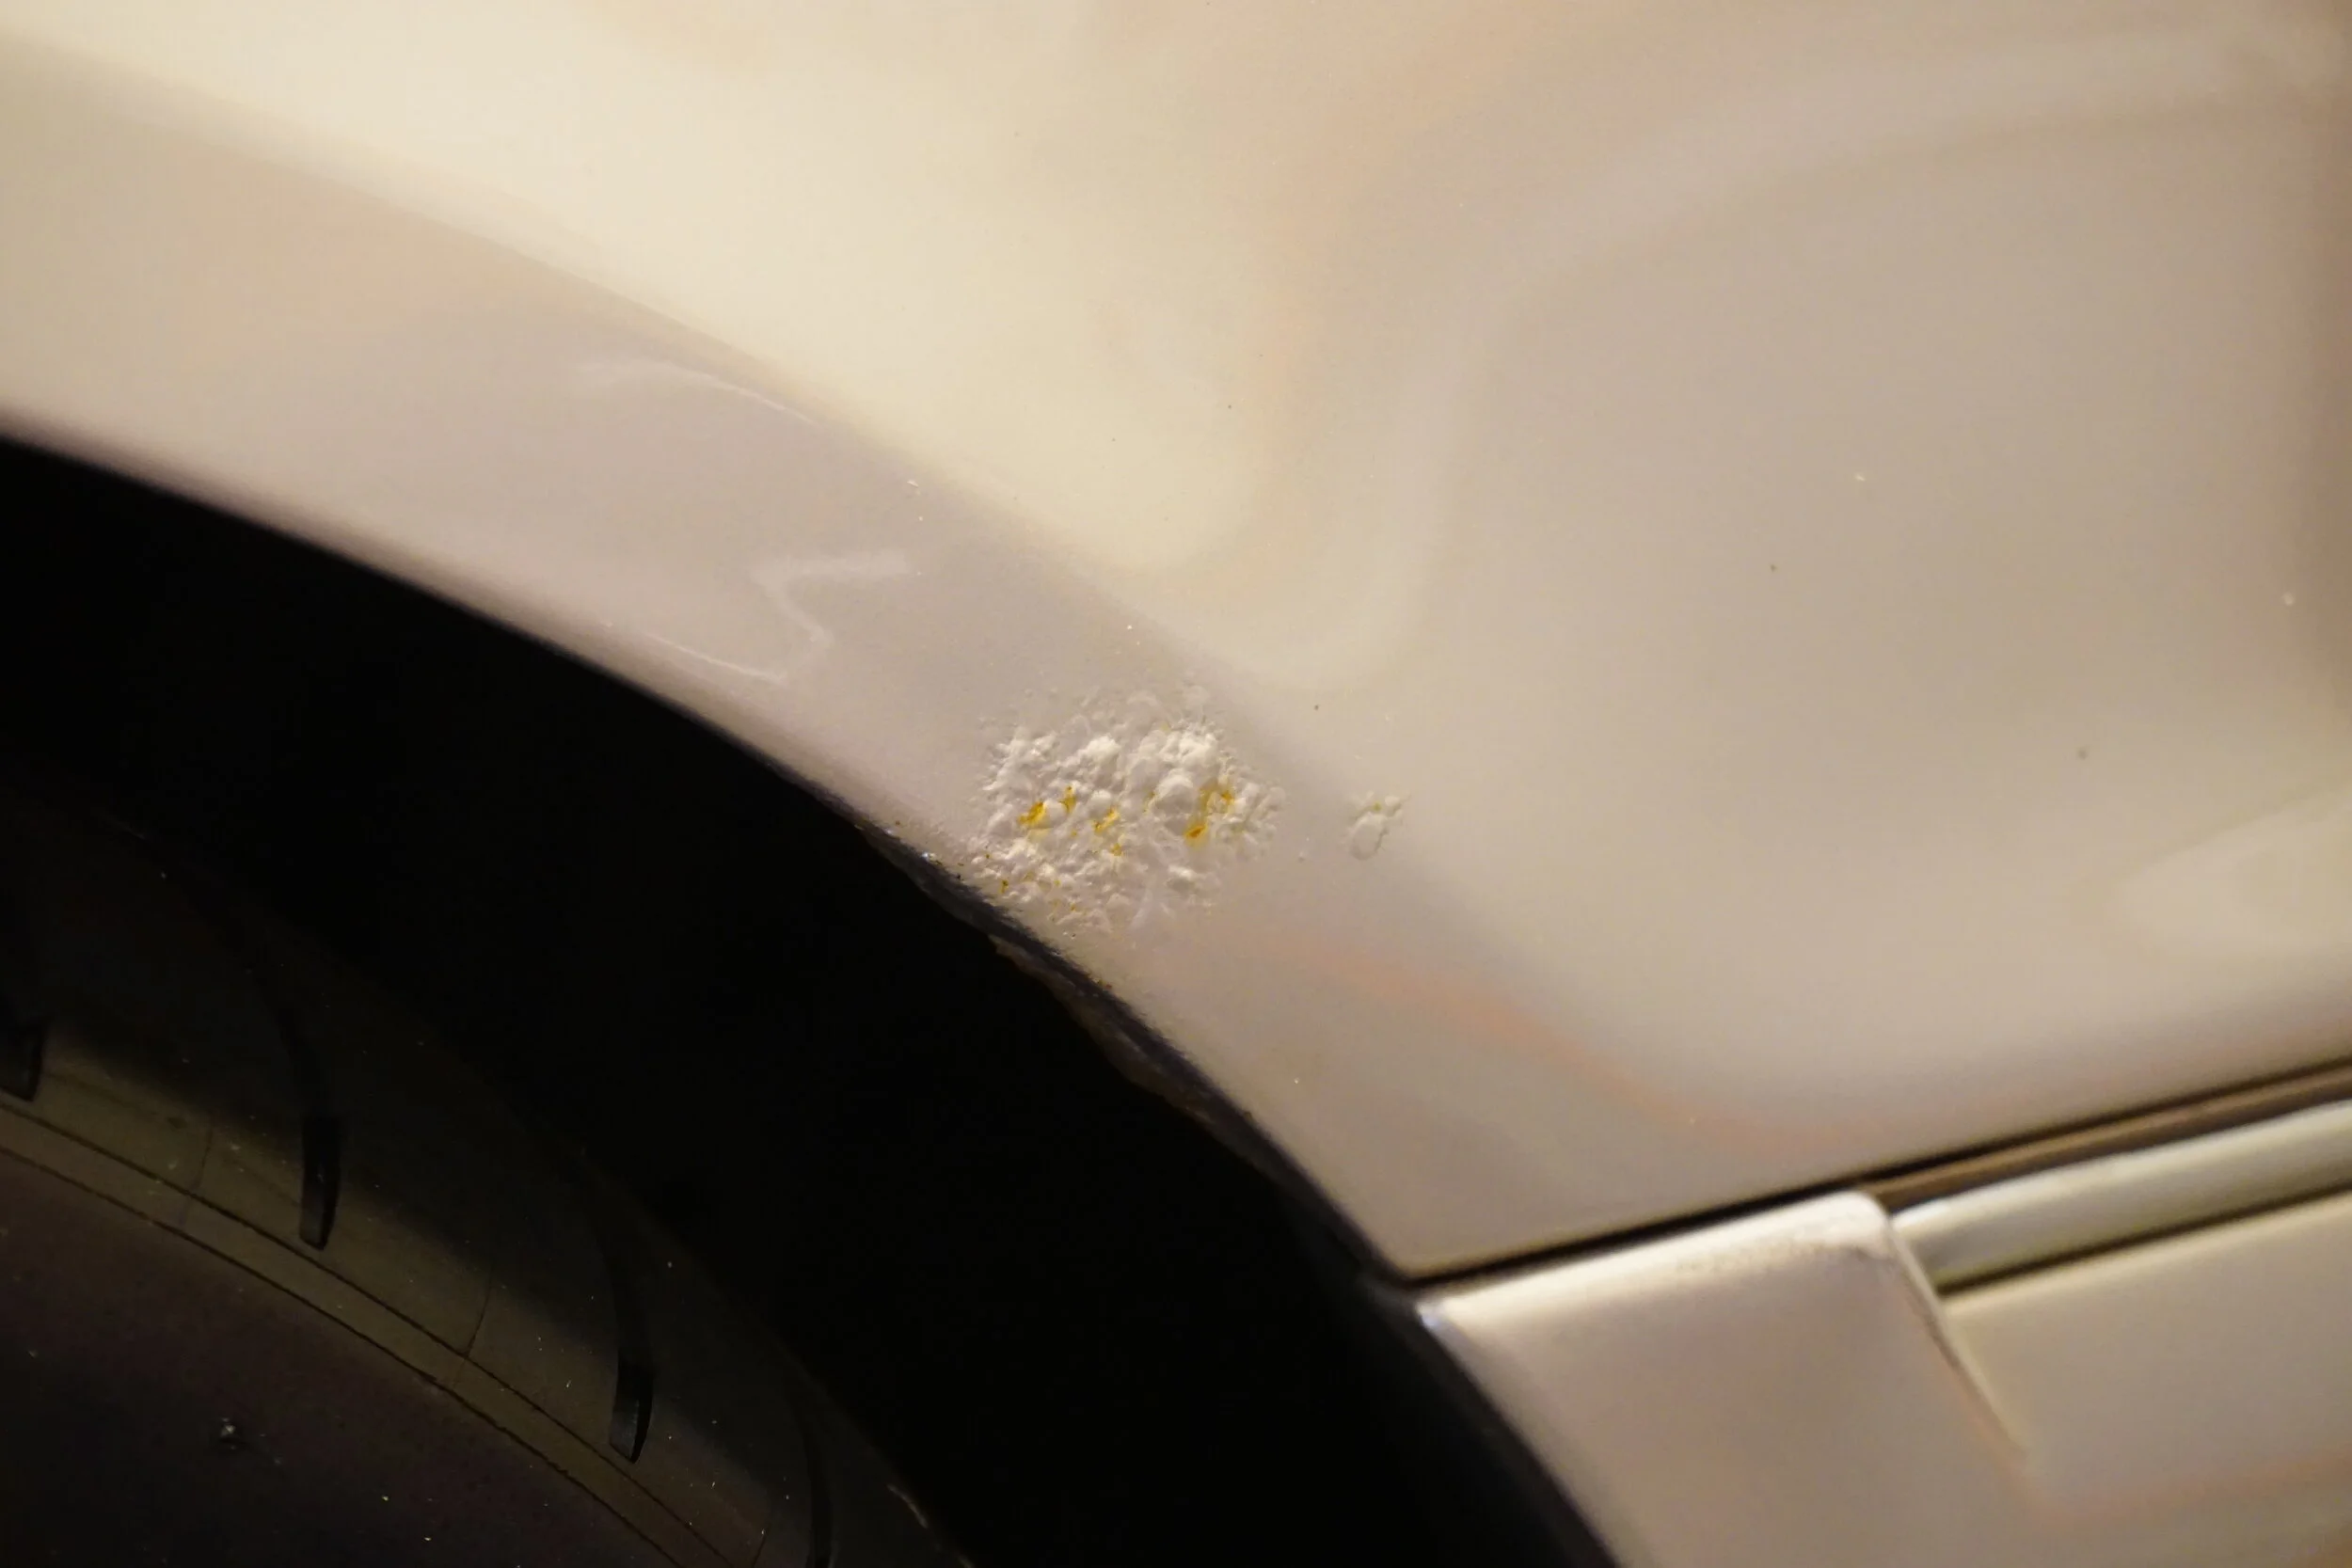
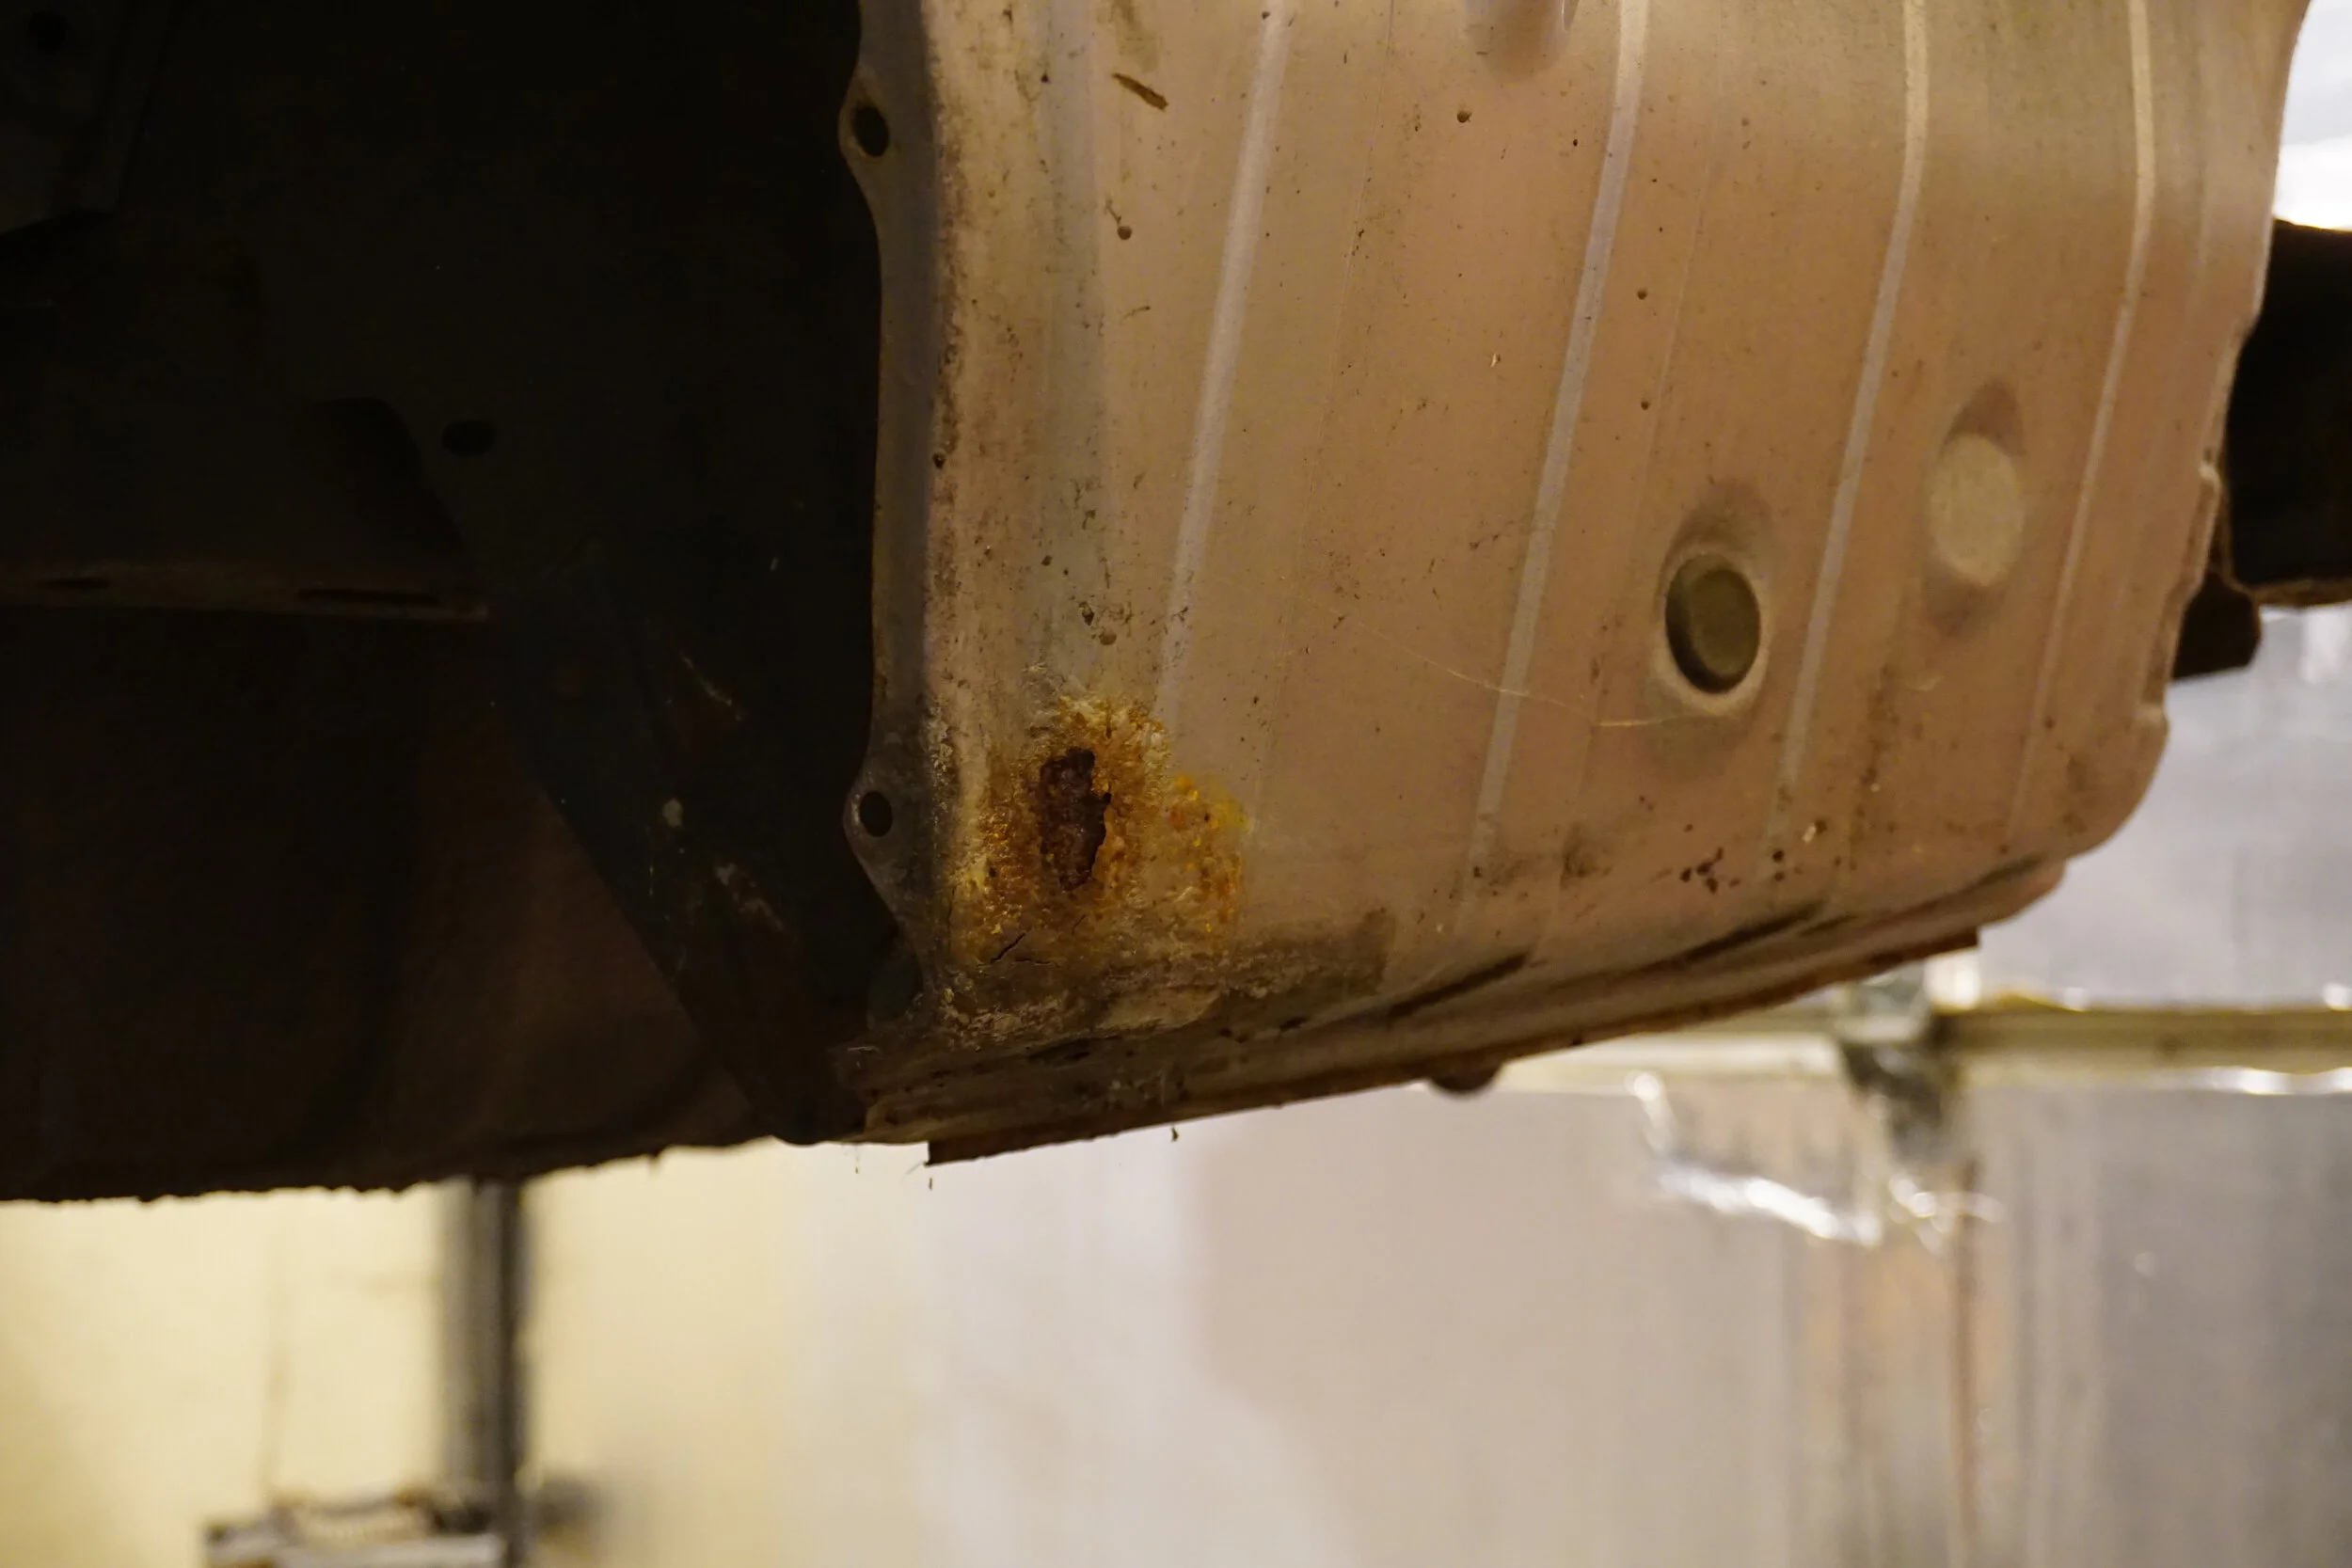
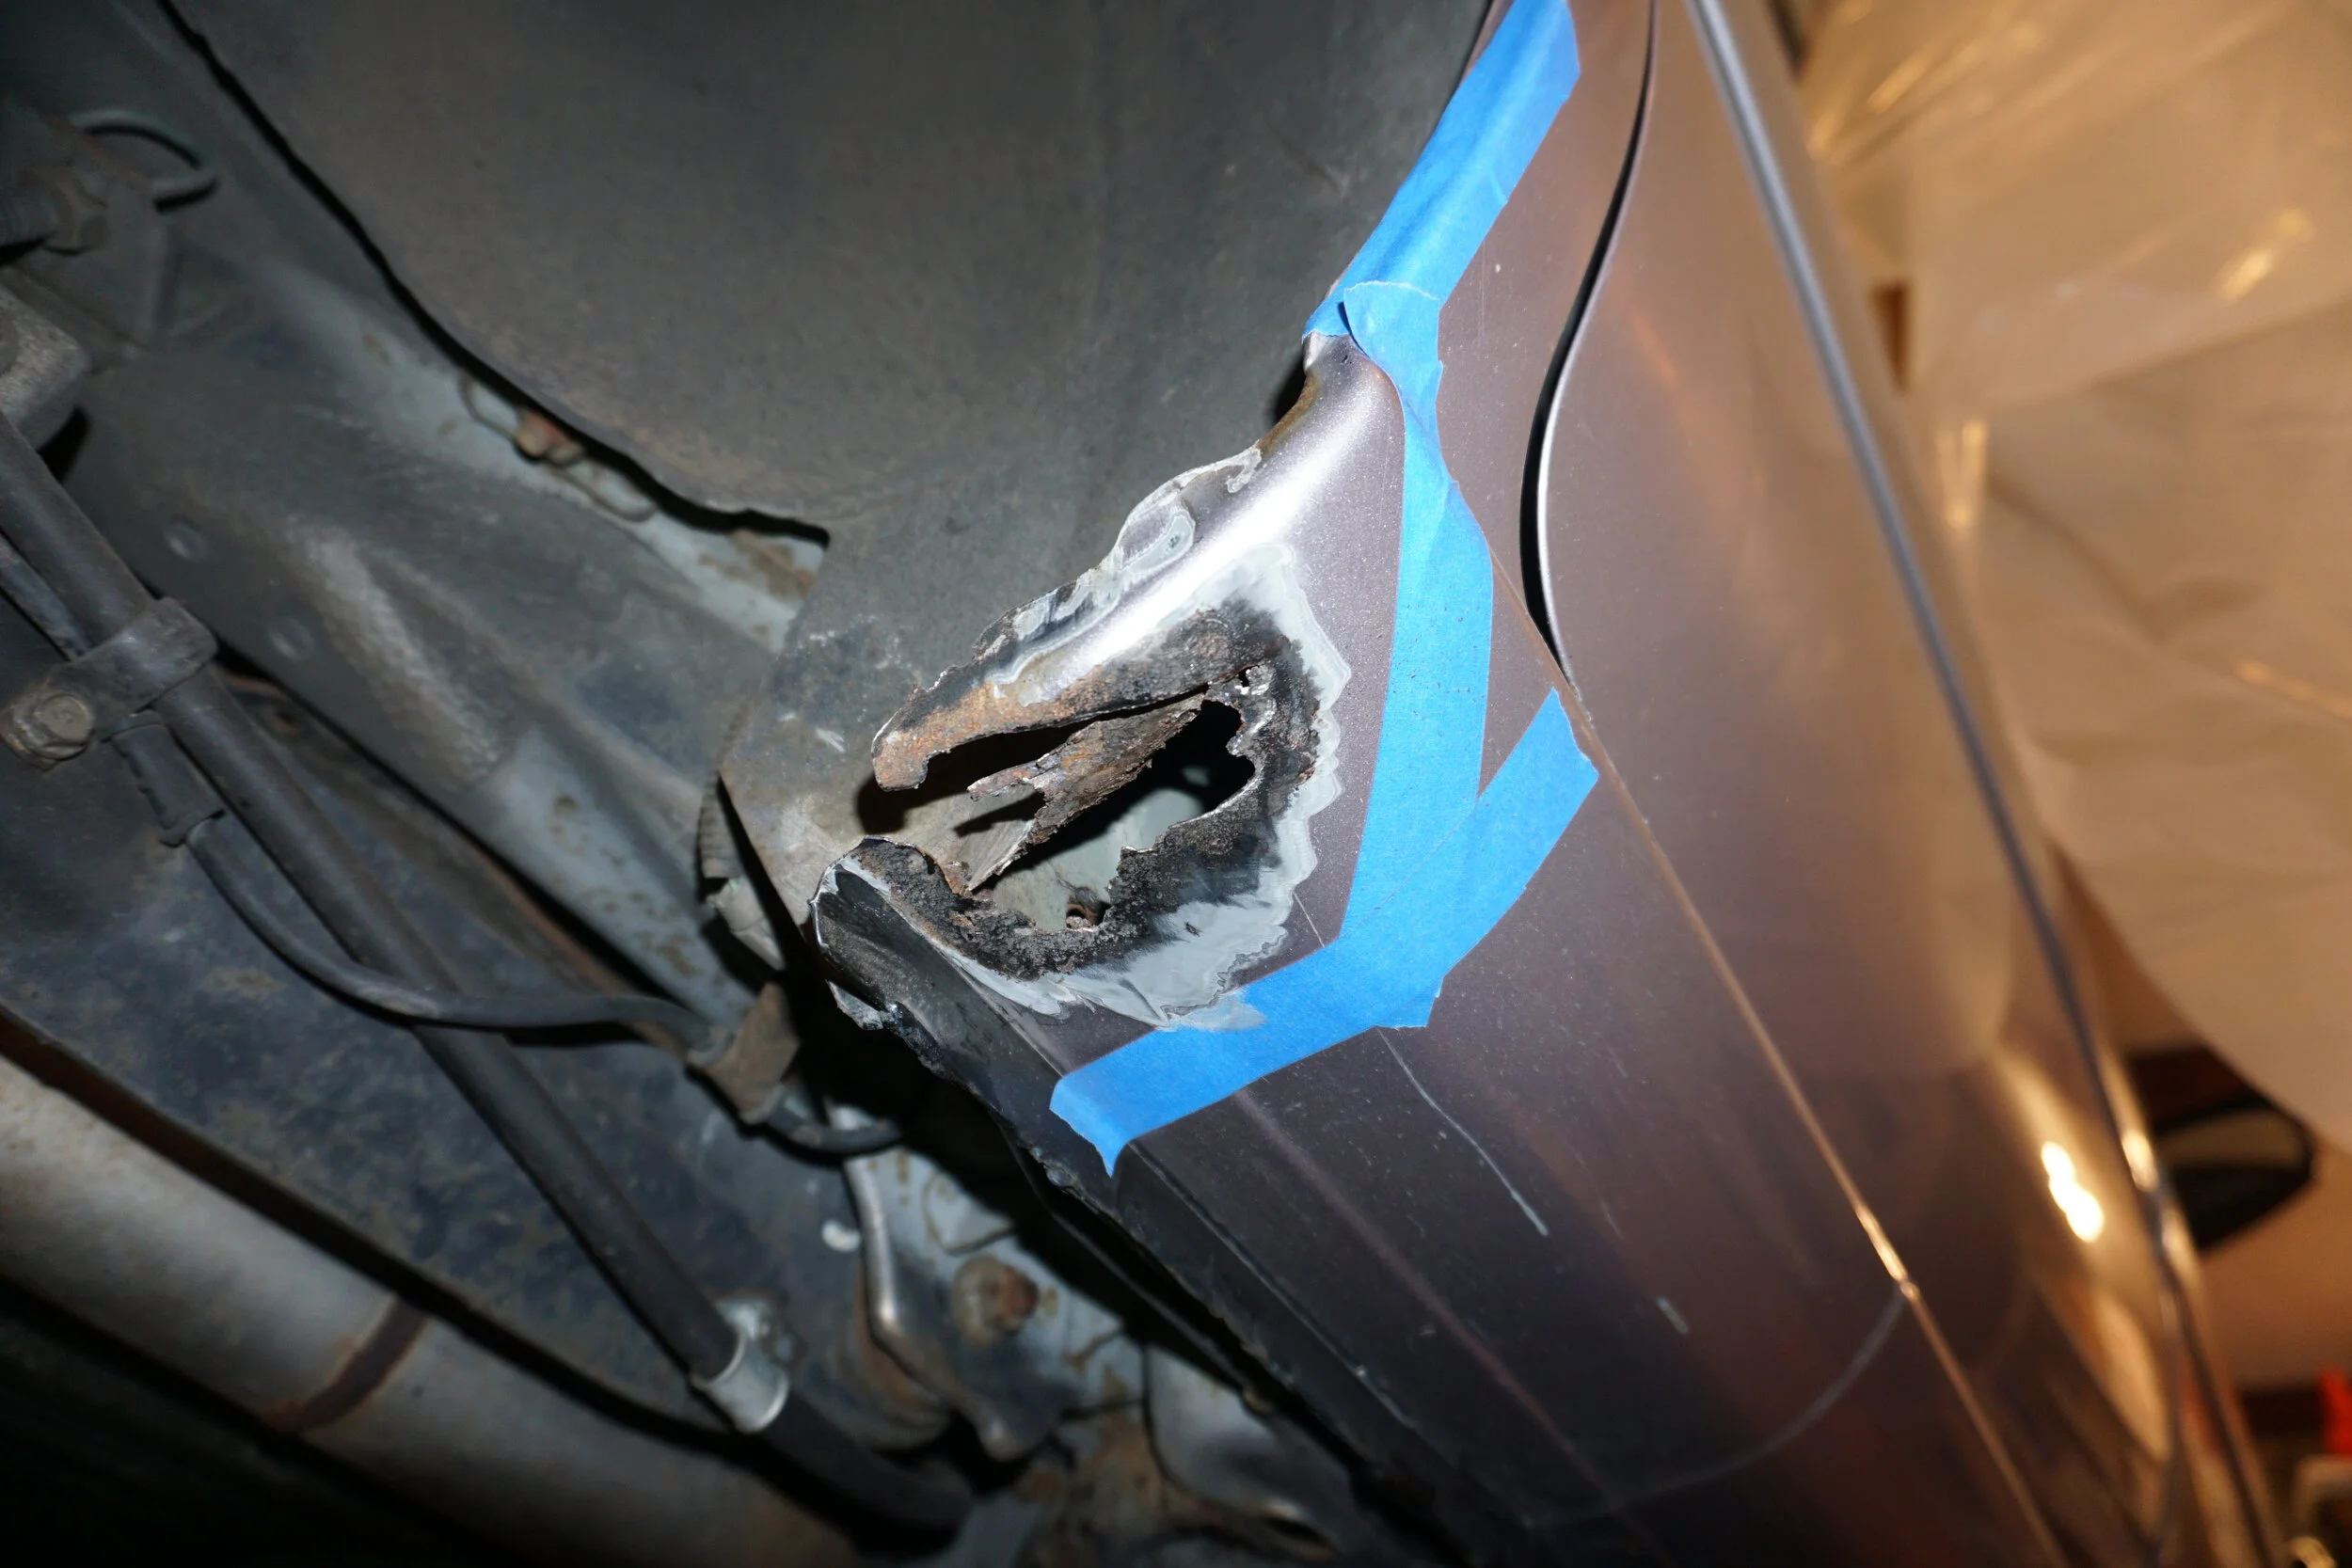
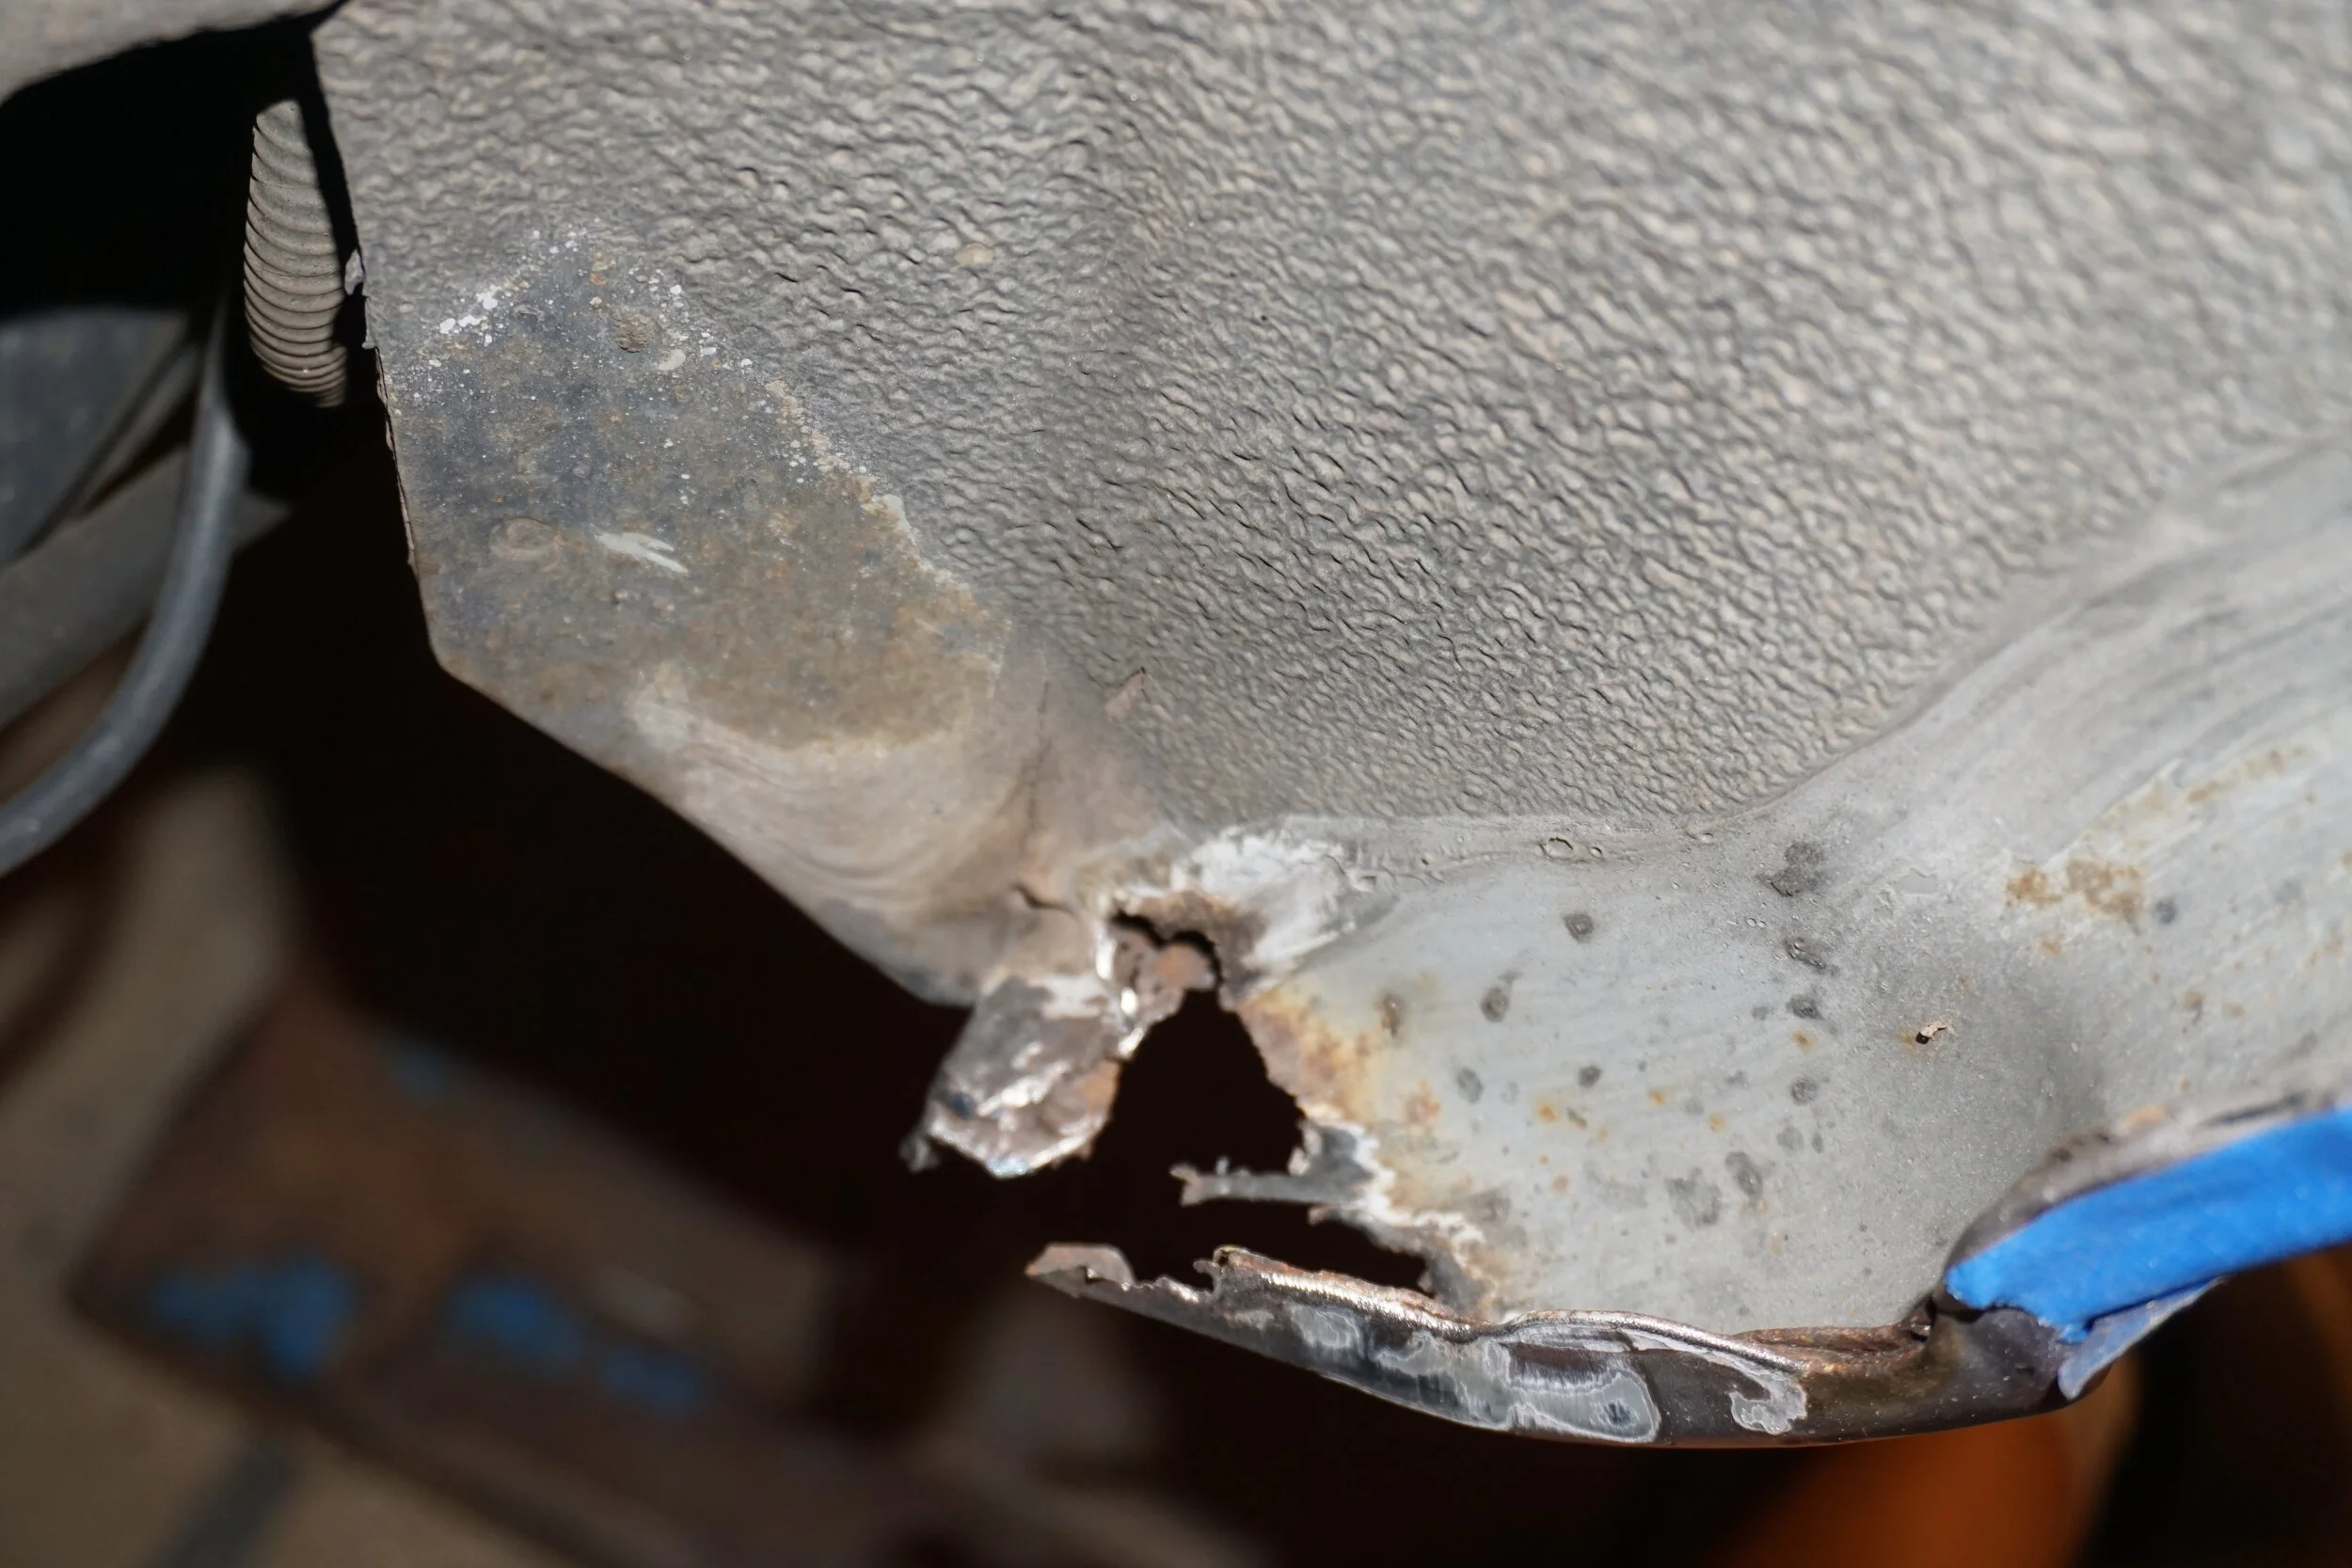
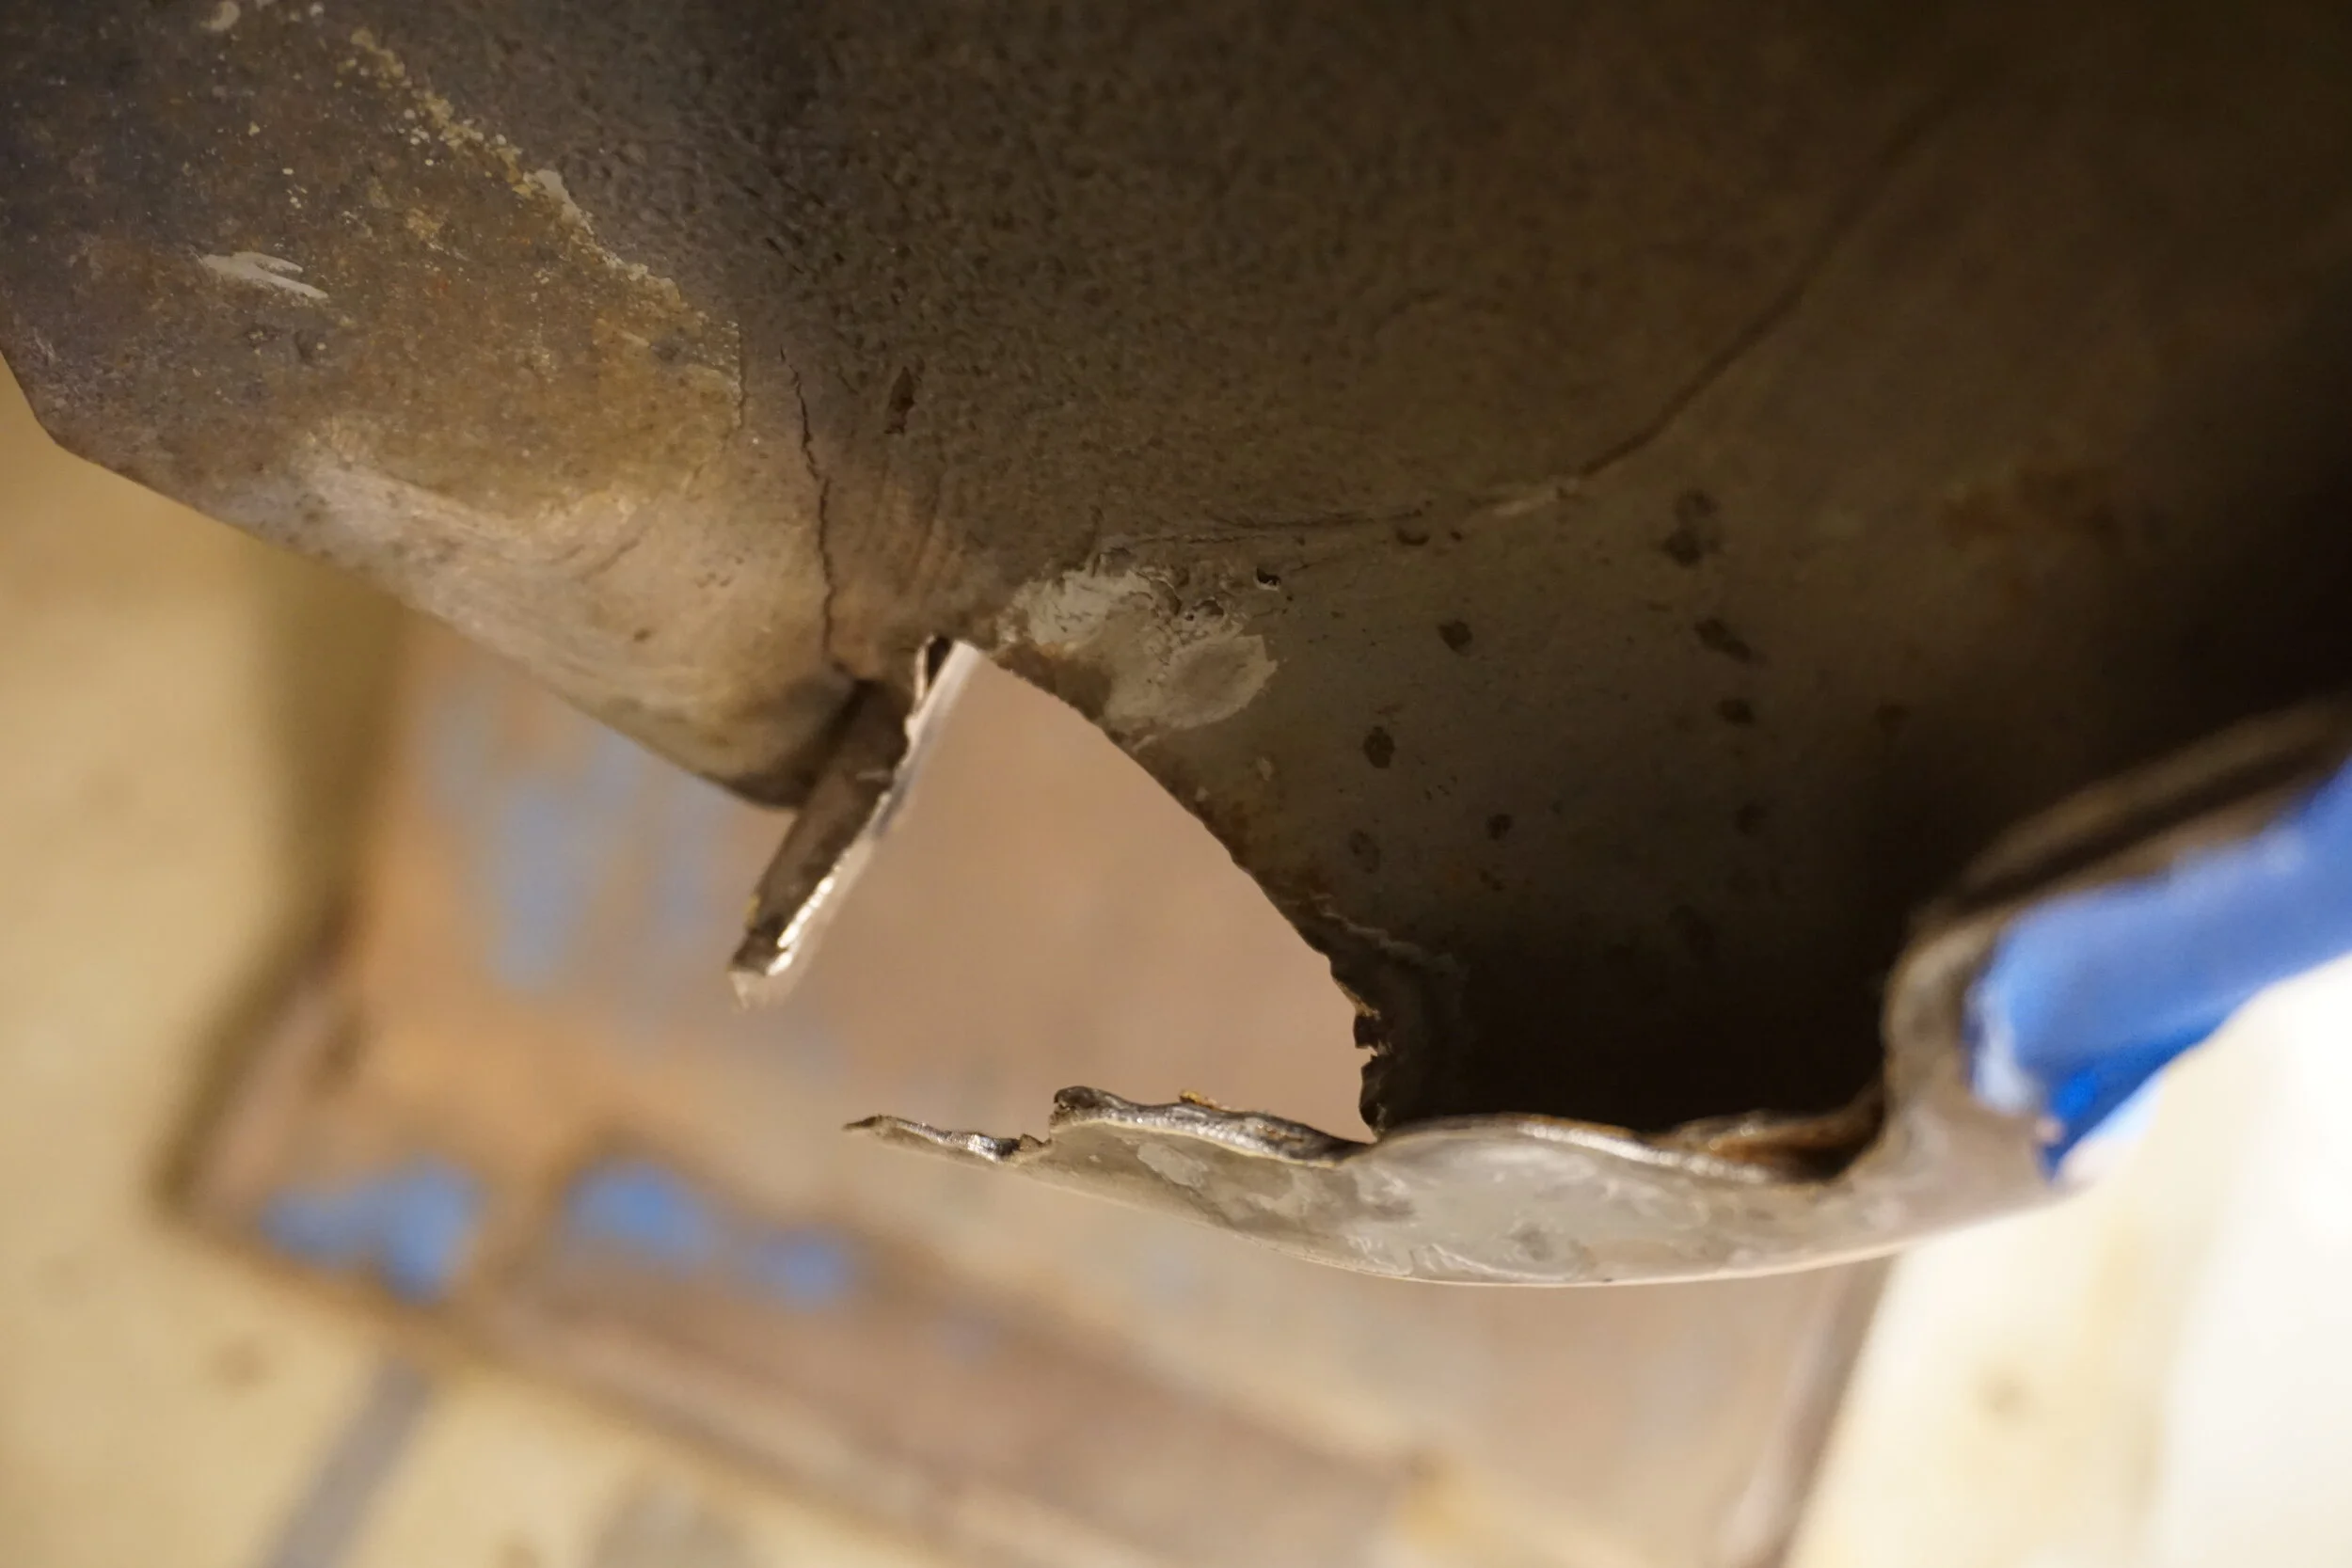
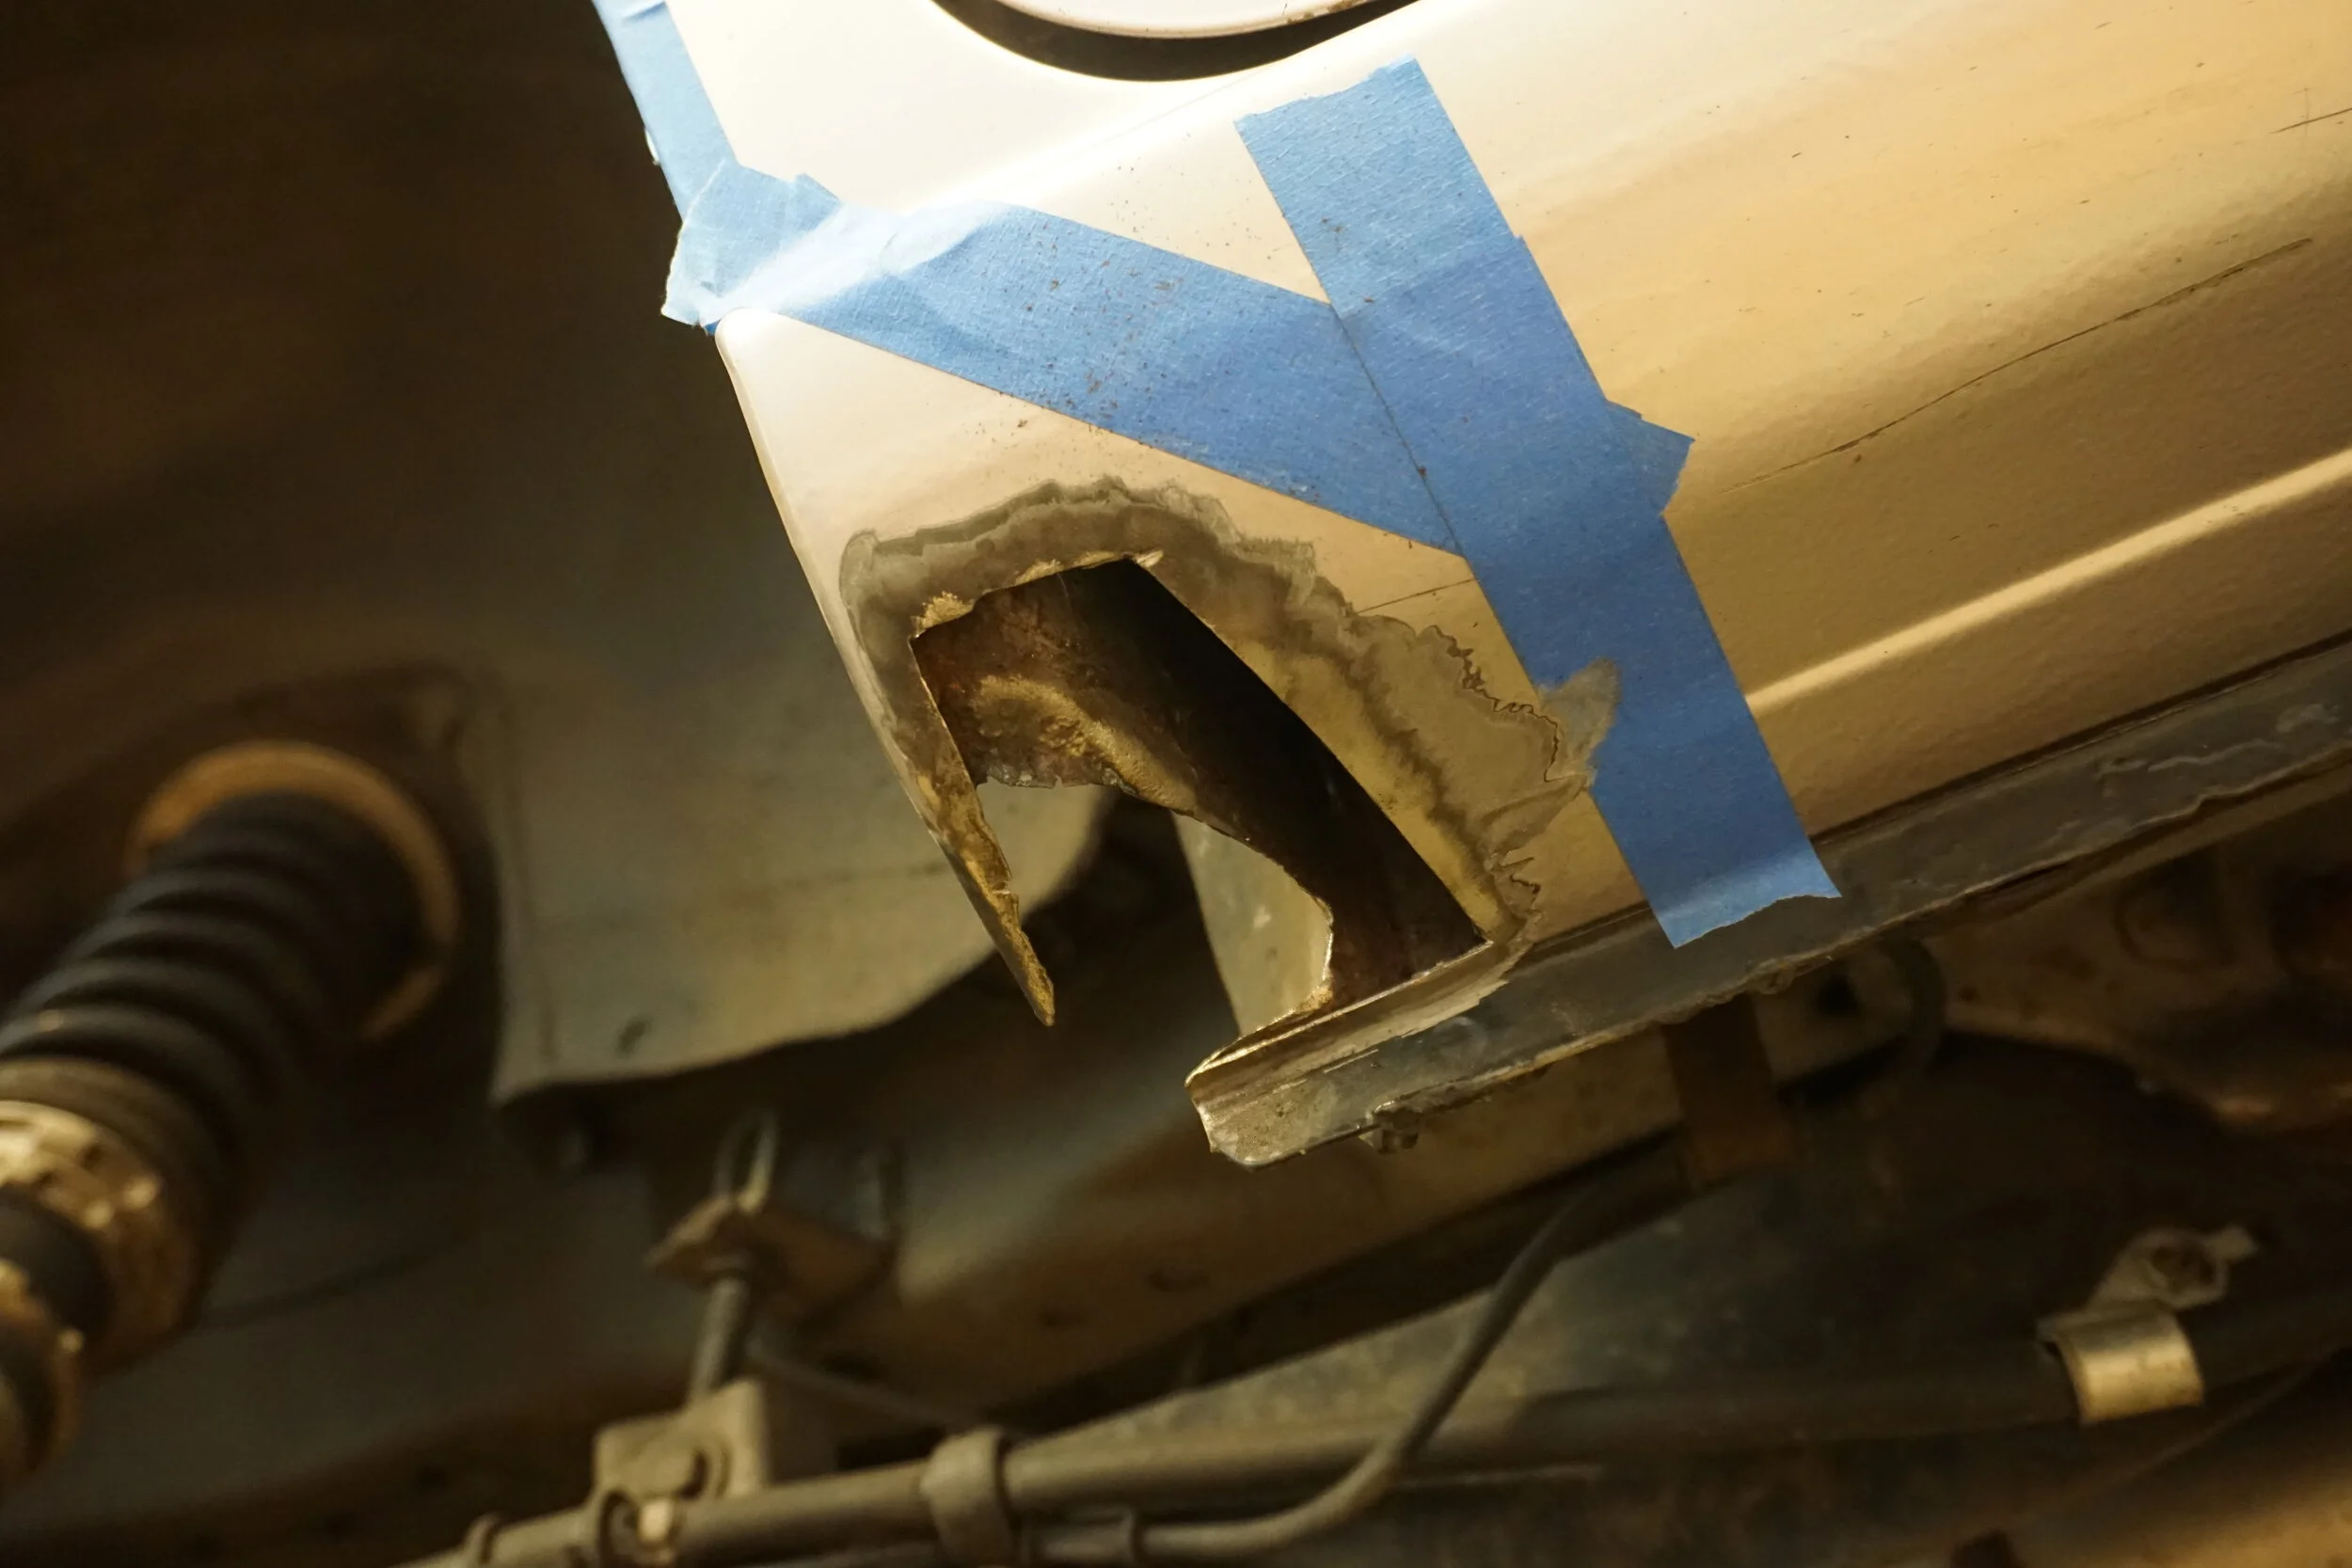
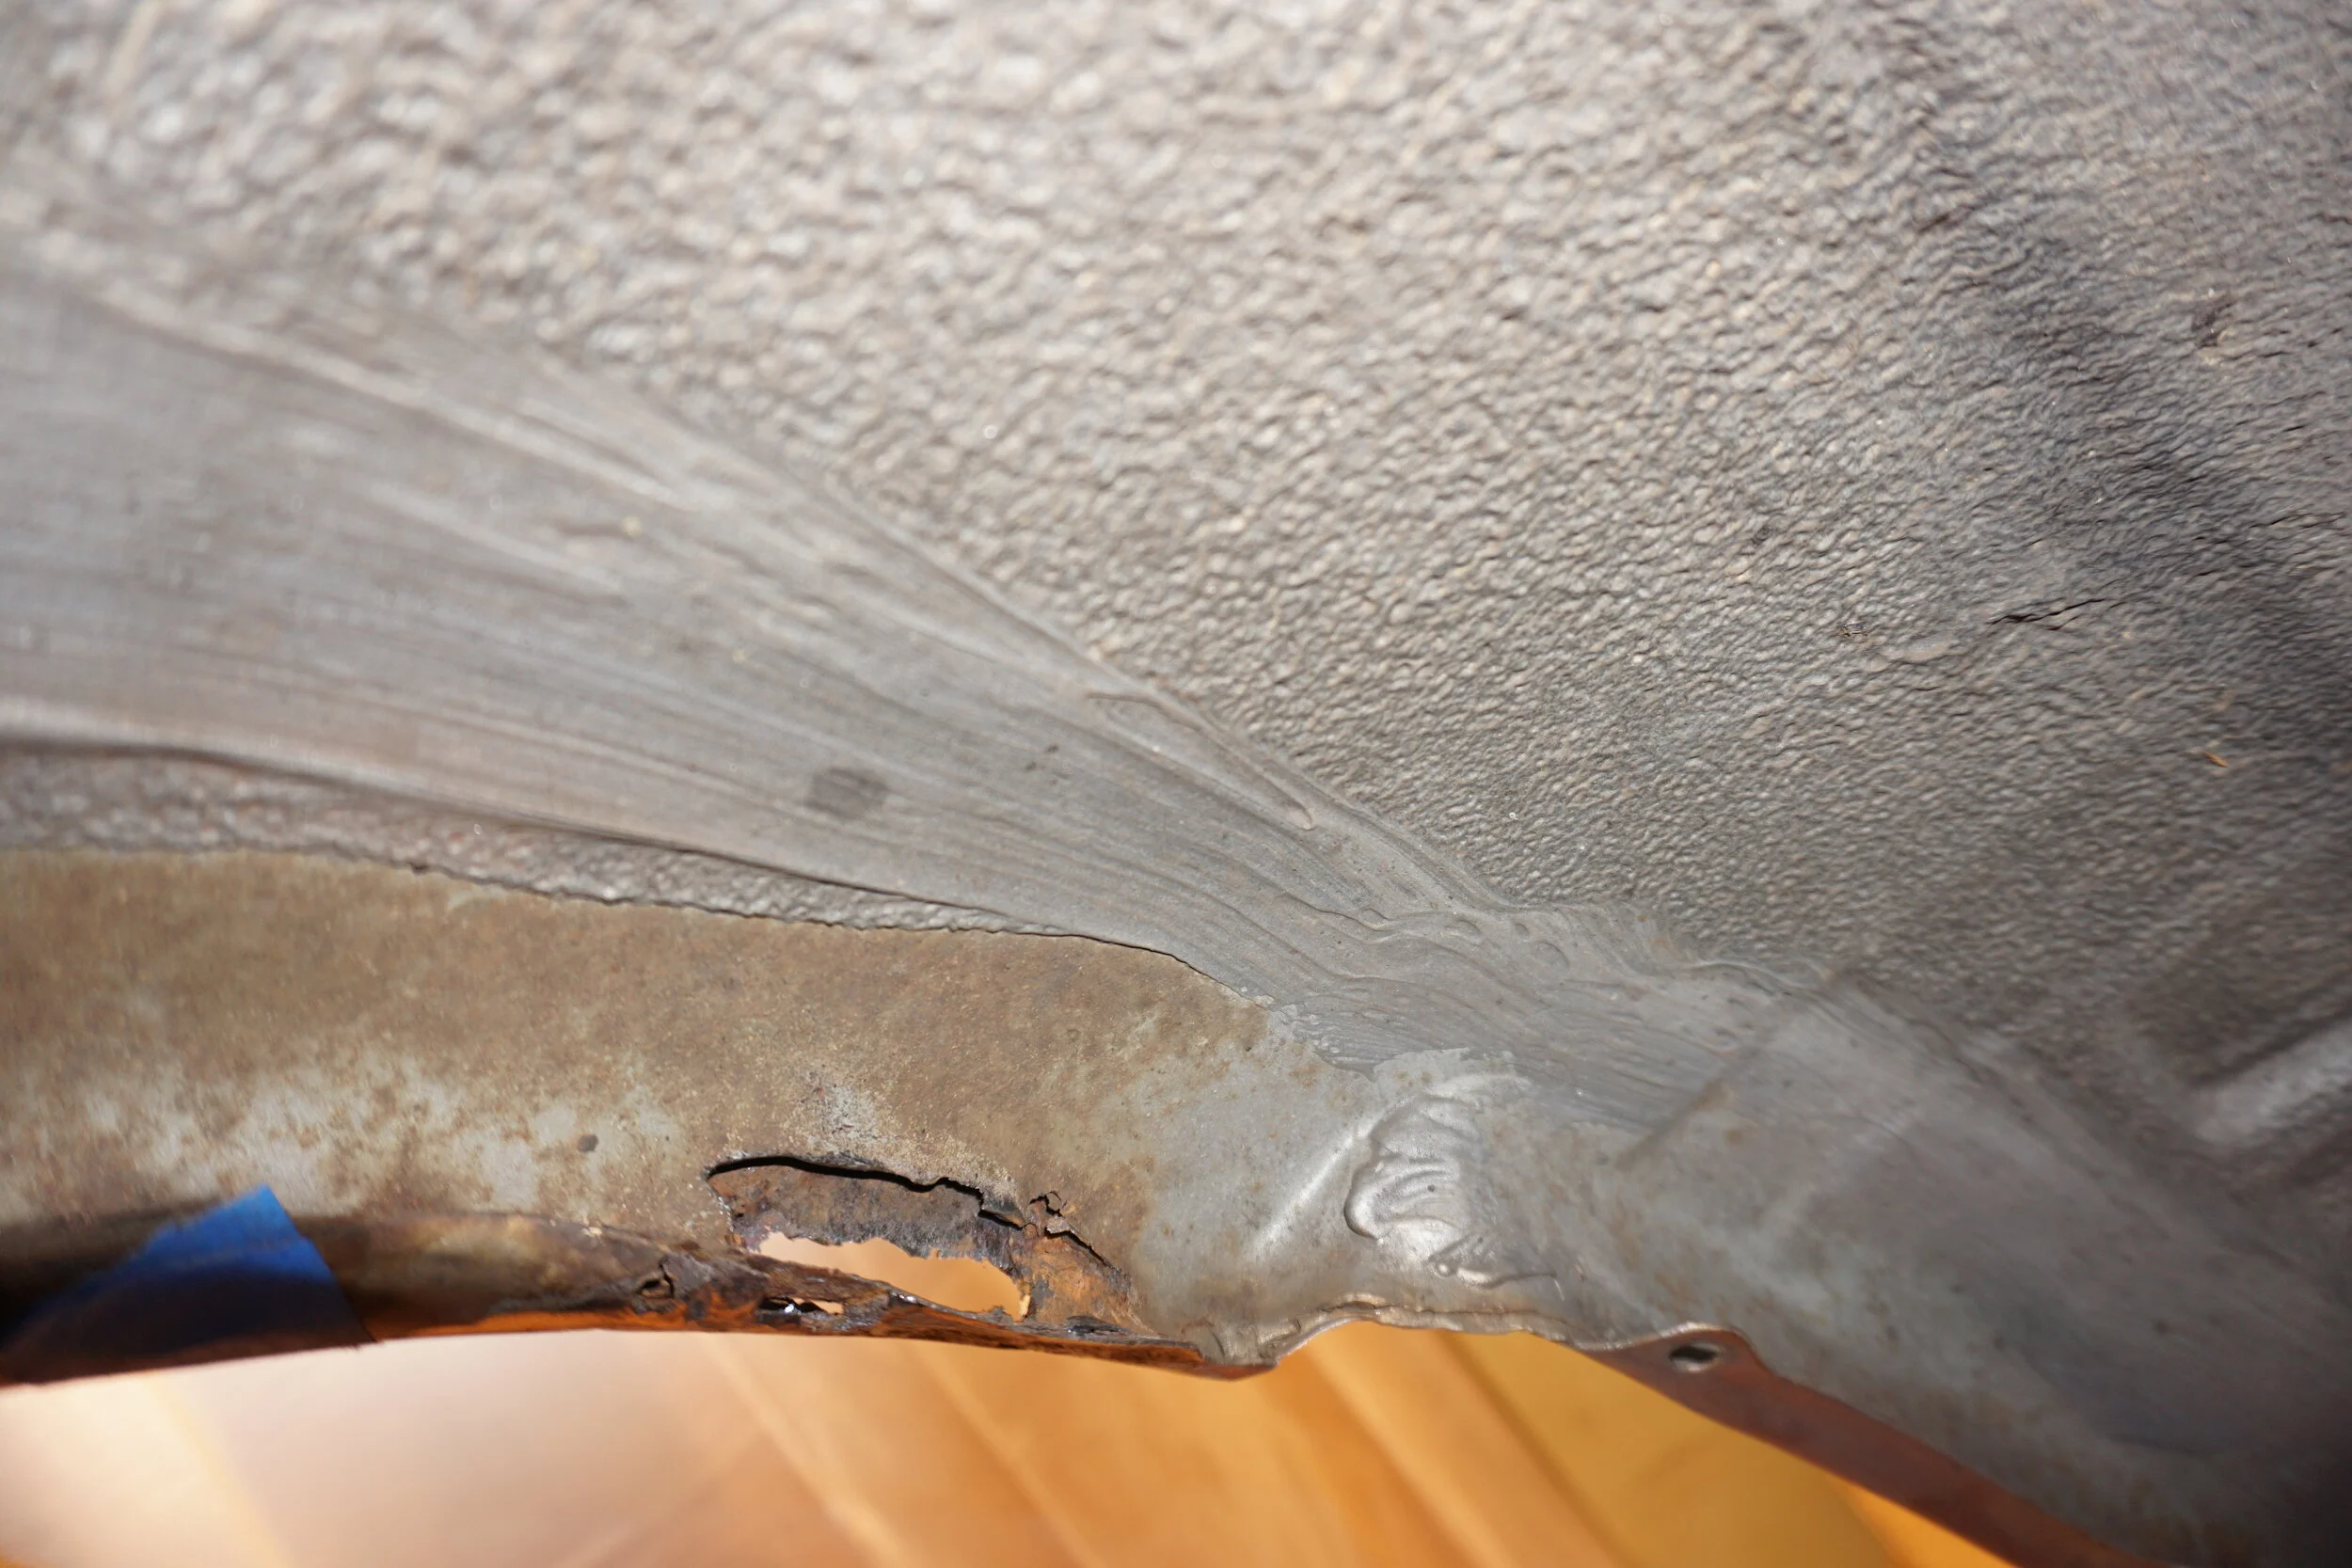
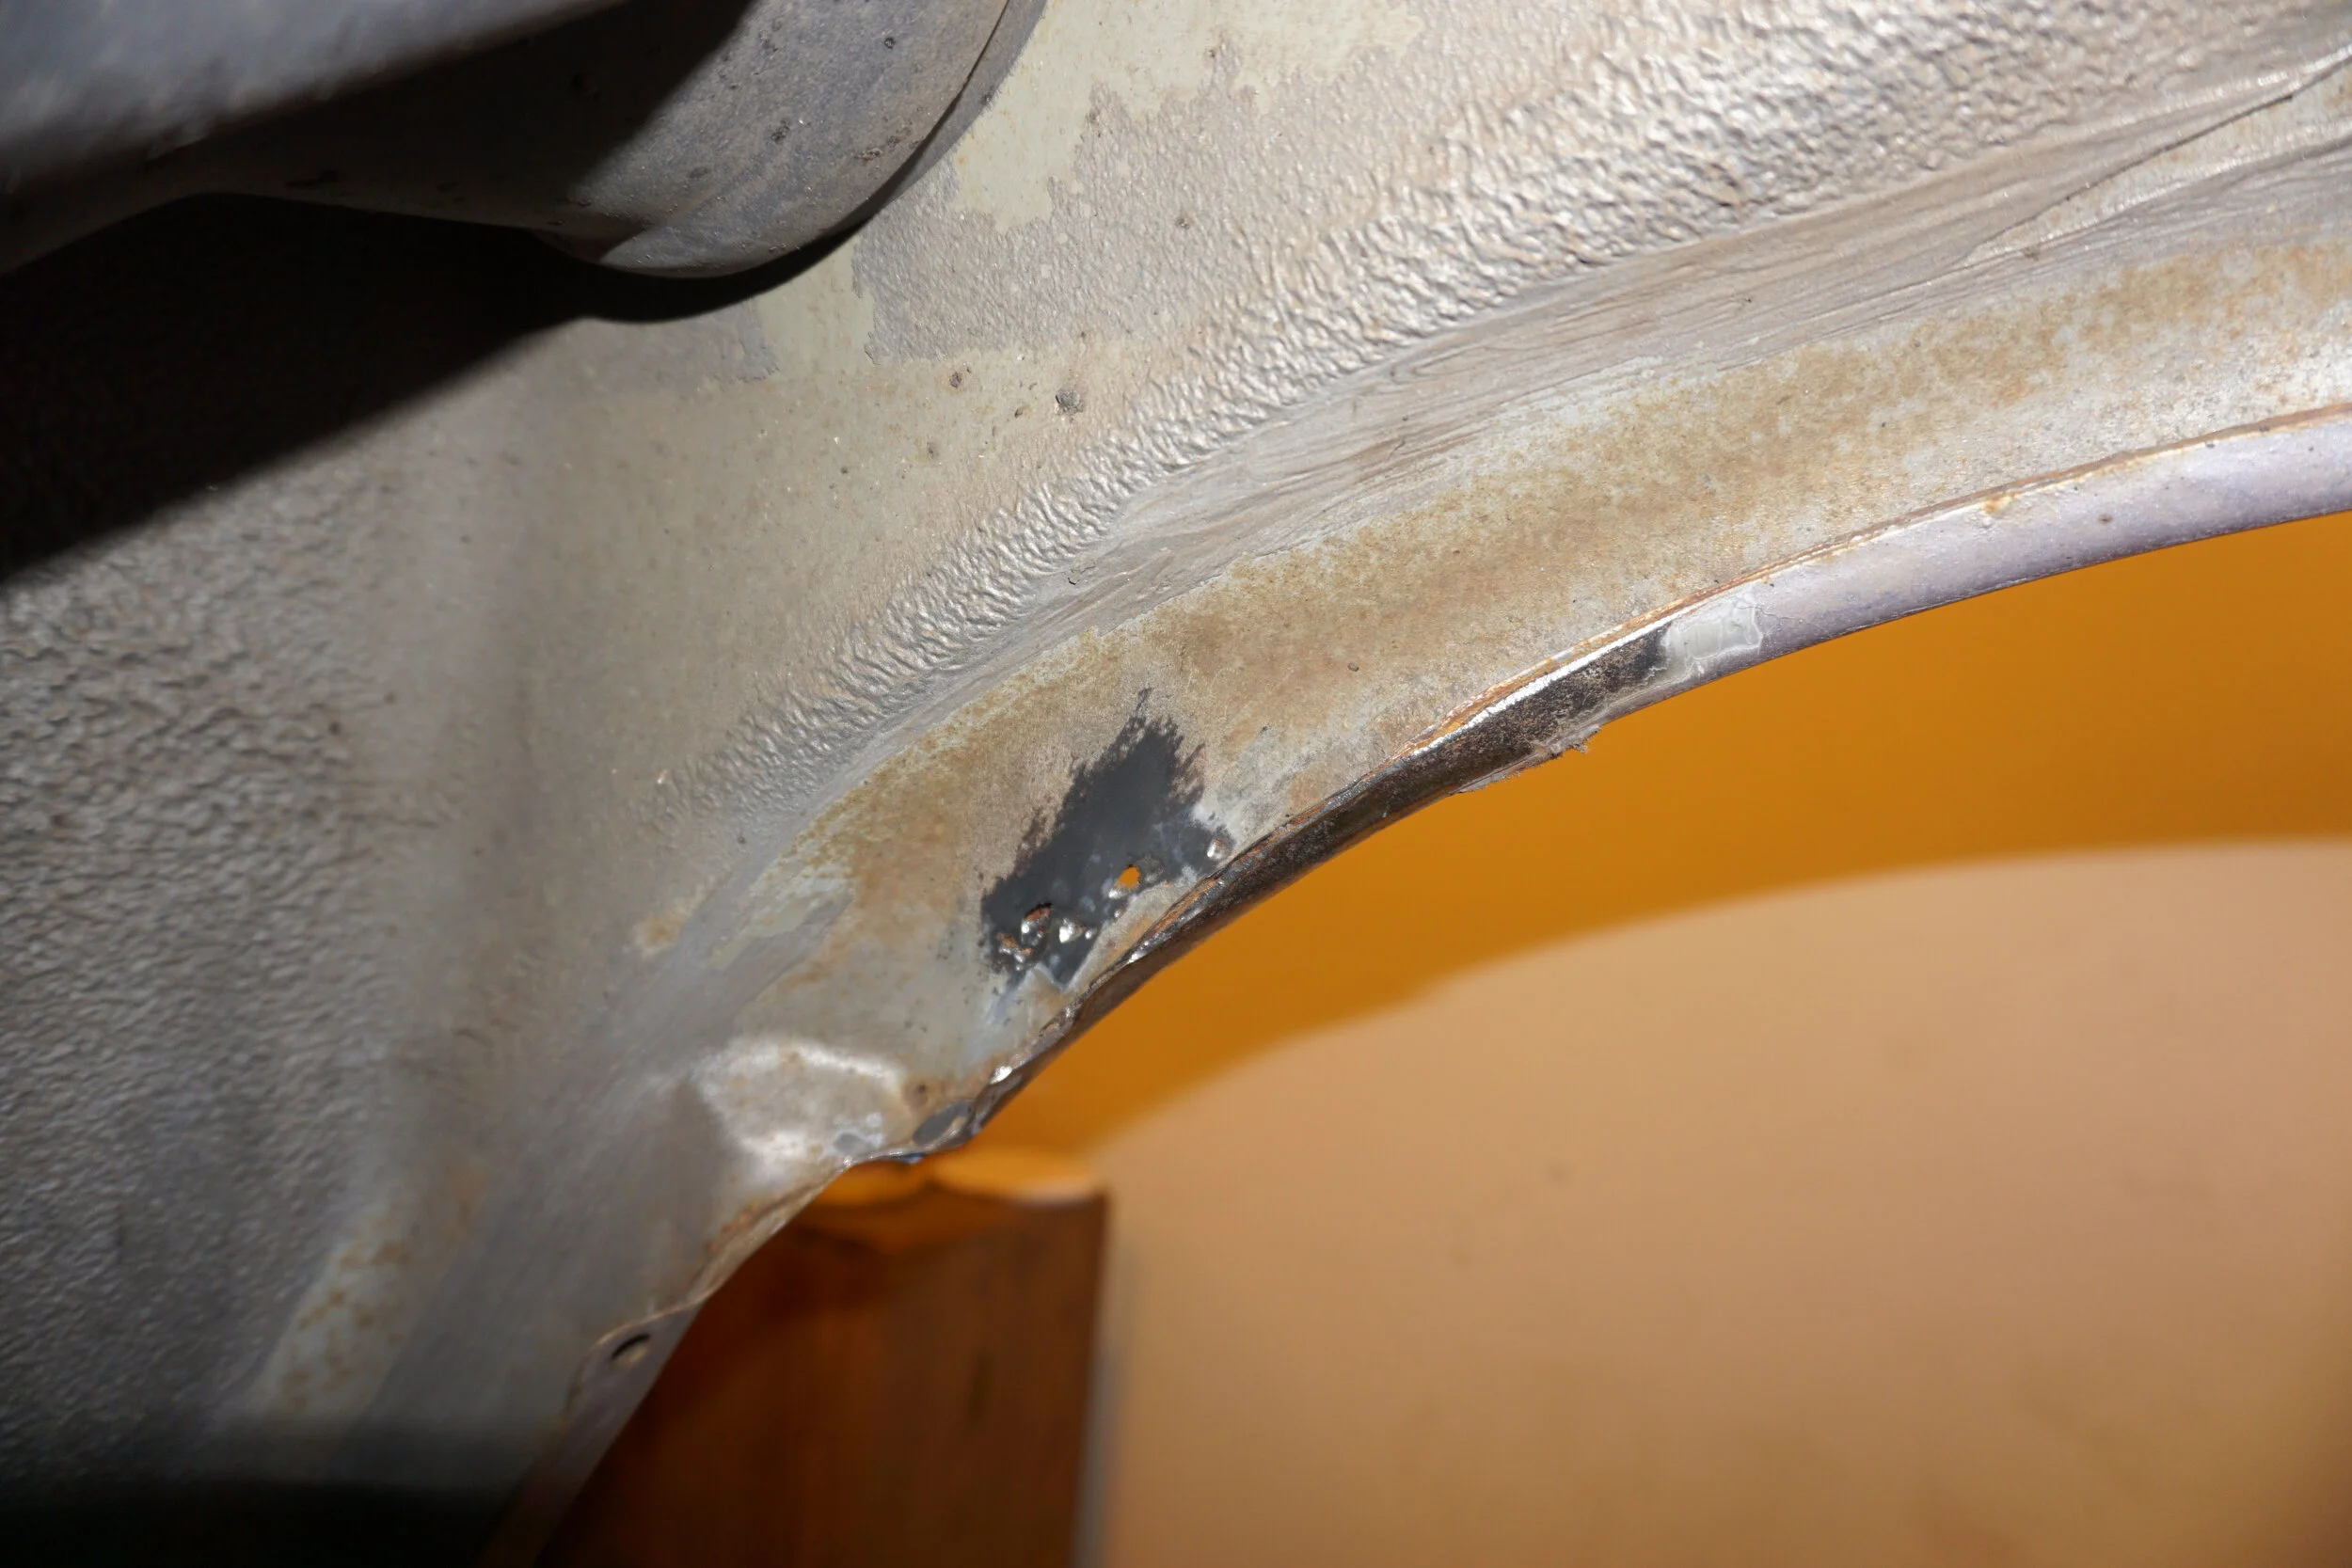
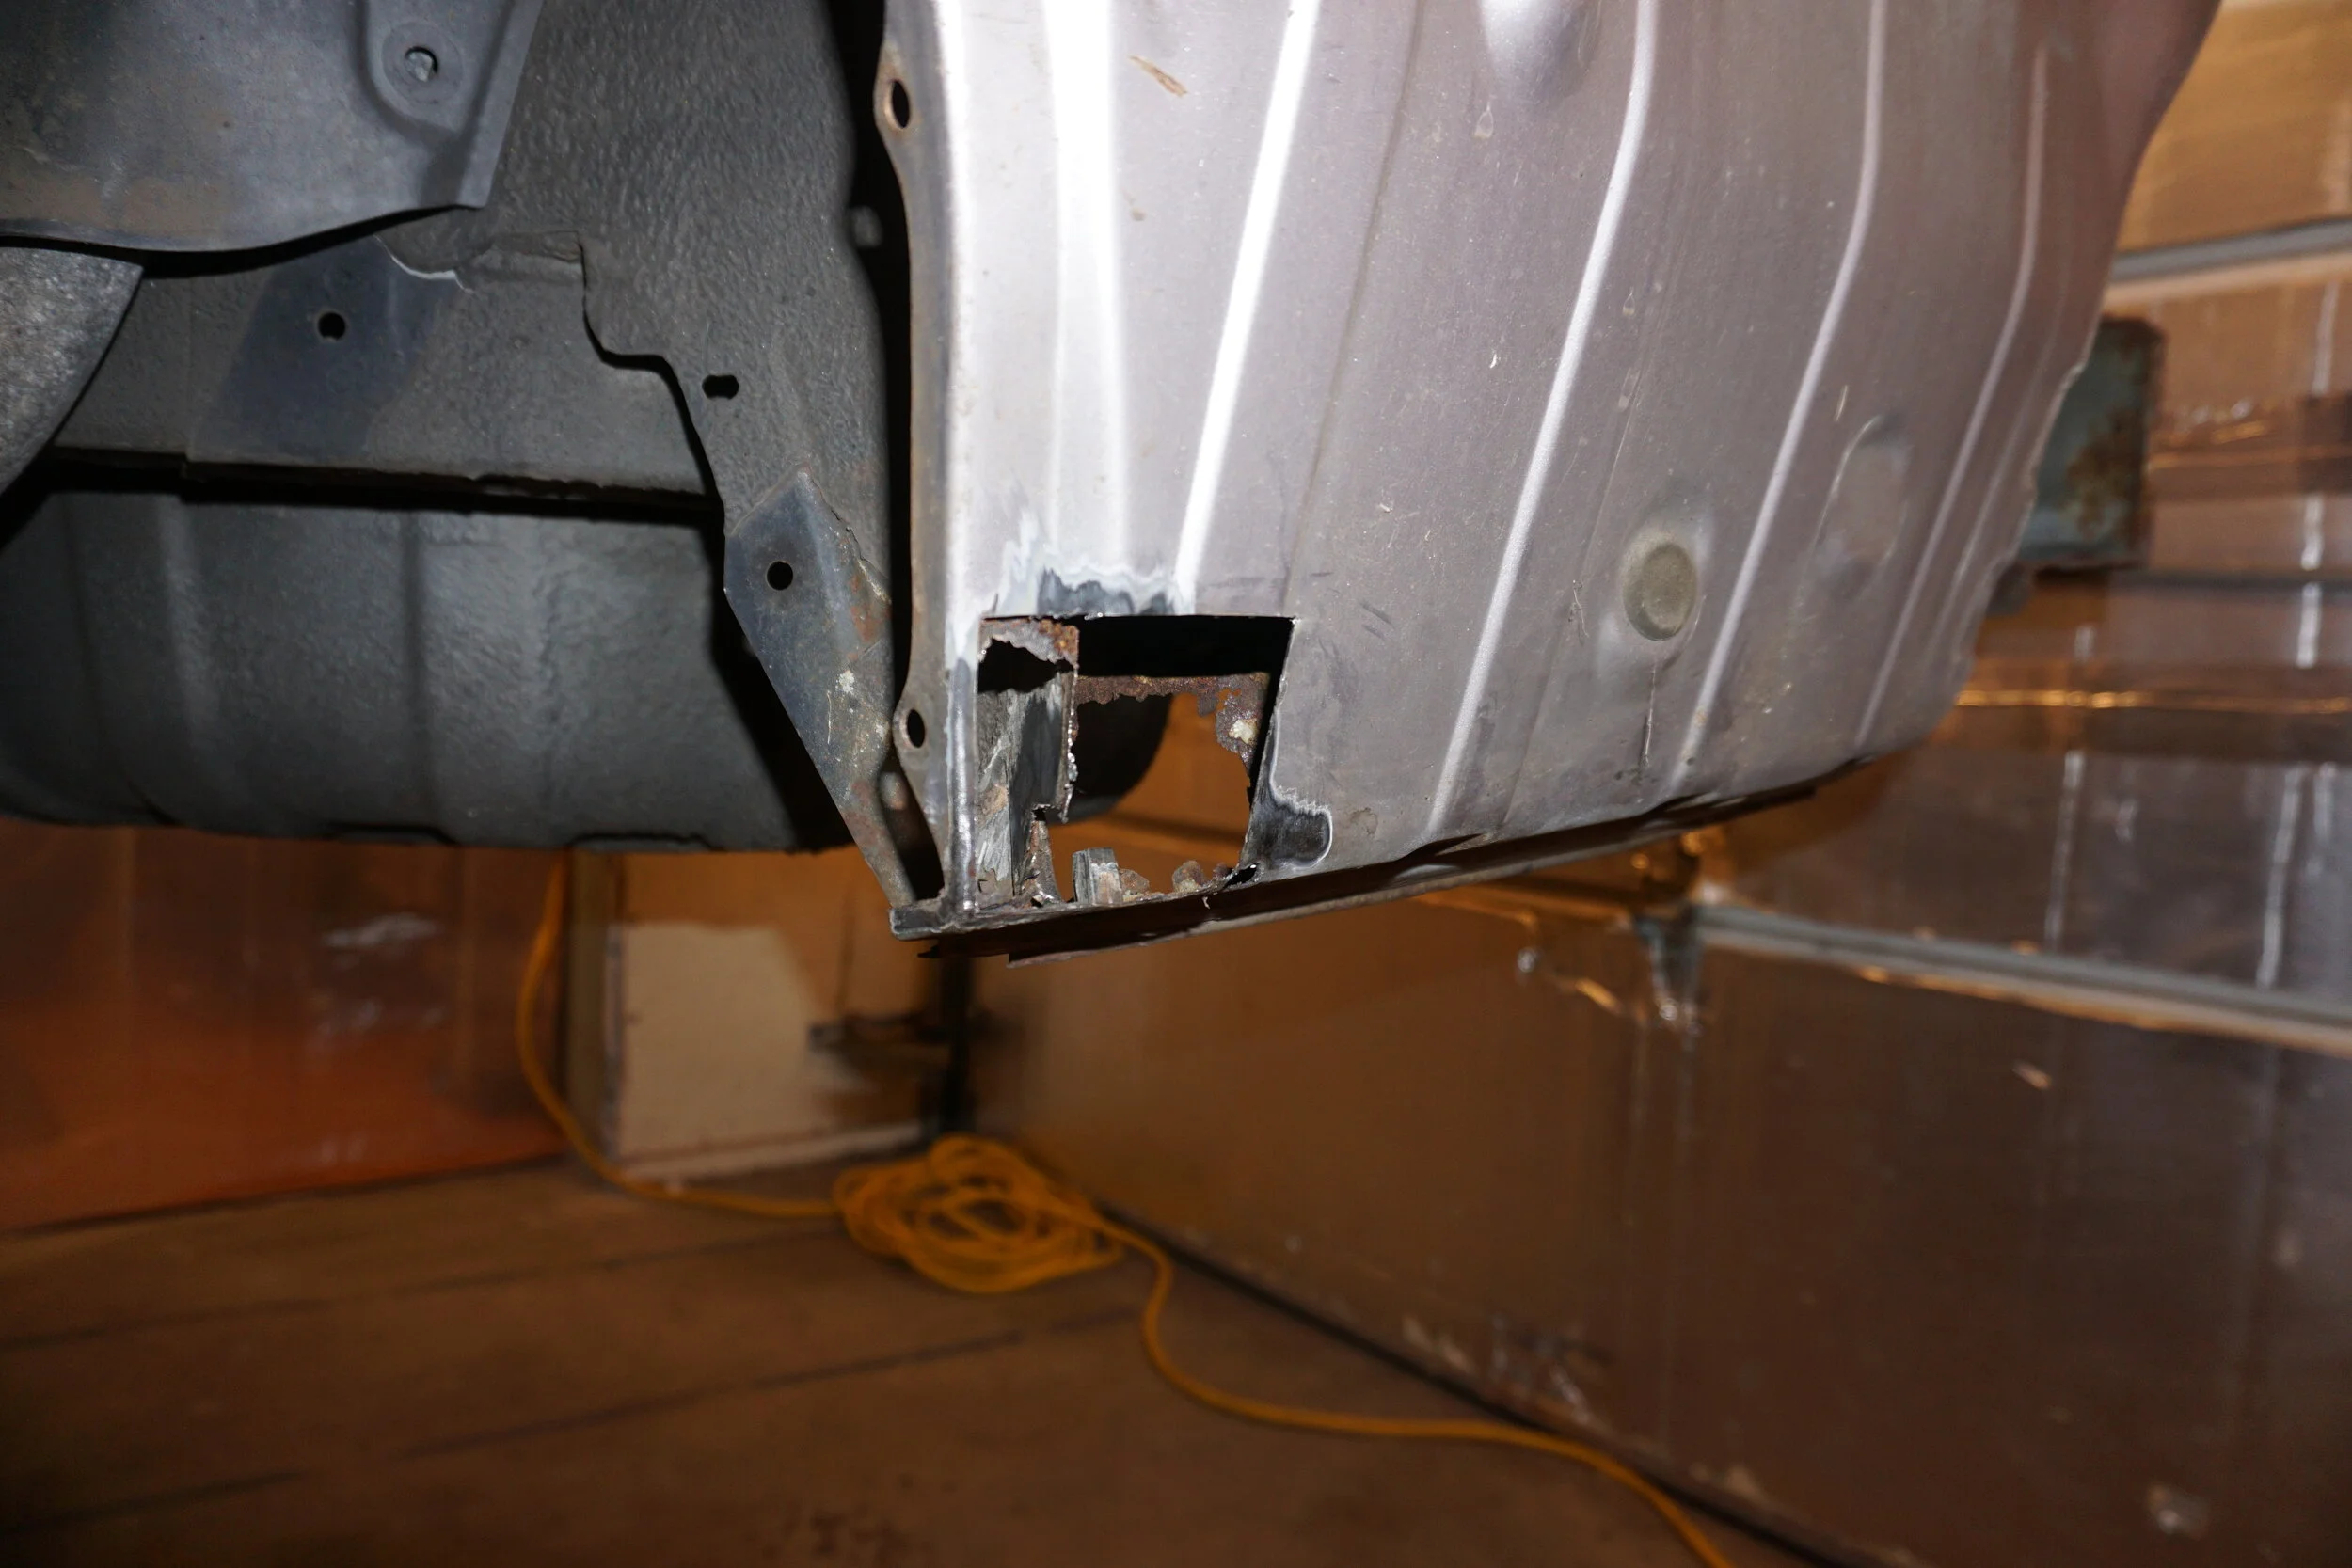
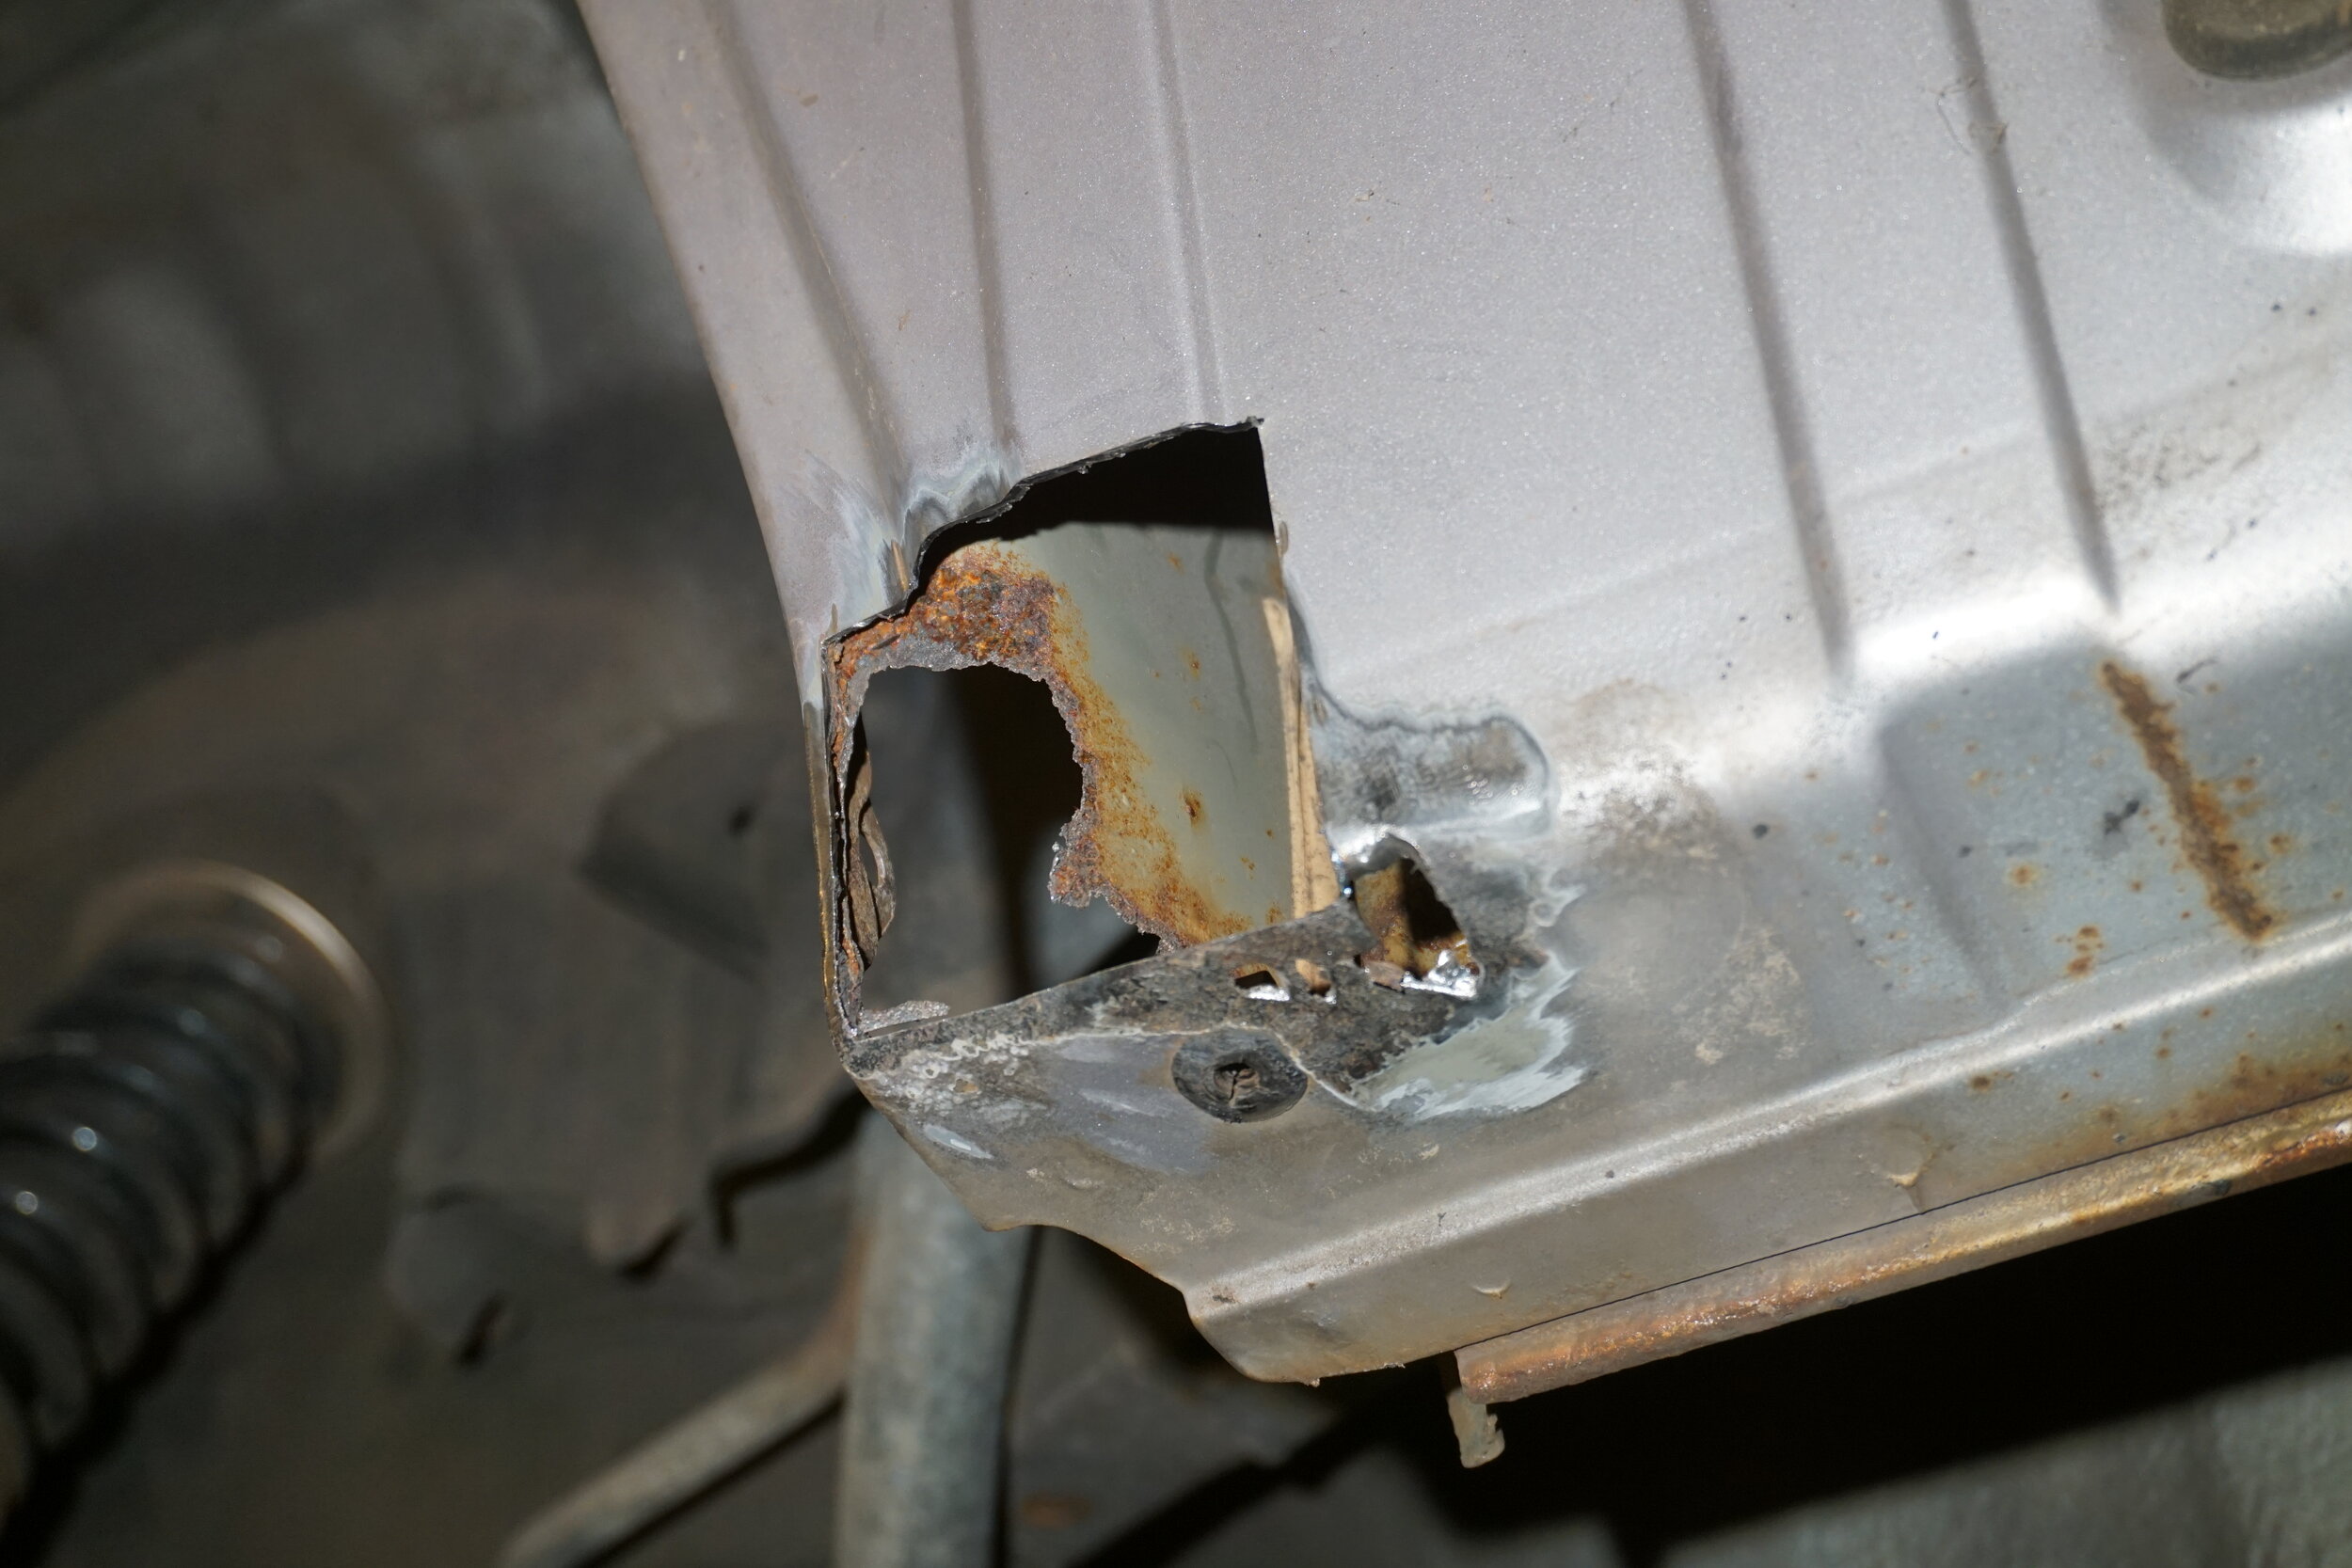
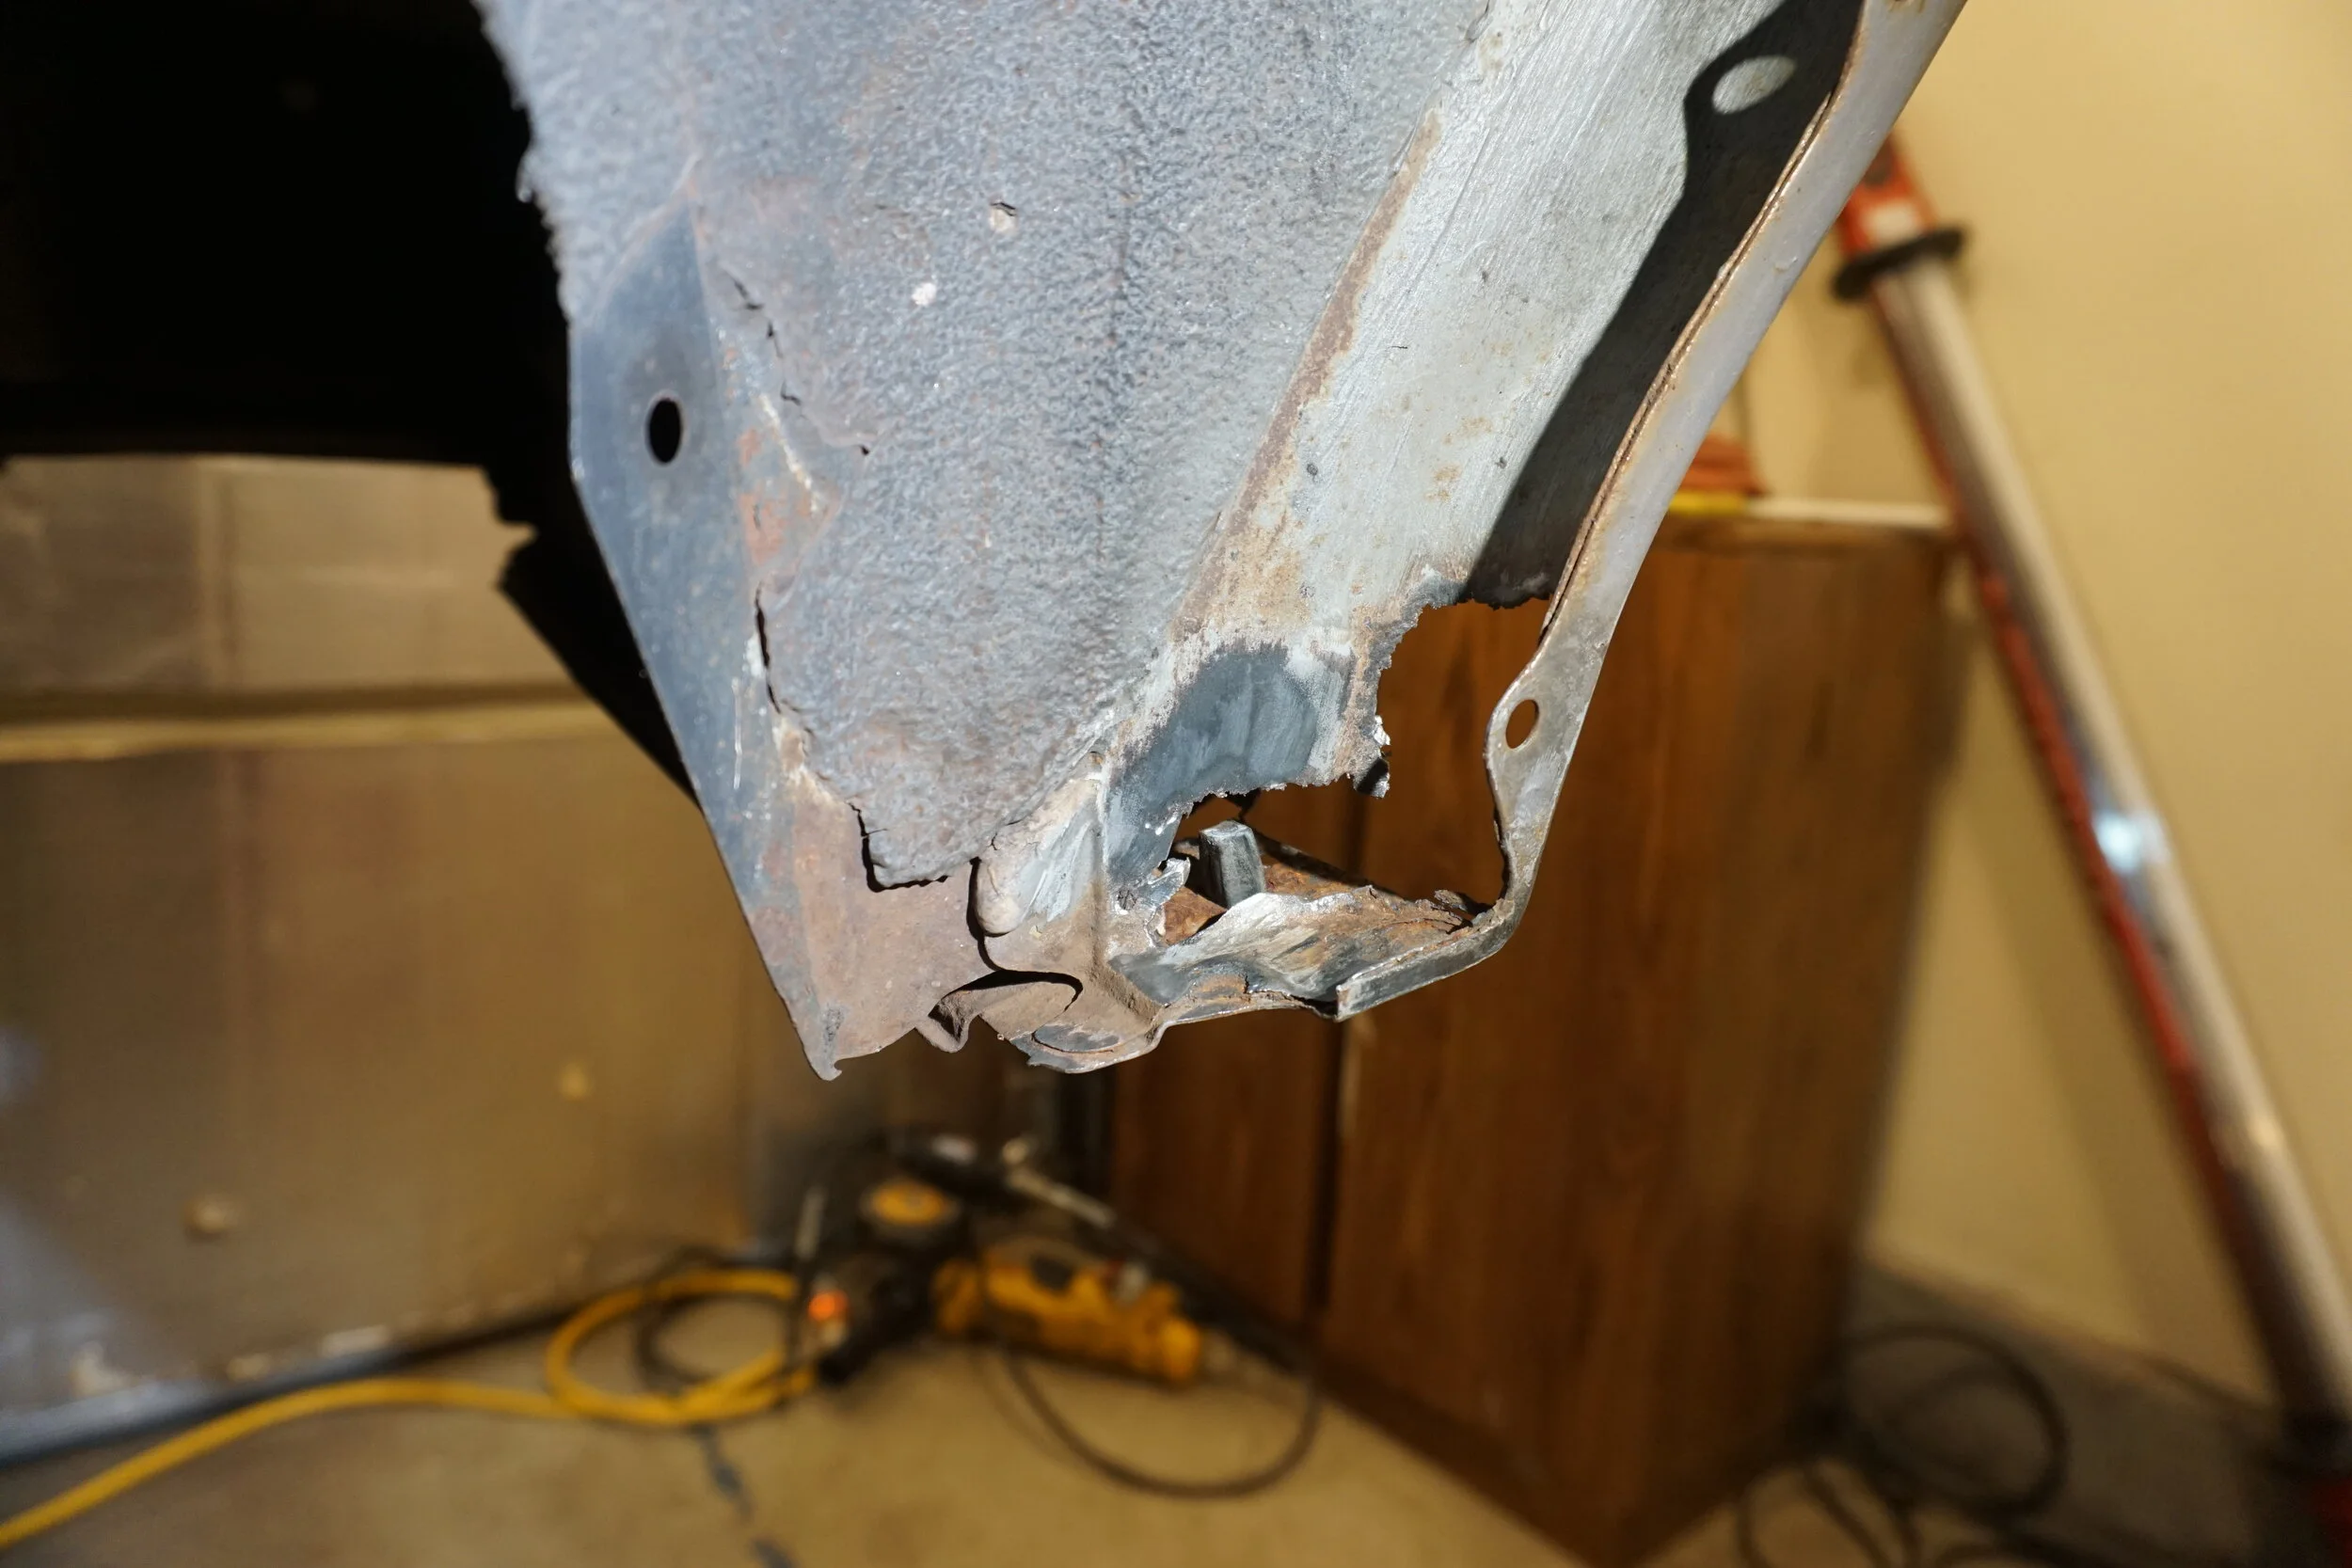
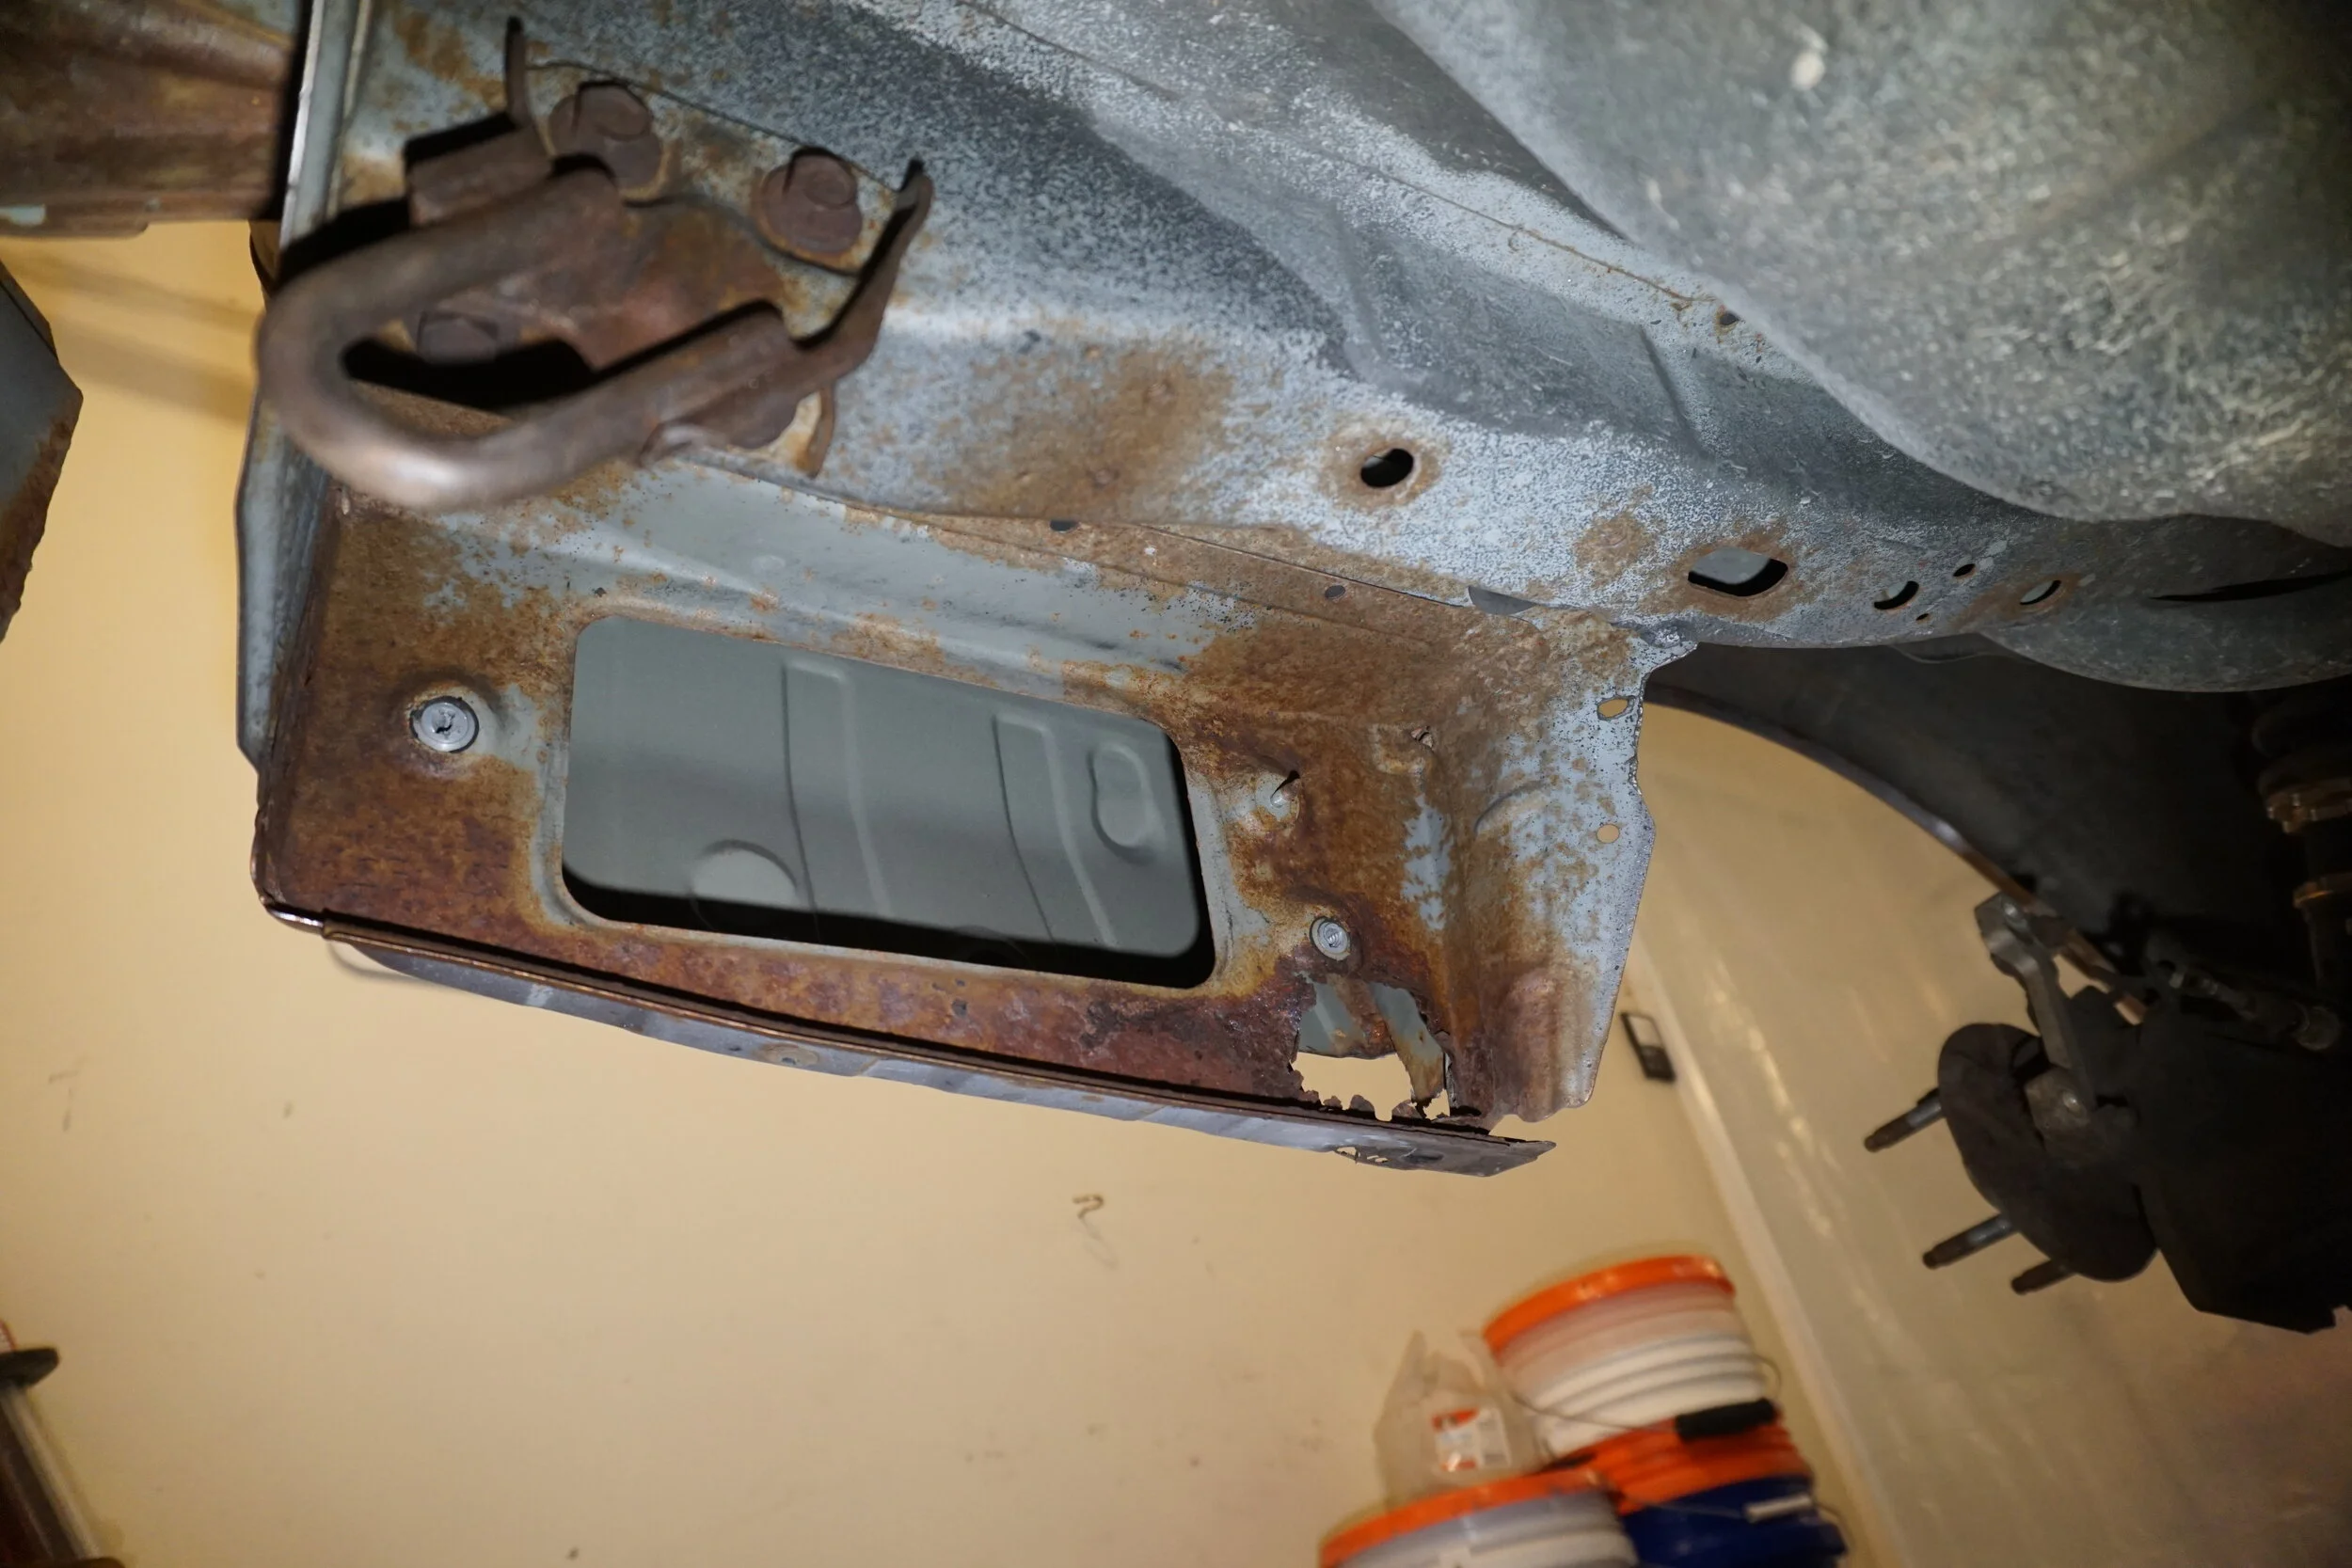
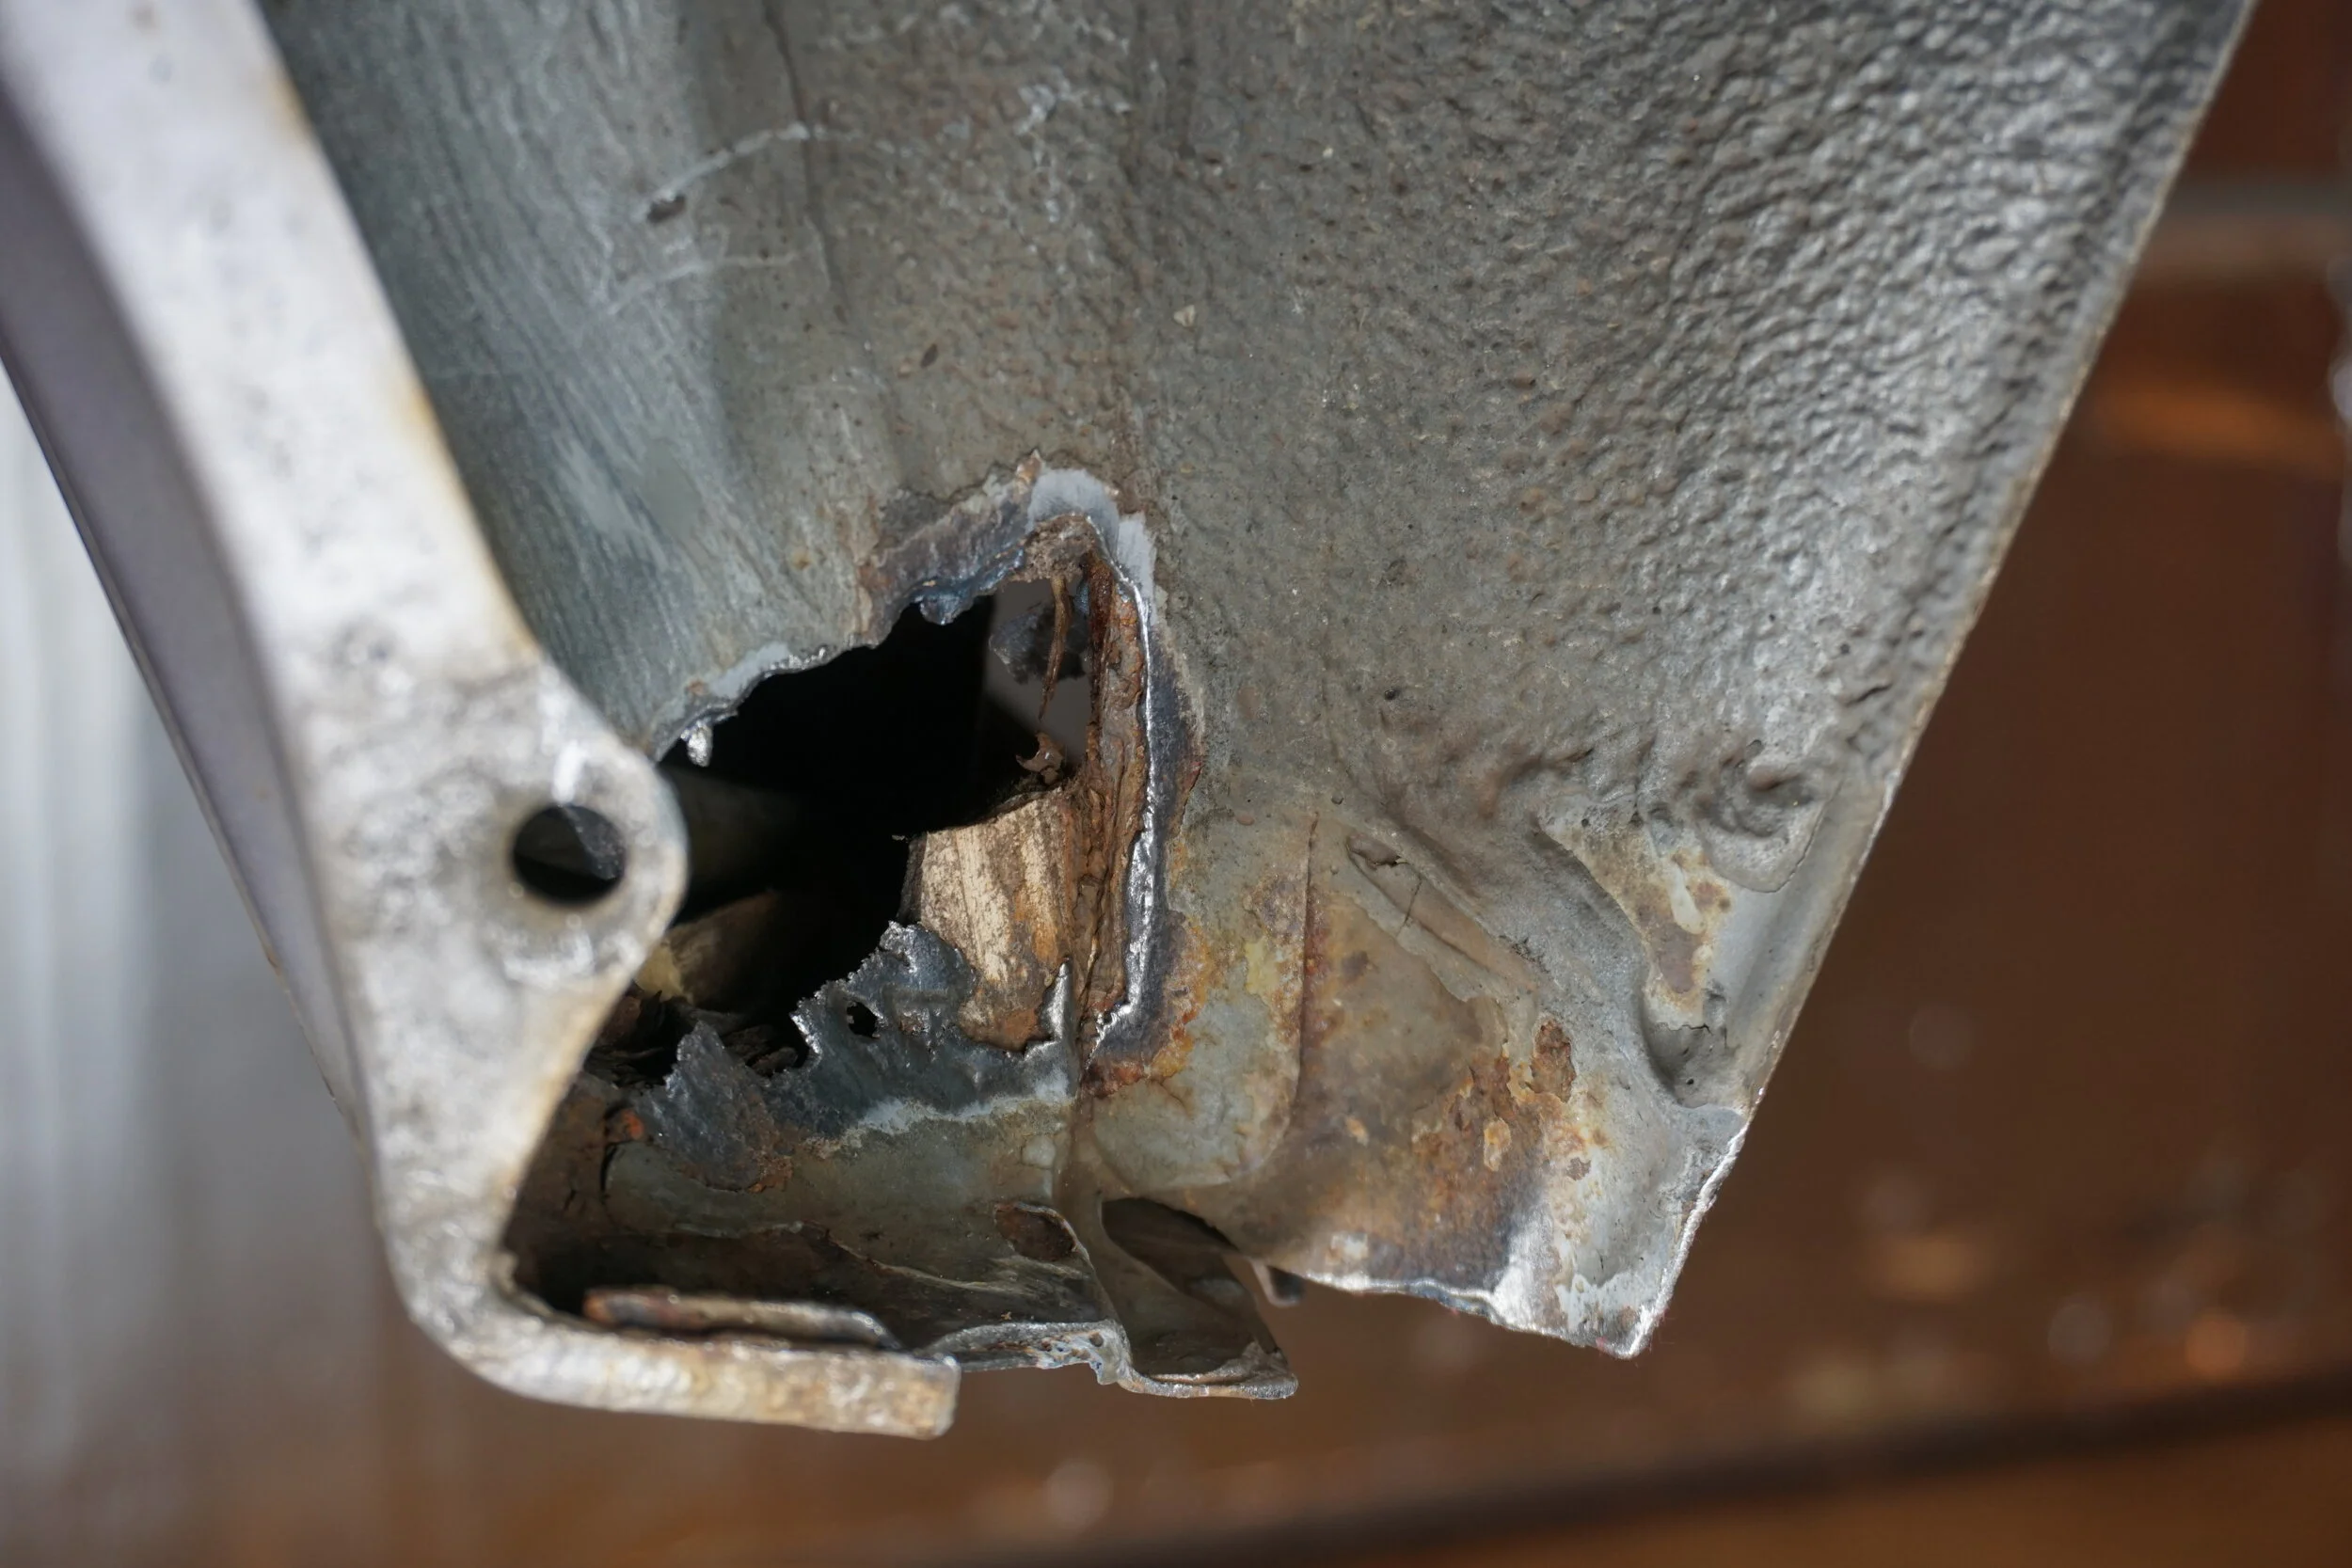
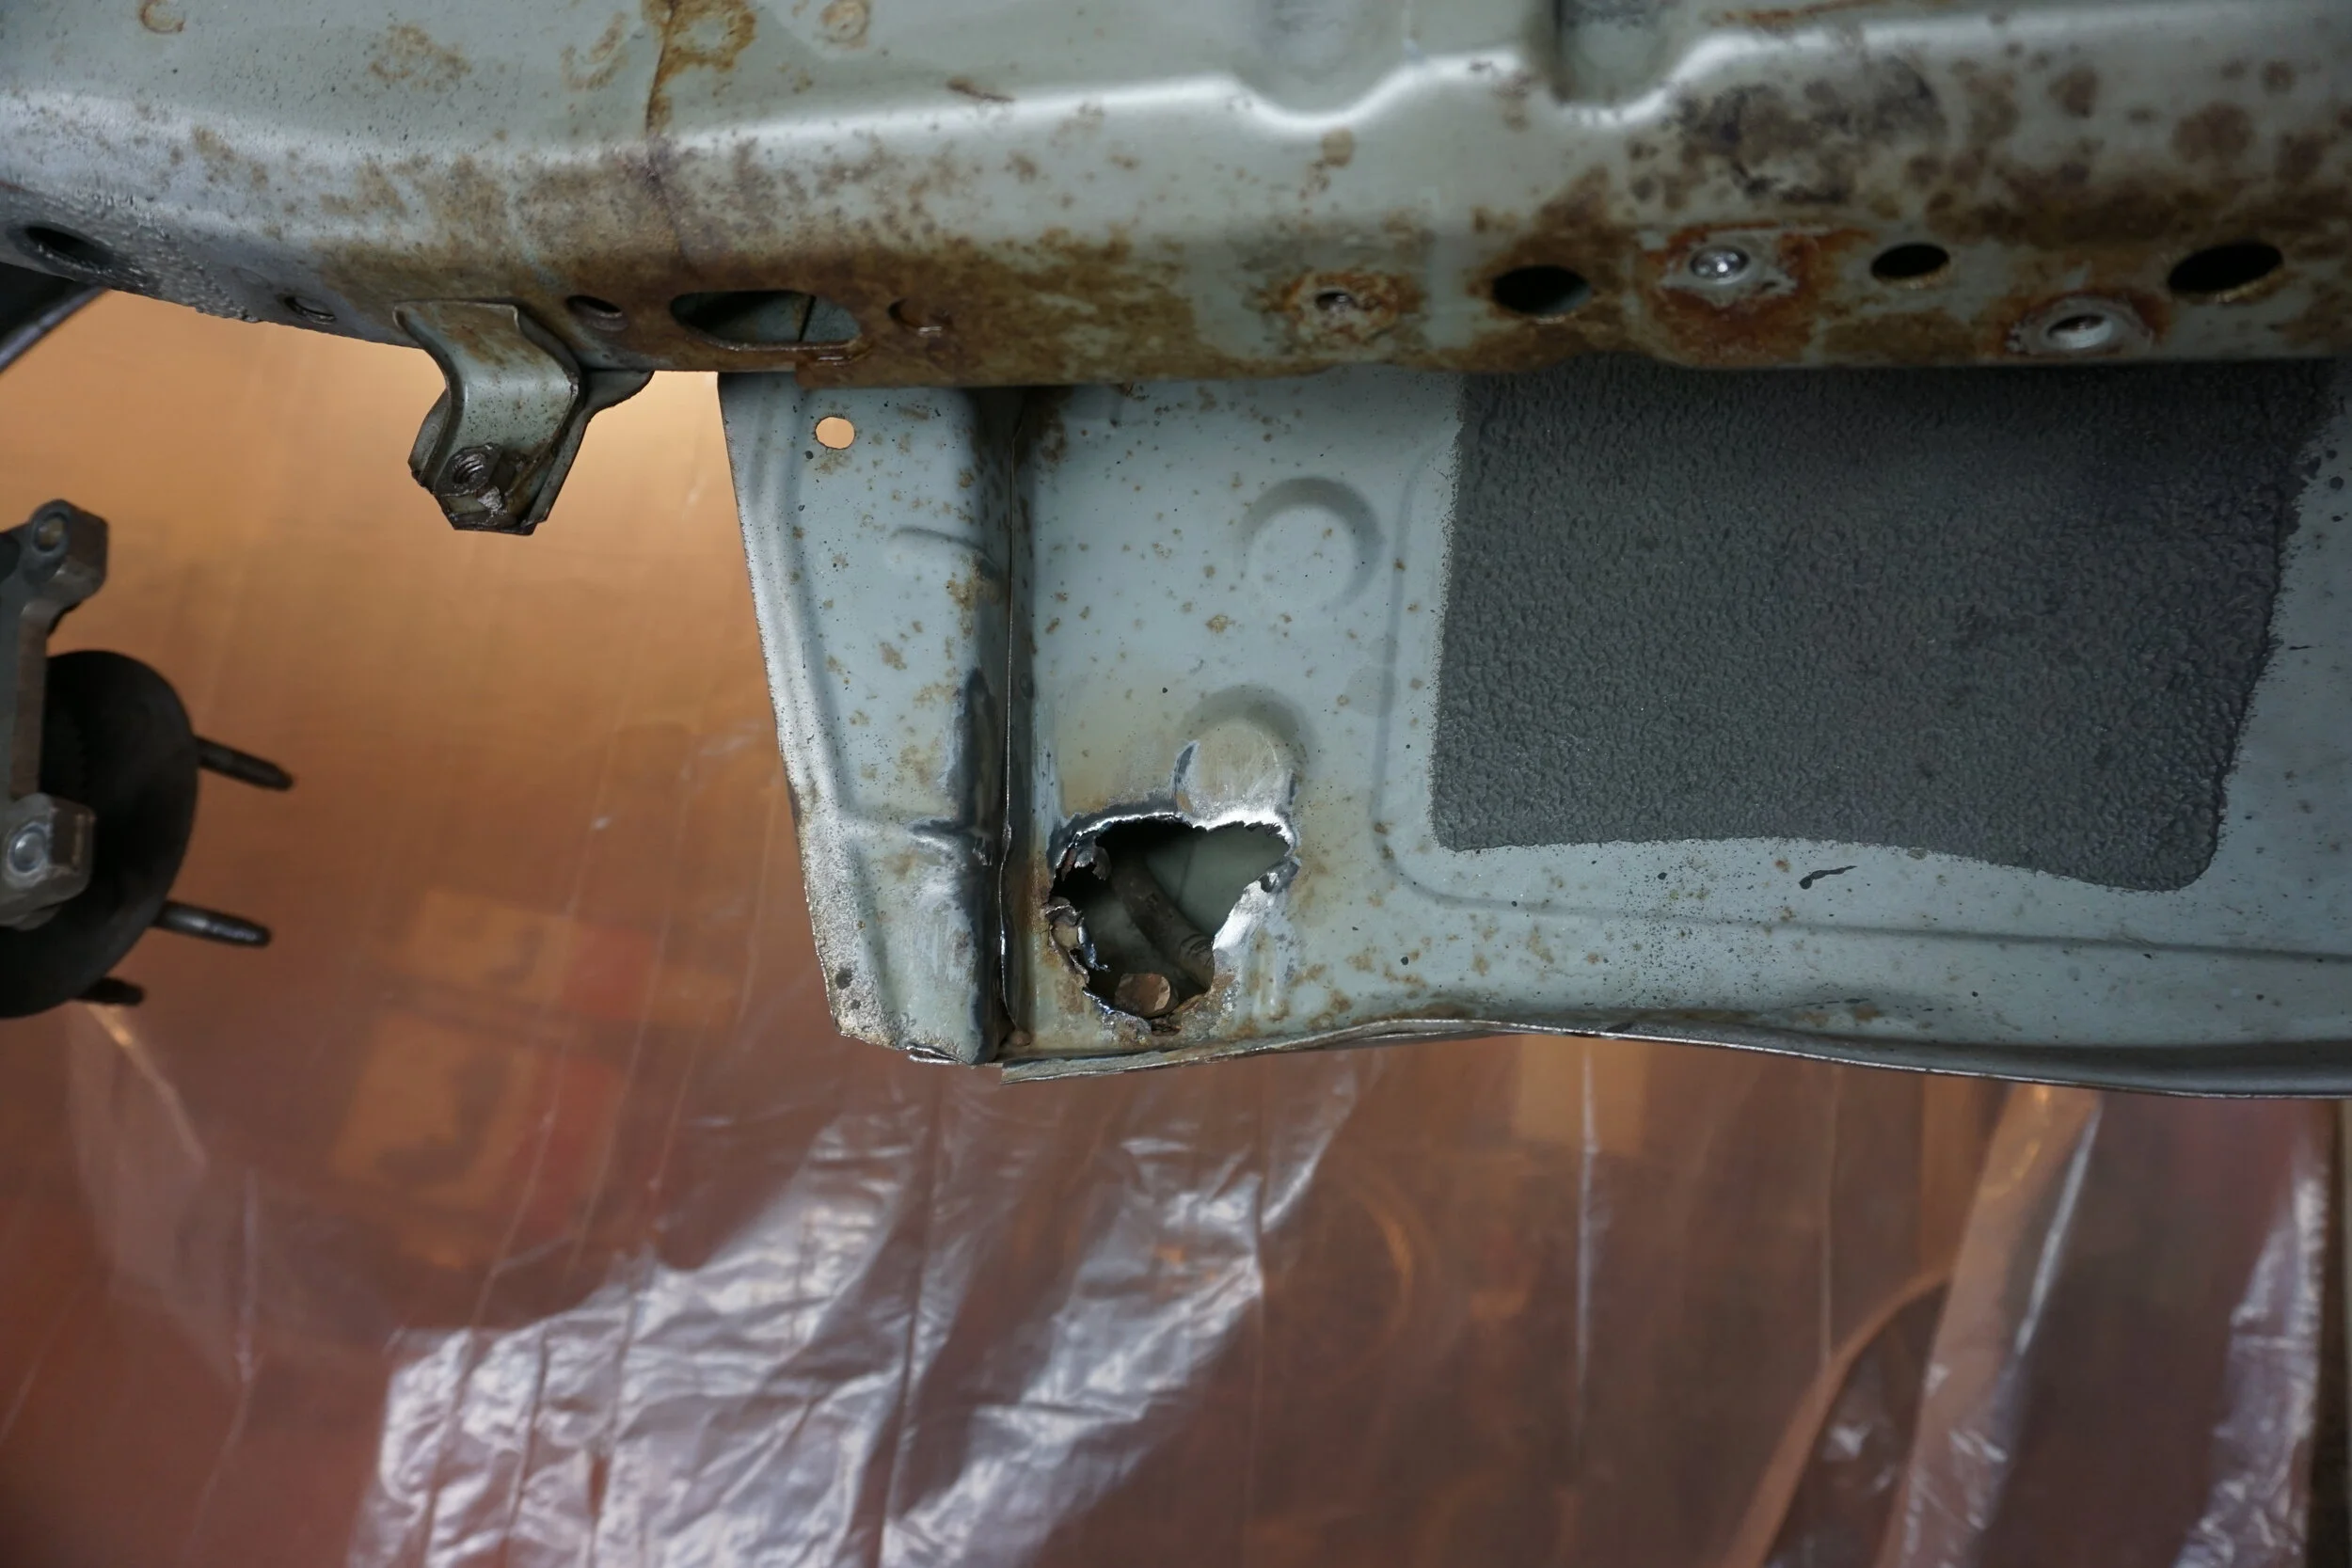
While I was in the area I took a closer look at a little rusty spot near the front of the SFC on the driver's side.
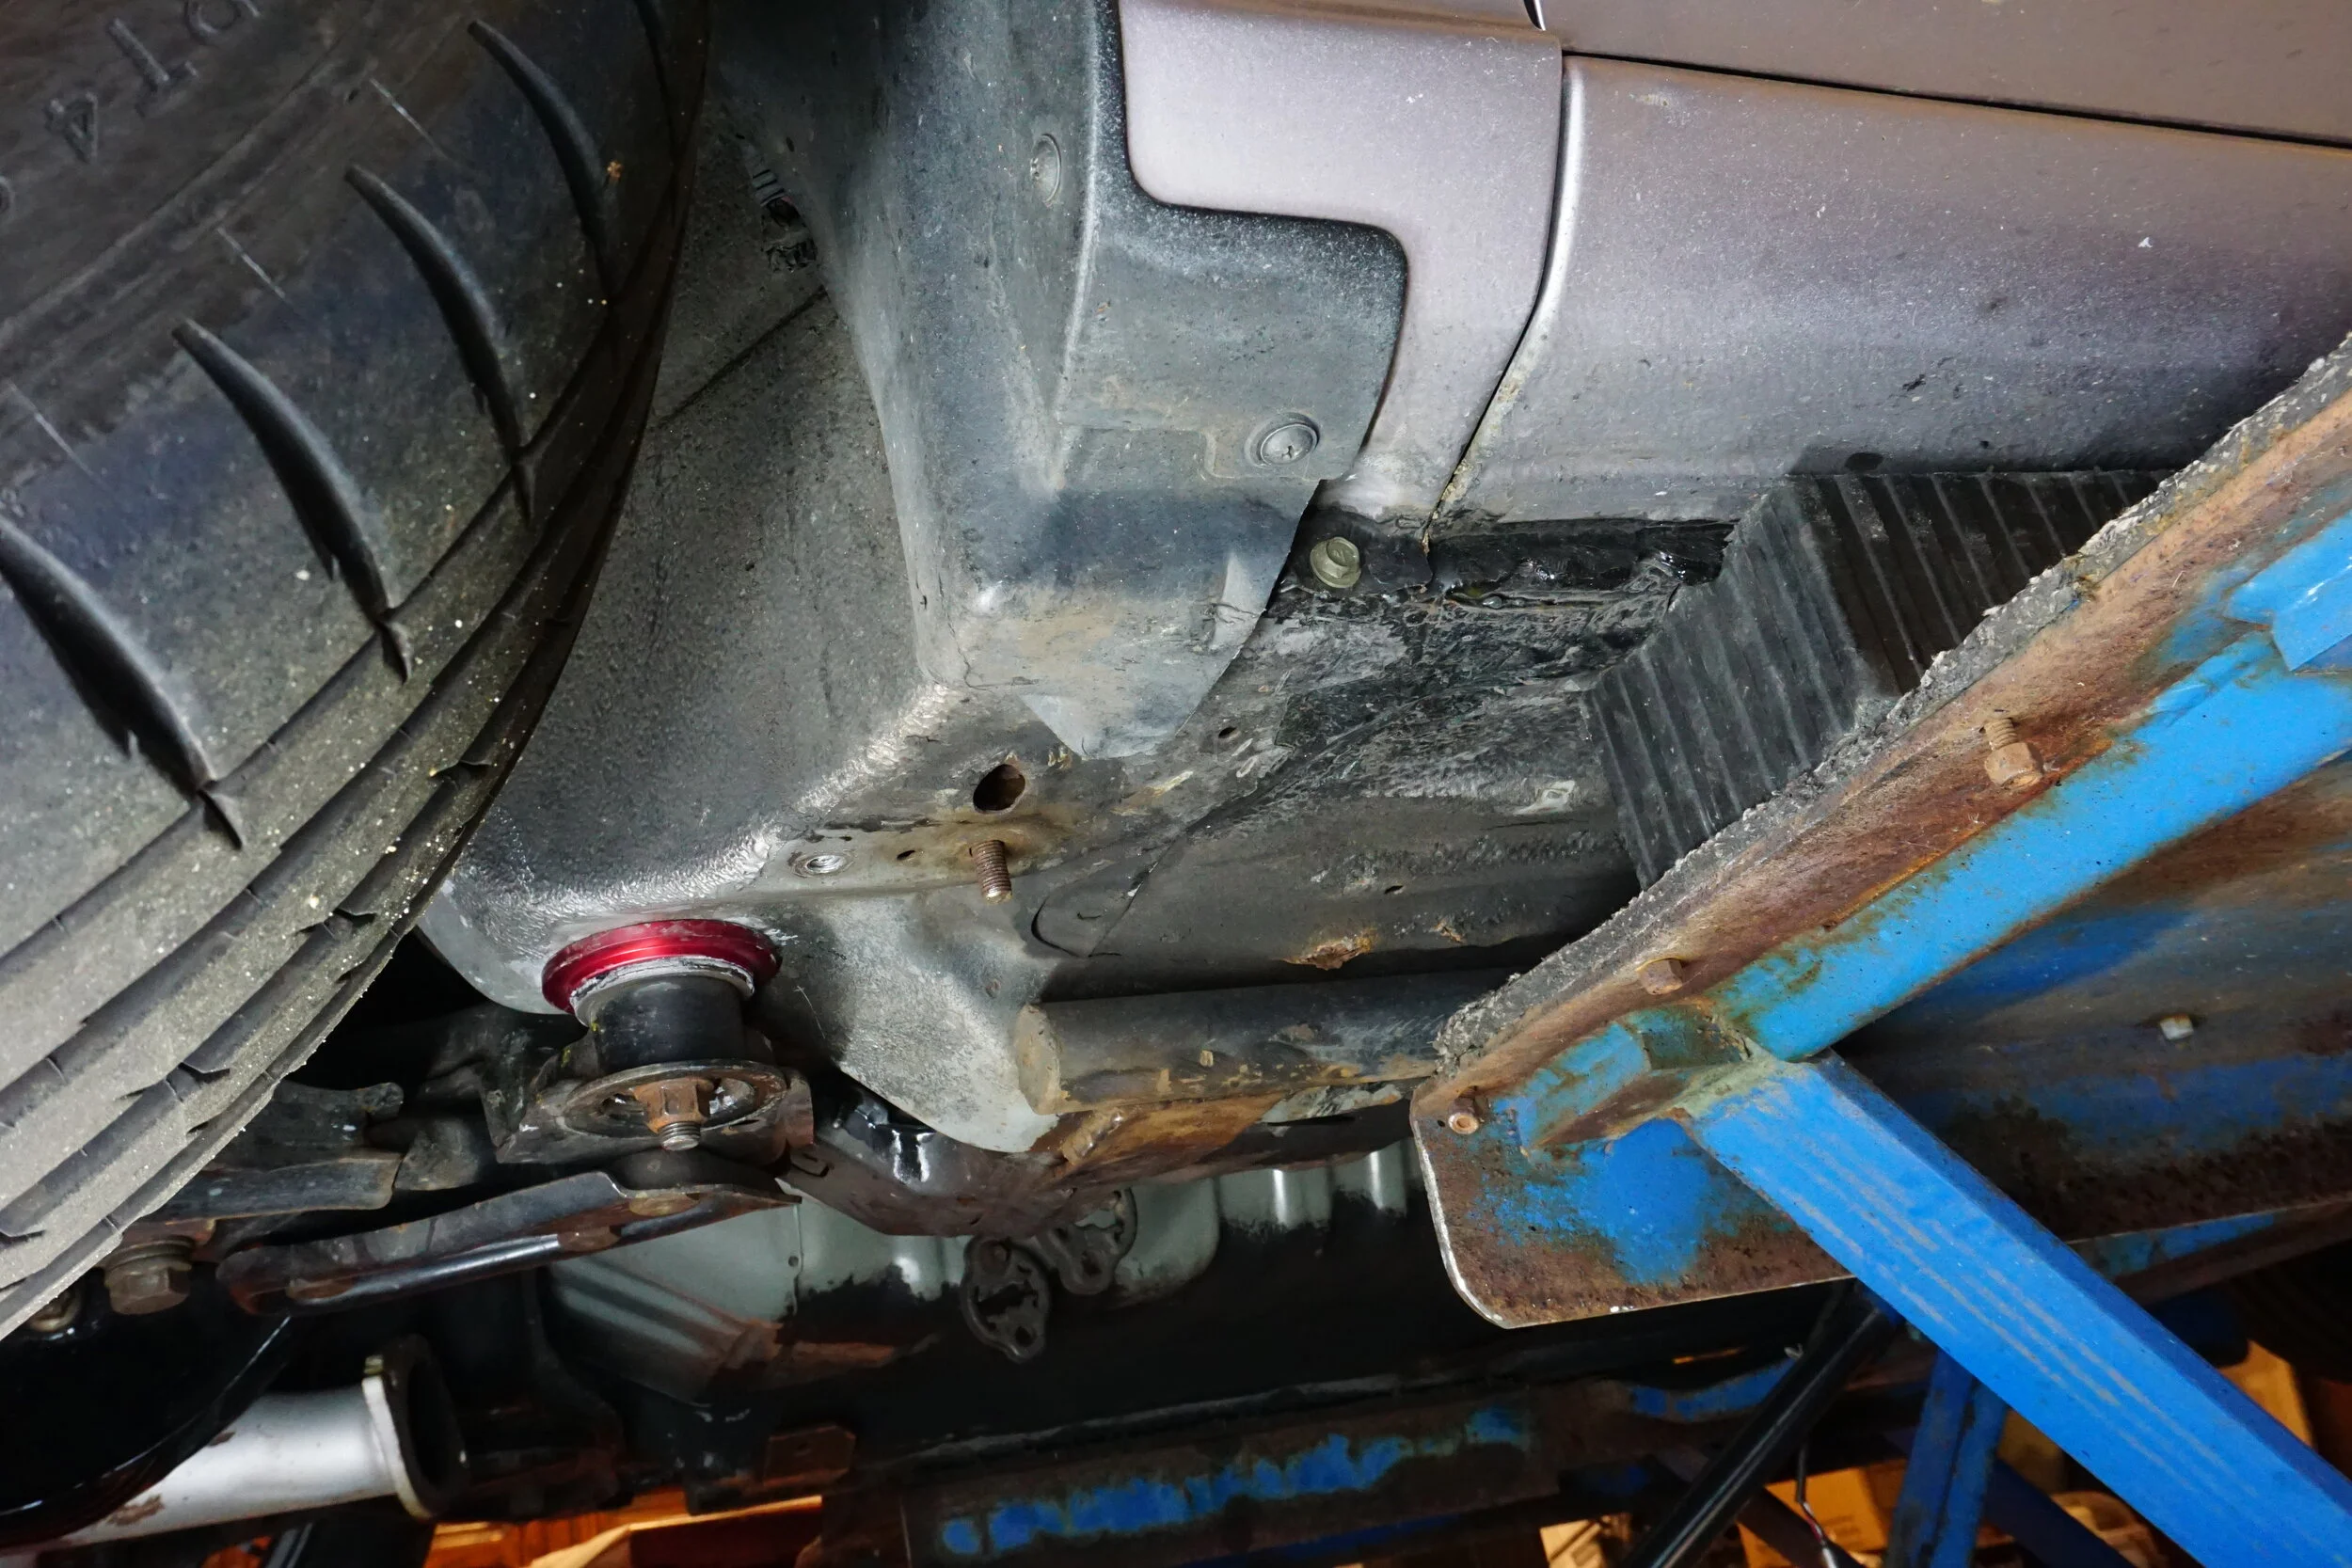
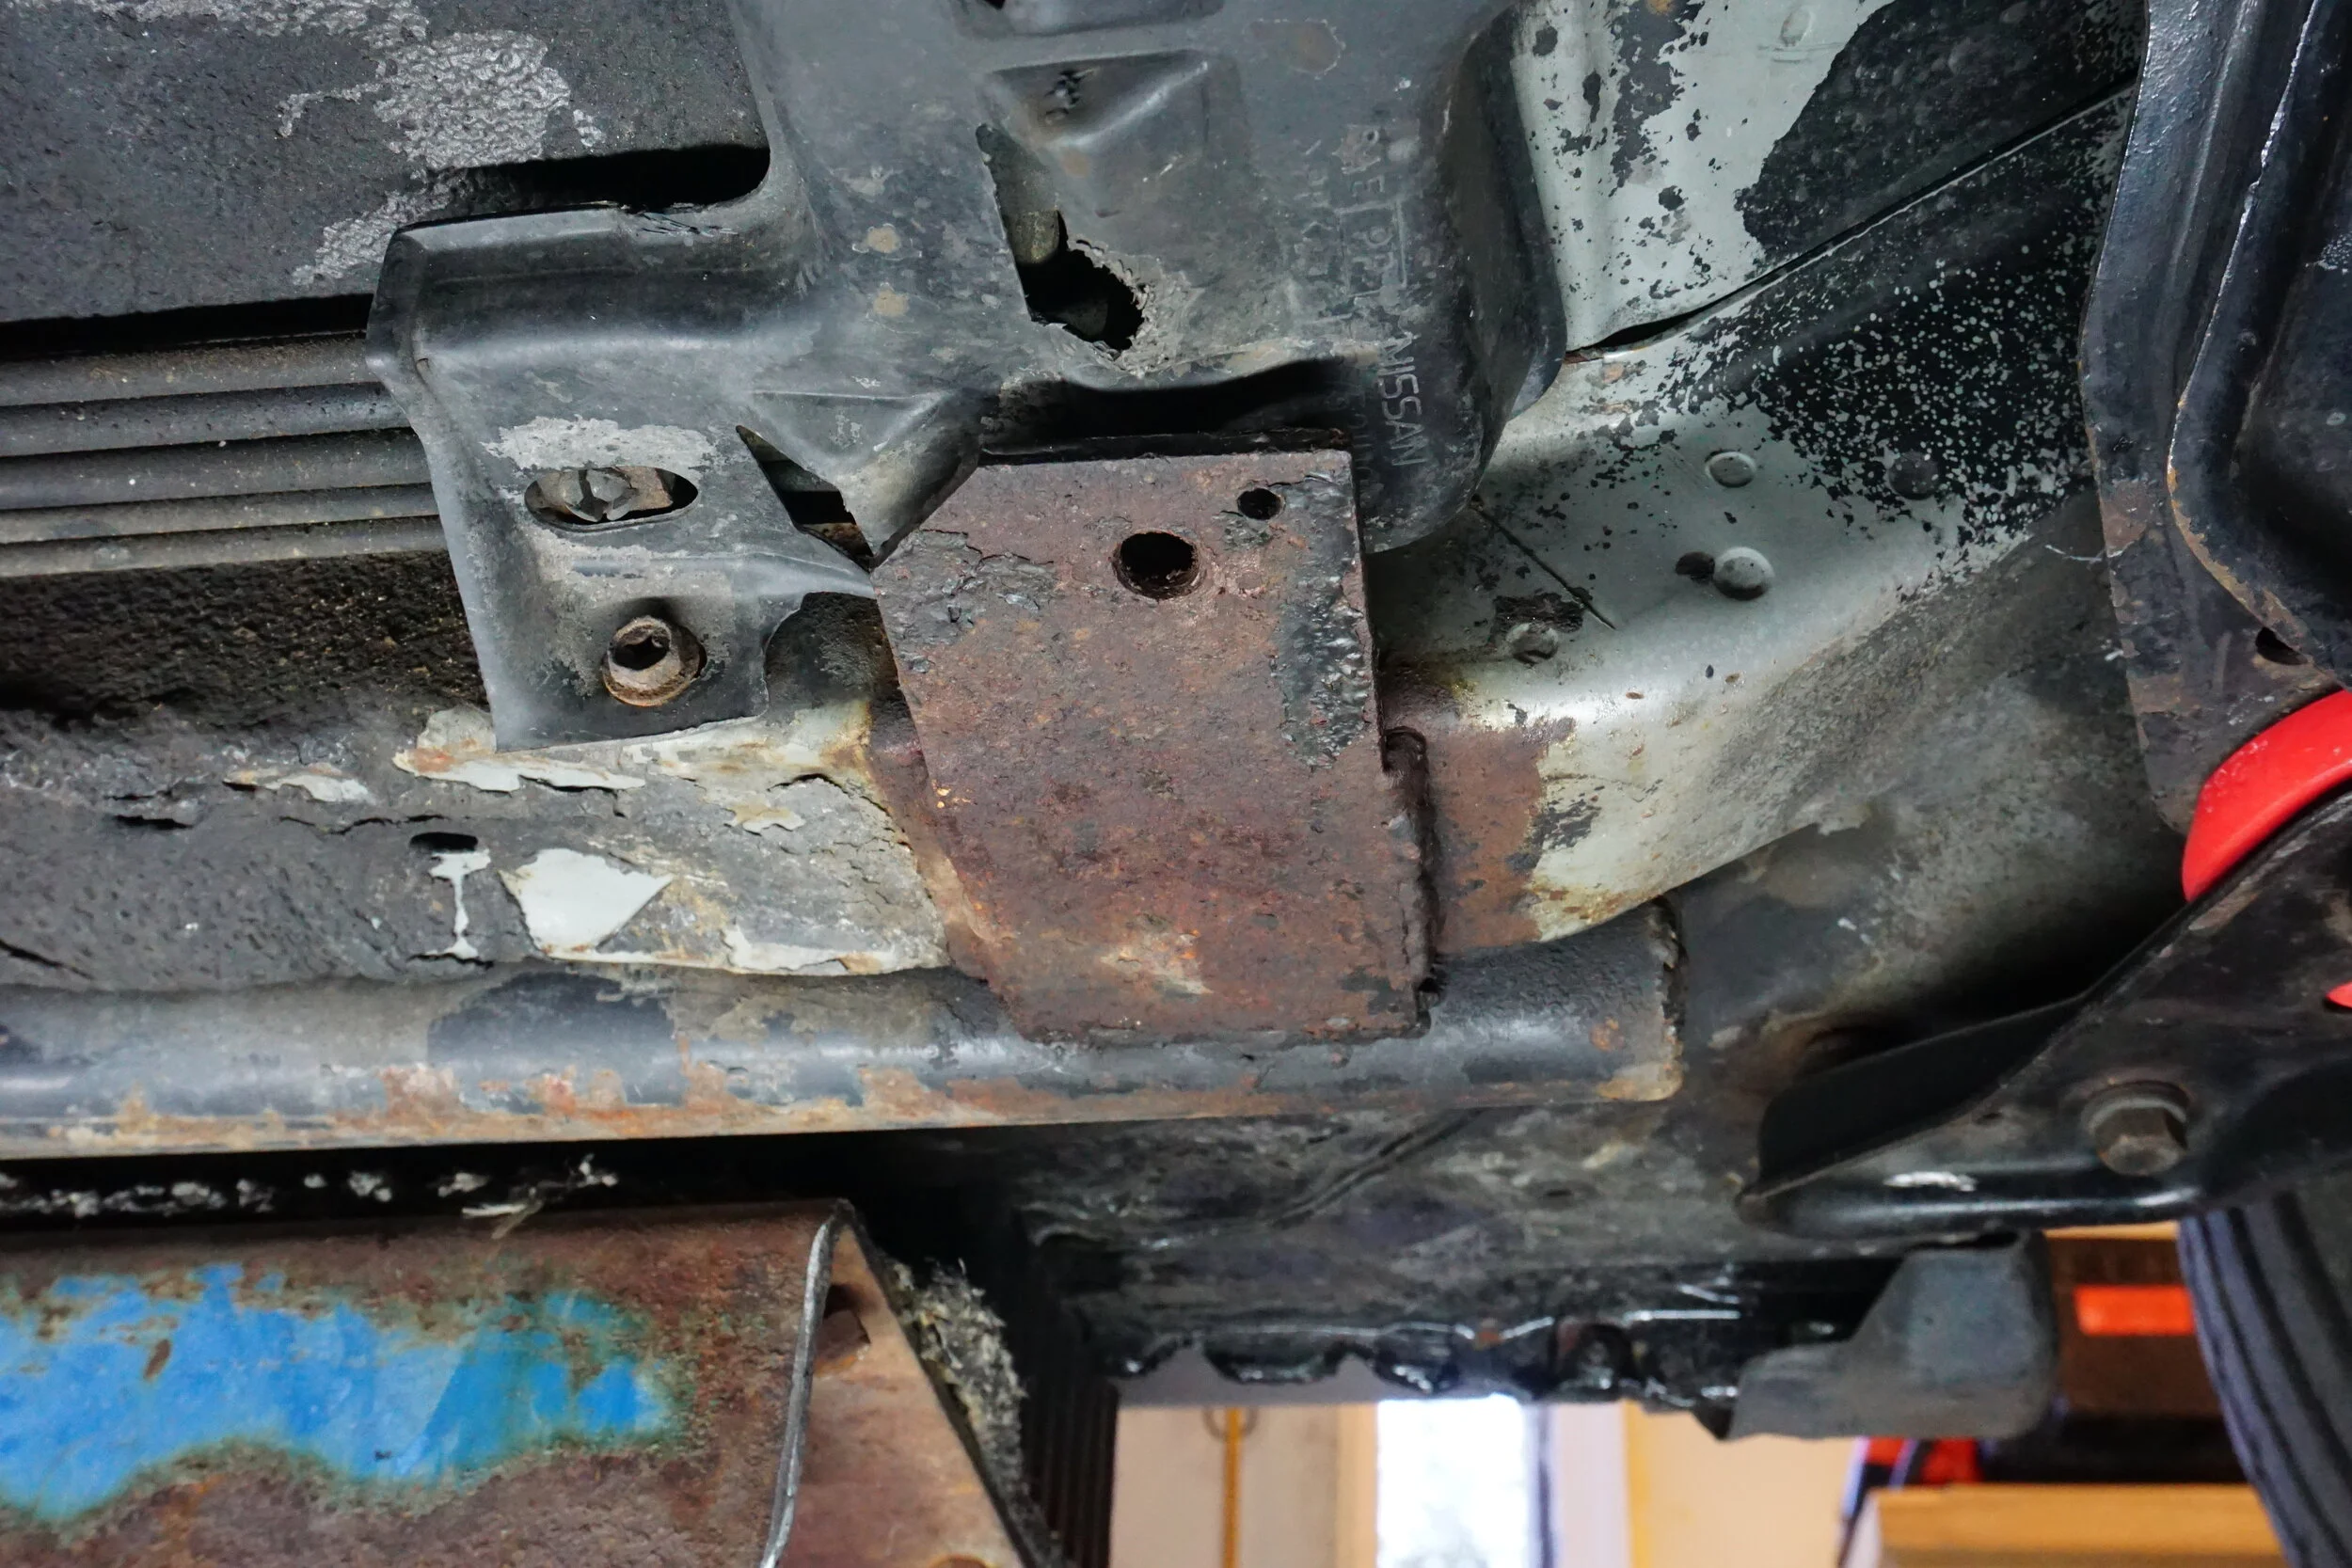
I poked at it, and it was all rotted out, and after a little ripping it expanded quite a bit:

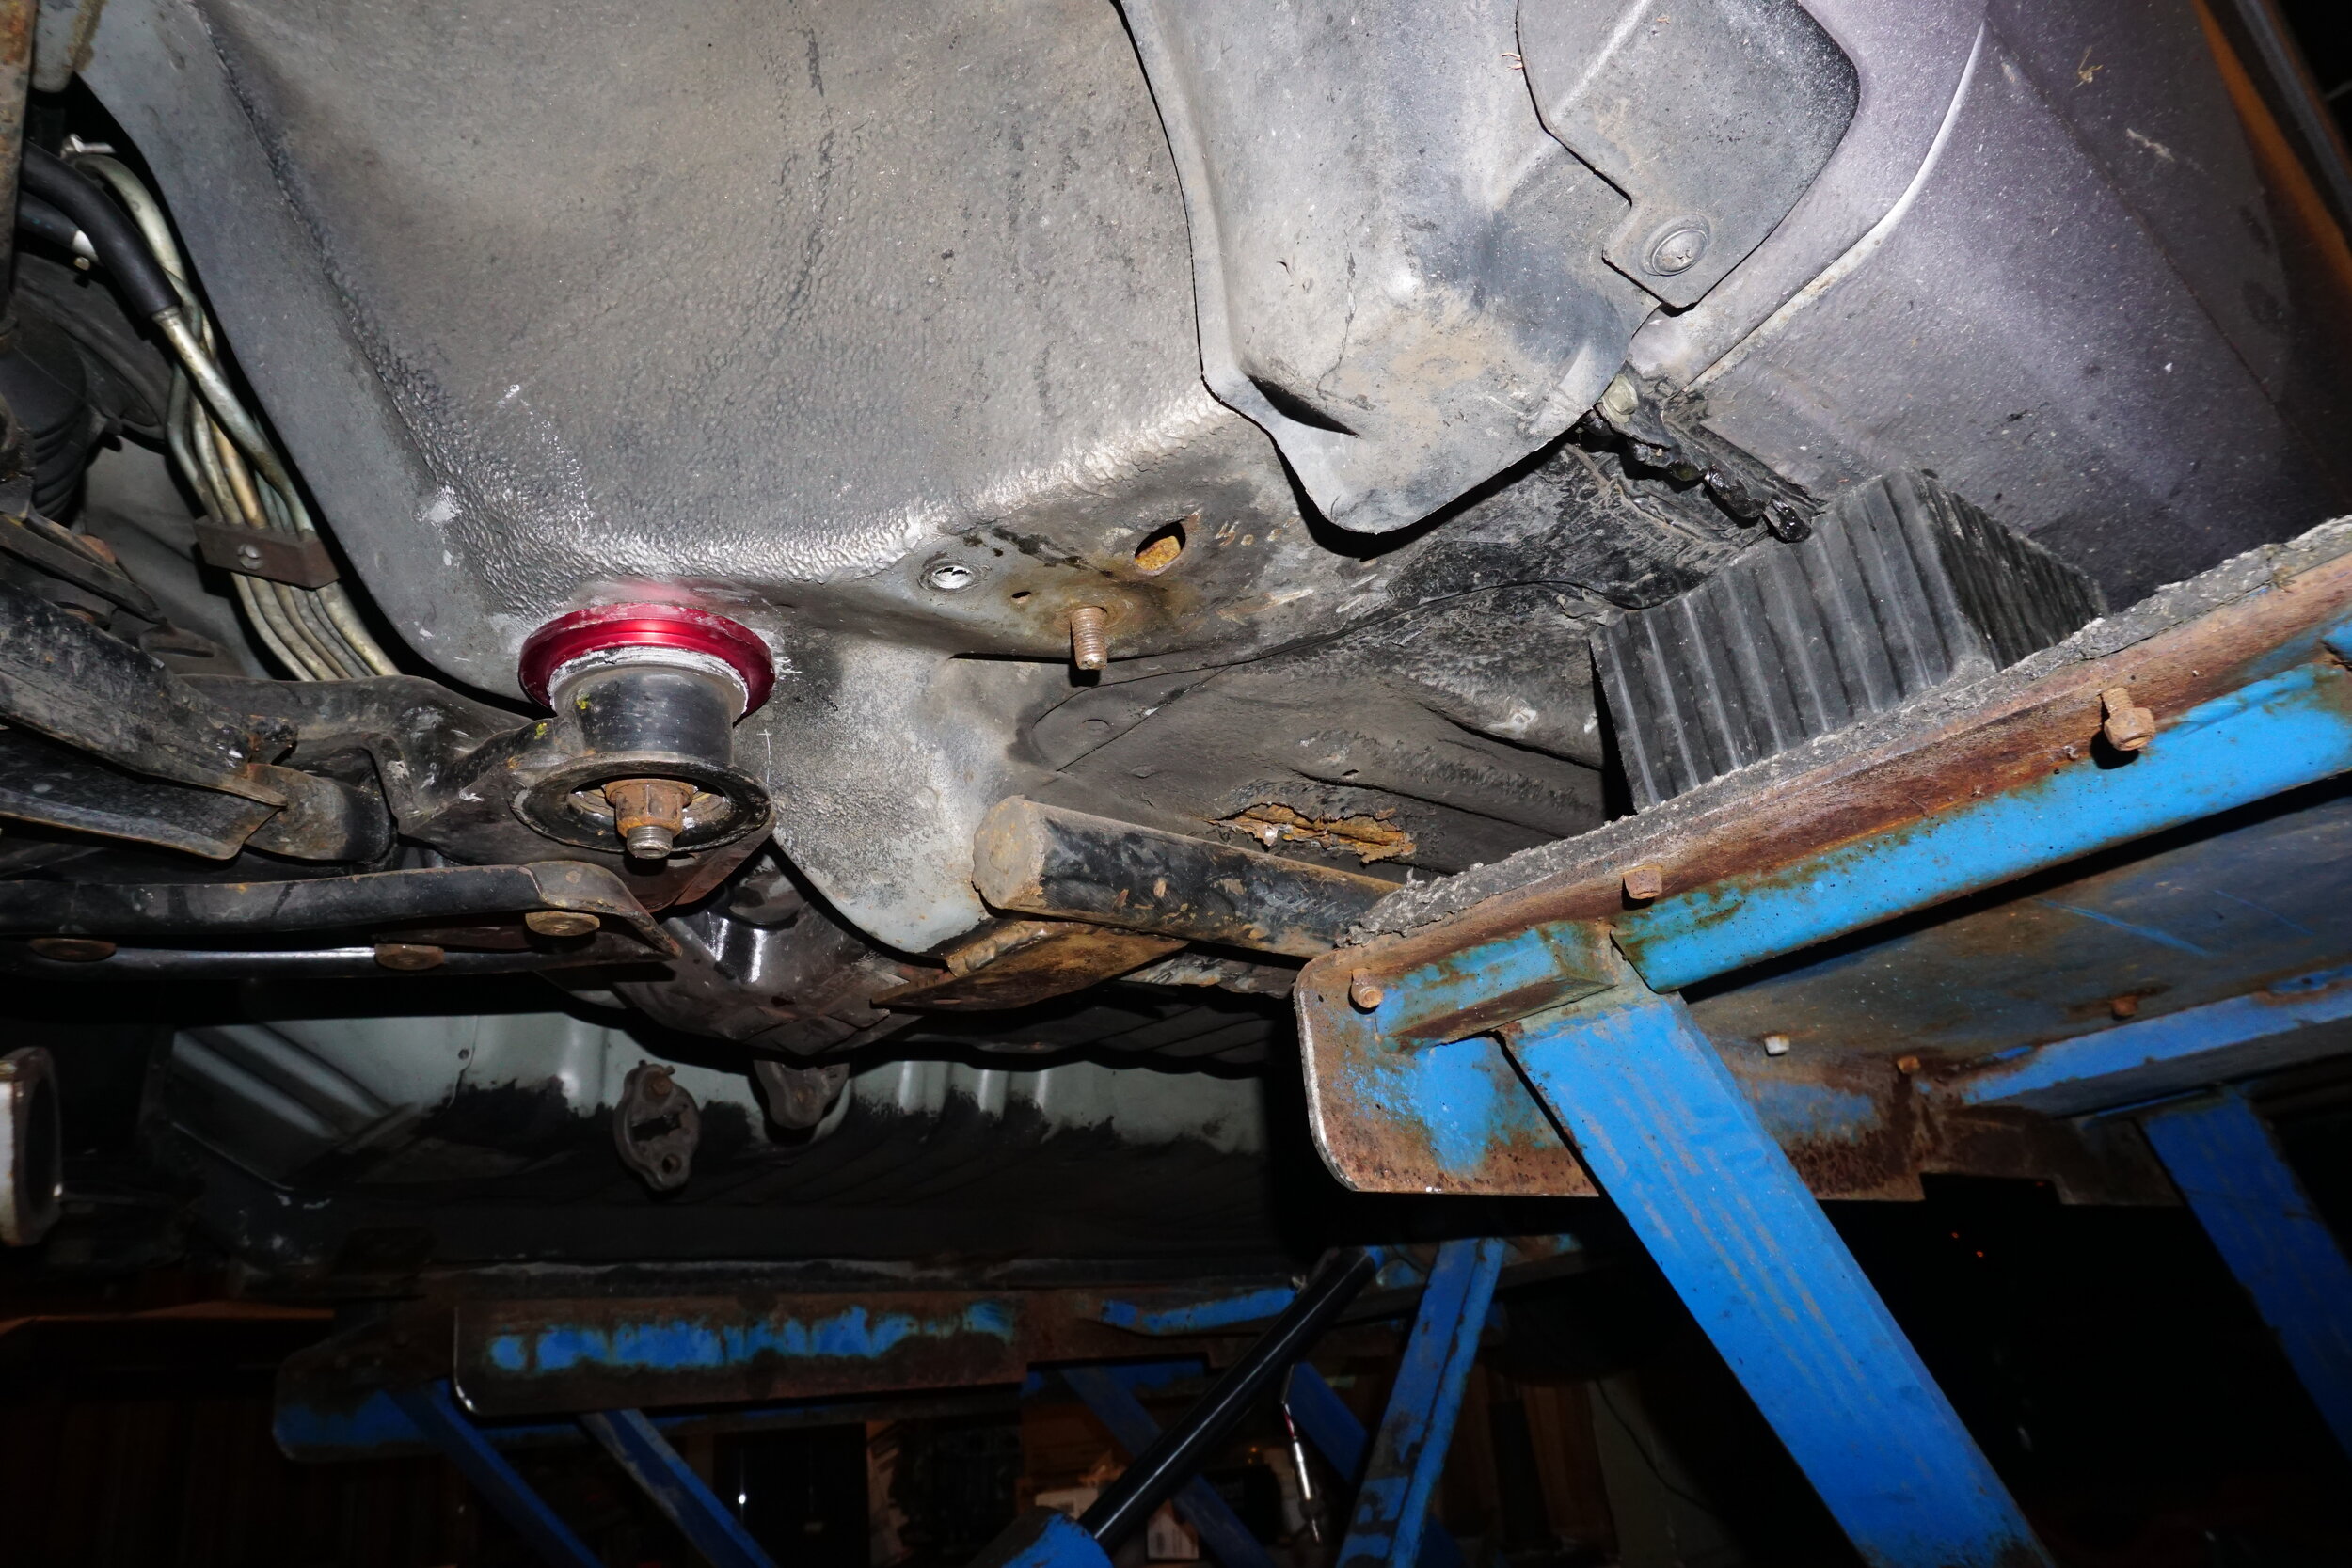
Given its proximity to the SFC, I'm not sure how I should repair this. Clearly, new metal needs to be welded in, but I won't be able to weld the side near the SFC. And even the other 3 sides are going to be difficult. Does anyone know of a way to do this properly without cutting off the SFC to gain access, and then weld the SFC back on? Ugh...
With the way my lift is designed, I don't have much access to the sides of the SFCs, but I can at least get to the plates the cross bars attach to. They needed a fresh coat of paint.
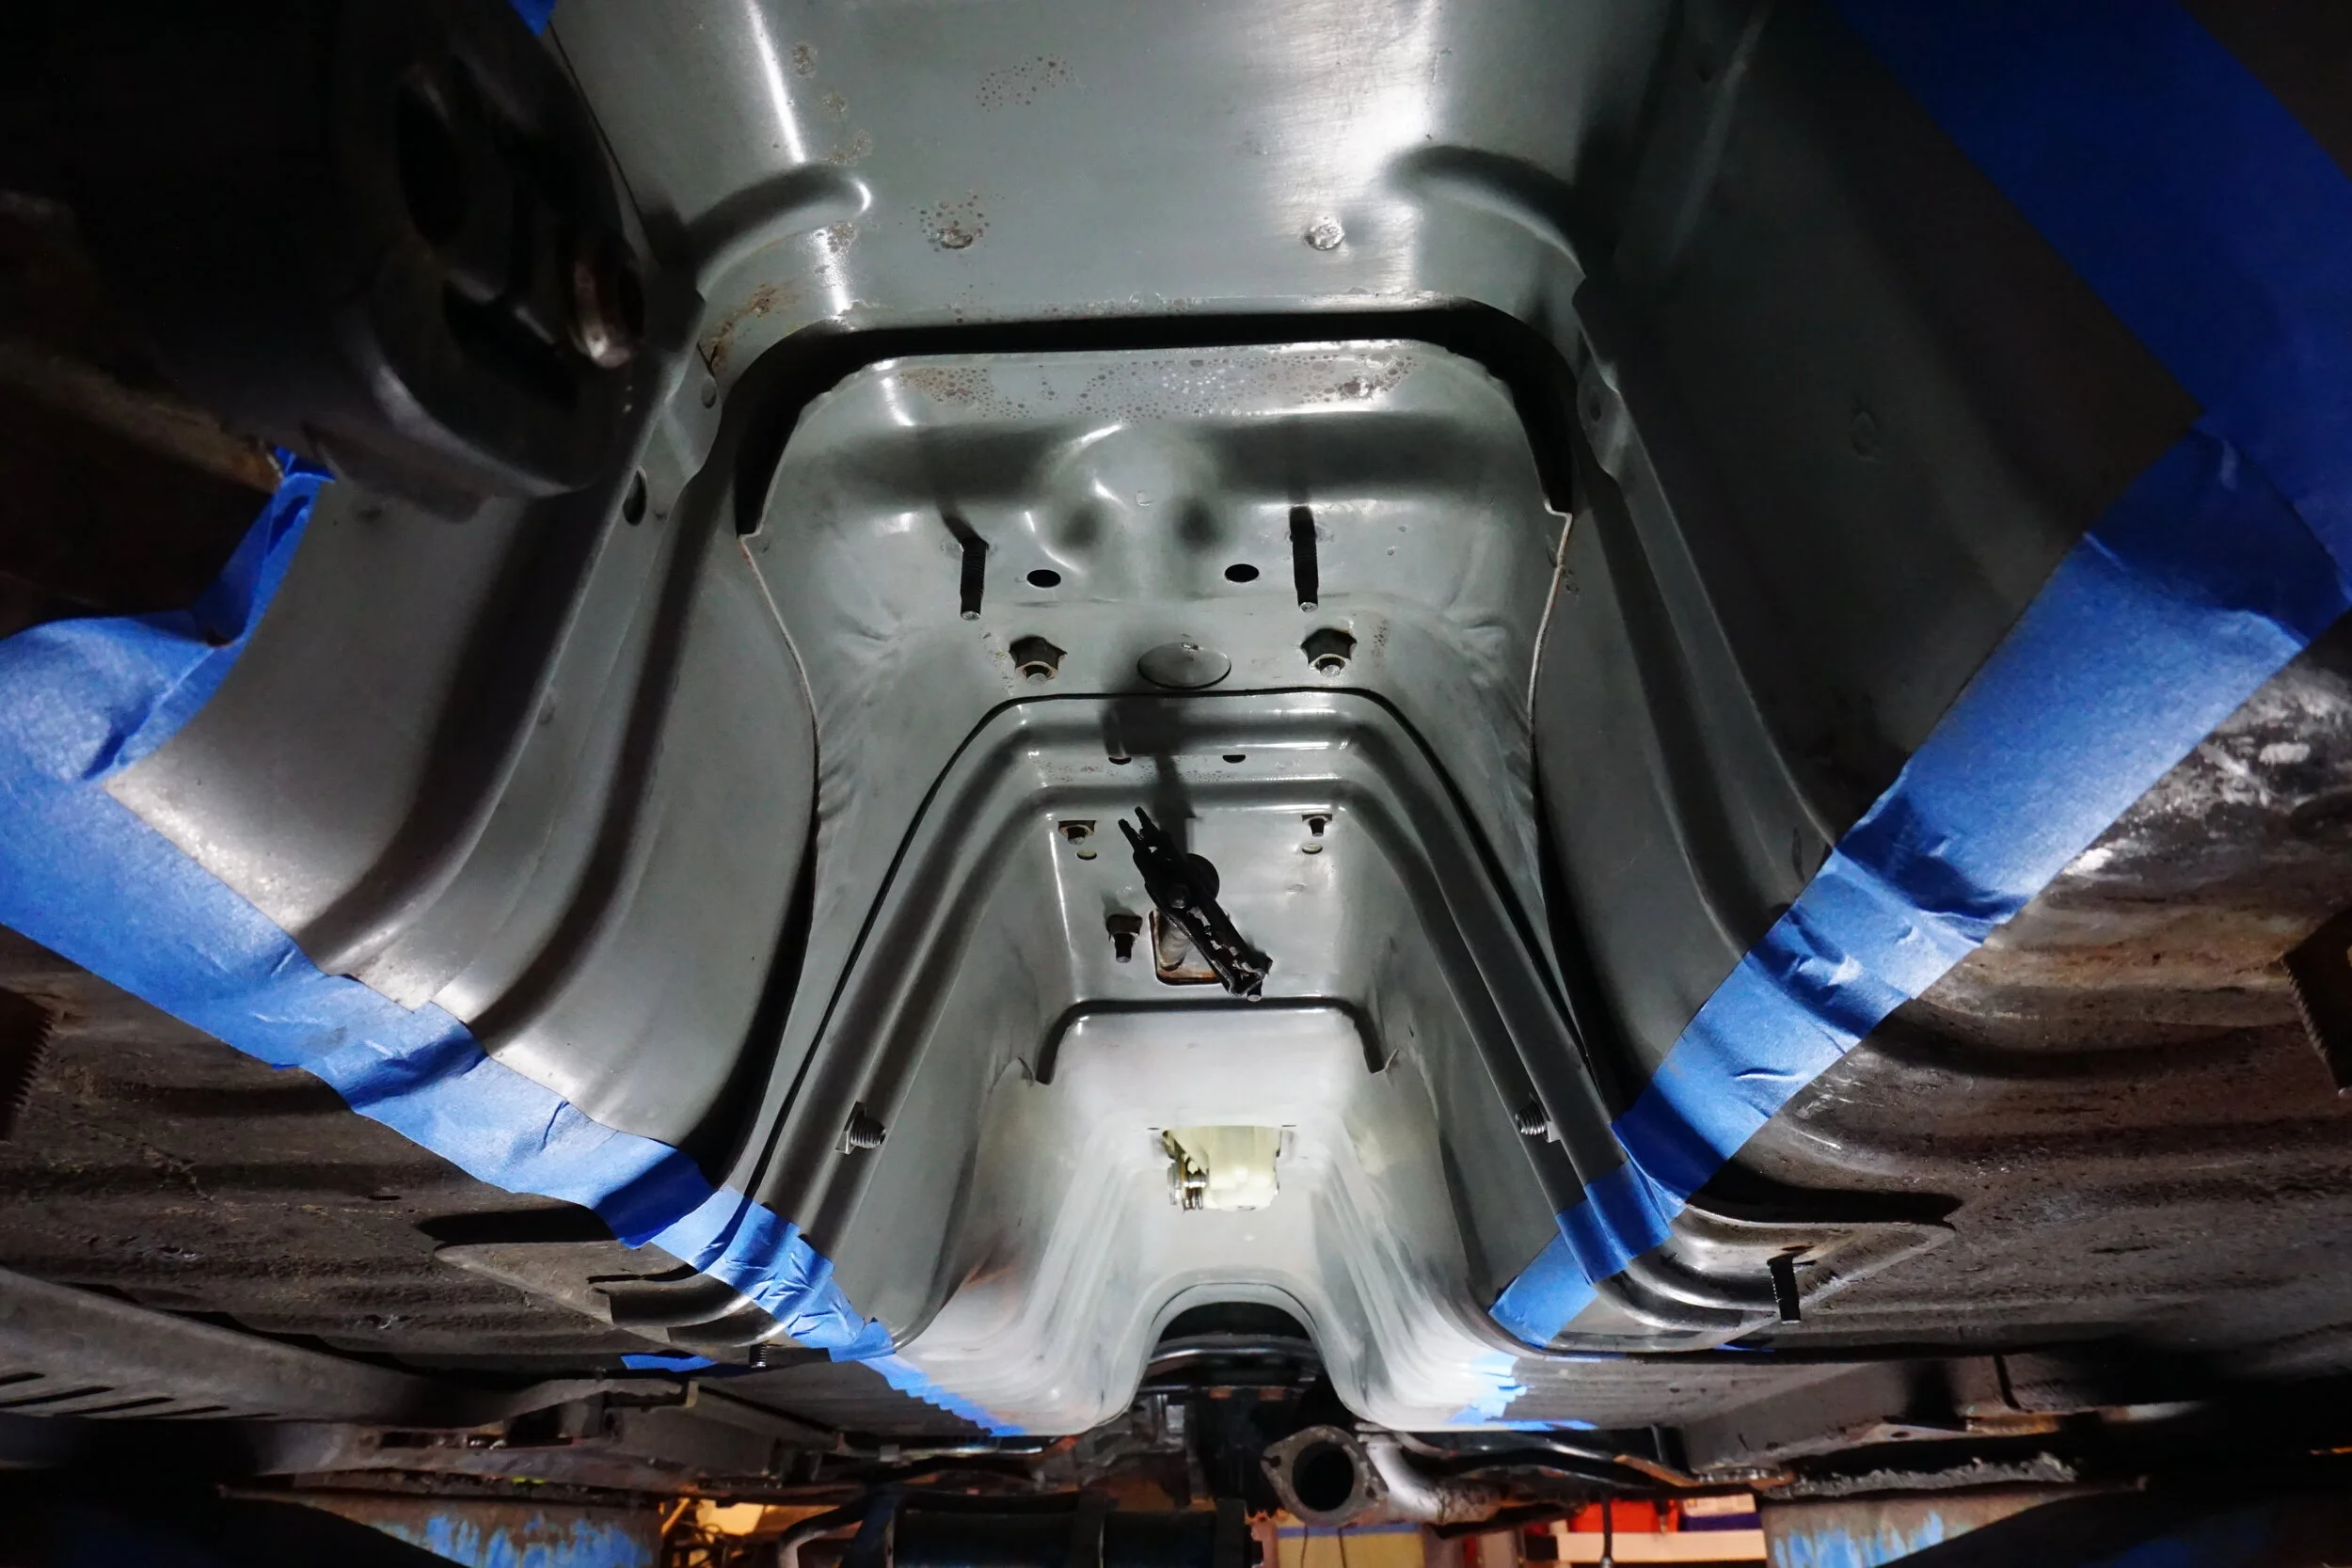
The exhaust tunnel itself was in pretty good shape, with only a few tiny spots of surface rust. This heat shielding has an adhesive backing to it, so I needed to clean up the entire tunnel very well before I could do anything else.
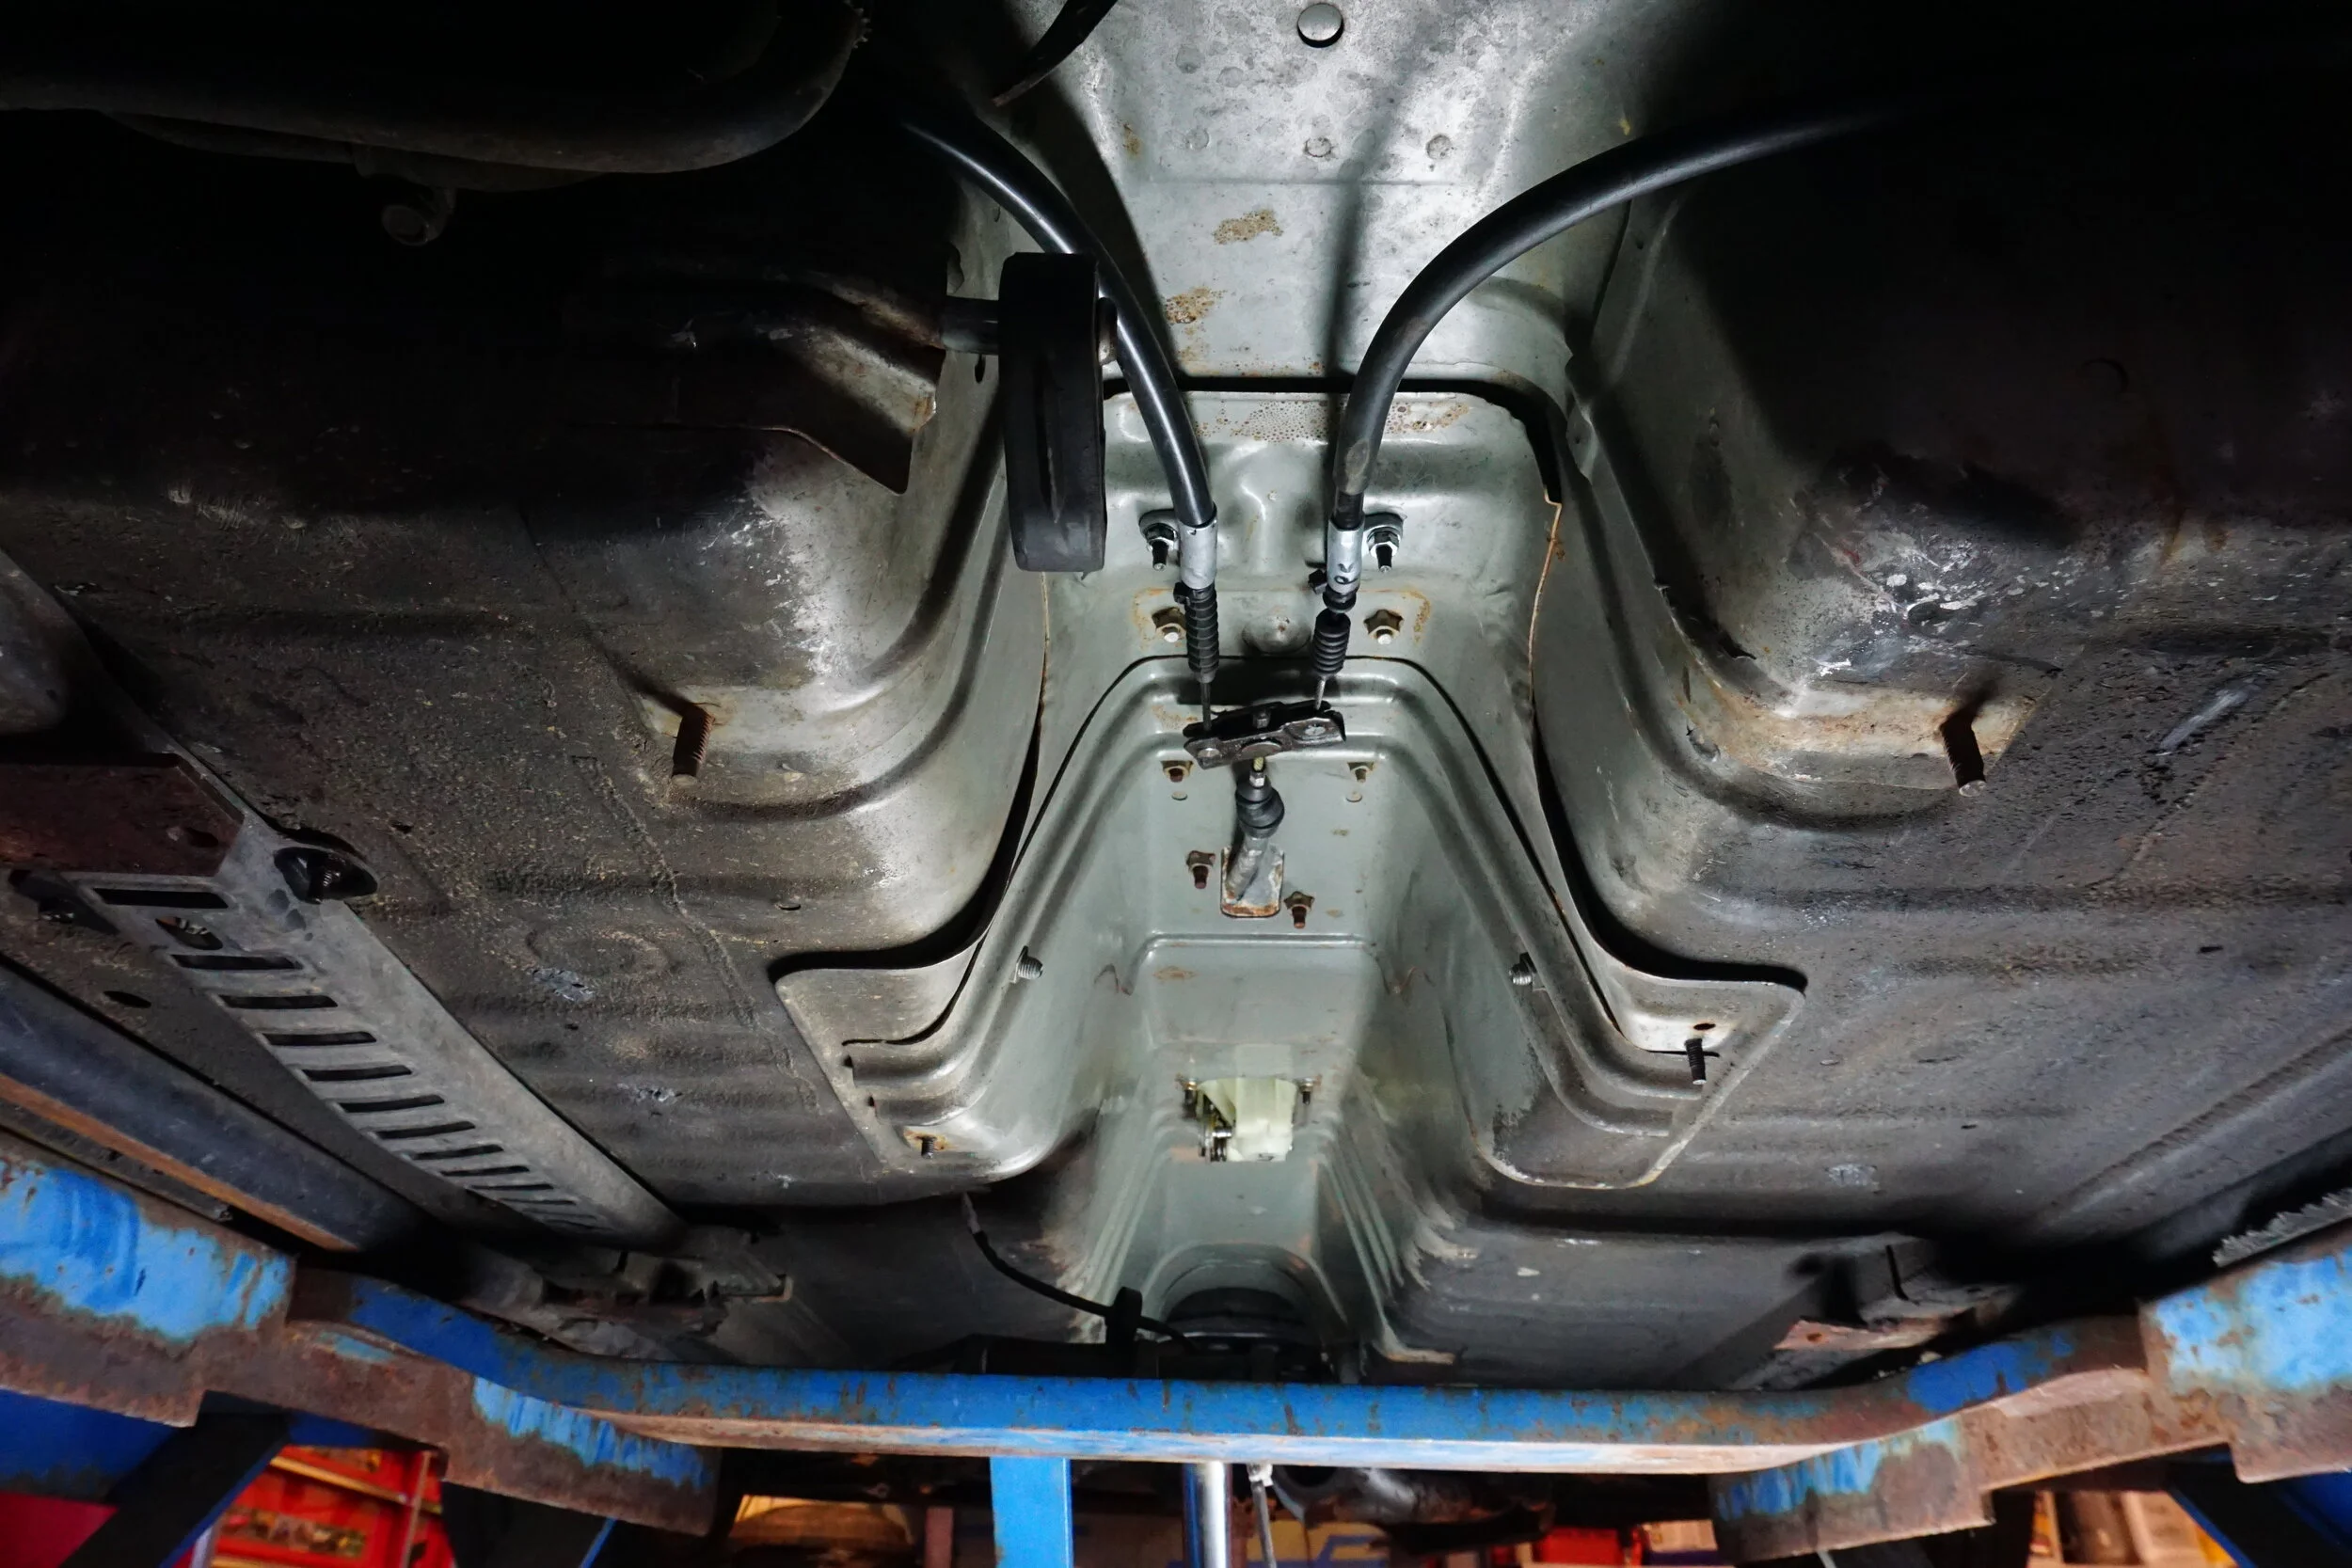

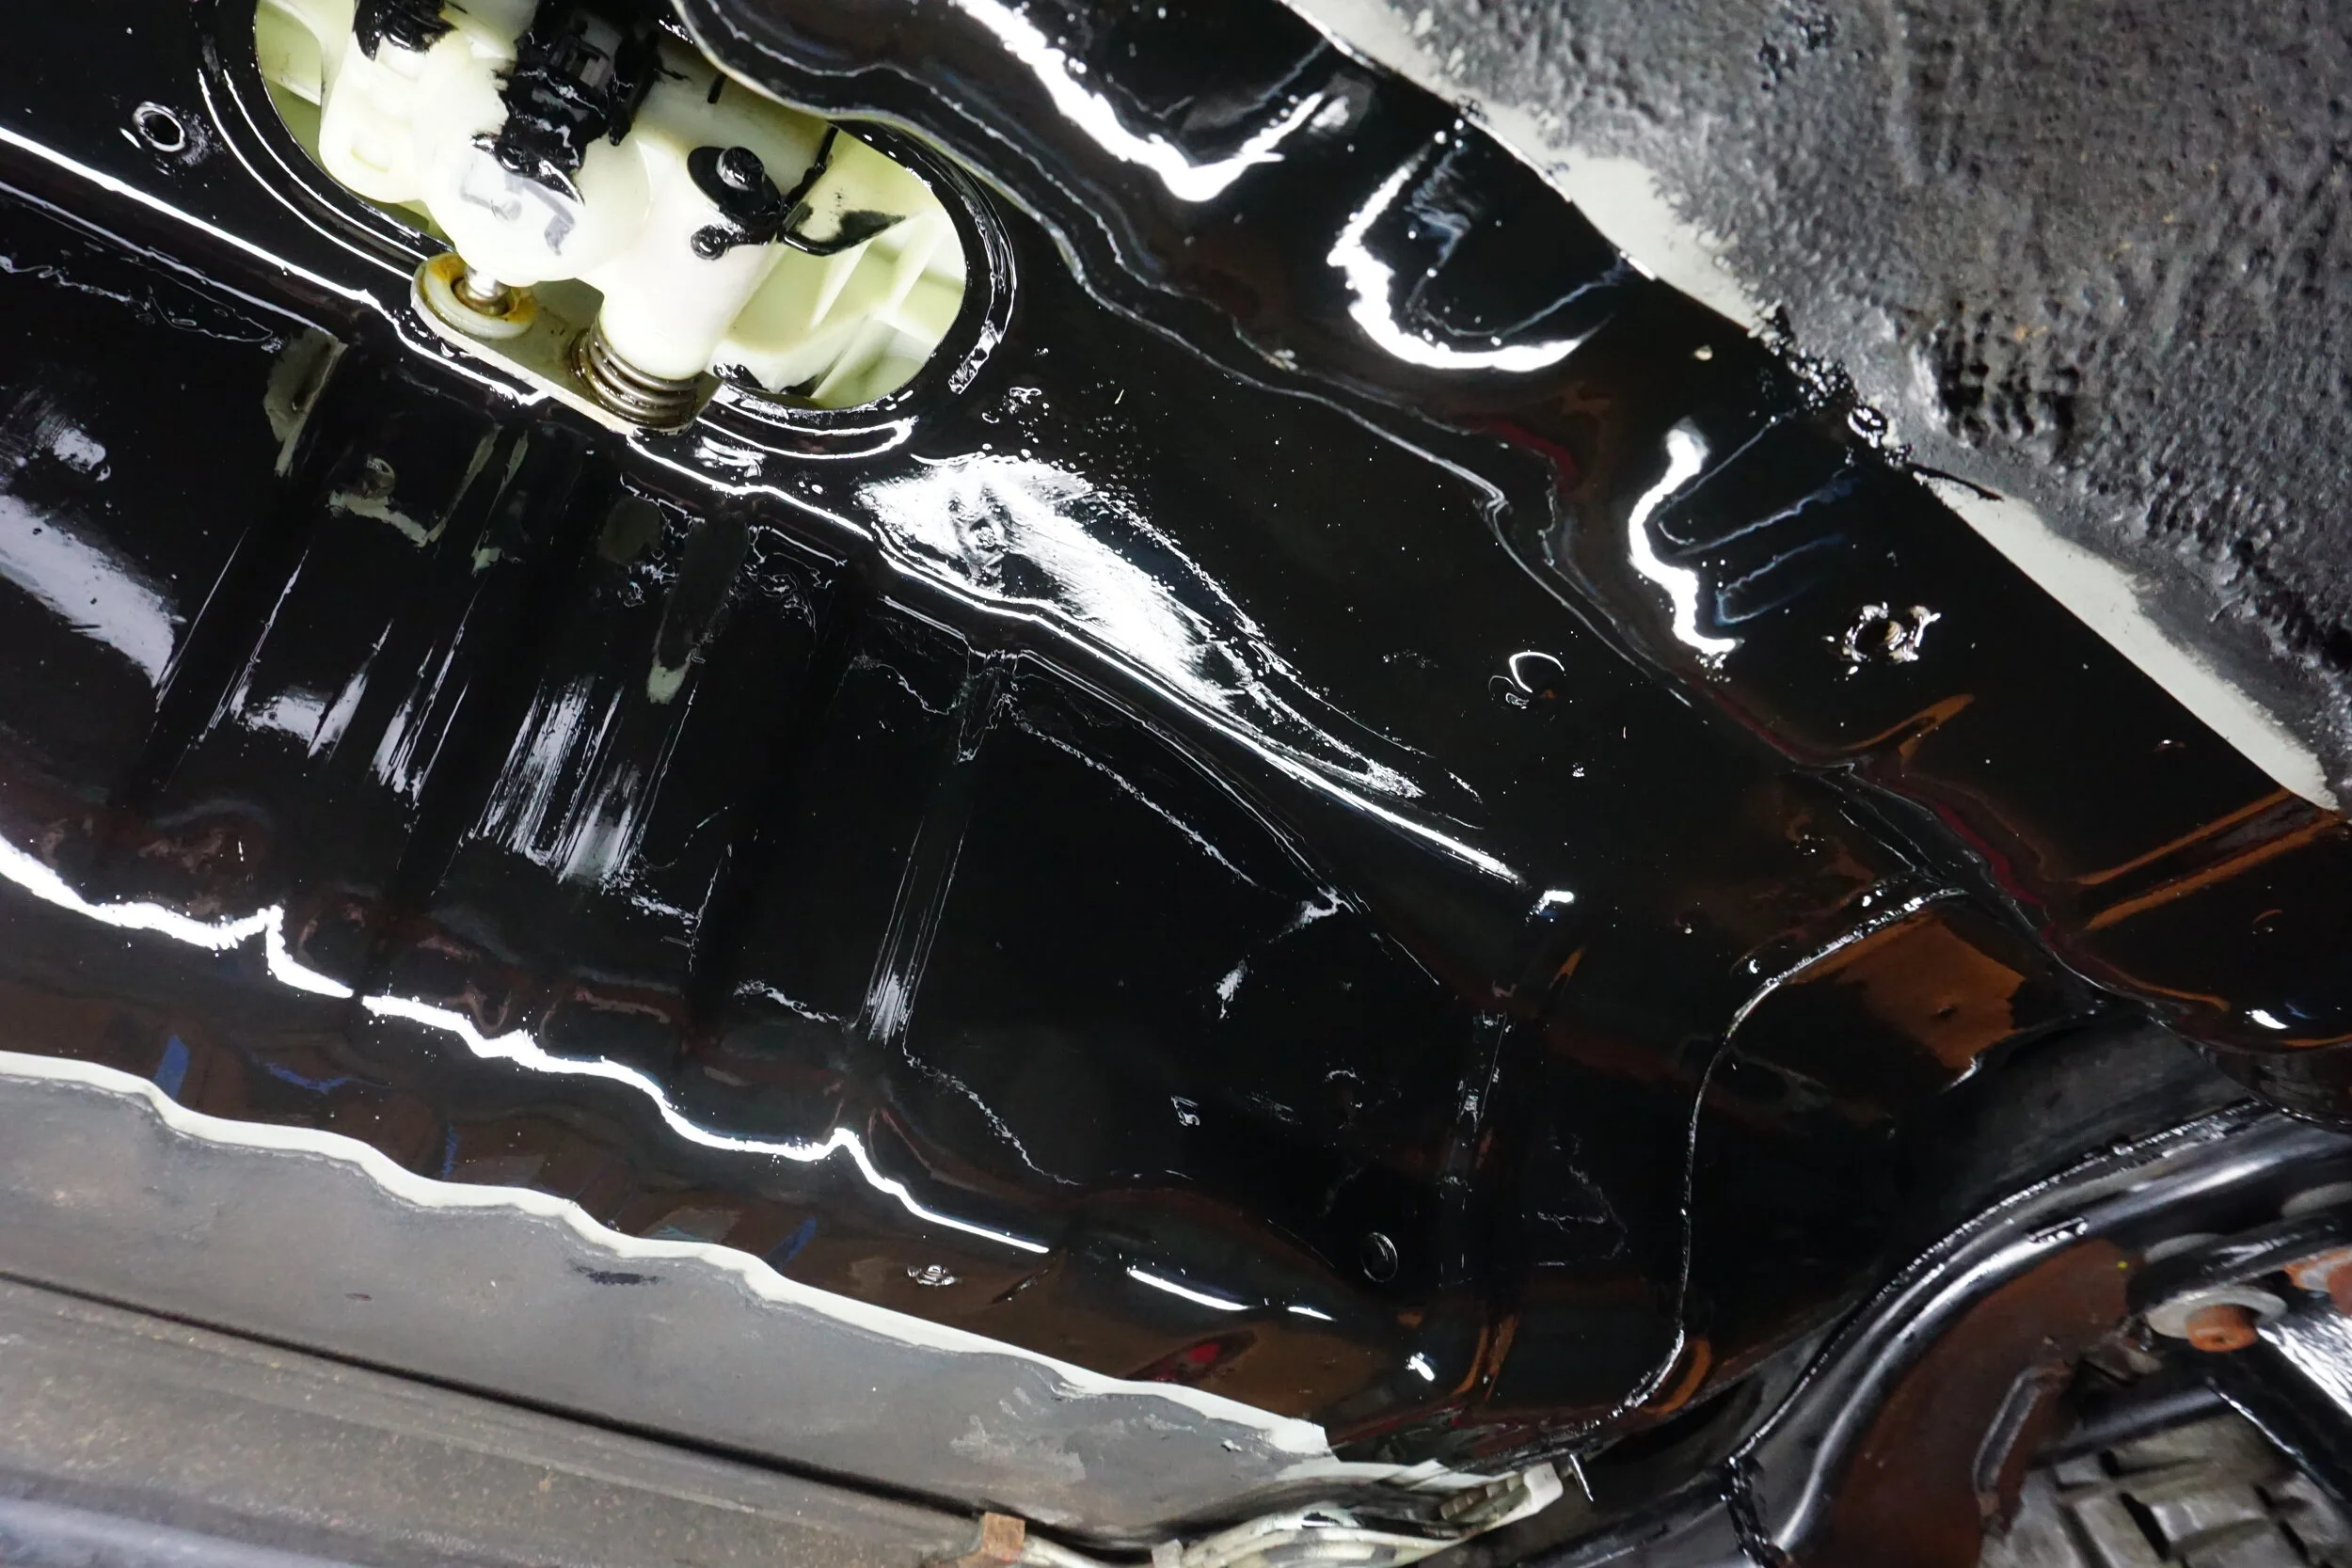
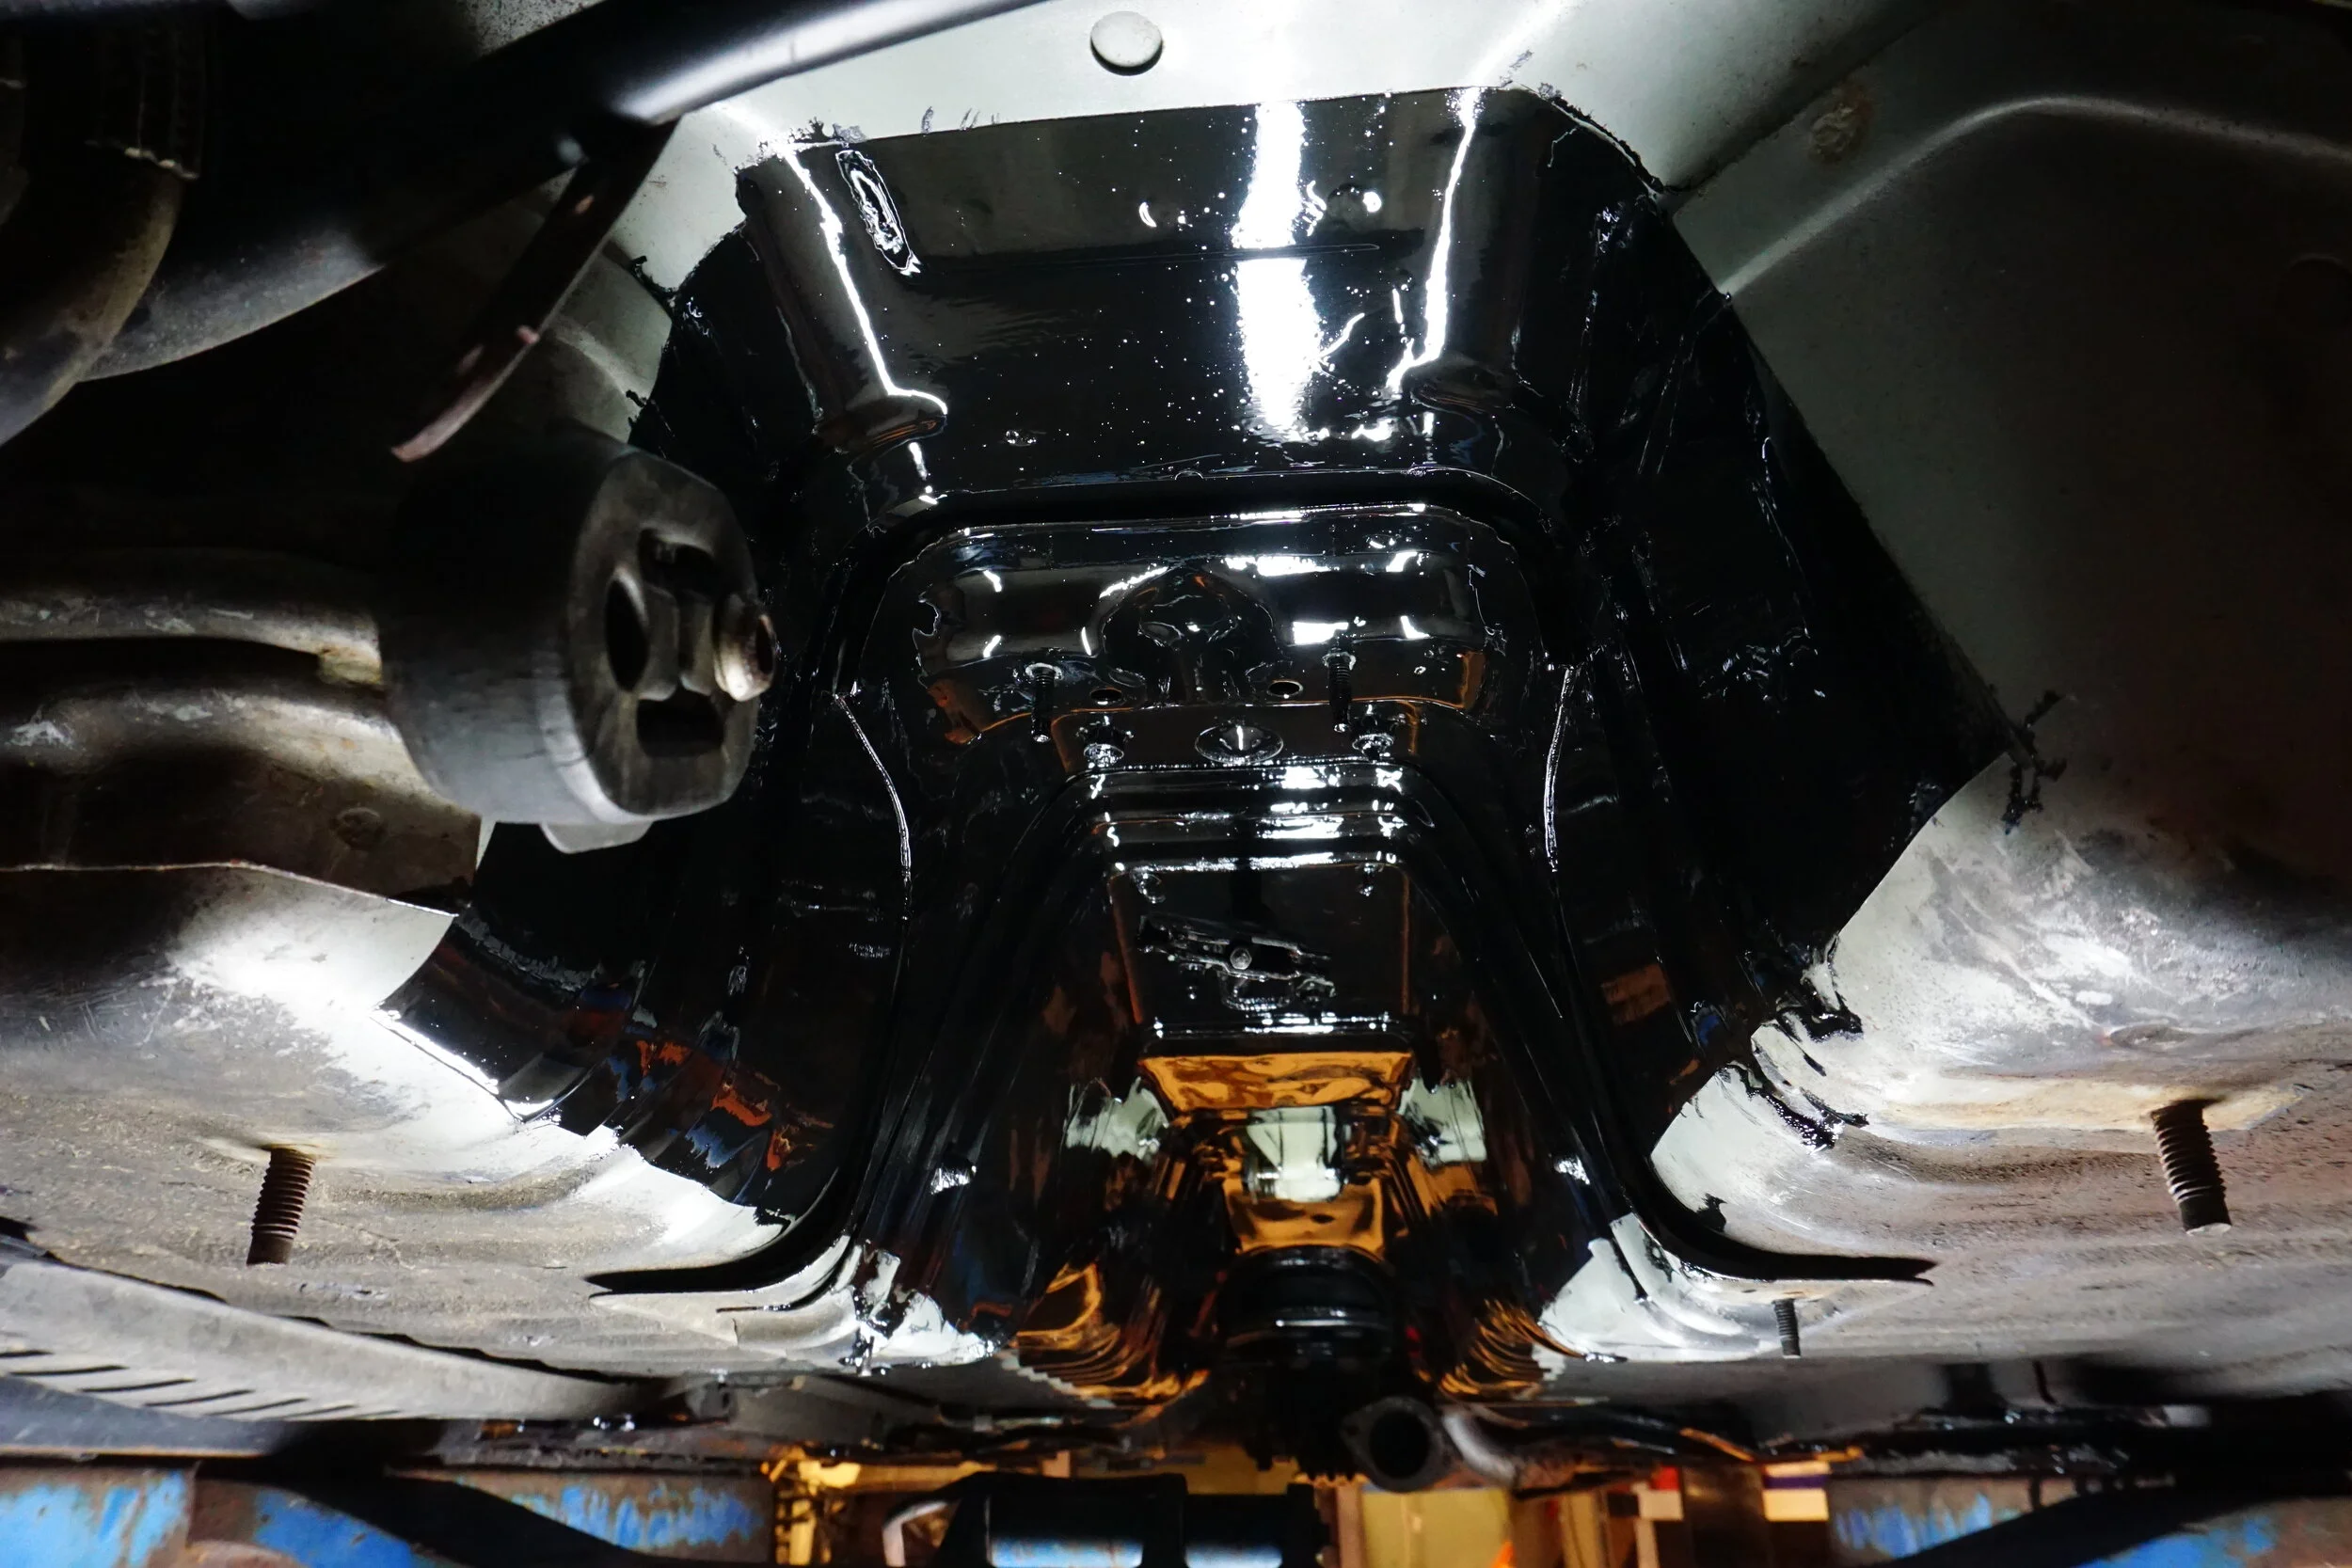
So I got busy with a lot of Purple Power and cleaned the whole thing as thoroughly as I could. I wanted pretty full coverage, so I cleaned things up further down and to the sides until I reached what I thought was the factory undercoating.
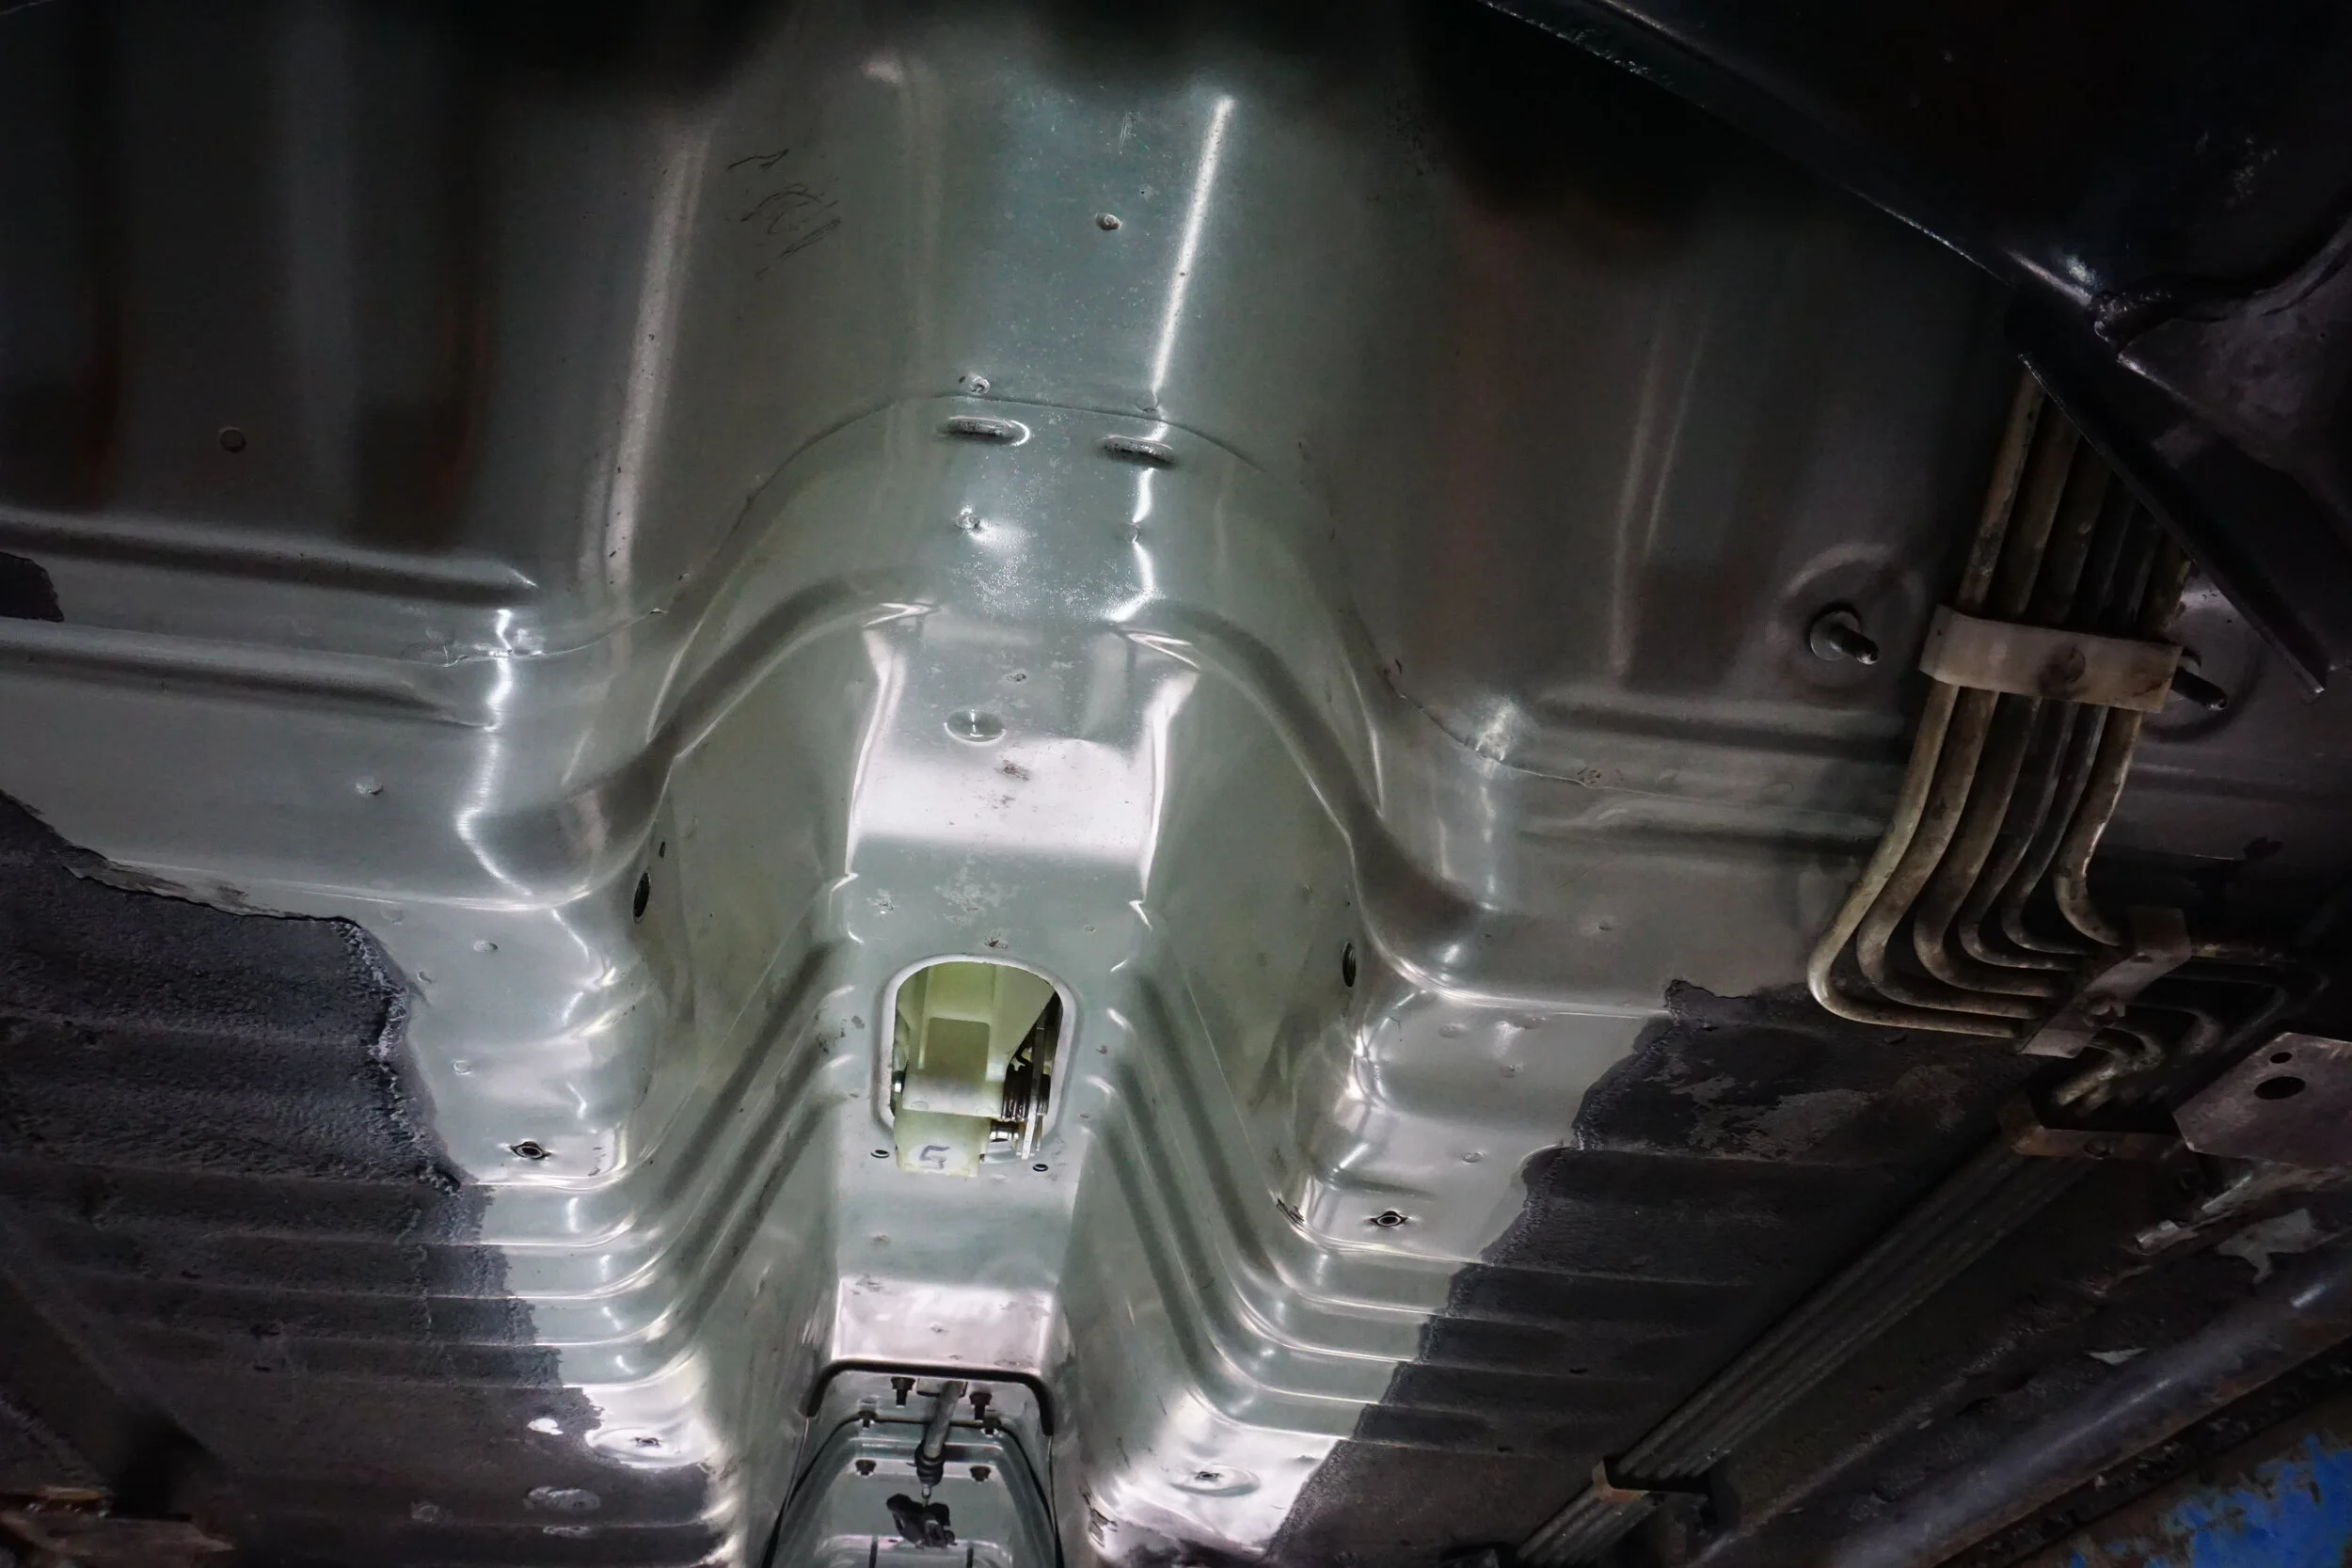
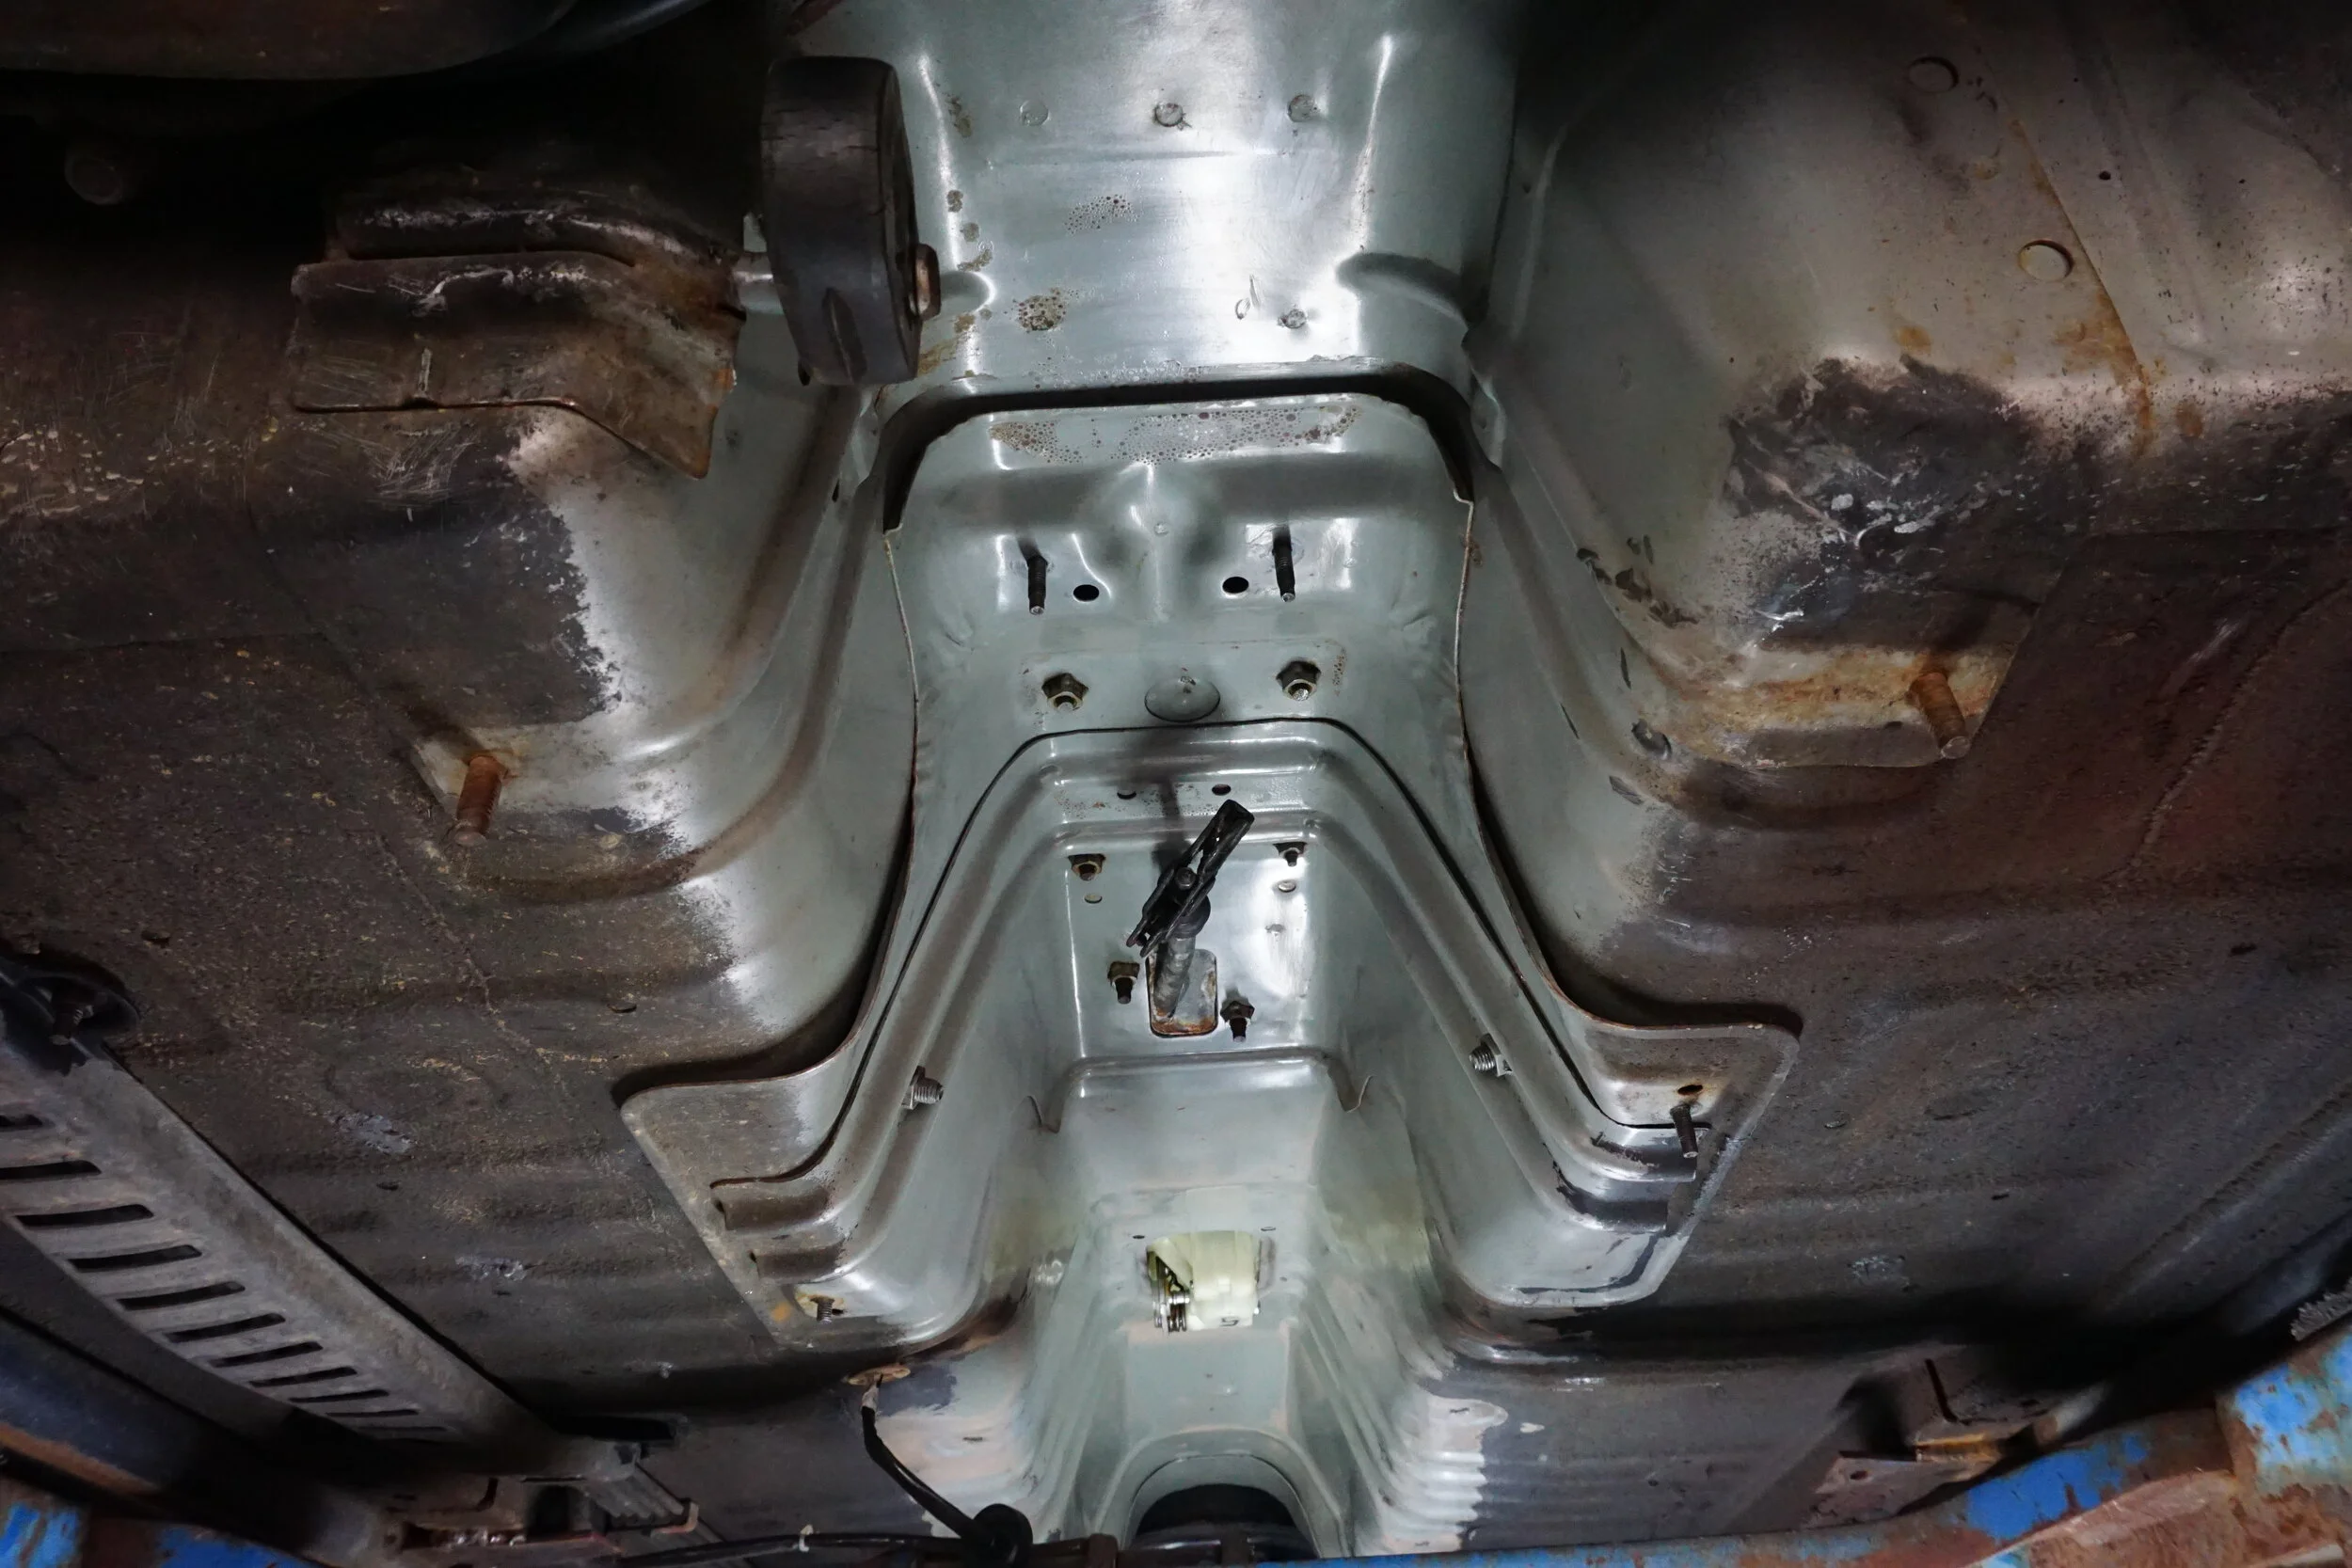
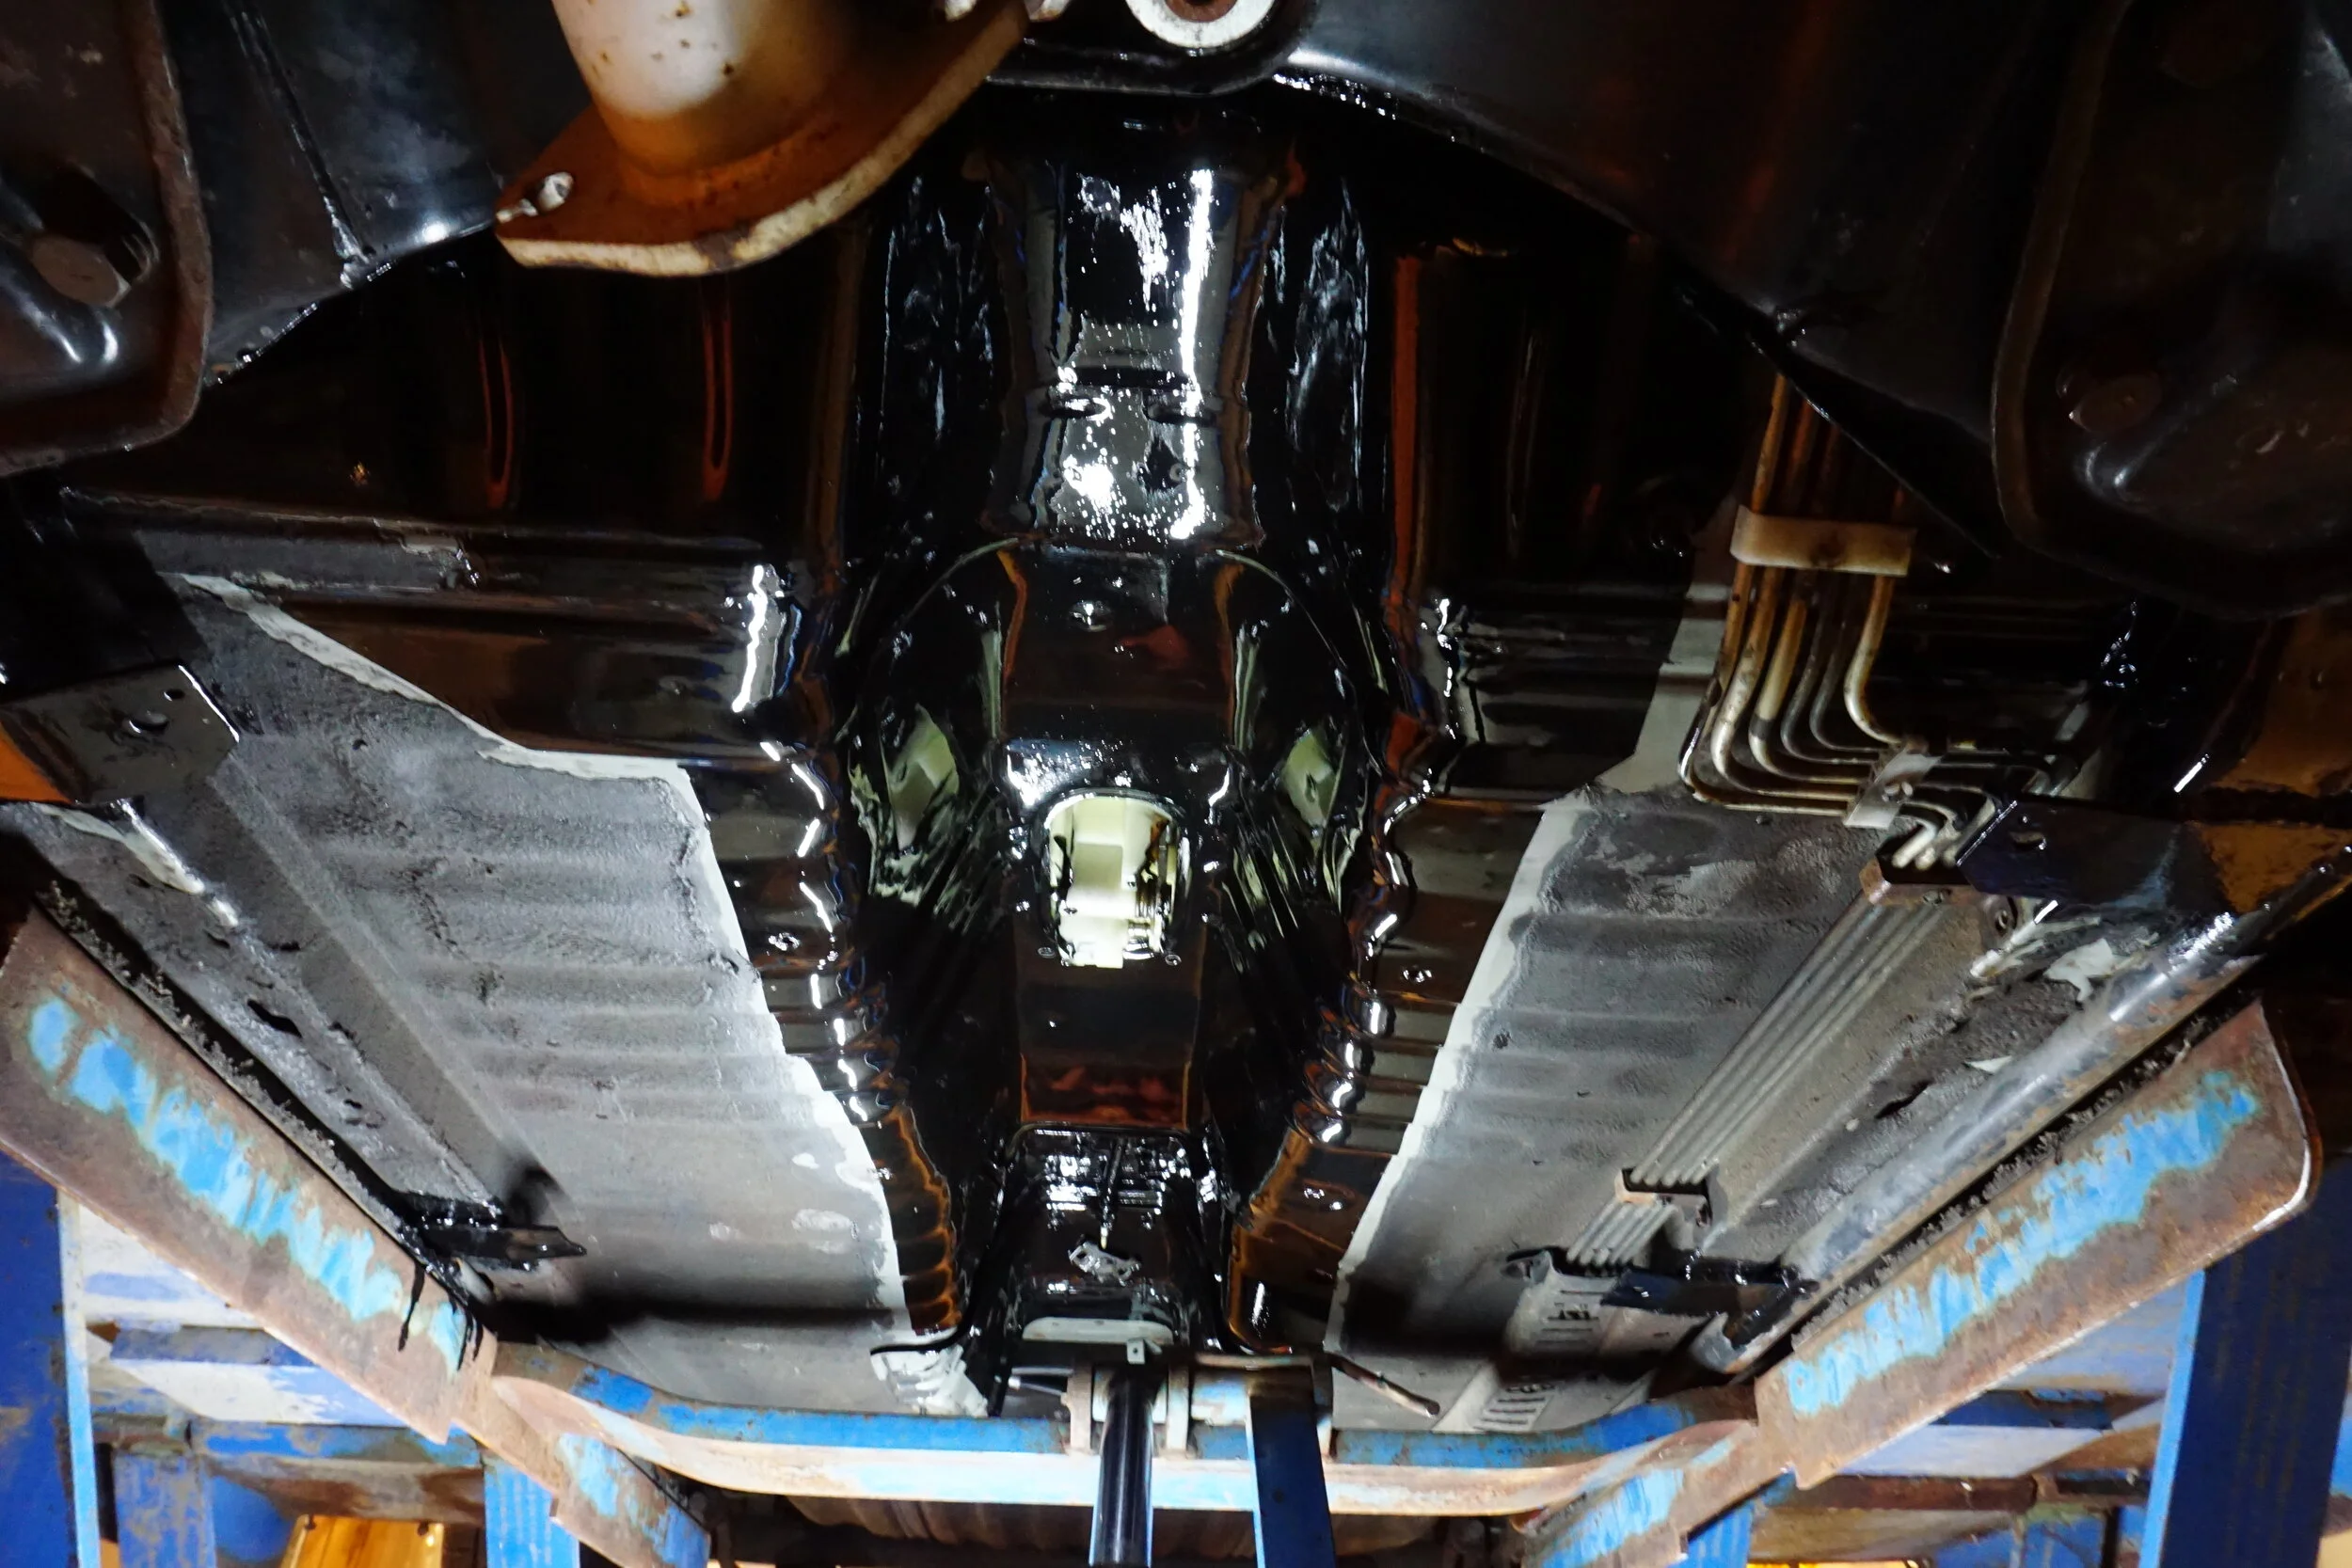
But before I put the shielding down, I wanted to make sure that if any moisture got under it that it wouldn't rust things out without me knowing it. So I scuffed up the whole surface with some scotchbrite pads, and did the whole POR15 routine.

First I had to remove my subframe connectors. Why are they called subframe connectors when they don't touch any subframe, btw? They should really be called unibody reinforcement bars, or something. They've been on the car since 2003, and have held up really well, all things considered. Most of the paint was still intact, and the rust was only on the surface.
But still, this seemed like a good time to make them look all pretty, because you know it's super important for things on the bottom of your car to look nice! So I got out the angle grinder and took them down to bare metal.
They then took a nice long bath in some Evapo-Rust, and got the full POR15 treatment.
The SE reinforcement plates got the same treatment.
While I was in the area I took a closer look at a little rusty spot near the front of the SFC on the driver's side.
I poked at it, and it was all rotted out, and after a little ripping it expanded quite a bit:
Given its proximity to the SFC, I'm not sure how I should repair this. Clearly, new metal needs to be welded in, but I won't be able to weld the side near the SFC. And even the other 3 sides are going to be difficult. Does anyone know of a way to do this properly without cutting off the SFC to gain access, and then weld the SFC back on? Ugh...
With the way my lift is designed, I don't have much access to the sides of the SFCs, but I can at least get to the plates the cross bars attach to. They needed a fresh coat of paint.
The exhaust tunnel itself was in pretty good shape, with only a few tiny spots of surface rust. This heat shielding has an adhesive backing to it, so I needed to clean up the entire tunnel very well before I could do anything else.
So I got busy with a lot of Purple Power and cleaned the whole thing as thoroughly as I could. I wanted pretty full coverage, so I cleaned things up further down and to the sides until I reached what I thought was the factory undercoating.
But before I put the shielding down, I wanted to make sure that if any moisture got under it that it wouldn't rust things out without me knowing it. So I scuffed up the whole surface with some scotchbrite pads, and did the whole POR15 routine.
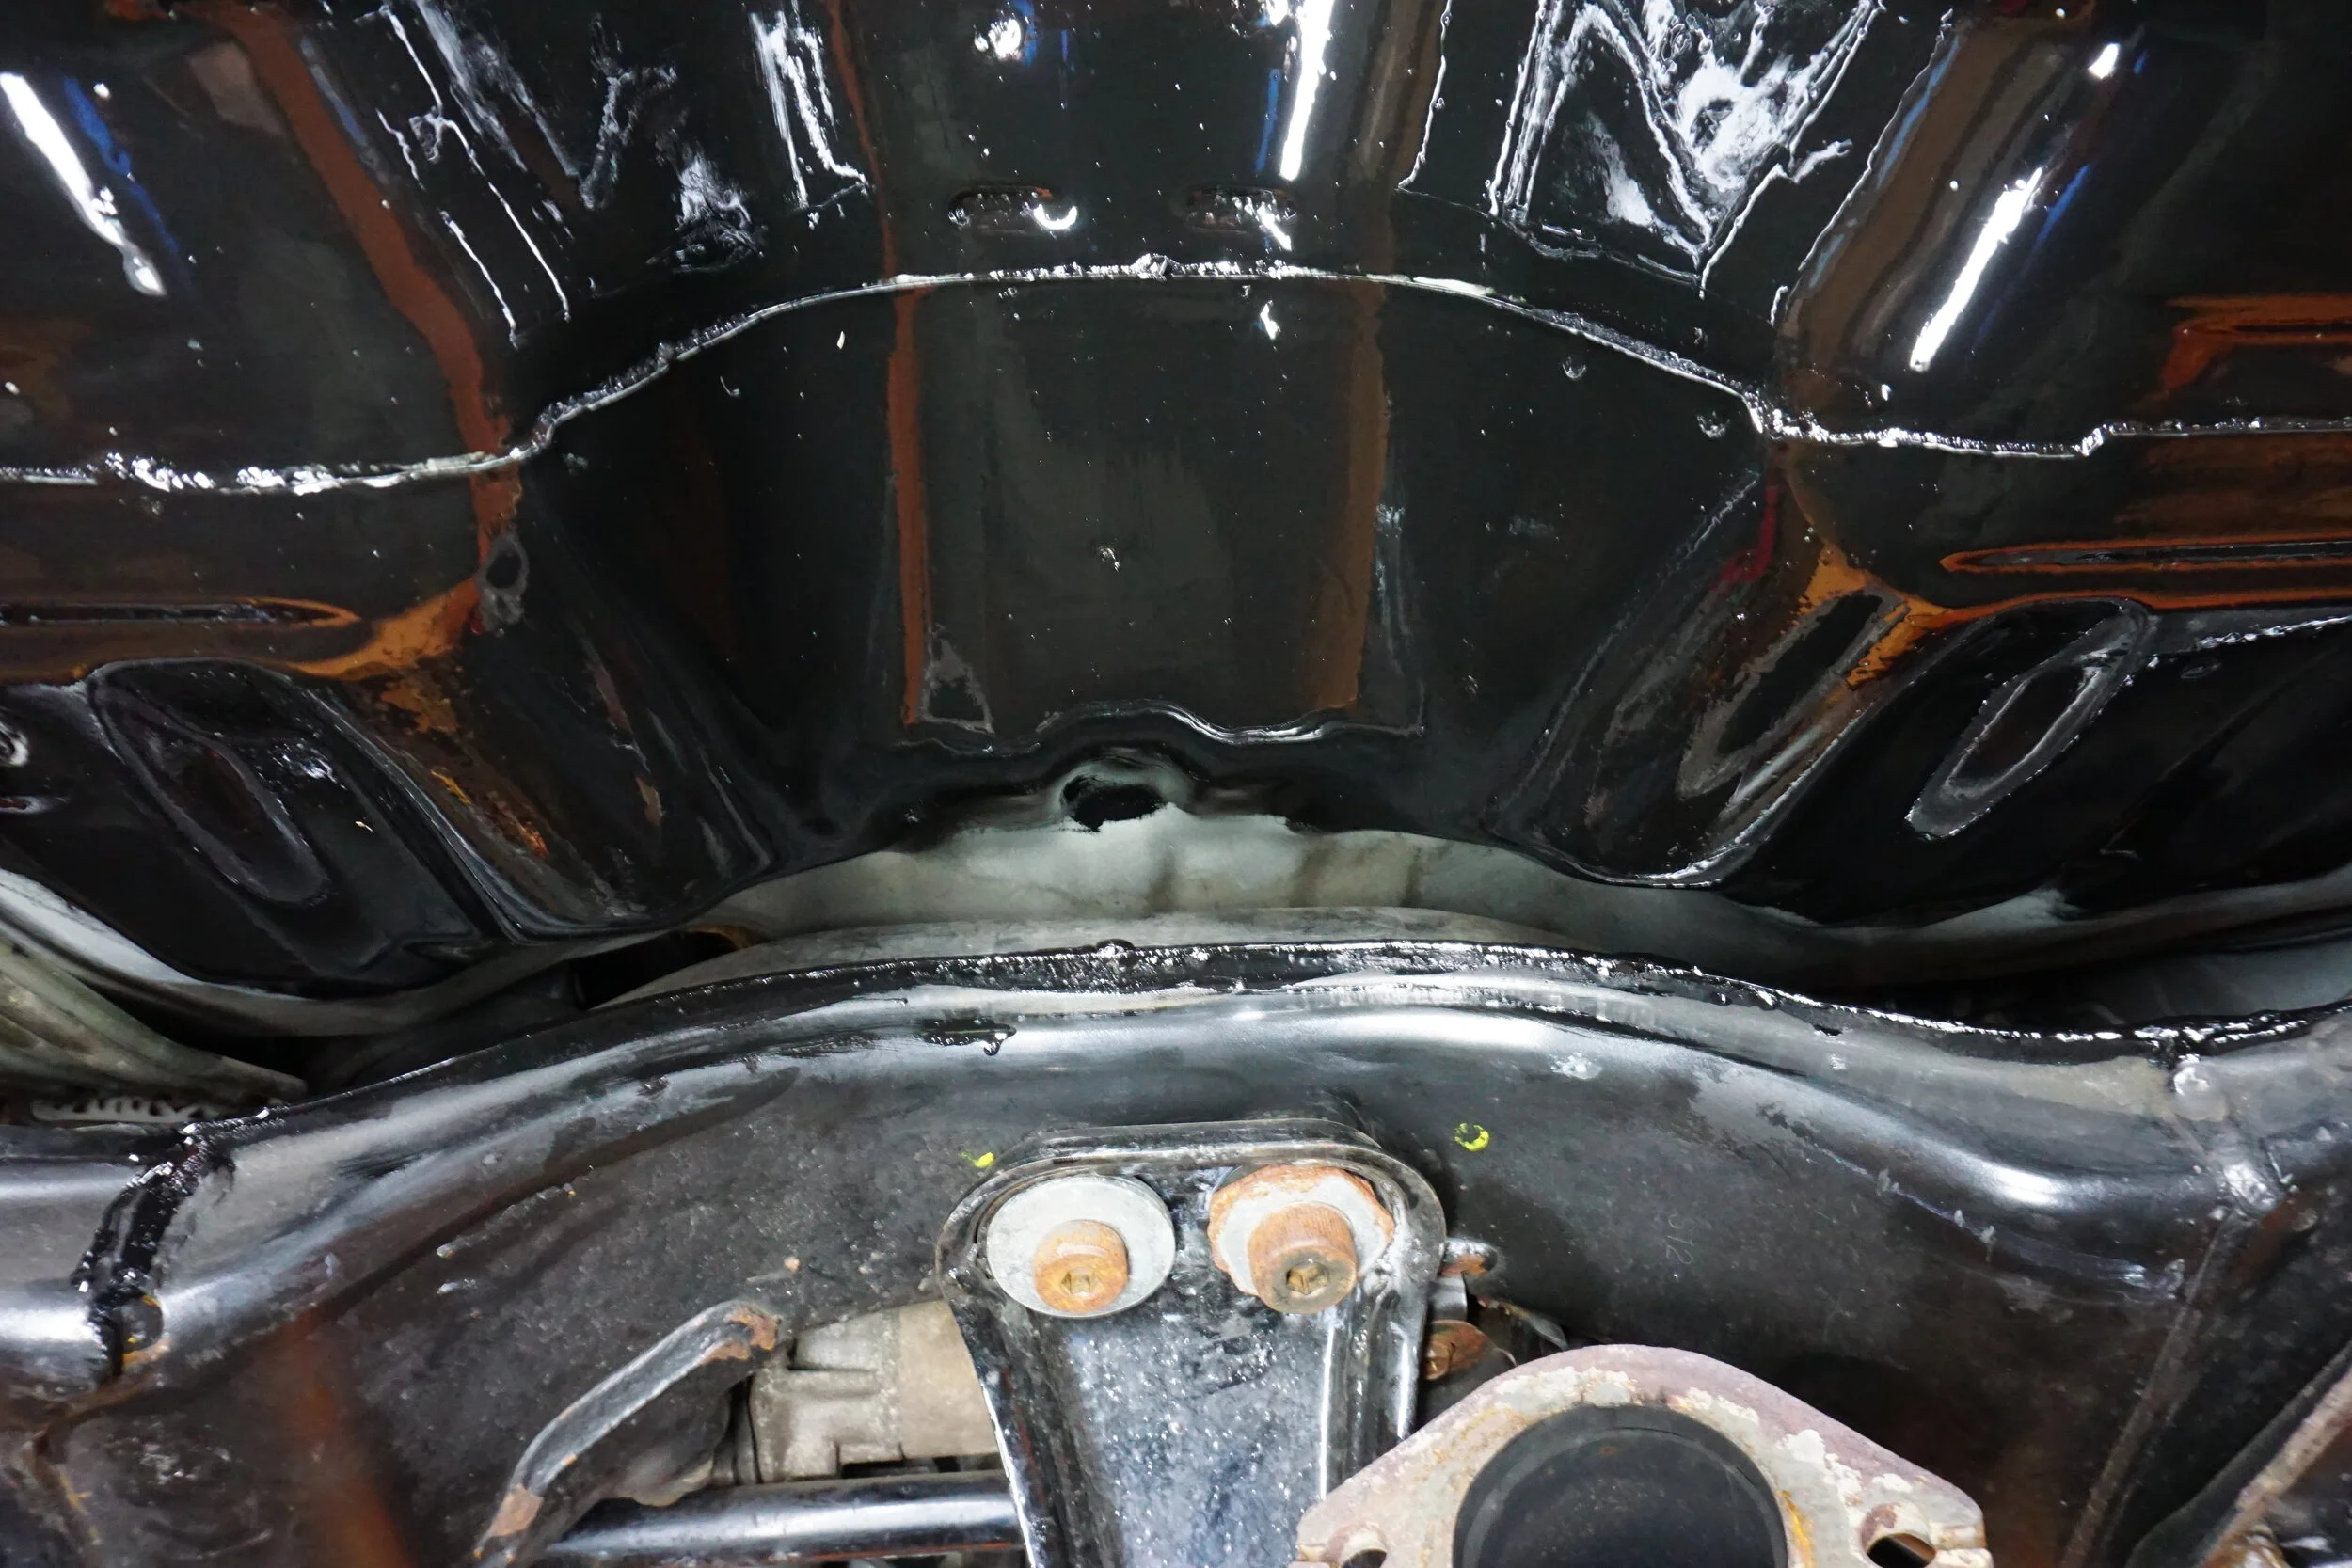
I also did the little areas at the back of each fender since they had some surface rust going on and should be protected.
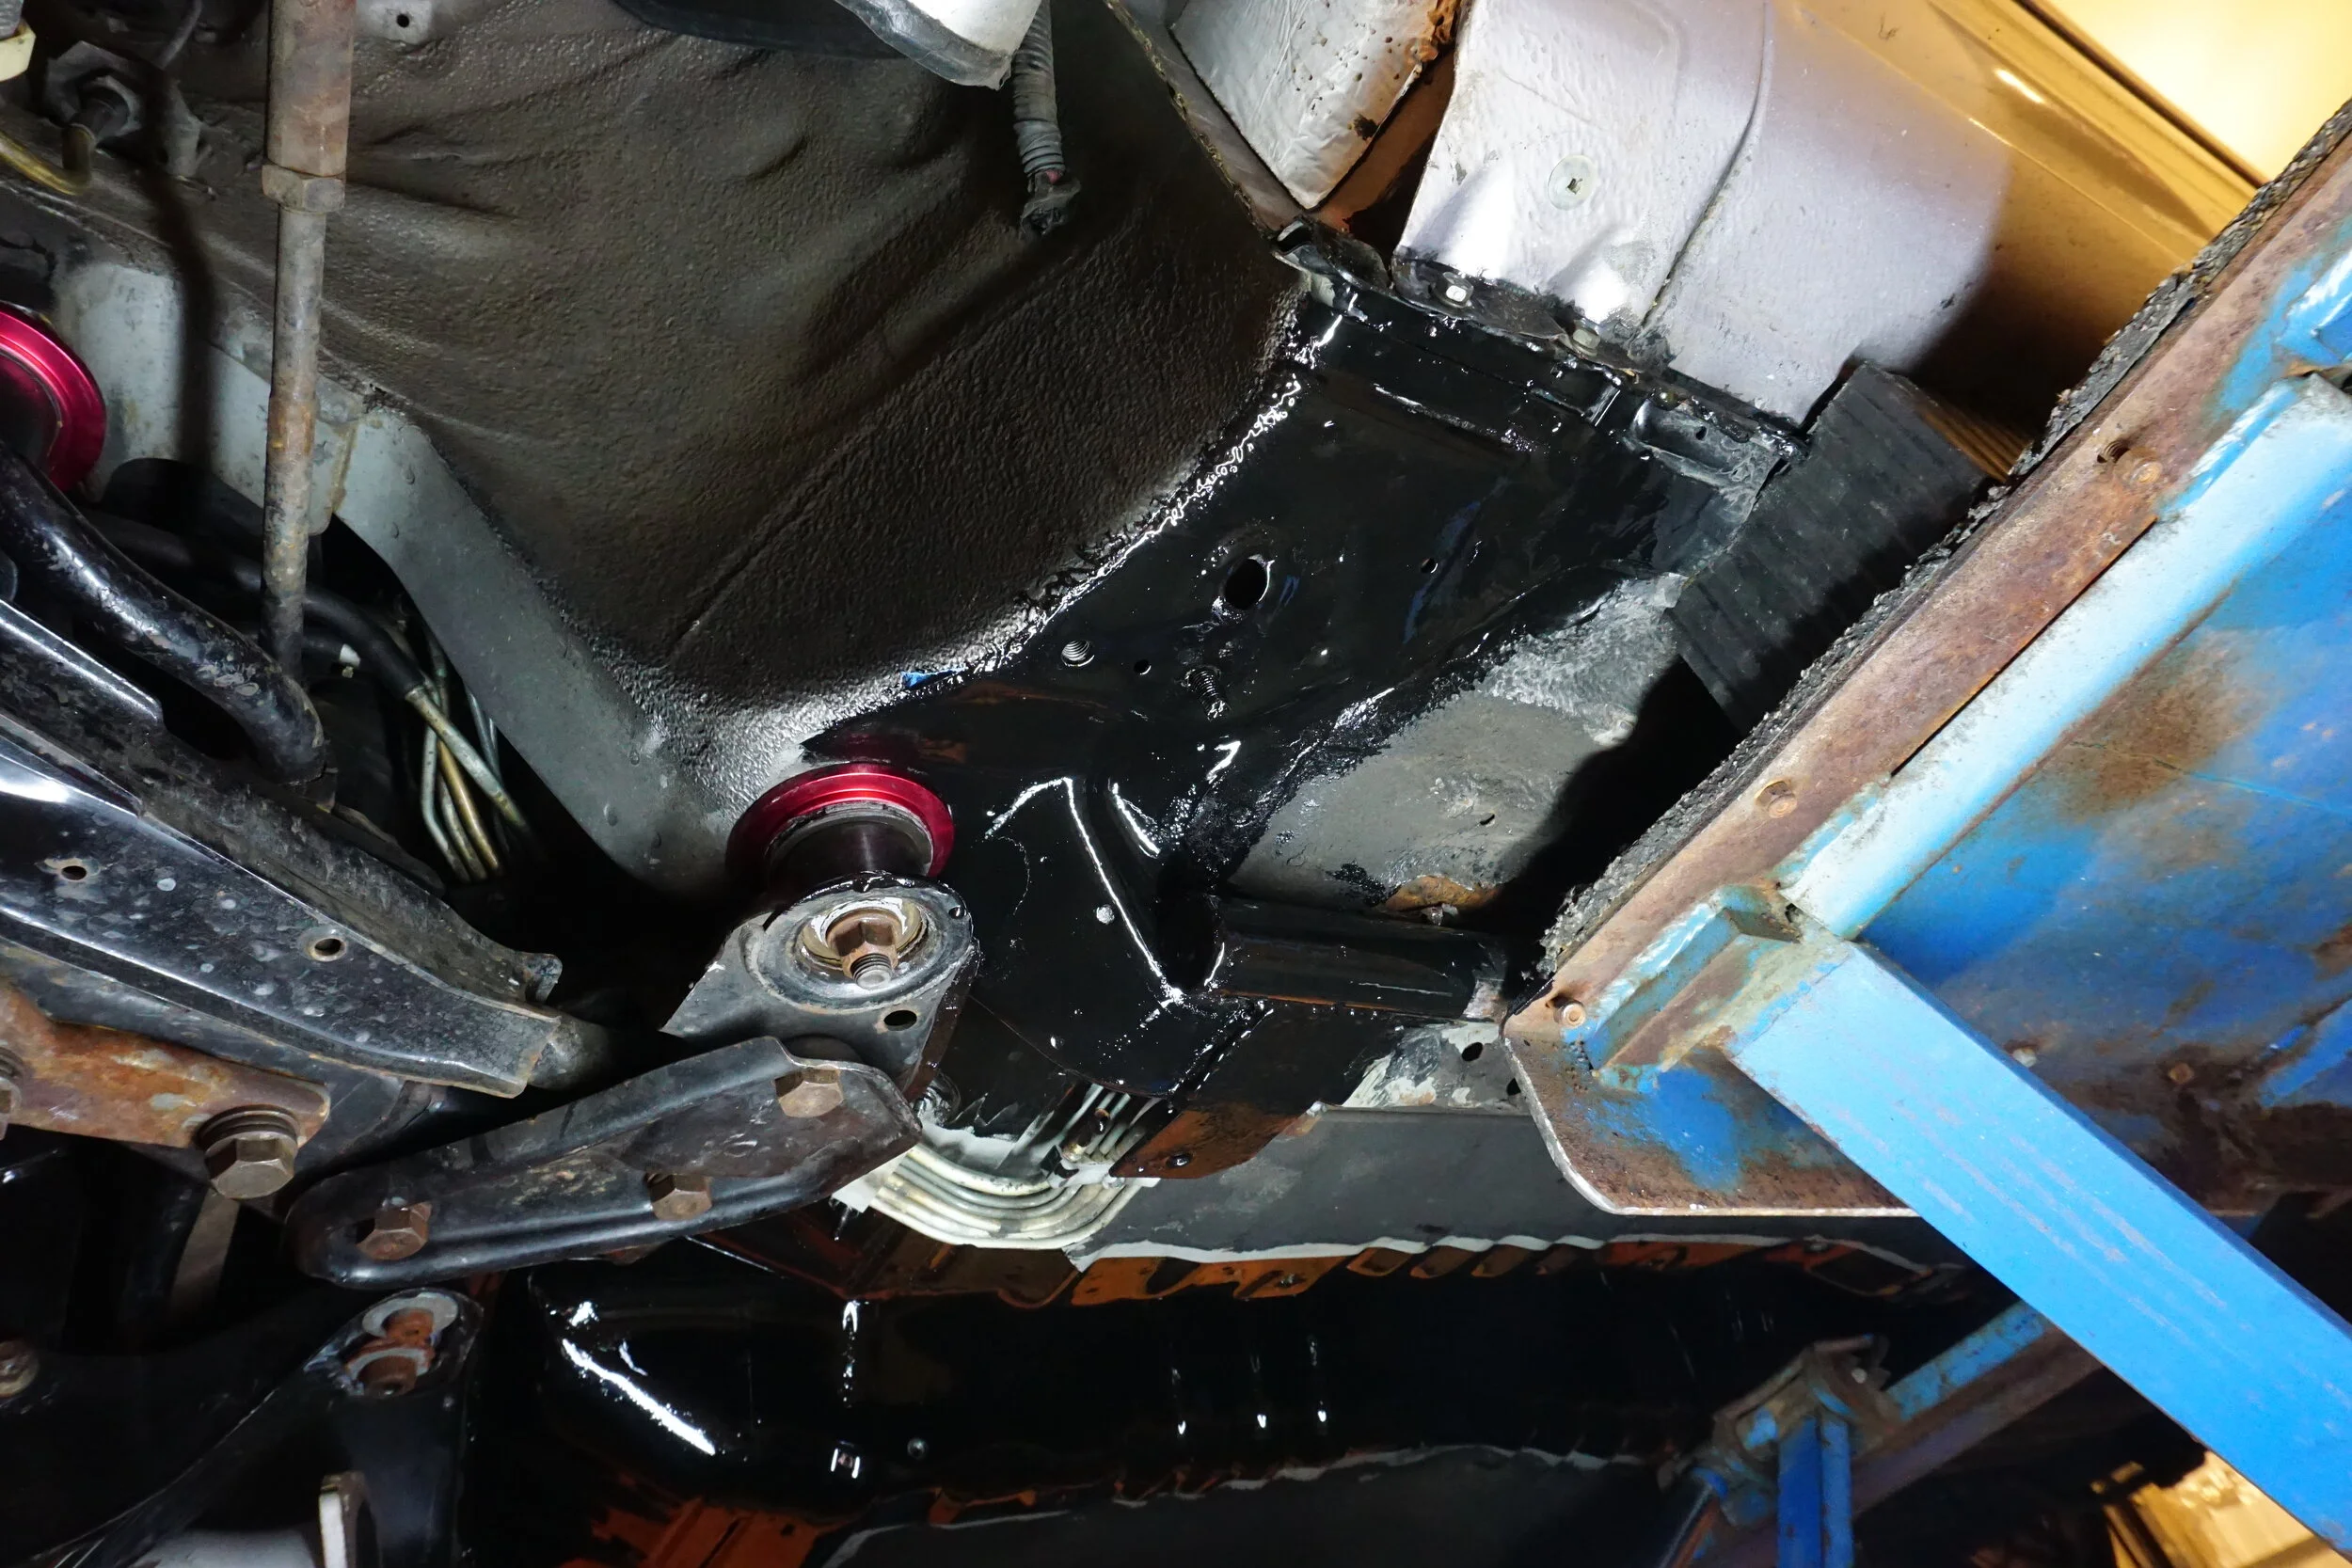
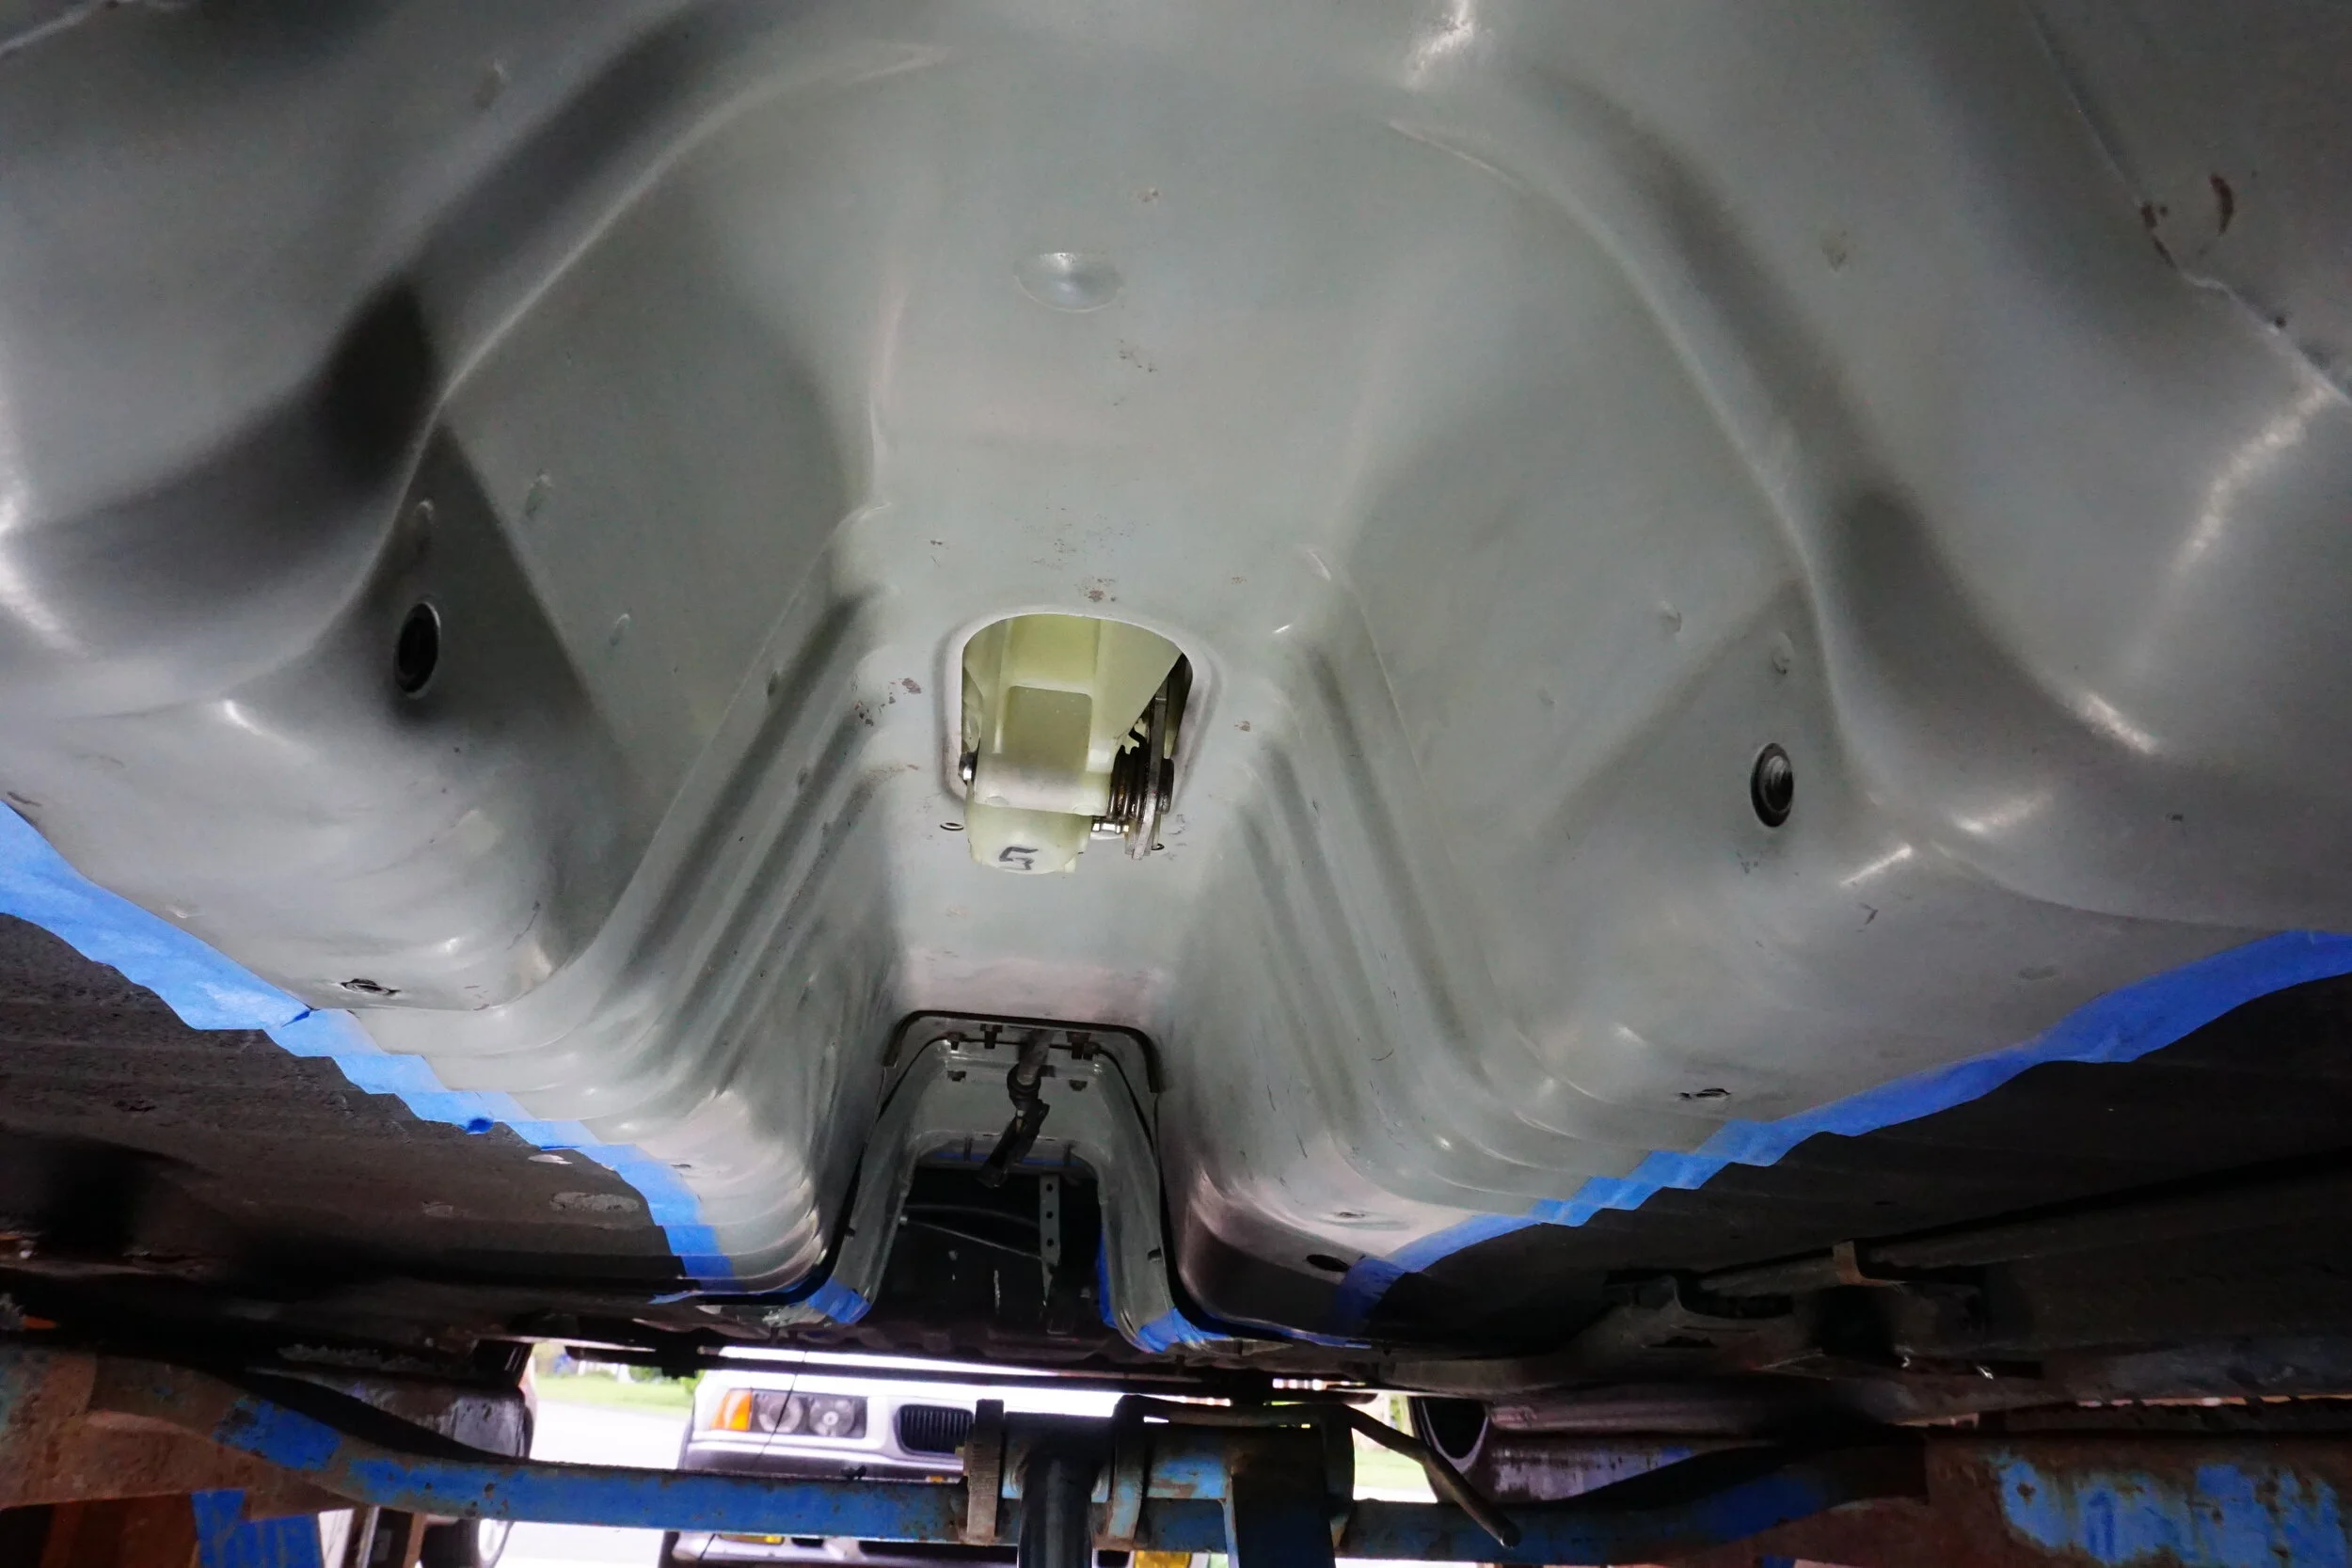
I painted as far forward as I could go up past the front subframe.
At waiting like a week for the POR15 to cure, it was time for the shielding. The adhesive on it is very sticky, so you kinda have to get things right the first time, because it really doesn't want to come off and be moved around. I traced out three main pieces using some cardboard to get the shapes pretty close, and laid them down from rear to front, so the piece in front would overlap the rear piece, so any rain/moisture couldn't be forced in from the front as I drive. I had to leave cutouts for the shifter and the e-brake cables, and used a roller tool to make sure it was firmly attached to the car. I then applied a layer of RTV all around the edges to prevent any moisture from working its way under it.

Then as another precaution I applied some good HVAC tape on top of the edges/RTV as another moisture barrier.

And NOW I'm ready to build that 3" exhaust.....I will be slapping a piece of shielding under the shifter assembly as well, so that will be protected.
I painted as far forward as I could go up past the front subframe.
At waiting like a week for the POR15 to cure, it was time for the shielding. The adhesive on it is very sticky, so you kinda have to get things right the first time, because it really doesn't want to come off and be moved around. I traced out three main pieces using some cardboard to get the shapes pretty close, and laid them down from rear to front, so the piece in front would overlap the rear piece, so any rain/moisture couldn't be forced in from the front as I drive. I had to leave cutouts for the shifter and the e-brake cables, and used a roller tool to make sure it was firmly attached to the car. I then applied a layer of RTV all around the edges to prevent any moisture from working its way under it.
Then as another precaution I applied some good HVAC tape on top of the edges/RTV as another moisture barrier.
And NOW I'm ready to build that 3" exhaust.....I will be slapping a piece of shielding under the shifter assembly as well, so that will be protected.
Last edited by 95maxrider; Jun 23, 2021 at 11:38 AM.
The junkyard gods have smiled upon me and I have been showered with their gifts!
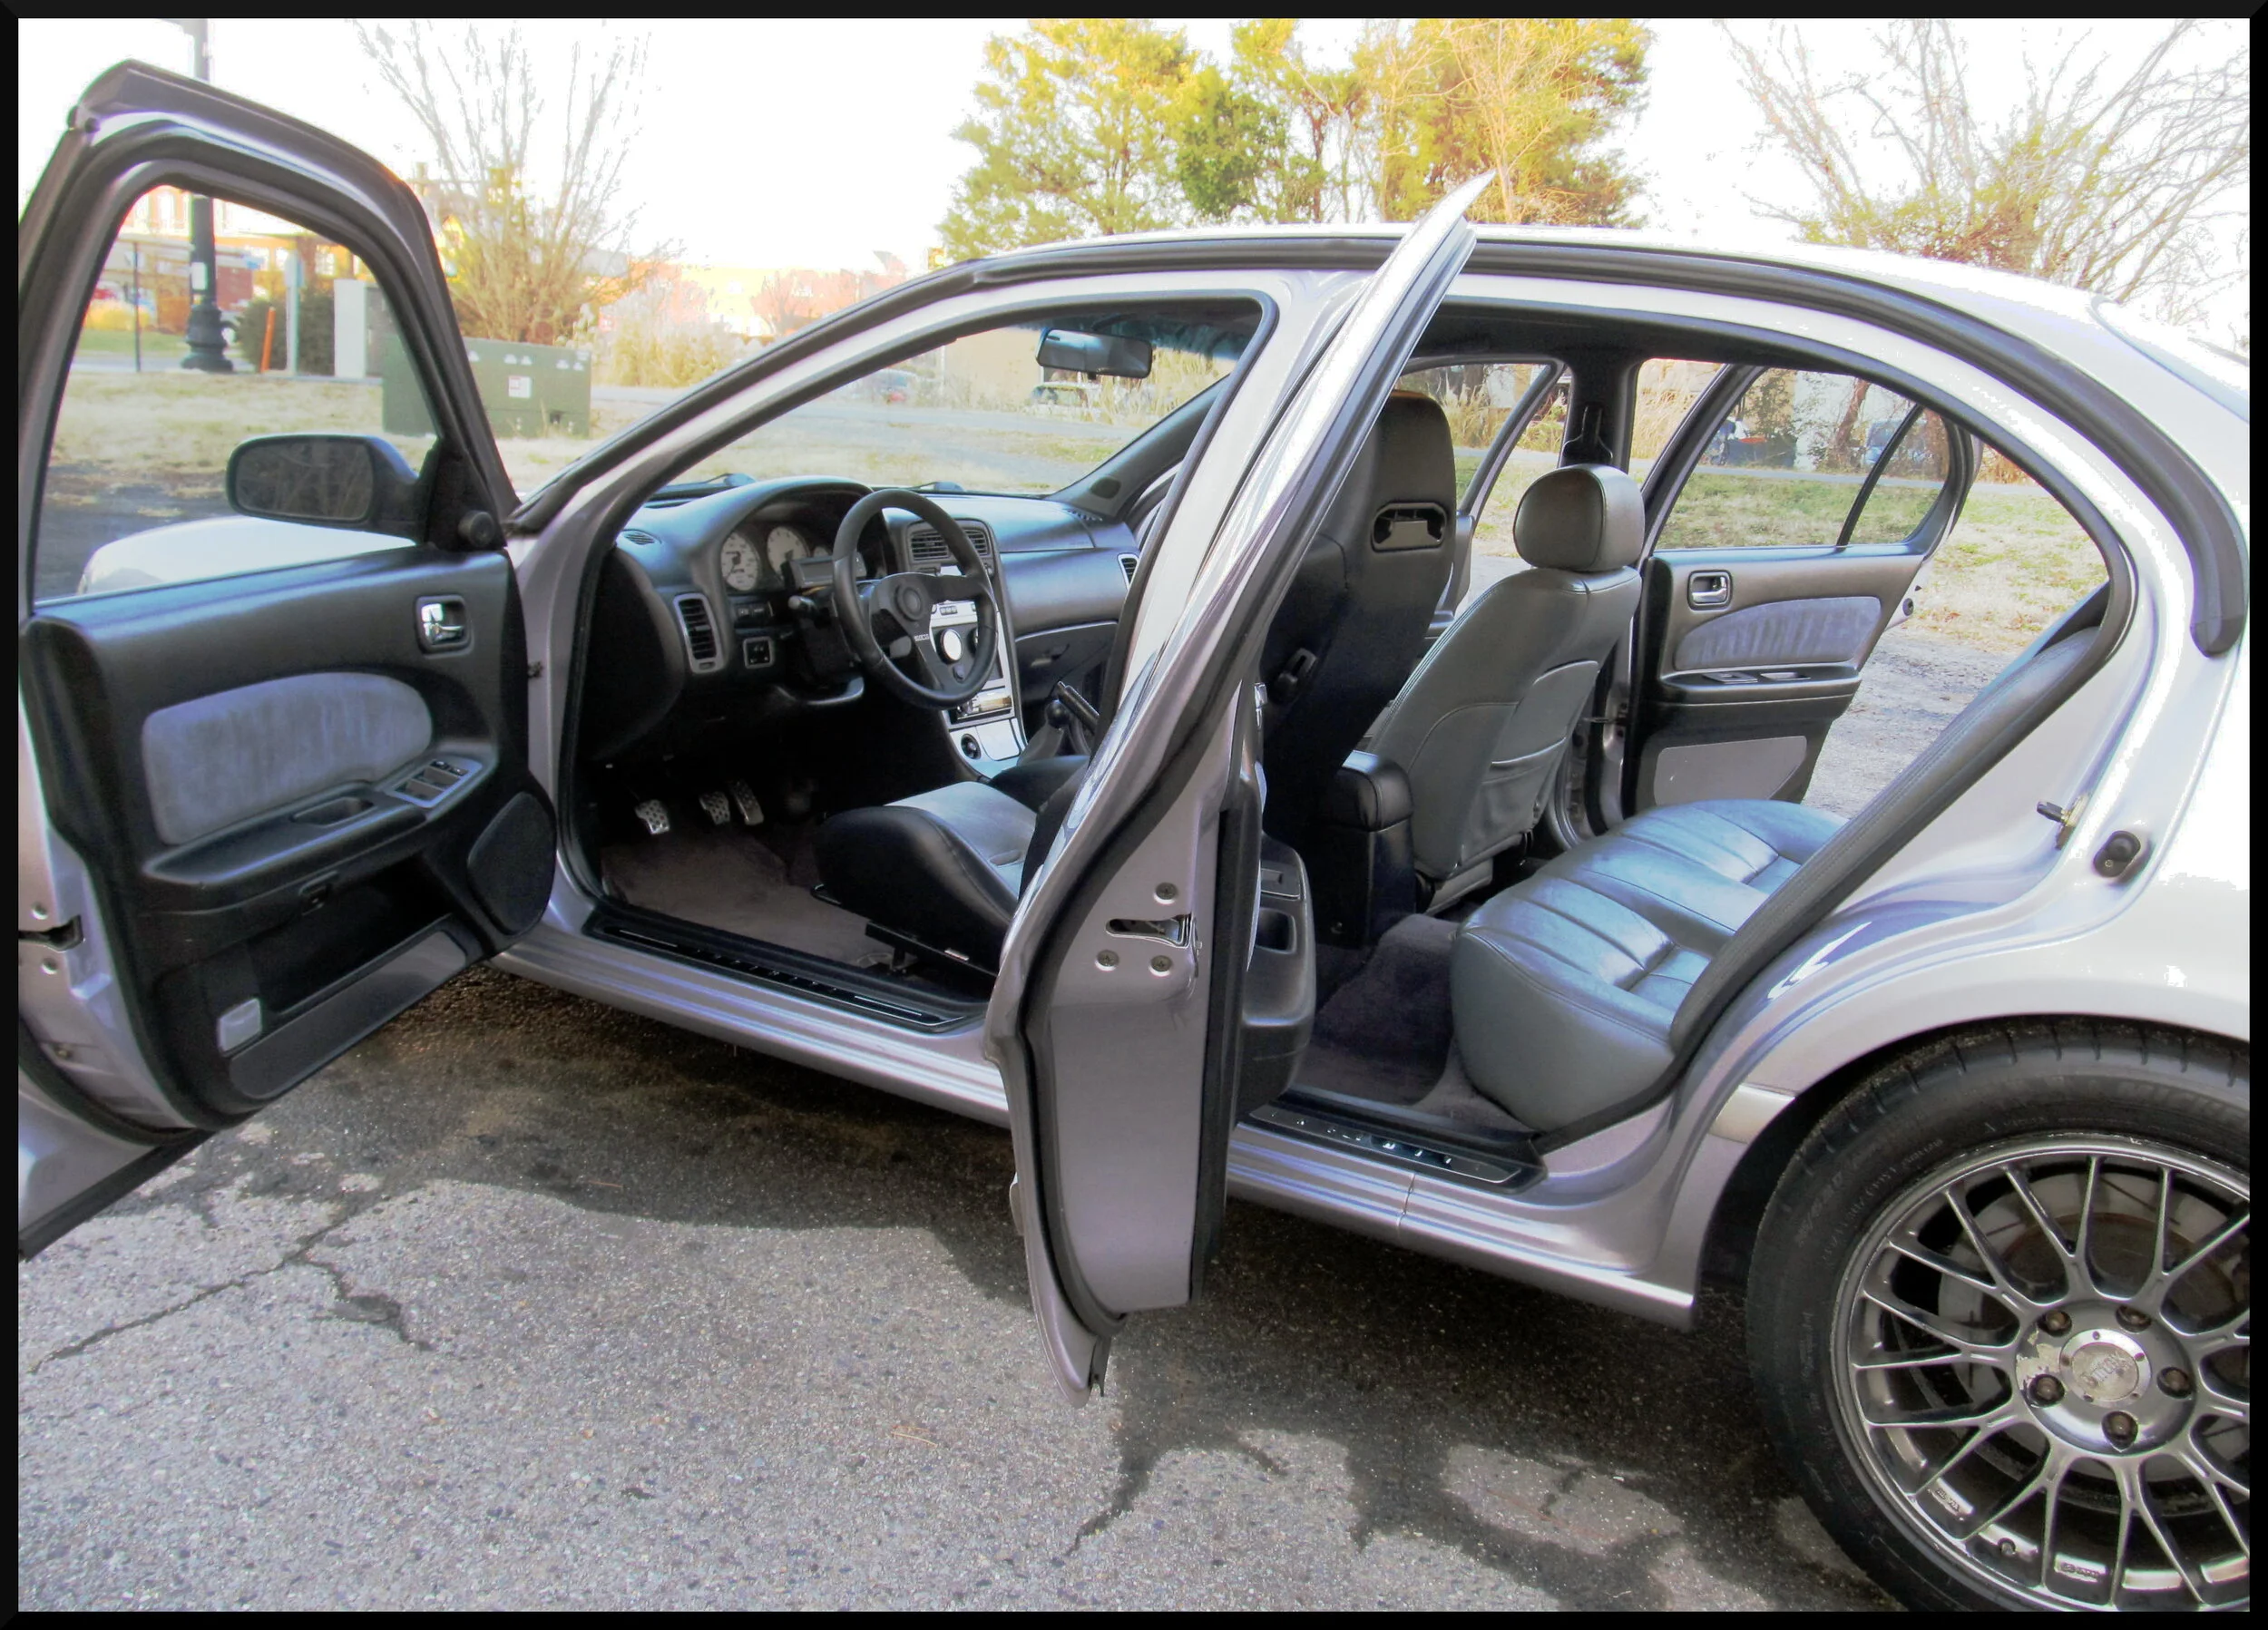
I went to the junkyards two weeks ago and was able to get a bunch of things for the FX and snagged 6MT shifter cables and center console from a 6th gen (to be sold). I also found an I30 with a non-rusty PS rear quarter panel, so I cut off a section of the wheel arch where I have rust on my car in case I need to weld something if mine is too rusted out to be saved. Part of what drew me to that yard was a 1996 I30 they had listed as silver, which would have meant it was the color of my car, which is quite rare. In looking at the pics of the car on the website, it looked like the interior of the car had white leather, but I figured it must have just been weird lighting making the tan leather and door look lighter than they really were. I approached the car and was immediately let down by the tan paint...ugh, another tan I30. But I opened the door and was greeted by the strangest thing I've ever seen on a 4th gen. This was a car that had a off-white/cream colored interior!
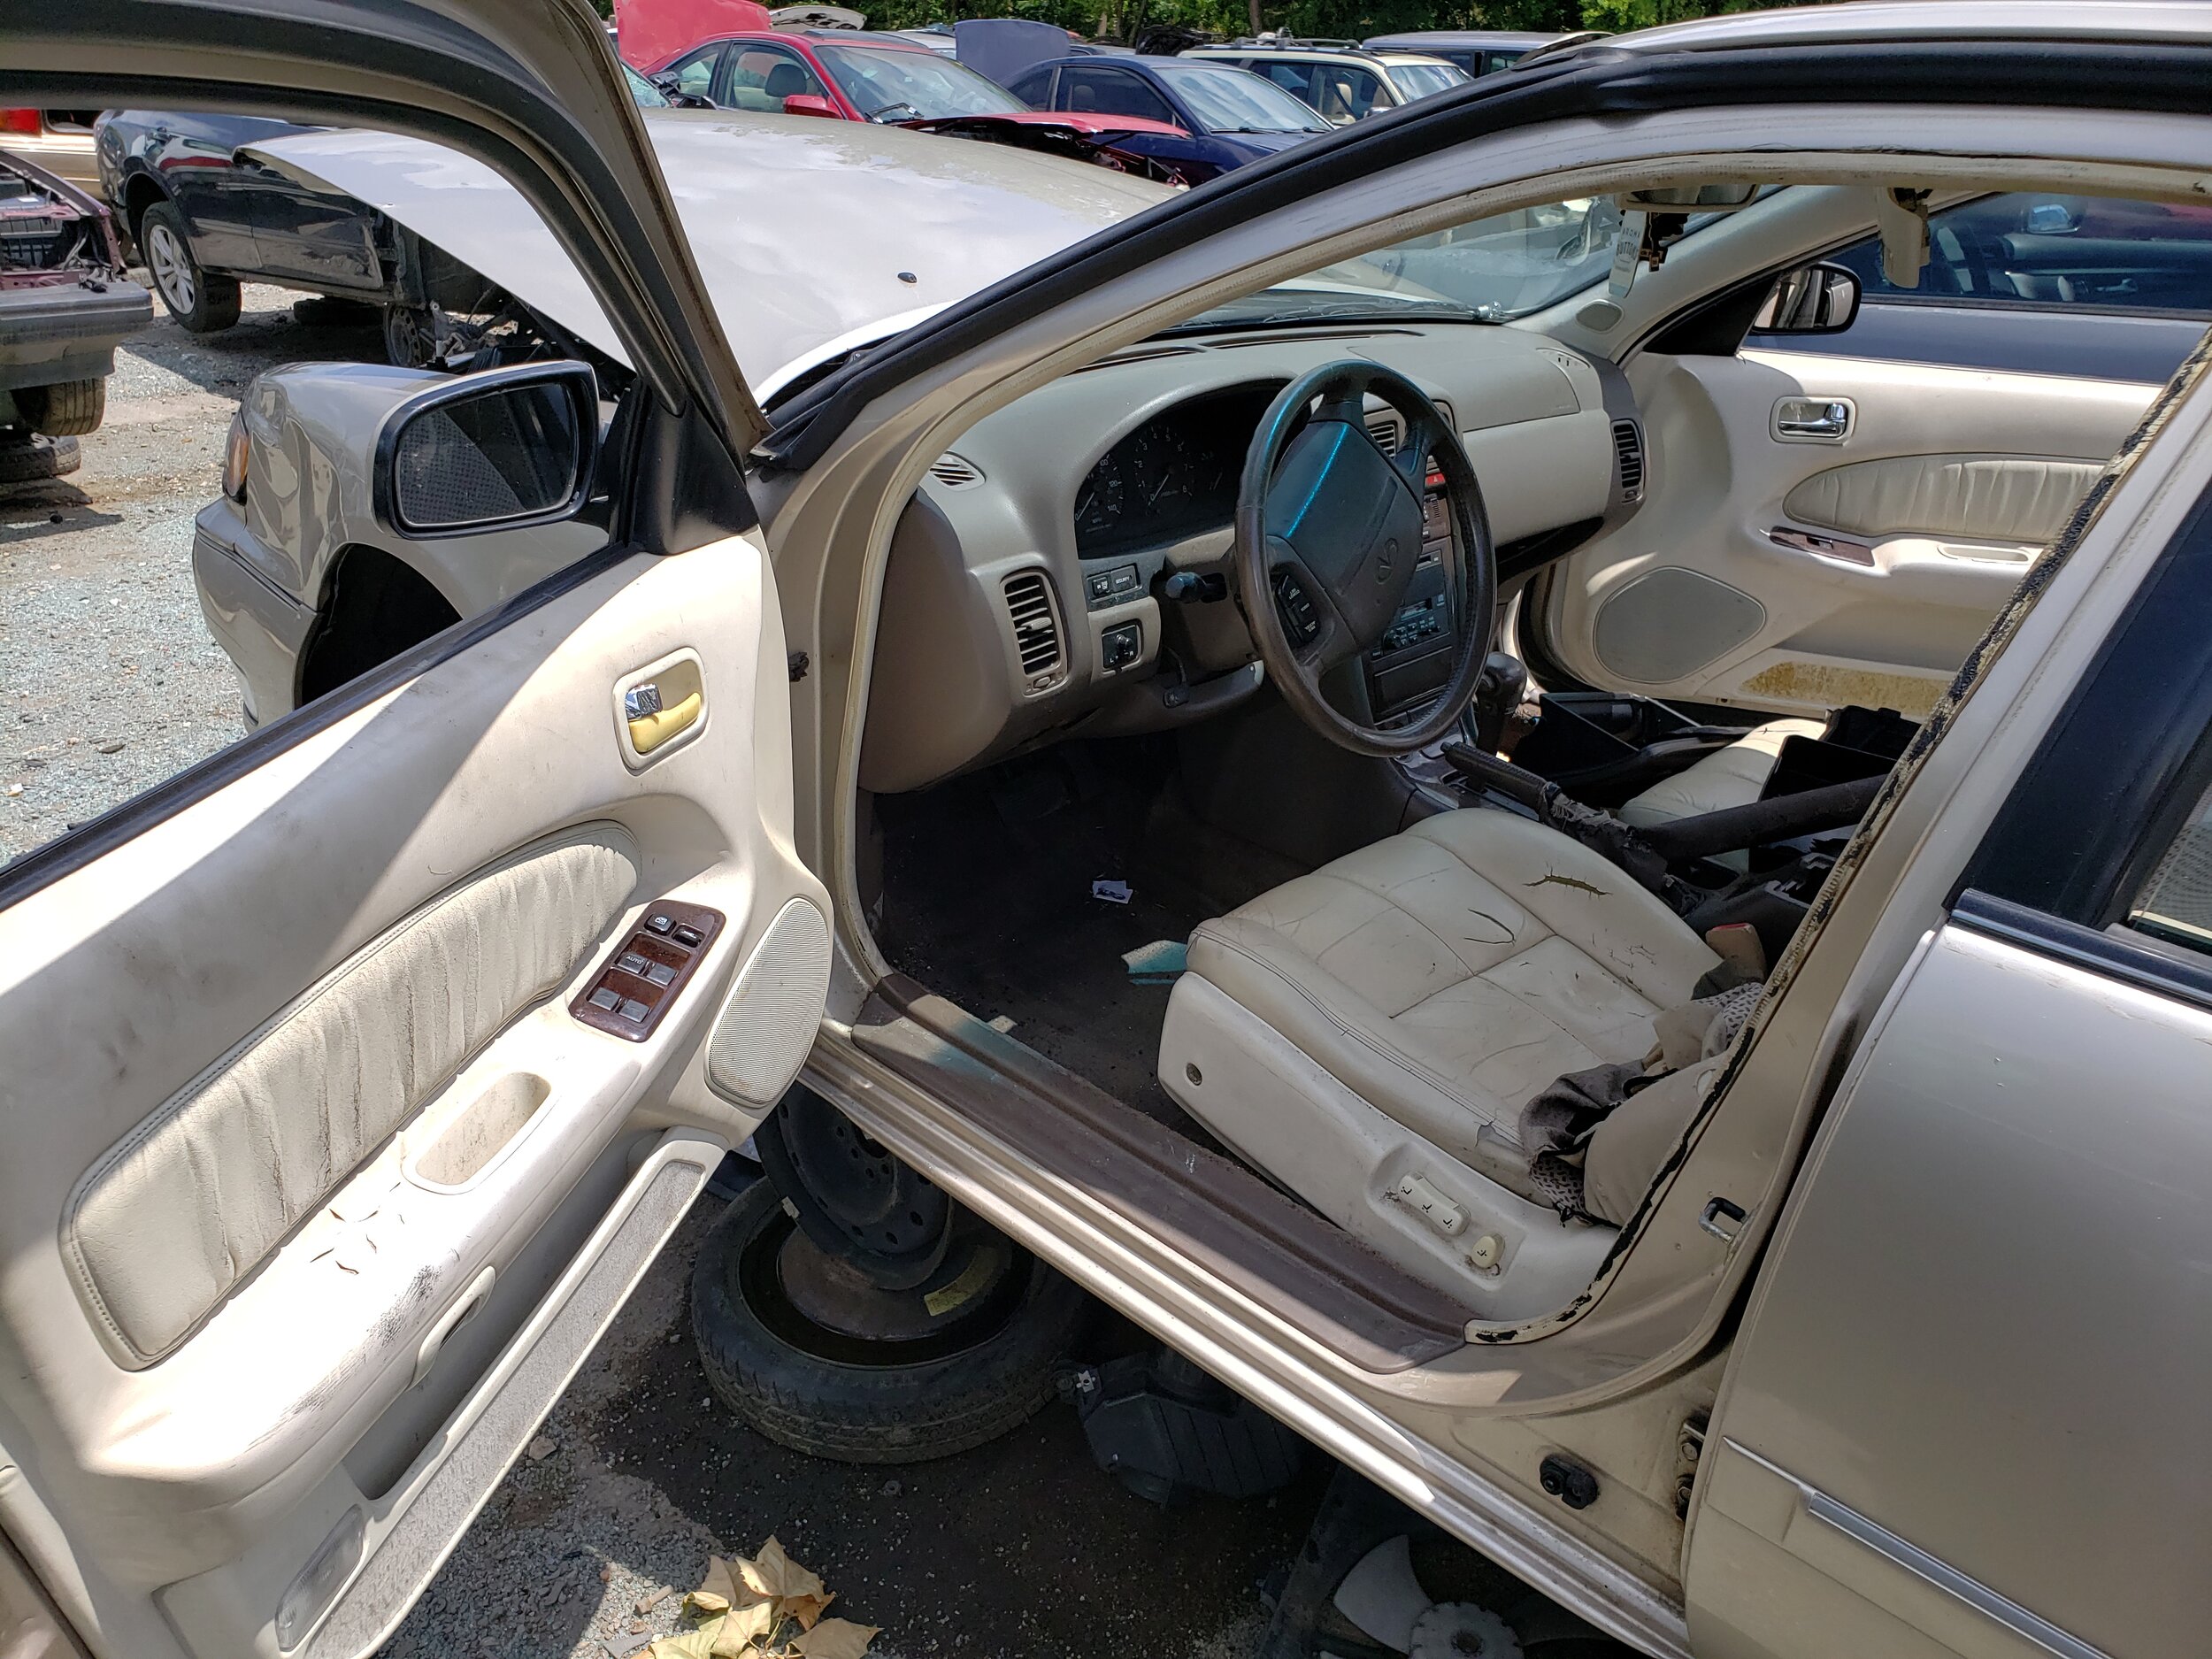
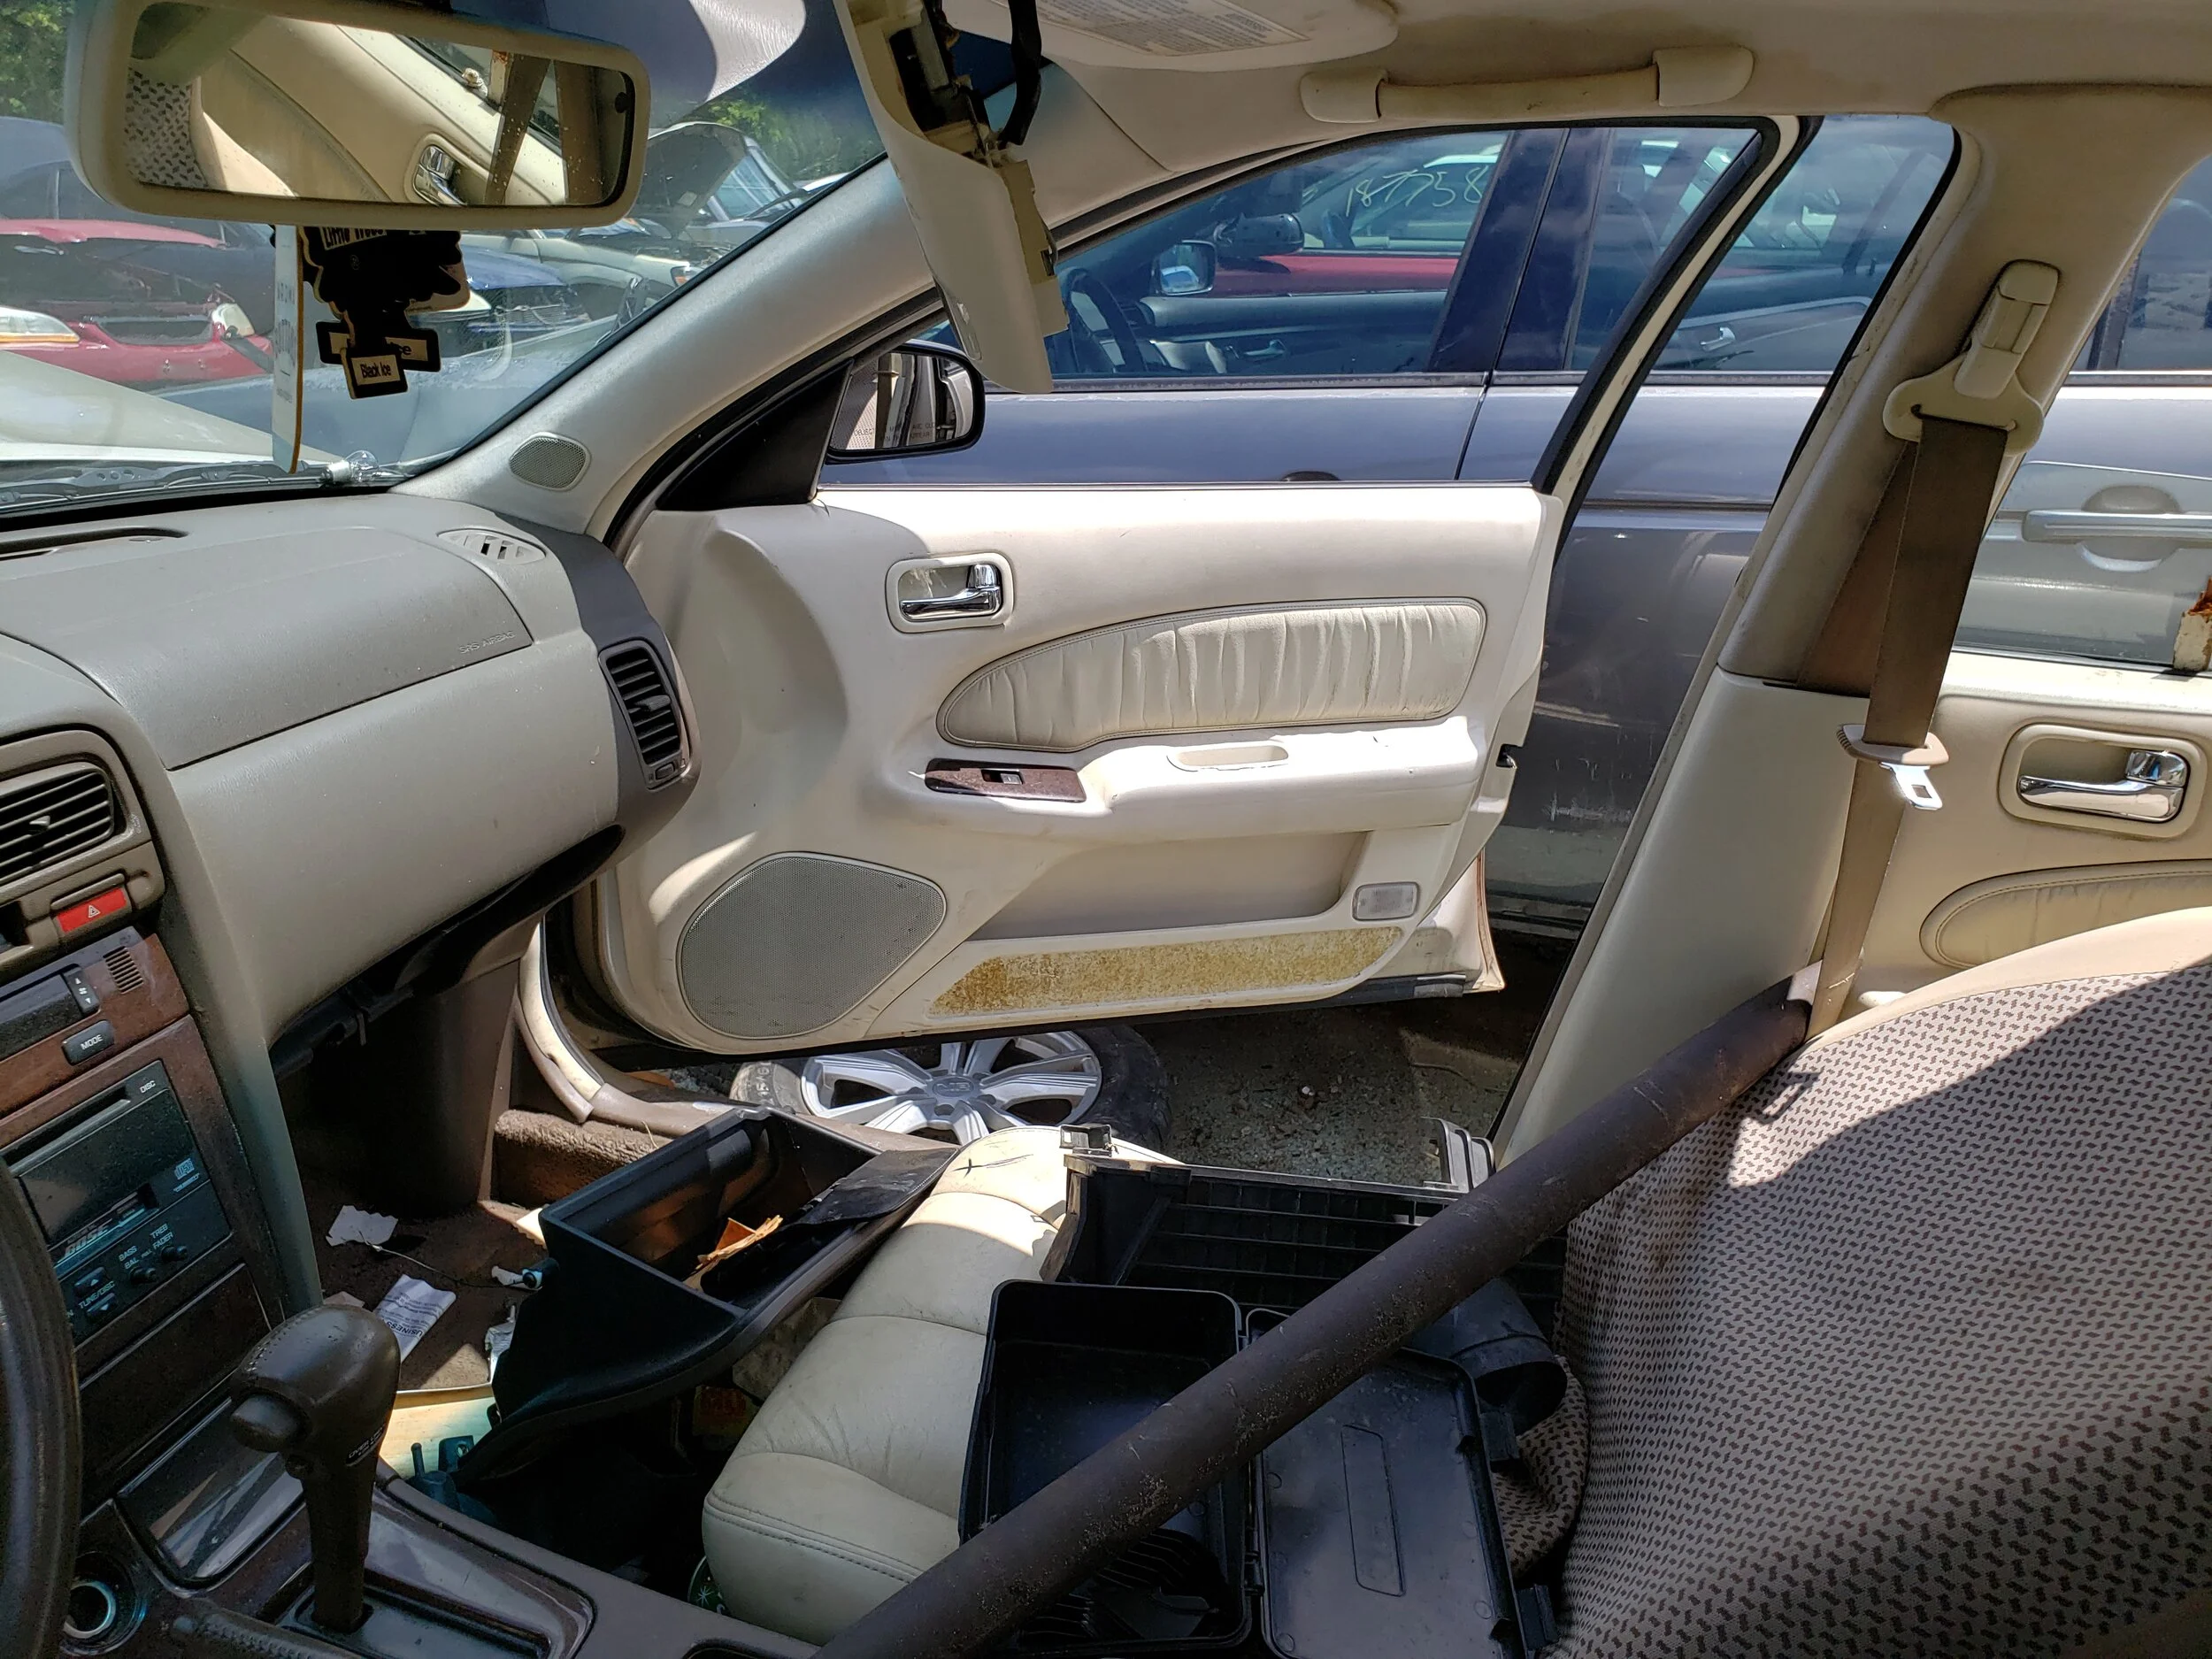


The dashboard was the normal tan color, but the seats, doors, and headliner were all this color I have never seen before. I was dumbfounded, but also giddy with excitement. What was I looking at, and how did such a thing exist? I've been doing the 4th gen thing for 20+ years, and I don't ever remember seeing such an interior before. If I had to guess, I would say 50% of cars had black interiors, 49% had tan, and 1% were that weird gray in some later 98-99 cars. Now my car was a little different since it had a black dash and doors, but a lighter gray leather that wasn't the same as what came in those later 98-99 cars. But this car was something entirely new, because not only was the leather a different color, but the doors were as well. All I can assume is that the first-year 1996 I30s had some weird options that didn't exist for Maximas and were gone by the '97 model year.
Unfortunately, the front door panels were trashed beyond repair, as was the driver's seat. The rear looked better, but due to an accident I couldn't open one of the rear doors to get a better look. All I could do was take pics and wonder how such a thing ever came to be.
--------------------
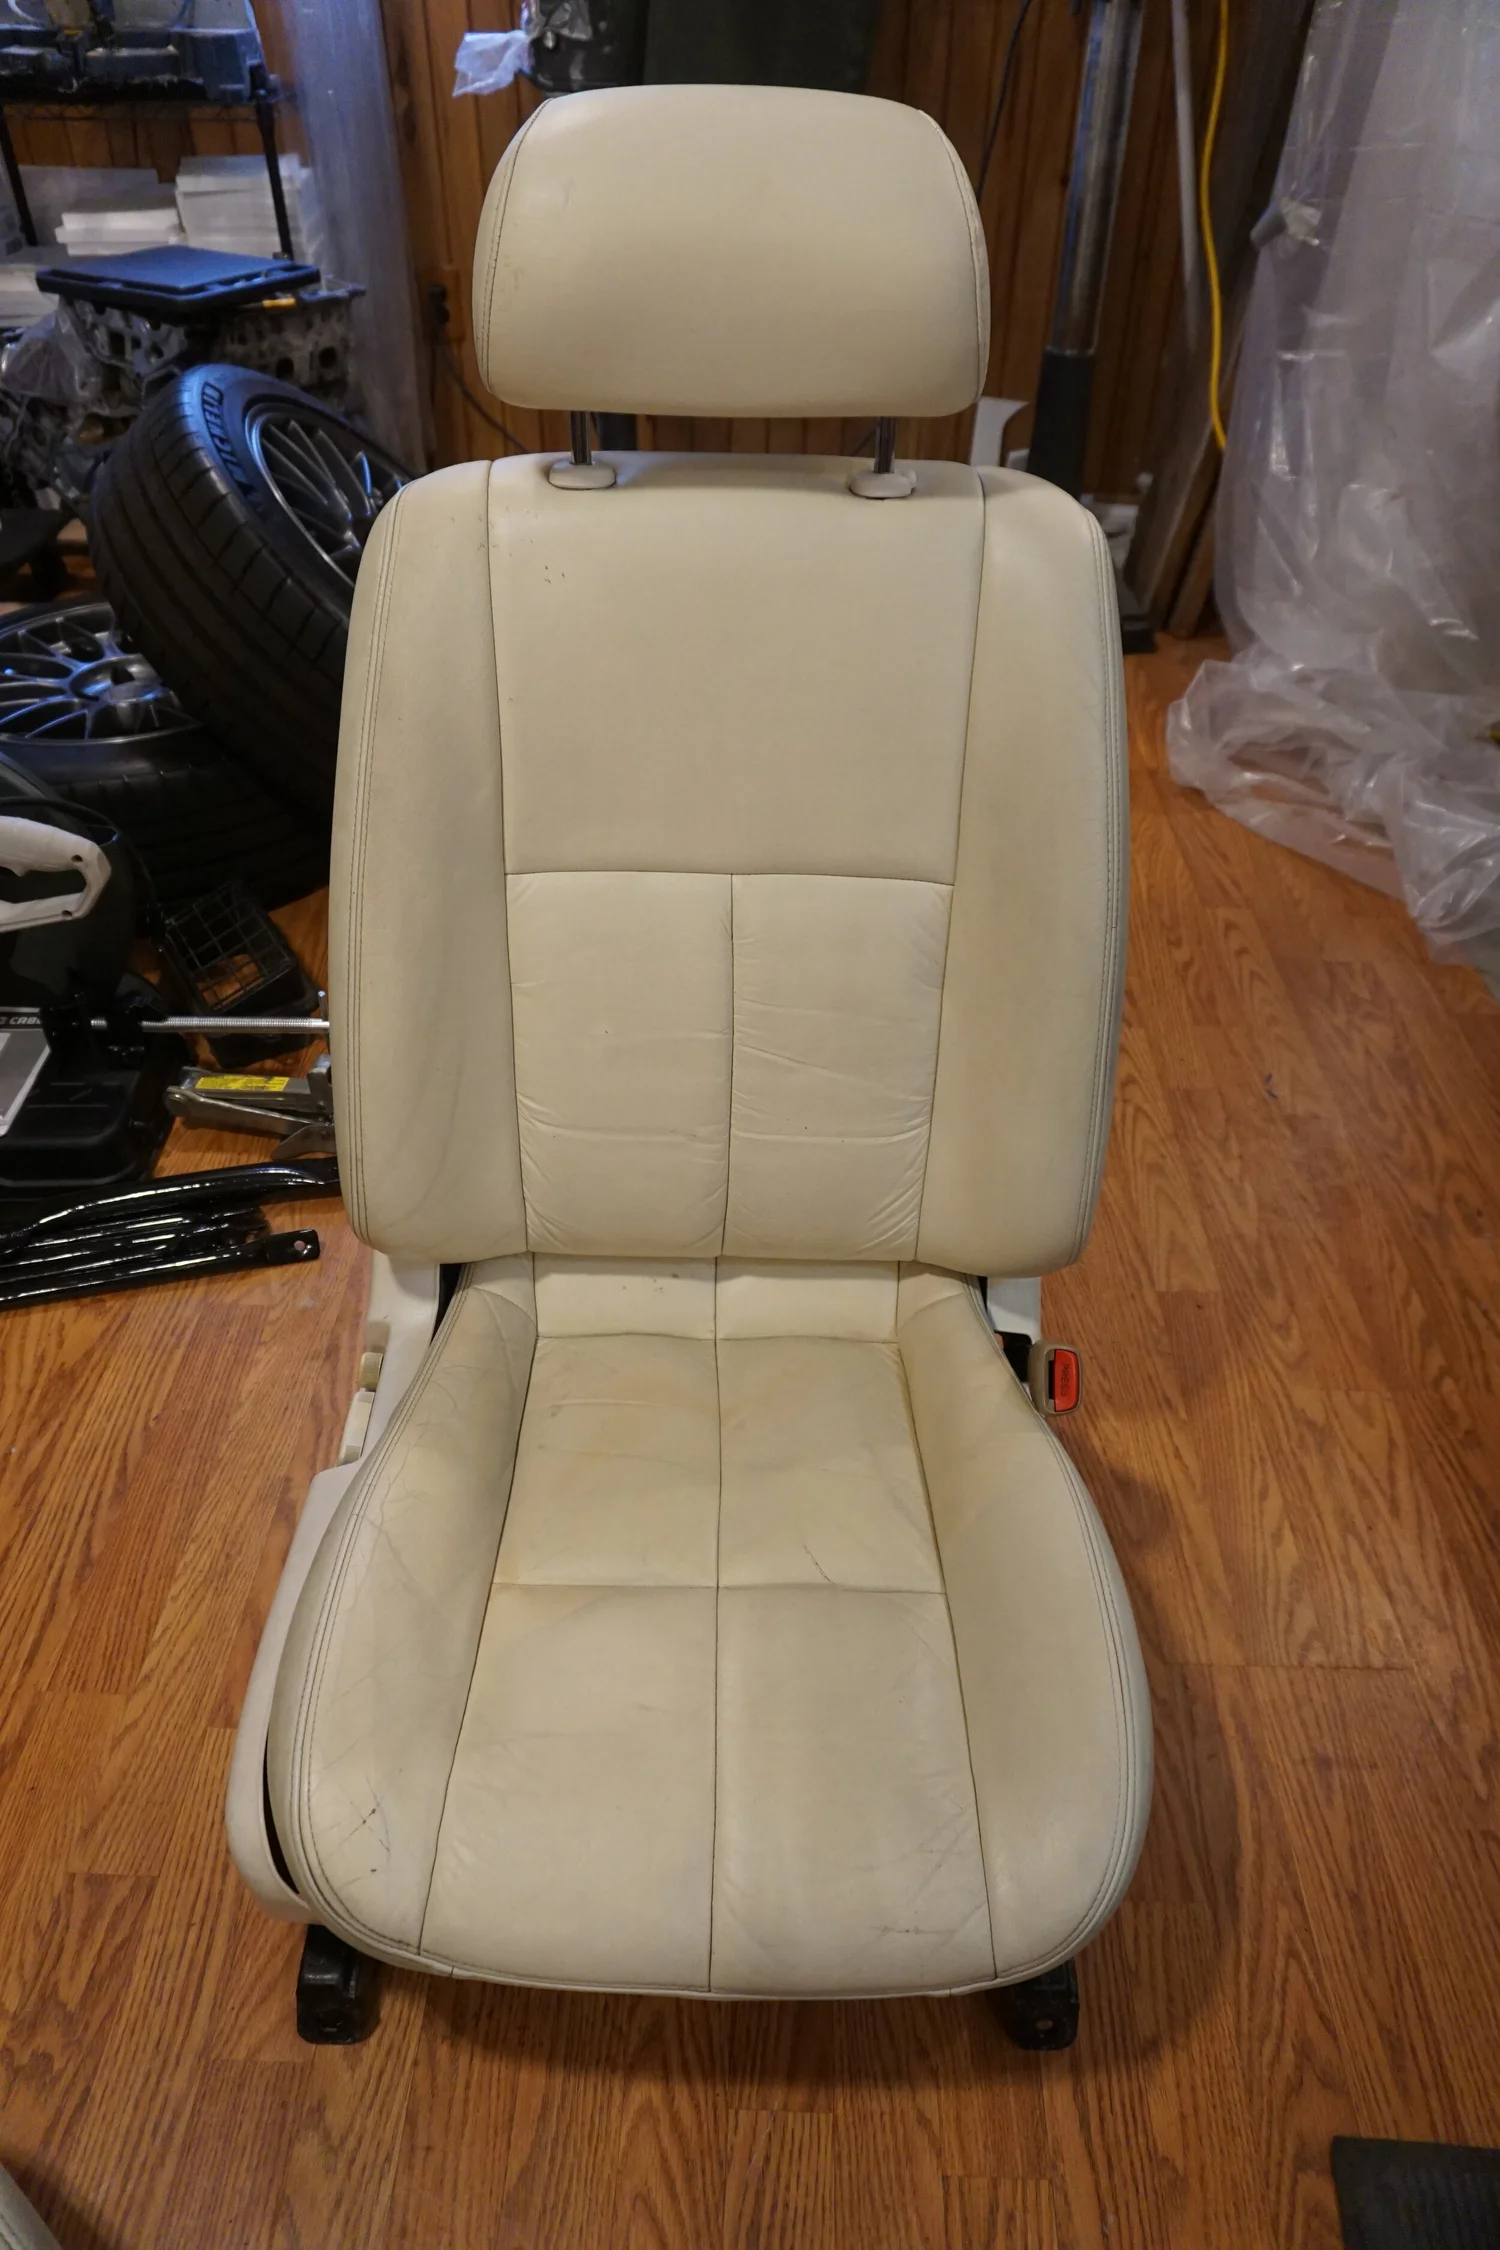
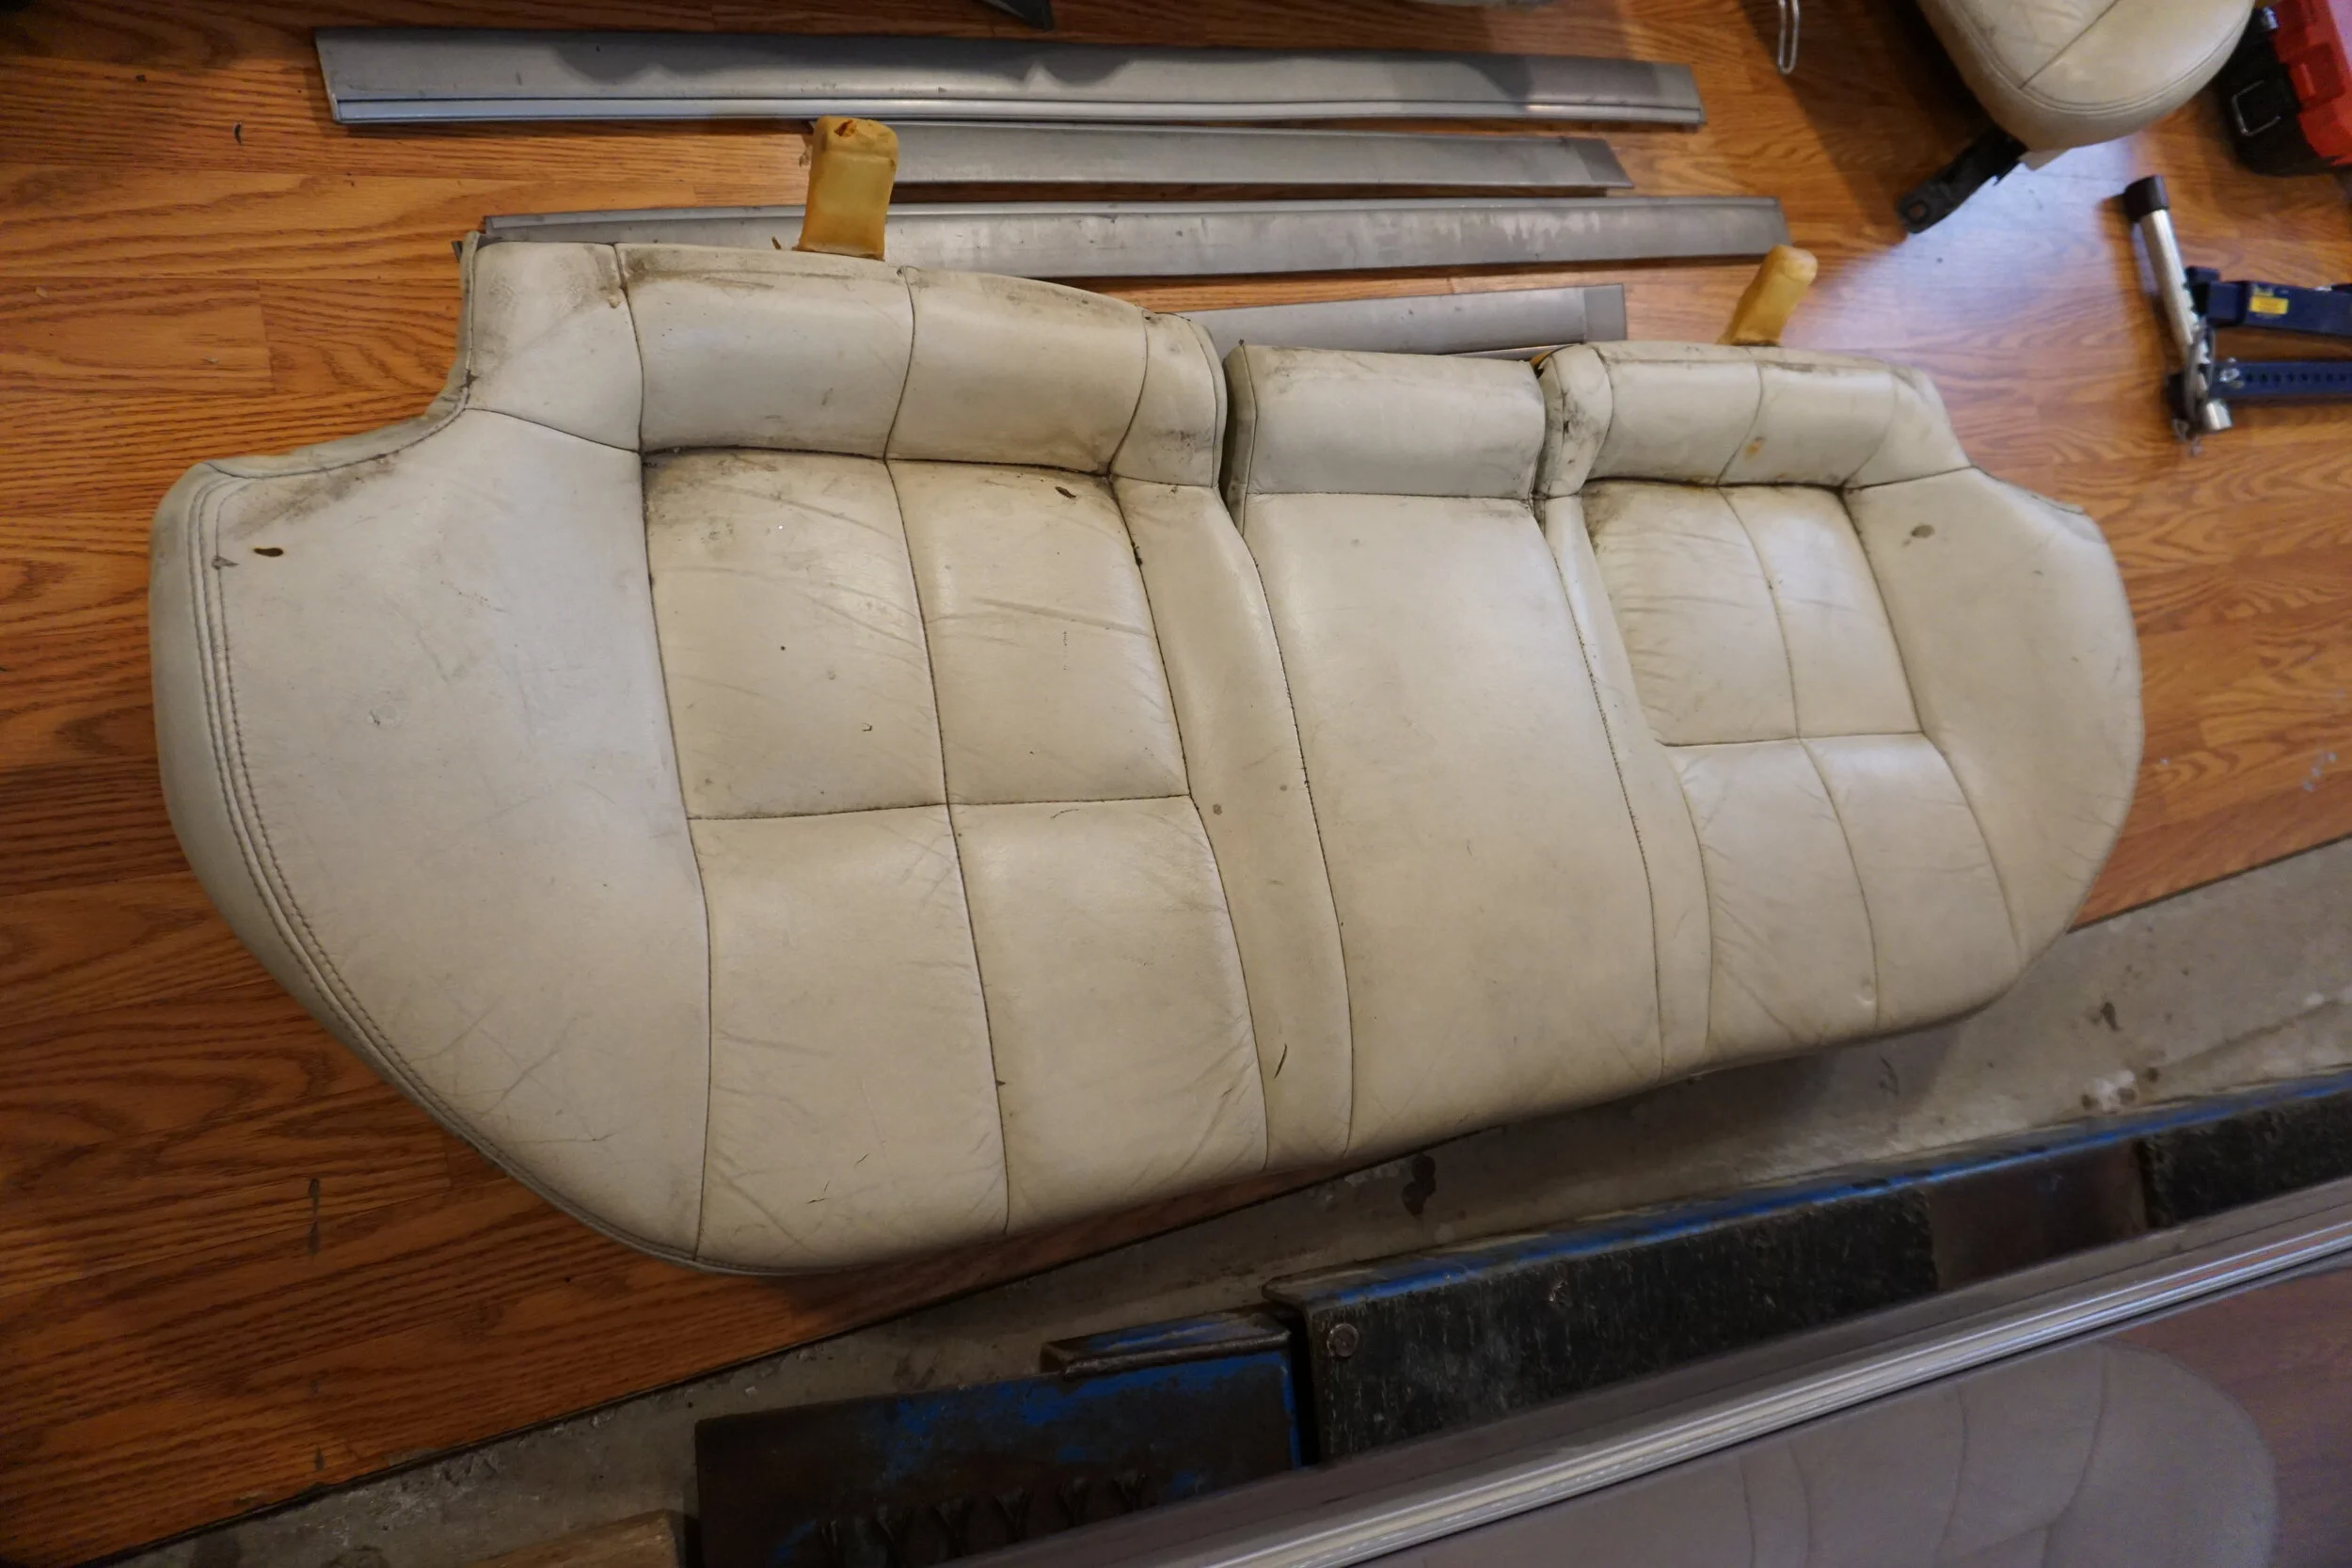
Over the course of that week I decided I wanted to go back to that yard since it had a 6MT 5.5th gen with everything still in the car, and I wanted to have a spare trans and also try to sell some of the accessories for profit. So back I went and I started off by pulling the trans and everything that goes with it. Everything went smoothly and my wheelbarrow was full of parts. But before I paid I went back to the unicorn I30 for another look. And I saw a passenger seat in pretty damn good shape with no rips in the leather, a back seat in similar condition, and rear door panels that just needed to be cleaned up. And I couldn't resist. I used my super pry bar to free up the rear door that was stuck shut and devised my plan. I remembered pics of the BMW Z4 concept car from a few years back, where the driver's side of the interior was black, and the passenger side was orange/brown, like so:

And even though it didn't really make a whole lot of sense given the color scheme of my car, I figured I would try something similar, just on a far less ambitious scale. Really, I just couldn't stand to let these rare pieces go to the crusher, never to be seen again. So I pulled the passenger seat, back seat, and rear door panels. Since I've got the Recaro in my car the trashed driver's seat wasn't really needed. It would have been great to grab the front door panels, but they were too far gone. But I could save the rest!
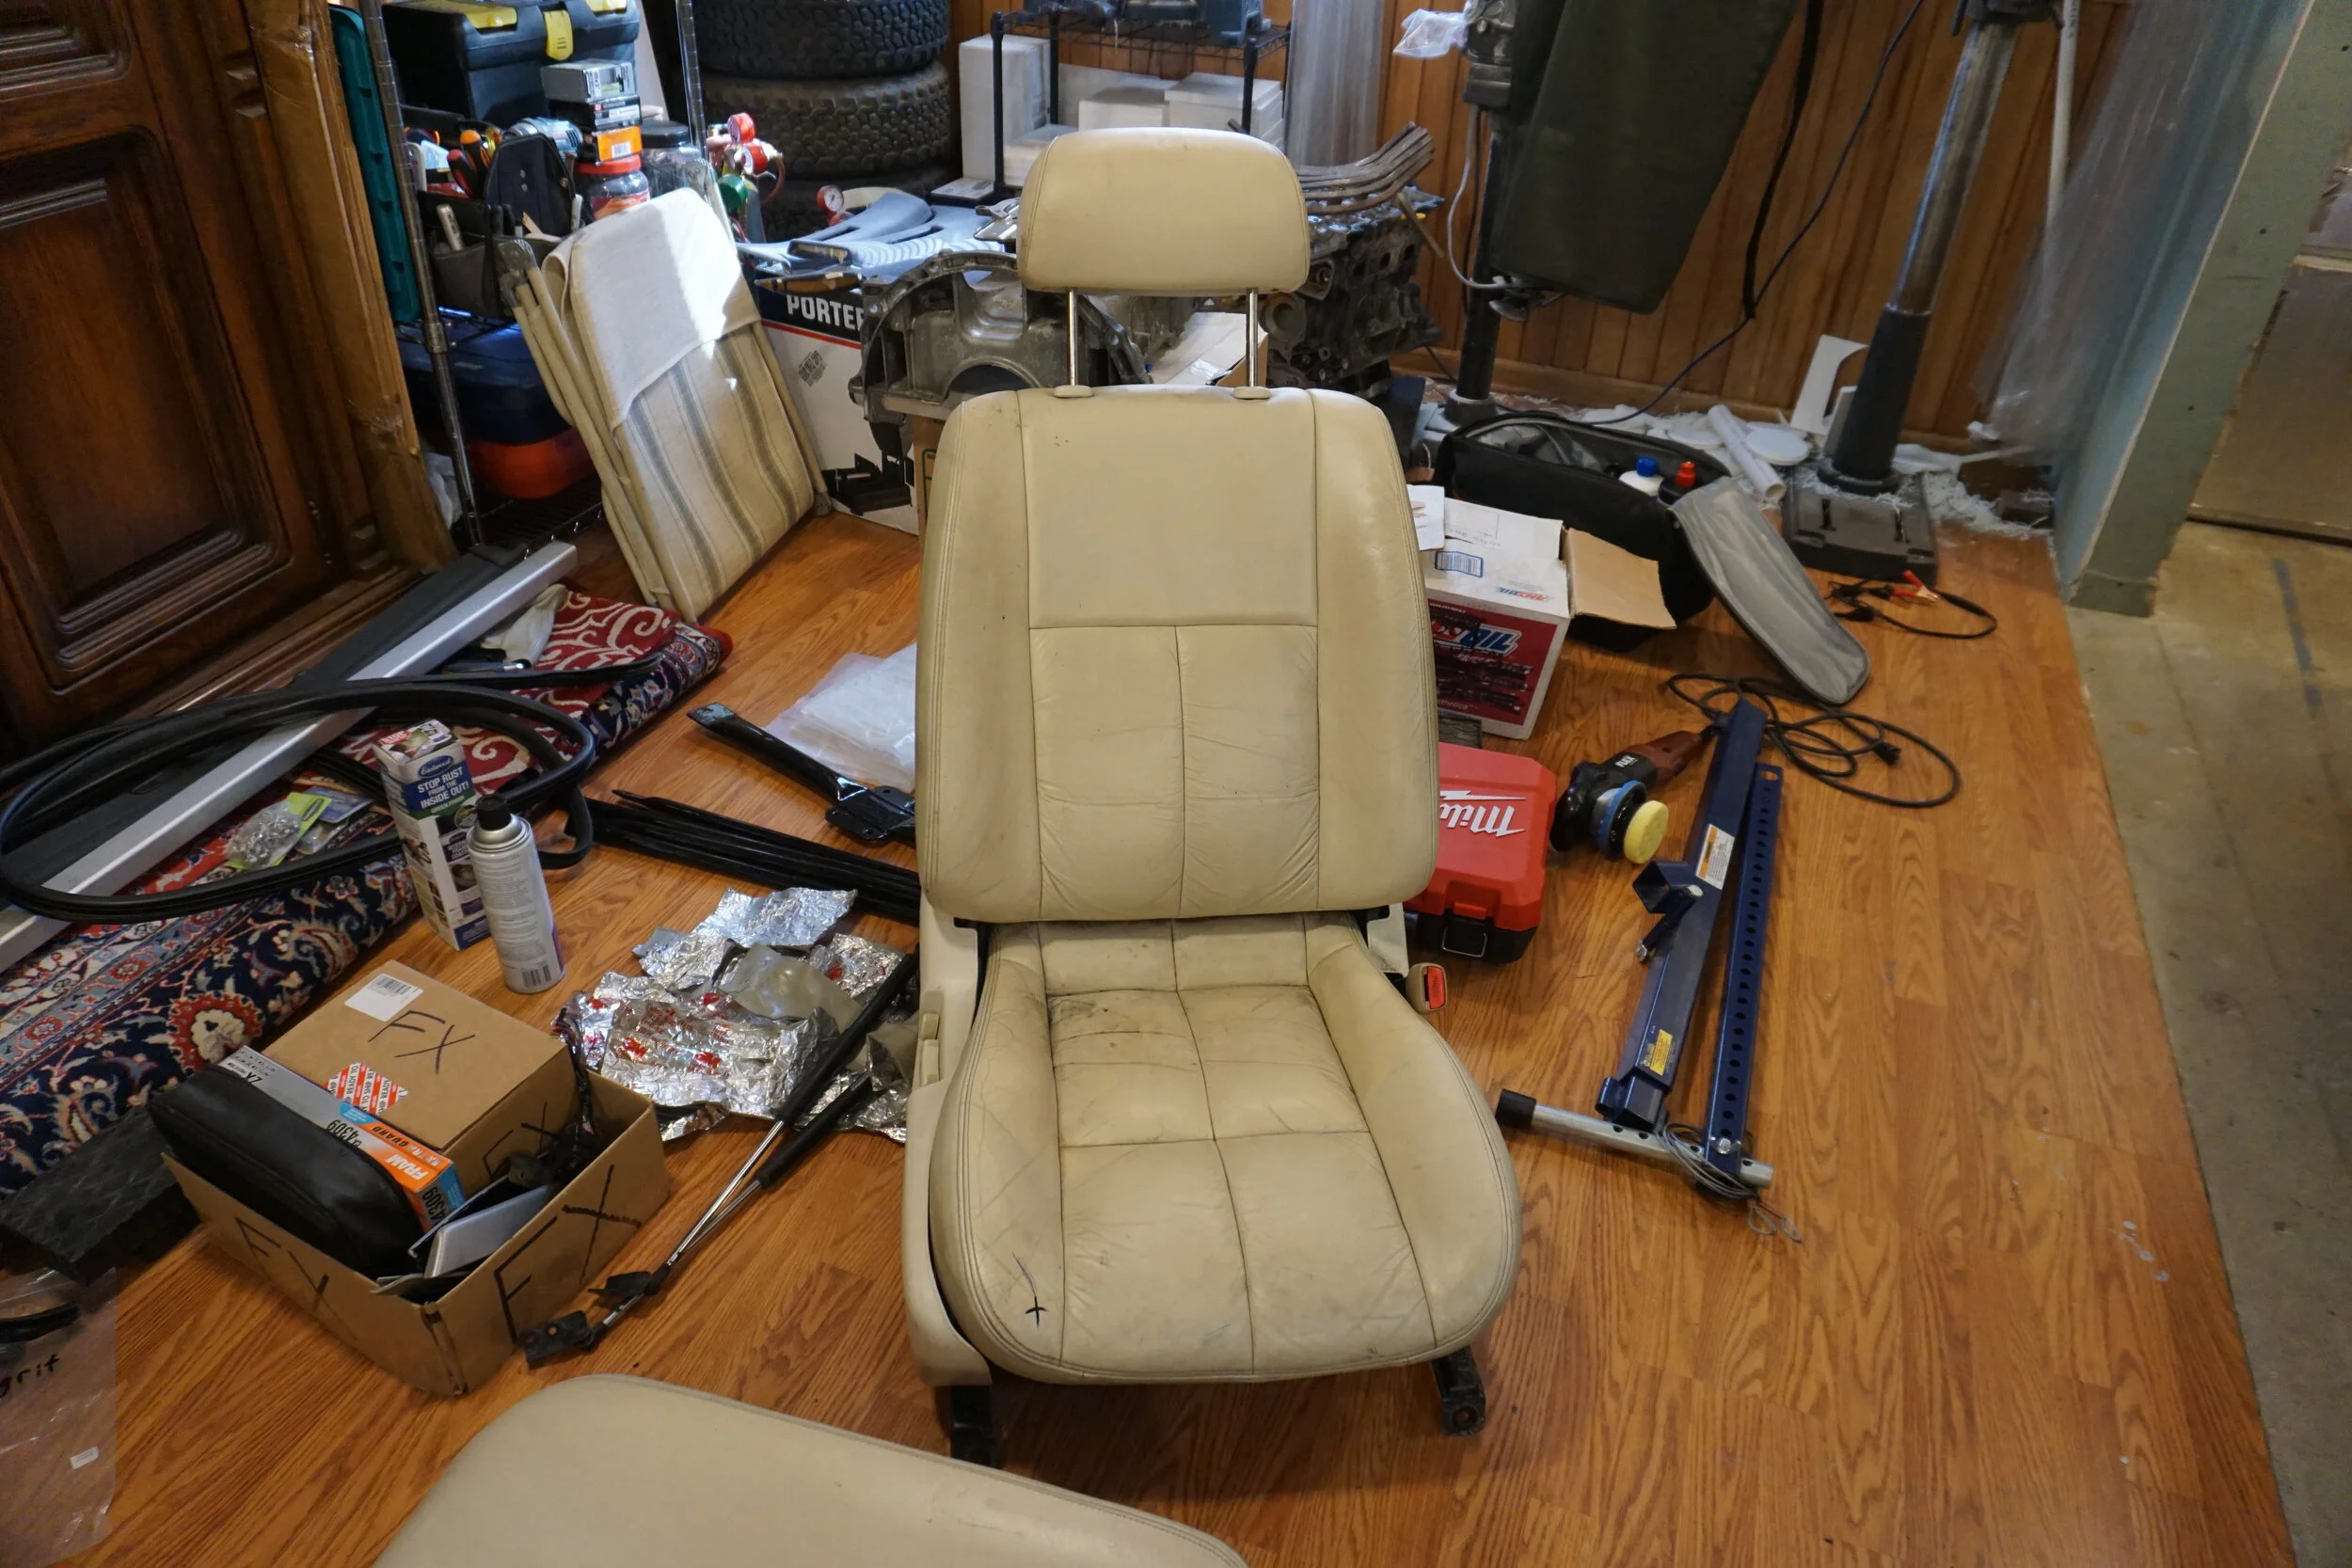
And that's how my garage turned into this:
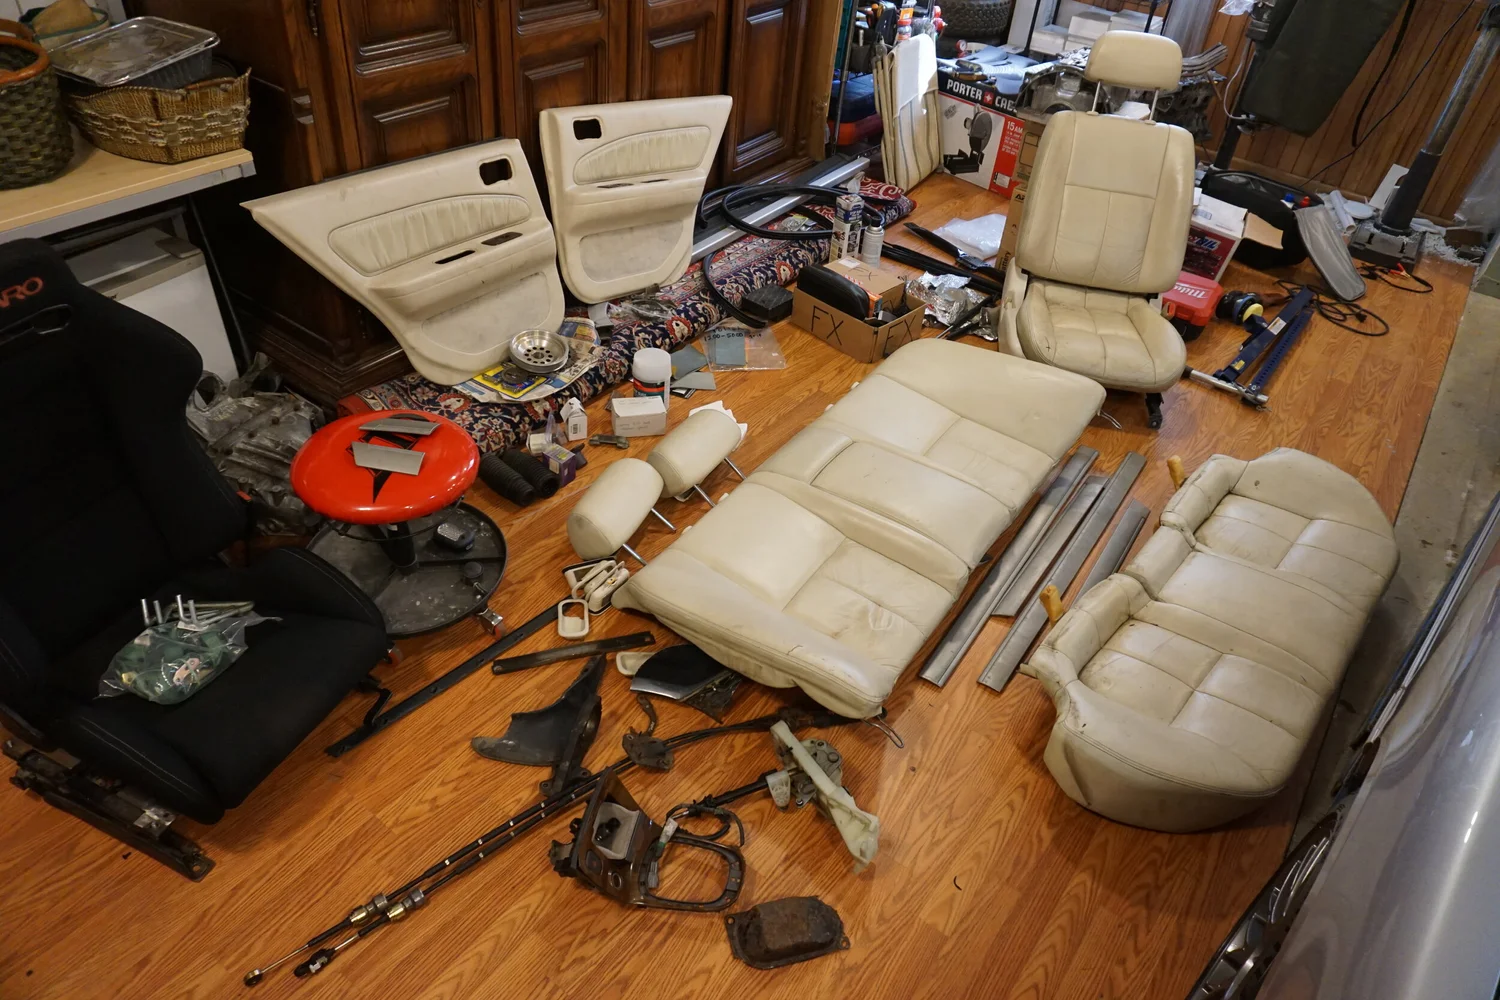
Also in that pile are the 5.5th gen 6MT parts, a cut off non-rusty DS I30 rear quarter panel (just in case), more silver I30 door bump guards, the factory underbody brace that goes under the b-pipe (that I haven't had on my car in god knows how long), and an I30 mud flap that should complete my set. I had built up enough "points" at the junkyard so my rather large purchase got a 20% off discount applied to it, which was quite nice.
So this begins the rather lengthy process of cleaning up all these parts and installing them in my car, much to the chagrin of my lovely wife, who couldn't for the life of her understand why I would bring home this interior since it doesn't exactly "go with" my current interior. She's pretty good about me bringing home stuff from the junkyard, but this was just a little too much, given how I've already filled up all of our storage spaces with other stuff. Oh well, she'll get over it. Join me, as I go on a wild adventure!
I went to the junkyards two weeks ago and was able to get a bunch of things for the FX and snagged 6MT shifter cables and center console from a 6th gen (to be sold). I also found an I30 with a non-rusty PS rear quarter panel, so I cut off a section of the wheel arch where I have rust on my car in case I need to weld something if mine is too rusted out to be saved. Part of what drew me to that yard was a 1996 I30 they had listed as silver, which would have meant it was the color of my car, which is quite rare. In looking at the pics of the car on the website, it looked like the interior of the car had white leather, but I figured it must have just been weird lighting making the tan leather and door look lighter than they really were. I approached the car and was immediately let down by the tan paint...ugh, another tan I30. But I opened the door and was greeted by the strangest thing I've ever seen on a 4th gen. This was a car that had a off-white/cream colored interior!
The dashboard was the normal tan color, but the seats, doors, and headliner were all this color I have never seen before. I was dumbfounded, but also giddy with excitement. What was I looking at, and how did such a thing exist? I've been doing the 4th gen thing for 20+ years, and I don't ever remember seeing such an interior before. If I had to guess, I would say 50% of cars had black interiors, 49% had tan, and 1% were that weird gray in some later 98-99 cars. Now my car was a little different since it had a black dash and doors, but a lighter gray leather that wasn't the same as what came in those later 98-99 cars. But this car was something entirely new, because not only was the leather a different color, but the doors were as well. All I can assume is that the first-year 1996 I30s had some weird options that didn't exist for Maximas and were gone by the '97 model year.
Unfortunately, the front door panels were trashed beyond repair, as was the driver's seat. The rear looked better, but due to an accident I couldn't open one of the rear doors to get a better look. All I could do was take pics and wonder how such a thing ever came to be.
--------------------
Over the course of that week I decided I wanted to go back to that yard since it had a 6MT 5.5th gen with everything still in the car, and I wanted to have a spare trans and also try to sell some of the accessories for profit. So back I went and I started off by pulling the trans and everything that goes with it. Everything went smoothly and my wheelbarrow was full of parts. But before I paid I went back to the unicorn I30 for another look. And I saw a passenger seat in pretty damn good shape with no rips in the leather, a back seat in similar condition, and rear door panels that just needed to be cleaned up. And I couldn't resist. I used my super pry bar to free up the rear door that was stuck shut and devised my plan. I remembered pics of the BMW Z4 concept car from a few years back, where the driver's side of the interior was black, and the passenger side was orange/brown, like so:
And even though it didn't really make a whole lot of sense given the color scheme of my car, I figured I would try something similar, just on a far less ambitious scale. Really, I just couldn't stand to let these rare pieces go to the crusher, never to be seen again. So I pulled the passenger seat, back seat, and rear door panels. Since I've got the Recaro in my car the trashed driver's seat wasn't really needed. It would have been great to grab the front door panels, but they were too far gone. But I could save the rest!
And that's how my garage turned into this:
Also in that pile are the 5.5th gen 6MT parts, a cut off non-rusty DS I30 rear quarter panel (just in case), more silver I30 door bump guards, the factory underbody brace that goes under the b-pipe (that I haven't had on my car in god knows how long), and an I30 mud flap that should complete my set. I had built up enough "points" at the junkyard so my rather large purchase got a 20% off discount applied to it, which was quite nice.
So this begins the rather lengthy process of cleaning up all these parts and installing them in my car, much to the chagrin of my lovely wife, who couldn't for the life of her understand why I would bring home this interior since it doesn't exactly "go with" my current interior. She's pretty good about me bringing home stuff from the junkyard, but this was just a little too much, given how I've already filled up all of our storage spaces with other stuff. Oh well, she'll get over it. Join me, as I go on a wild adventure!
Wow, all that work on the underbody is definitely a labor of love, and makes me very glad to live in the southwest.
Now just tackle the rust on your lift
Looking at the front driver door panel it almost looks like they were painted or dyed white due to the black showing underneath the wear of the panel and leather insert, yet the power seat switch still has the original looking icons/decals on it.
Now just tackle the rust on your lift
Looking at the front driver door panel it almost looks like they were painted or dyed white due to the black showing underneath the wear of the panel and leather insert, yet the power seat switch still has the original looking icons/decals on it.
Yeah, this interior looks like a factory job to me, I saw nothing to indicate otherwise. Have you ever seen anything like it?

This thread is like the tv show you're hooked on that only airs once-per-week and it really sucks waiting for the next episode but when it finally comes on you're super excited to watch it.
Nice jy finds! That white is very interesting. I'm certainly not a 4th gen scholar like some on here, but I've never seen that color before either.
Nice jy finds! That white is very interesting. I'm certainly not a 4th gen scholar like some on here, but I've never seen that color before either.

The junkyard gods have smiled upon me and I have been showered with their gifts!\
So this begins the rather lengthy process of cleaning up all these parts and installing them in my car, much to the chagrin of my lovely wife, who couldn't for the life of her understand why I would bring home this interior since it doesn't exactly "go with" my current interior. She's pretty good about me bringing home stuff from the junkyard, but this was just a little too much, given how I've already filled up all of our storage spaces with other stuff. Oh well, she'll get over it. Join me, as I go on a wild adventure!
So this begins the rather lengthy process of cleaning up all these parts and installing them in my car, much to the chagrin of my lovely wife, who couldn't for the life of her understand why I would bring home this interior since it doesn't exactly "go with" my current interior. She's pretty good about me bringing home stuff from the junkyard, but this was just a little too much, given how I've already filled up all of our storage spaces with other stuff. Oh well, she'll get over it. Join me, as I go on a wild adventure!
I've put off this project for something like a decade now, but I can't put it off any longer. It's time to tackle my rust problems. To keep the project manageable, I think I'm going to split it into two or three parts and do one at a time instead of everything at once. The first stage will be exterior/painted surfaces and will include the spoiler (obviously not rusty, just needs to be repainted). The second stage will involve everything under the rear 1/3 of the vehicle (the middle 1/3 was mostly completed recently when I did the exhaust tunnel project). The third stage will be me painting the new/used front and rear bumpers I picked up at the junkyard. This car is 25 years old now, and it needs and deserves some restoration. As part of that restoration, I recently splurged and had the entire car PDR'ed, but I'll get into that later. With all that said, let's get this thing ready for another 25 years!
This post will just be pictures of all the "before" pics. Rather than just doing a single huge picture dump at the end of the project like I normally do, I'm going to try to post up after each stage so you can follow along and provide input.
There are two things that scared me about this project: blending the new paint and making it look presentable, and welding. For the most part, the paint on my car is in fantastic shape. Over my 18 years of ownership (half of my damn life...) I've buffed the paint so many times that orange peel has been reduced to almost nothing, and the finish is just beautiful. Not to mention that the only non-factory paint is on the bumpers, when I kinda repaired them about a decade ago. I'm so reluctant to apply new paint to the actual body of the car, because I know that it's not going to be a perfect match. But I'm a cheap bastard, and there's no way I can/would pay a shop to do this for me, but I also can't let this rust keep progressing, so I've boxed myself into a corner and will just have to do this all myself. I got a lot of good practice doing a similar project on my M3 a year ago, and so far my job has held up perfectly, and I learned from the few mistakes I made there so hopefully I won't make any on this project.
For ***** and giggles, here are some pics of the M3 boondoggle.


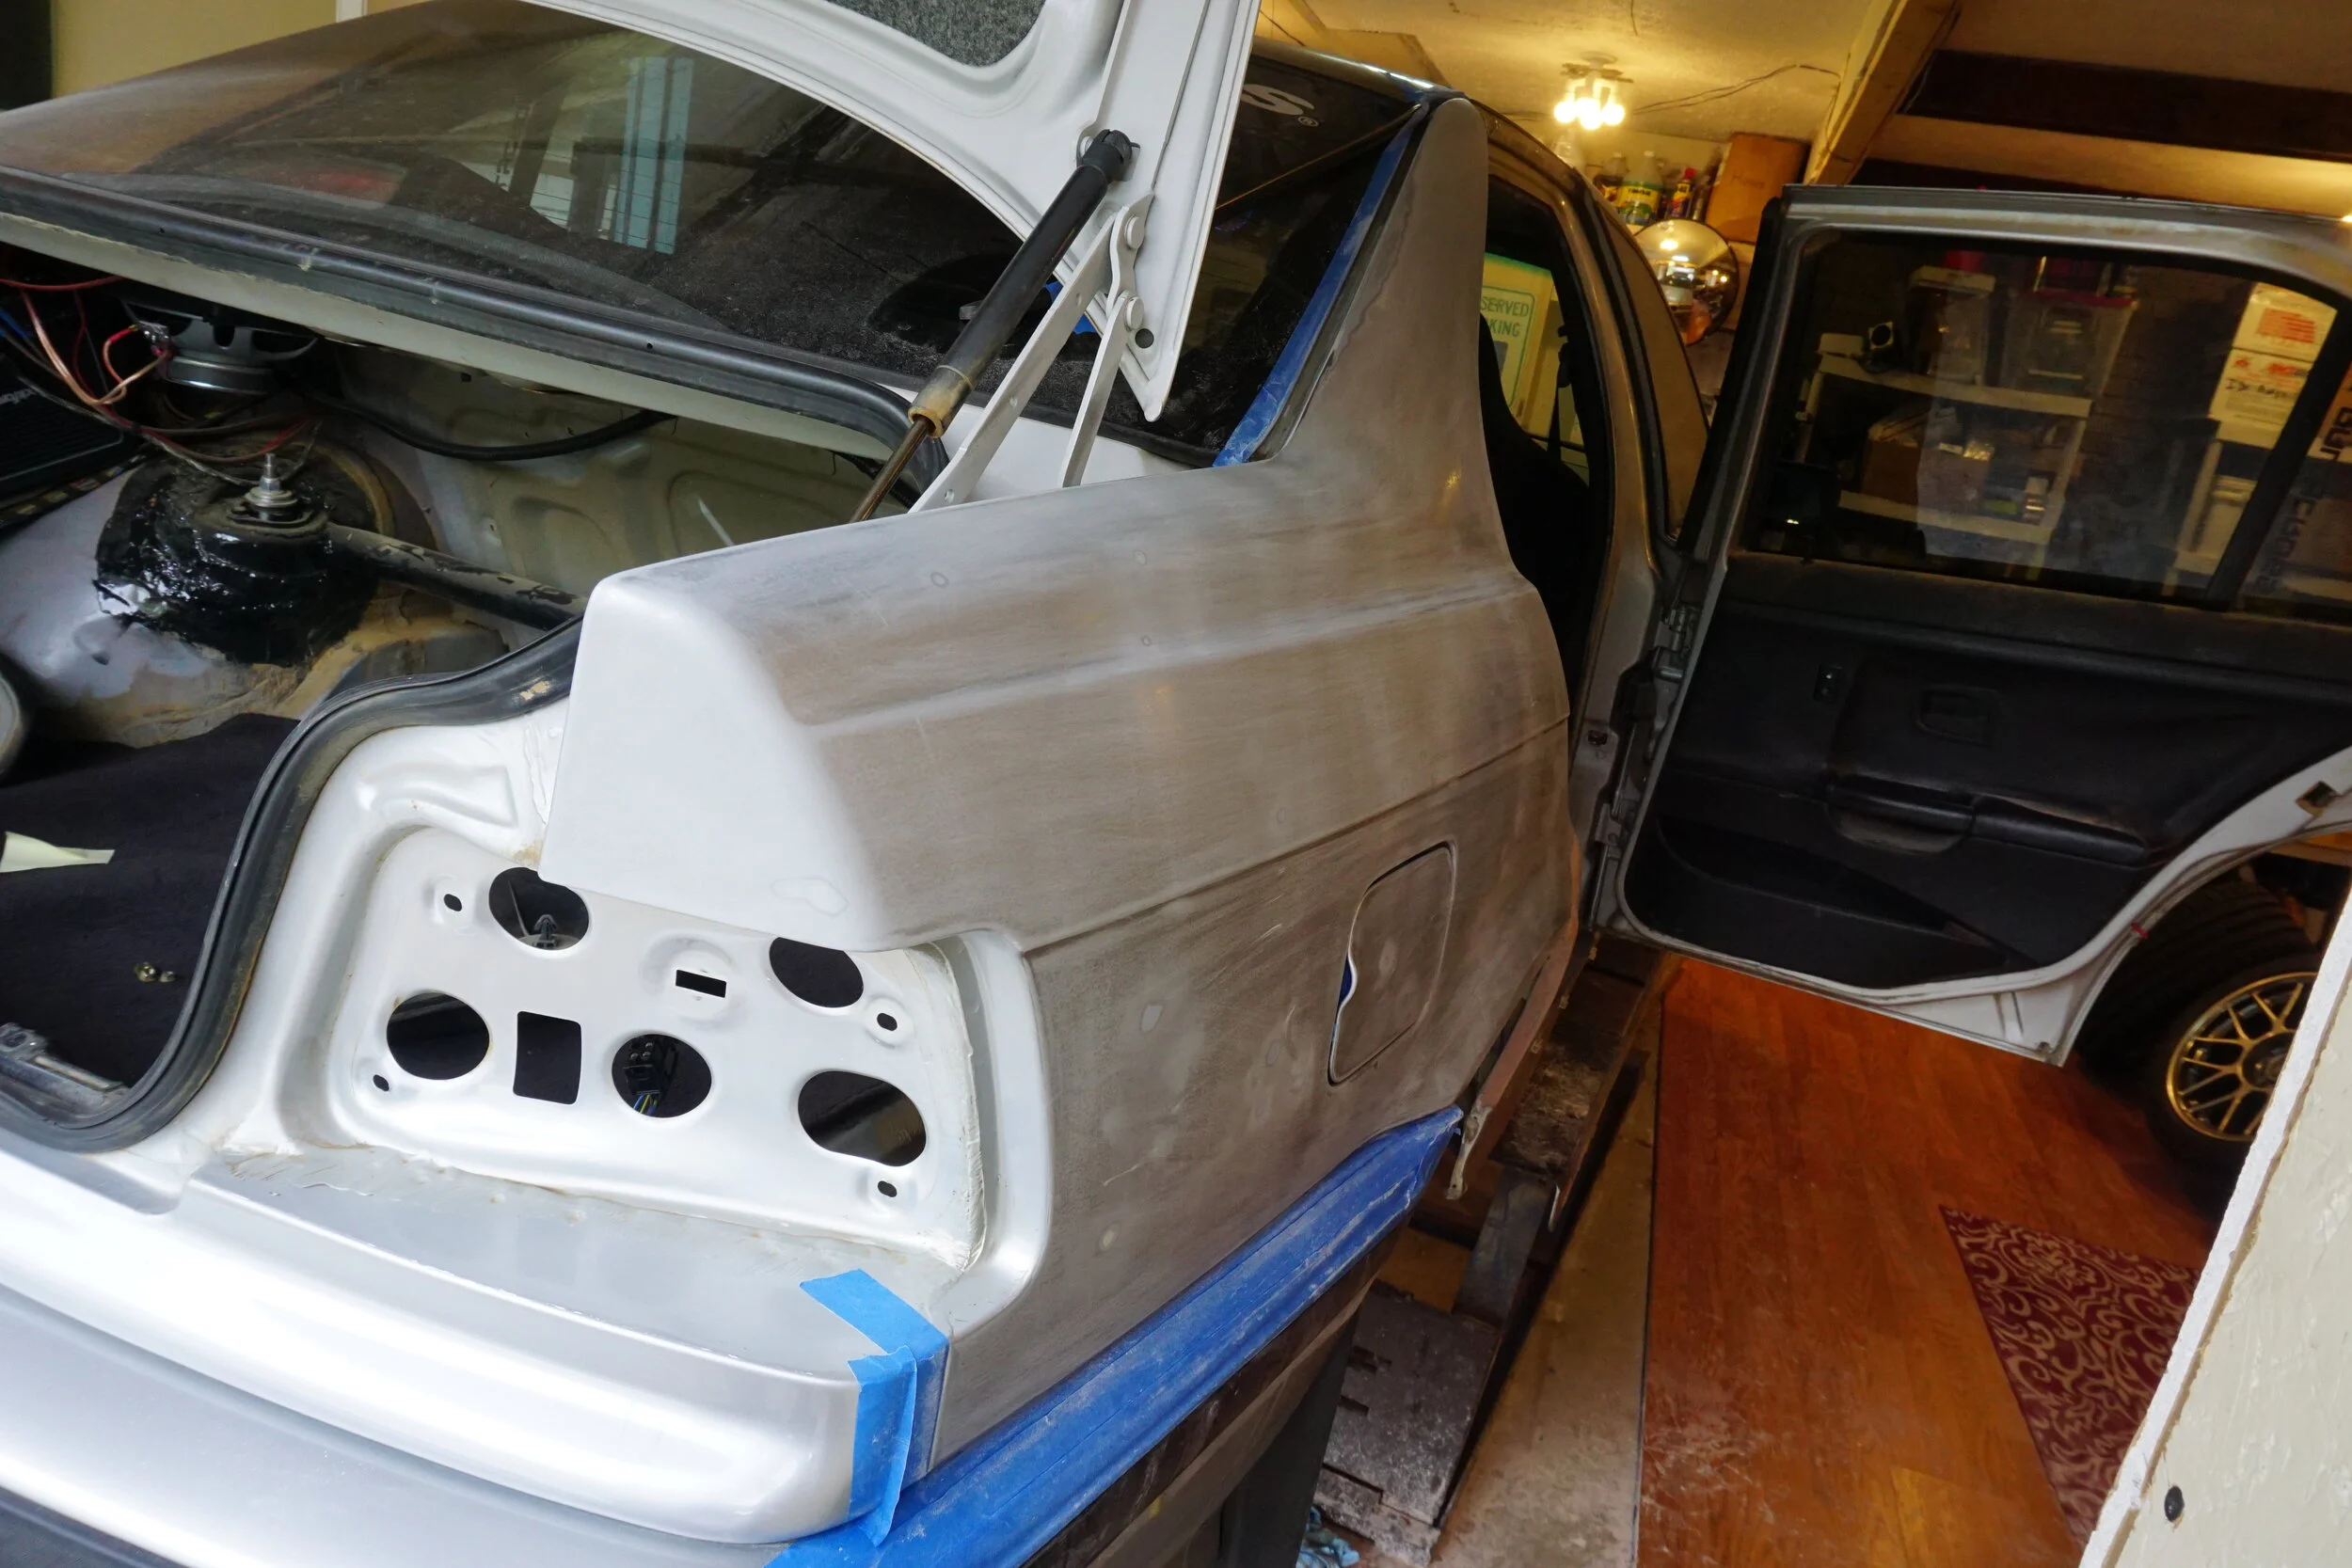
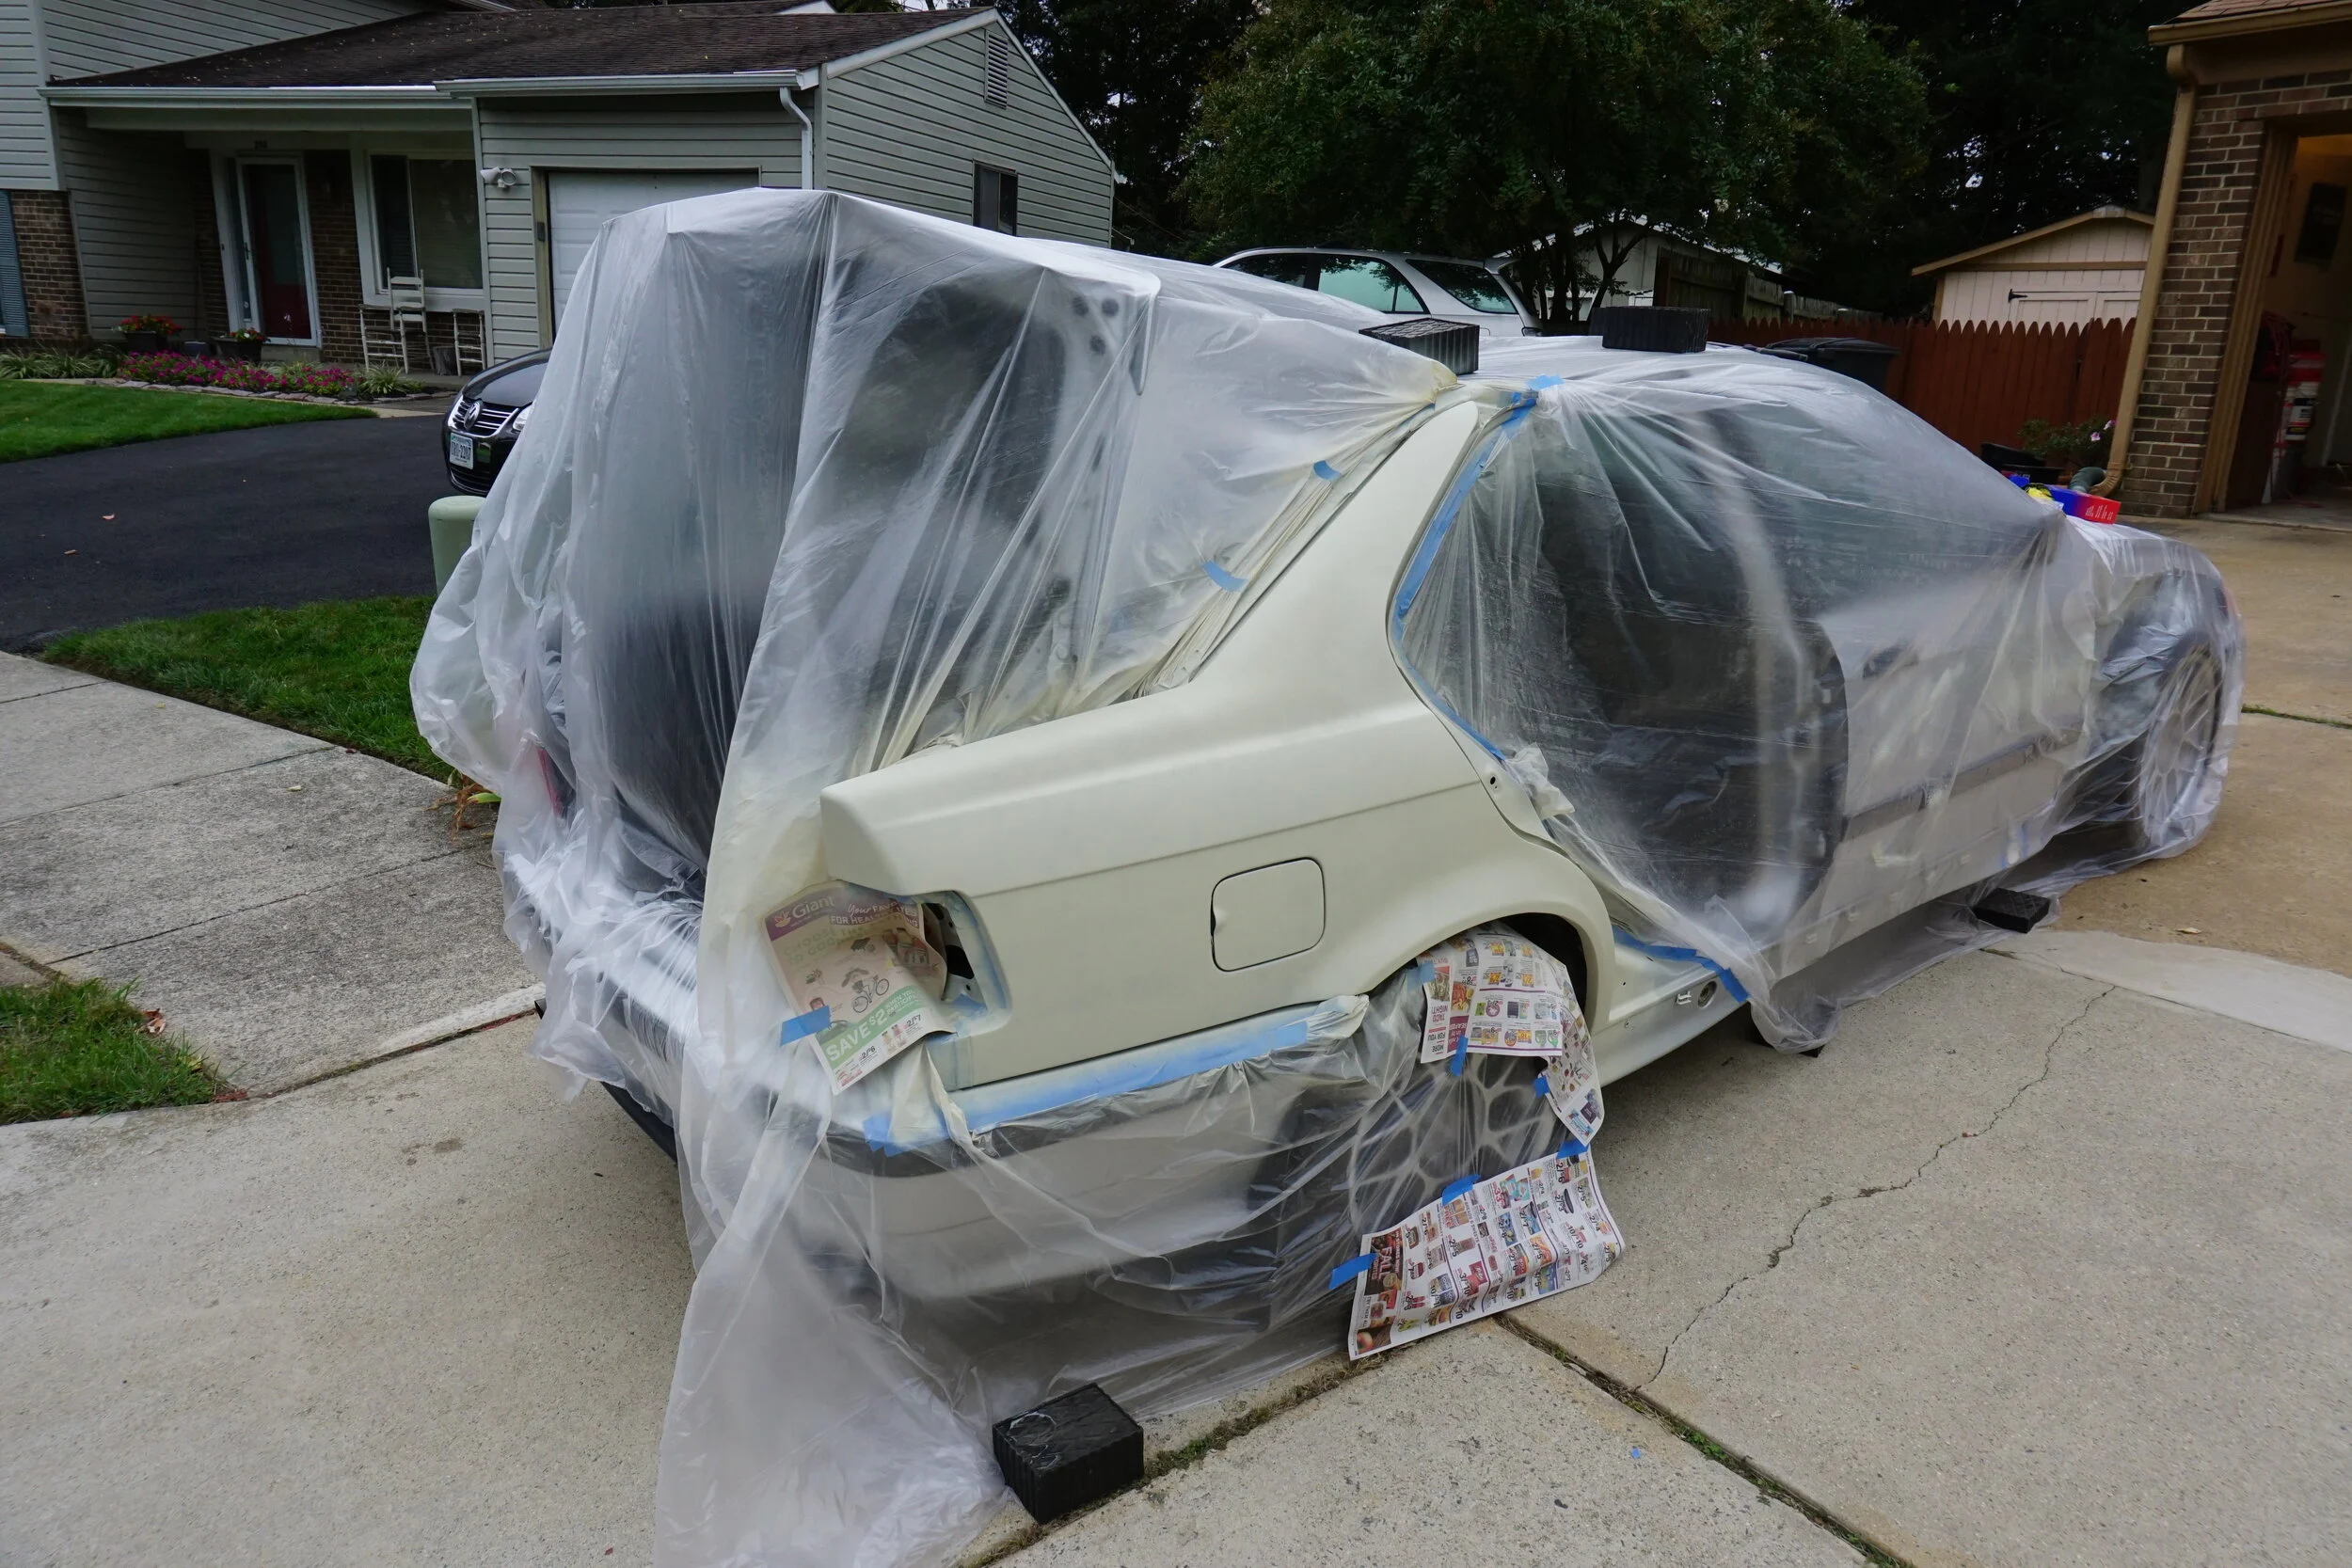
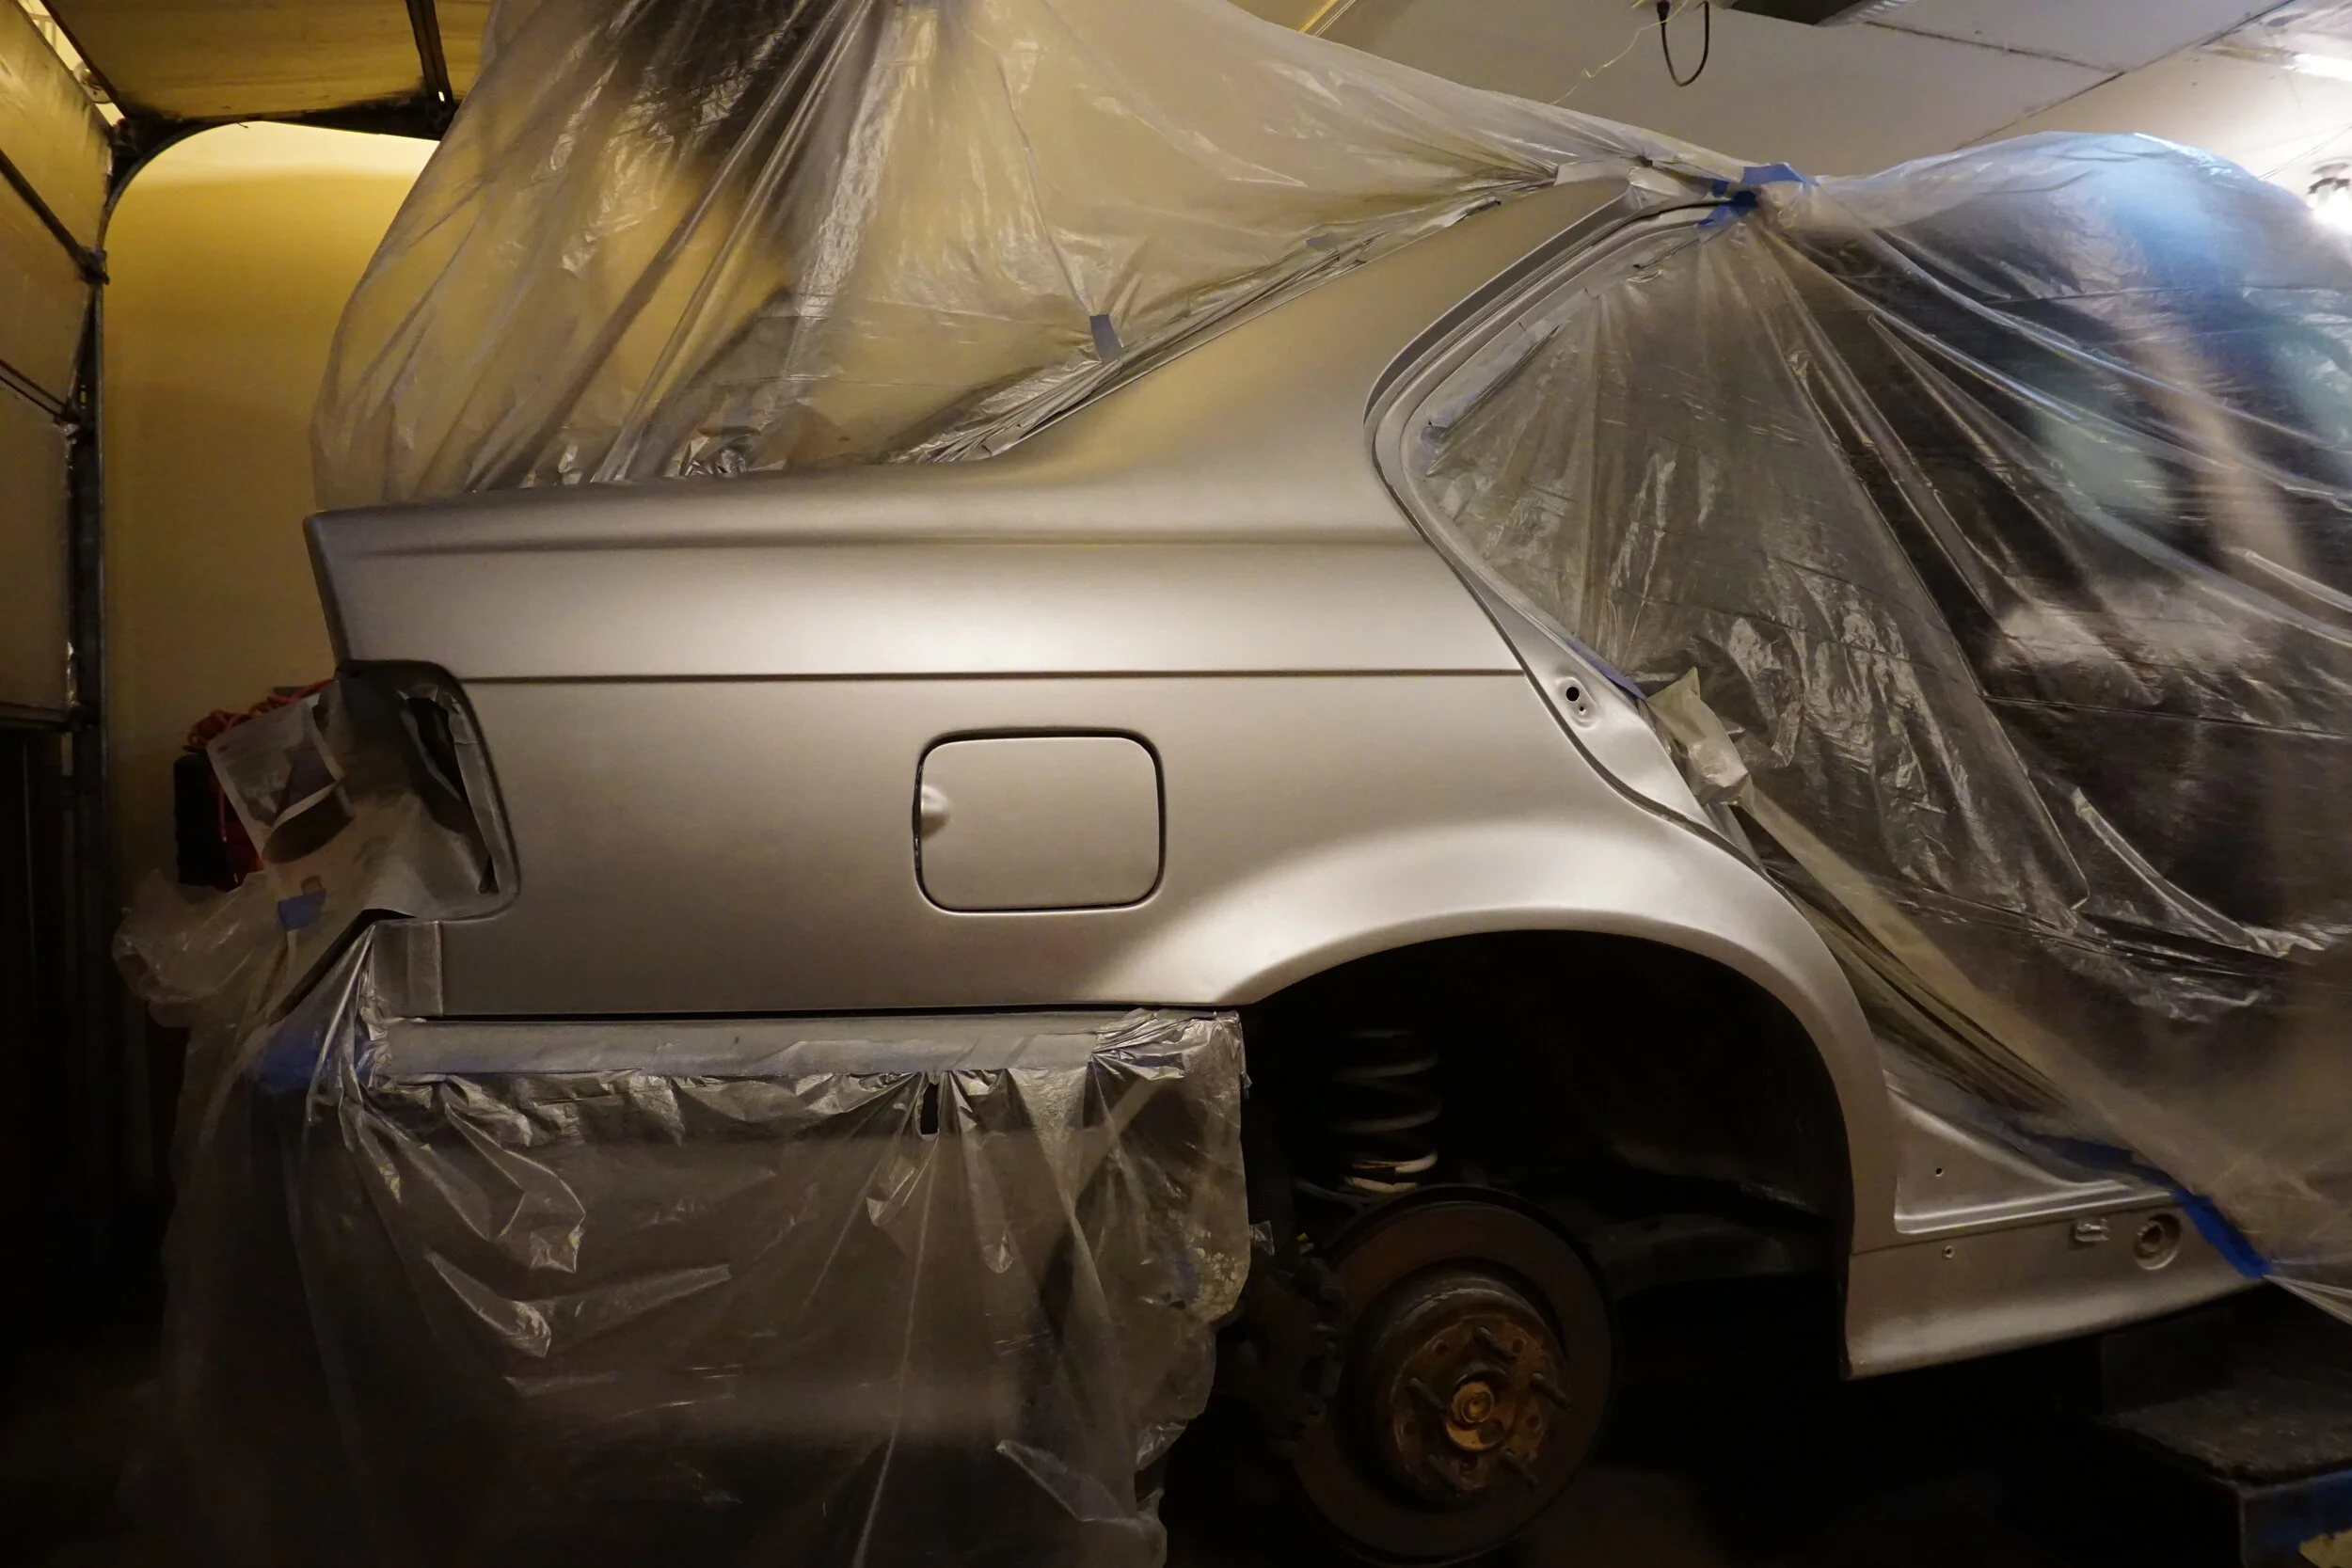
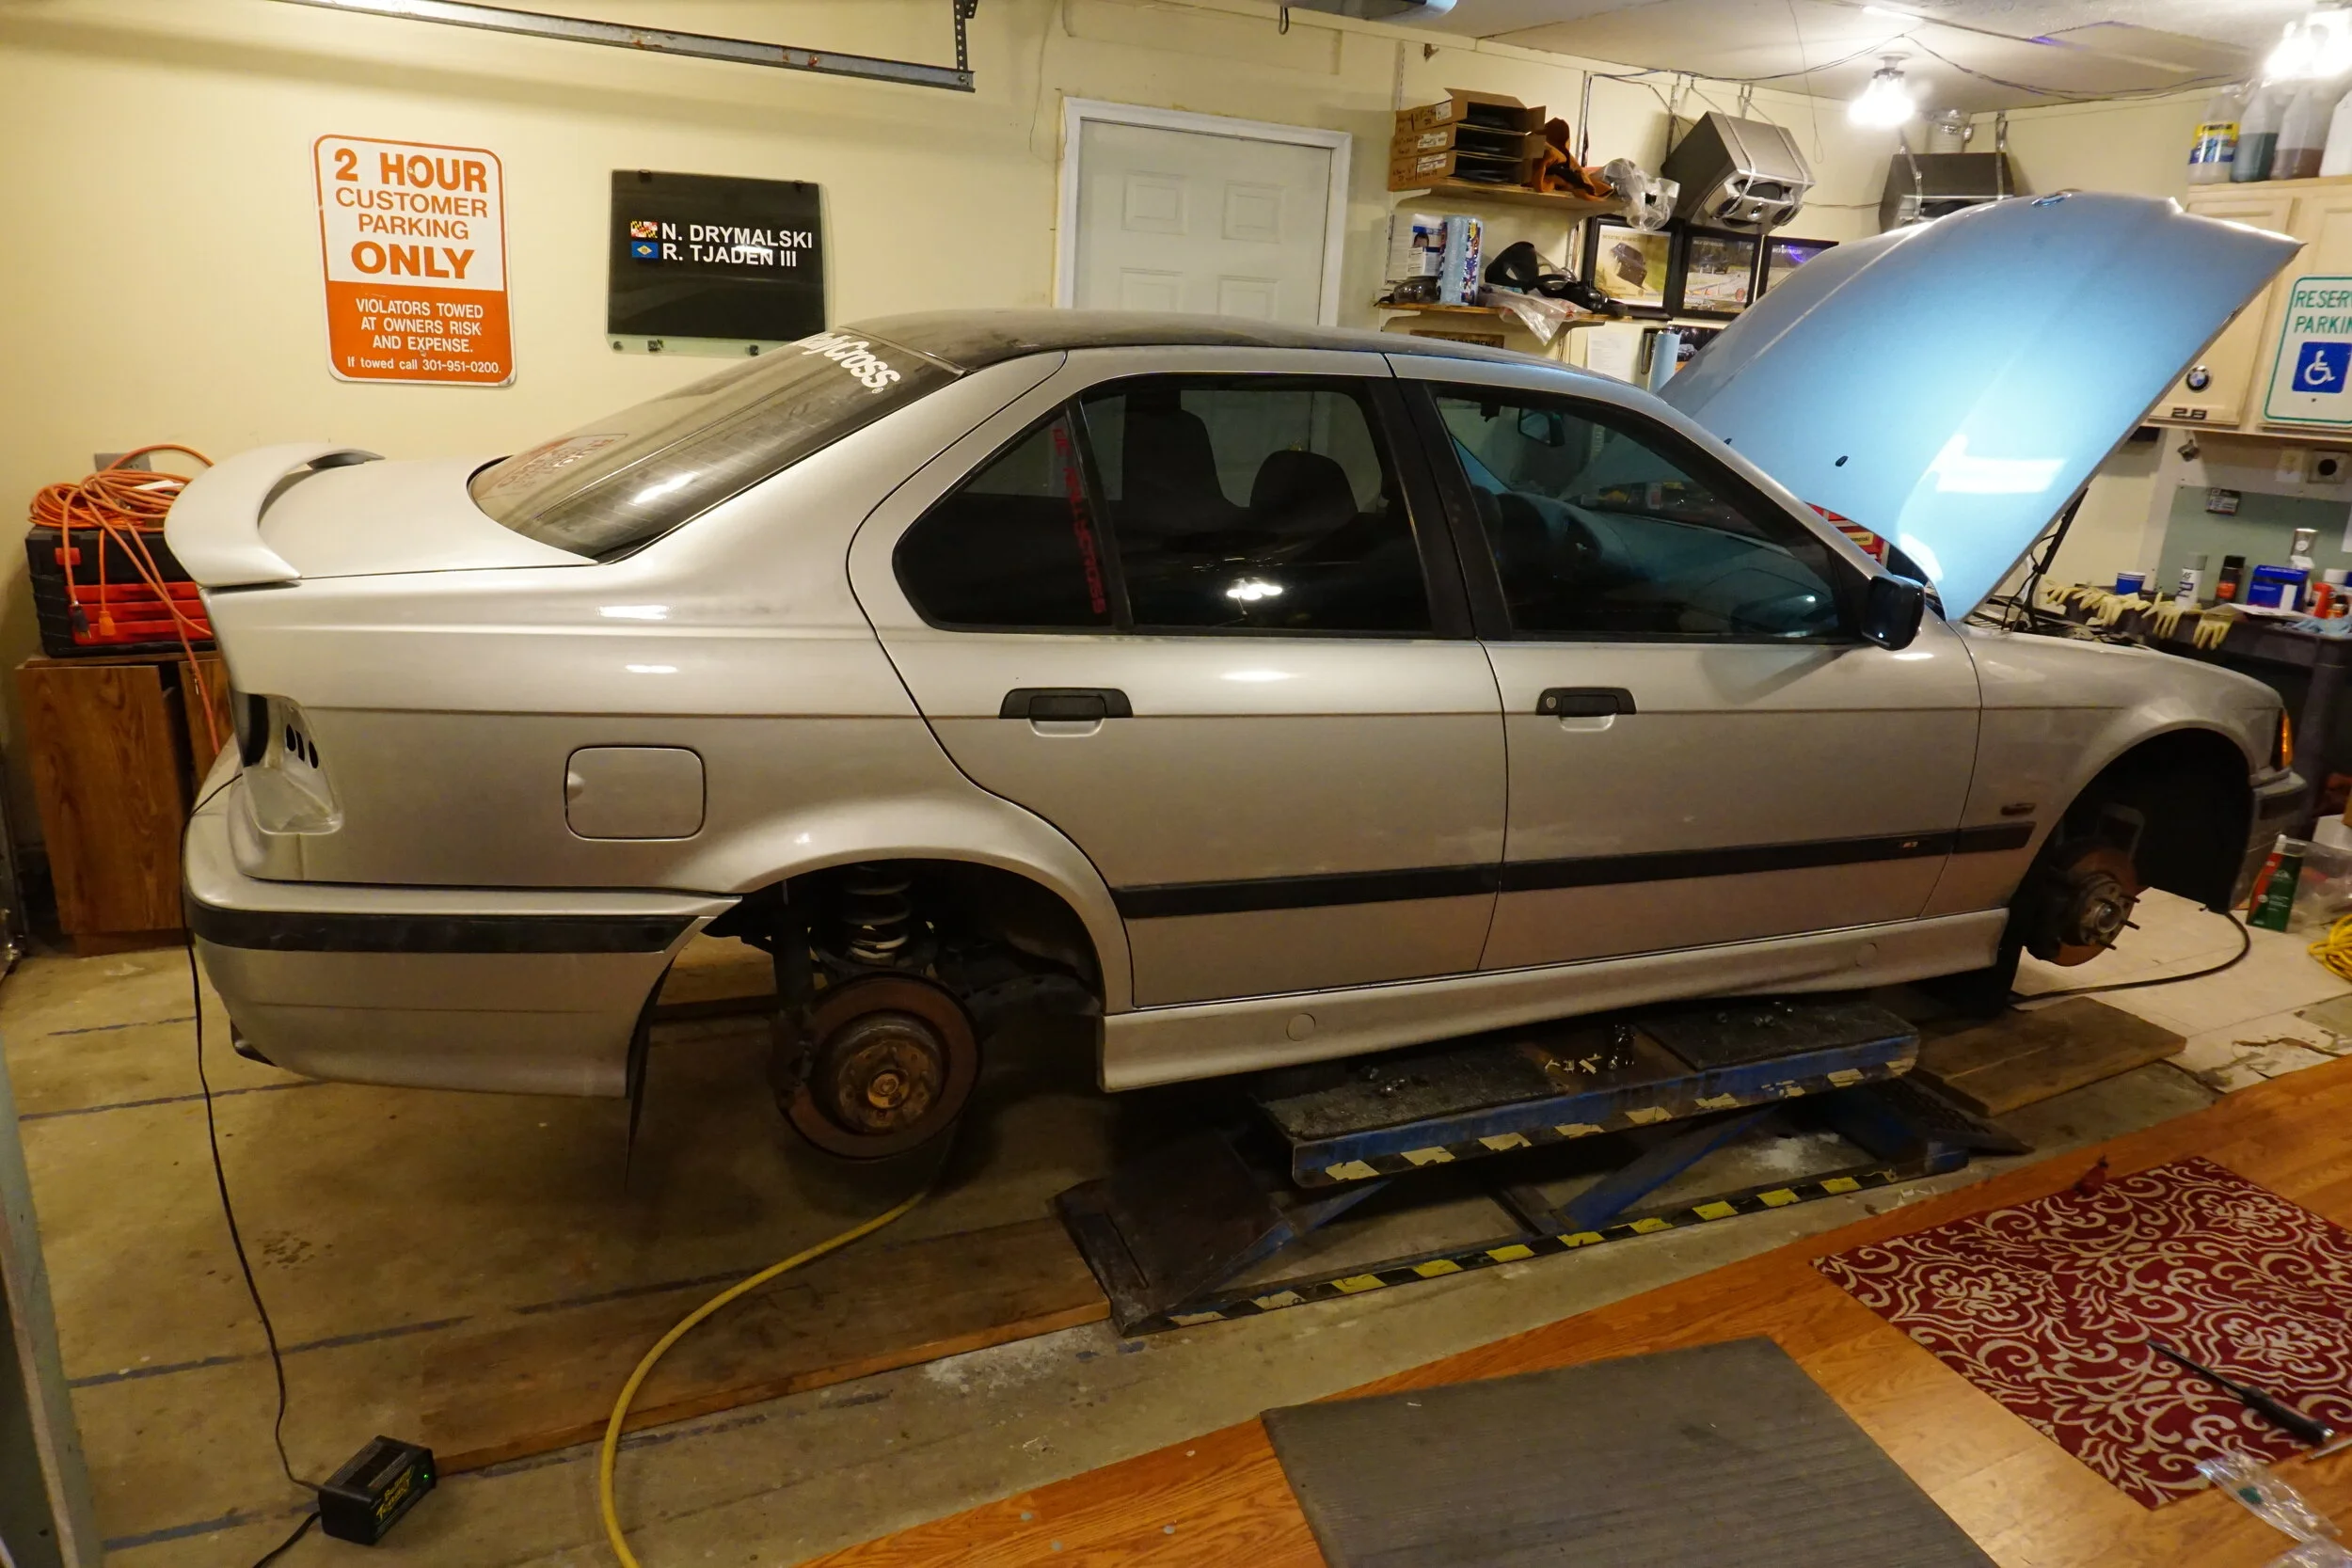
The final pic there was before I wet sanded and polished it up. Everything was done (and will be done) with rattle cans, as I don't have a giant compressor and spray gun. I use 2k epoxy primer and 2k clear. Anyways, onto pics.
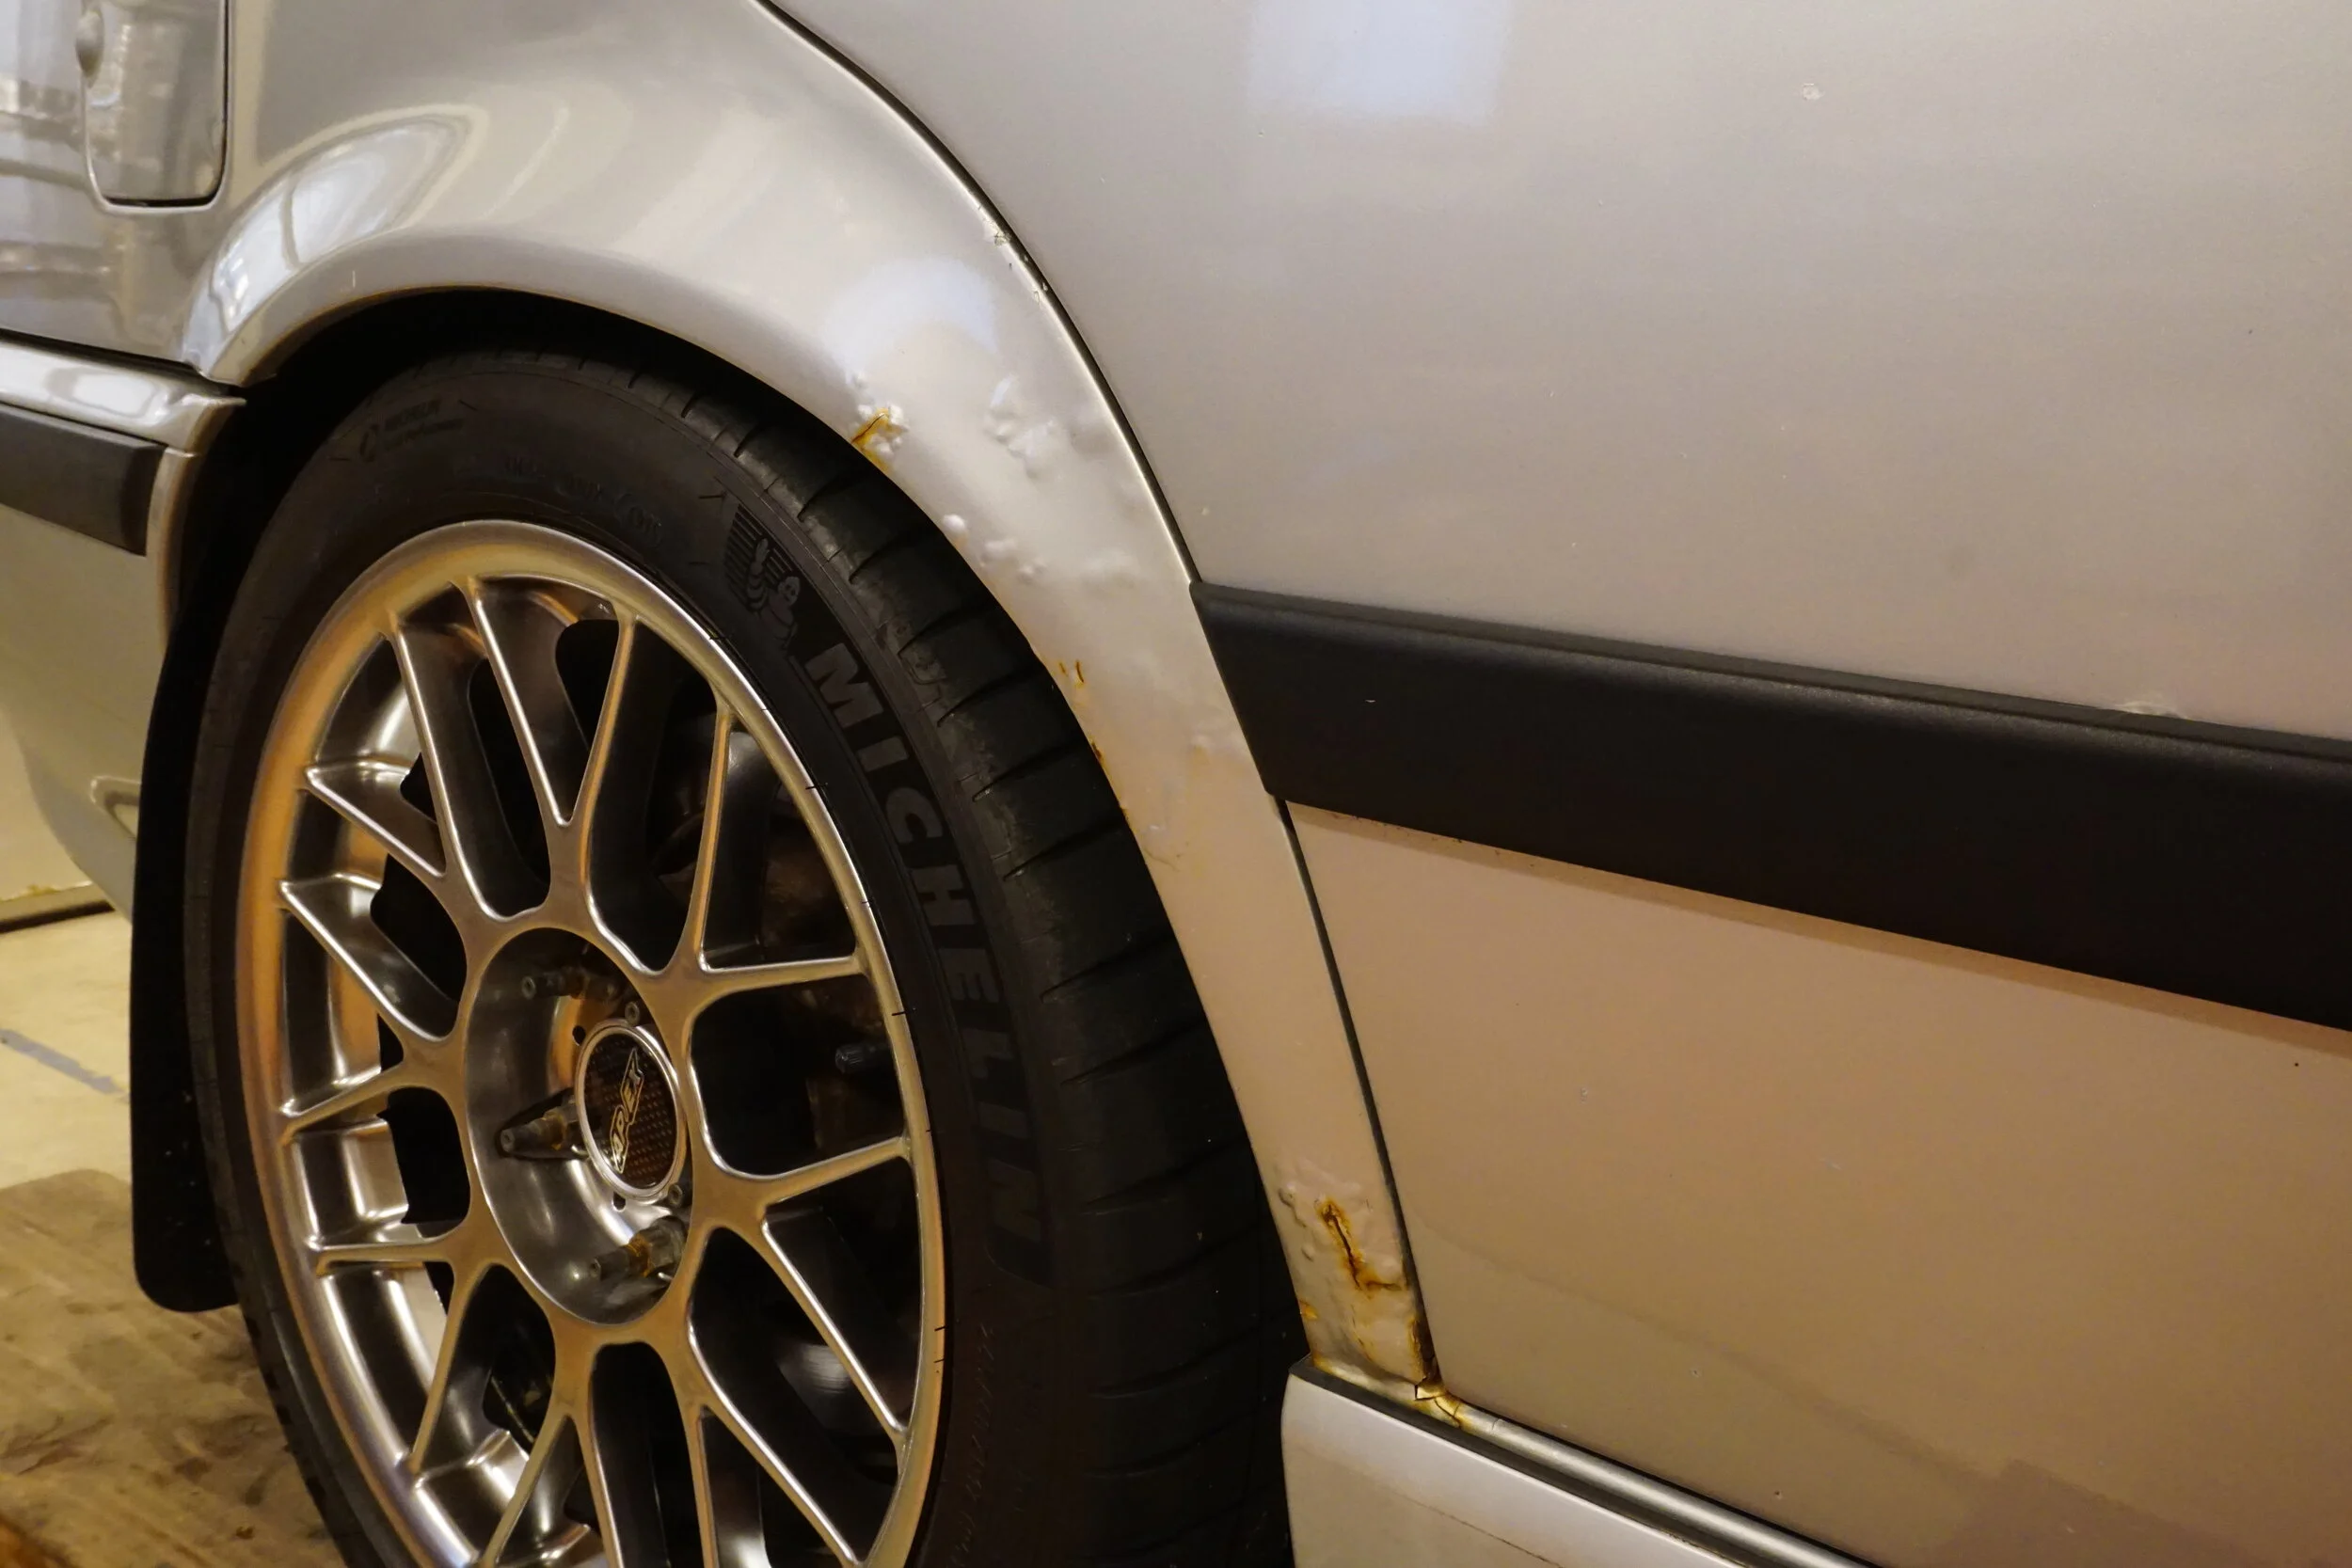
Passenger side:
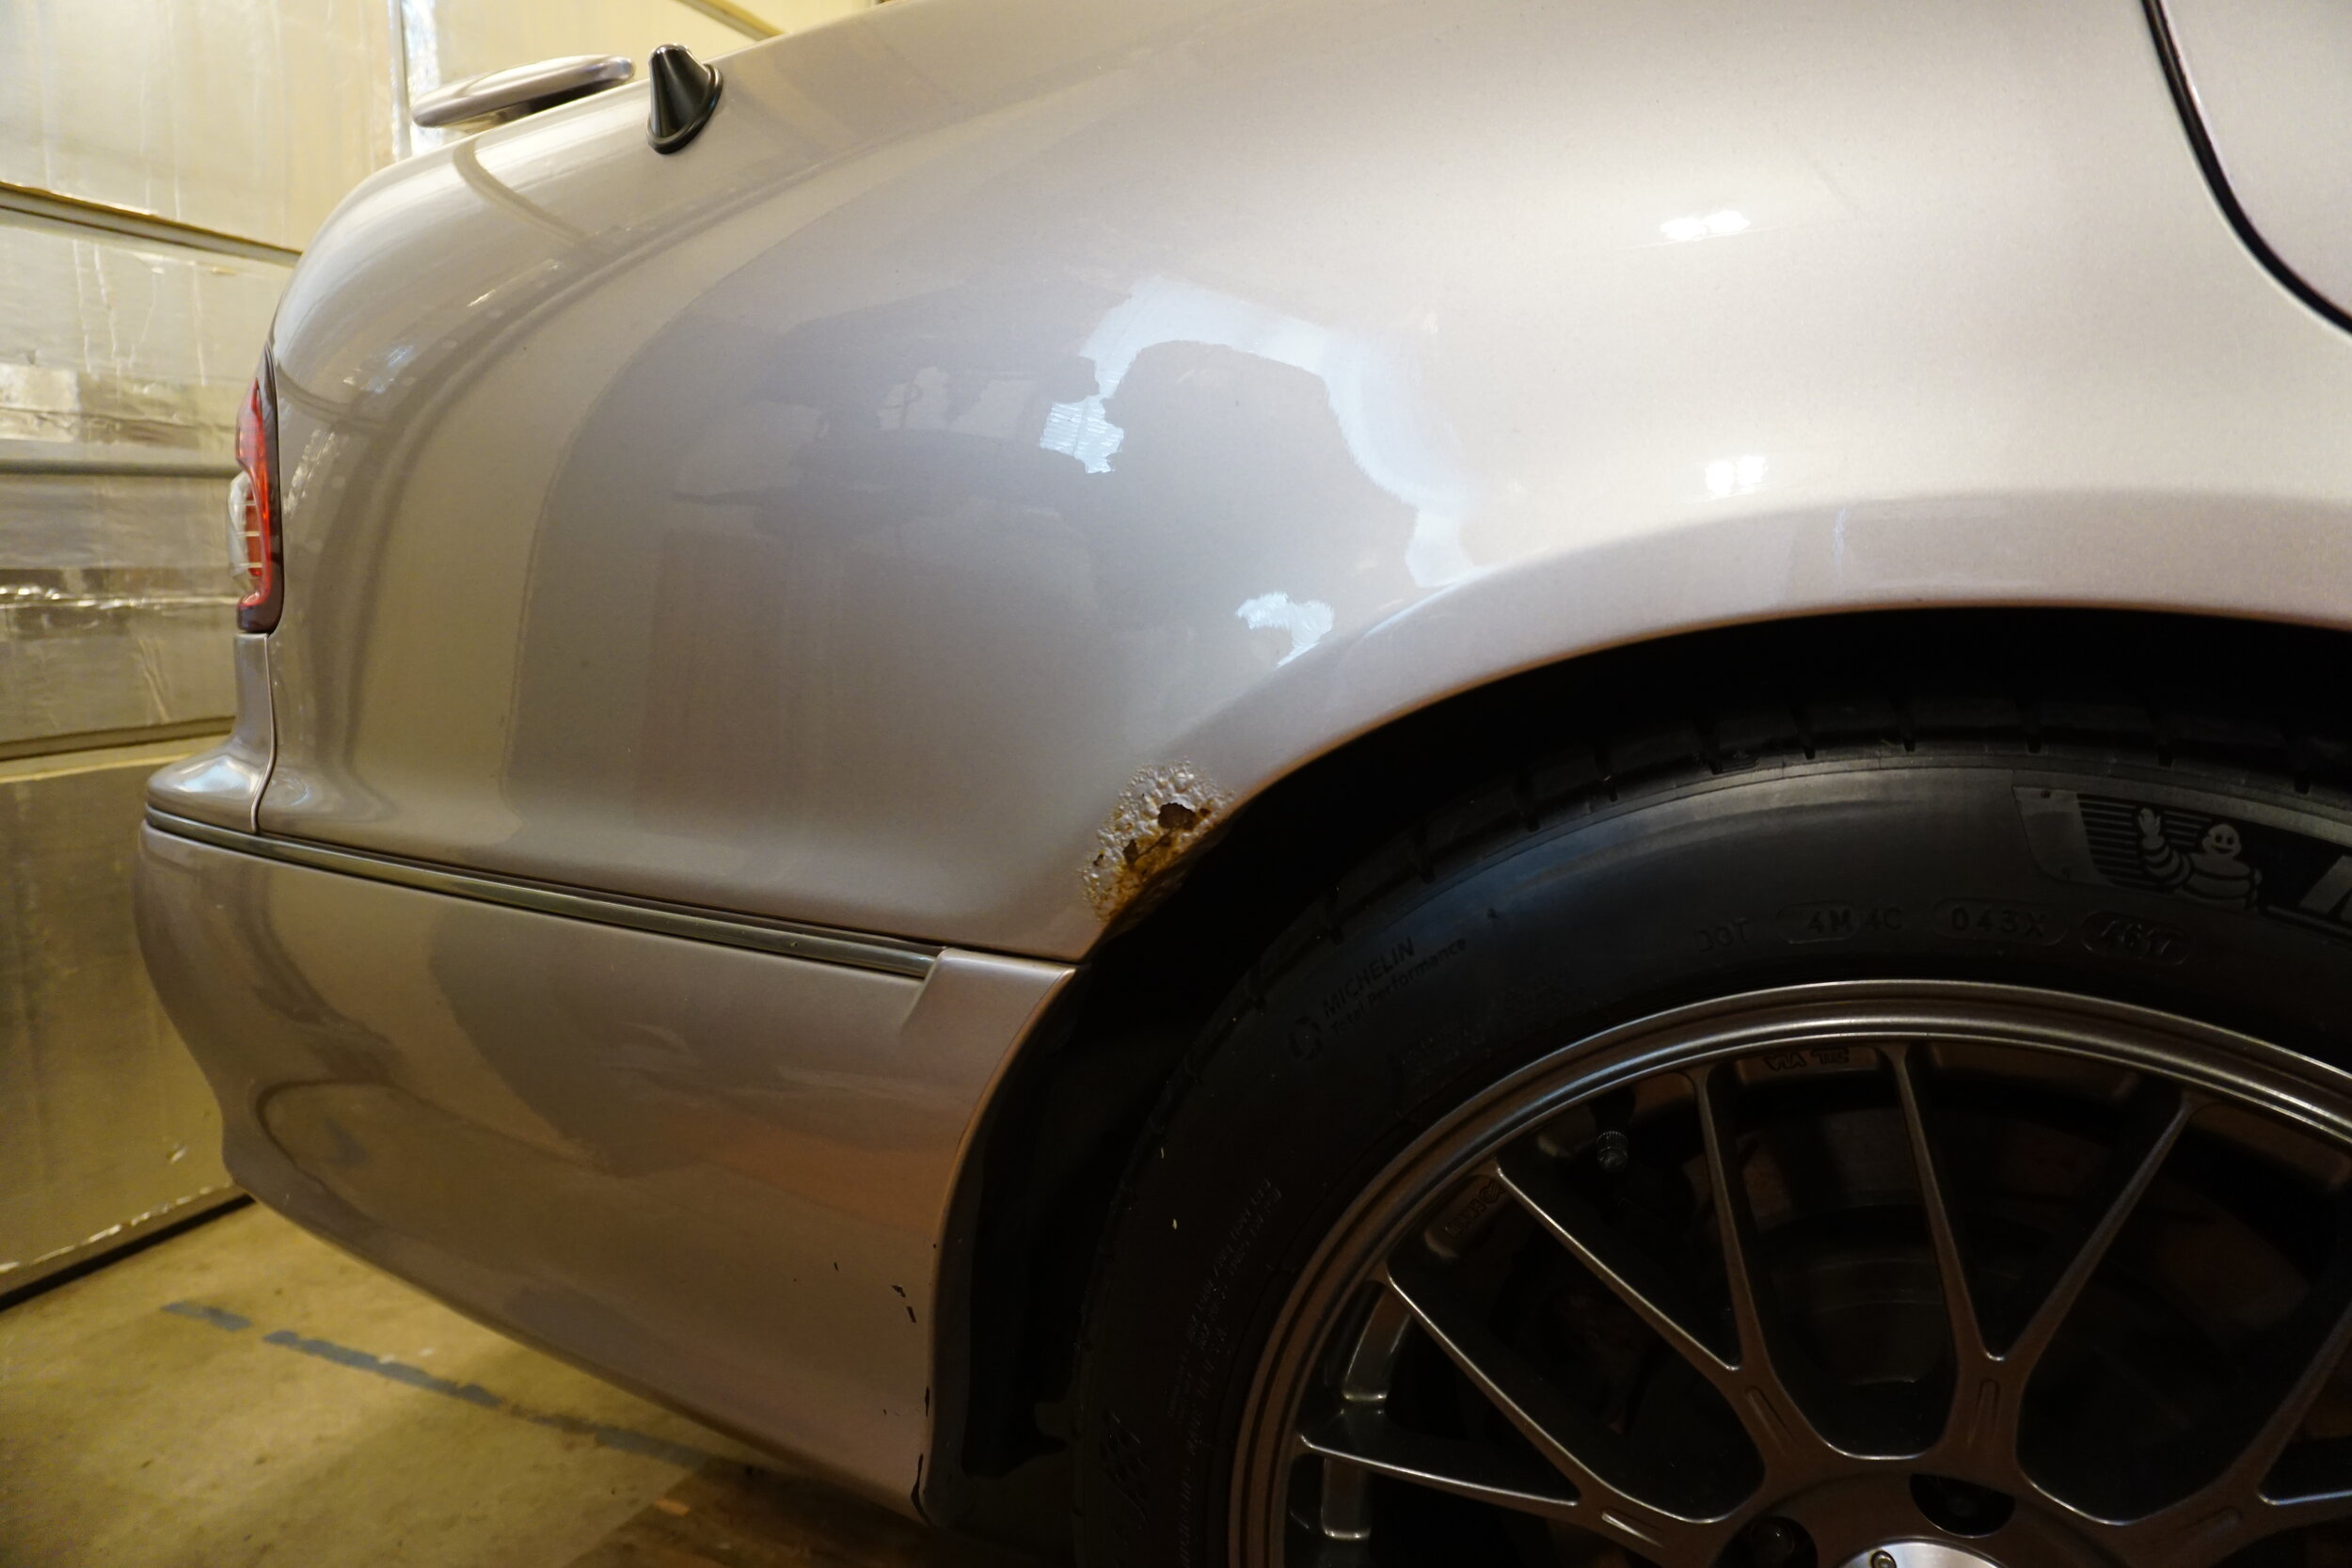
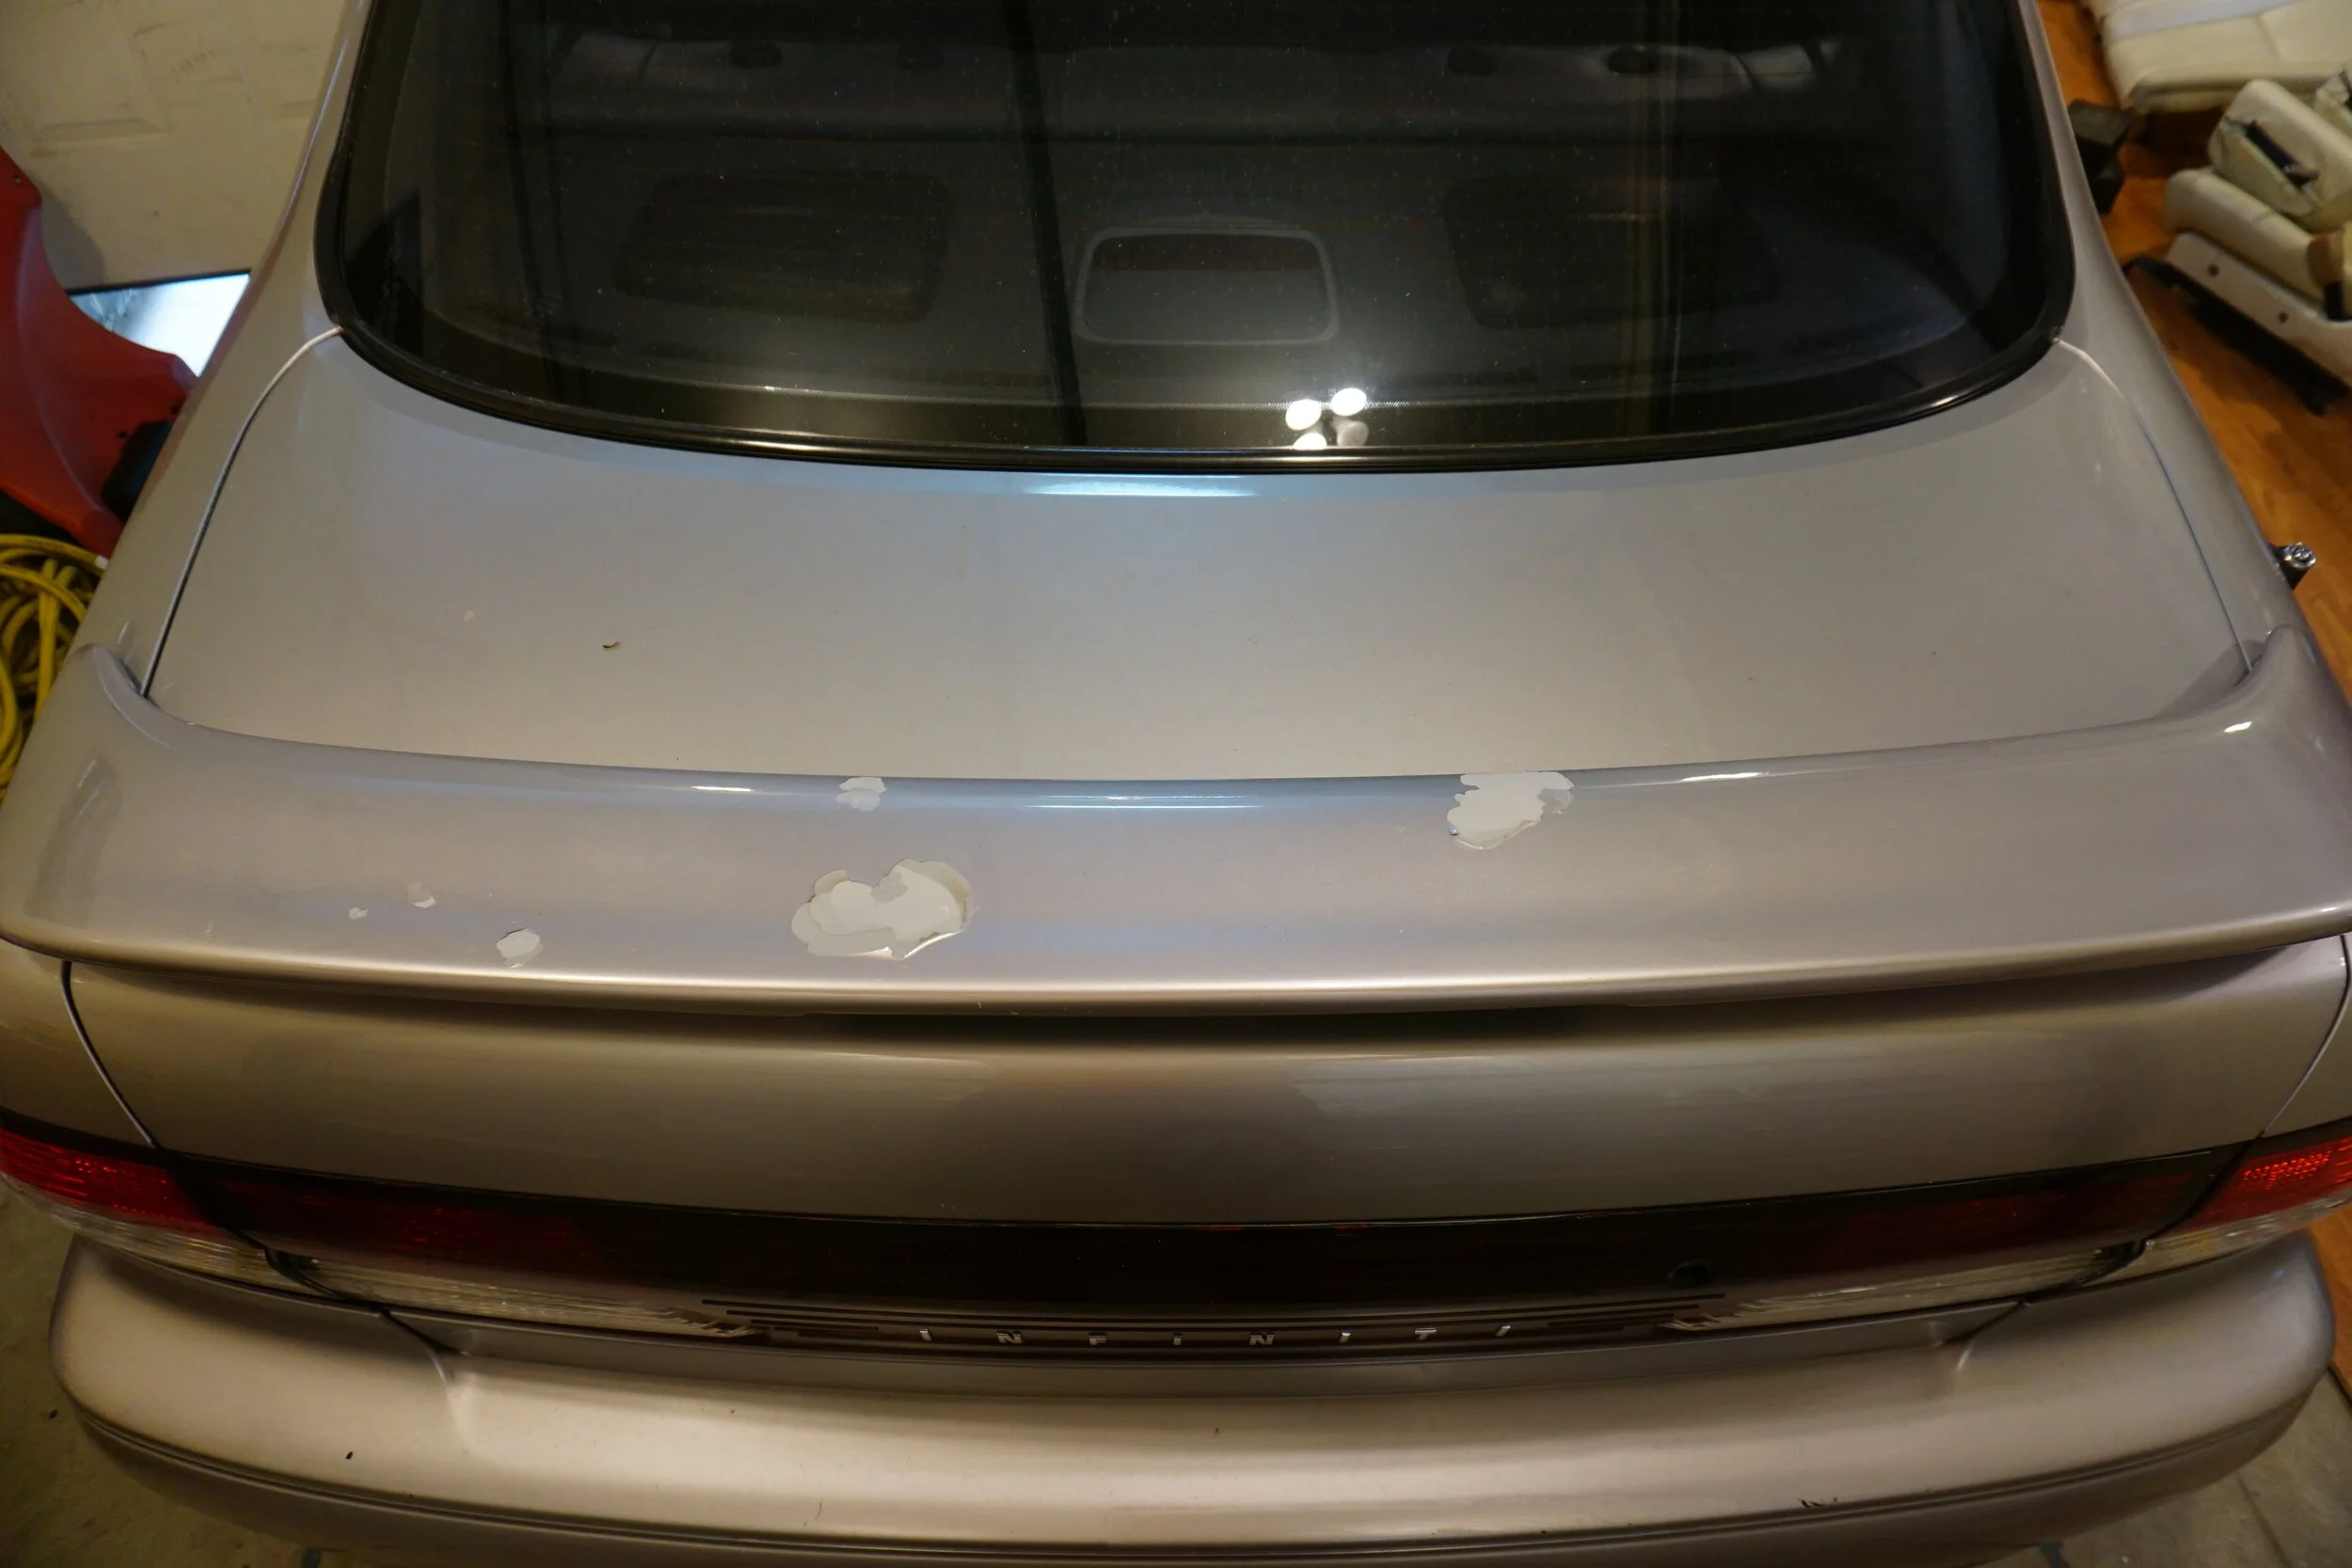
Driver side:
Passenger side:

Driver side under the rear bumper behind the rear wheel:
Now if you'll excuse me, I need to get back to work.
This post will just be pictures of all the "before" pics. Rather than just doing a single huge picture dump at the end of the project like I normally do, I'm going to try to post up after each stage so you can follow along and provide input.
There are two things that scared me about this project: blending the new paint and making it look presentable, and welding. For the most part, the paint on my car is in fantastic shape. Over my 18 years of ownership (half of my damn life...) I've buffed the paint so many times that orange peel has been reduced to almost nothing, and the finish is just beautiful. Not to mention that the only non-factory paint is on the bumpers, when I kinda repaired them about a decade ago. I'm so reluctant to apply new paint to the actual body of the car, because I know that it's not going to be a perfect match. But I'm a cheap bastard, and there's no way I can/would pay a shop to do this for me, but I also can't let this rust keep progressing, so I've boxed myself into a corner and will just have to do this all myself. I got a lot of good practice doing a similar project on my M3 a year ago, and so far my job has held up perfectly, and I learned from the few mistakes I made there so hopefully I won't make any on this project.
For ***** and giggles, here are some pics of the M3 boondoggle.
The final pic there was before I wet sanded and polished it up. Everything was done (and will be done) with rattle cans, as I don't have a giant compressor and spray gun. I use 2k epoxy primer and 2k clear. Anyways, onto pics.
Passenger side:
Driver side:
Passenger side:
Driver side under the rear bumper behind the rear wheel:
Now if you'll excuse me, I need to get back to work.
Good luck with it. I would suggest copper primer on the hidden side of any patch panel and then cavity wax behind any hidden area that was been welded.
How are your rear wheel wells? I remember one of the big problem areas on my i30 was the hole in the driver's rear wheel well behind the rear seat.
How are your rear wheel wells? I remember one of the big problem areas on my i30 was the hole in the driver's rear wheel well behind the rear seat.
My wheel wells are fine for the most part, aside from the lower corners and lip. Got any pics of where yours were so bad? It appears as if having my fenders rolled may have contributed to my rust issues, but I can't be sure as I don't remember exactly when it was done versus when my rust started. More pics later today hopefully, it's not looking so good. Definitely going to need some welding. I'm going to need some help in determining exactly how the rust started so I can do everything possible to resolve the issue. There will be plenty of POR15 involved.
If the Eastwood internal fame coating works well, that's a good route too. I've used the brand of copper primer you linked. The idea is that it can liquify and re-cure during welding to keep the hidden side of the panel coated. You'll want to try and coat the inner perimeter you're welding to too since the factory coating will cook off. As long as the hidden side ends up with some sort of non-permeable paint, that's what you want. Any filler exposed to air on the inside of the panel should be sealed too since it'll hold moisture.
Sorry no pics of my driver's wheel well rust but if I took the rear seat back out, I could see the ground through the lower part of the wheel well closest to the door. The passenger side was similar to yours but at the top and I also feel like rolling the fenders propagated it.
Sorry no pics of my driver's wheel well rust but if I took the rear seat back out, I could see the ground through the lower part of the wheel well closest to the door. The passenger side was similar to yours but at the top and I also feel like rolling the fenders propagated it.
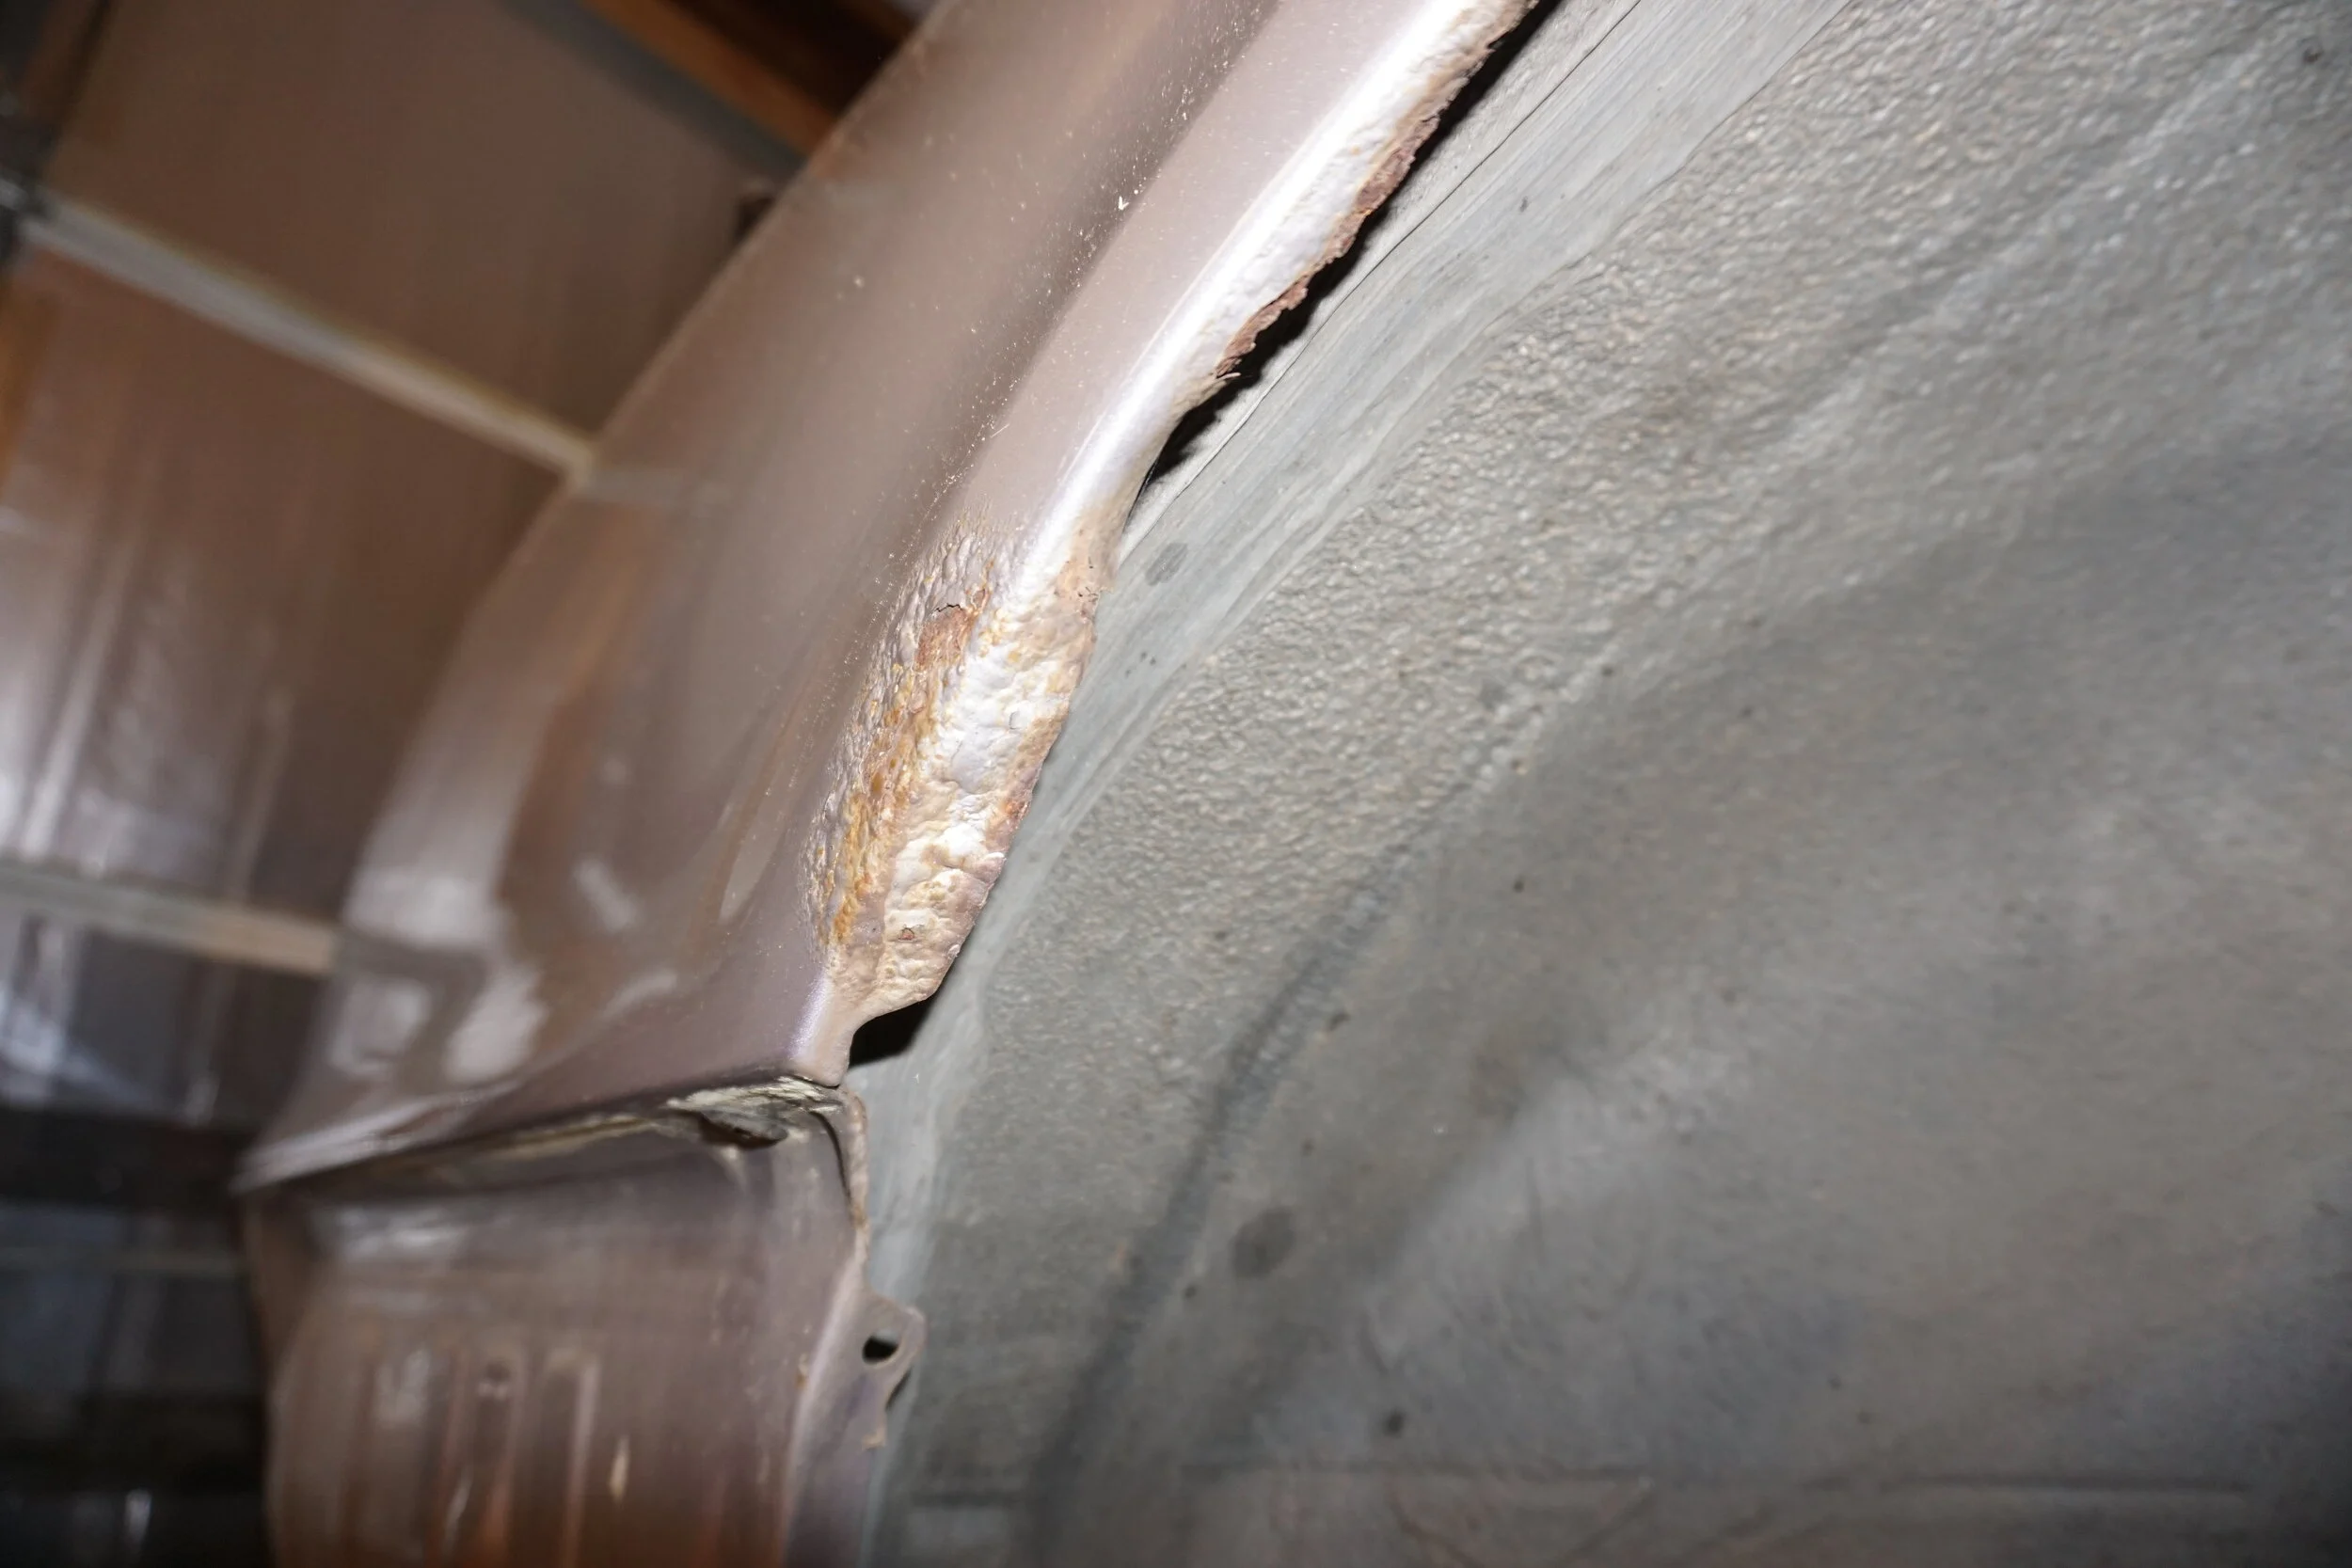
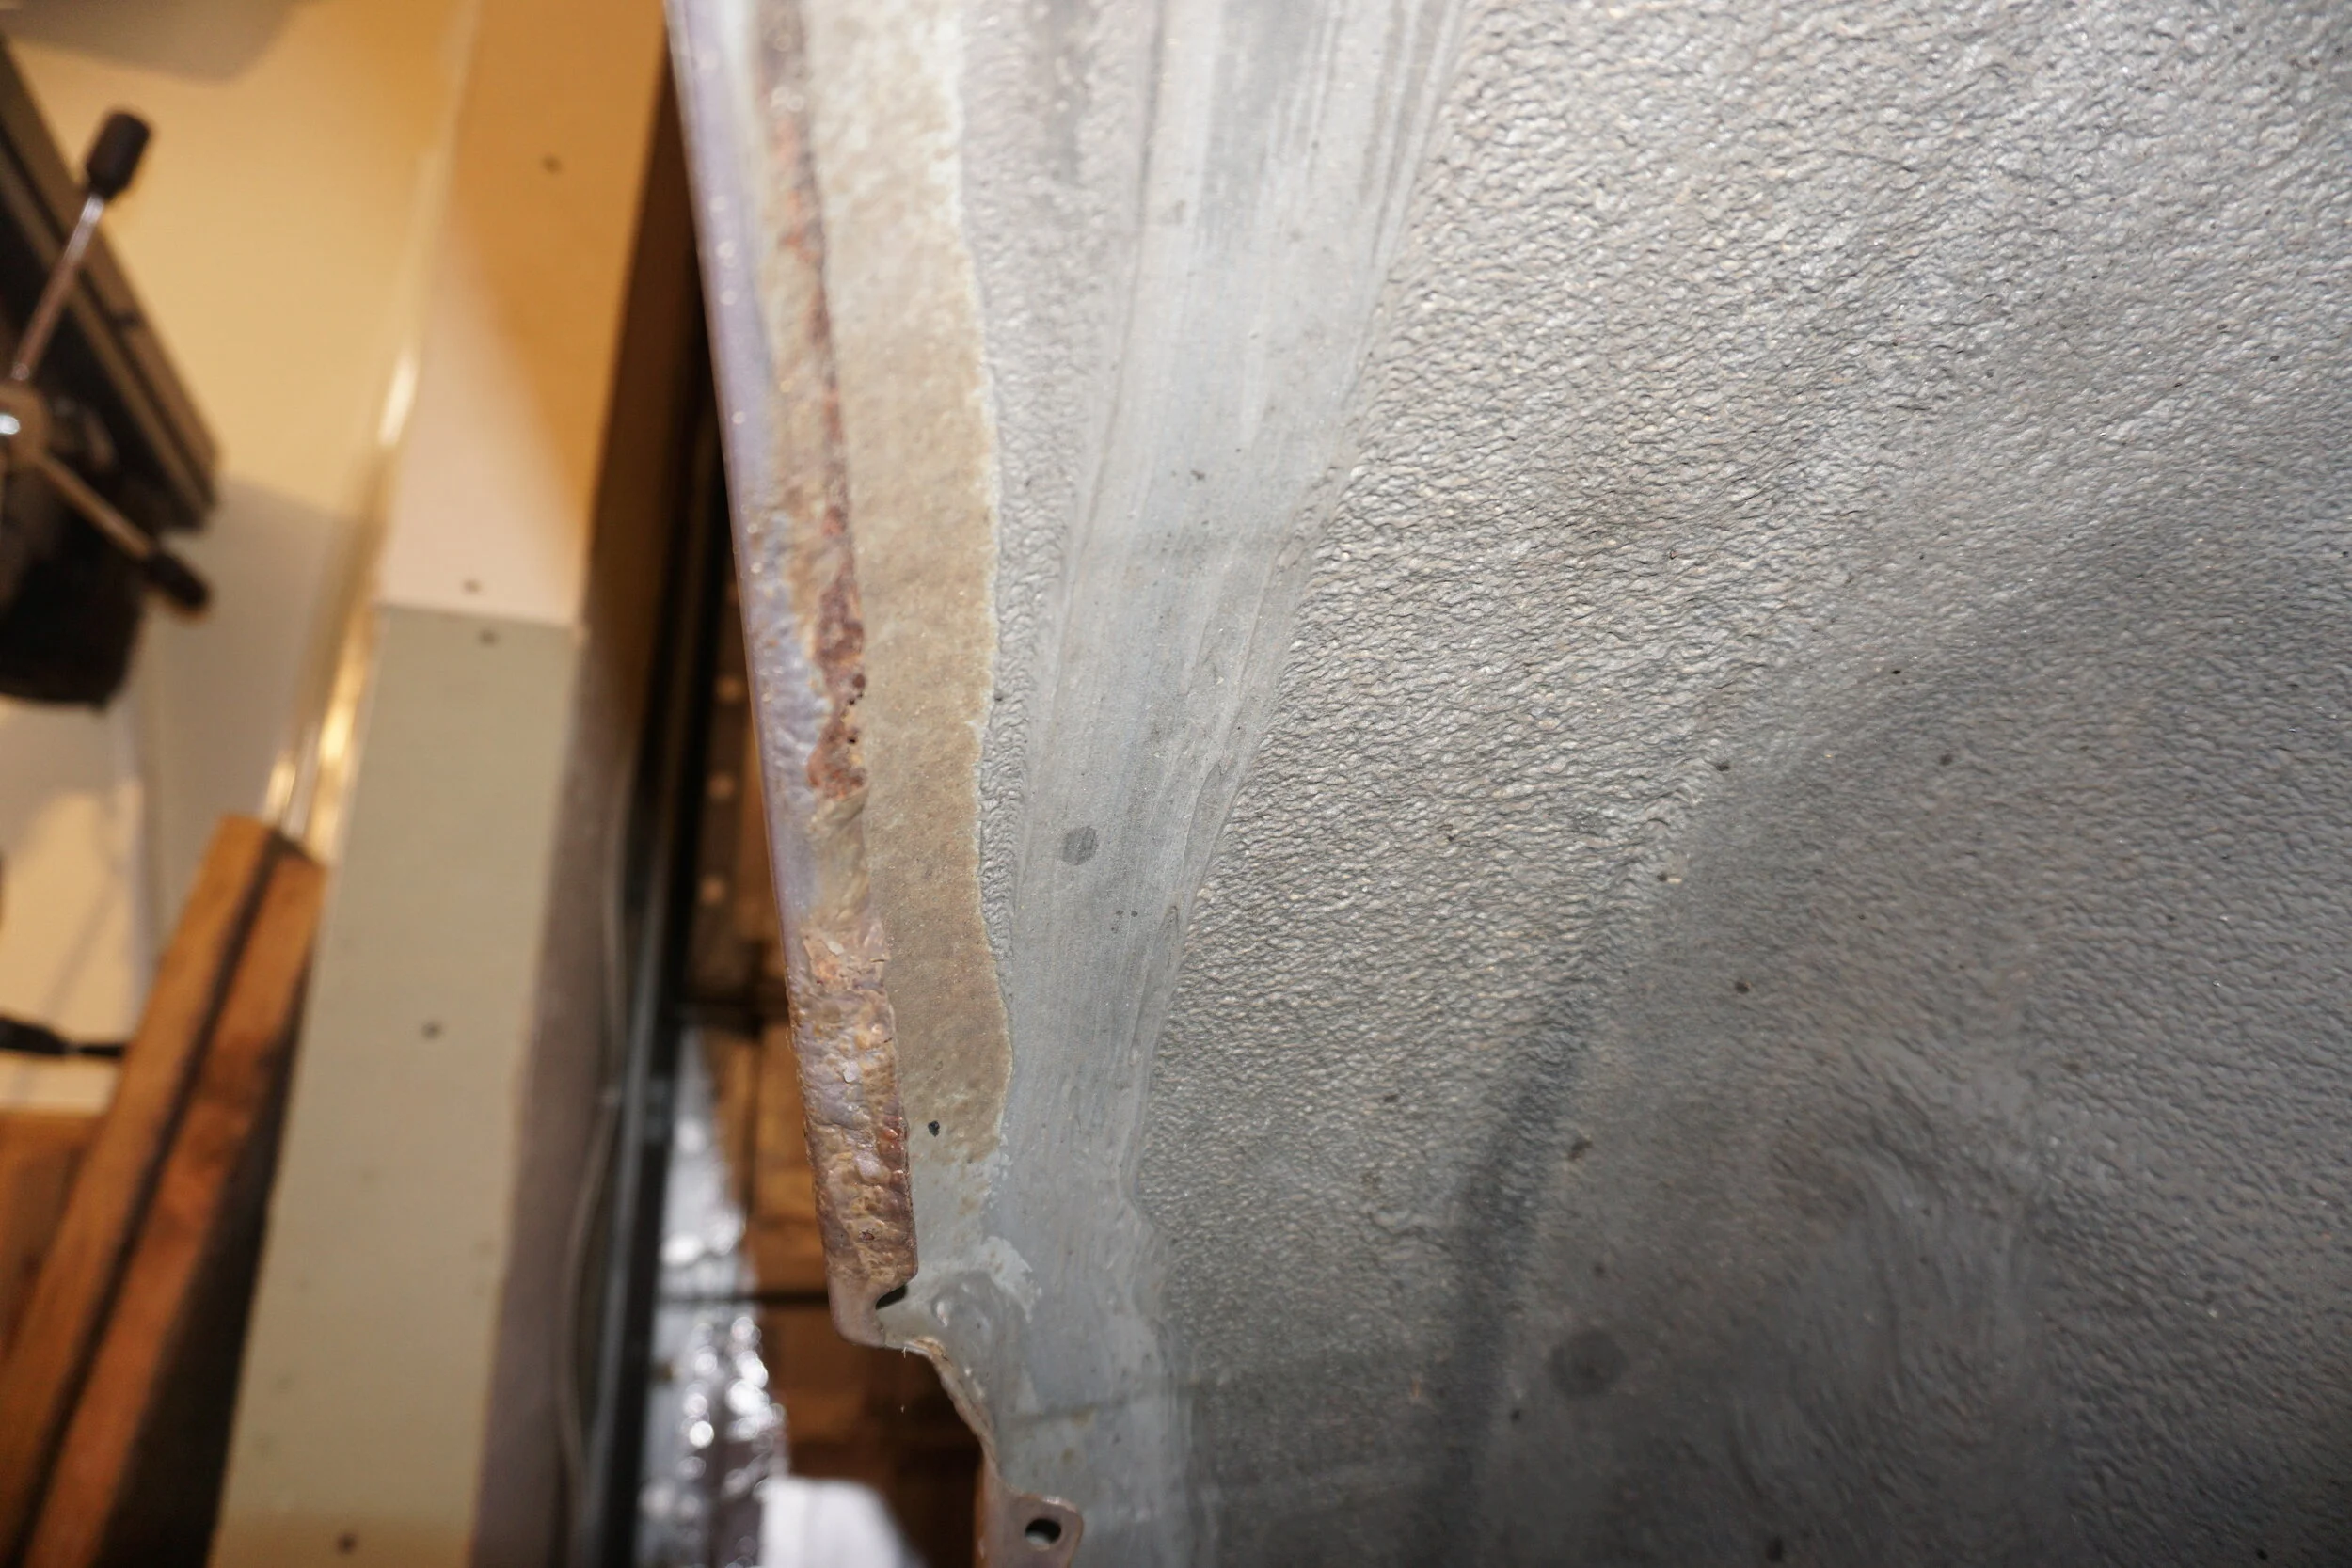
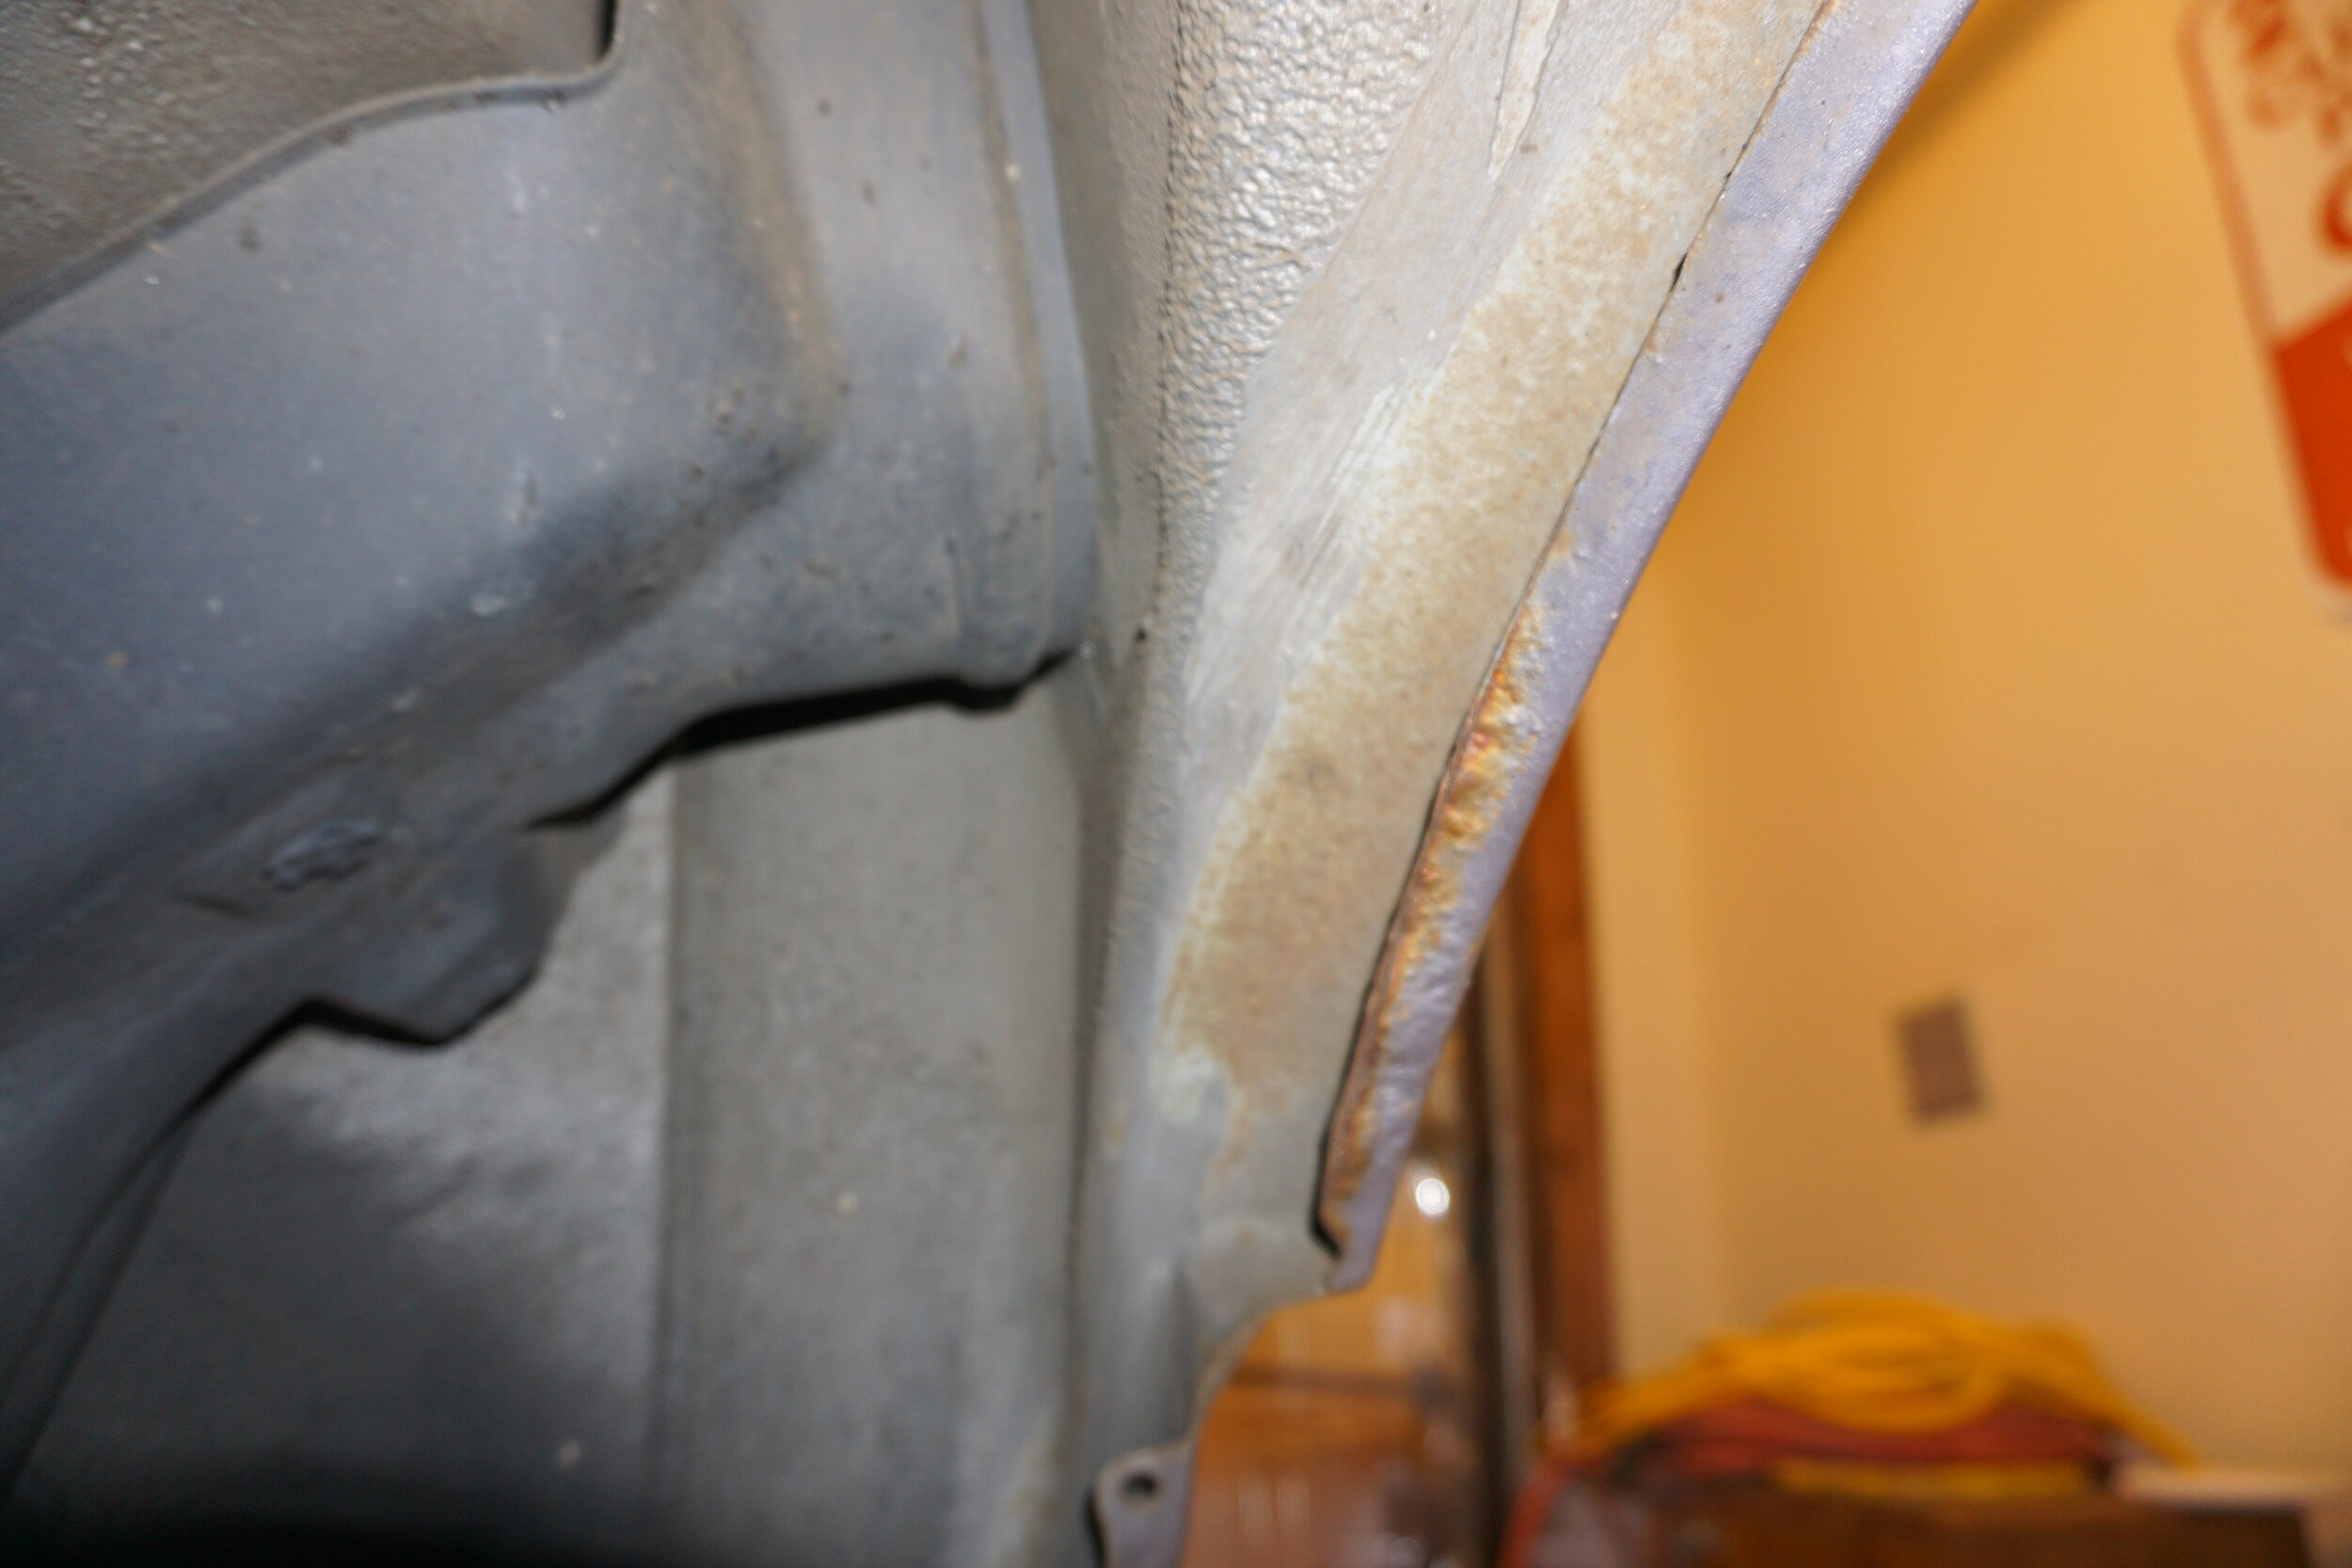
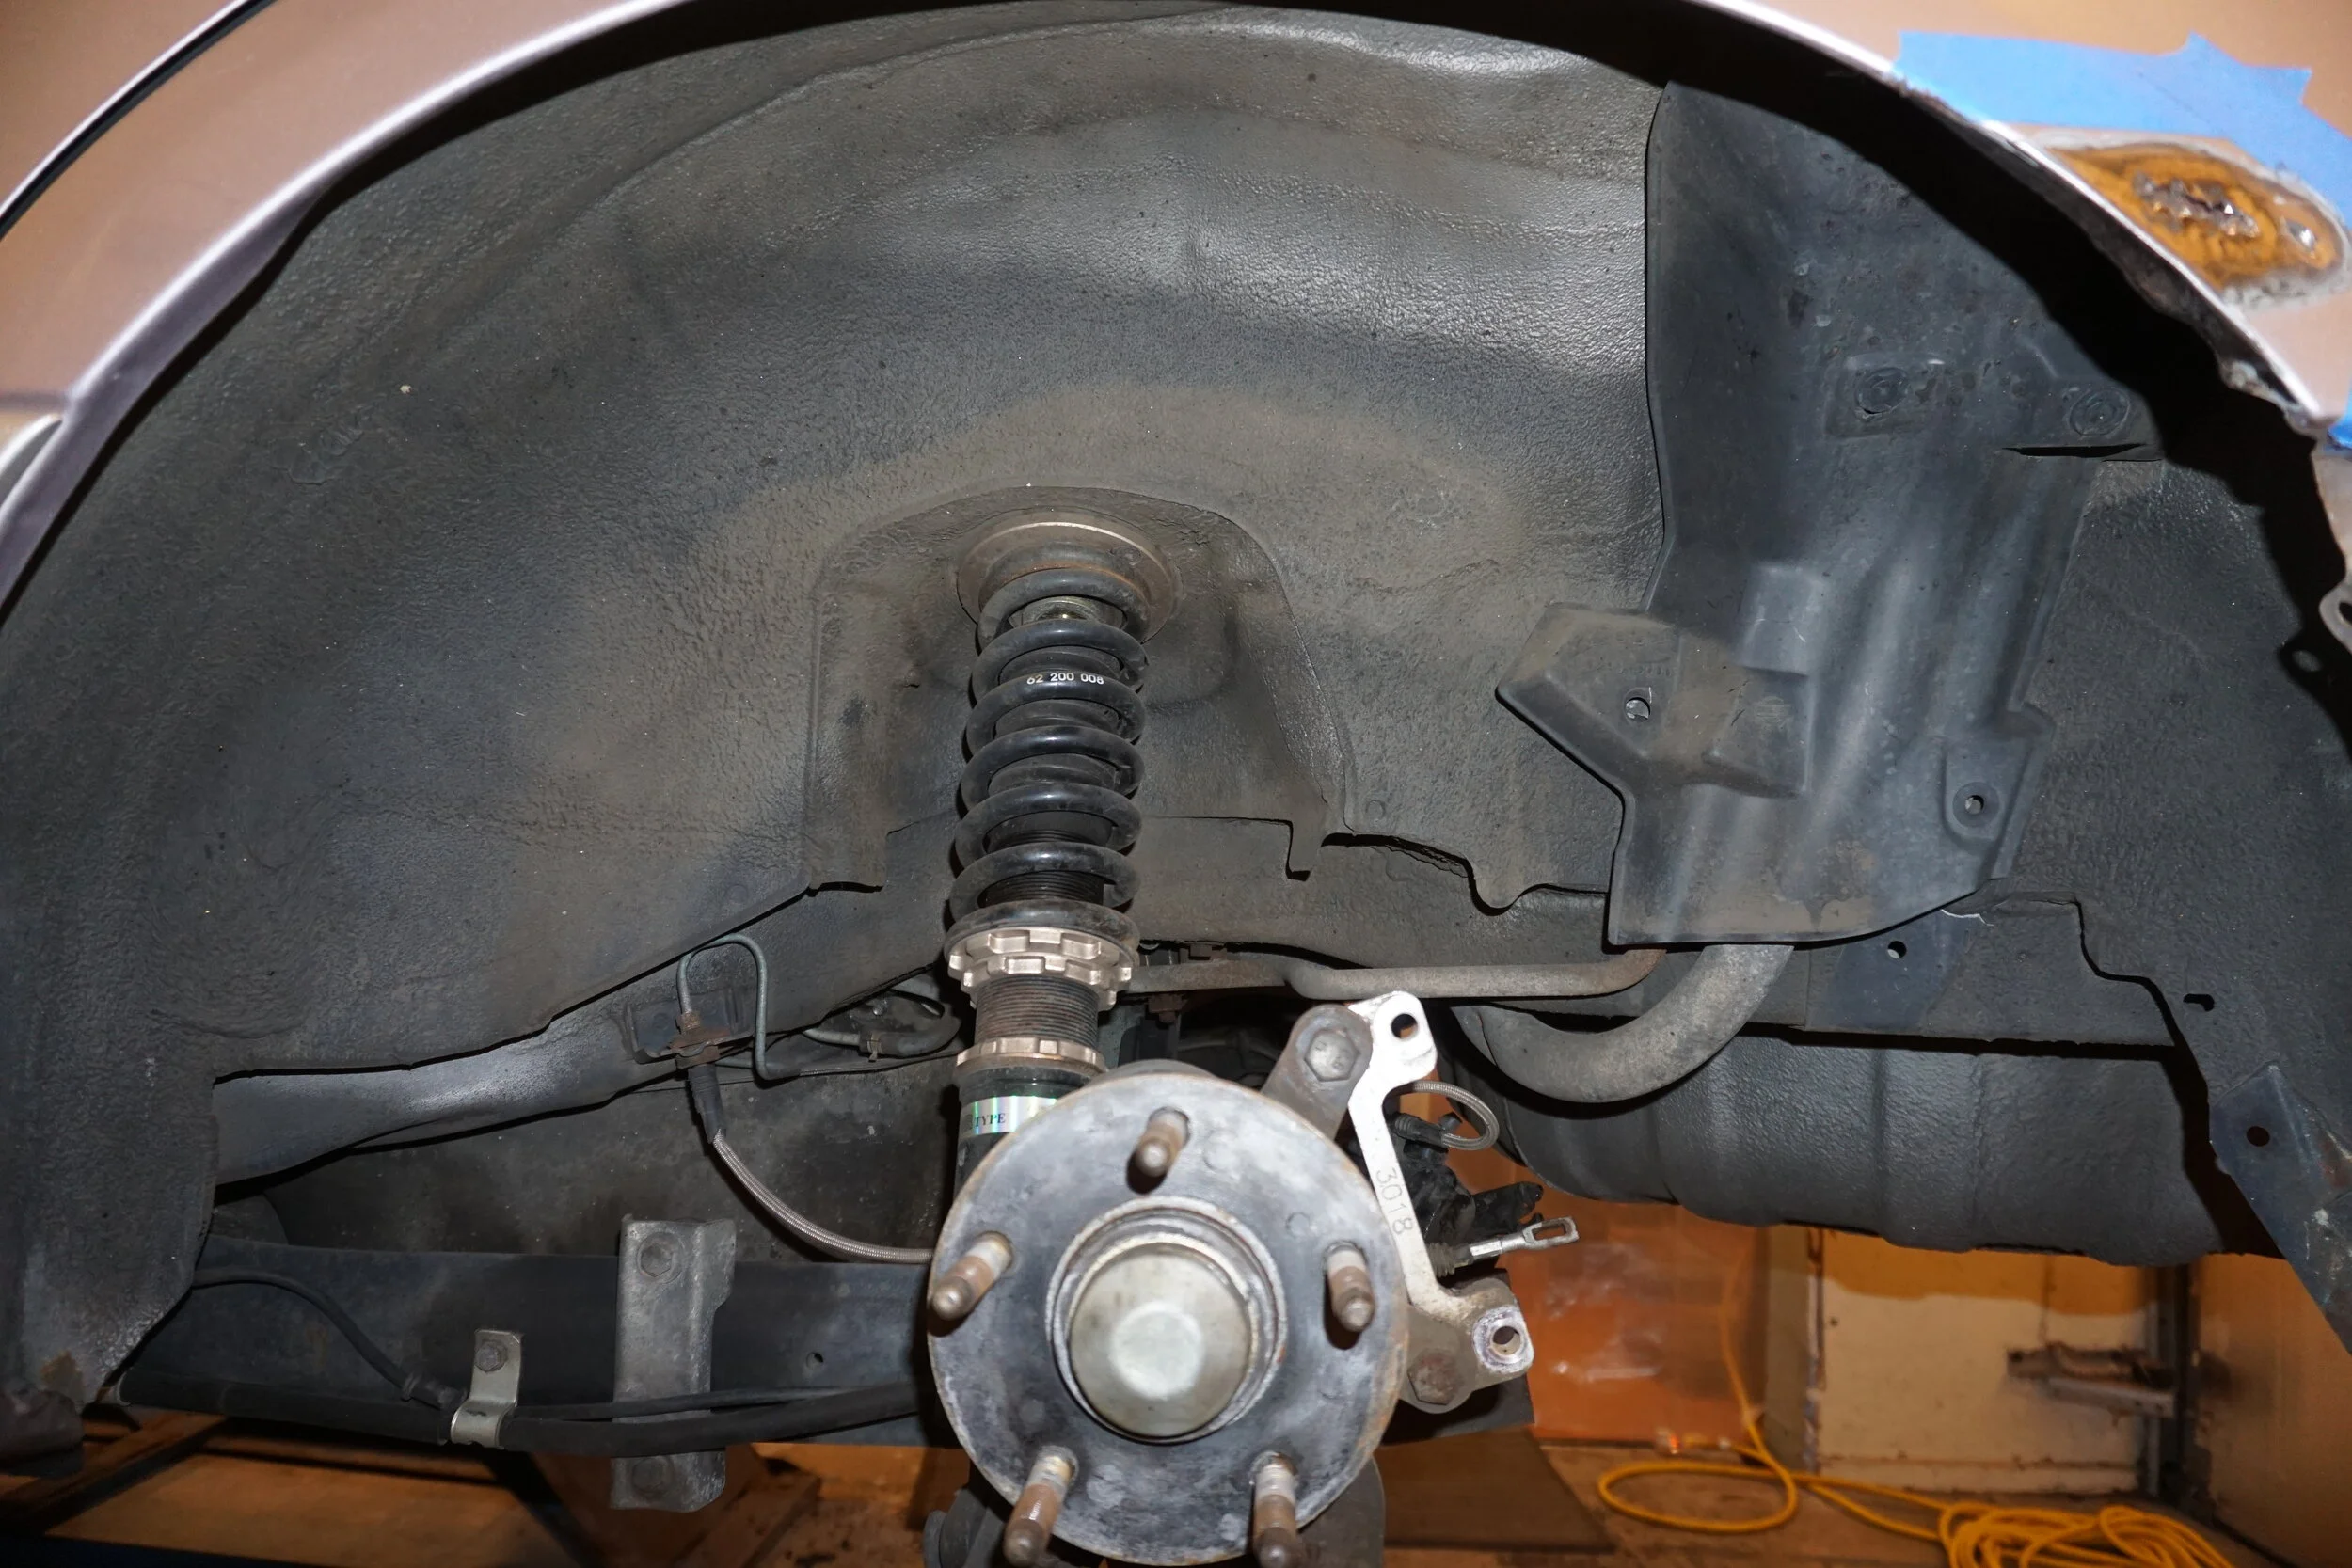
Here are two pics of my rear wheel wells for Mike. They look pretty good to me? 

I made a little "booth" to keep rust and metal particles from being flung all over my garage during the grinding and cutting phase.
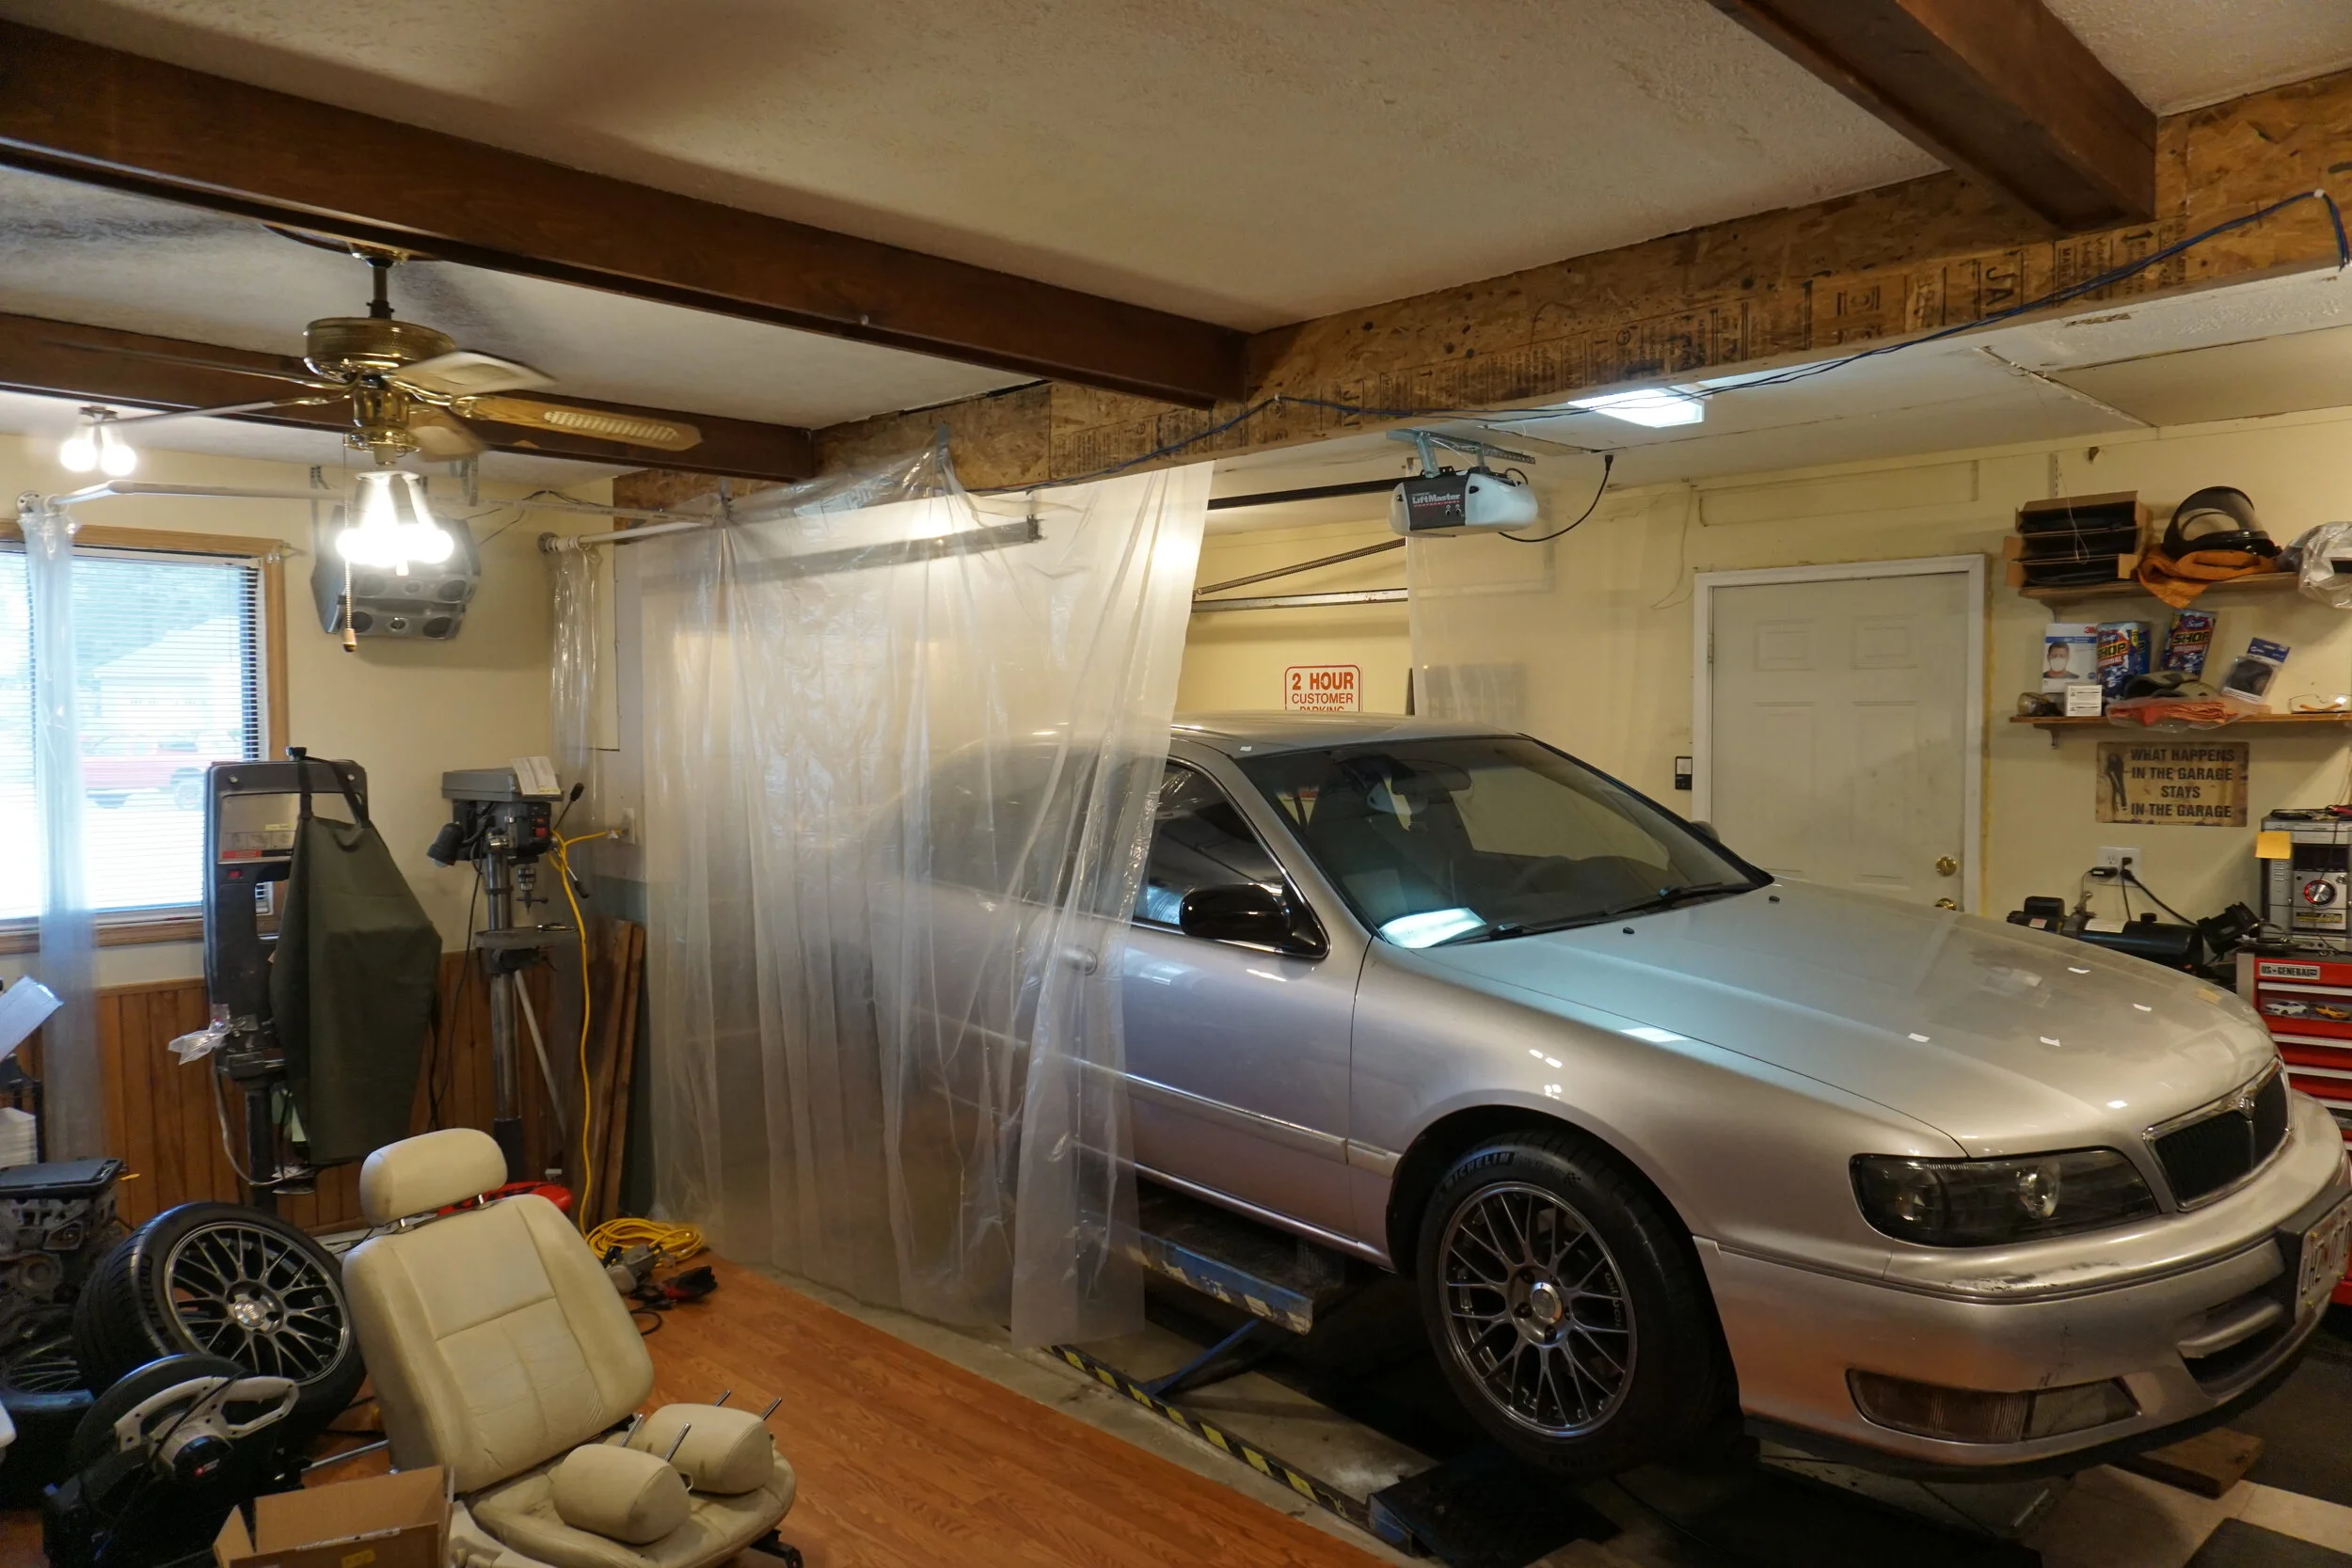
I made a little "booth" to keep rust and metal particles from being flung all over my garage during the grinding and cutting phase.
I cut off some rear fender material from I30s at junkyards and while I may not need to use it, it's instructive in showing how these areas are assembled and how they rust.
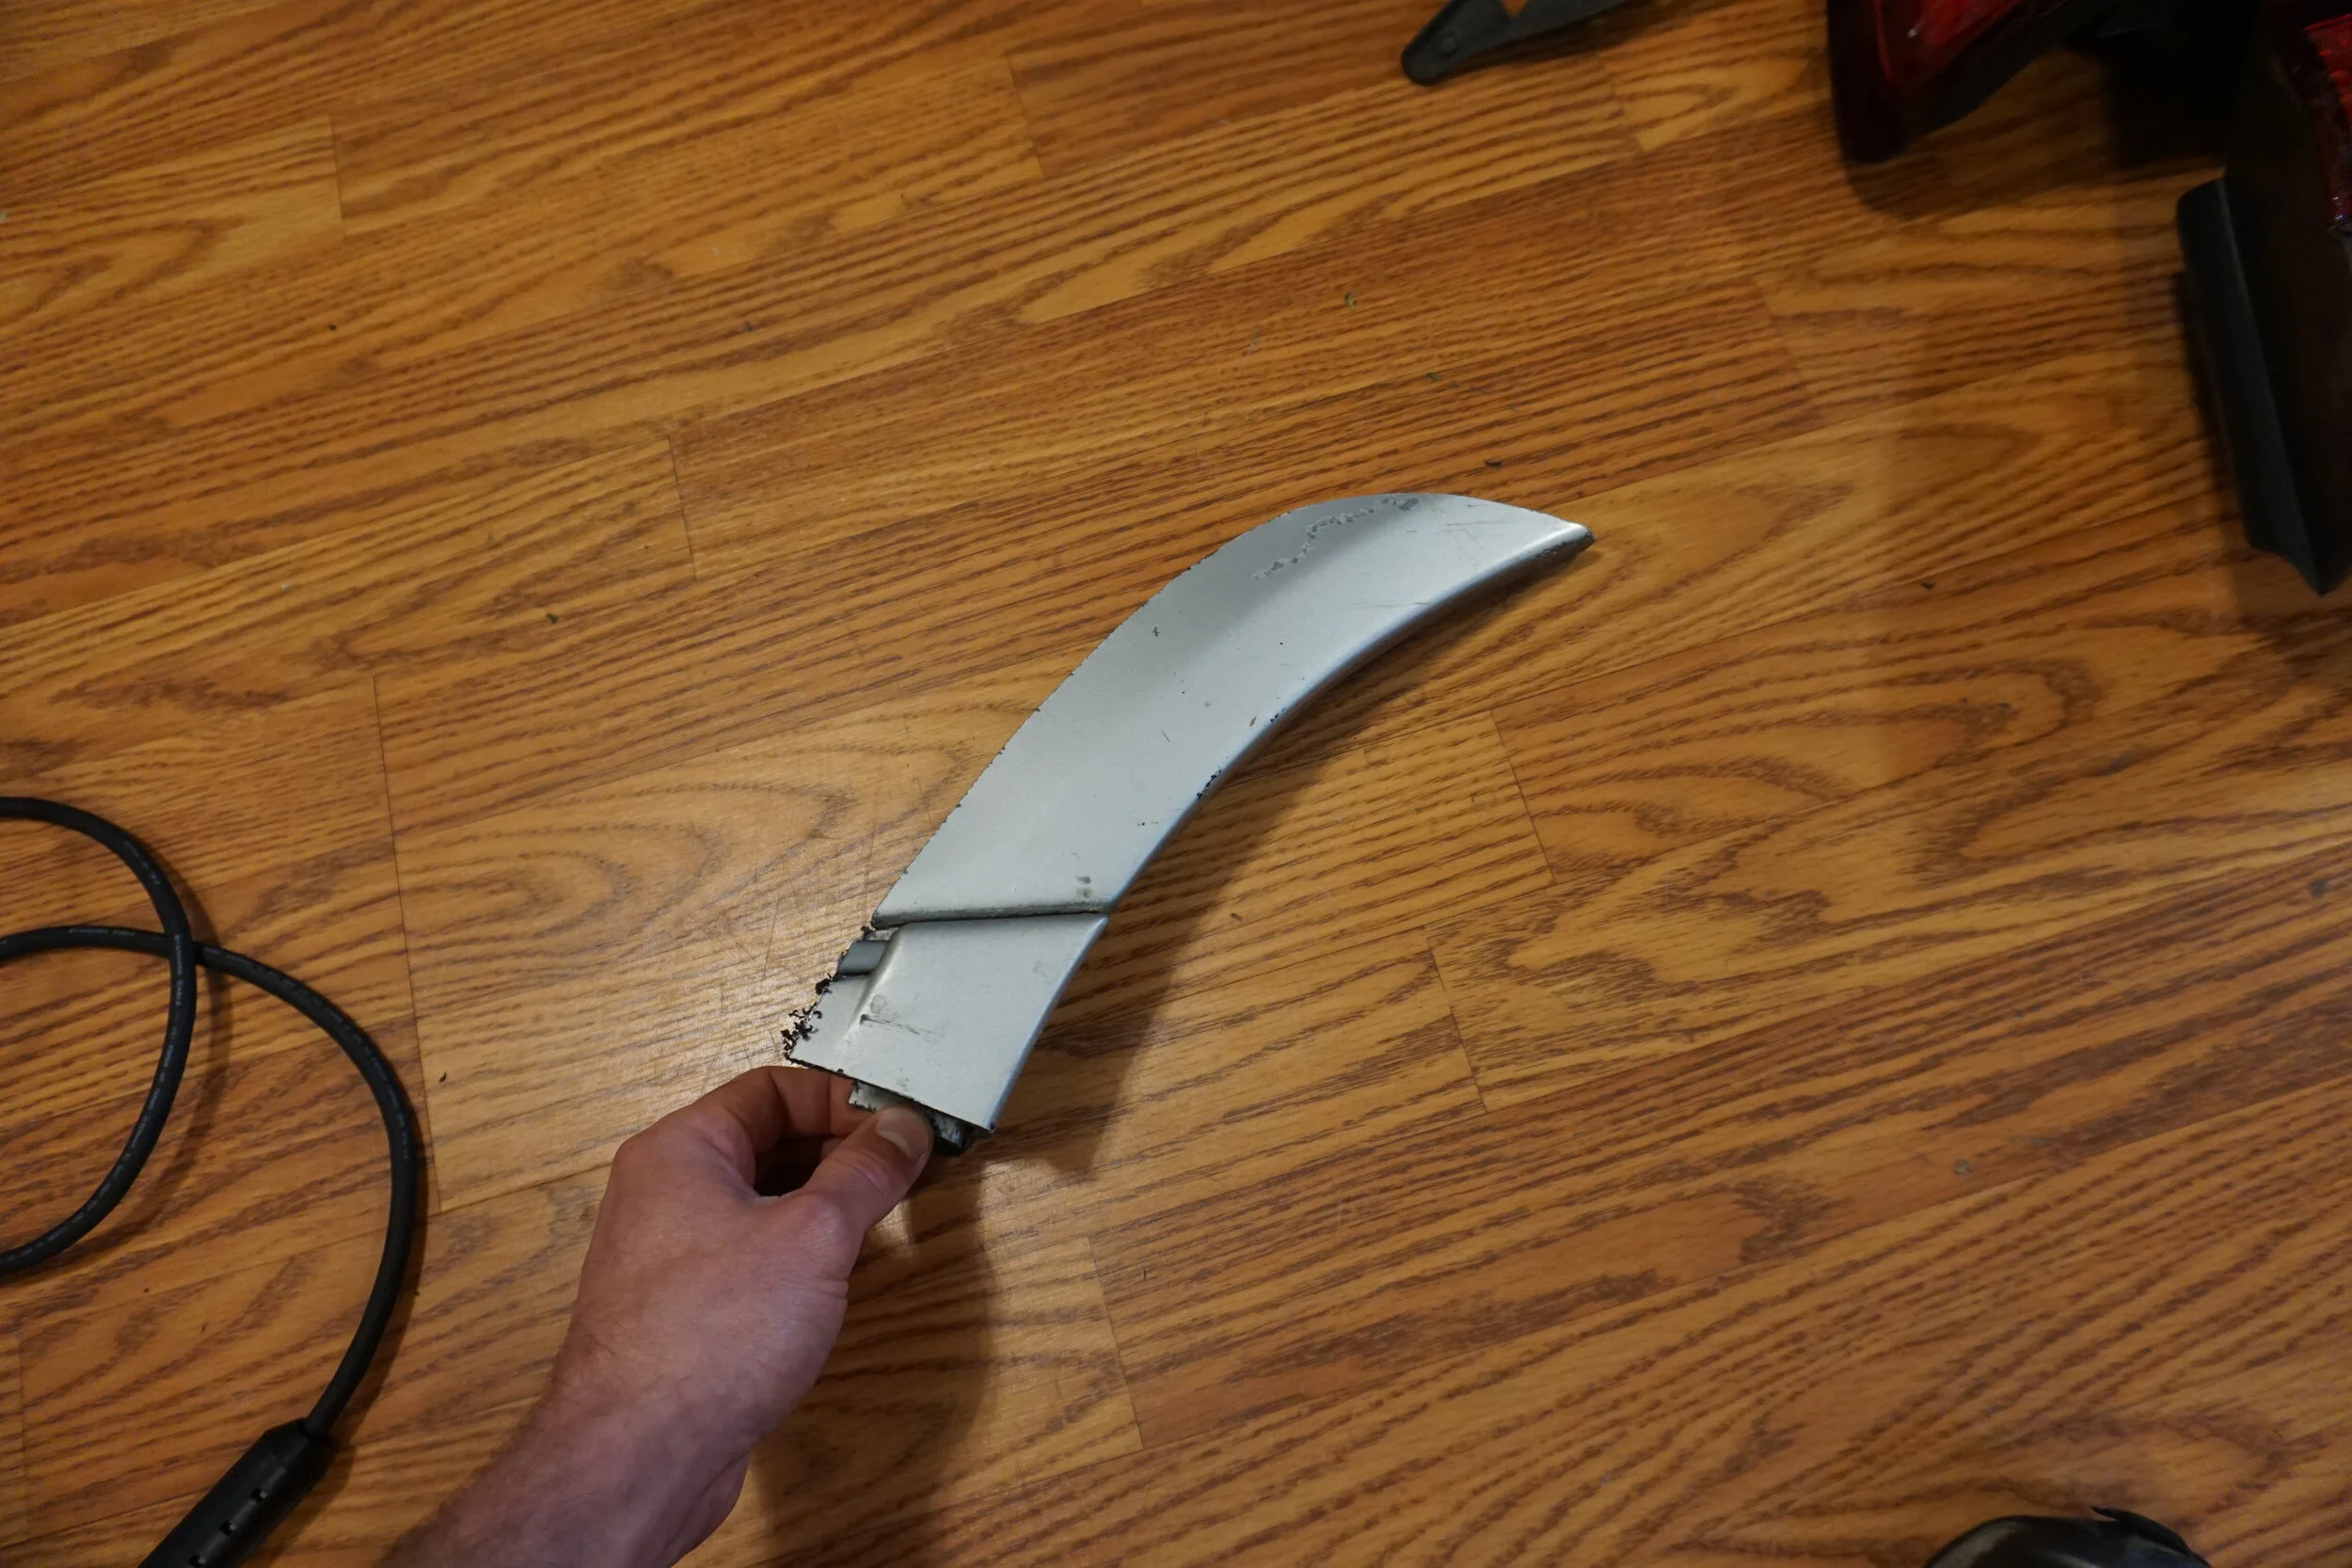

I'm really trying to figure out how the rust gets started in these areas. Does the water just slowly make its way between the two pieces of metal that make up the lip? How can I future-proof this so it can't happen again? Is it a failure of the factory seam sealer like it was under my dashboard under the A pillar? Help me brainstorm!
I bought a nice little 5" sander and took care of the spoiler real quick.
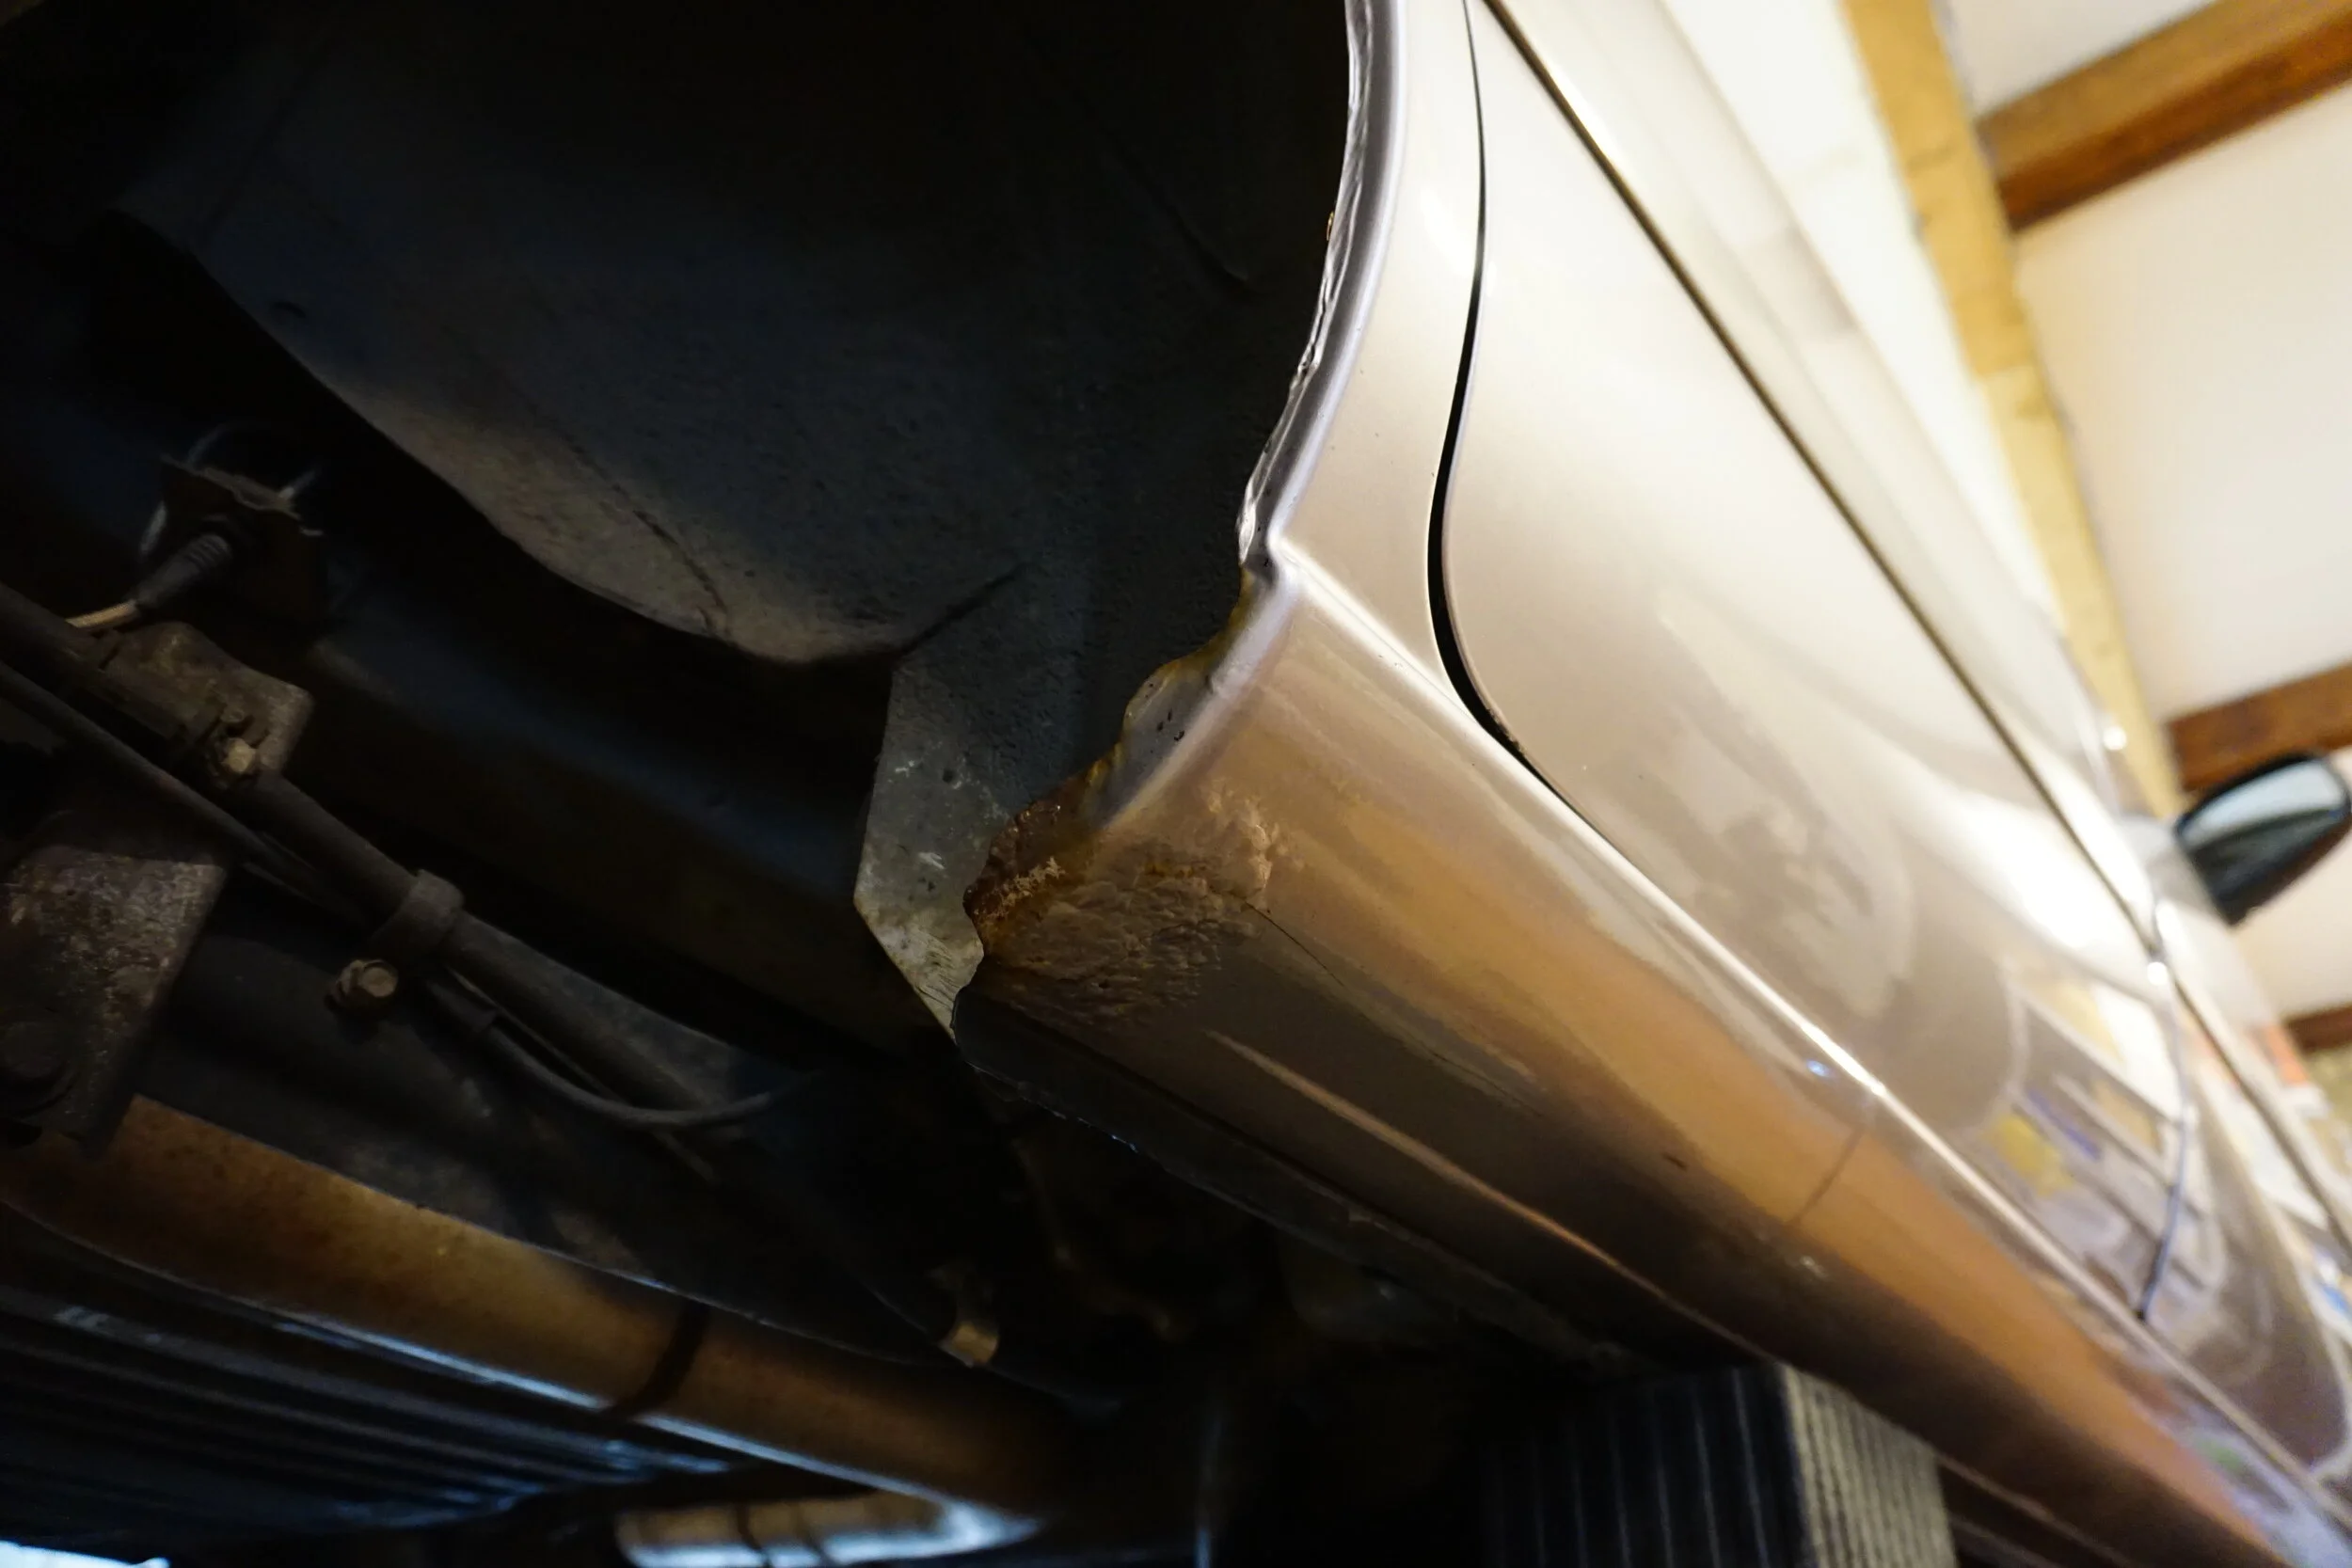
The rocker on the PS fell apart pretty quick with the wire wheel on the angle grinder:
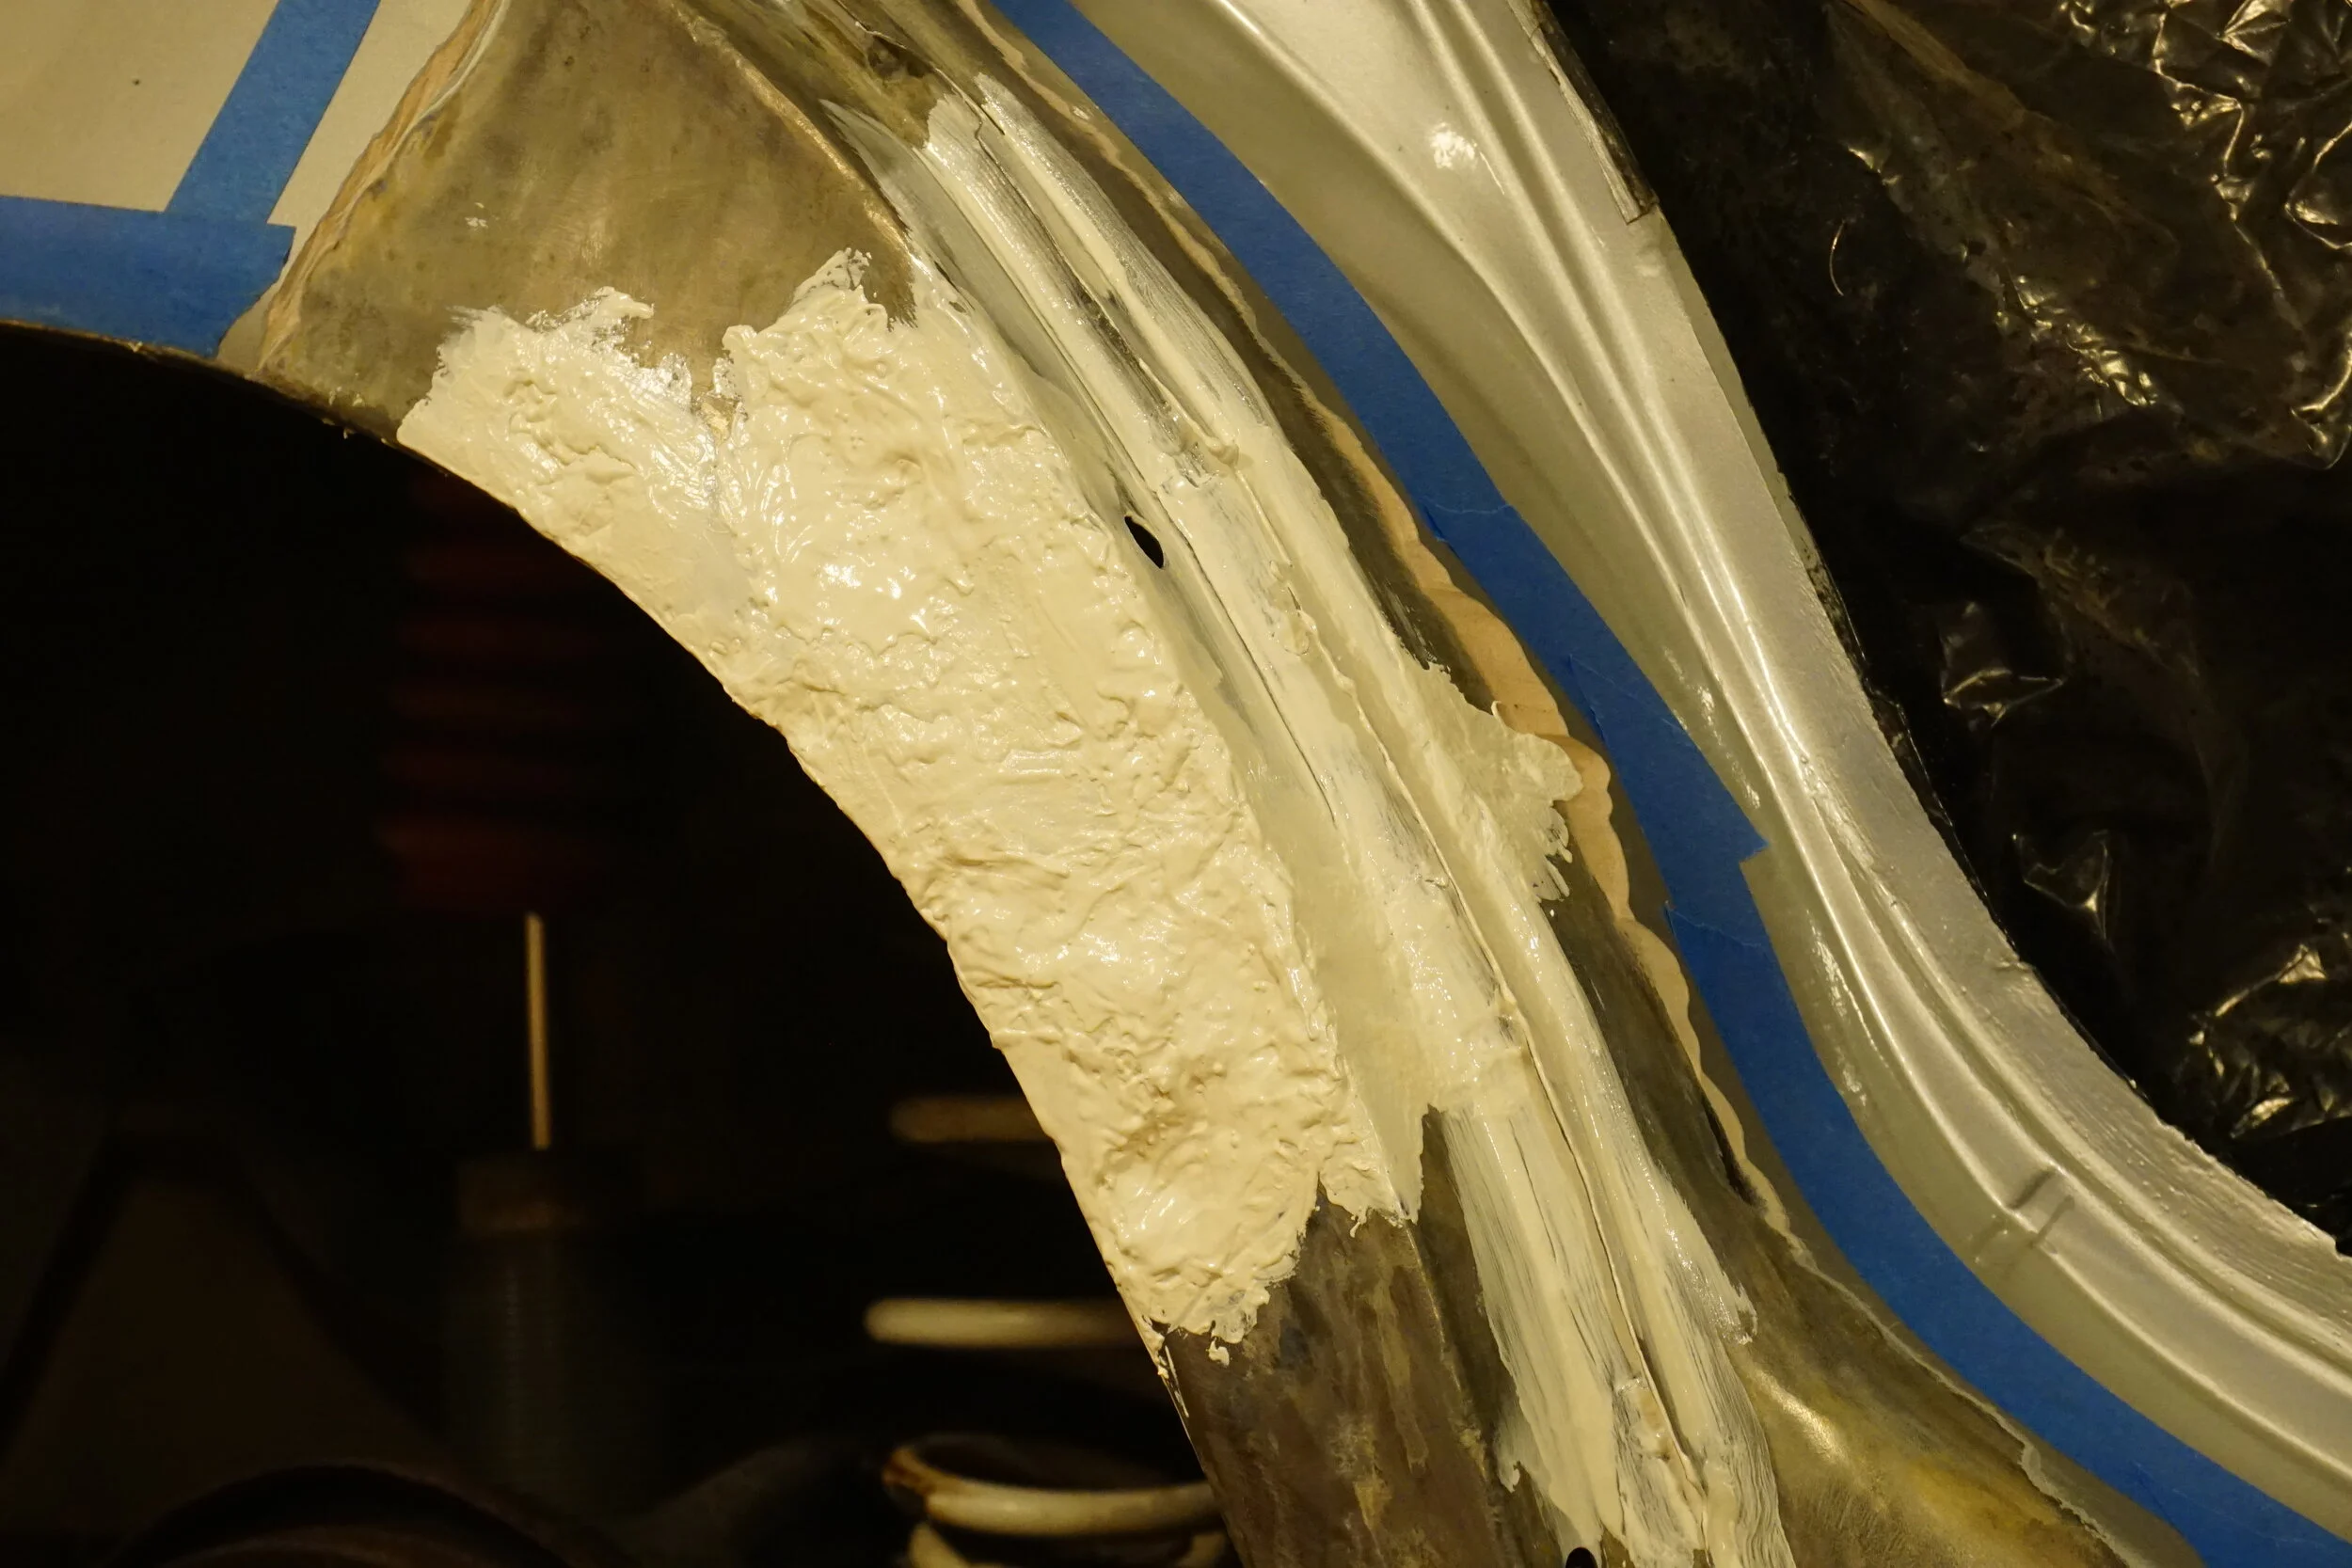
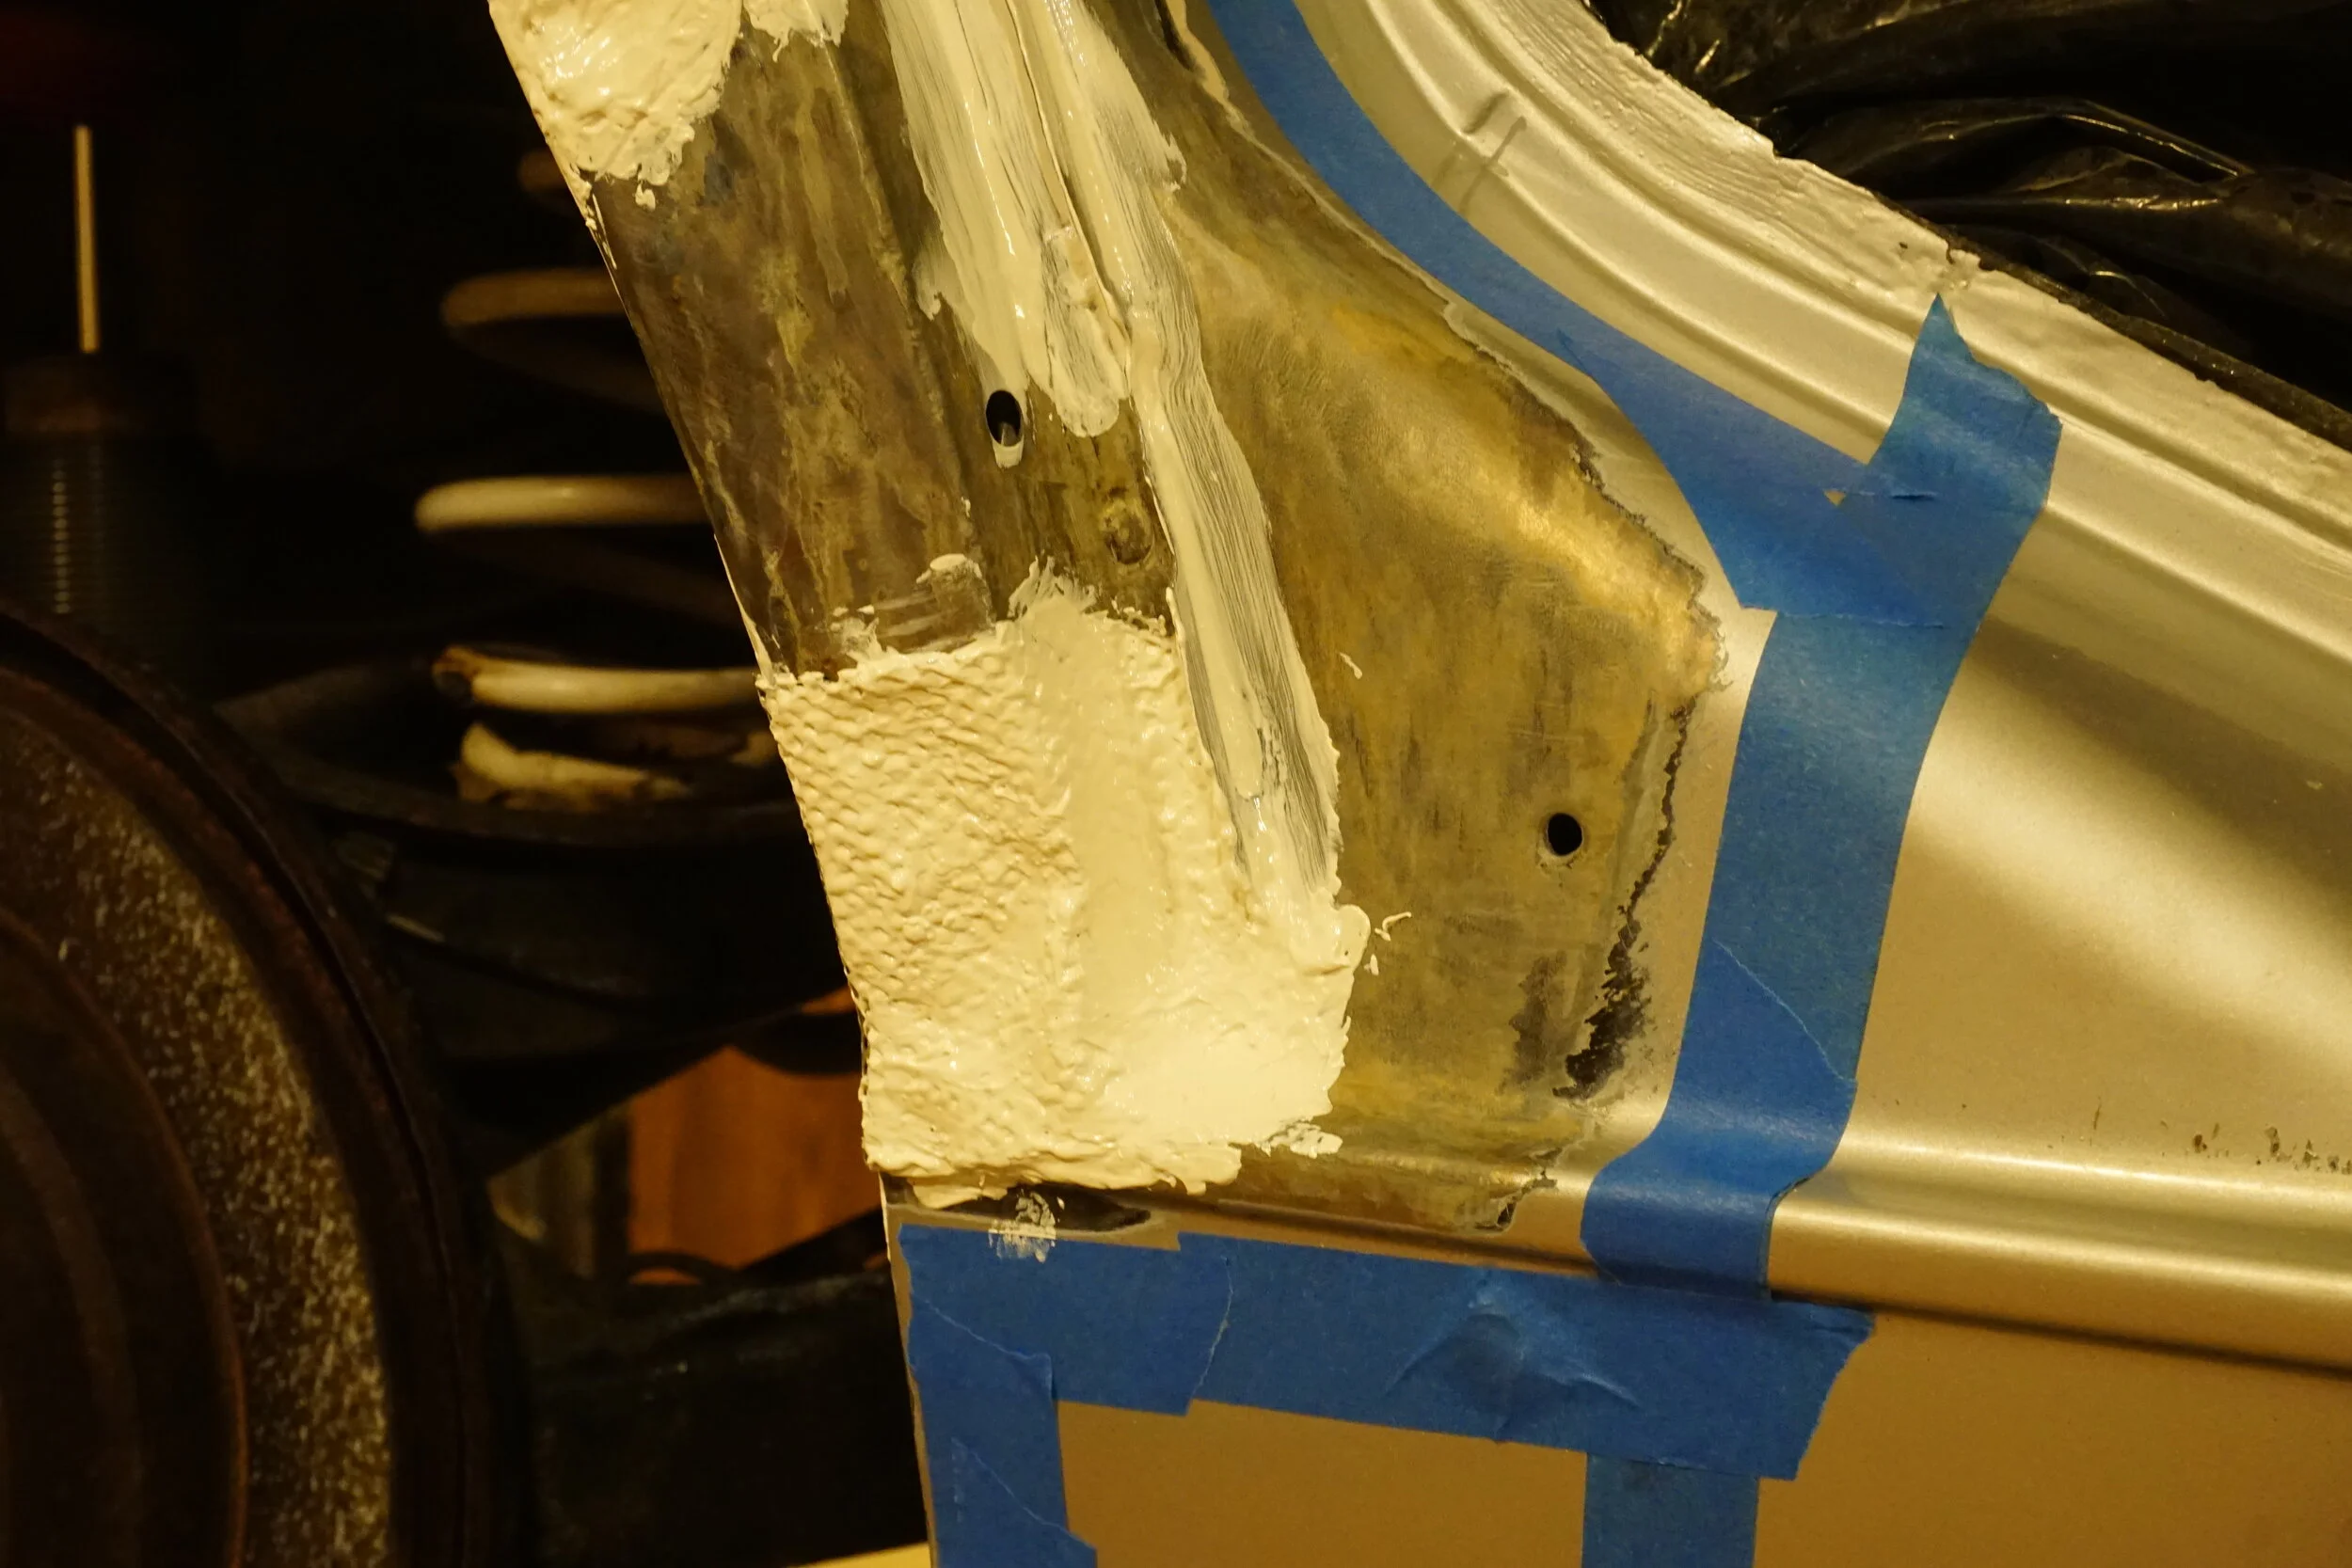
I quickly realized my normal method of "patching" (Bondo wire mesh + POR15 body seam sealer stuff) just wasn't going to cut it for this project. It may have been fine for the 3rd gen, and I made it work on the M3, but my I30 deserves a real repair. I bought this damn welder, and it's high time I put it to good use. Trial by fire! Which meant I needed to cut out any compromised metal so I had something good to weld to.
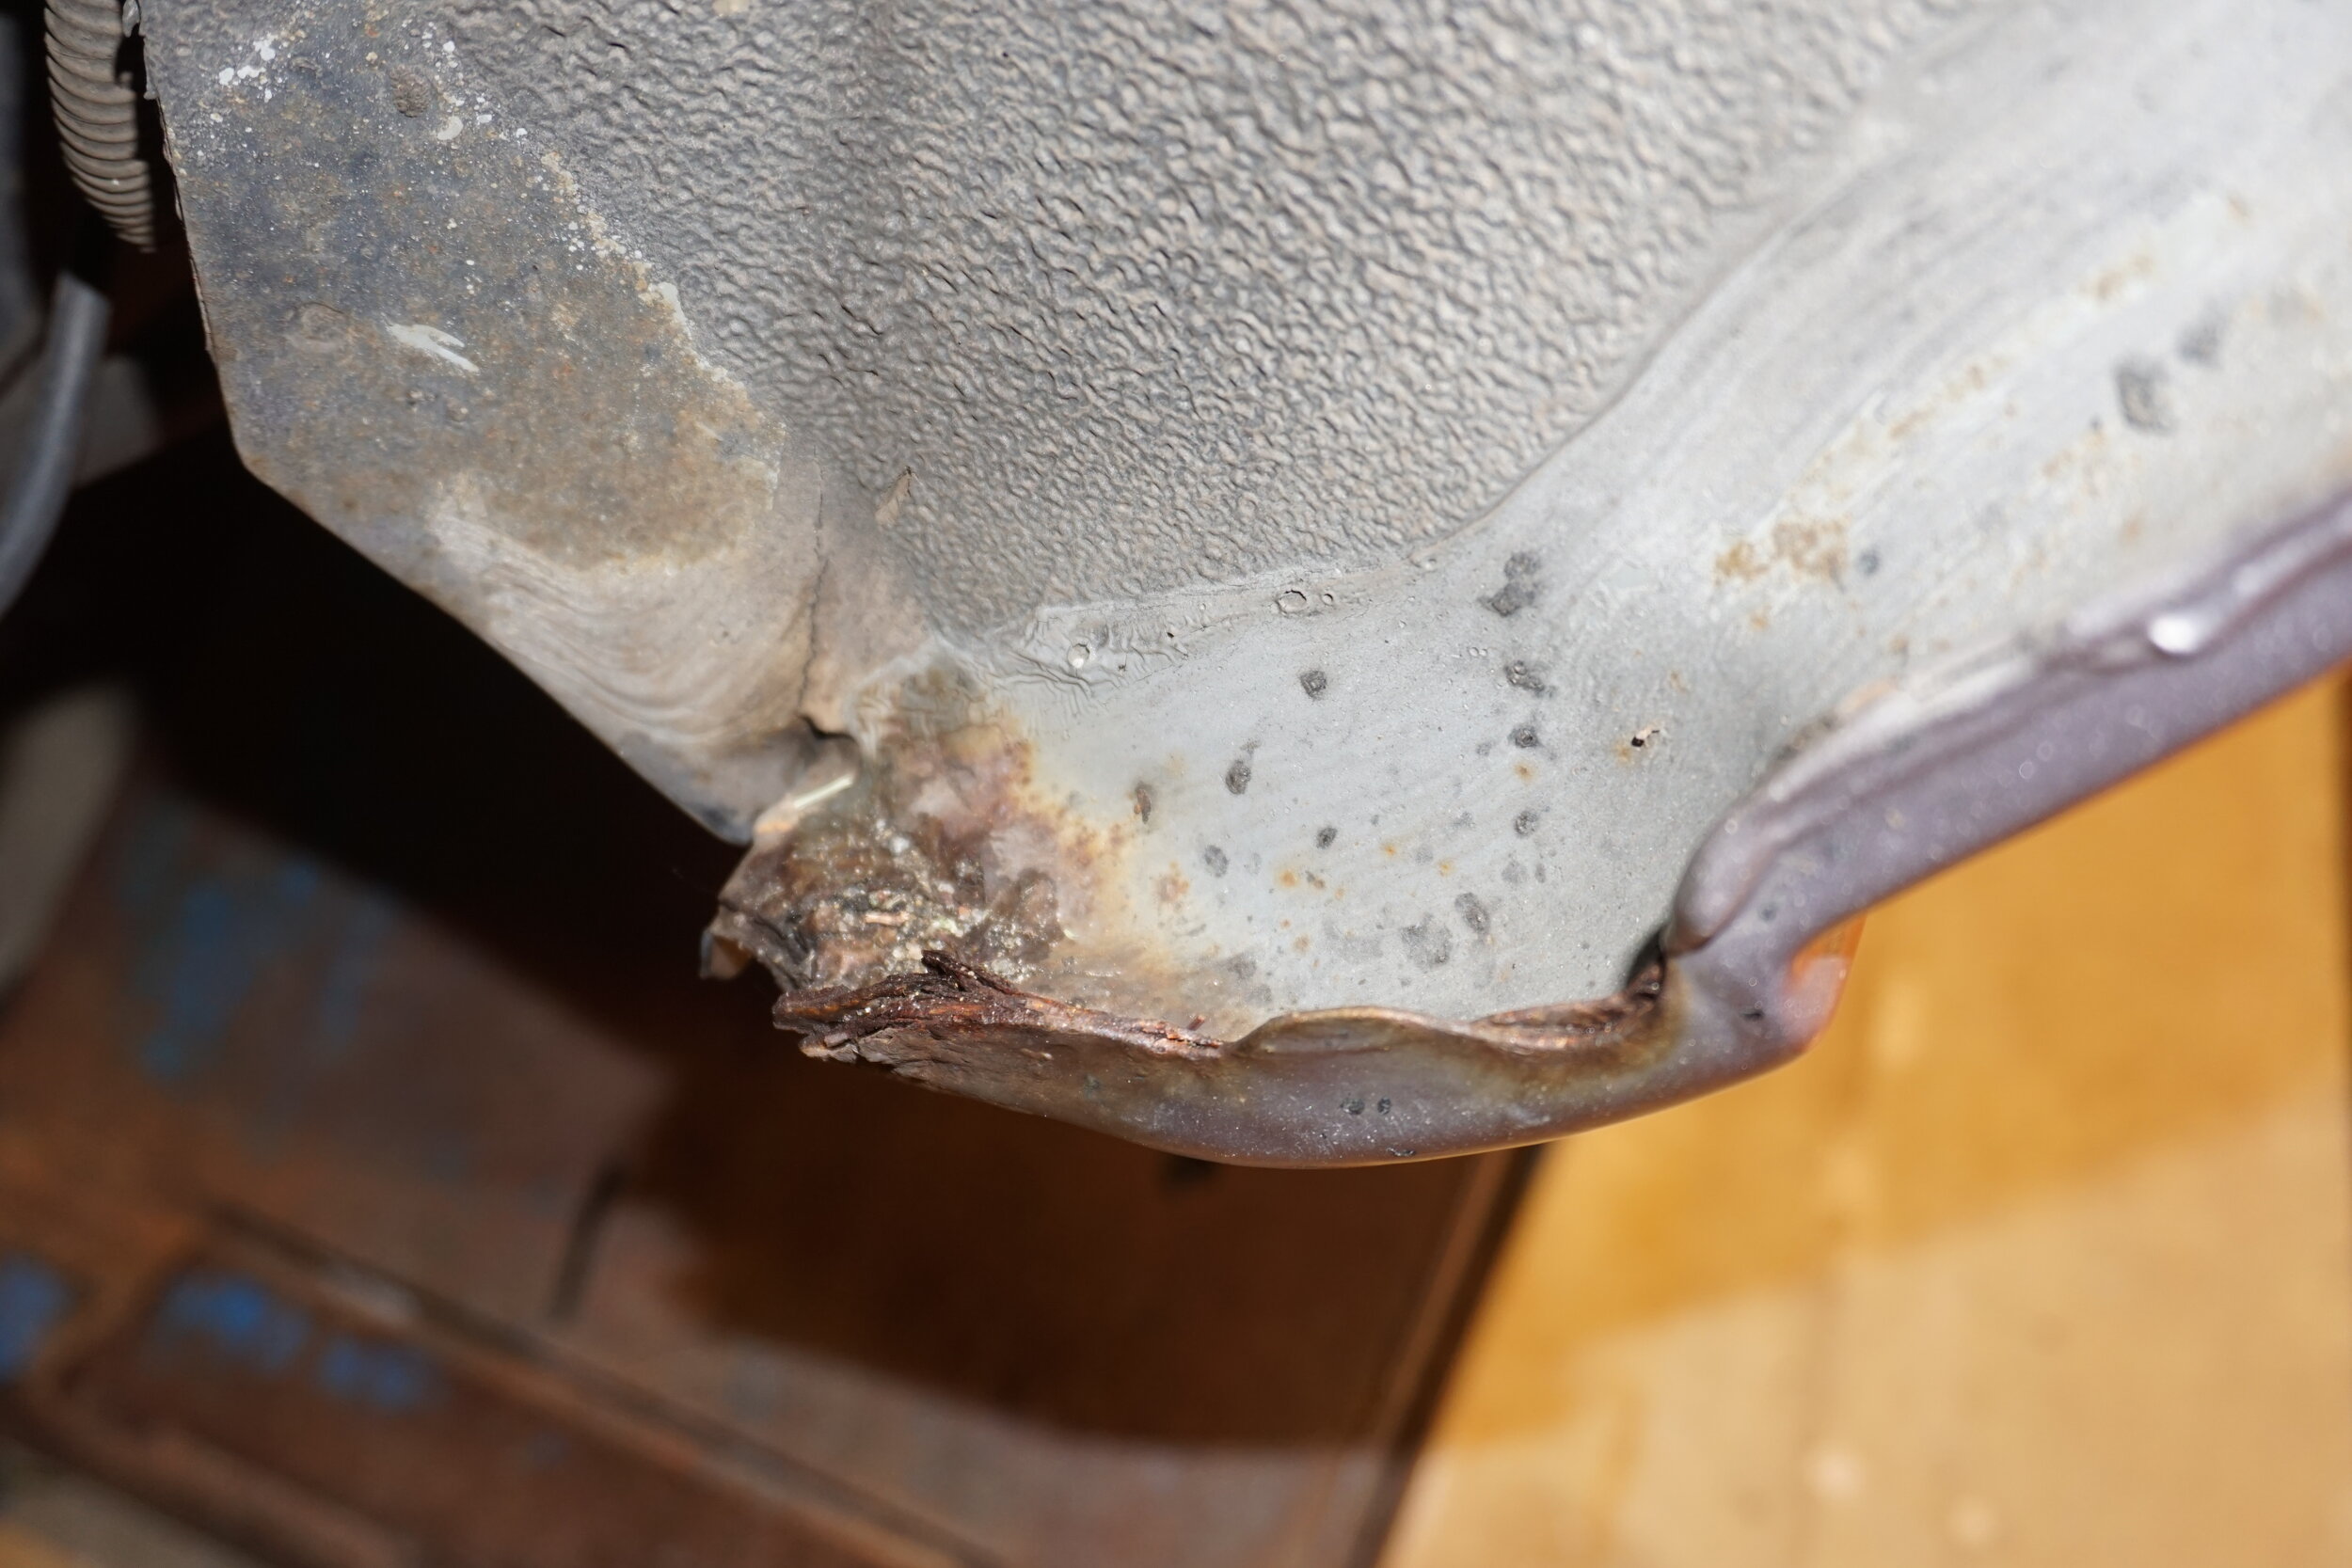
The PS fender also fell apart....

I'm not done with that one yet....
More of the same on the DS:
It's way too damn hard to get an angle grinder in there up above the fender lip...

Oooooh boy...
I'm just getting started
Because this is bad
Crap
I'm not sure how I'm going to get to all of that

So yeah, this has already spiraled way out of control, and there's way more cutting that needs to be done before I can think of patching things up. This is really going to put my amateur welding skills to the test! Thankfully most of it isn't visible when just walking by the car, so even if it's not perfect it should be okay. Now I just need to find me some 18 gauge sheet metal....
I'm really trying to figure out how the rust gets started in these areas. Does the water just slowly make its way between the two pieces of metal that make up the lip? How can I future-proof this so it can't happen again? Is it a failure of the factory seam sealer like it was under my dashboard under the A pillar? Help me brainstorm!
I bought a nice little 5" sander and took care of the spoiler real quick.
The rocker on the PS fell apart pretty quick with the wire wheel on the angle grinder:
I quickly realized my normal method of "patching" (Bondo wire mesh + POR15 body seam sealer stuff) just wasn't going to cut it for this project. It may have been fine for the 3rd gen, and I made it work on the M3, but my I30 deserves a real repair. I bought this damn welder, and it's high time I put it to good use. Trial by fire! Which meant I needed to cut out any compromised metal so I had something good to weld to.
The PS fender also fell apart....
I'm not done with that one yet....
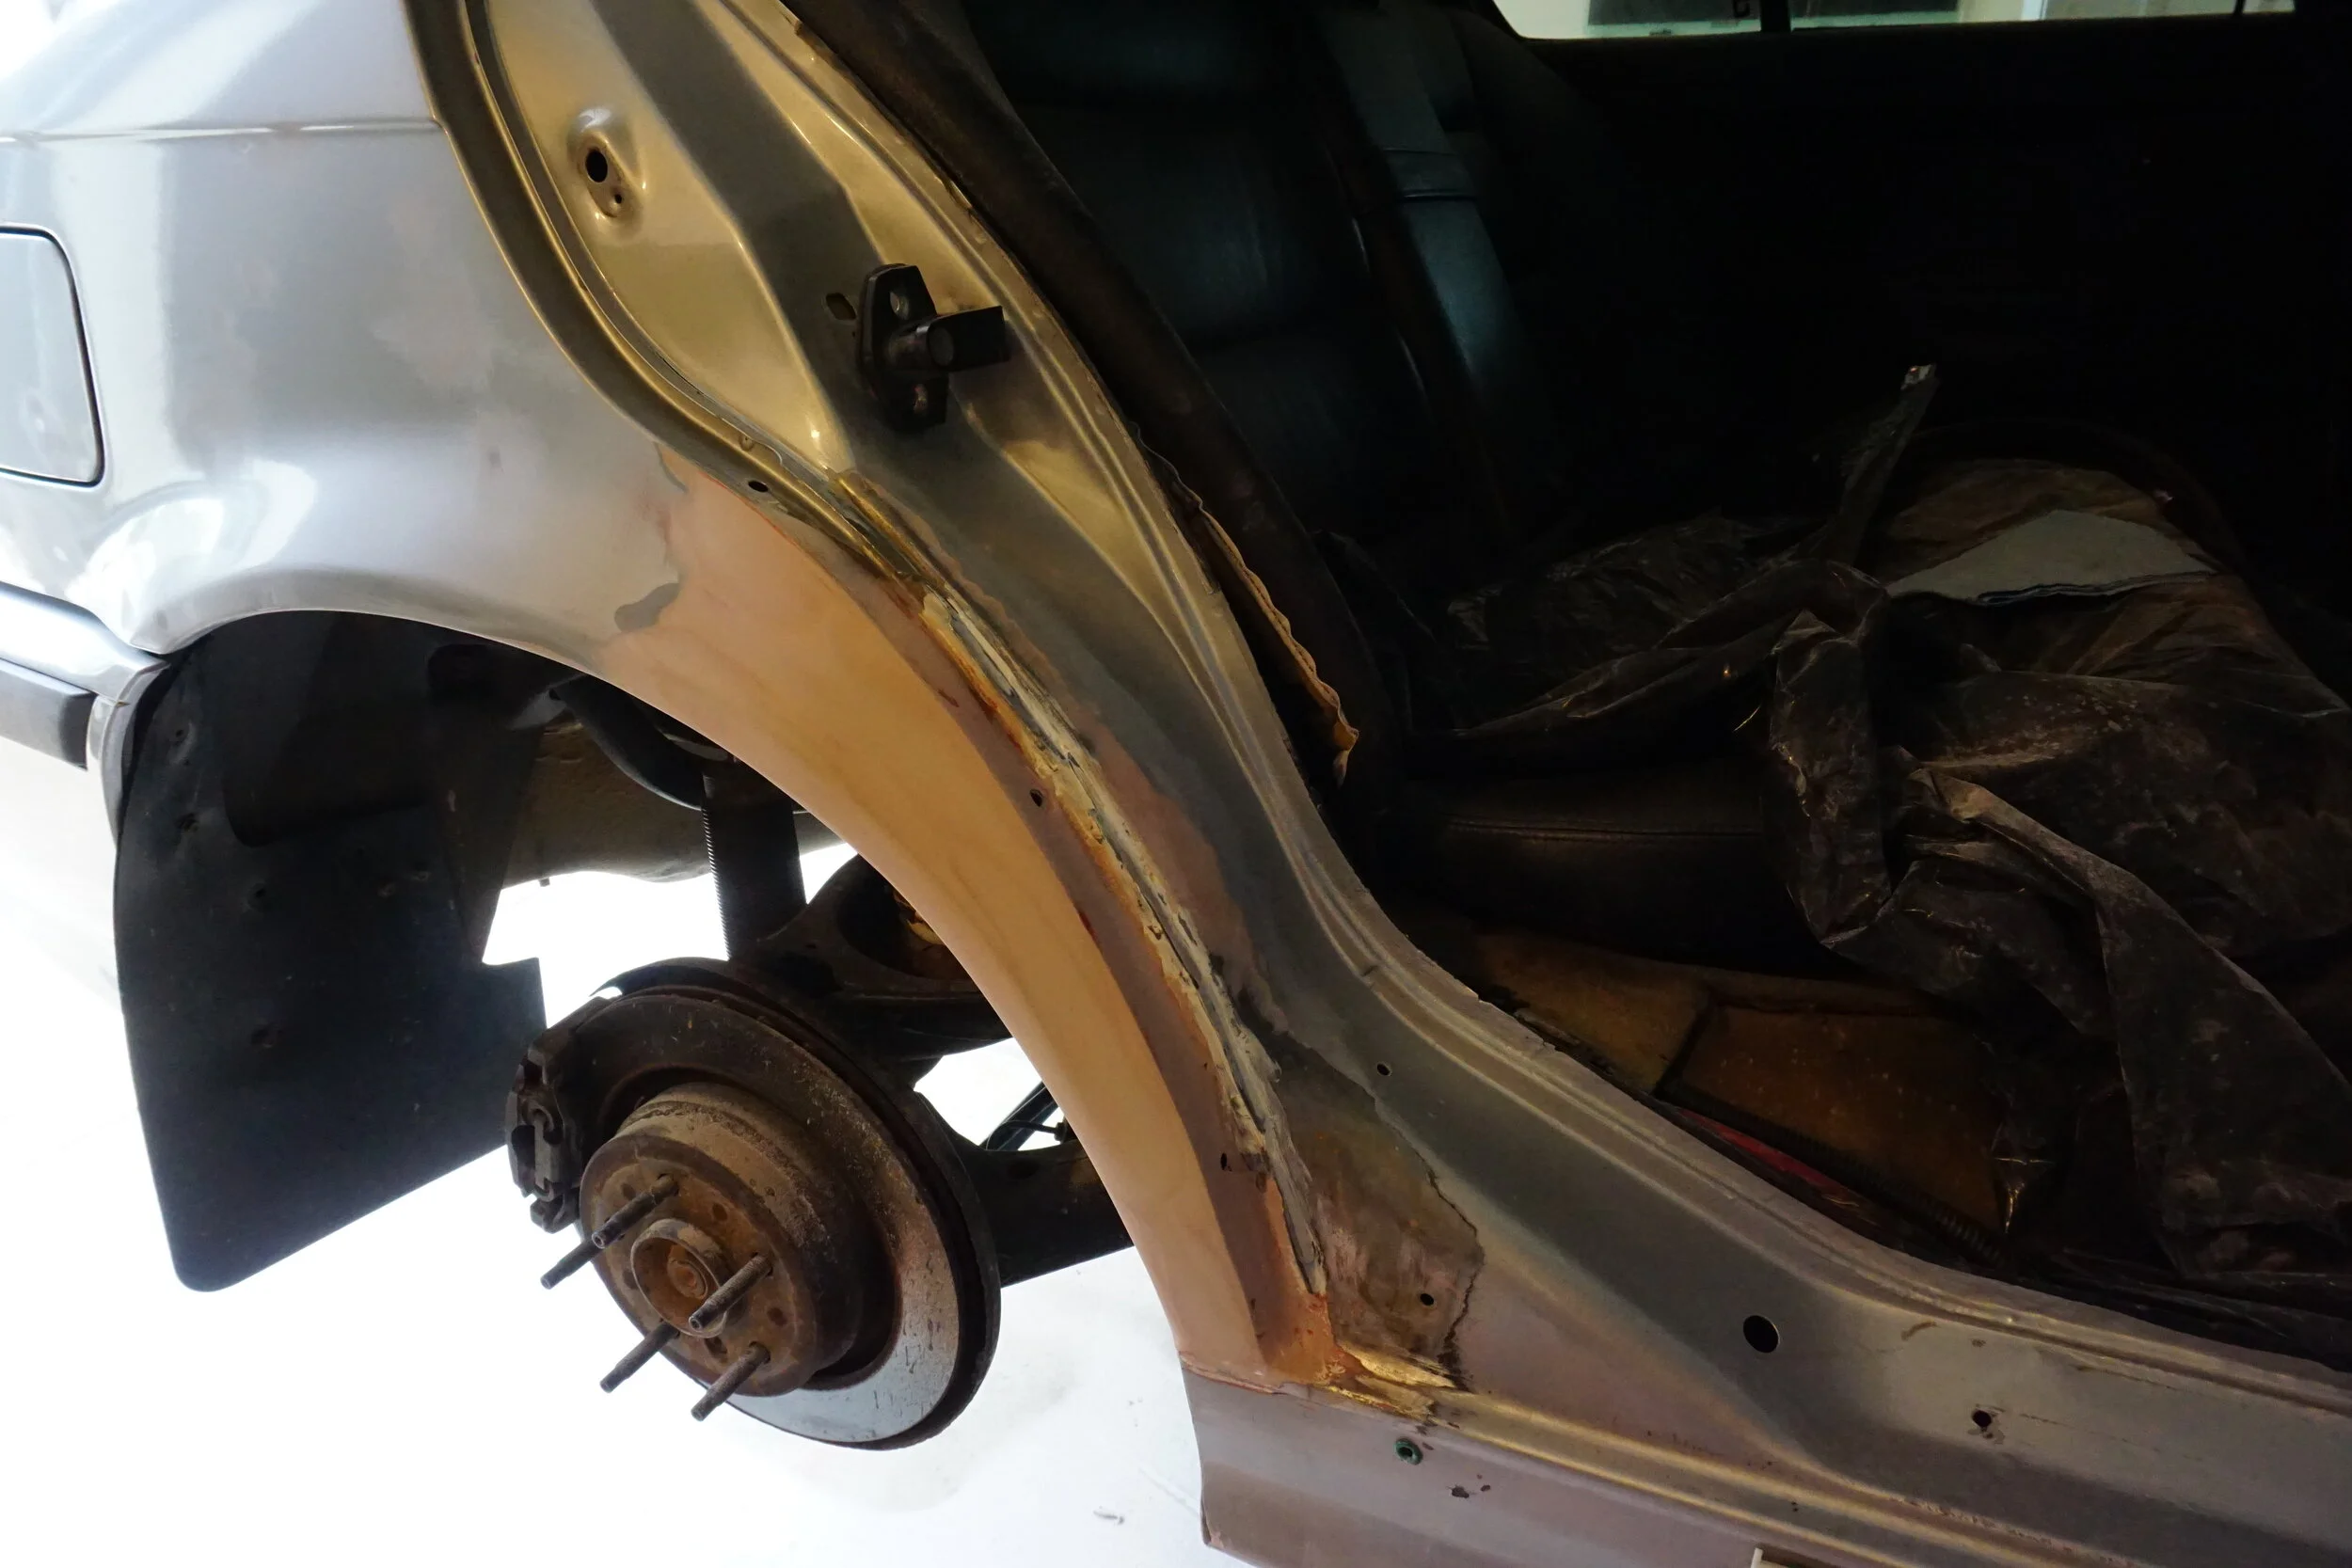
More of the same on the DS:
It's way too damn hard to get an angle grinder in there up above the fender lip...
Oooooh boy...
I'm just getting started
Because this is bad
Crap
I'm not sure how I'm going to get to all of that
So yeah, this has already spiraled way out of control, and there's way more cutting that needs to be done before I can think of patching things up. This is really going to put my amateur welding skills to the test! Thankfully most of it isn't visible when just walking by the car, so even if it's not perfect it should be okay. Now I just need to find me some 18 gauge sheet metal....
I always feel like there's a rule of thirds with rust where you only see 1/3 of the problem before you start digging into it. For what it's worth, I just used mild steel sheet metal from home depot to make patch panels for my Bonneville.
Just think about heat when you tack the patch panels in. Let the wire hit the body first since it has more thermal mass. Smaller parts heat up quick and blow through easier.
Your wheel wells do look pretty good. My major issue was just out of sight in your pic behind the body sheet metal aft of the door jamb.
I always feel like there's a rule of thirds with rust where you only see 1/3 of the problem before you start digging into it. For what it's worth, I just used mild steel sheet metal from home depot to make patch panels for my Bonneville.
Just think about heat when you tack the patch panels in. Let the wire hit the body first since it has more thermal mass. Smaller parts heat up quick and blow through easier.
Your wheel wells do look pretty good. My major issue was just out of sight in your pic behind the body sheet metal aft of the door jamb.

Titanium MIG 170 with an upgraded ground clamp and cable running C25 gas on 220v.
So I'm having a real hard time finding some 18 gauge mild steel locally. The best I could find so far was a shop that only sold it in 4'x8' sheets for $150, and that's way more than I'll ever need. I finally found some online here for a decent price. Is cold rolled appropriate? Do you have any tips on forming the patches for areas that aren't flat? The area behind the DS wheel has all these ridges and curves to it, and I'm not sure how to make the metal follow those. Do I do a bunch of smaller patches and stitch them together? Do I need to worry about making the patch flush with the existing metal, or can I just overlay it?
So while I waited on my sheet metal to arrive, I did a little more grinding and opened up some more holes on the PS of the car.
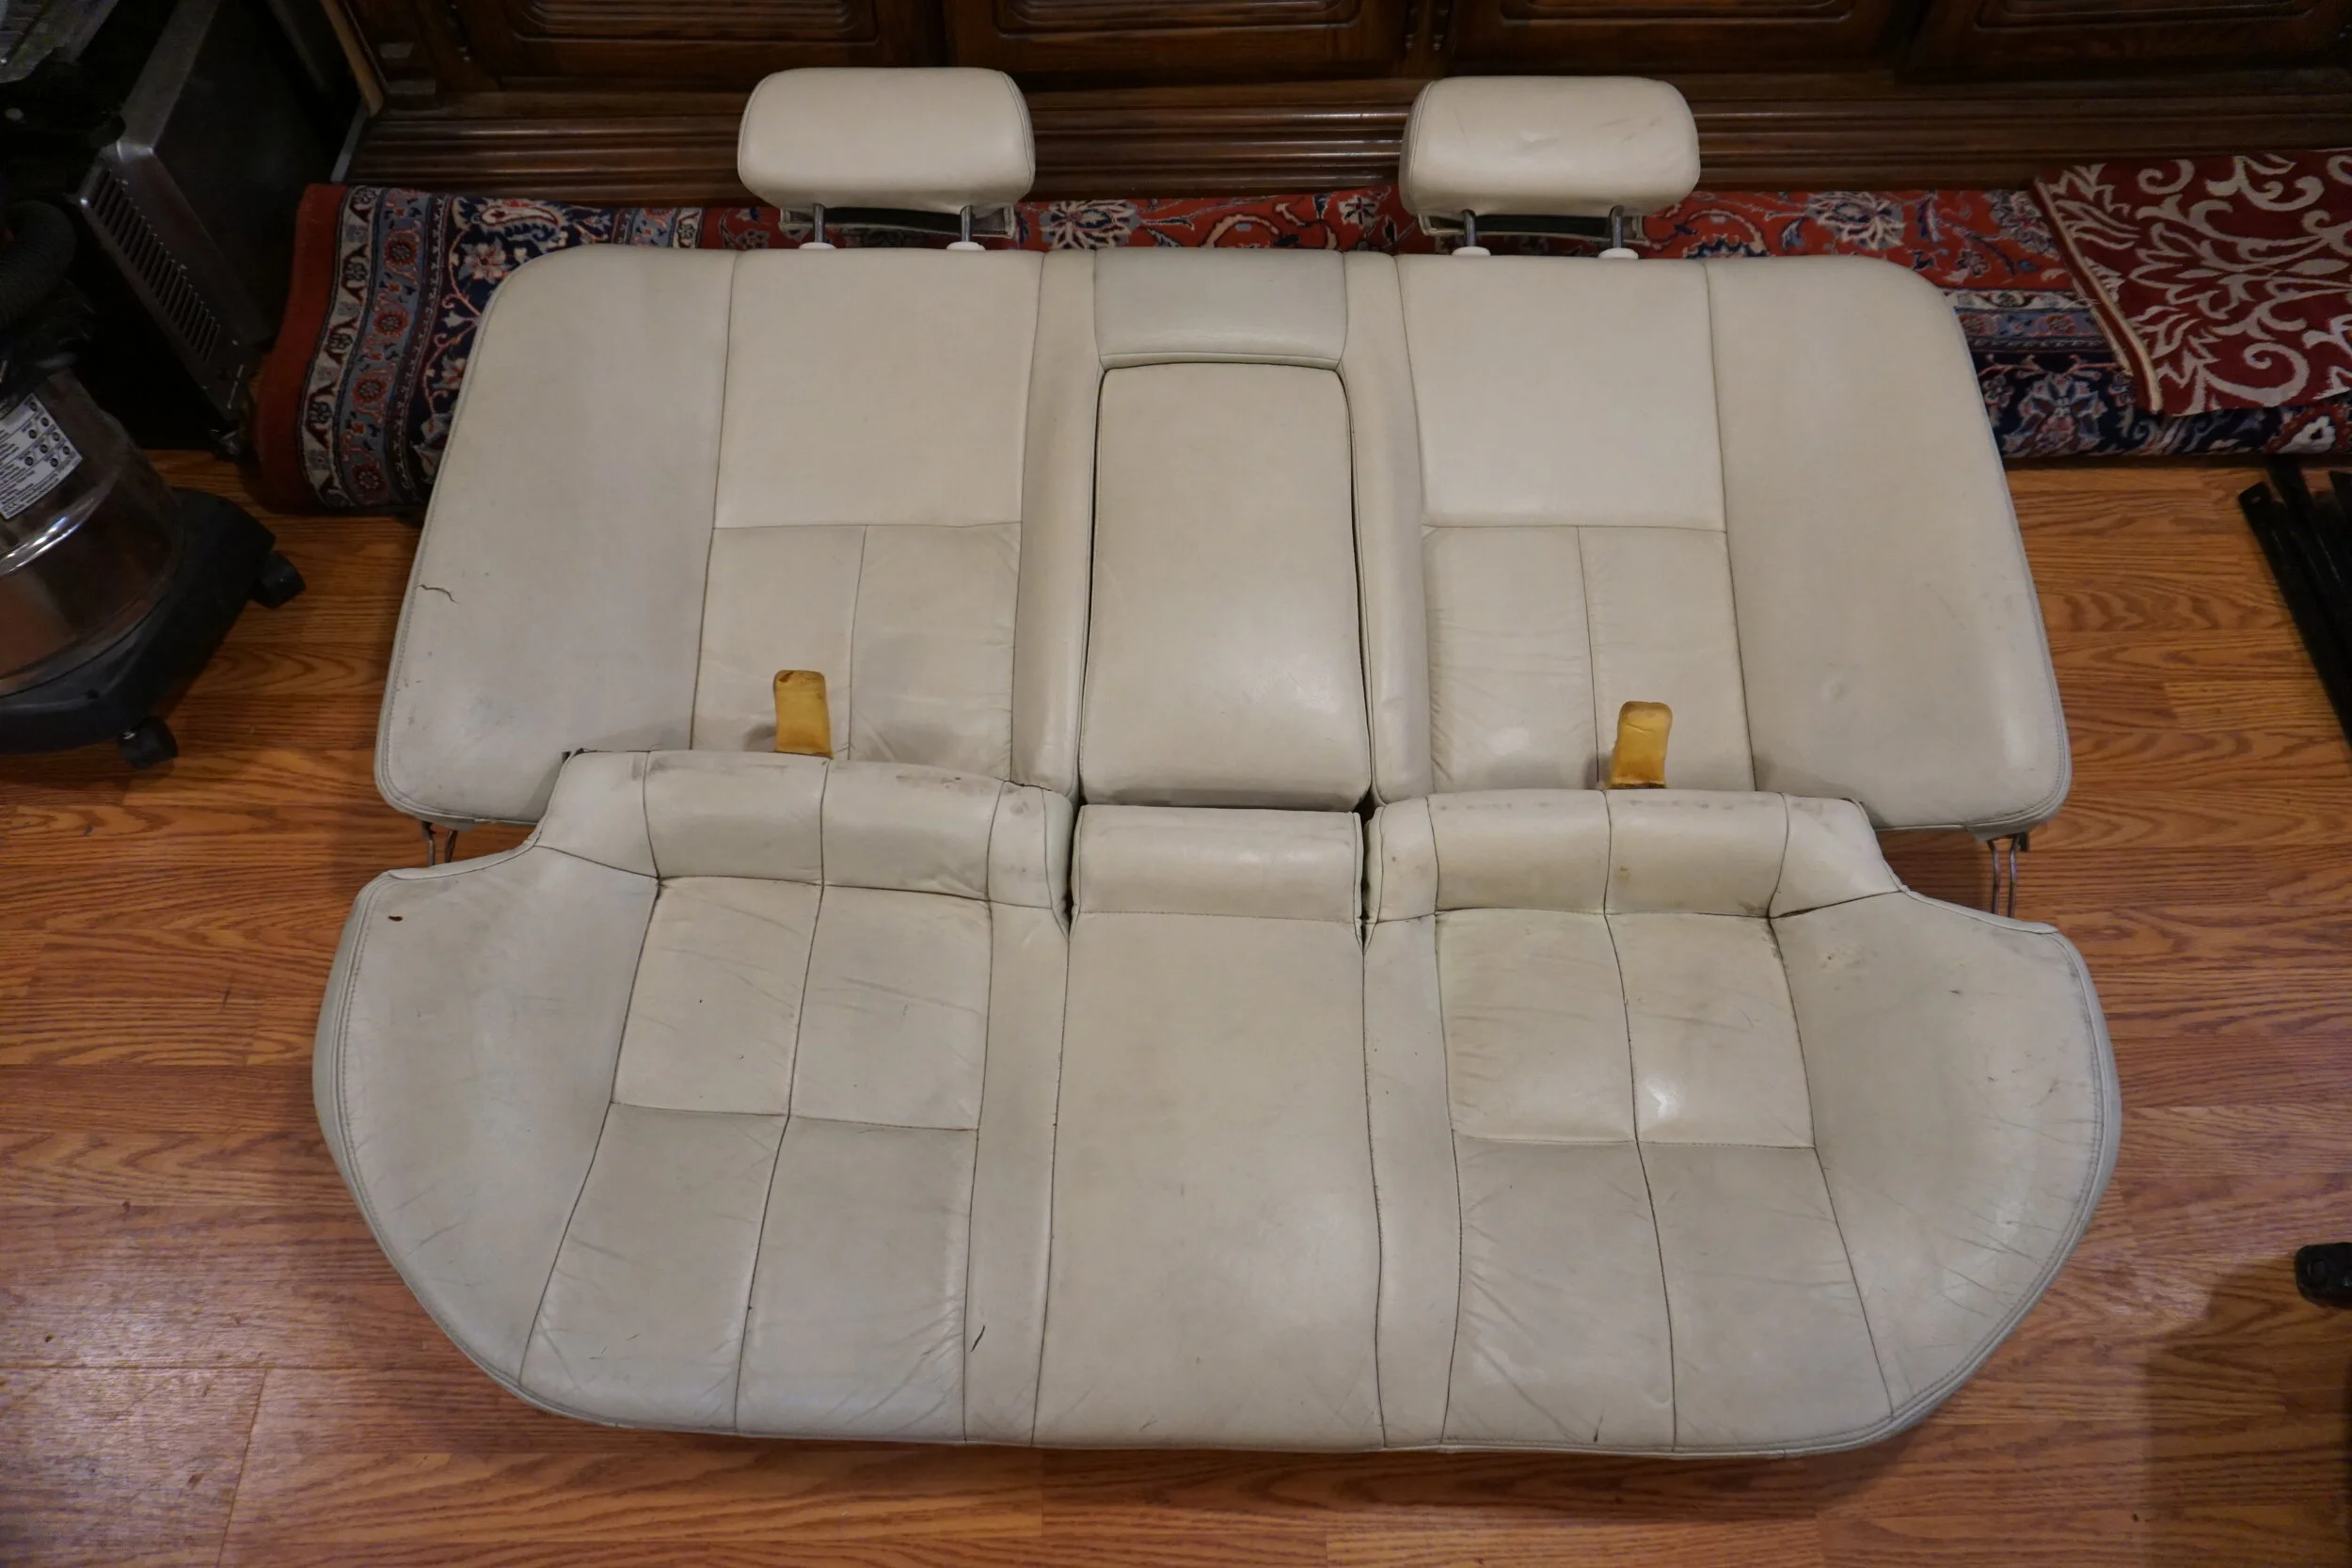
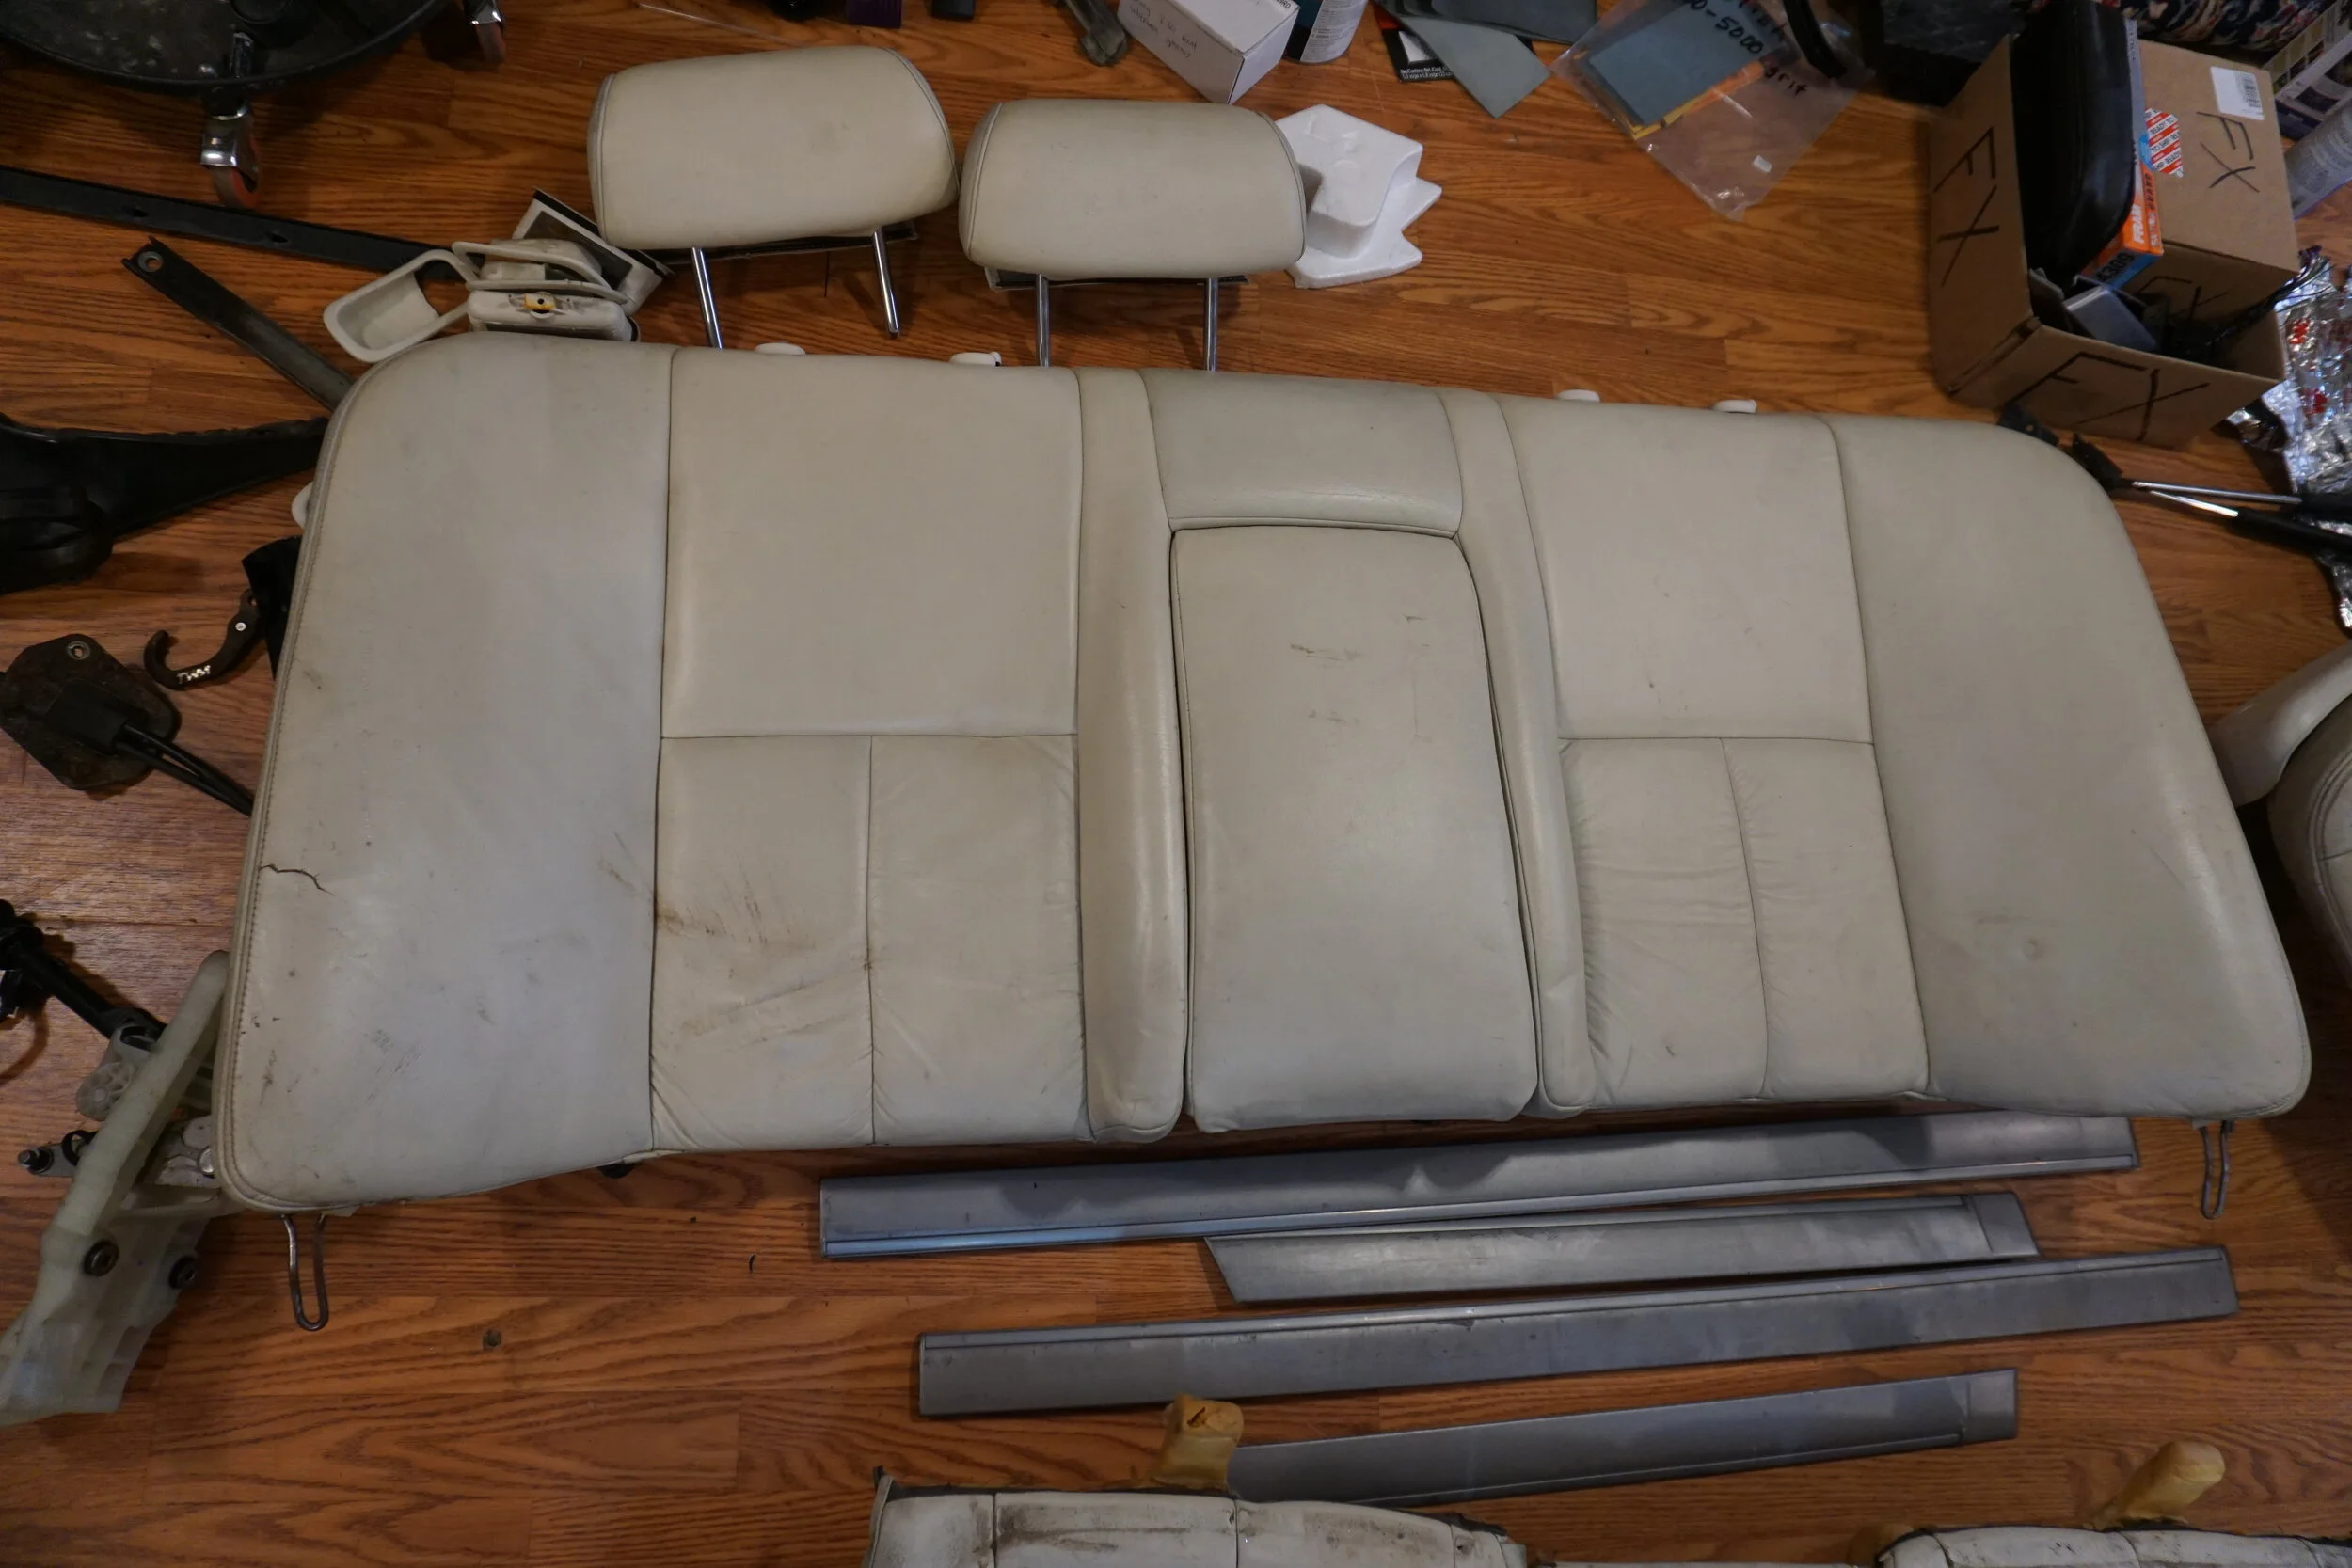
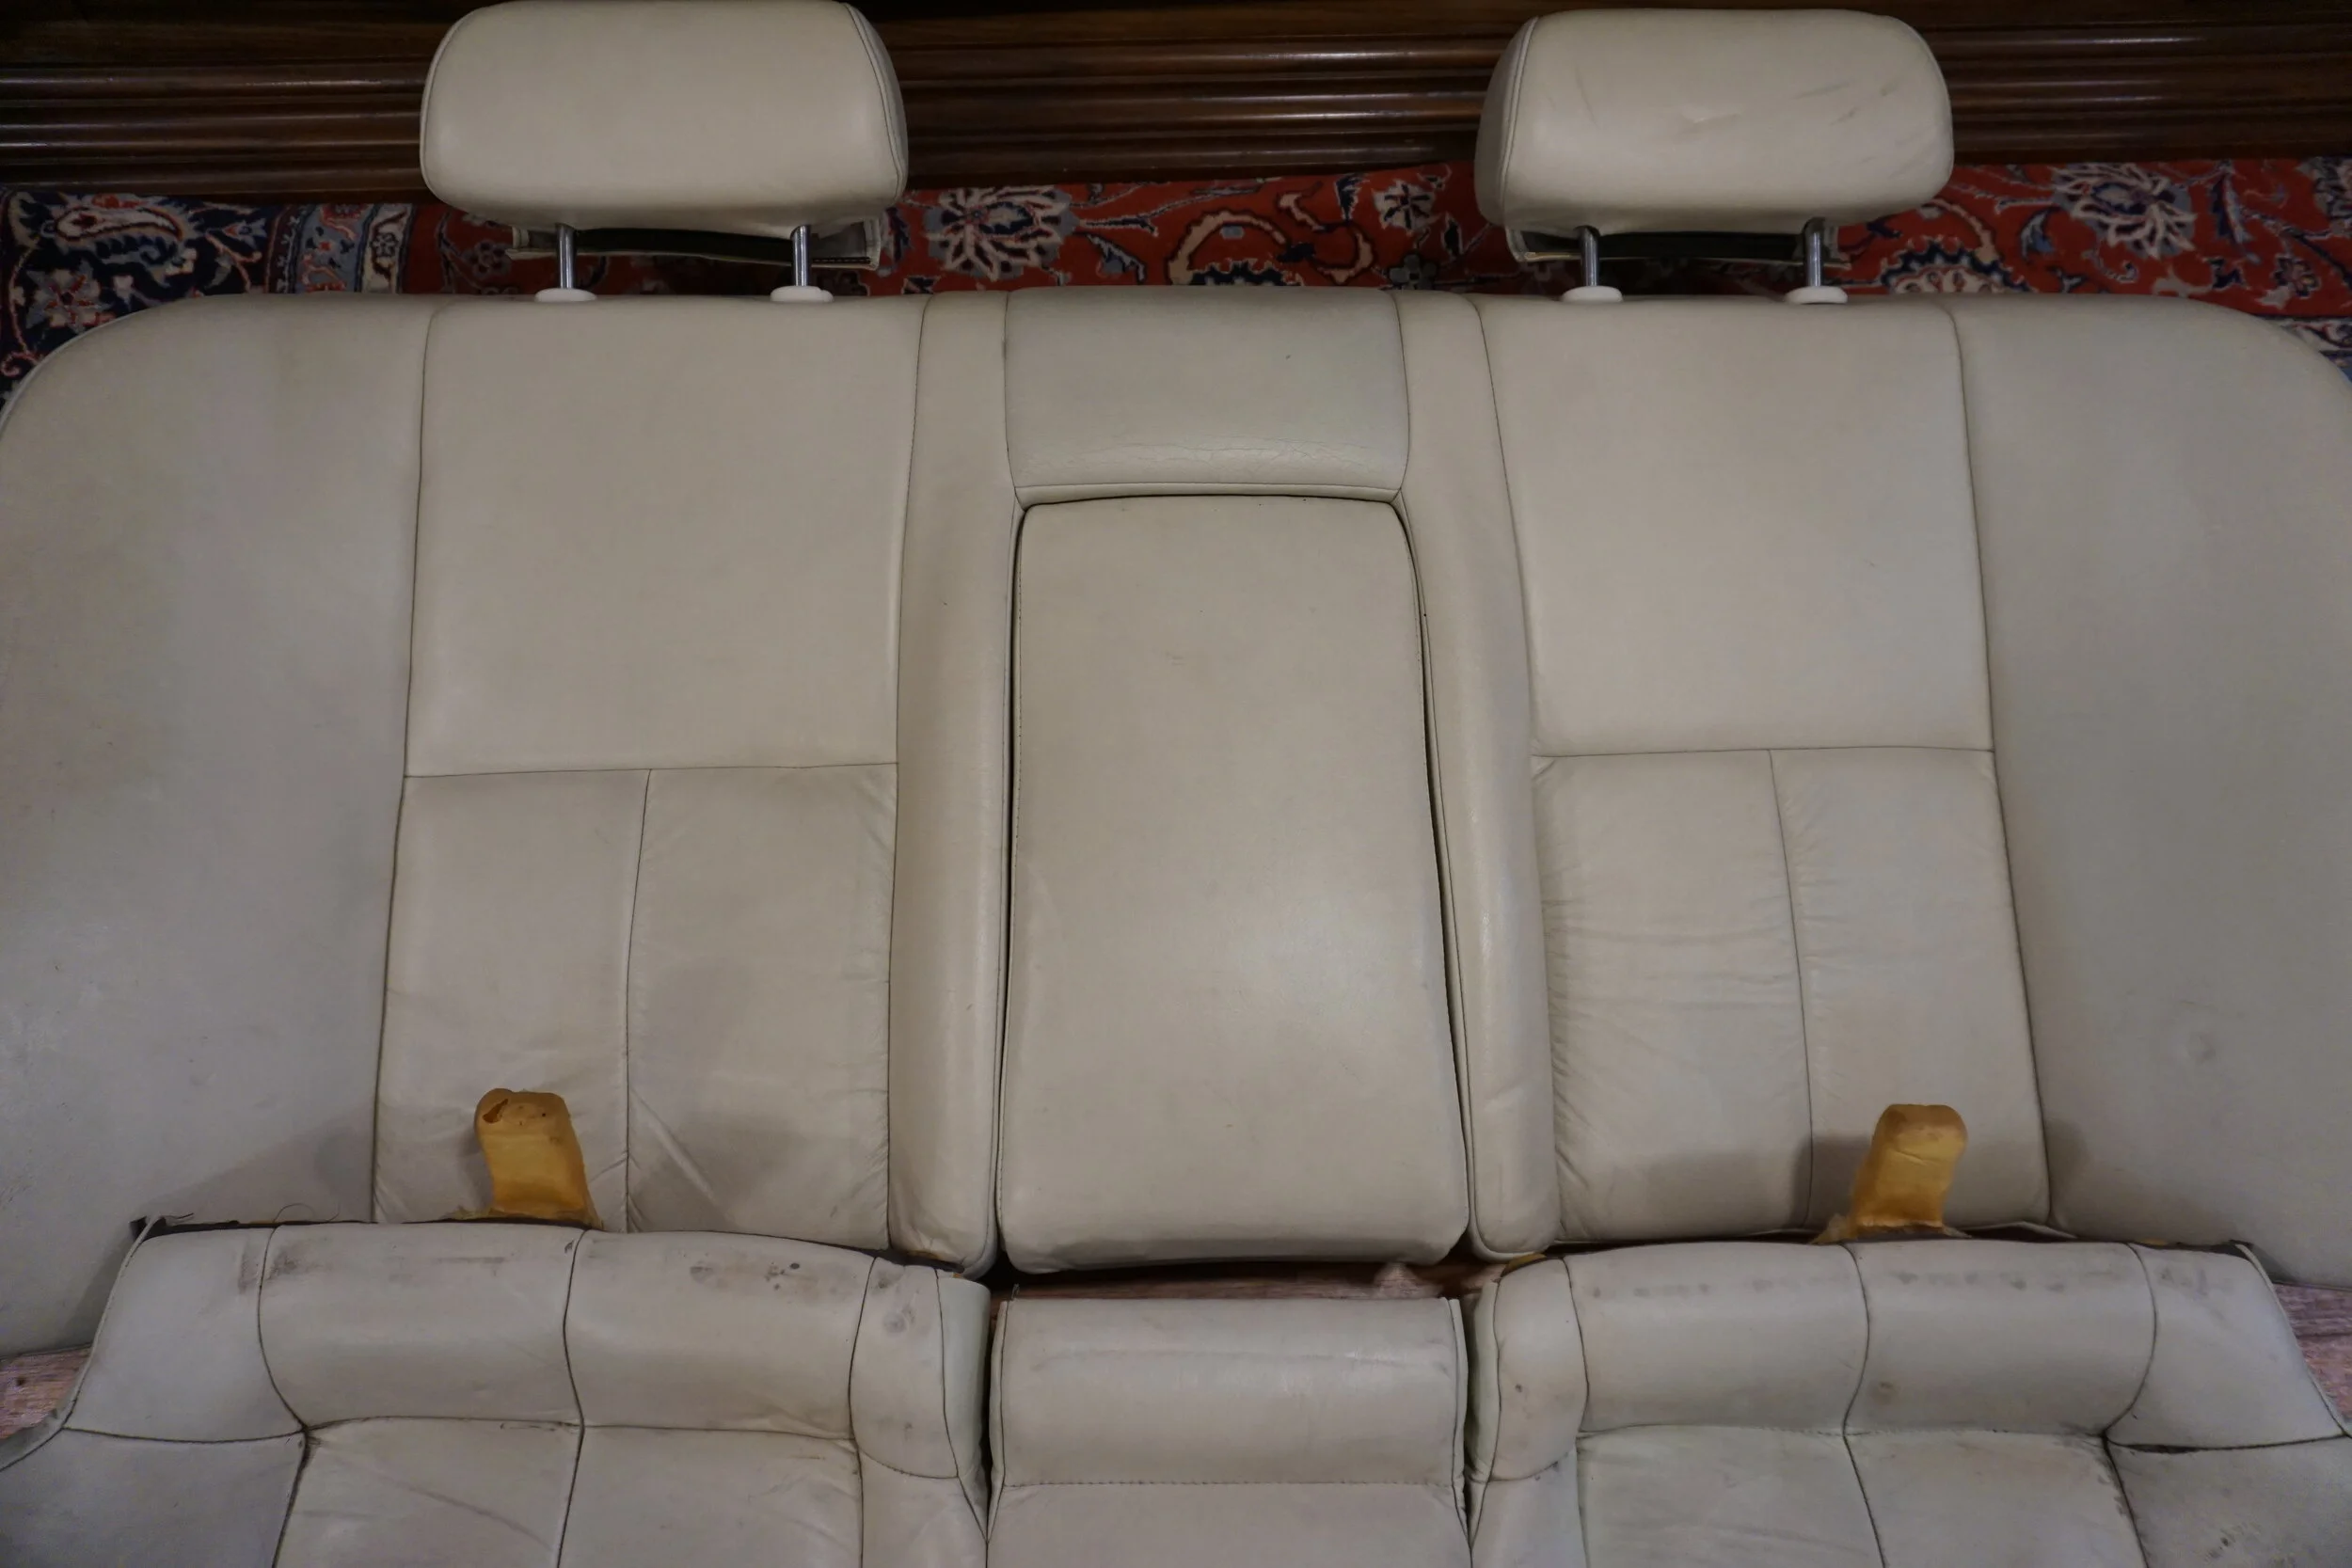
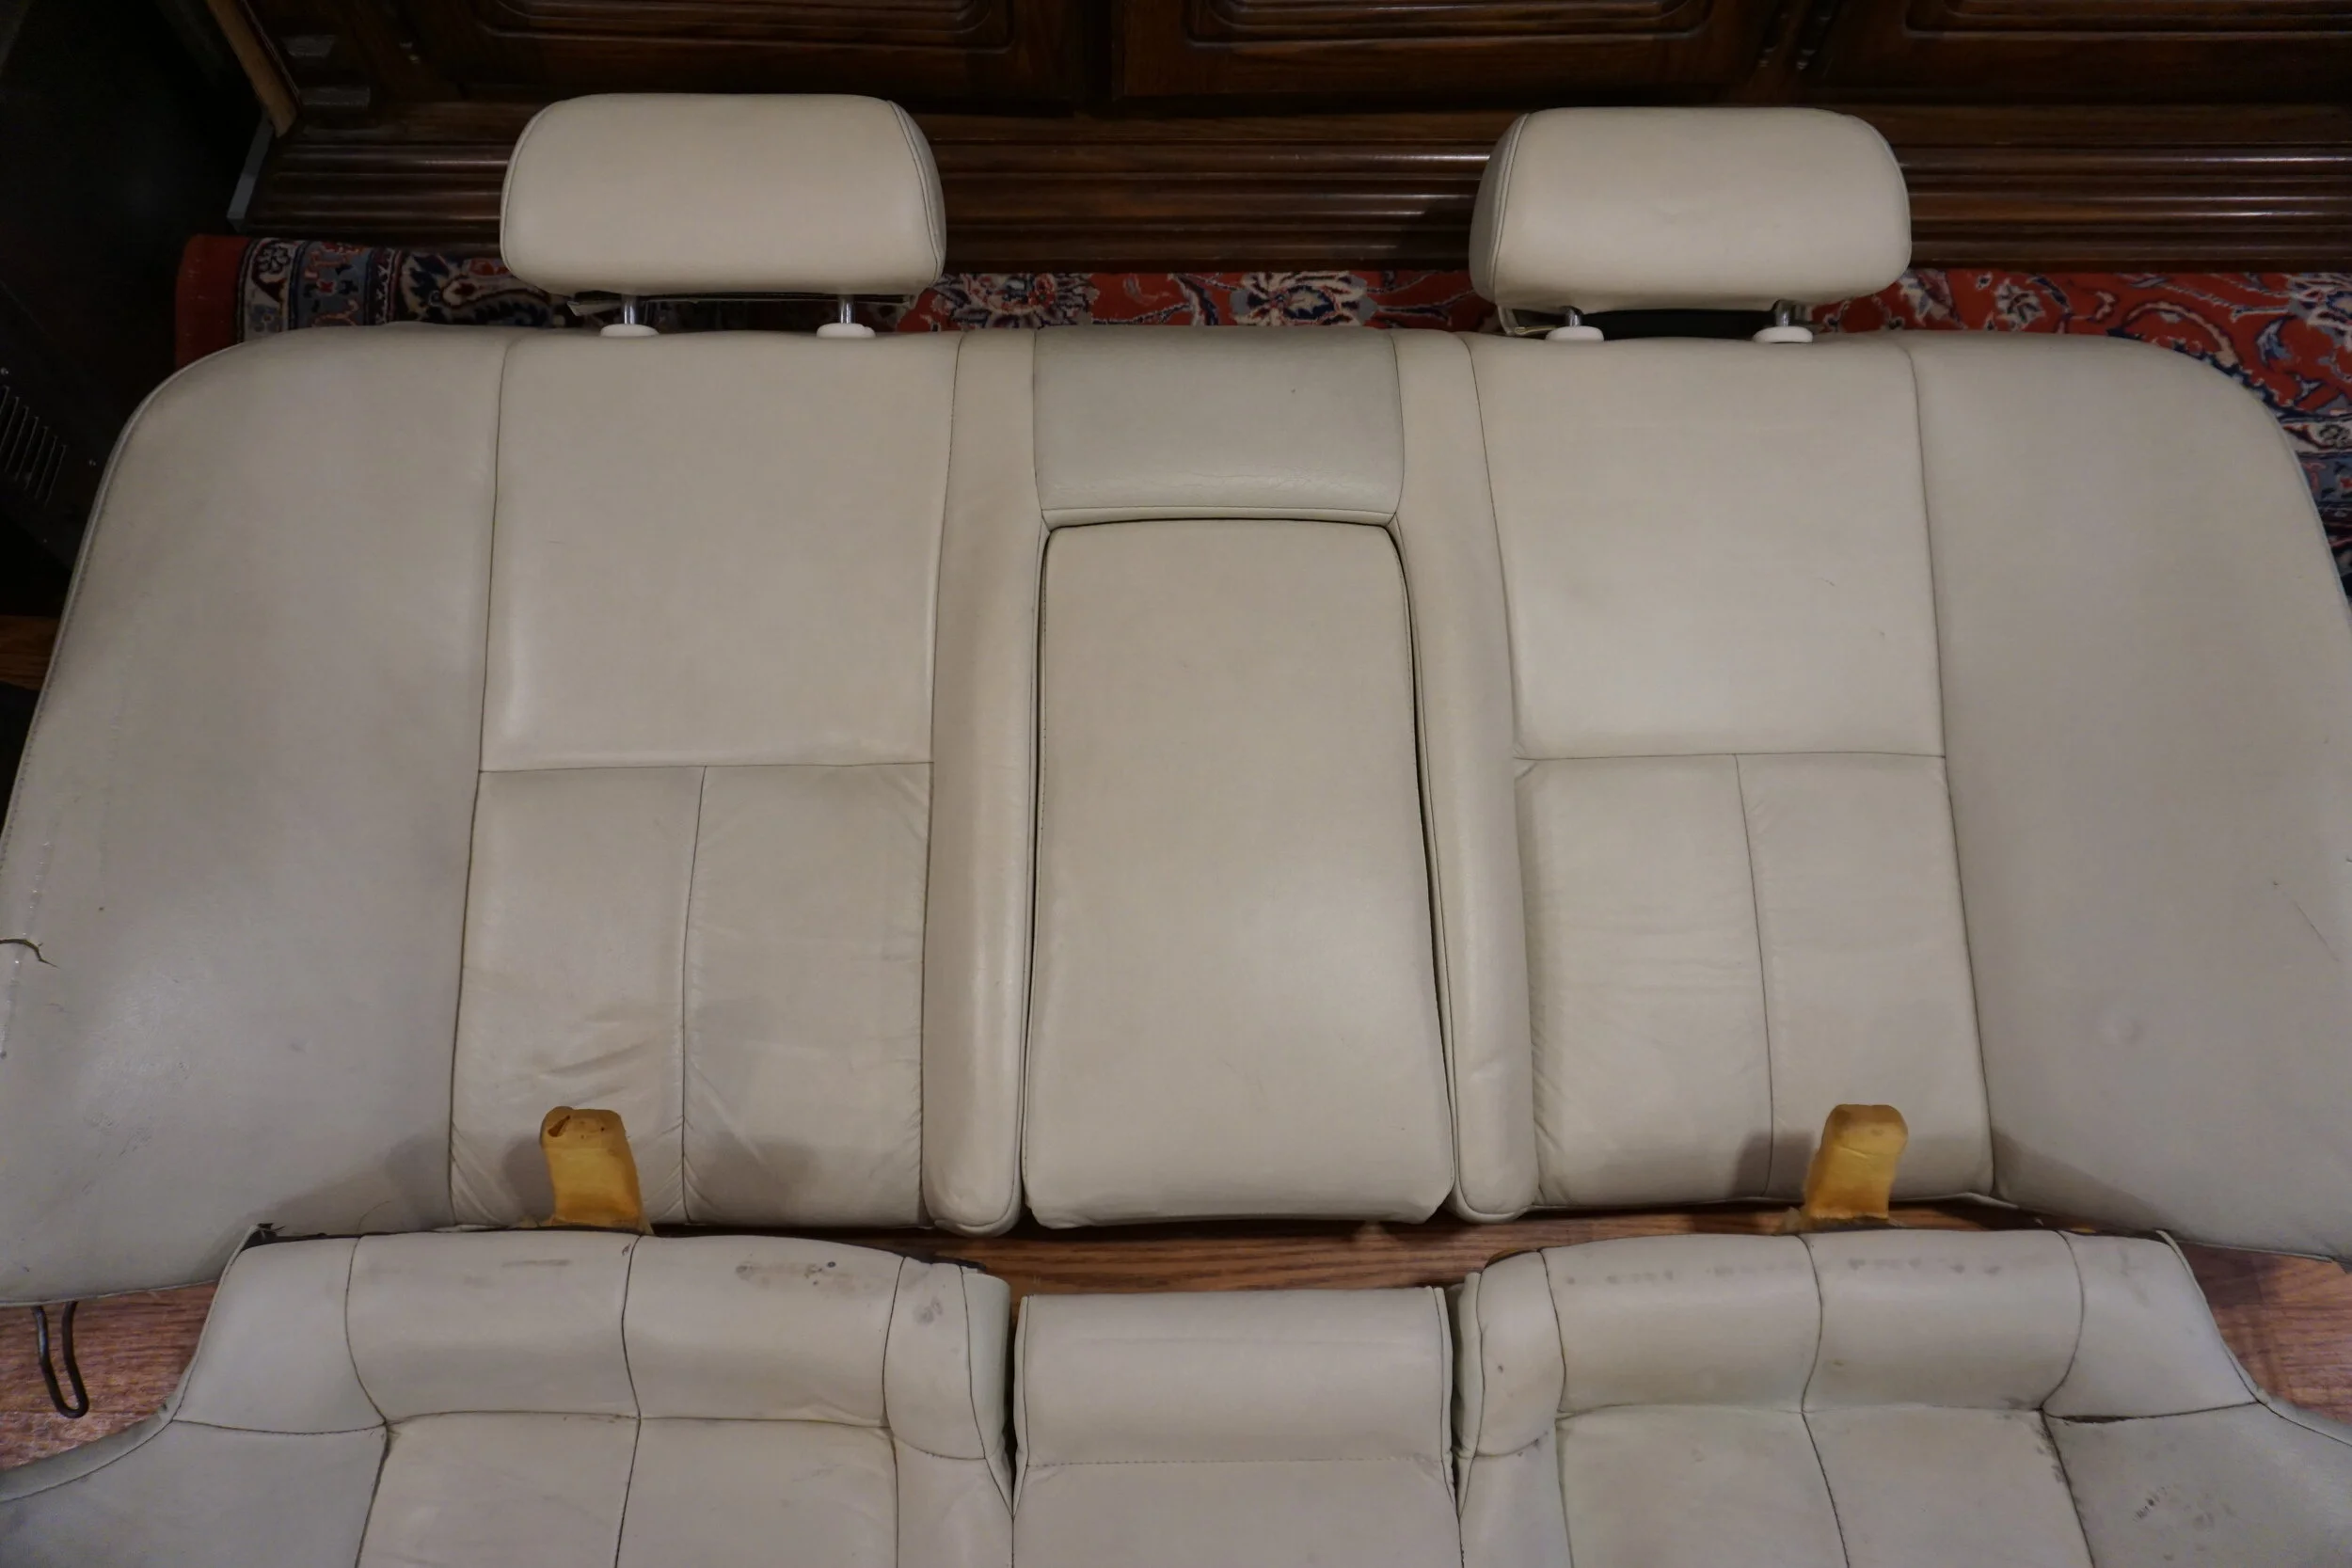
And then I couldn't help myself and wasted time cleaning up the white (bone? cream?) leather interior. First I scrubbed it all with a rag and some soapy water to get the bulk of the dirt off. Then I attacked some of the problems spots individually, like the ink and marker on the front seat. This revealed quite the color difference below the grime, but it took a lot of scrubbing to get there, and I couldn't do that for every square inch. I then got out my super old Leatherique and applied the rejuvenating oil and let everything bake inside the other cars outside for a week. I then brought them inside and cleaned them up with the cleaning product and my soft plastic bristled attachment for my drill gun. This made quick work of the grime and didn't damage the "leather". Just a note: Maxima seats ARE real leather (well, not the sides and back, those are vinyl), despite what some people claim. It's just not high quality, and it has a thick protective coating on it. 99% of all automotive leather is coated, but the quality of the leather and the thickness/type of coating varies widely. The problem is how to get the oil from the products into the leather, since the coating makes that very difficult. Some people here have said it's not possible. Well, I'm going to take this to the extreme and see if multiple thick coatings and extended periods of baking in hot cars makes any difference. Most people can only let stuff bake for a day before they need to use the car again, but I'm going to take this opportunity to see what's possible given enough time and energy.
I didn't apply enough oil the first round, so after this round of cleaning I applied a thicker second round of oil, and will apply even more once my new shipment arrives (I've been using Leatherique that's like 13+ years old, and it was separating, so it's not the best representation of the stuff). But for now, here's the progress that's been made.
Original filth:
Rag cleaned and spot treated (see the light areas?)

And then after oil and cleaner product with spinny brush on drill gun:
Rinse and repeat on the other parts....

Oh, and I think I forgot to post up two other little silly things I got last time at the junkyard. An unused maintenance log and a fancy master key that I didn't even know was an option:
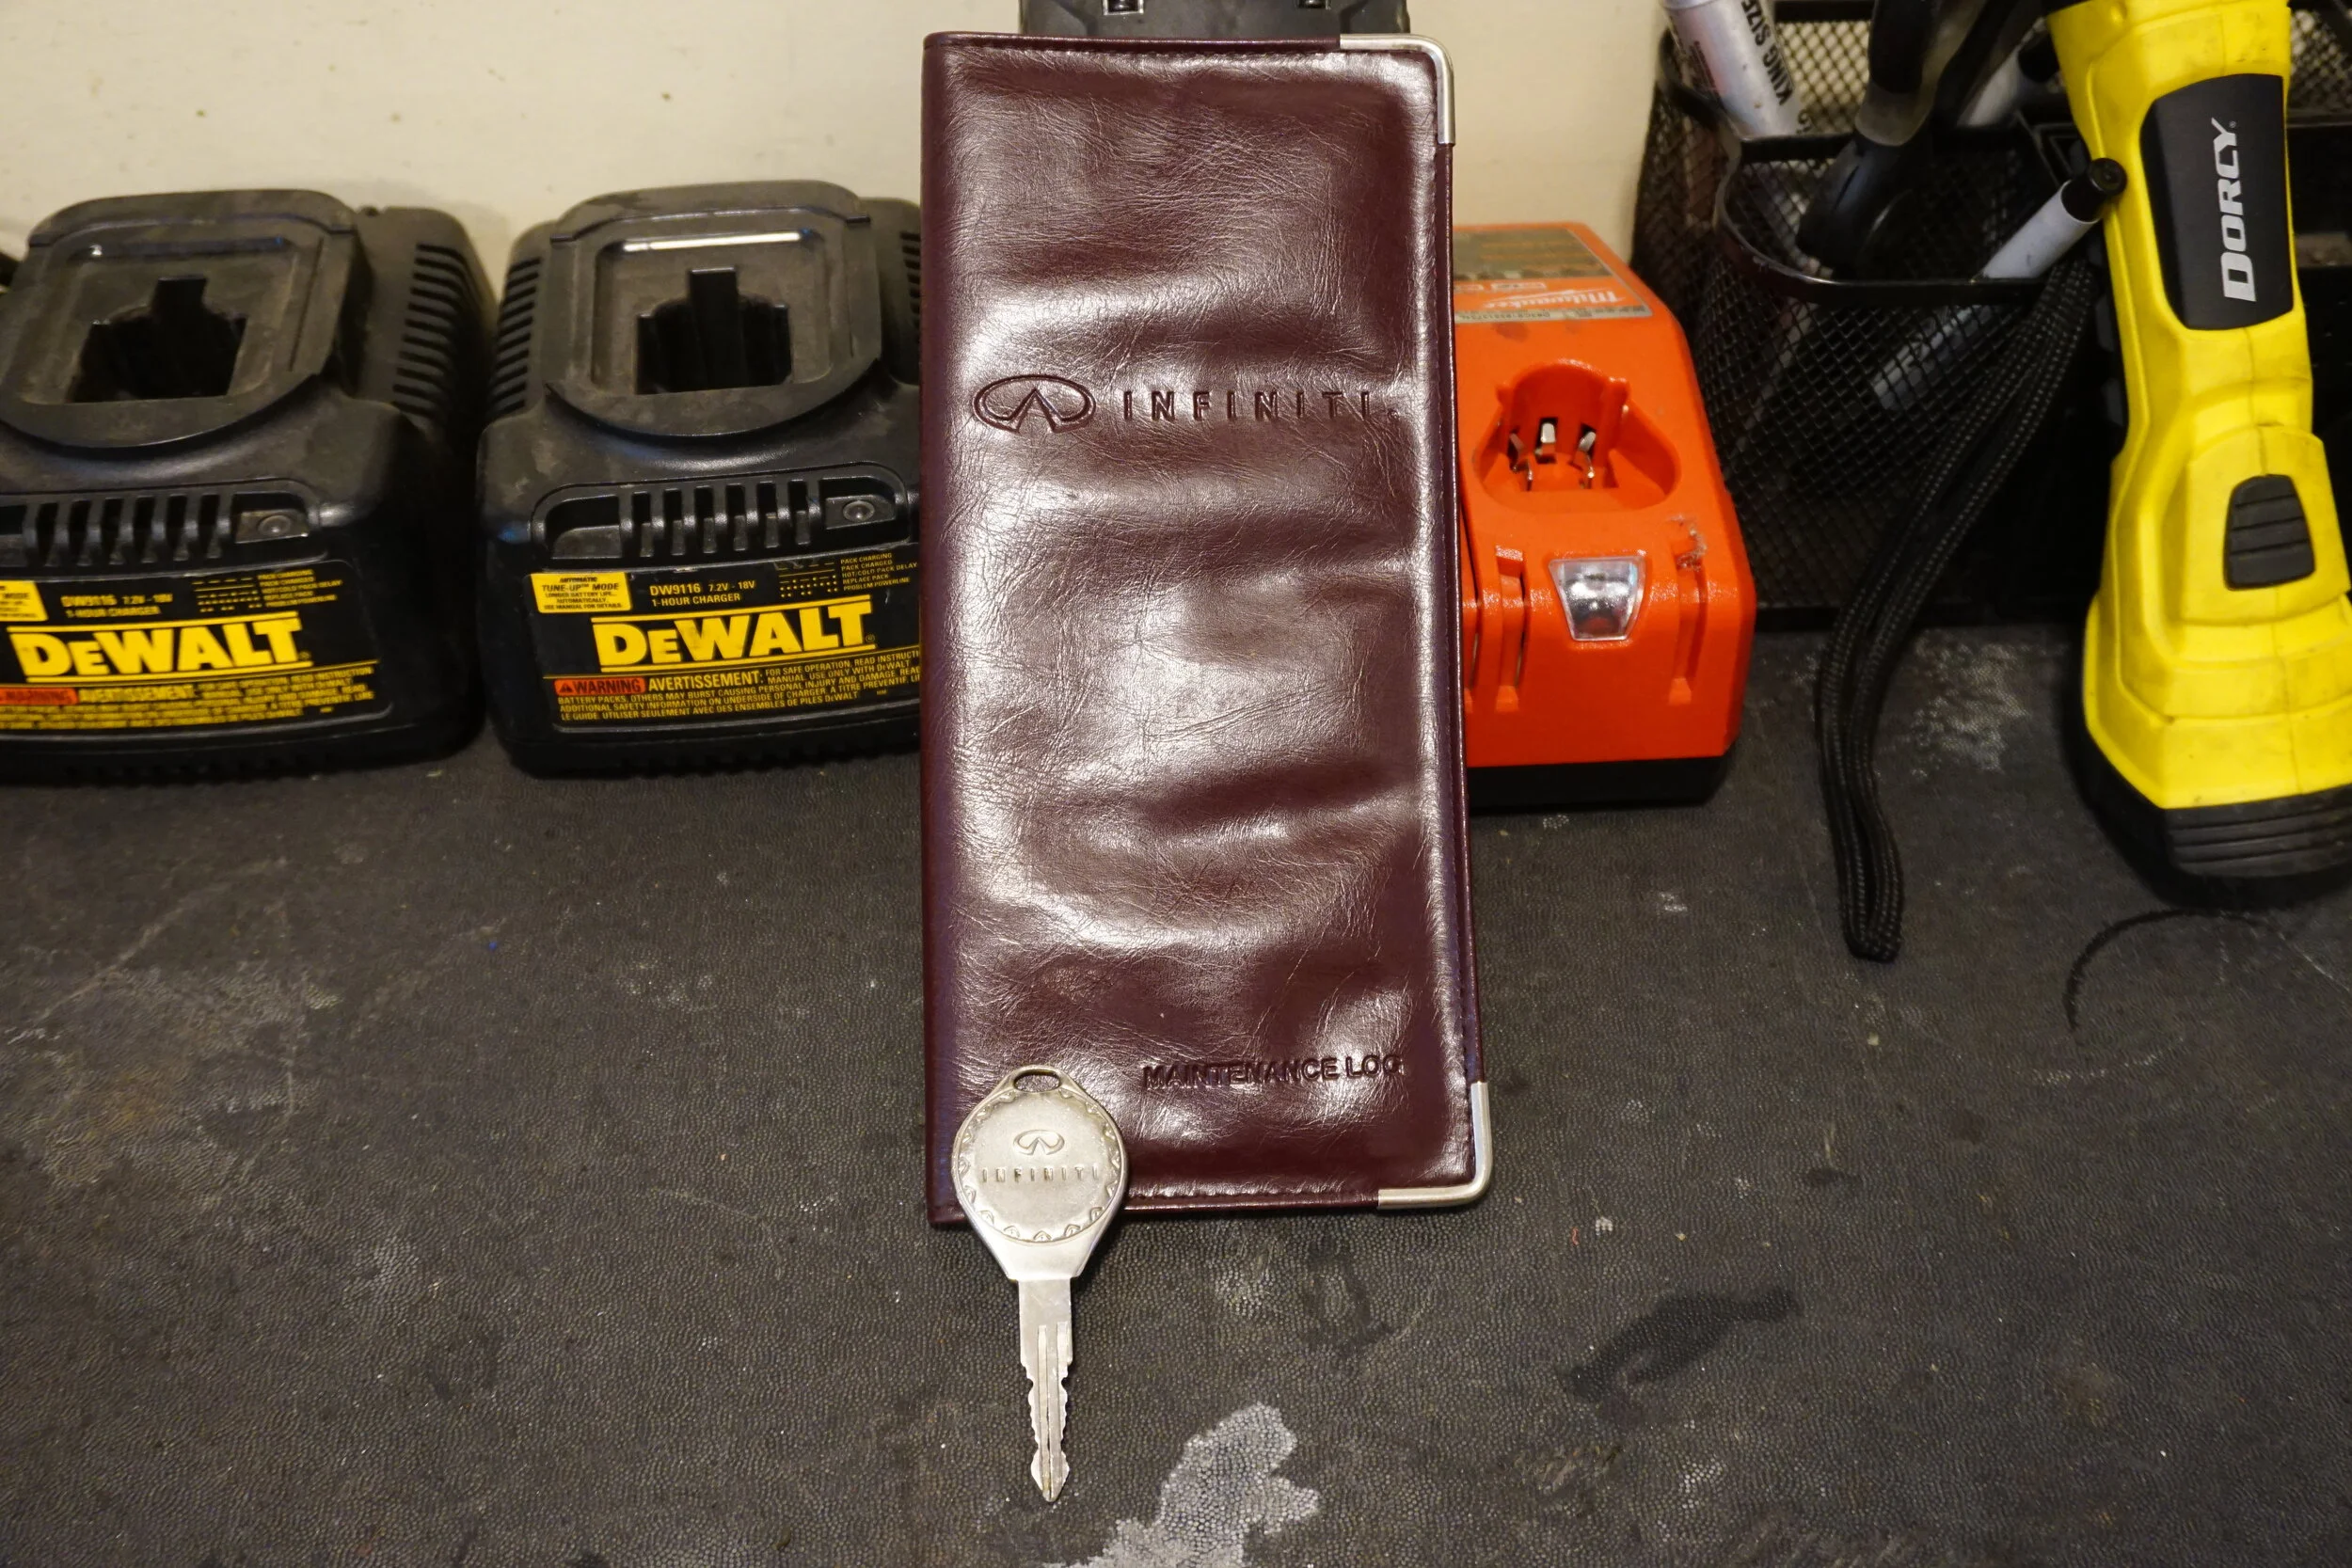
I don't plan on doing anything with the log, that was just an interesting find, and it matches the owners manual. But that key got me thinking. All I have is some dinky key with a little black plastic end cap thing. This thing is all metal and feels really nice. Curious, I called a dealership and was told it costs like $160! I found it on Infiniti Parts Deal for like $110, but couldn't justify spending that much on a key.
But then I checked out Ebay for the first time in a long time and spent money on things I probably shouldn't have.....
And then I couldn't help myself and wasted time cleaning up the white (bone? cream?) leather interior. First I scrubbed it all with a rag and some soapy water to get the bulk of the dirt off. Then I attacked some of the problems spots individually, like the ink and marker on the front seat. This revealed quite the color difference below the grime, but it took a lot of scrubbing to get there, and I couldn't do that for every square inch. I then got out my super old Leatherique and applied the rejuvenating oil and let everything bake inside the other cars outside for a week. I then brought them inside and cleaned them up with the cleaning product and my soft plastic bristled attachment for my drill gun. This made quick work of the grime and didn't damage the "leather". Just a note: Maxima seats ARE real leather (well, not the sides and back, those are vinyl), despite what some people claim. It's just not high quality, and it has a thick protective coating on it. 99% of all automotive leather is coated, but the quality of the leather and the thickness/type of coating varies widely. The problem is how to get the oil from the products into the leather, since the coating makes that very difficult. Some people here have said it's not possible. Well, I'm going to take this to the extreme and see if multiple thick coatings and extended periods of baking in hot cars makes any difference. Most people can only let stuff bake for a day before they need to use the car again, but I'm going to take this opportunity to see what's possible given enough time and energy.
I didn't apply enough oil the first round, so after this round of cleaning I applied a thicker second round of oil, and will apply even more once my new shipment arrives (I've been using Leatherique that's like 13+ years old, and it was separating, so it's not the best representation of the stuff). But for now, here's the progress that's been made.
Original filth:
Rag cleaned and spot treated (see the light areas?)
And then after oil and cleaner product with spinny brush on drill gun:
Rinse and repeat on the other parts....
Oh, and I think I forgot to post up two other little silly things I got last time at the junkyard. An unused maintenance log and a fancy master key that I didn't even know was an option:
I don't plan on doing anything with the log, that was just an interesting find, and it matches the owners manual. But that key got me thinking. All I have is some dinky key with a little black plastic end cap thing. This thing is all metal and feels really nice. Curious, I called a dealership and was told it costs like $160! I found it on Infiniti Parts Deal for like $110, but couldn't justify spending that much on a key.
But then I checked out Ebay for the first time in a long time and spent money on things I probably shouldn't have.....
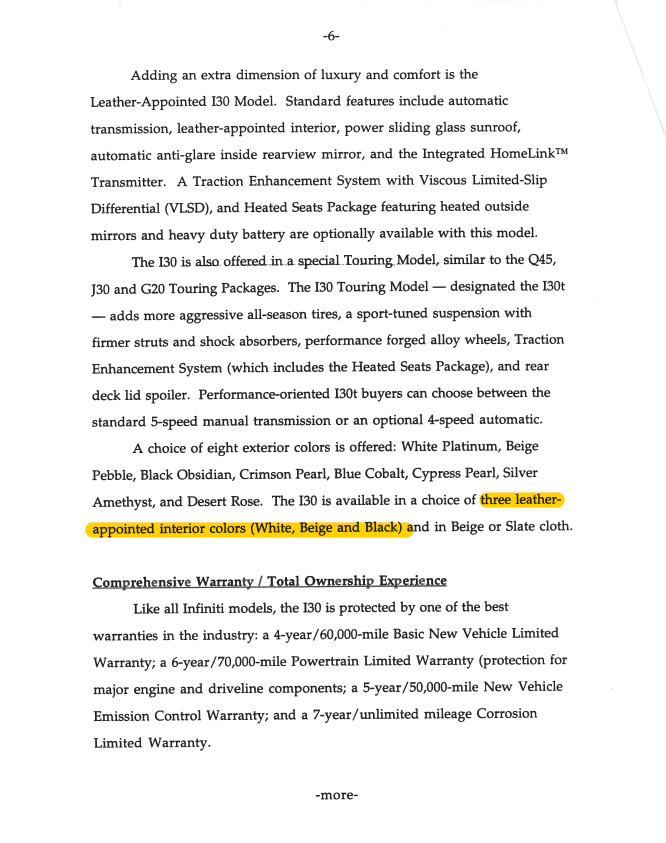
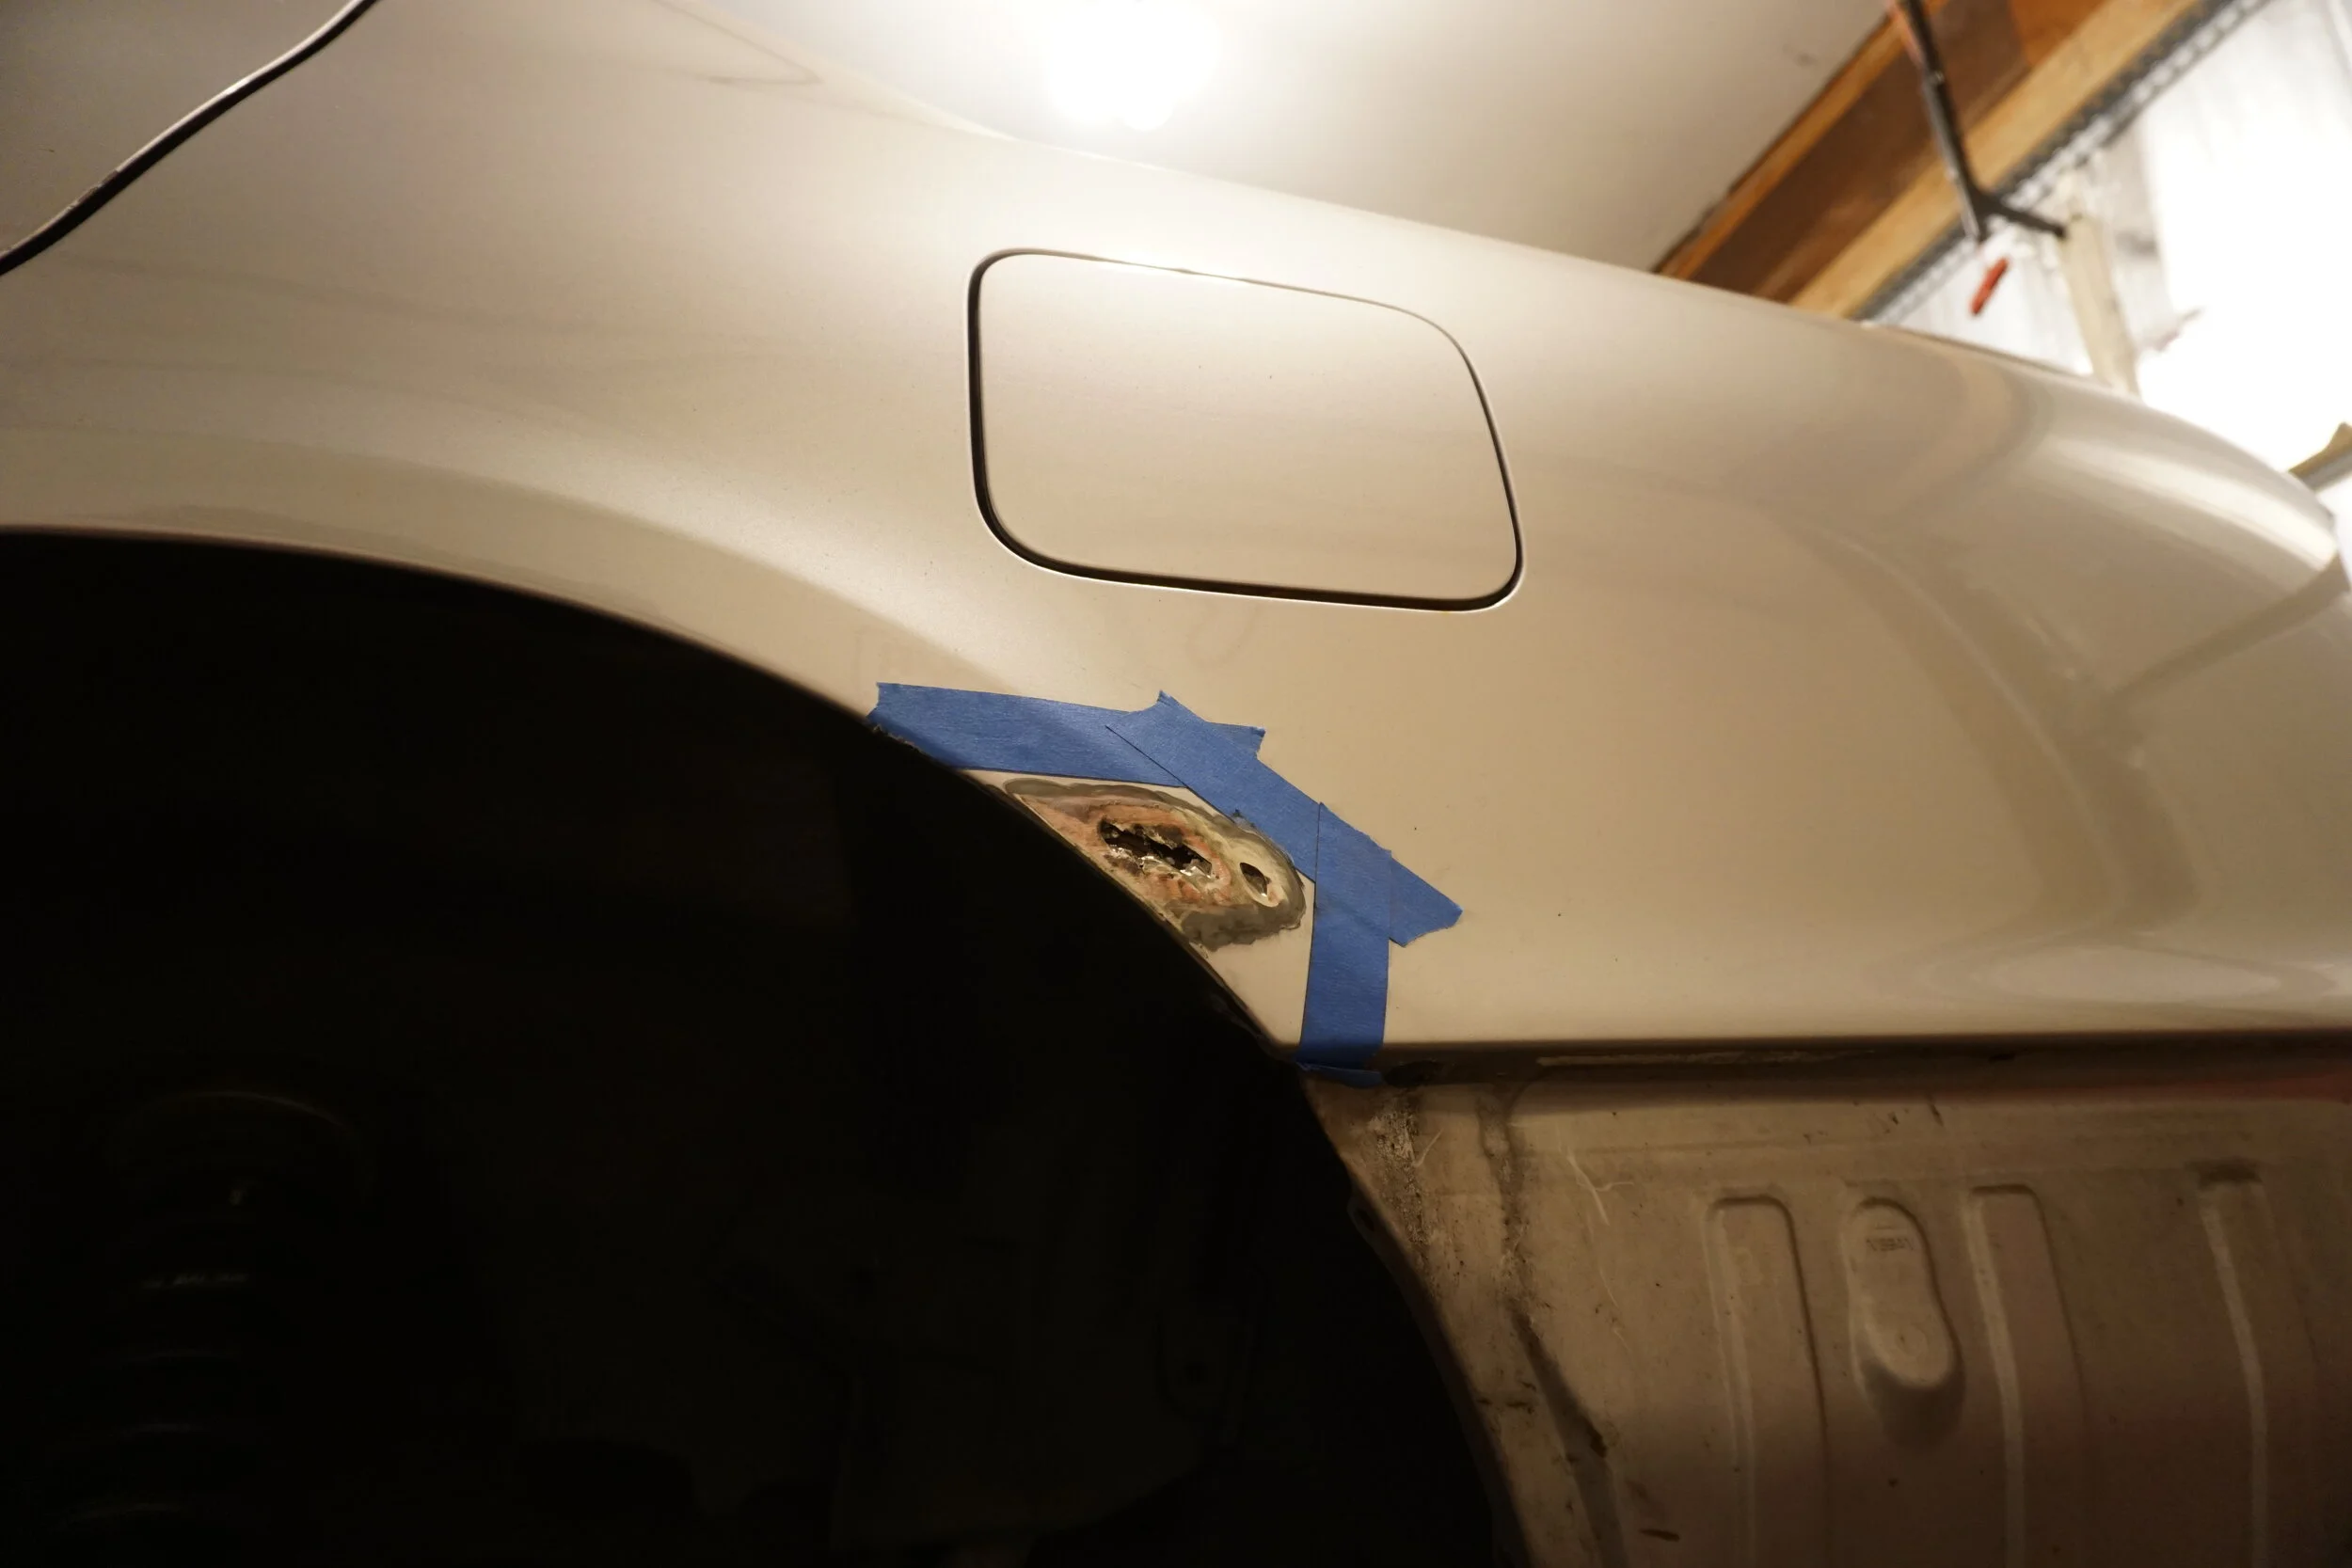
So there you have it folks, a white interior was an option on 1996 I30s! I didn't order literature for 97s, but I have a feeling it was no longer offered by that point. This of course still leaves the questions about my interior wide open. Here's a pic for reference:
I got an interesting alert from my local junkyard last Monday. At first, it looked like another beat up I30. But I took a closer look at it and realized something was off. It had a front bumper on it that I had never seen before! The picture was pretty crummy so I couldn't see it in detail, but I knew I had to go get this thing. I couldn't take off any work last week, so I prayed it would still be there when I got there on Saturday morning. Thankfully, it was, and I was dazzled and confused by what I was looking at:

It was clear that this had not come on the car from the factory, as it was very poorly installed with only a handful of bolts and screws. I had it off in a matter of minutes and took a closer look. There were no Infiniti/Nissan logos on it, just this:
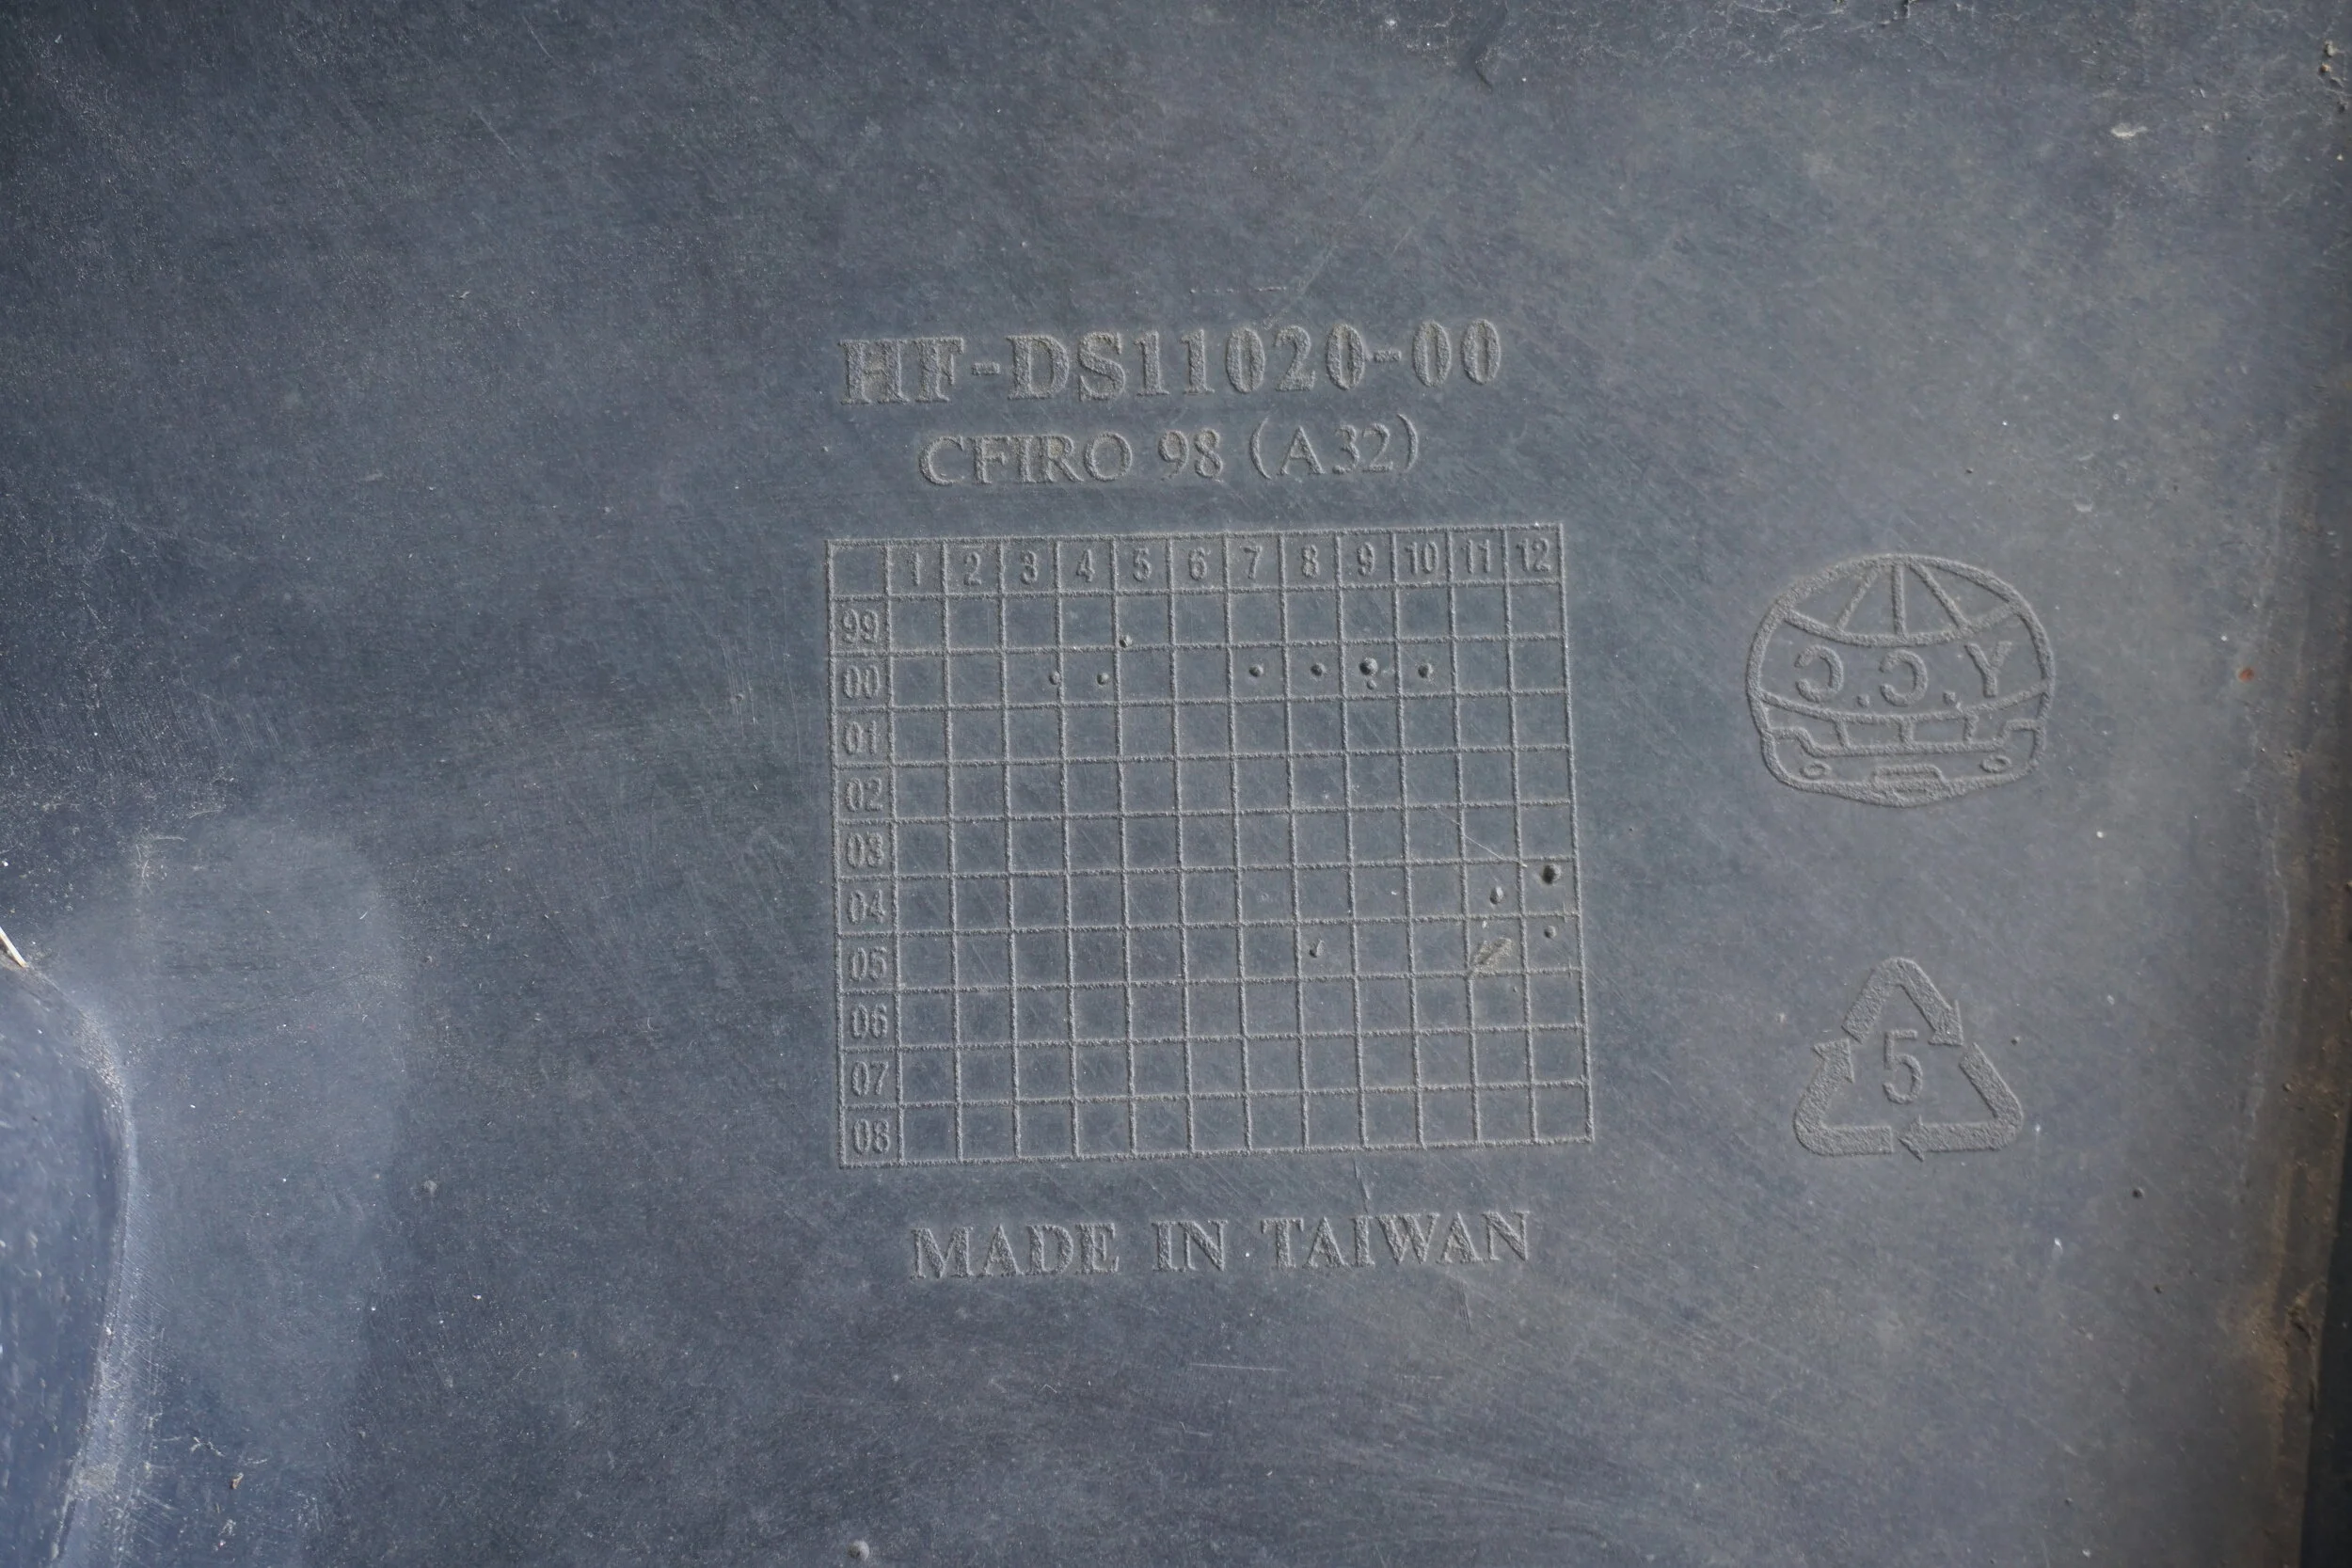
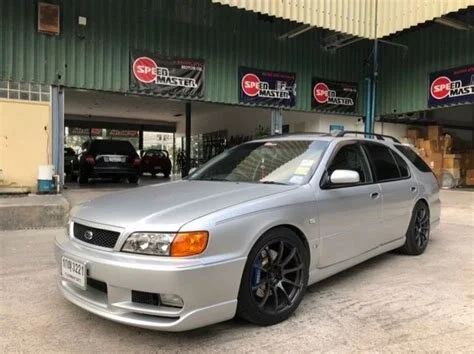
So I Googled "Taiwan Cefiro" and found these two pics that looked like the same bumper:
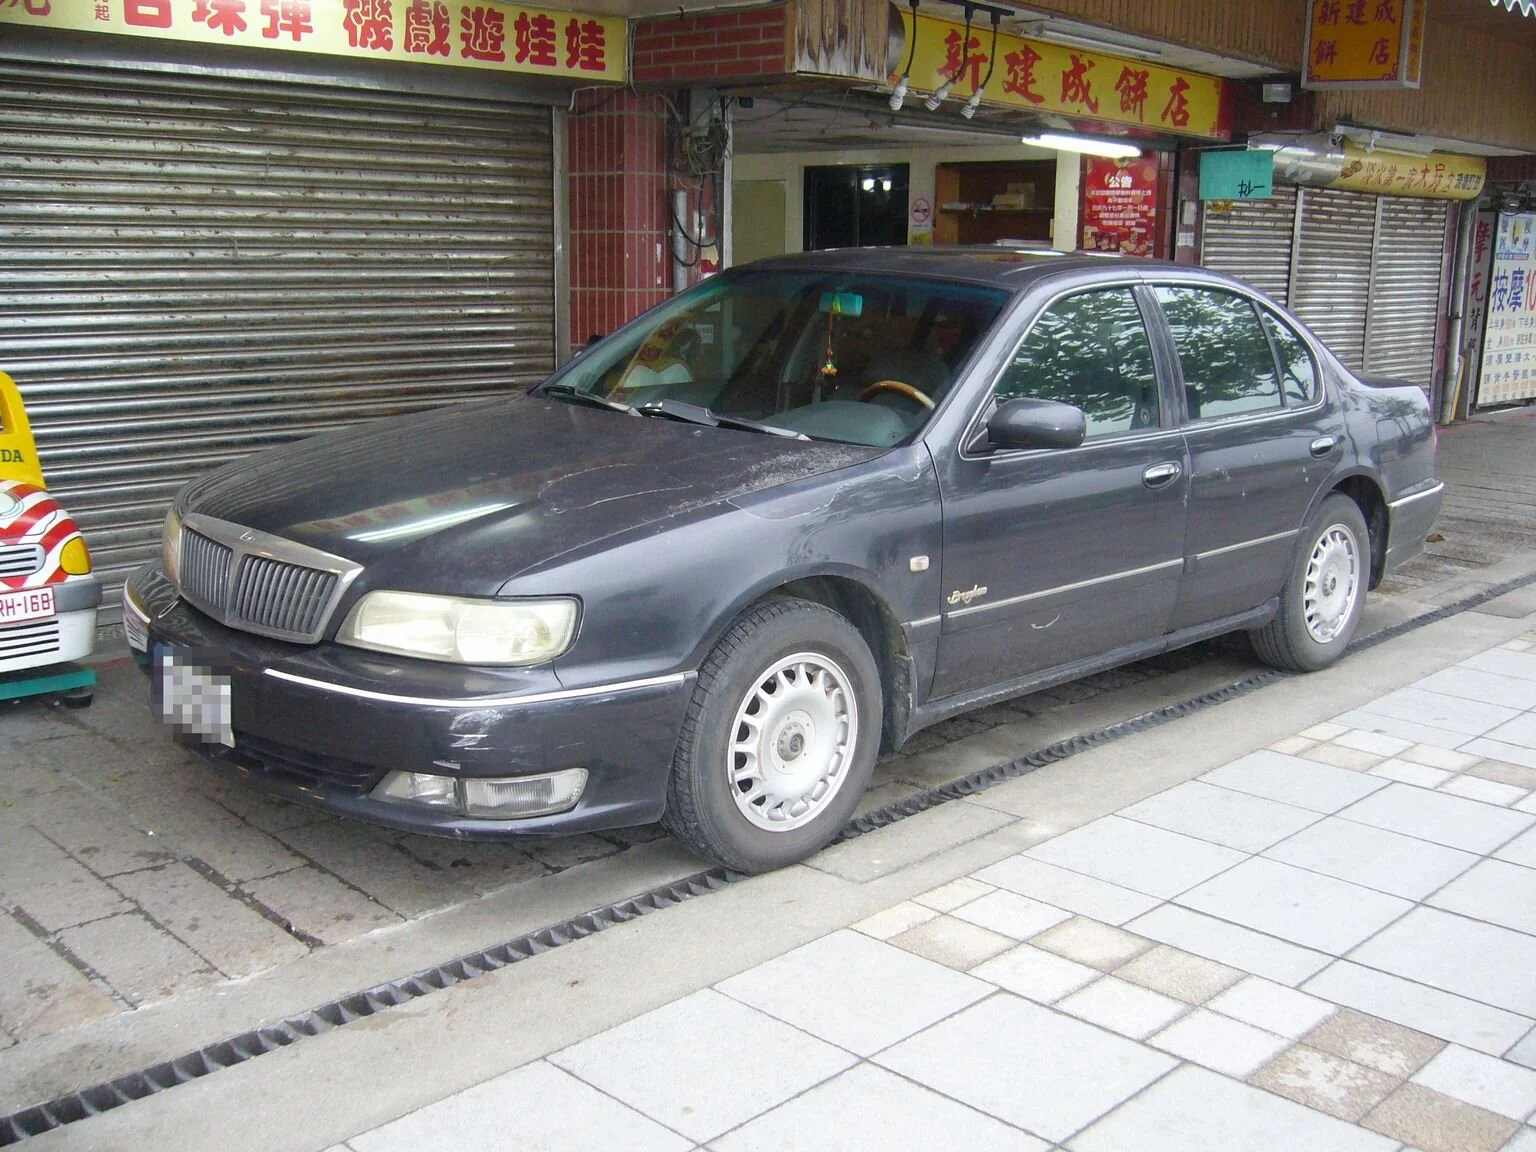

I also stumbled across this beauty....
Anyways, I got it home, and here's what it looks like:
Judging by the chrome strips that match what is on my bumper, I'm guessing this is an OEM (or reproduction) bumper and not an aftermarket/tuner affair. It also doesn't look cool enough to be an aftermarket bumper. But this raises the question of WTF is this bumper doing here, attached to some random non-modified, regular-***, automatic I30? Who would have brought this over, and why? I don't understand the vertical brackets behind where the fog light would go, but it appears that if I cut them off I can install my fog and corner lights into this thing no problem. I'm not even sure if I like this more than my current bumper (with the three vertical slats cut out from the lower opening):
But I'll eventually paint it and install it, just so I can see what it looks like on my car. Because how cool is that?? $30 in a junkyard....
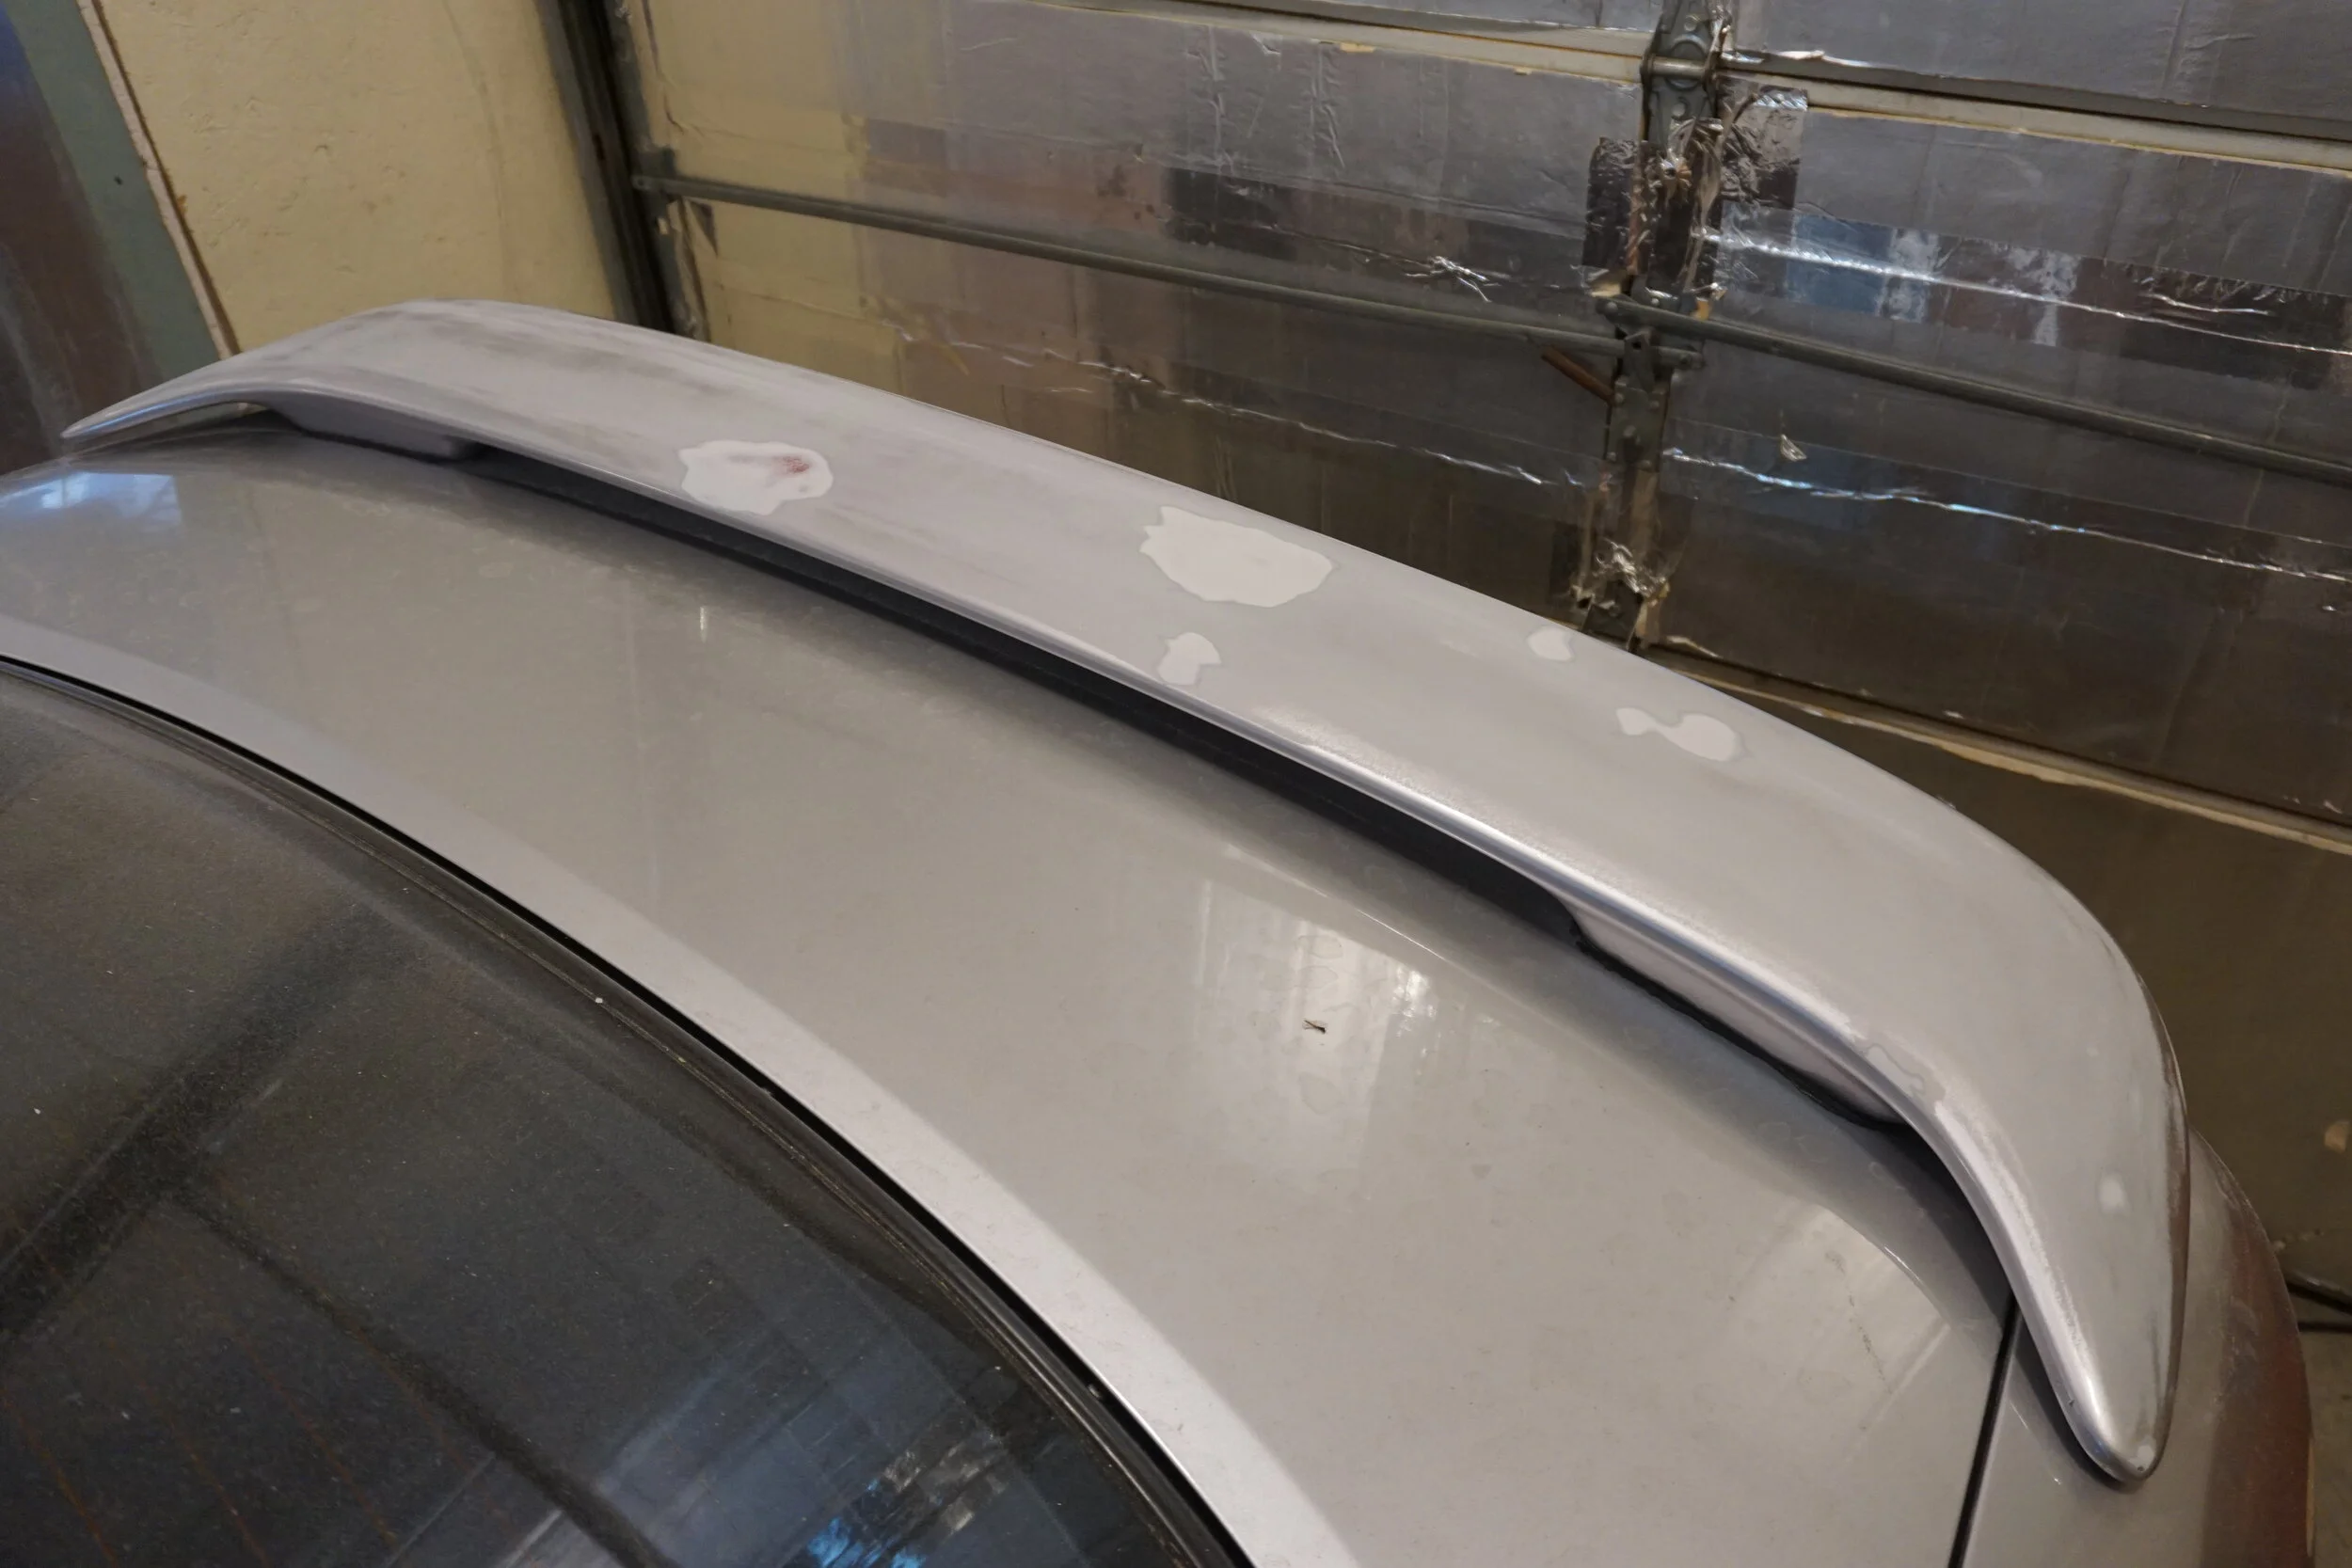
I also lucked out with some other choice parts that day. From that same I30 I plucked a center console in very good condition with the switches for heated seats, a spoiler in mint condition, an auto-dimming rearview mirror, and a whole lot of sheet metal. I plan on installing a seat heater into my Recaro, and it would be really sweet if I could make it work with the OEM buttons for a clean looking install, and my center console is all scratched up for me removing it a million times over the years. I got the spoiler since I have a feeling it will save me a lot of prep work for painting over the one on my car that had all the paint peeled off that I had to sand down to the base material.
I also got an elusive shifter box from under a 5.5th gen off in one piece (the previous one was too rusty and the edges all broke off):
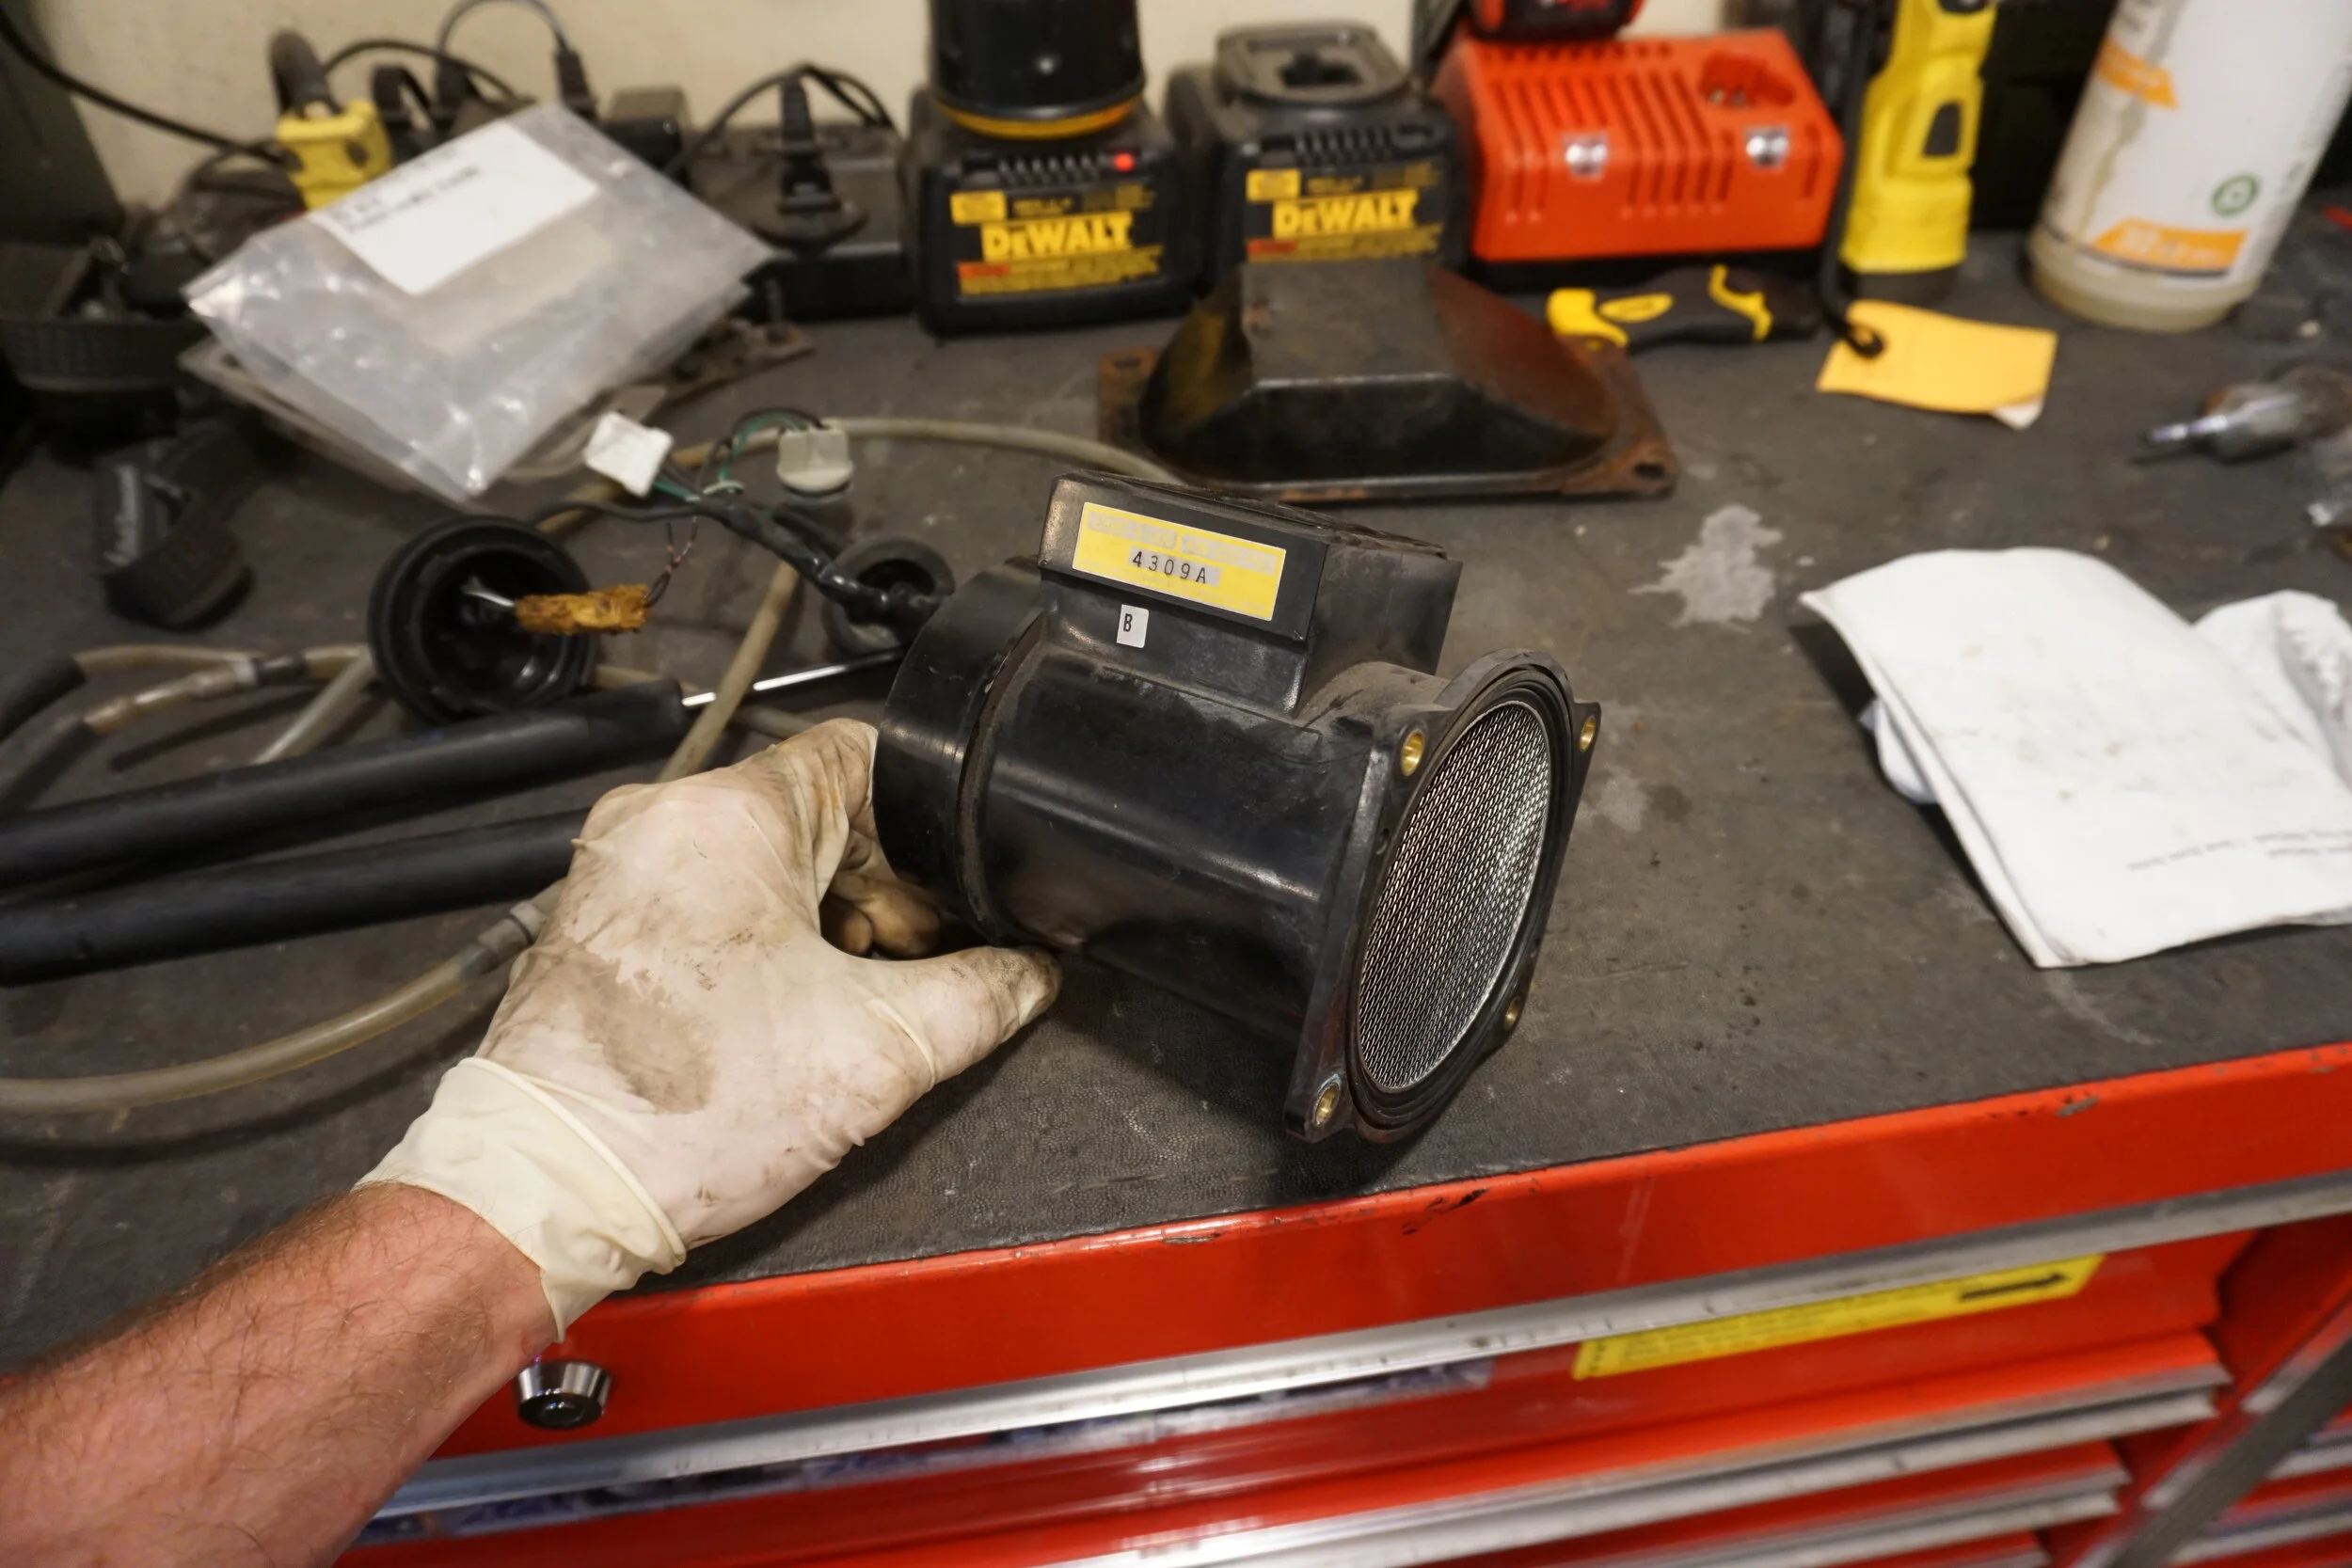
And a MAF off a Q45 that I'll keep as a spare (the 4" intake will be going on at some point....)
So yeah, that was my weekend. I ordered some more tools before I get going on the rust repair to make things as easy as possible, and they haven't arrived yet.
Last edited by 95maxrider; Aug 24, 2021 at 09:52 AM.
That bumper is quite the find here in the states.. Back when I got my chinesium Cefiro center garnish, other sellers on ebay were selling front and rear A32 bumpers. Shipping was astronomical but it was still possible. I wanted a brougham rear bumper and center garnish with a plate recess in a bad way but shipping on the bumper was just wayy too much. If I had to guess, this bumper got shipped.via a military relocation from somewhere in Asia. I've read of an Air Force guy who got a Y32 Gloria back to the states in the early/mid 00s, completely bypassing the 25 year rule. A bumper would probably be easy.