
My Massive I30 Revival and Build Thread


Well the rust project got delayed due to racing and then breaking of the M3, but I took a few days off work and I'm back on track. This is still a work in progress, but here are some pics to give you an idea of what I'm up against. Yes, I know the fitment of some of the patch panels isn't perfect, I'll fix it one way or another. Keep in mind this is the first time I'm doing any sort of sheet metal work, or really, any metal work at all, and will also be my first real welding project.
Progress on the rust repair project has been pretty slow due to trouble with the M3, racing the M3, and preparing to take the car to RallyCross Nationals (wish me luck!). But I'm almost done welding (well, the parts that aren't usually visible, the fenders are a whole 'nother story) and considering this is my first welding project, I'd say it's going pretty well. I'm learning a lot as I go, and some sections are much harder than others (thin, semi-rusted metal, limited access, etc). So you'll see some ugly booger welds where I blew threw the metal and had to fill it back in. These will all be ground down and made "pretty" before they get painted, but for now you get to witness amateur welds in all their glory and sadness. Any remaining holes that I just couldn't weld up will be filled with POR15 seam sealer.
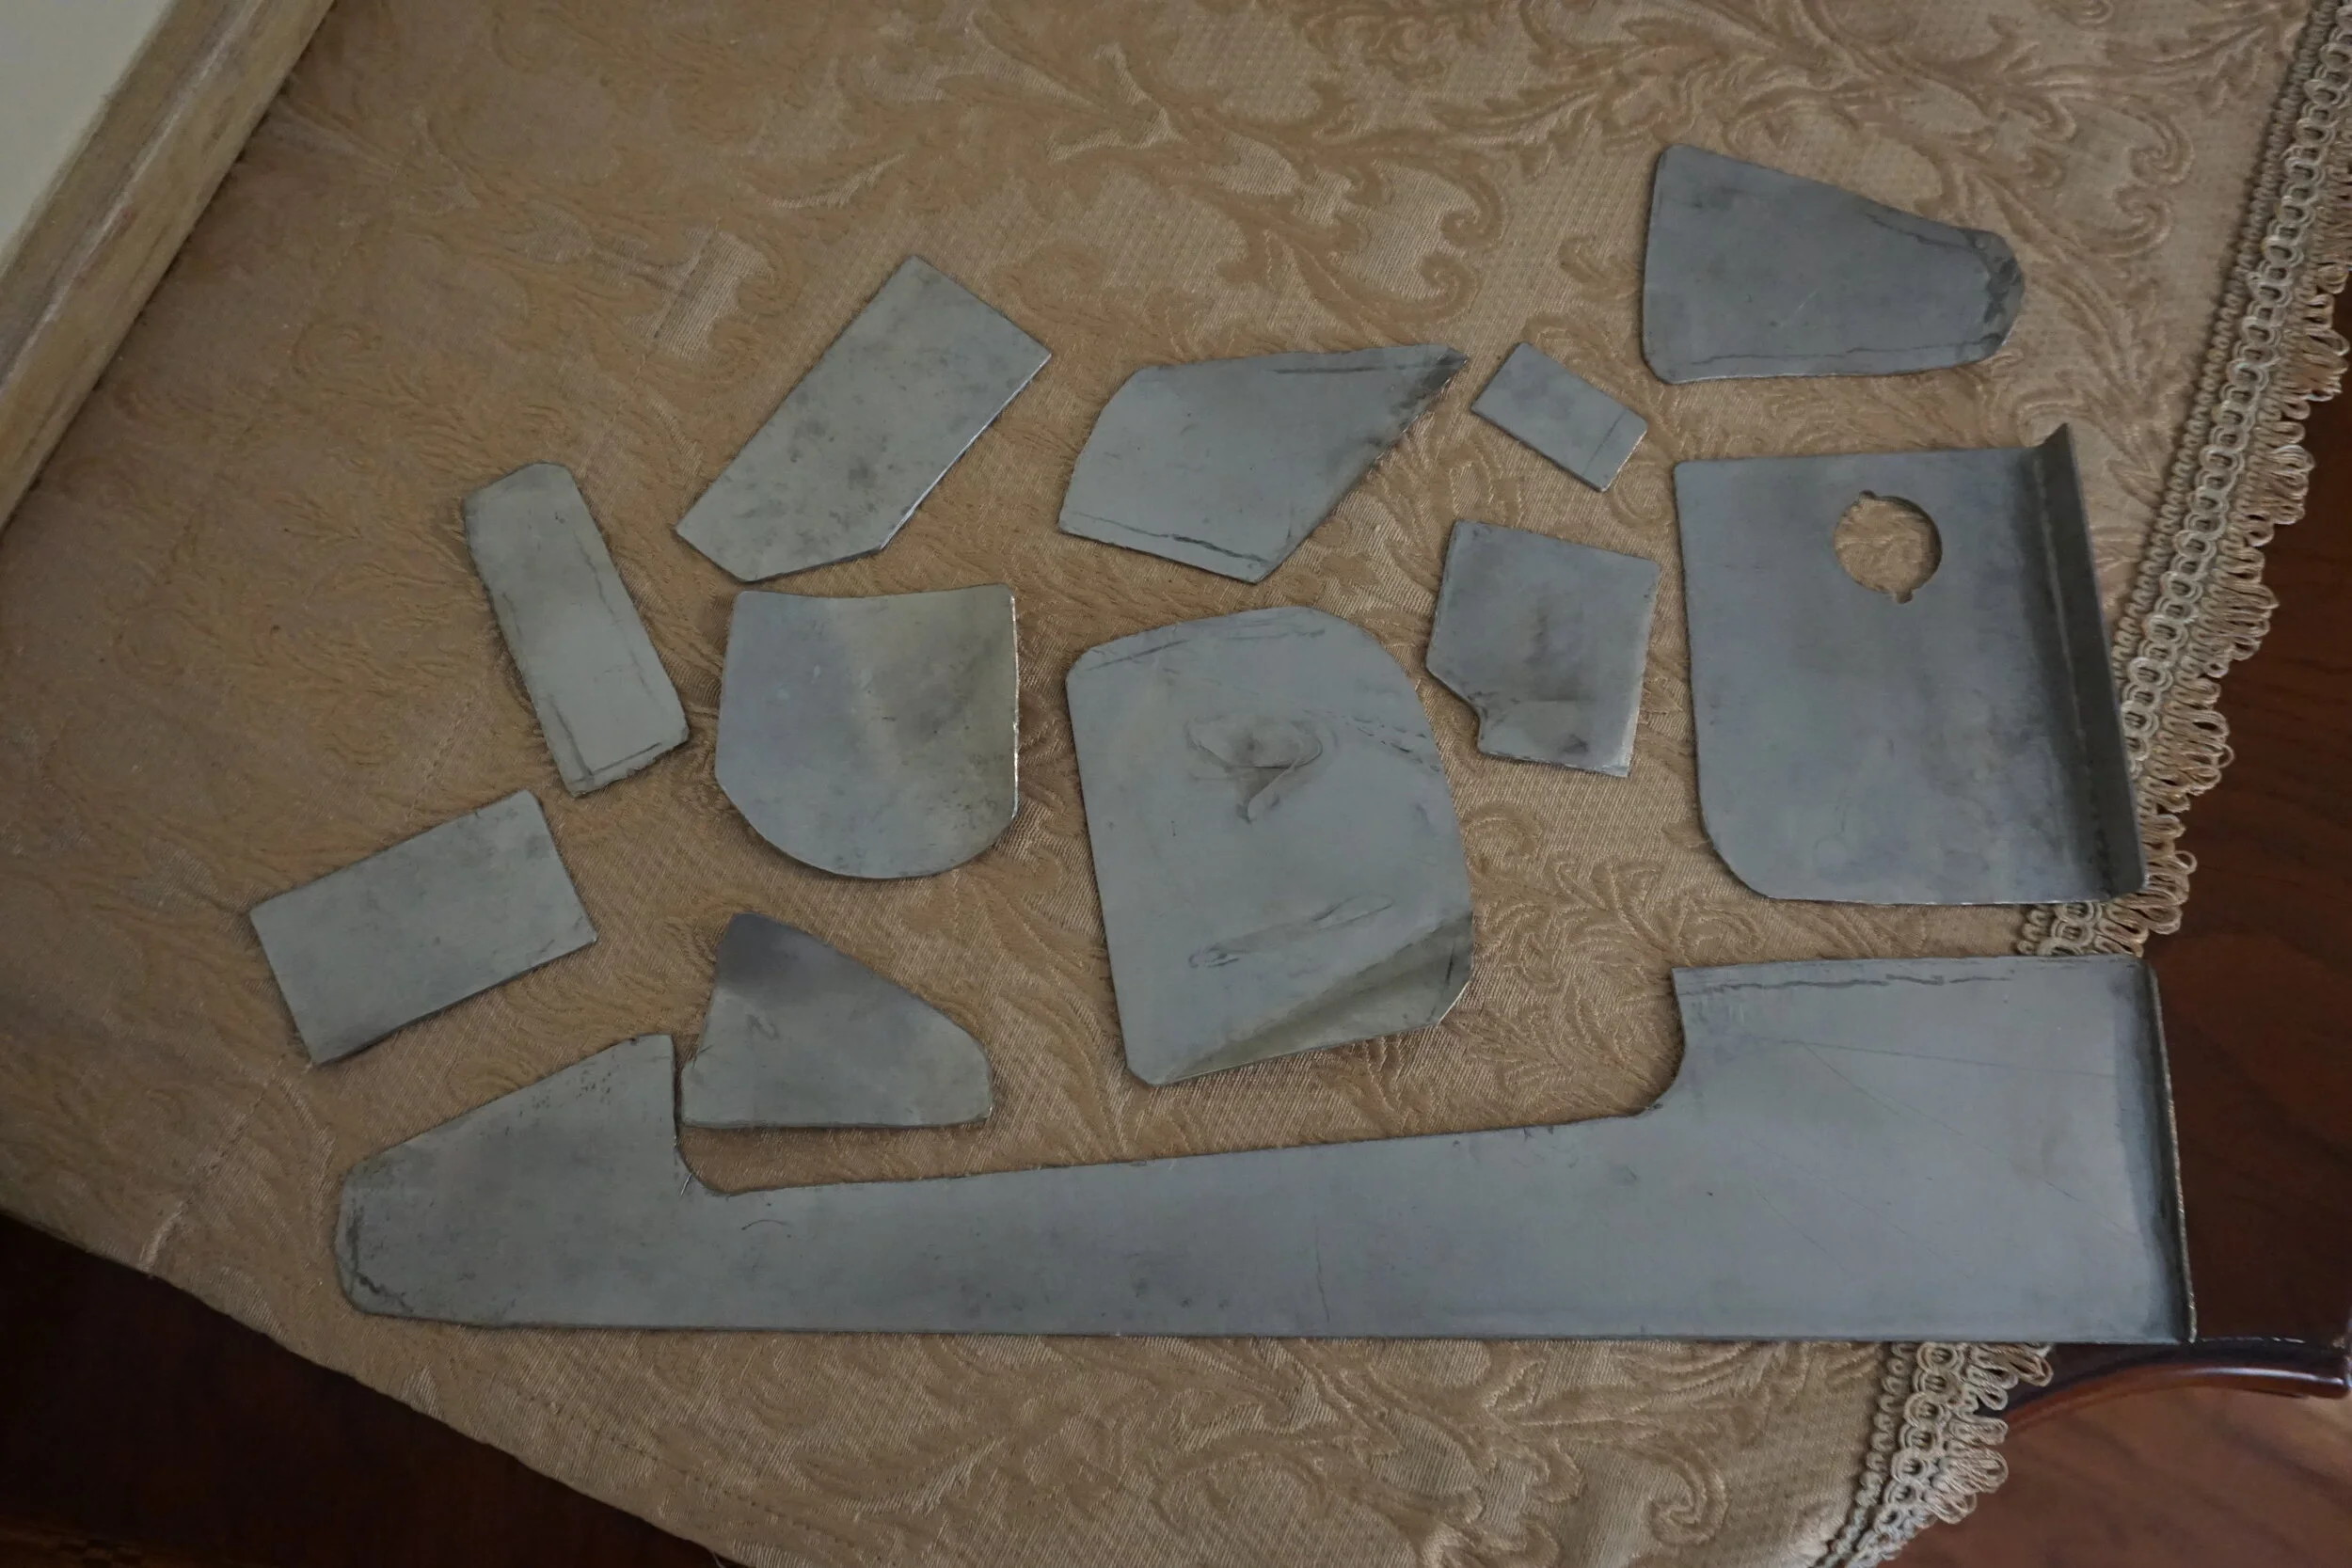
These were all of my patches before I started welding. I quickly learned that having near-perfect fitment was absolutely crucial to welding quickly and not wasting time filling in gaps and blowing through stuff, so I had to remake a number of these when I tried to fit them up and realized they weren't going to cut it.
Driver side (rear)
I started welding on the three patches you see on the right here. This was a bad idea, since the metal in the area was thin and liked to blow through, and I was also welding upside down. As a result, I had to fill in lots of gaps and such and it wasn't very nice looking. I then moved on to the pieces on the left, starting with the bottom piece. This generally went pretty well, and I built it up from there.
Welding is easy when you're welding two new pieces of metal together.
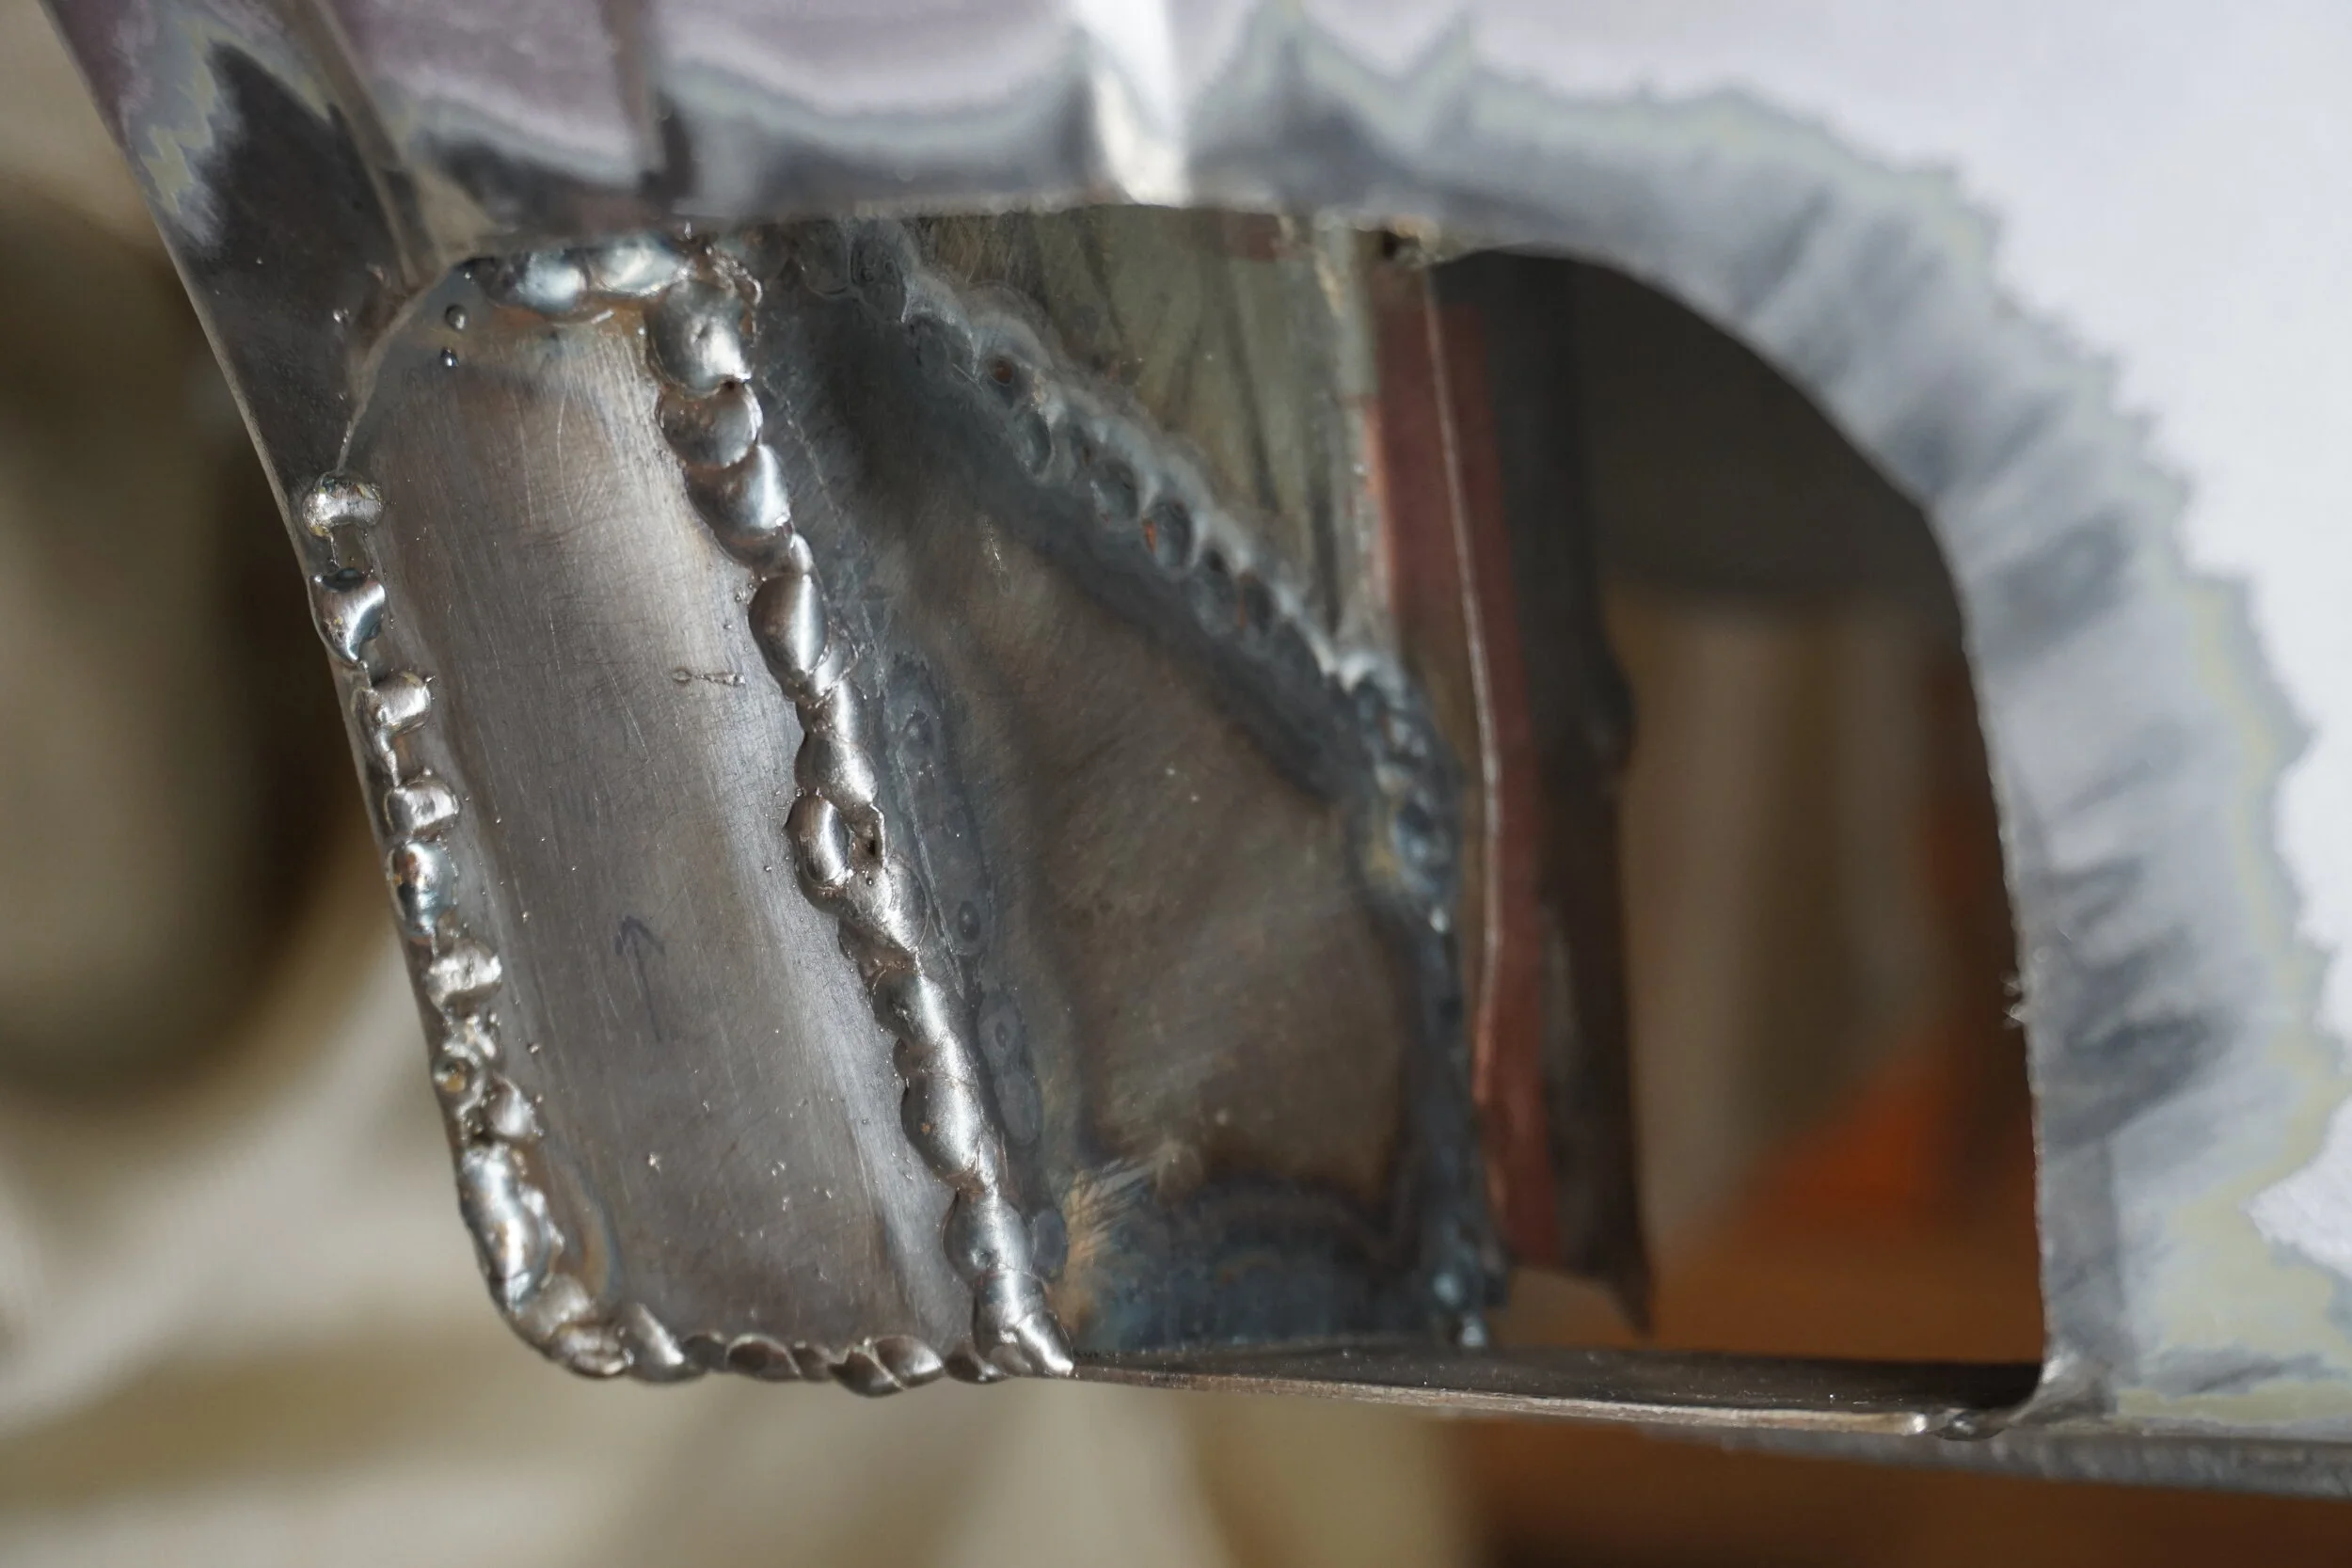
I ground them down a bit before covering them up.
There were a few large gaps around this patch panel, which required lots of booger welds to fill it all up. Fitment was very tricky due to all the different angles the original metal was bent into. I had to simplify a bit with my replacement.
Driver side (rear)
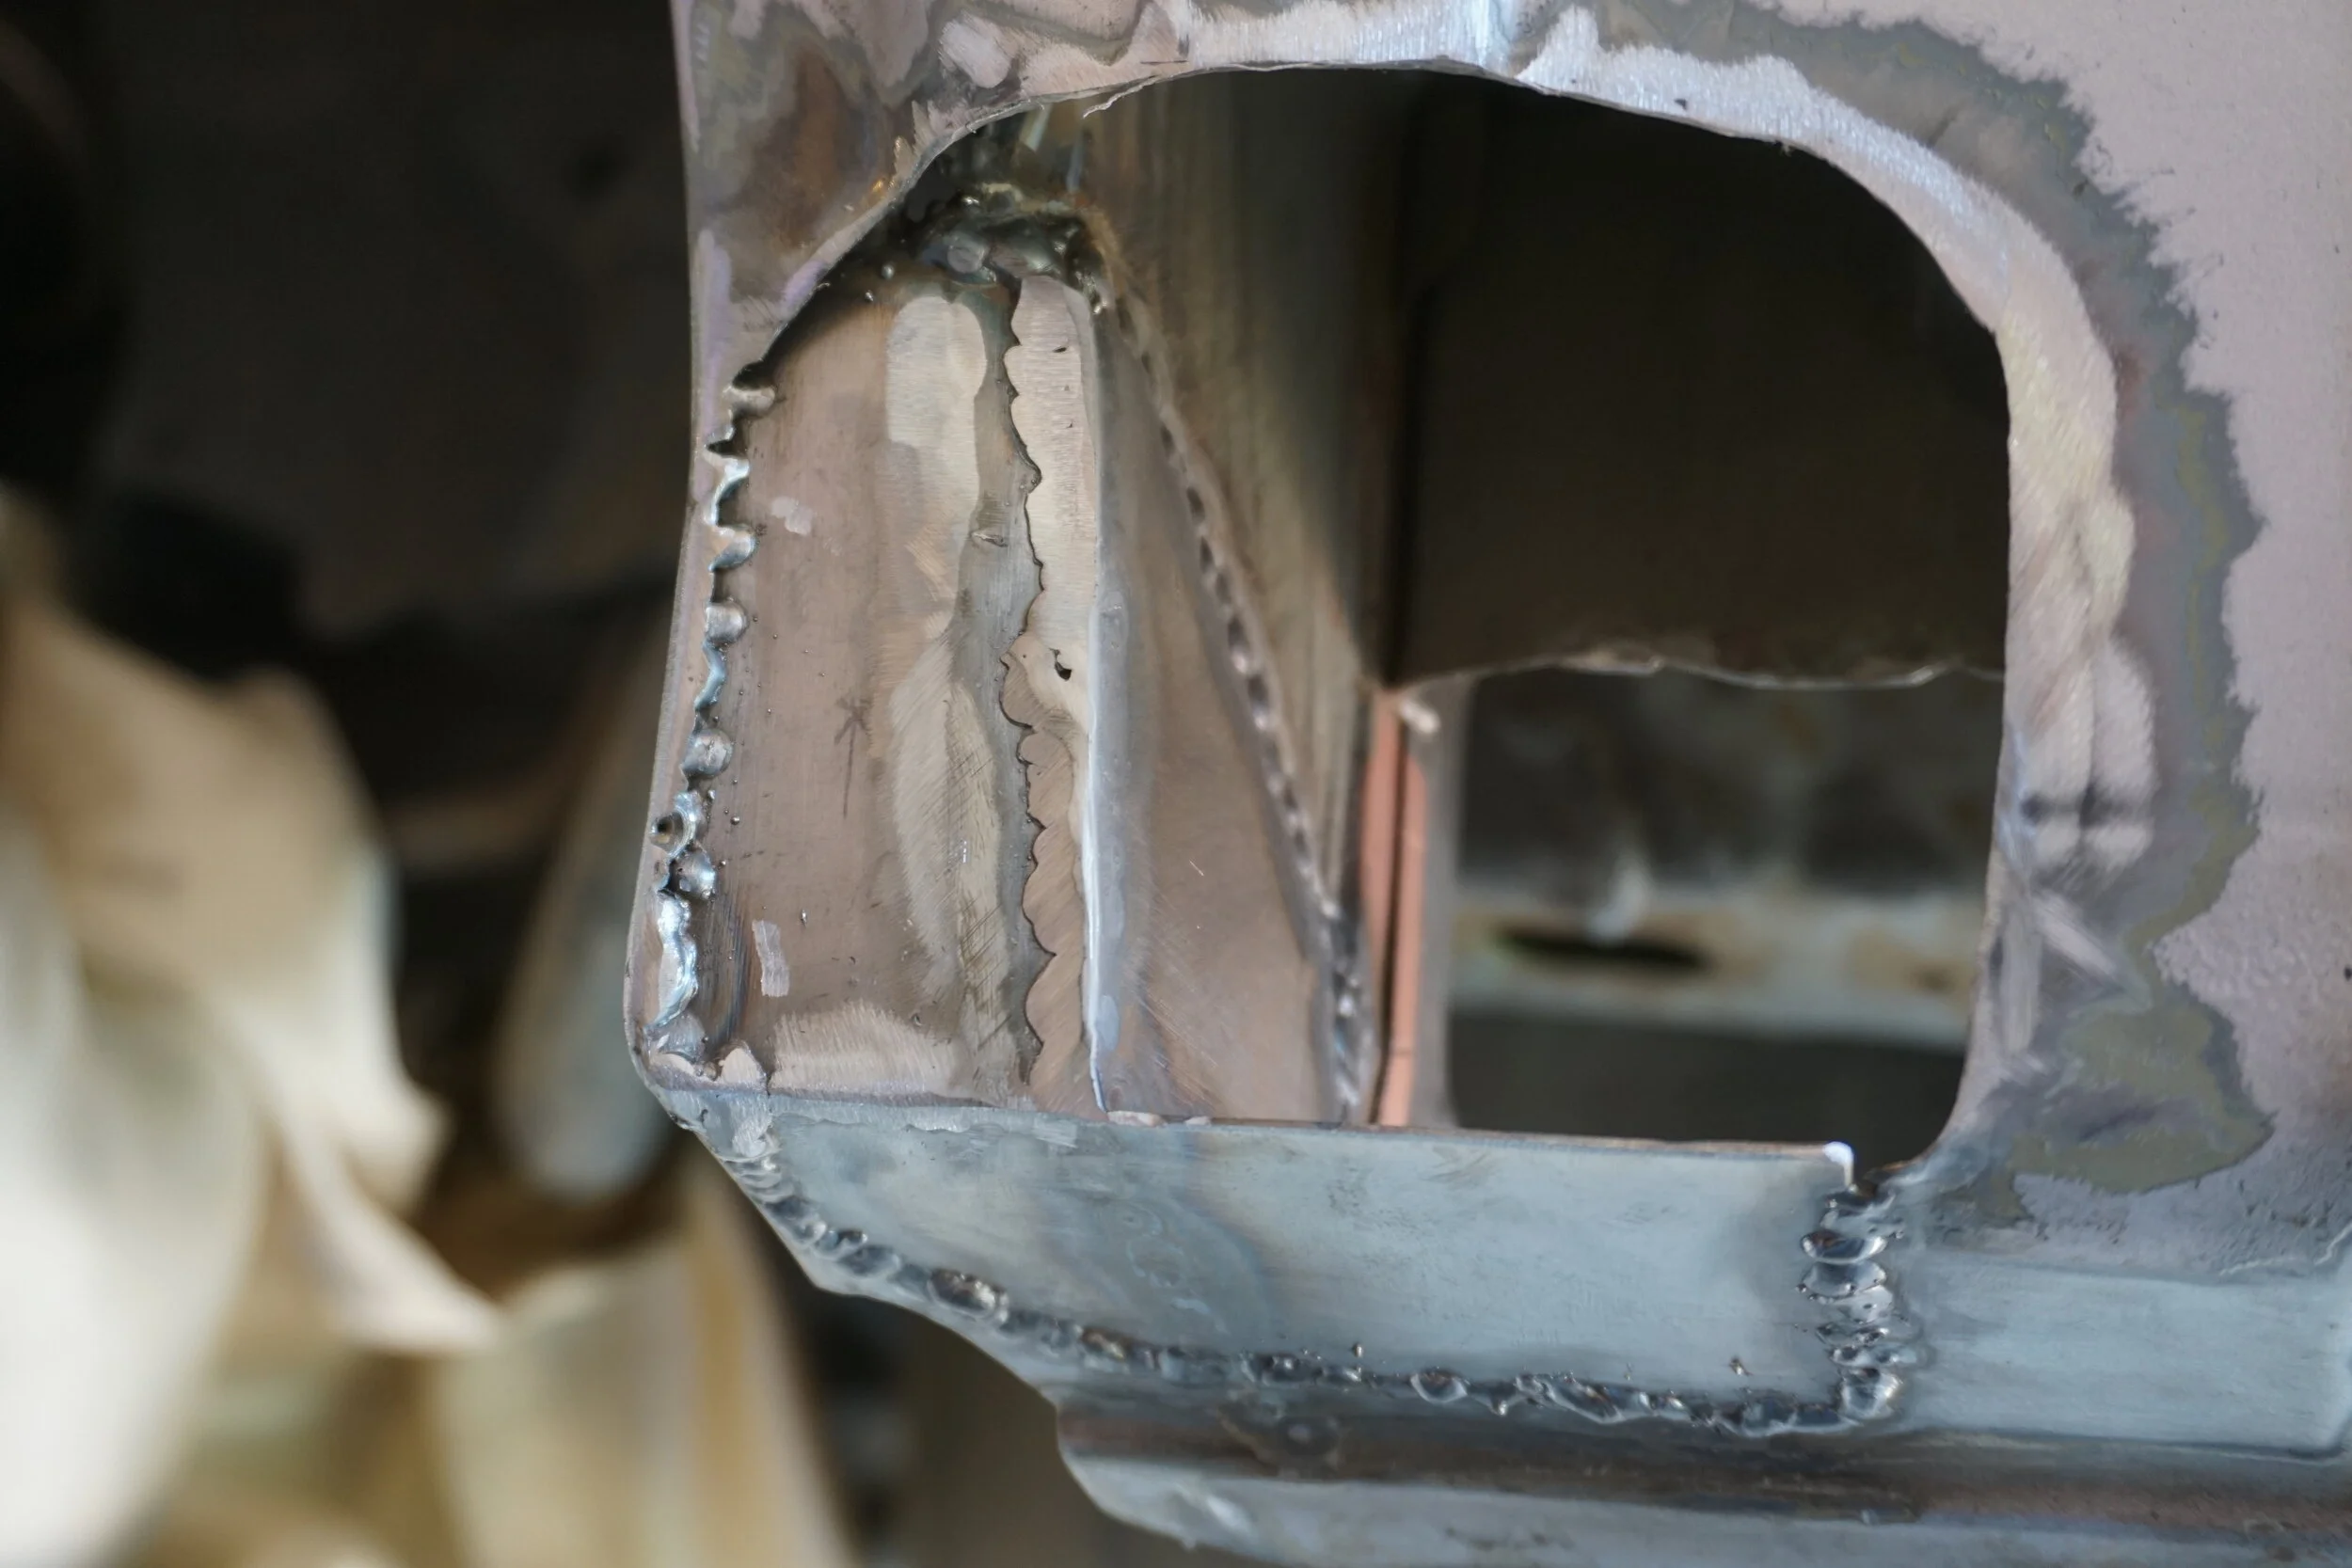
And from the inside, where I added more welds wherever I could. I couldn't get the welder in the one corner that you can't see, so that will get the POR15 treatment.
Driver side (inside rear)
This one sucked. The fitment was actually pretty good, but the metal was thin on the top and kept blowing through. On the right side under the bend I applied some weld through primer on both panels, but I swear that stuff was an anti-weld primer. Nothing I could do would make it weld there, so it looks like ****.
Passenger side (inside rear)
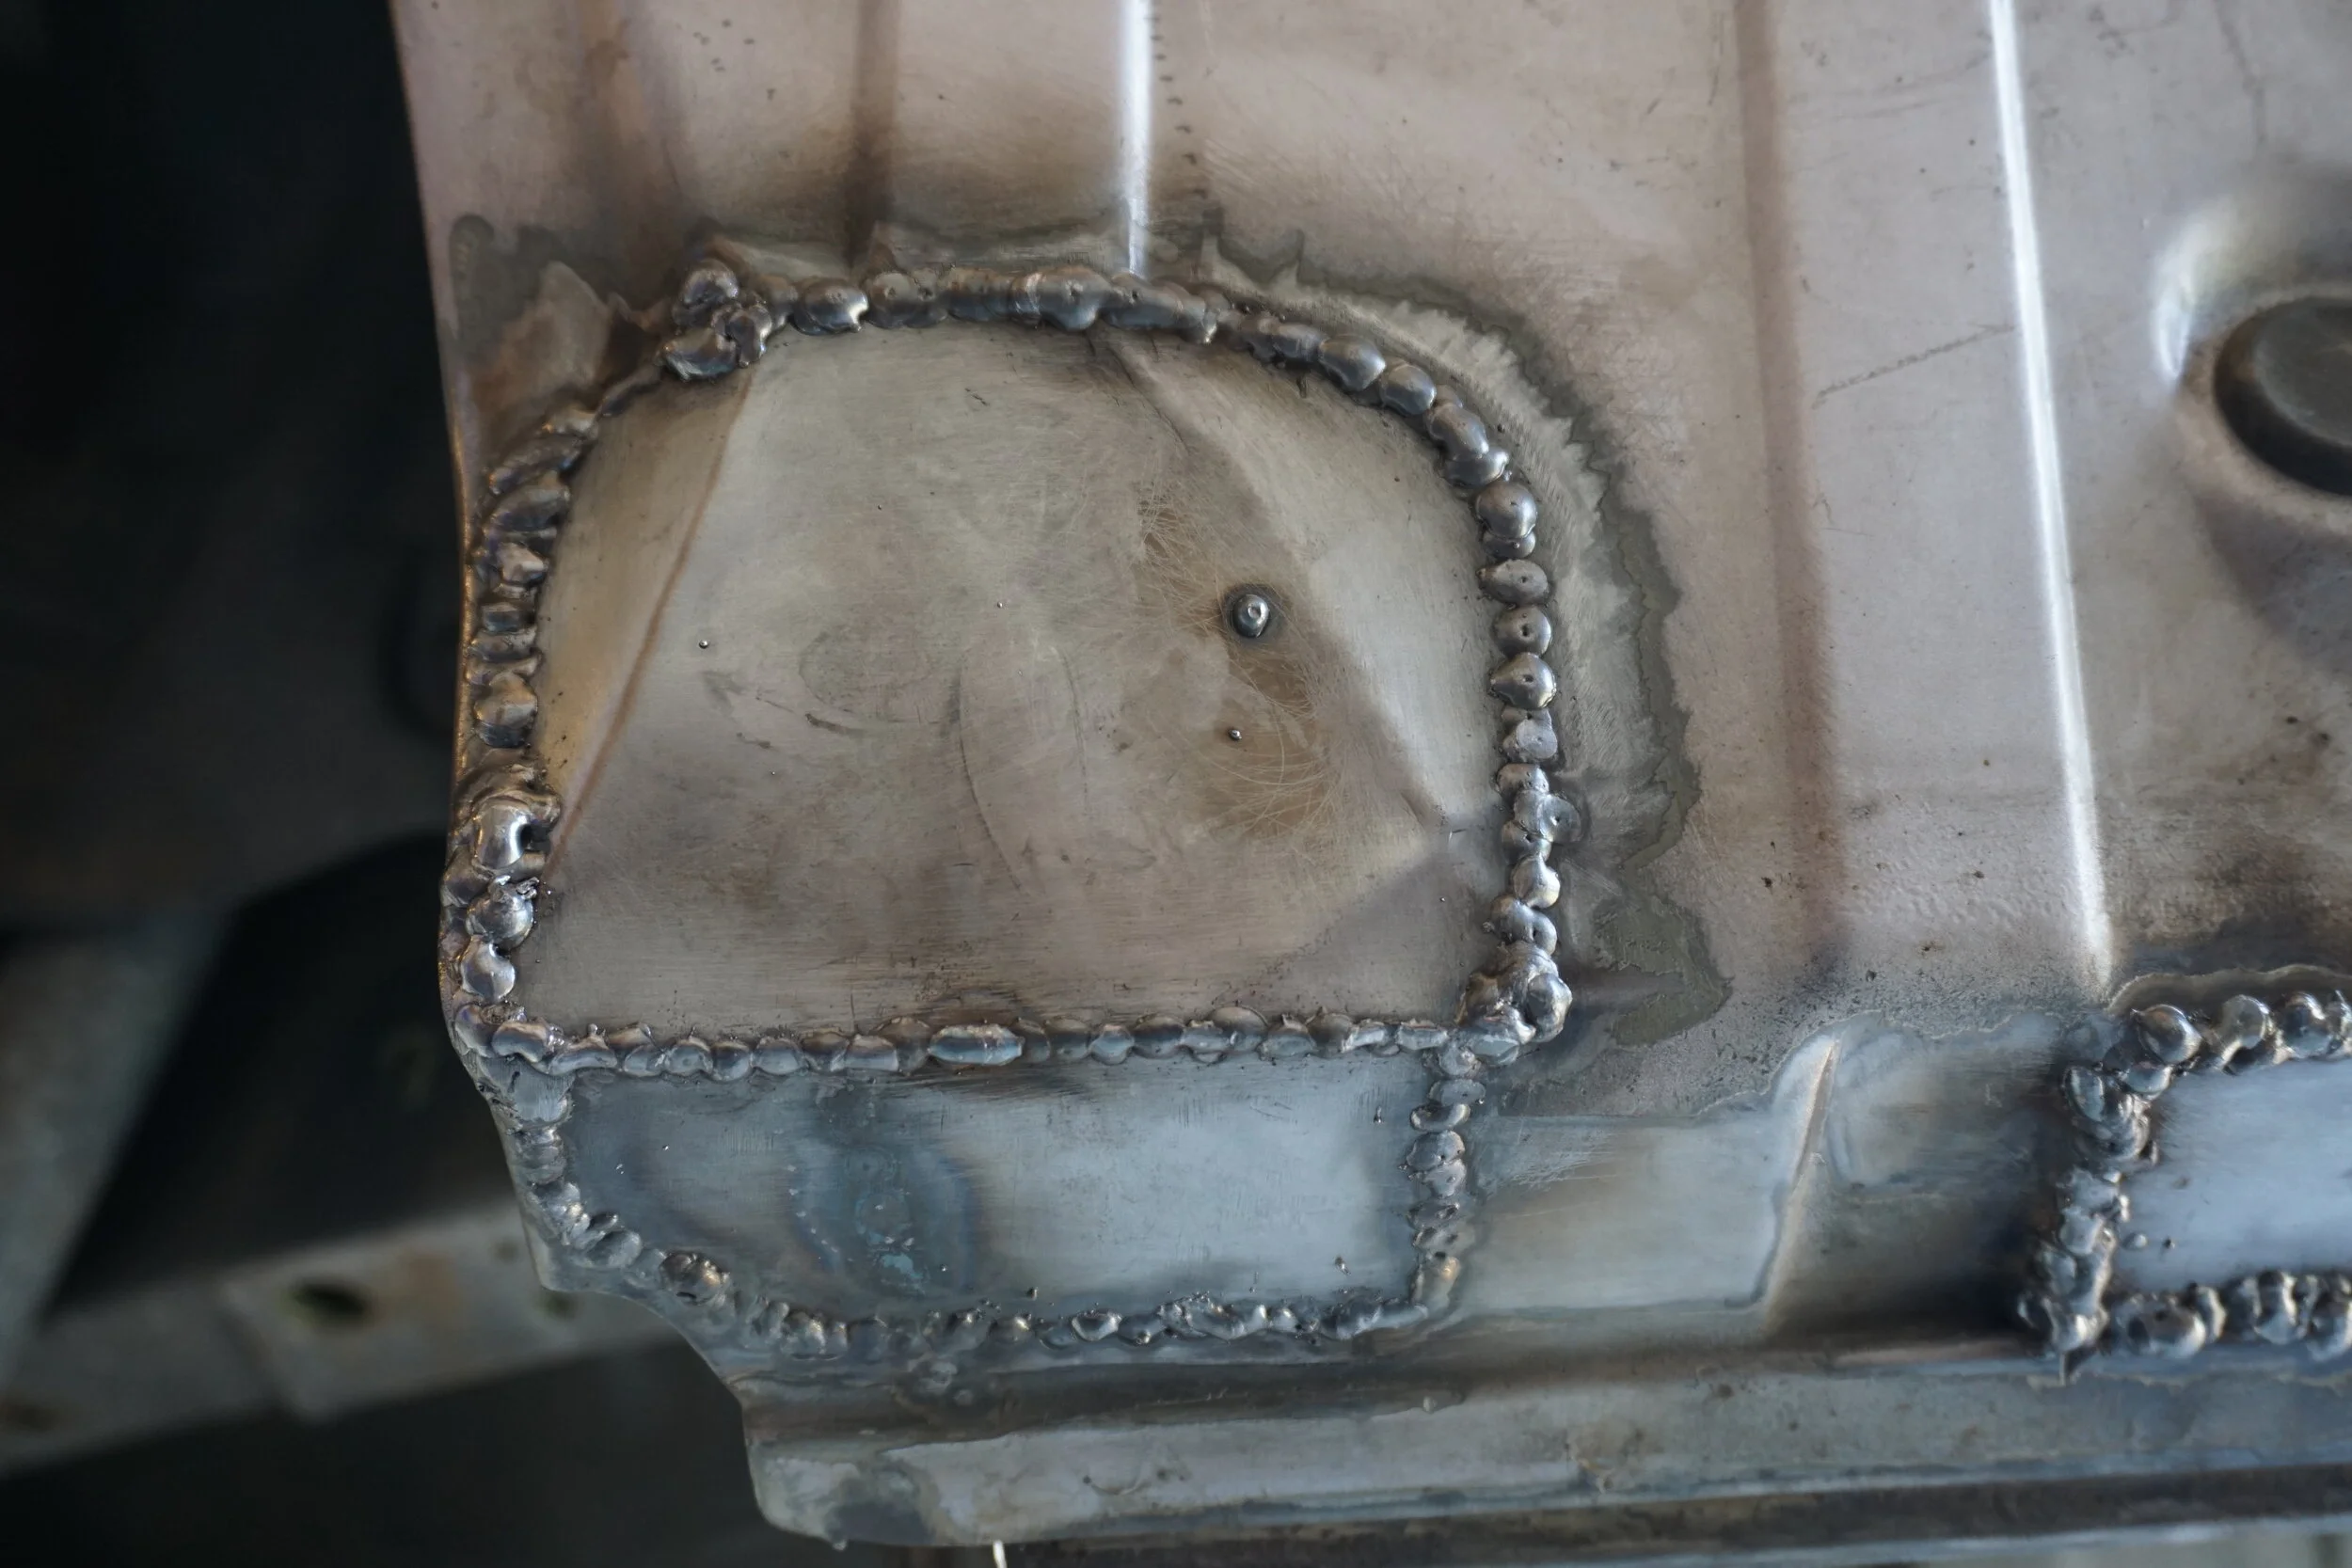
Finally, something presentable! A tight fitting patch plus good surrounding metal, and some wiser (cooler) settings on the welder got me this. Hotter settings would have made the welds flatter, but I didn't want to risk blowing through and wasting a ton of time, so I played it safe.
Passenger side (rear)
Even though this patch fit perfect, I was still blowing through on one side and wasted a bunch of time trying to fix that.
Passenger side (front)
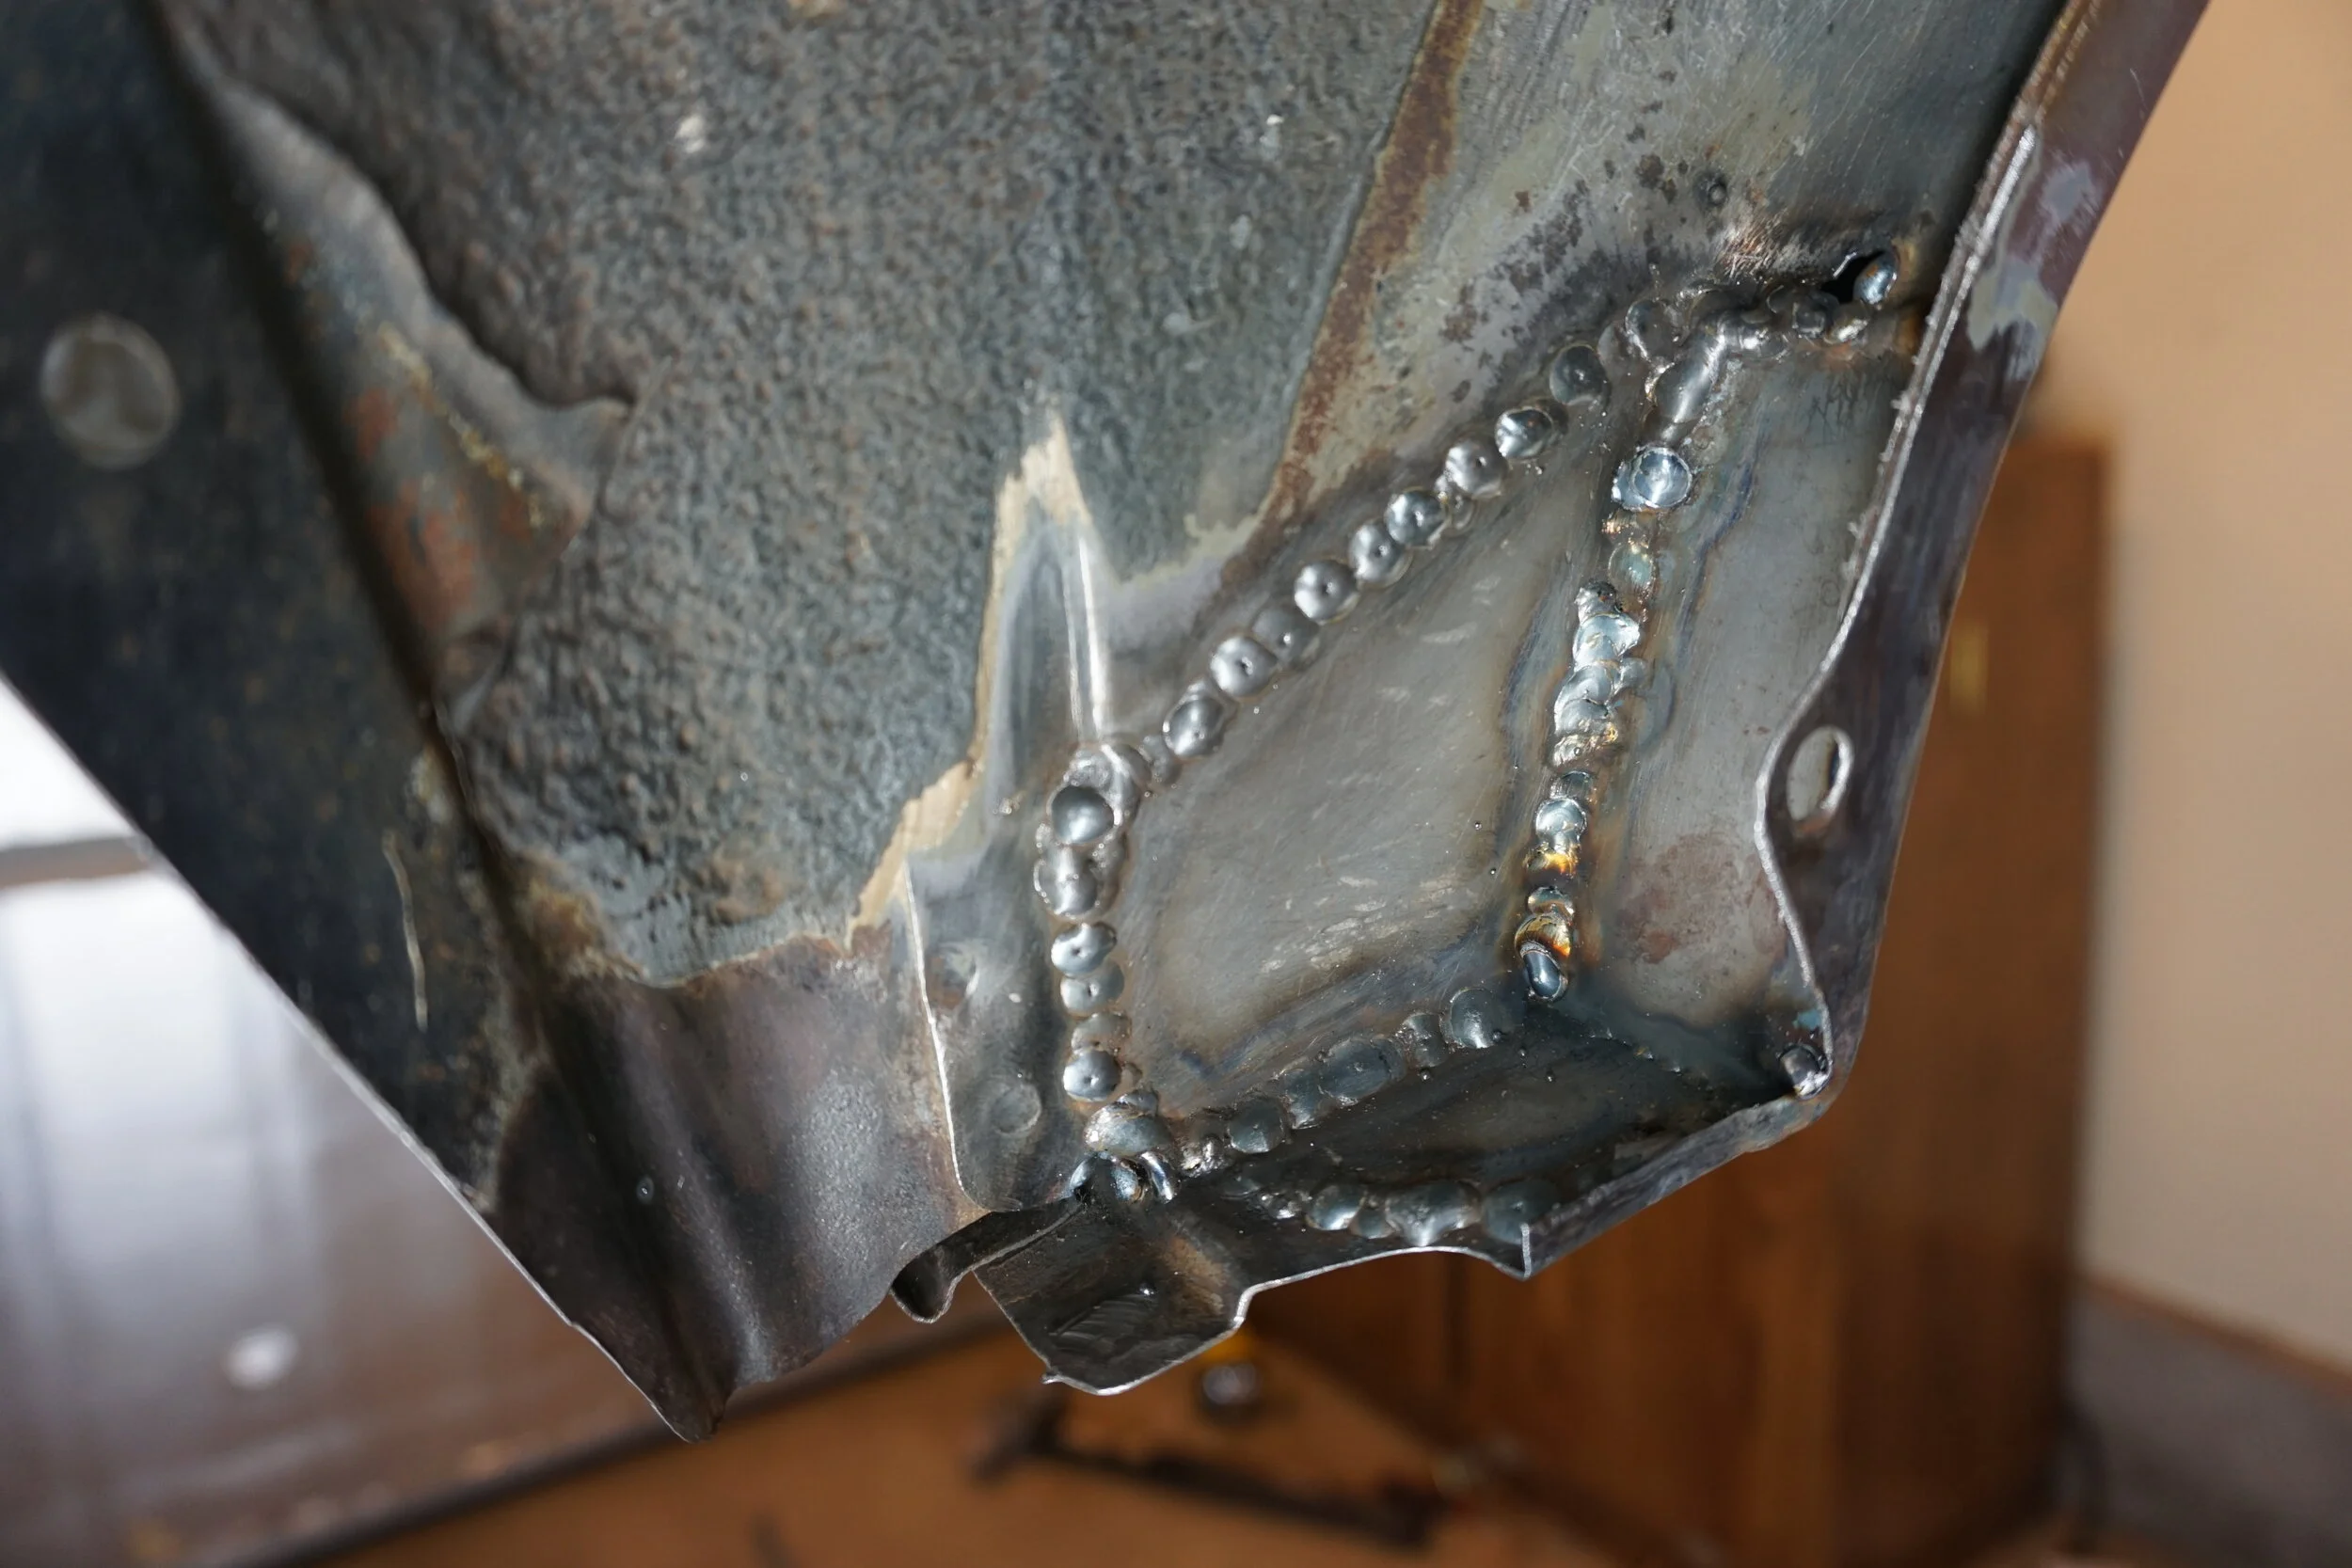
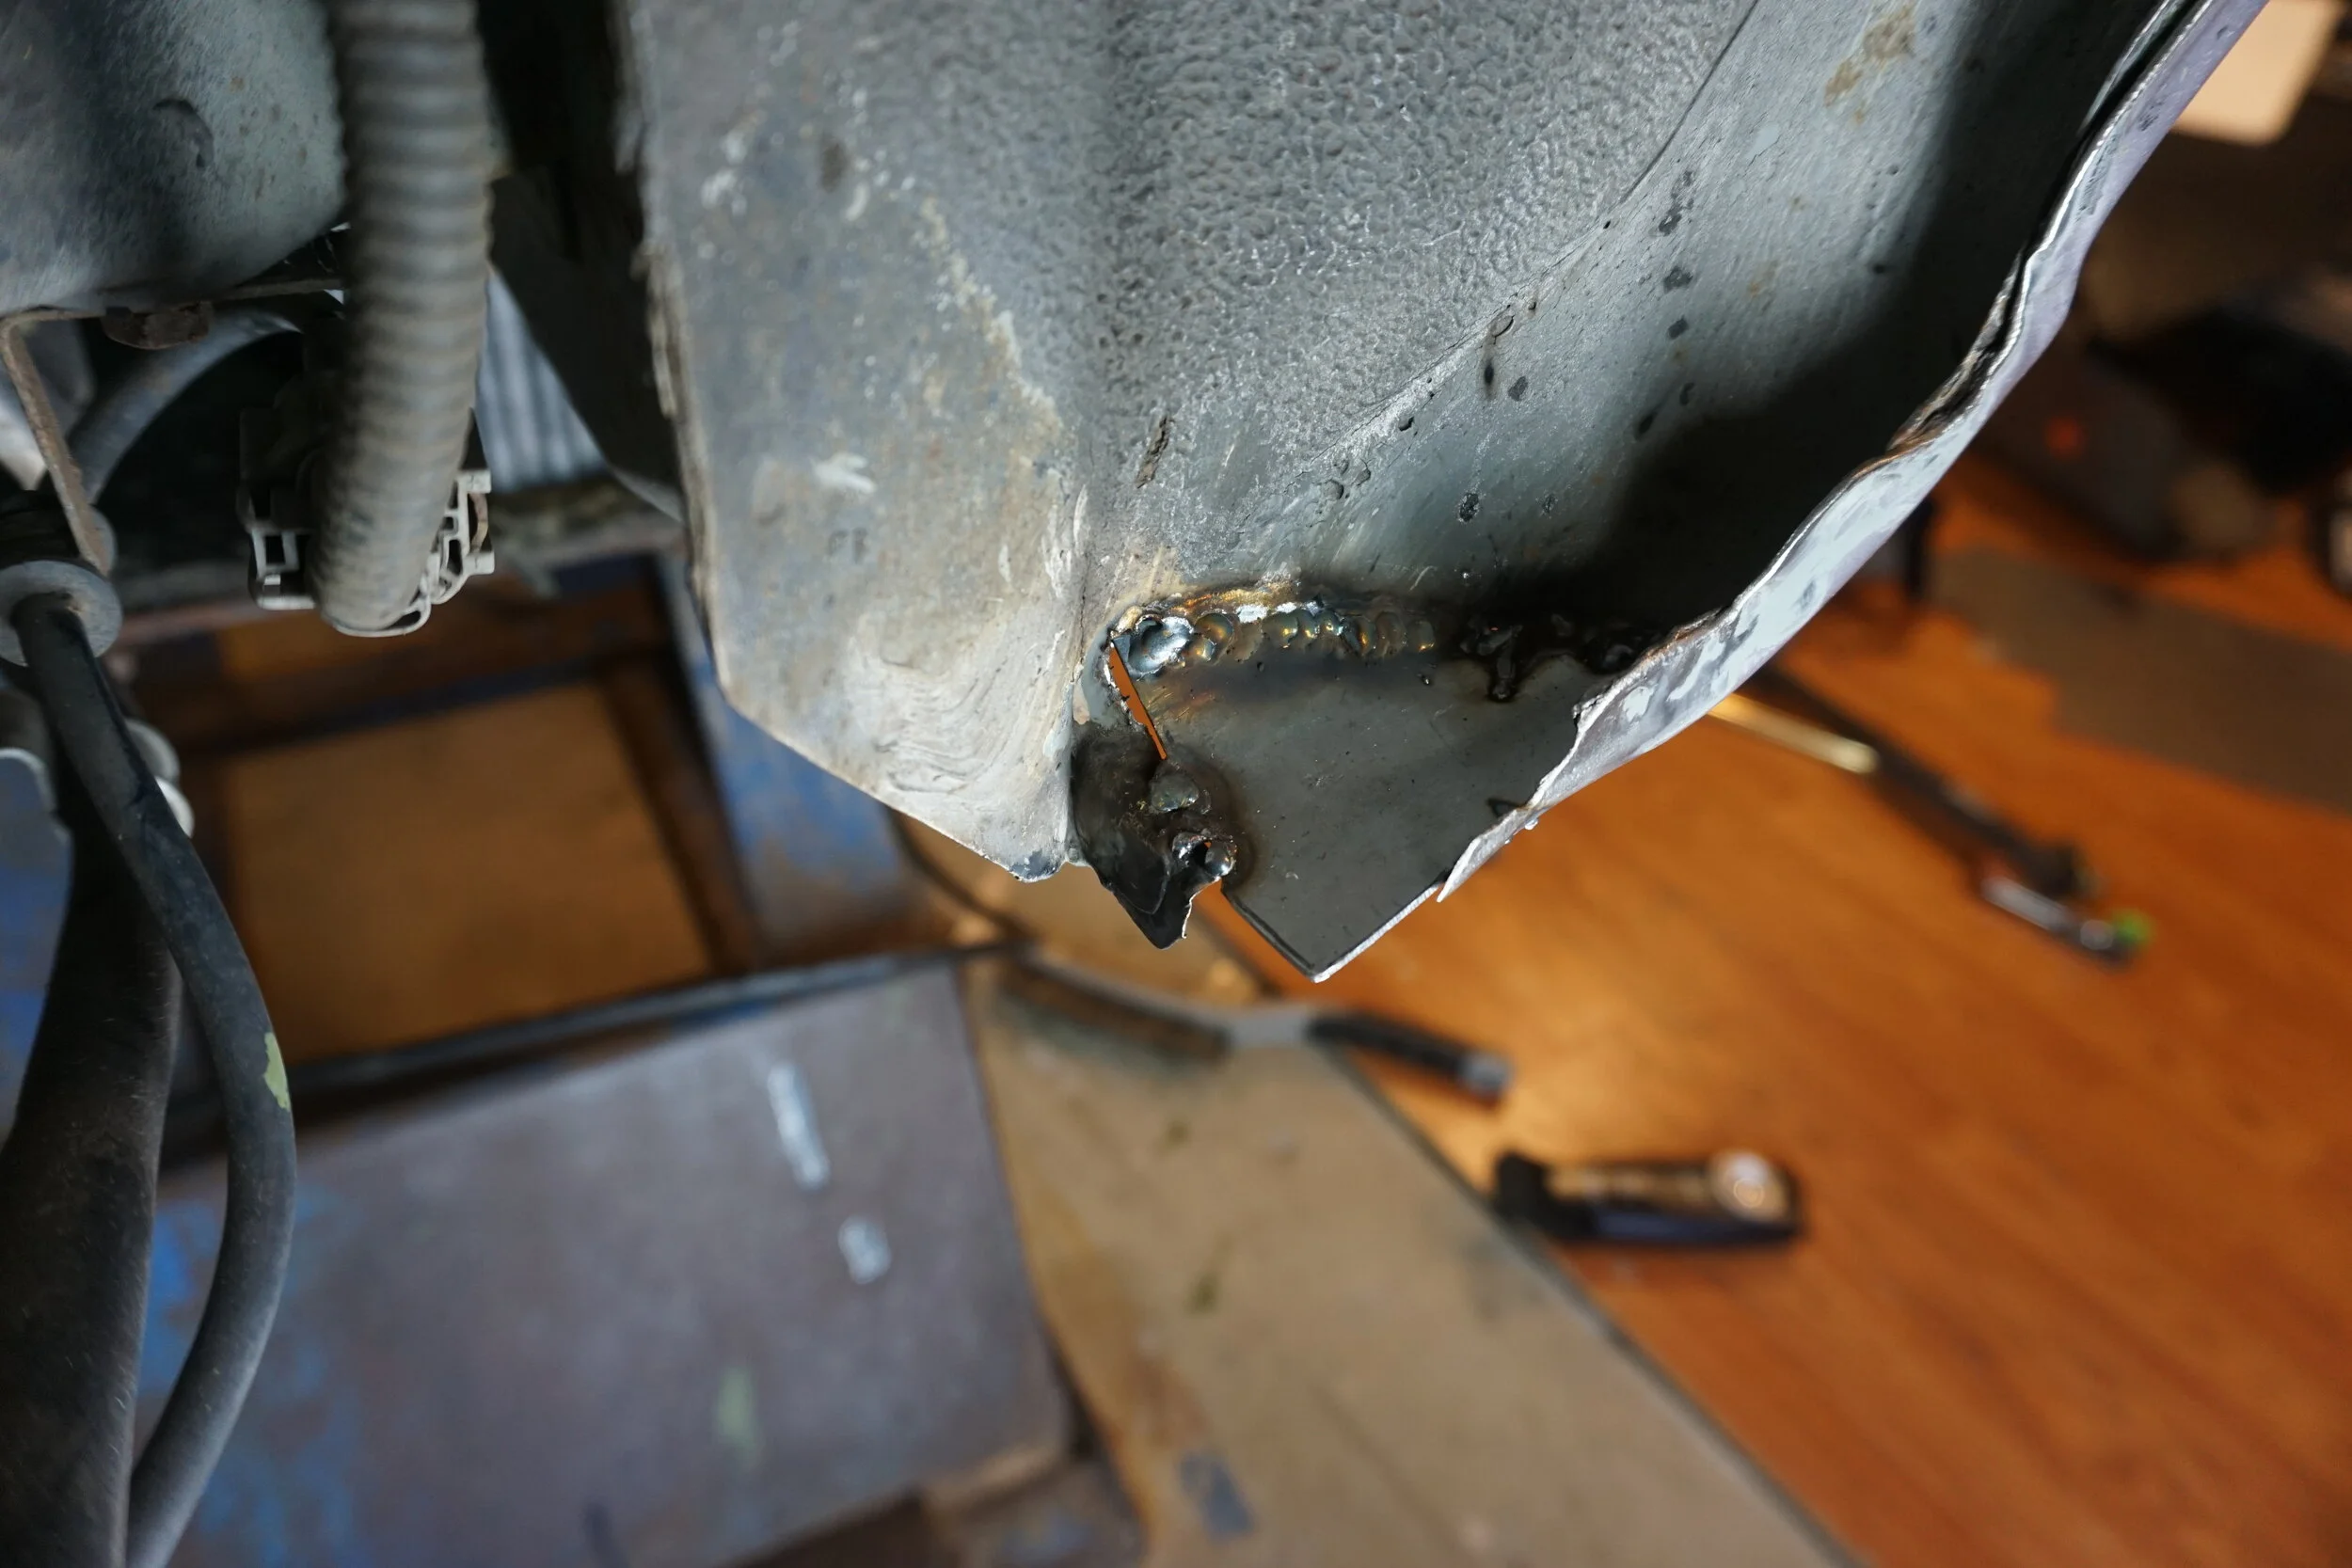
Now this one....ugh. I knew this was going to be difficult, and I was right. I had to re-do this patch since my first version was just too far off in too many dimensions. This one was better, but due to the contours of the area, wasn't perfect. As a result there was a gap in one corner that has been patched up with the POR15 stuff. Access was also difficult, and the surrounding metal was thin and hard to weld to.
That's all for a week or so as I'll be driving the M3 to Ohio for Nationals and going up against the fastest cars in the country. Once I get back I'll weld up the one last patch, grind things smooth, and put some primer down. Then I need to figure out how I'm going to tackle the rust on the fenders....
These were all of my patches before I started welding. I quickly learned that having near-perfect fitment was absolutely crucial to welding quickly and not wasting time filling in gaps and blowing through stuff, so I had to remake a number of these when I tried to fit them up and realized they weren't going to cut it.
Driver side (rear)
I started welding on the three patches you see on the right here. This was a bad idea, since the metal in the area was thin and liked to blow through, and I was also welding upside down. As a result, I had to fill in lots of gaps and such and it wasn't very nice looking. I then moved on to the pieces on the left, starting with the bottom piece. This generally went pretty well, and I built it up from there.
Welding is easy when you're welding two new pieces of metal together.
I ground them down a bit before covering them up.
There were a few large gaps around this patch panel, which required lots of booger welds to fill it all up. Fitment was very tricky due to all the different angles the original metal was bent into. I had to simplify a bit with my replacement.
Driver side (rear)
And from the inside, where I added more welds wherever I could. I couldn't get the welder in the one corner that you can't see, so that will get the POR15 treatment.
Driver side (inside rear)
This one sucked. The fitment was actually pretty good, but the metal was thin on the top and kept blowing through. On the right side under the bend I applied some weld through primer on both panels, but I swear that stuff was an anti-weld primer. Nothing I could do would make it weld there, so it looks like ****.
Passenger side (inside rear)
Finally, something presentable! A tight fitting patch plus good surrounding metal, and some wiser (cooler) settings on the welder got me this. Hotter settings would have made the welds flatter, but I didn't want to risk blowing through and wasting a ton of time, so I played it safe.
Passenger side (rear)
Even though this patch fit perfect, I was still blowing through on one side and wasted a bunch of time trying to fix that.
Passenger side (front)
Now this one....ugh. I knew this was going to be difficult, and I was right. I had to re-do this patch since my first version was just too far off in too many dimensions. This one was better, but due to the contours of the area, wasn't perfect. As a result there was a gap in one corner that has been patched up with the POR15 stuff. Access was also difficult, and the surrounding metal was thin and hard to weld to.
That's all for a week or so as I'll be driving the M3 to Ohio for Nationals and going up against the fastest cars in the country. Once I get back I'll weld up the one last patch, grind things smooth, and put some primer down. Then I need to figure out how I'm going to tackle the rust on the fenders....


Alright so RallyCross Nationals went pretty well, all things considered, and I was able to finish in 5th, grabbing the last trophy spot!
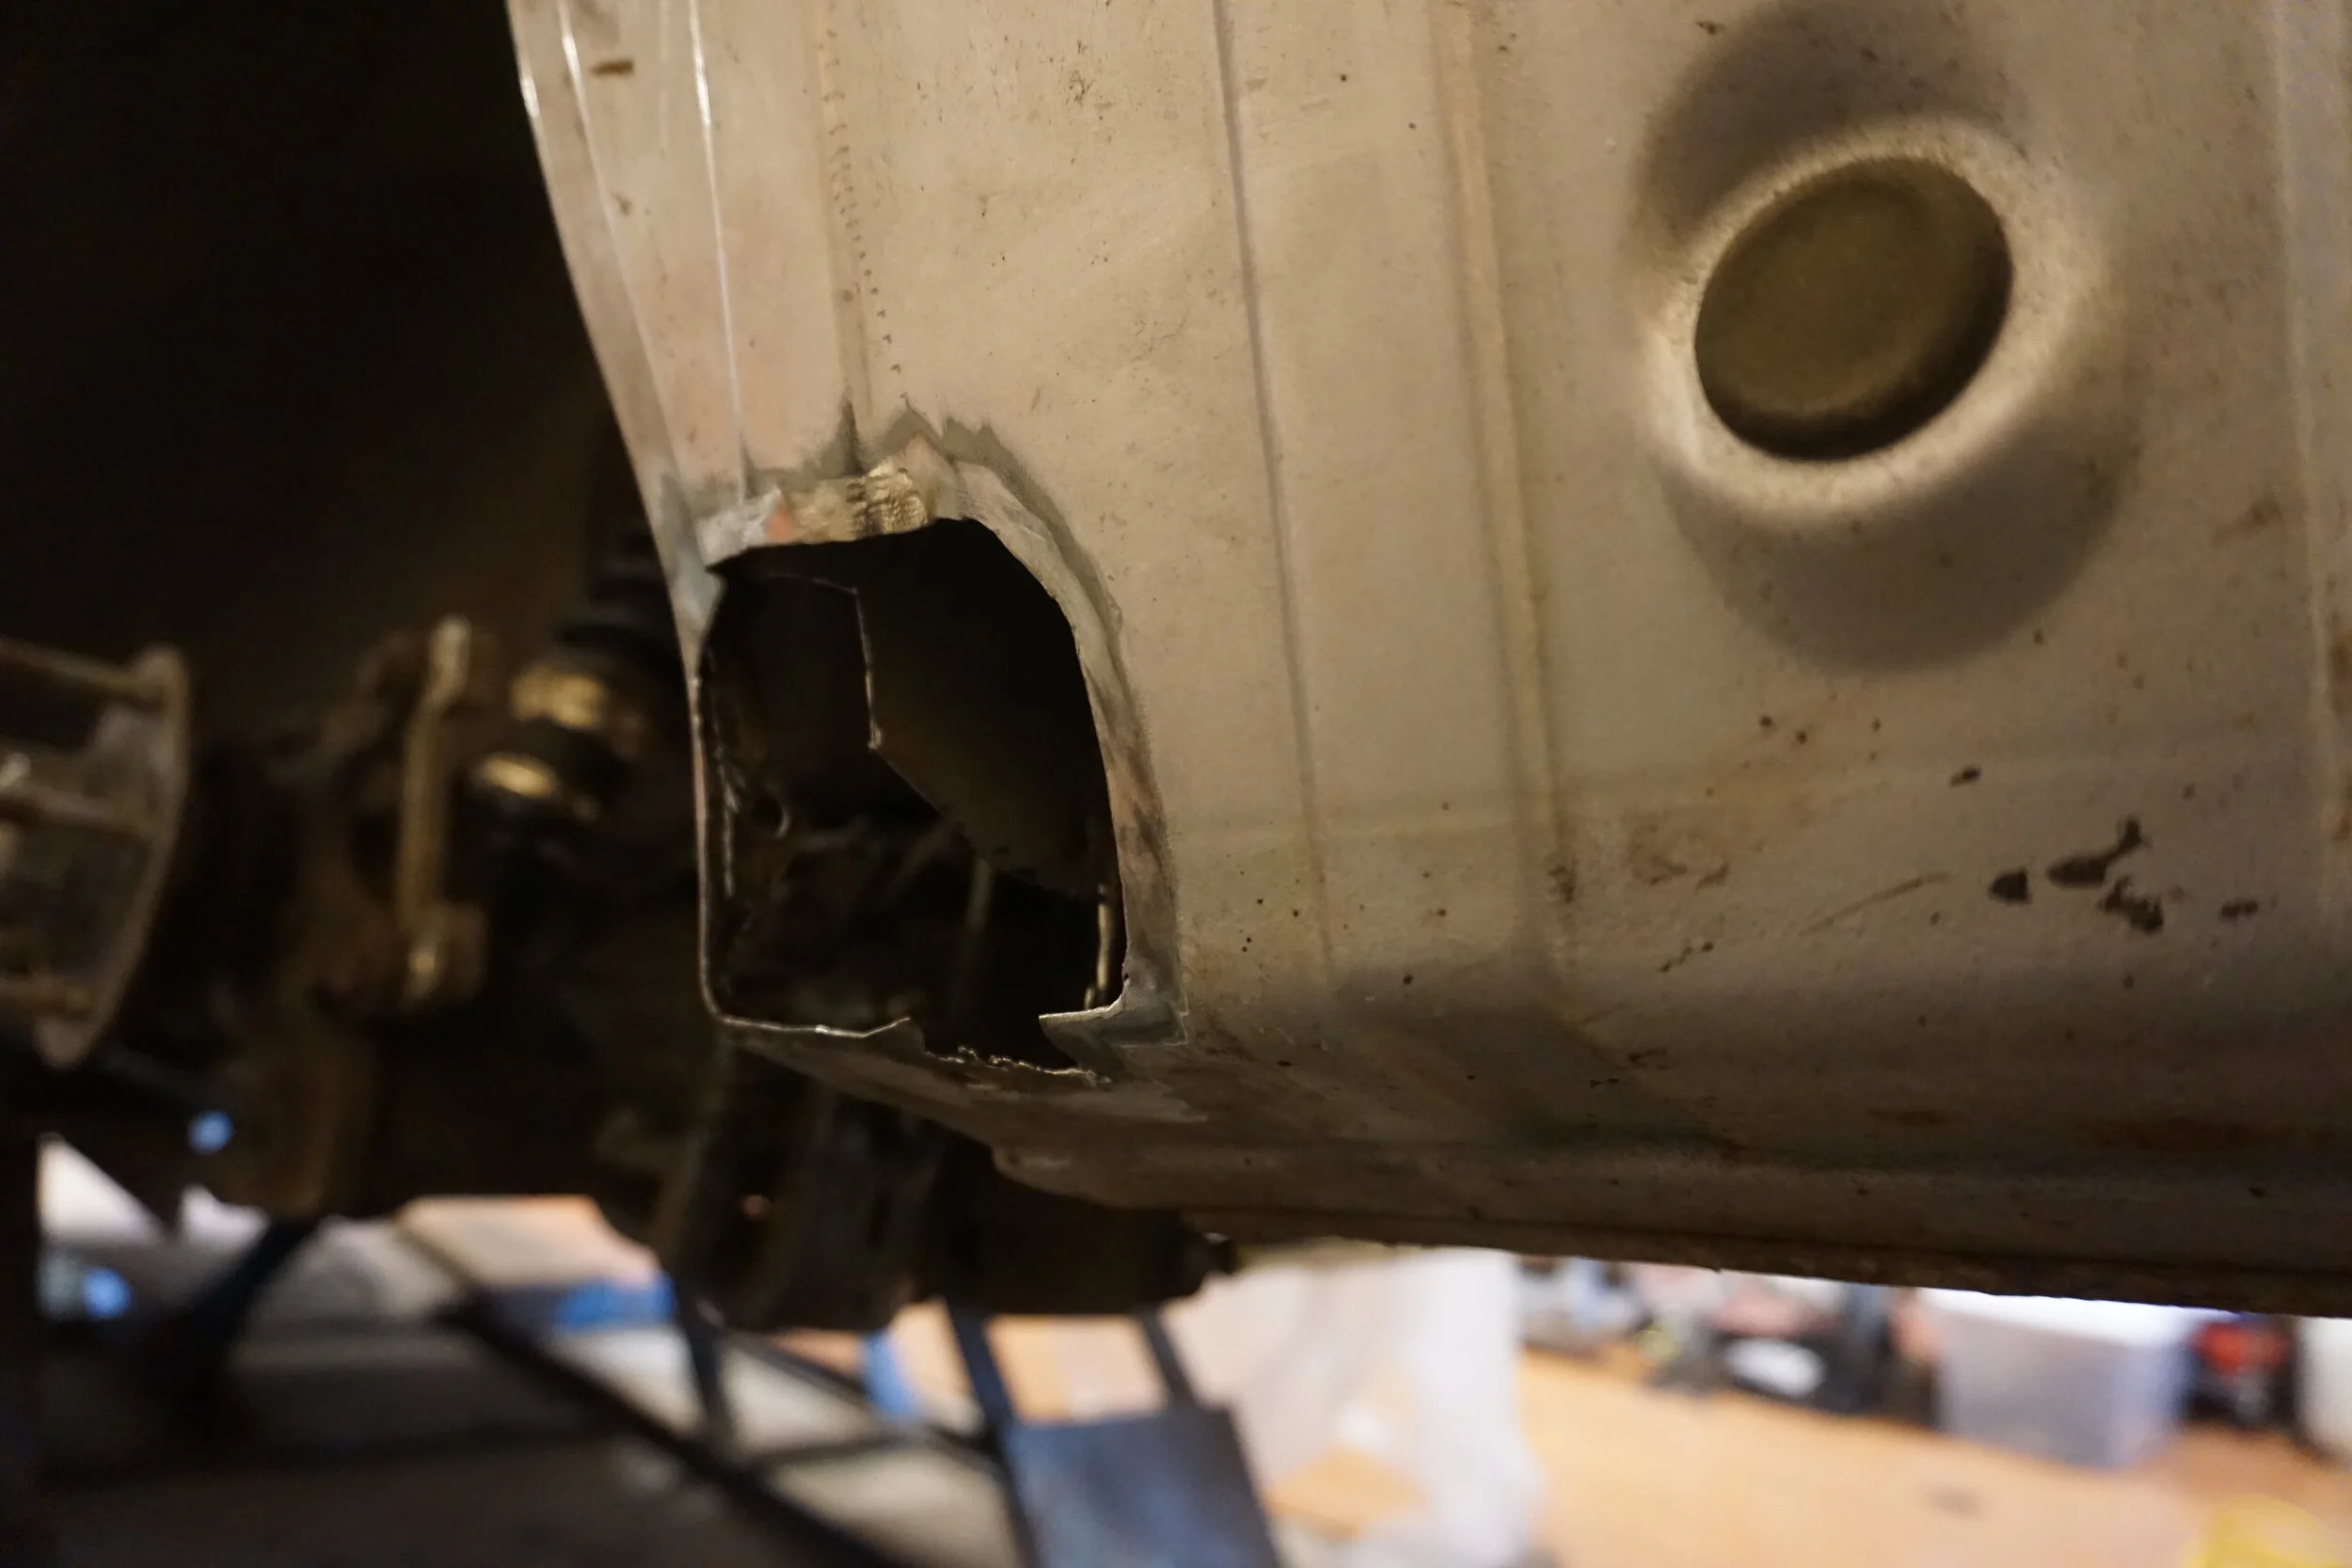
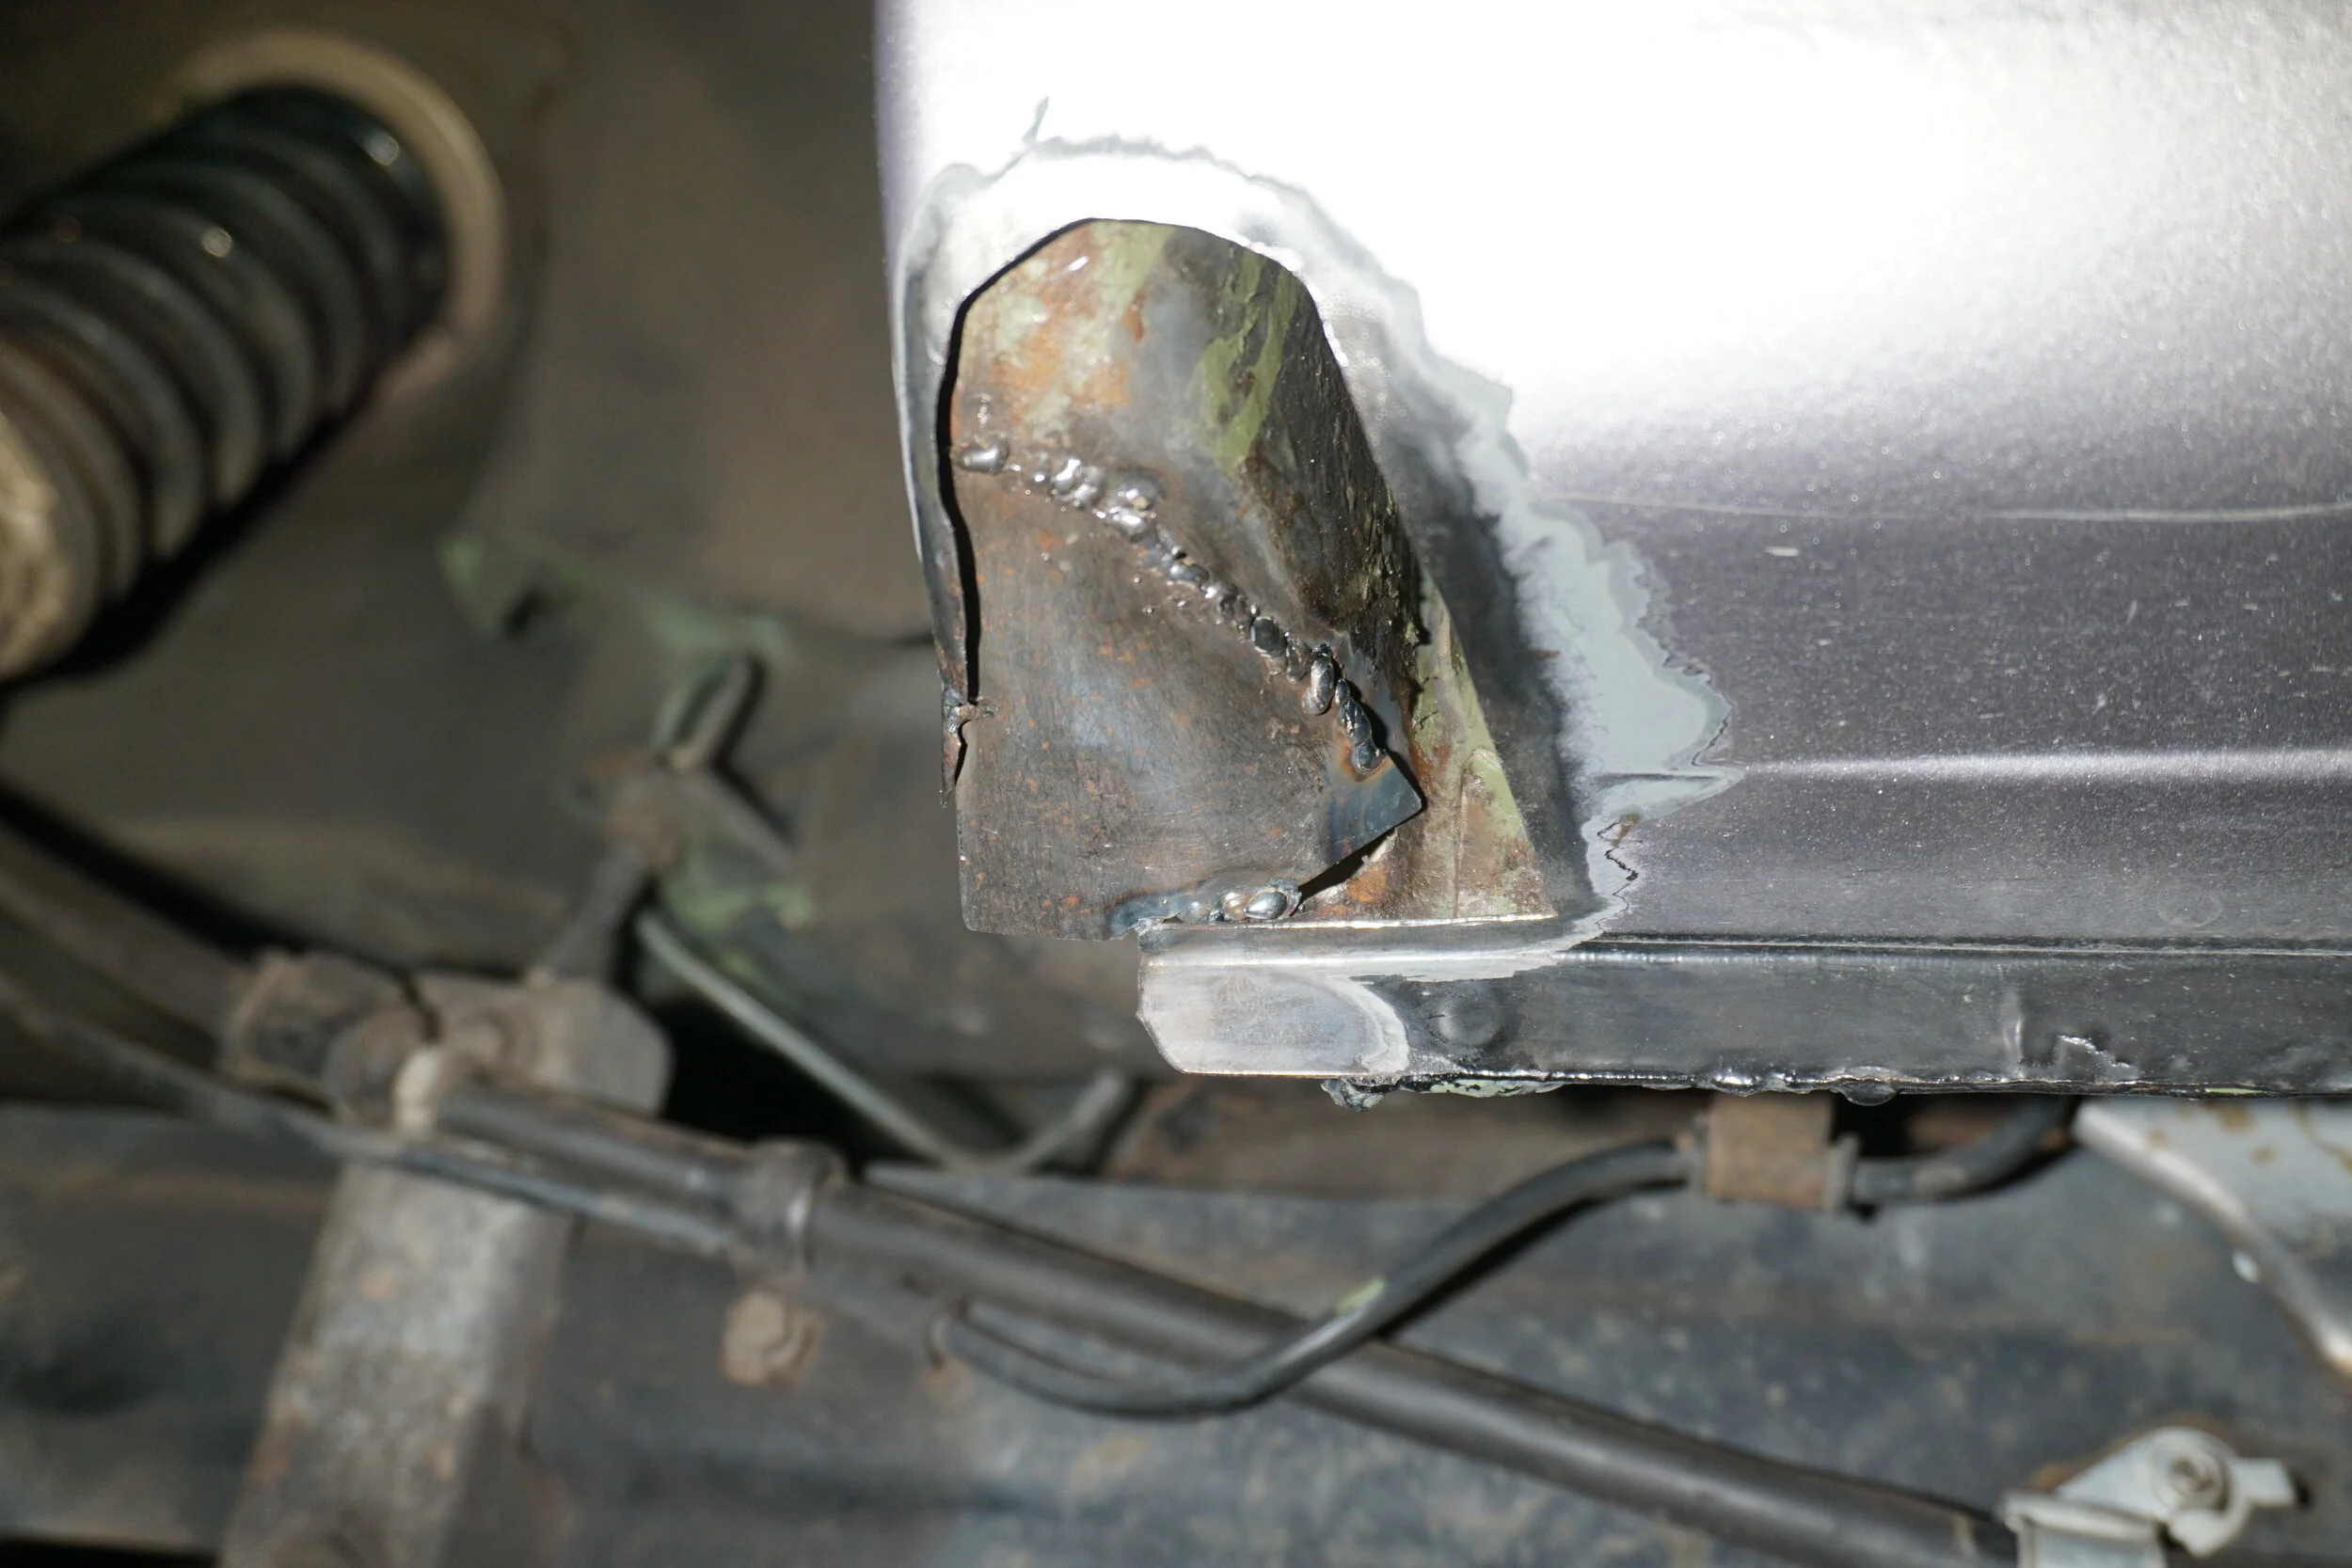
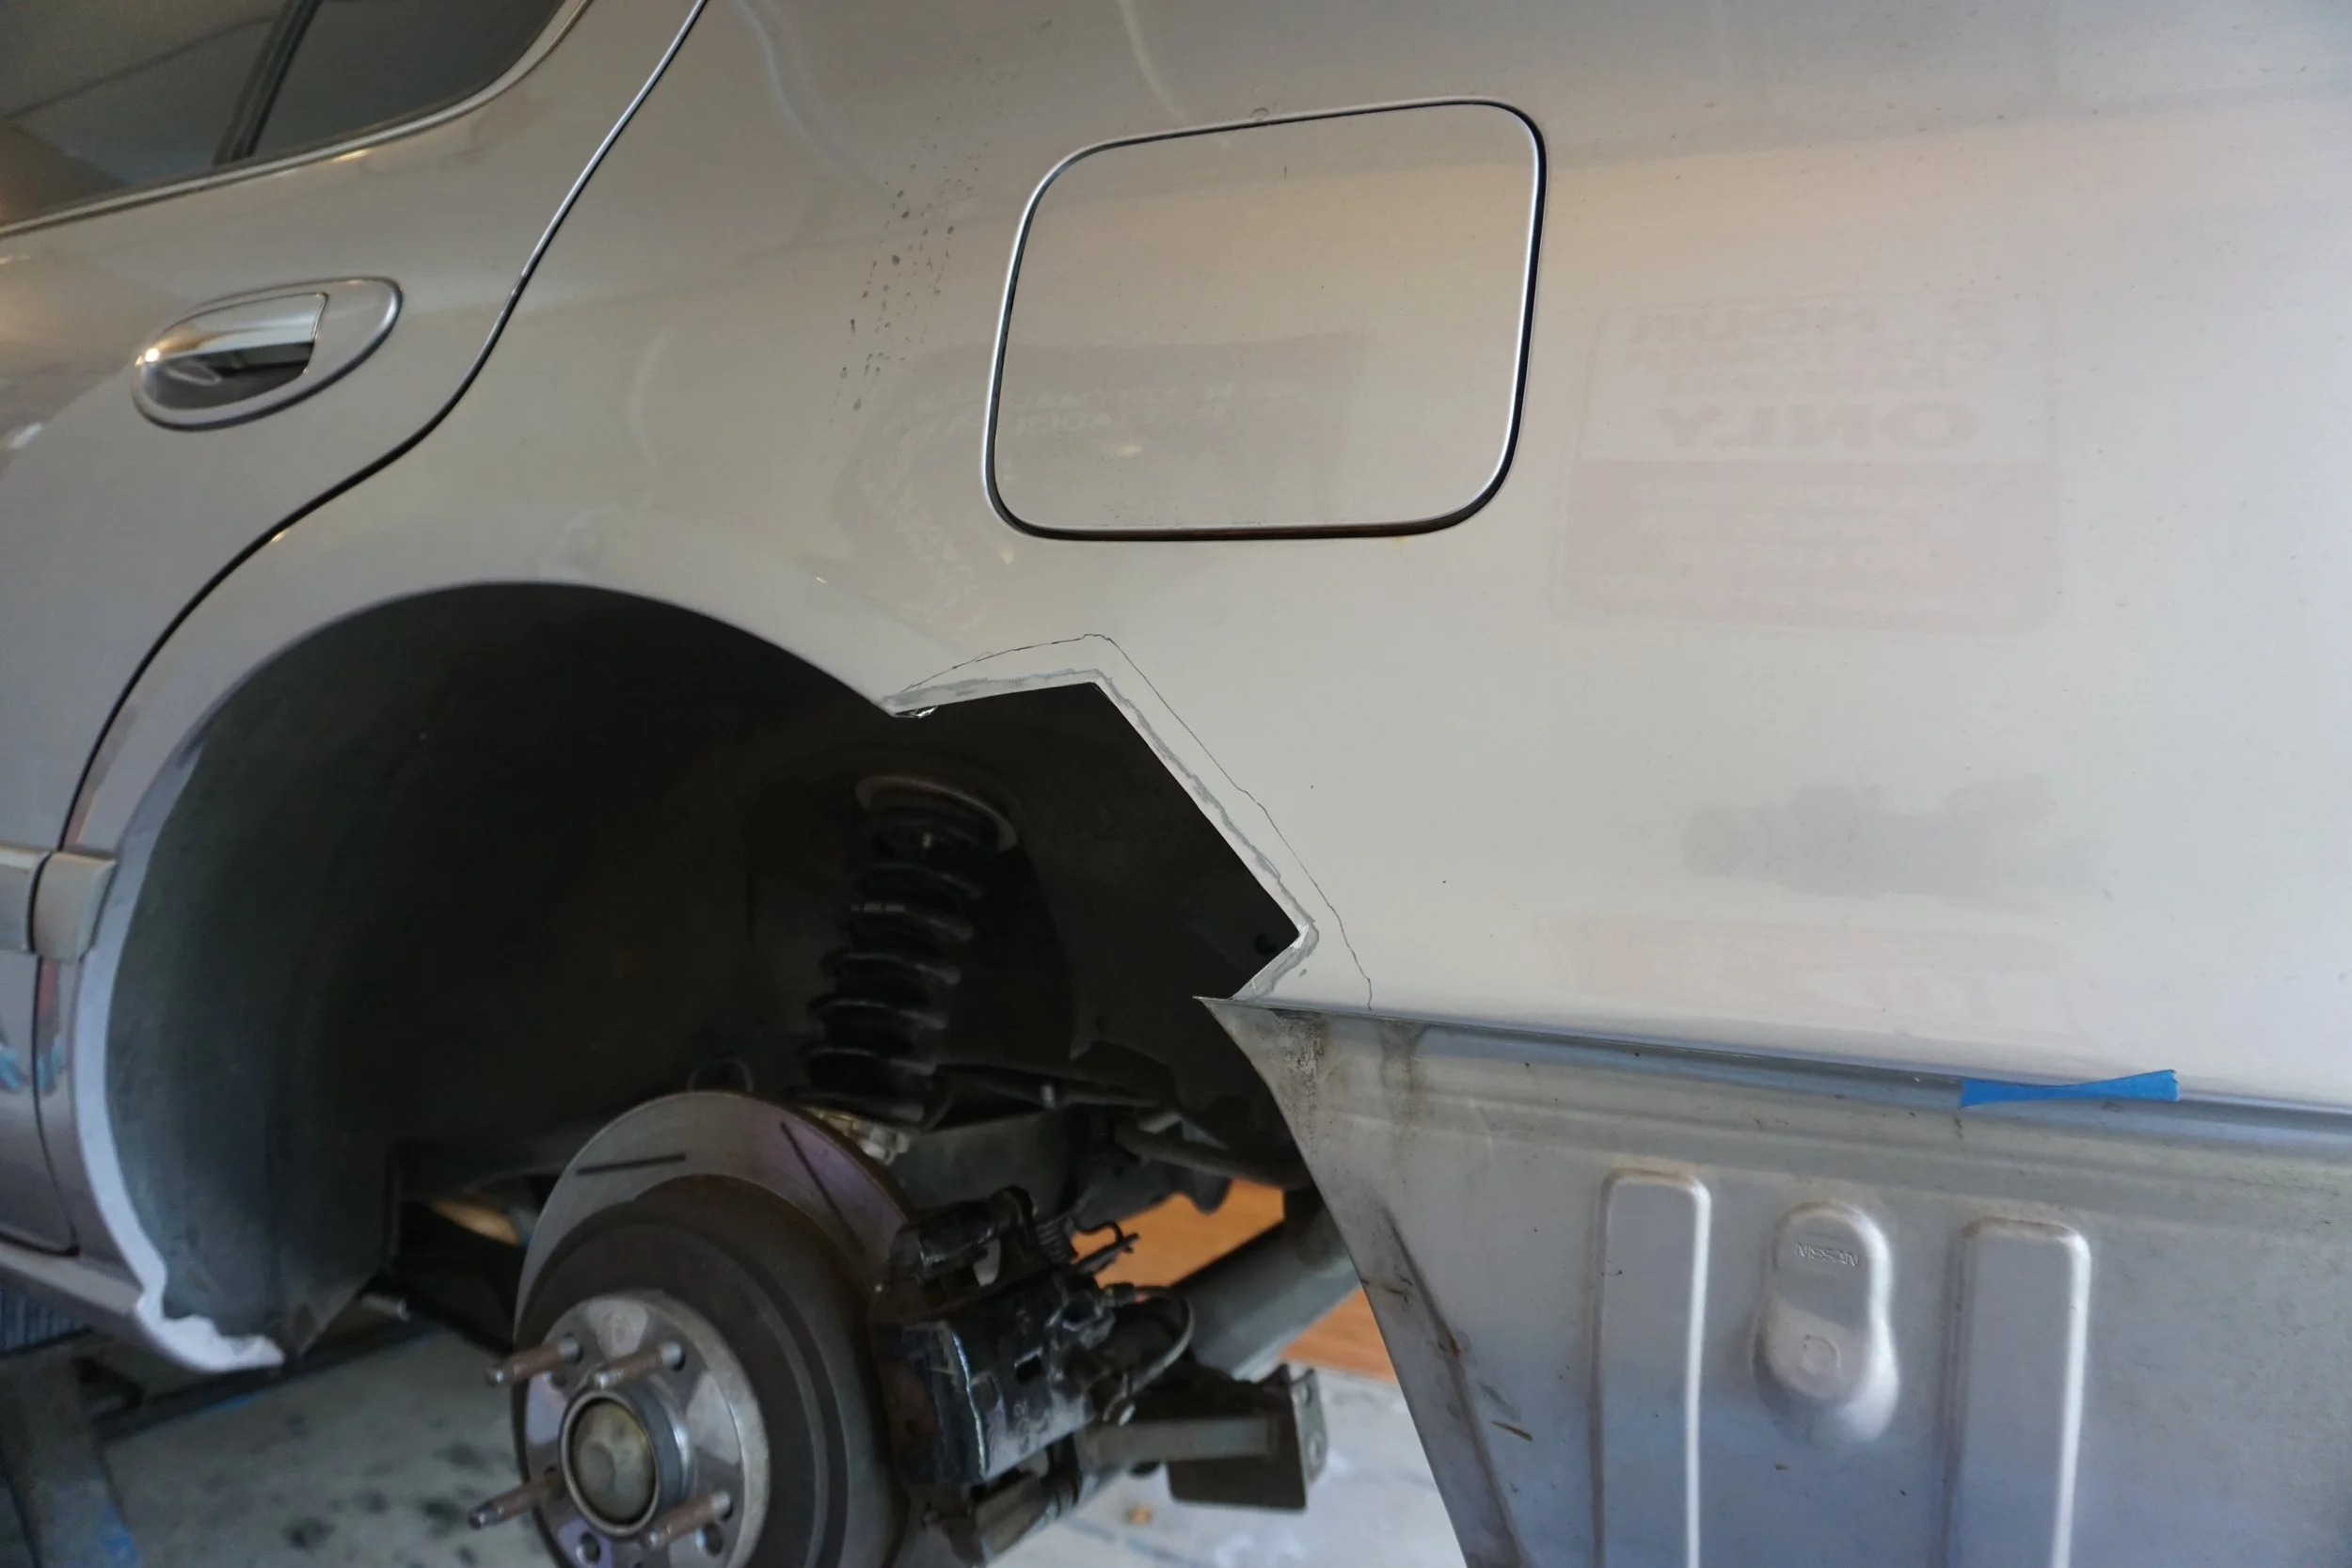
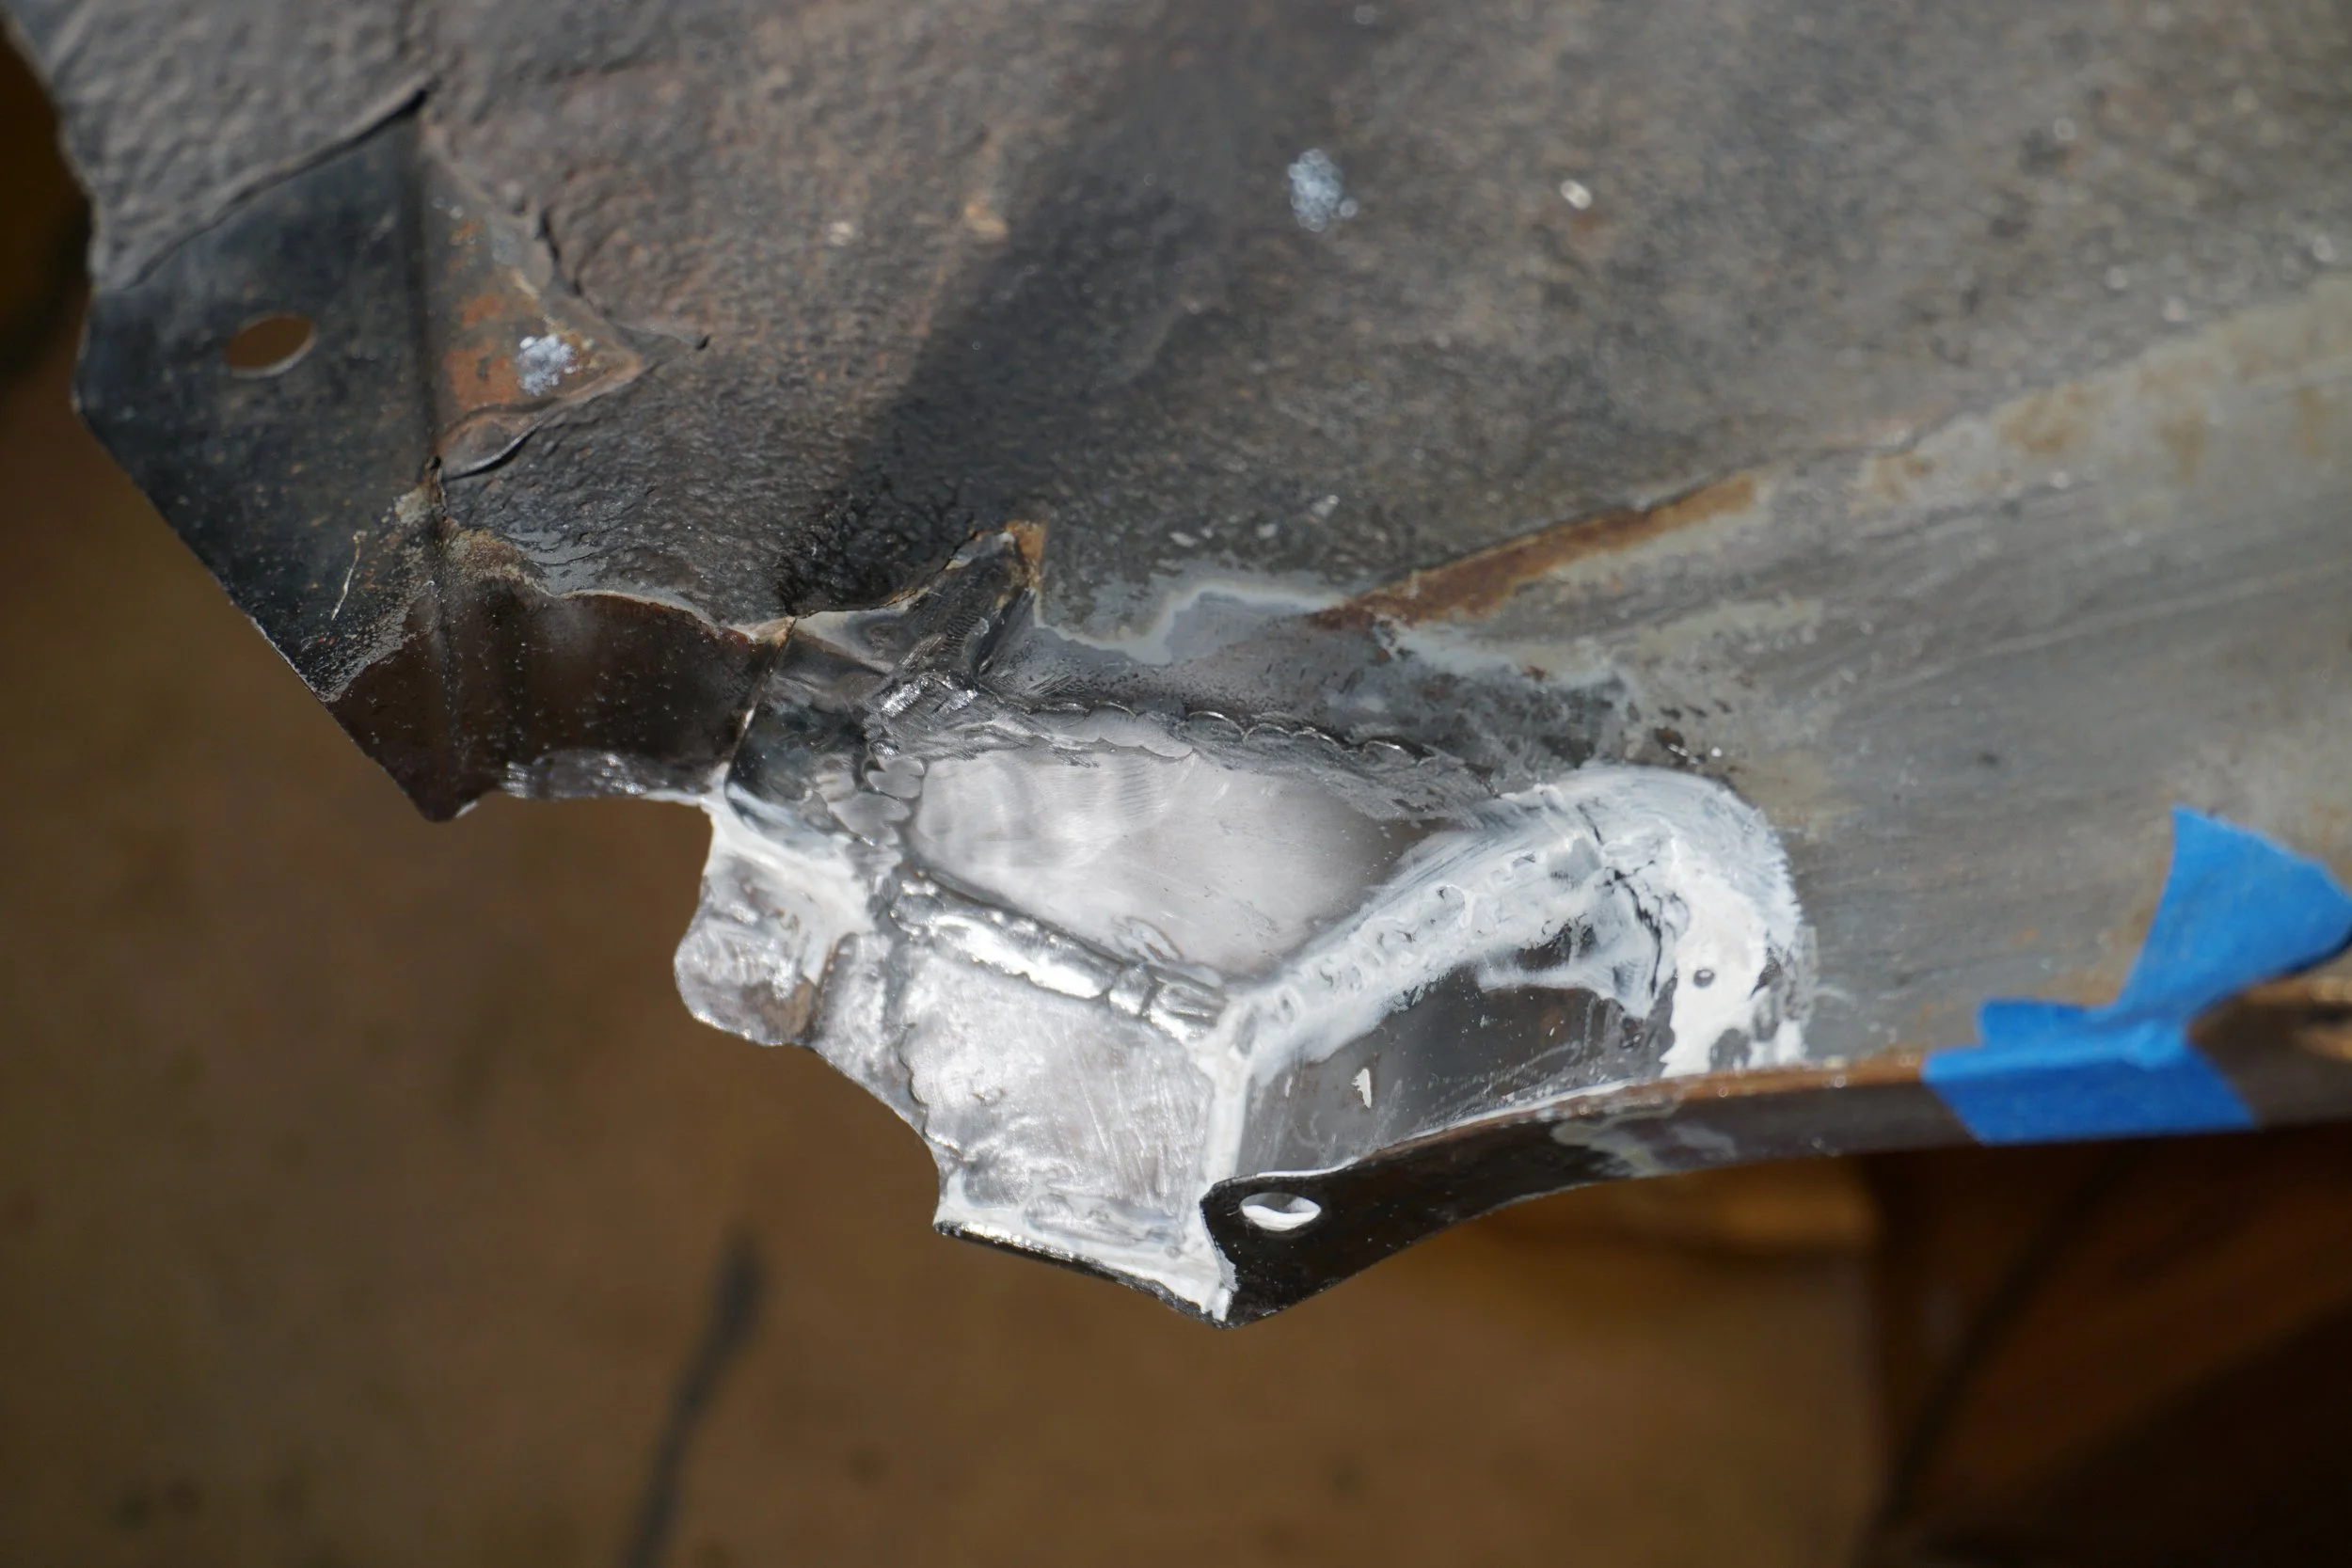
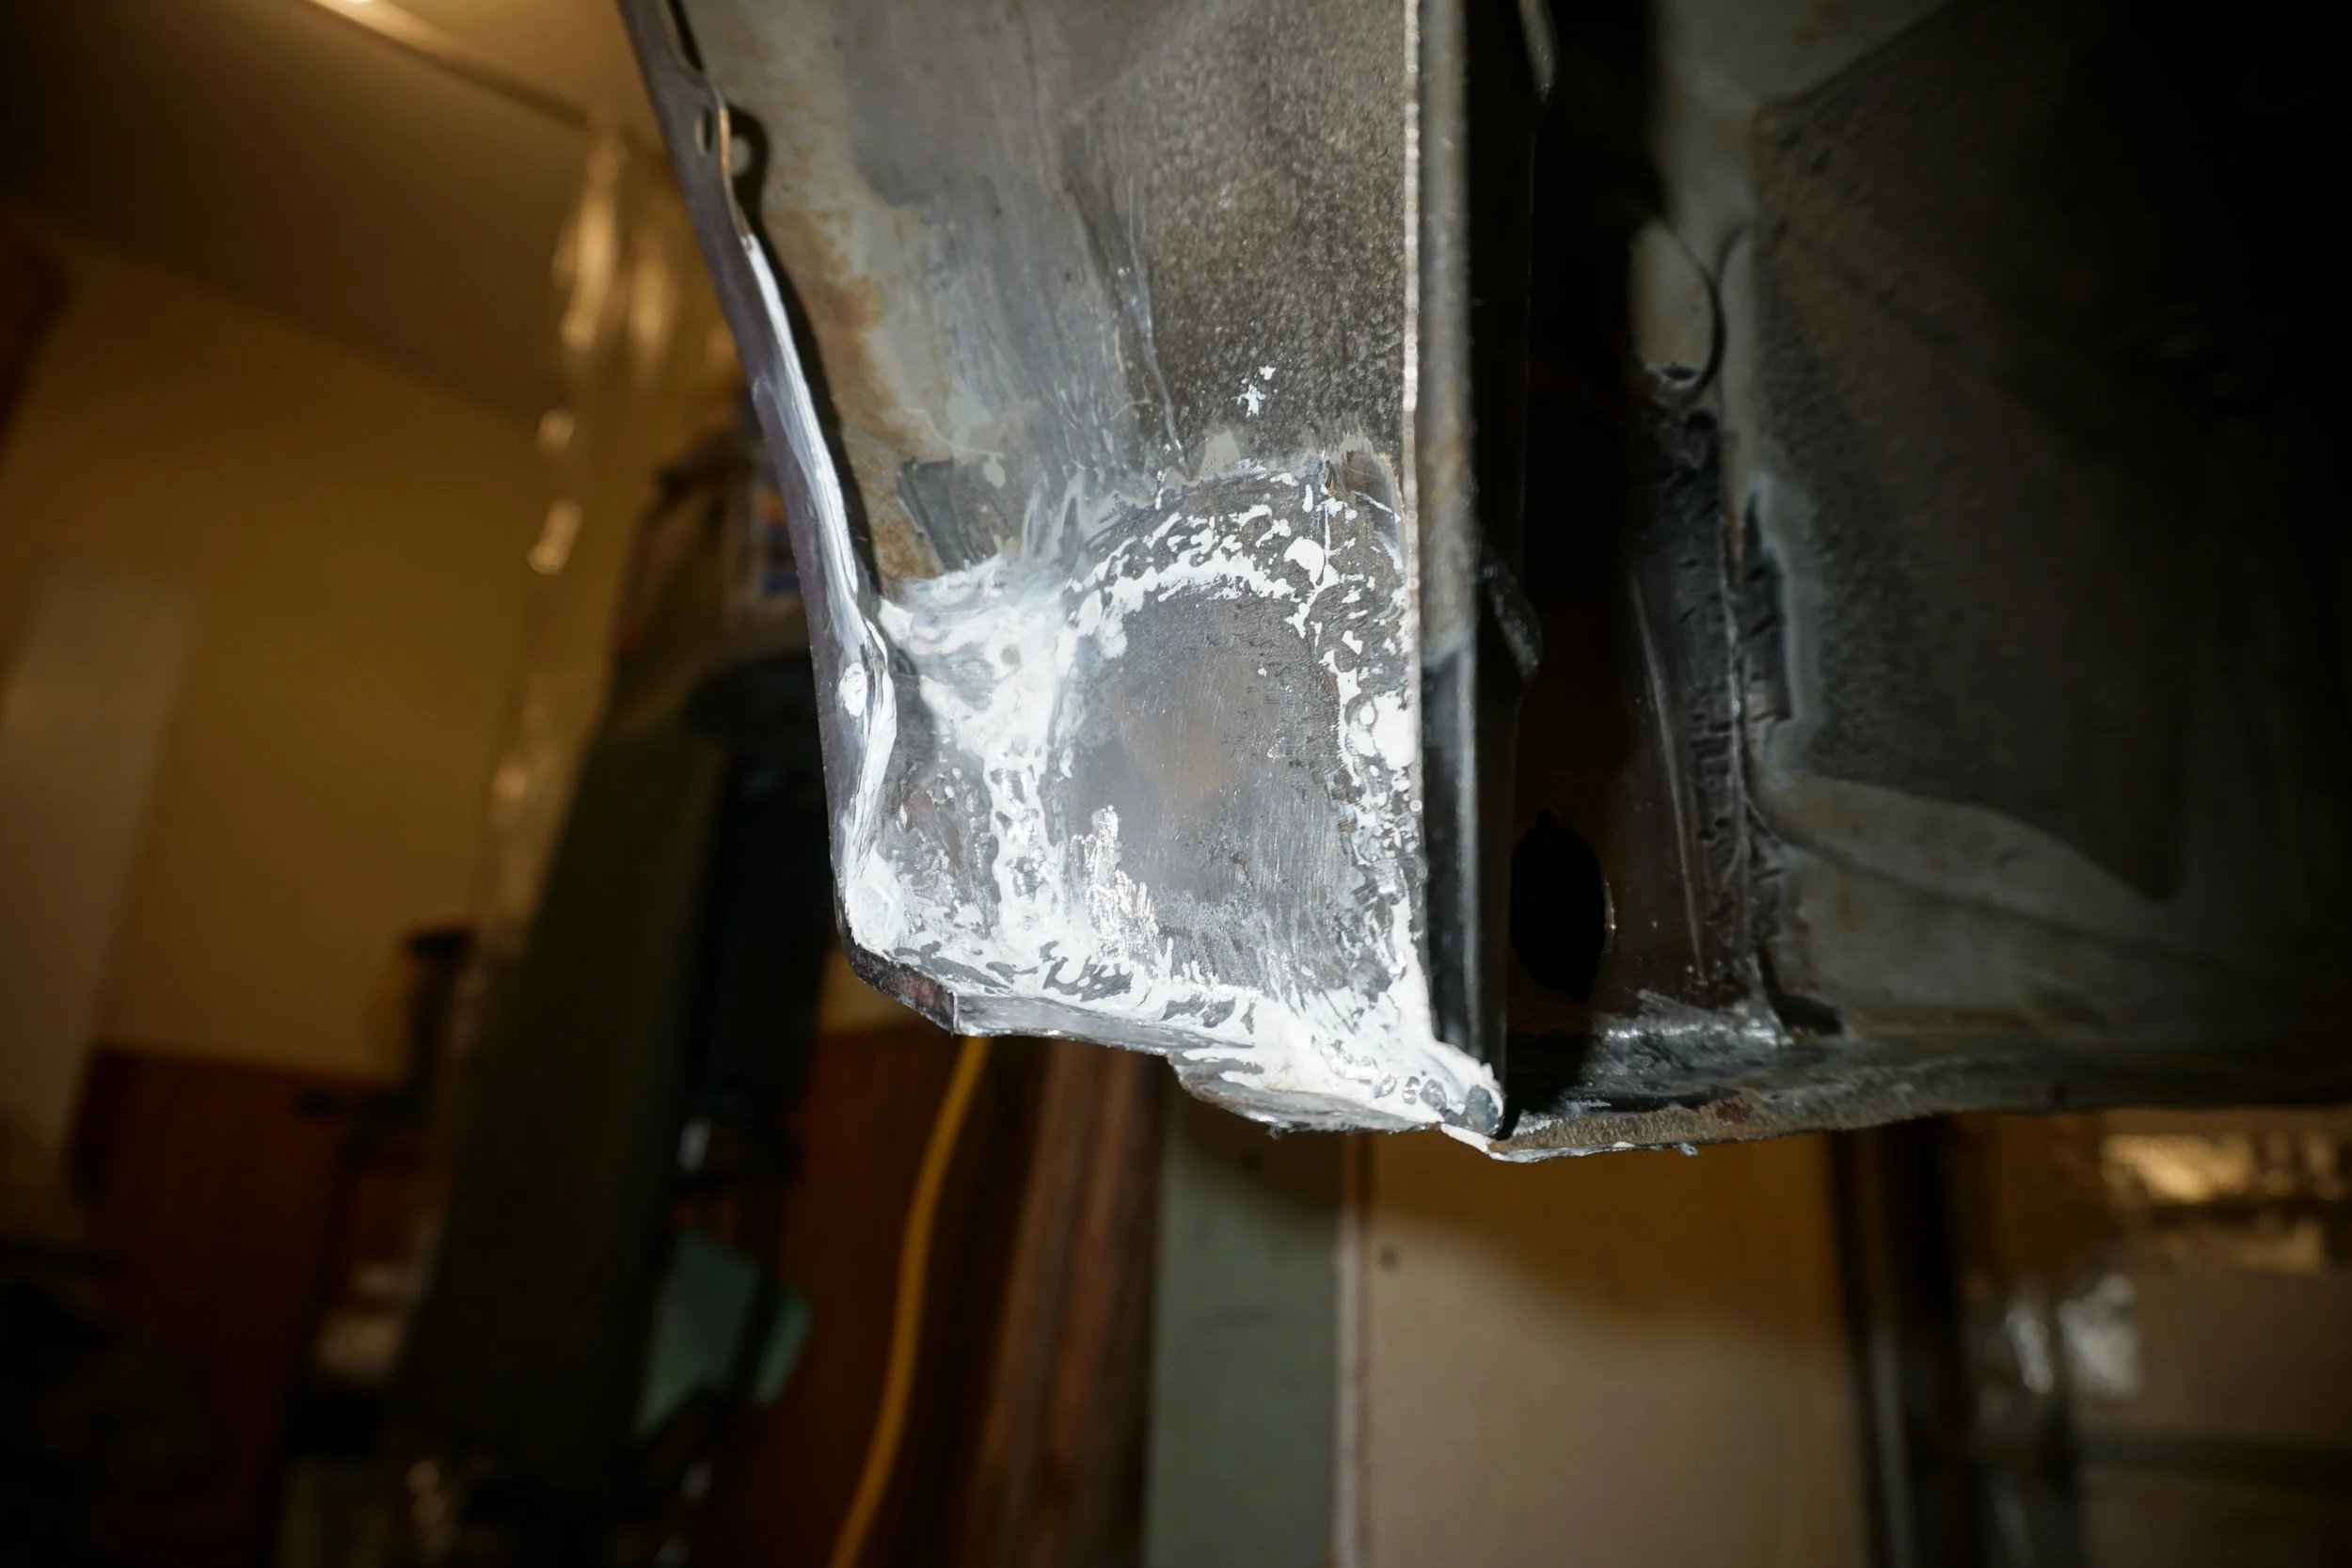
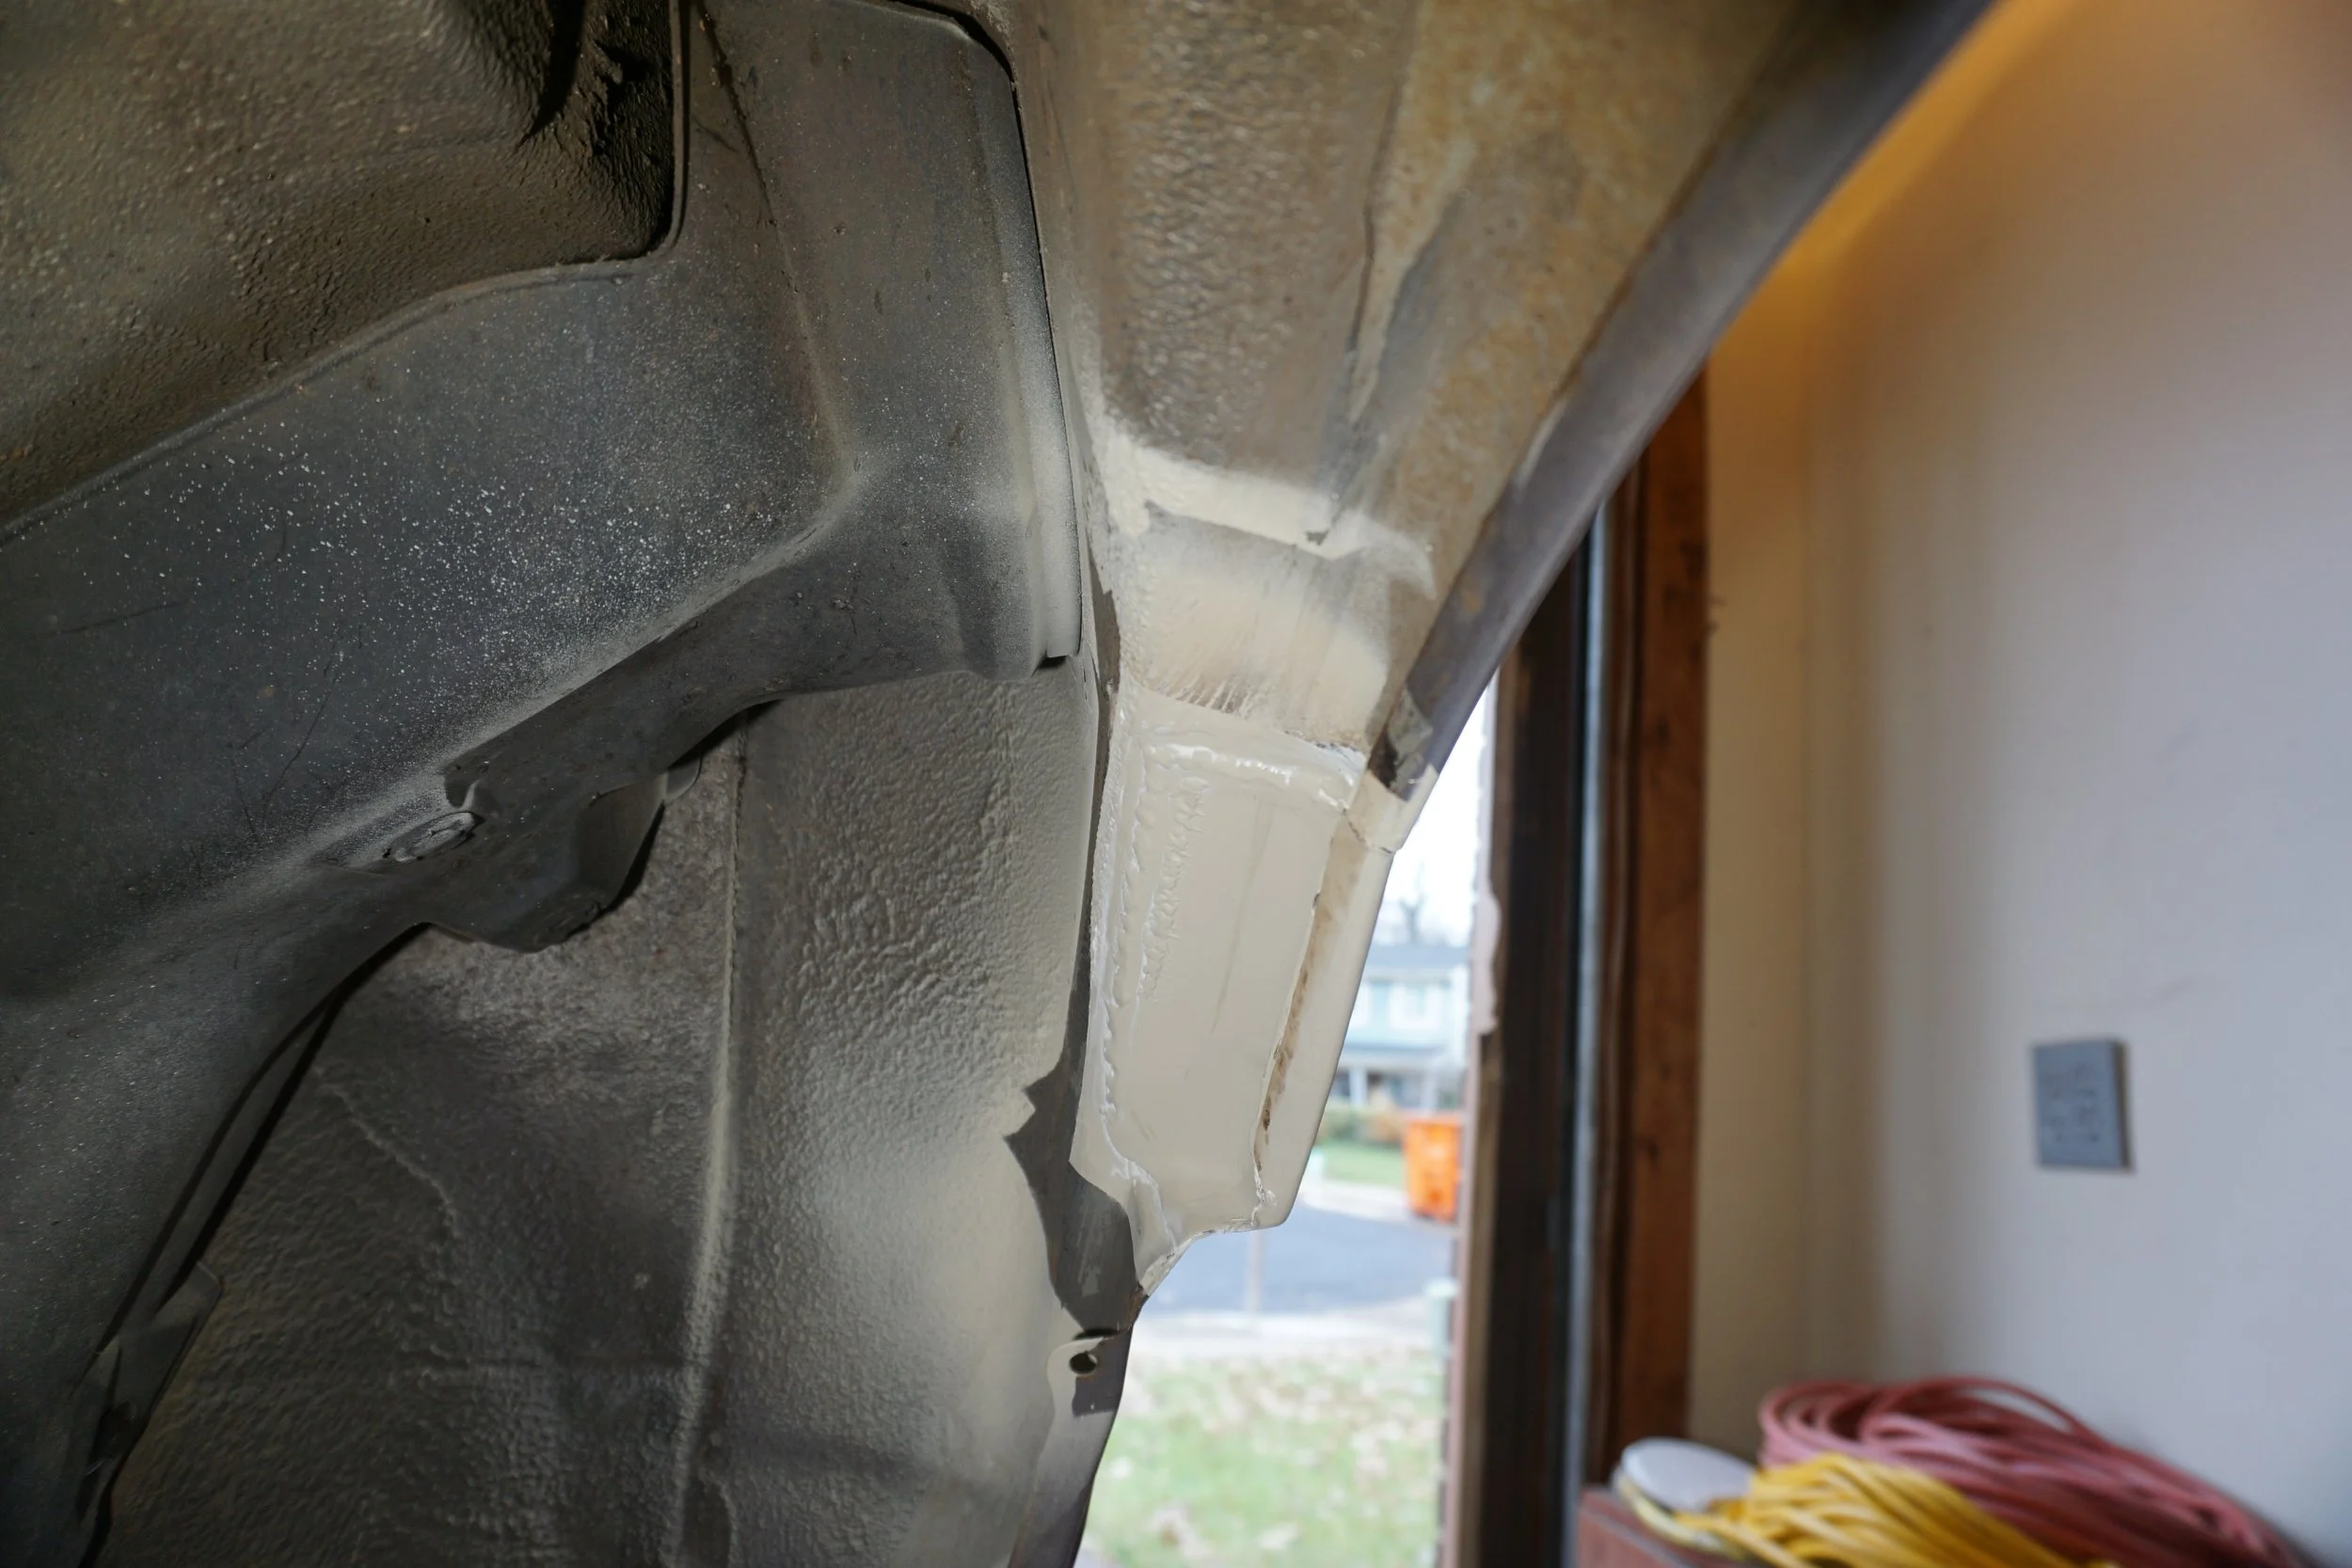
But, back to the I30. So I would like to reiterate that I have NO training doing welding, body work, or painting. This is really the first welding I have done, and although I have "done" some body work and painting before, it's all amateur-level stuff. This whole project I've been dreading making a decision about what to do with my rear quarter panels. They had some pretty good rust going on, and I've been real anxious about cutting that out, because I knew welding in new metal and getting it to line up in every dimension was going to be incredibly challenging. Not to mention that these areas are actually visible when you look at the car, and I would also need to blend the paint. I kept thinking about what would happen if I just did a hack job and filled in the rust with some POR15 body filler goop. Sure, it would need to be repaired again in the future, but who doesn't like kicking difficult decisions and projects down the road? I knew cutting and welding was the proper way to go, but damn if it didn't scare the **** out of me. I decided to cut out the inner part of the panel to see what the backside of the outer (visible) panel looked like. Sure enough, it was much worse than the visible side of the panel. My decision was made, I had to cut out the cancer and weld in "fresh" metal. Taking my cutoff wheel to the outer panel was one of the scariest things I've ever done to a car. There were so many ways I could **** this up, and really only one way to get it right. There was much trouser defecation.
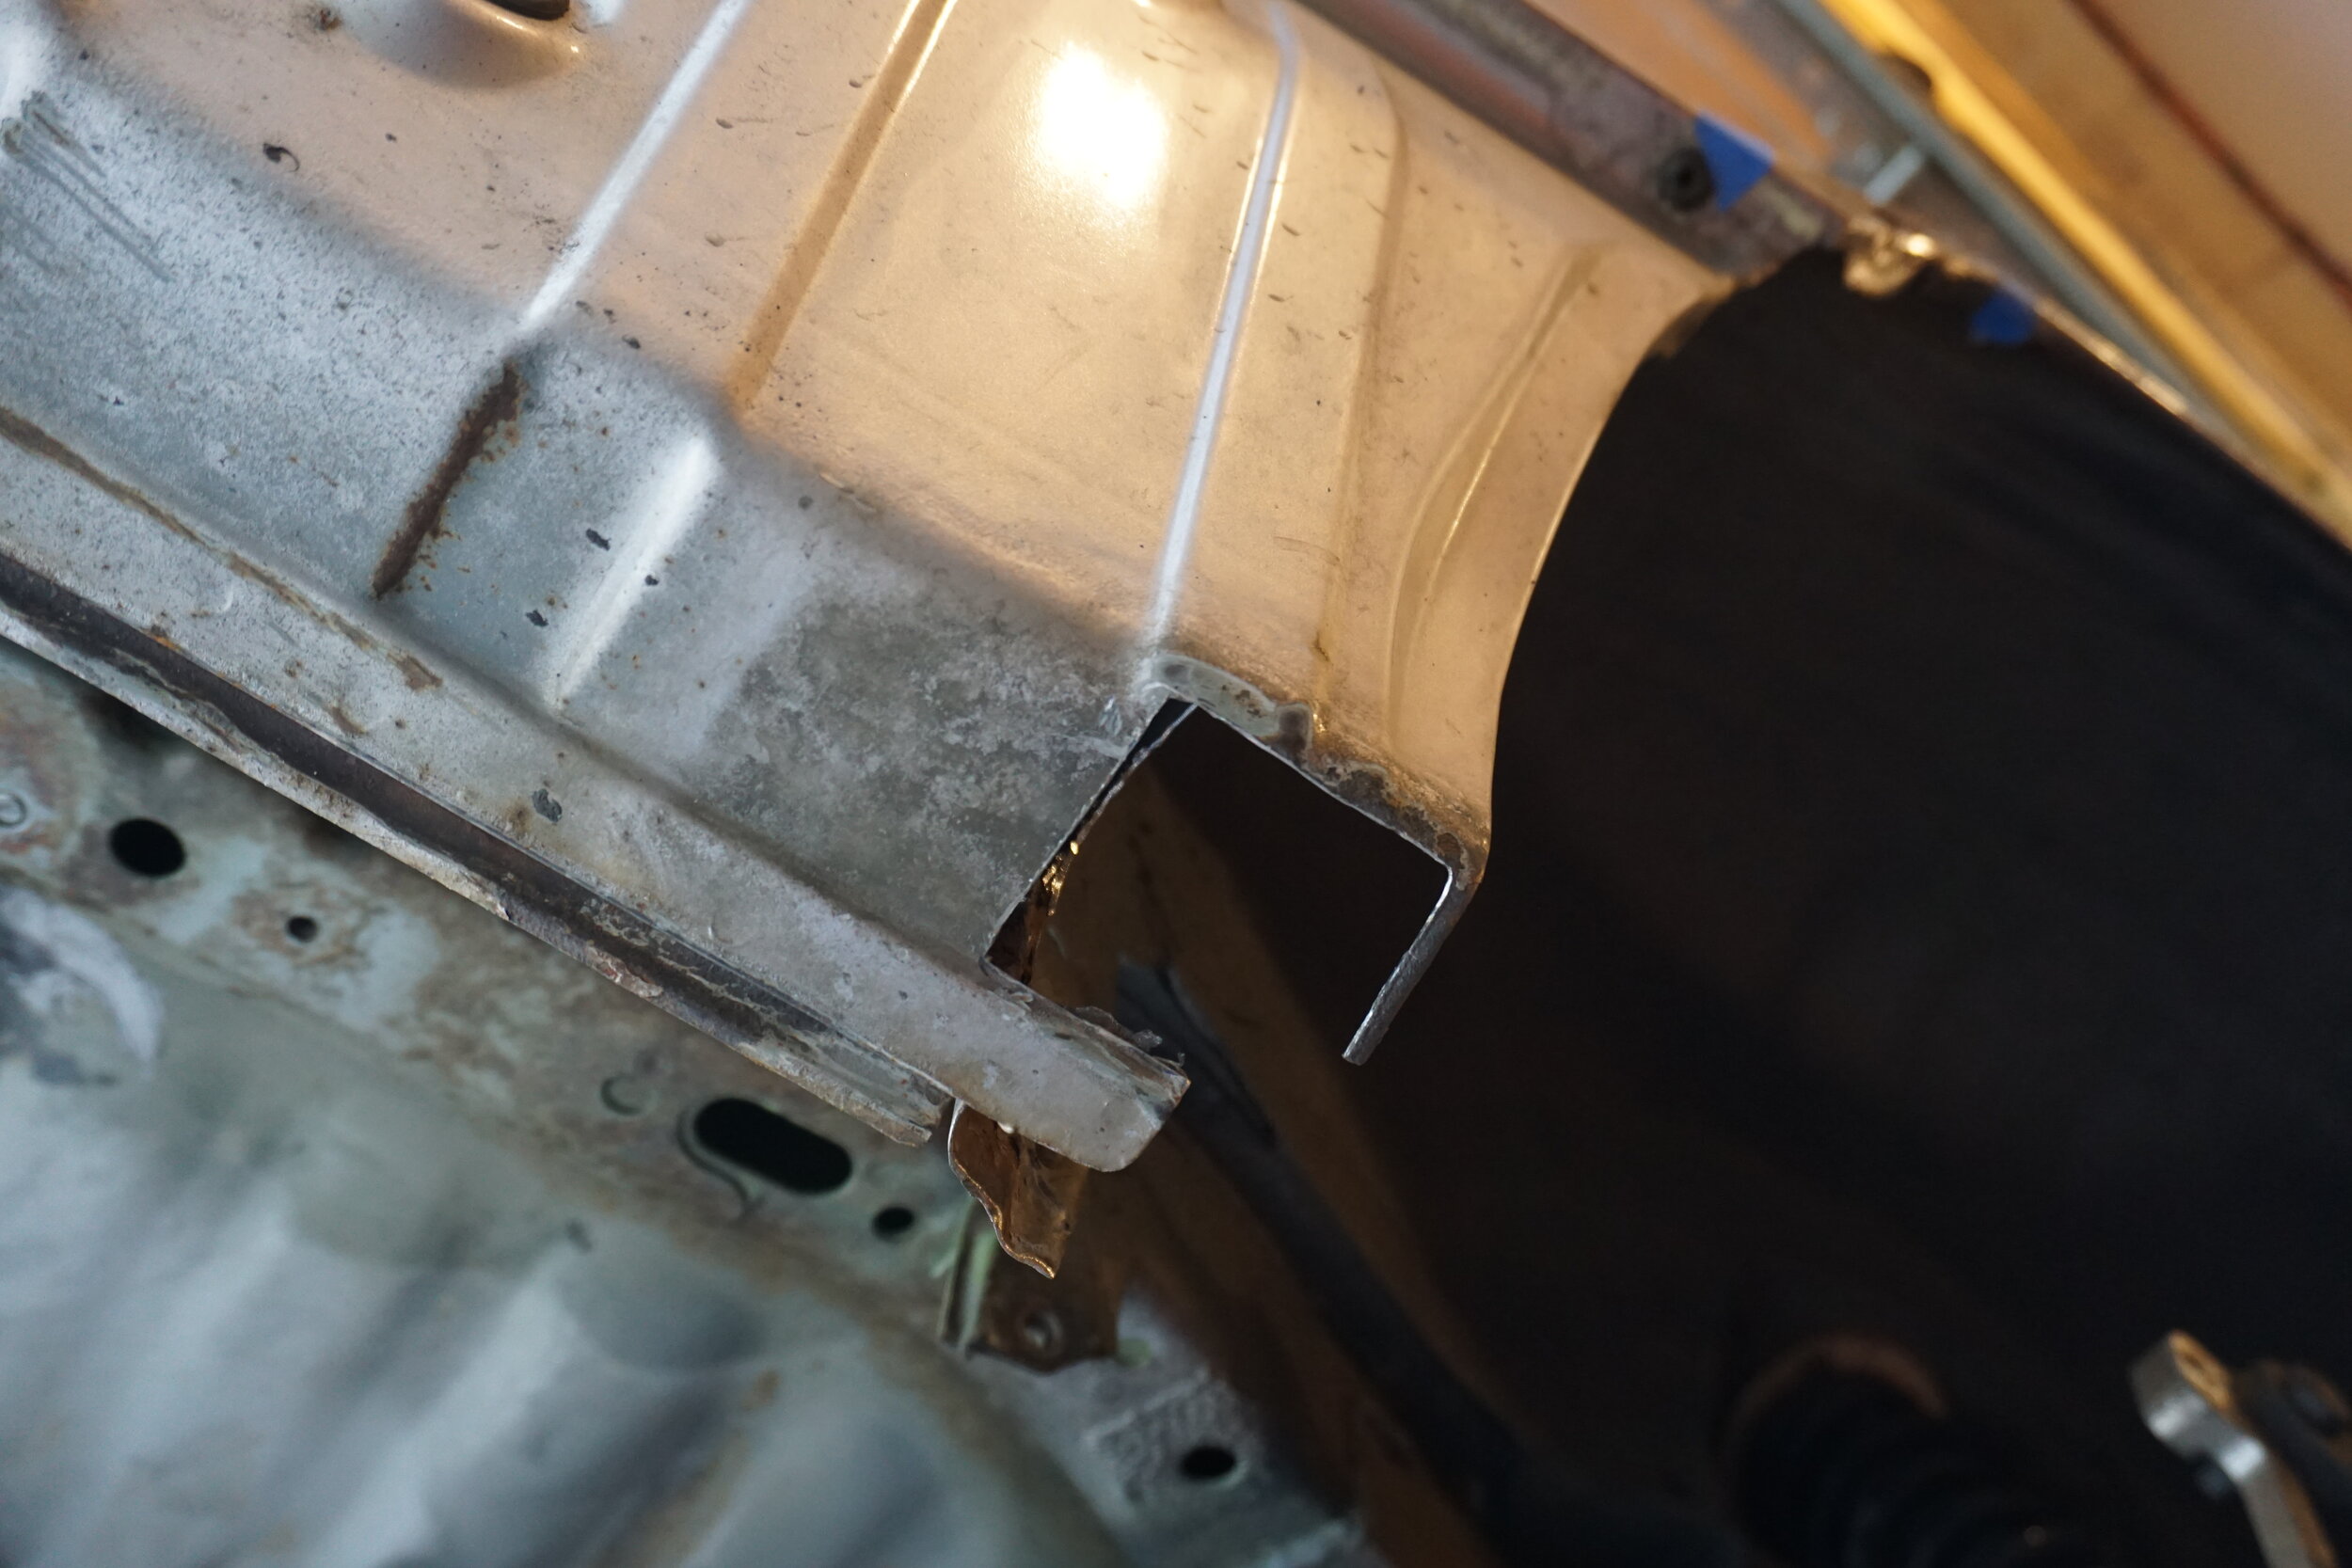
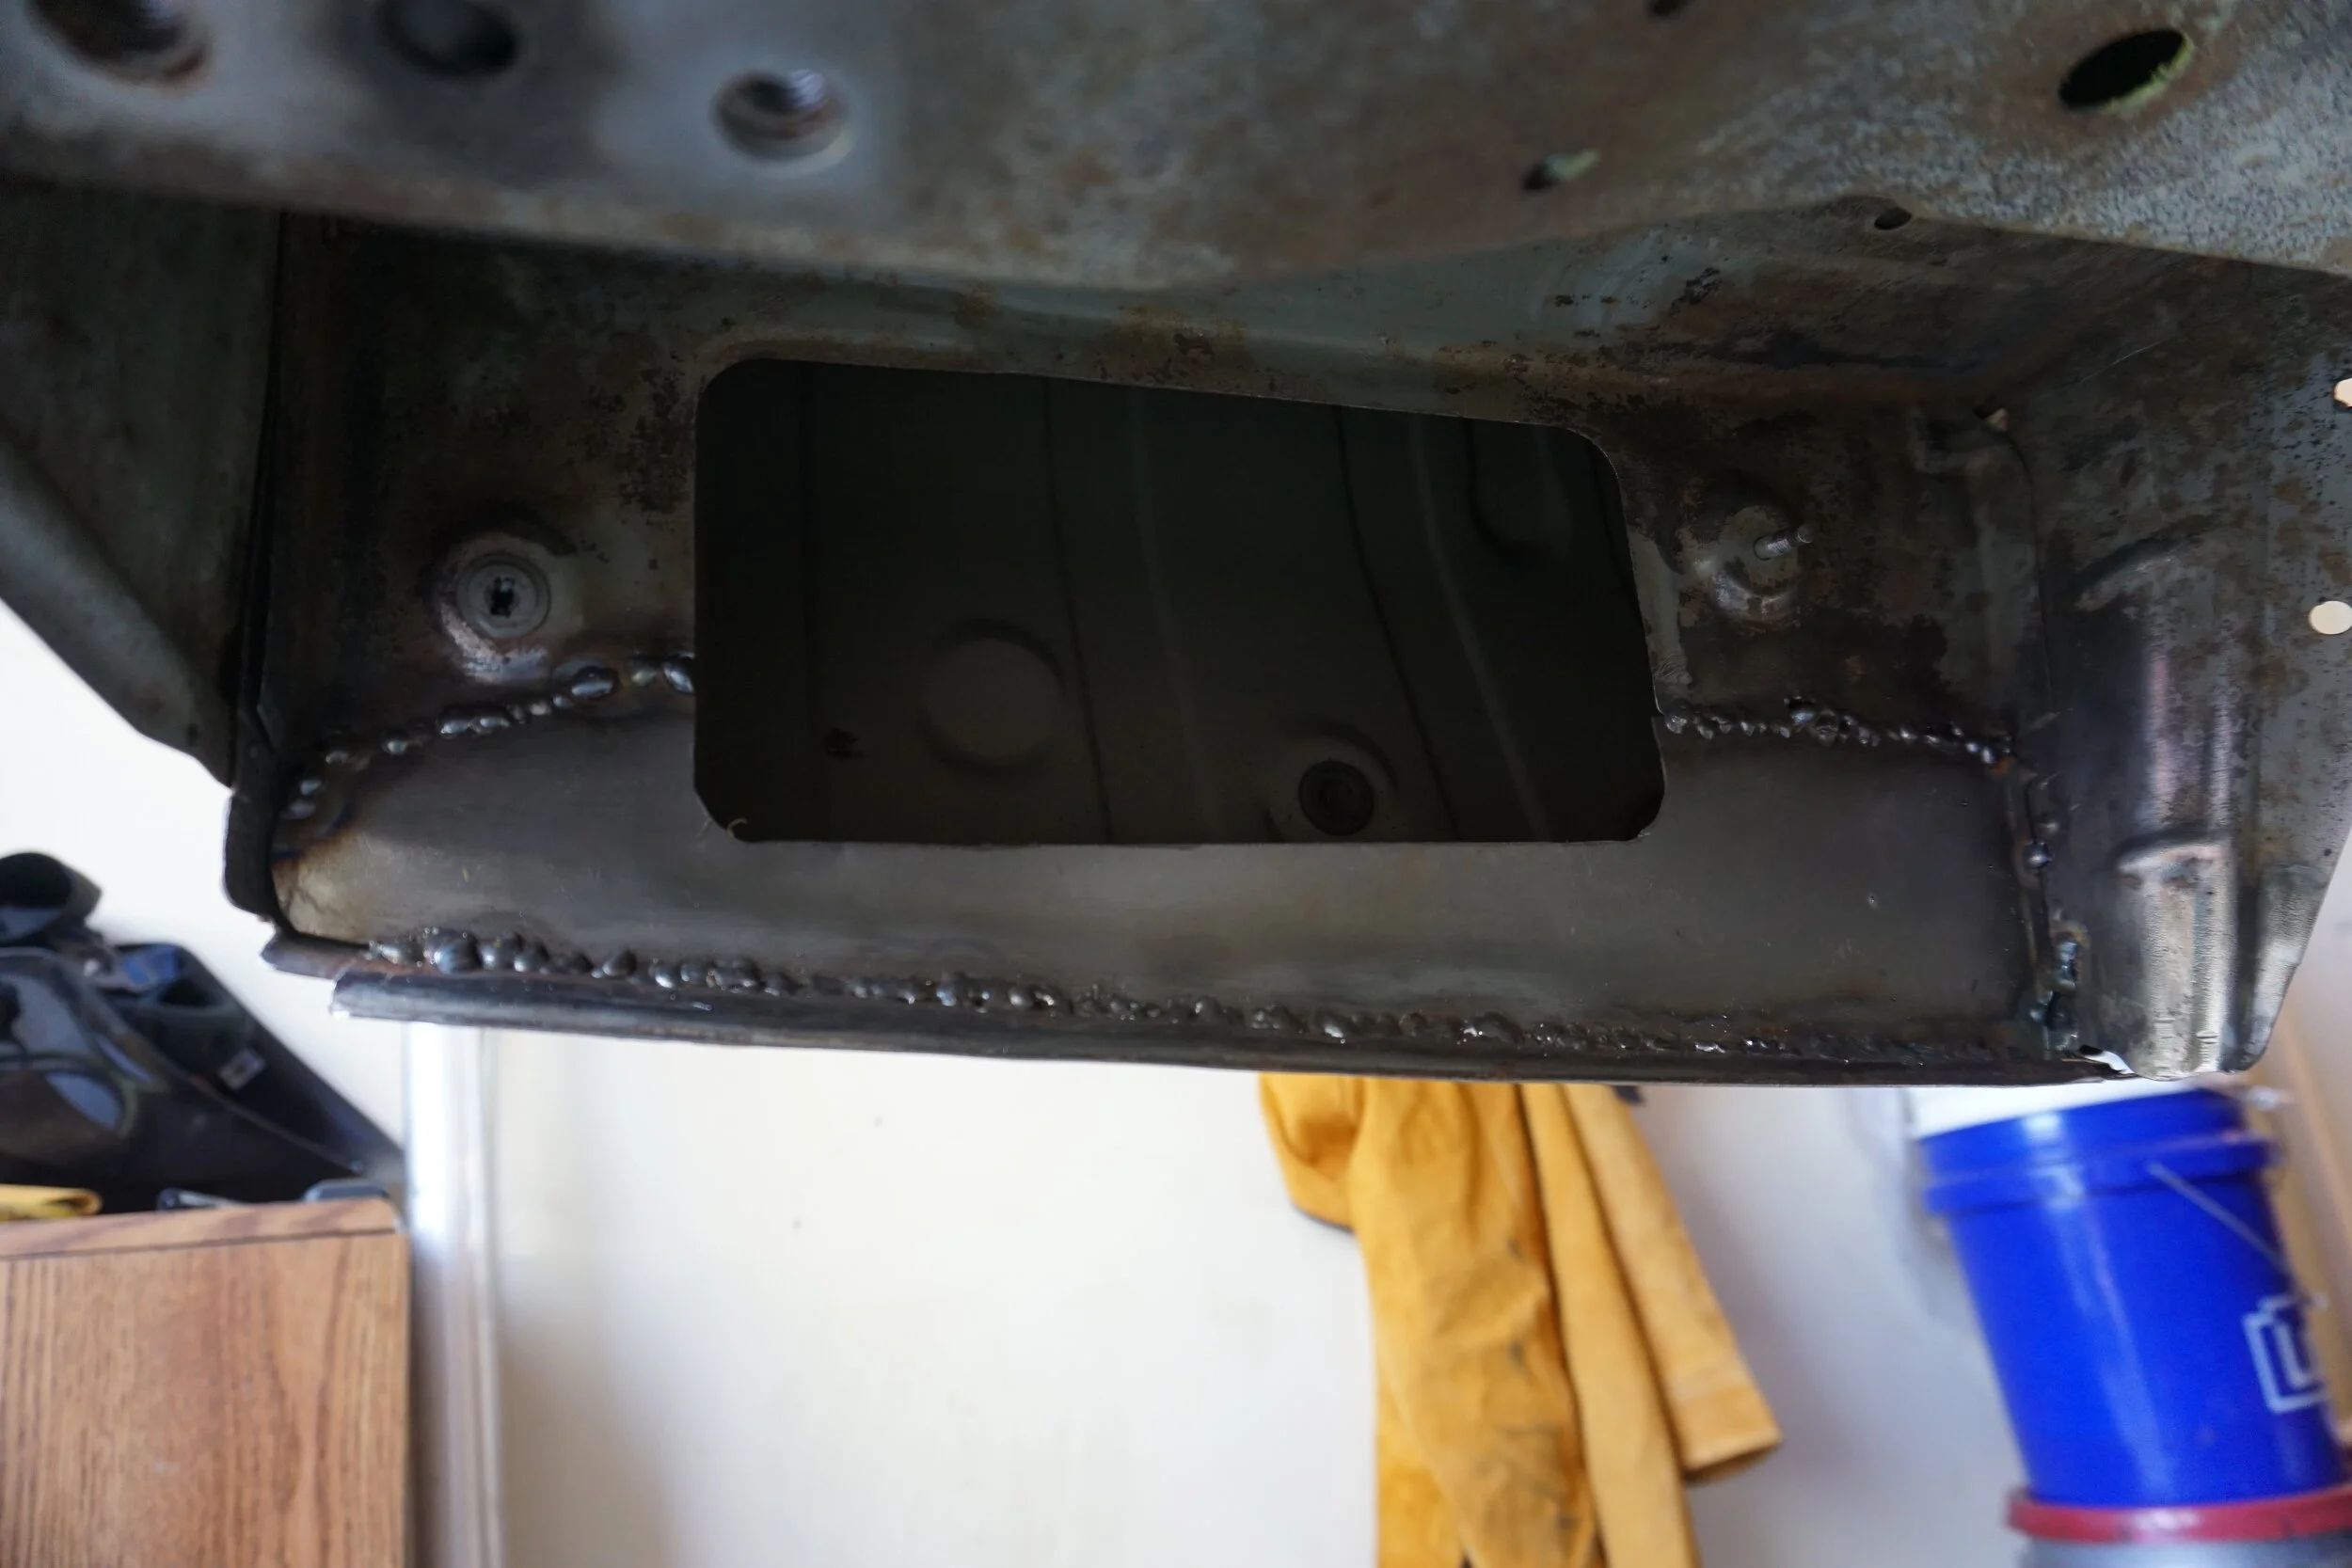
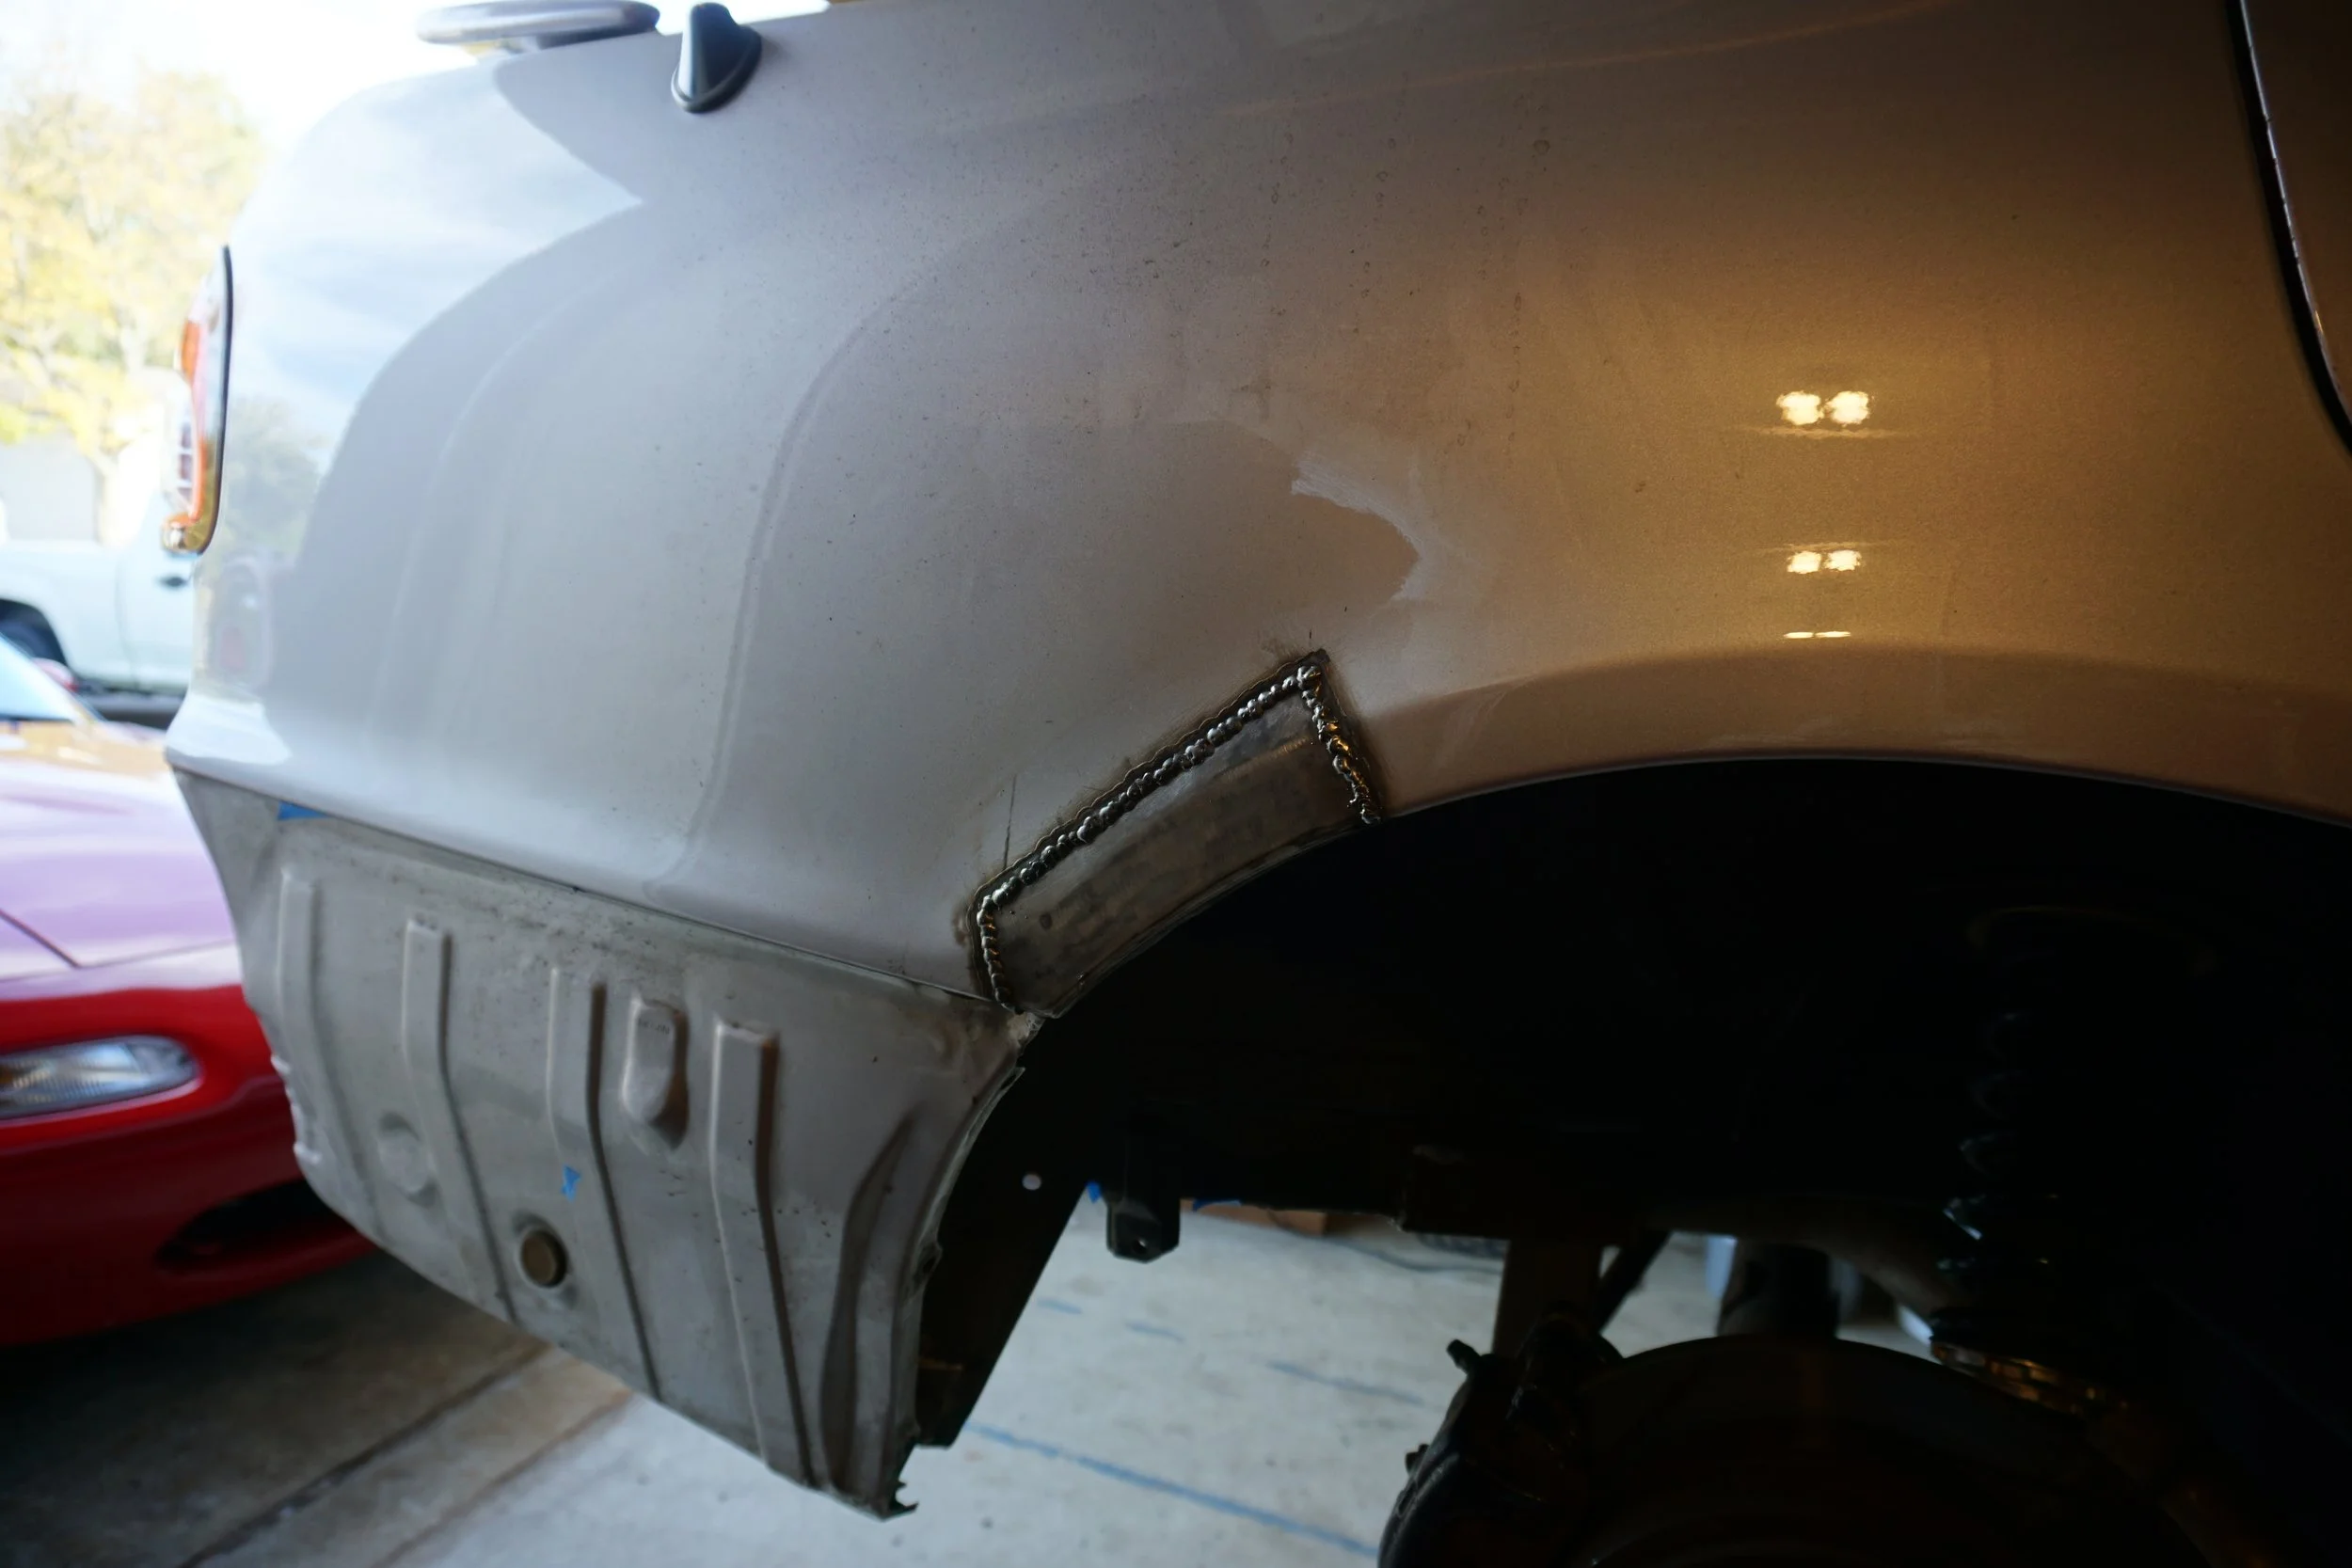
I traced the shape of the panel I cut from a car in the junkyard onto my car to know how much I could cut out. I was initially hoping to just do a small 2" section, but when I saw what the back of the panel looked like, I knew I needed to cut out as much as I could. I took a deep breath and started cutting, trying to make my cuts as straight as possible so fitting in the patch panel would be easier.
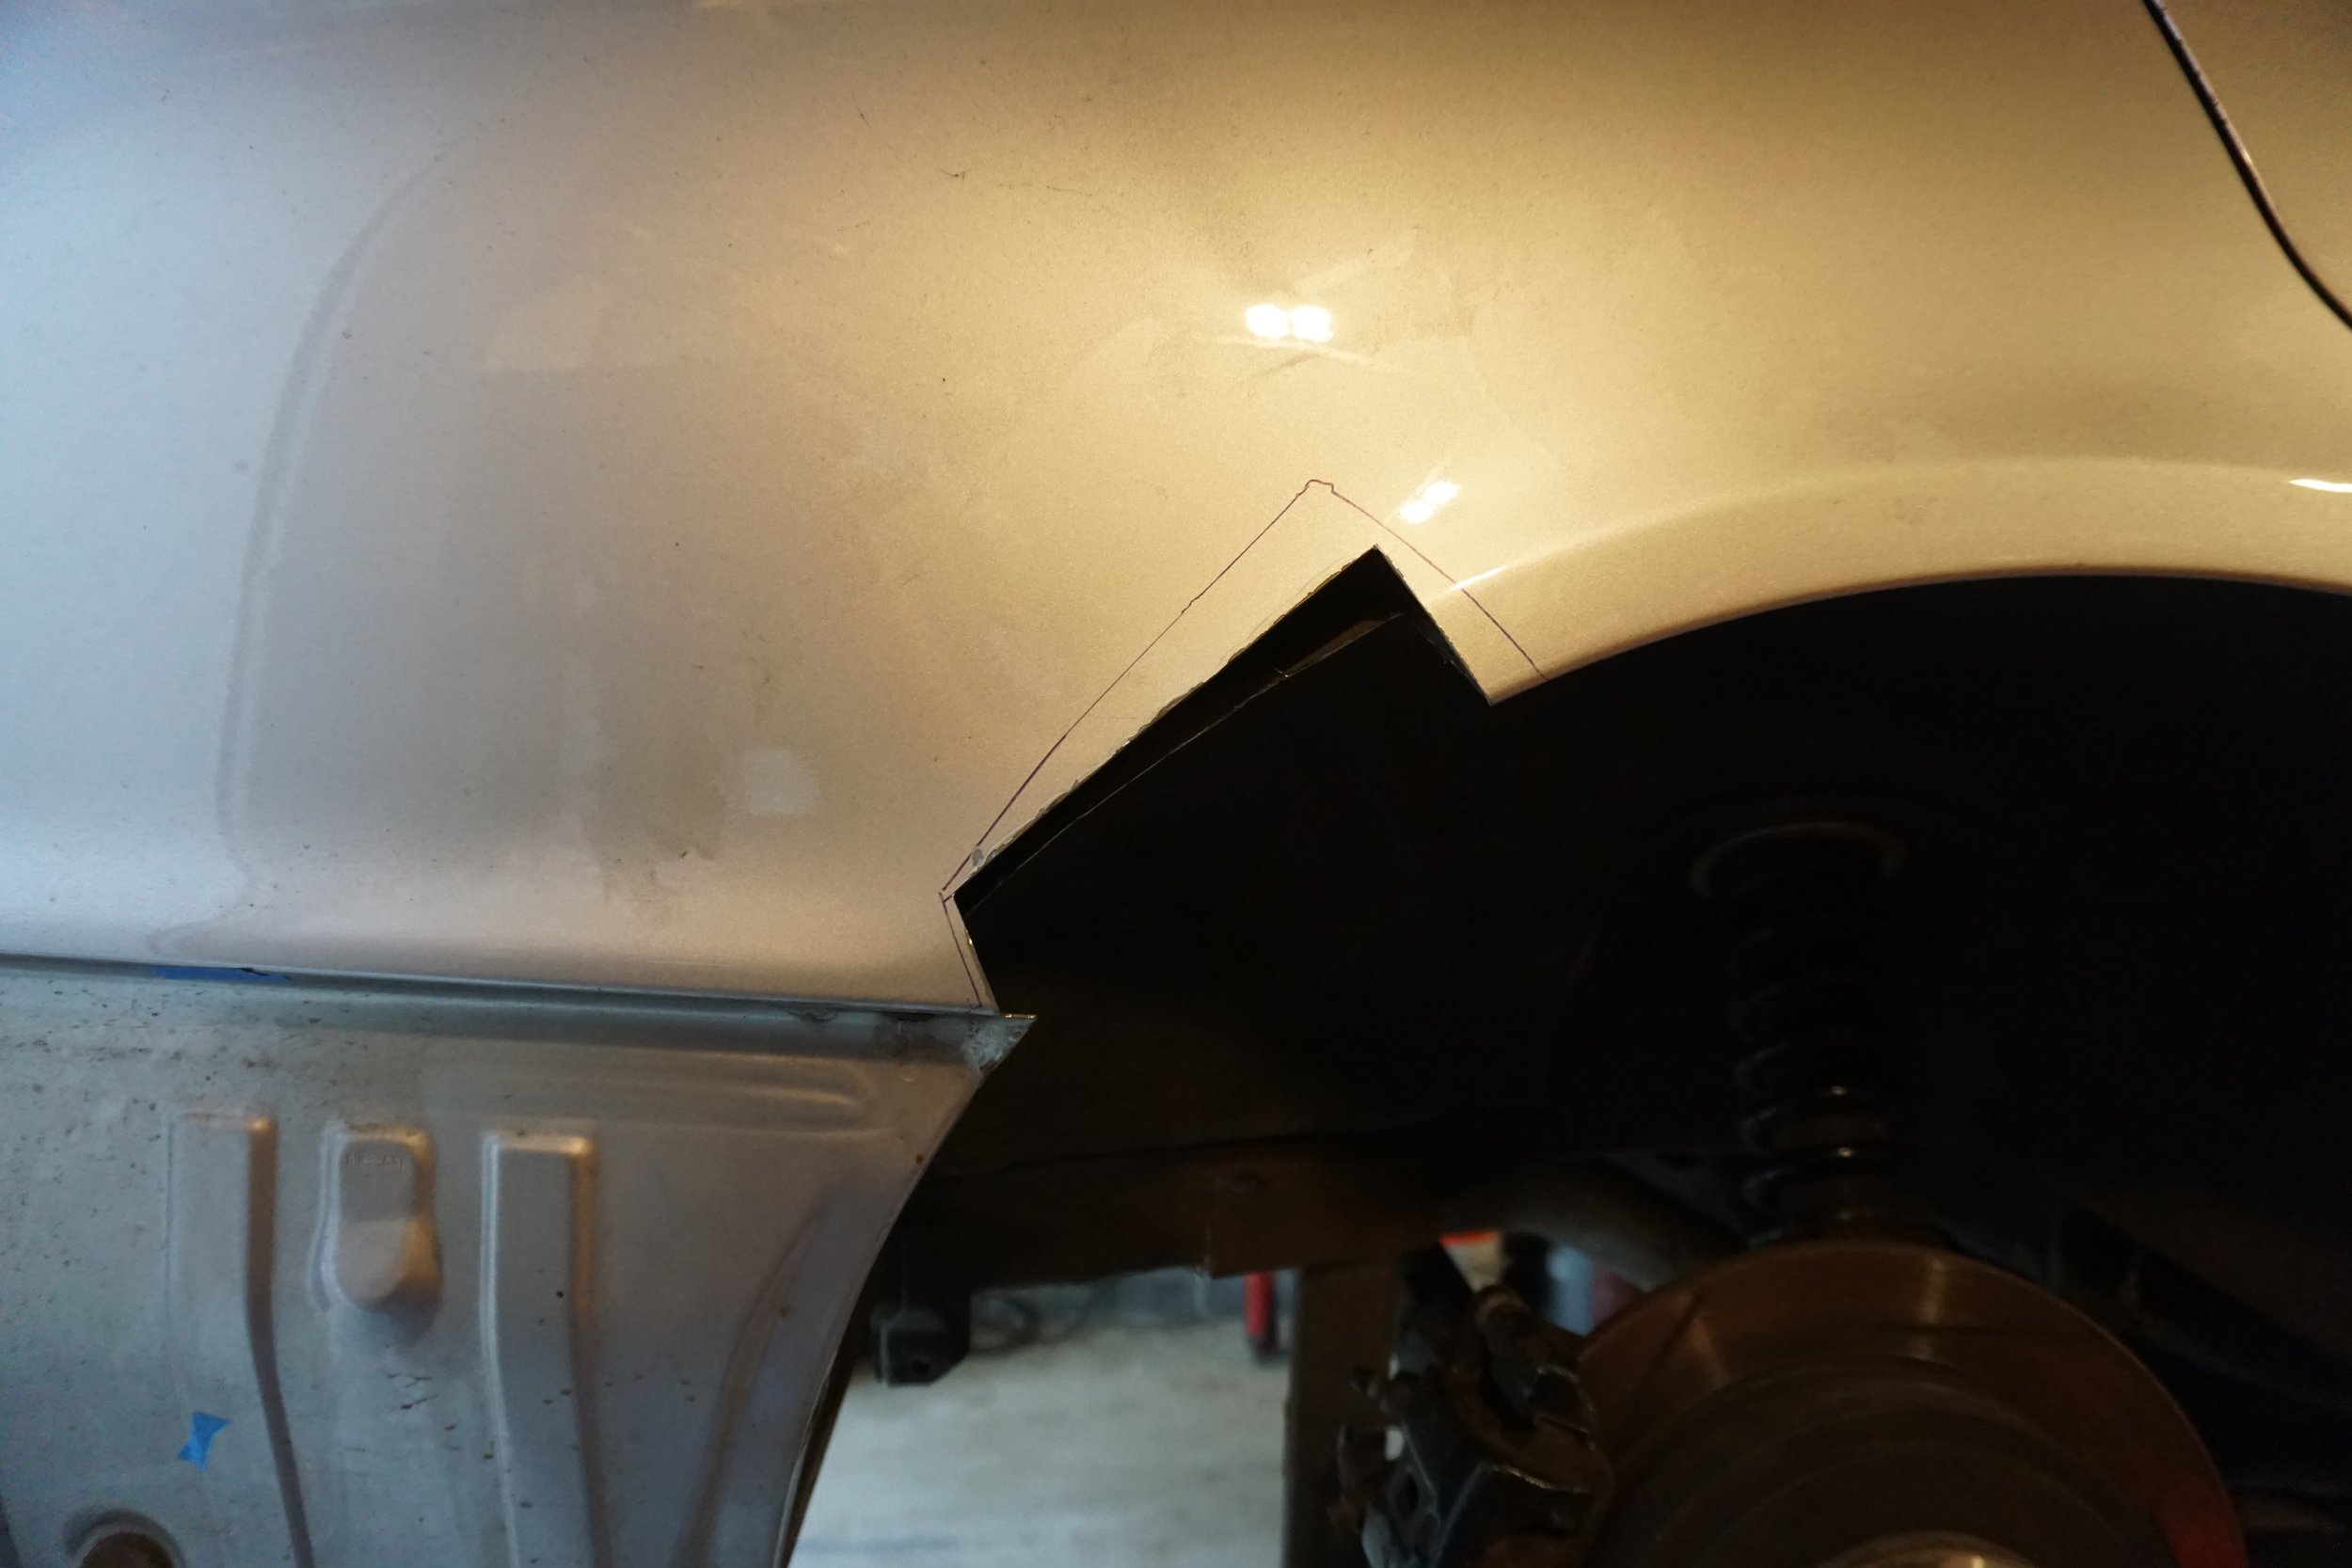
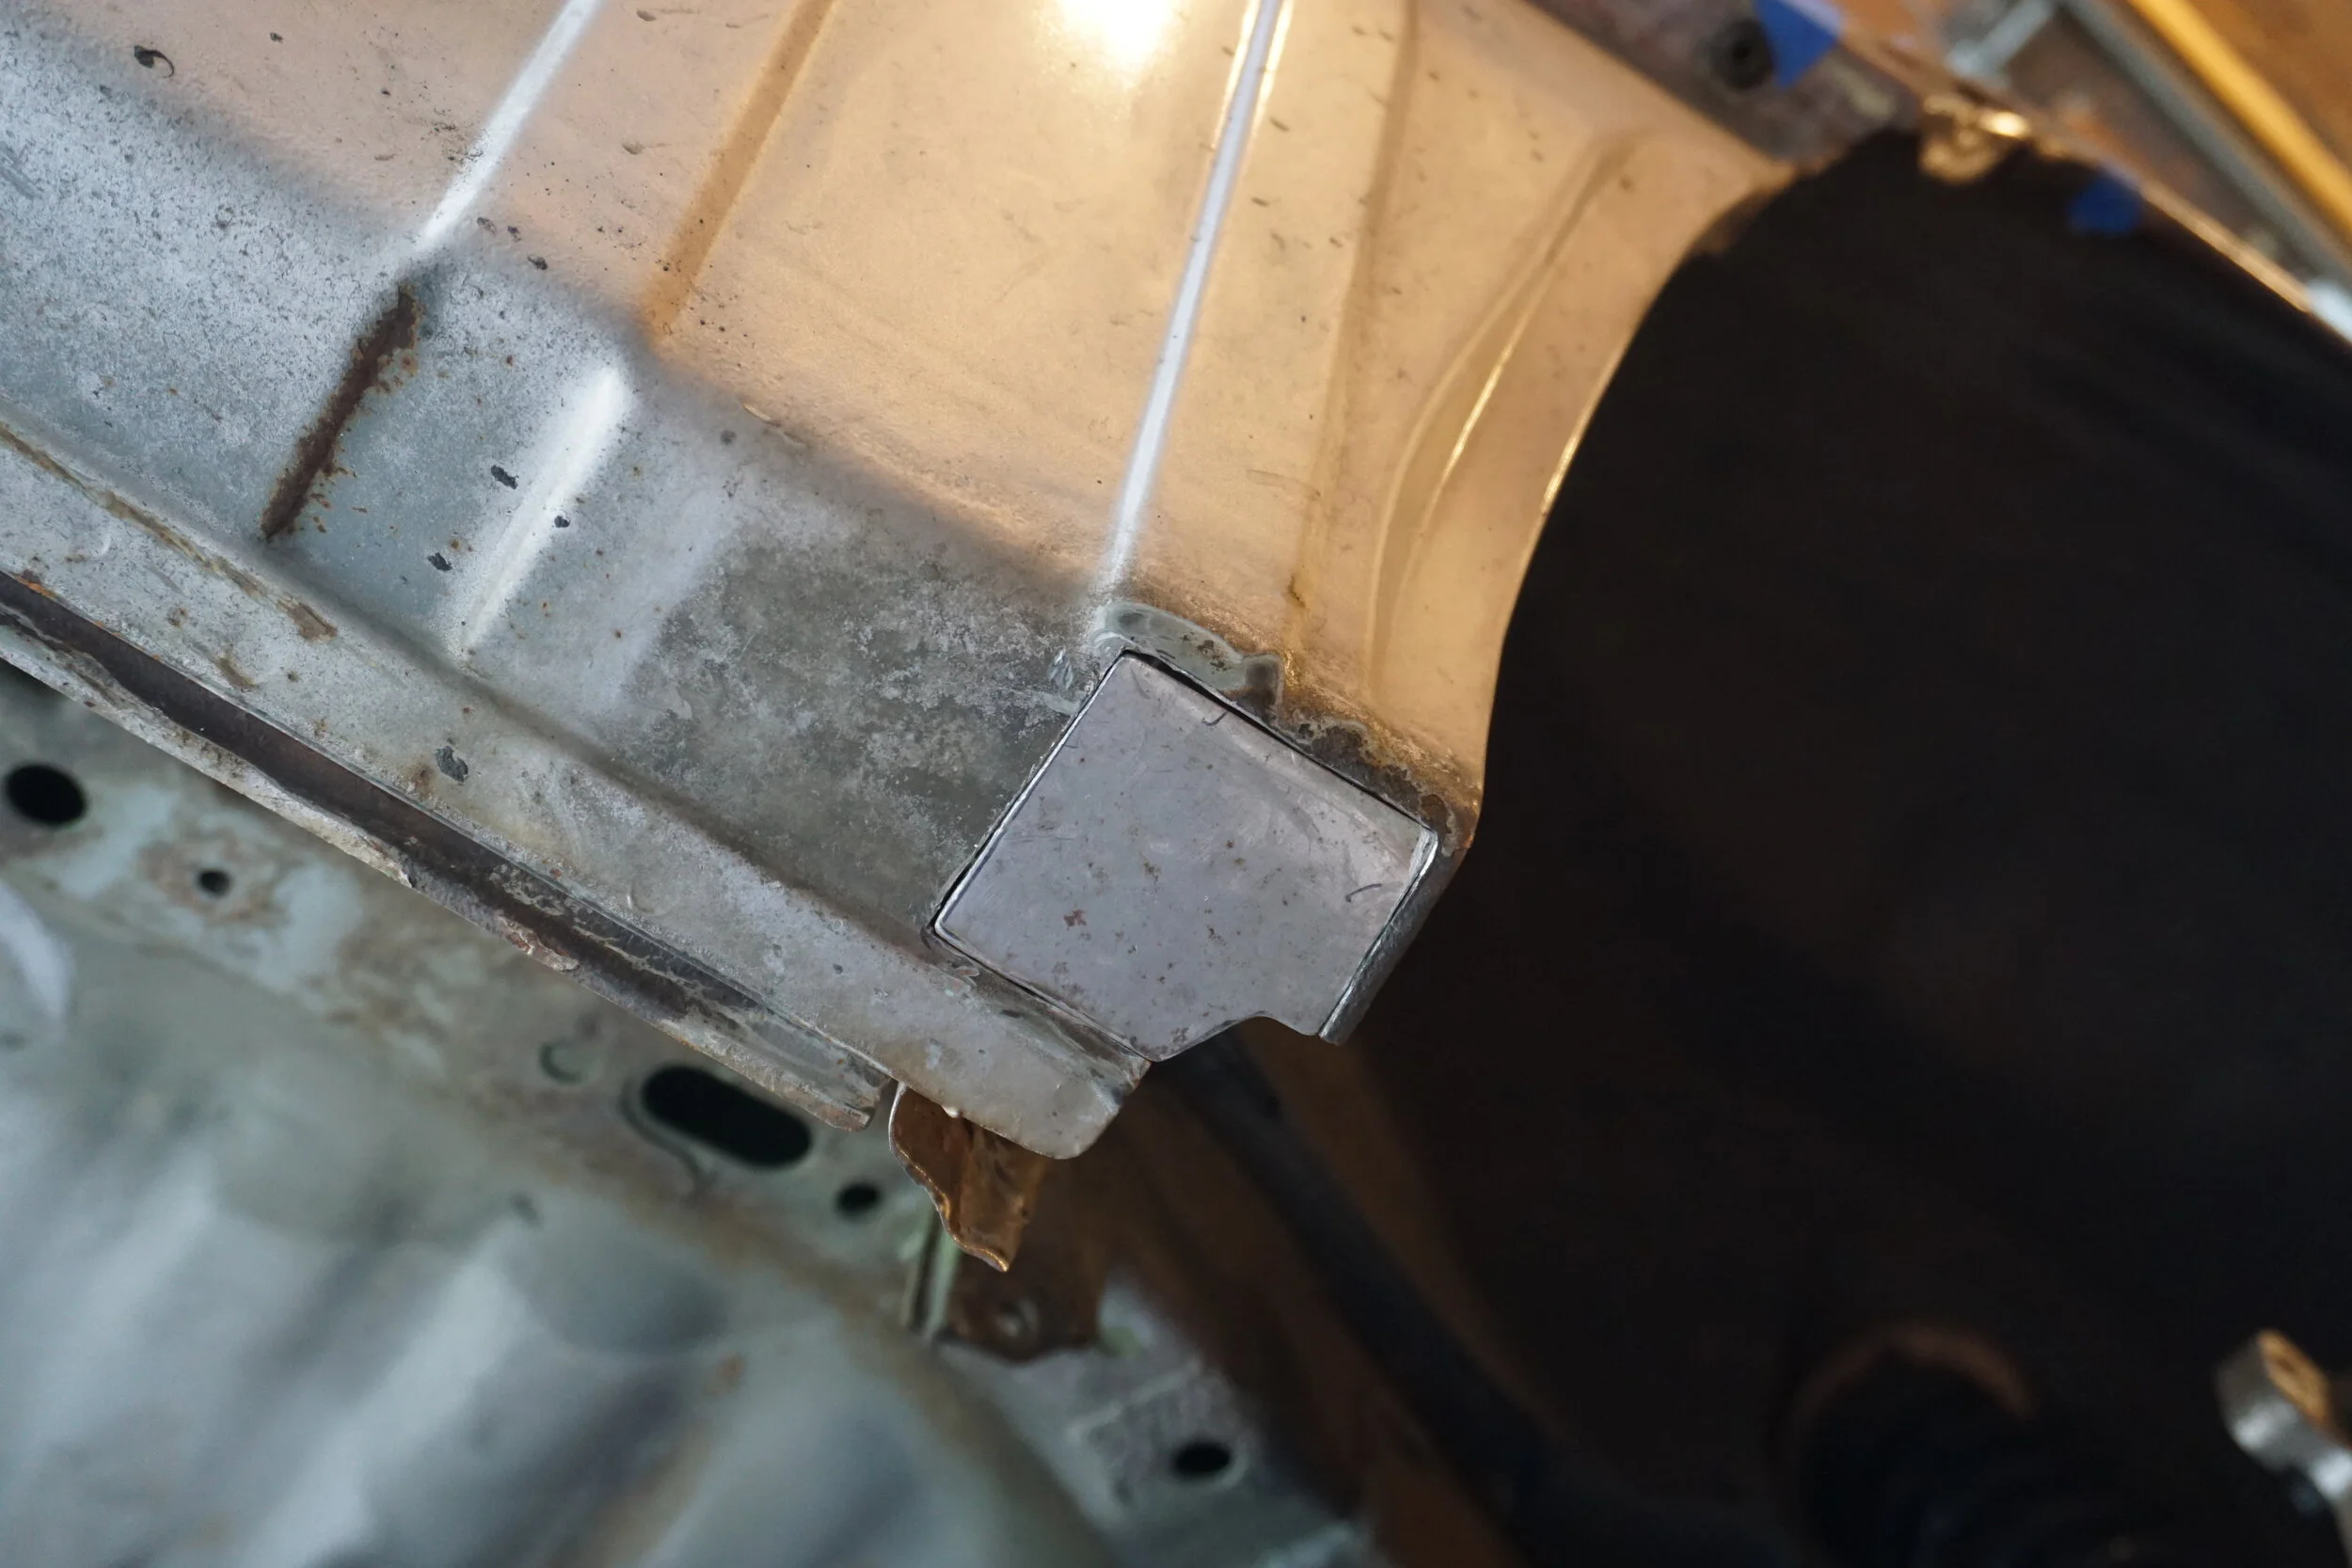
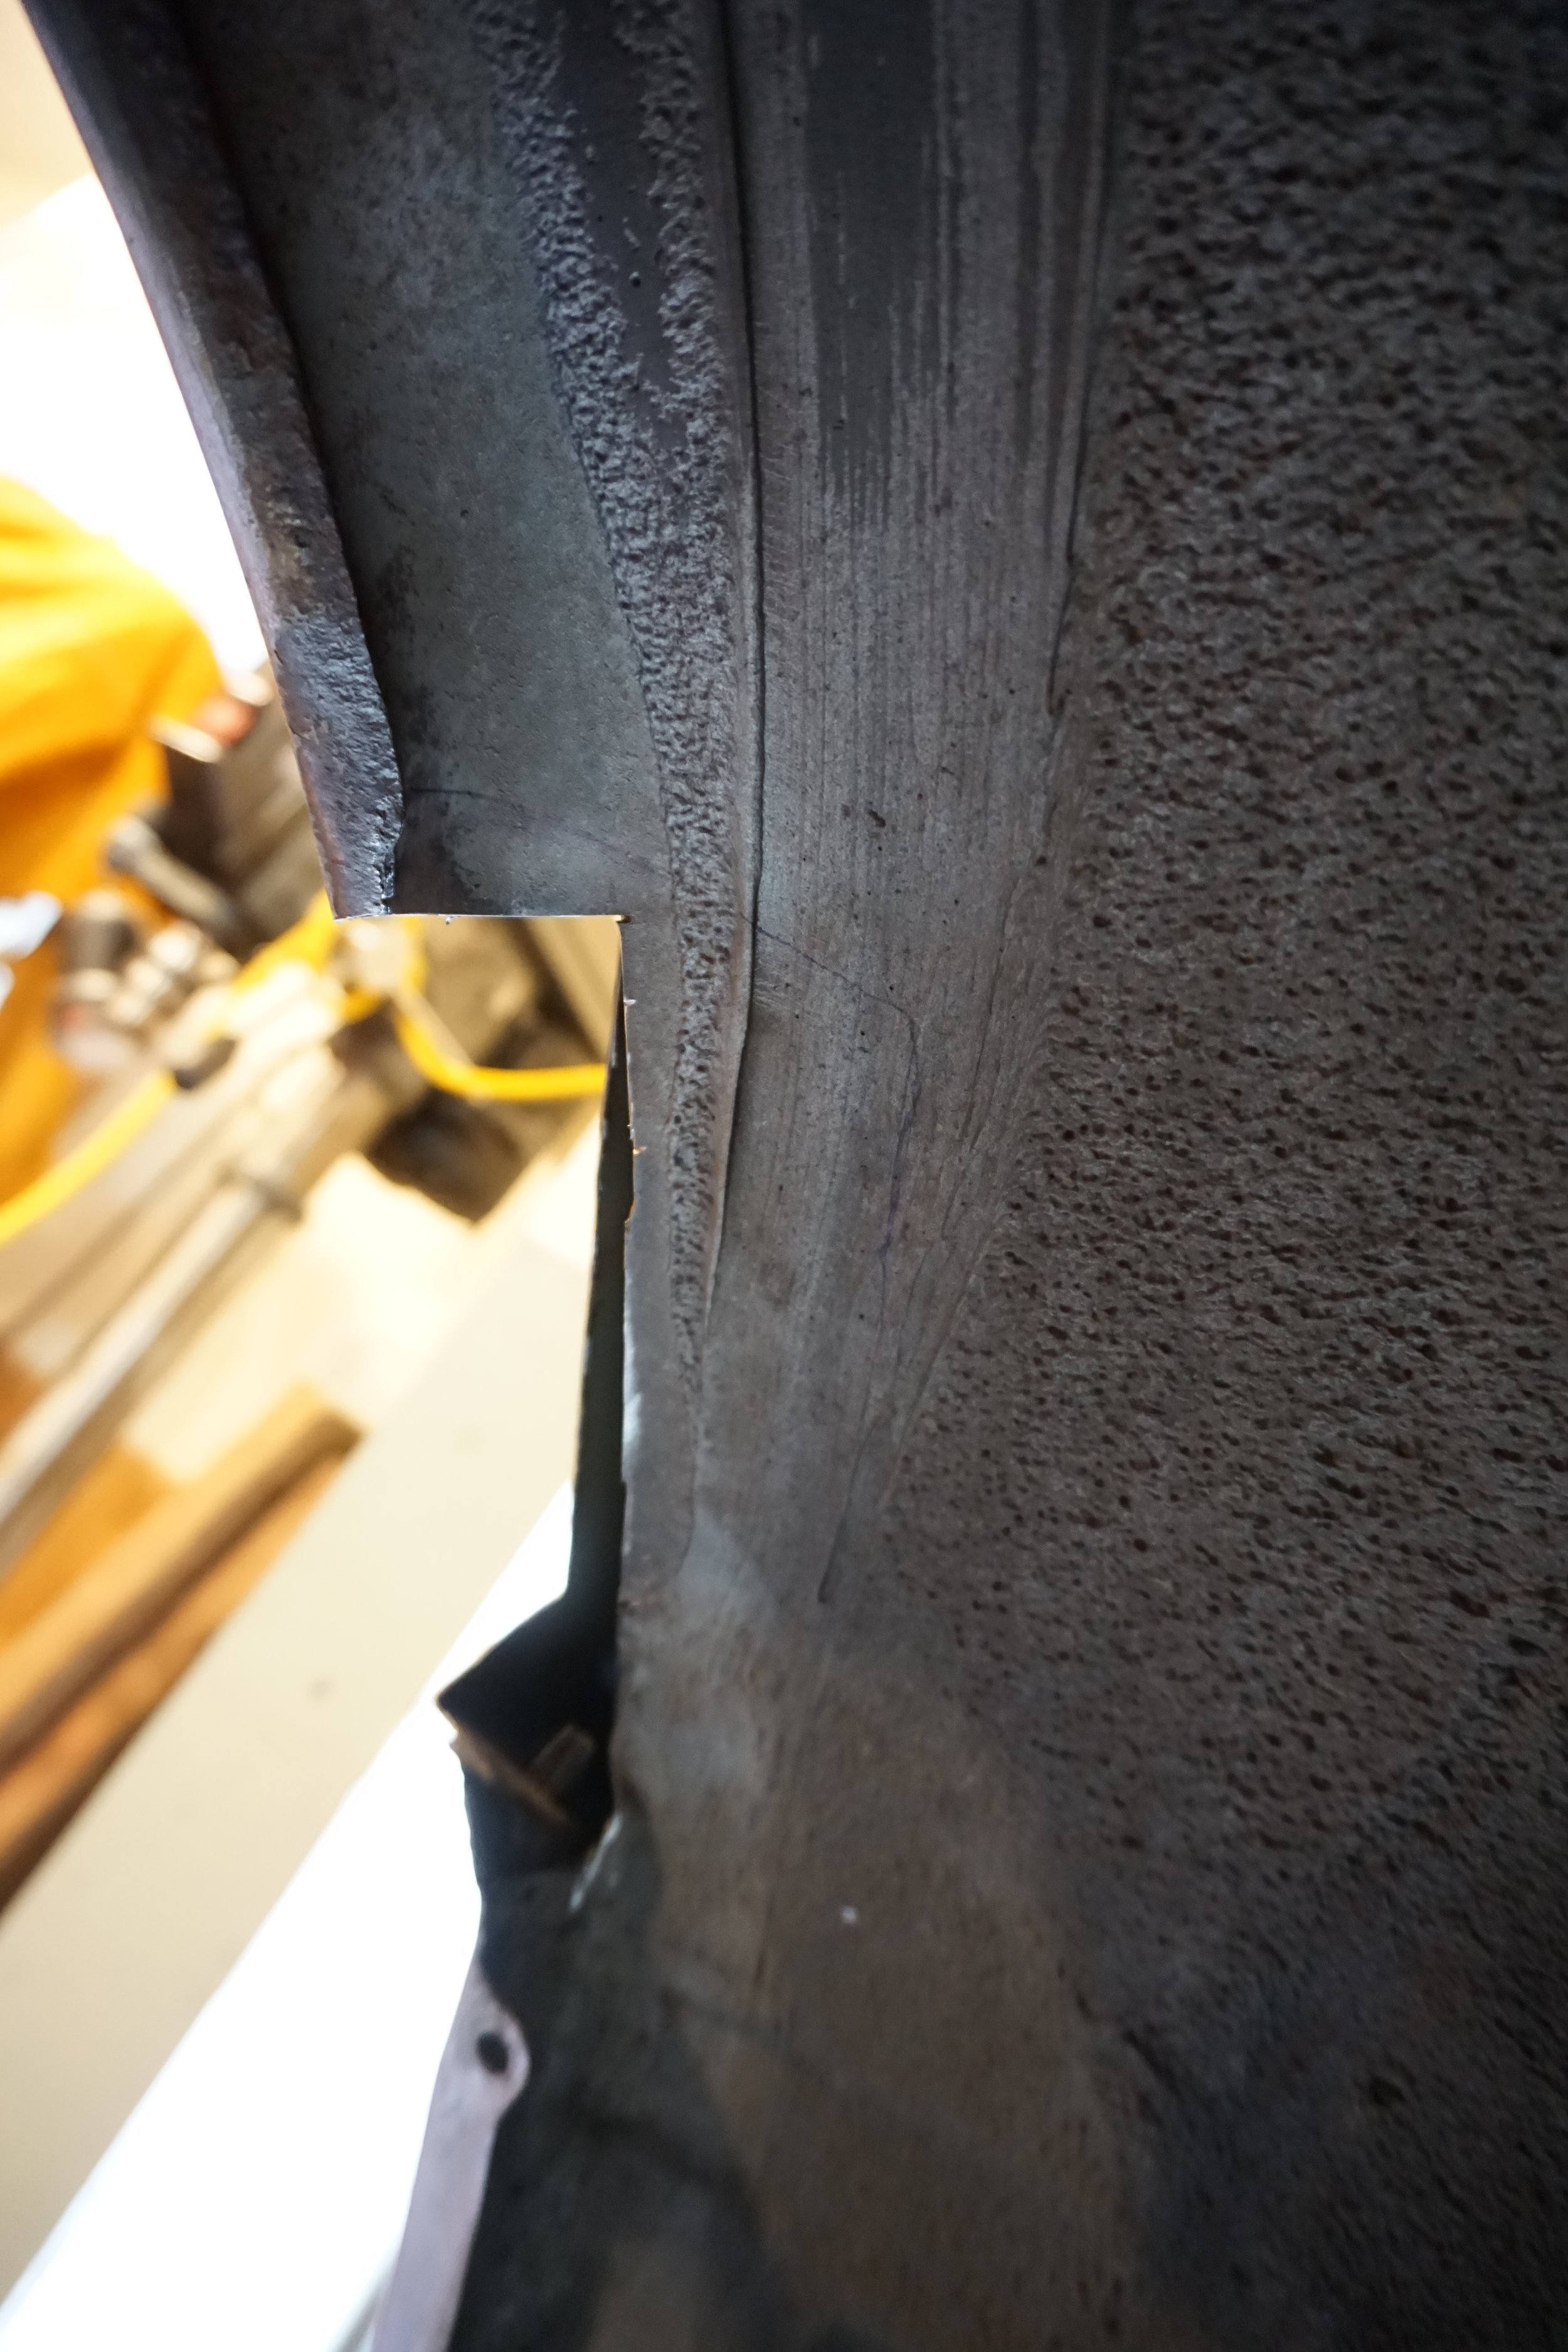
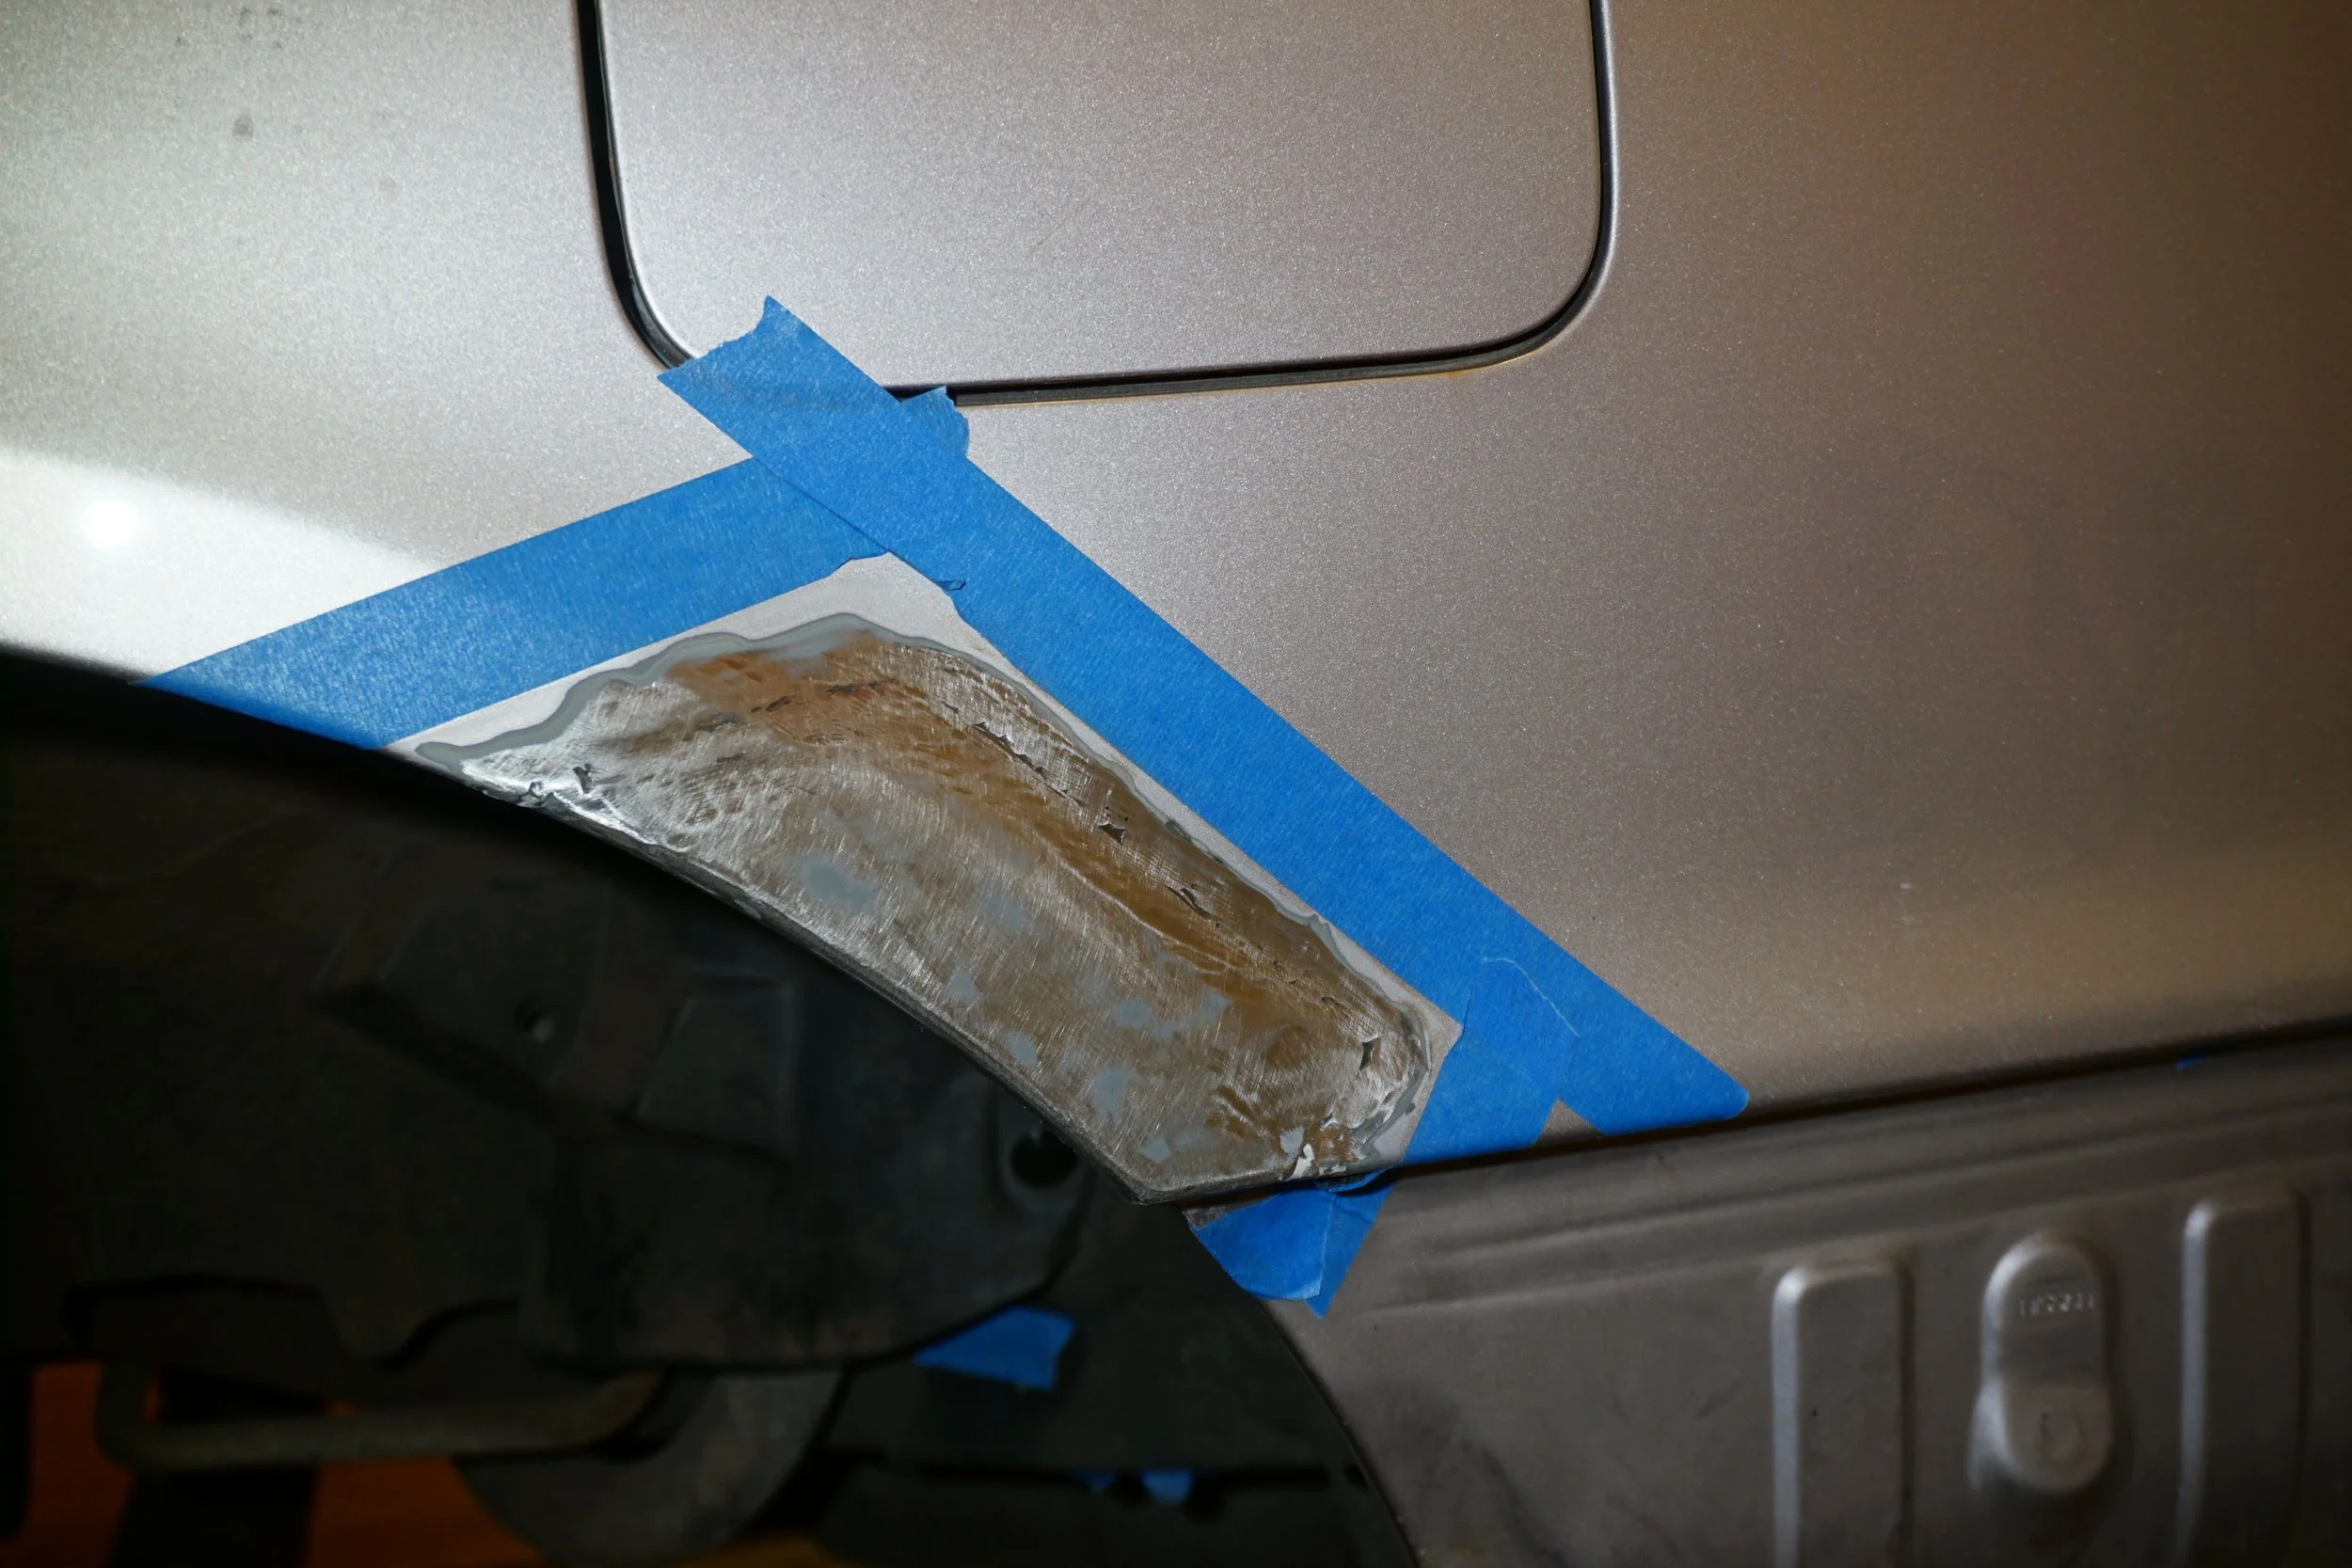
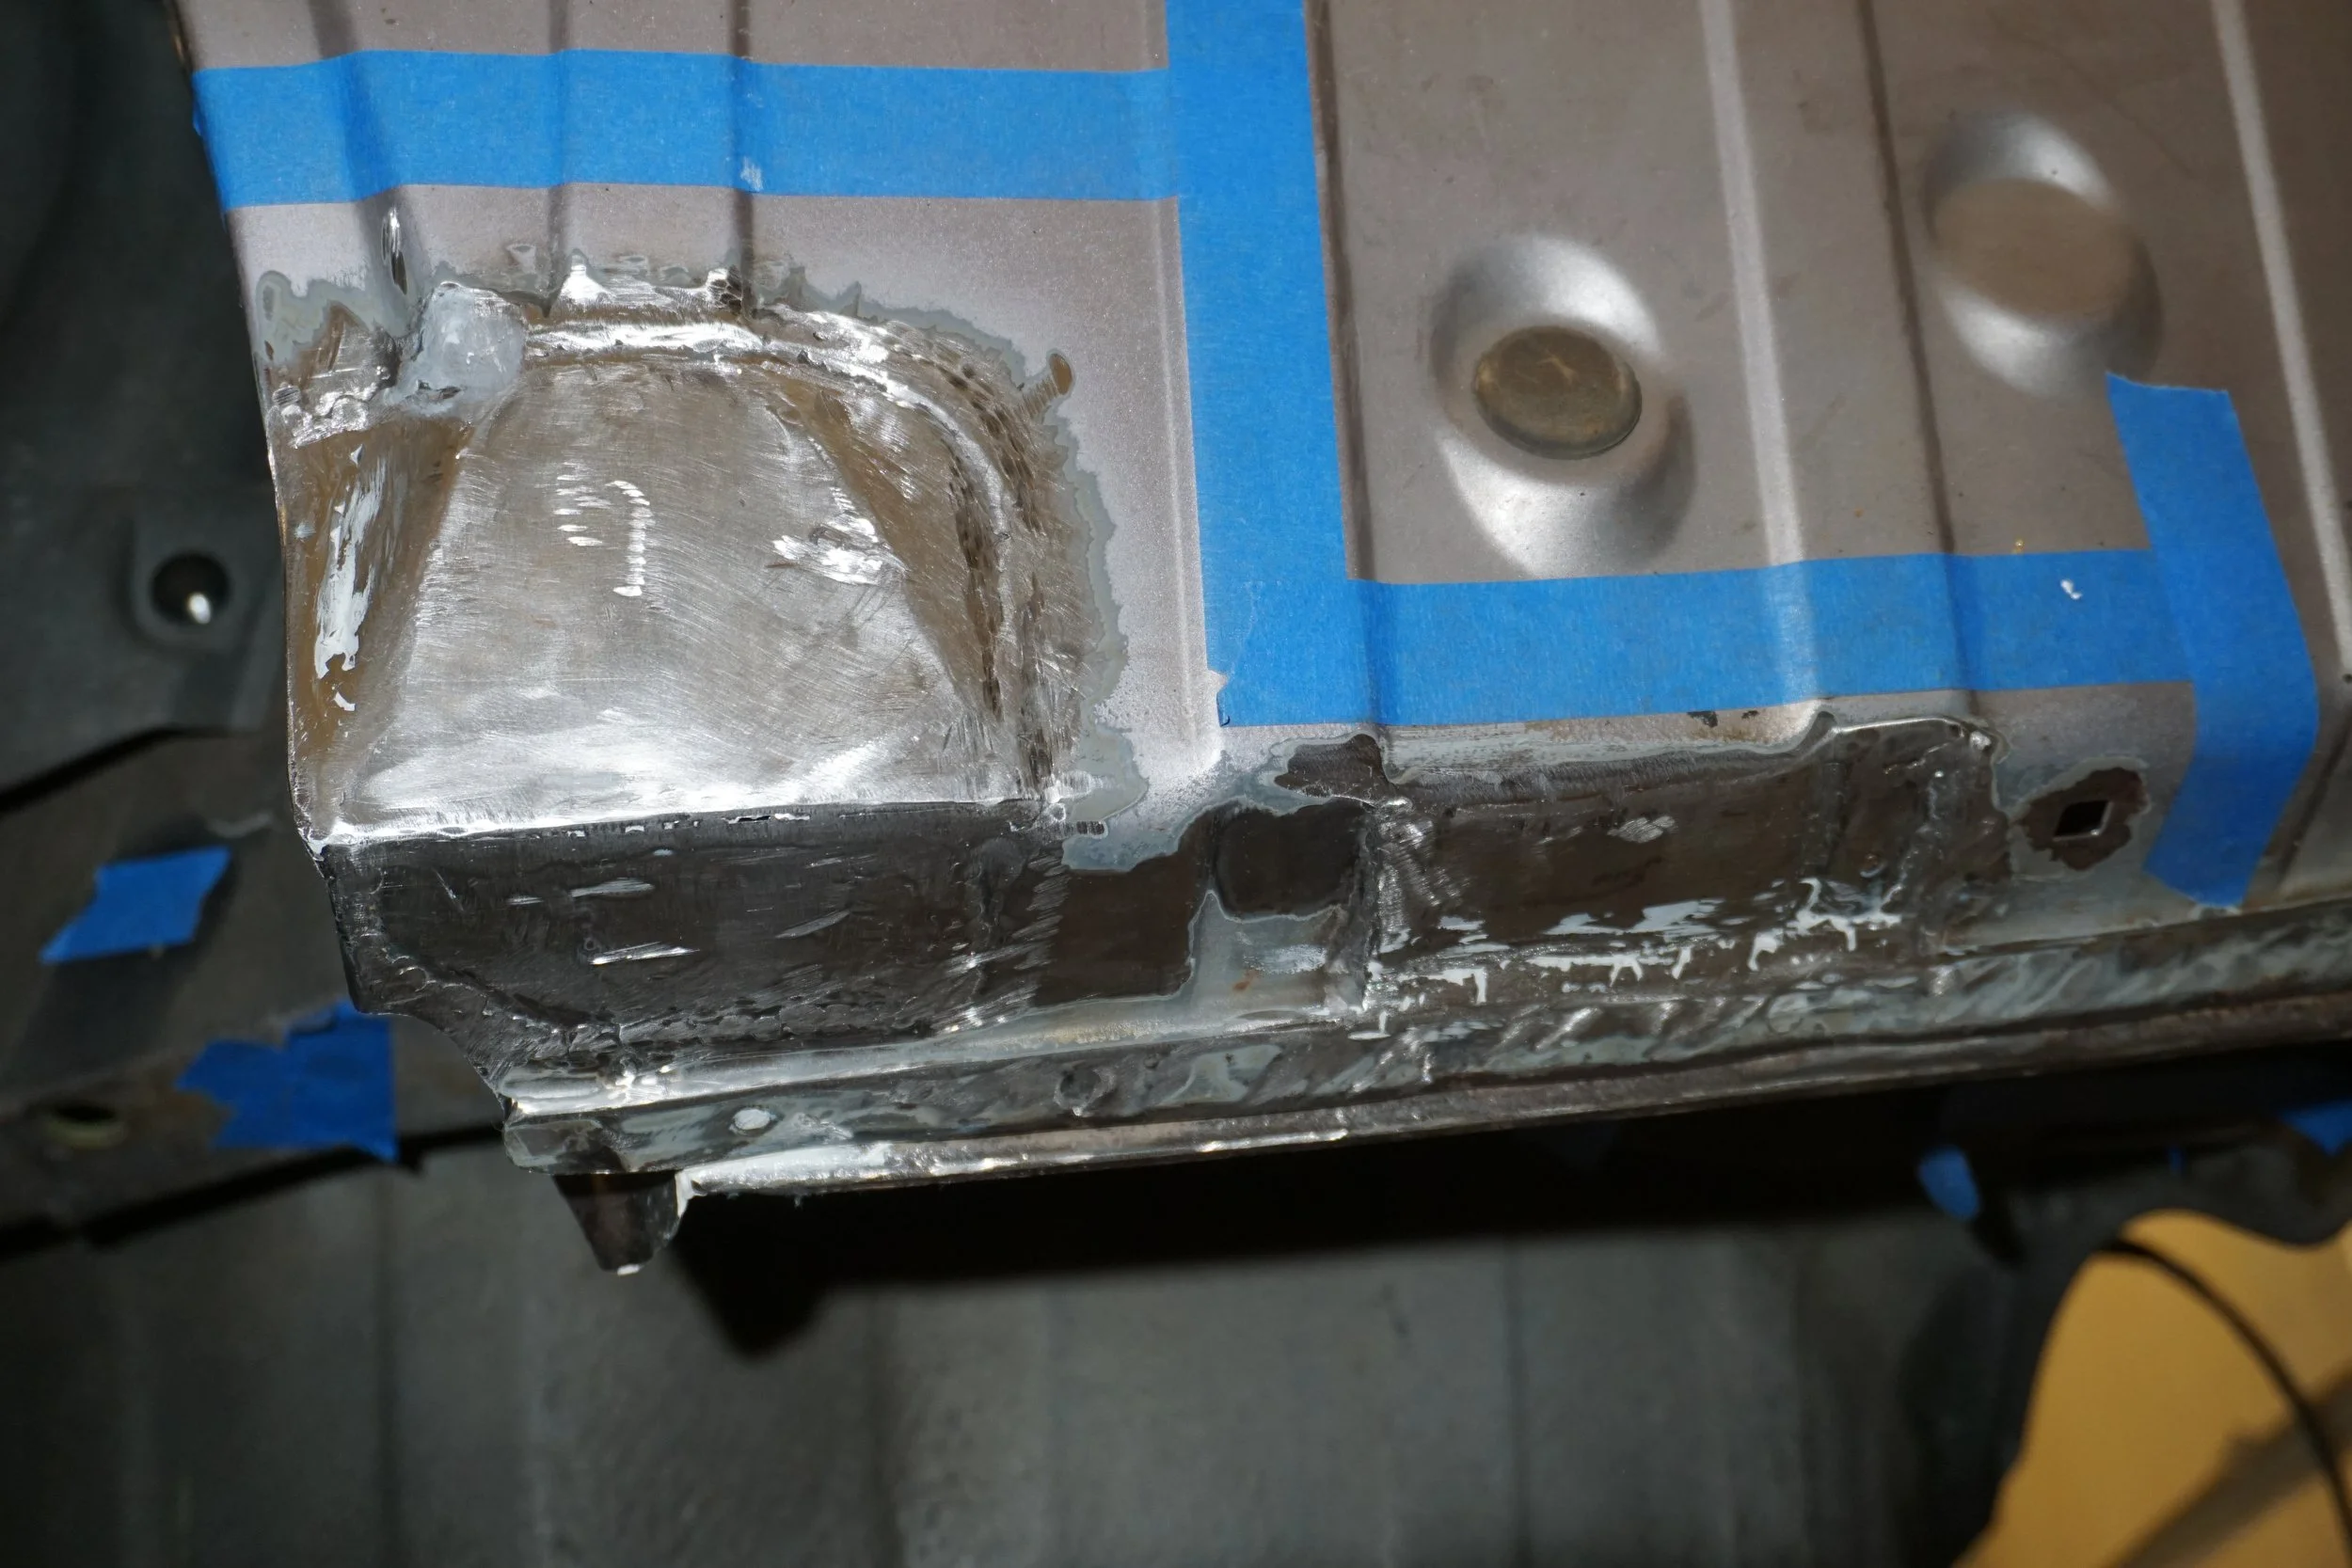
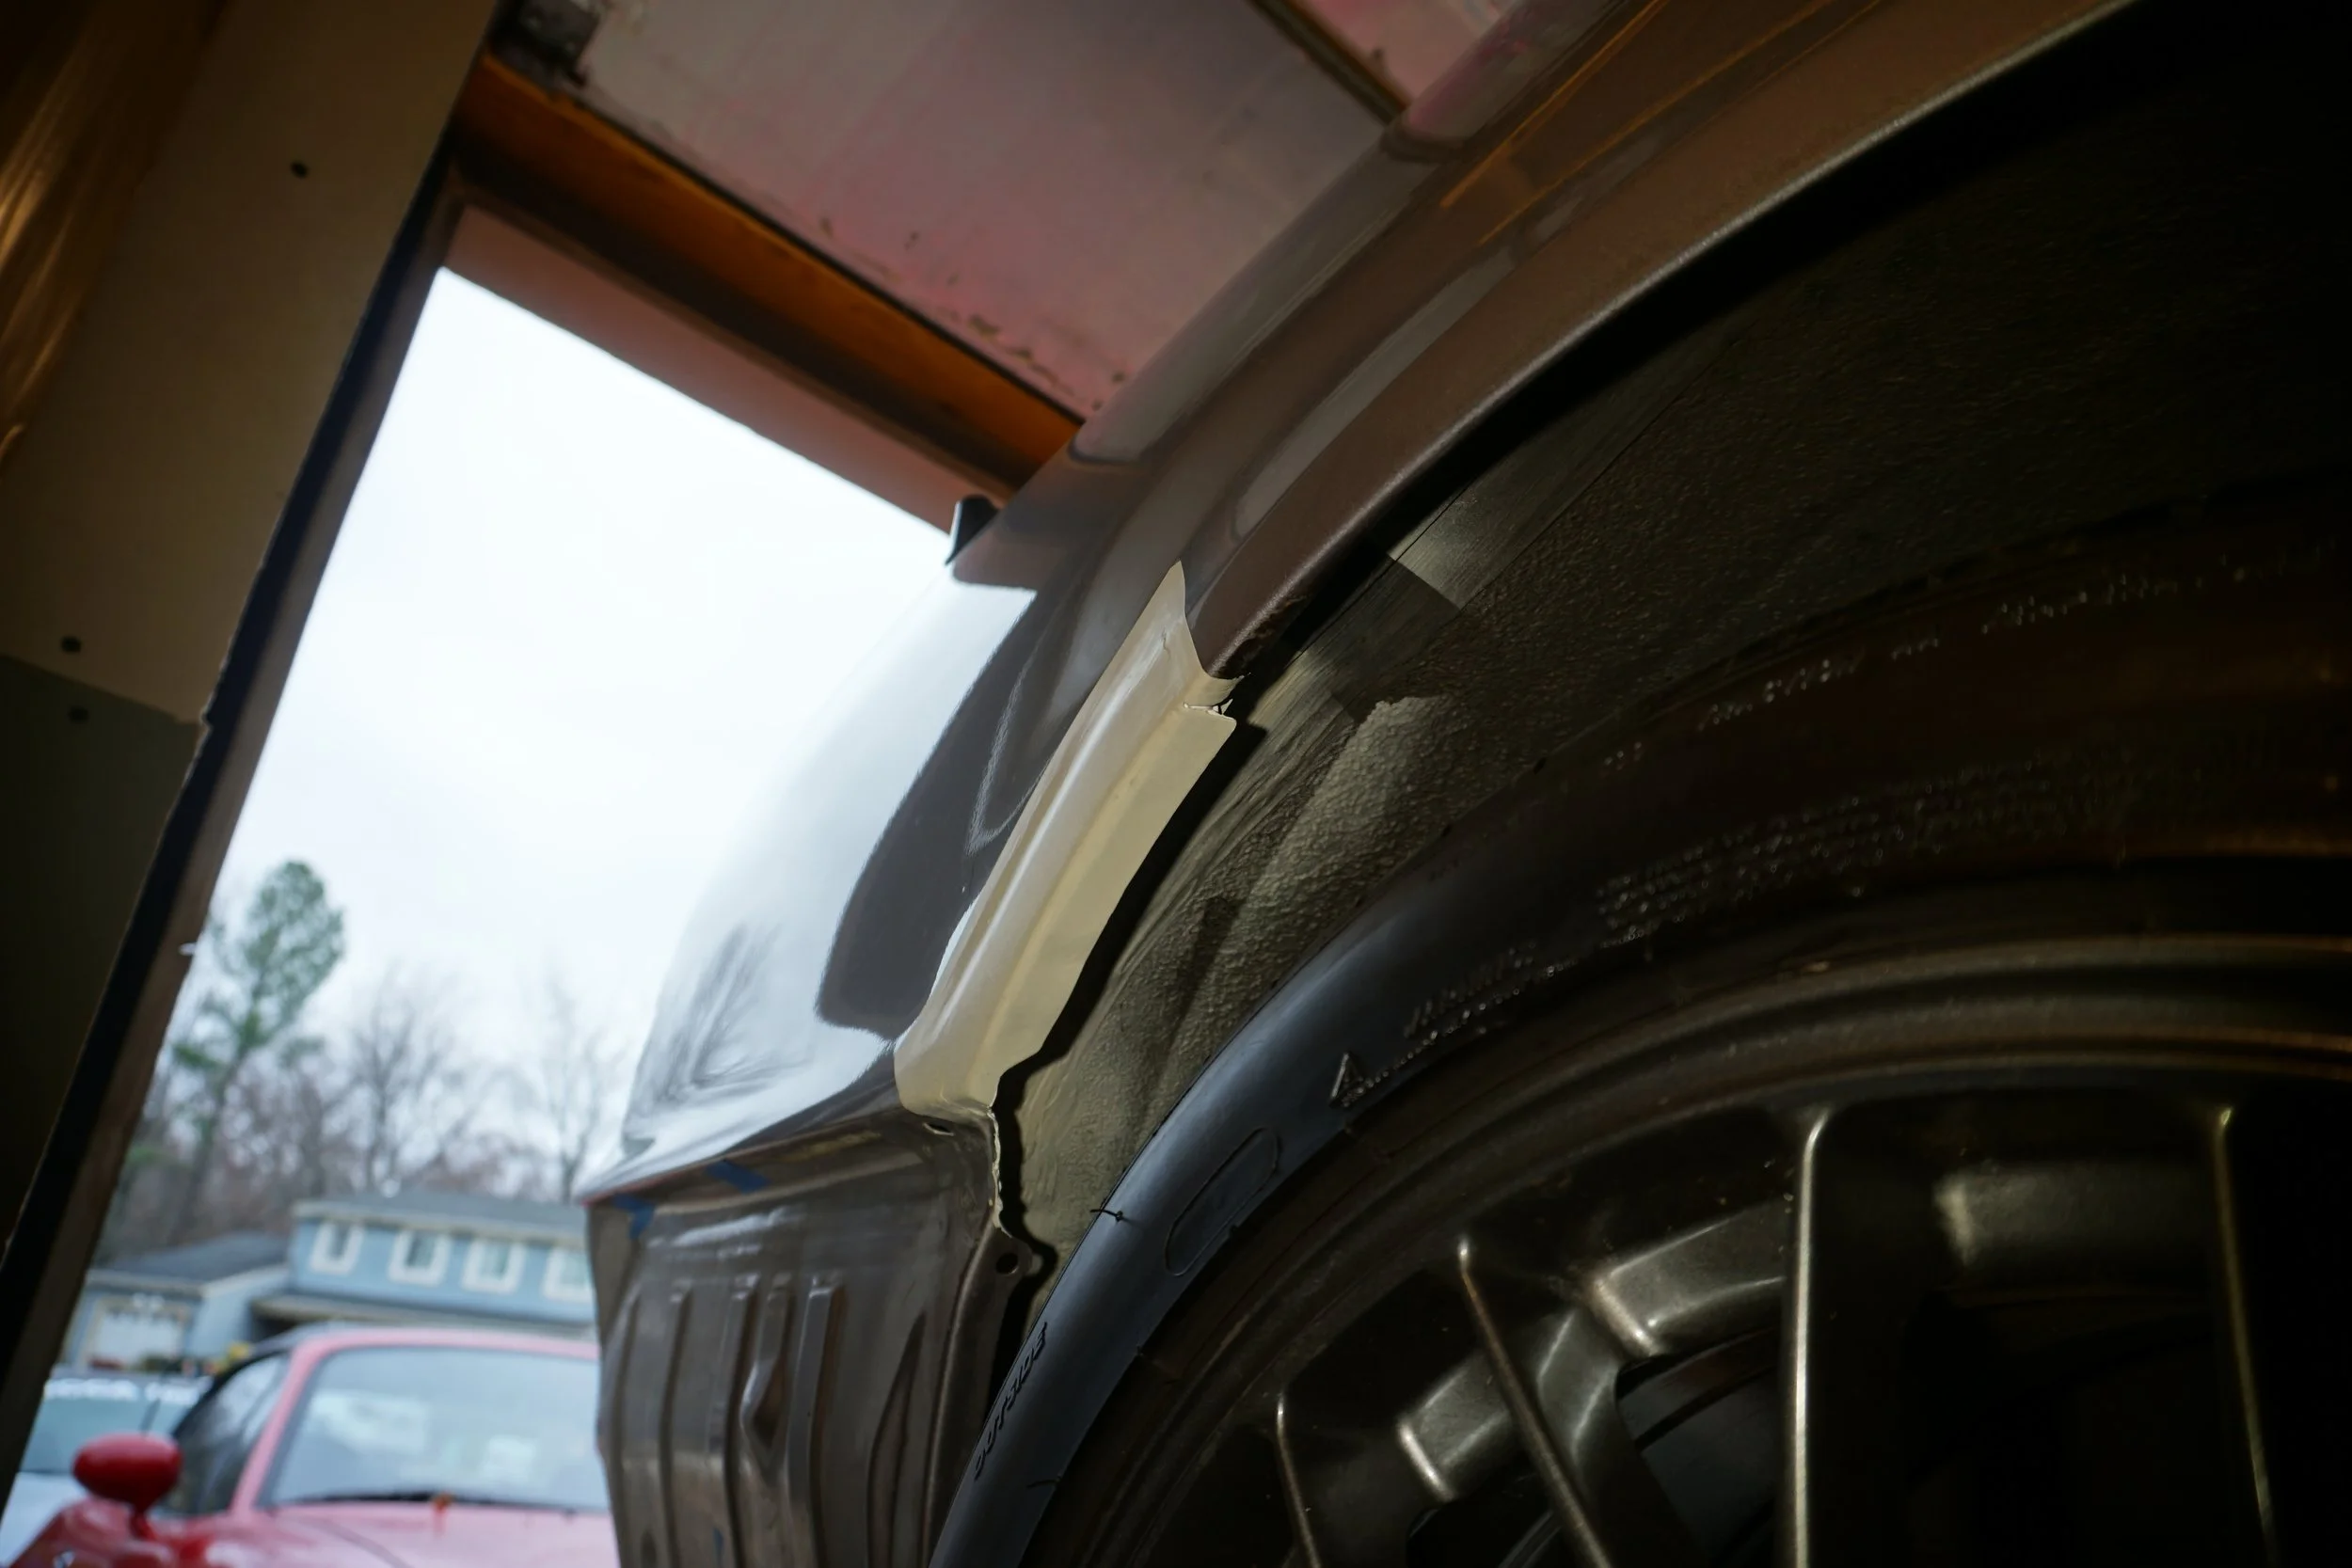
I then worked on trimming the patch to fit perfectly, which took quite some time. It needed to fit real tight or else I risked blowing through the metal, and getting this thing to line up in so many dimensions was super hard.
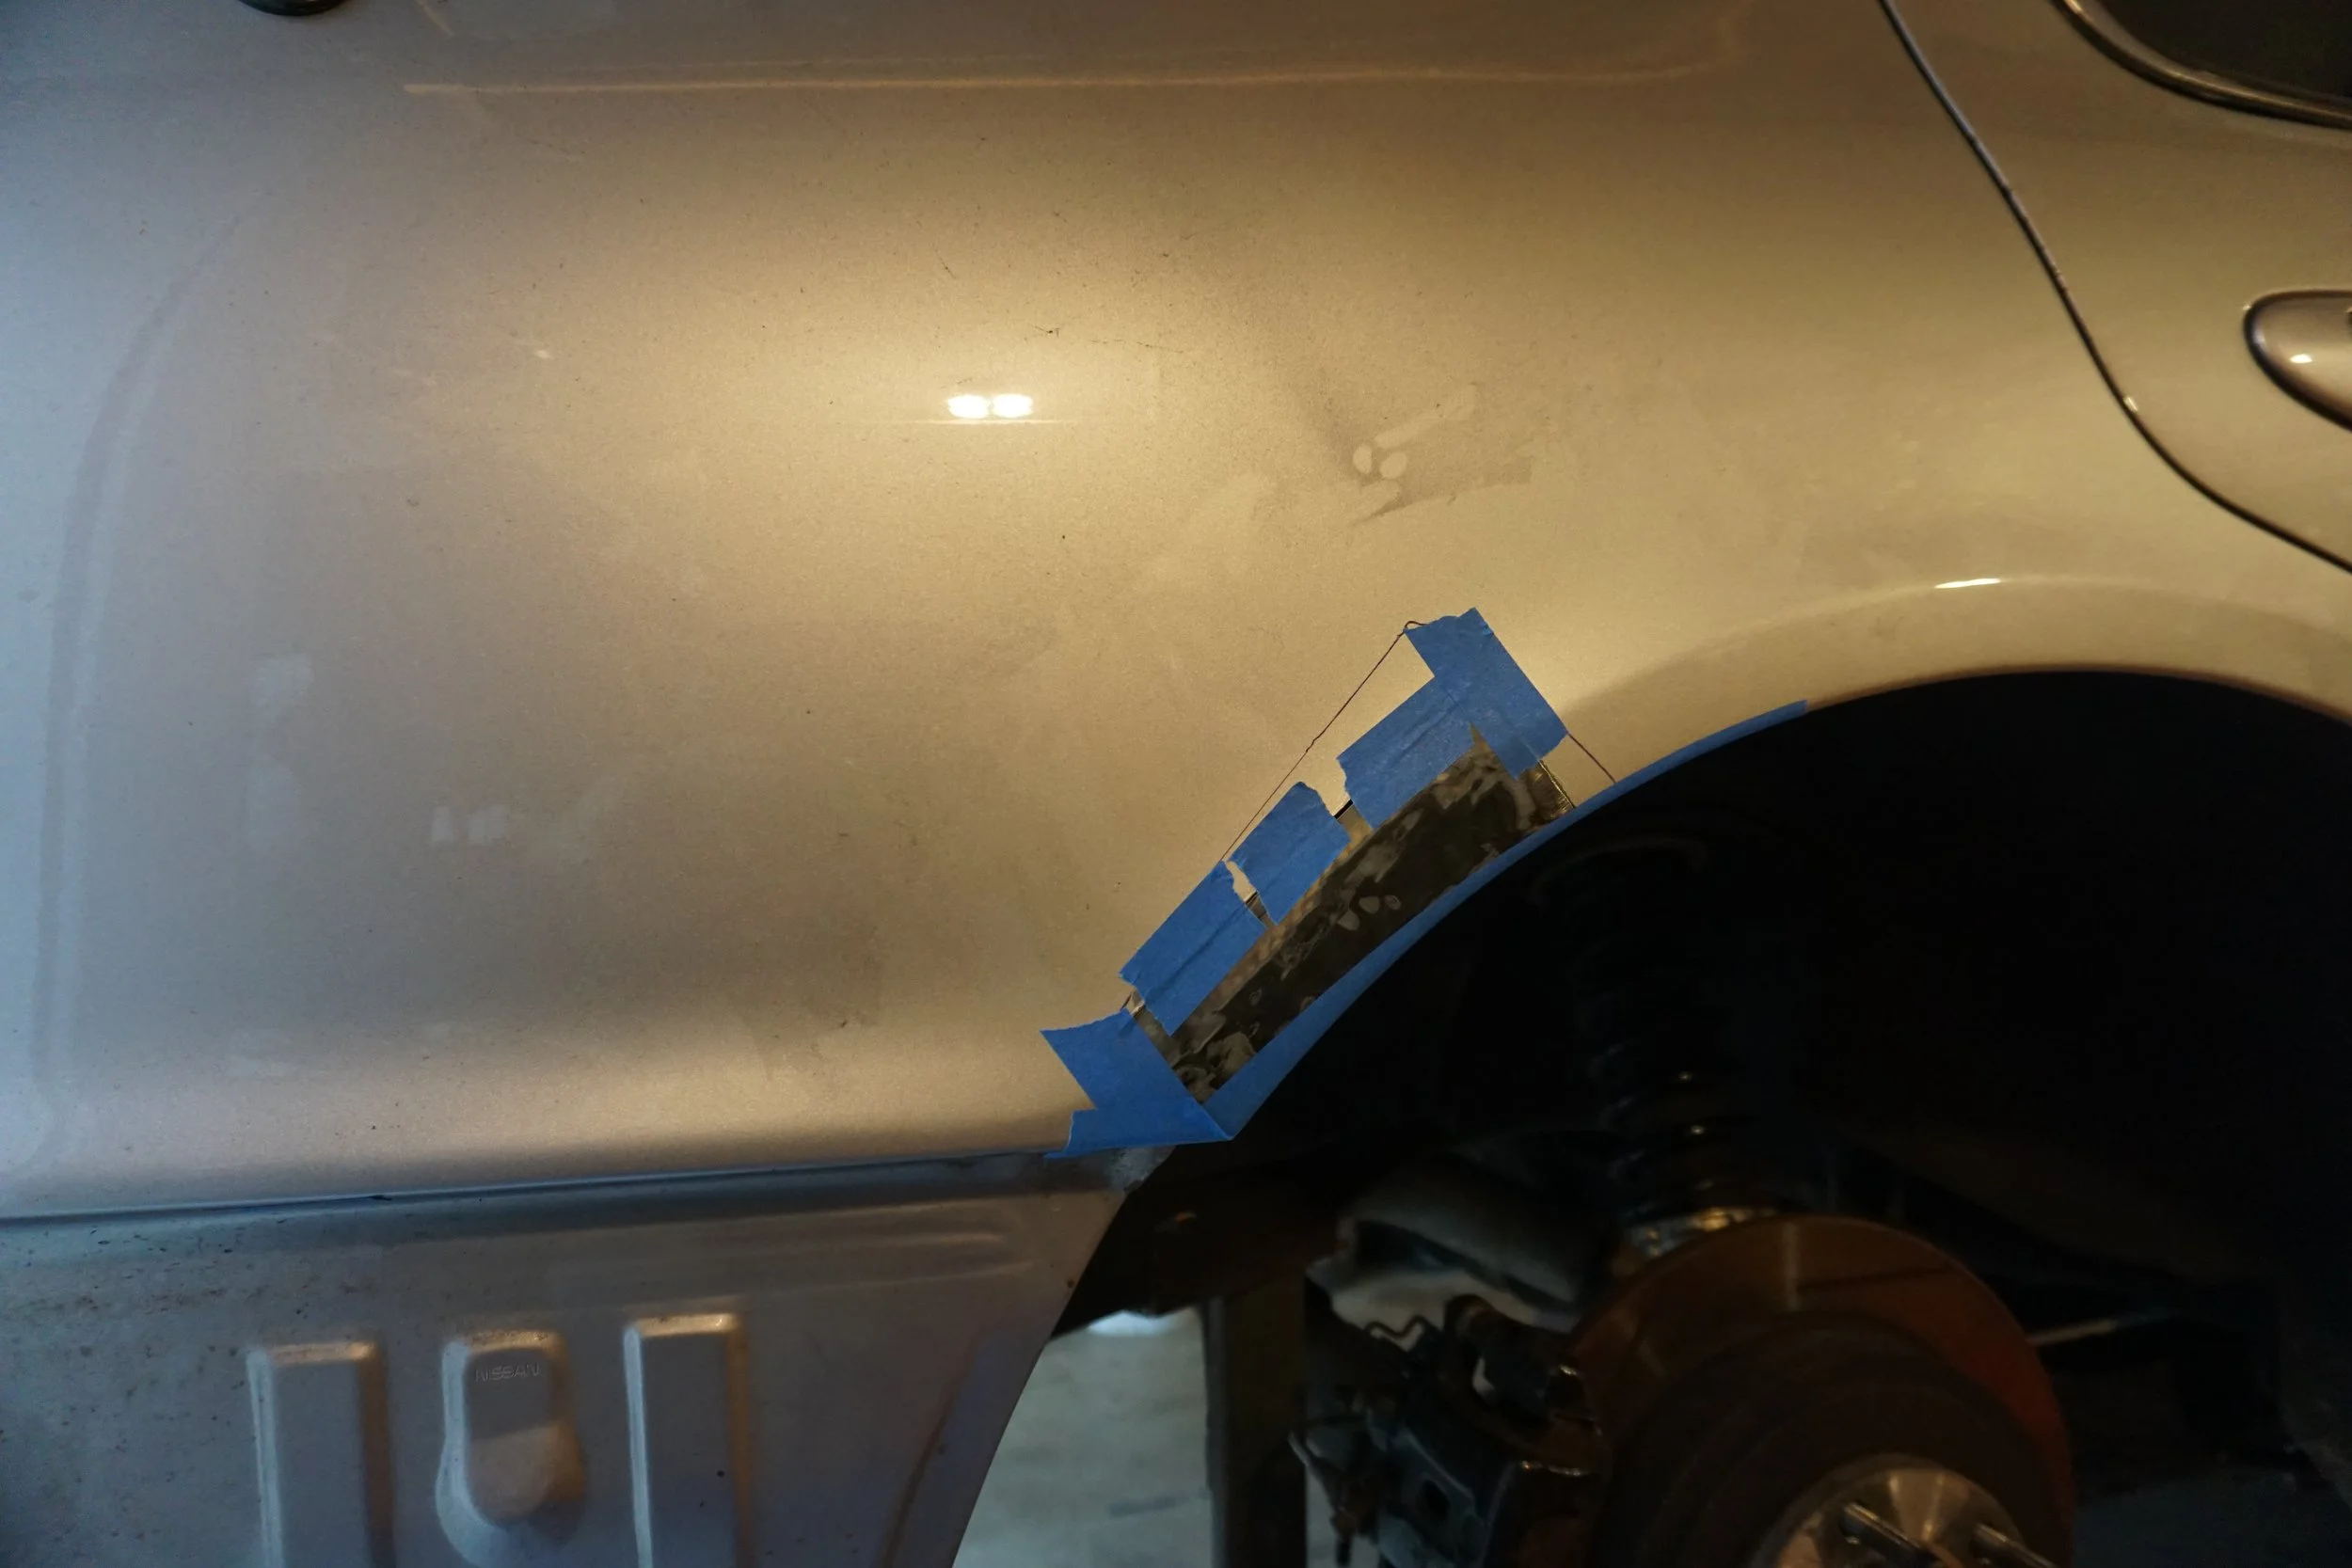
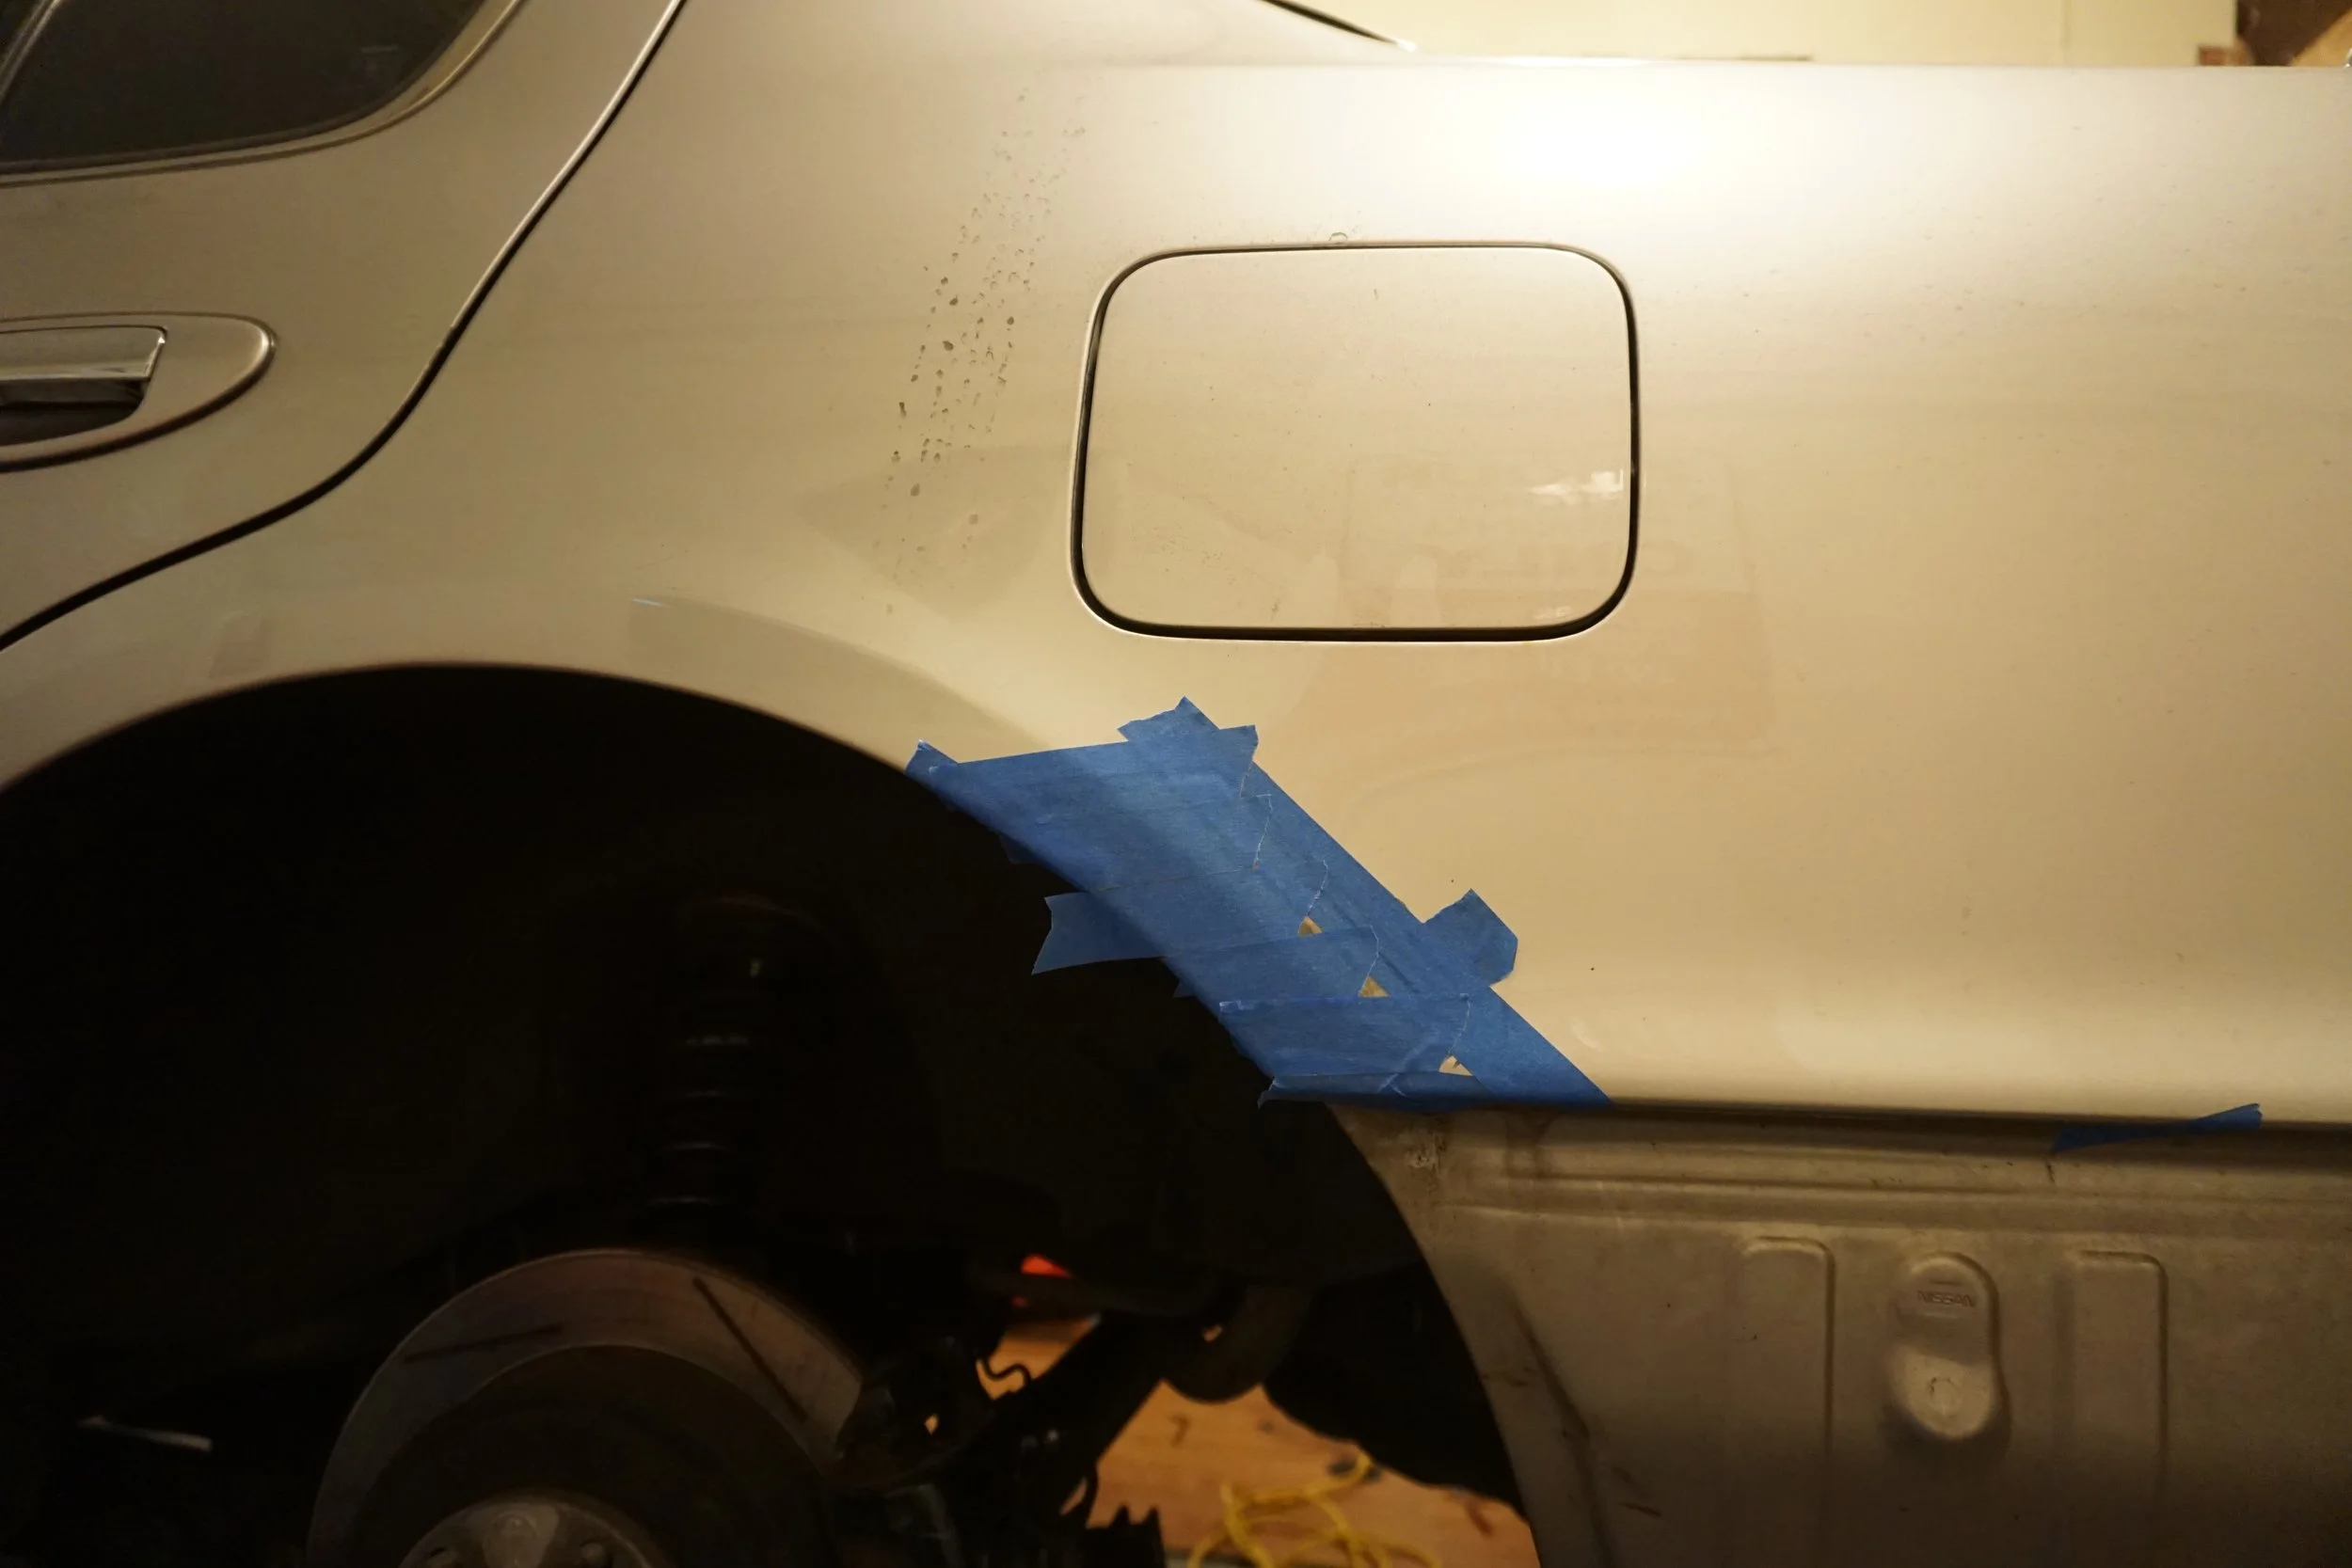
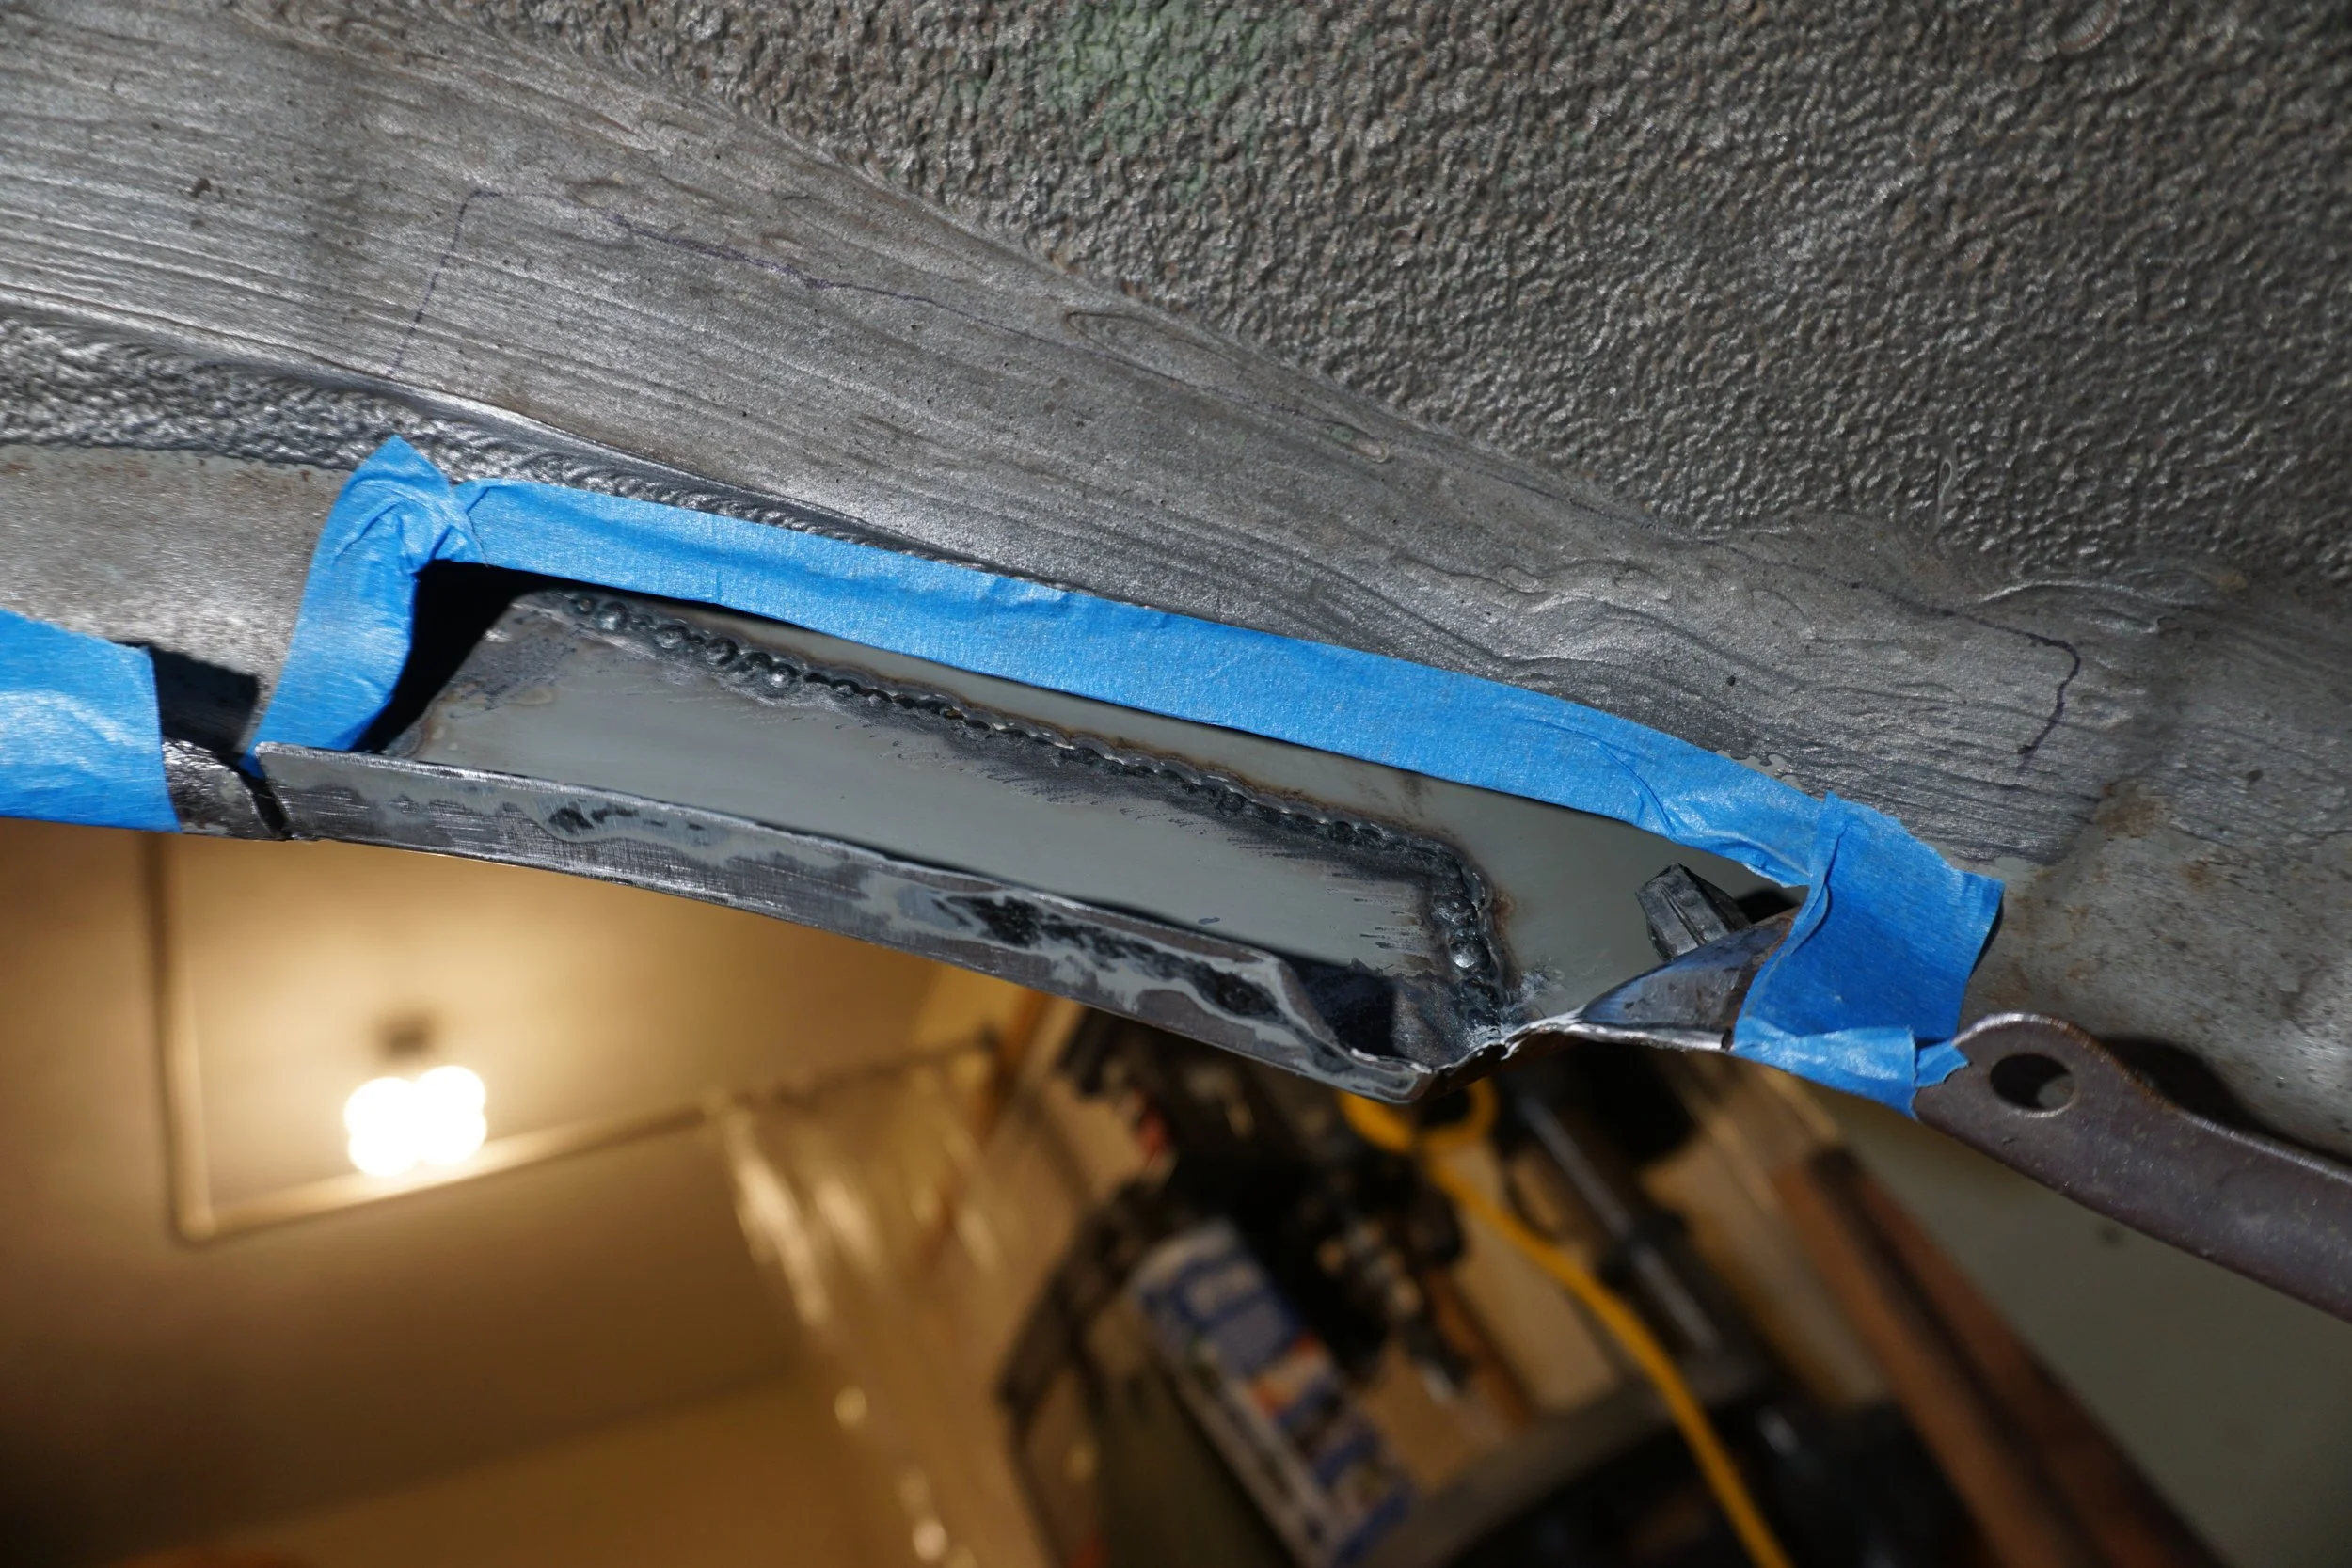
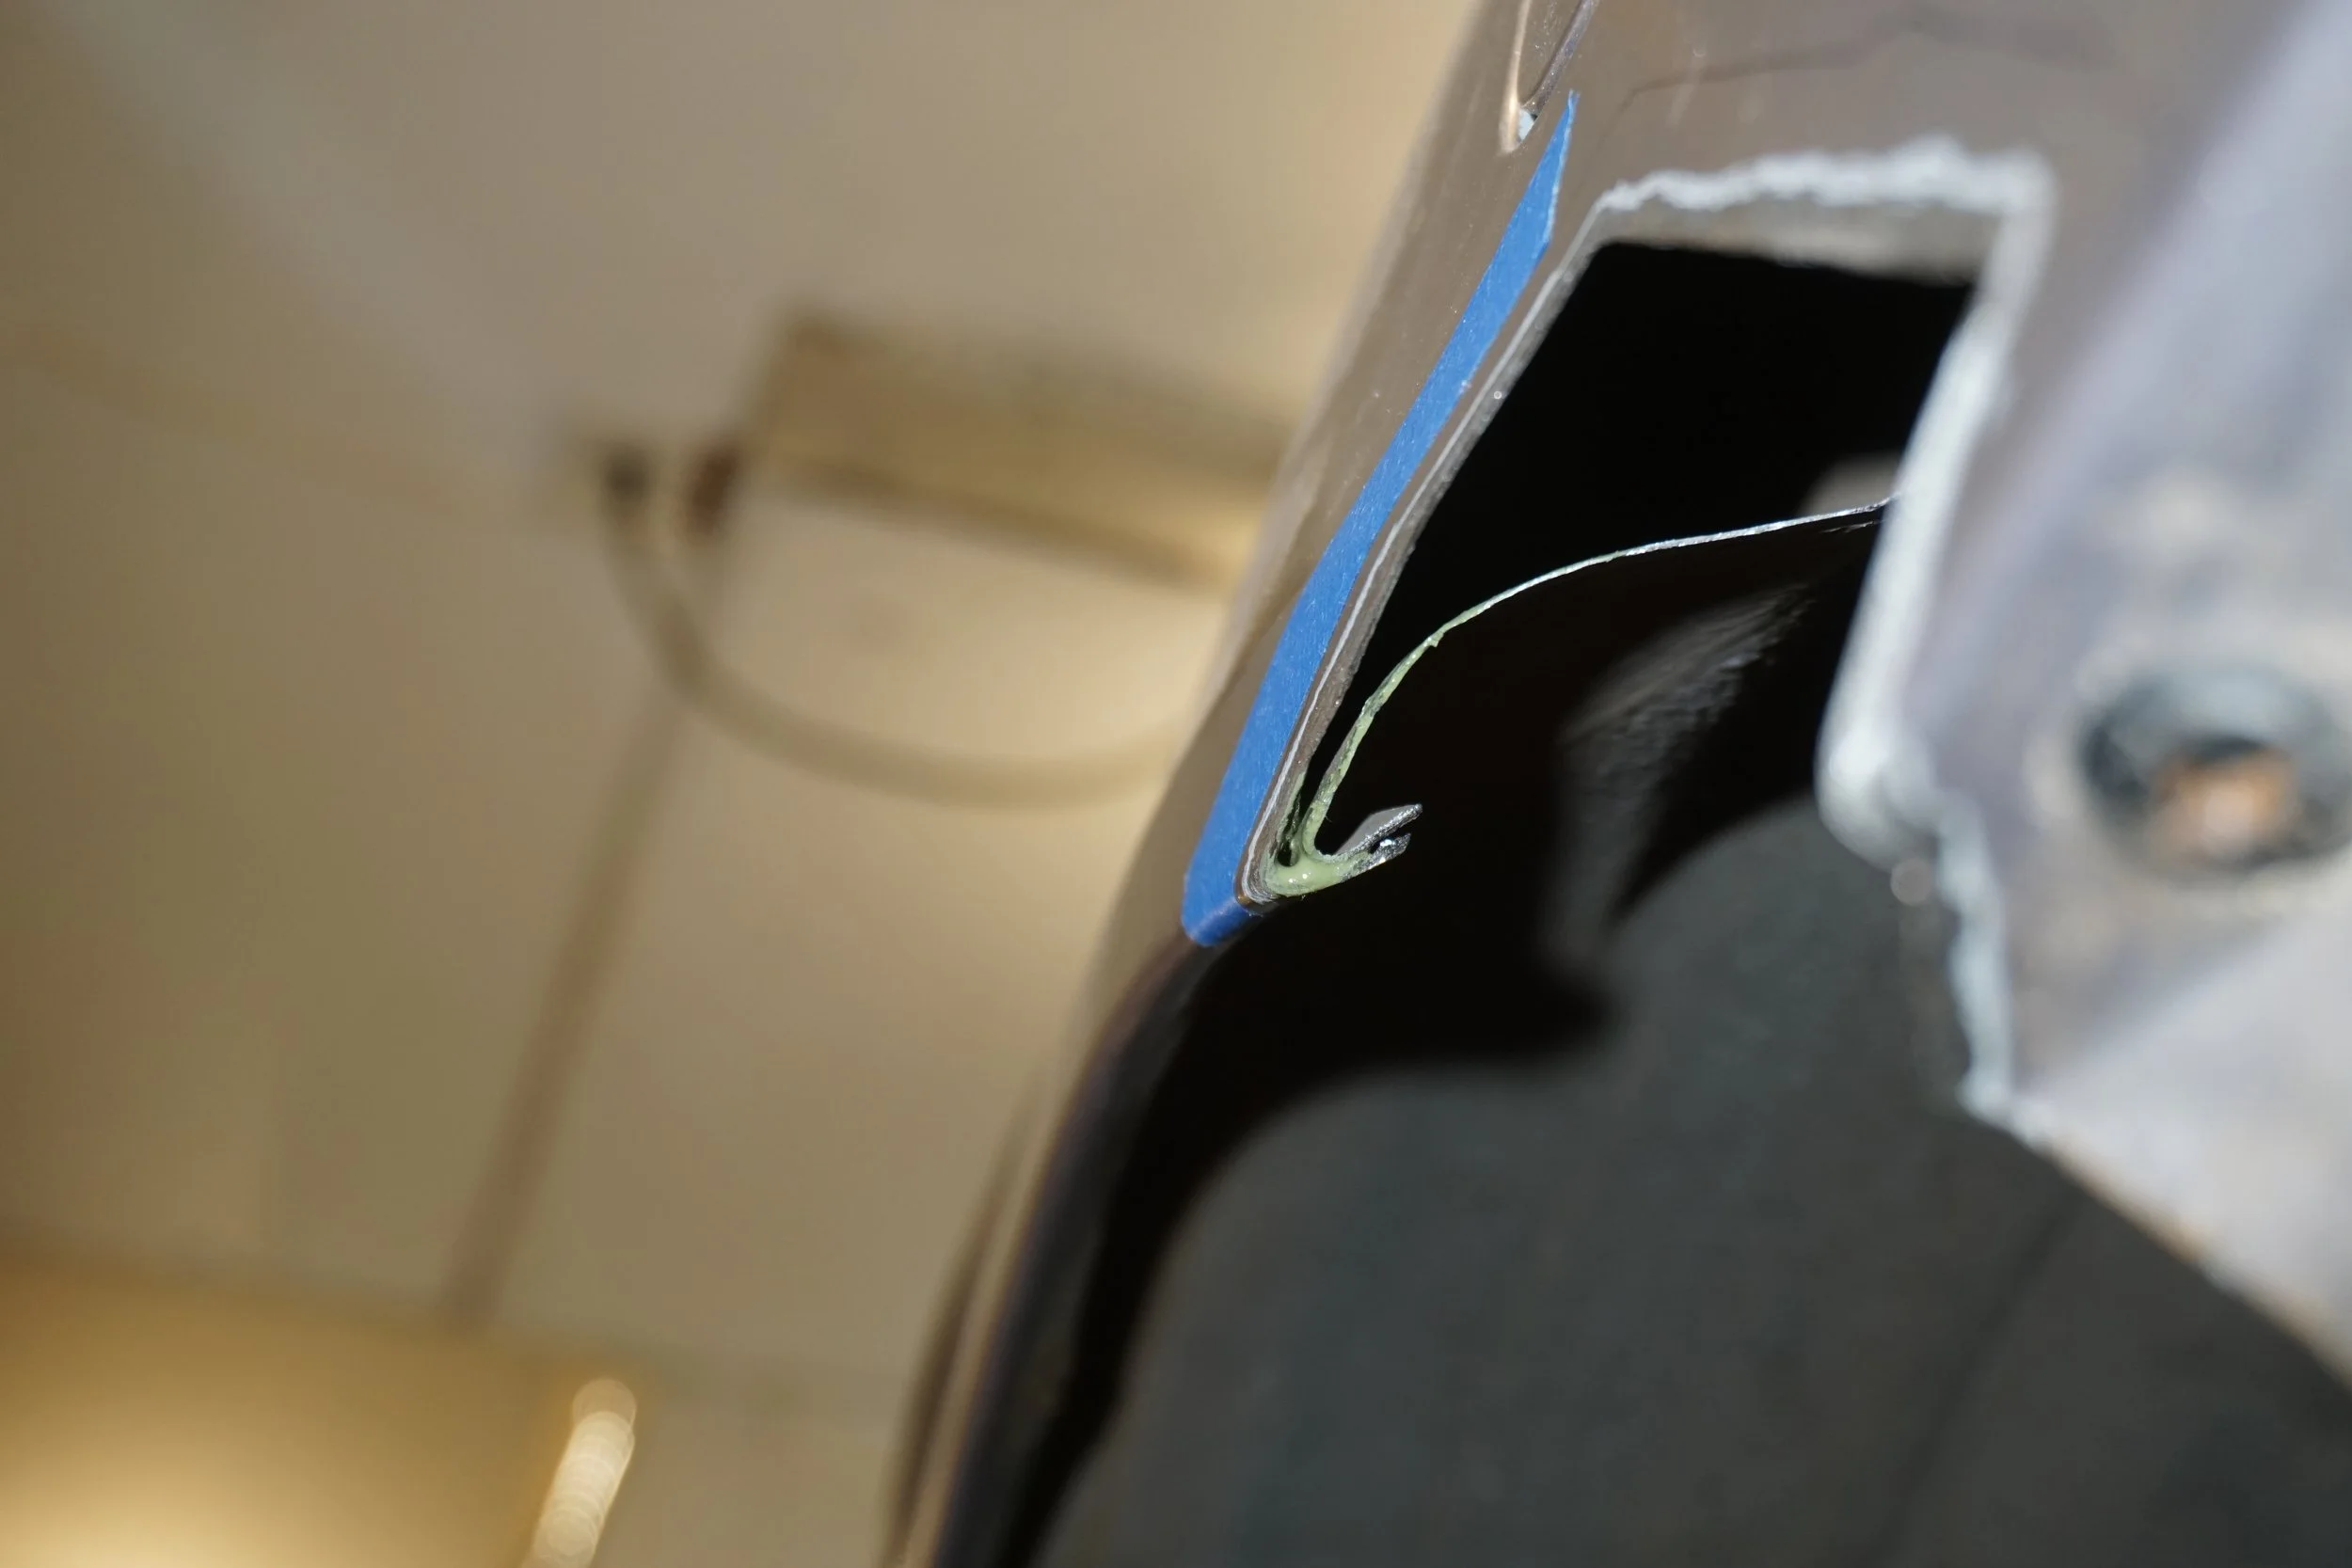
The scary part is that I don't think I'll know for sure if it's lined up perfectly until I spray the clear coat on it. That's what happened when I did the M3 last year. You just can't see stuff like that when there are different finishes and gloss levels. The best idea I had was to put painters tape over the seams and curves to trick my eyes into seeing the whole picture instead of individual sections. It kinda works?
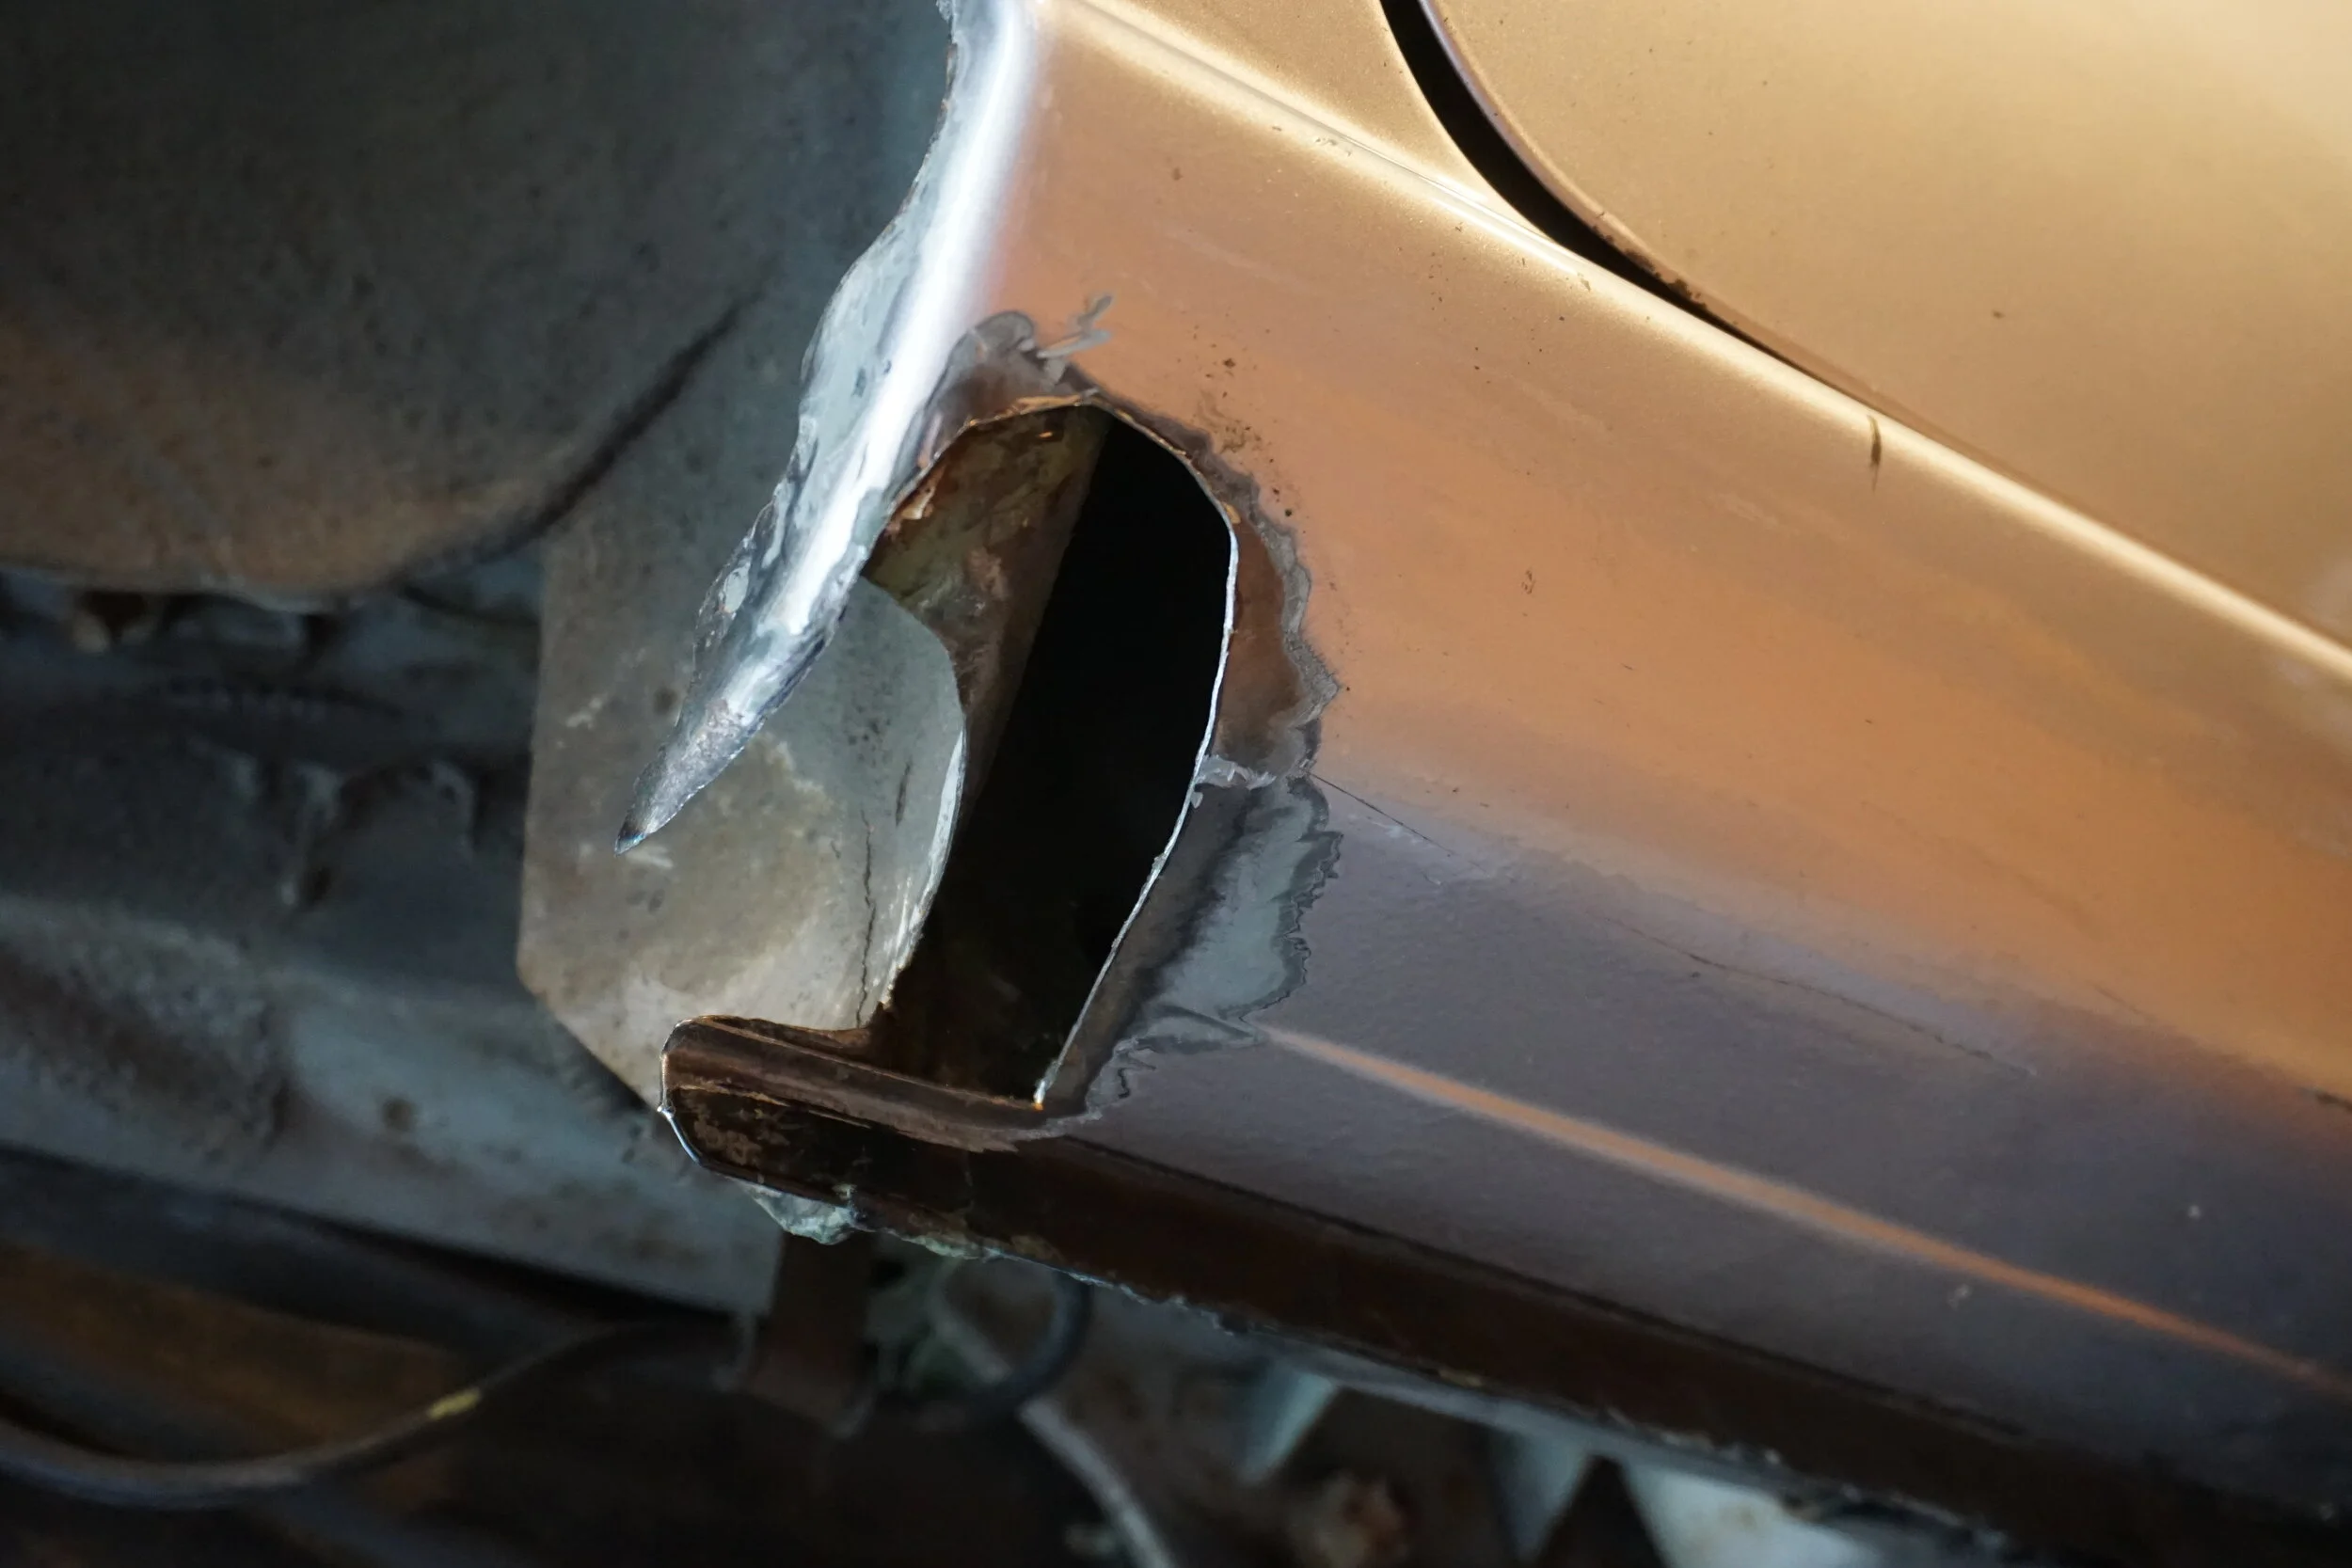
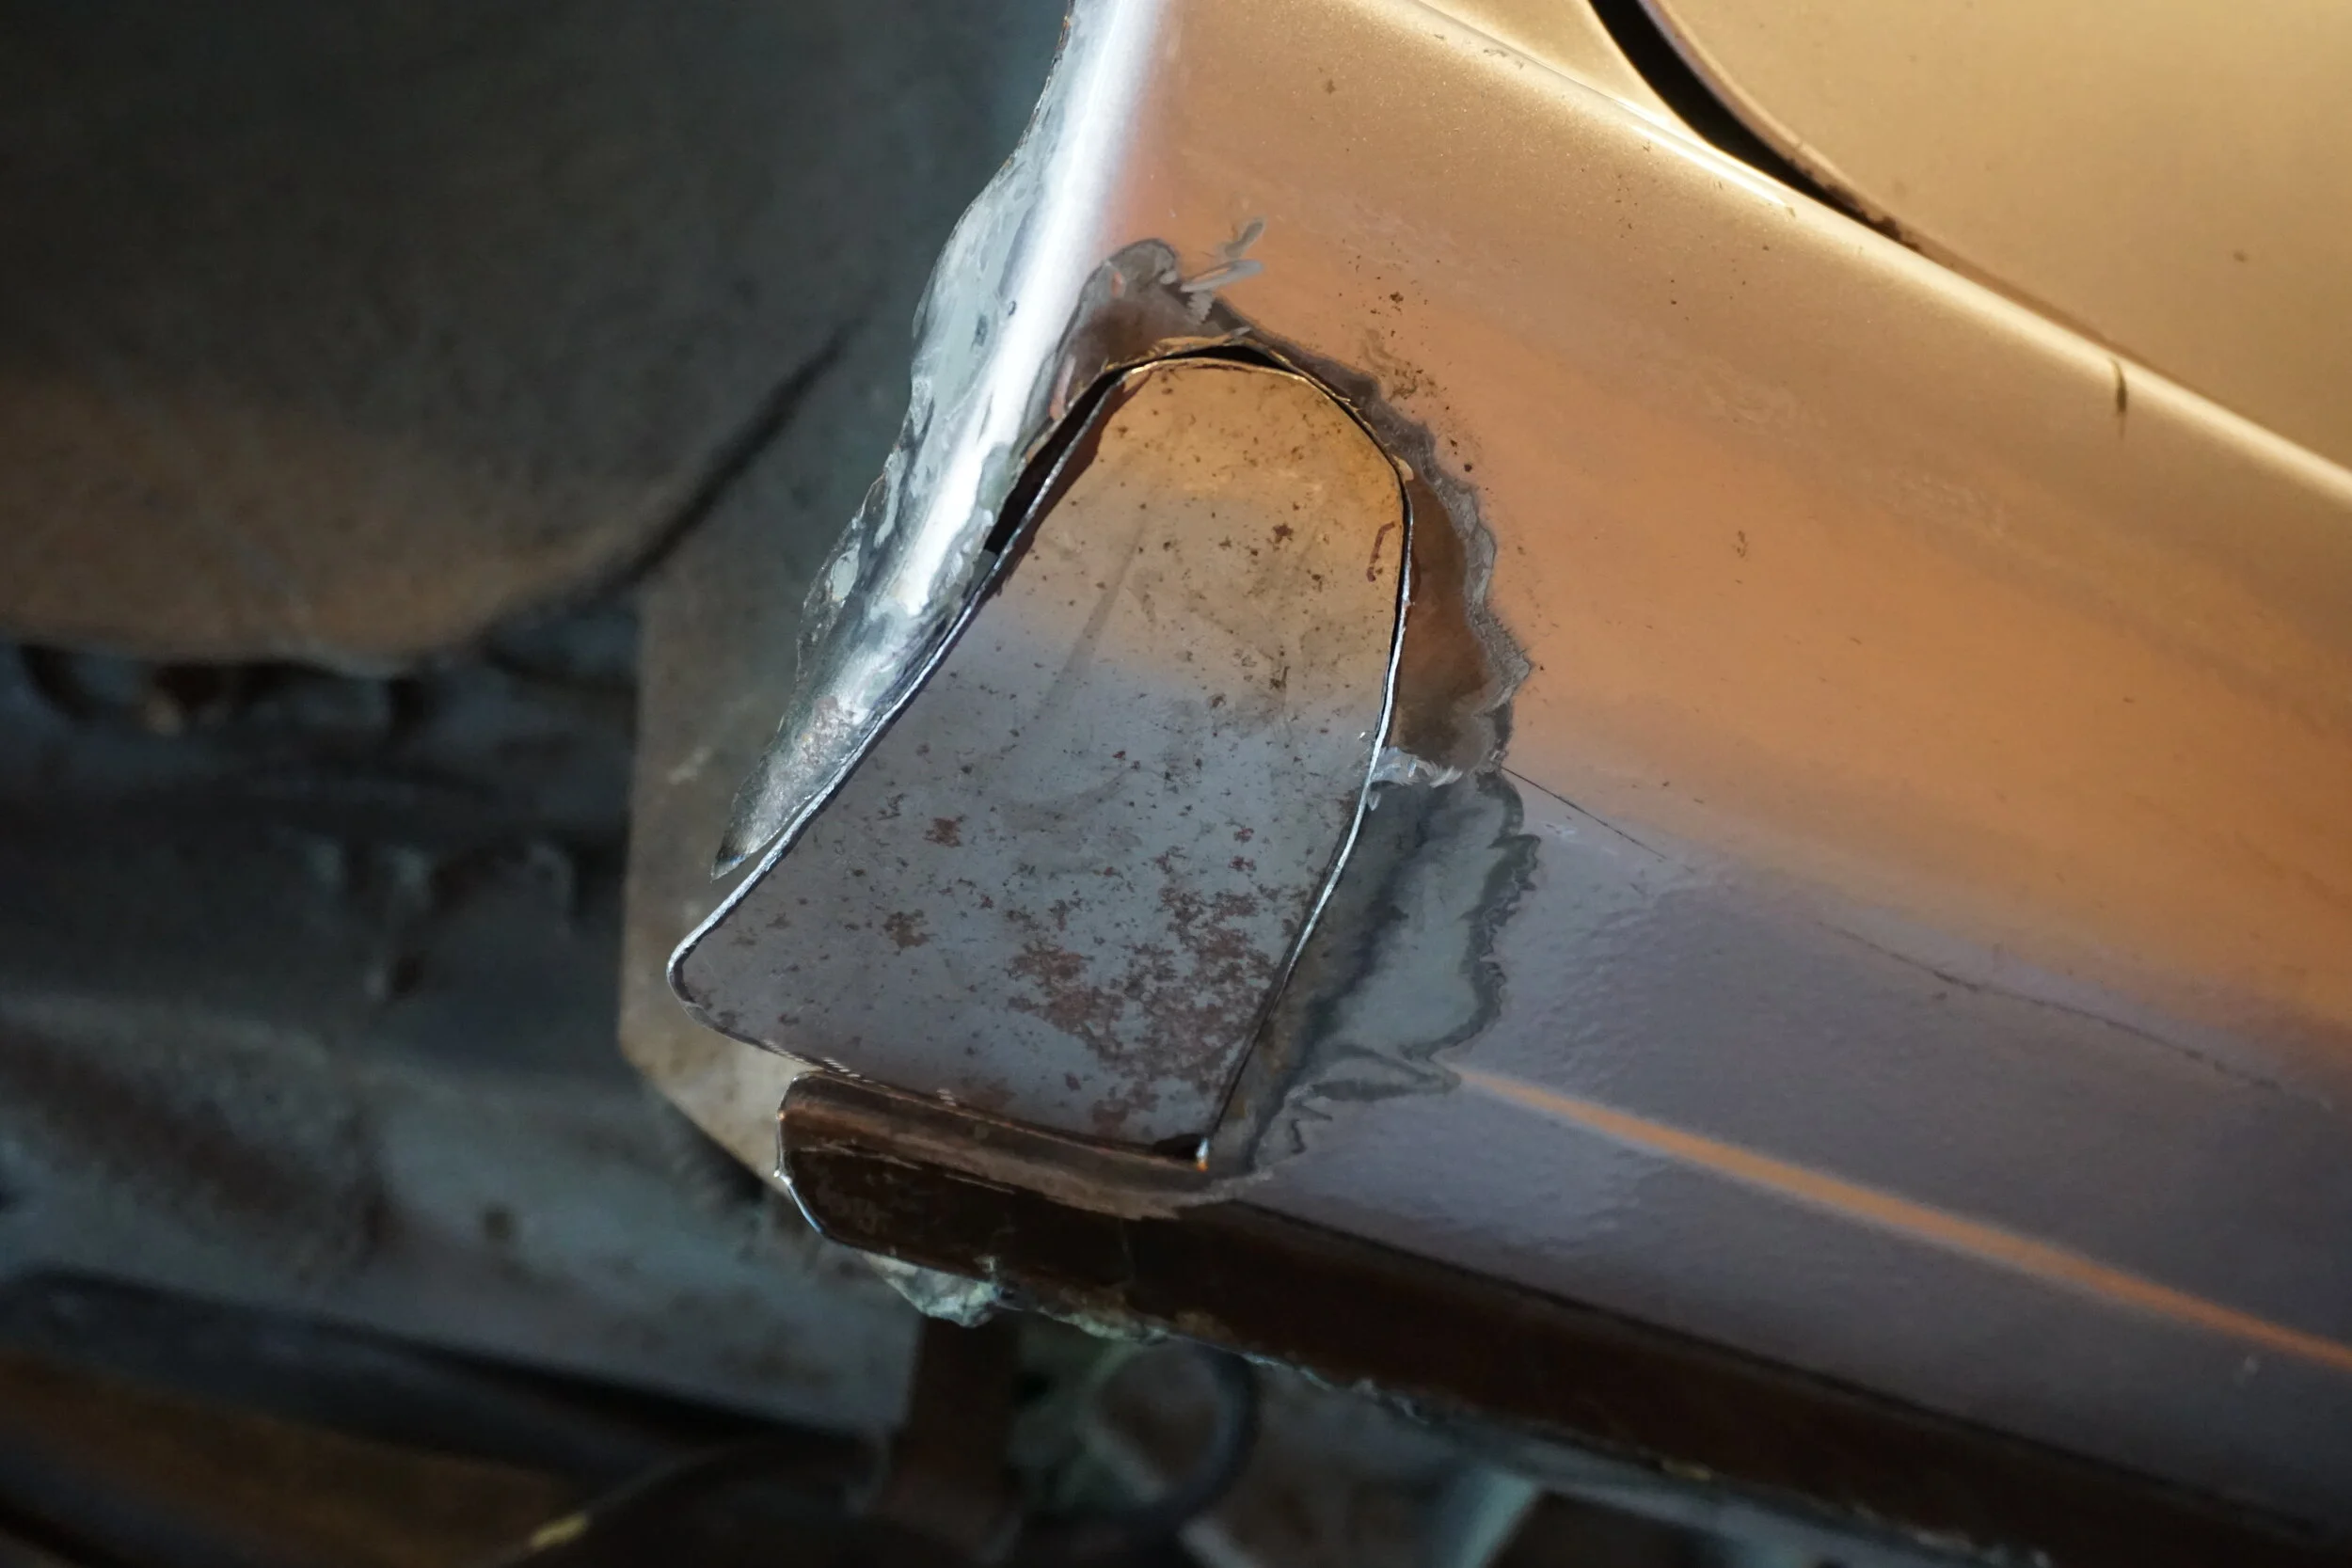
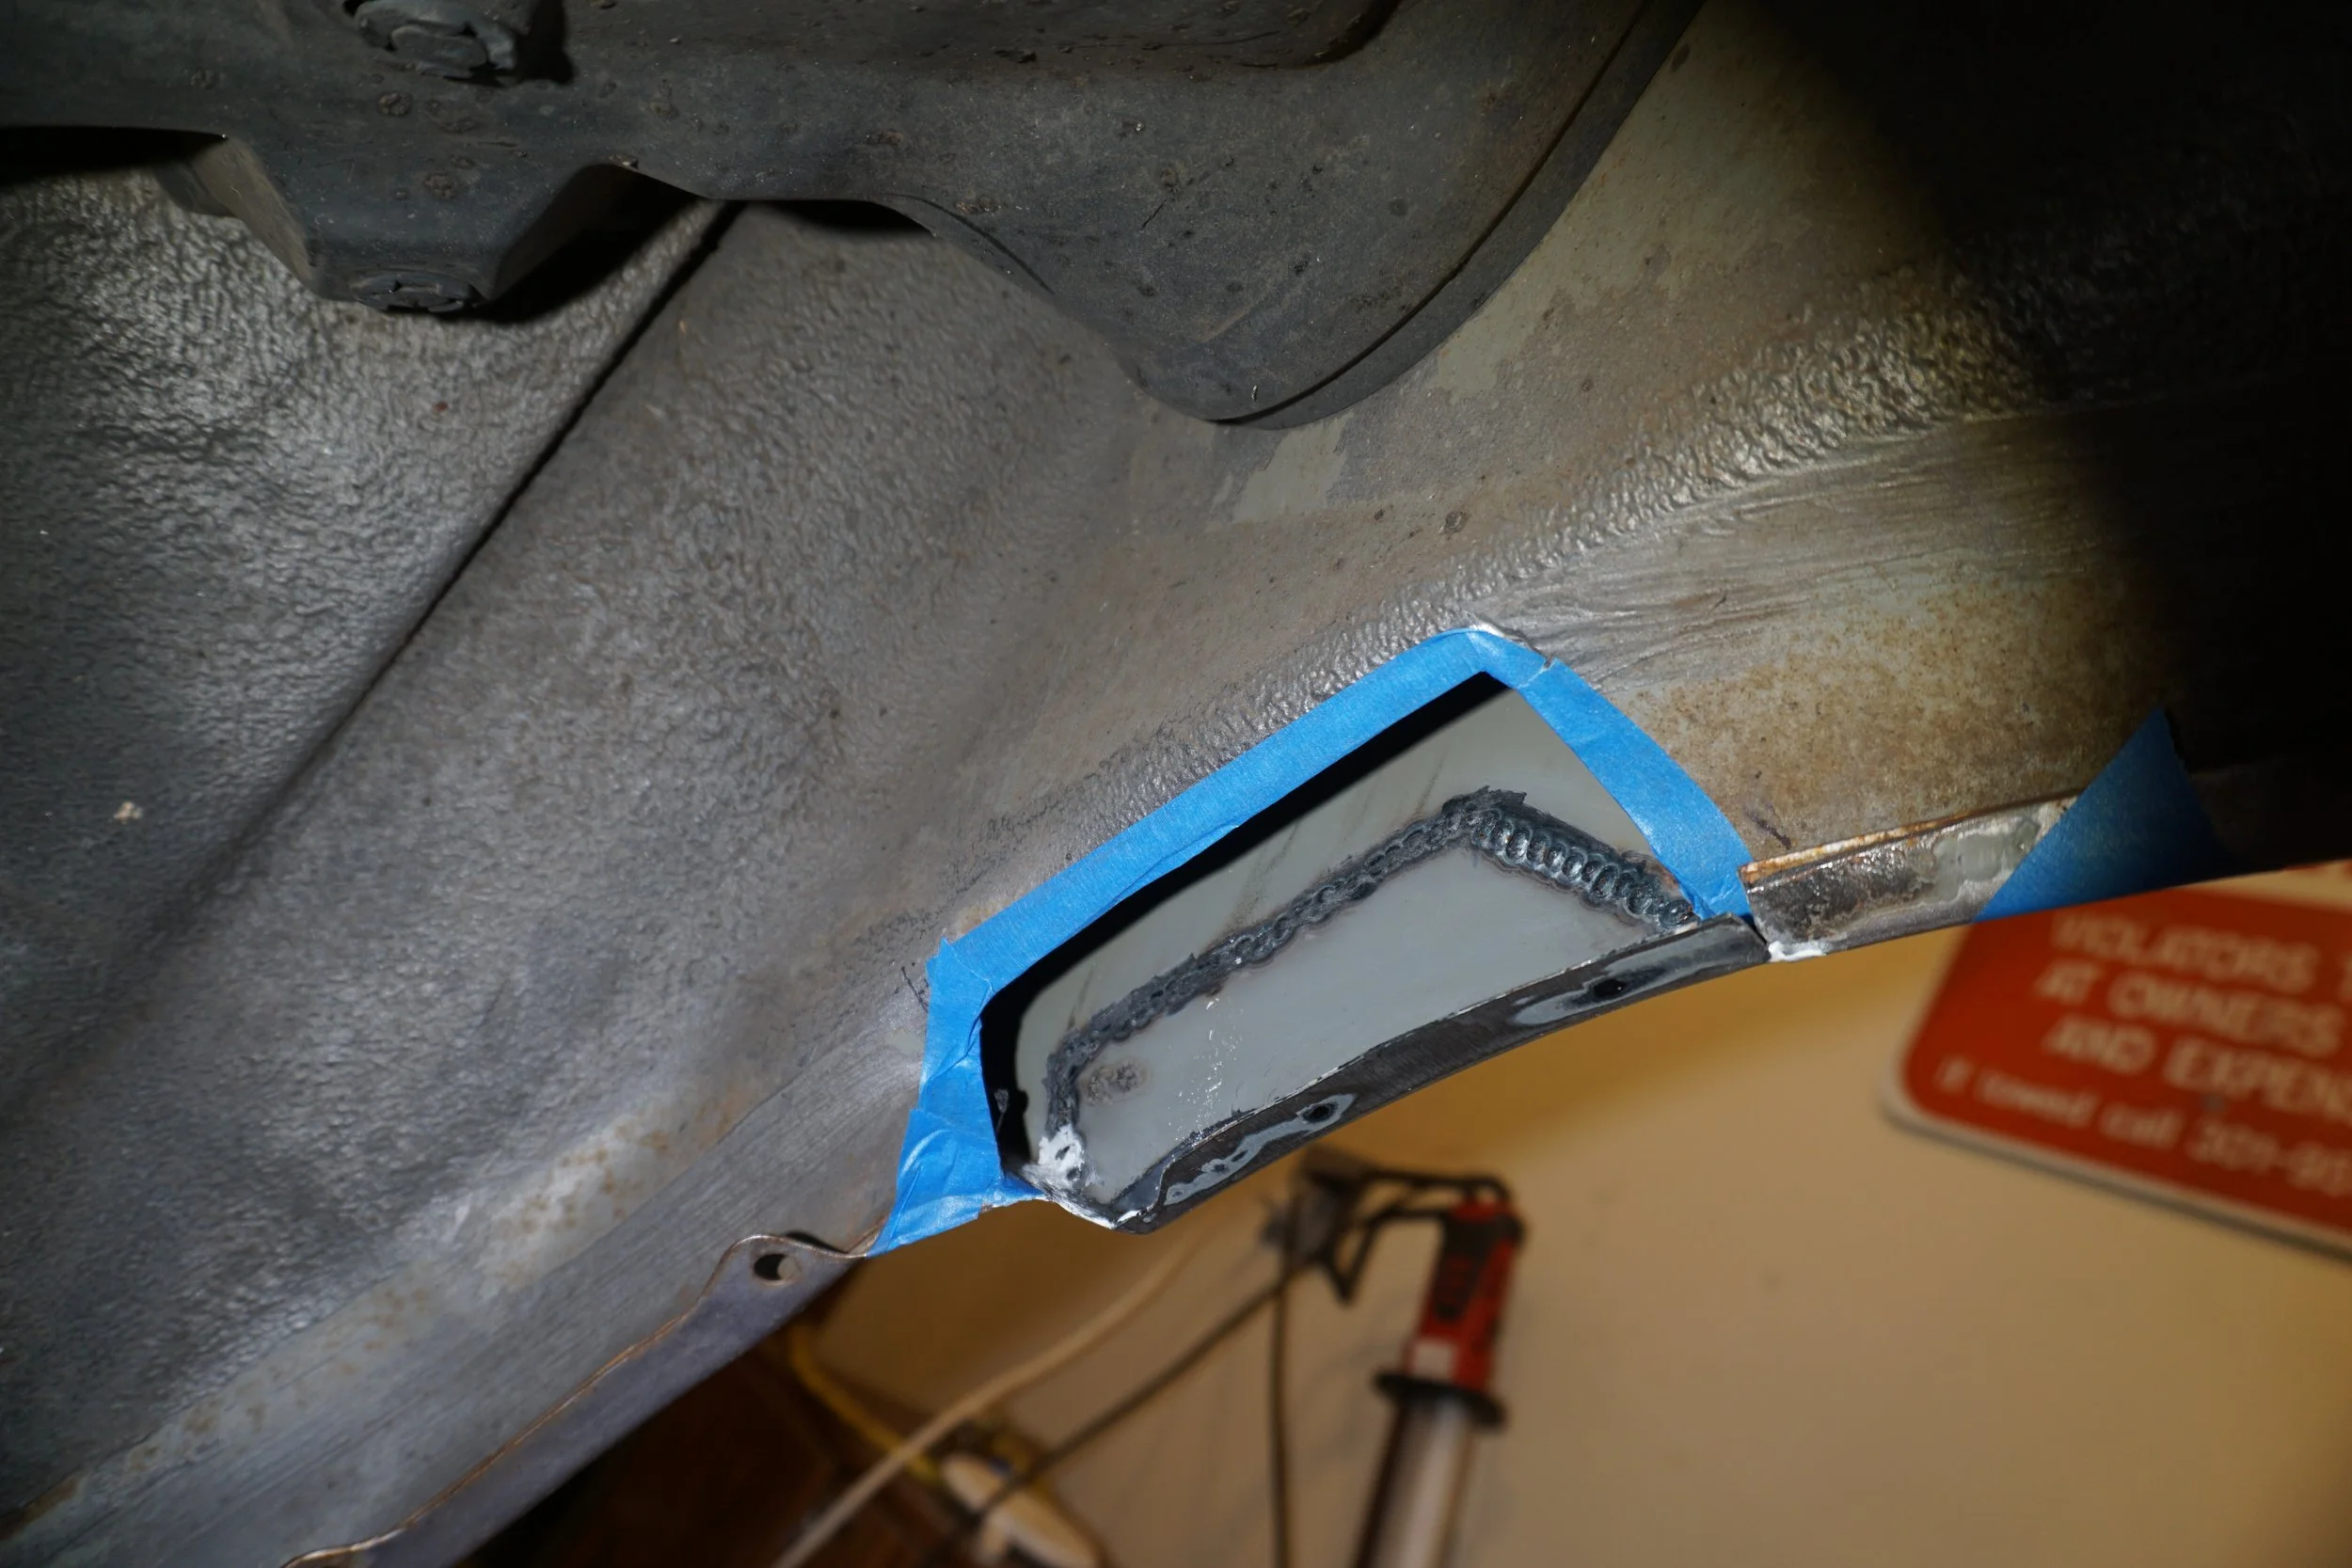
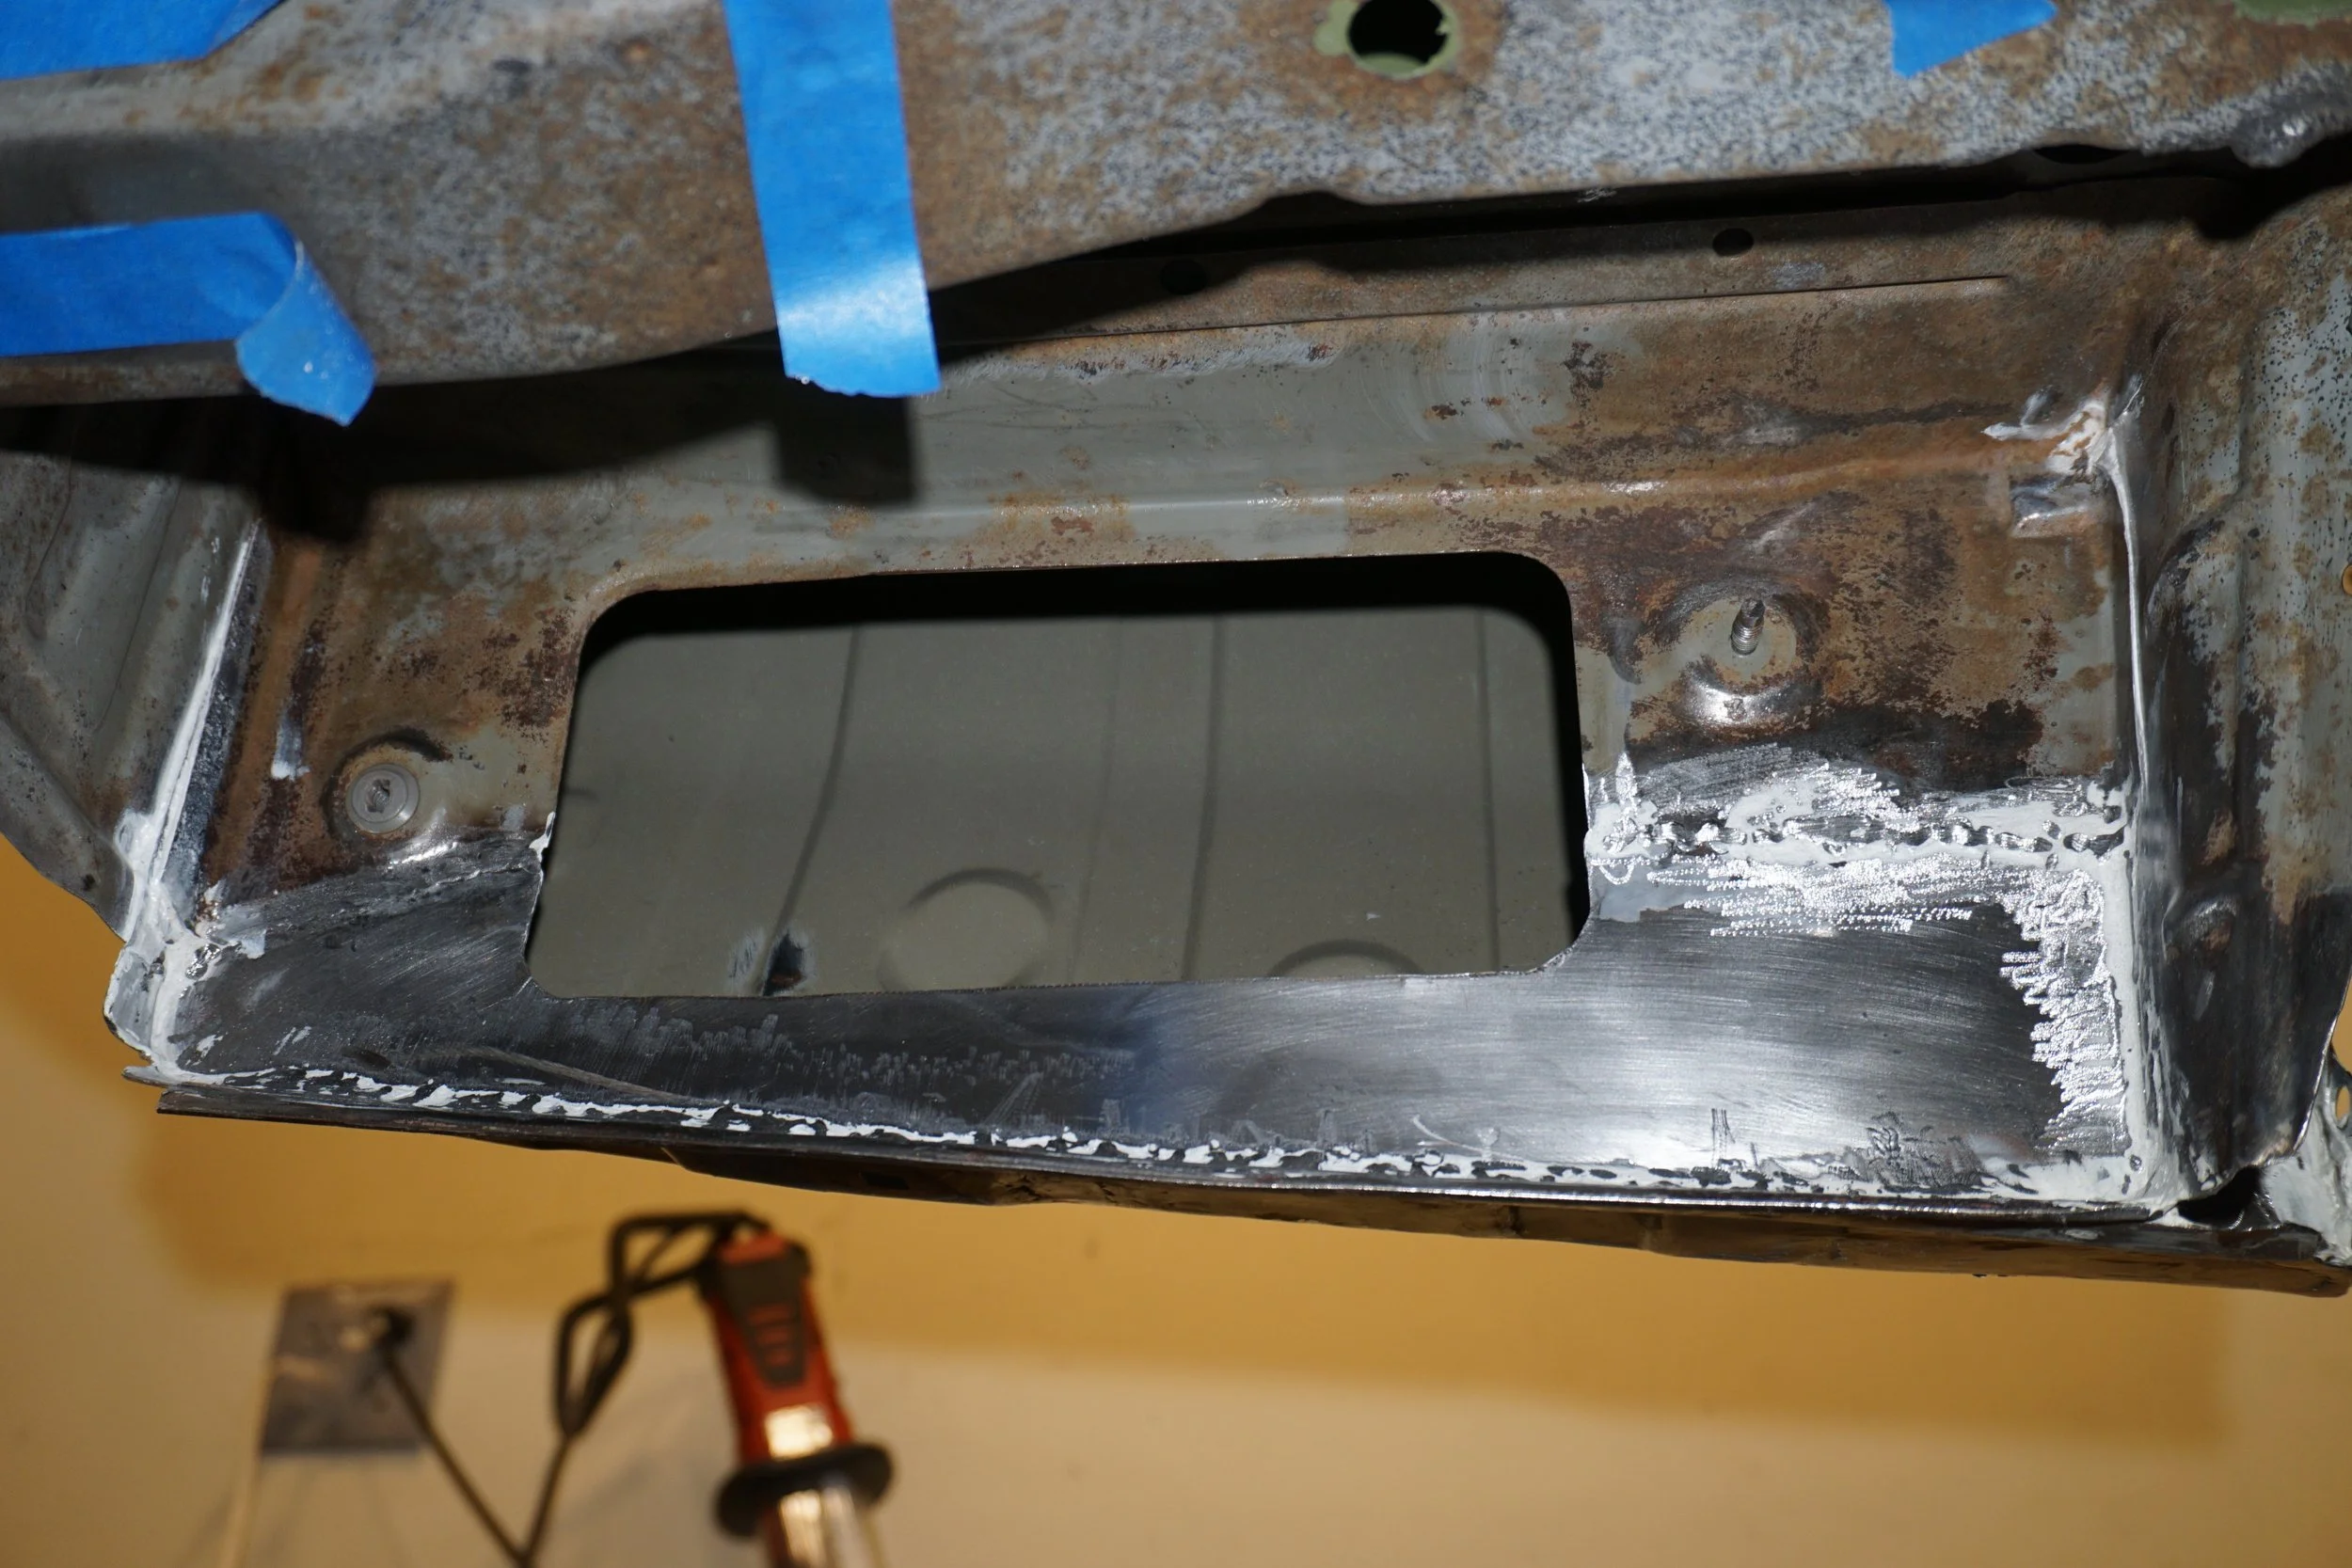
Cutting the inner panel was of course more difficult due to tighter access.
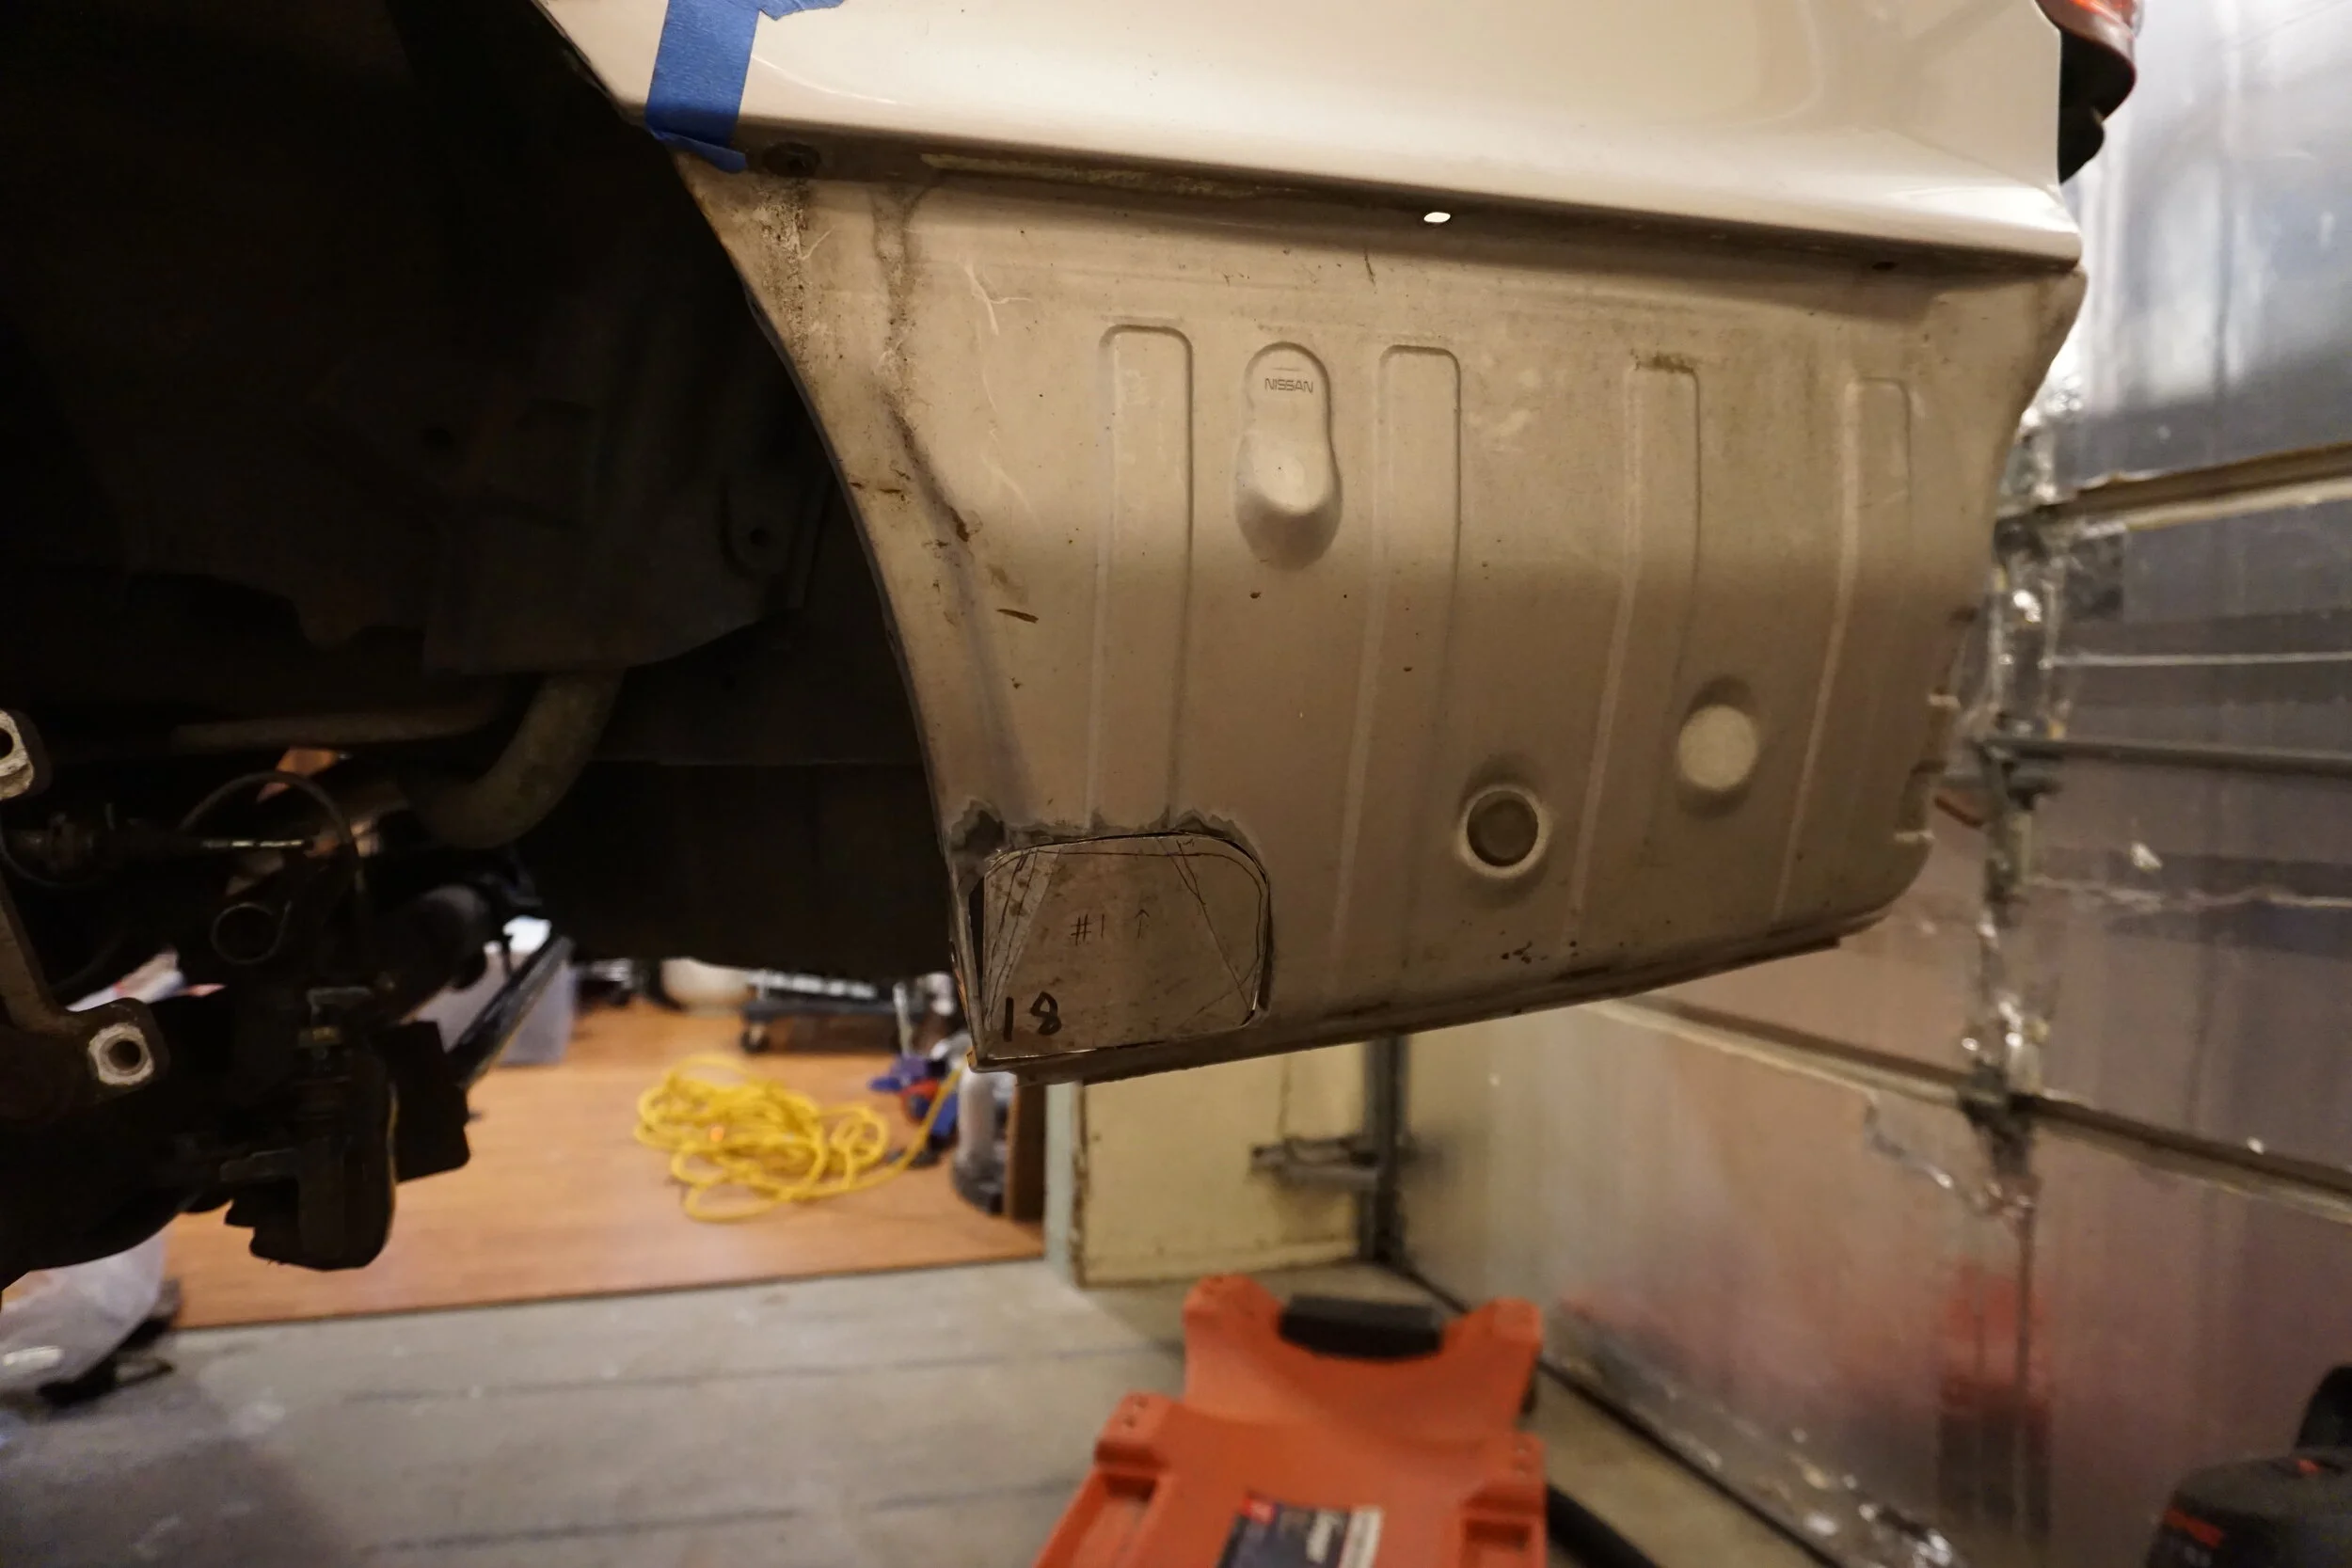
"New" vs old for the passenger side:
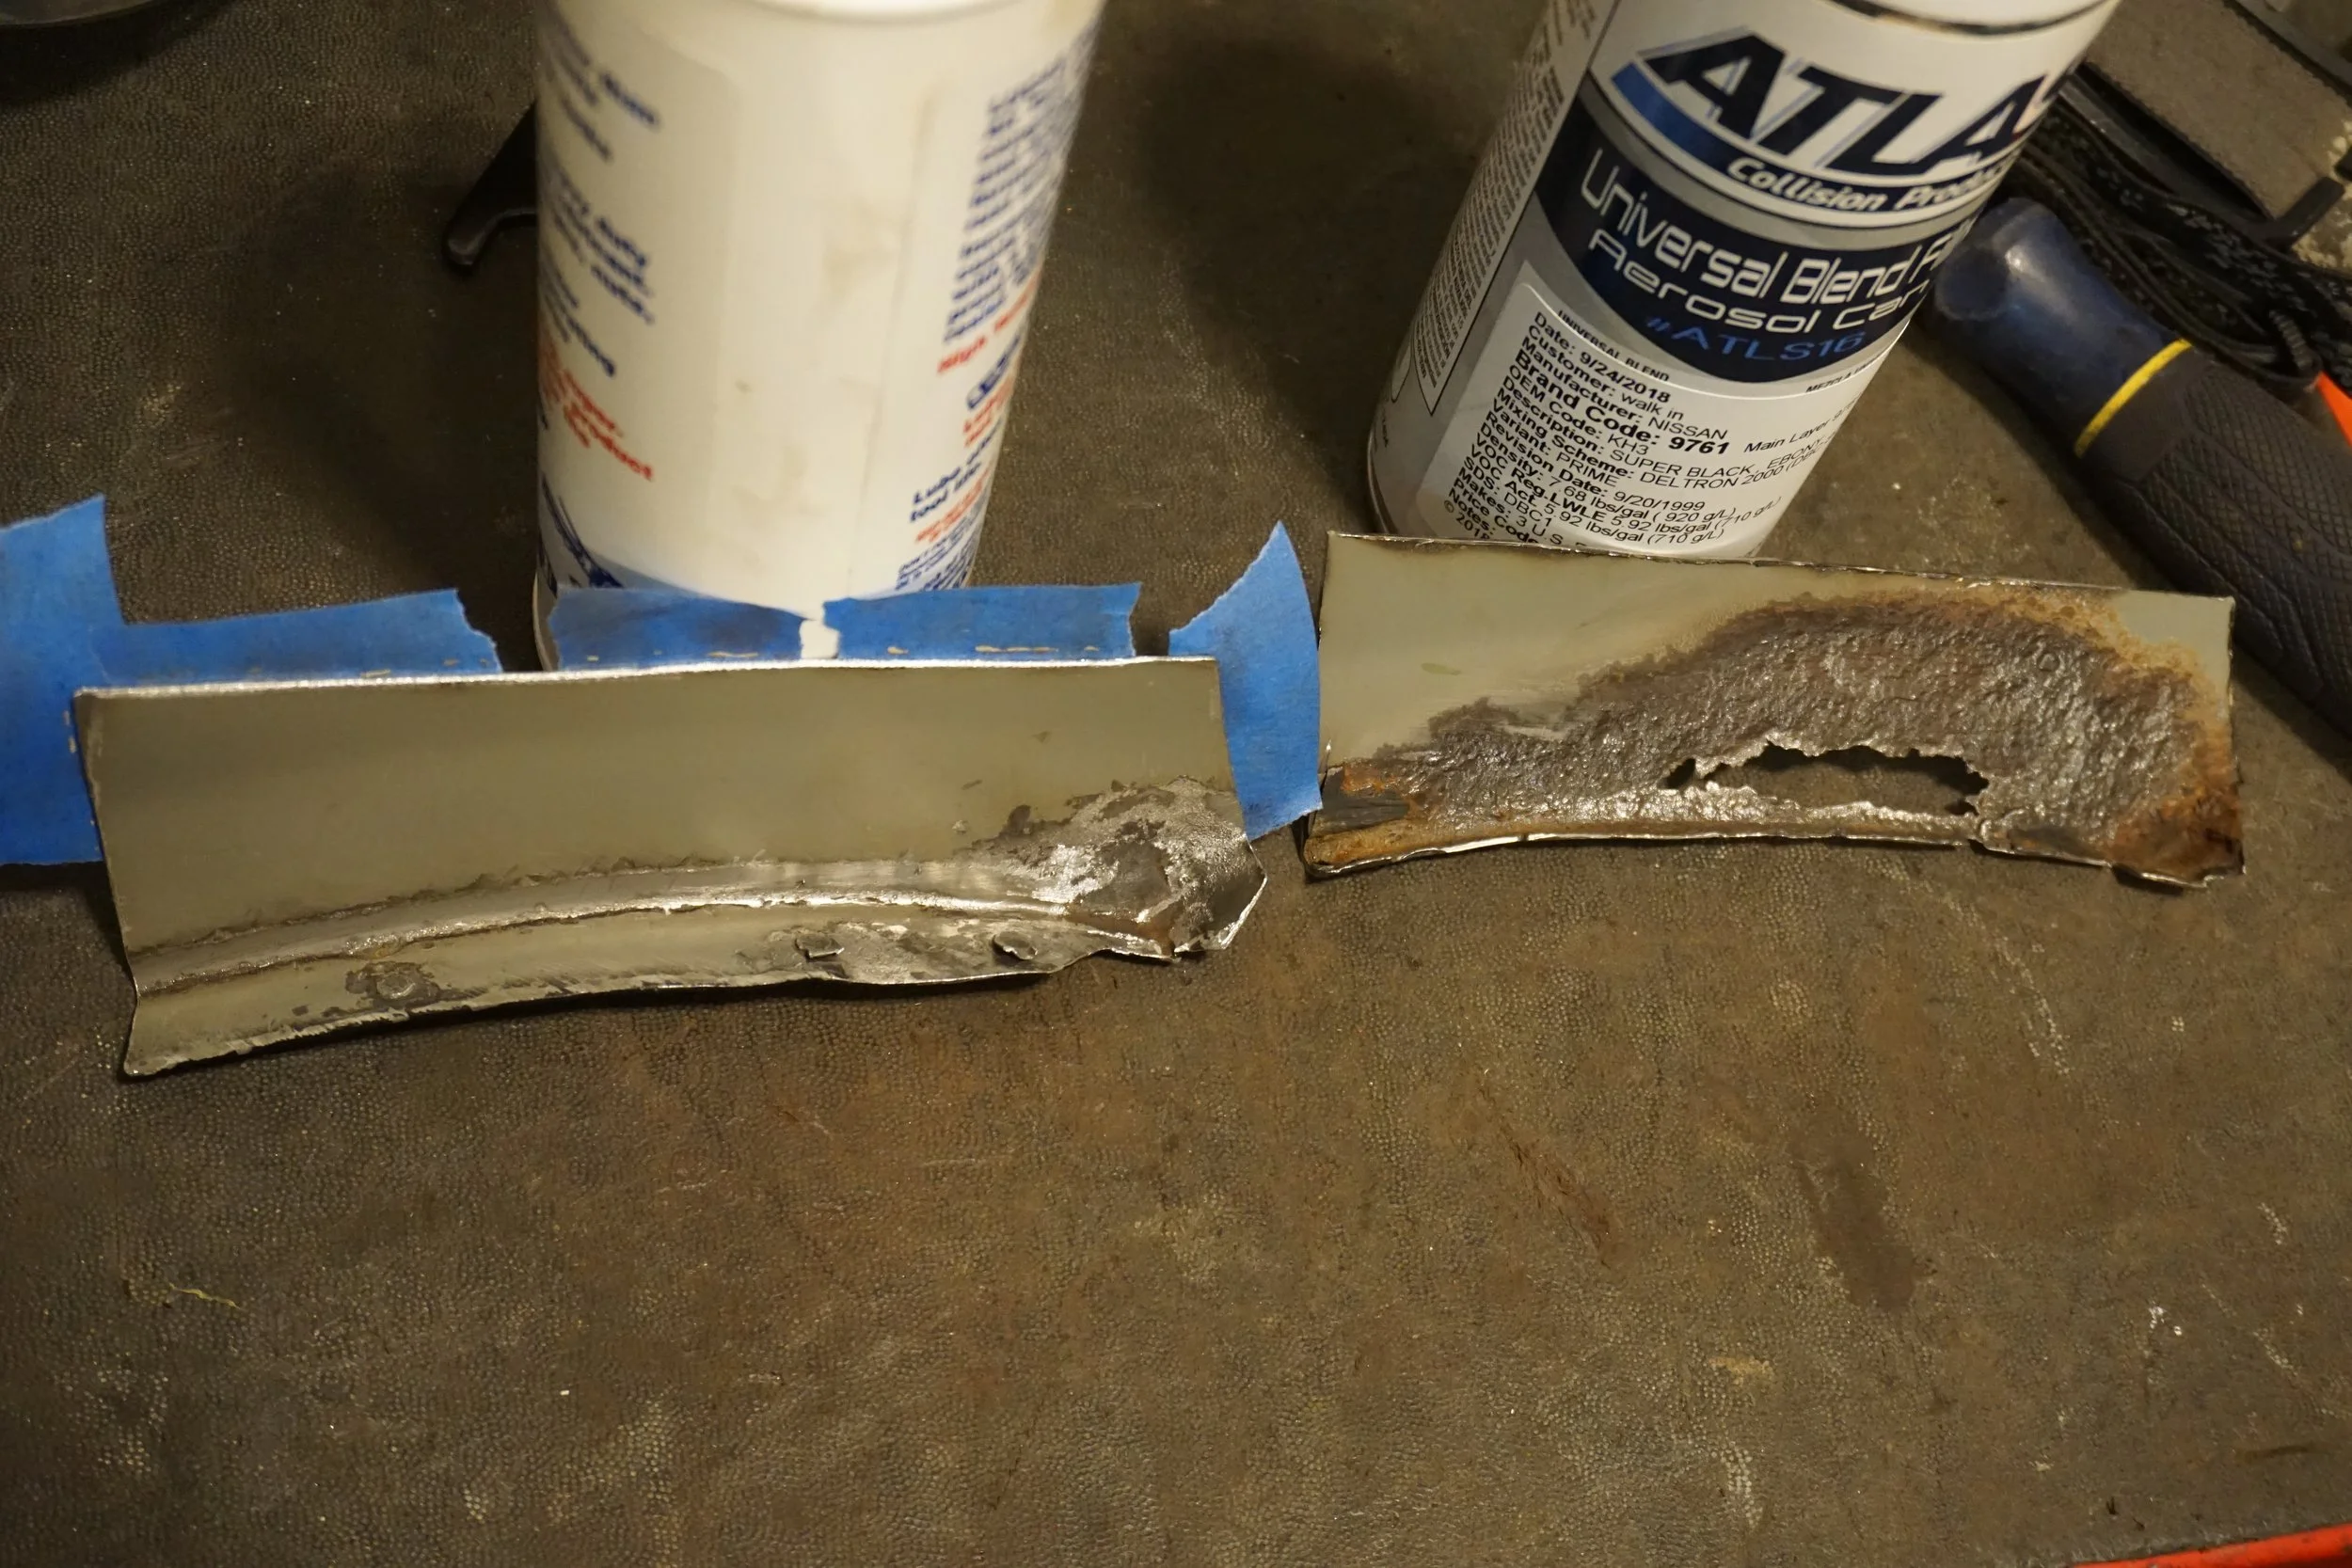
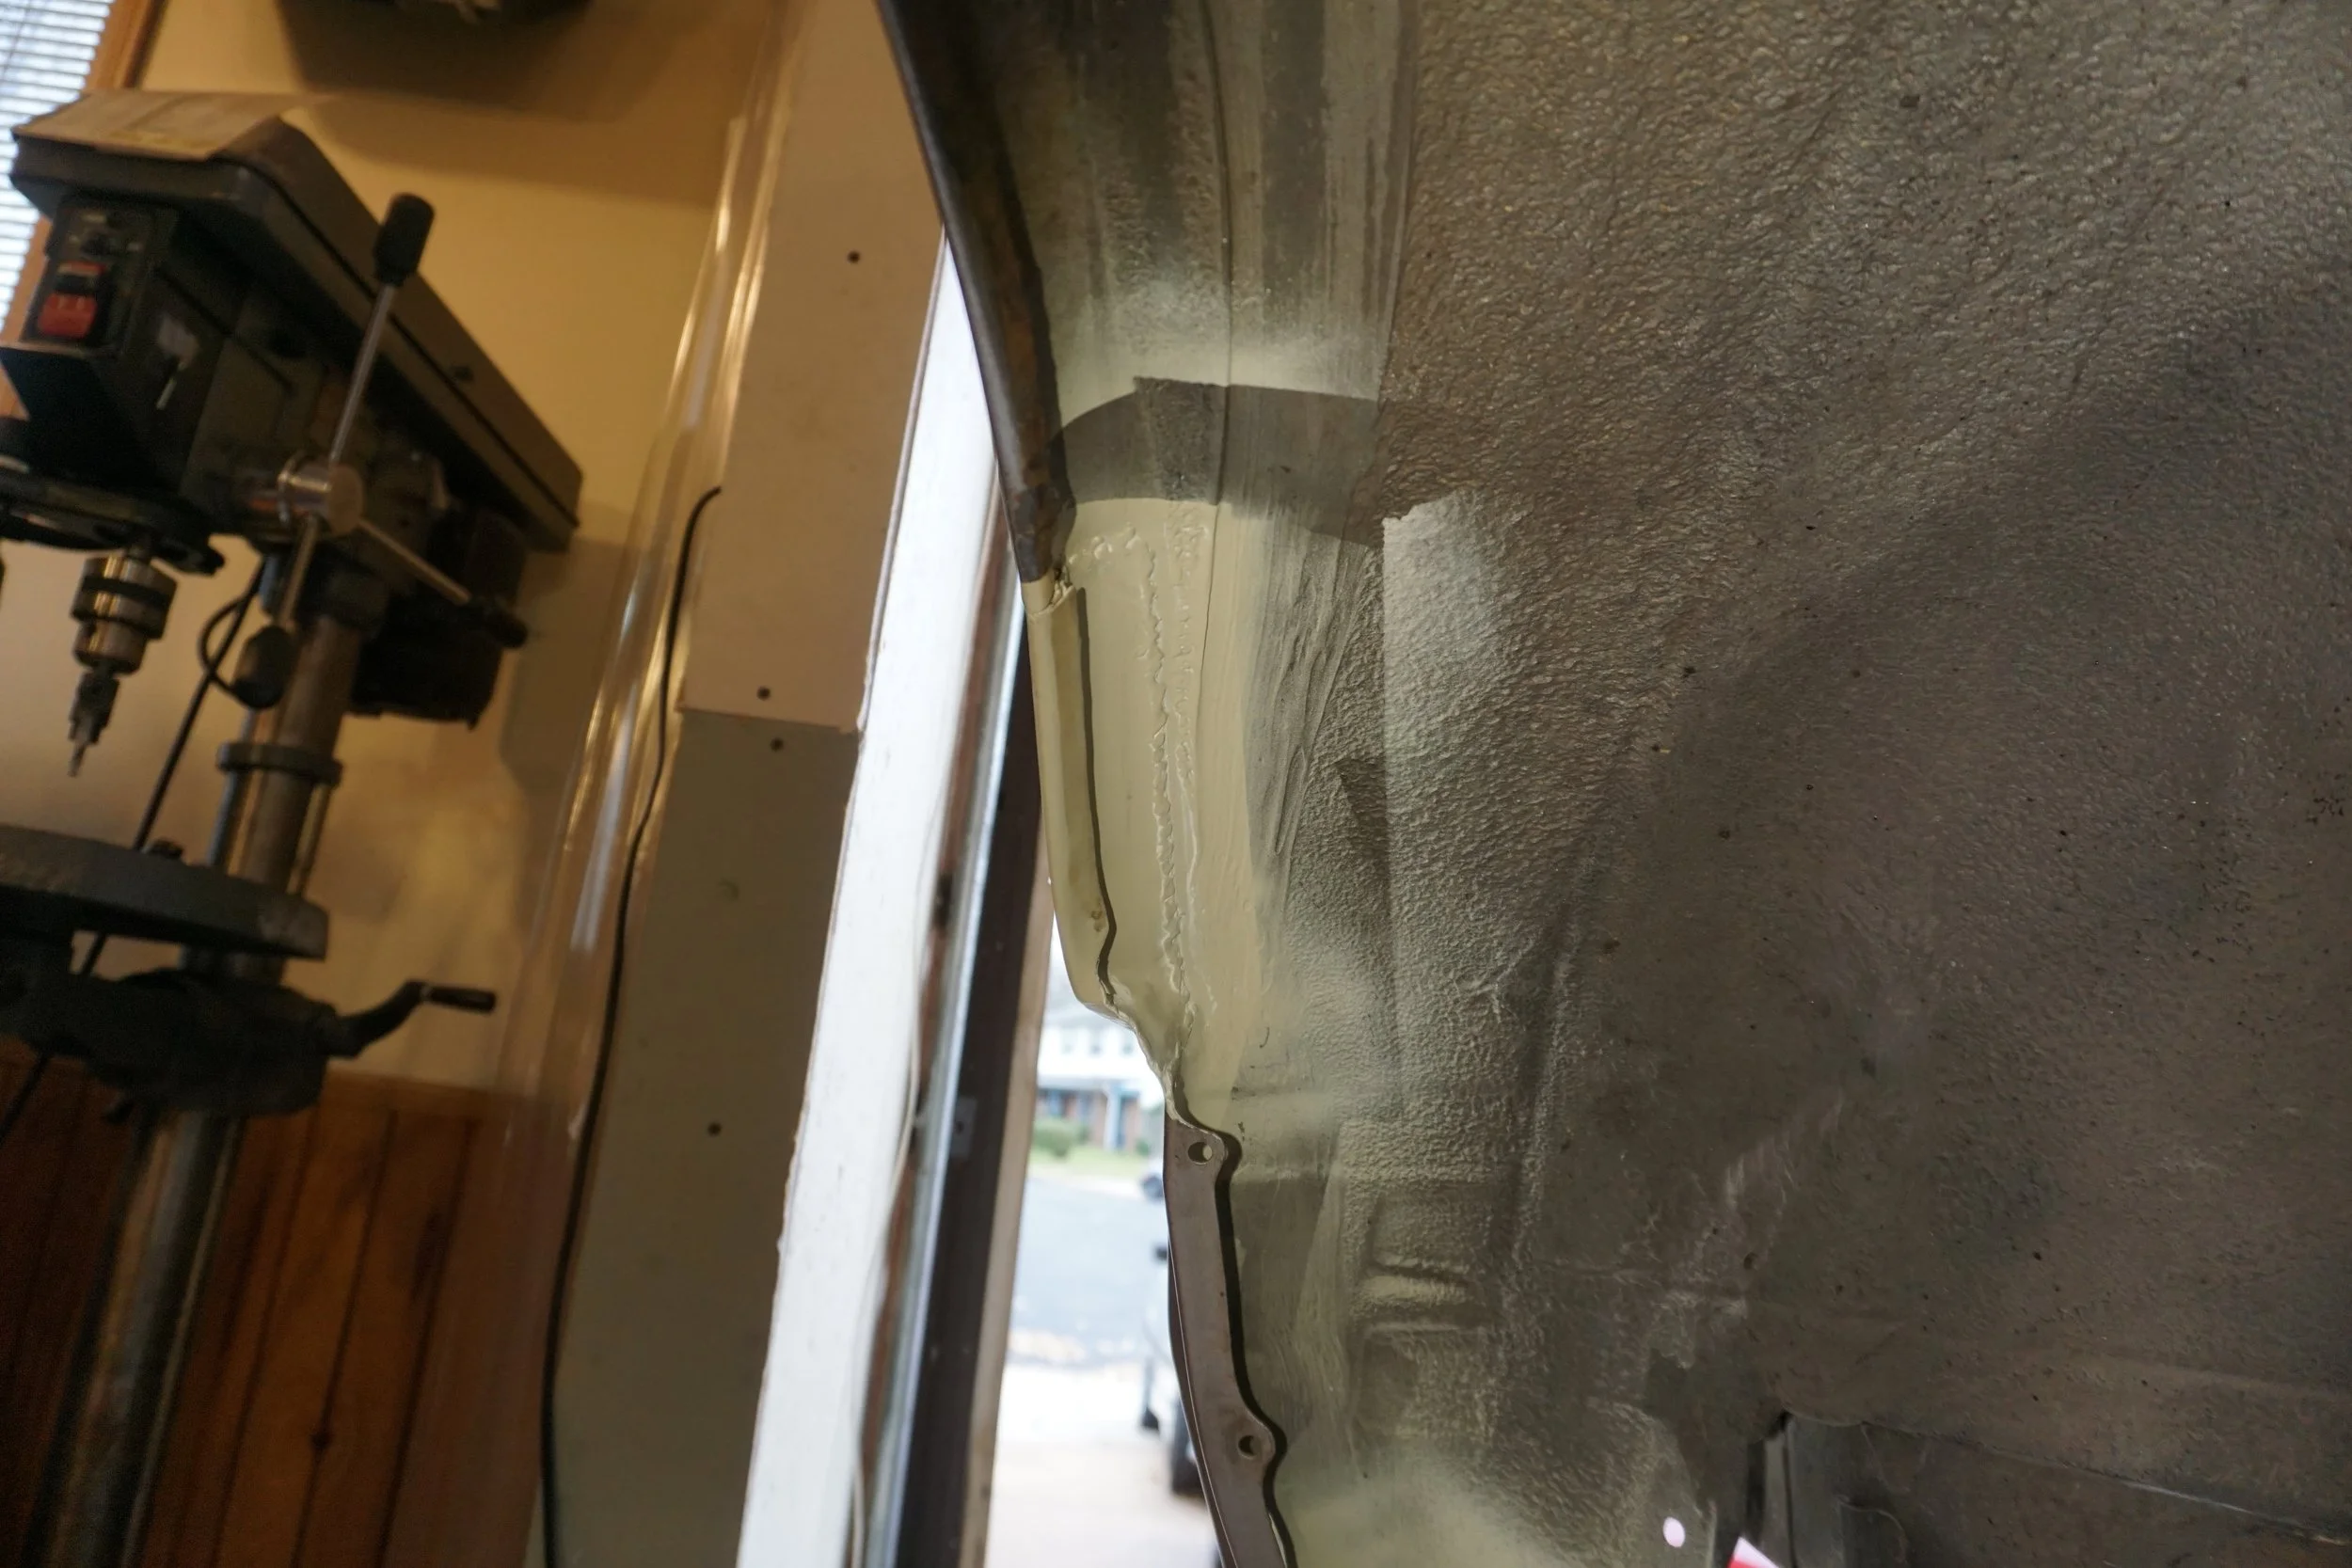
After getting everything mocked up on the PS, I moved on to the DS and refined the process a bit. Started by cutting the inner again to see the back condition of the outer:

Dear god
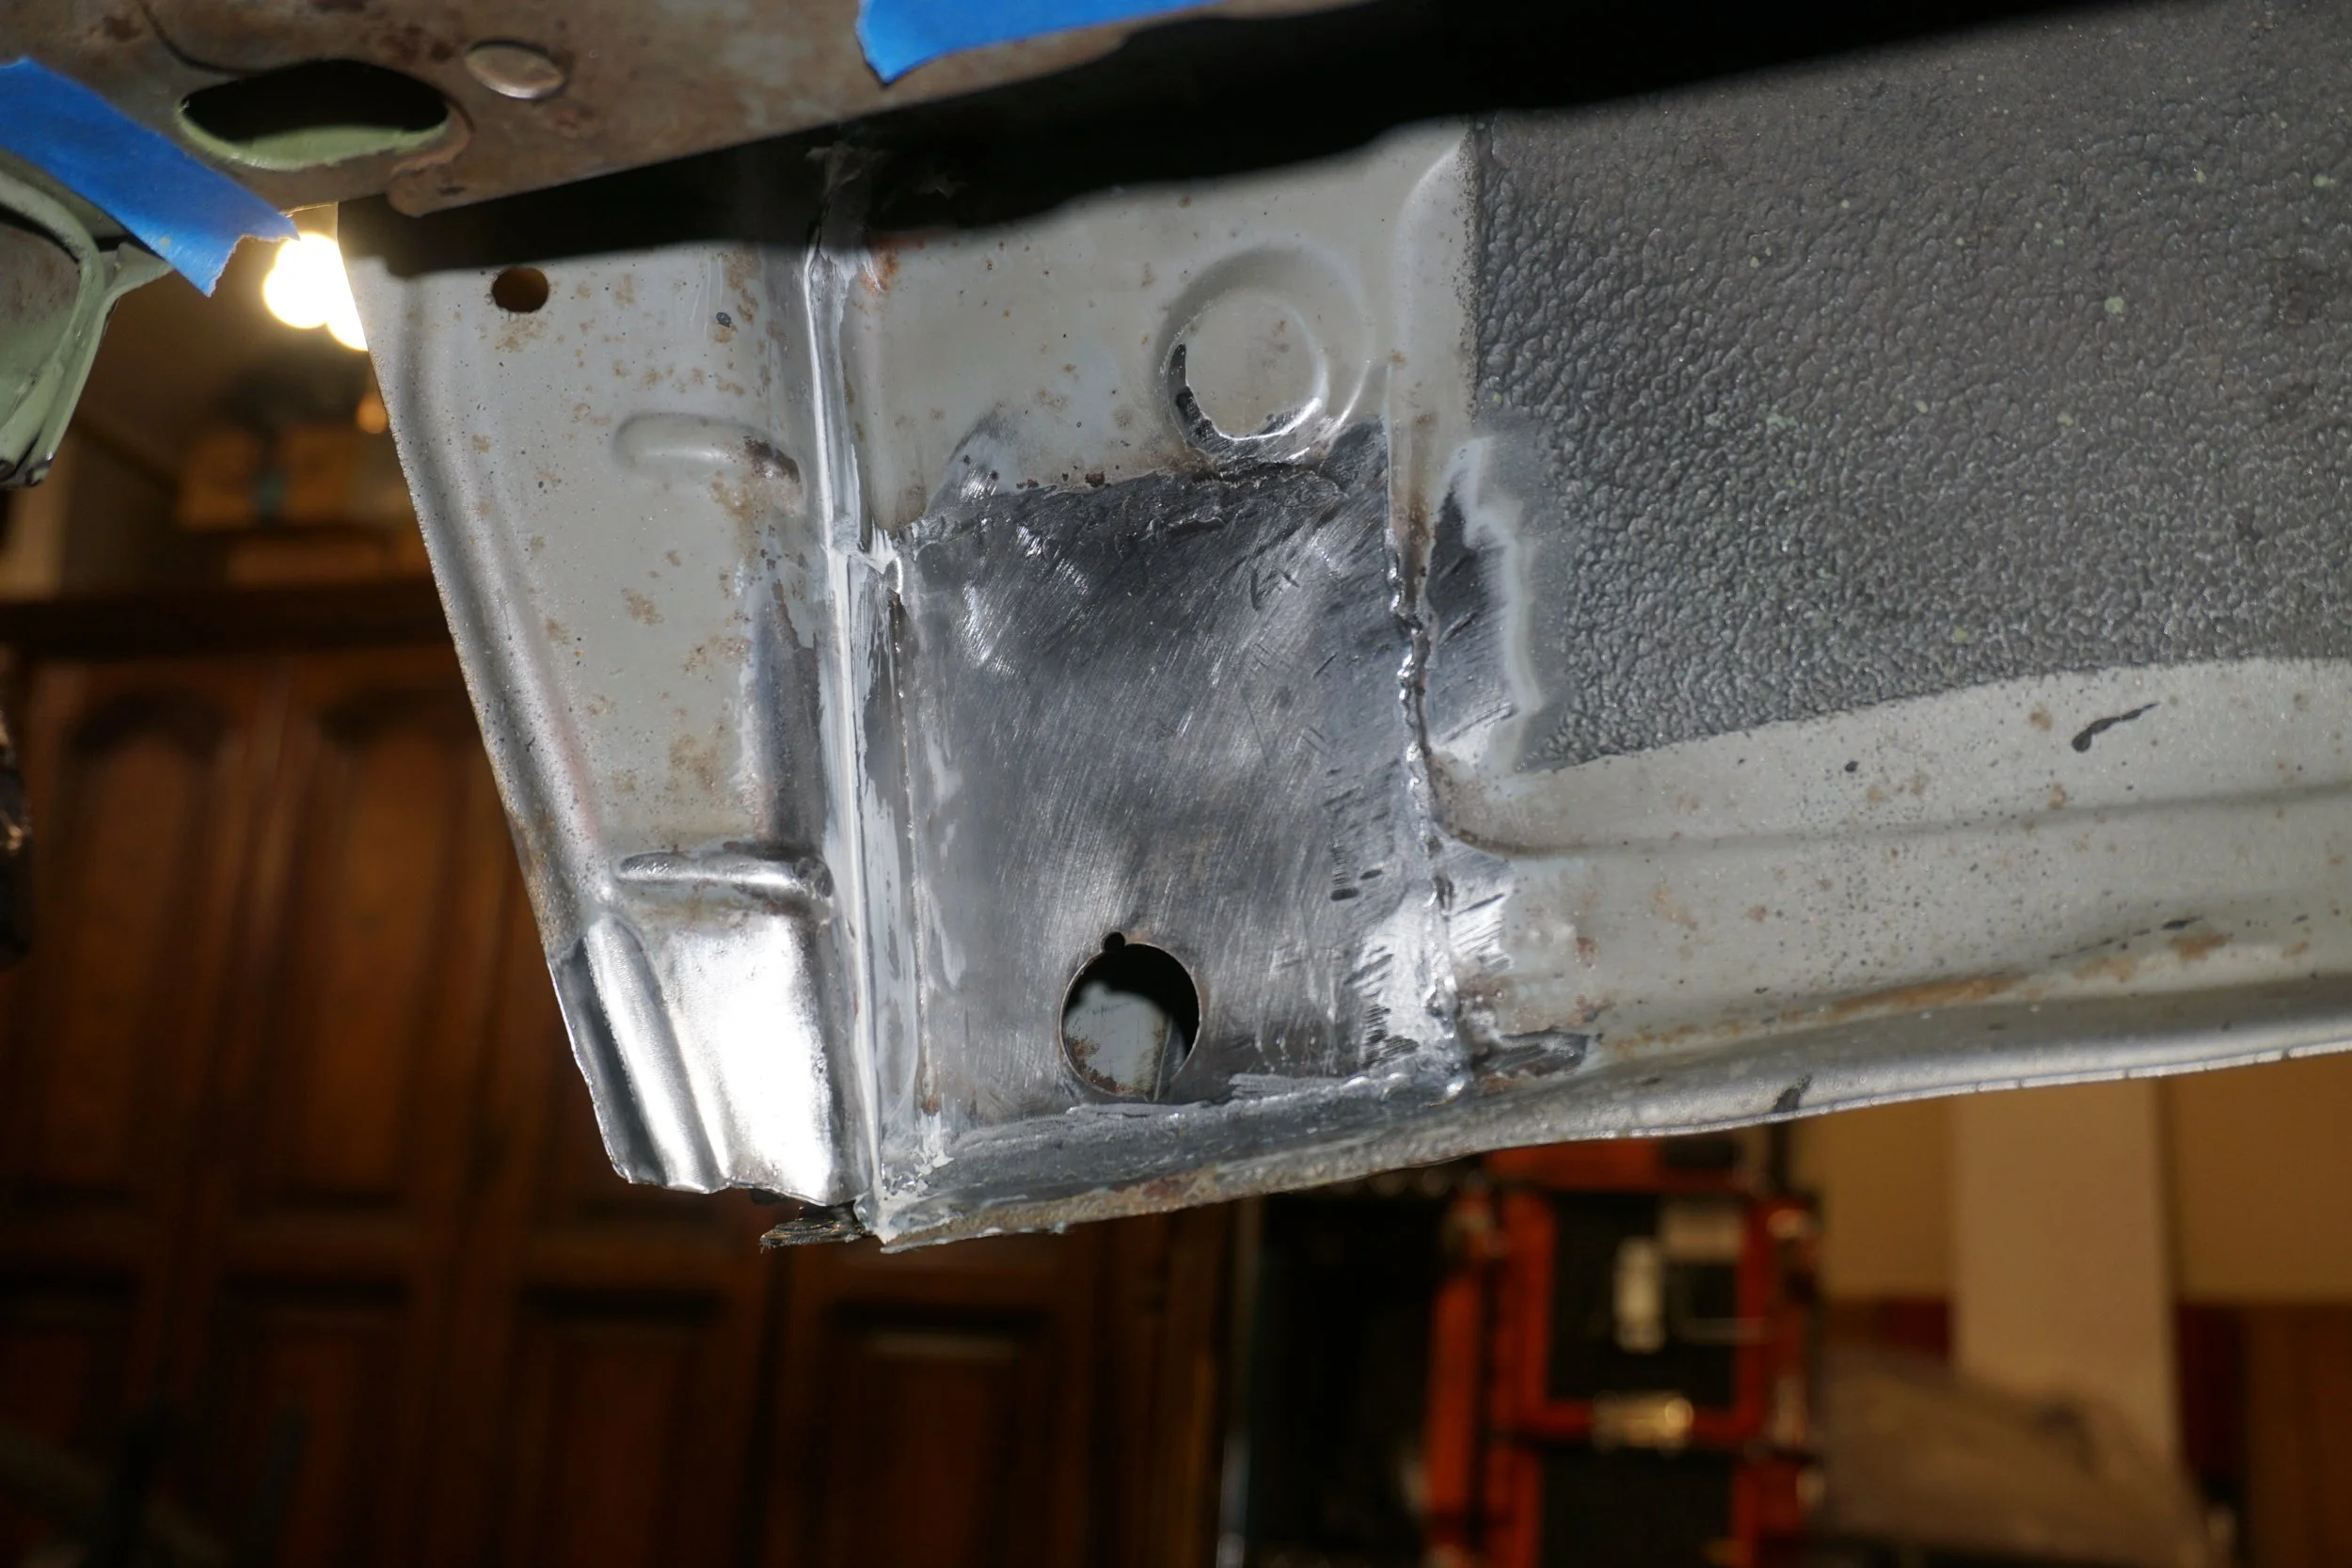
"New" vs old on the drivers side
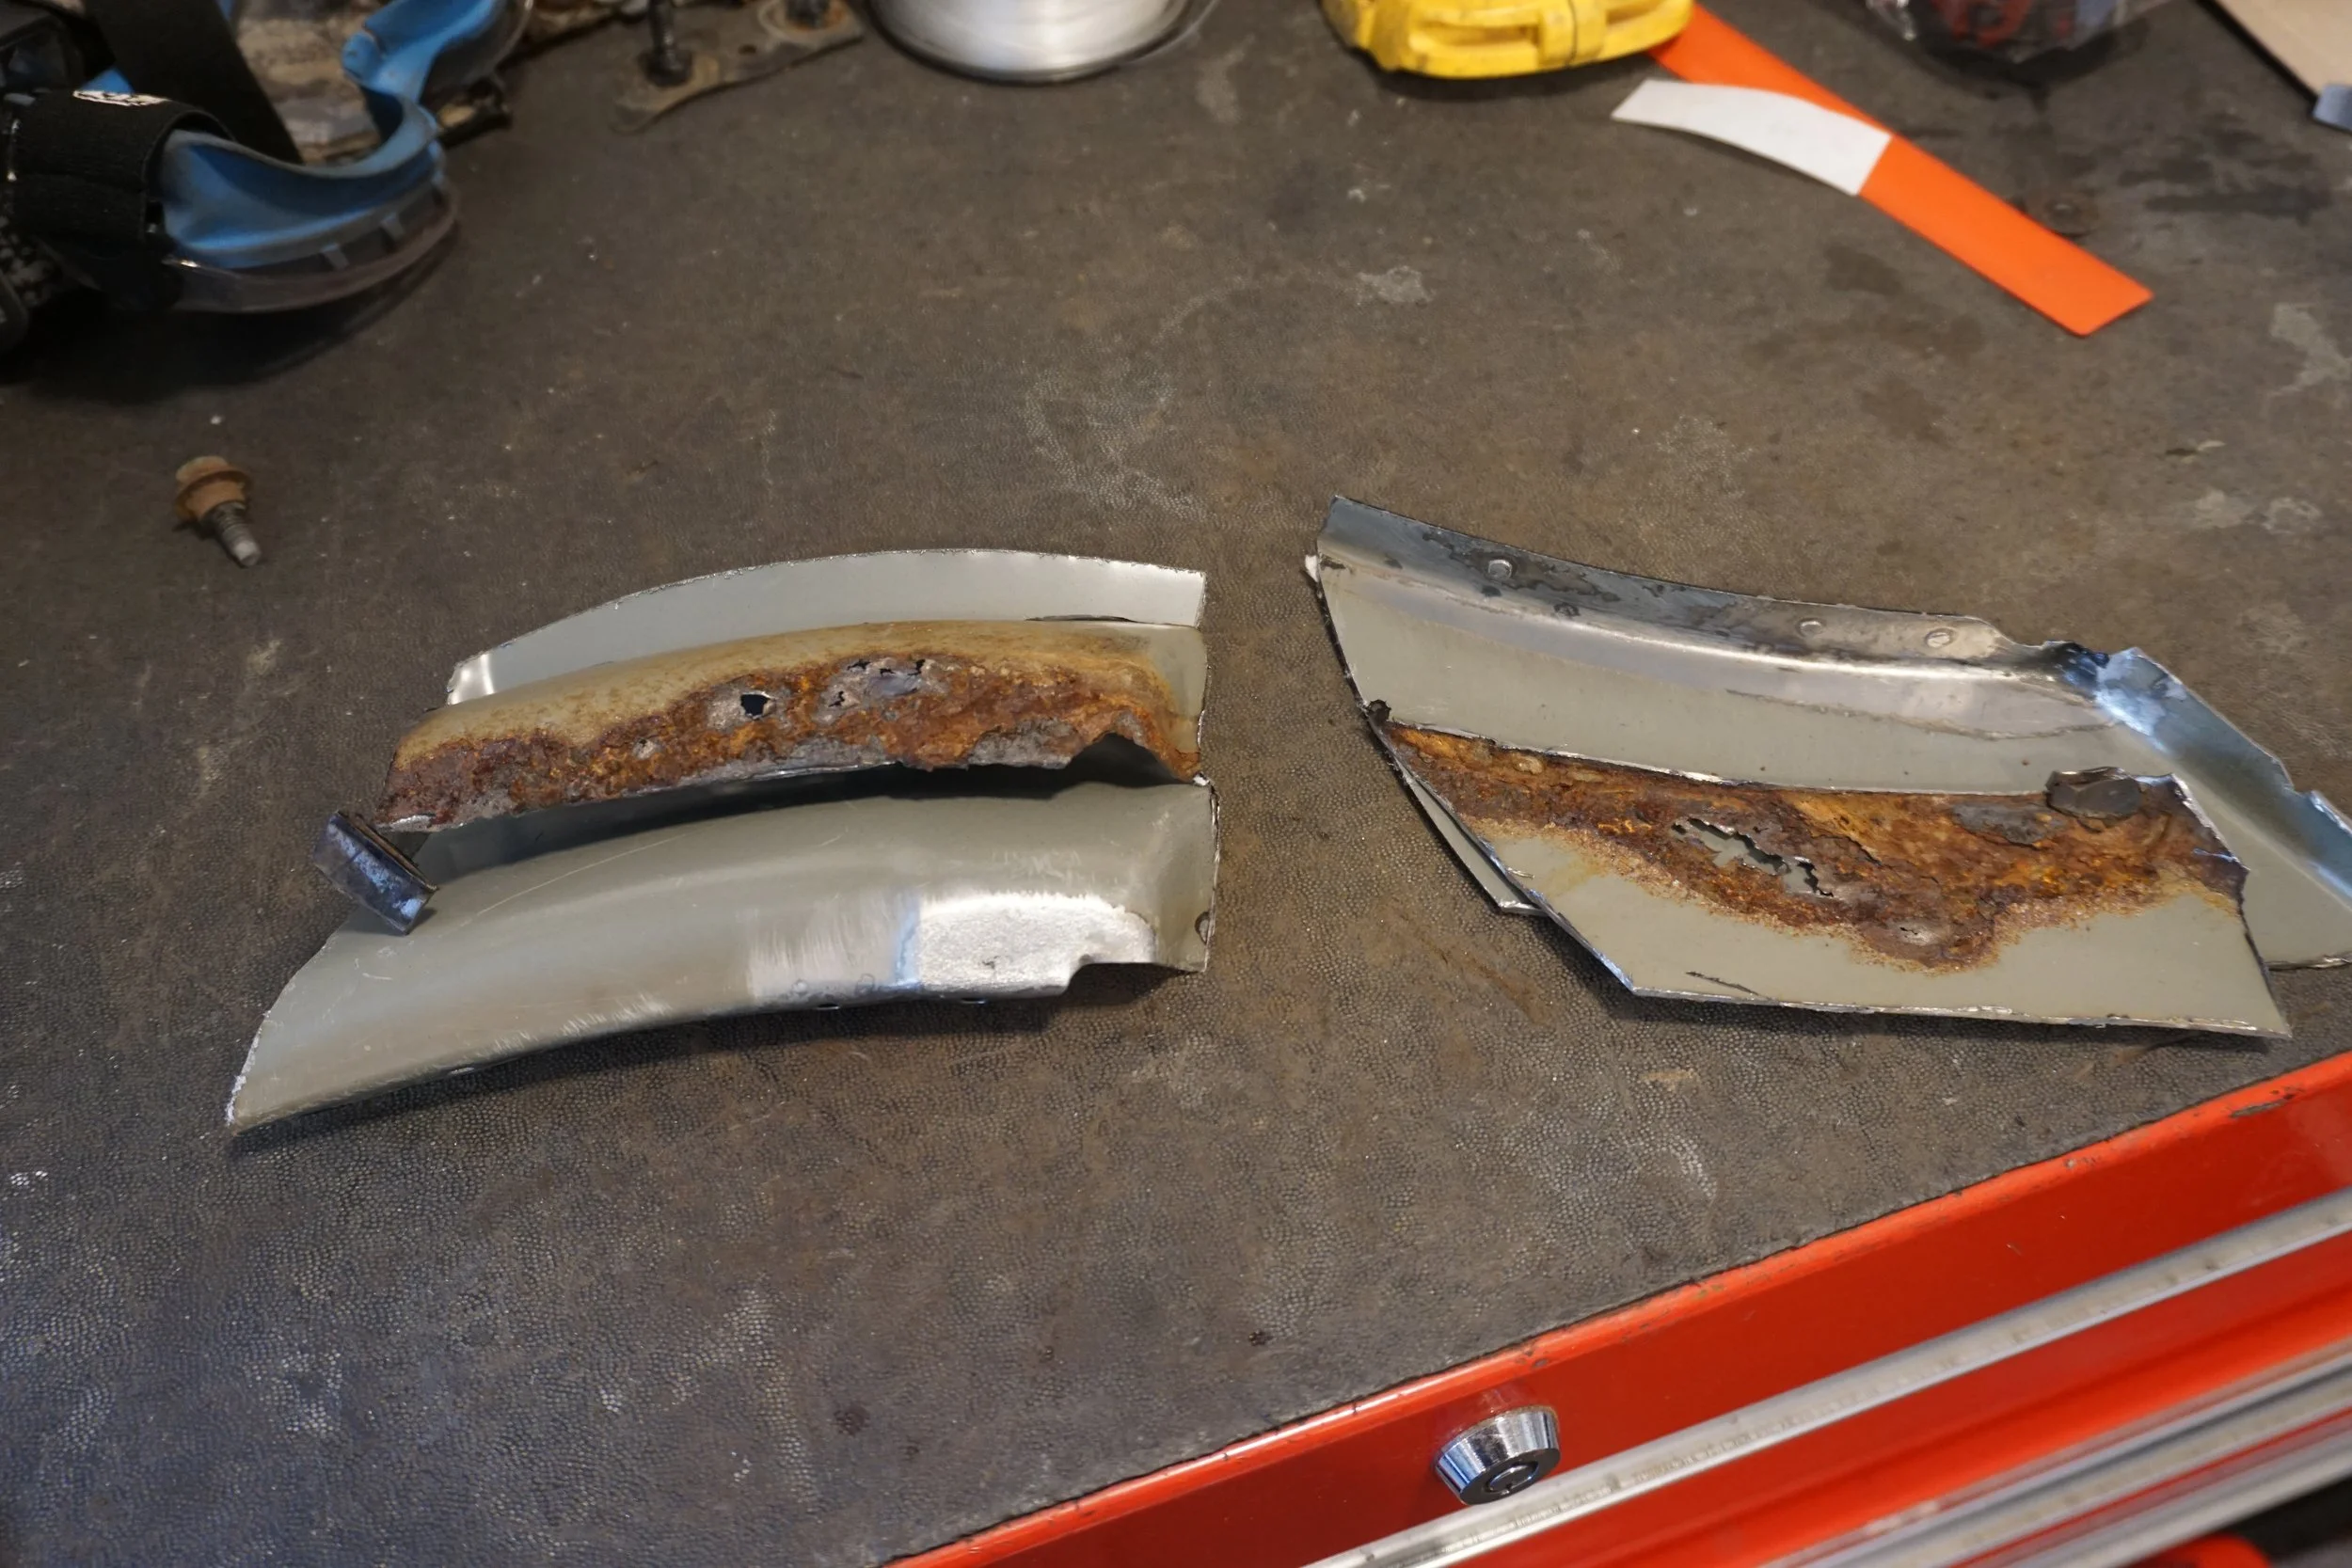
It's close, but I don't think it's perfect yet.
This is absolutely terrifying. Help!?
But, back to the I30. So I would like to reiterate that I have NO training doing welding, body work, or painting. This is really the first welding I have done, and although I have "done" some body work and painting before, it's all amateur-level stuff. This whole project I've been dreading making a decision about what to do with my rear quarter panels. They had some pretty good rust going on, and I've been real anxious about cutting that out, because I knew welding in new metal and getting it to line up in every dimension was going to be incredibly challenging. Not to mention that these areas are actually visible when you look at the car, and I would also need to blend the paint. I kept thinking about what would happen if I just did a hack job and filled in the rust with some POR15 body filler goop. Sure, it would need to be repaired again in the future, but who doesn't like kicking difficult decisions and projects down the road? I knew cutting and welding was the proper way to go, but damn if it didn't scare the **** out of me. I decided to cut out the inner part of the panel to see what the backside of the outer (visible) panel looked like. Sure enough, it was much worse than the visible side of the panel. My decision was made, I had to cut out the cancer and weld in "fresh" metal. Taking my cutoff wheel to the outer panel was one of the scariest things I've ever done to a car. There were so many ways I could **** this up, and really only one way to get it right. There was much trouser defecation.
I traced the shape of the panel I cut from a car in the junkyard onto my car to know how much I could cut out. I was initially hoping to just do a small 2" section, but when I saw what the back of the panel looked like, I knew I needed to cut out as much as I could. I took a deep breath and started cutting, trying to make my cuts as straight as possible so fitting in the patch panel would be easier.
I then worked on trimming the patch to fit perfectly, which took quite some time. It needed to fit real tight or else I risked blowing through the metal, and getting this thing to line up in so many dimensions was super hard.
The scary part is that I don't think I'll know for sure if it's lined up perfectly until I spray the clear coat on it. That's what happened when I did the M3 last year. You just can't see stuff like that when there are different finishes and gloss levels. The best idea I had was to put painters tape over the seams and curves to trick my eyes into seeing the whole picture instead of individual sections. It kinda works?
Cutting the inner panel was of course more difficult due to tighter access.
"New" vs old for the passenger side:
After getting everything mocked up on the PS, I moved on to the DS and refined the process a bit. Started by cutting the inner again to see the back condition of the outer:
Dear god
"New" vs old on the drivers side
It's close, but I don't think it's perfect yet.
This is absolutely terrifying. Help!?

You're doing great. Don't sweat it. Just make sure you get rid of all the rust.
Try using magnets to line up your patch.
Metal work does not need to be 100% as filler and/or glazing and spot putty will be needed. Then various primers will smooth it out even more.
Try using magnets to line up your patch.
Metal work does not need to be 100% as filler and/or glazing and spot putty will be needed. Then various primers will smooth it out even more.
I've got the helping hand magnets and will use them when tacking it up.
You say it doesn't need to be 100%, but I don't think any amount of filler and primer will fix it if I don't get the arch/curve lined up perfectly. That's what's got me worried.

As usual, I'm running behind on updates, so let's try to get caught up.
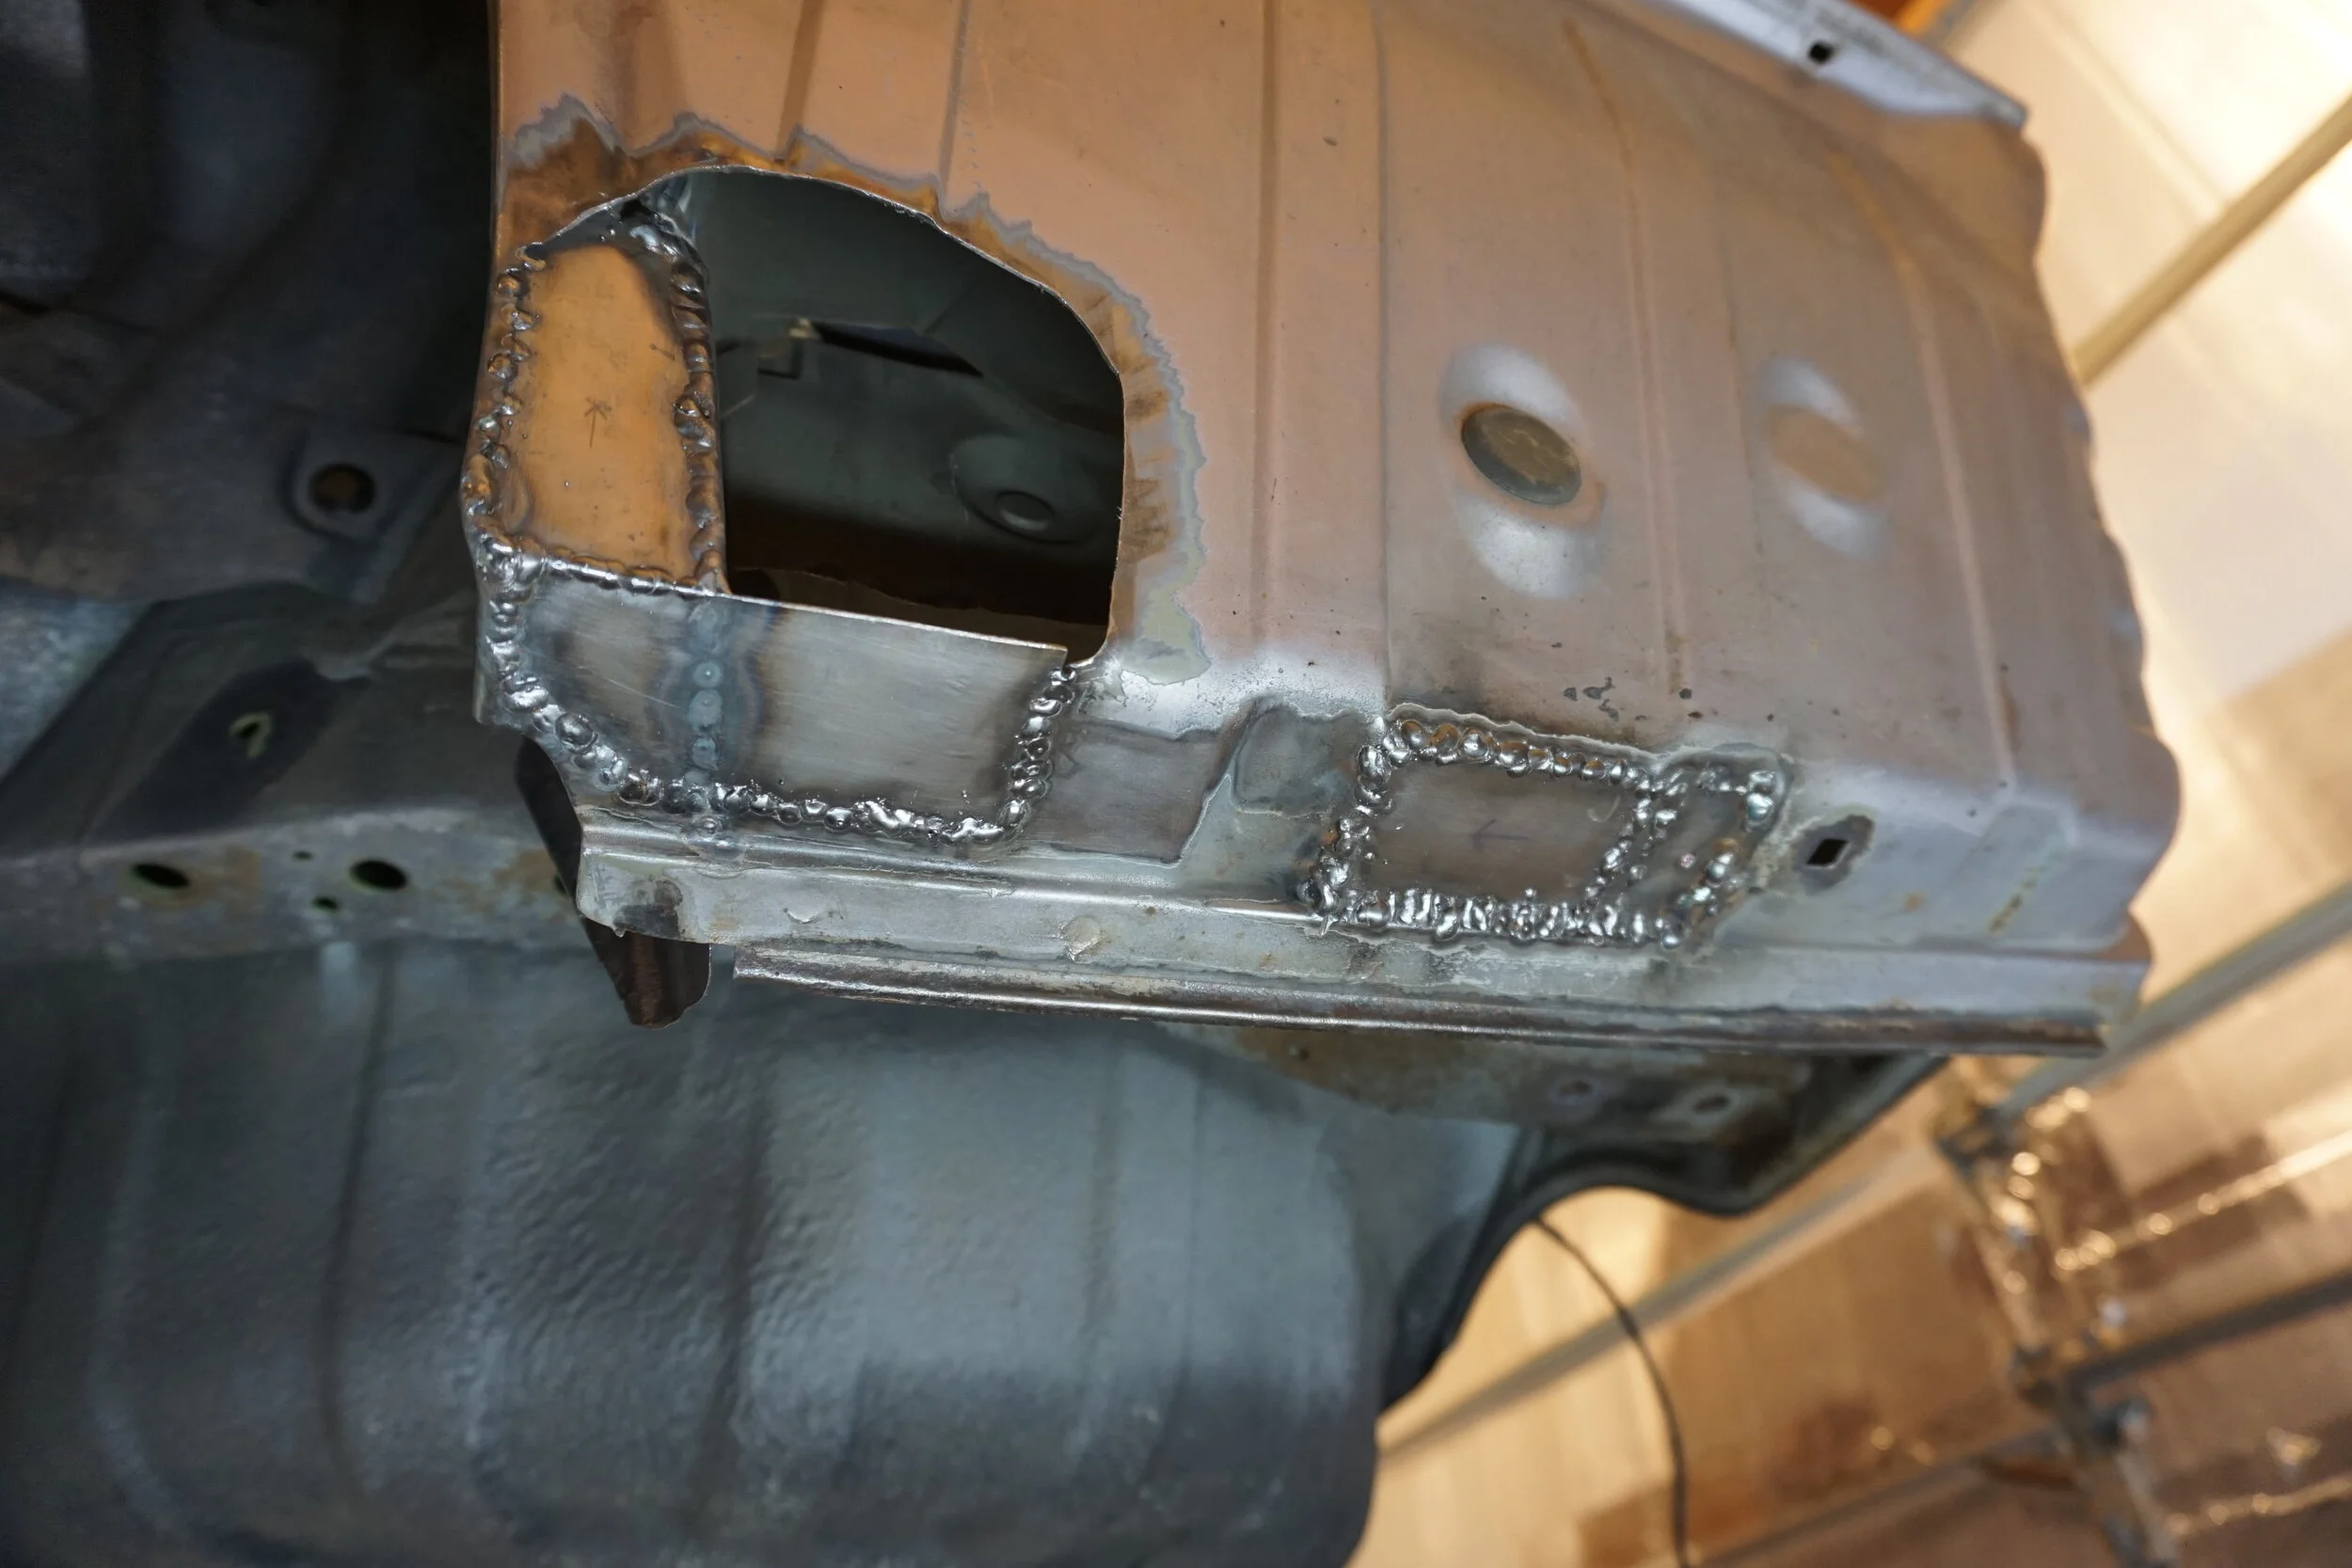
First, I have a new, and unexpected addition to the fleet. See if you can guess what is it. I also welded up the outer portions of the rear quarter panels:
As hard as a tried to keep the temperature down, I think I warped the rear quarter panels a little bit, and I'm not sure how I'm going to tackle it. I'm trying to get my PDR guy to come by and take a look and give me his expert opinion. I'm sure I'll revisit this later, but for now, let's keep moving.
With all this bare metal, surface rust was starting to creep in, so I knew I had to get some primer down on everything. Even though almost everything I'm doing is under the car or covered up by the rear bumper, I couldn't help but want to clean up the welds and make everything look pretty. I also applied the white POR15 goop to fill in crevices between welds where things were uneven, and also used it to patch up any holes where the welds blew through or I couldn't weld at all. I used all of my many grinding and smoothing tools to clean everything up, and then hand sanded everything down with 400 grit sandpaper so the primer had something to bite into. Once that was all done (and it took a VERY long time) I wiped everything down with Prep-All three times to remove any dust or oils from the surface.
DS quarter panel
Inside of DS quarter
DS rear/bottom fender area
DS lower outer
DS lower inner
PS lower inner
PS rear/bottom fender area
PS lower outer

Inside of PS quarter
PS quarter panel

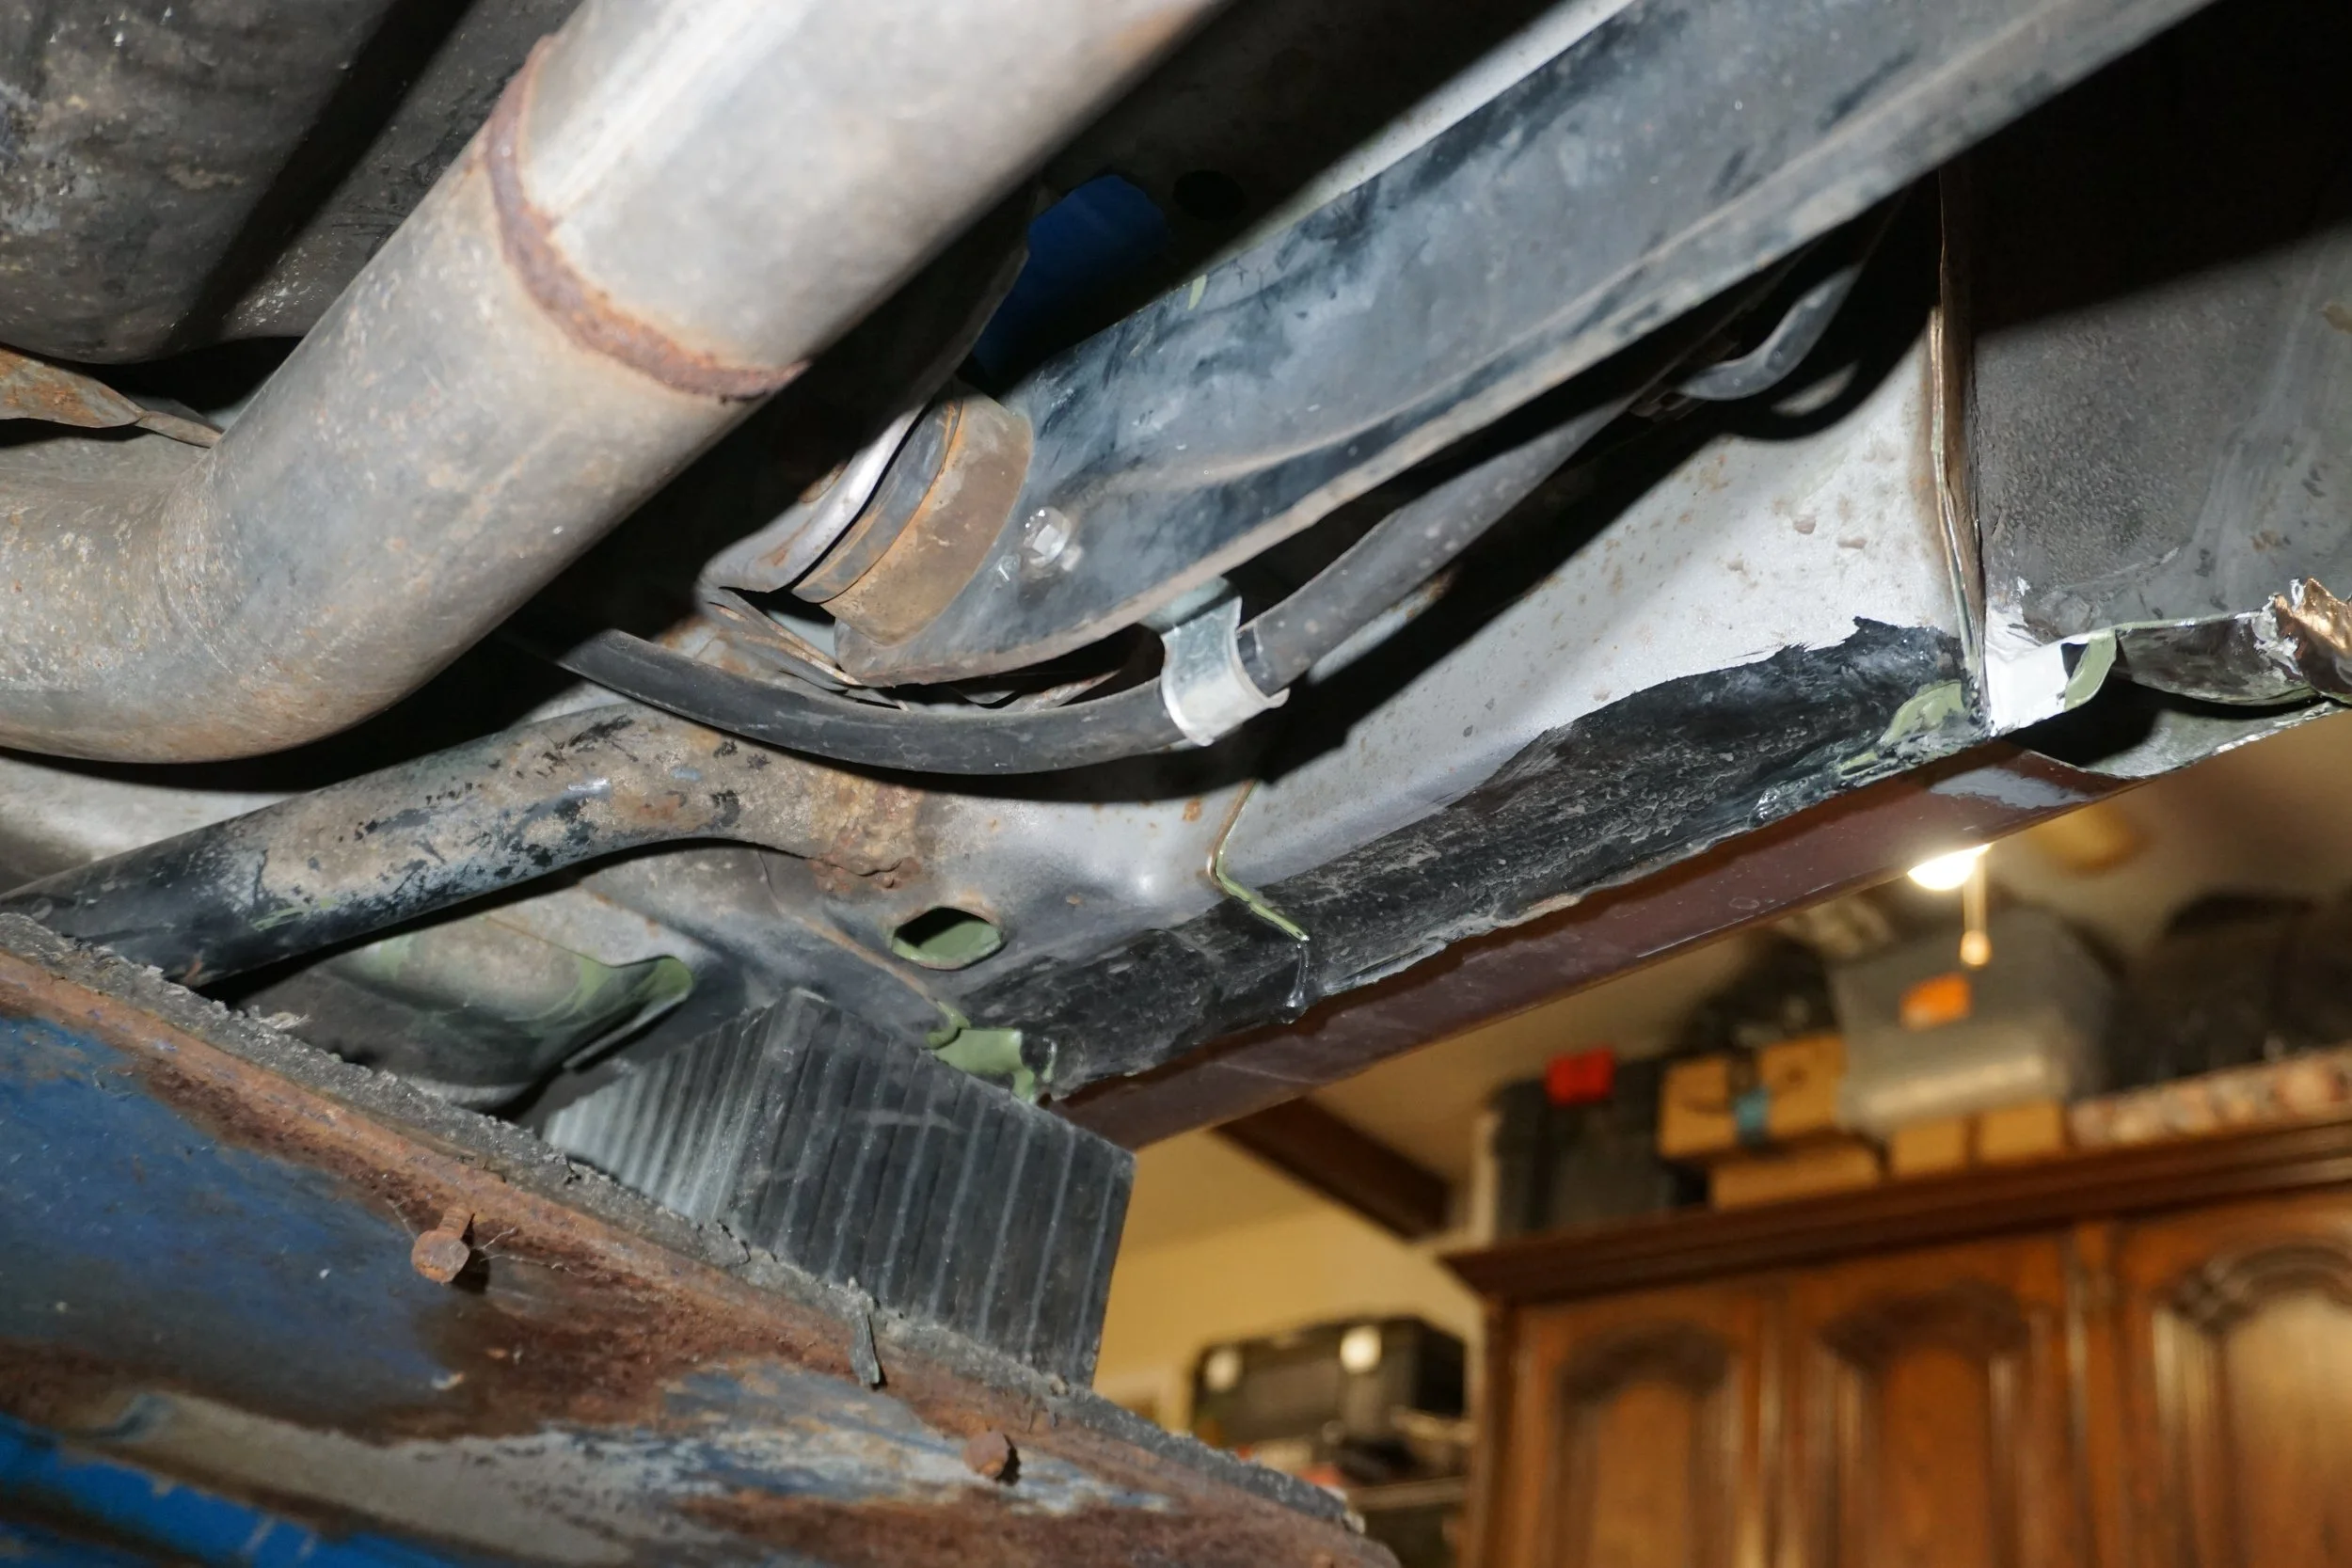
PS front/lower fender area (from underneath) (the green stuff is Eastwood Internal Frame Coating)
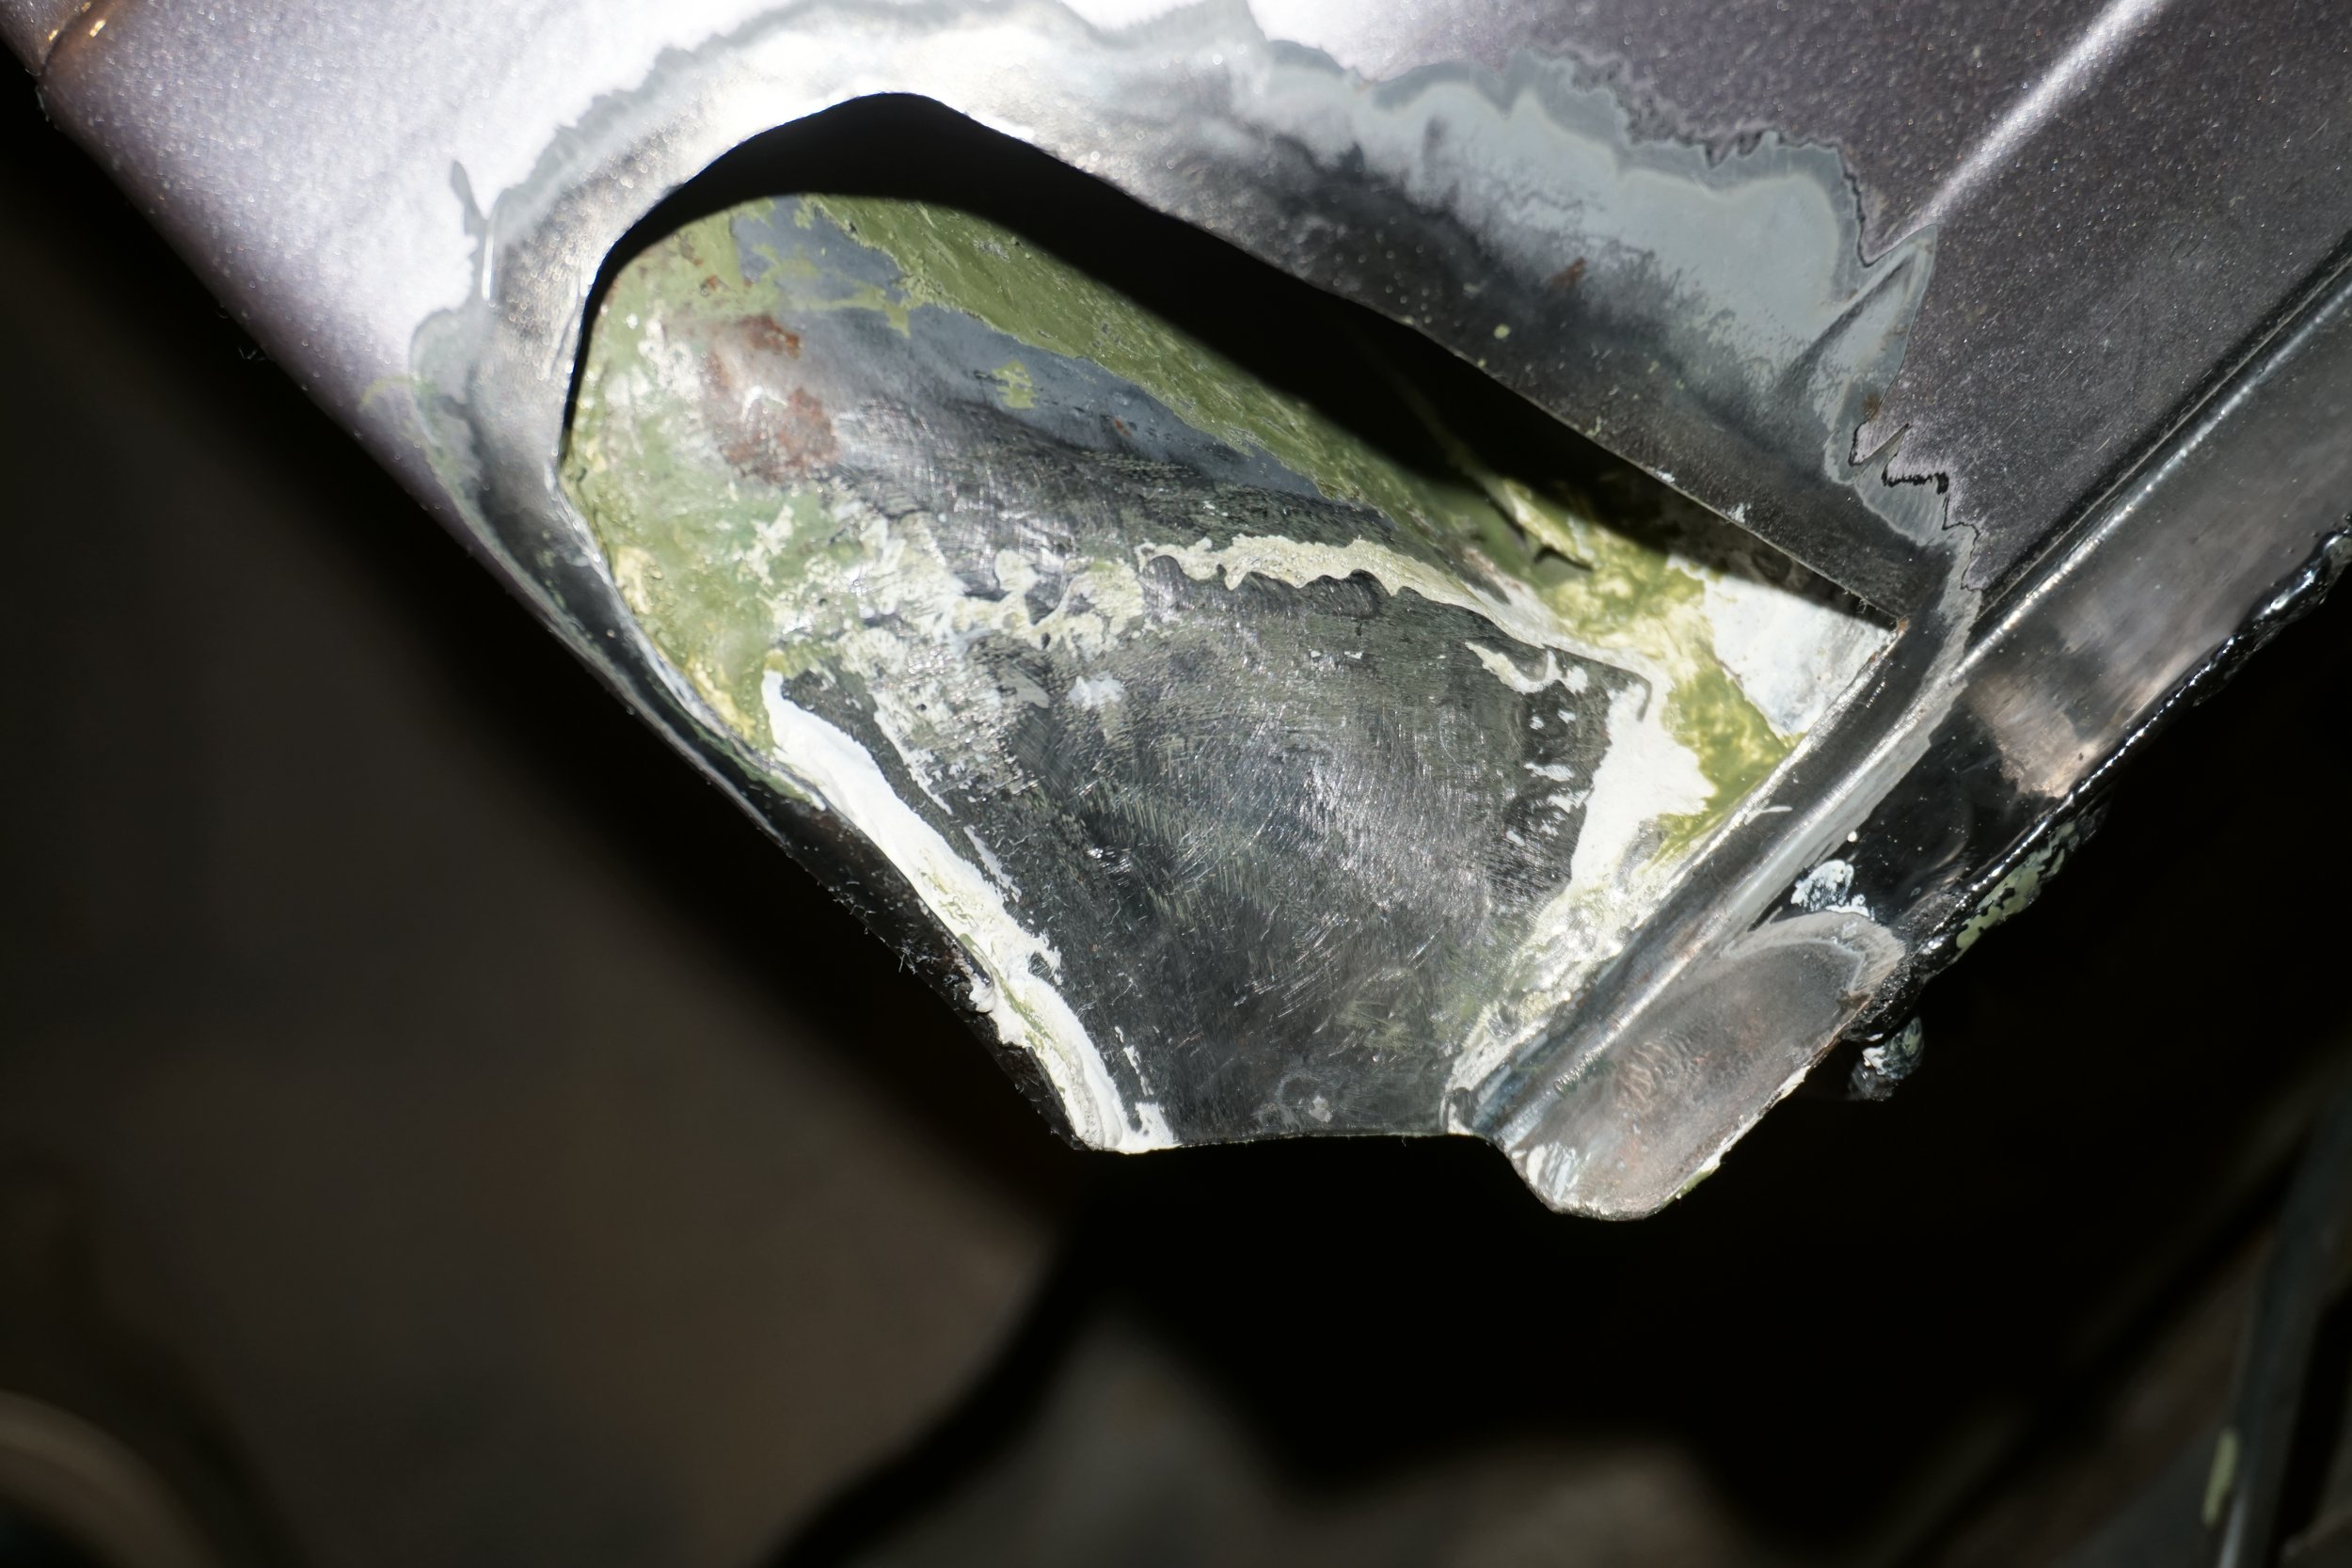
Speaking of the Eastwood Internal Frame Coating (I went with the green color instead of black so I could see it easier), I applied a few coats of it into the rest of my fender lips while they were cut open, with the hopes the stuff would soak into all those tight crevices (from the fenders being rolled) to mitigate any rust that's hiding in there.
I taped up a lot of the holes underneath the rear of the car and sprayed this stuff everywhere the wand could reach:
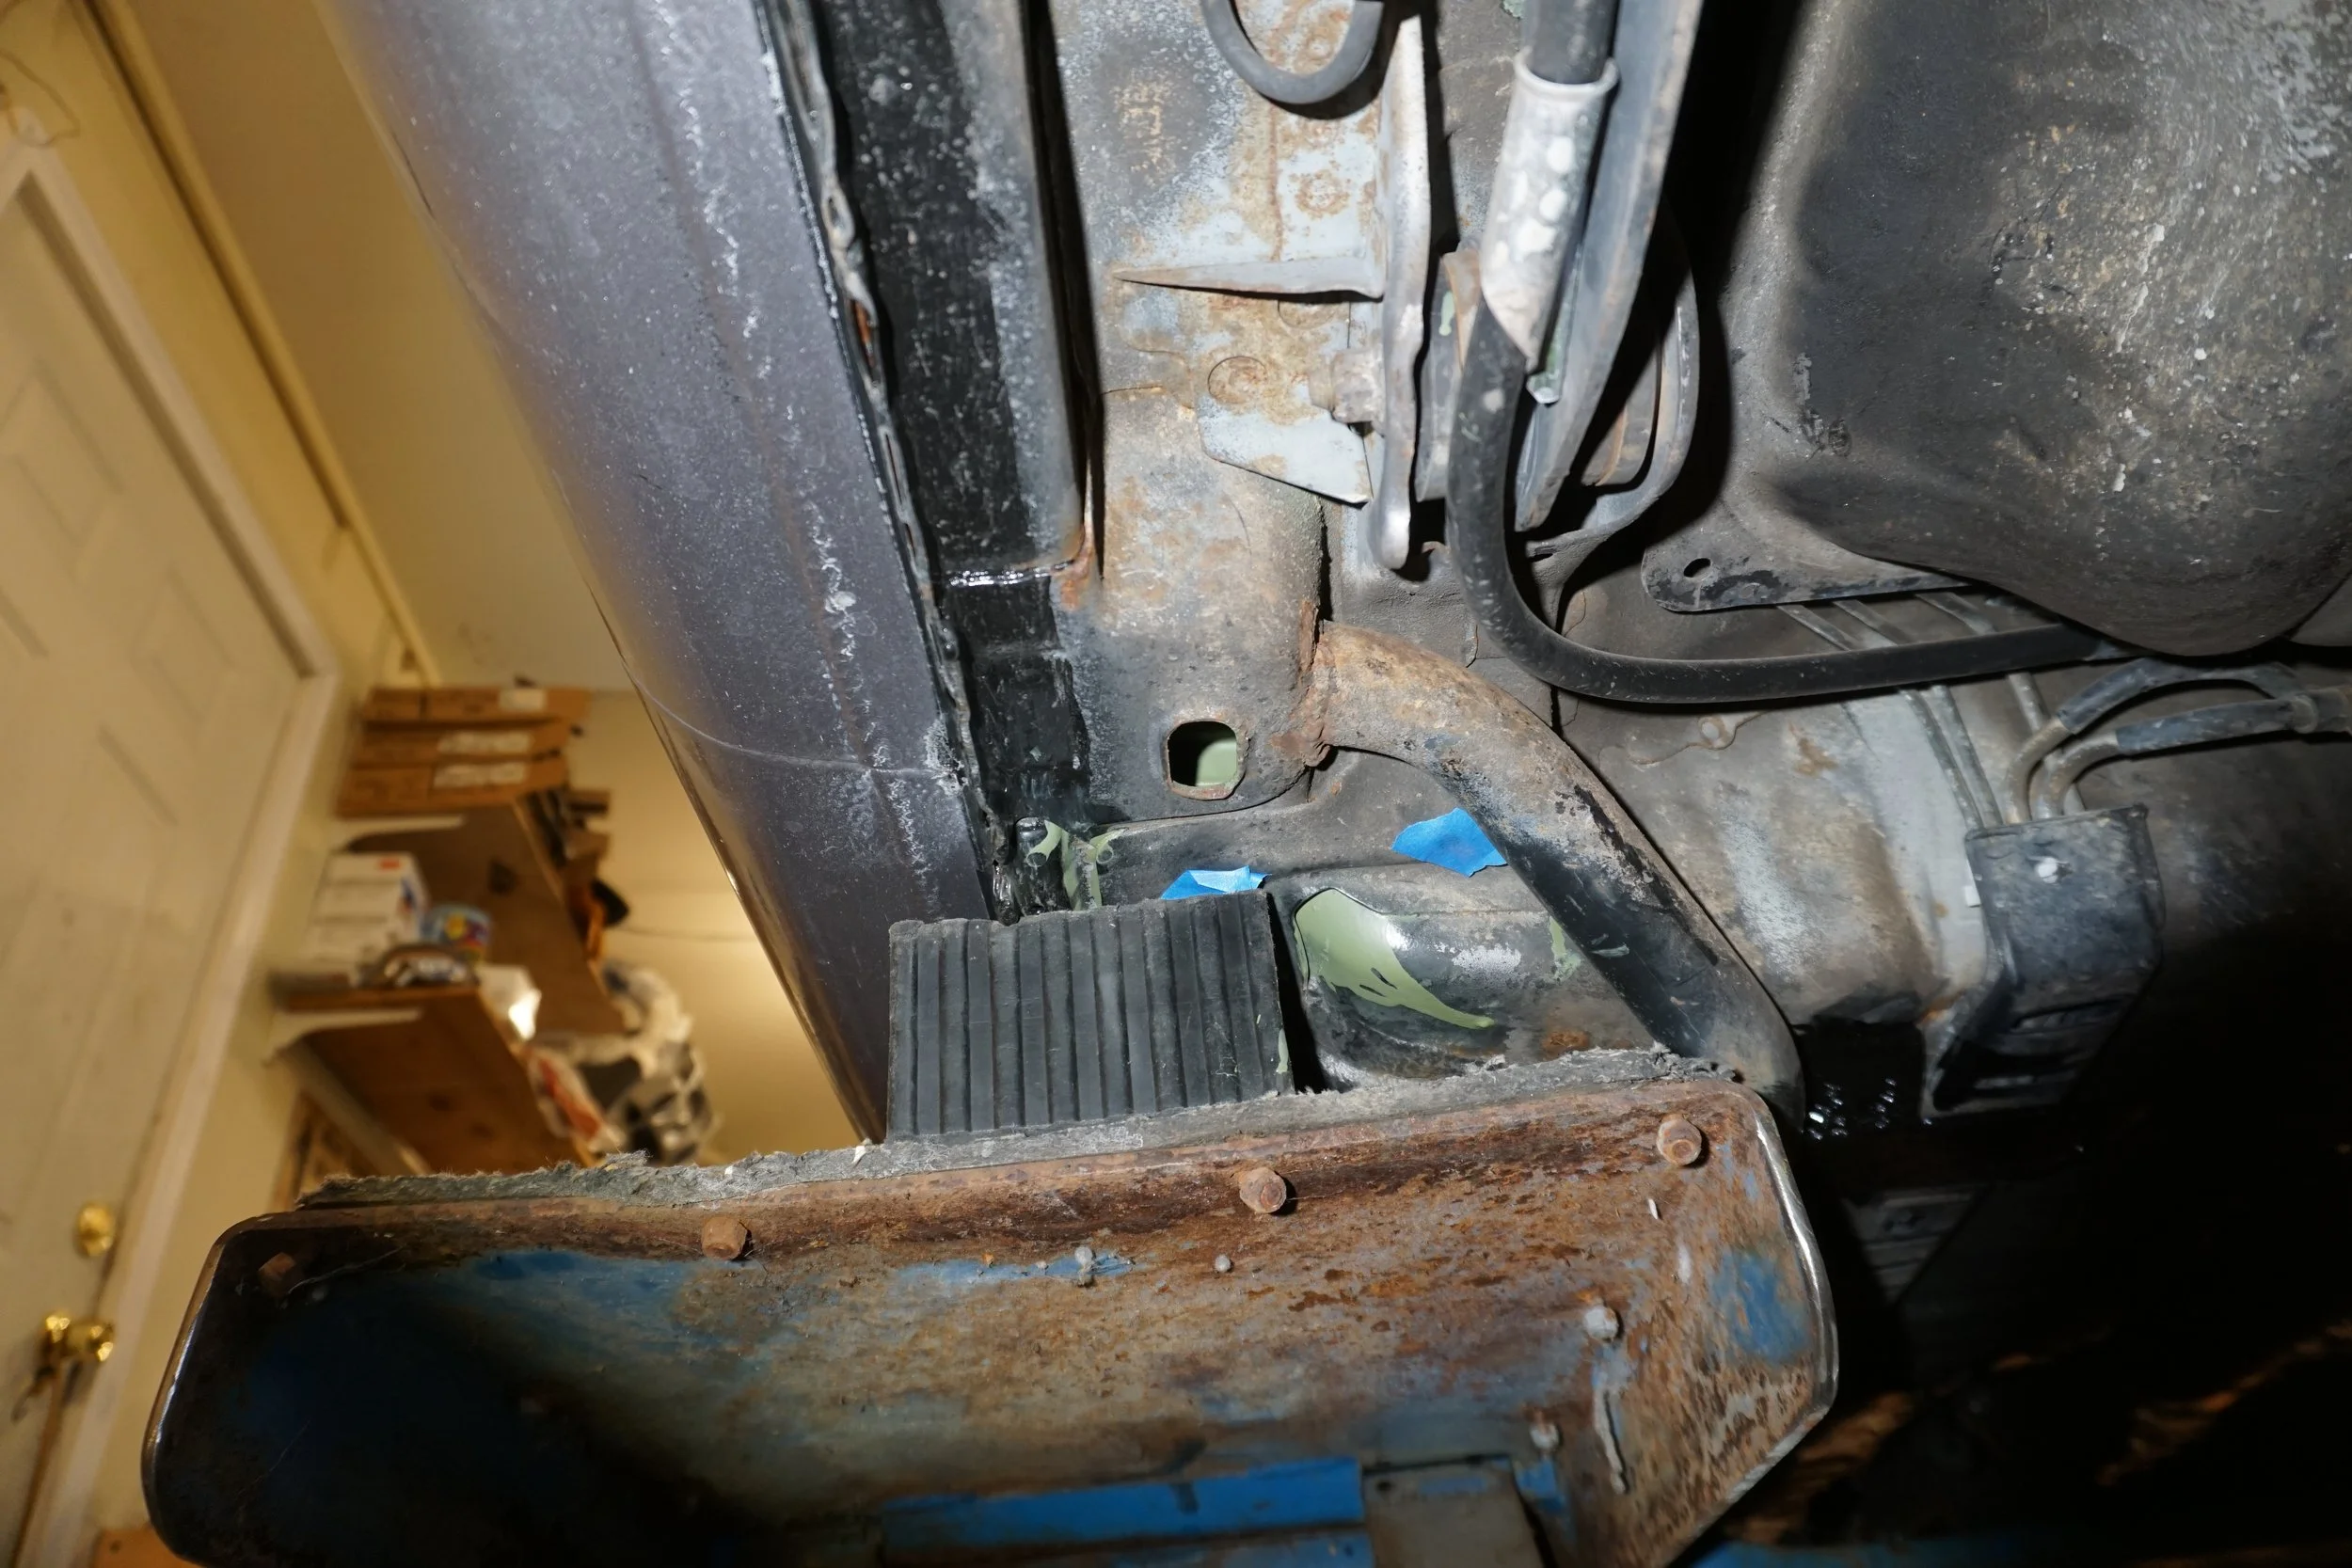
Up into the support bar for the panhard rod:
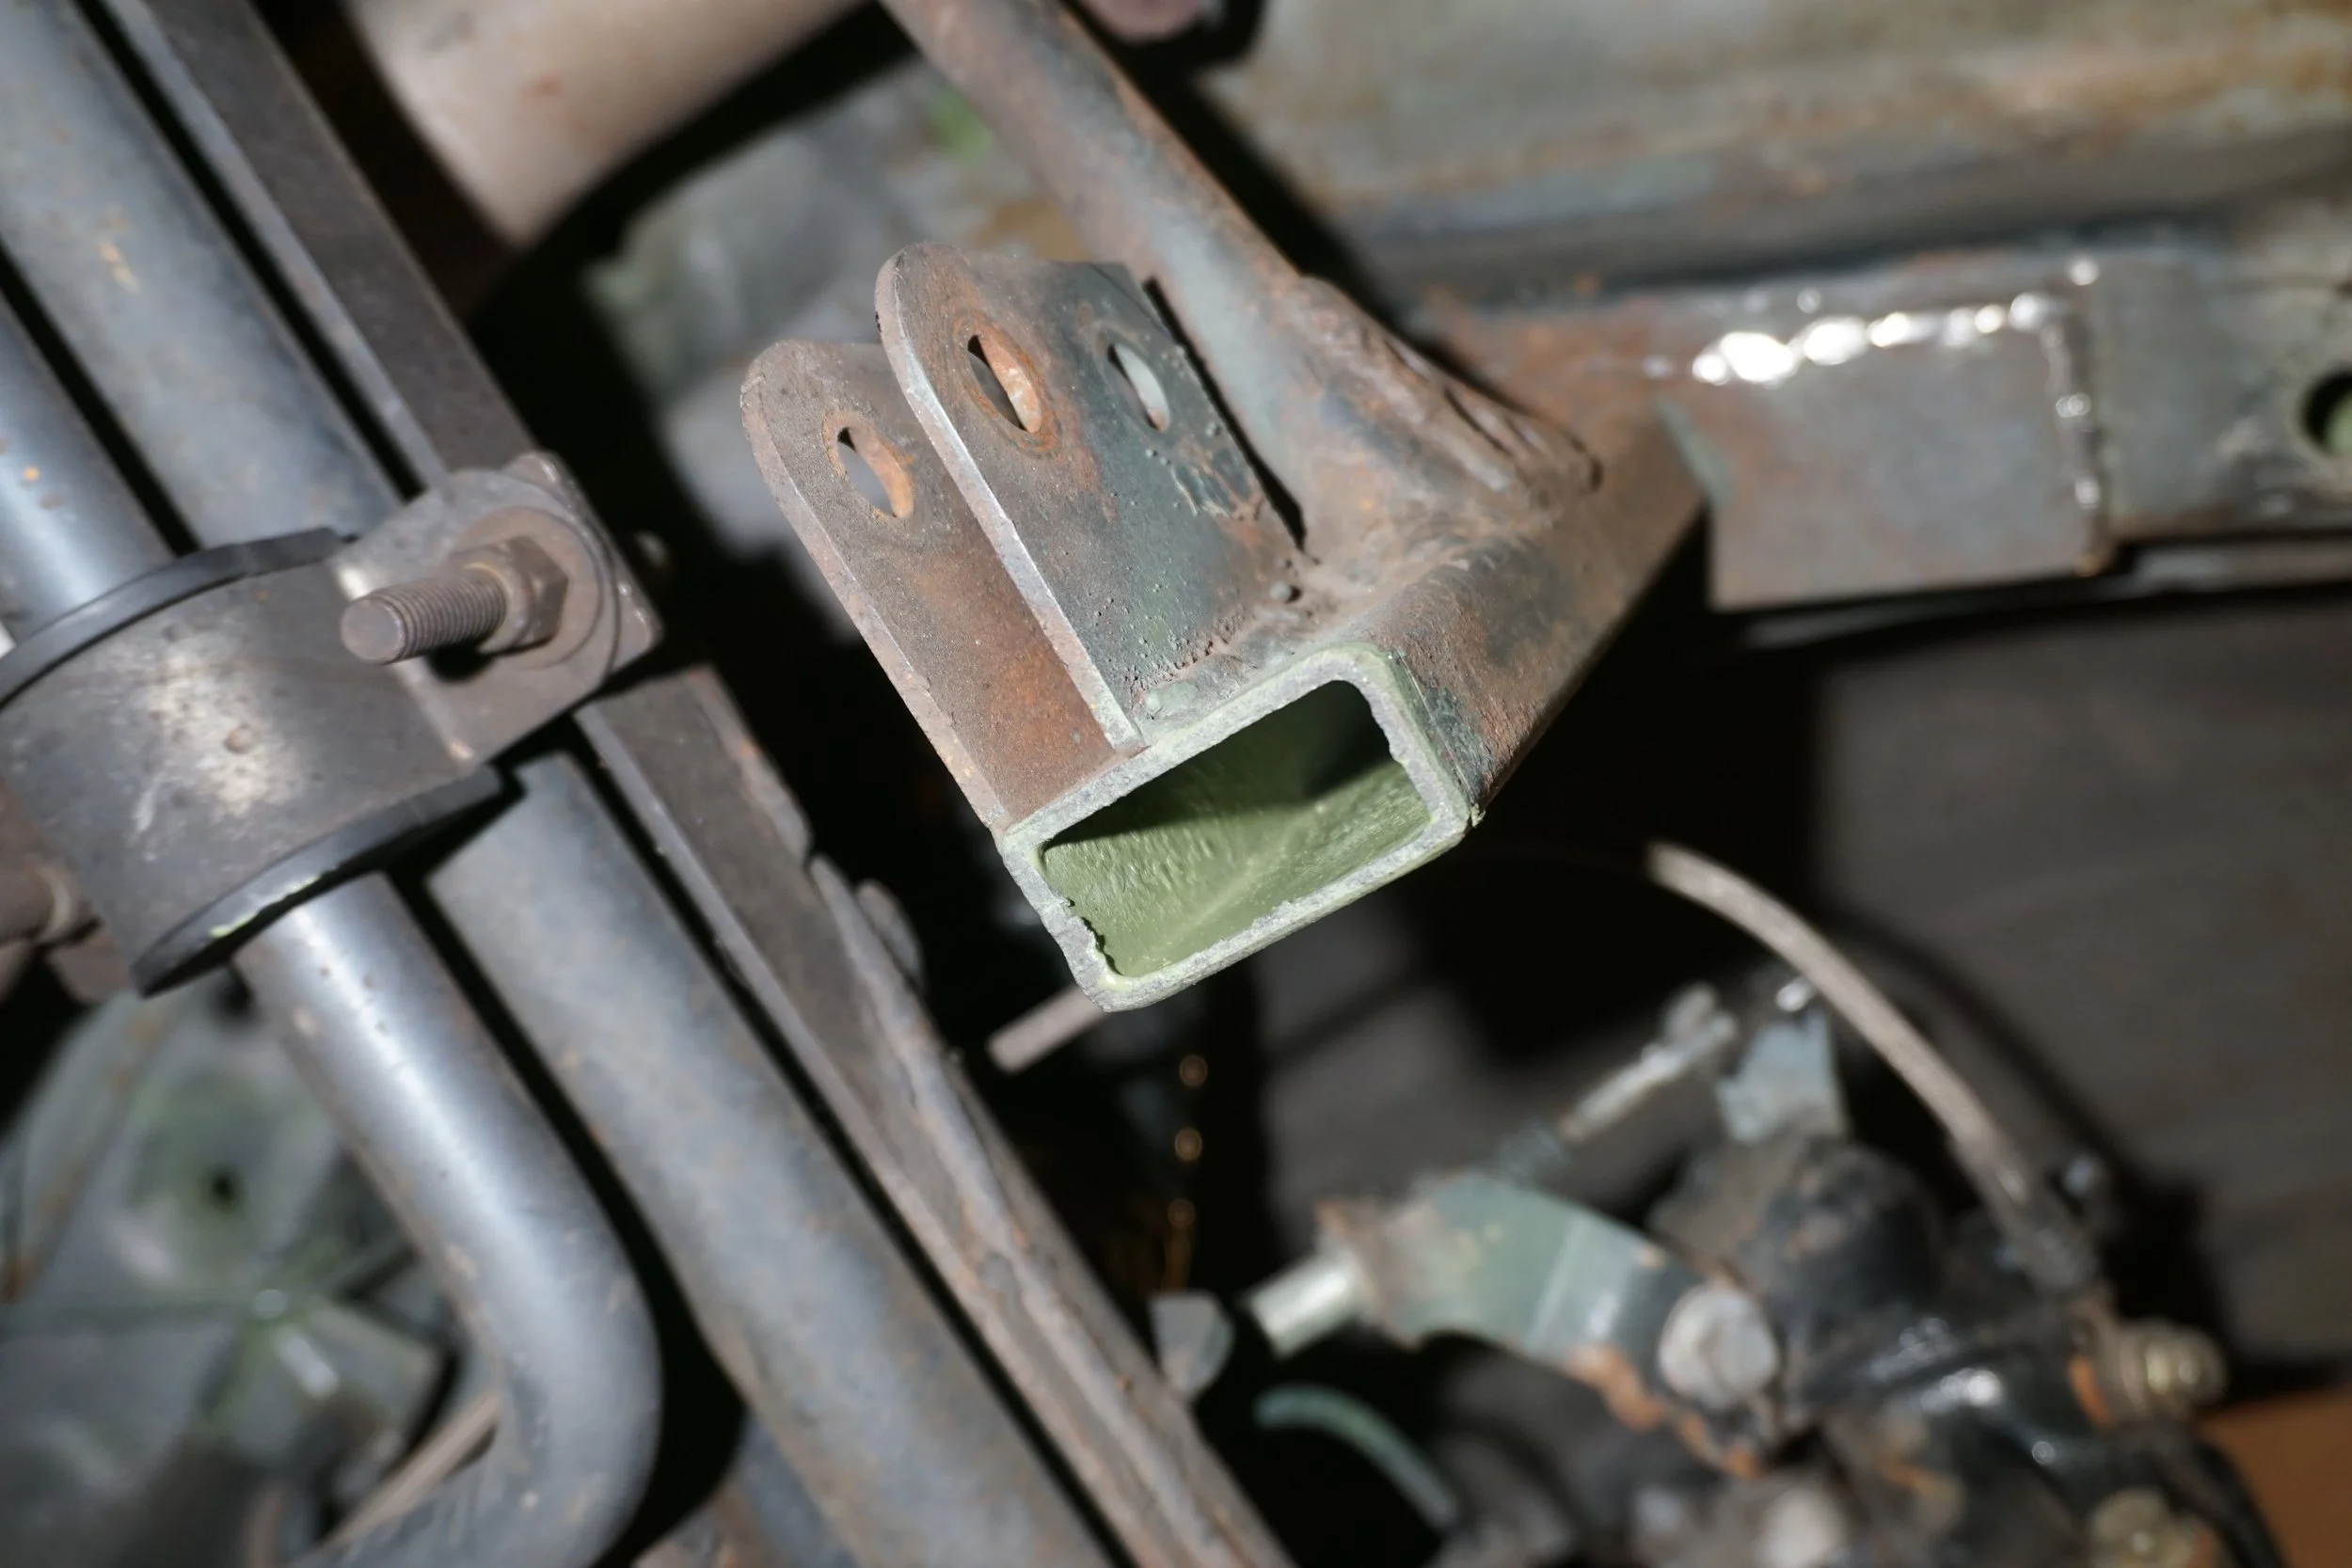
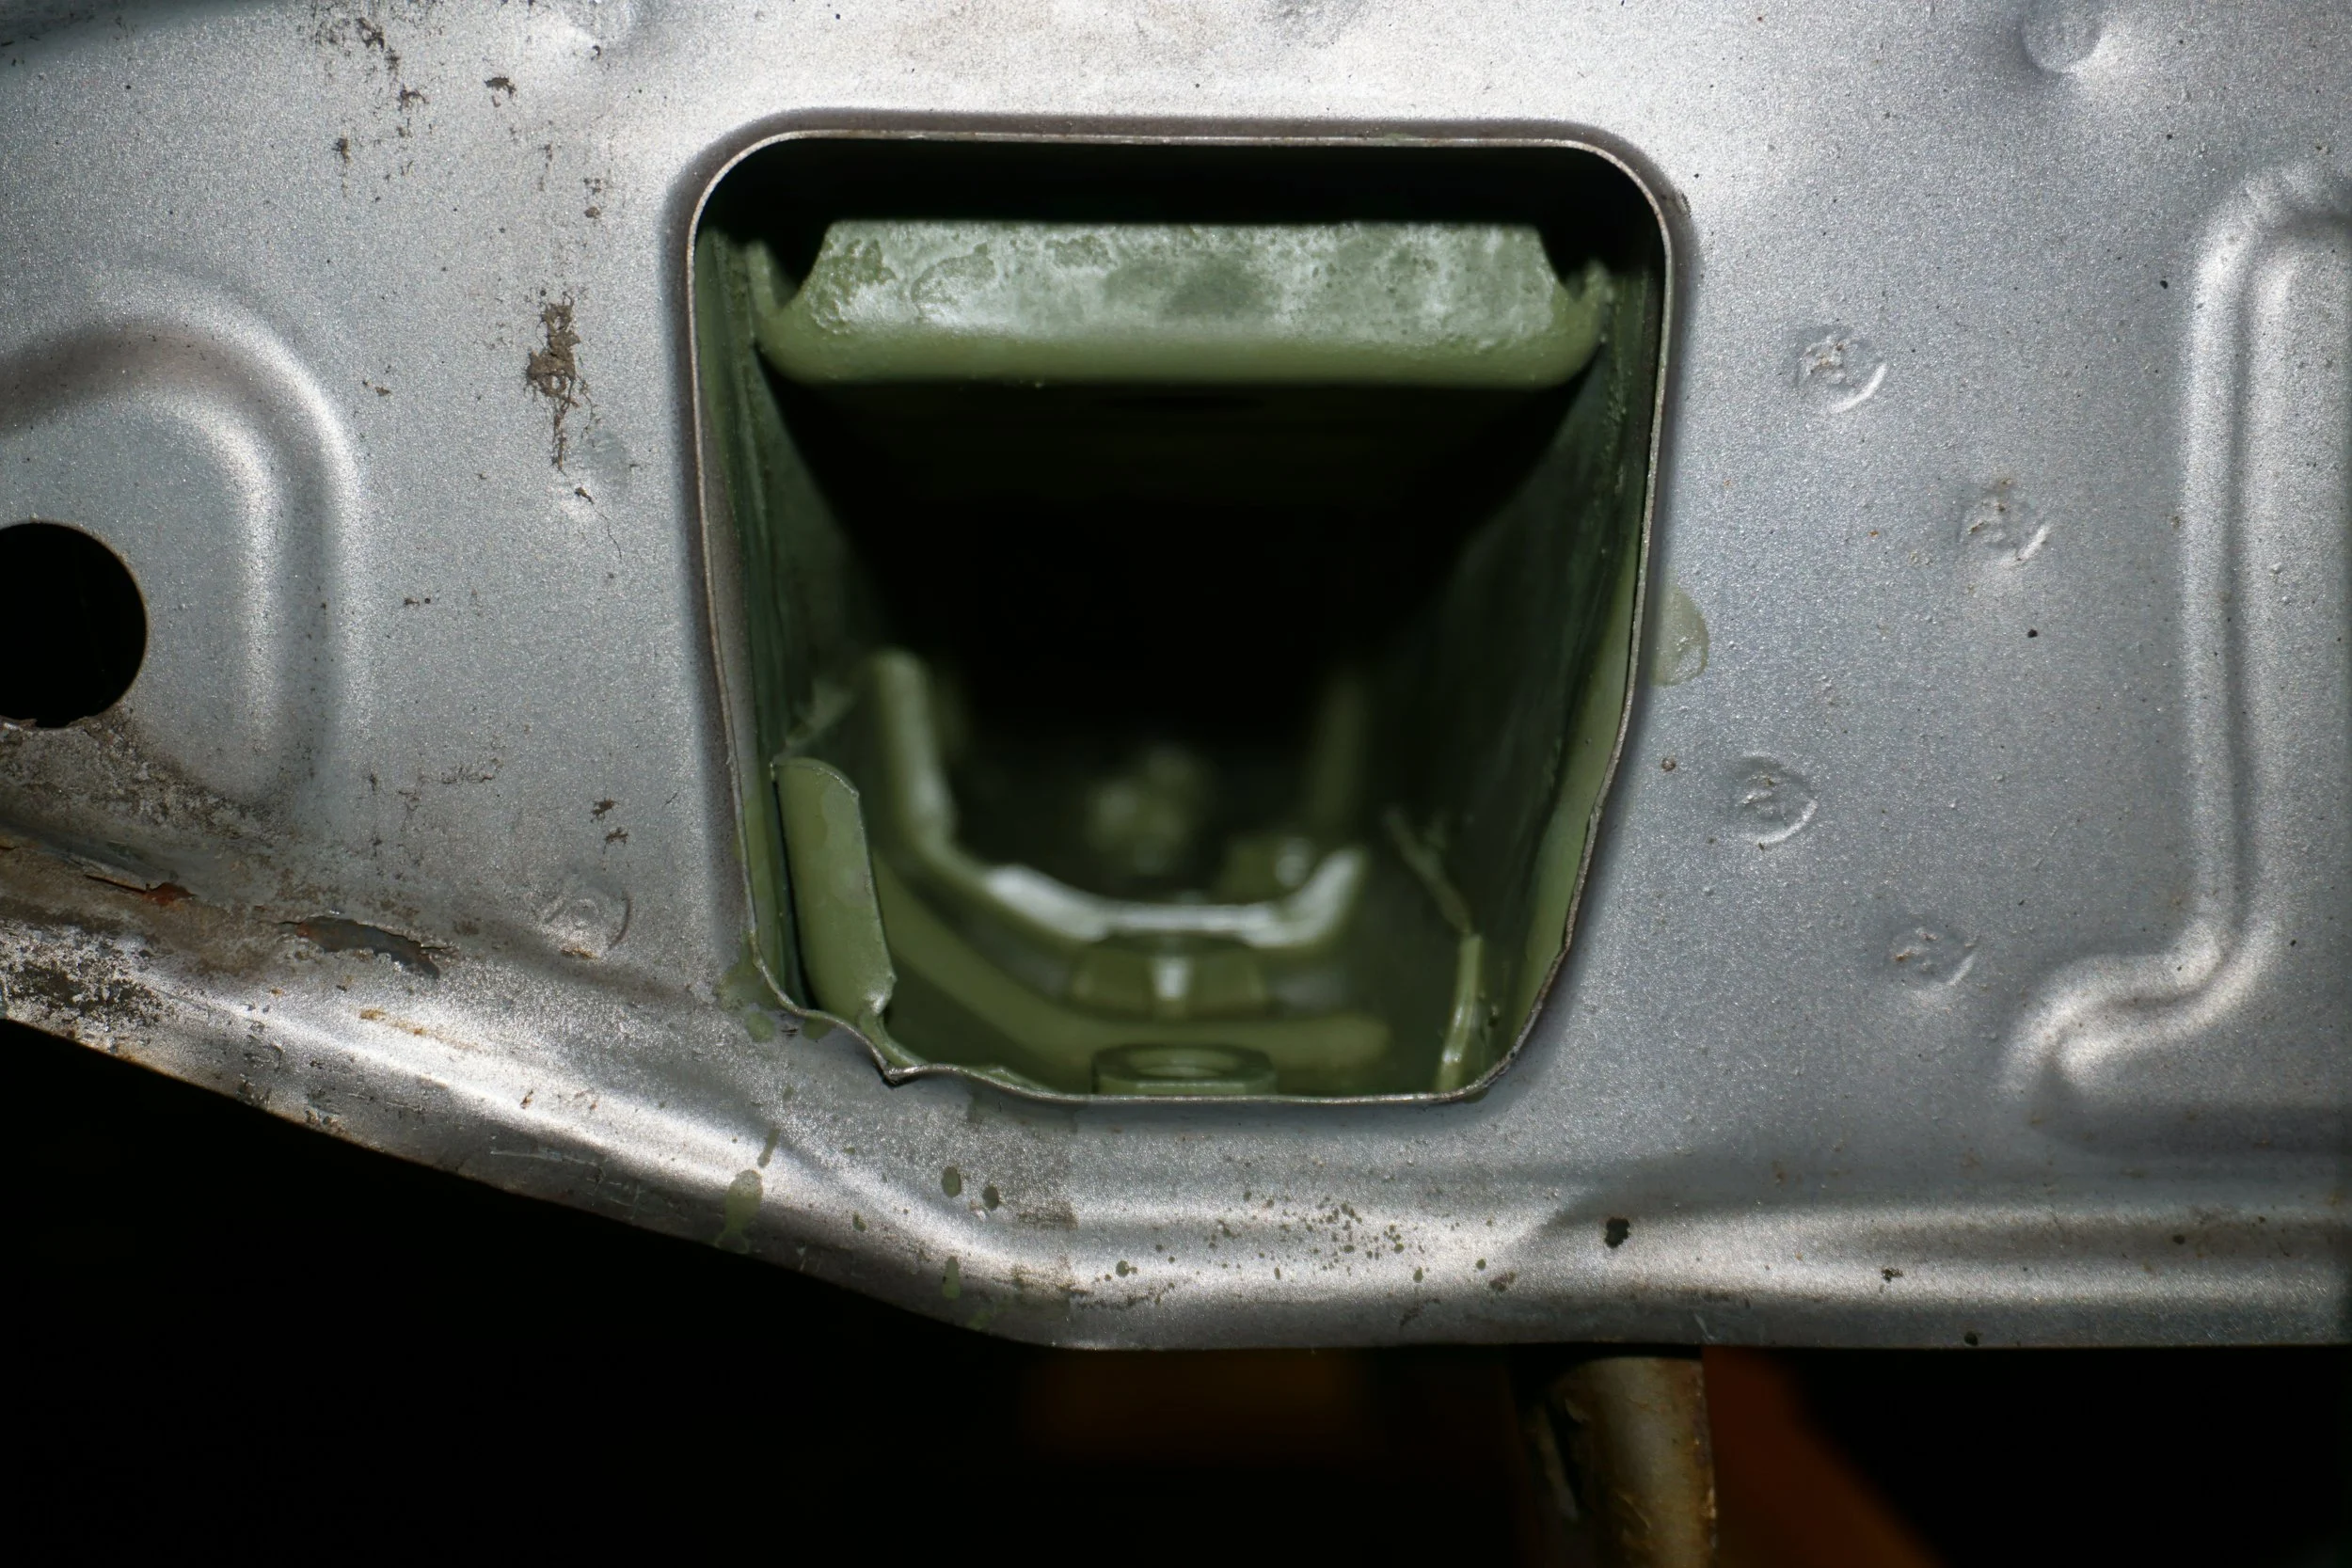
And soaked the entire length of the rear "frame rails" (this view is from the rear where the crash beam bolts into)
First, I have a new, and unexpected addition to the fleet. See if you can guess what is it. I also welded up the outer portions of the rear quarter panels:
As hard as a tried to keep the temperature down, I think I warped the rear quarter panels a little bit, and I'm not sure how I'm going to tackle it. I'm trying to get my PDR guy to come by and take a look and give me his expert opinion. I'm sure I'll revisit this later, but for now, let's keep moving.
With all this bare metal, surface rust was starting to creep in, so I knew I had to get some primer down on everything. Even though almost everything I'm doing is under the car or covered up by the rear bumper, I couldn't help but want to clean up the welds and make everything look pretty. I also applied the white POR15 goop to fill in crevices between welds where things were uneven, and also used it to patch up any holes where the welds blew through or I couldn't weld at all. I used all of my many grinding and smoothing tools to clean everything up, and then hand sanded everything down with 400 grit sandpaper so the primer had something to bite into. Once that was all done (and it took a VERY long time) I wiped everything down with Prep-All three times to remove any dust or oils from the surface.
DS quarter panel
Inside of DS quarter
DS rear/bottom fender area
DS lower outer
DS lower inner
PS lower inner
PS rear/bottom fender area
PS lower outer
Inside of PS quarter
PS quarter panel
PS front/lower fender area (from underneath) (the green stuff is Eastwood Internal Frame Coating)
Speaking of the Eastwood Internal Frame Coating (I went with the green color instead of black so I could see it easier), I applied a few coats of it into the rest of my fender lips while they were cut open, with the hopes the stuff would soak into all those tight crevices (from the fenders being rolled) to mitigate any rust that's hiding in there.
I taped up a lot of the holes underneath the rear of the car and sprayed this stuff everywhere the wand could reach:
Up into the support bar for the panhard rod:
And soaked the entire length of the rear "frame rails" (this view is from the rear where the crash beam bolts into)

It's hilariously slow, but also hilariously fun around corners! Not entirely sure what the plans are at the moment. It's a 1995 with the 1.8, ~170k miles. I bought it from the original owner, and it was garage kept for 95% of its life. There is ZERO rust on the car, it's bone stock, and the top has been replaced with one that has a glass rear window and is in perfect shape. I have dreams of a K24 swapped Miata, but the more I think about it, the more I think I want to do that to an NB instead of an NA. This car is OBD1, and I think I want OBD2, and I just like the looks of the NB more than NAs. I'll probably just do some maintenance to it, fix a few small little issues, and just drive it. Maybe sell it in the spring/summer for a healthy profit, since I got it for a great price.
Lmao sounds like my N/A mr2.
Ive seen J swaps on miatas, but not so much on K swaps.
Would it really matter if the old engine coming out is OBD2 or not since the new engine is coming with its own ECU is already OBD2?
Ive seen J swaps on miatas, but not so much on K swaps.
Would it really matter if the old engine coming out is OBD2 or not since the new engine is coming with its own ECU is already OBD2?
SW20, right?. That has been on my list of cars to own as long as the Miata has. I want to put a 3SGTE in one of those so bad! That or a V6. The beauty of the K swap is that it doesn't really change the weight of the car and is in line with the character of the car. It also responds very well to mods, with 220 whp pretty easy with full bolt-ons. As for OBD2, it very well might not matter at all, I haven't looked into that too closely yet.
SW20, right?. That has been on my list of cars to own as long as the Miata has. I want to put a 3SGTE in one of those so bad! That or a V6. The beauty of the K swap is that it doesn't really change the weight of the car and is in line with the character of the car. It also responds very well to mods, with 220 whp pretty easy with full bolt-ons. As for OBD2, it very well might not matter at all, I haven't looked into that too closely yet.
I sold that car and have a 93 hardtop thats waiting for me to get off my butt and pick a v6 for it.
The K has got to be lighter than the stock engine too, win win situation.


Okay, back to work! With the rally-x season over and done with (season champion, woot!) I'll hopefully have more time to finish this project, if that pesky Miata doesn't take over my garage.
With most of the patches welded in, the bare metal was starting to get minor surface rust on it, so I was itching to get some primer on everything. I will be using some SprayMax 2-part epoxy primer for this project, as it's the best stuff you can get. I was going back and forth about whether I should do the whole POR15 prep process on everything, but this includes wiping everything down with water multiple times, which I just didn't think was a great idea, so instead I just went crazy with some 320 or 400 grit sandpaper. This served two purposes; it got off all the surface rust, and it also gave me a nice roughed up surface for the primer to adhere to. Once I was happy with the way everything looked, I wiped it all down 3 times with some Prep-All to remove any traces of oils from the surface. Then I masked off the rest of the car, and laid down three coats of primer.
PS in front of the rear wheel:


Back of the PS quarter panel

PS behind the rear wheel (inside)

PS behind the rear wheel:

DS behind the rear wheel (inside)

DS behind the rear wheel

DS behind the rear wheel (outside)


Back of the DS quarter panel

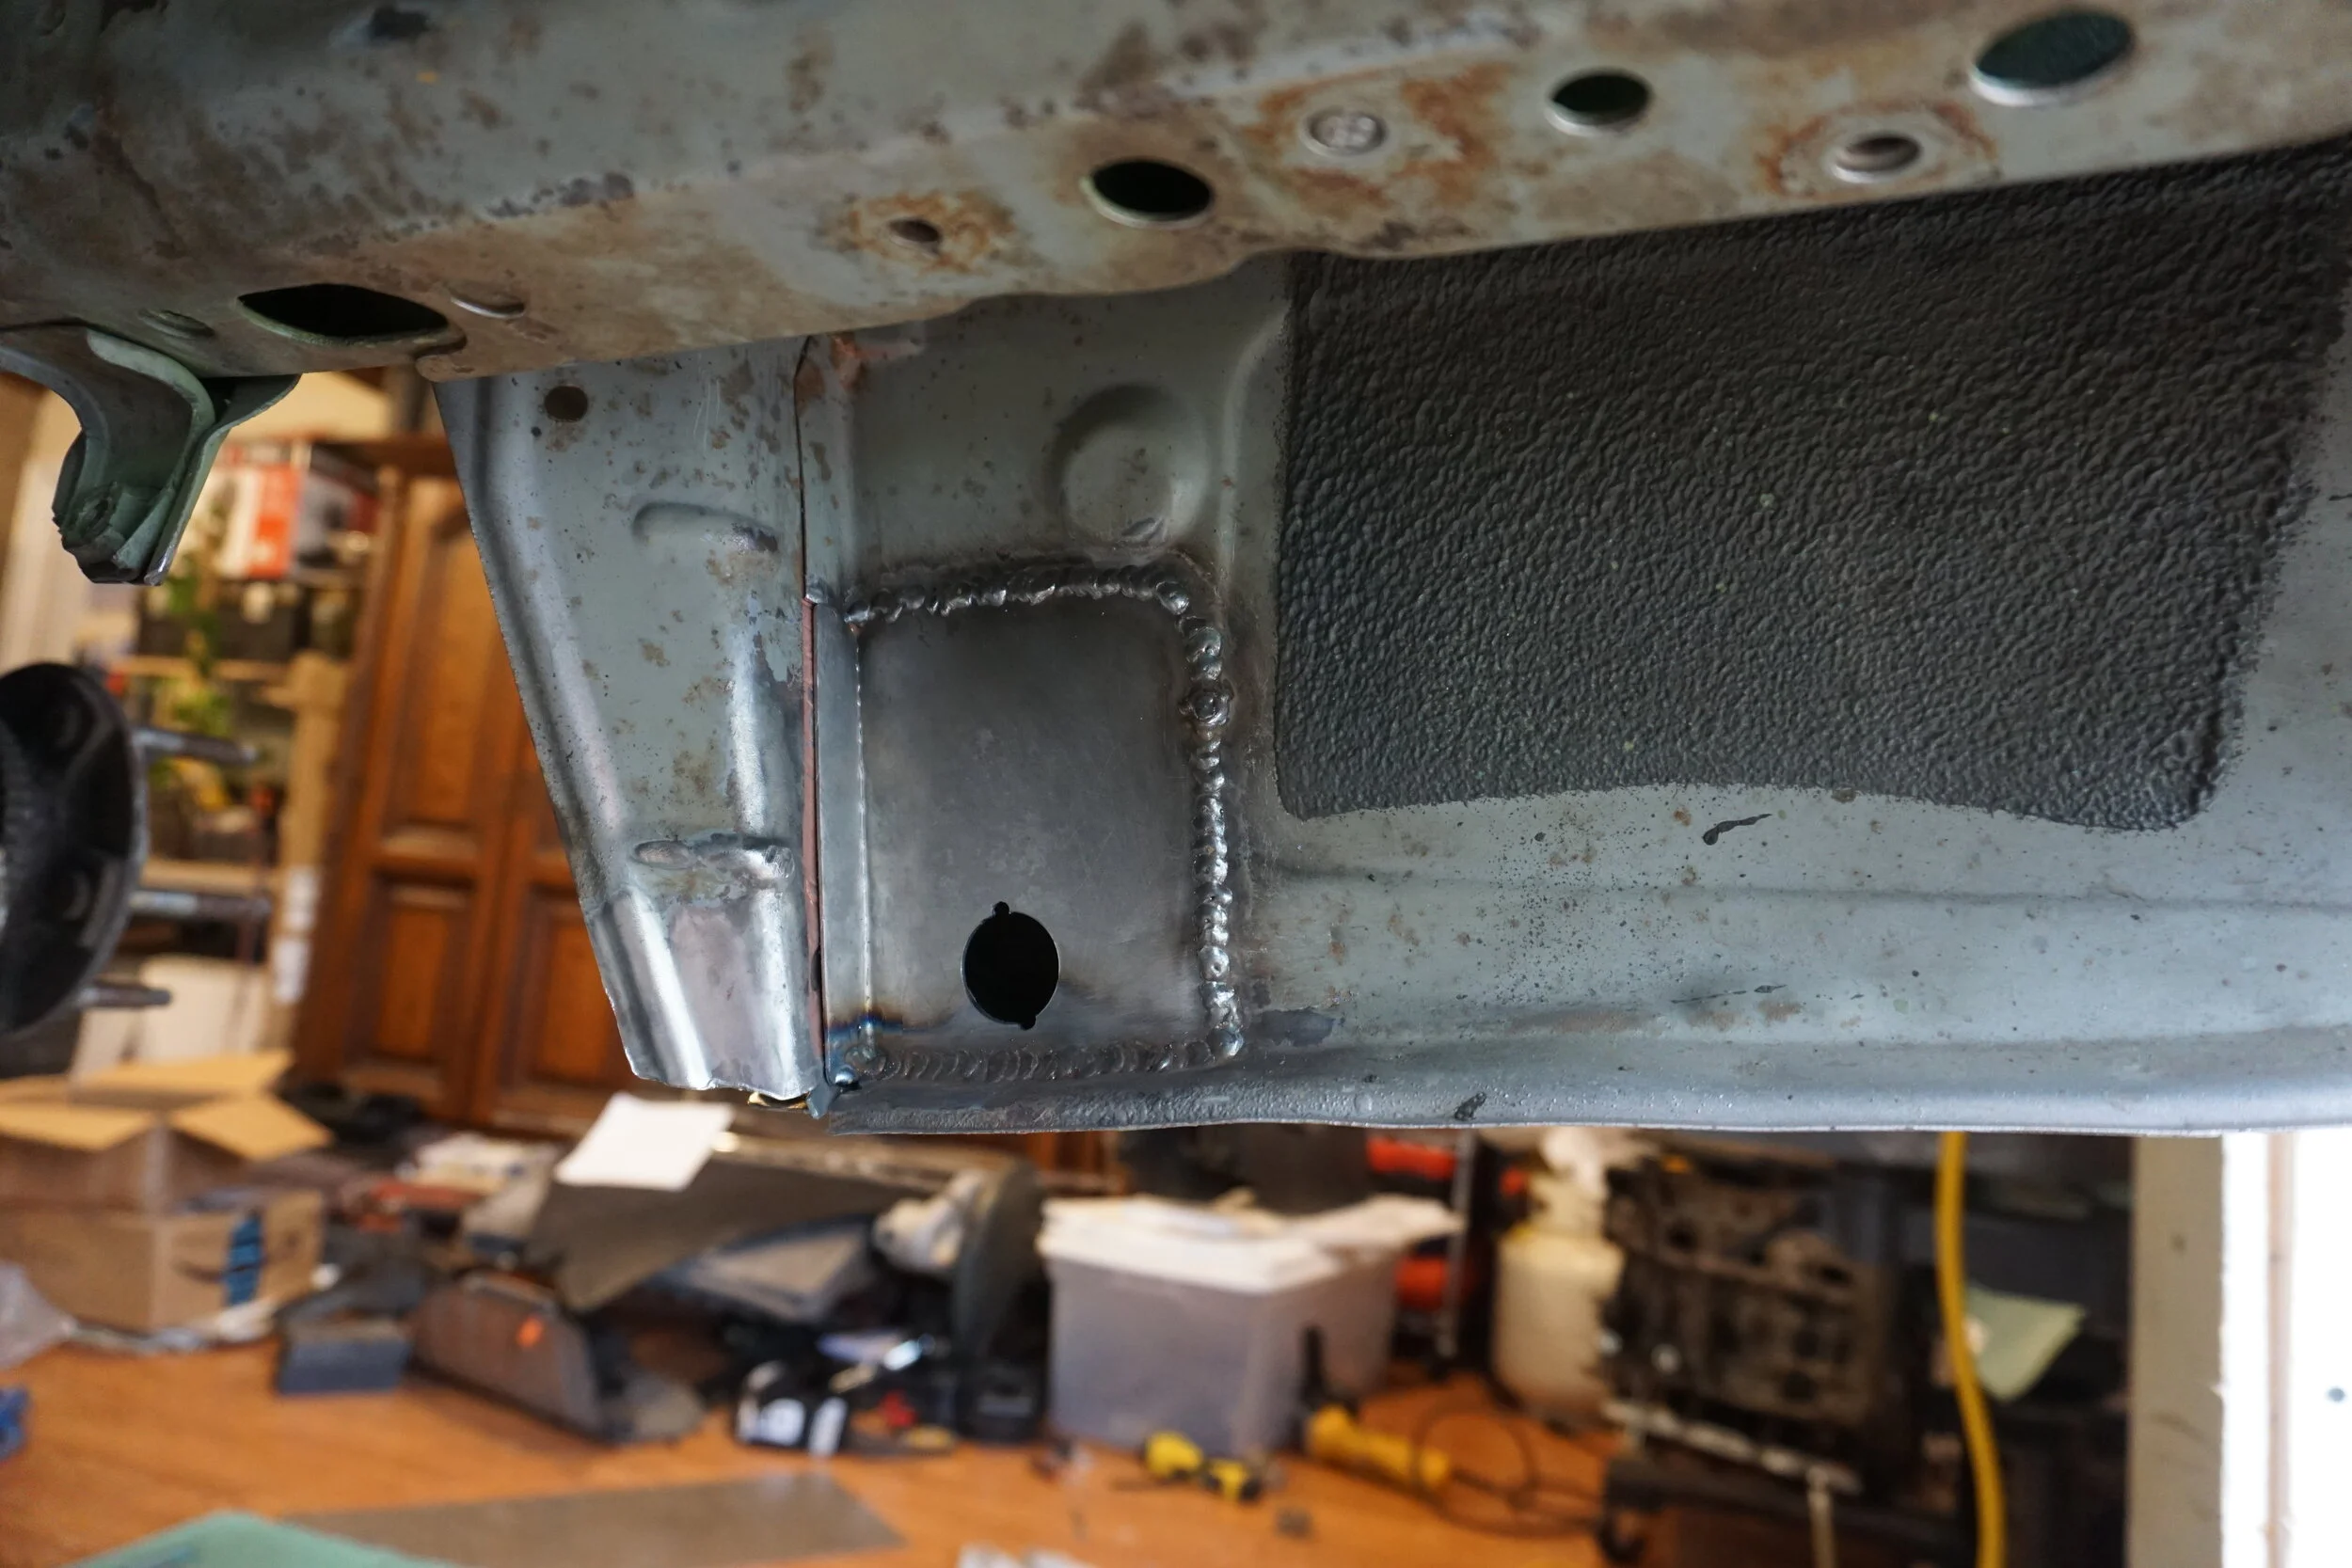
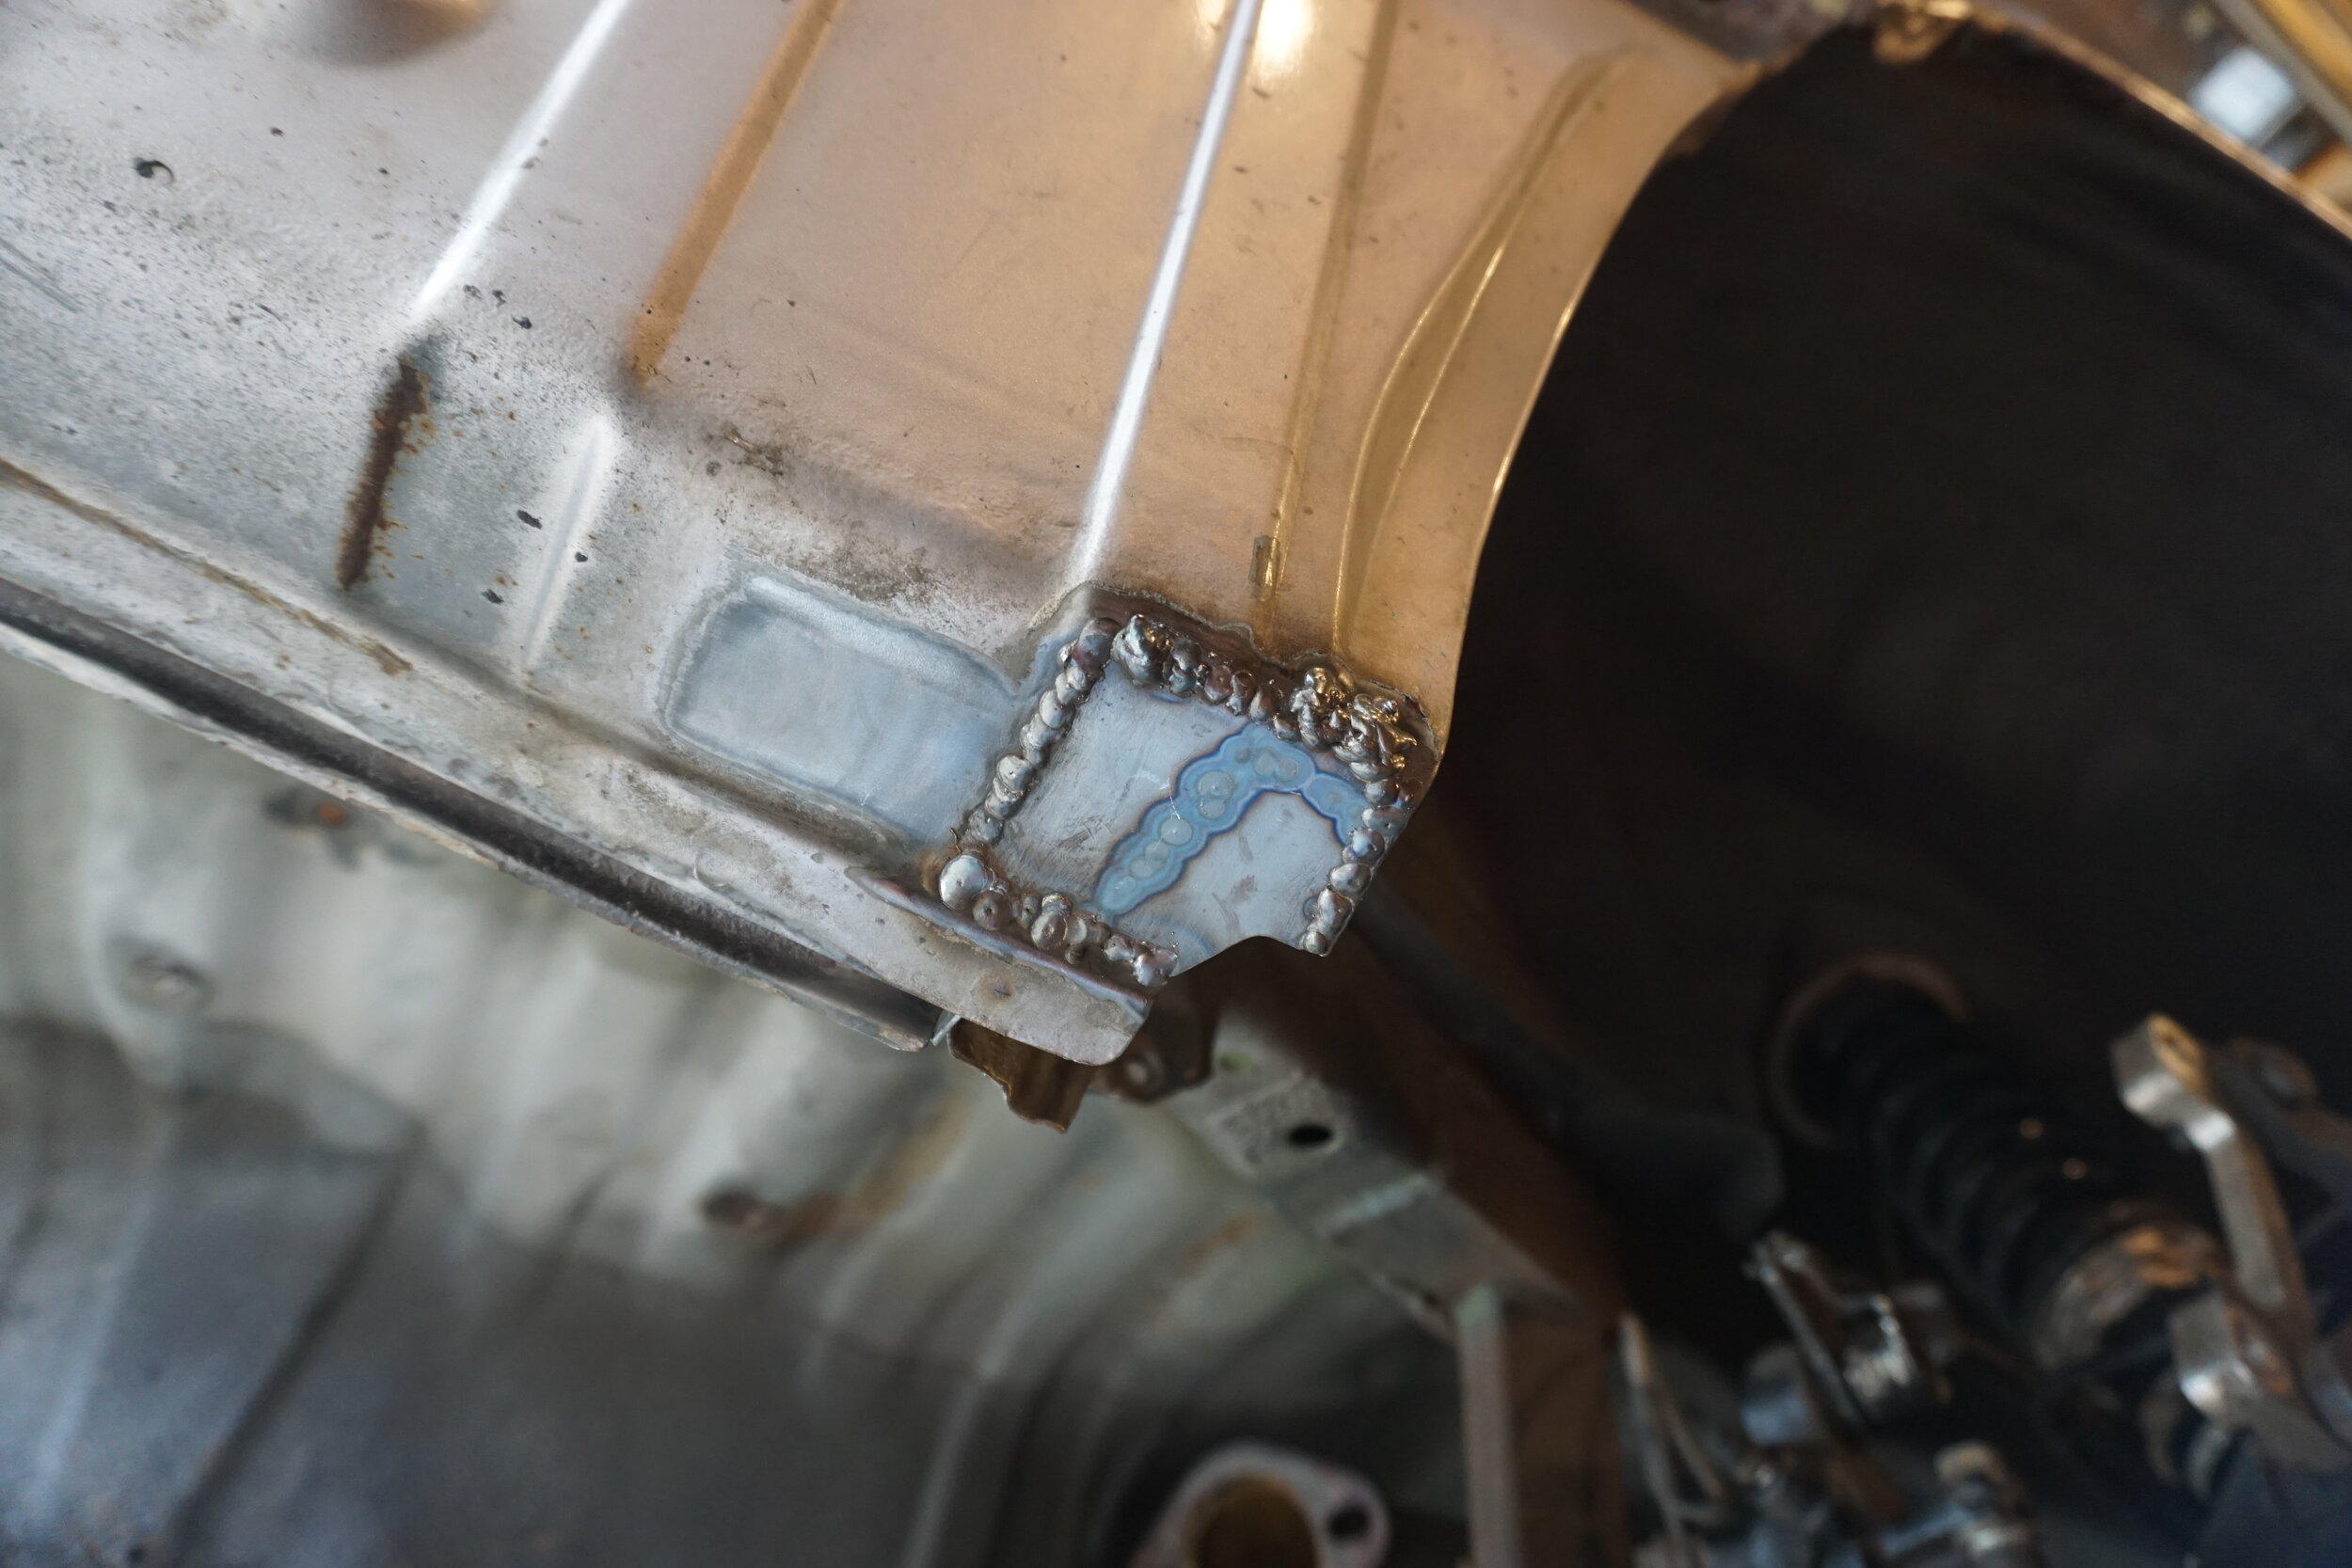
Then I had to weld in the last few pieces. These had to wait until after I sprayed the internal areas with the epoxy primer so they were protected before they got covered up. I started on the curved piece on the PS in front of the rear wheel. The patch I had originally made just didn't fit tight enough, so I had to throw it away and make a new one, which took a few hours to get right given the complexity of the shape. But it finally turned out great, and the welding went pretty well. There were a few small areas where it blew through, but nothing a little POR15 goop couldn't solve. Ground it down, and it looks awesome!


Then for the inner part of the PS rear fender:

And the DS:

Then they got primered (the white stuff you see is the POR15 goop)


With most of the patches welded in, the bare metal was starting to get minor surface rust on it, so I was itching to get some primer on everything. I will be using some SprayMax 2-part epoxy primer for this project, as it's the best stuff you can get. I was going back and forth about whether I should do the whole POR15 prep process on everything, but this includes wiping everything down with water multiple times, which I just didn't think was a great idea, so instead I just went crazy with some 320 or 400 grit sandpaper. This served two purposes; it got off all the surface rust, and it also gave me a nice roughed up surface for the primer to adhere to. Once I was happy with the way everything looked, I wiped it all down 3 times with some Prep-All to remove any traces of oils from the surface. Then I masked off the rest of the car, and laid down three coats of primer.
PS in front of the rear wheel:
Back of the PS quarter panel
PS behind the rear wheel (inside)
PS behind the rear wheel:
DS behind the rear wheel (inside)
DS behind the rear wheel
DS behind the rear wheel (outside)
Back of the DS quarter panel
Then I had to weld in the last few pieces. These had to wait until after I sprayed the internal areas with the epoxy primer so they were protected before they got covered up. I started on the curved piece on the PS in front of the rear wheel. The patch I had originally made just didn't fit tight enough, so I had to throw it away and make a new one, which took a few hours to get right given the complexity of the shape. But it finally turned out great, and the welding went pretty well. There were a few small areas where it blew through, but nothing a little POR15 goop couldn't solve. Ground it down, and it looks awesome!
Then for the inner part of the PS rear fender:
And the DS:
Then they got primered (the white stuff you see is the POR15 goop)
Alright, so I need some community feedback here!
A company is now making a HD detent kit for the 6 speed transmission:
https://www.visiononeracing.com/prod.../hd-detent-kit
As well as shift selector springs:
https://www.visiononeracing.com/prod...r-springs-race
I'm considering buying both of these parts as my 4.4 FD 6 speed transmission is still awaiting some parts before it's reassembled, and now would be the perfect time to install these things. But these parts are so new that I can't find any reviews on them. Does anyone have experience with parts like these? What are the odds they would make the trans/shifter too stiff for daily driver use?
Definitely need to take into account your shifter choice.
Short throw shifter? Weighted ****?
With my combo, everything is needed. My extended and weighted shift **** makes shifts feel vague mid corner even though I thoroughly appreciate the shorter distance from the steering wheel.
I will be trying some similar fixes along with trying to repair the whole shifter assembly to maintain crispness.
I haven't driven the 6 speed in anger yet since it's missing 3rd gear, but in driving it around my neighborhood it so far seems to shift nice and smooth. As of now I only have the bushings installed and not the STS. Any chance these stiffer springs would make things too stiff and make it unpleasant to drive on the street?
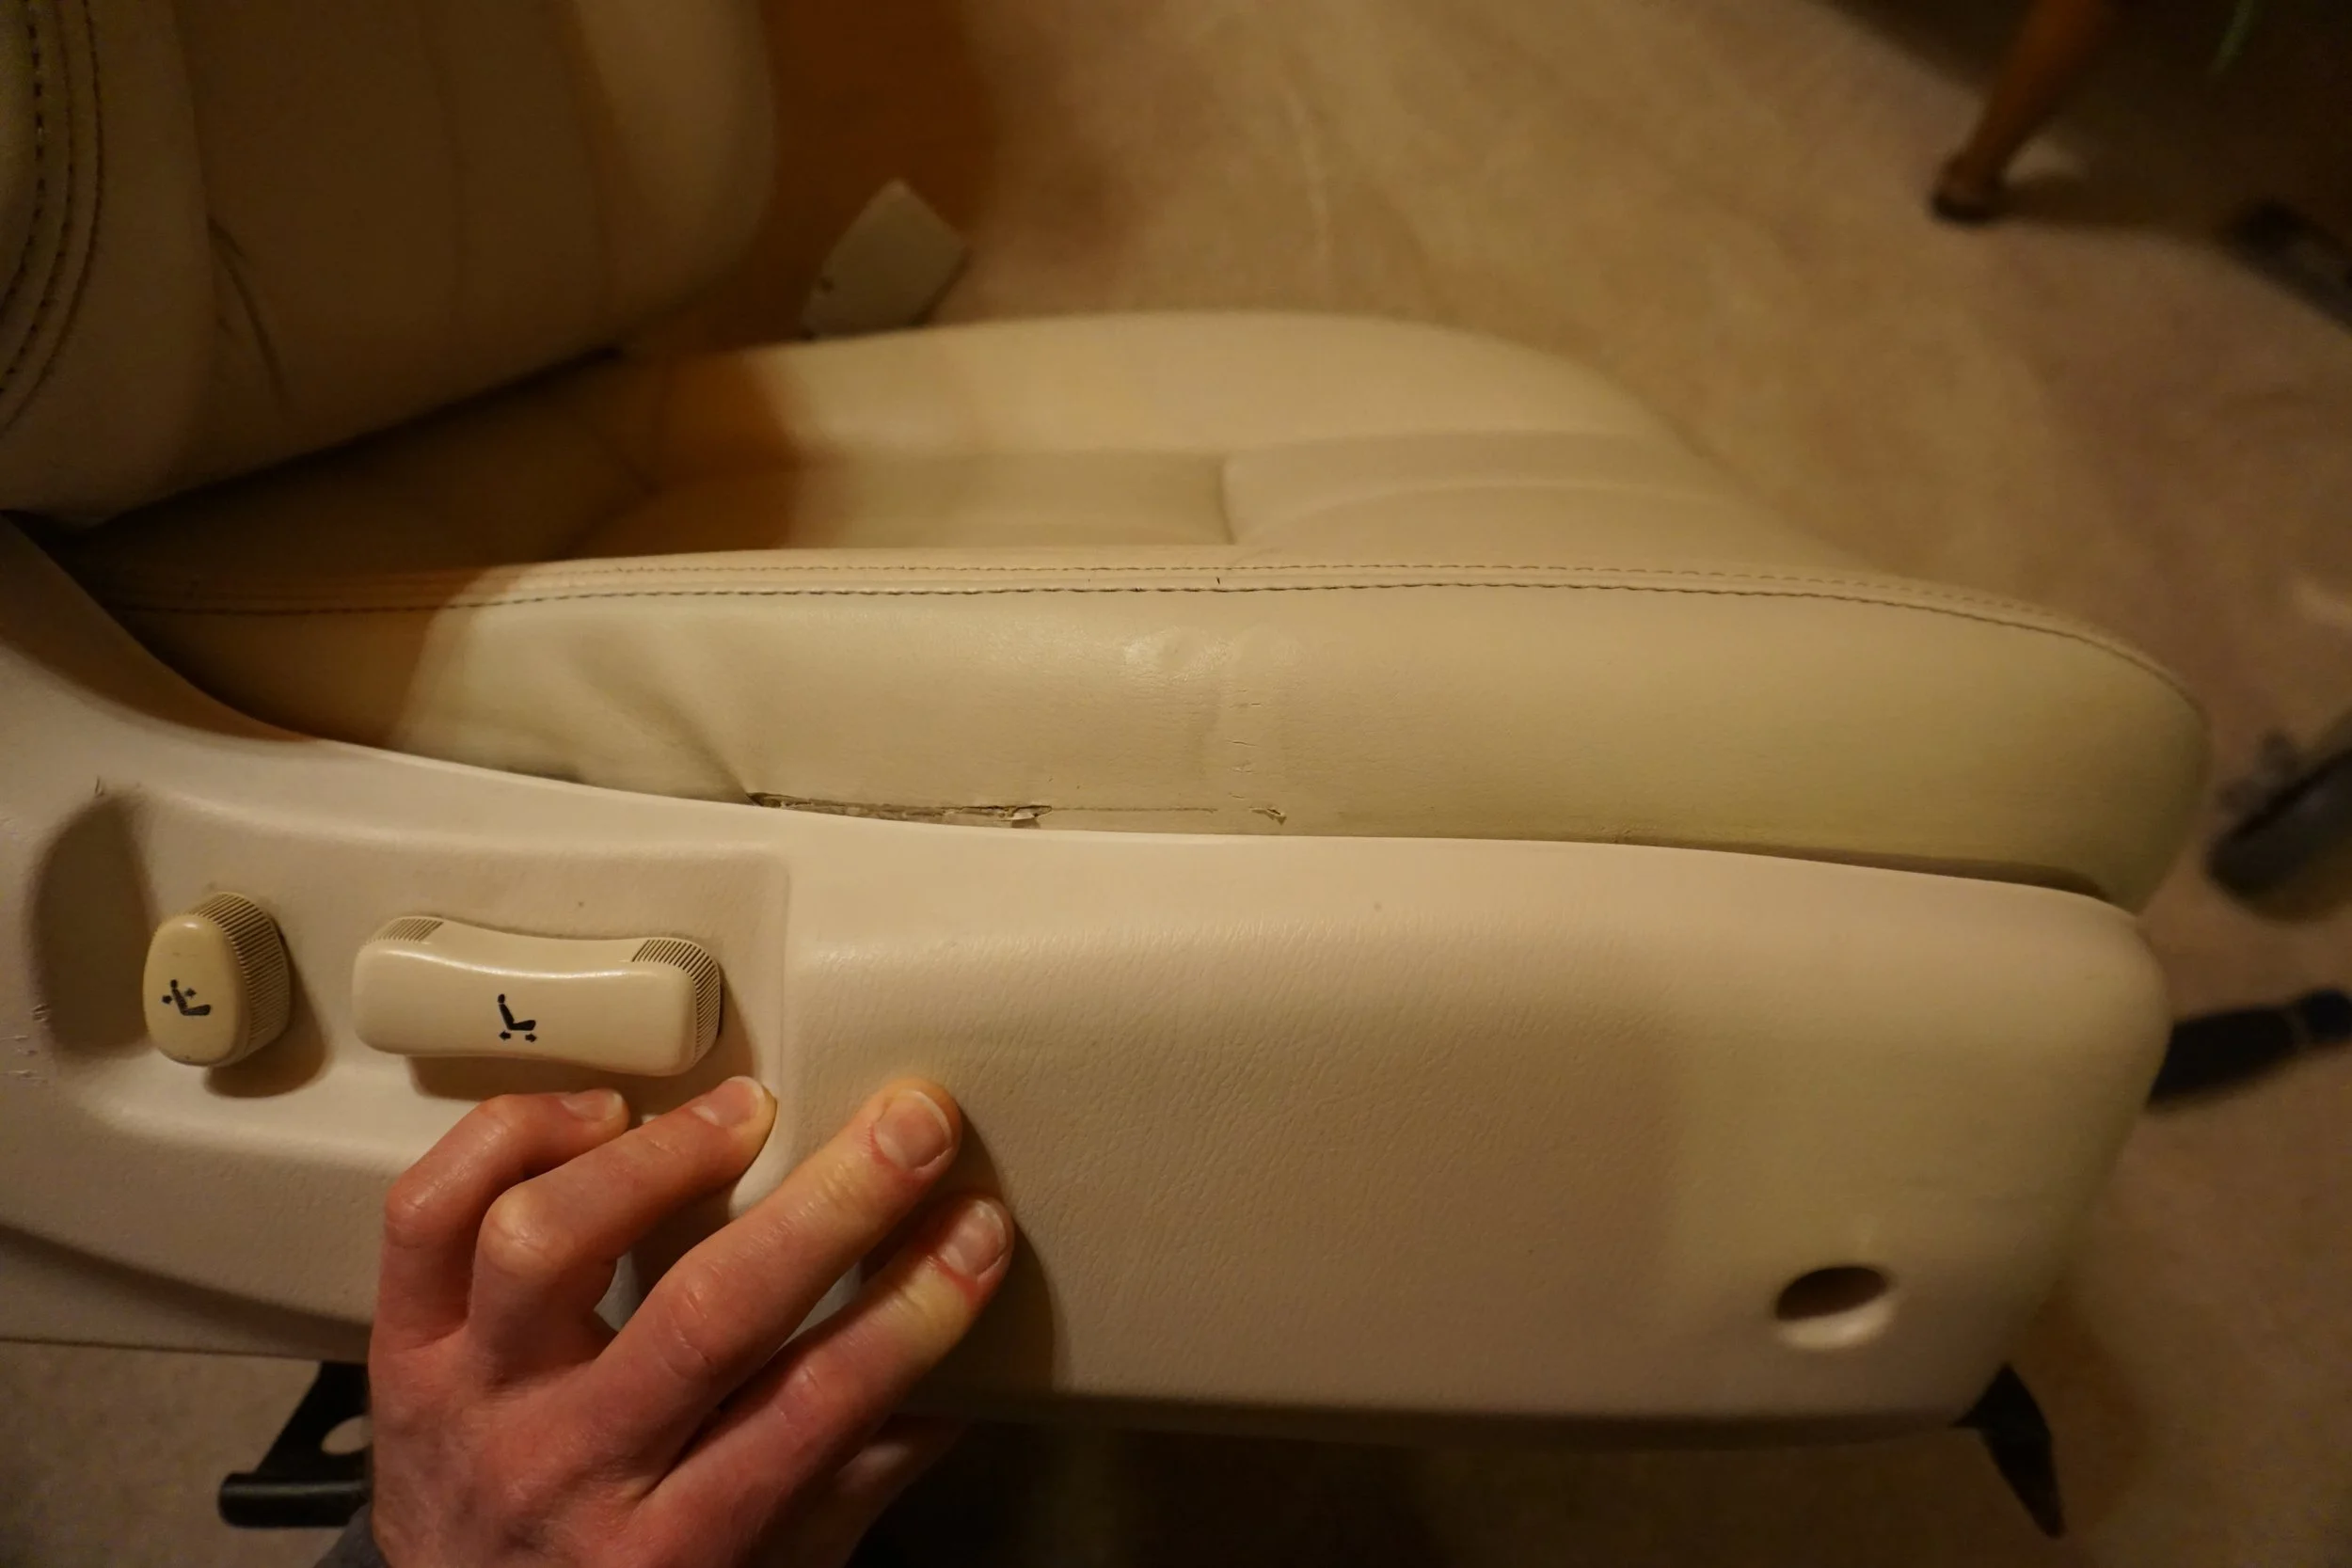
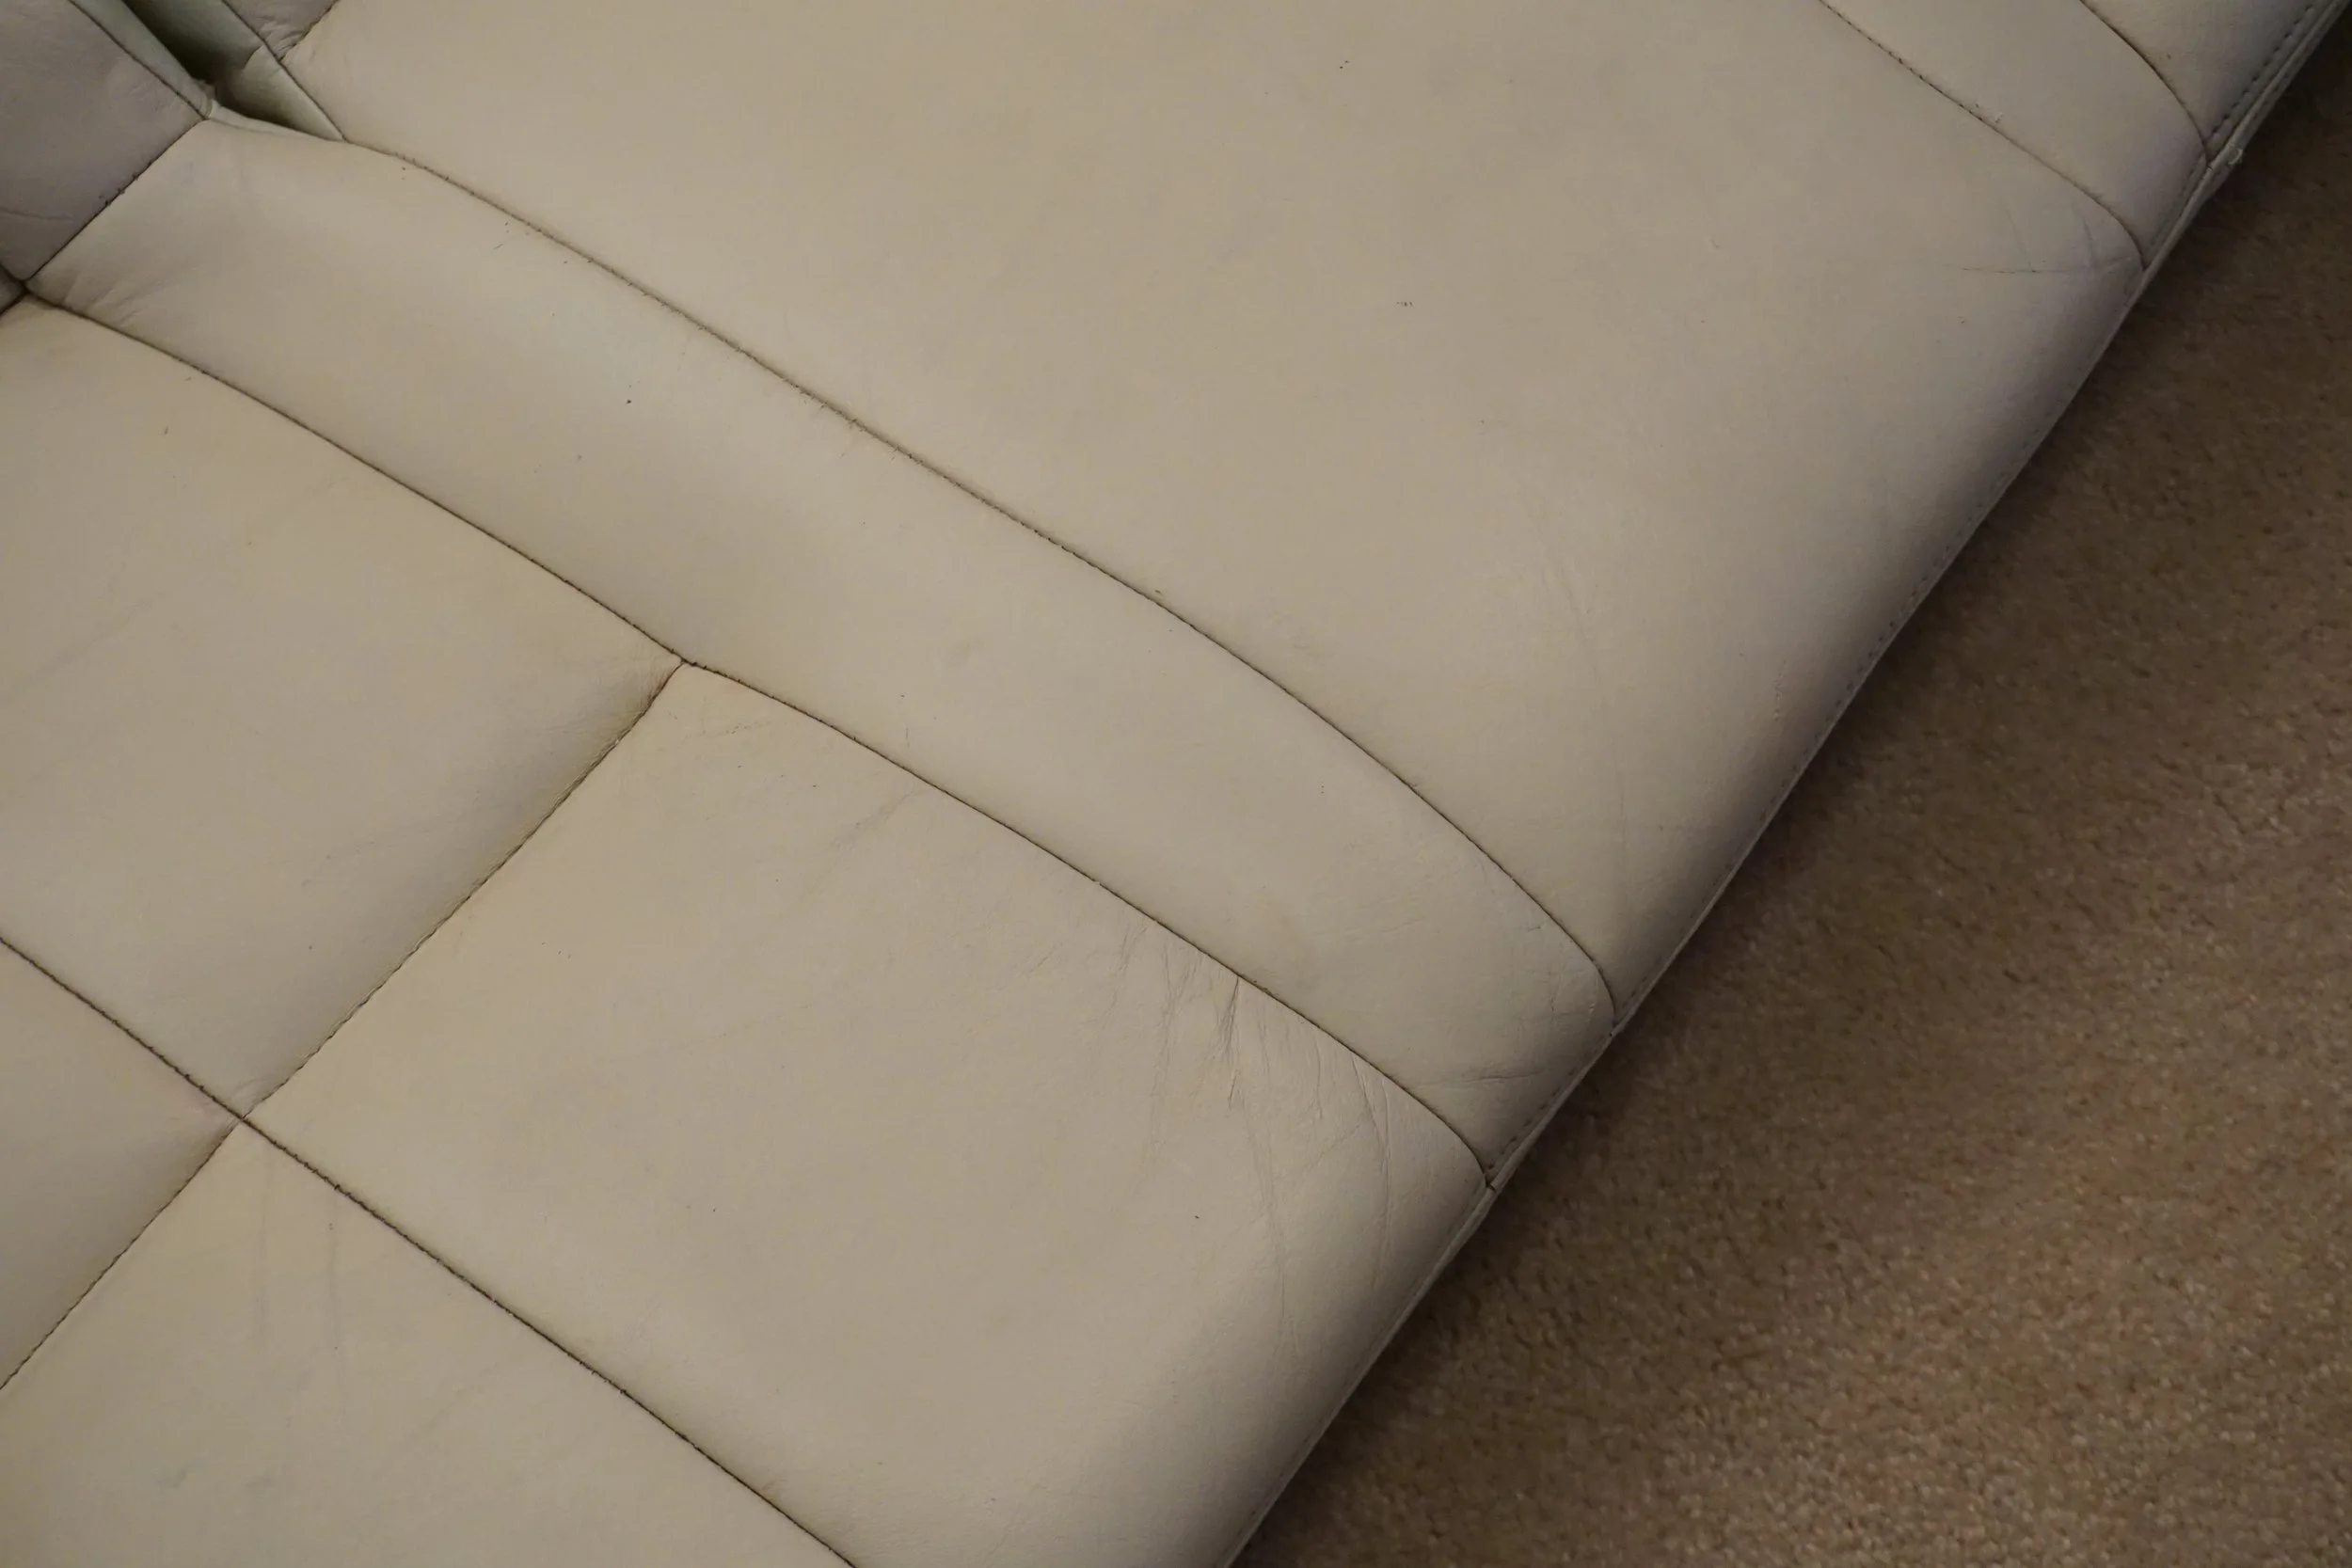
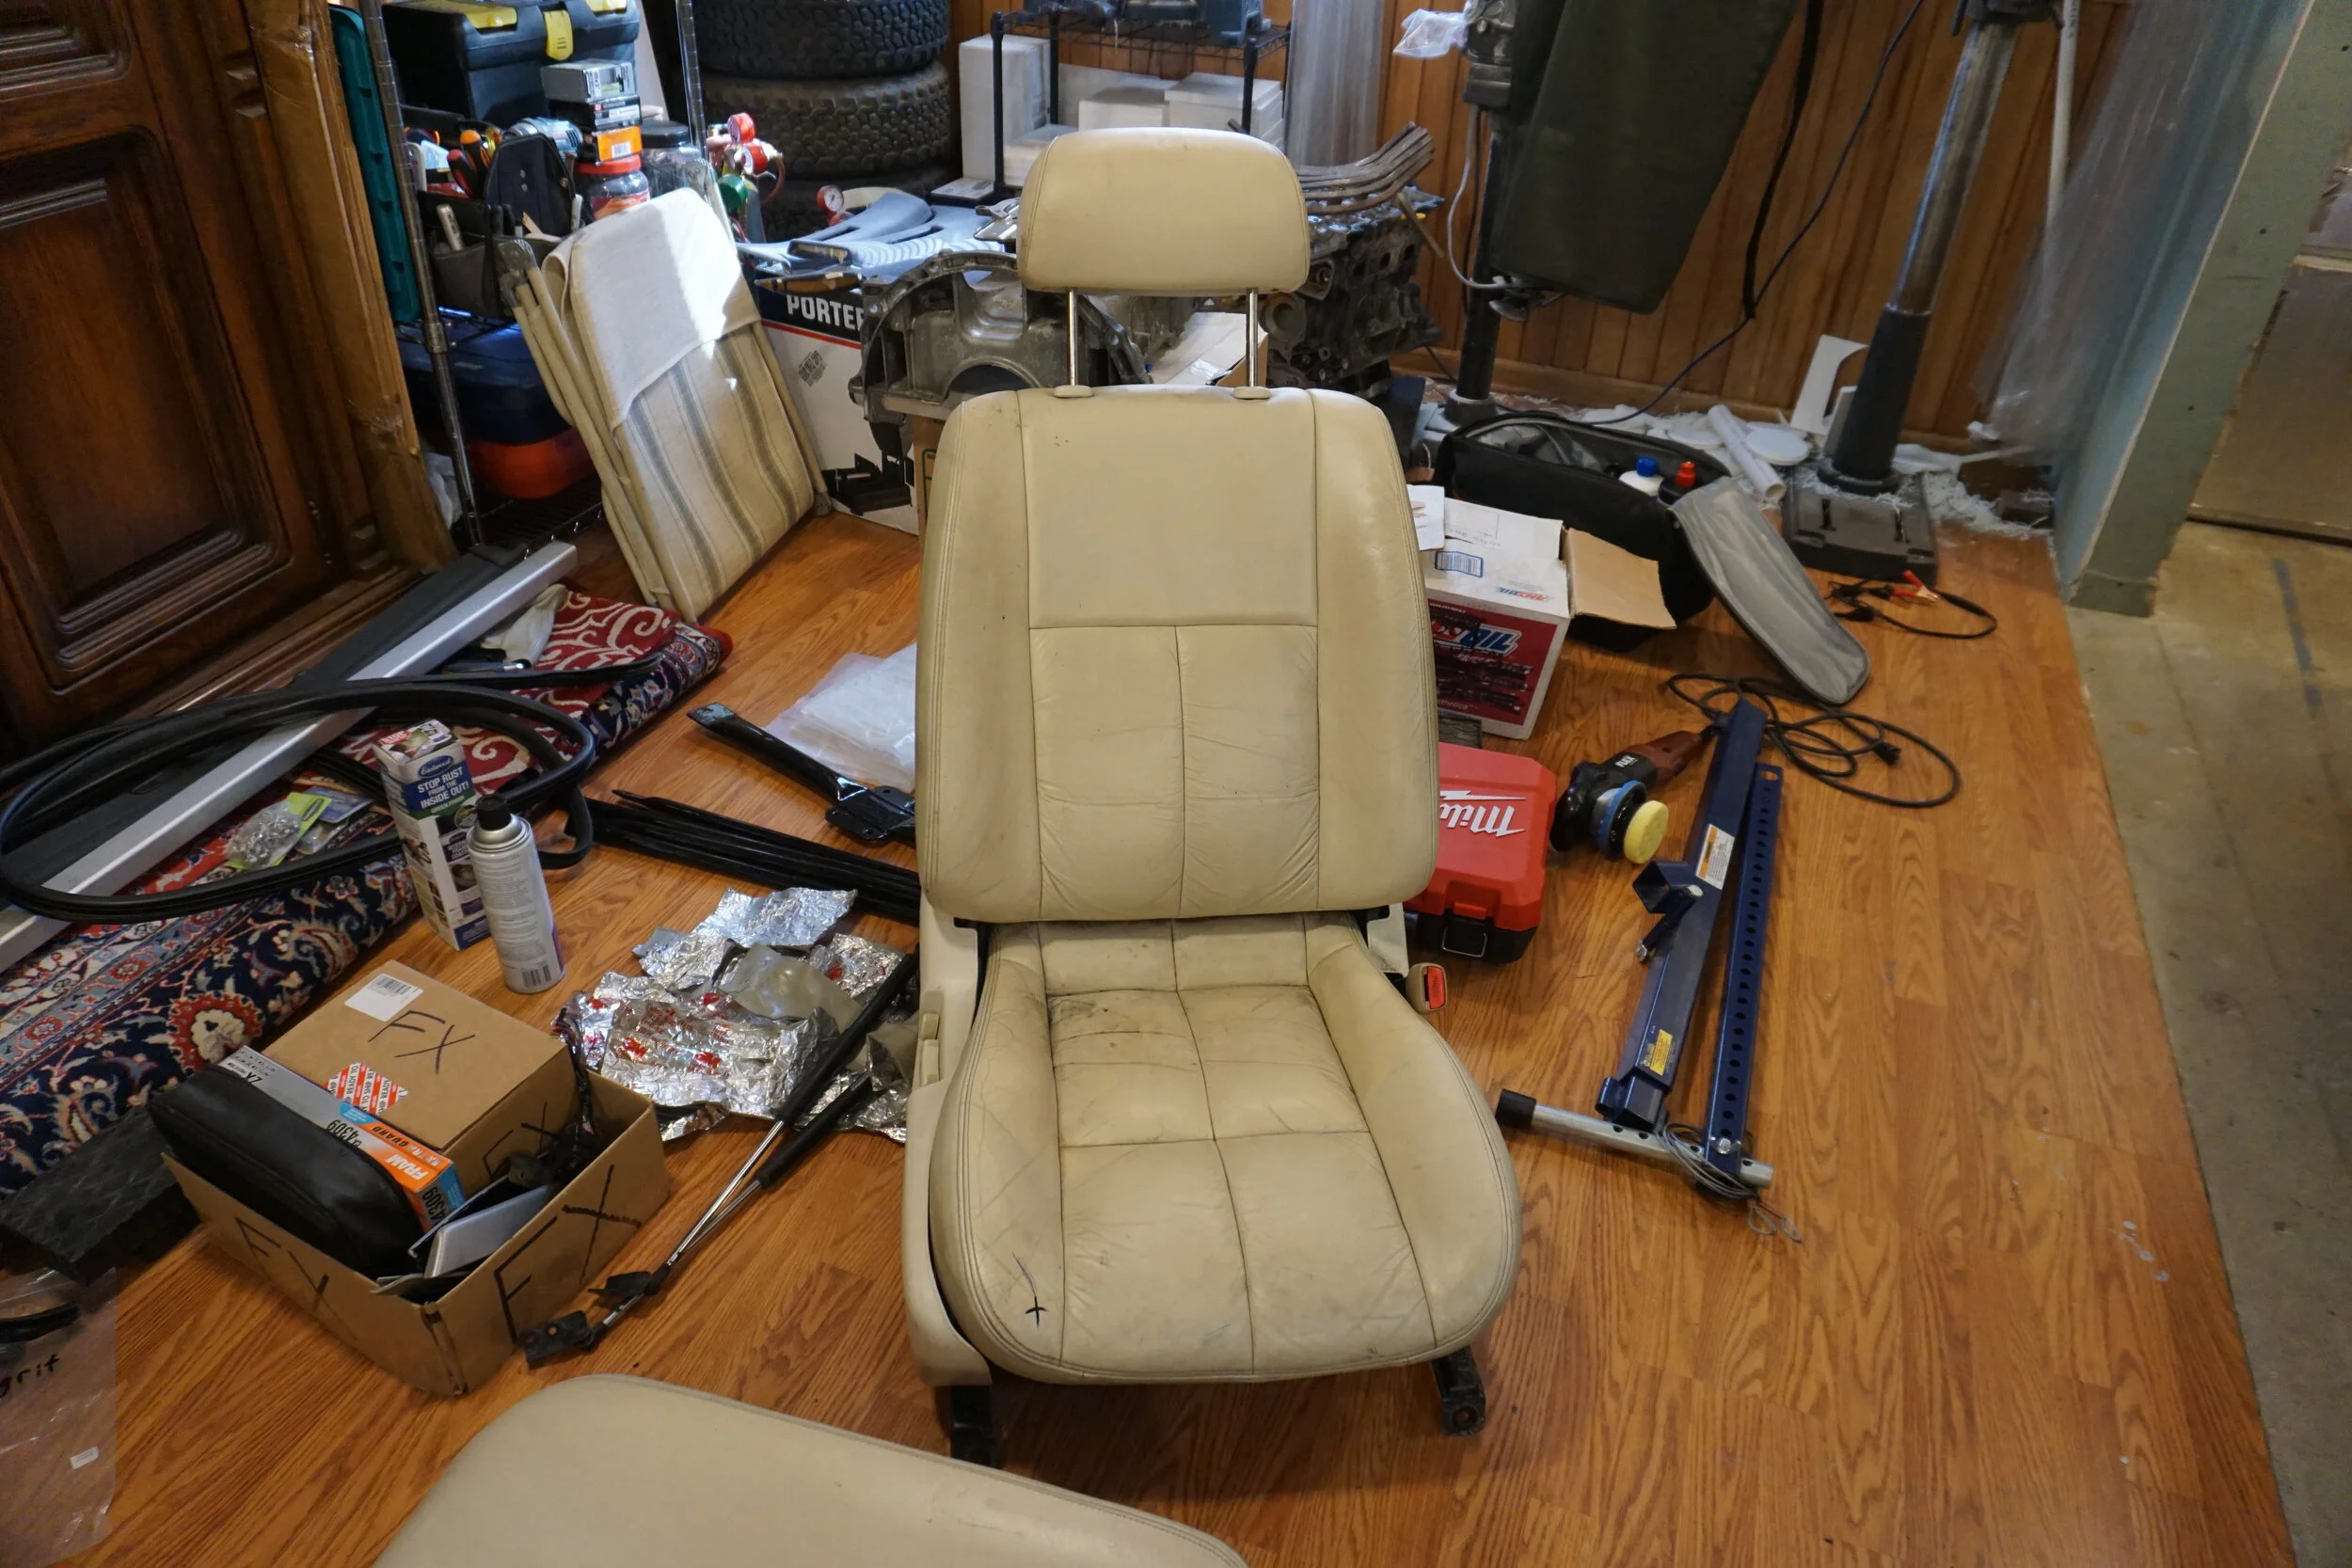
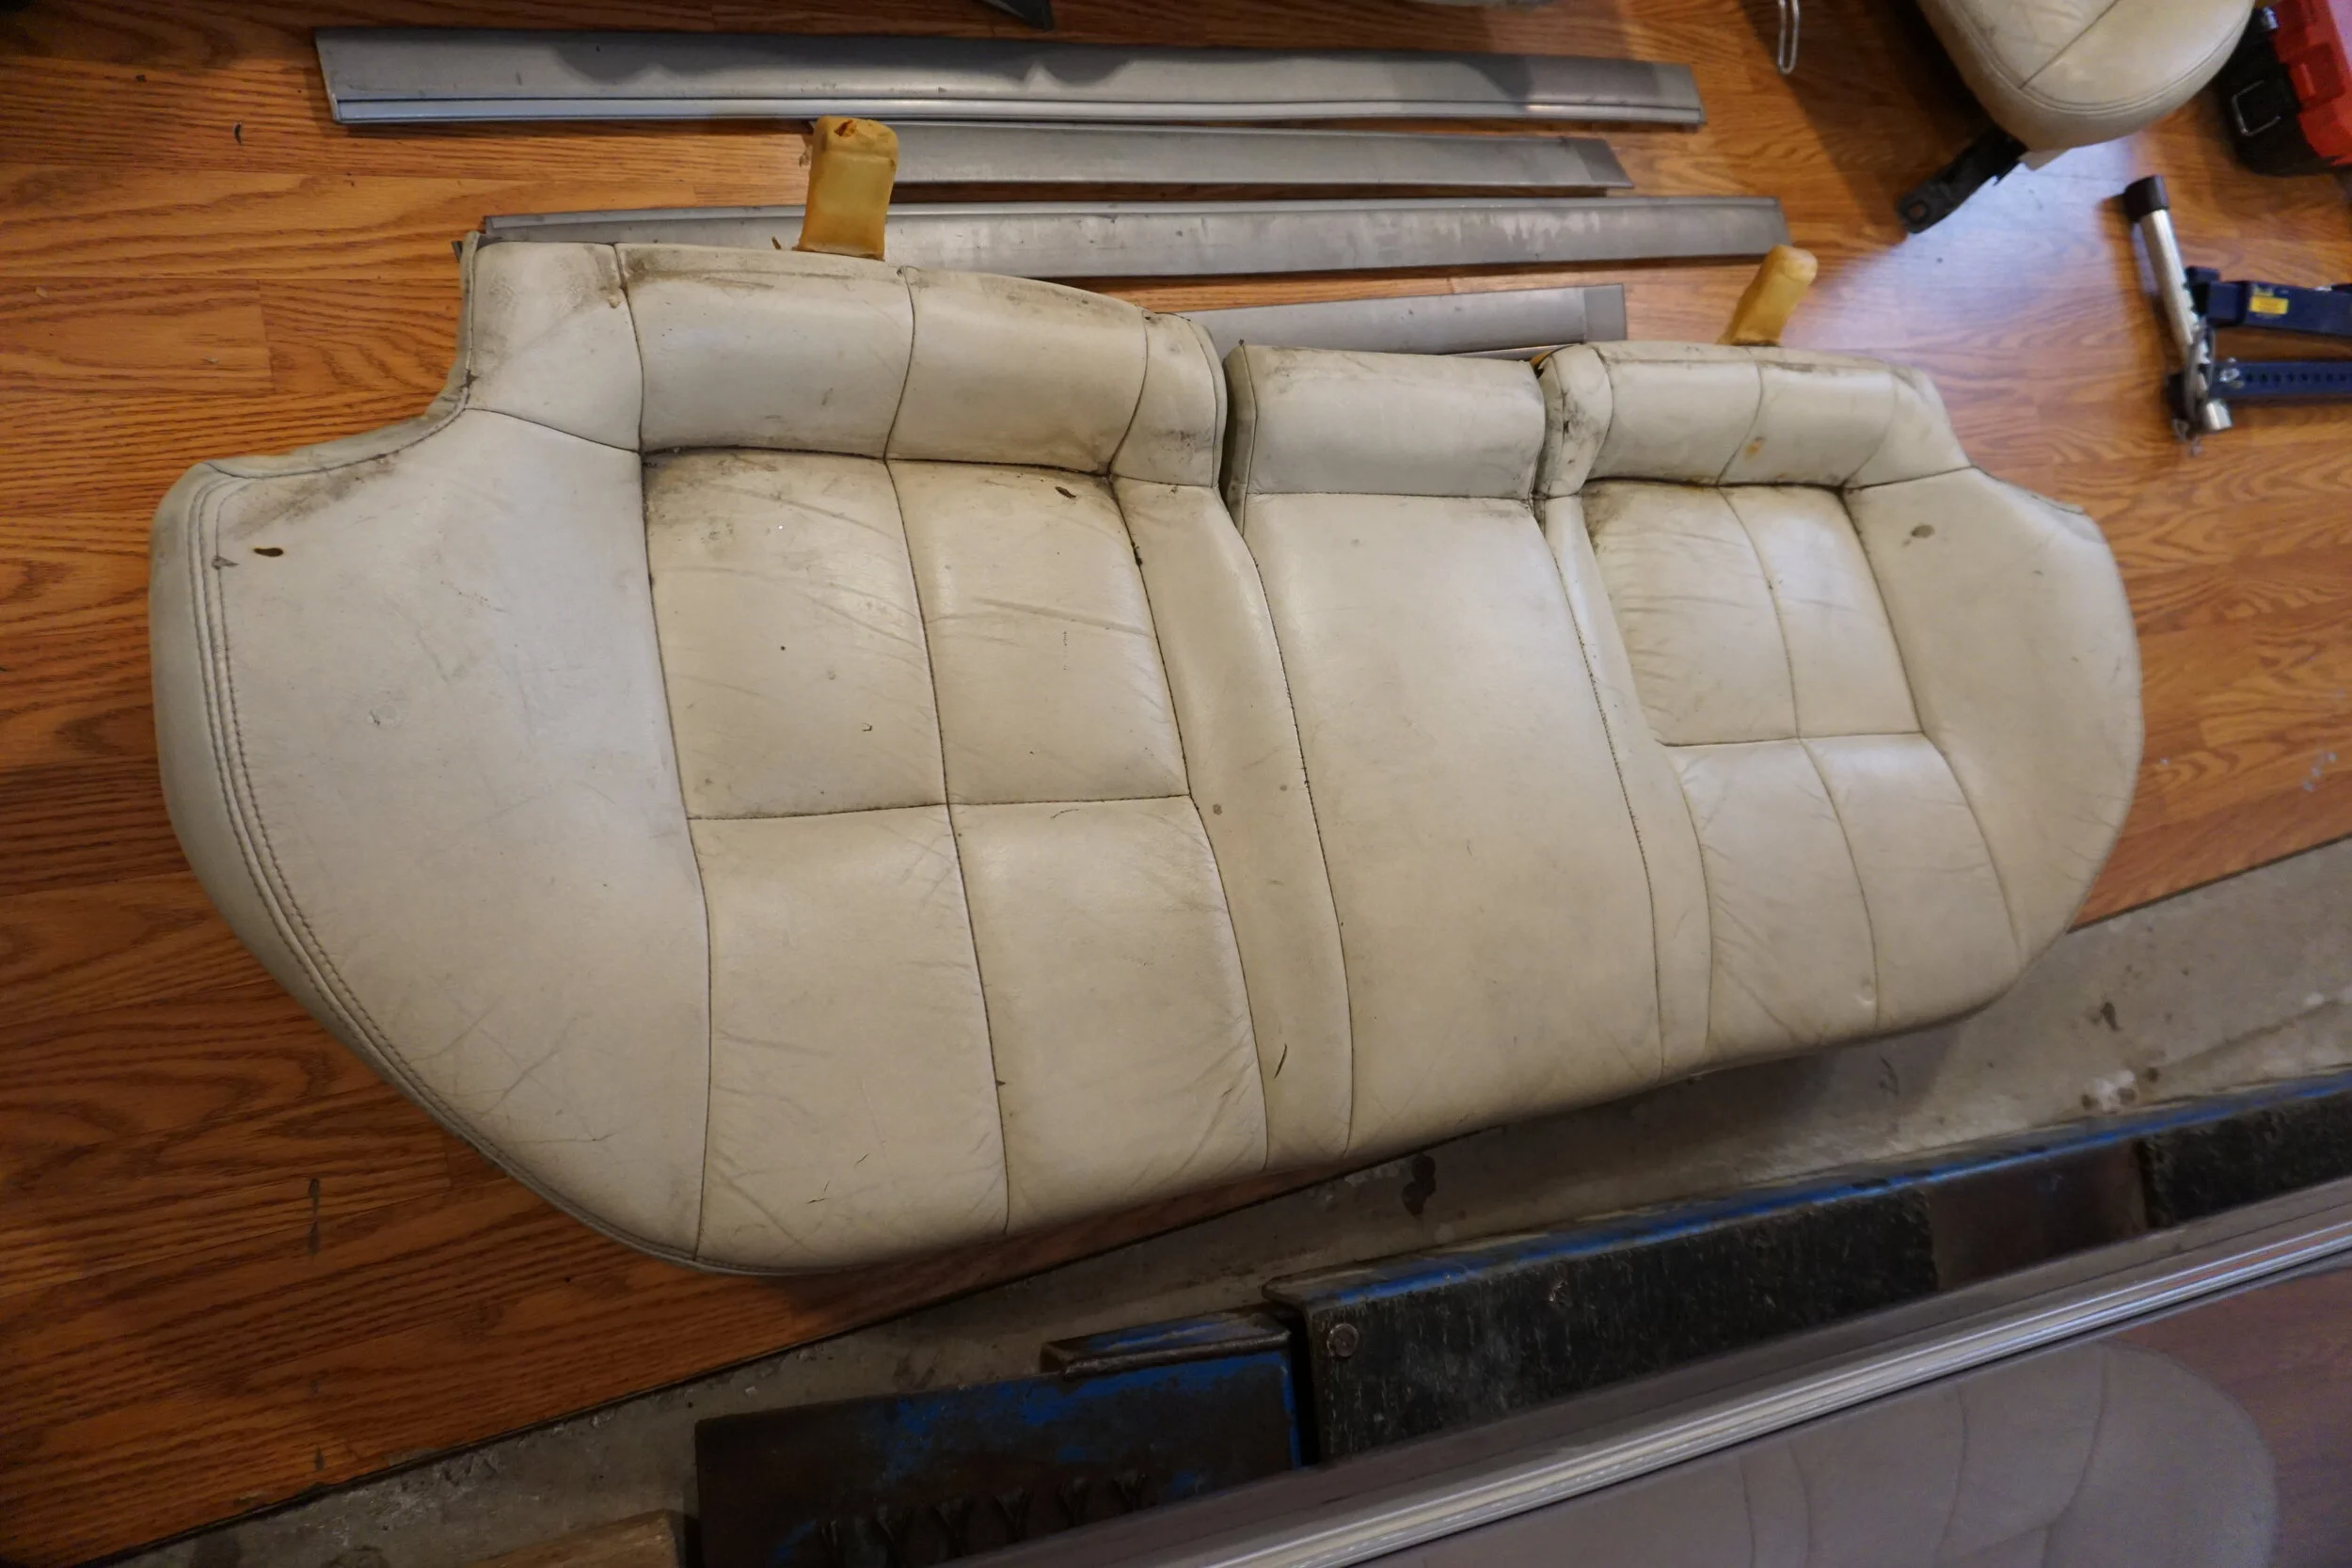
I've been dragging my feet on taking the I30 to the body shop for them to paint everything because I know it's going to be expensive, so to procrastinate I got back to working on those white leather junkyard seats. Part of me really did want to make them look as good as I could, and another part of me just wanted to see what was possible, even if it didn't turn out great. So I did some experimentation, and for the most part I think it turned out pretty well.
Cleaning
The first thing I had to do was to clean them up. I started with soapy water and a MF towel to get the bulk of the loose stuff off. On the area of the front passenger seat with permanent marker and pen ink, I used some rubbing alcohol and scrubbed it vigorously. That got it pretty clean, but not perfect. One things were clean enough, I did a round of Leatherique rejuvenating oil and let them bake outside inside a hot car. Allowing the oil to "soak" in supposedly helps bring dirt and grime to the surface, allowing it to be cleaned off more easily. It should be noted that 99% of all automotive leather is coated/painted, so claims of oil really soaking in are suspect. The only places oil 100% soaked in were where the top coat/paint has been scraped off or damaged, allowing the oil to actually reach the underlying leather. I then cleaned them with the Leatherique cleaning solution, which frankly didn't appear to do a whole lot. It probably didn't help that the stuff I had at the time was 13+ years old.
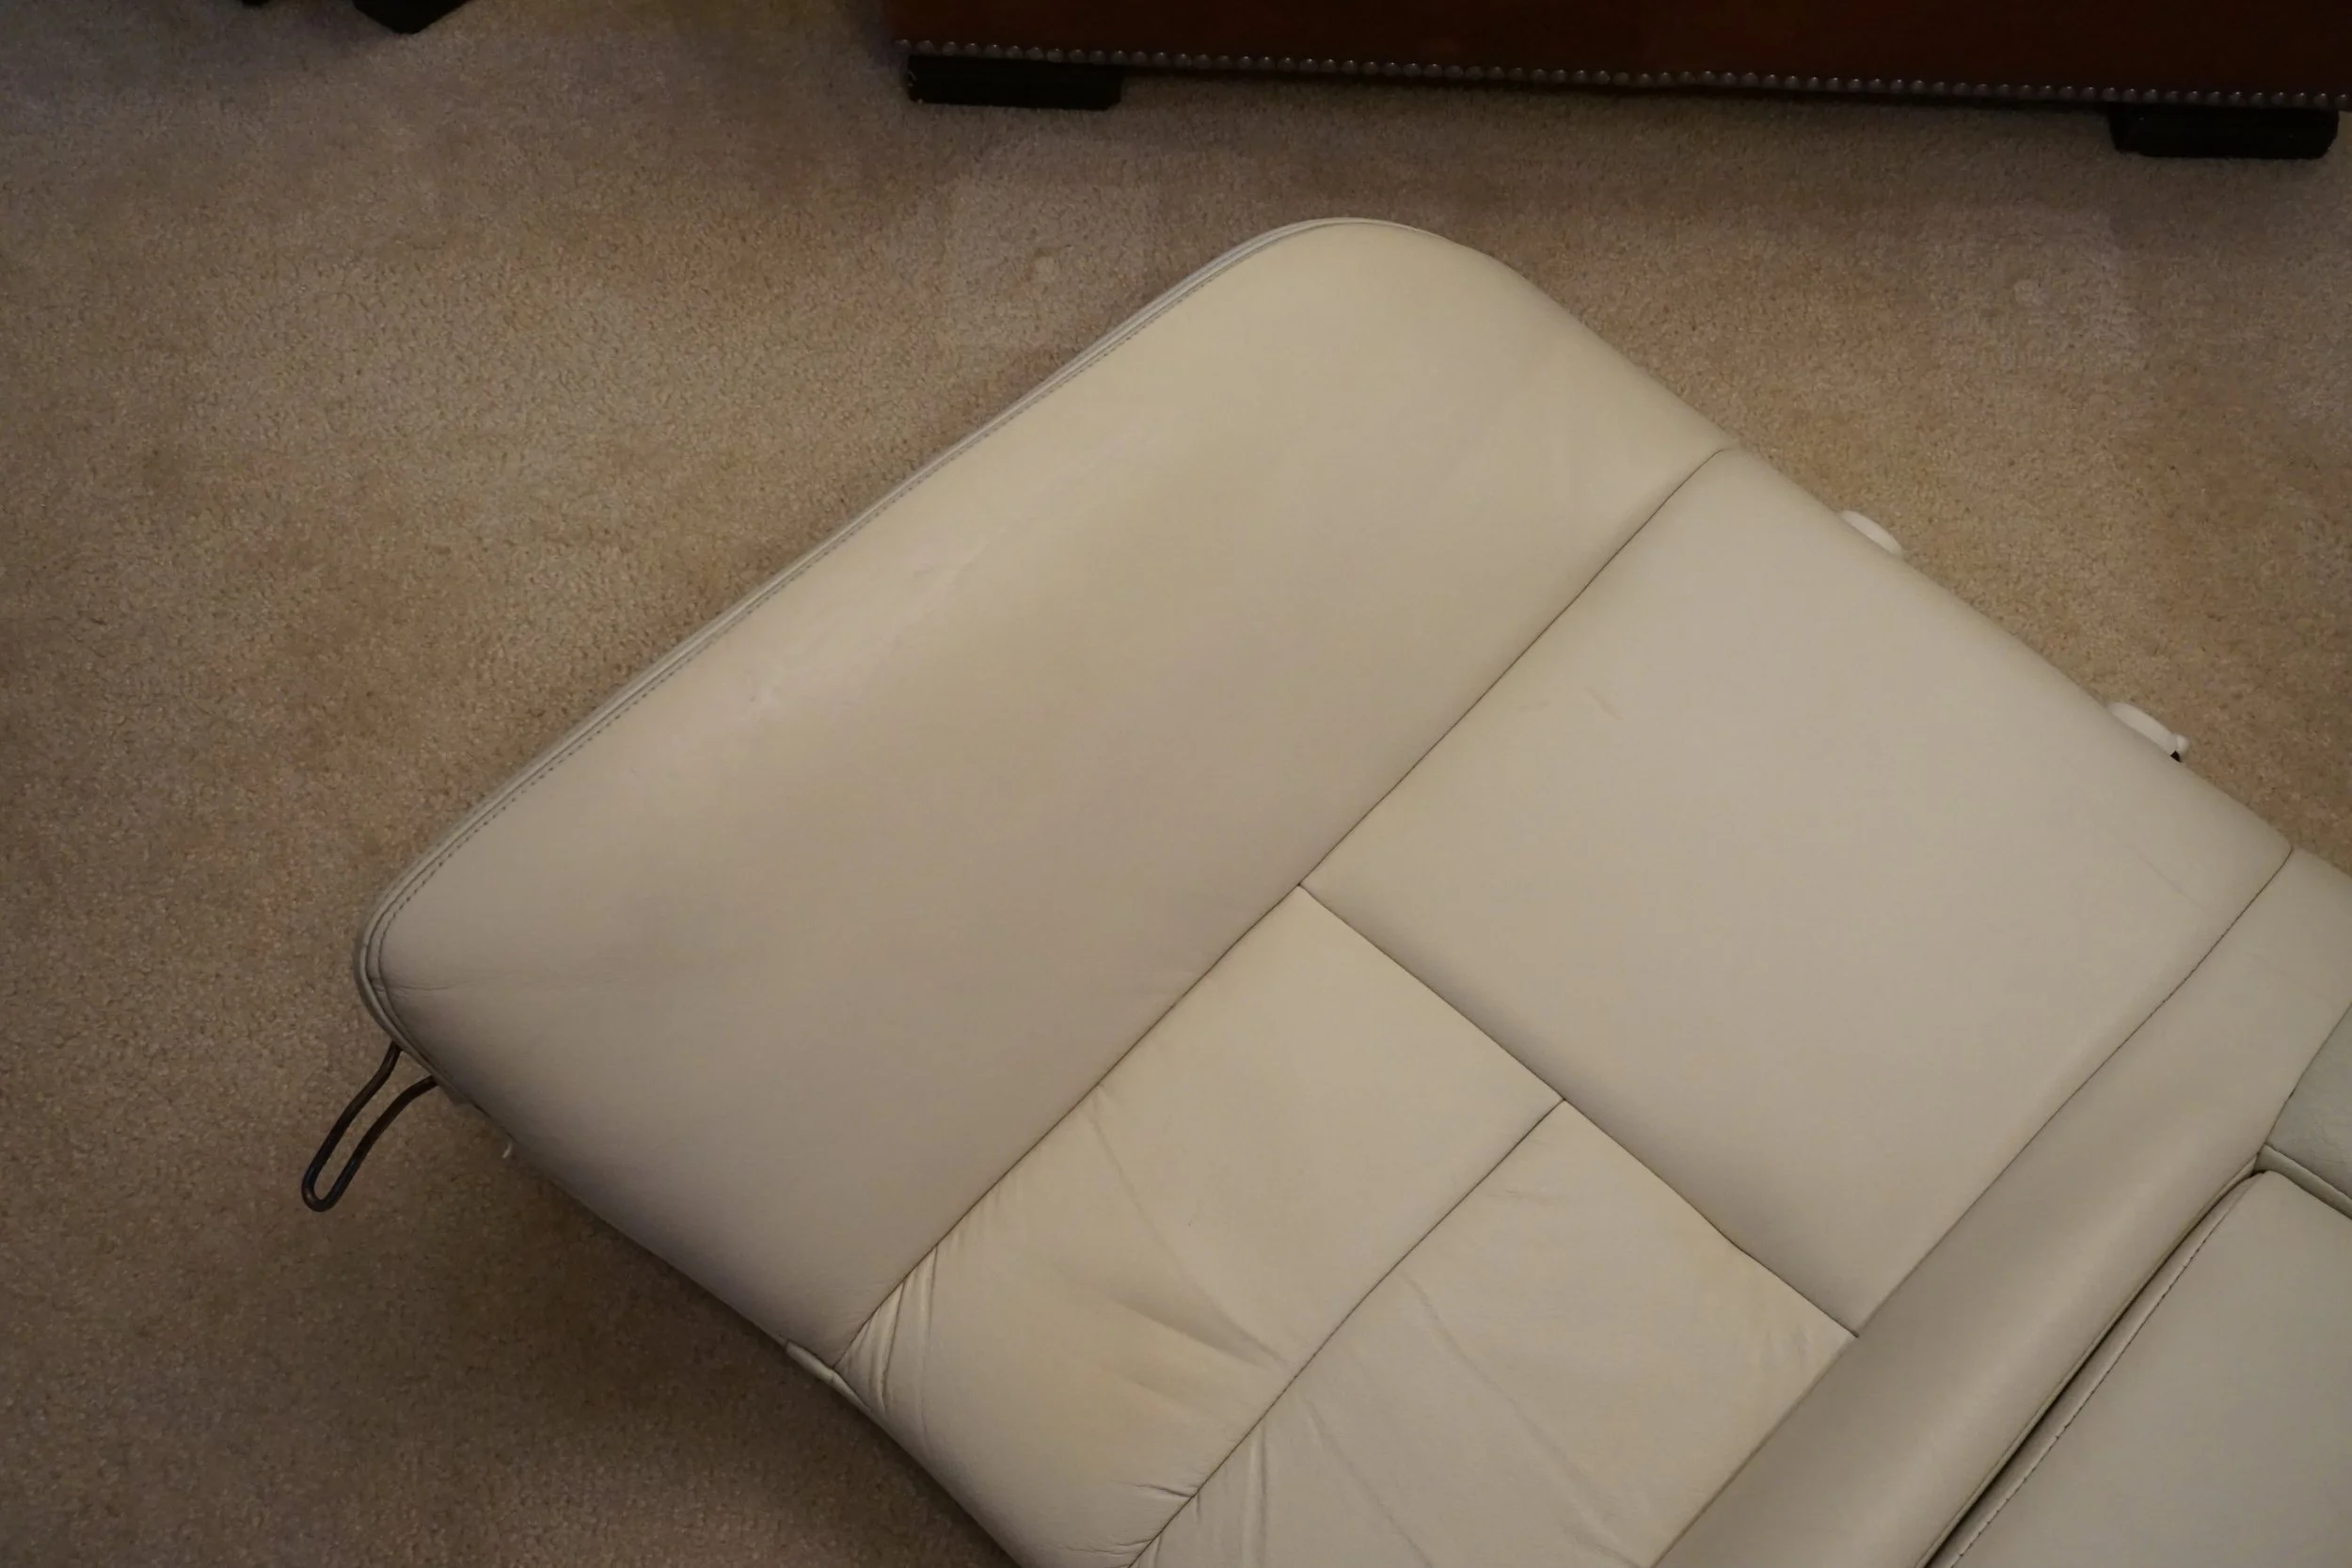
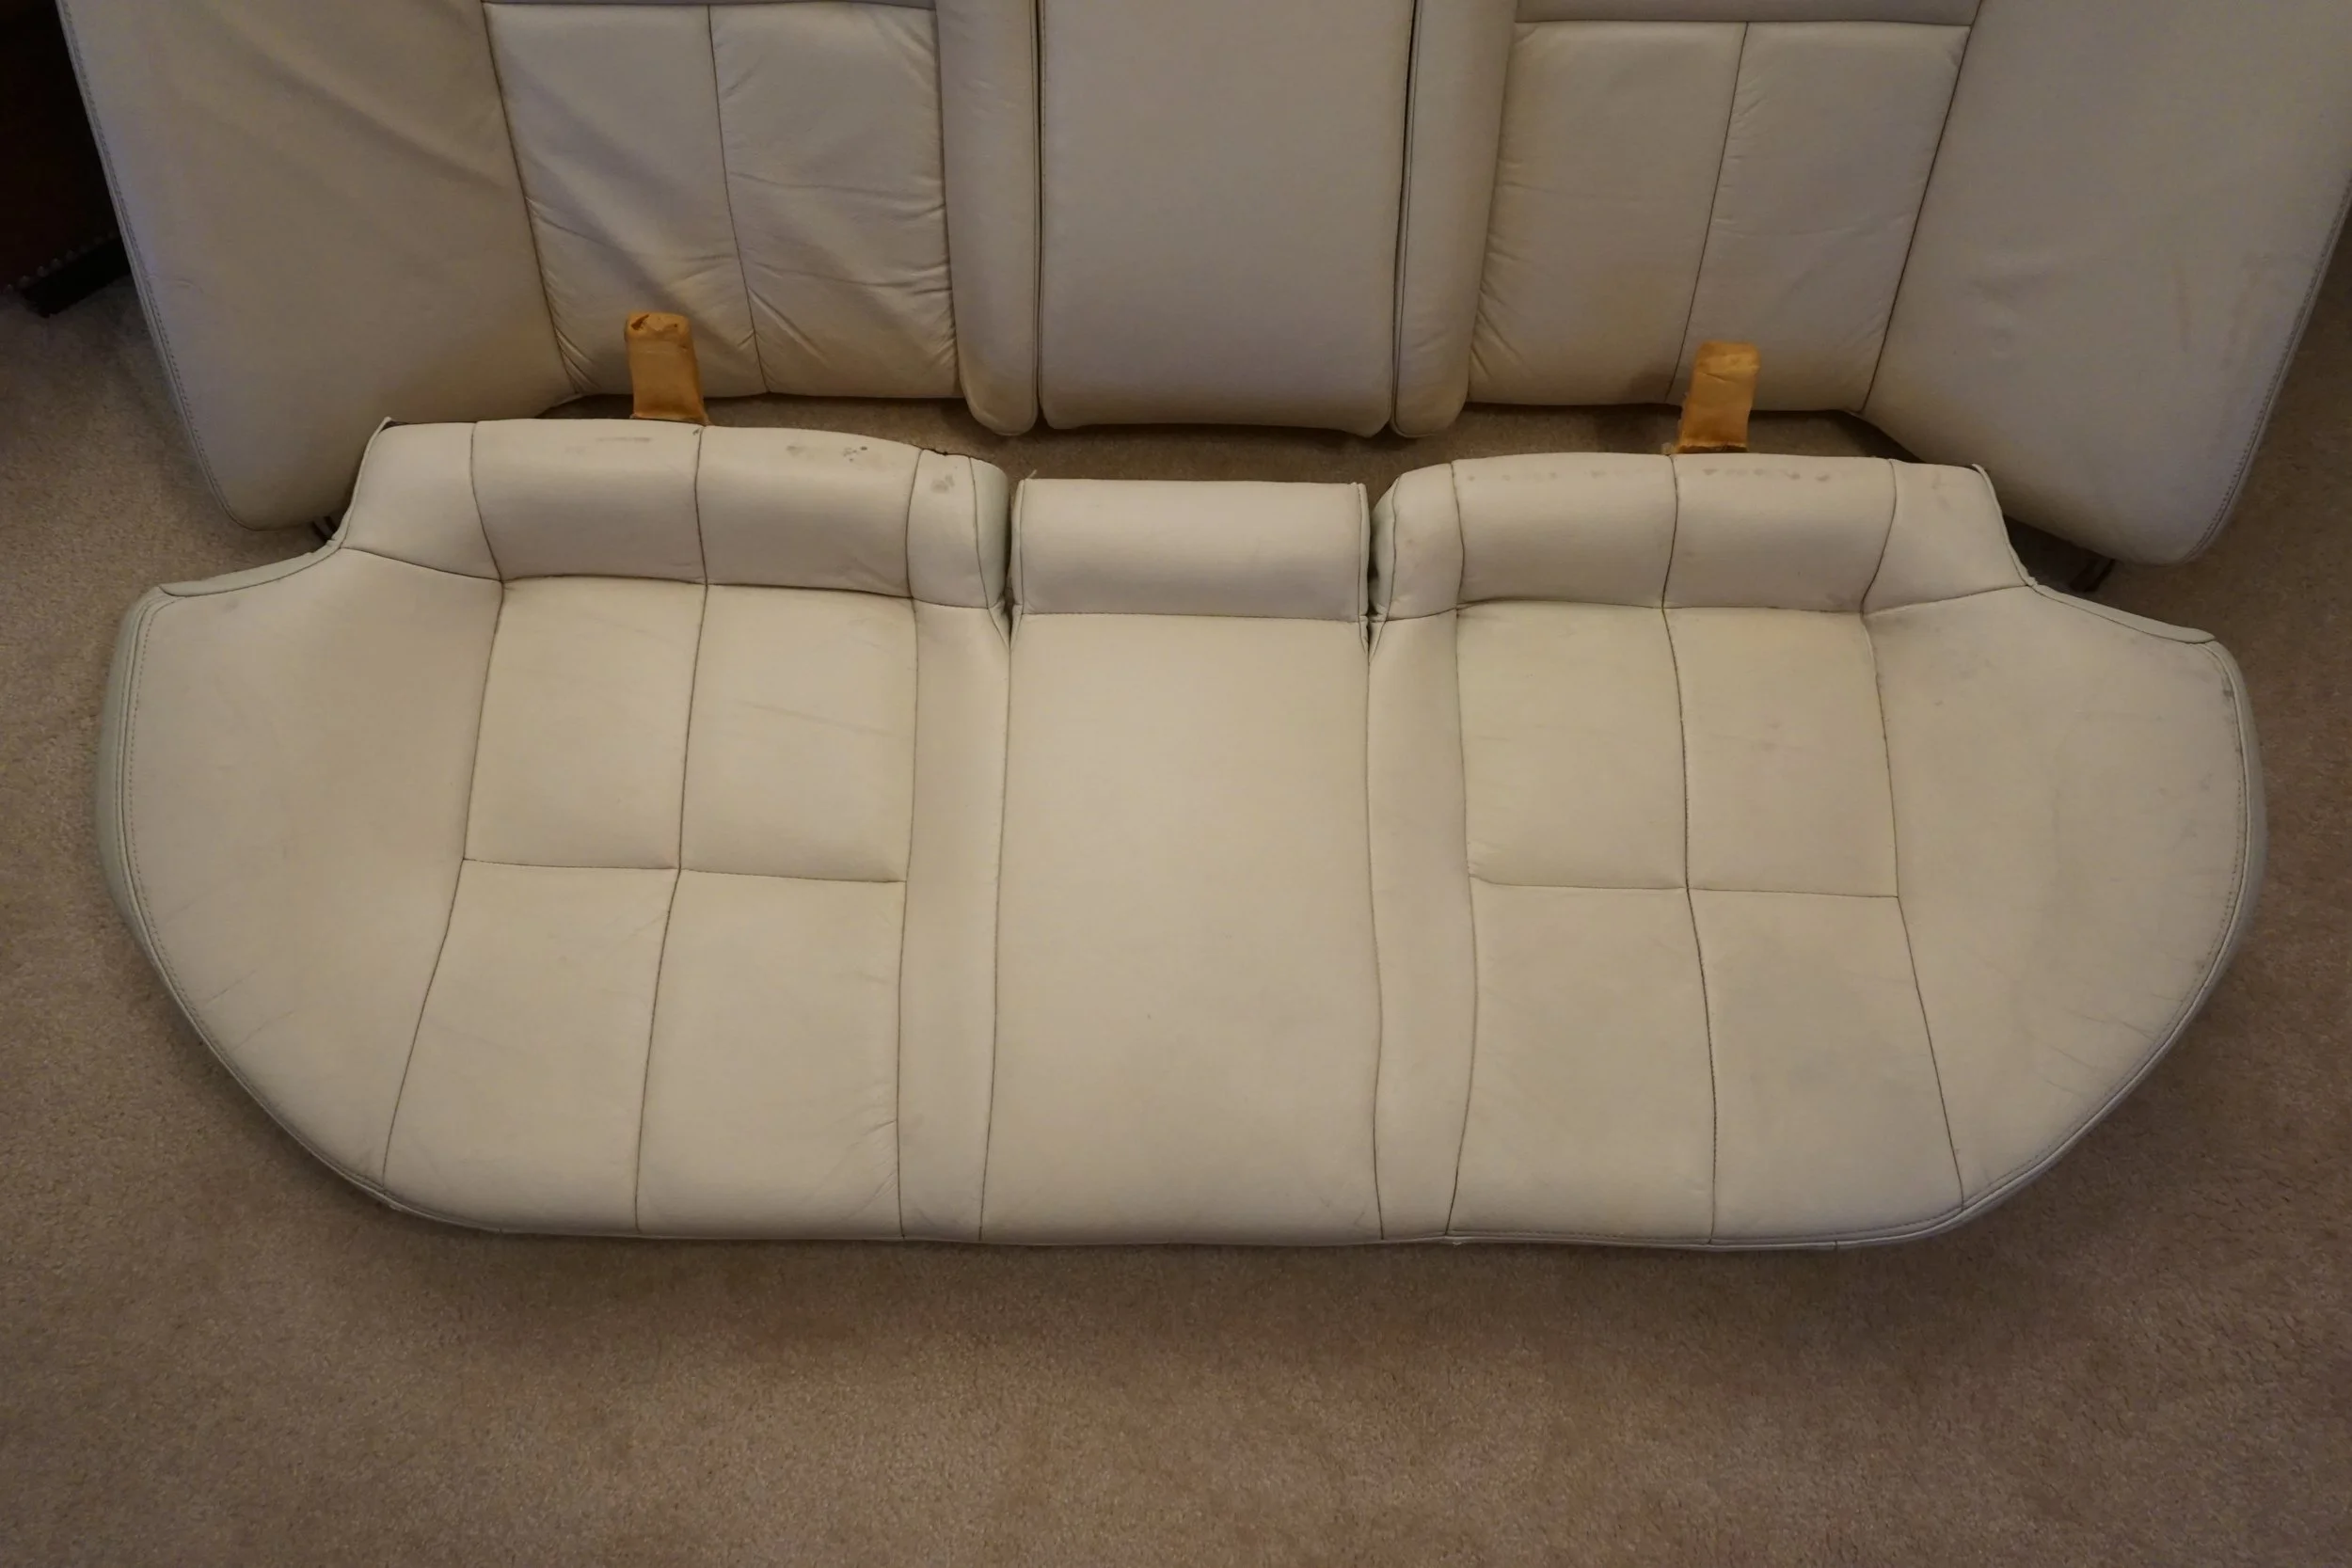
I did another round of oil/cleaner for ****s and giggles, and then followed up with a Magic Eraser (ME) on everything. This is where things started to get REALLY clean. The ME started pulling out grime that I thought was baked in. I'm aware of how abrasive the ME is, but it didn't appear to damage anything, and the results were pretty spectacular. And since I had came that far, I did one final round of (new) Leatherique. With everything as clean and conditioned as it was going to get, I moved onto the experimental stuff.
Superglue removal
I had previously used "Bob Smith Industries Un-Cure" super glue remover on some interior trim and came away pretty impressed with what it could do, so I decided to give it a go on what appeared to be super glue (nail polish?) on the upright portion of the back seat and the side of the front seat. This stuff has the potential to damage plastic (and surely whatever this leather is coated with) so I tried to be as careful with it as I could. I squeezed out enough to cover the glue, let it sit for a minute, and then gently worked on it with a little dull pick tool I have. I would then wipe everything clean with a soapy paper towel. After a couple rounds it got off most of the glue and I did a finishing round or two with Q-tips soaked with the stuff to get up and remaining residue without damaging the leather more than I already had. The super glue had damaged/cracked the leather and apparently had also soaked up some of the color, so what I was left with wasn't exactly pretty, but at least it was free of super glue. I would attempt to cover up this damage in later steps with varying degrees of success.
Before

After
Before
After
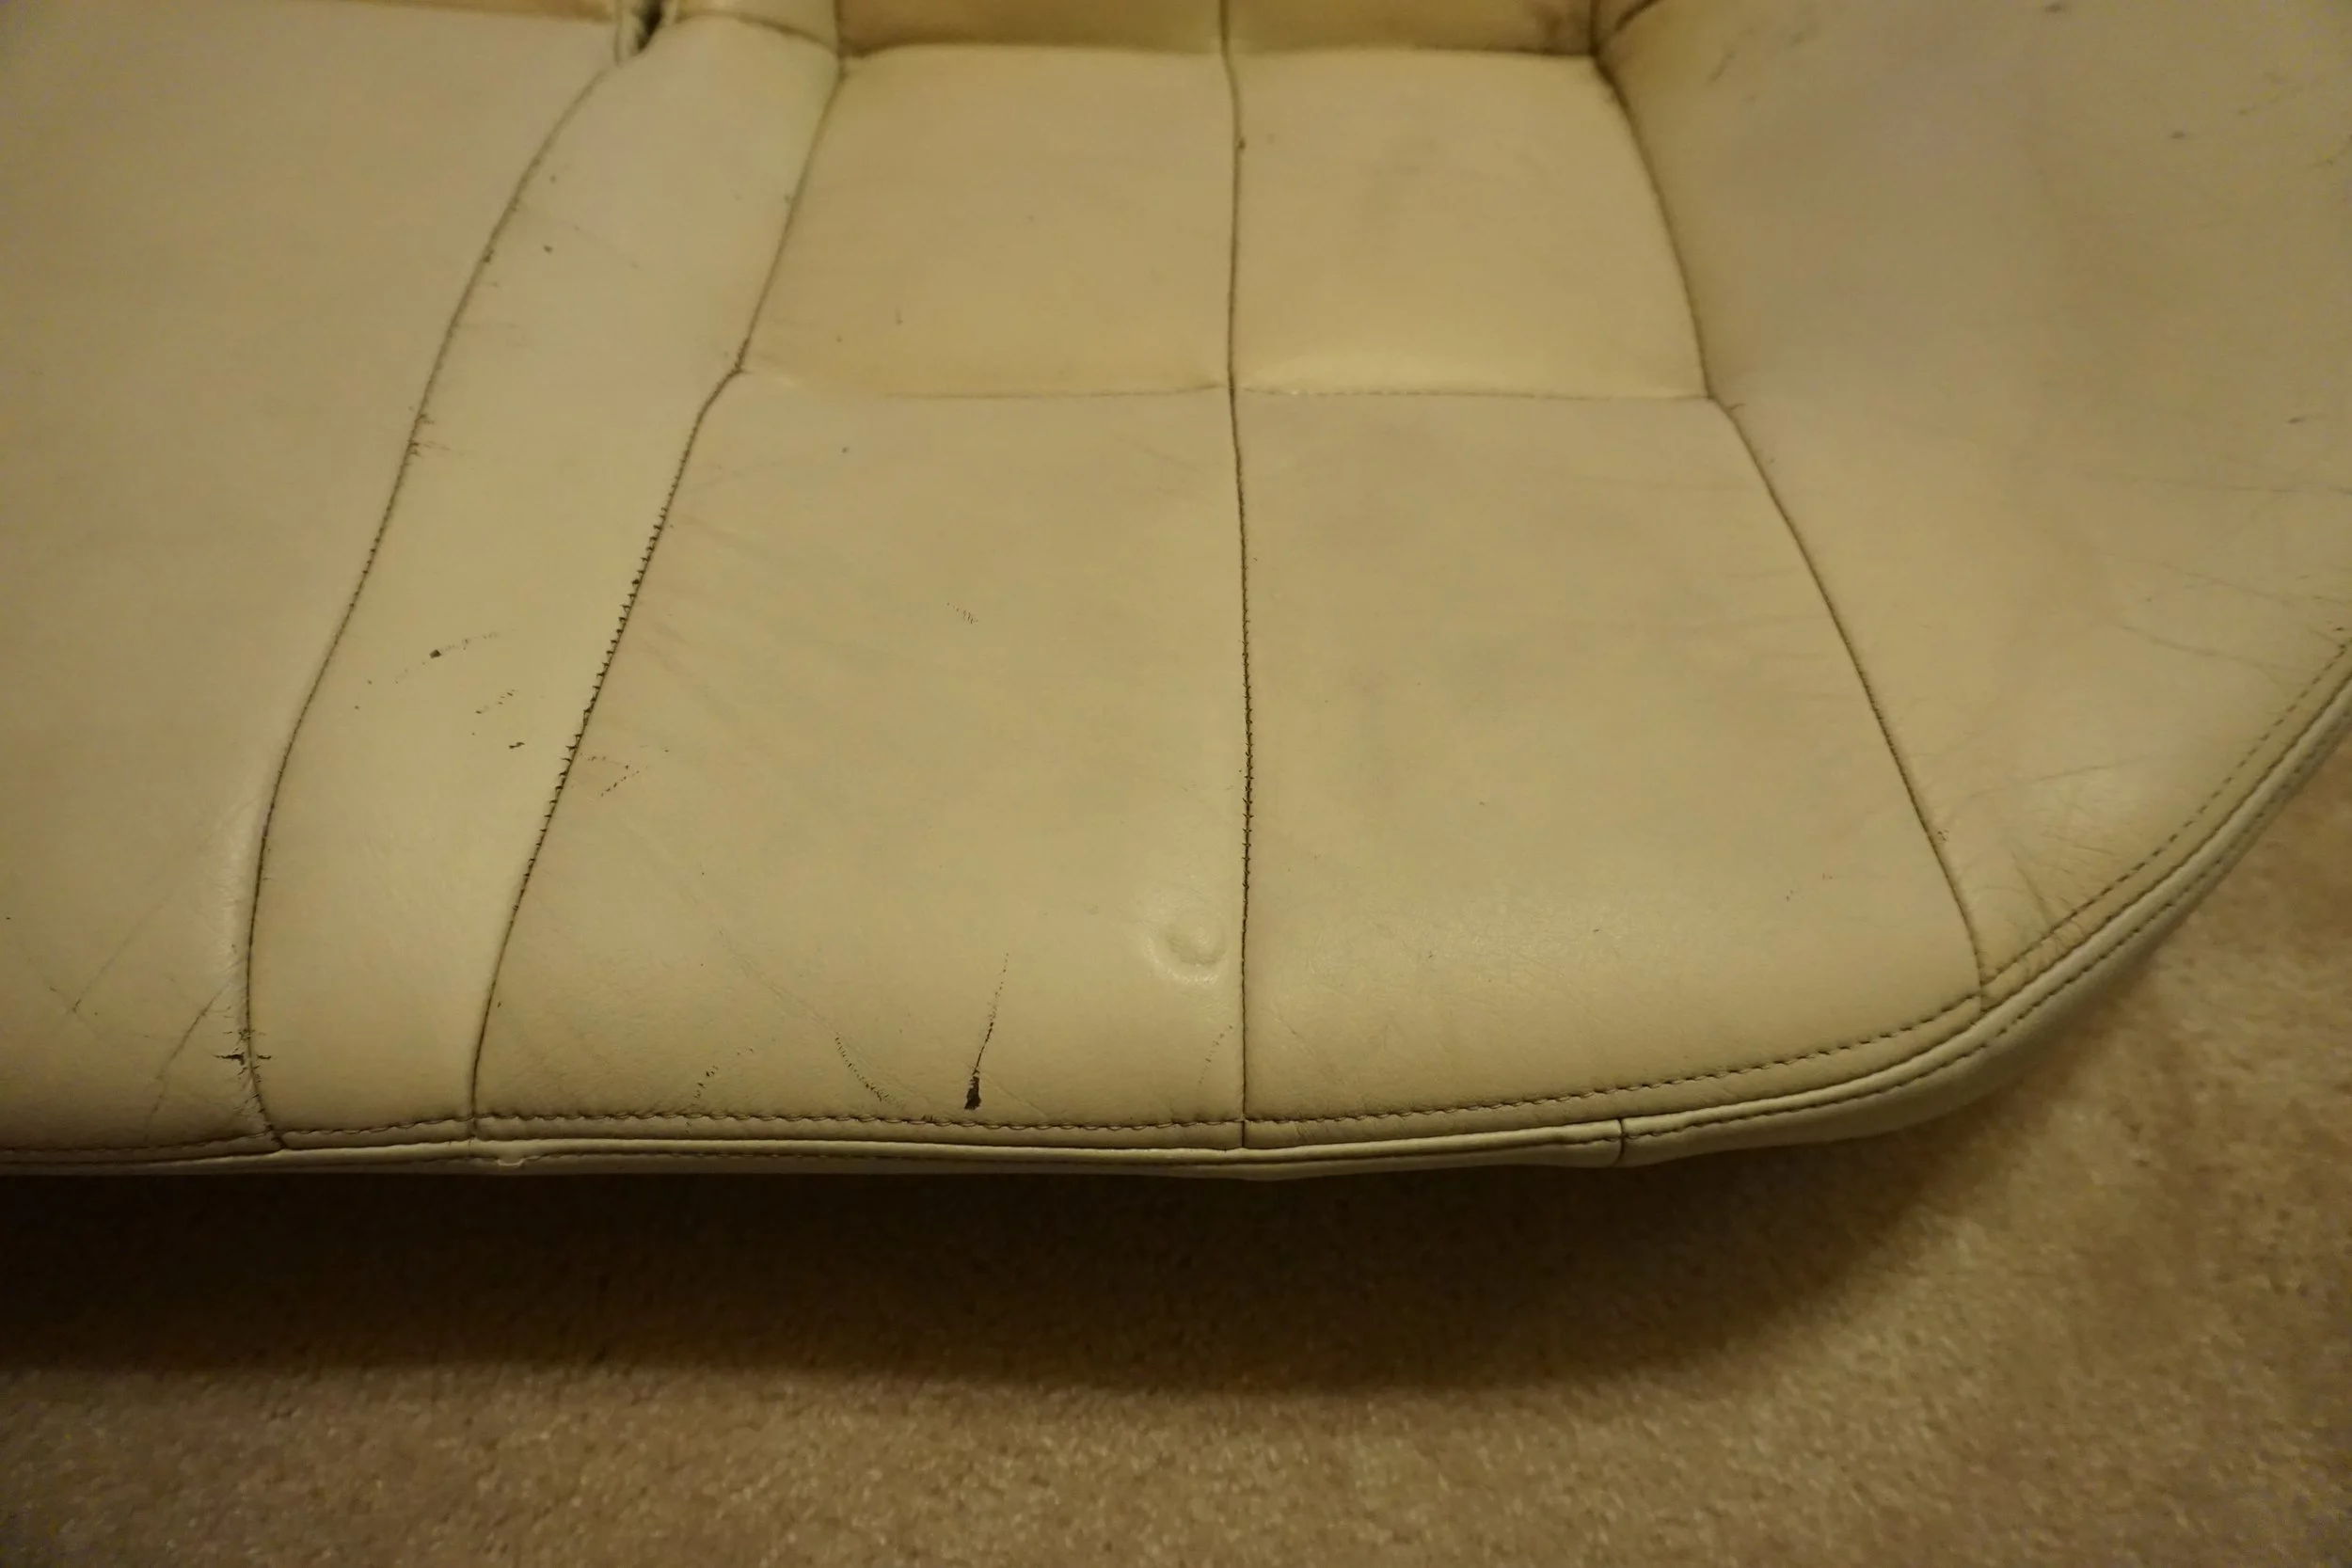
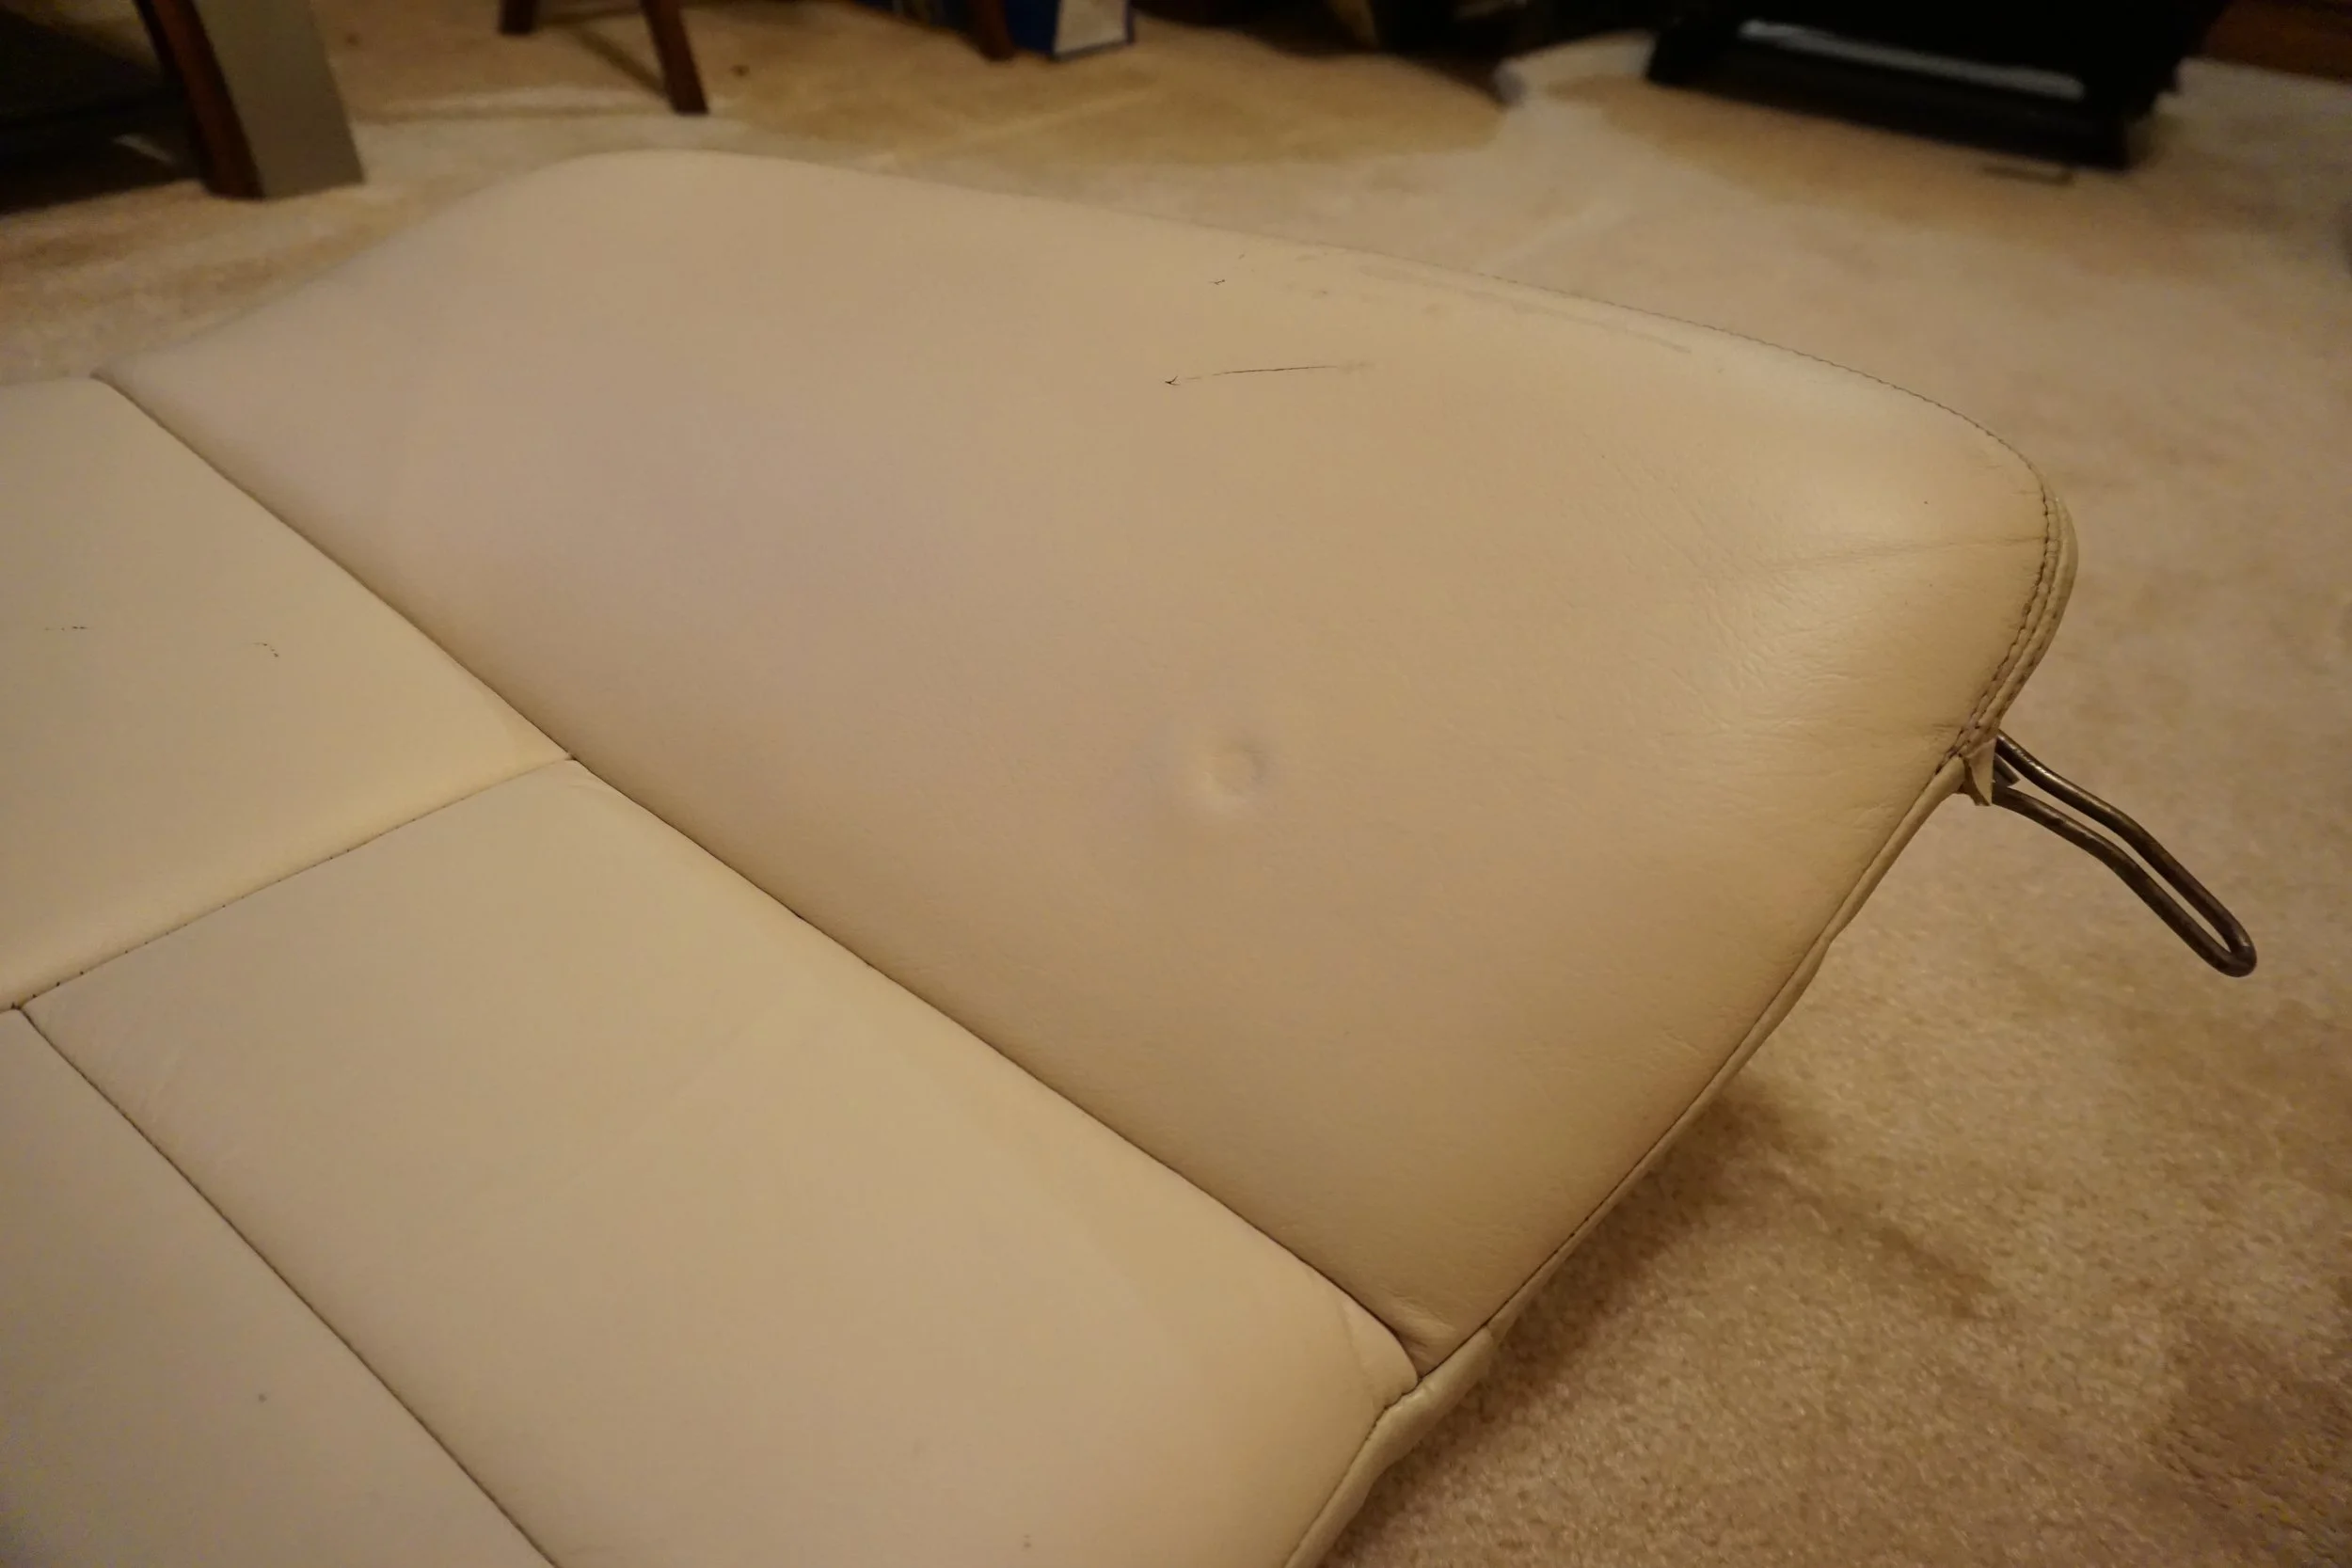
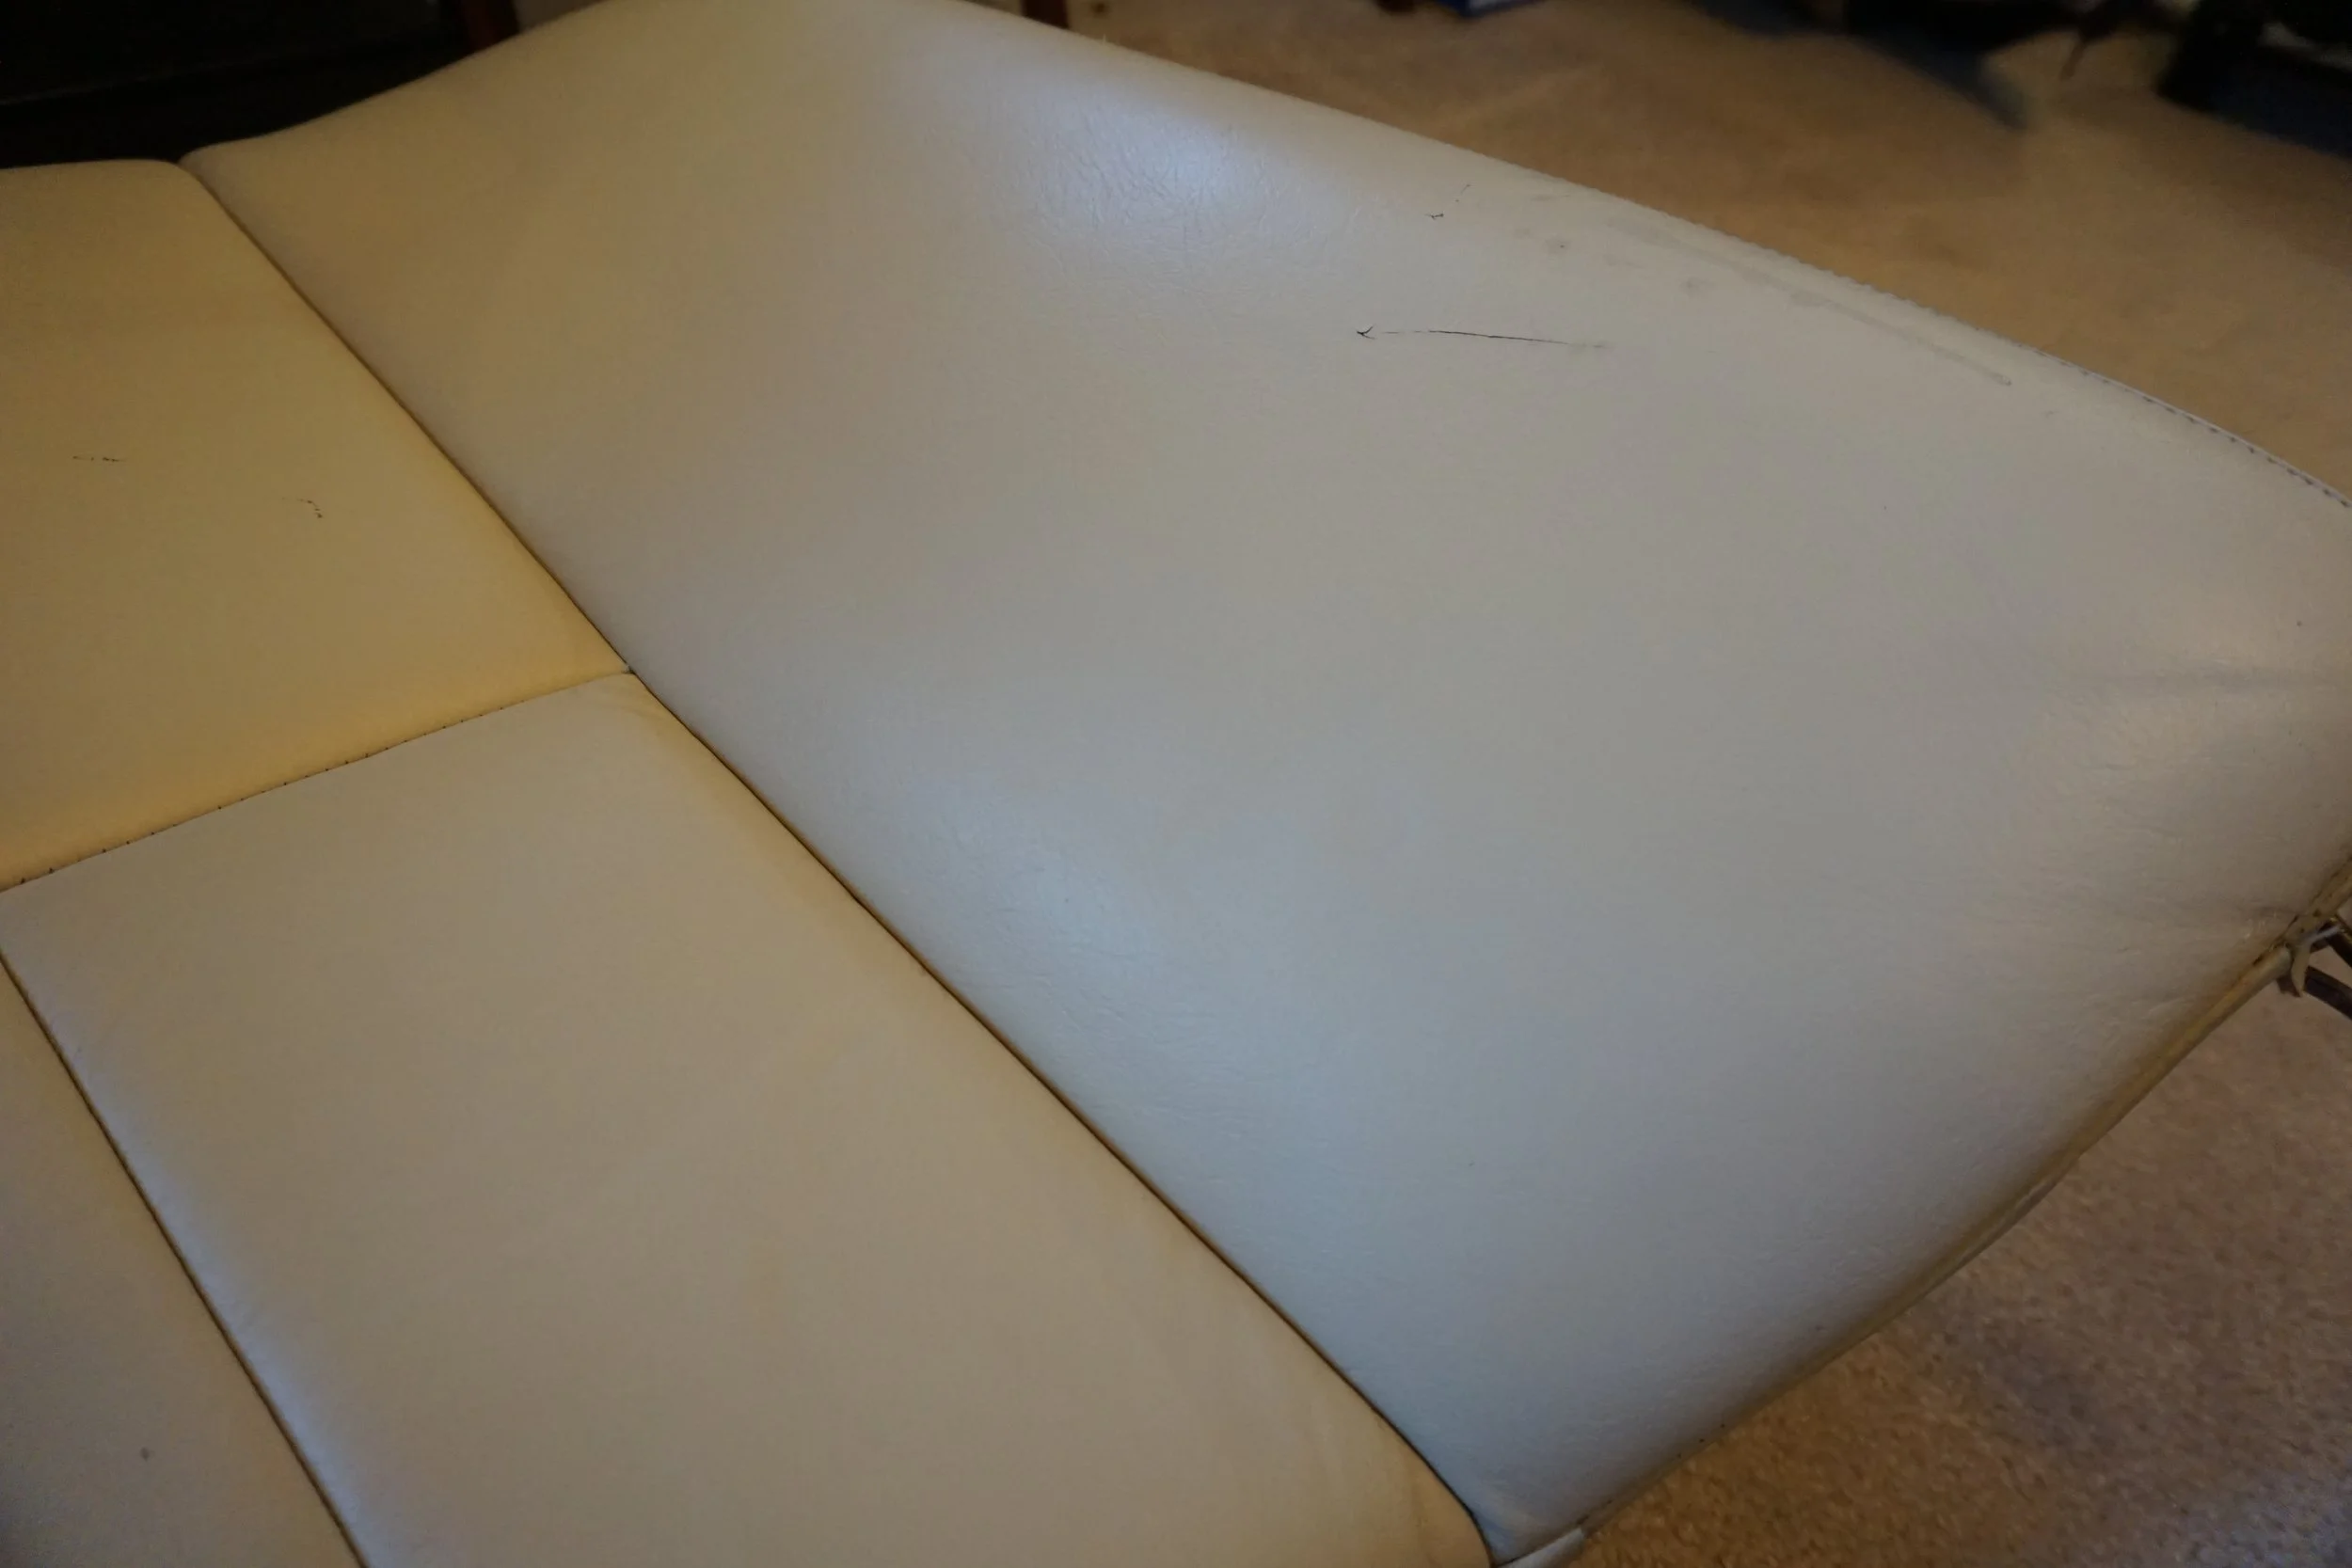
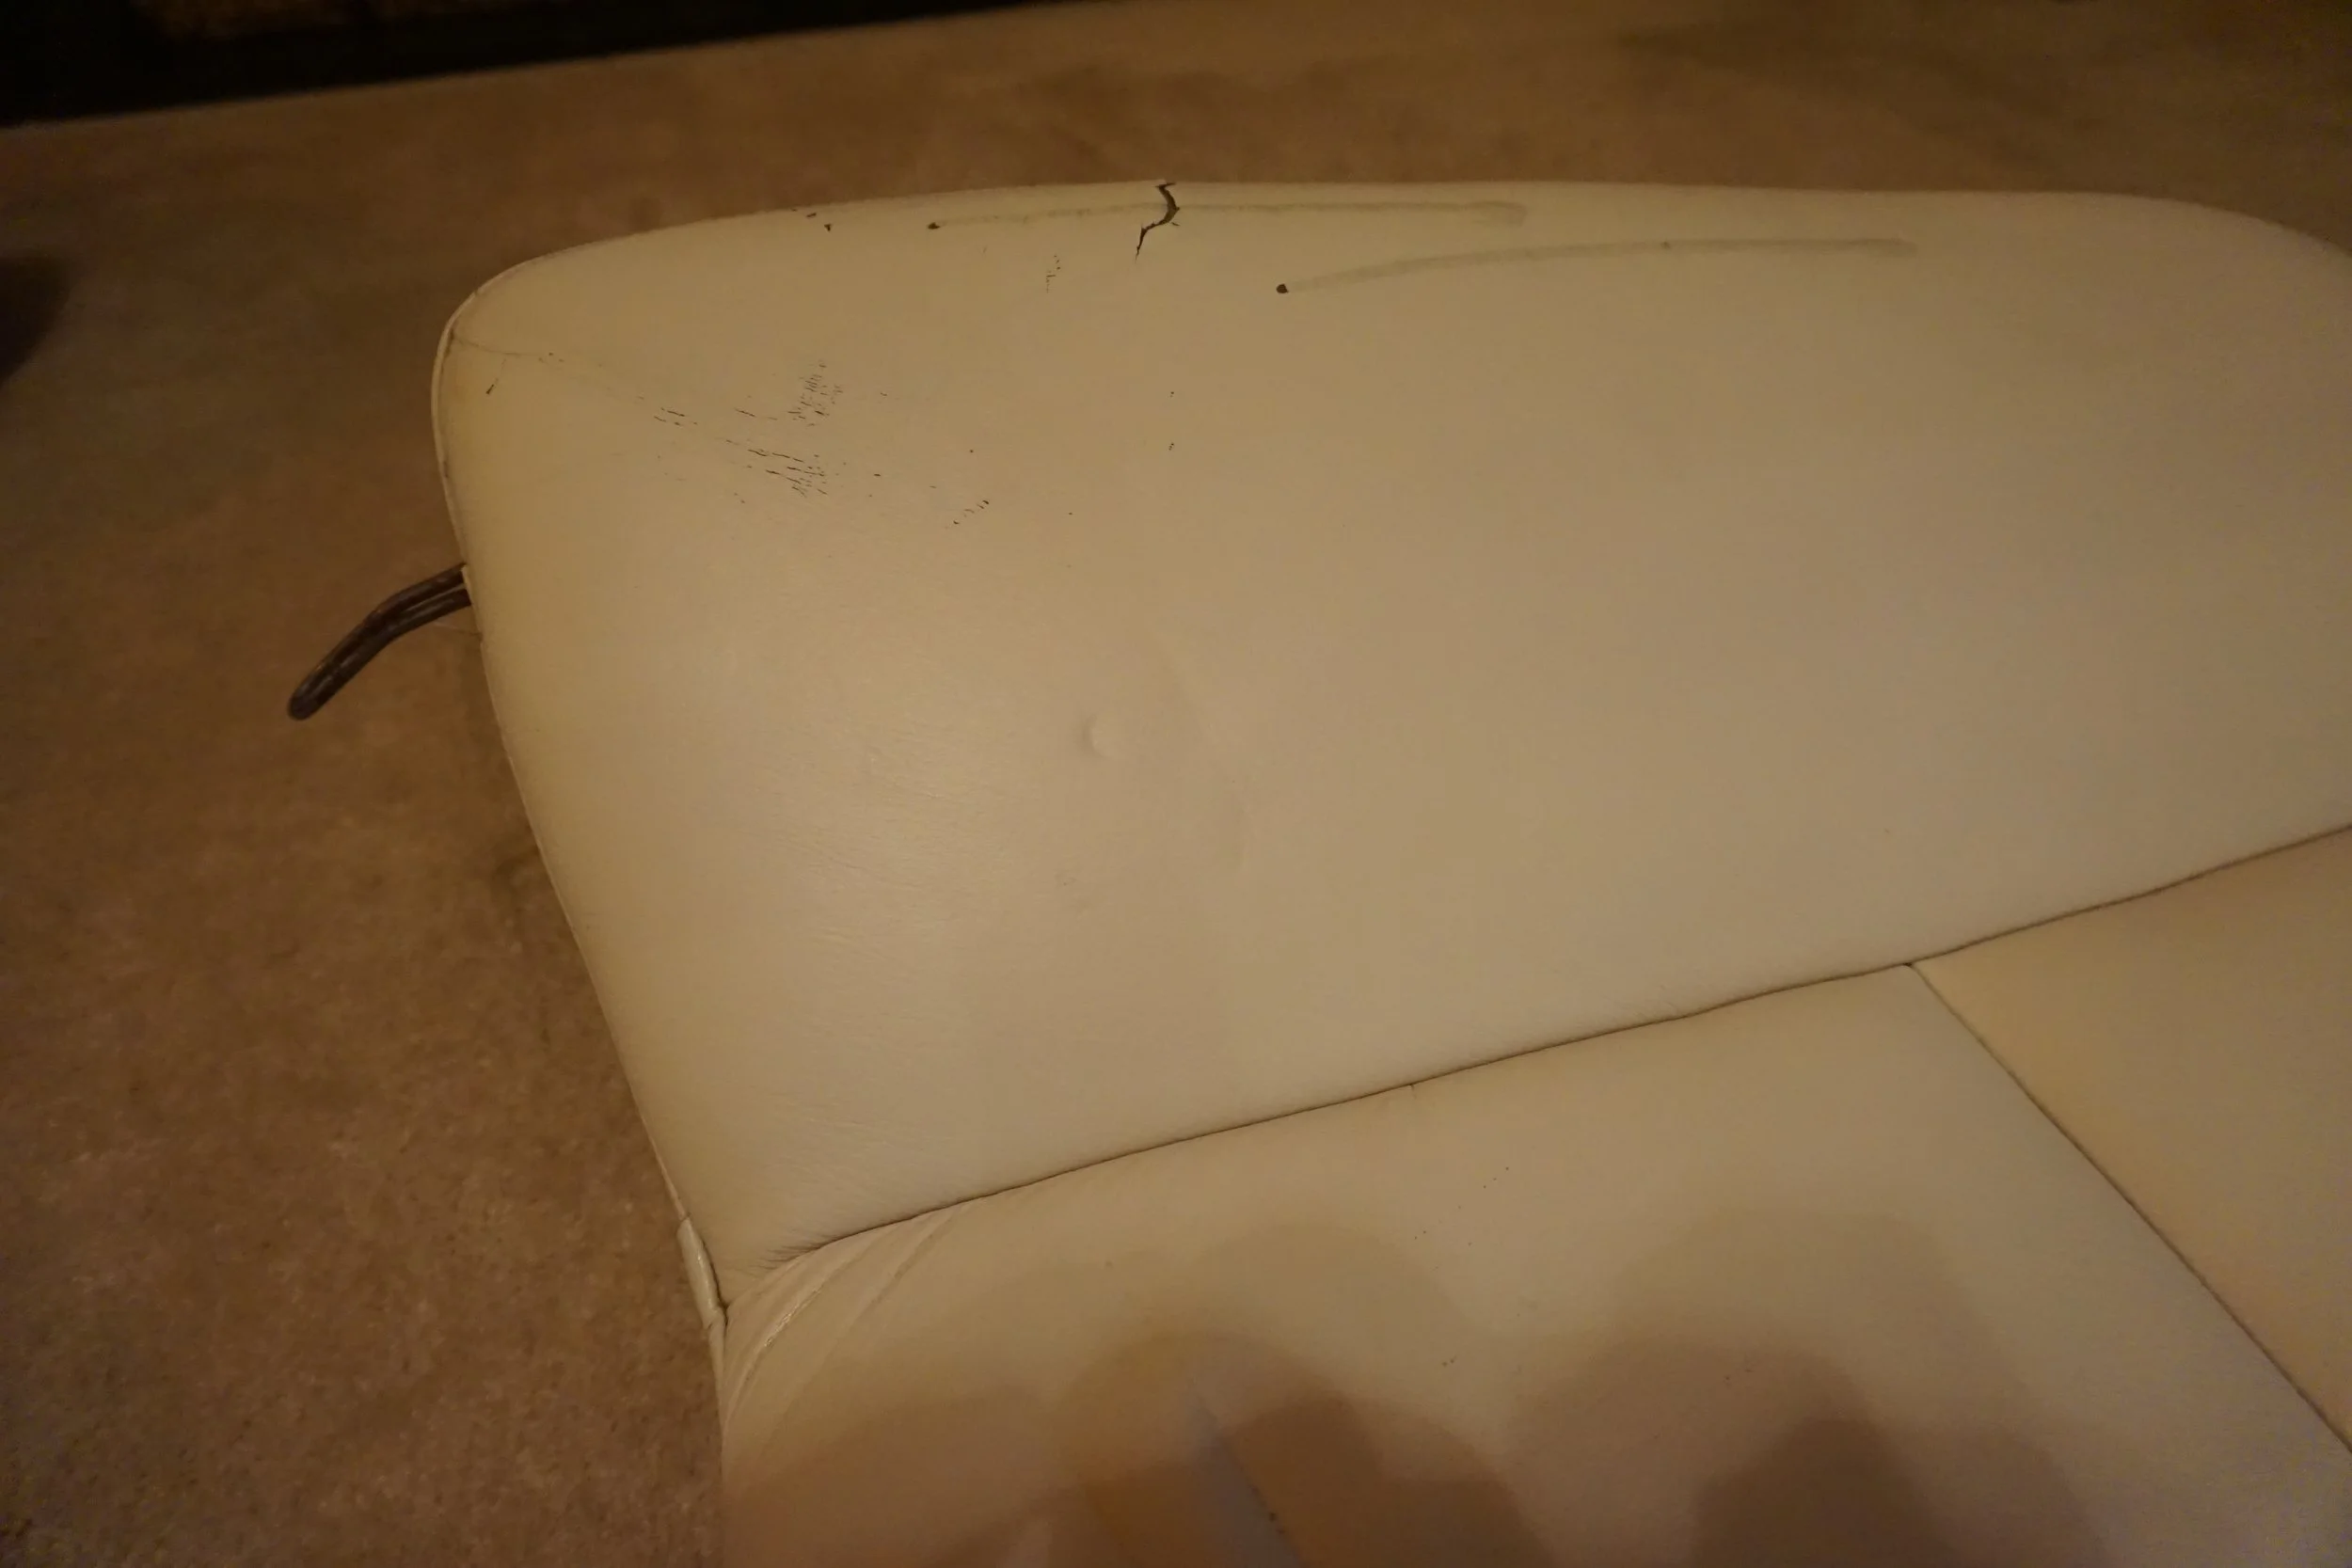
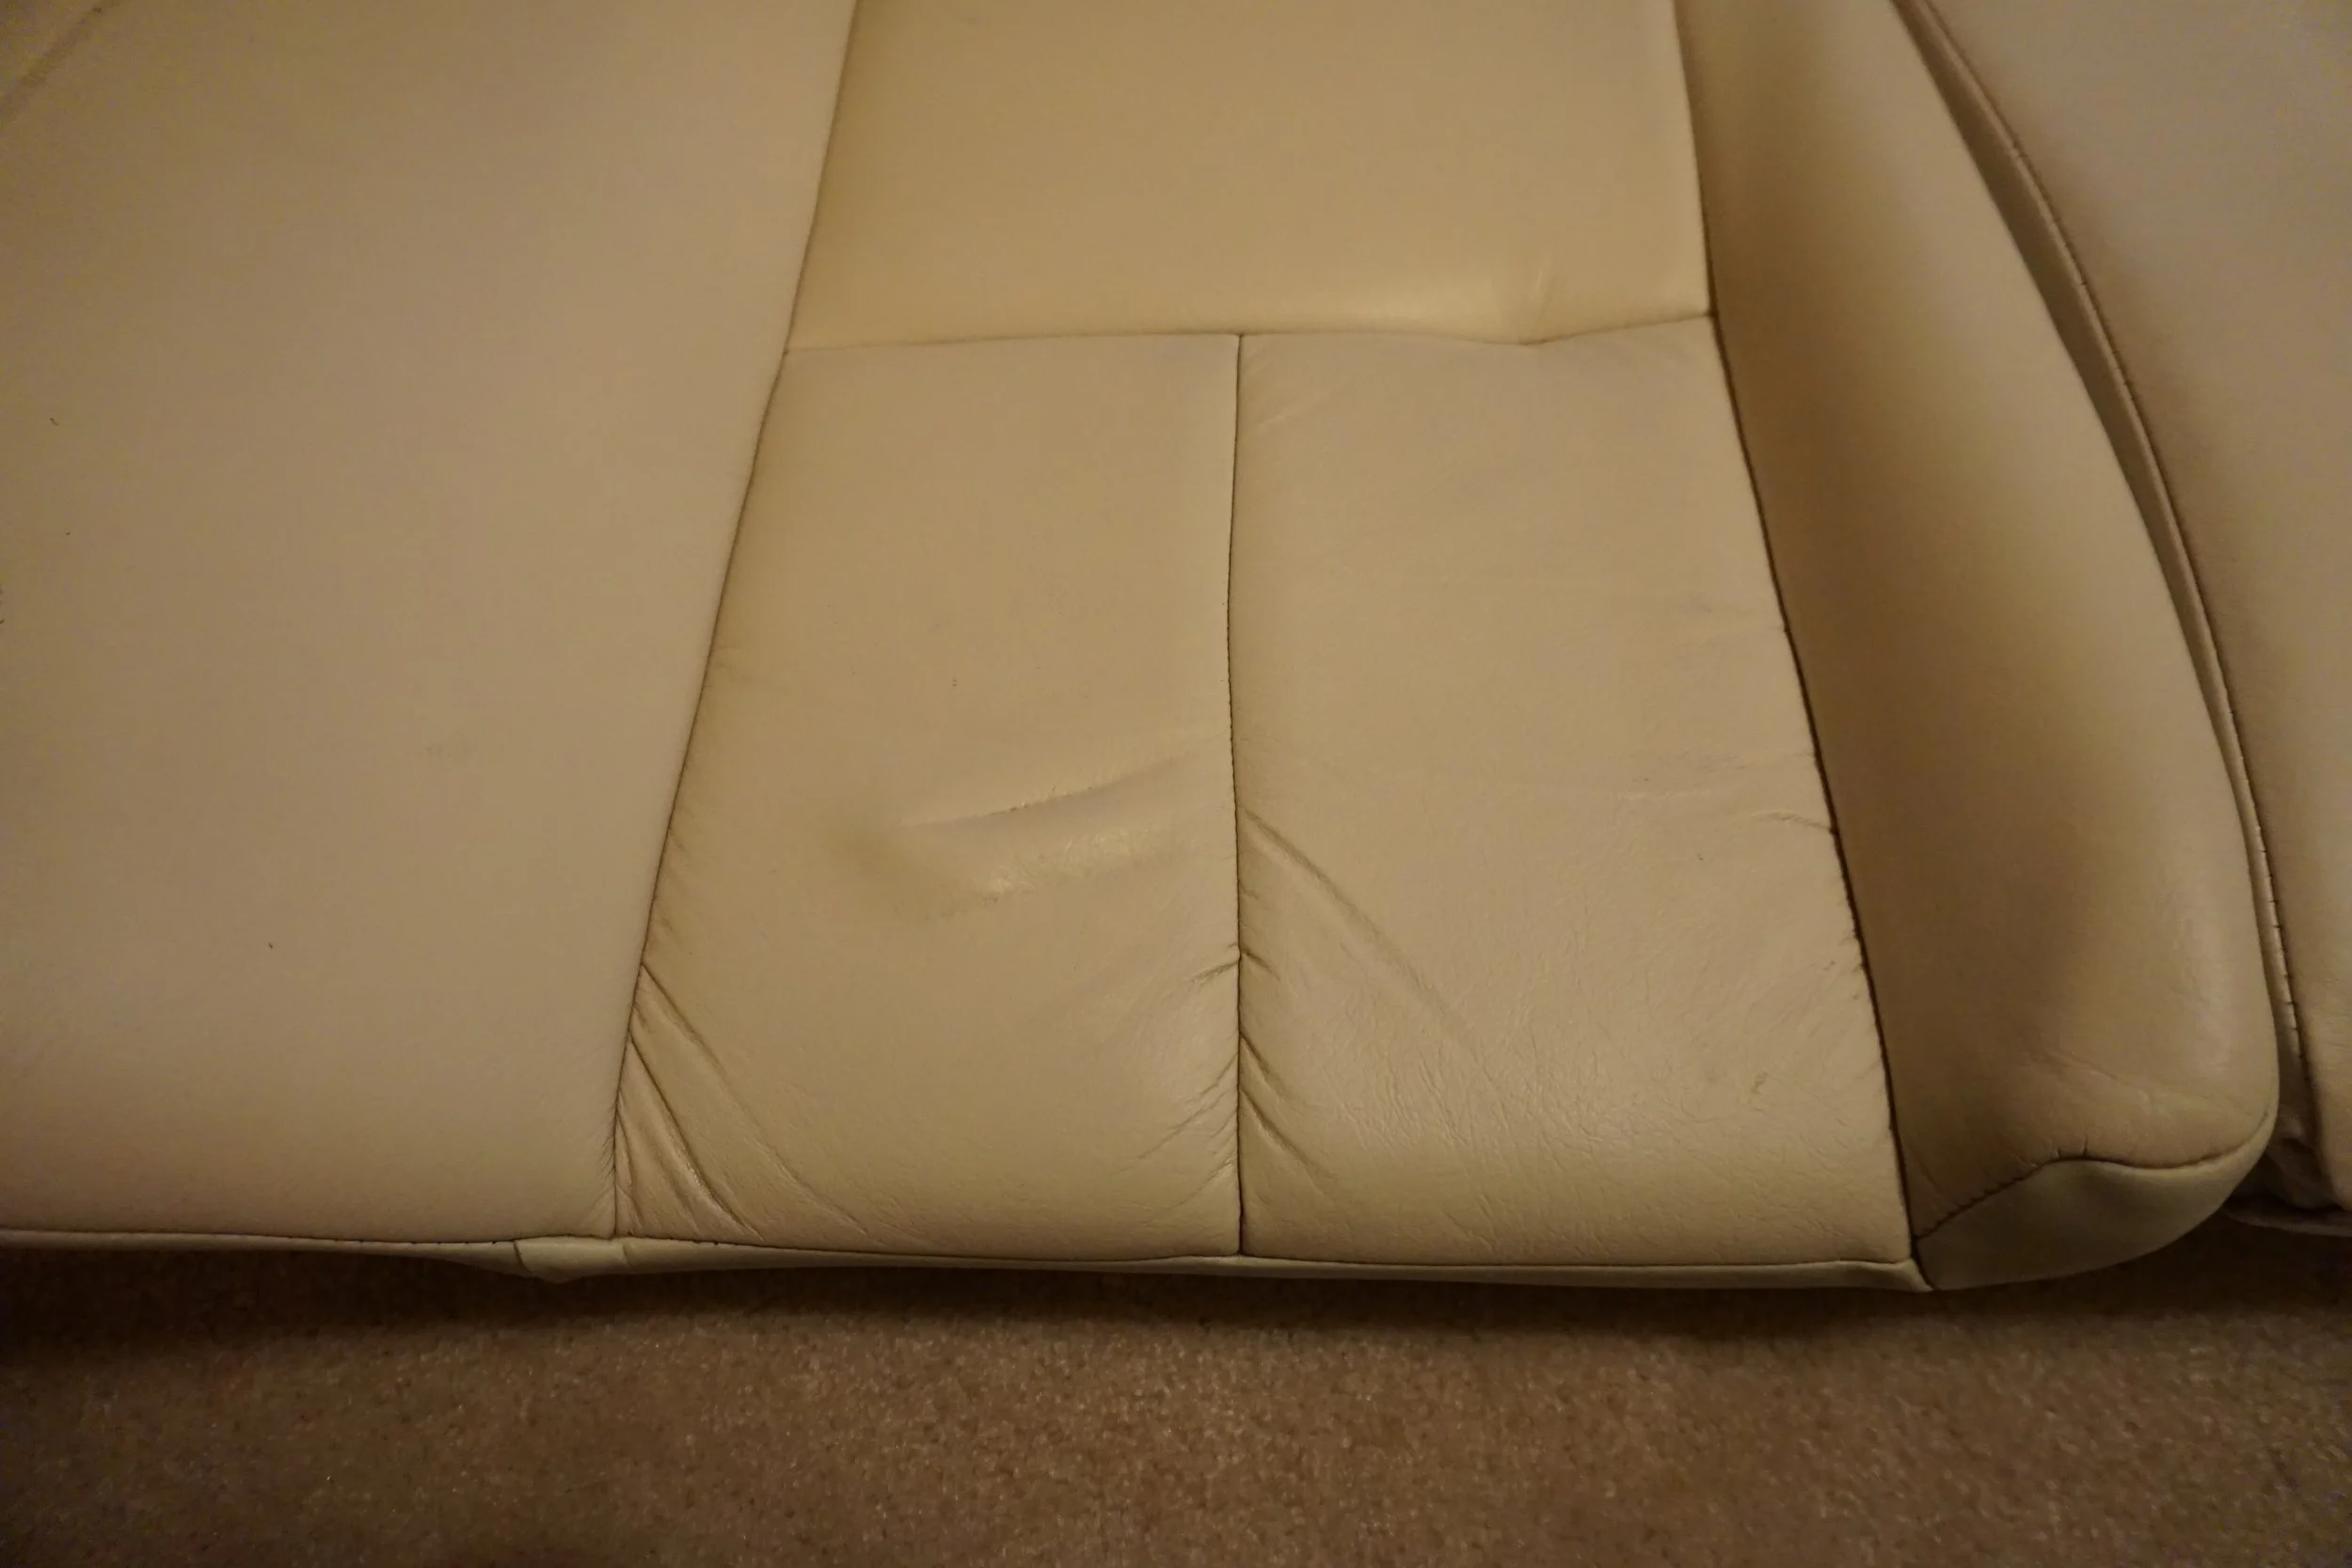
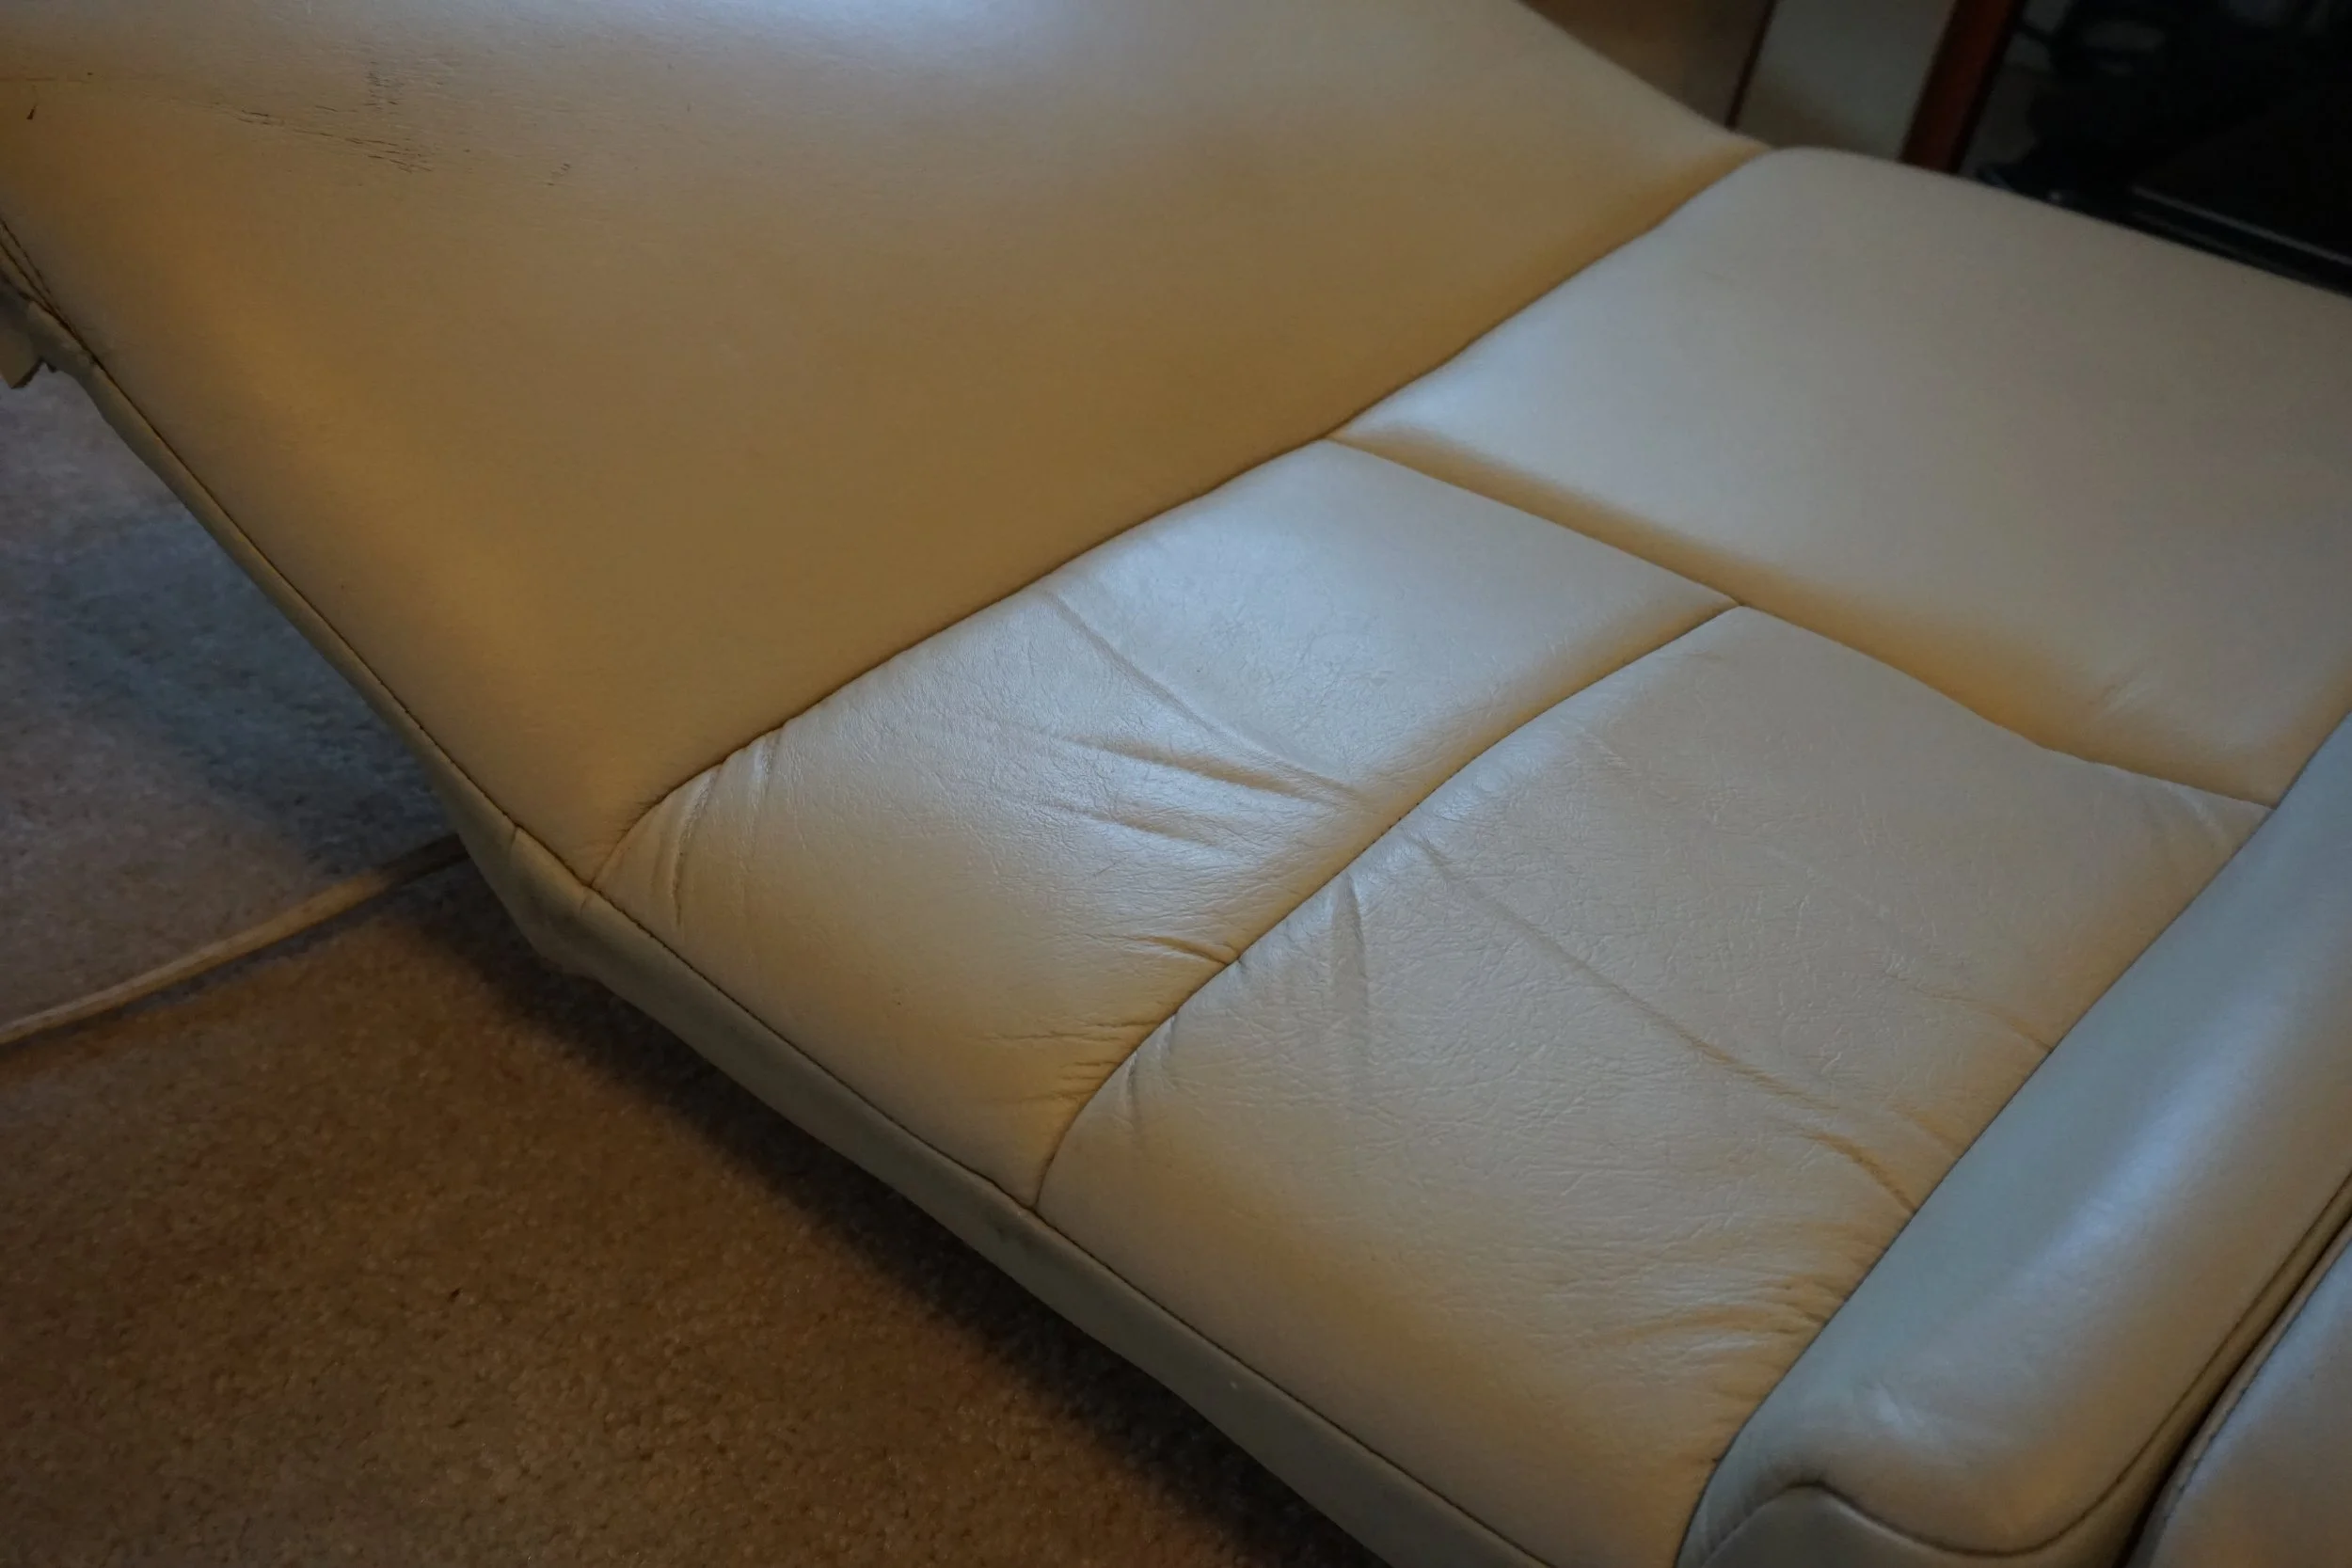
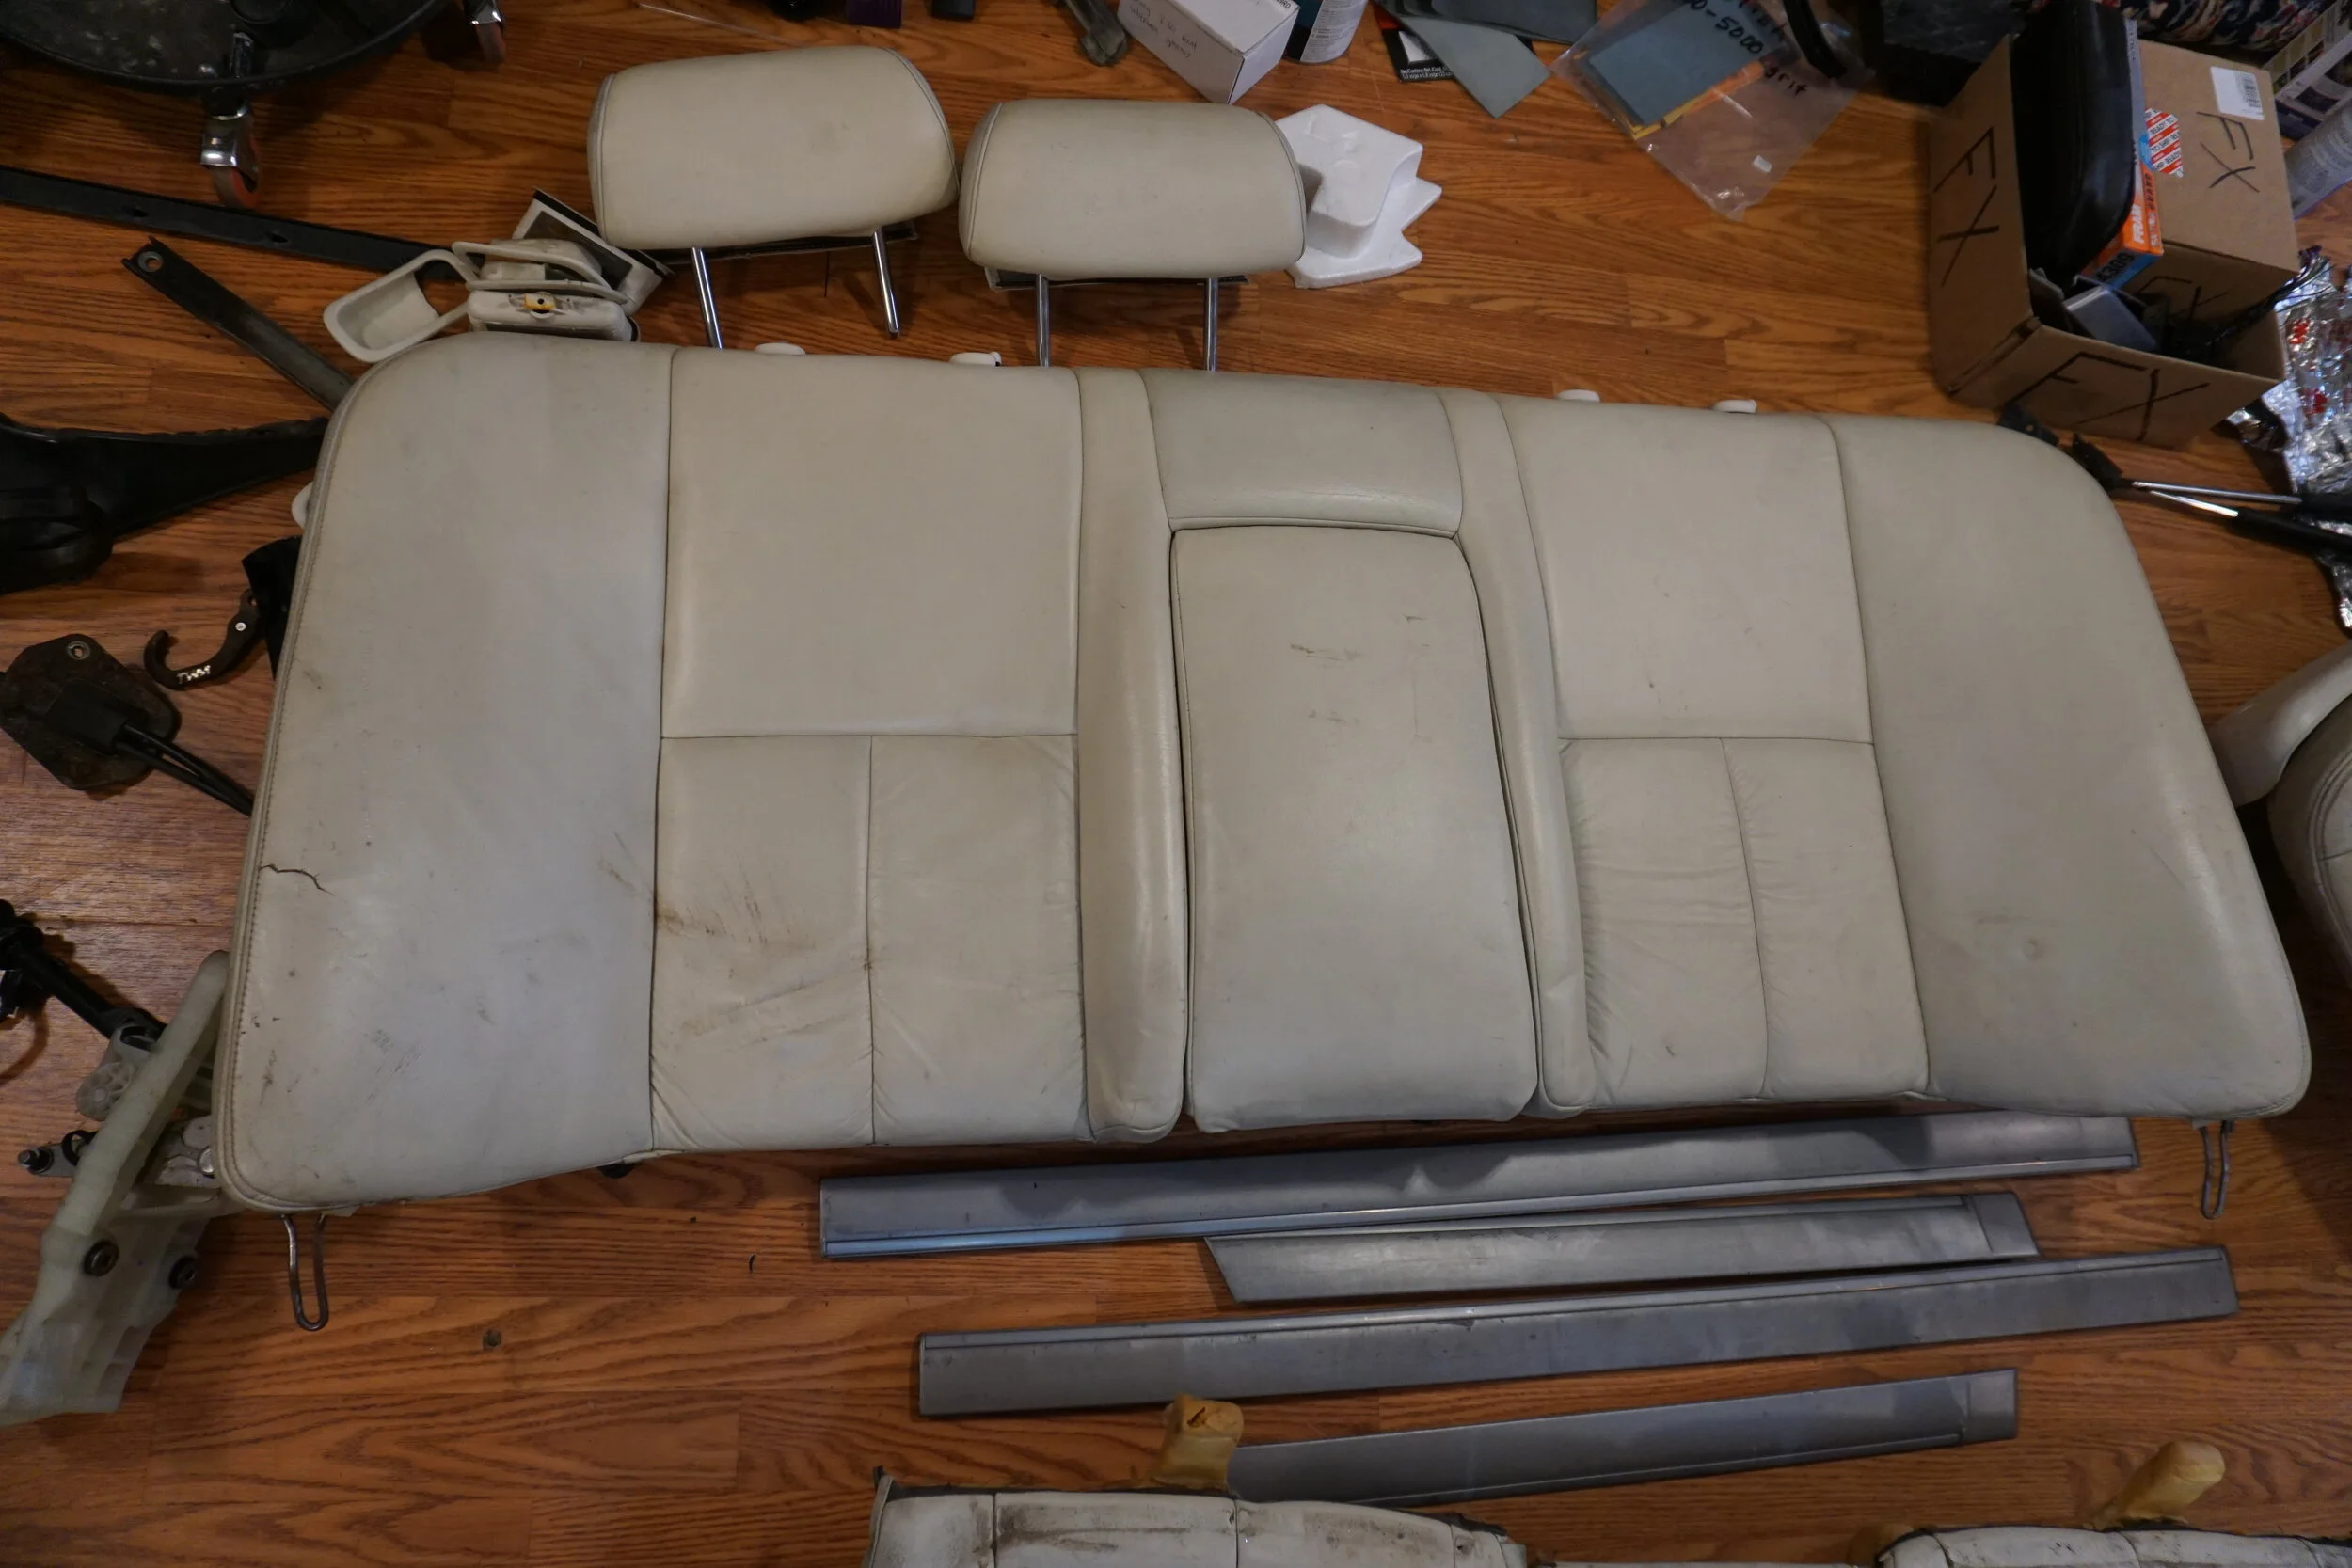
Dent removal
There were dents/divots/stretched leather in various spots that I wanted to see if I could minimize. I had seen videos of people using heat guns/hair dryers to massage out those sorts of things, so I gave it a try. On leather this old and stiff, it took a loooong time but in principle it works. It goes something like this: heat up the area for a few minutes, then rub the spot with something to stretch it out (but only a little!). At first I tried using my finger, but I got tired of burning myself, so I moved on to the round end of a kitchen knife. But sometimes I pressed too hard and stretched out the leather too much, which meant I had to apply more heat to allow it to pull itself tight again. The deeper the divot, the less likely it is you can get it all out. But I would say I was able to reduce them by about 50-75%, which I was pretty happy with. I got impatient in one spot and ended up getting the leather too hot and "burning" it a little. I'm sure this wouldn't have been noticeable on black leather, but on white leather it turned it just a little bit brown. Oh well, lesson learned.
Before/after of each spot:

Cleaning
The first thing I had to do was to clean them up. I started with soapy water and a MF towel to get the bulk of the loose stuff off. On the area of the front passenger seat with permanent marker and pen ink, I used some rubbing alcohol and scrubbed it vigorously. That got it pretty clean, but not perfect. One things were clean enough, I did a round of Leatherique rejuvenating oil and let them bake outside inside a hot car. Allowing the oil to "soak" in supposedly helps bring dirt and grime to the surface, allowing it to be cleaned off more easily. It should be noted that 99% of all automotive leather is coated/painted, so claims of oil really soaking in are suspect. The only places oil 100% soaked in were where the top coat/paint has been scraped off or damaged, allowing the oil to actually reach the underlying leather. I then cleaned them with the Leatherique cleaning solution, which frankly didn't appear to do a whole lot. It probably didn't help that the stuff I had at the time was 13+ years old.
I did another round of oil/cleaner for ****s and giggles, and then followed up with a Magic Eraser (ME) on everything. This is where things started to get REALLY clean. The ME started pulling out grime that I thought was baked in. I'm aware of how abrasive the ME is, but it didn't appear to damage anything, and the results were pretty spectacular. And since I had came that far, I did one final round of (new) Leatherique. With everything as clean and conditioned as it was going to get, I moved onto the experimental stuff.
Superglue removal
I had previously used "Bob Smith Industries Un-Cure" super glue remover on some interior trim and came away pretty impressed with what it could do, so I decided to give it a go on what appeared to be super glue (nail polish?) on the upright portion of the back seat and the side of the front seat. This stuff has the potential to damage plastic (and surely whatever this leather is coated with) so I tried to be as careful with it as I could. I squeezed out enough to cover the glue, let it sit for a minute, and then gently worked on it with a little dull pick tool I have. I would then wipe everything clean with a soapy paper towel. After a couple rounds it got off most of the glue and I did a finishing round or two with Q-tips soaked with the stuff to get up and remaining residue without damaging the leather more than I already had. The super glue had damaged/cracked the leather and apparently had also soaked up some of the color, so what I was left with wasn't exactly pretty, but at least it was free of super glue. I would attempt to cover up this damage in later steps with varying degrees of success.
Before
After
Before
After
Dent removal
There were dents/divots/stretched leather in various spots that I wanted to see if I could minimize. I had seen videos of people using heat guns/hair dryers to massage out those sorts of things, so I gave it a try. On leather this old and stiff, it took a loooong time but in principle it works. It goes something like this: heat up the area for a few minutes, then rub the spot with something to stretch it out (but only a little!). At first I tried using my finger, but I got tired of burning myself, so I moved on to the round end of a kitchen knife. But sometimes I pressed too hard and stretched out the leather too much, which meant I had to apply more heat to allow it to pull itself tight again. The deeper the divot, the less likely it is you can get it all out. But I would say I was able to reduce them by about 50-75%, which I was pretty happy with. I got impatient in one spot and ended up getting the leather too hot and "burning" it a little. I'm sure this wouldn't have been noticeable on black leather, but on white leather it turned it just a little bit brown. Oh well, lesson learned.
Before/after of each spot:
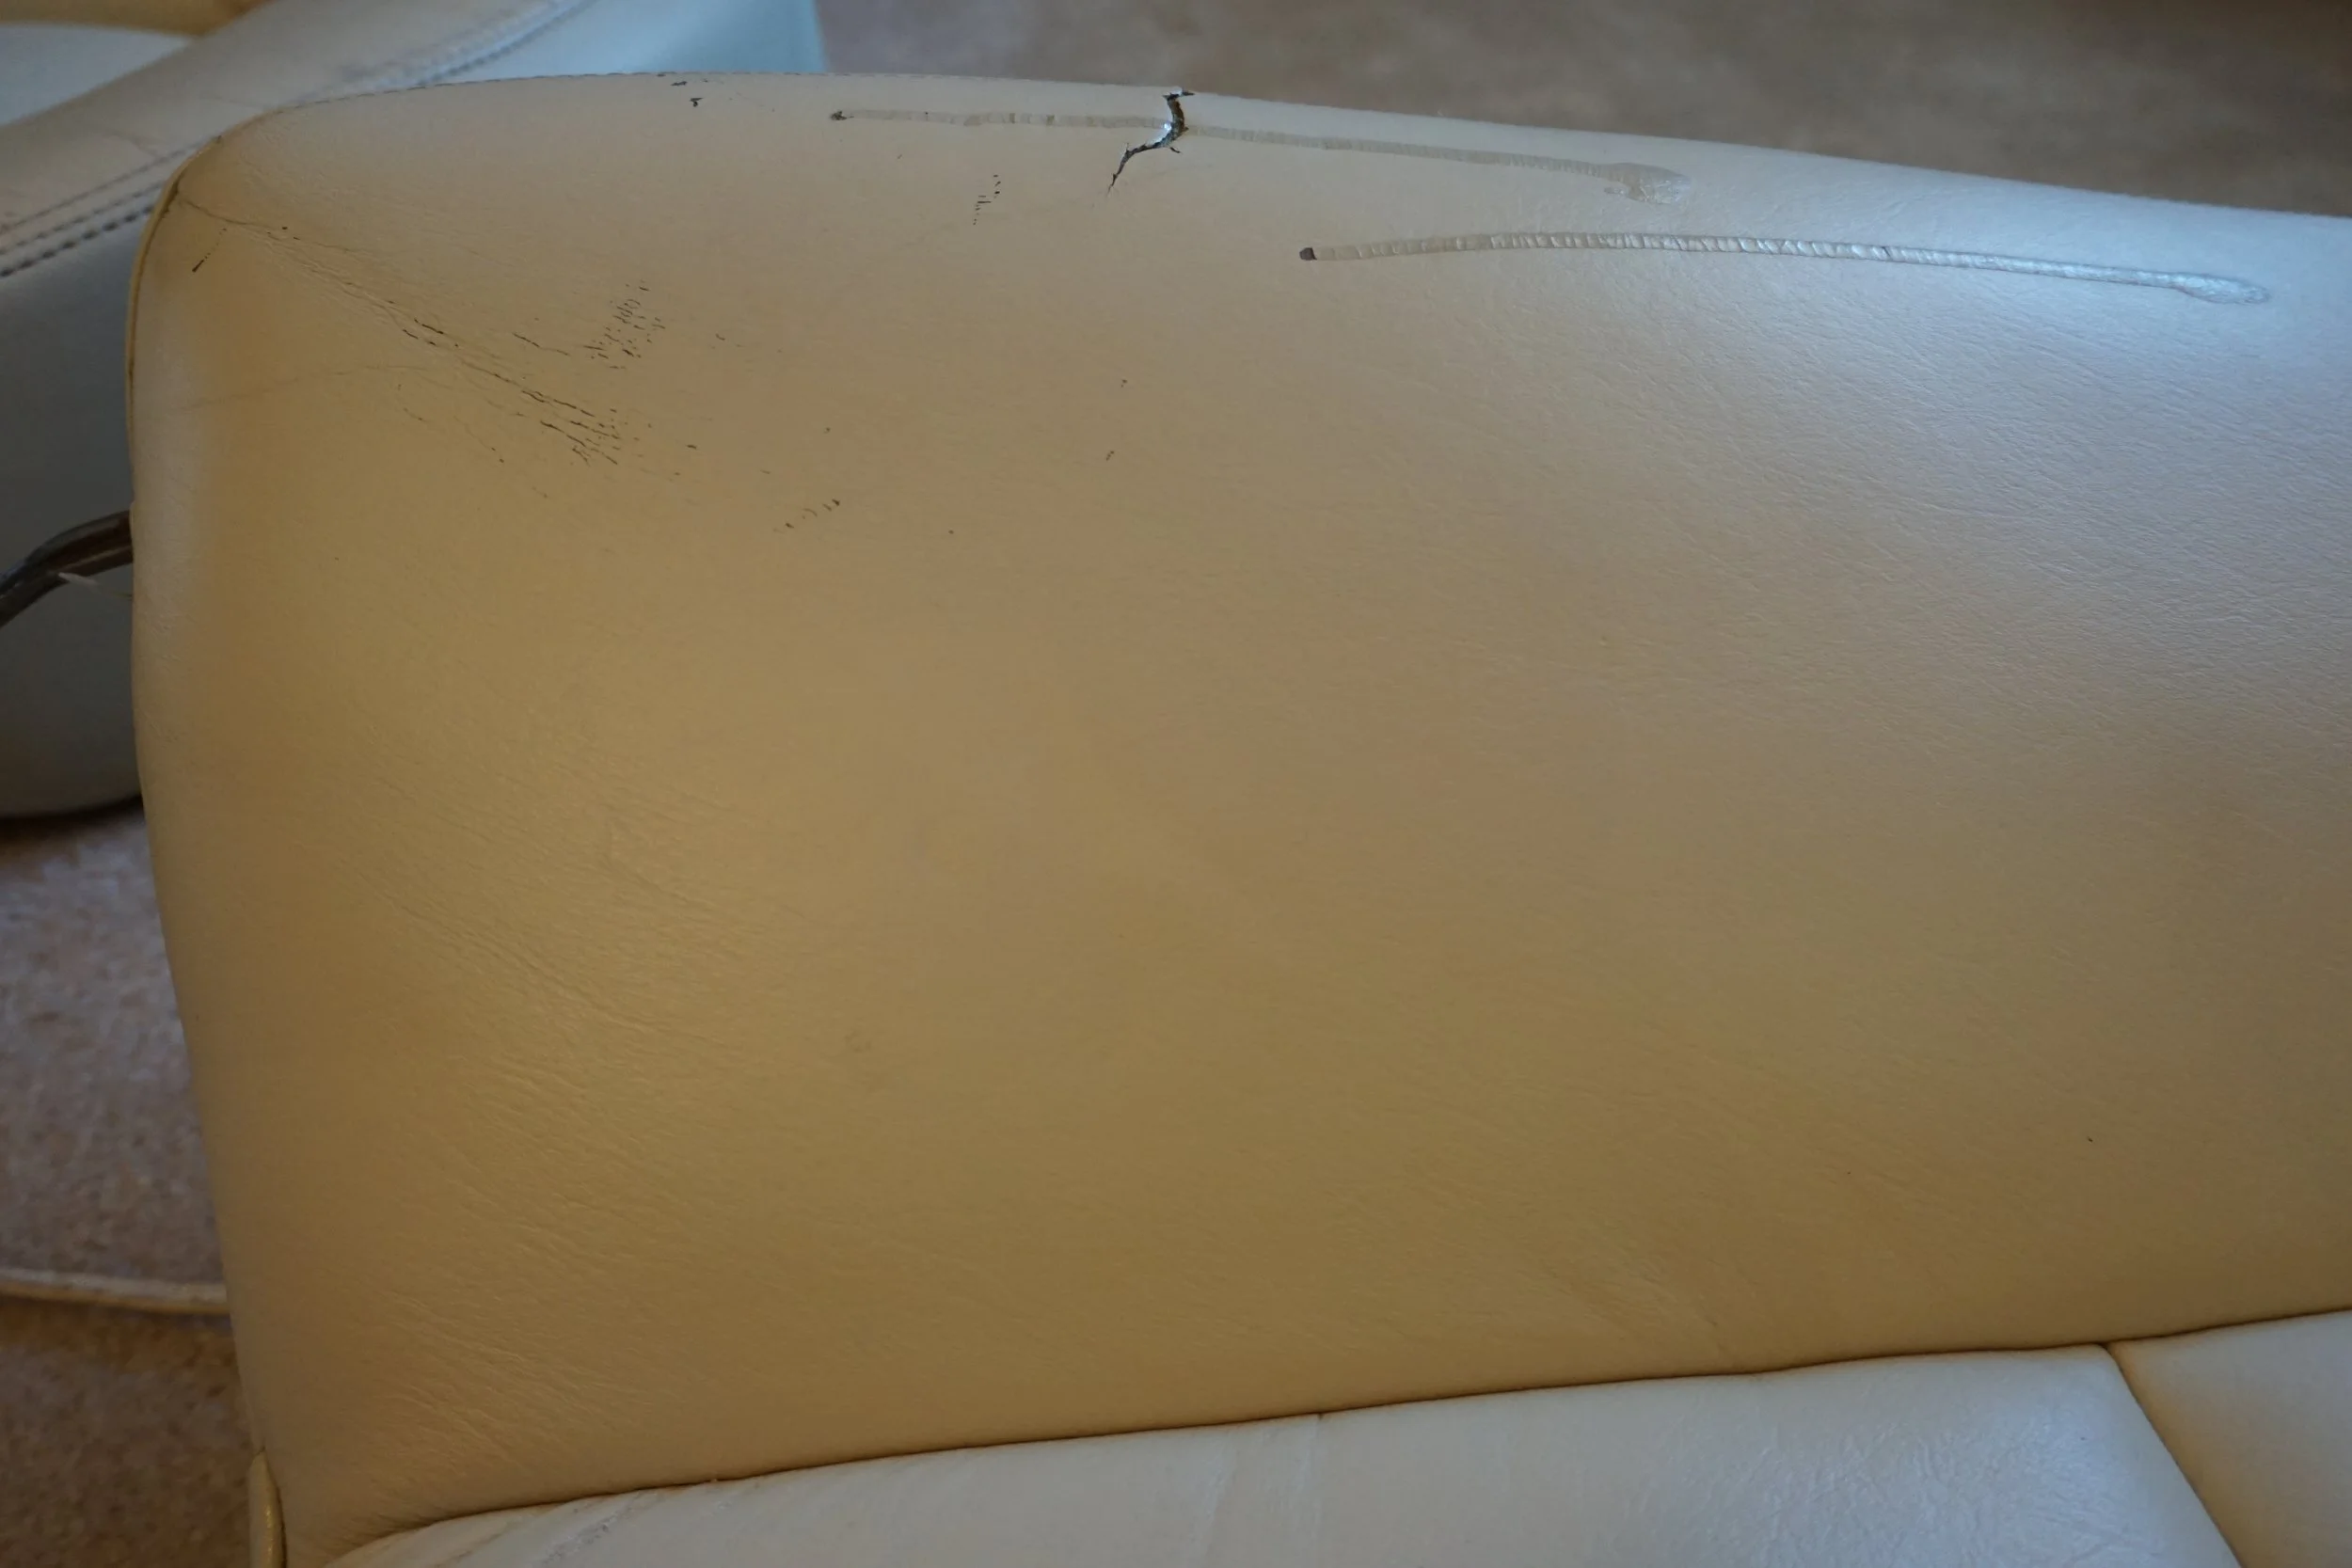
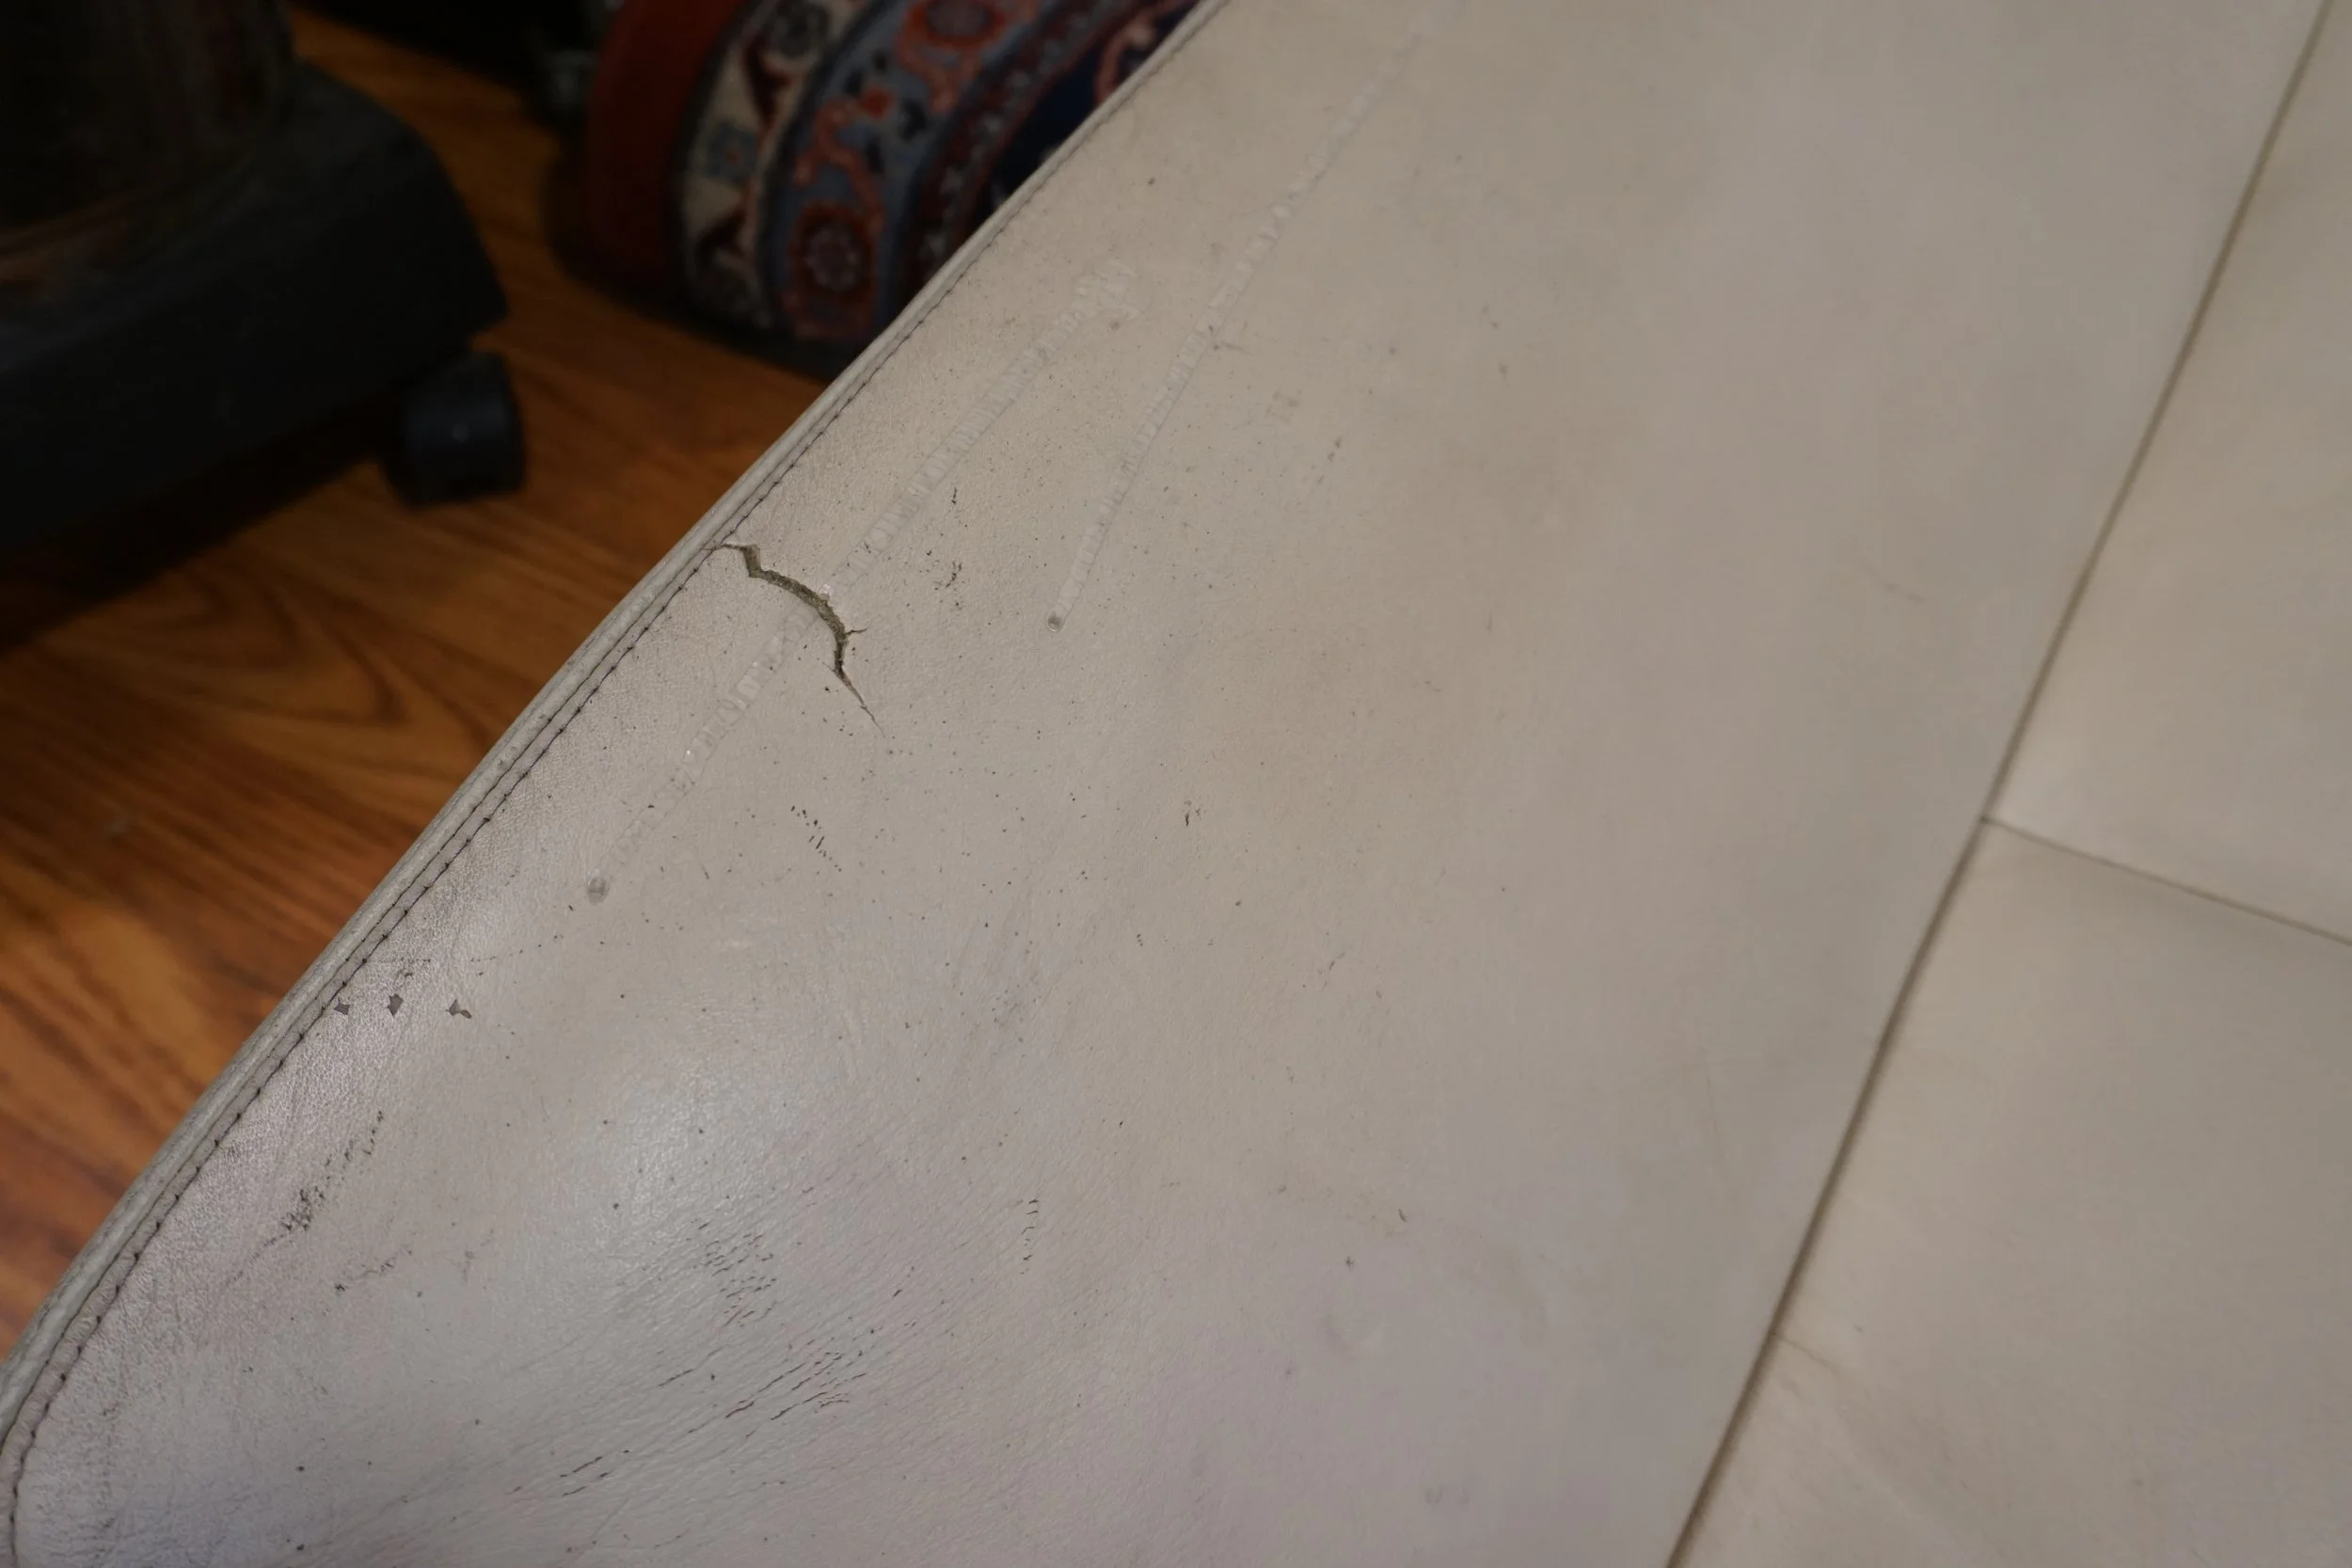
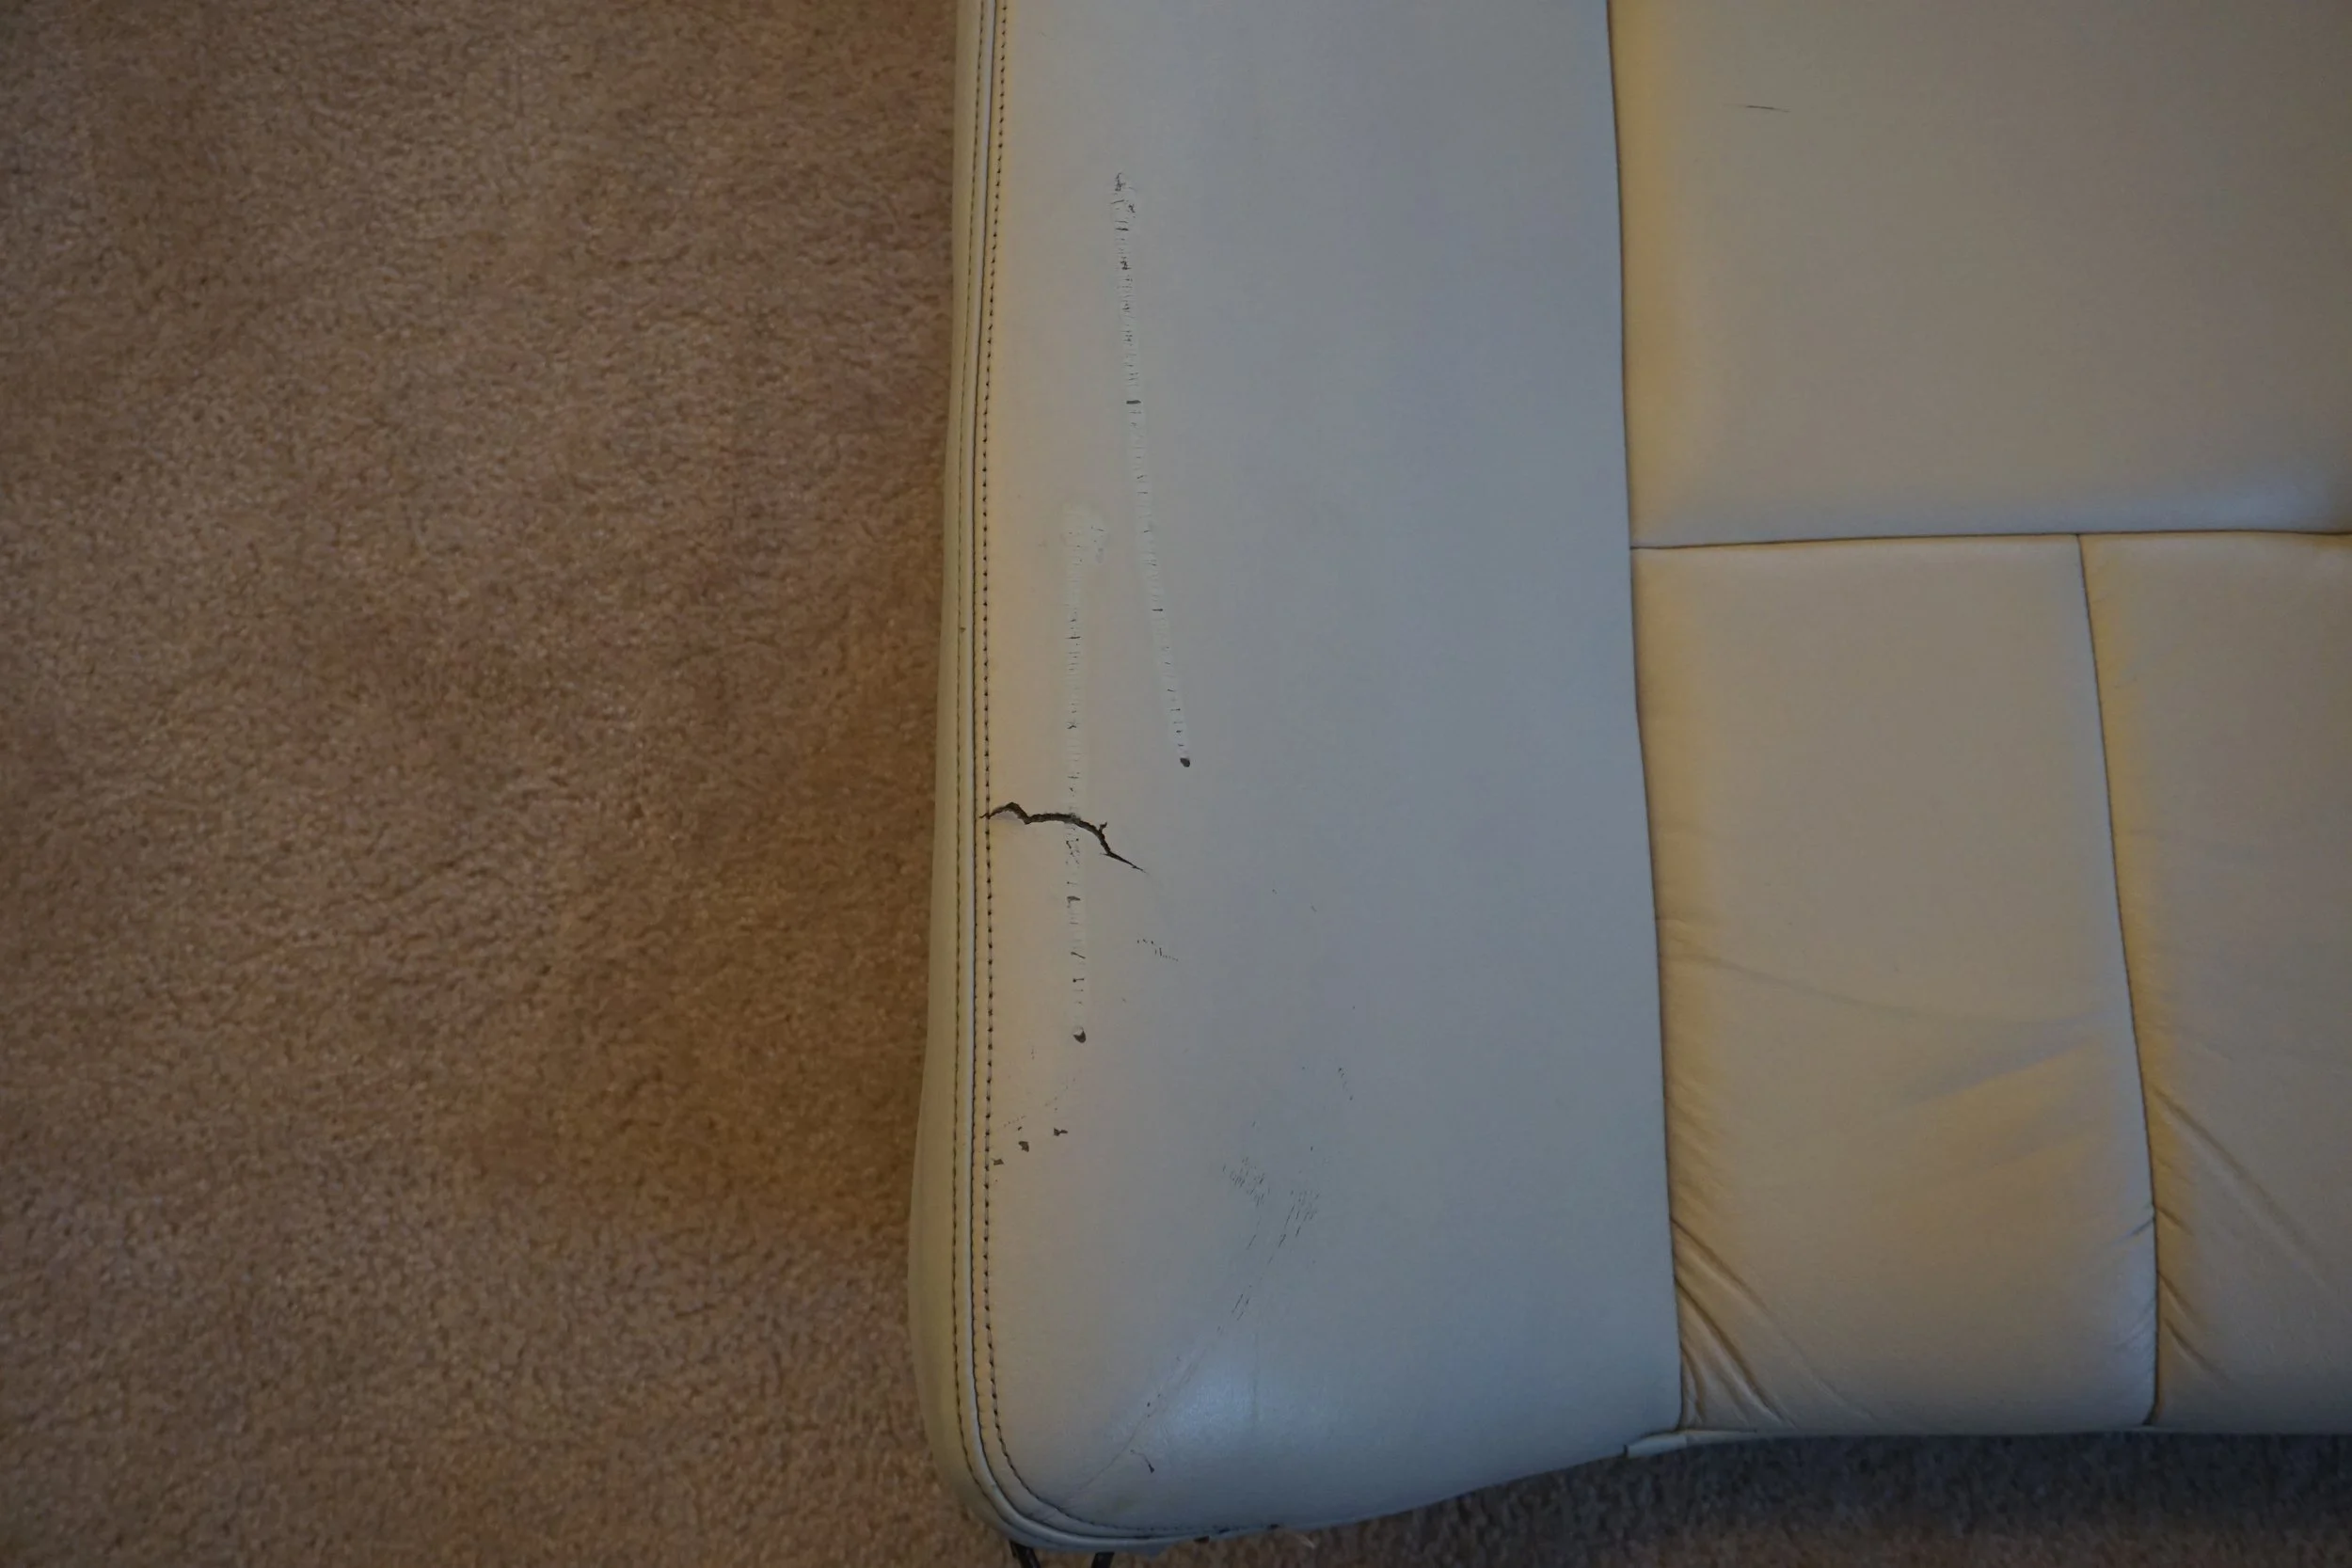
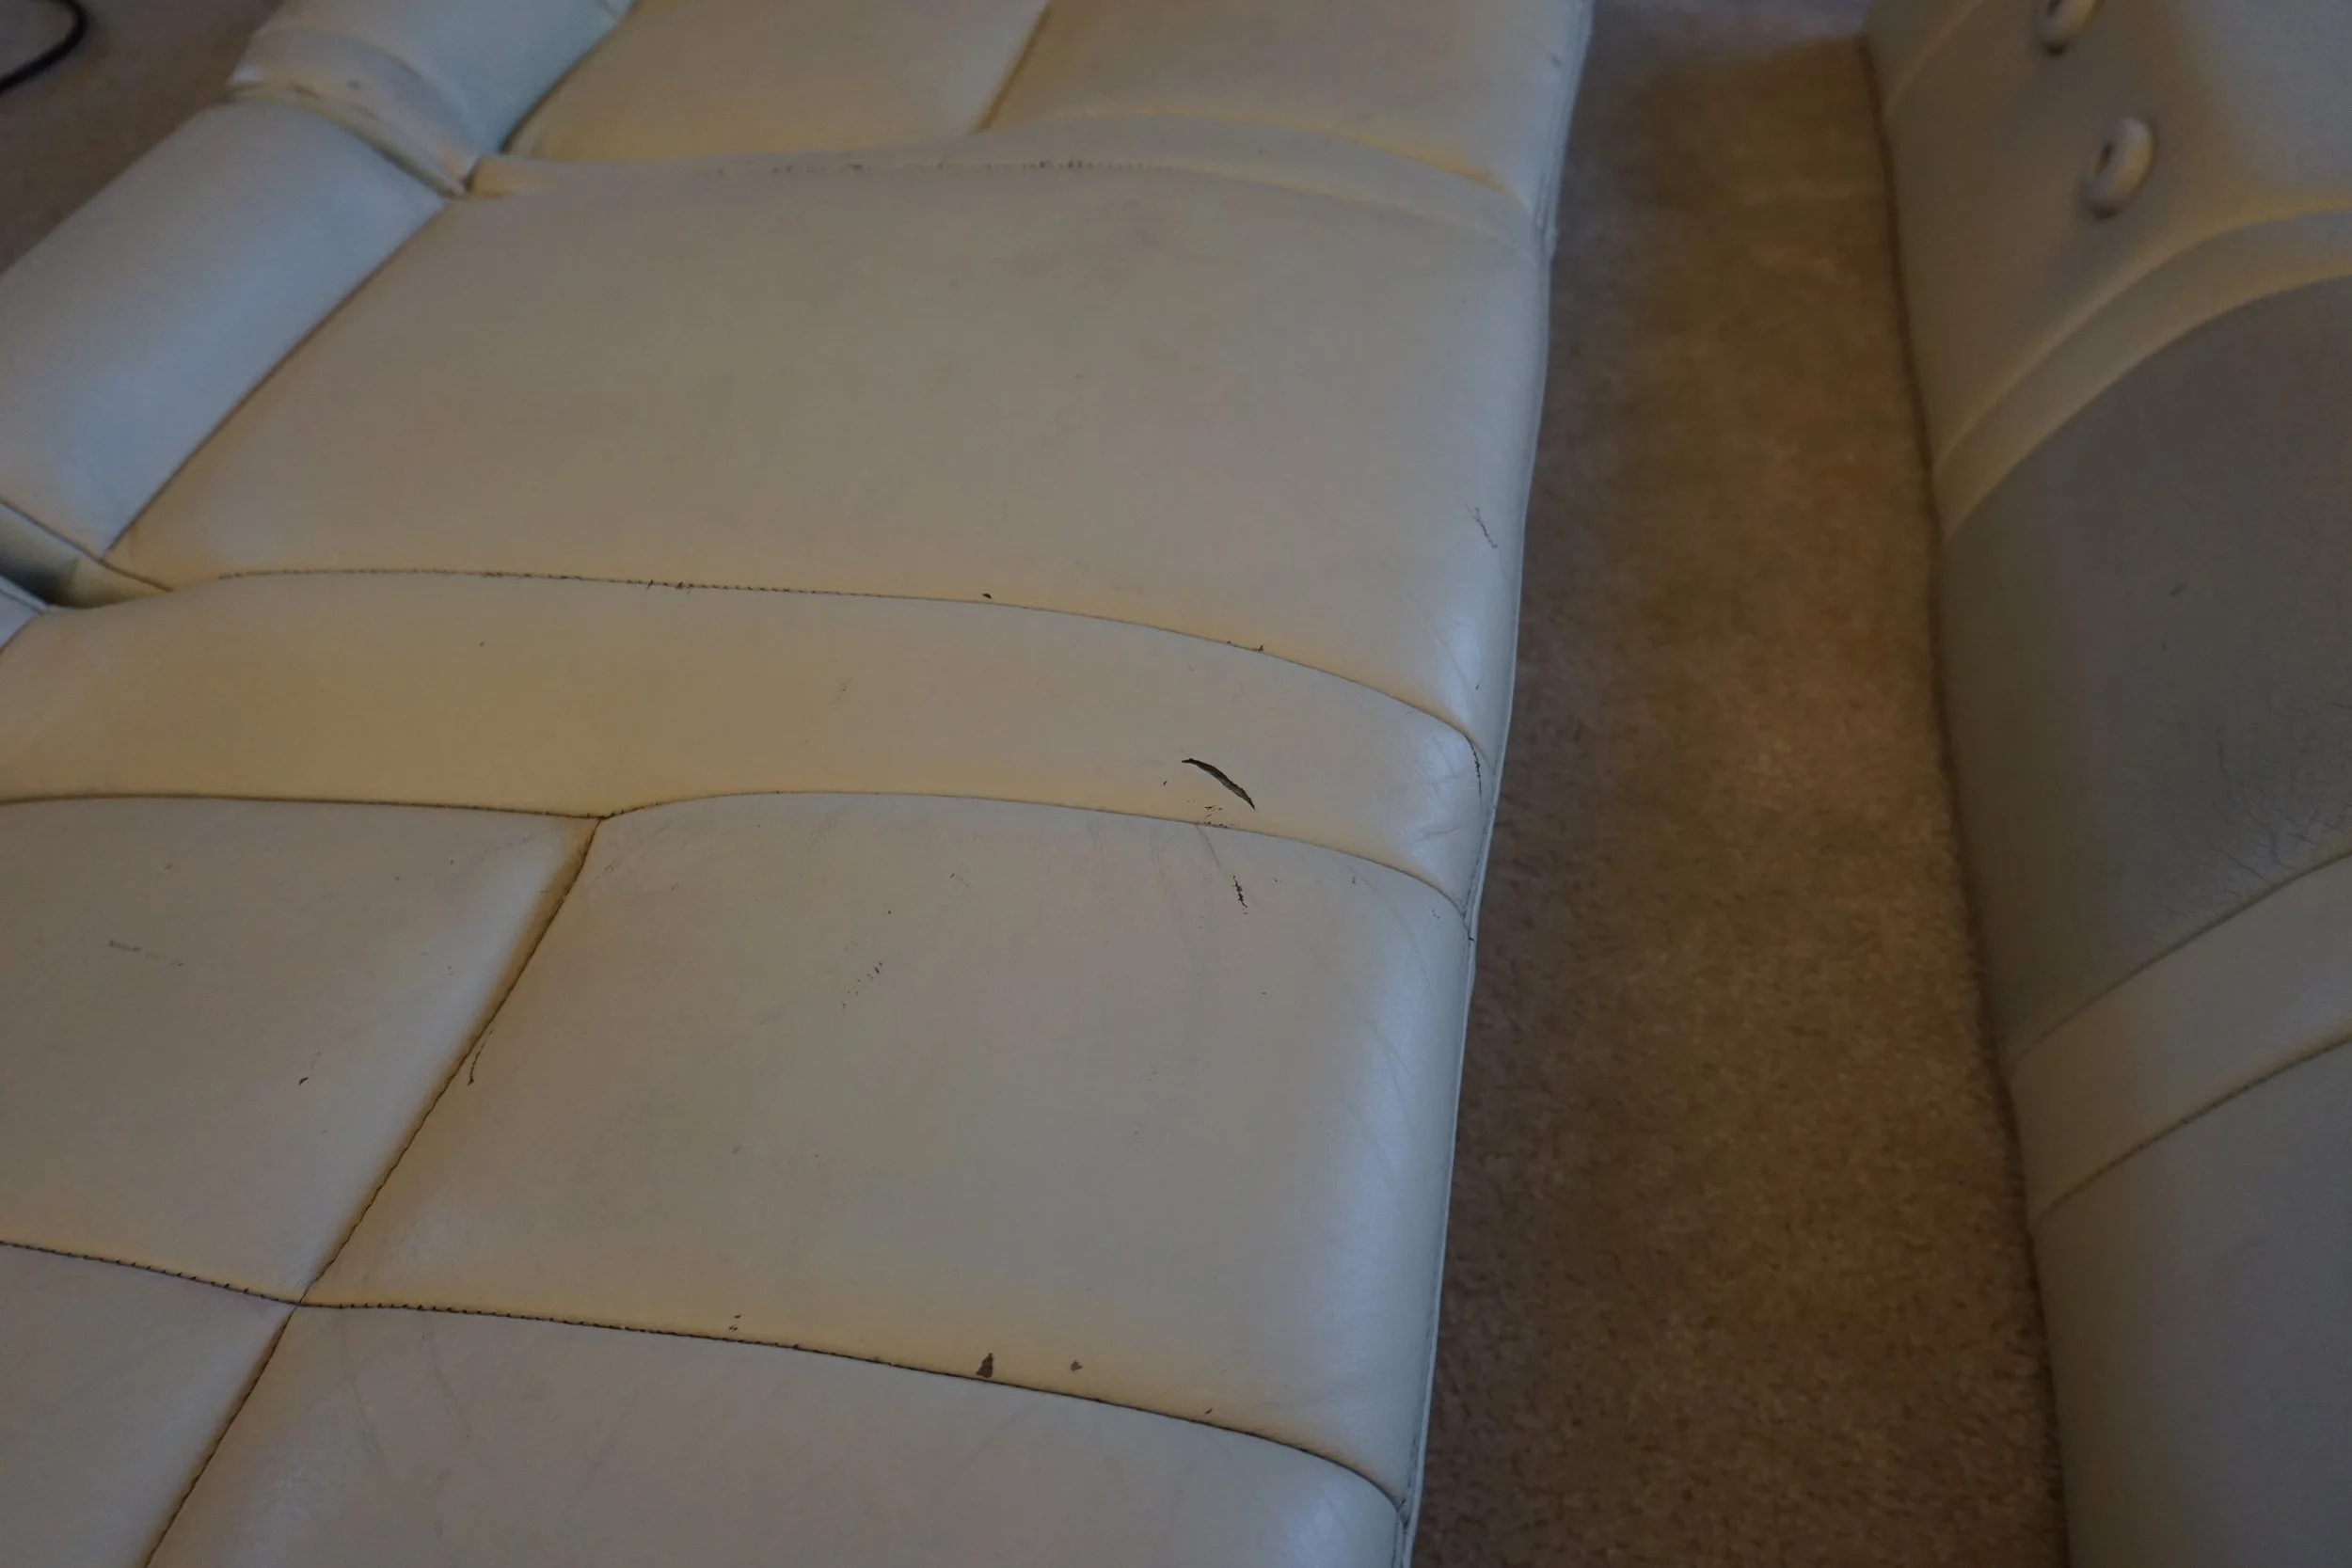
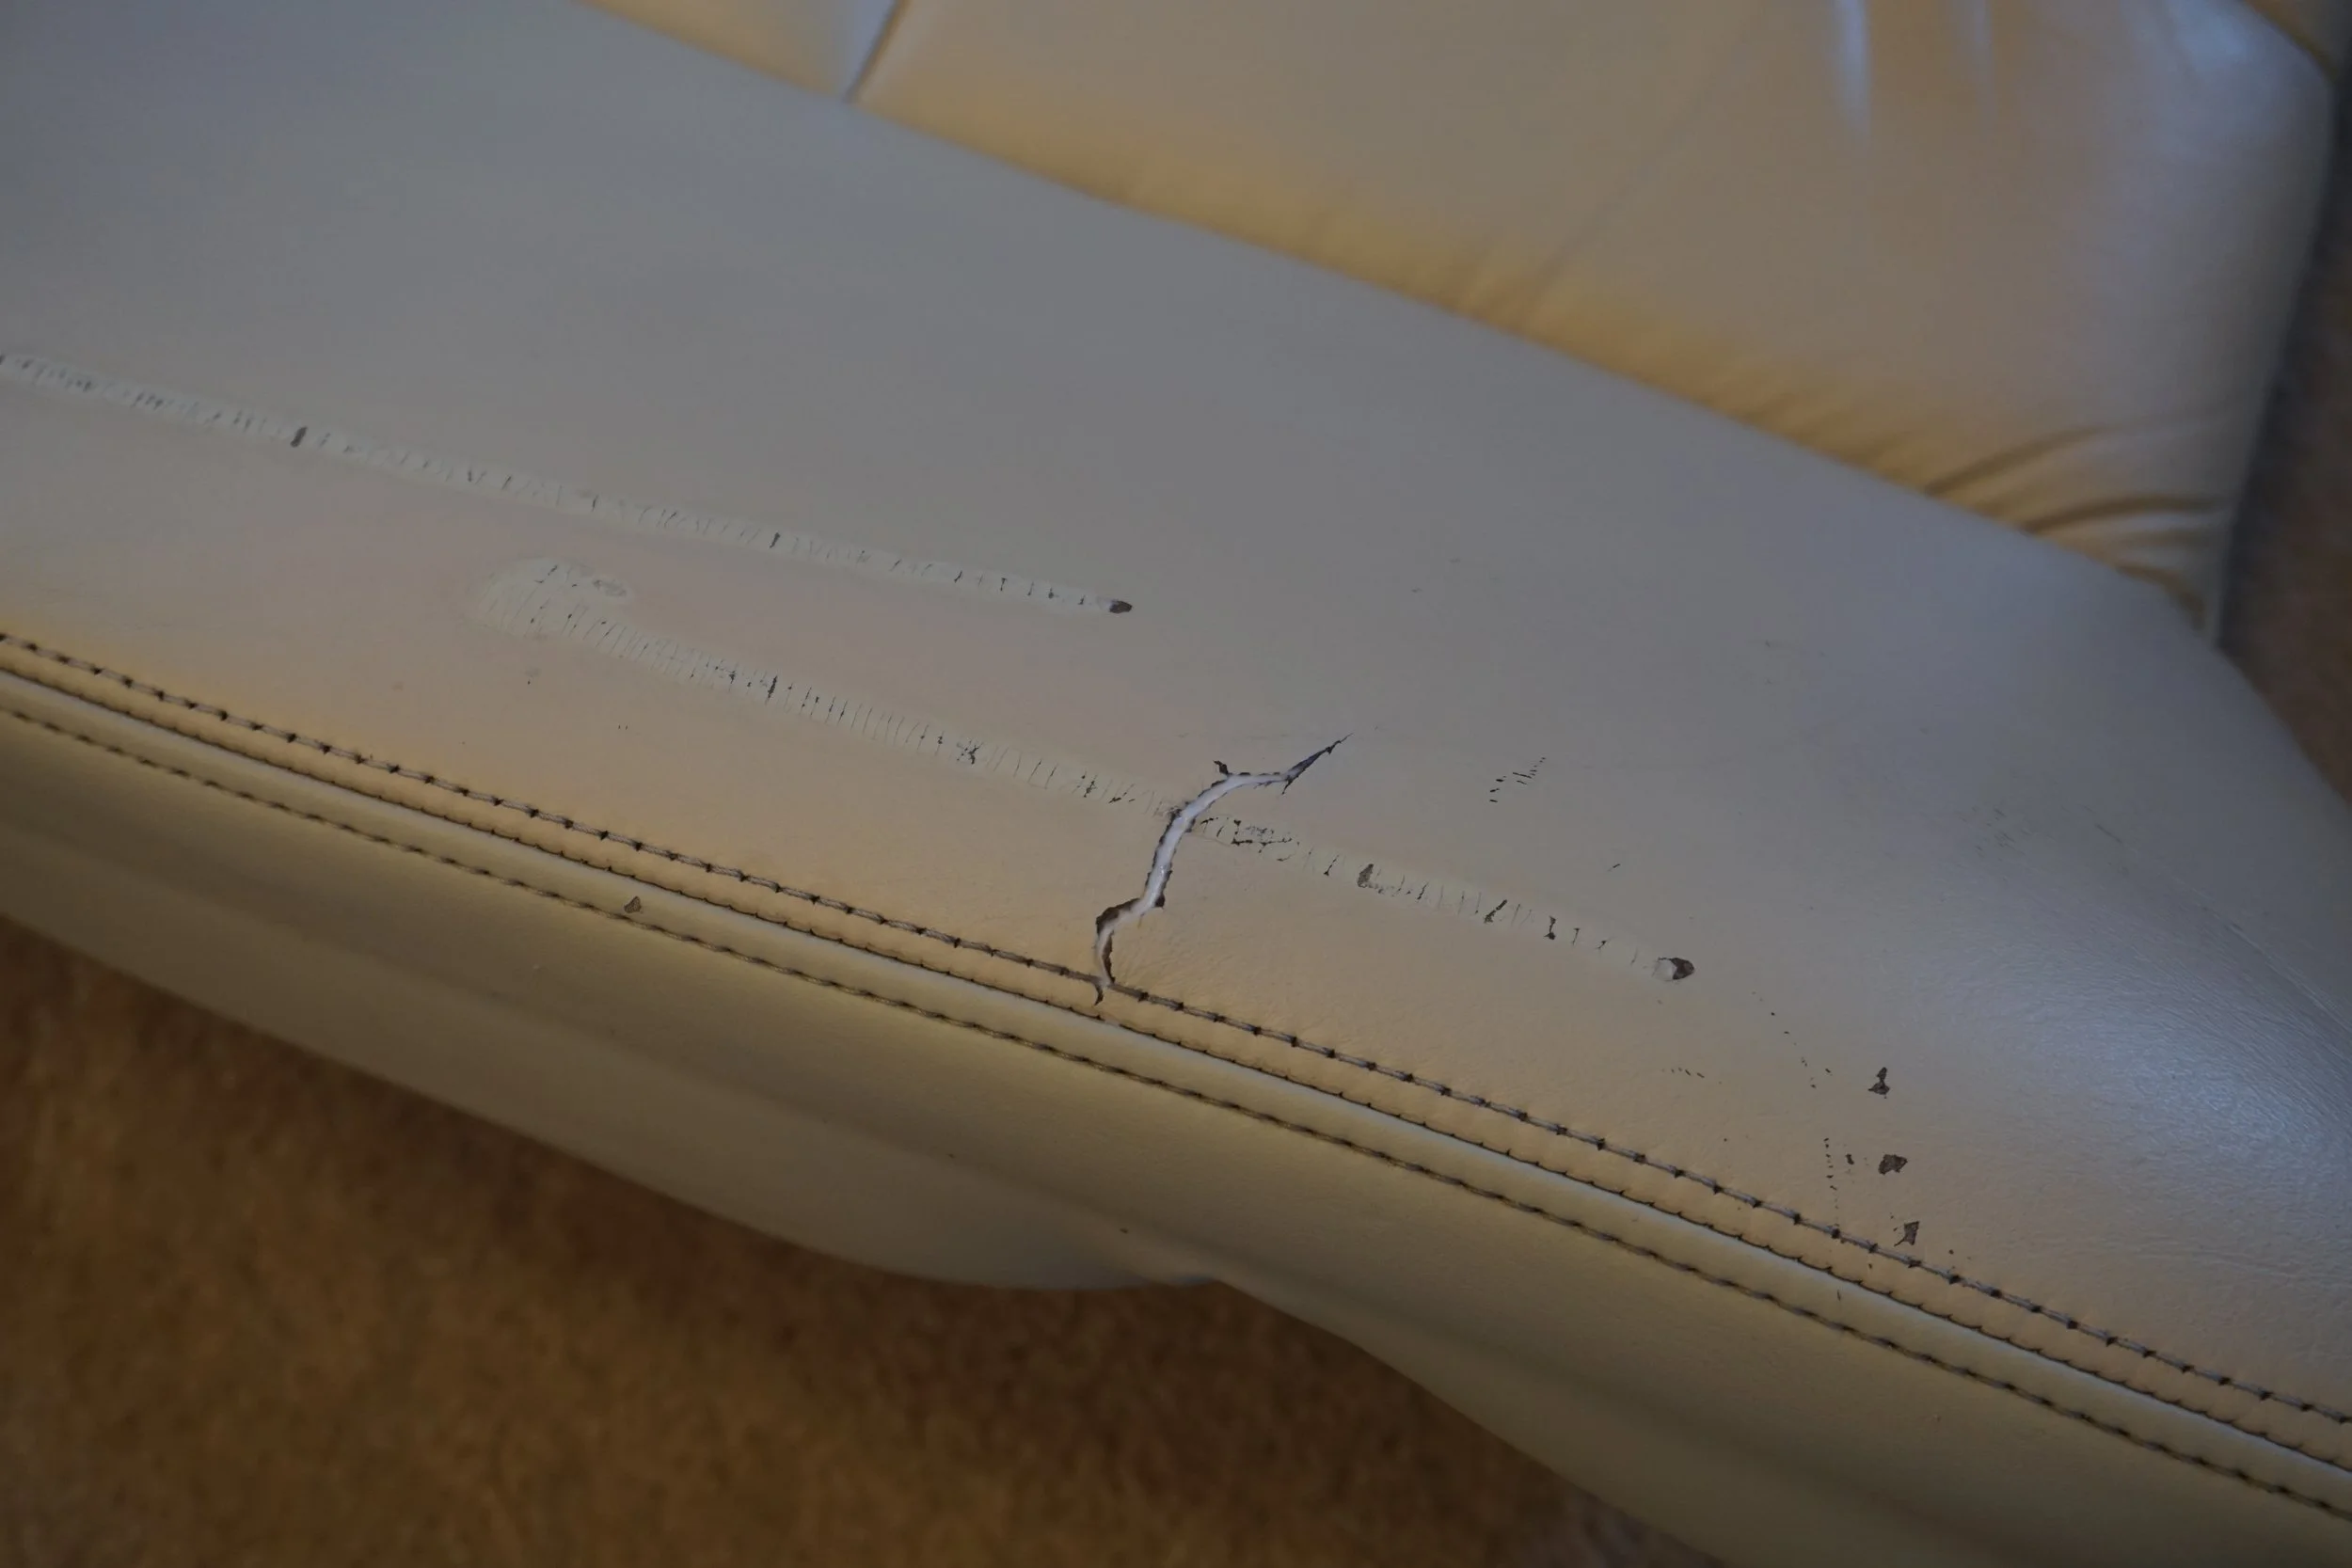
Repairing cracks and tears
I bought a vinyl-based leather repair kit for about $20 to see if I could patch up the large gashes and make them less obvious. First step is to fill them in with white vinyl glue stuff along with a small amount of fabric to kind of tie everything together with. This cured by itself overnight and seemed to make a pretty solid base to work from. I no longer had to worry about the gashes getting any bigger if they got tugged on.
Next up was the top coat. This part had to be mixed up with various colors to match the leather, and then cured with heat to solidify. Getting it to match was time consuming, but I eventually got it pretty close. The ratio was something like 20 parts white, 4 parts brown, and 2 parts yellow. The most annoying part of this part was getting it hot enough to cure and harden. The kit comes with this tiny little metal circle on a wooden stick that you're supposed to heat up with a clothes iron, and then press onto a sheet of patterned vinyl/plastic over top of the goo you applied. Naturally, this didn't work very well and/or took forever, so I got impatient and just (carefully) put the iron onto the patterned vinyl sheet on top of the goo. This sped things up considerably, but only worked on flat surfaces, of which I only had one or two. The rest of the repairs involved more heat gun action, and took forever. Some areas didn't feel like they ever fully cured, but I didn't care at that point. But I will say that it turned out pretty well, and the cracks/tears/gashes were substantially filled in and repaired. It wasn't fun, but it was effective.
Before
Mid-way
Finished (after painting in the next step)
Final step: Touch up paint
Yes, paint. Again, I mixed up white, brown, and yellow until it was close enough, but this product (which is different than the vinyl stuff in the previous step) cured quickly by itself. Unfortunately, when it dried the color seemed to change a bit, which made it not look as good as I thought it was going to. I used this stuff to cover up the areas where I had removed the super glue, as well as all of the little nicks and scrapes. Once I got the hang of using the tiny brush that came with the kit it went down pretty well and did a great job of covering things up.
To get the full picture of what was accomplished, let's do some fun before/after pics.
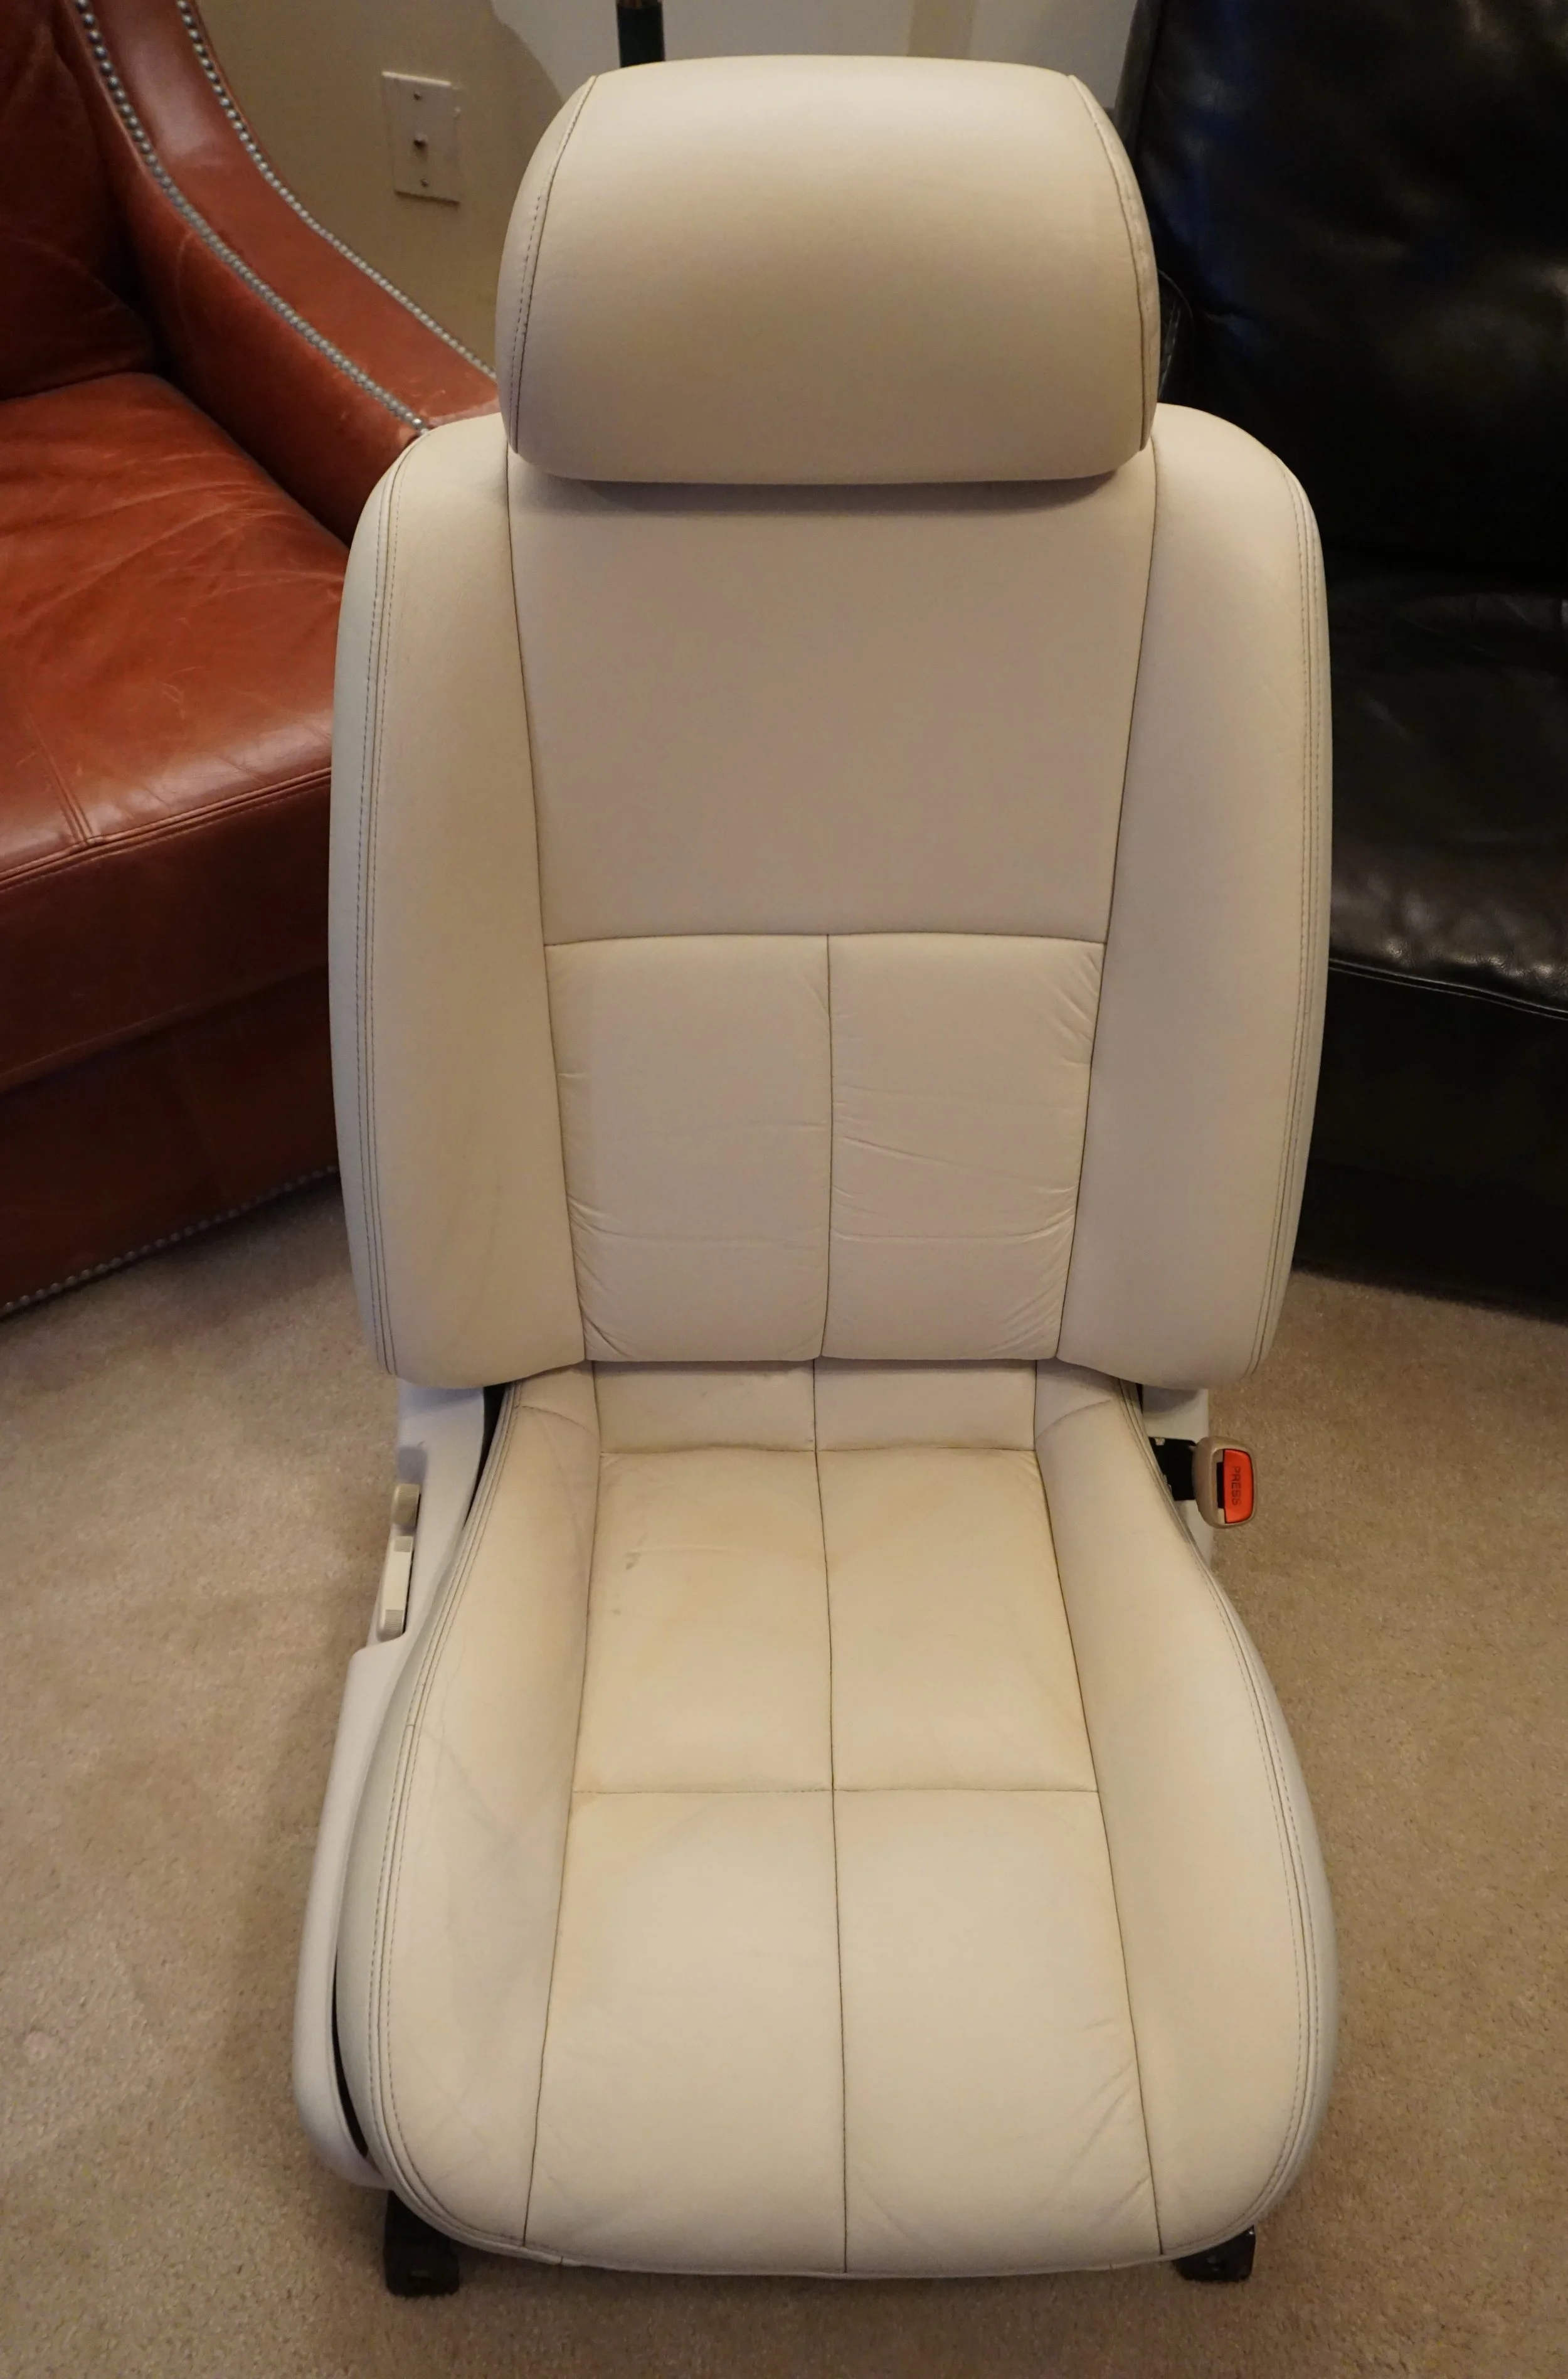

So that's it, I did the best I could to restore this extremely rare interior and save it from being lost forever. I'll install it in my car at a later date and post up pics, but this is it for now. It's far from perfect, but it's no longer the disgusting mess it was before, and is at least semi-presentable. It even got my wife's tentative approval, so I must have done something right!
I bought a vinyl-based leather repair kit for about $20 to see if I could patch up the large gashes and make them less obvious. First step is to fill them in with white vinyl glue stuff along with a small amount of fabric to kind of tie everything together with. This cured by itself overnight and seemed to make a pretty solid base to work from. I no longer had to worry about the gashes getting any bigger if they got tugged on.
Next up was the top coat. This part had to be mixed up with various colors to match the leather, and then cured with heat to solidify. Getting it to match was time consuming, but I eventually got it pretty close. The ratio was something like 20 parts white, 4 parts brown, and 2 parts yellow. The most annoying part of this part was getting it hot enough to cure and harden. The kit comes with this tiny little metal circle on a wooden stick that you're supposed to heat up with a clothes iron, and then press onto a sheet of patterned vinyl/plastic over top of the goo you applied. Naturally, this didn't work very well and/or took forever, so I got impatient and just (carefully) put the iron onto the patterned vinyl sheet on top of the goo. This sped things up considerably, but only worked on flat surfaces, of which I only had one or two. The rest of the repairs involved more heat gun action, and took forever. Some areas didn't feel like they ever fully cured, but I didn't care at that point. But I will say that it turned out pretty well, and the cracks/tears/gashes were substantially filled in and repaired. It wasn't fun, but it was effective.
Before
Mid-way
Finished (after painting in the next step)
Final step: Touch up paint
Yes, paint. Again, I mixed up white, brown, and yellow until it was close enough, but this product (which is different than the vinyl stuff in the previous step) cured quickly by itself. Unfortunately, when it dried the color seemed to change a bit, which made it not look as good as I thought it was going to. I used this stuff to cover up the areas where I had removed the super glue, as well as all of the little nicks and scrapes. Once I got the hang of using the tiny brush that came with the kit it went down pretty well and did a great job of covering things up.
To get the full picture of what was accomplished, let's do some fun before/after pics.
So that's it, I did the best I could to restore this extremely rare interior and save it from being lost forever. I'll install it in my car at a later date and post up pics, but this is it for now. It's far from perfect, but it's no longer the disgusting mess it was before, and is at least semi-presentable. It even got my wife's tentative approval, so I must have done something right!
Last edited by 95maxrider; Jan 8, 2022 at 09:35 AM.

Short throw, stock ****, id use stiffer springs just to have a sportier feel but not shift retention springs.
When you get a weighted **** thats when youll need all the spring you can get (as i felt with my nunchuck).
And holy moly that job you did on your seats was amazing! I wish mine wasnt so far gone.
Wait nvm... im not even using stock seats up front... lawl.
I wish there was a person i knew who could re-pad them to make them have more lateral support.
Thanks, the seat job was kinda fun since it was all one big experiment, and I figured I couldn't make them any worse.
If you can build a motor, you can certainly work some hog ring pliers and stuff some additional foam in your side bolsters!
I had a nice weighted **** for my 5 speed, but it doesn't work with the reverse lockout on the 6 speed, so for now I'm using the stock ****, but would like to use a weighted if I can find a nice one. Can you explain why I would need to other springs once I get a weighted ****?
-the weighted **** amplifies all user input force, so youll need more resistance or the shifter will feel like a spoon in a jello cup (thats what my tall shift **** feels like), typical run of the mill weighted ***** wont make it as dramatic as mine but the difference is noticeable.
Thanks, the seat job was kinda fun since it was all one big experiment, and I figured I couldn't make them any worse.
If you can build a motor, you can certainly work some hog ring pliers and stuff some additional foam in your side bolsters!


I could use some help with something that should be very simple, but I'm out of ideas.
My auto trunk release hasn't worked properly in over a decade. I just got used to opening the trunk with a key. Yesterday I decided to actually try to fix the issue, but was unsuccessful. Here's what I did:
-Replaced the motor and hinge with units from another car. My original motor still worked, but it seems like the cable was stretched a bit. The original bracket was also bent out of shape somehow.
-Lubricated the lower hinge assembly as well as the lock mechanism in the trunk lid.
-Made sure the lower hinge is in the unlocked position.
-Played with the position of the motor and hinge.
-I do have some sound deadening in the trunk lid, but it still won't pop/unlock even if I'm pulling up on the lid with someone pressing the release button.
The motor is pulling the release cable, and I can hear it making a different sound when it's in the locked/unlocked position. So it's mostly working. But it still won't actually unlock without using the key. Does anyone have any other suggestions on how to make this work?
I wish I could post up some "mission complete" stories, but really I'm stuck in the middle of some mission creep on like five different projects, so the best I can do is some progress pictures to give you an idea of what's been going on. First up, the paint situation. So the paint shop I was hoping would do my car turned the job down since they "really just do collision work" even though I know they can do much more than that. But I get it, once you tell a shop that you were the one who did rust repairs, they have every right to believe you did a **** job and won't want anything to do with it. And as hard as I tried to do this correctly, maybe I did do a **** job? I'm still waiting to hear back from a hot rod shop that does more restoration work, but I have a feeling they're going to give me a $3,000+ estimate for the work, which will be hard for me to swallow. Since I only have a 20 gallon air compressor, spraying conventionally myself is out of the question, so I'm seriously considering buying this
for about $1,250. So for now, that project is still up in the air.
I did re-roll my rear fenders after welding everything in, so at least that's done. I knew that fender roller I bought like 5 years ago would come in handy!

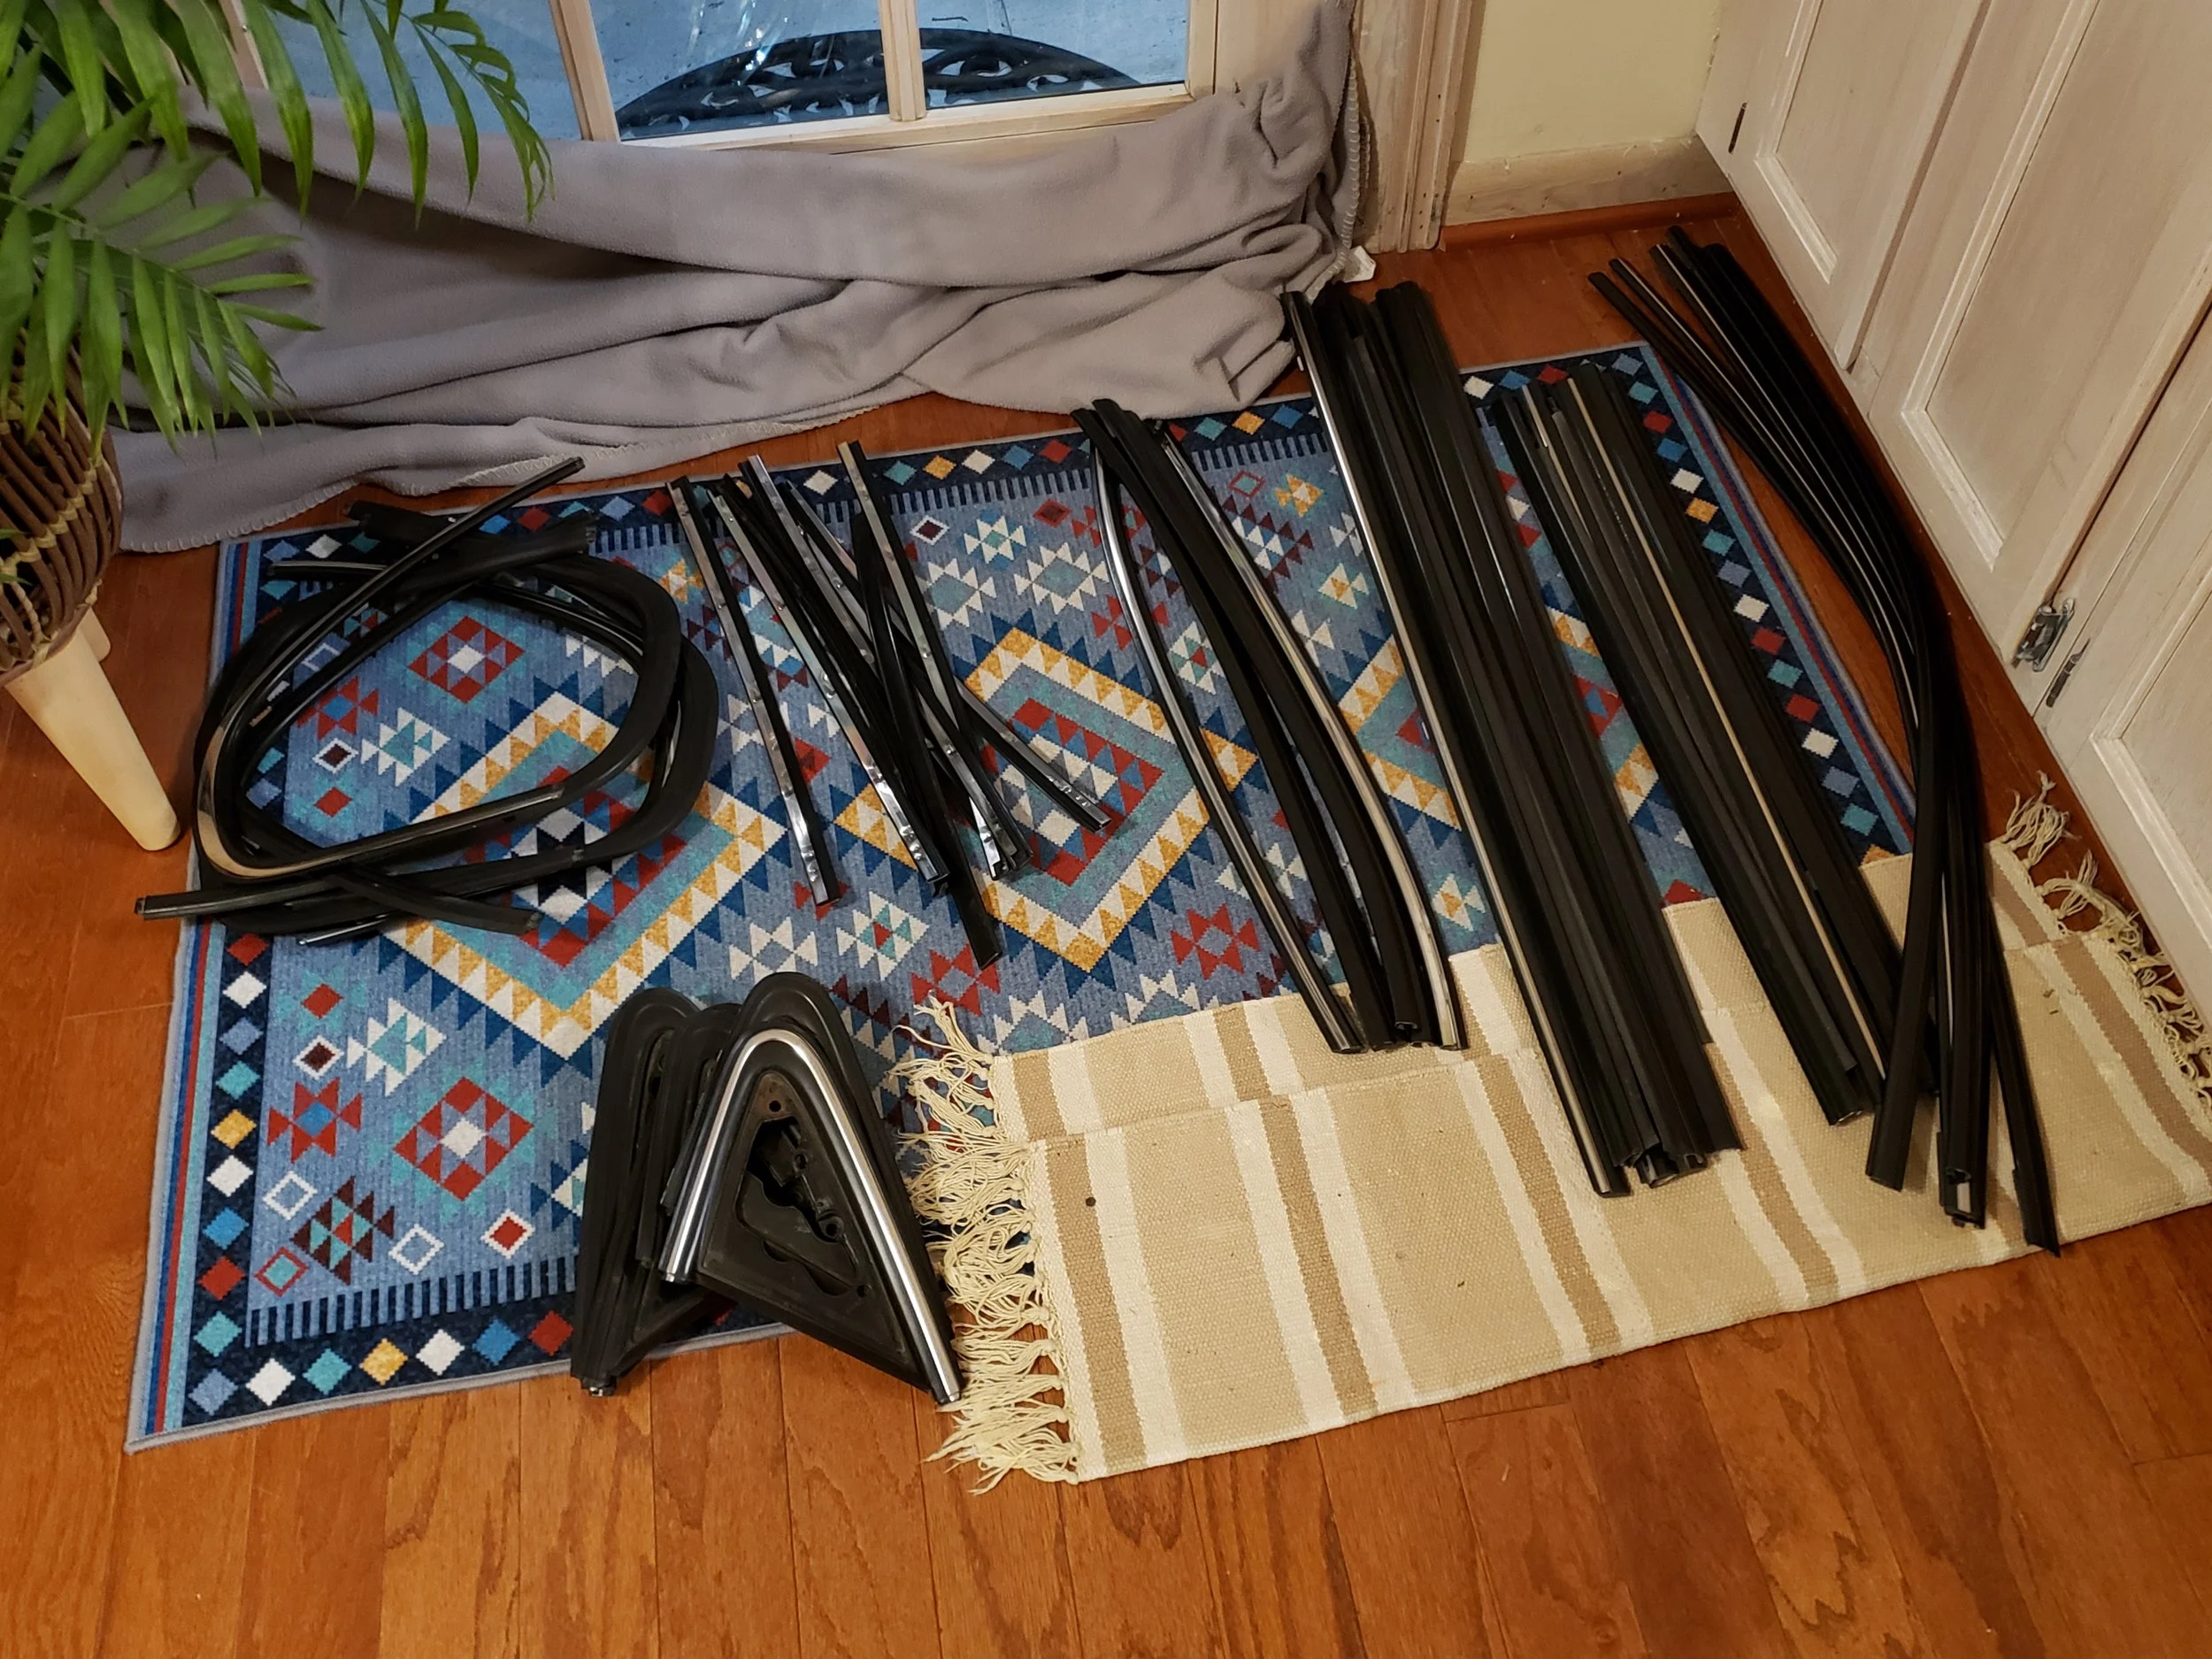
I've been wanting to replace the trim around the front and back glass on the car since it looks so crummy, but it turns out that almost none of it exists in the US anymore. So after much trolling of the internet for part numbers I came across a site that seemed like a dream come true, https://www.amayama.com. It's a company based out of Japan that stocks all sorts of OEM parts for Japanese manufacturers, with prices that often seem too good to be true. Once I started digging through the site and punching in parts numbers, I got a little carried away. All those bearings for my 6 speed transmission that don't exist in this country, or if they do they cost an arm and a leg? Oh, they're all on Amayama, and for a faction of the listed price here. All those rubber and trim pieces? They're there too, and also for great prices. Hell, I could have bought OEM Cefiro bodykit parts, but those were listed at "regular" dealer cost, so I couldn't stomach that. But in the end, I went hog wild and purchased a very large order. Considering the box was like 6'x1'x1' and weighed 25(?) pounds, shipping was a very reasonable $180 or so, and it arrived in 5 days! Enough talk, let's ogle some fresh OEM goodness:

Much of it won't be installed until the car is painted, so it's just a tease for right now. When I said I'm doing a minor restoration of this car, I meant it!
In a similar vein, I pulled a bunch of chrome and black window trim off cars at the junkyards. The trim on my car is kind of messed up after multiple applications of chrome trim blackout tape that left nasty residue in spots that's impossible to remove. Part of me really wants to install the SE black trim, but another part of me thinks the chrome trim kind of nicely goes with my chrome door handles and trim running along the bumpers and door bump guards. Thoughts?
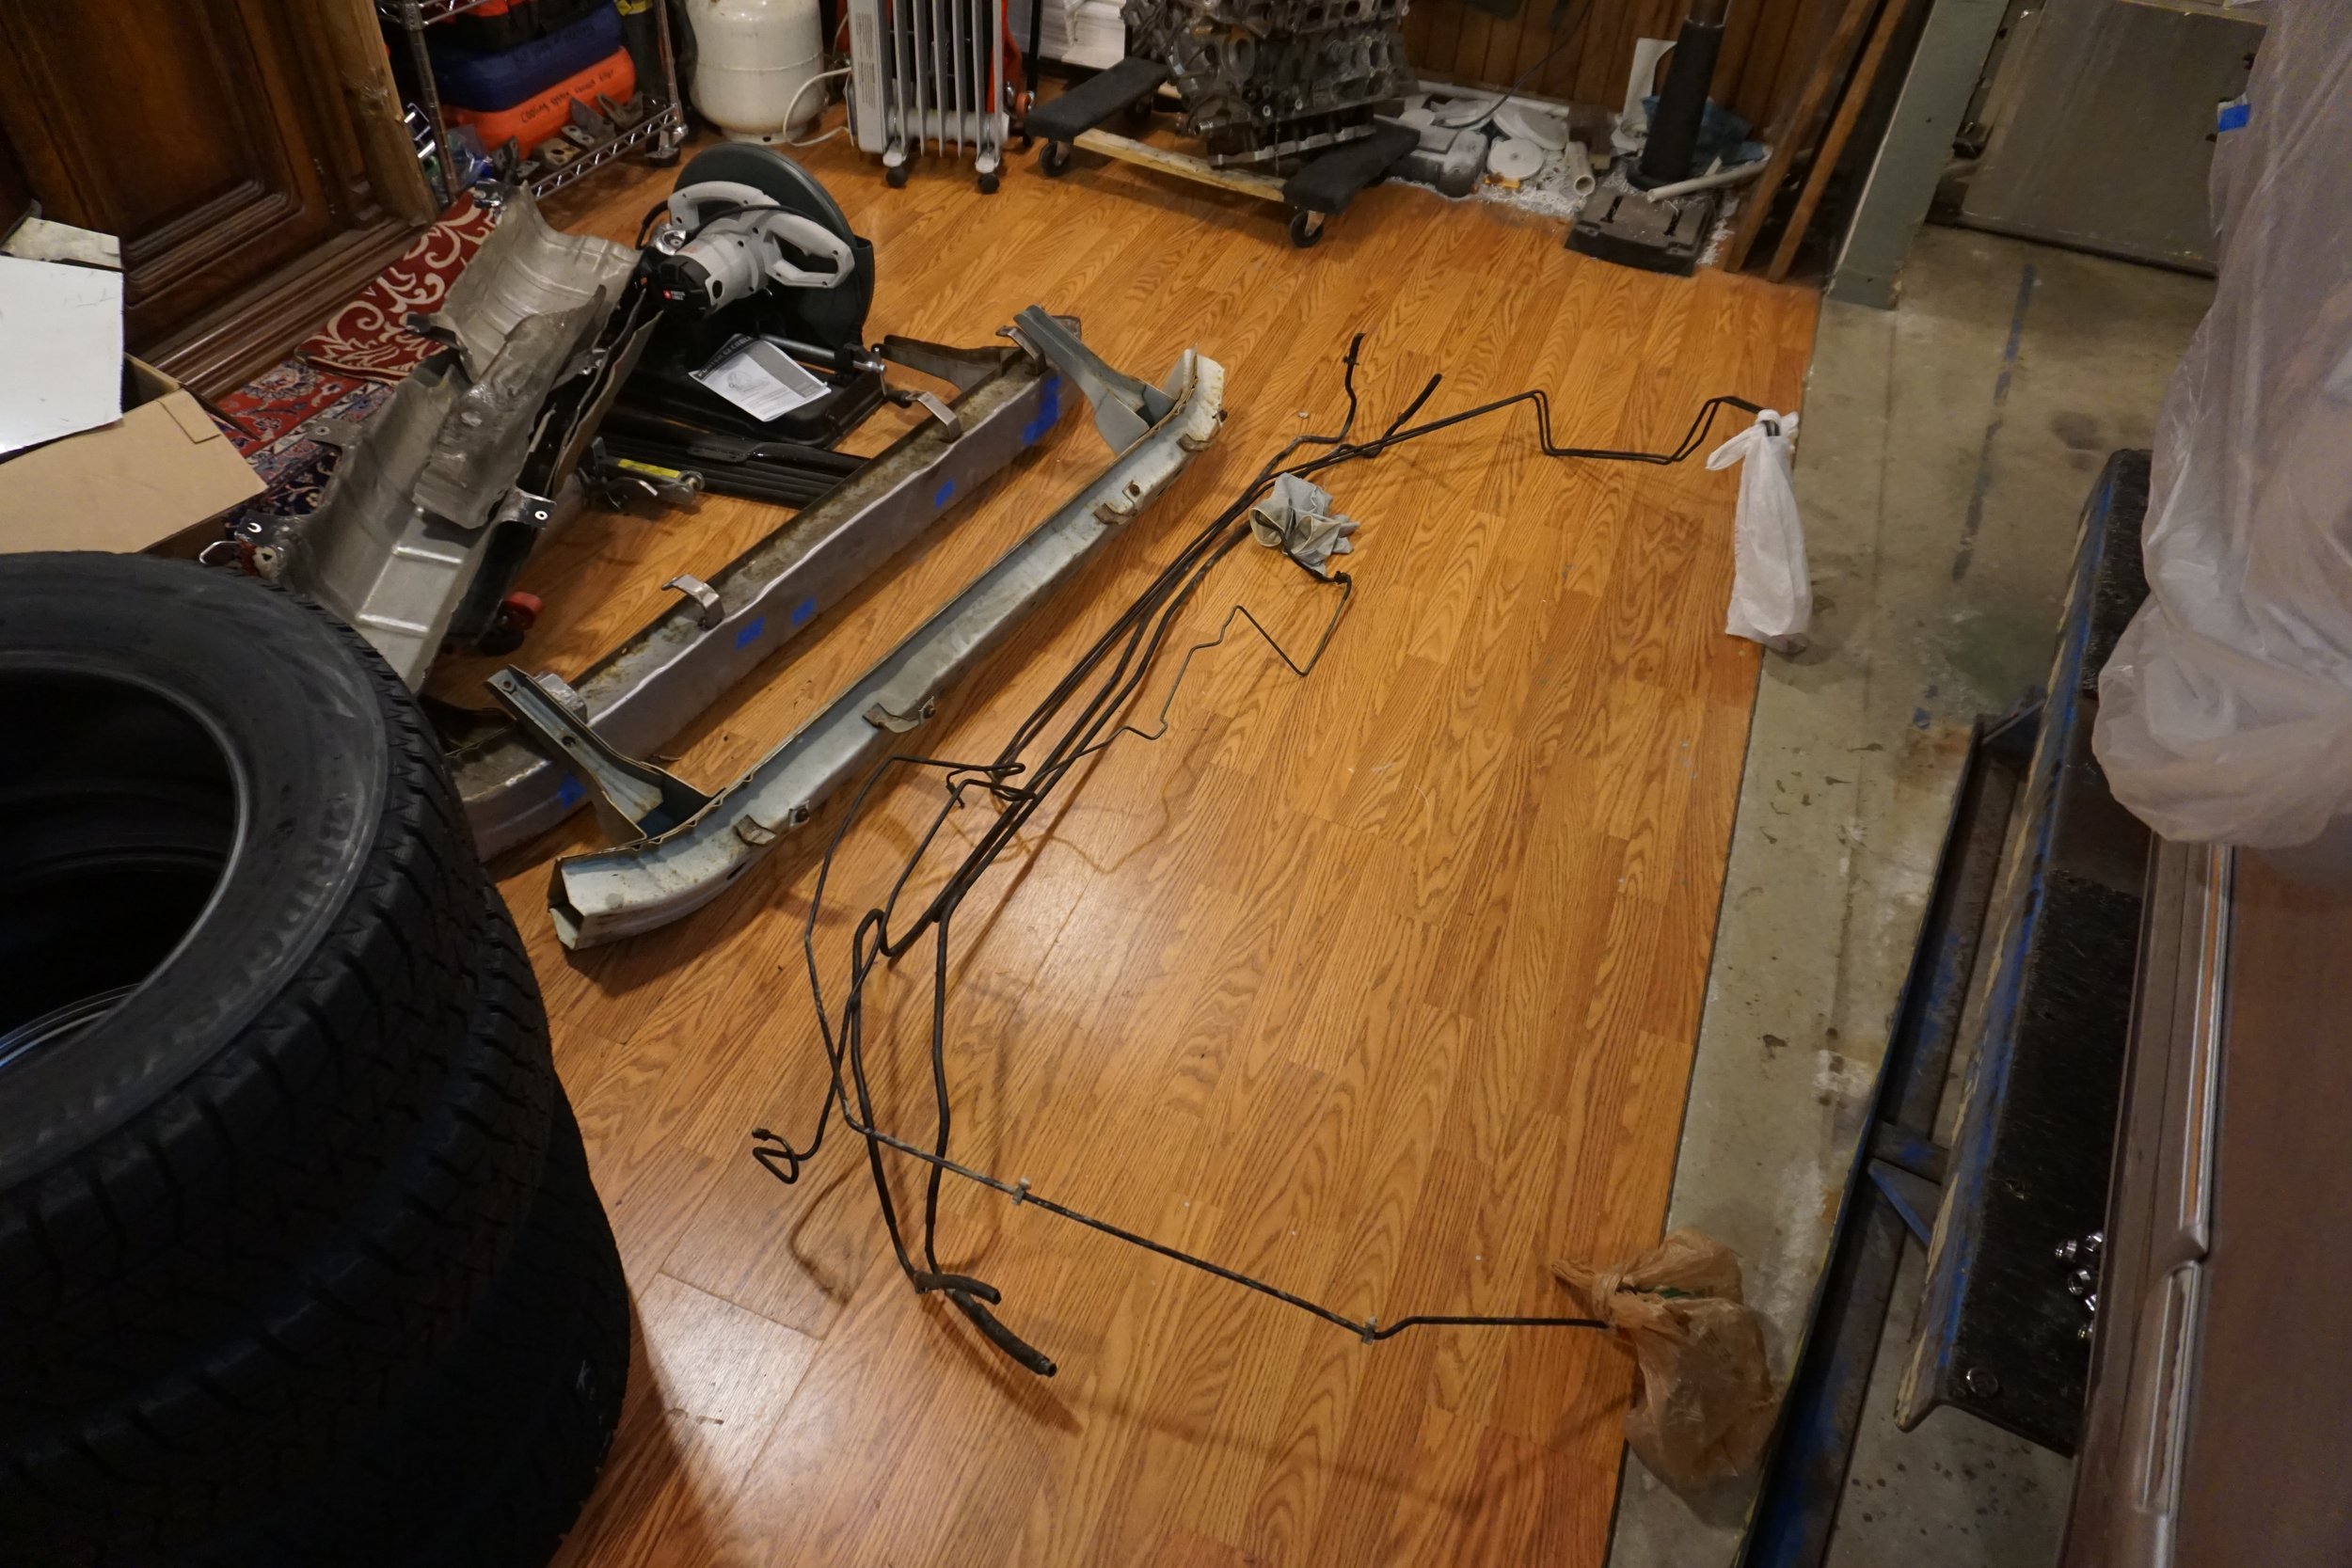
In other junkyard news, I found a mint I30 in the yard with pretty much zero rust, so I snagged a bunch of stuff off it, like a rear bumper crash beam, coated brake/fuel lines (from 97-99 cars, my 96 has uncoated lines and a few aren't looking so great), exhaust heat shields, etc.
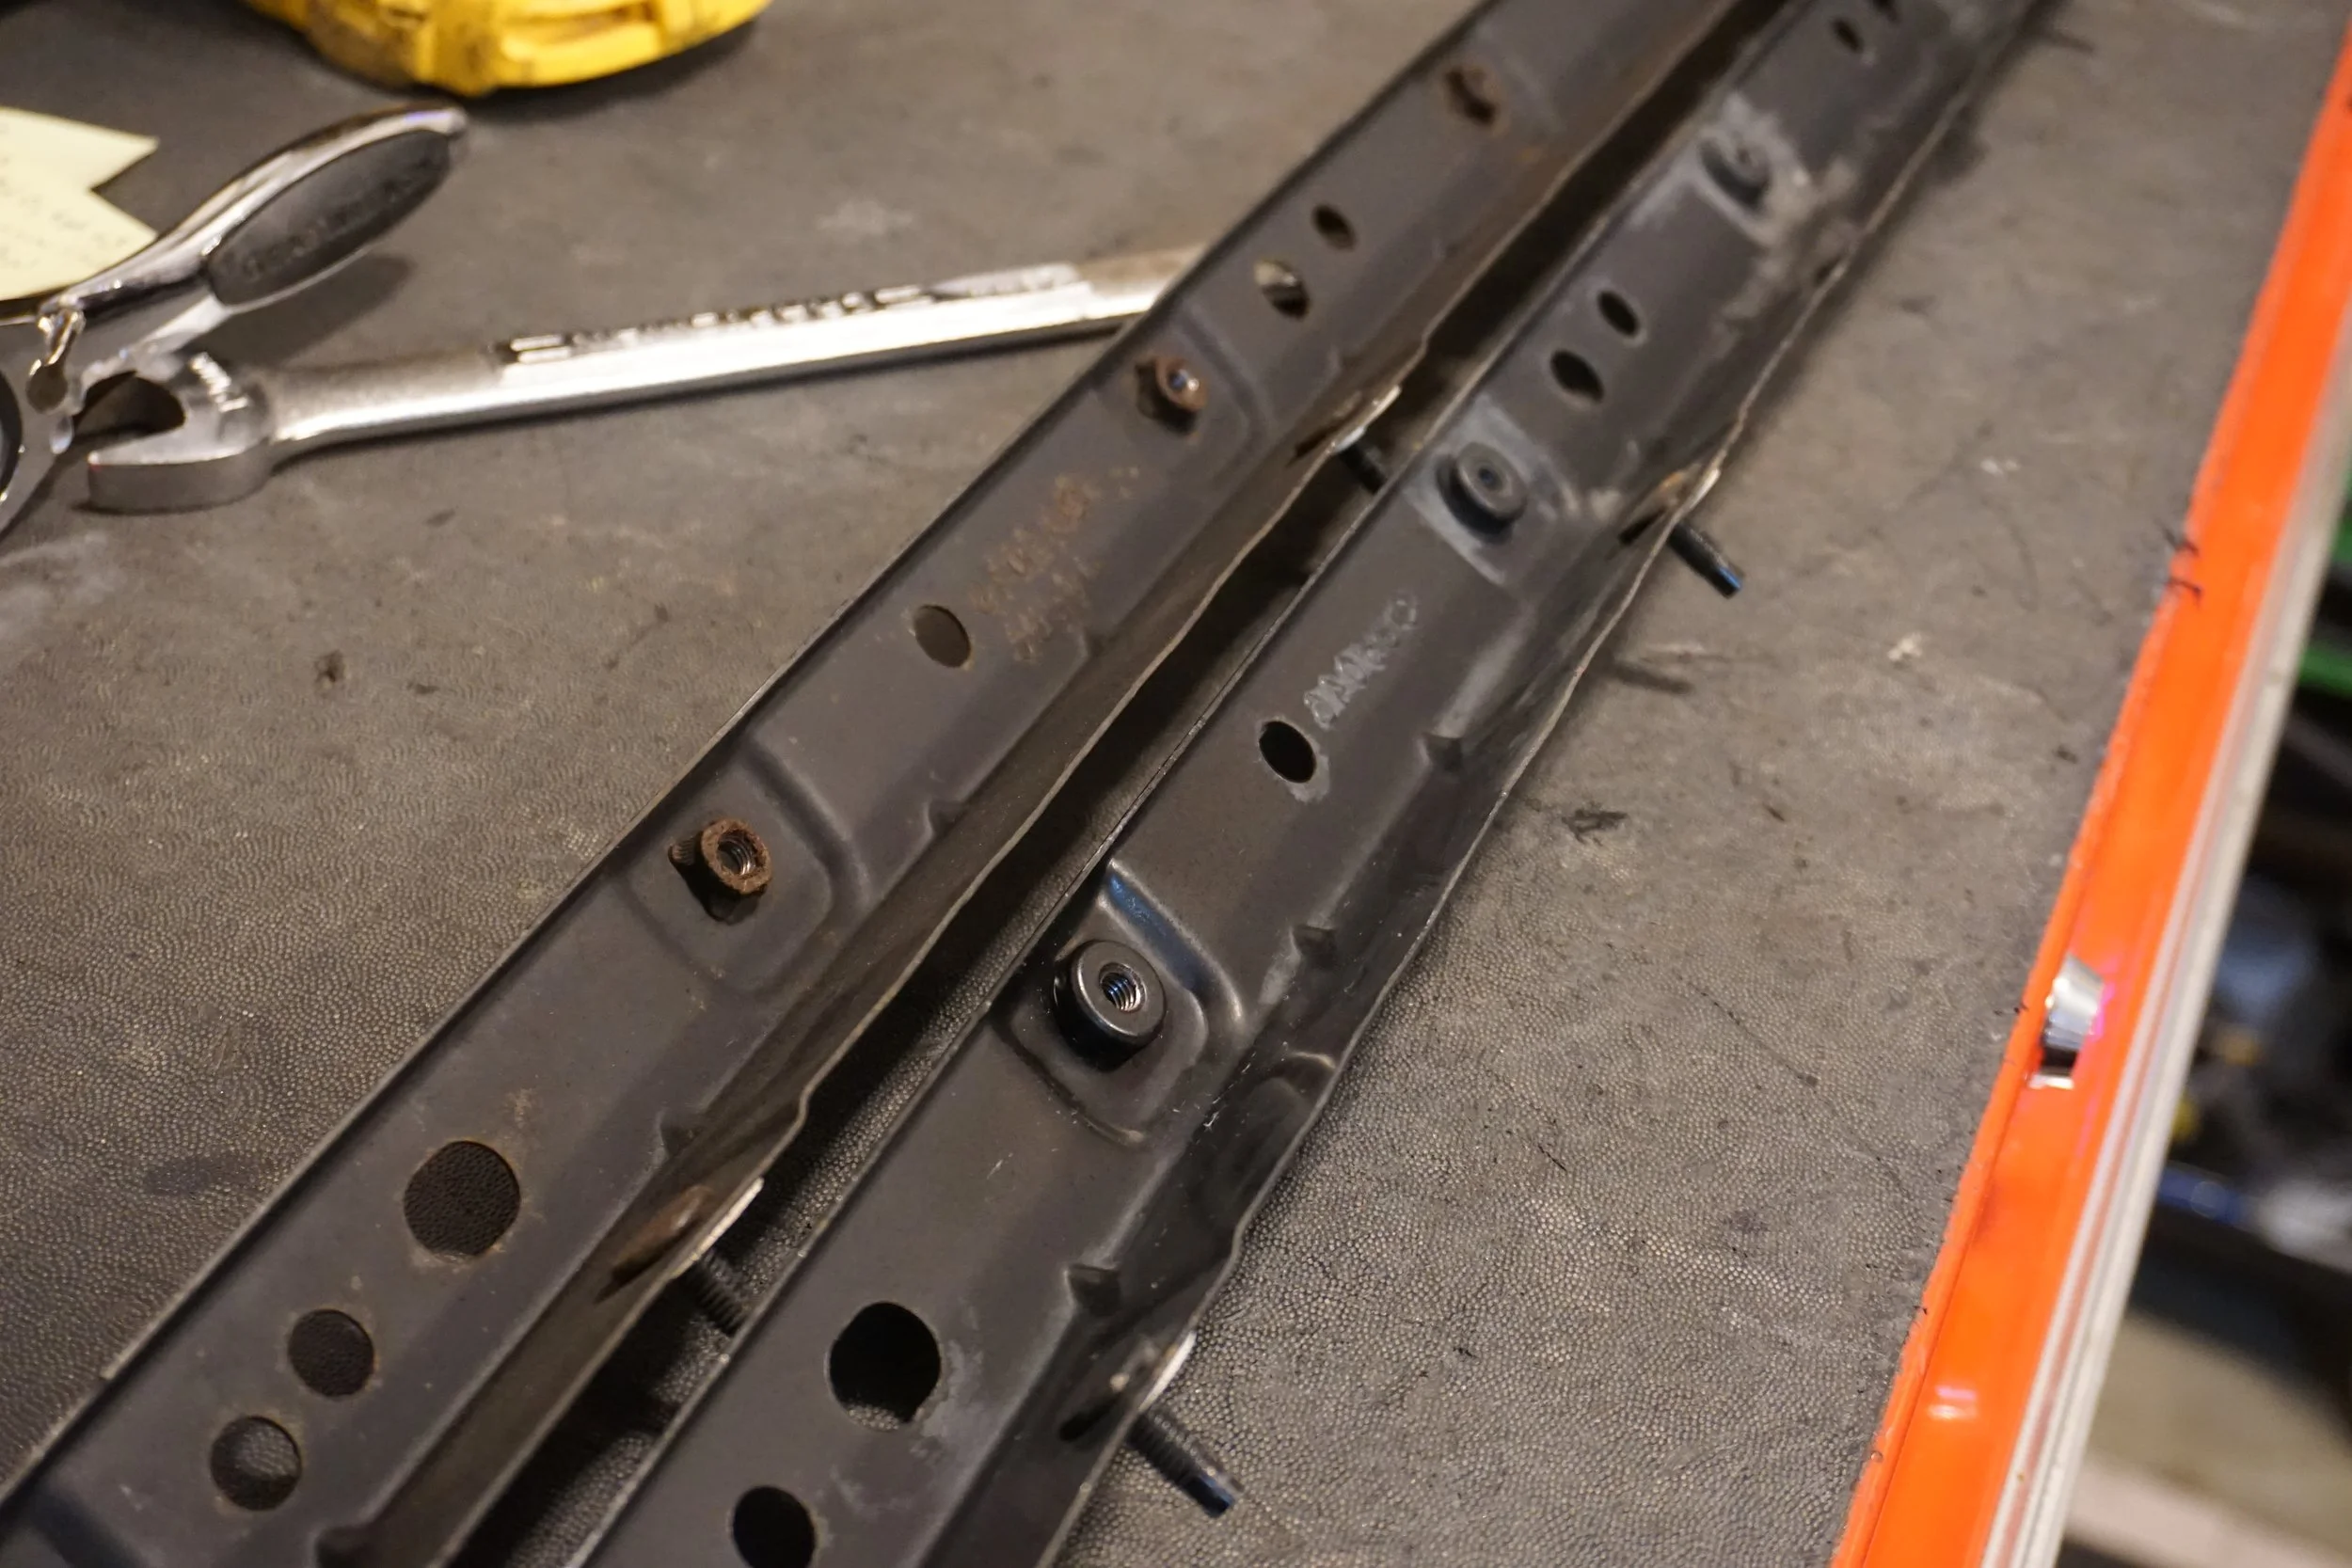
Things like this bracket that bolts to the car at the trunk lid. Mine was looking crusty, so instead of cleaning it up and painting it, I'll just throw this one on.
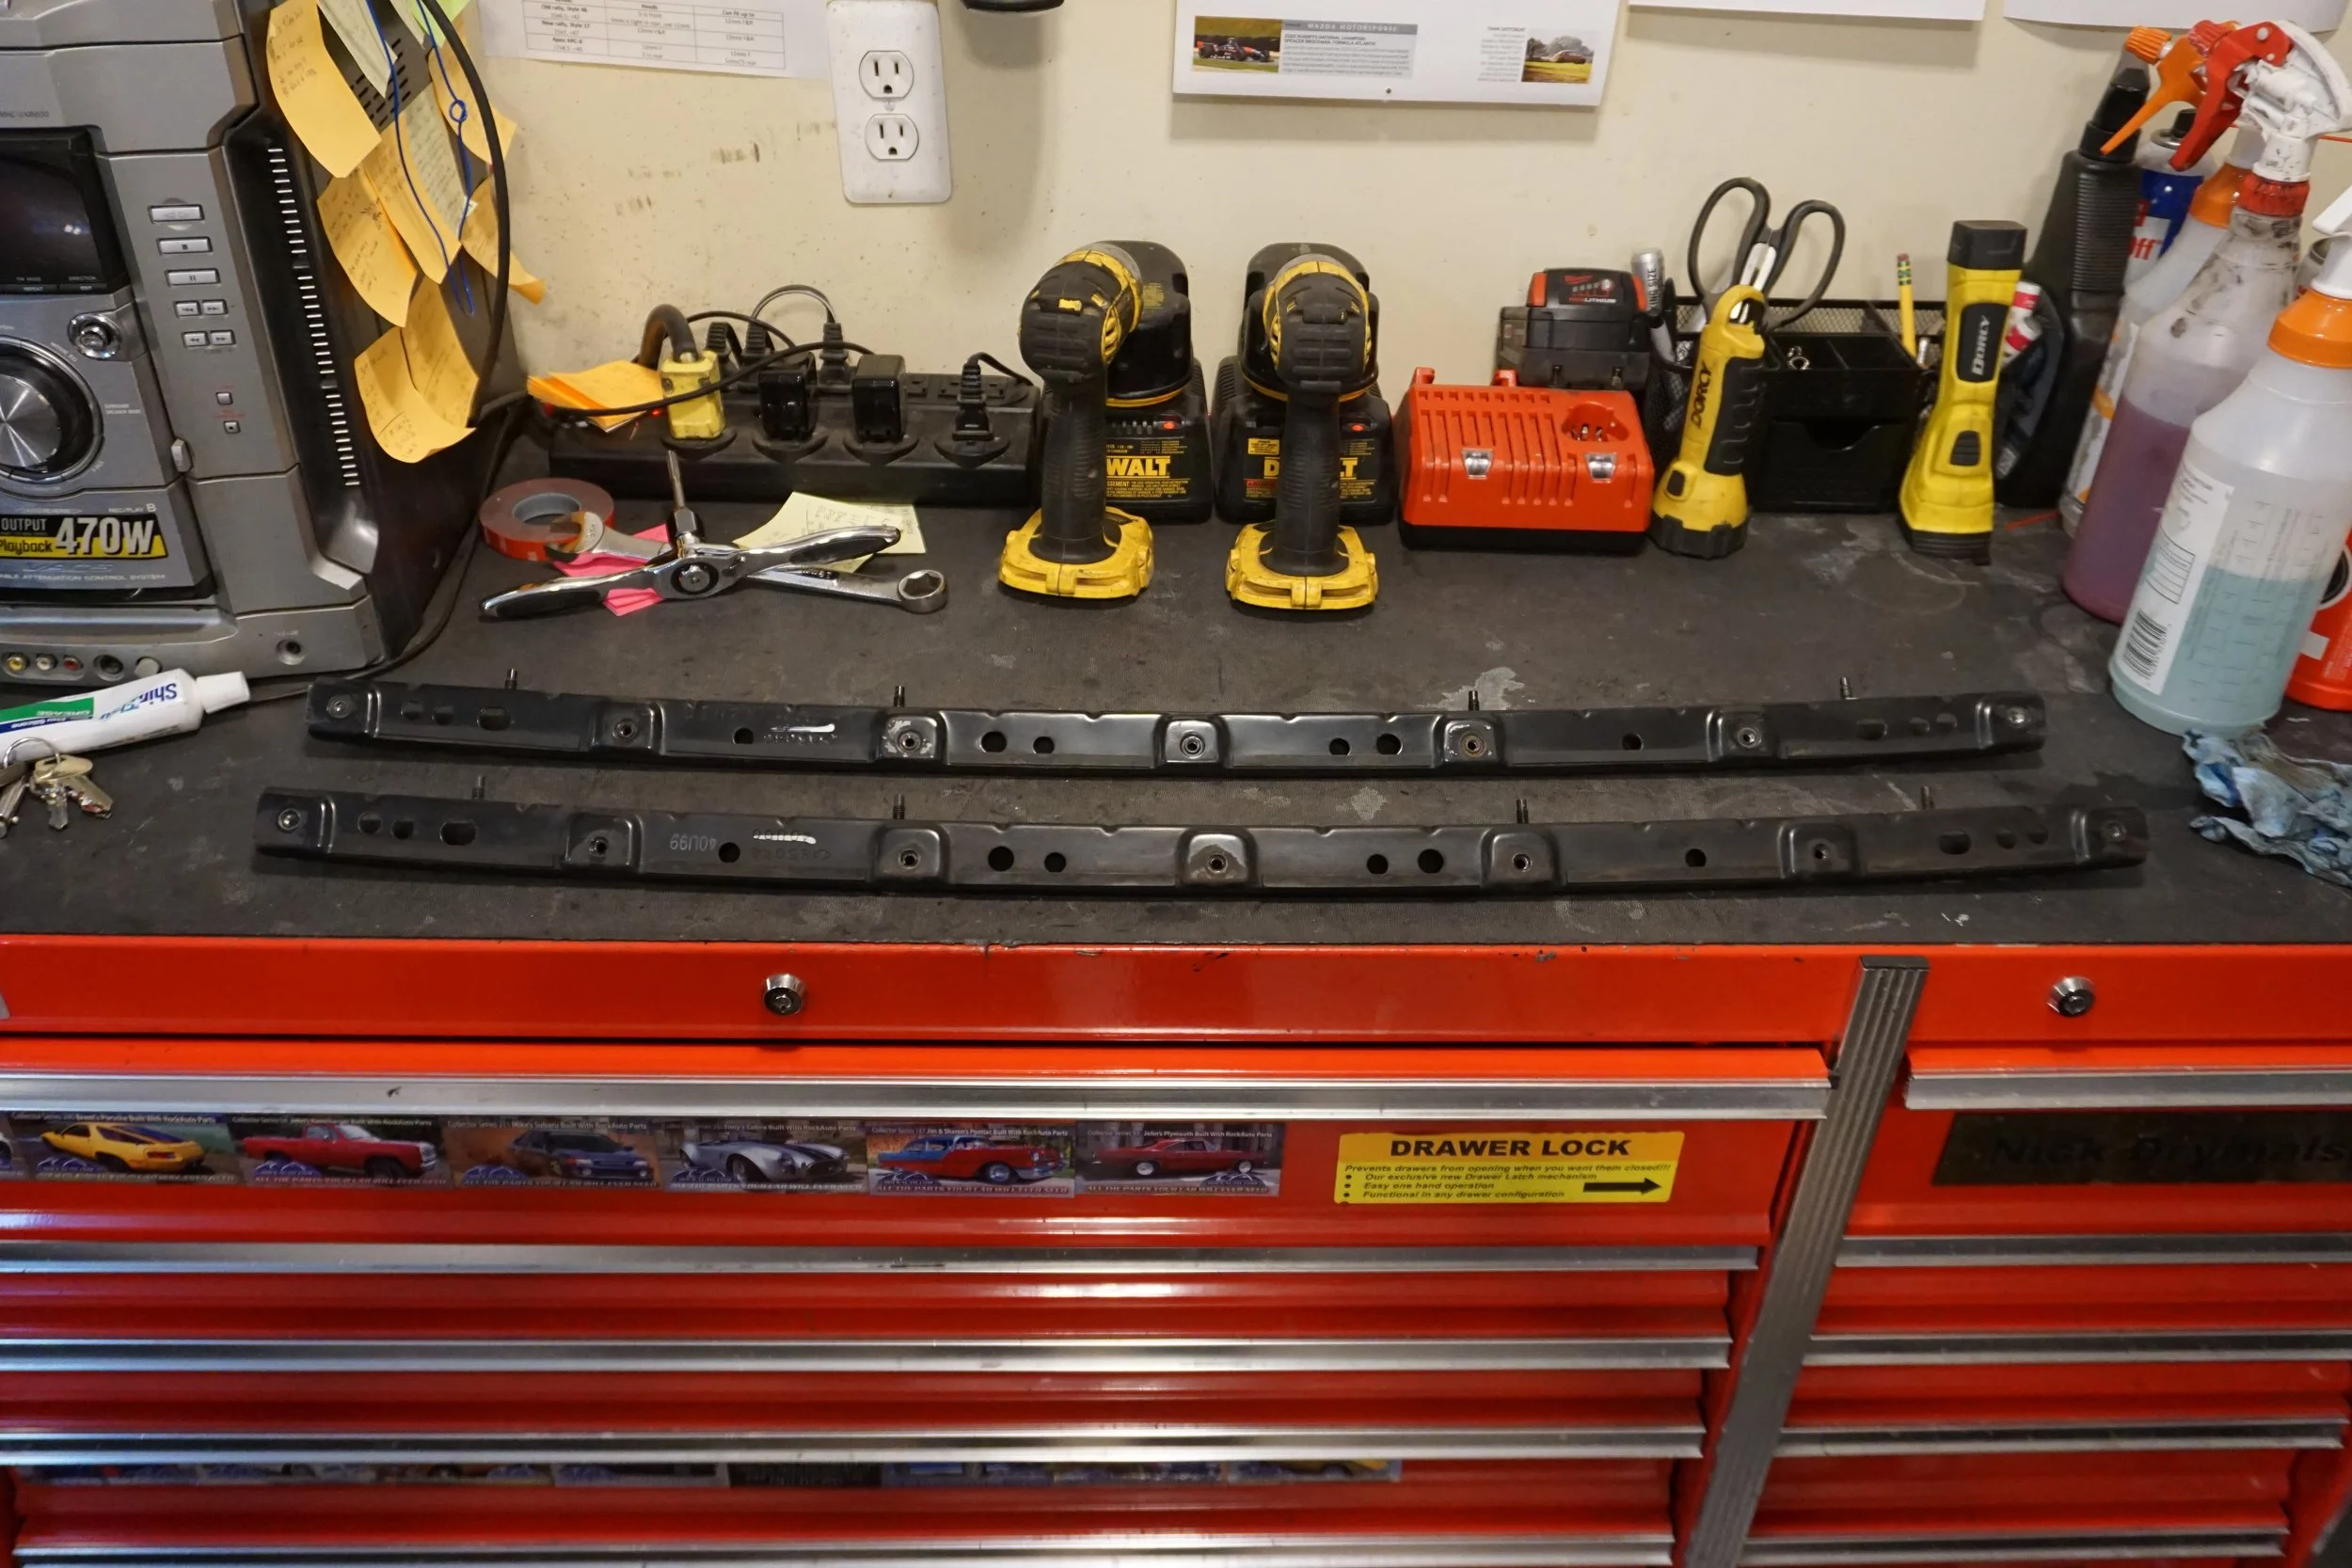
Looks like Nissan revised it at some point:
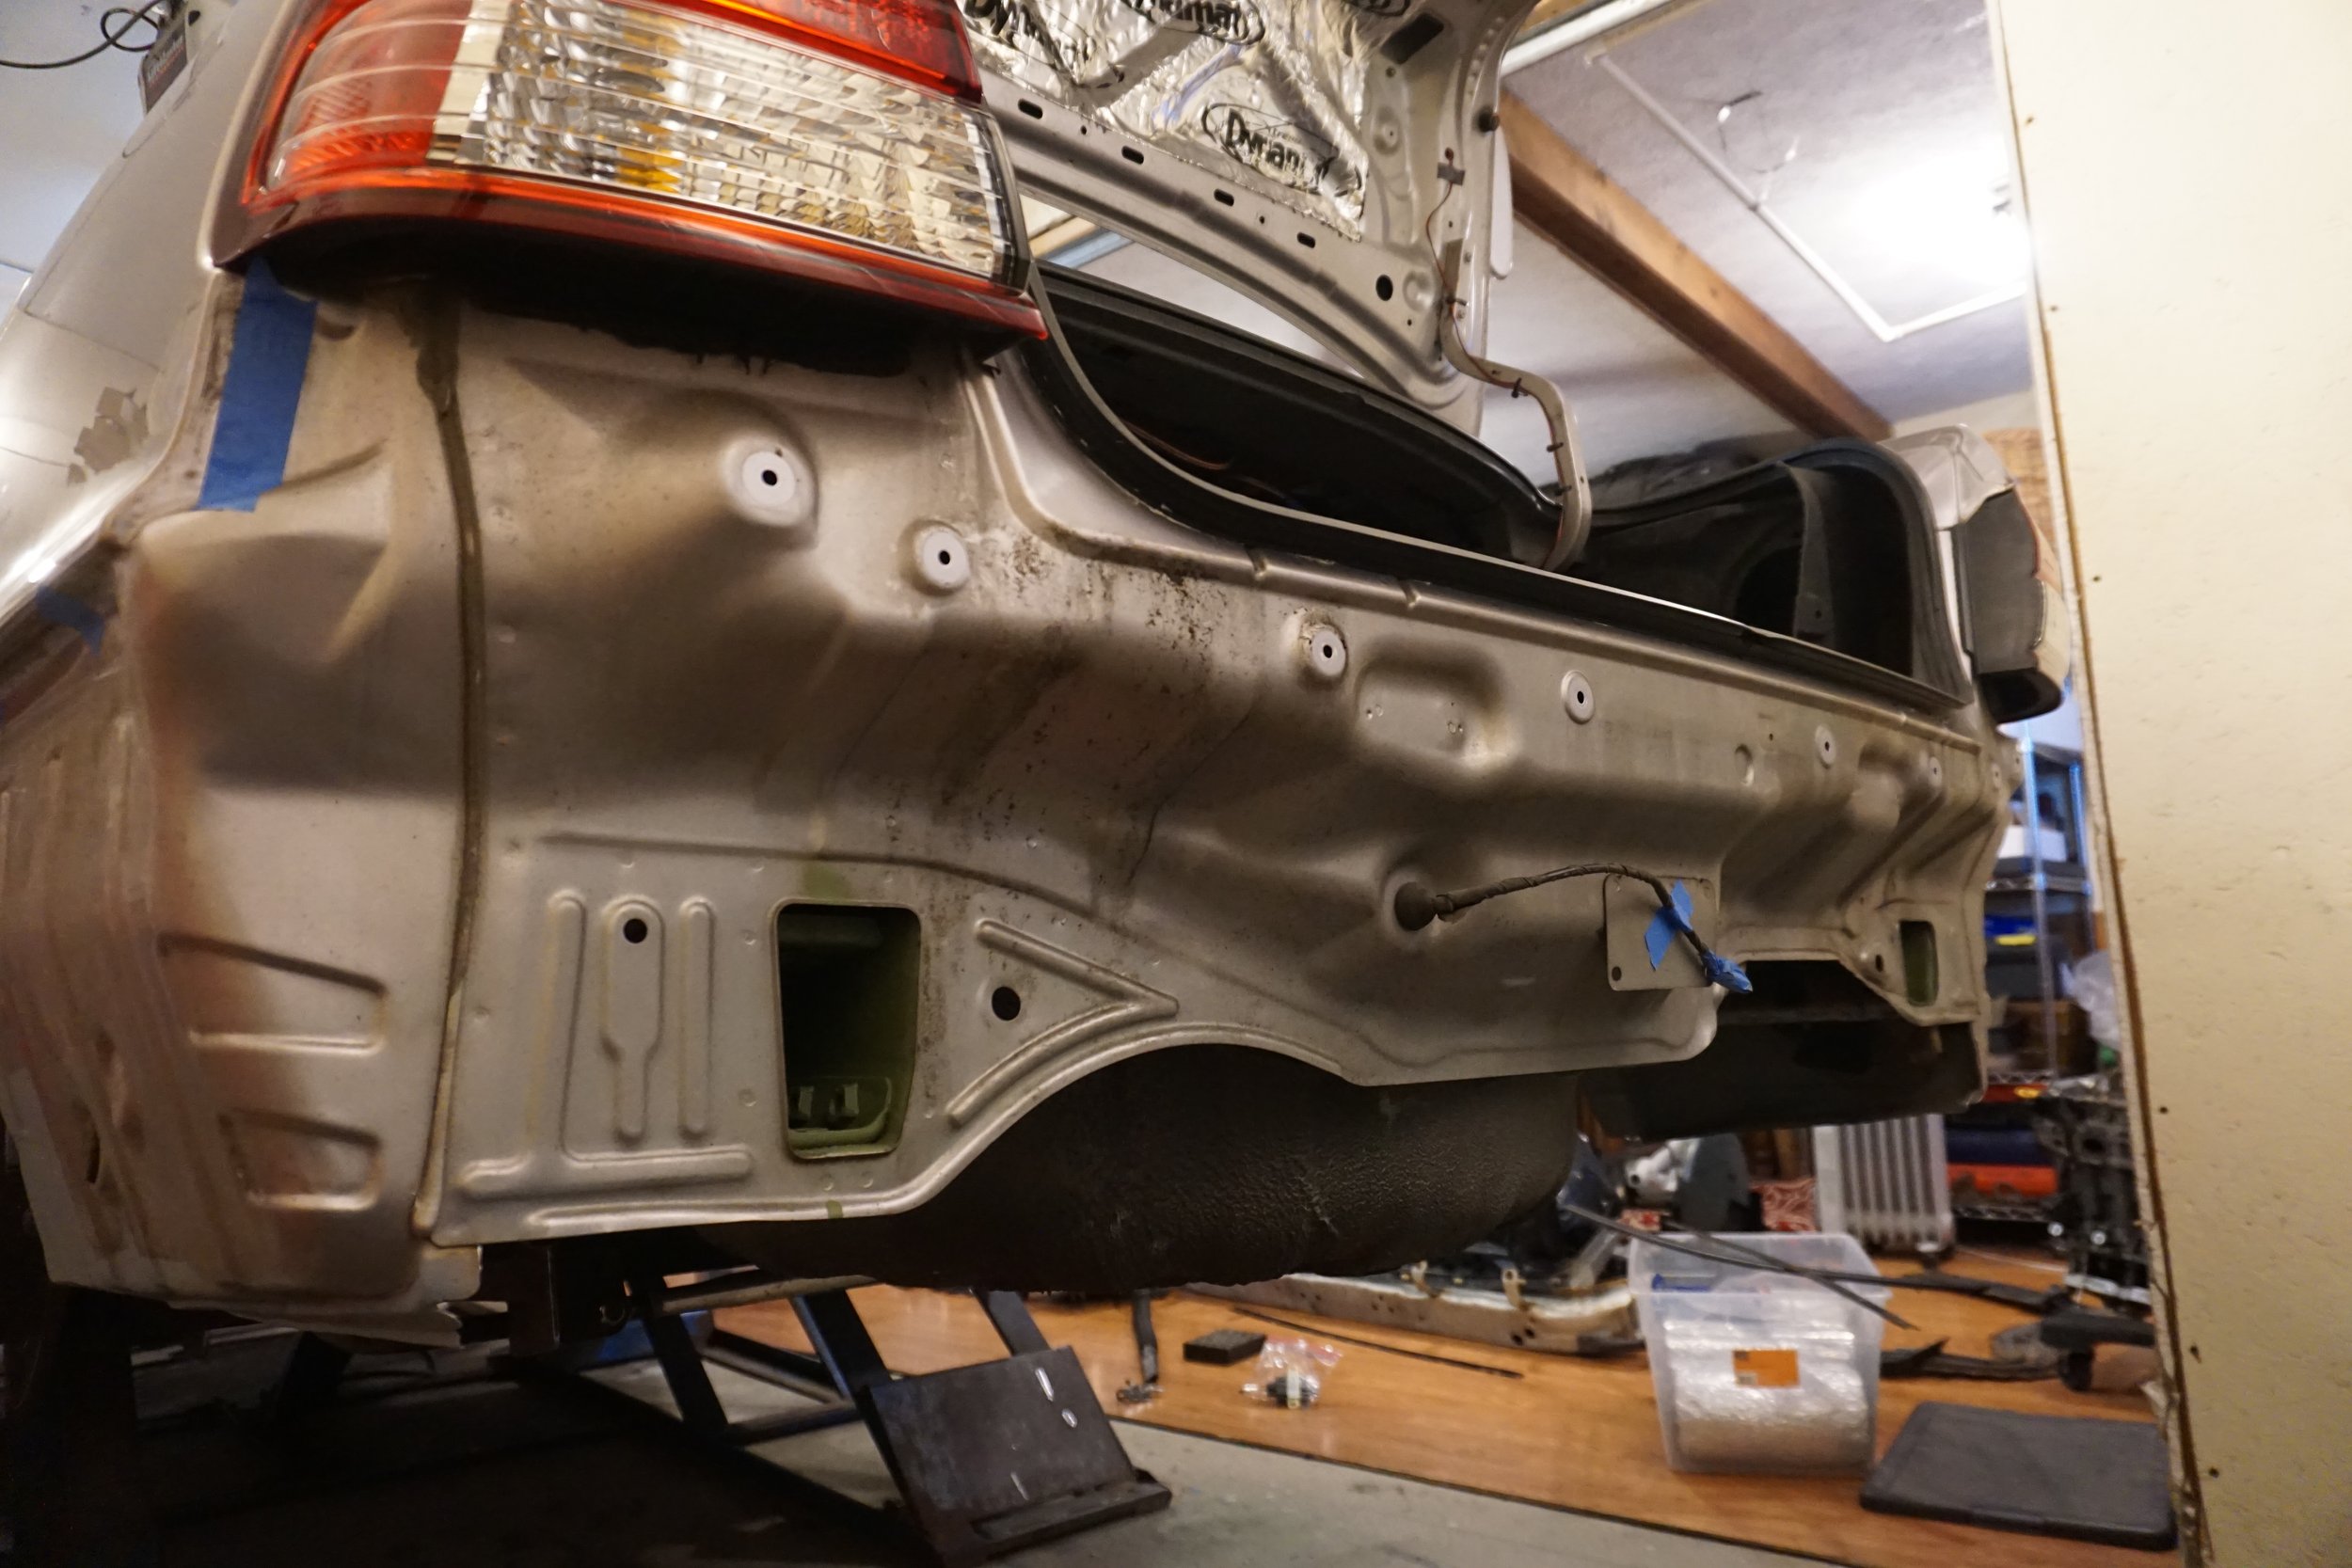
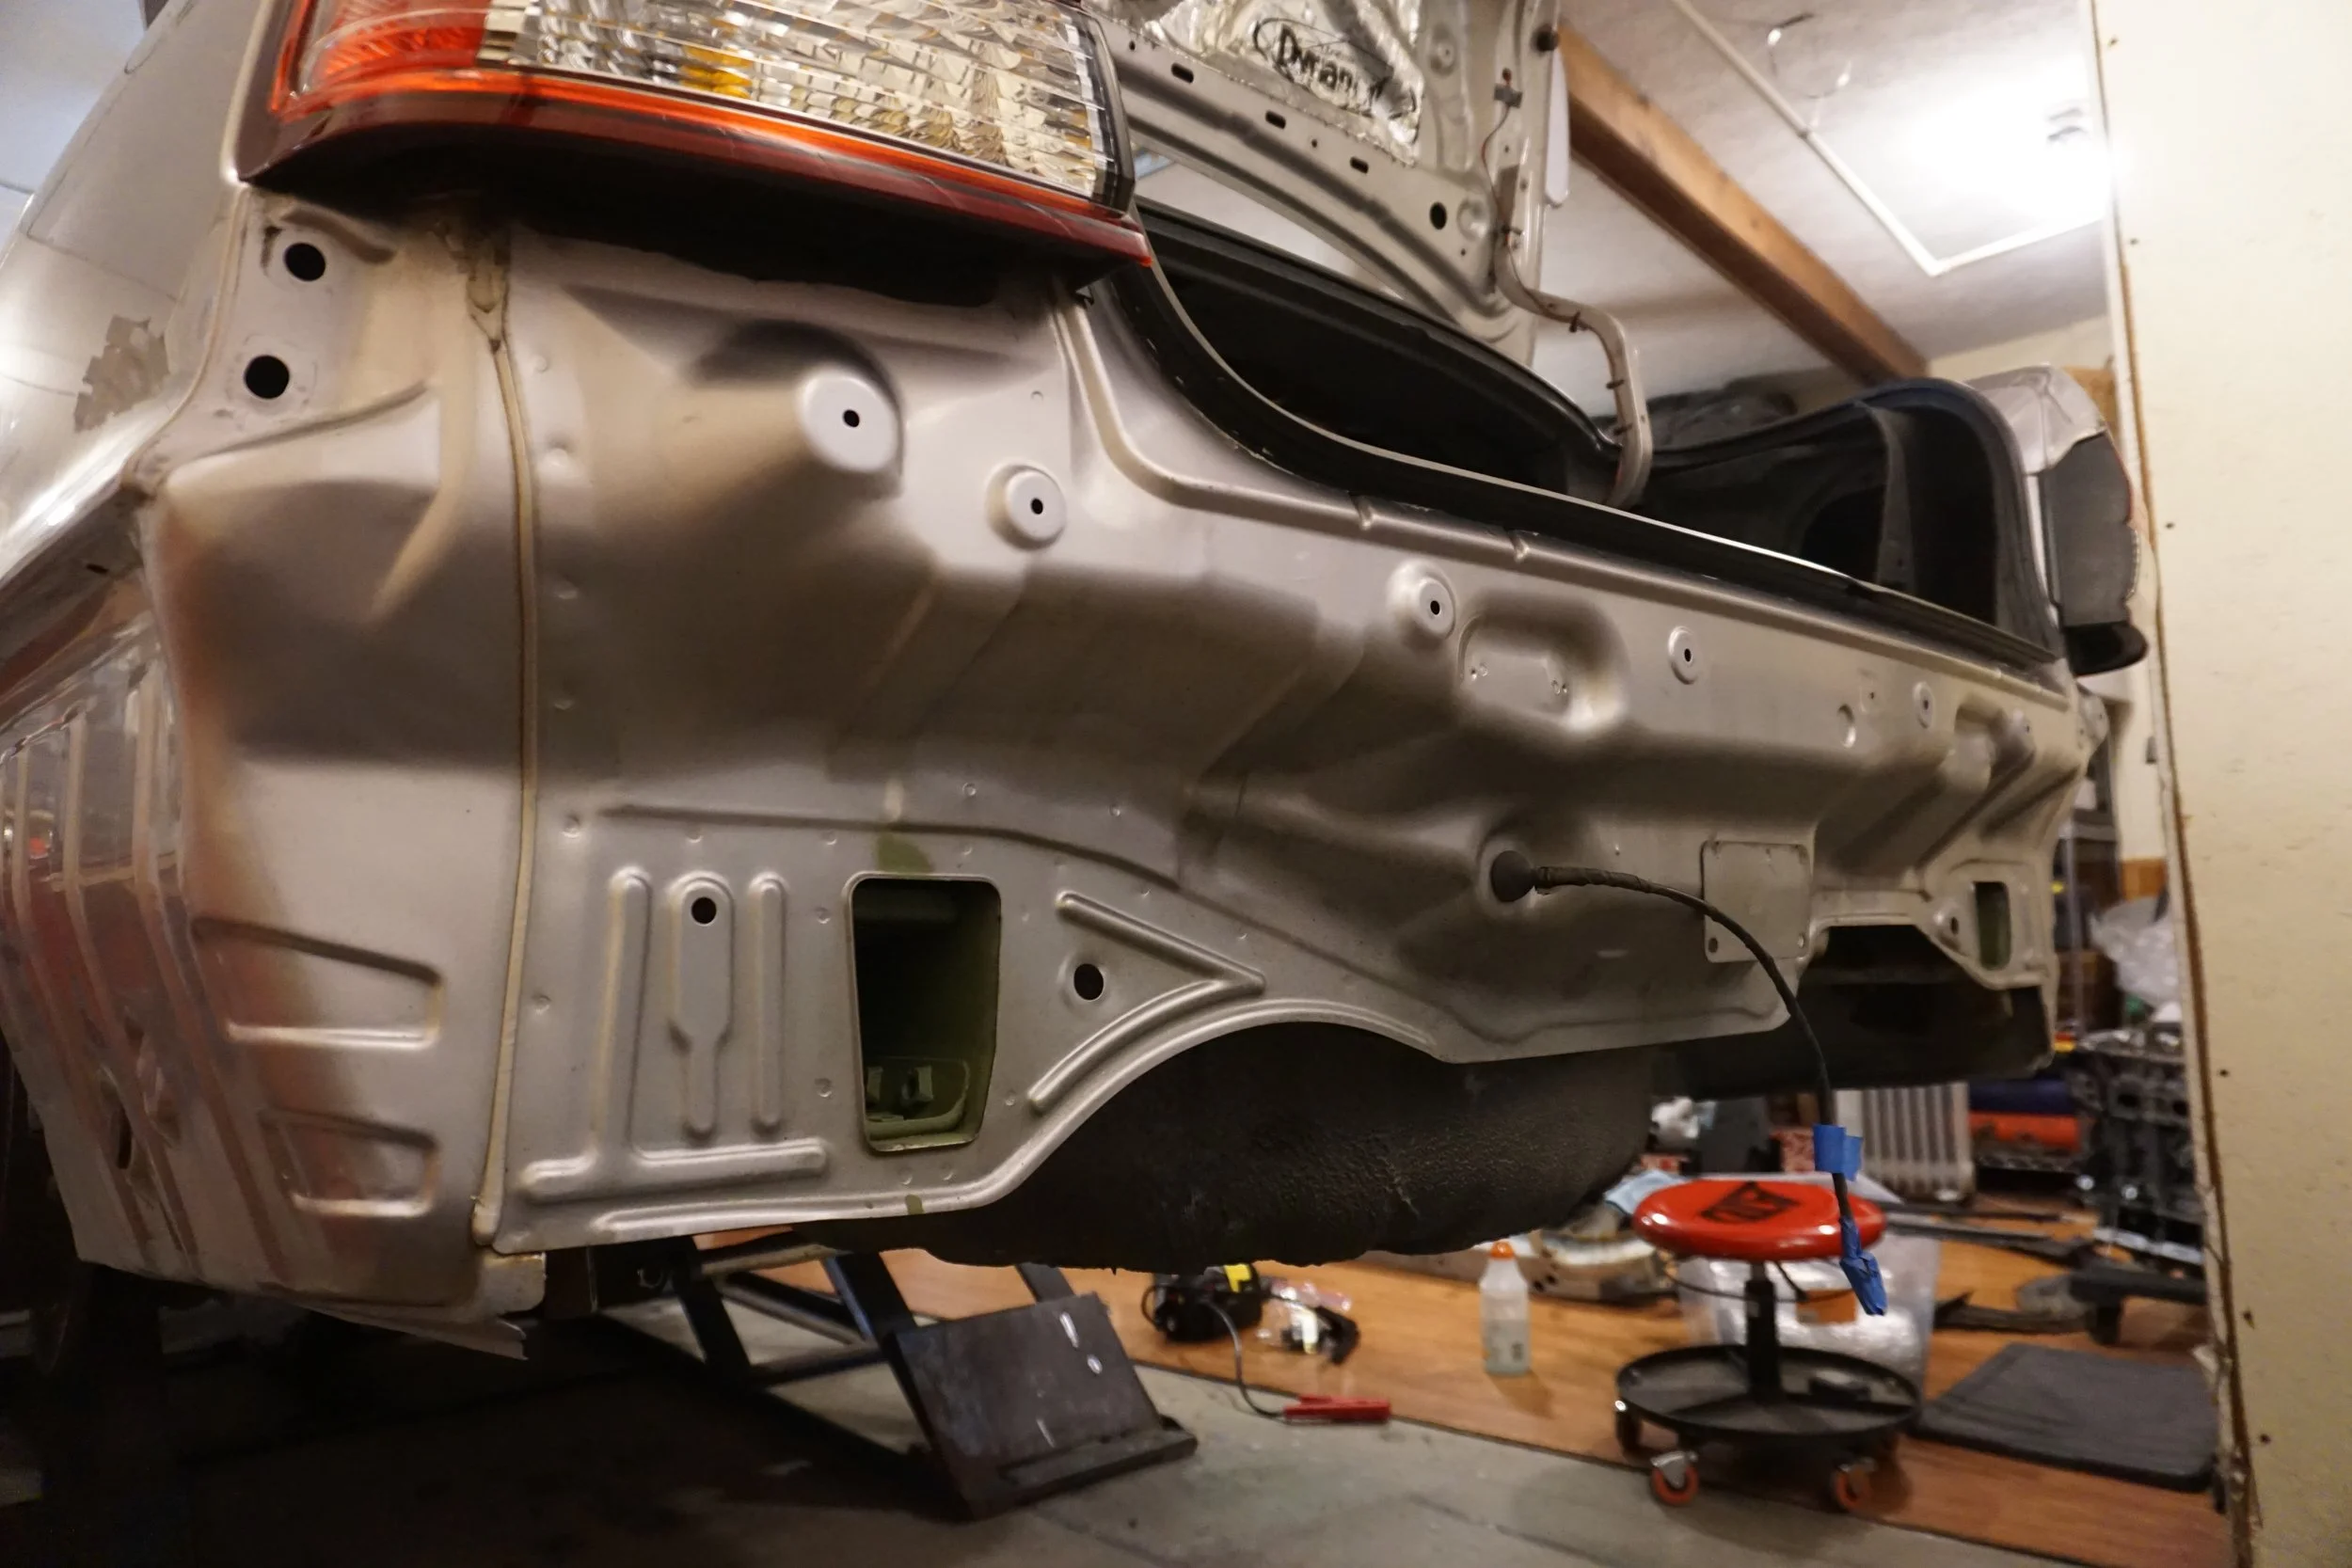
While I still had everything apart I decided I might as well clean up the body behind the bumper even though it will never be seen again.
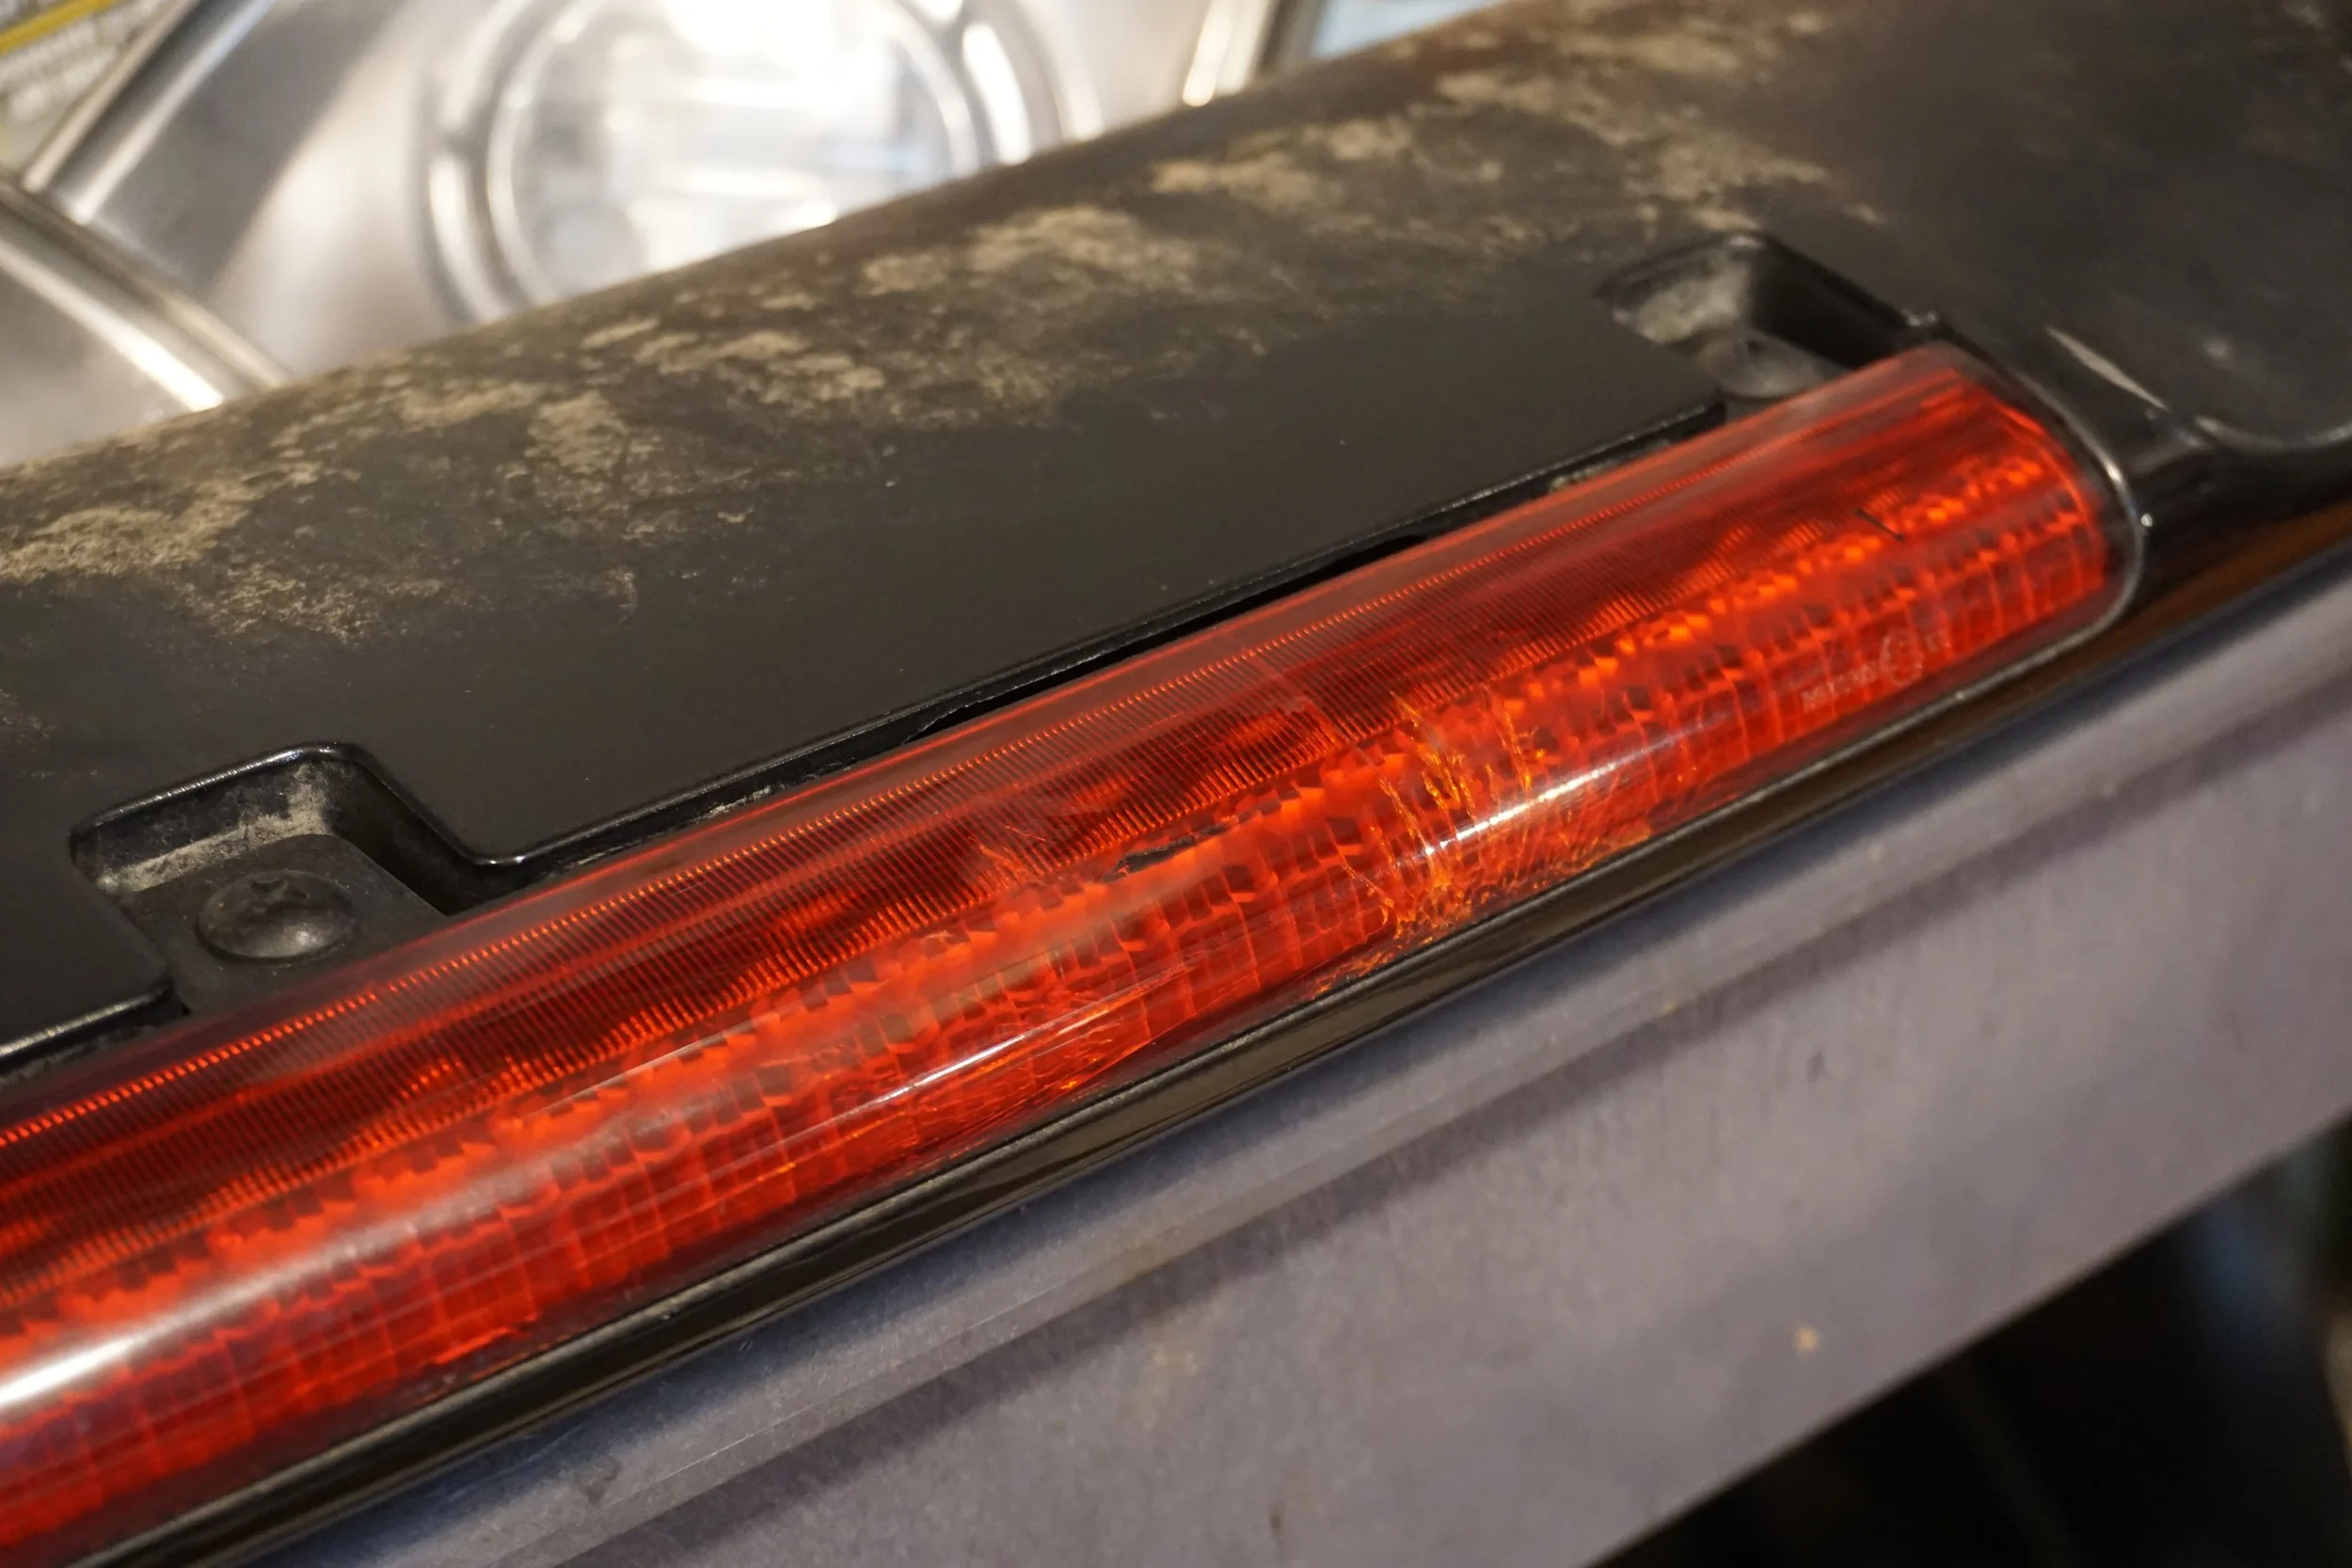
I picked up a spoiler in mint condition a while back with the intention of having it painted instead of the one on my car, since mine is pretty messed up. I took a closer look at it and realized it must have been repainted since there was overspray on a few areas on the 3rd brake light. Also, the 3rd brake light is cracked. So I decided I would experiment with some sanding and polishing to see how it would turn out, and I'm pretty happy with the results.
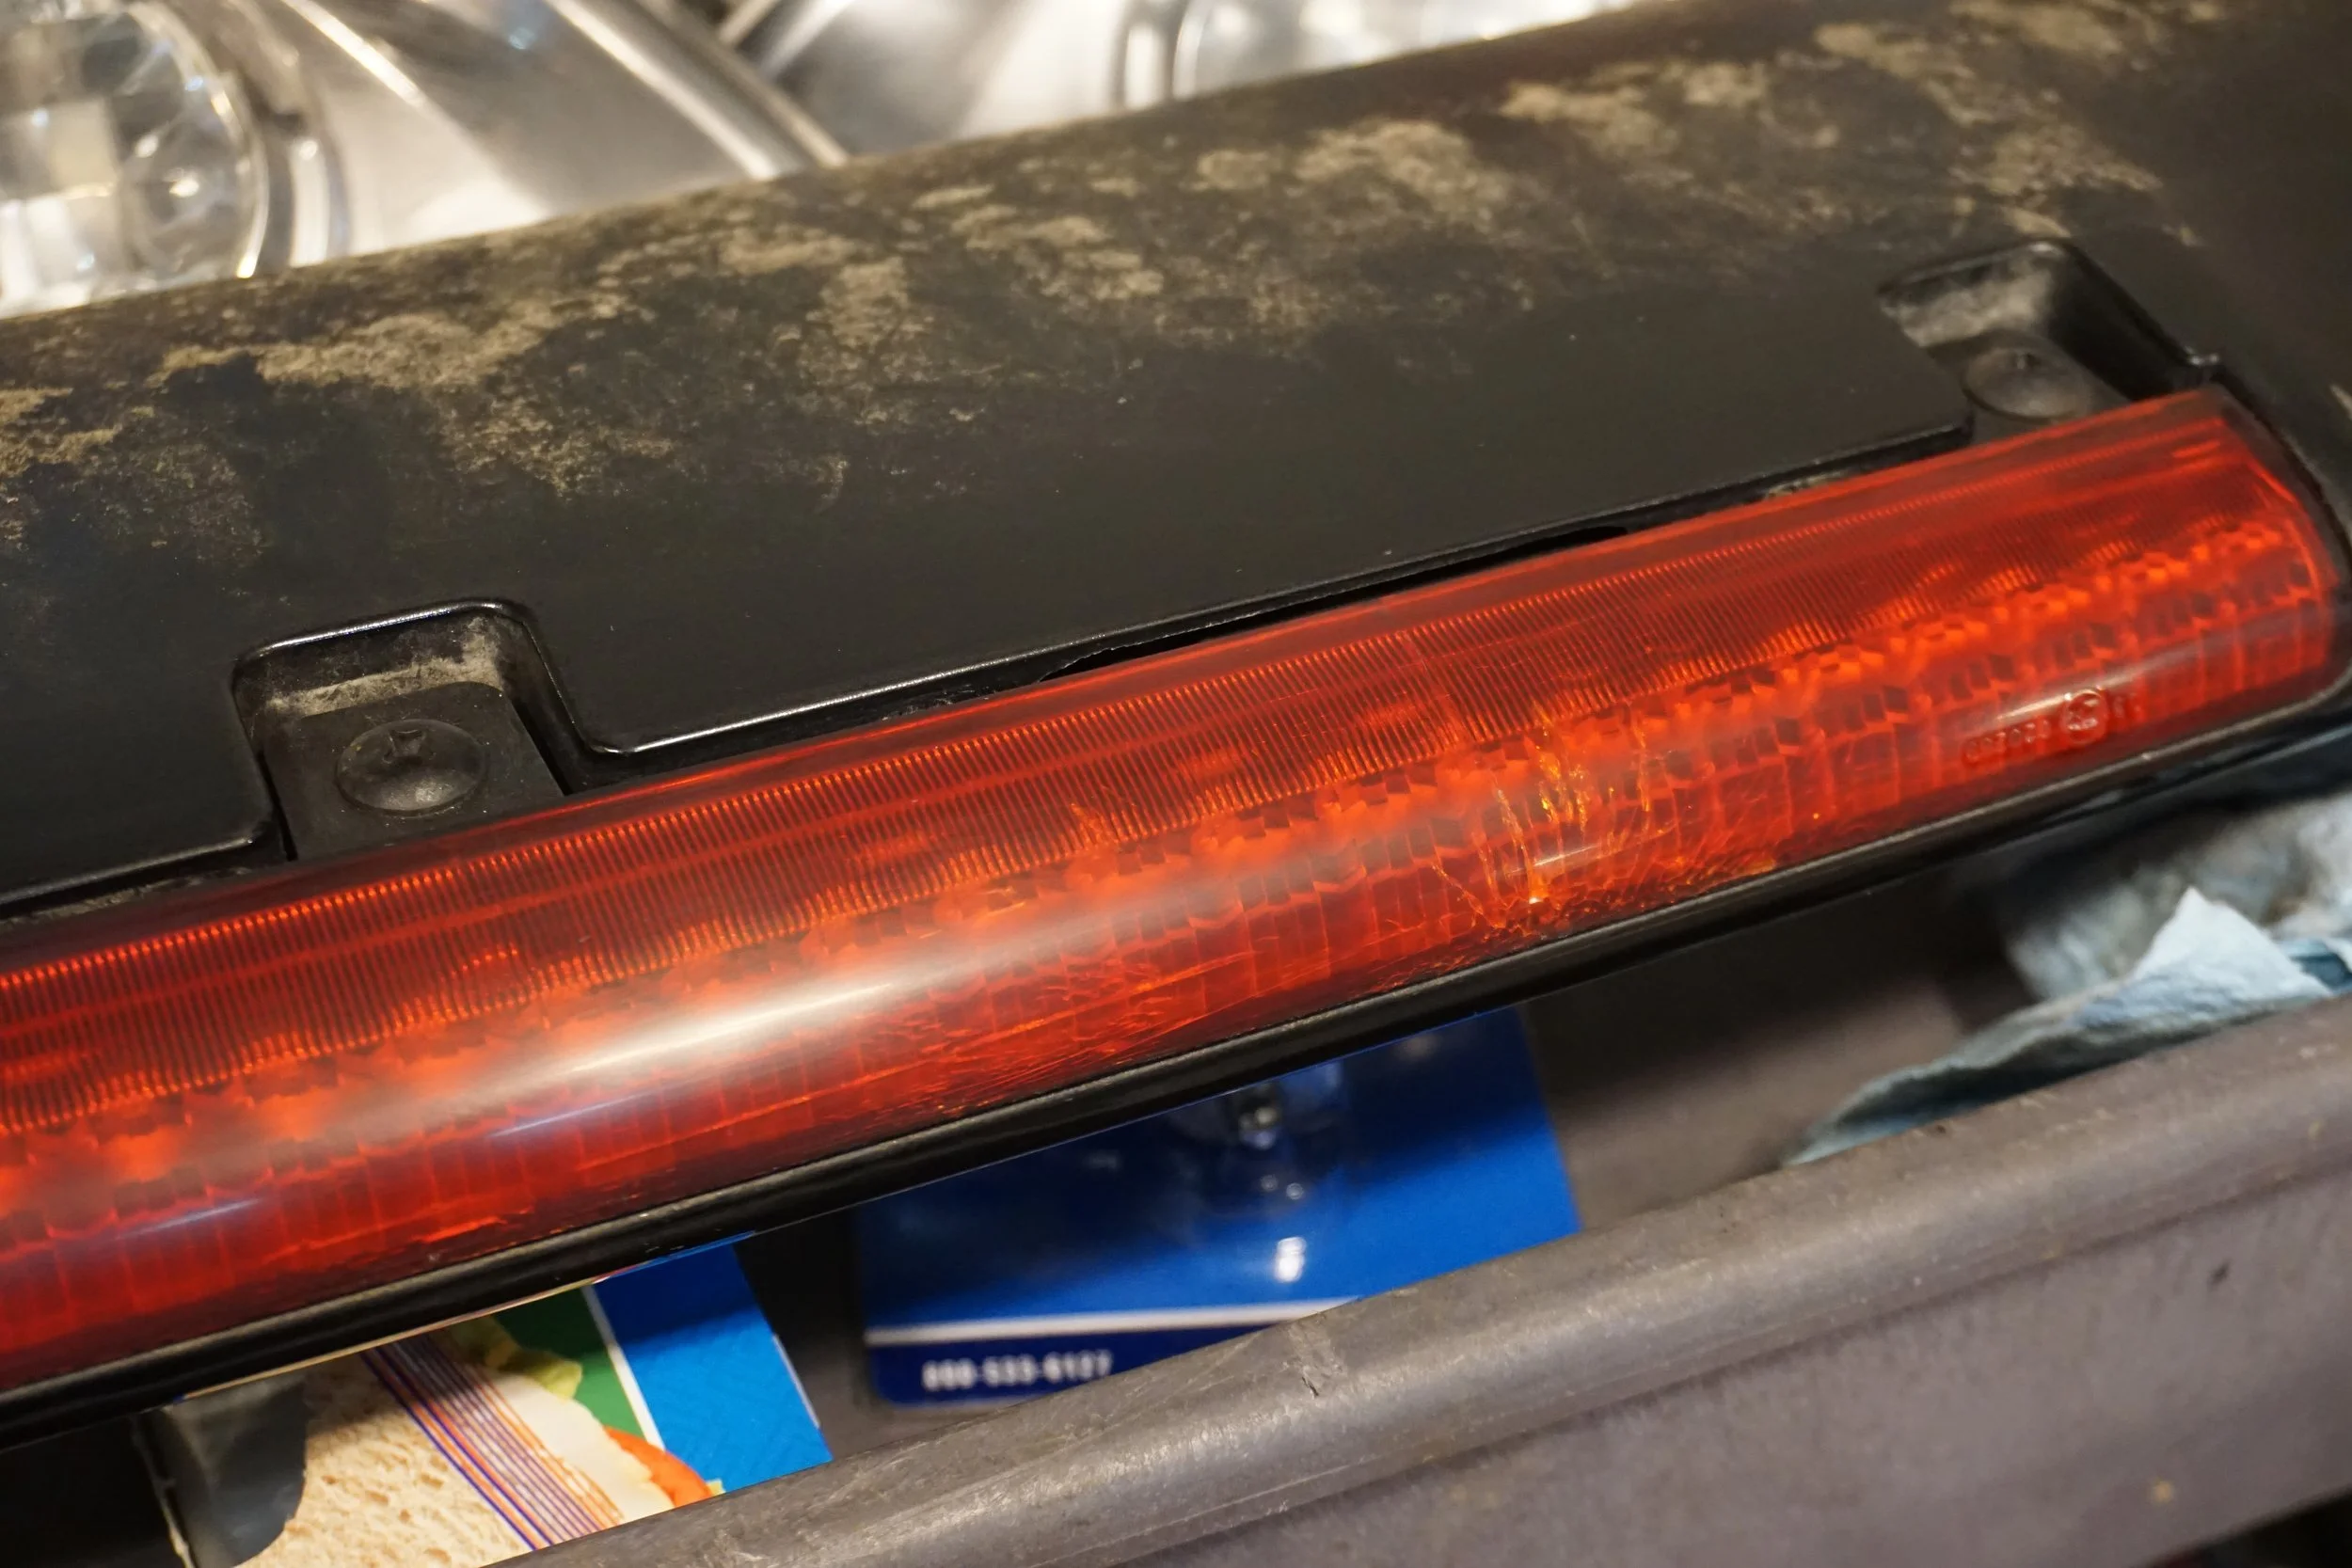
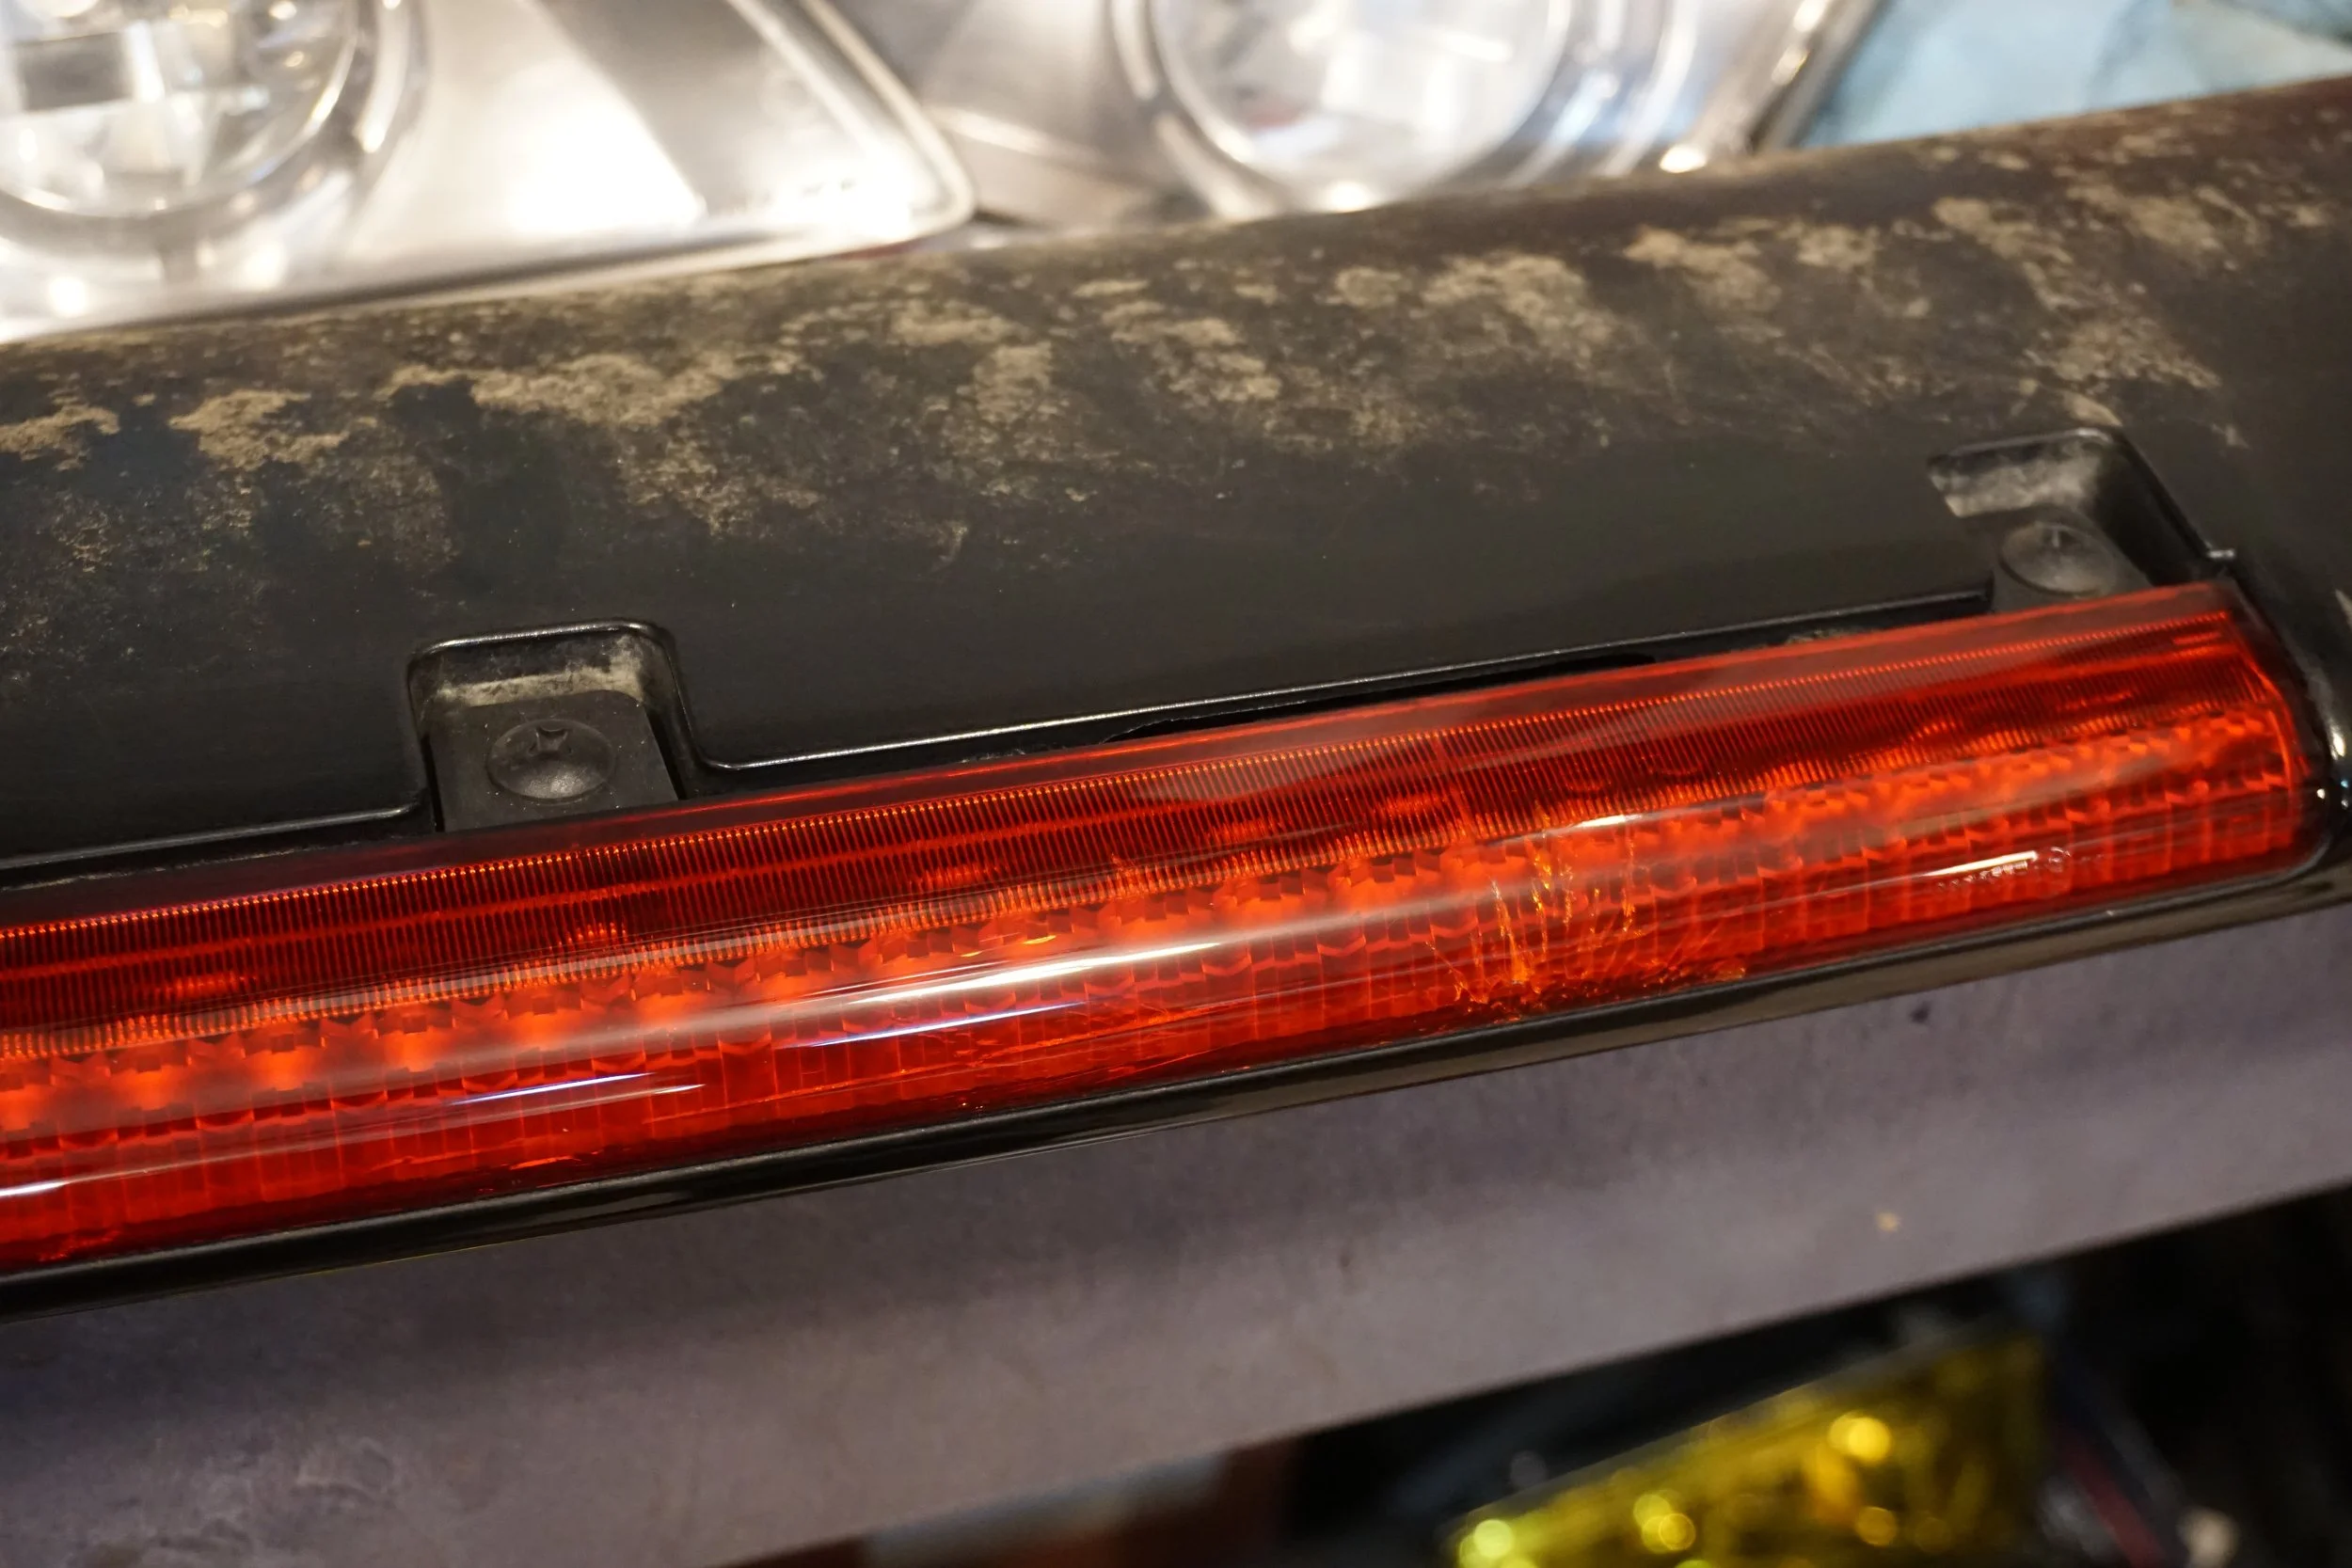
The overspray is gone, and it's very shiny now
I also removed my spoiler in anticipation of having a fresh one installed, so I had to clean up the black tar goo that was left.
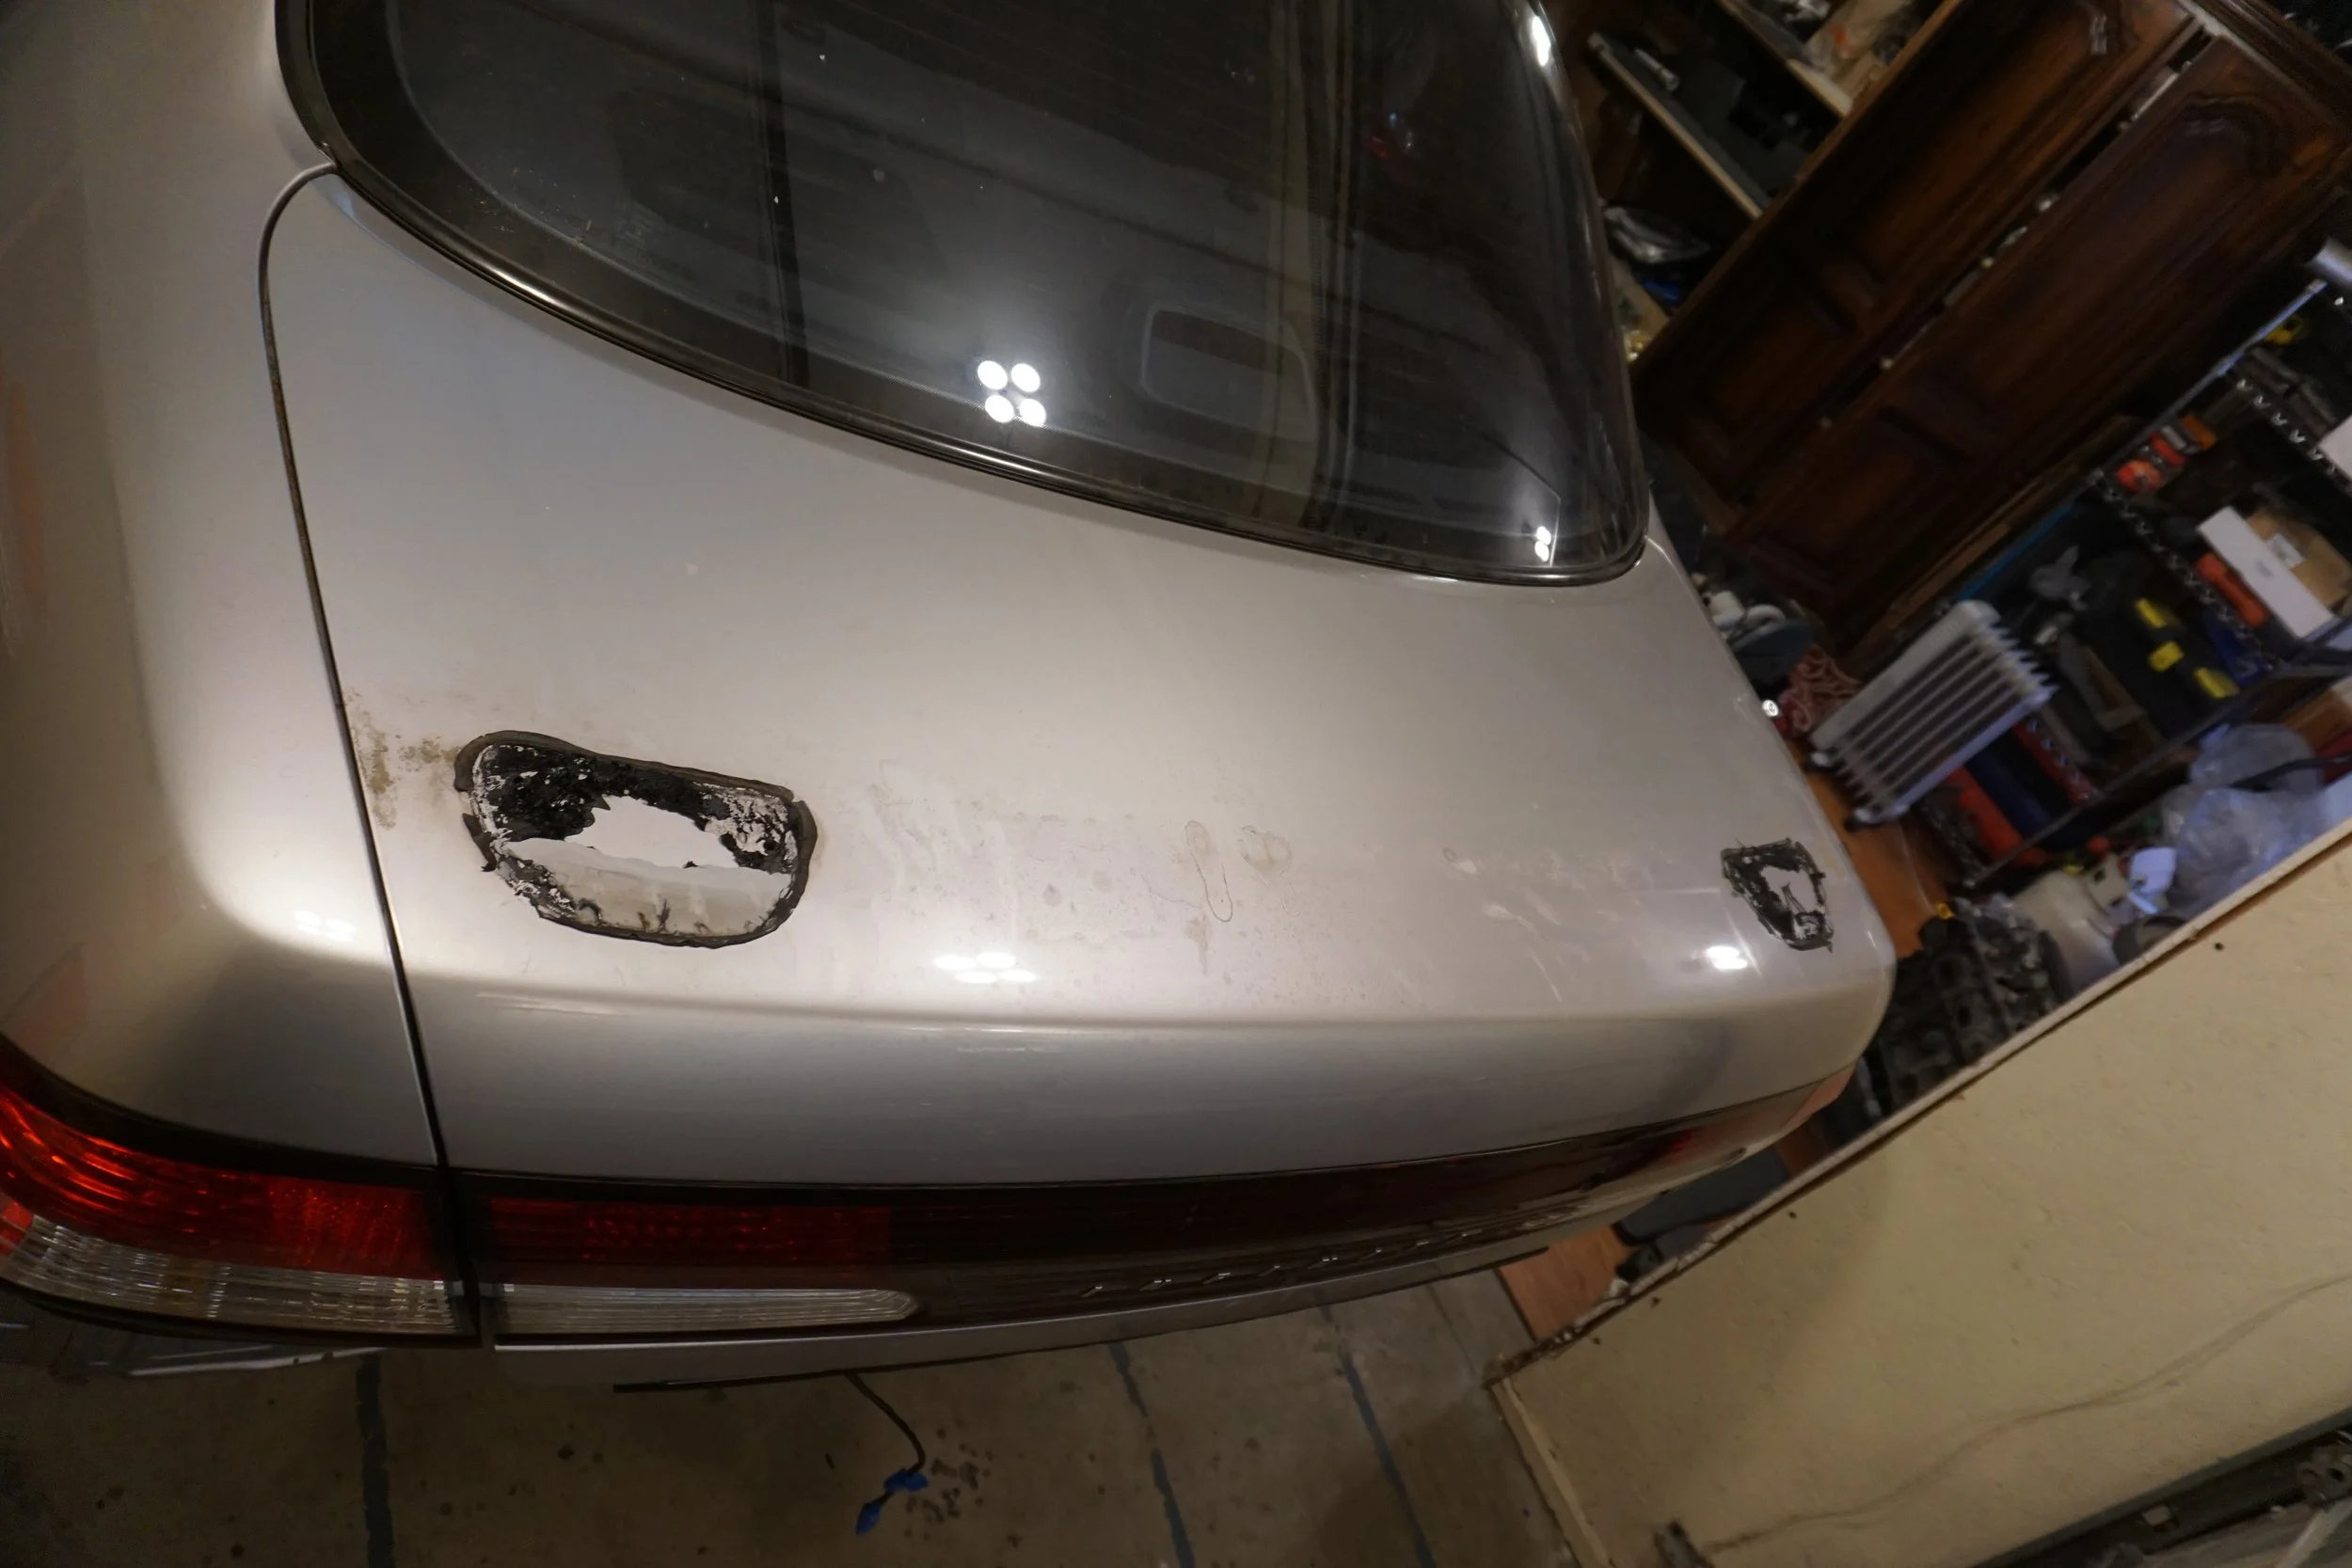
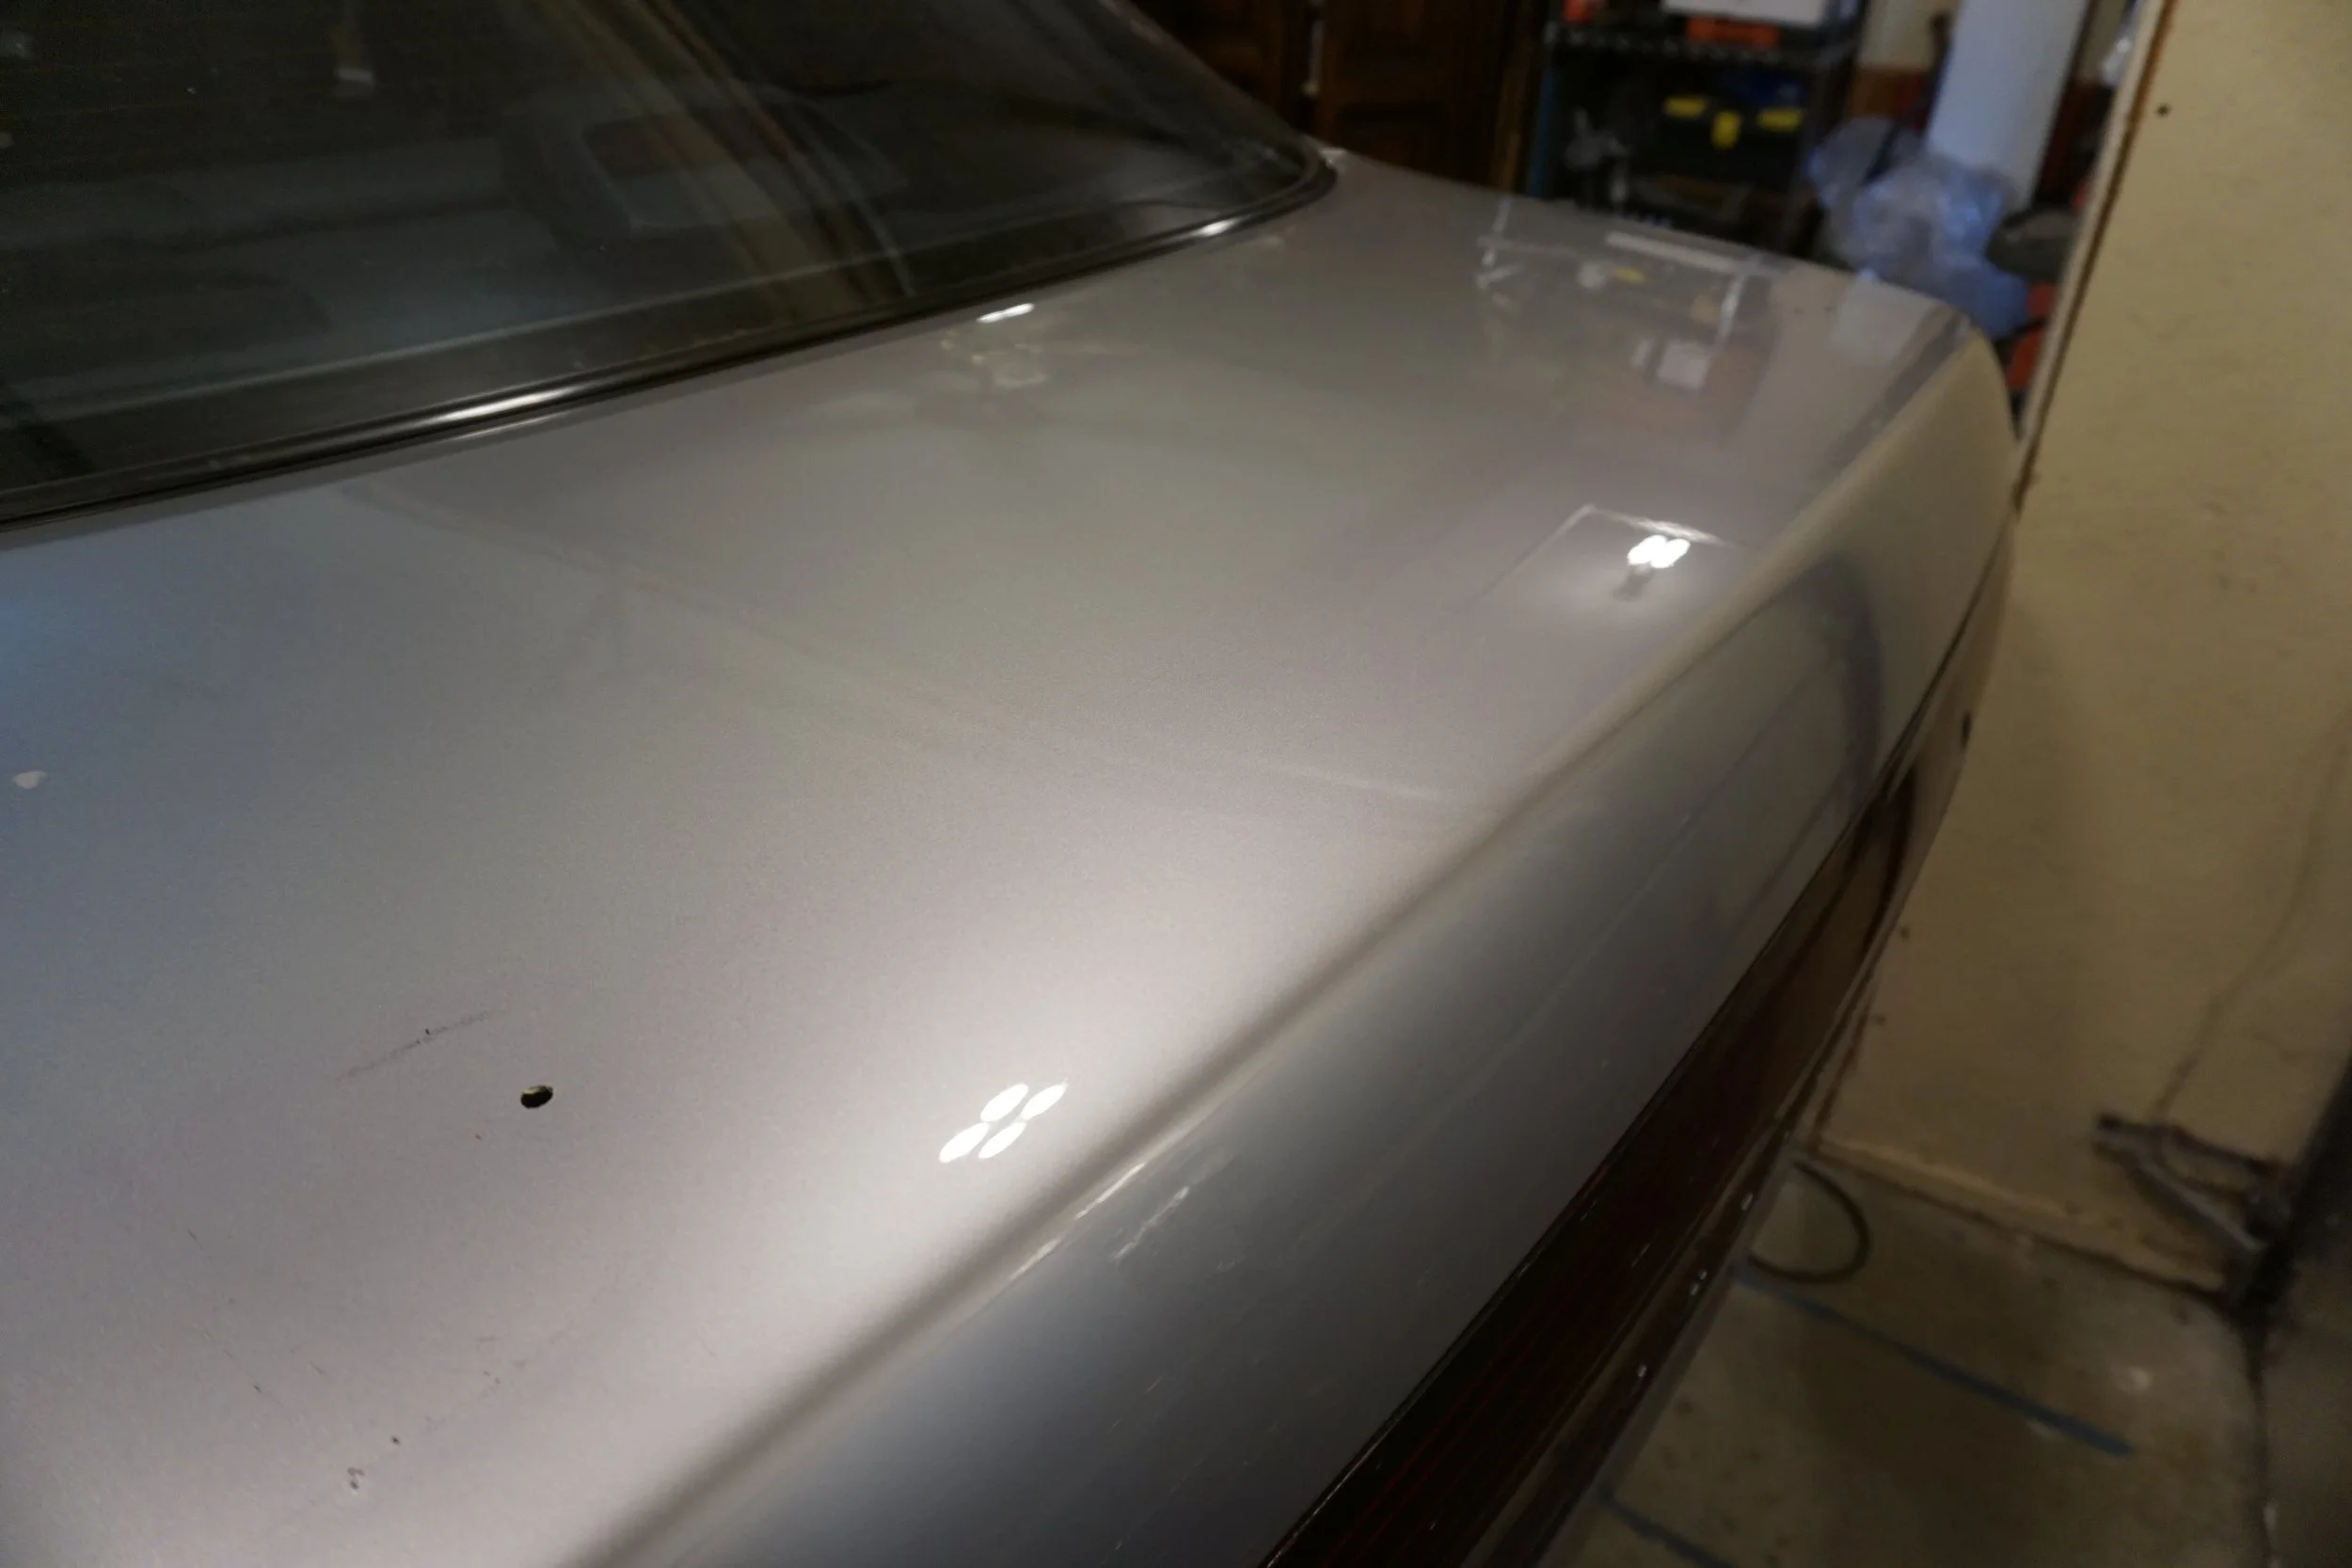
Which gave me access to that area of the trunk for the first time in 18 years, so naturally I polished the crap out of it. You can see more of the original purple tint in that area since it was protected from the sun for all these years. Yes, my paint has faded quite a bit even though it's still pretty and shiny.
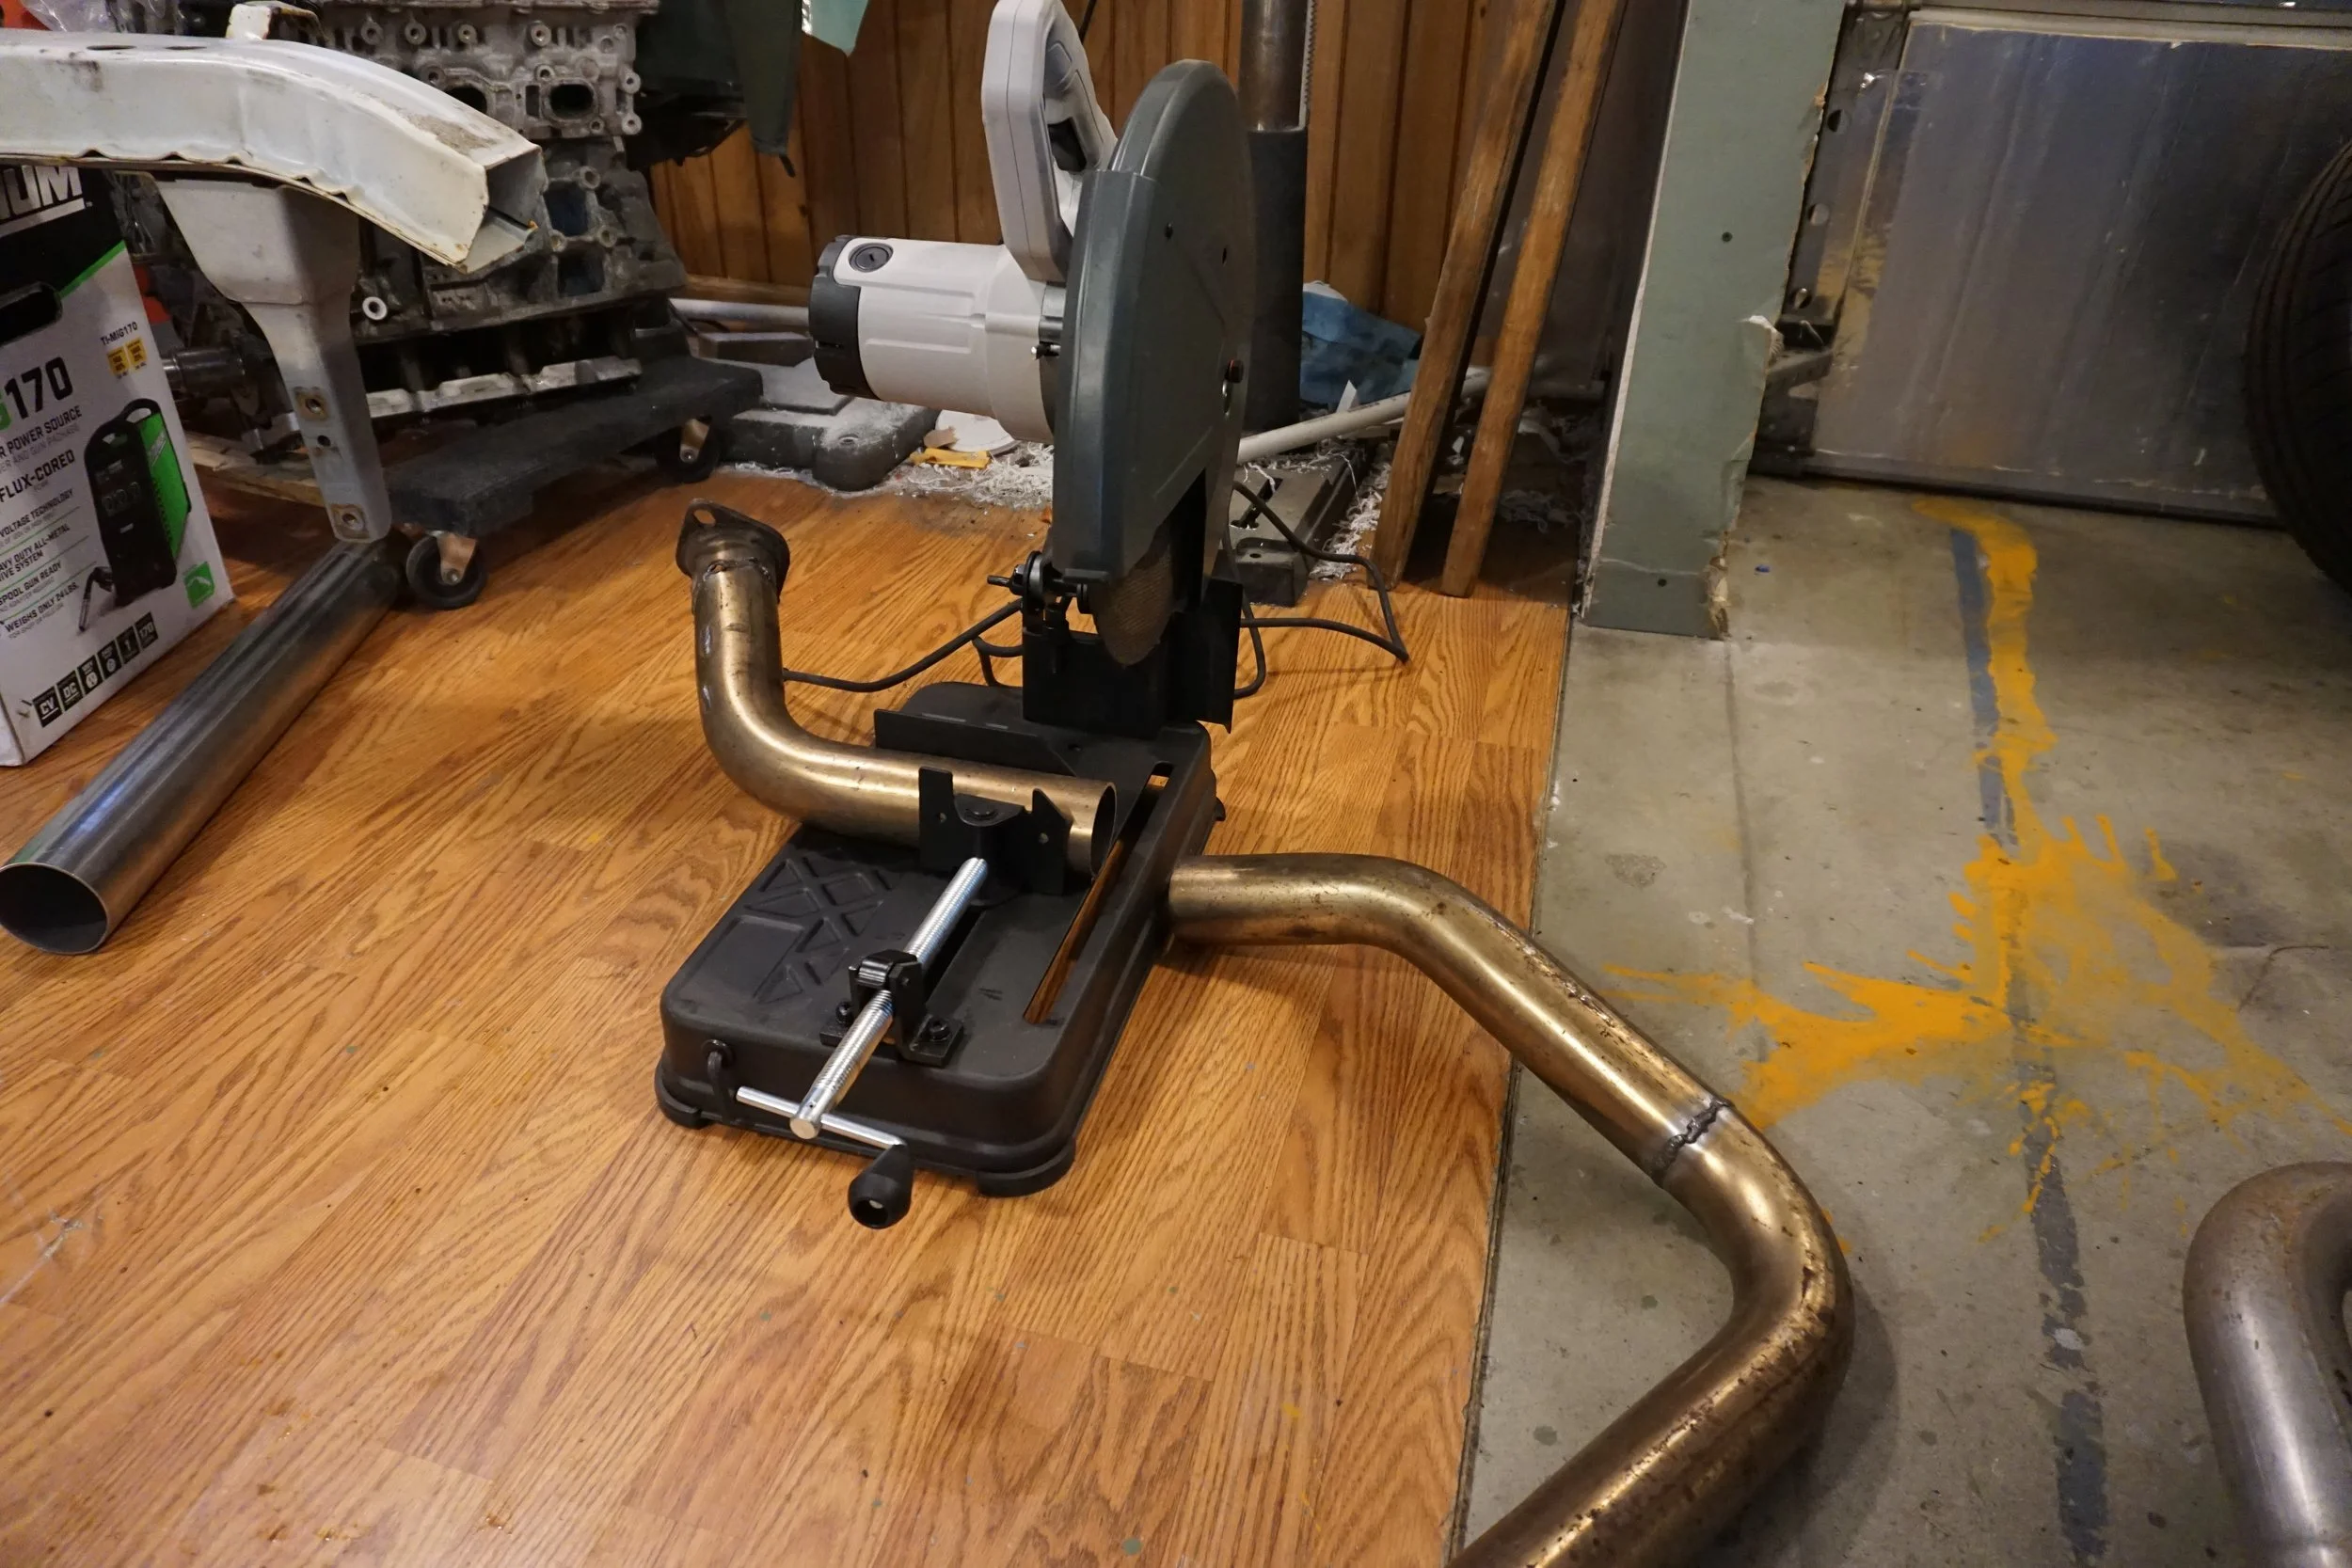
I've also been working on putting together my 3" full SS exhaust that I've been putting off for way too long. I bought this bad boy to help cut it up for me:
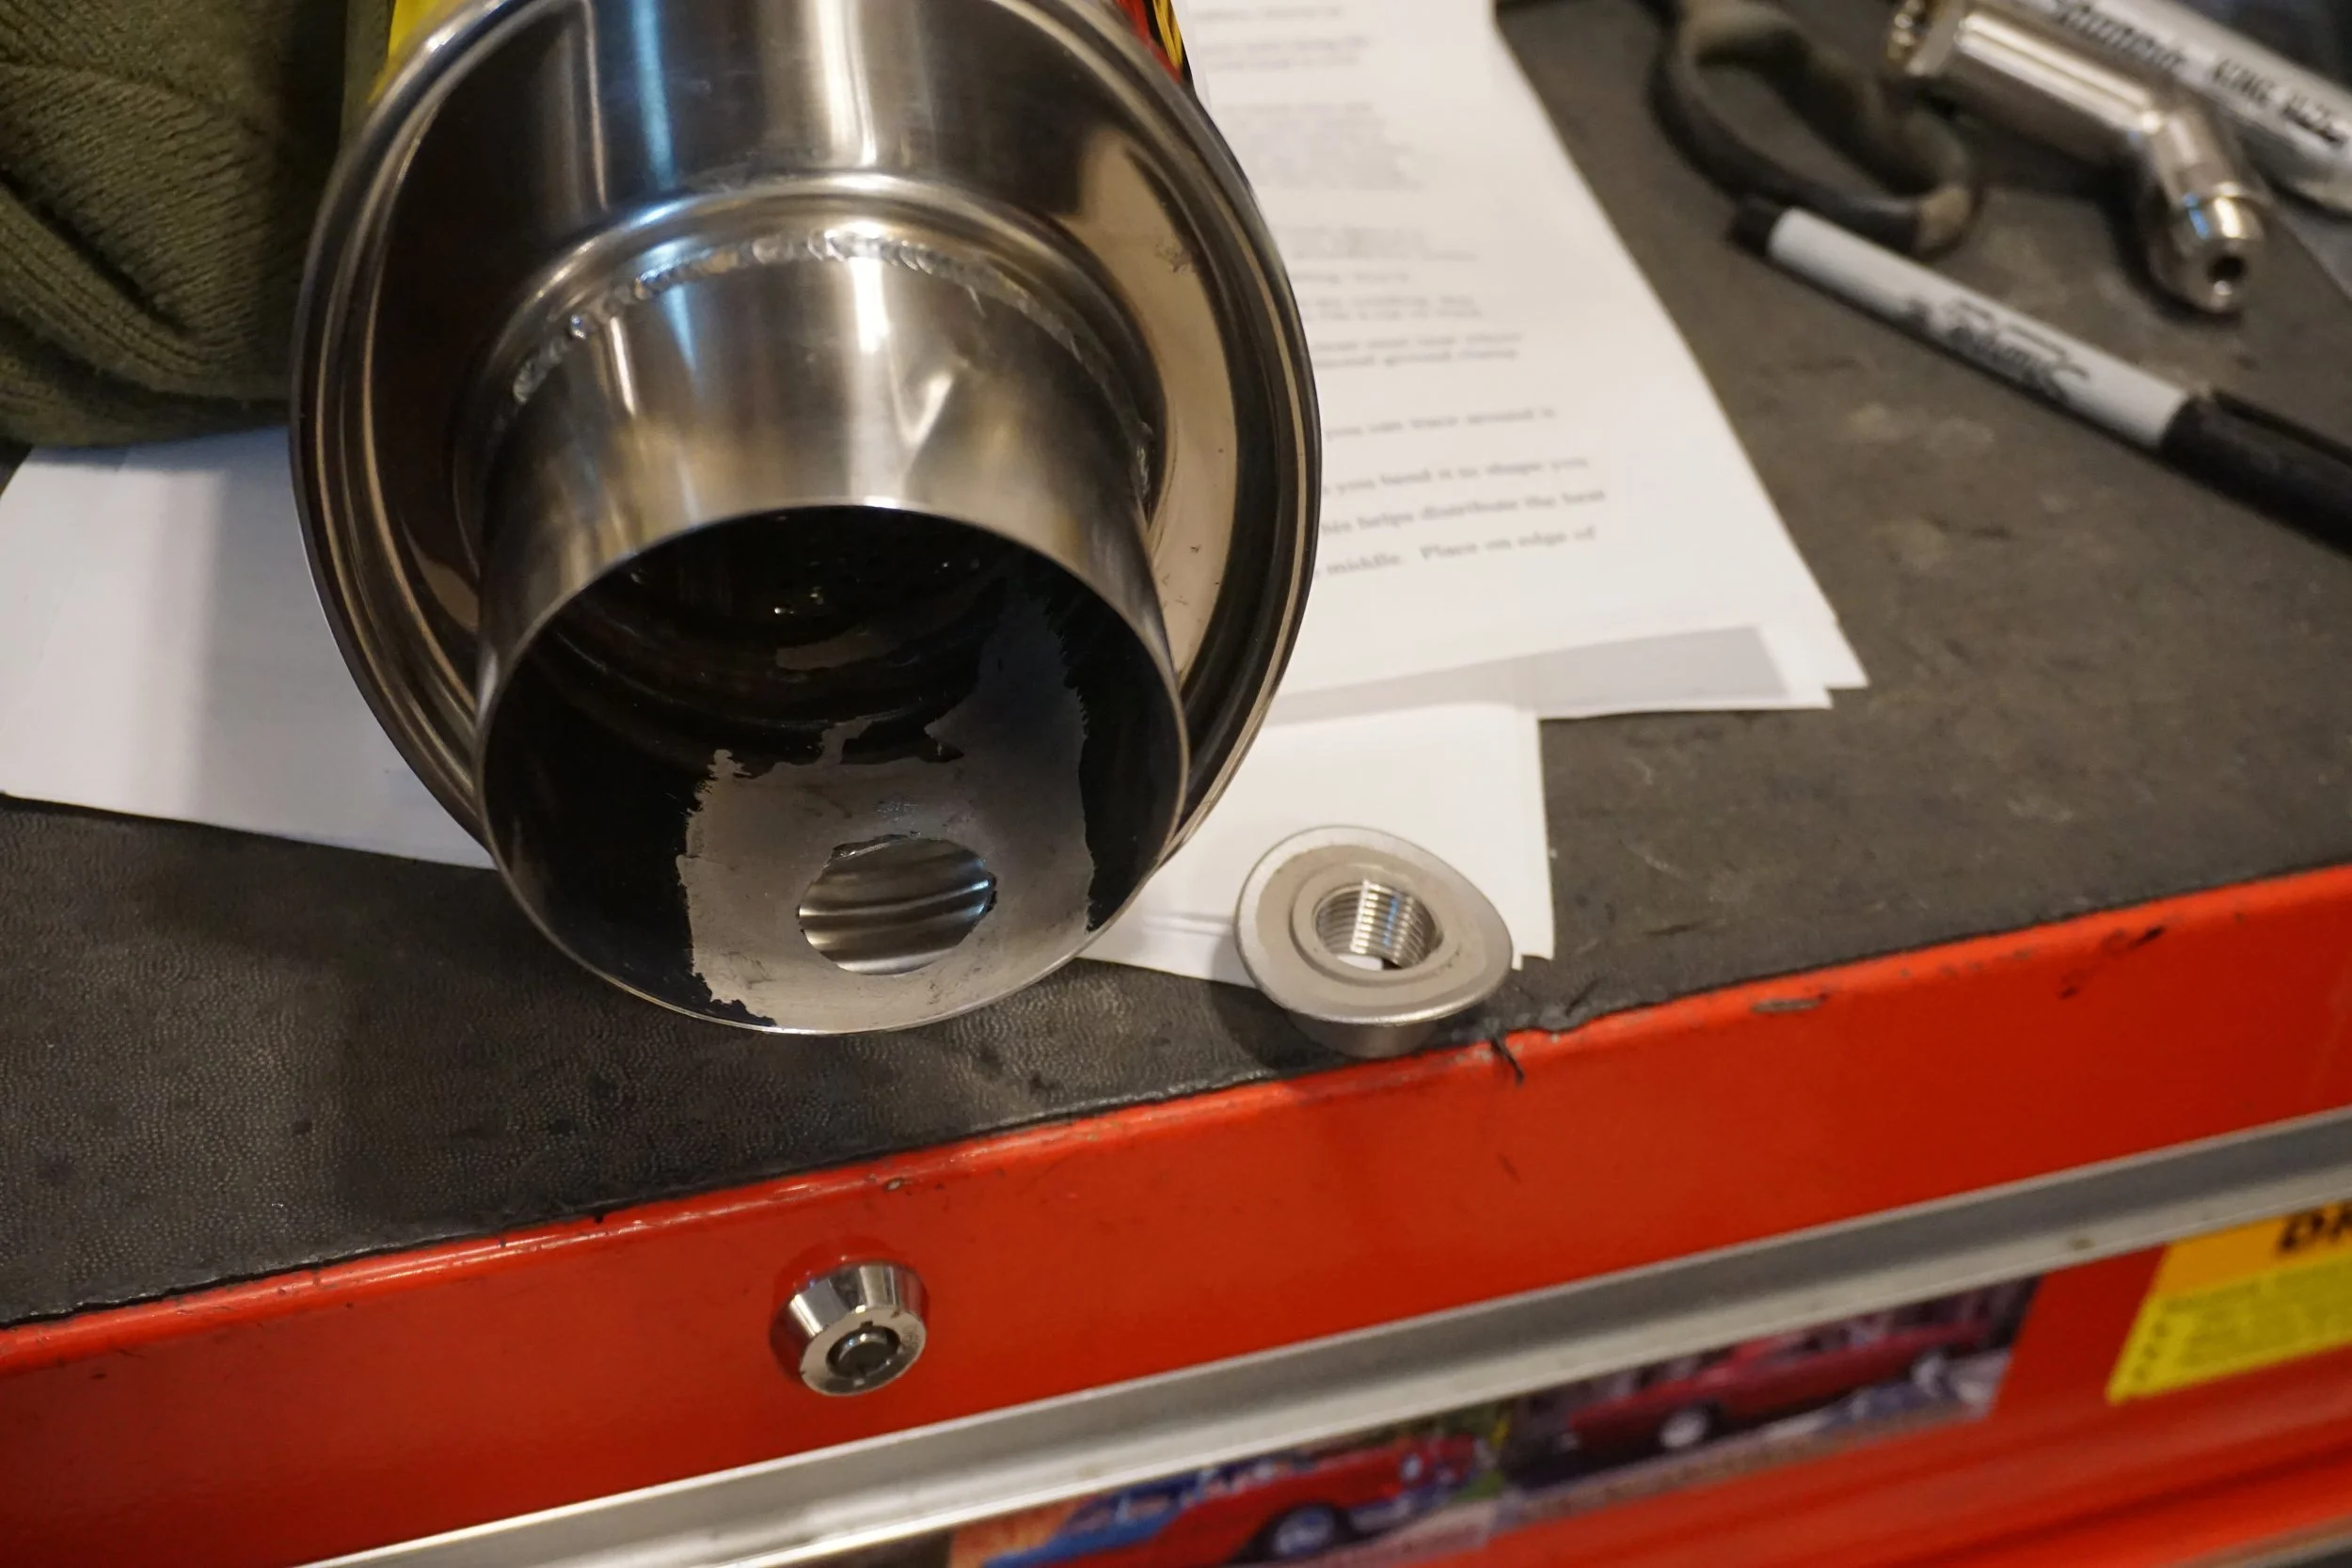
After spending many hours testing different settings on my welder, I finally found a combo that seemed to work really well. Now I know I'm not doing this SS welding the proper way. I'm not using tri-mix gas, and I'm not able to back purge the pipe. I am using what I believe to be the correct wire, which is some ER309L. My exhaust is a combination of 304 (piping, Vibrant resonator) and 409 (Magnaflow resonators) and the wire is rated to work with both. To protect the welds from the back side since I won't be using purge gas, I picked up some Solar Flux Type B and some HEET, mixed them up, and painted them on the inside as protection. It's not as good as gas, but it's better than nothing. Here I am welding an O2 bung into a resonator using the stuff.
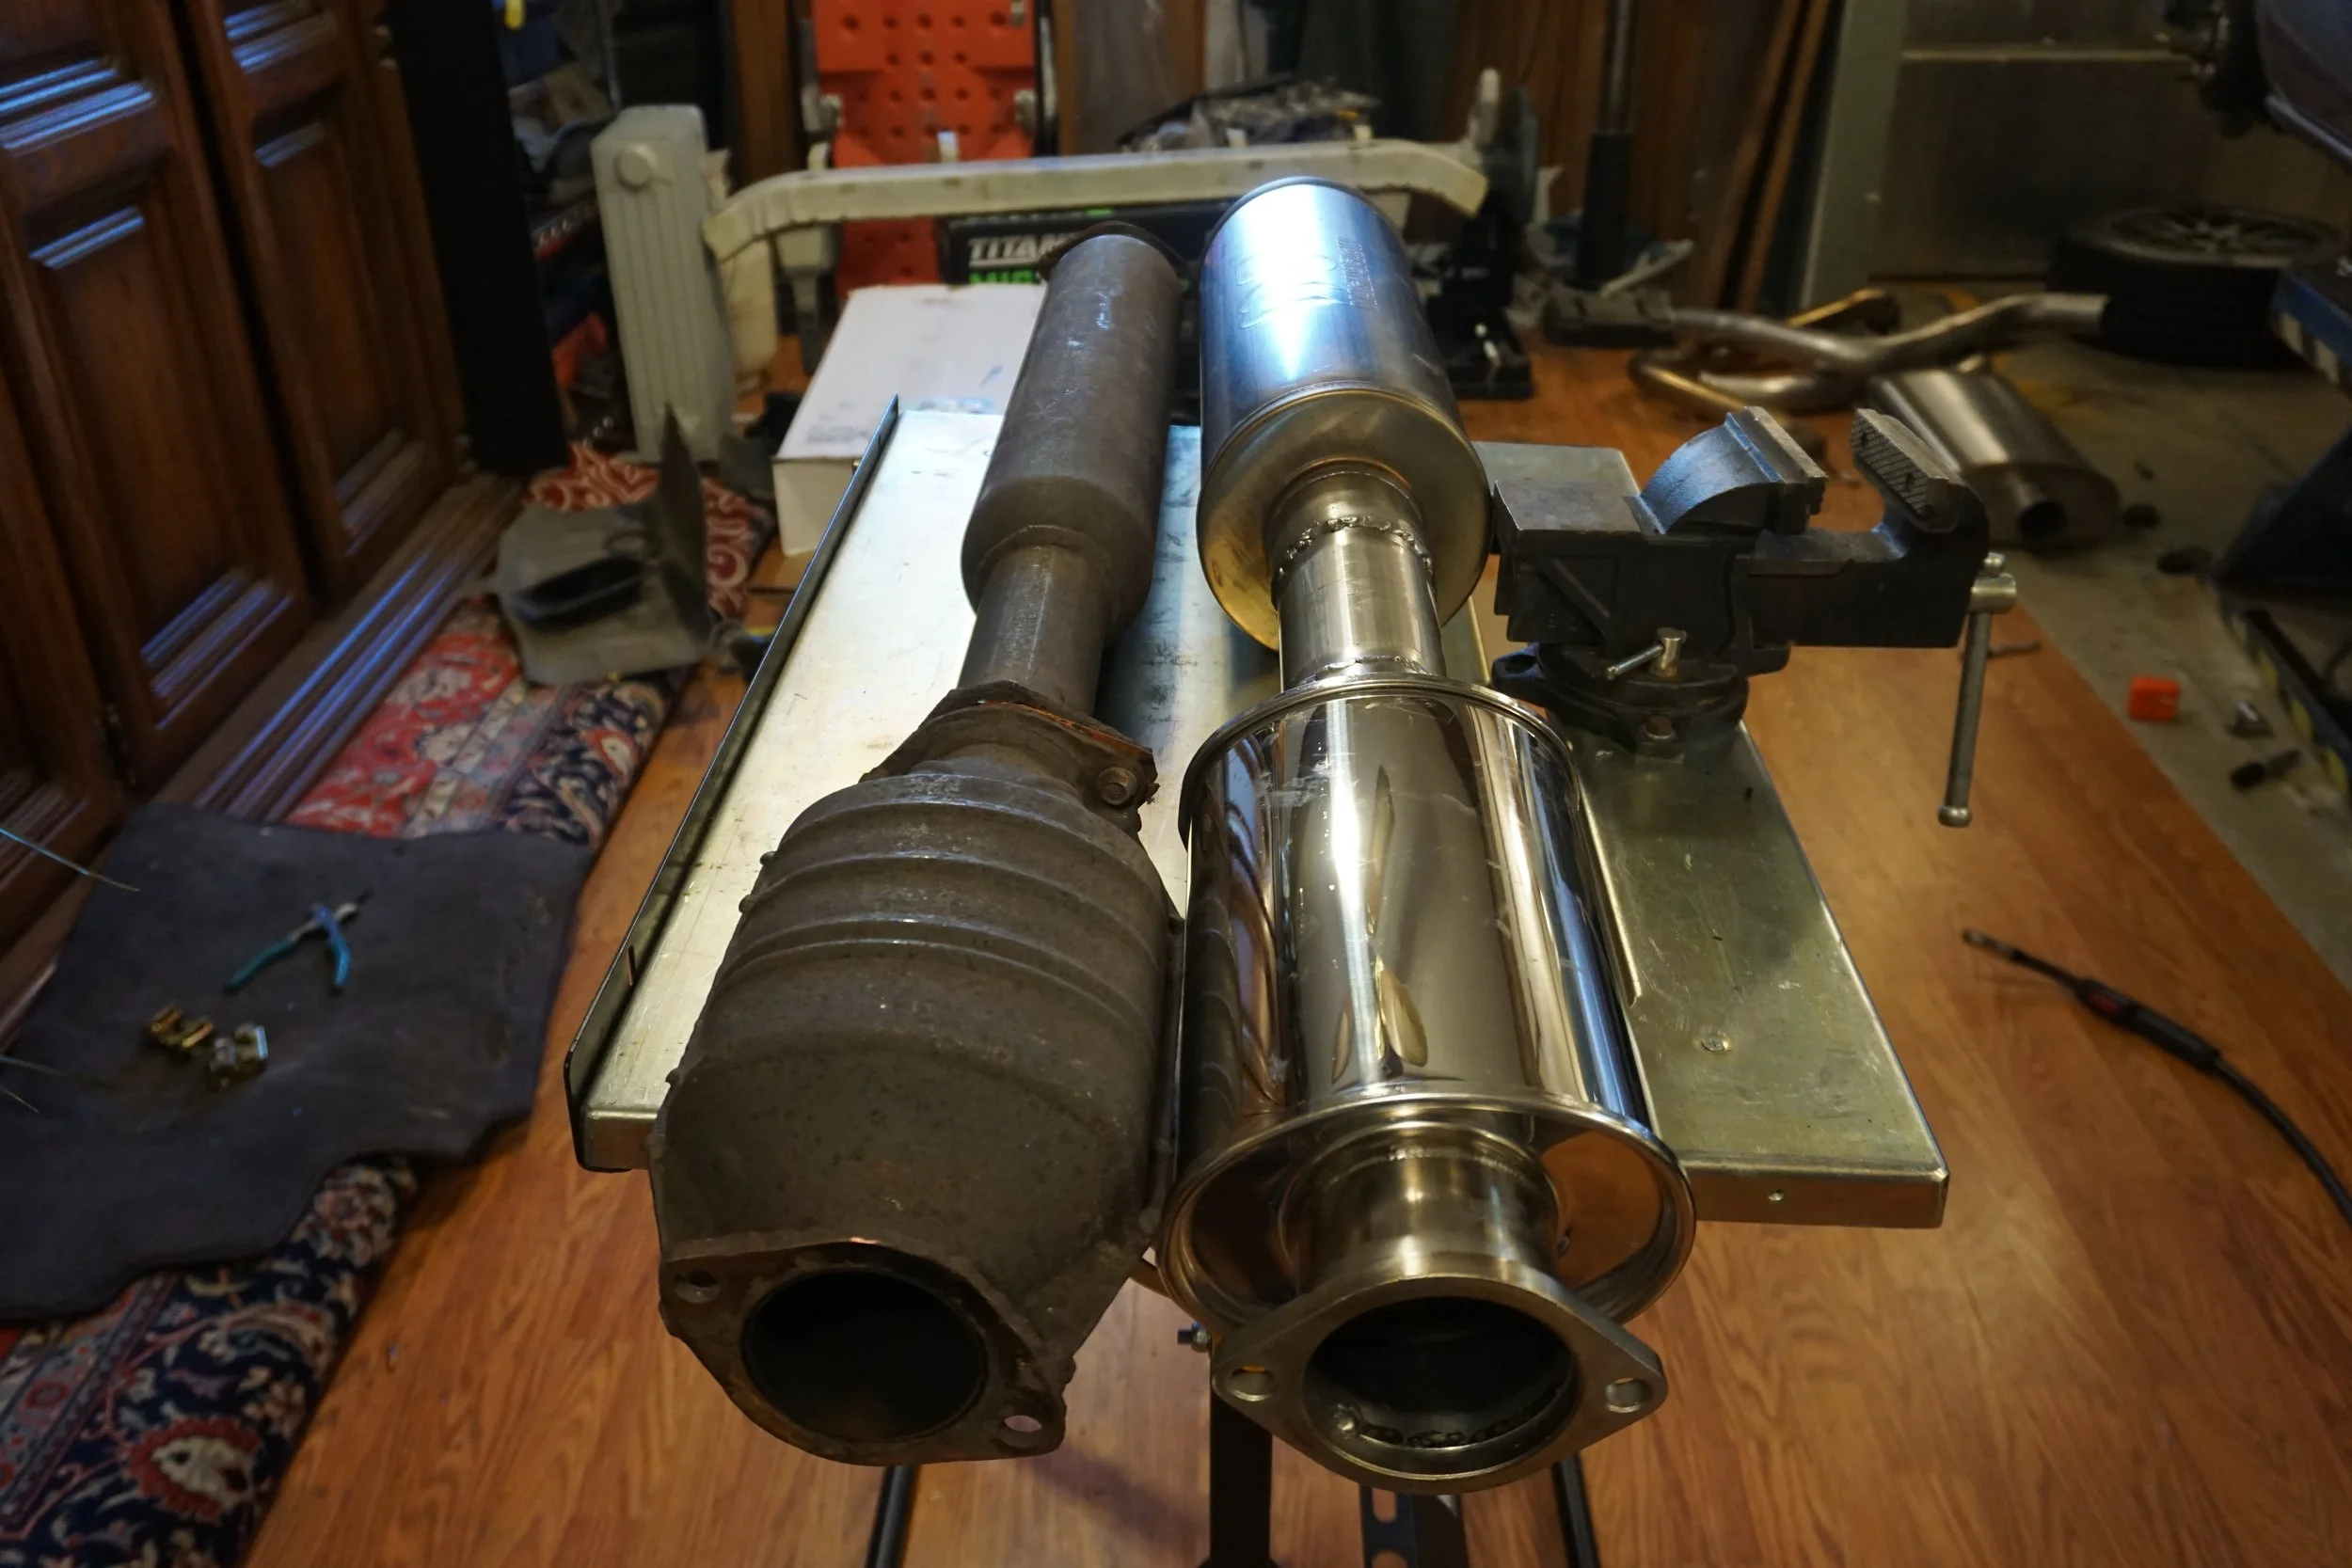
Here's a comparison between my current Cattman muffler and the giant Magnaflow one that will be replacing it.
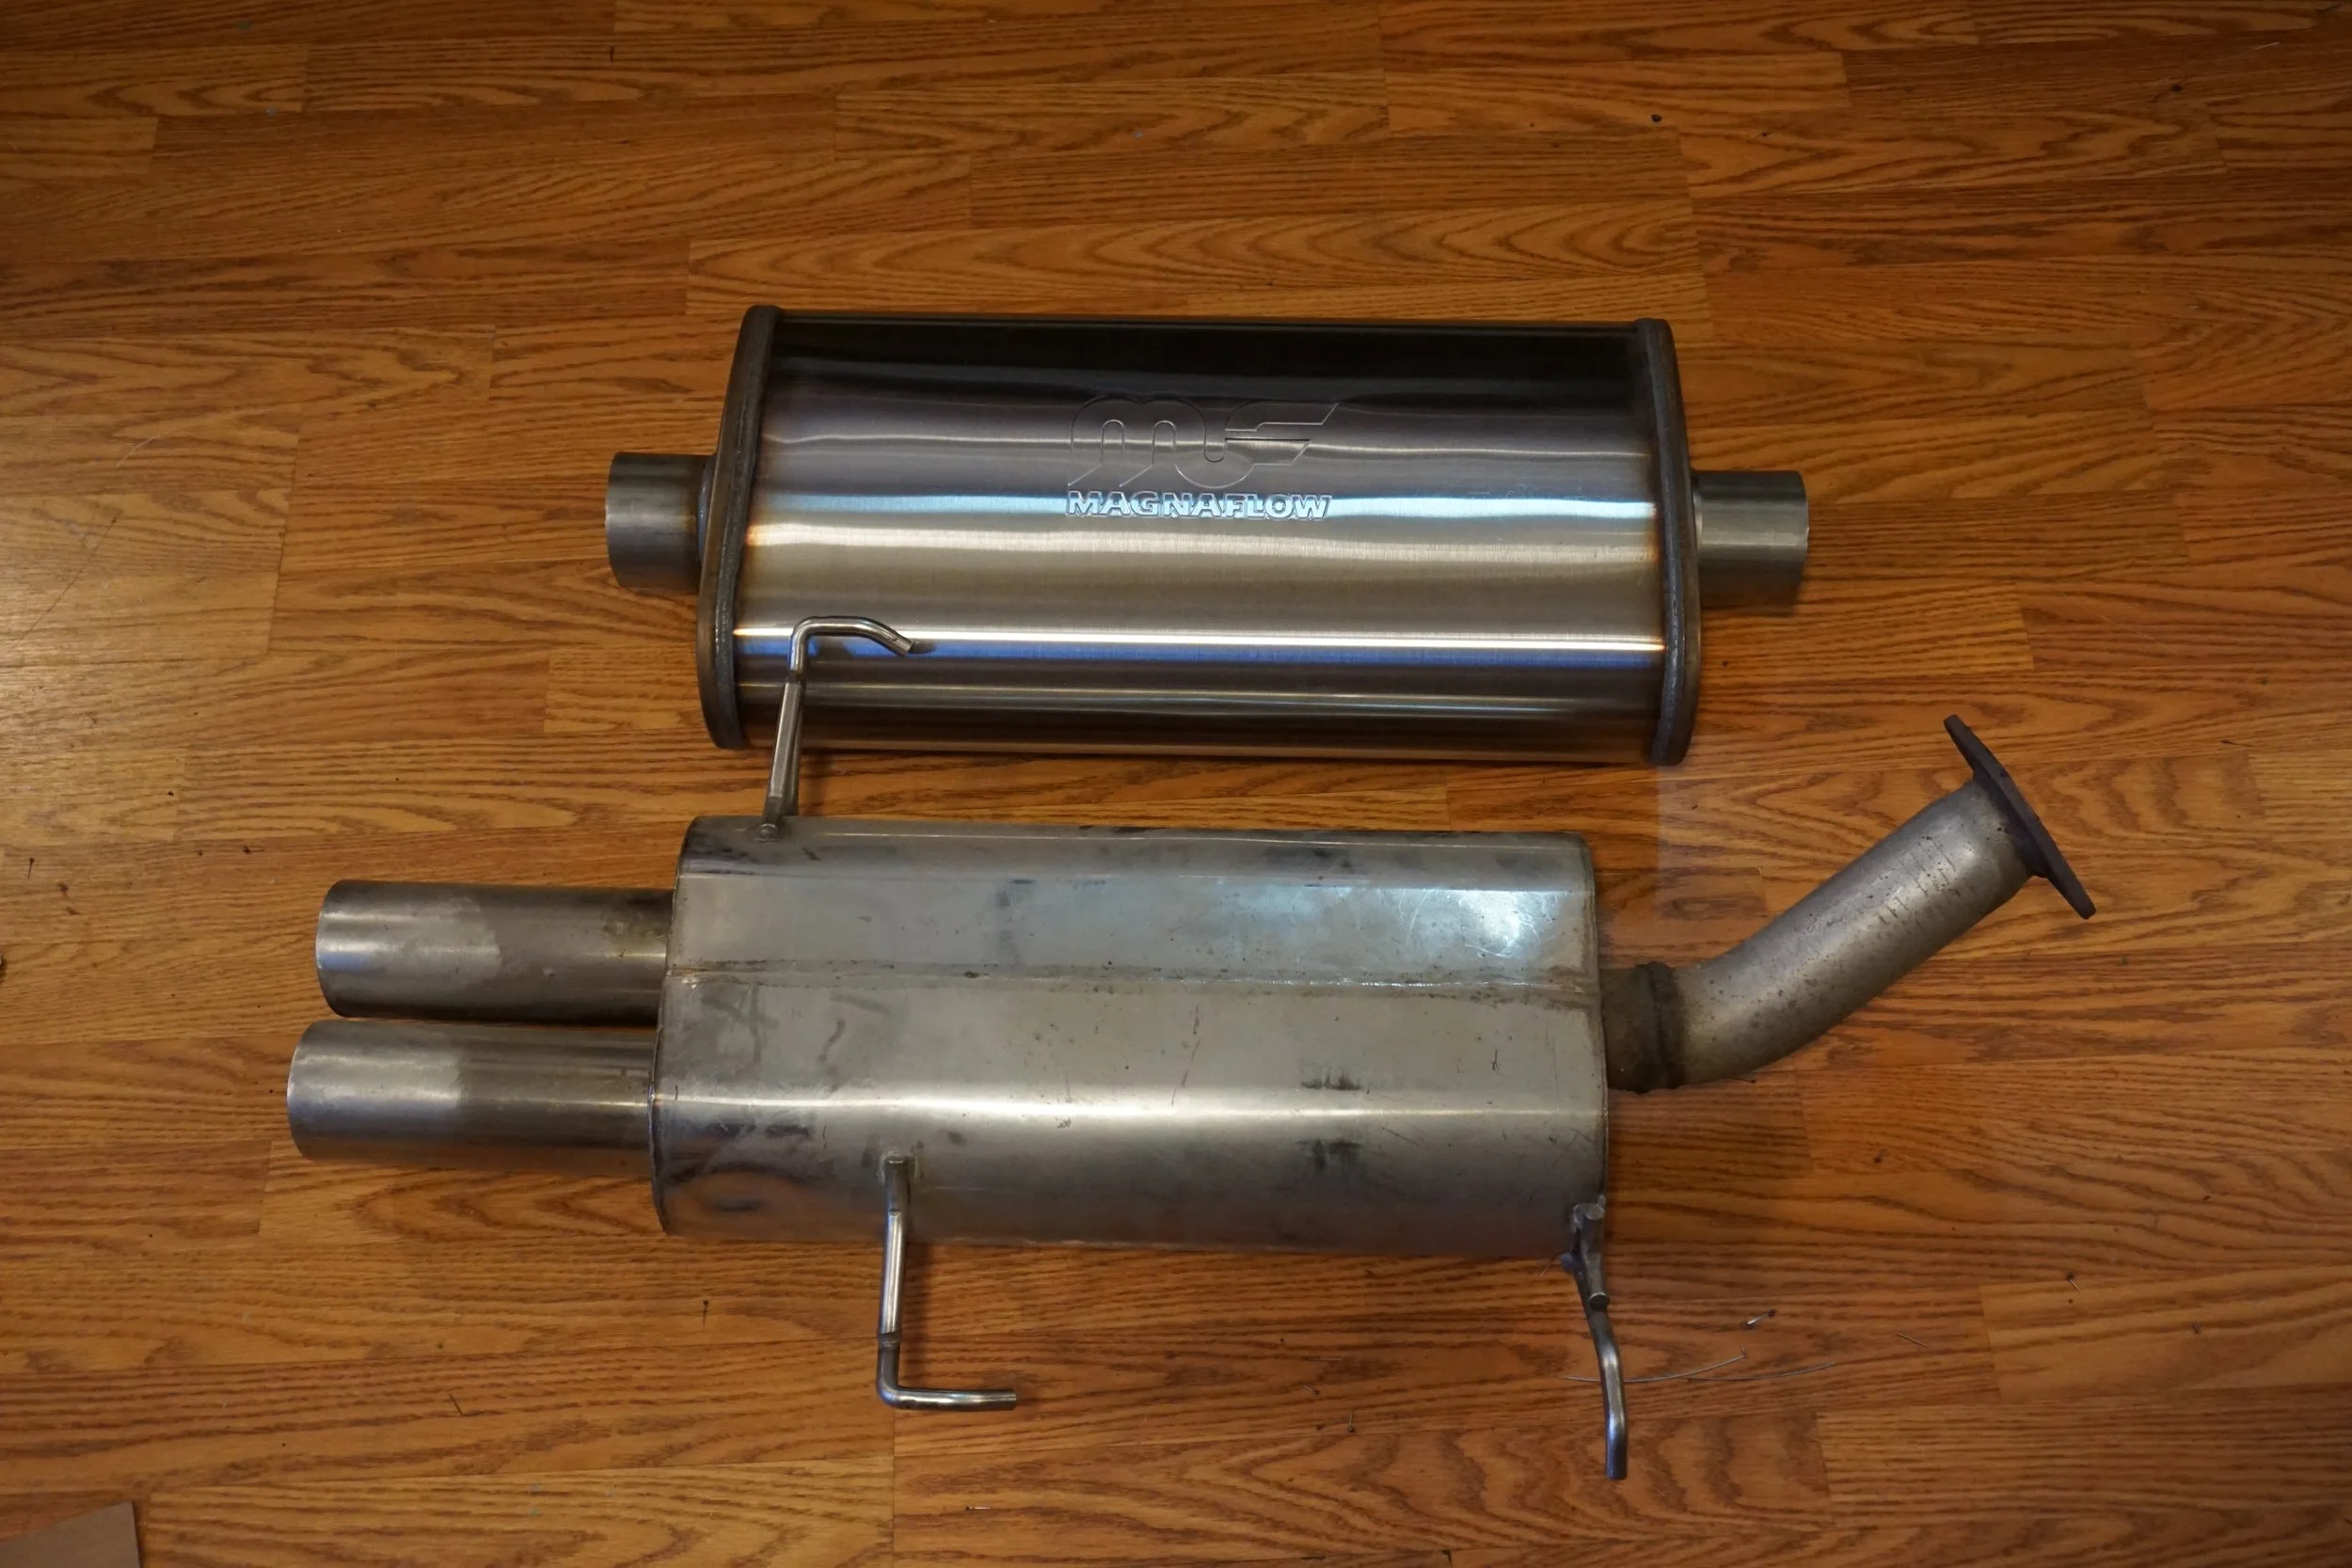
Yeah, it's gonna be a tight fit.
I did re-roll my rear fenders after welding everything in, so at least that's done. I knew that fender roller I bought like 5 years ago would come in handy!
I've been wanting to replace the trim around the front and back glass on the car since it looks so crummy, but it turns out that almost none of it exists in the US anymore. So after much trolling of the internet for part numbers I came across a site that seemed like a dream come true, https://www.amayama.com. It's a company based out of Japan that stocks all sorts of OEM parts for Japanese manufacturers, with prices that often seem too good to be true. Once I started digging through the site and punching in parts numbers, I got a little carried away. All those bearings for my 6 speed transmission that don't exist in this country, or if they do they cost an arm and a leg? Oh, they're all on Amayama, and for a faction of the listed price here. All those rubber and trim pieces? They're there too, and also for great prices. Hell, I could have bought OEM Cefiro bodykit parts, but those were listed at "regular" dealer cost, so I couldn't stomach that. But in the end, I went hog wild and purchased a very large order. Considering the box was like 6'x1'x1' and weighed 25(?) pounds, shipping was a very reasonable $180 or so, and it arrived in 5 days! Enough talk, let's ogle some fresh OEM goodness:
Much of it won't be installed until the car is painted, so it's just a tease for right now. When I said I'm doing a minor restoration of this car, I meant it!
In a similar vein, I pulled a bunch of chrome and black window trim off cars at the junkyards. The trim on my car is kind of messed up after multiple applications of chrome trim blackout tape that left nasty residue in spots that's impossible to remove. Part of me really wants to install the SE black trim, but another part of me thinks the chrome trim kind of nicely goes with my chrome door handles and trim running along the bumpers and door bump guards. Thoughts?
In other junkyard news, I found a mint I30 in the yard with pretty much zero rust, so I snagged a bunch of stuff off it, like a rear bumper crash beam, coated brake/fuel lines (from 97-99 cars, my 96 has uncoated lines and a few aren't looking so great), exhaust heat shields, etc.
Things like this bracket that bolts to the car at the trunk lid. Mine was looking crusty, so instead of cleaning it up and painting it, I'll just throw this one on.
Looks like Nissan revised it at some point:
While I still had everything apart I decided I might as well clean up the body behind the bumper even though it will never be seen again.
I picked up a spoiler in mint condition a while back with the intention of having it painted instead of the one on my car, since mine is pretty messed up. I took a closer look at it and realized it must have been repainted since there was overspray on a few areas on the 3rd brake light. Also, the 3rd brake light is cracked. So I decided I would experiment with some sanding and polishing to see how it would turn out, and I'm pretty happy with the results.
The overspray is gone, and it's very shiny now
I also removed my spoiler in anticipation of having a fresh one installed, so I had to clean up the black tar goo that was left.
Which gave me access to that area of the trunk for the first time in 18 years, so naturally I polished the crap out of it. You can see more of the original purple tint in that area since it was protected from the sun for all these years. Yes, my paint has faded quite a bit even though it's still pretty and shiny.
I've also been working on putting together my 3" full SS exhaust that I've been putting off for way too long. I bought this bad boy to help cut it up for me:
After spending many hours testing different settings on my welder, I finally found a combo that seemed to work really well. Now I know I'm not doing this SS welding the proper way. I'm not using tri-mix gas, and I'm not able to back purge the pipe. I am using what I believe to be the correct wire, which is some ER309L. My exhaust is a combination of 304 (piping, Vibrant resonator) and 409 (Magnaflow resonators) and the wire is rated to work with both. To protect the welds from the back side since I won't be using purge gas, I picked up some Solar Flux Type B and some HEET, mixed them up, and painted them on the inside as protection. It's not as good as gas, but it's better than nothing. Here I am welding an O2 bung into a resonator using the stuff.
Here's a comparison between my current Cattman muffler and the giant Magnaflow one that will be replacing it.
Yeah, it's gonna be a tight fit.
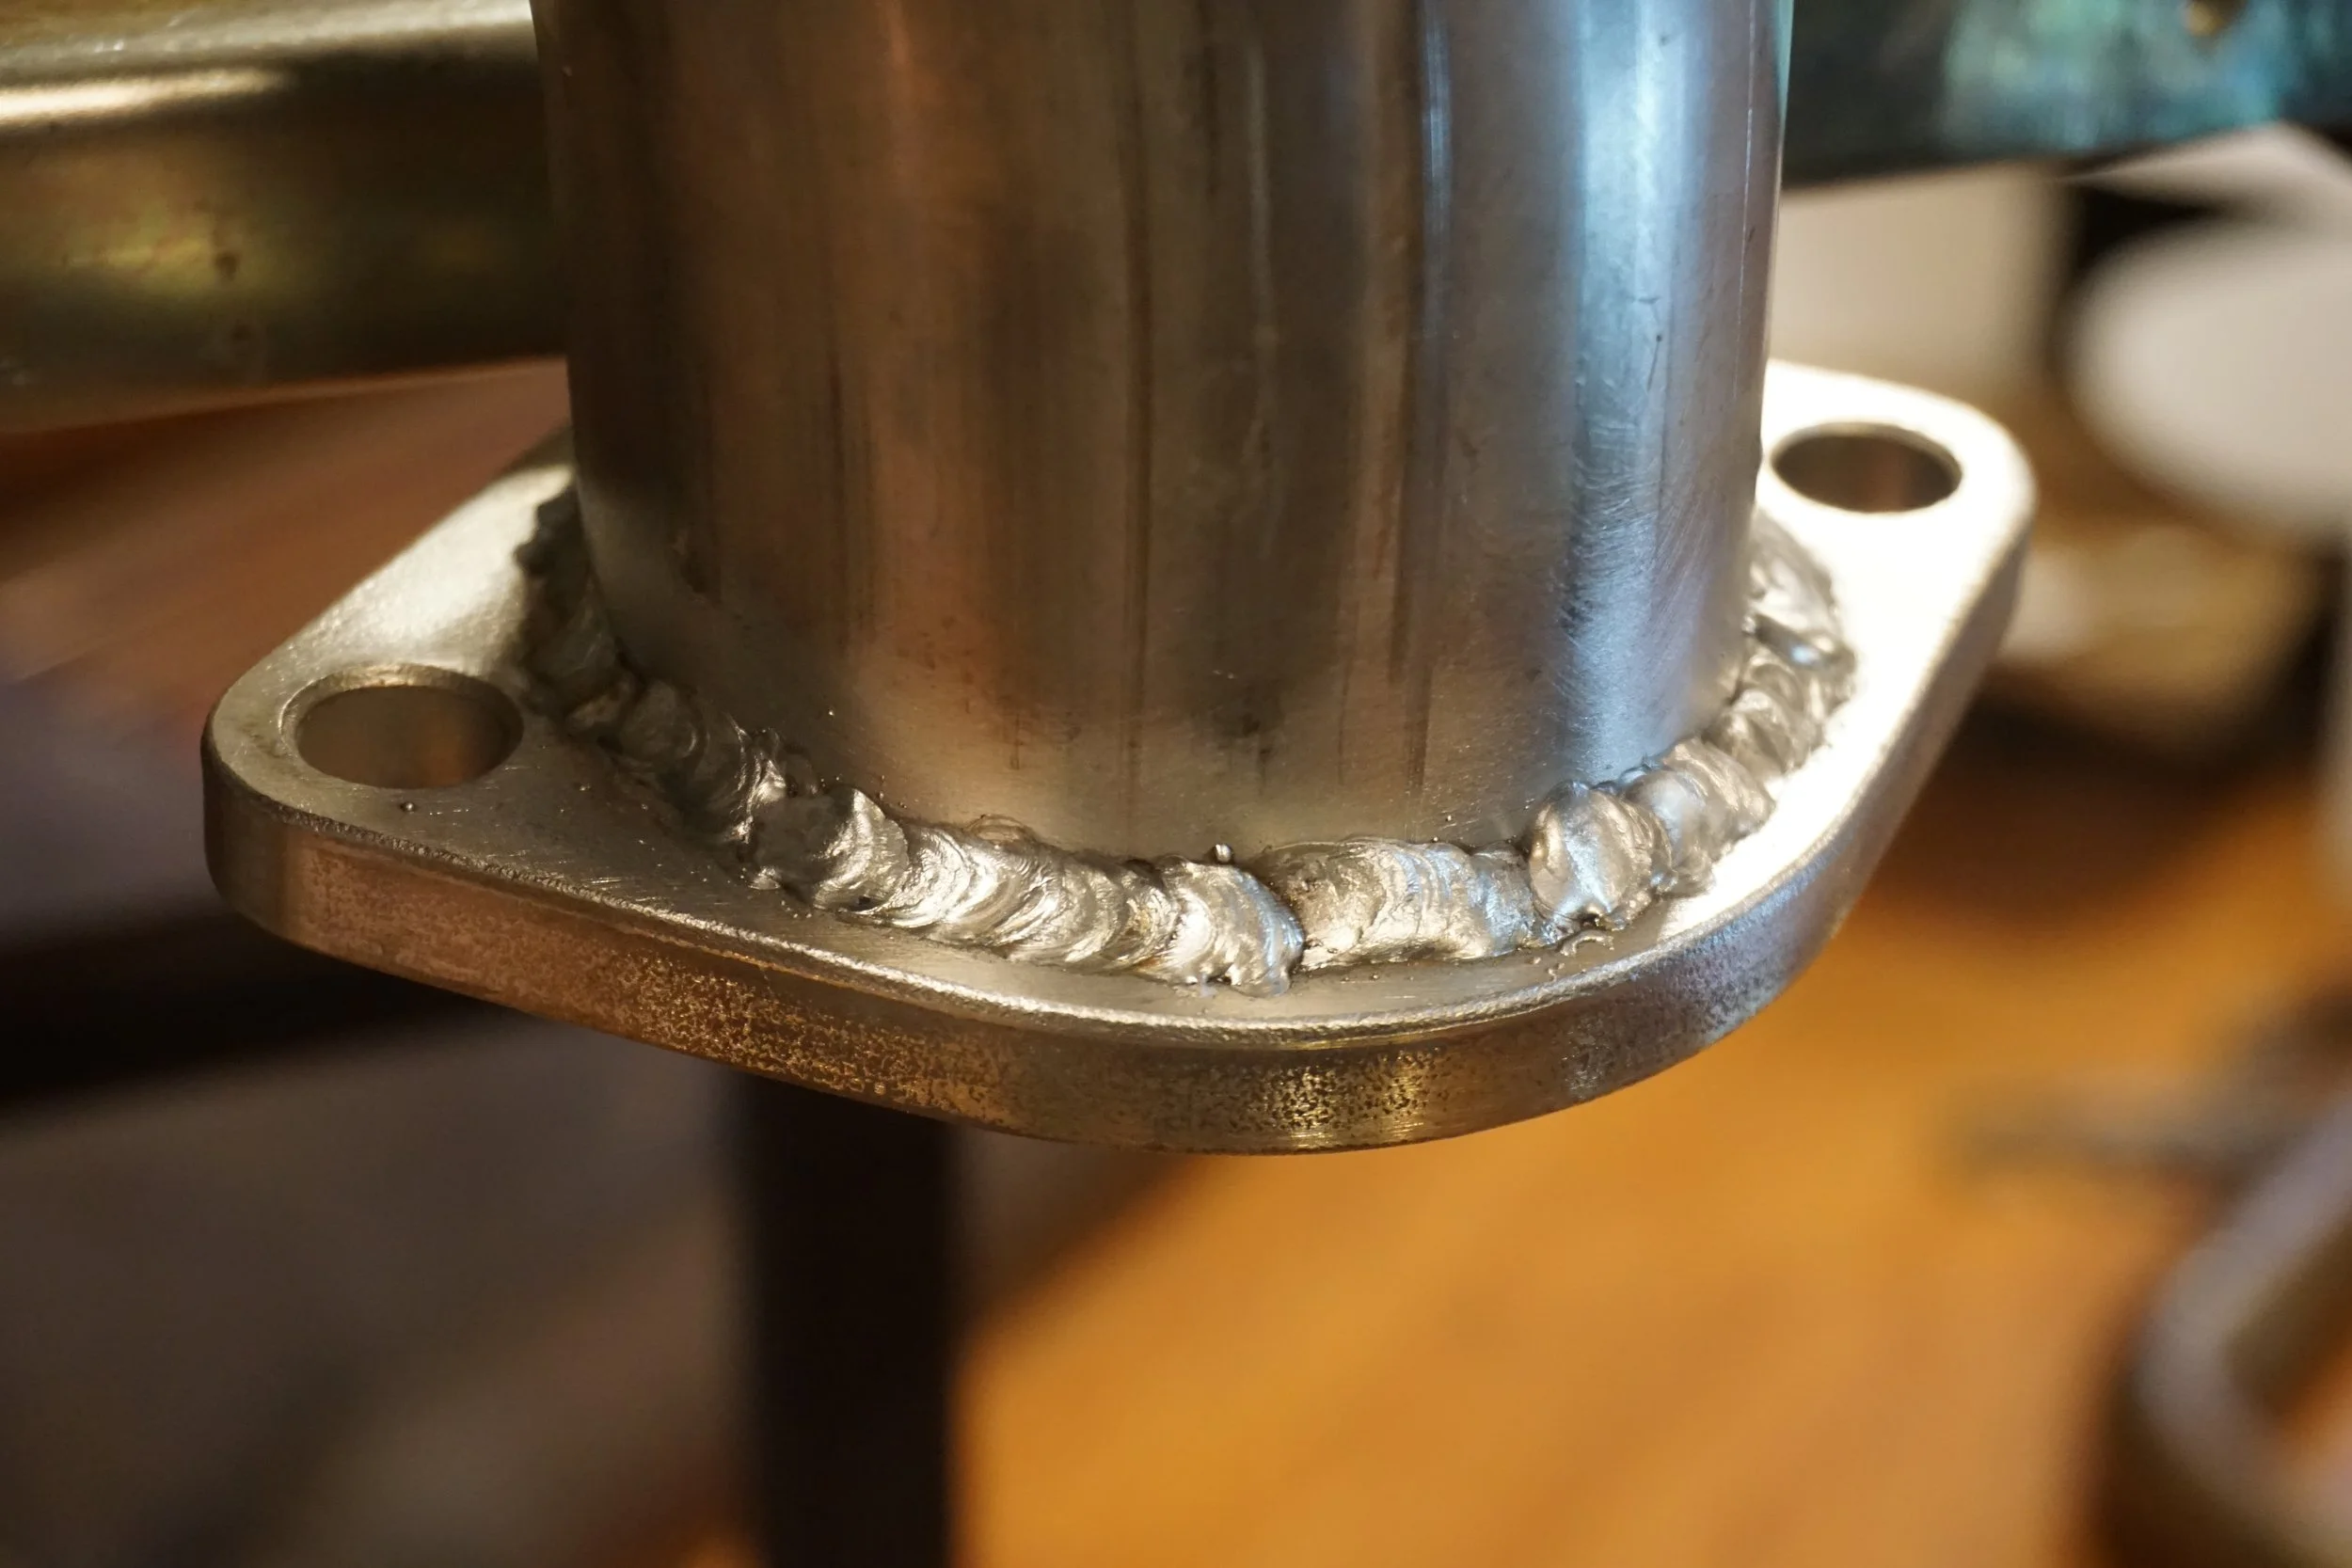
The center section is done. Part of what I want to accomplish in this job is getting rid of some flange joints where leaks like to happen. My current Cattman y-pipe/header merge is a 2 piece design, and my current center section is two piece as well (cat, and then resonator). The center section is now a single piece, and the y-pipe will be too when I'm done making it a 3" piece. Keep in mind that I have stage 2 subframe connectors on my car, so making these giant things fit was quite the chore. The other obvious goals were to get some more power while also making what I'm hoping will be the quietest 3" exhaust ever installed on a Maxima.
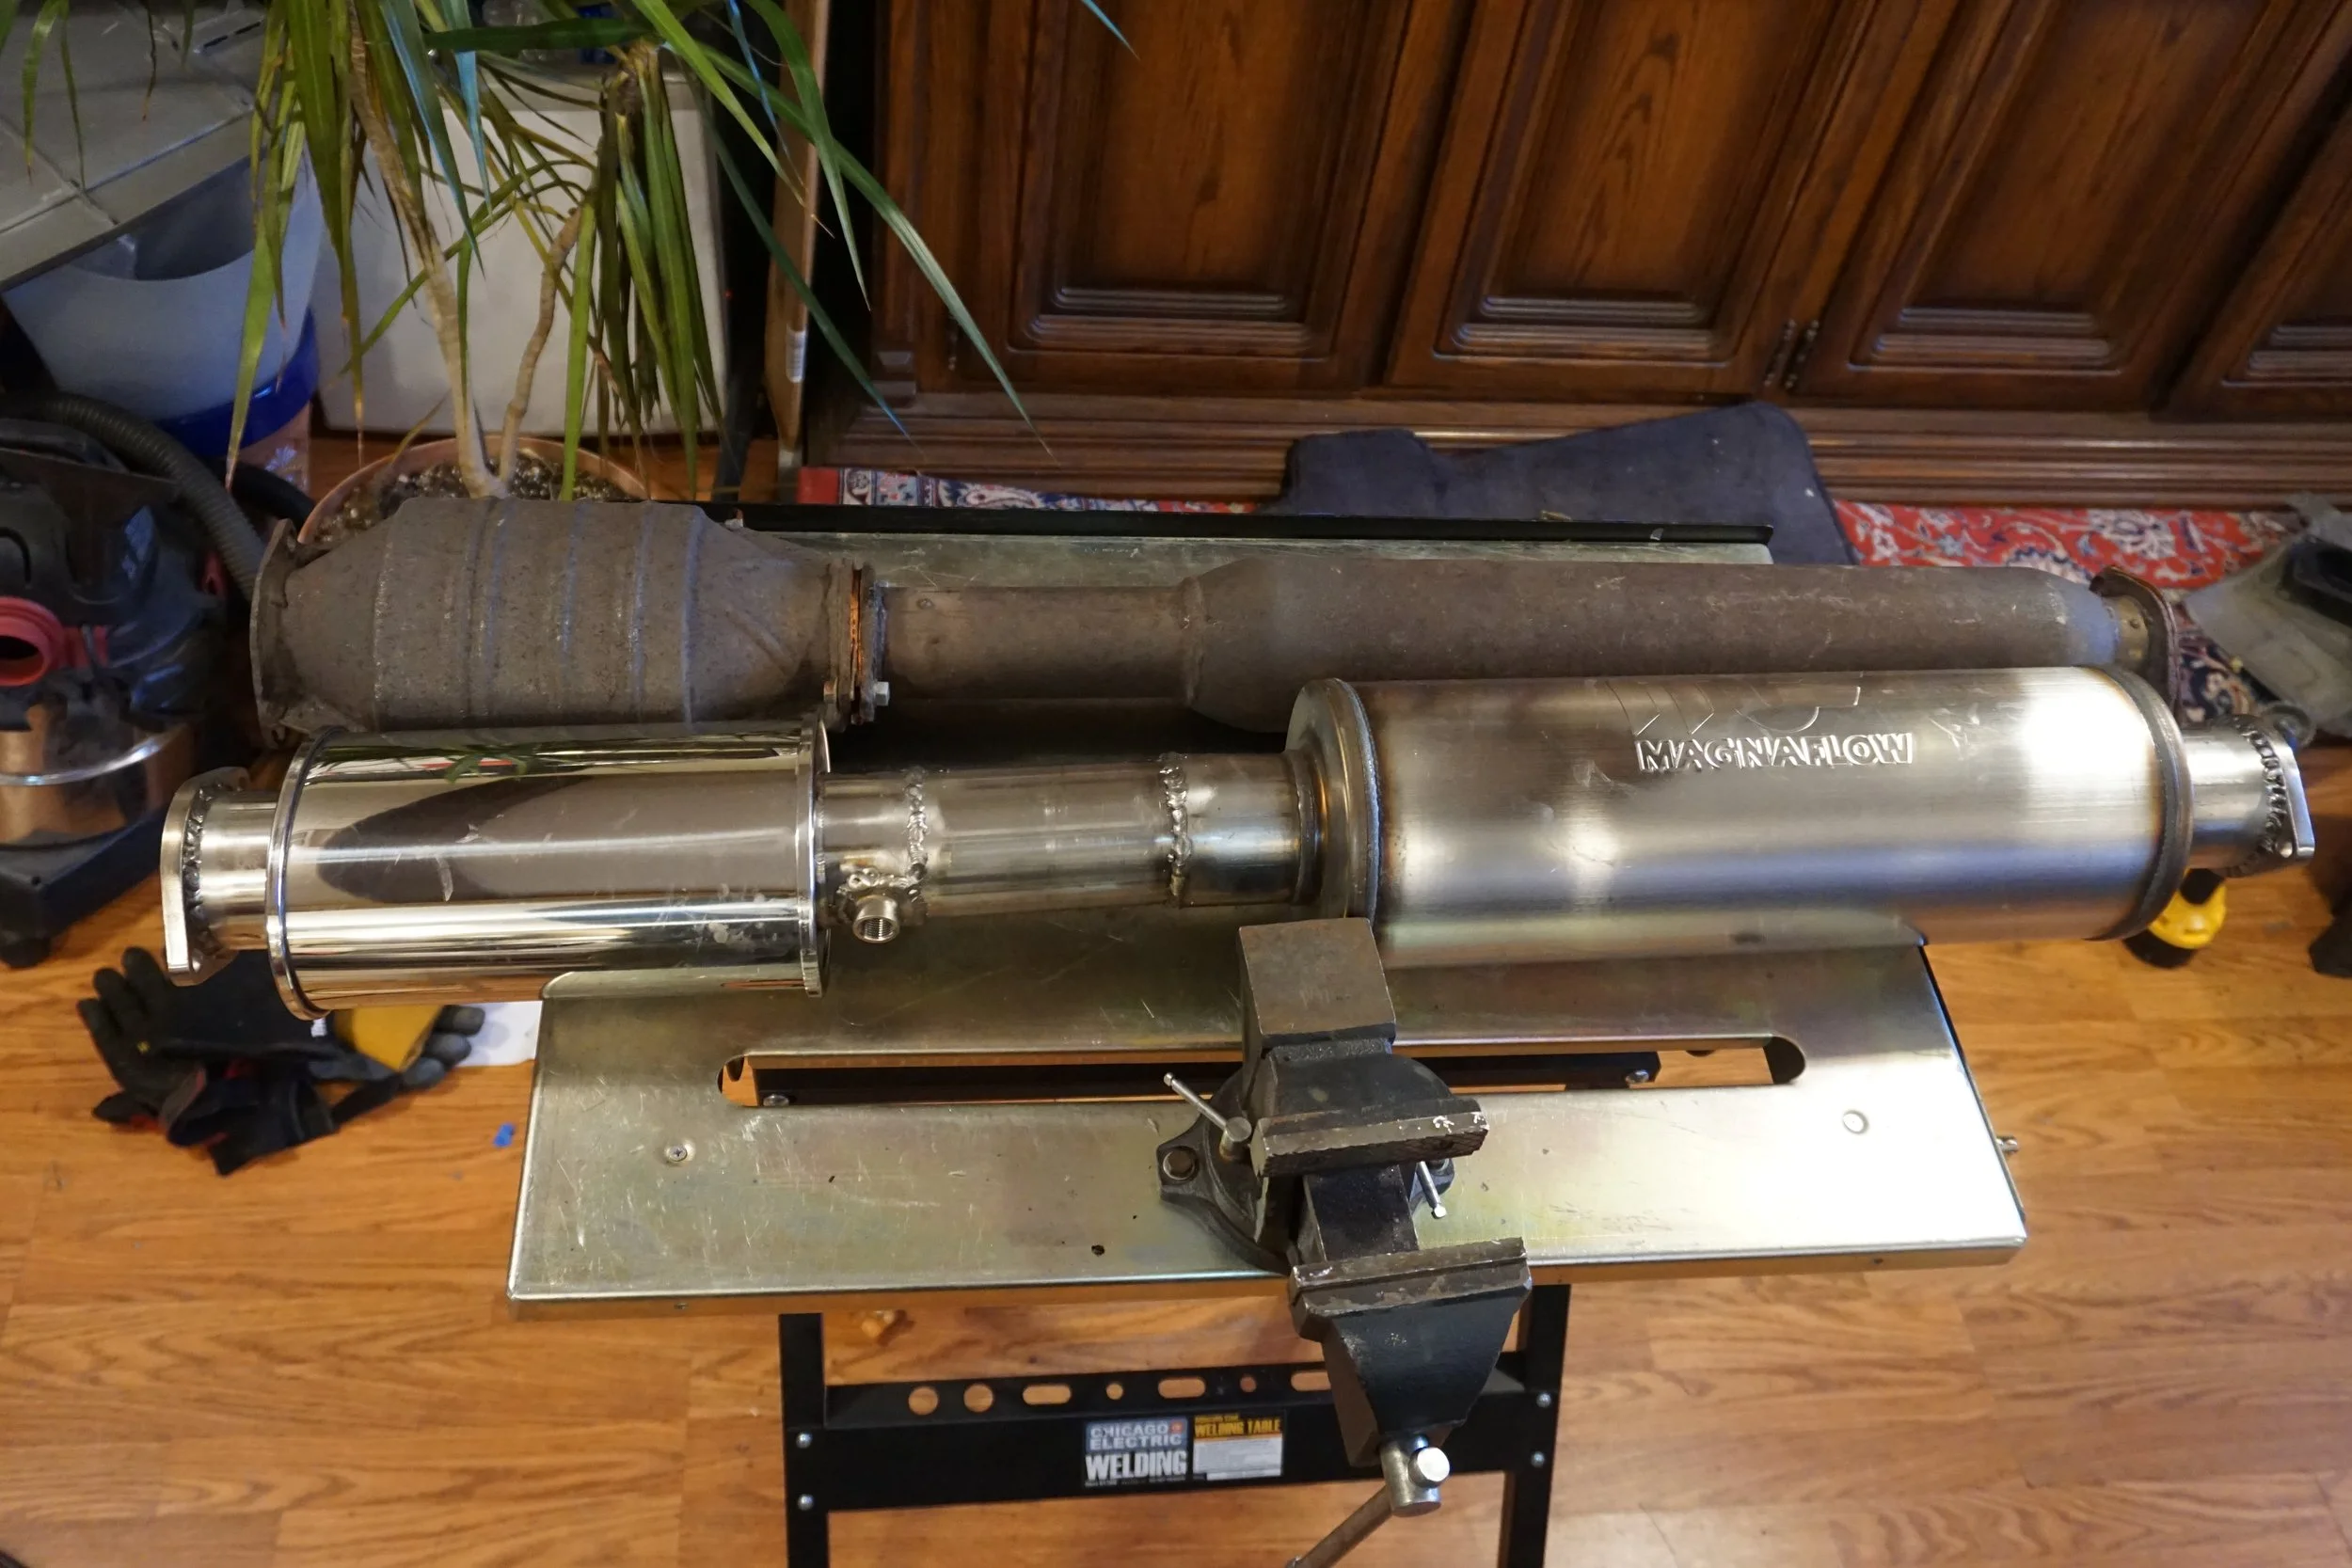
Oh, and I'm trying to make all the new stuff backwards compatible with my current setup. In retrospect that probably wasn't the best idea, but it's too late to turn back now.
My welds are.....acceptable.
I think that's all for now. Let me know if you have any thoughts or suggestions on anything!
Oh, and I'm trying to make all the new stuff backwards compatible with my current setup. In retrospect that probably wasn't the best idea, but it's too late to turn back now.
My welds are.....acceptable.
I think that's all for now. Let me know if you have any thoughts or suggestions on anything!
Last edited by 95maxrider; Feb 12, 2022 at 11:37 AM.

The muffler is the Magnaflow 12579, it's enormous. And it's also got an internal Y design, so that should make it even quieter. It will be a small miracle if I can get it to mate up to the B pipe.
Nice work all around and awesome find on that site. I think the black or chrome would work either way on the window trim.
For the exhaust, you may be accounting for this somehow but if not, I would suggest keeping one side of the 2 bolt flanges not welded and tack it in place on-car. It's crazy how far off a slight twist can be otherwise.
For the exhaust, you may be accounting for this somehow but if not, I would suggest keeping one side of the 2 bolt flanges not welded and tack it in place on-car. It's crazy how far off a slight twist can be otherwise.