
My Massive I30 Revival and Build Thread


At this point one of the biggest complaints I have about the I30 is the steering. Even though I've had a 97-99 SE rack in the car for a long time (and it did help things a little bit), it's still way too slow. A looooong time ago I bought a rack out of a B15 SE-R Spec V, since at the time I thought it had a much quicker ratio, but I now can't remember why I thought that or where I got the info from. It has been sitting around ever since, waiting for me to do something about it. With the impending 6 speed swap, I figured that would be a good time to swap racks since that would give me more room to work. I've replaced a rack before, but I've never attempted a swap, so I could use some help in thinking about all the ways that it could go wrong, and what I could do to actually make it work.
My concerns:
-Bolting it up to the firewall (just need to measure spacing between bolt holes?)
-PS hard lines to the rack (may need to have new lines bent up?)
What other things could go wrong or need customization?
My concerns:
-Bolting it up to the firewall (just need to measure spacing between bolt holes?)
-PS hard lines to the rack (may need to have new lines bent up?)
What other things could go wrong or need customization?

I've bent the hard lines to fit when I needed to in a pinch. But I know places will remake a hard line if you need something changed or a new high pressure line for your forming if you need it.
What about tie rods, inner and outer? If its like my car, we can just swap the inner and outers to what ever and the rack is the same between all the models.
What about tie rods, inner and outer? If its like my car, we can just swap the inner and outers to what ever and the rack is the same between all the models.

Nissan threads are generally the same across the board.
EG, 240SX guys use 6th gen rods for cheap drift steering angle kits because they're longer, don't ask me how that stuff works I just saw a thread on zsilvia where a guy measured out tie rods for his drift build and 6th gen maximas are what he ended up using on his 240.
EG, 240SX guys use 6th gen rods for cheap drift steering angle kits because they're longer, don't ask me how that stuff works I just saw a thread on zsilvia where a guy measured out tie rods for his drift build and 6th gen maximas are what he ended up using on his 240.
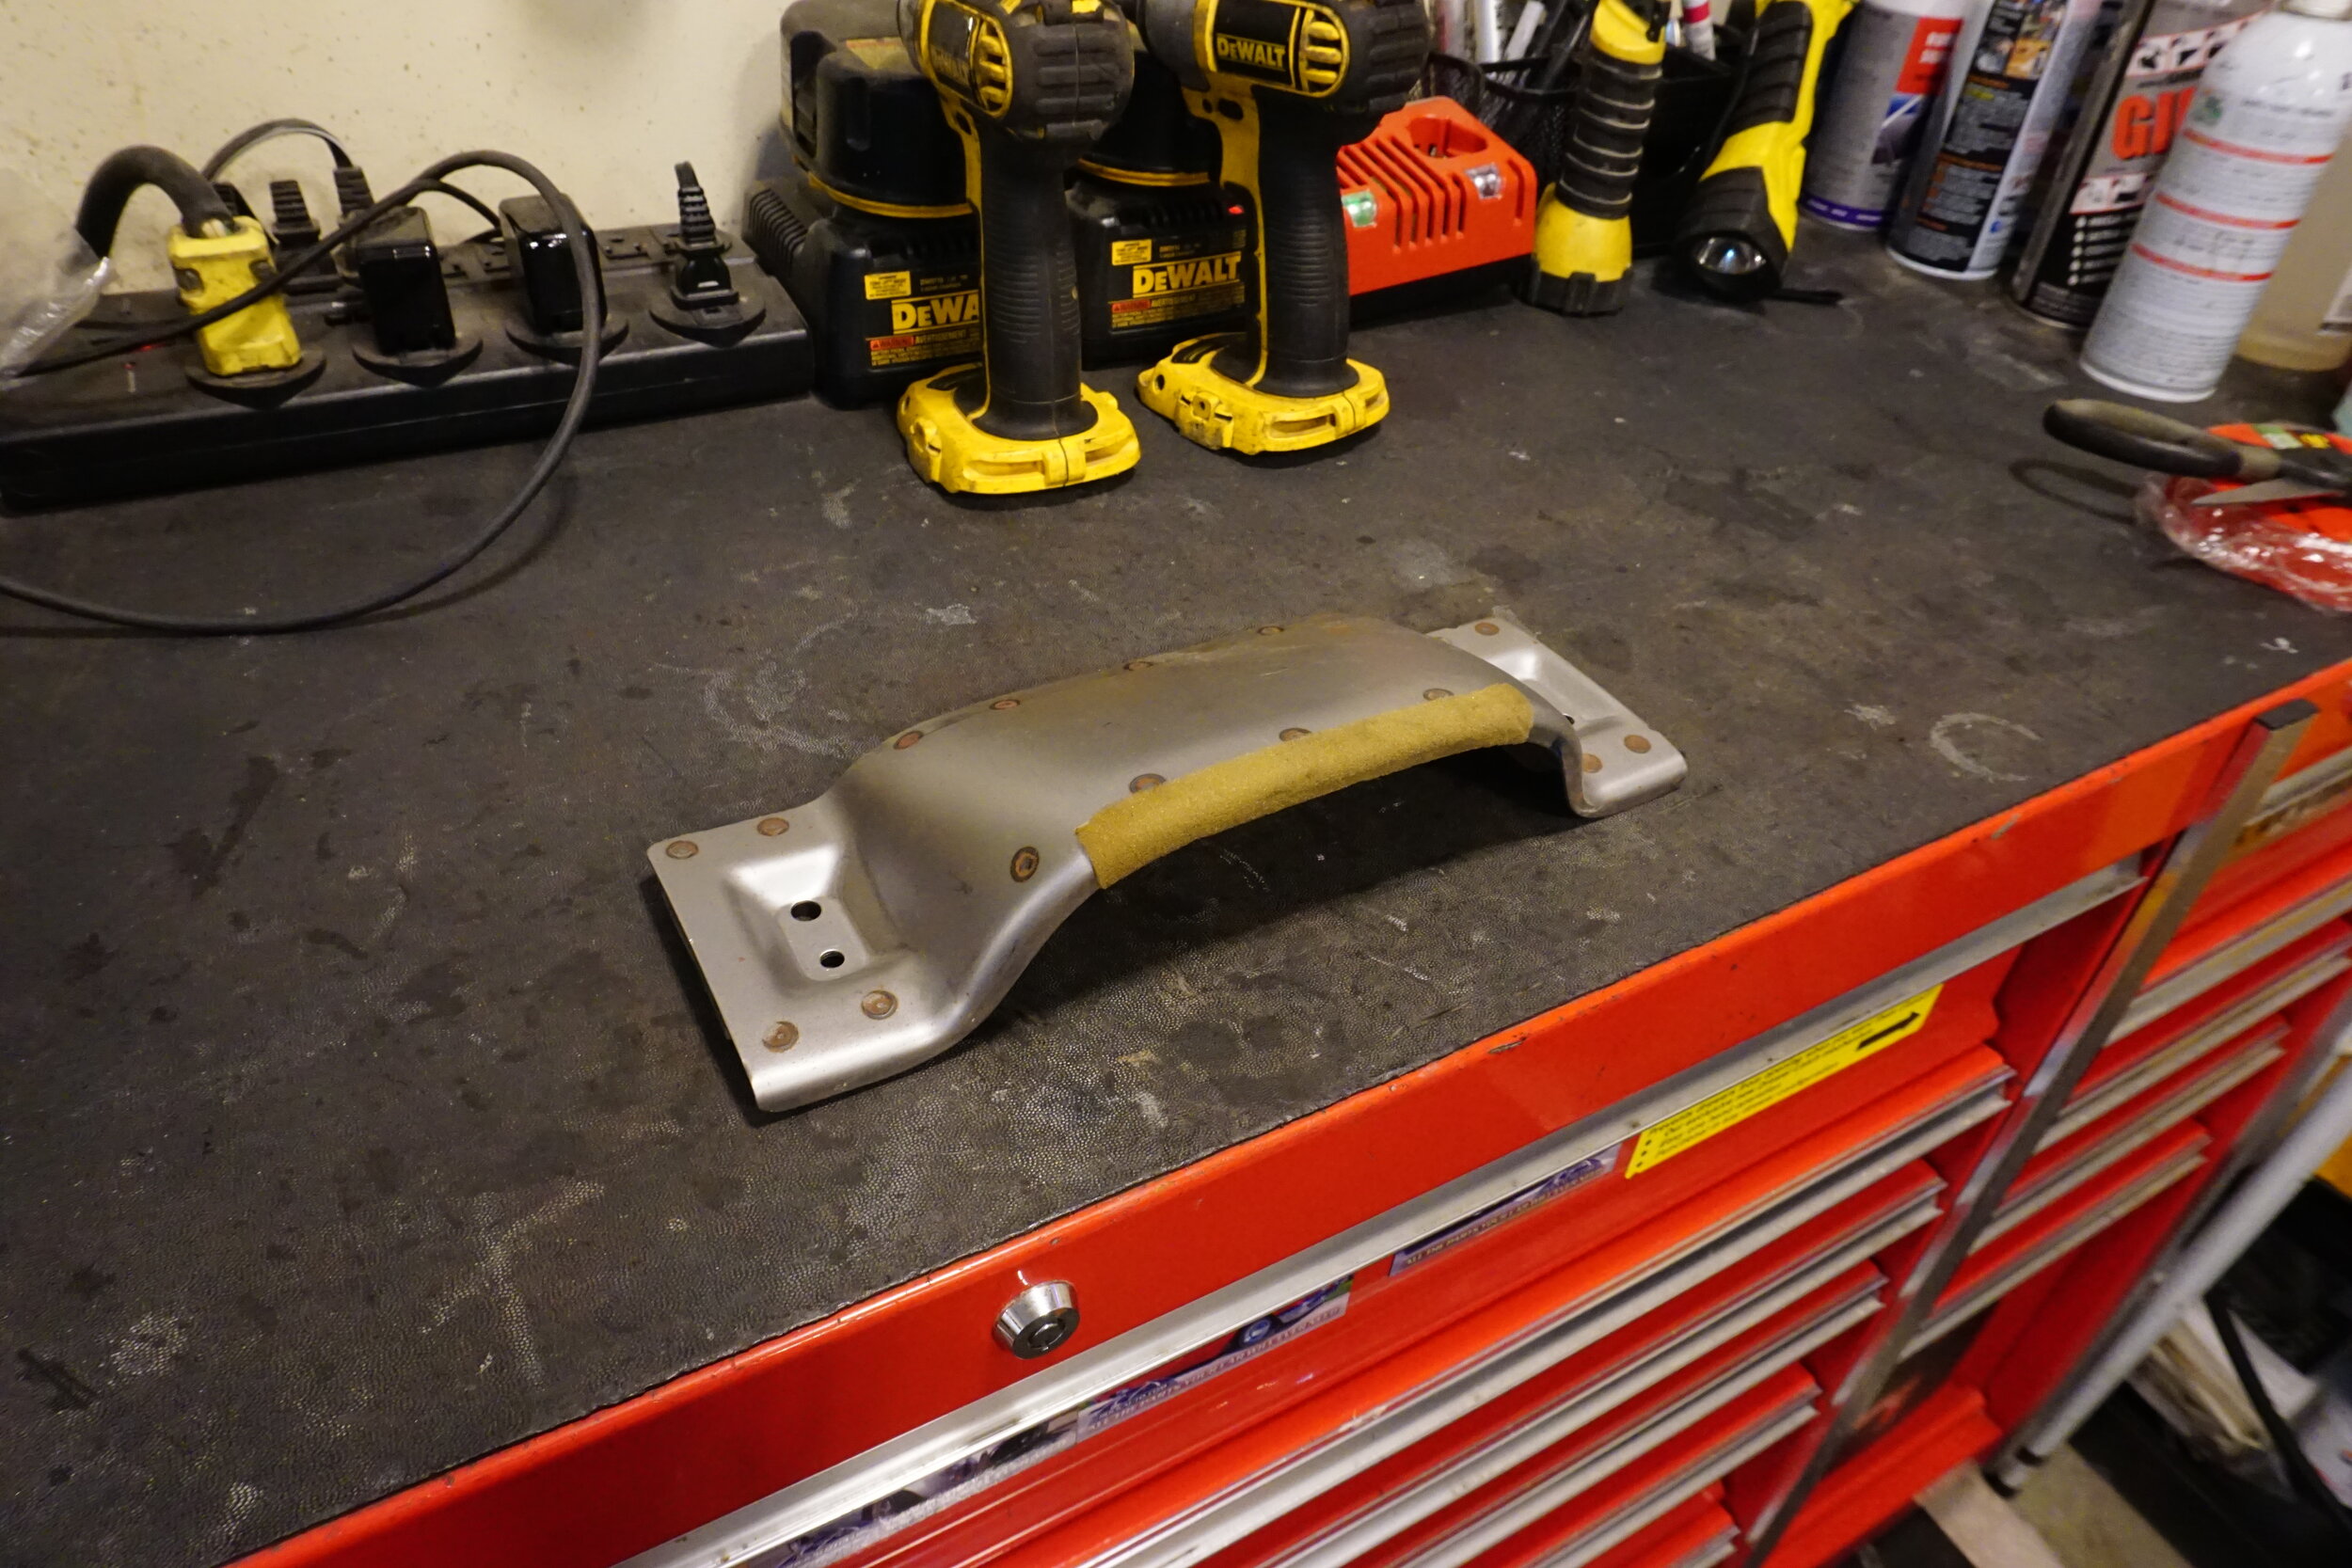
While working on the wife's FX35 a while back I was doing a lot of stuff around and in front of the rear wheels under the vehicle. This put me precariously close to the corners of my lift, which I inevitably bumped into multiple times with my head. One time I hit a corner so hard with the top of my head that I heard a nice crack (was it my skull? My neck?) and did some good bleeding. I vowed I would fix those damn edges before I got started on either of my two future projects that will put me in that area again, and this weekend I finally got around to doing them. Here's what those bastards looked like, there are eight in total:


I started with a cutoff wheel, then a grinding disc, and finished up with a flap wheel. Now when I hit them it will simply hurt instead of causing potential brain damage.


Hooray
I started with a cutoff wheel, then a grinding disc, and finished up with a flap wheel. Now when I hit them it will simply hurt instead of causing potential brain damage.
Hooray

I wanted to re-seat my two front upper subframe delrin spacers as they weren't fully seated (needed to be hammered in a bit):

But when I got in there I noticed that two spacers in the front had started for form some cracks (after 10+ years of use):

So now I think I'm just going to replace all of them with the ones CS-AR uses as there's no point in trying to fix something that's halfway broken. But when I went to test the removal of the nuts for the front studs, I couldn't get any tools in there. The access hole in the Moog control arms didn't line up:

And the control arms are too close to the stud to get any sockets in there:

I'm guessing that's due to the coilovers not having as much droop travel as stock style struts. It looks like the easiest way to get access would be to pop the ball joint off the knuckle to allow the control arm to droop down further. What do you think?
And in case anyone else was wondering, here's what the FSM says about torque specs. 107 ft-lbs for the front and rear nuts, and 33 ft-lbs for the two bolts for the SE triangular braces.

Speaking of the triangular braces, one of the bolts was apparently seized to the captive nut inside the body, which broke loose from the body when I went to remove the bolt, so now I have one bolt that I can't remove. I could cut it, but I would still have the captive nut and remainder of the bolt rattling around in that cavity. Is there any way I get break the bolt loose from the nut without having the cut the body open and weld it back together? There a little hole by it, but it's too small to get any tools into.

But when I got in there I noticed that two spacers in the front had started for form some cracks (after 10+ years of use):
So now I think I'm just going to replace all of them with the ones CS-AR uses as there's no point in trying to fix something that's halfway broken. But when I went to test the removal of the nuts for the front studs, I couldn't get any tools in there. The access hole in the Moog control arms didn't line up:
And the control arms are too close to the stud to get any sockets in there:
I'm guessing that's due to the coilovers not having as much droop travel as stock style struts. It looks like the easiest way to get access would be to pop the ball joint off the knuckle to allow the control arm to droop down further. What do you think?
And in case anyone else was wondering, here's what the FSM says about torque specs. 107 ft-lbs for the front and rear nuts, and 33 ft-lbs for the two bolts for the SE triangular braces.
Speaking of the triangular braces, one of the bolts was apparently seized to the captive nut inside the body, which broke loose from the body when I went to remove the bolt, so now I have one bolt that I can't remove. I could cut it, but I would still have the captive nut and remainder of the bolt rattling around in that cavity. Is there any way I get break the bolt loose from the nut without having the cut the body open and weld it back together? There a little hole by it, but it's too small to get any tools into.

You can try to weld a bolt to the broken piece if there's any space.
If not, you can drill out the captive nut and put a long rivnut through it. I did this for a center support bearing bracket bolt on an awd car a couple years back. No issues so far.
If not, you can drill out the captive nut and put a long rivnut through it. I did this for a center support bearing bracket bolt on an awd car a couple years back. No issues so far.
This thread has been going since 2012, and a lot has happened since then. In an effort to make it easier to find things, I decided to create an index of where everything is. I will also update the first post with this info.
Page 1: March 2012
Projector retrofit
Different grille options
Enkei RPF1s and Hoosier tires
ARP wheel studs
LTB removal effects
Painting interior trim
Interior LED retrofit
First Wilwood front BBK
NWP IM spacers
First Mishimoto radiator
Recaro Speed seat
Fender braces
Page 2: March 2012 - June 2012
Paint and body work
Sound deadening
Cattman headers
Alcantara shift boots
Quaife transmission
Energy Suspension poly bushings and delrin LCA bushings
G35 sedan muffler
Transmission problems
Page 3: June 2012 - August 2012
Oil and power steering coolers
Fuel injectors
Second Wilwood front BBK
Corner balancing
Quaife transmission died
Fastbrakes rear BBK
VLSD transmission, new clutch and flywheel
Poly side/trans mounts
Page 4: August 2012 - December 2012
Power steering lines
Murano washer nozzles
Photo shoot
Rubber hood stops
New 2 channel amp
Getting the horn to work
Alcantara door inserts
Page 5: December 2012 - May 2013
Delrin LCA bushings
Sway bar end links
Fixing Fastbrakes rear BBK
Alignment with redrilled strut towers for caster alignment
Page 6: May 2013 - November 2014
Rebuilding the Quaife transmission
New subwoofer box
Auto-x pics
New front pads and rotors
3.5 swap trouble
Knock sensor install
Radiator hose
300zx fuel filter
The "Speedbump incident" and resulting fuel leak
Page 7: November 2014 - April 2015
New Mishimoto radiator
New intake manifold elbow
sicivic89 3.5 PFTB adapter
AFPR
New garage door lip (GDL)
Page 8: April 2015 - October 2015
Cracked header repair
Axle carrier bearing/support replacement
Dyno with Nistune
Trans fluid leak
Ball joints
ES poly LCA bushings
New GDL
Detailing and photo shoot
Page 9: October 2015 - April 2017
ABS sensor
Sparco steering wheel
Cattman header repair
POR15
Rear main seal and upper oil pan project
Alternator harness
Thermostat
Radiator hoses
Front valve cover gasket
Crossmember bushings and bolts
Page 10: April 2017 - December 2017
Oil pressure and temperature gauge settings
Alignment
EGR trouble and work
O2 sensor codes
Page 11: December 2017 - March 2018
New/used exhaust
PFTB IACV BOP
EGR cleaning
Horn fixing
Heater core hoses
Cold start problems
Coolant temp sensors
New 300zx fuel filter
Rear calipers
Axles, Moog control arms, and bushings project
Coolant drain plug
Page 12: March 2018 - June 2018
Alignment
Headlight projector re-do
Leaking rear caliper
IACV replacement
Page 13: June 2018 - January 2019
2nd gen 3.5 swap talk
Tracking down interior water leak
Page 14: January 2019 - July 2019
Tracking down interior water leak
Polishing Enkei RPM2 wheels
New e-brake cables
Door lock actuators
Stereo wiring
Cleaning K&N intake filter
New front door plungers
New panhard rod (PHR)
Oil catch can
Page 15: July 2019 - March 2020
Poly PS engine mount
Fixing interior water leak
Pinch weld repair and painting
Detailing and photo shoot
Page 16: March 2020 - April 2020
6 speed swap info and discussion
Squeaks and rattles
6 speed parts
Page 17: April 2020 - August 2020
Squeaks and rattles
6 speed rebuild info
SS clutch line
Trunk liner
Powder coating Enkei RPM2s
Page 18: August 2020 -
Making the lift safer
Subframe spacers/collars
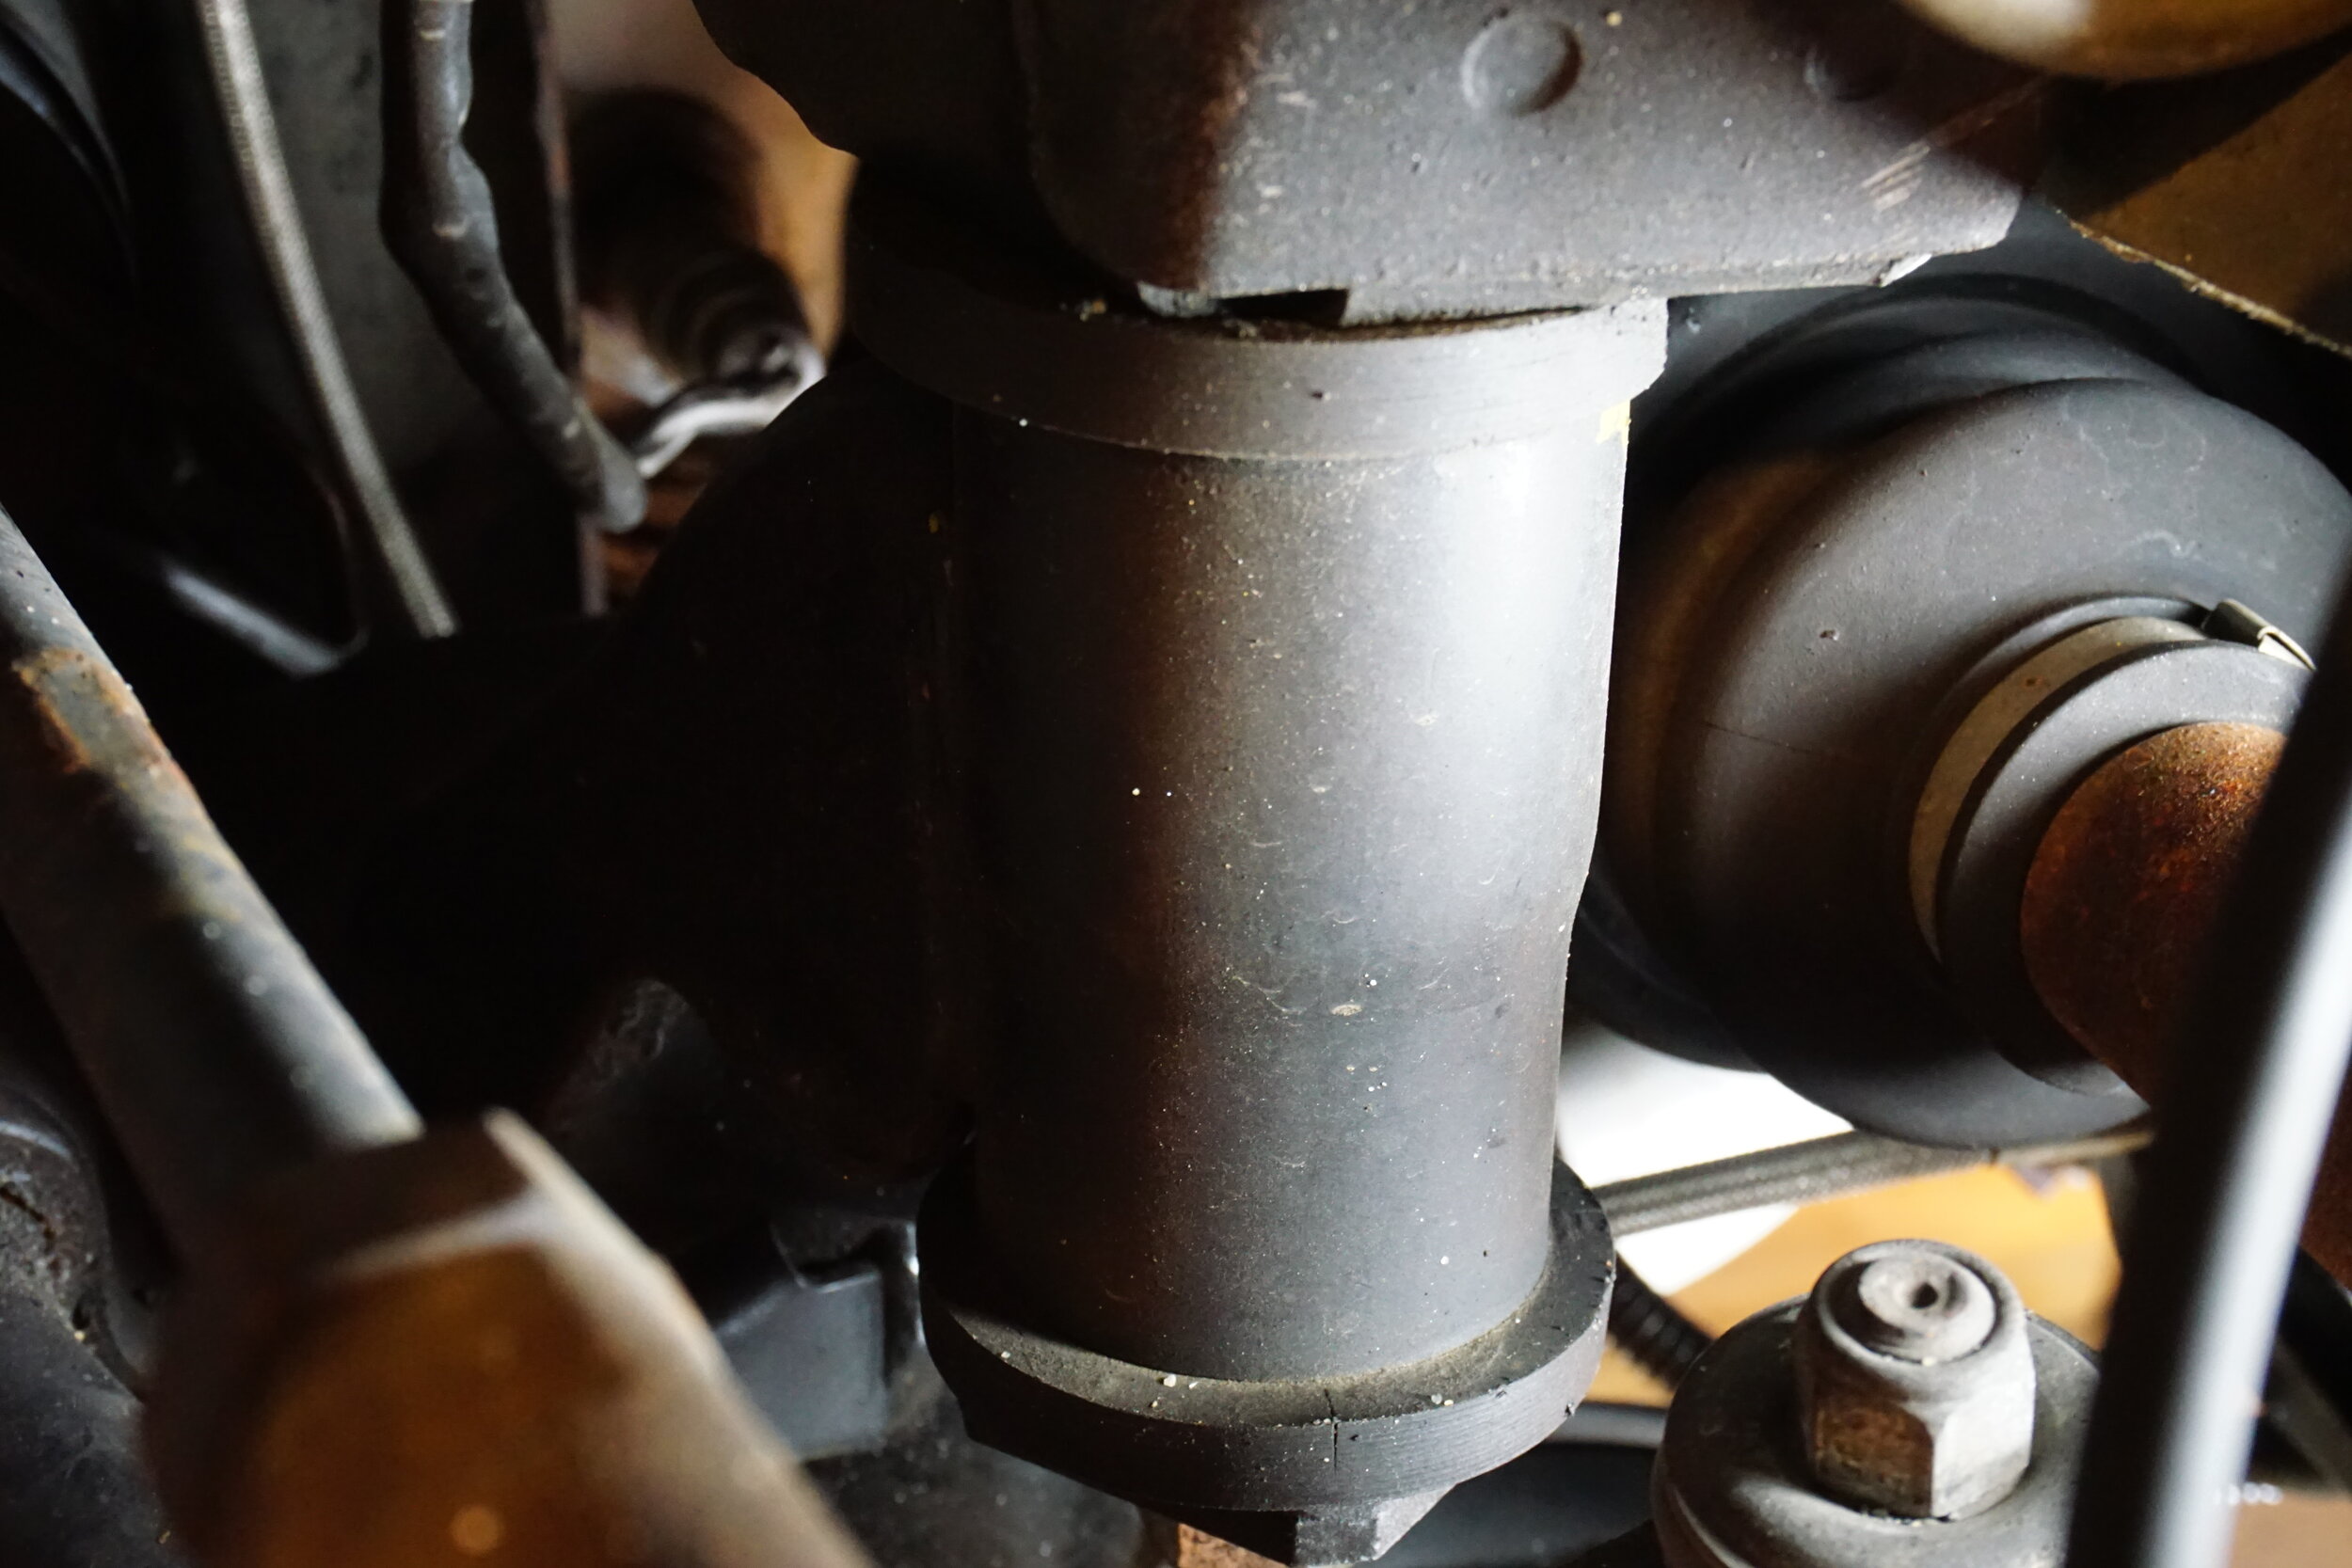
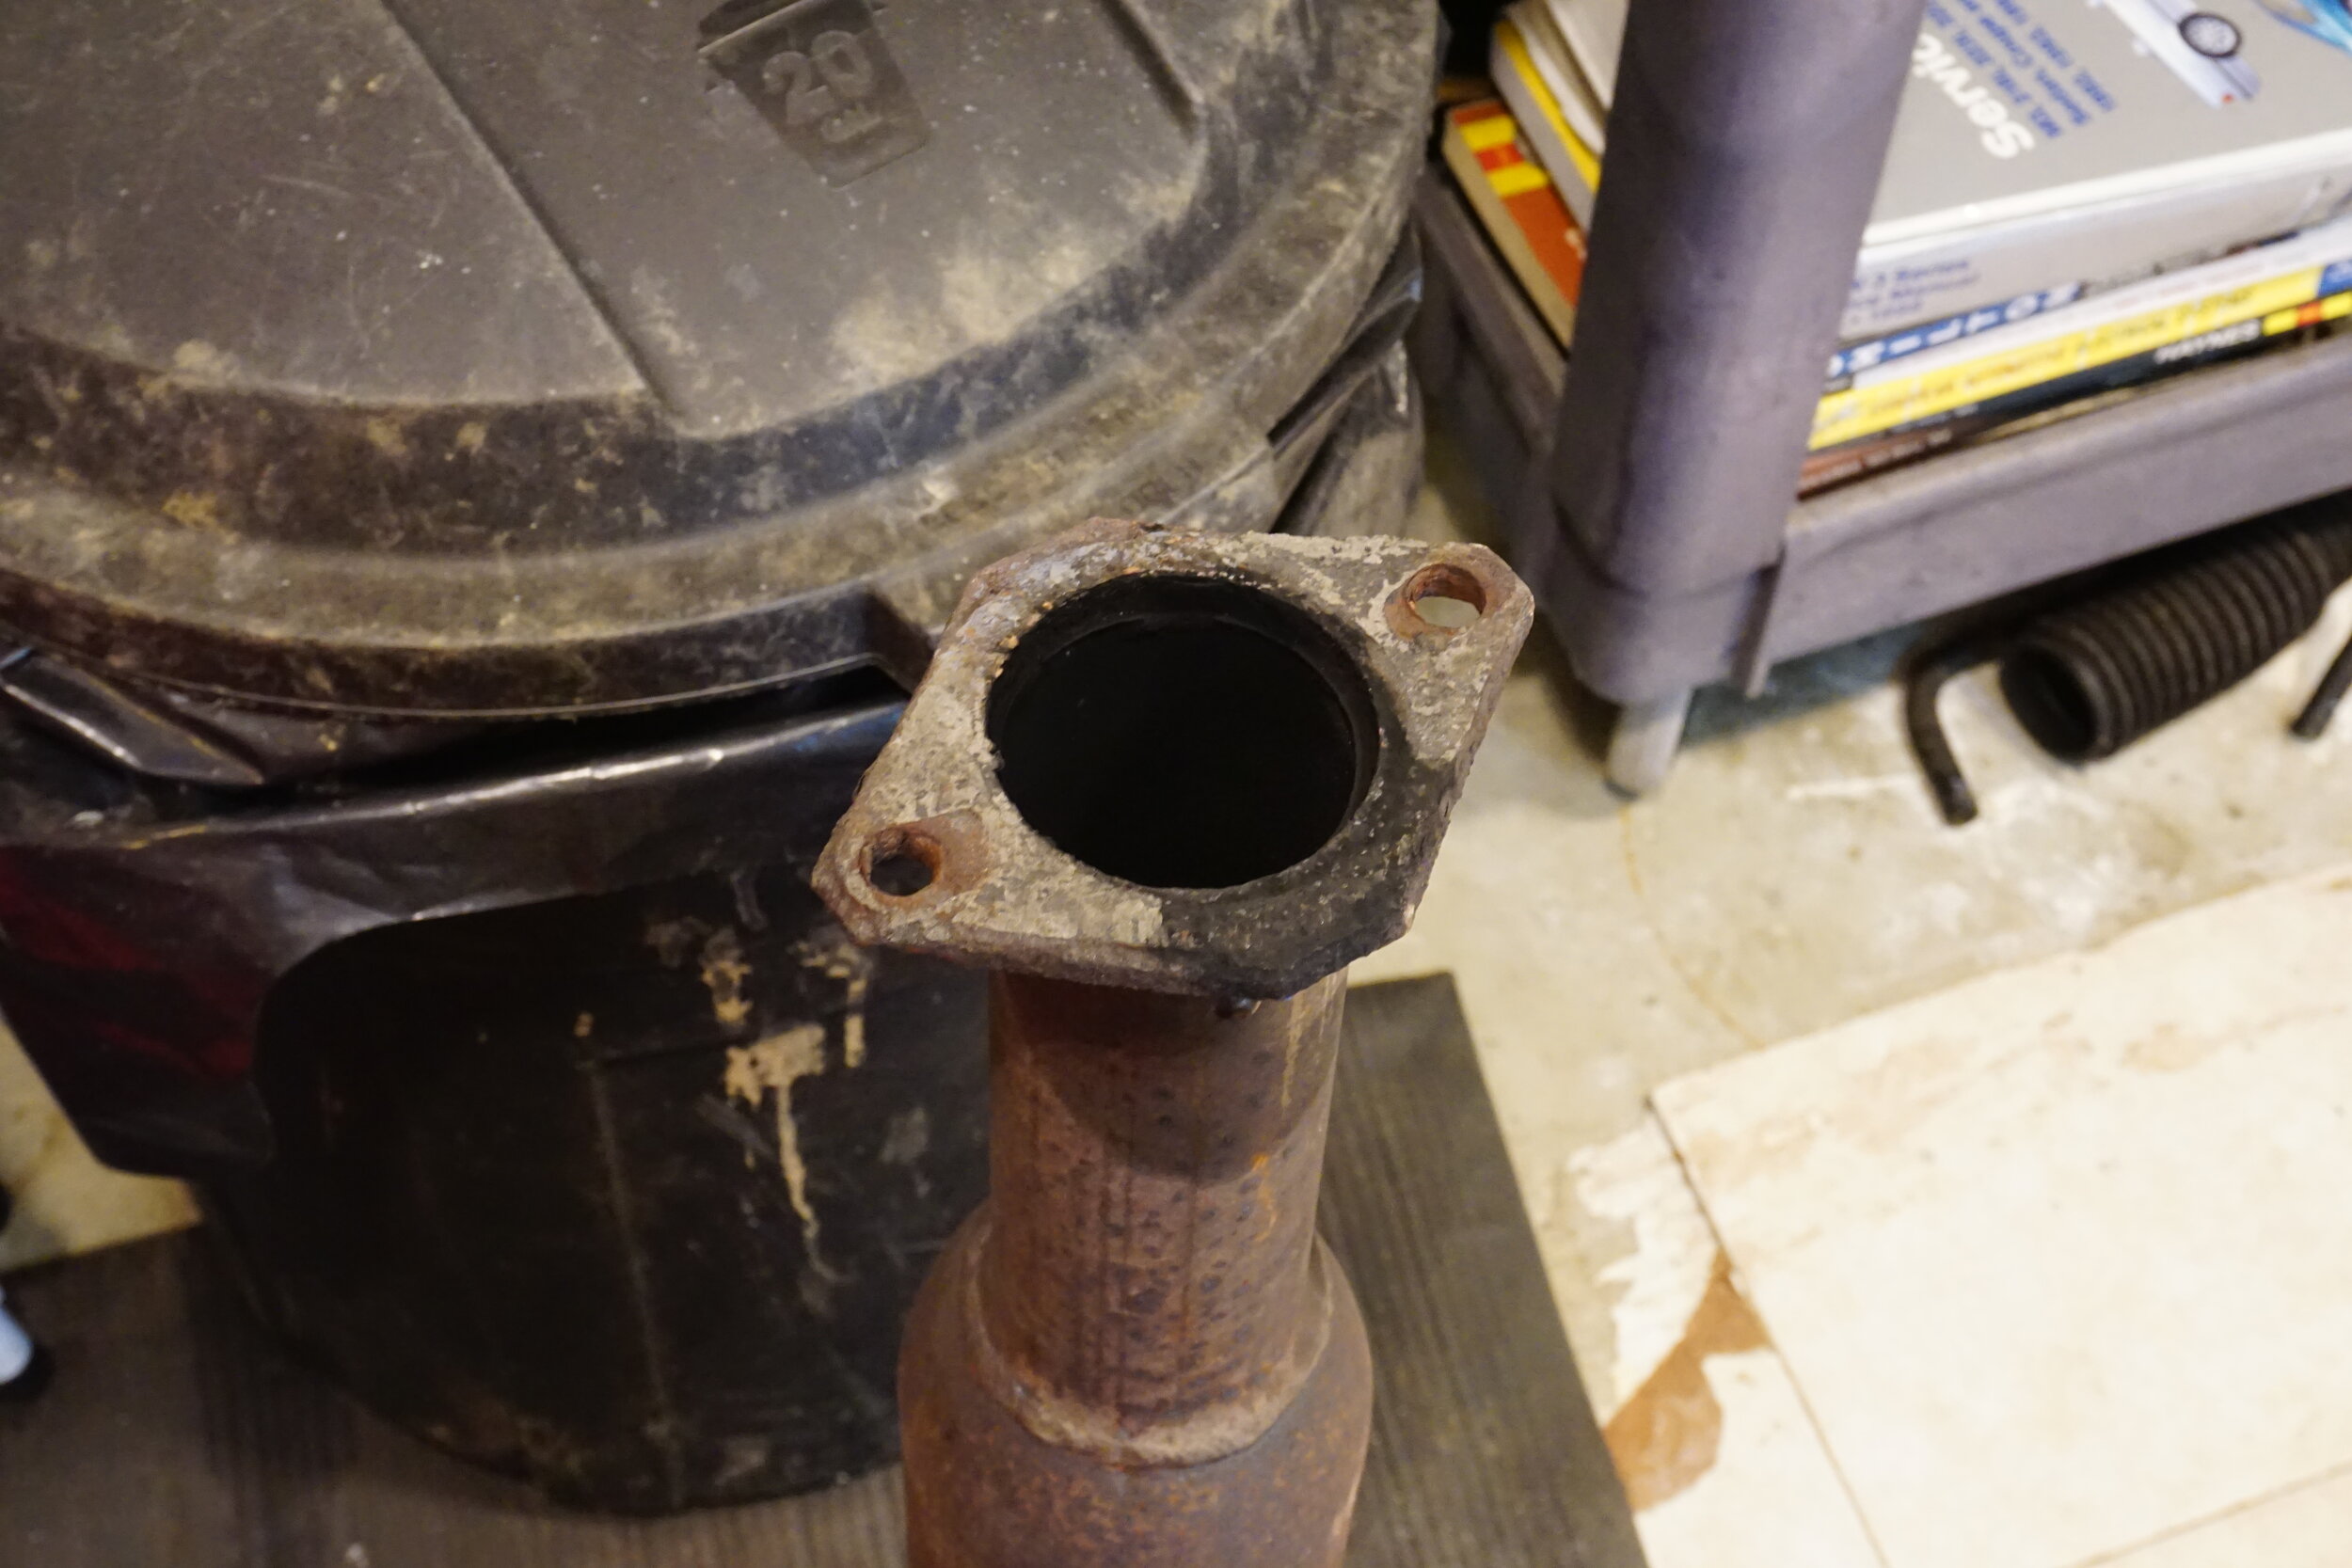
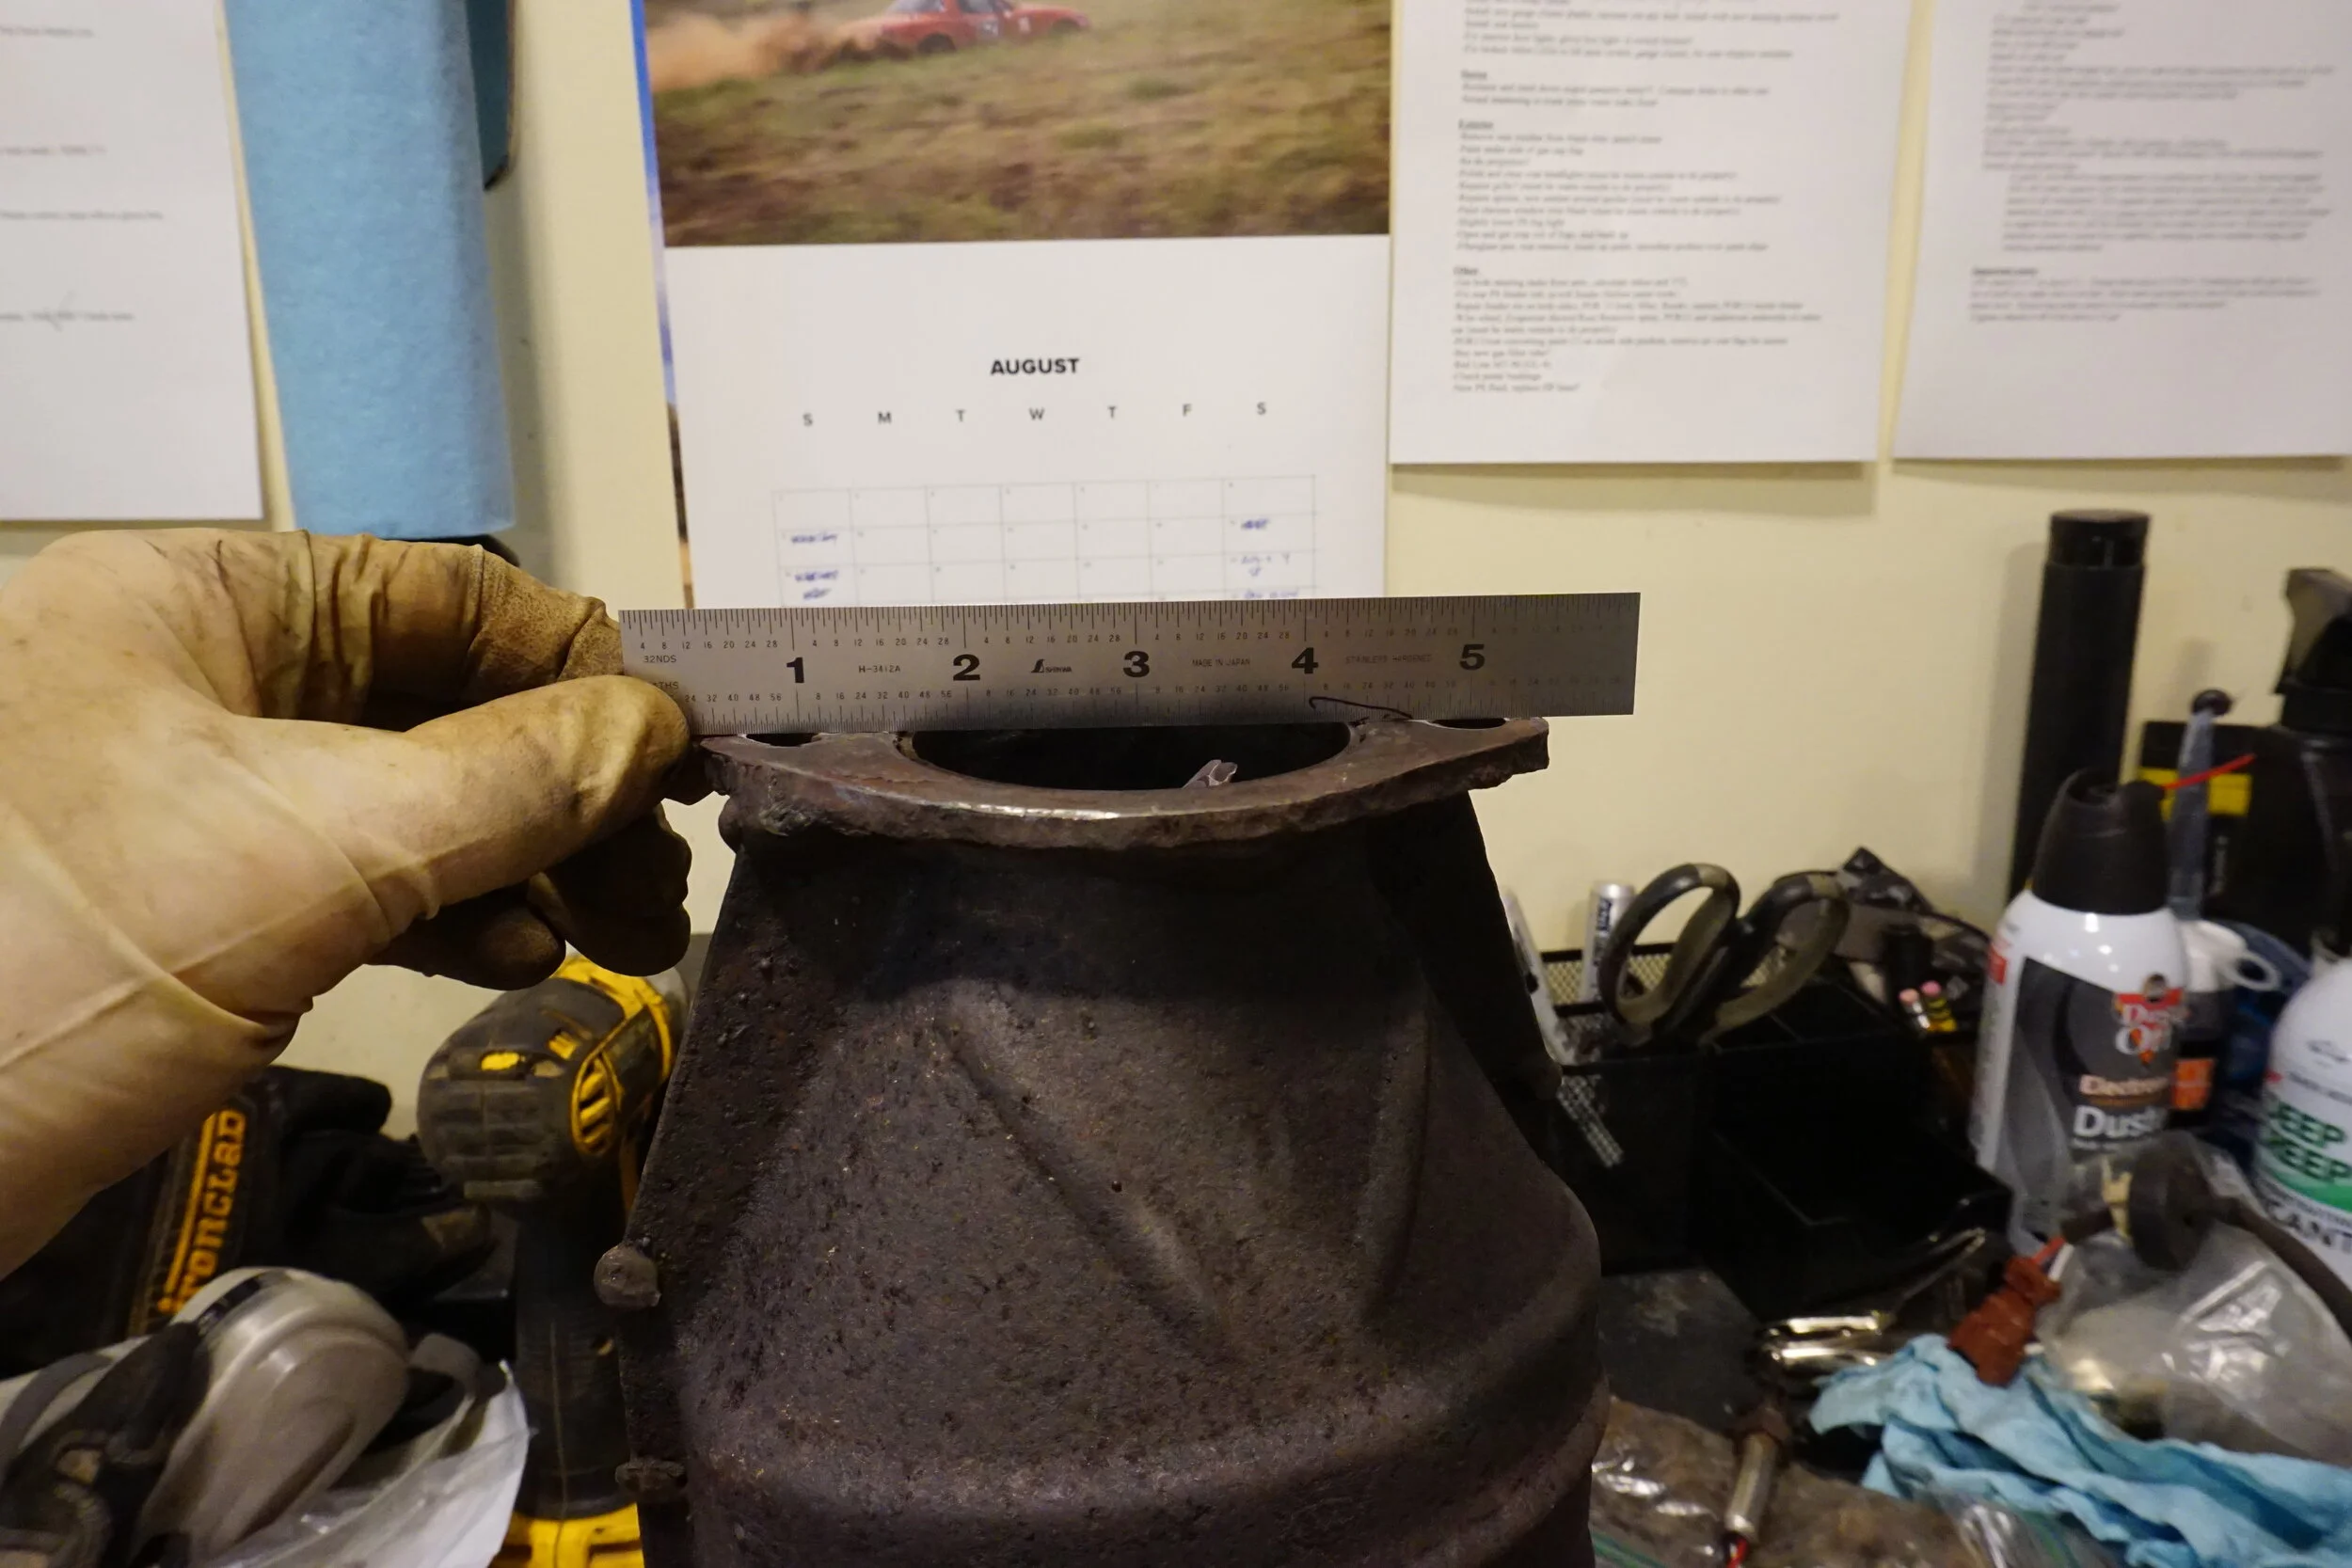
I've had an exhaust leak slowly getting worse for a while now, and I finally had some time to take care of it. The leak was between the back of the cat and the resonator. The flanges for both parts were pretty sad looking, and weren't flat. On the resonator there was a narrow high spot around the center, and then material had rusted away around the edges, so there wasn't much of a surface for the gasket to seal against, so I ground things flatter with a grinding wheel and smoothed them out with a flap wheel.
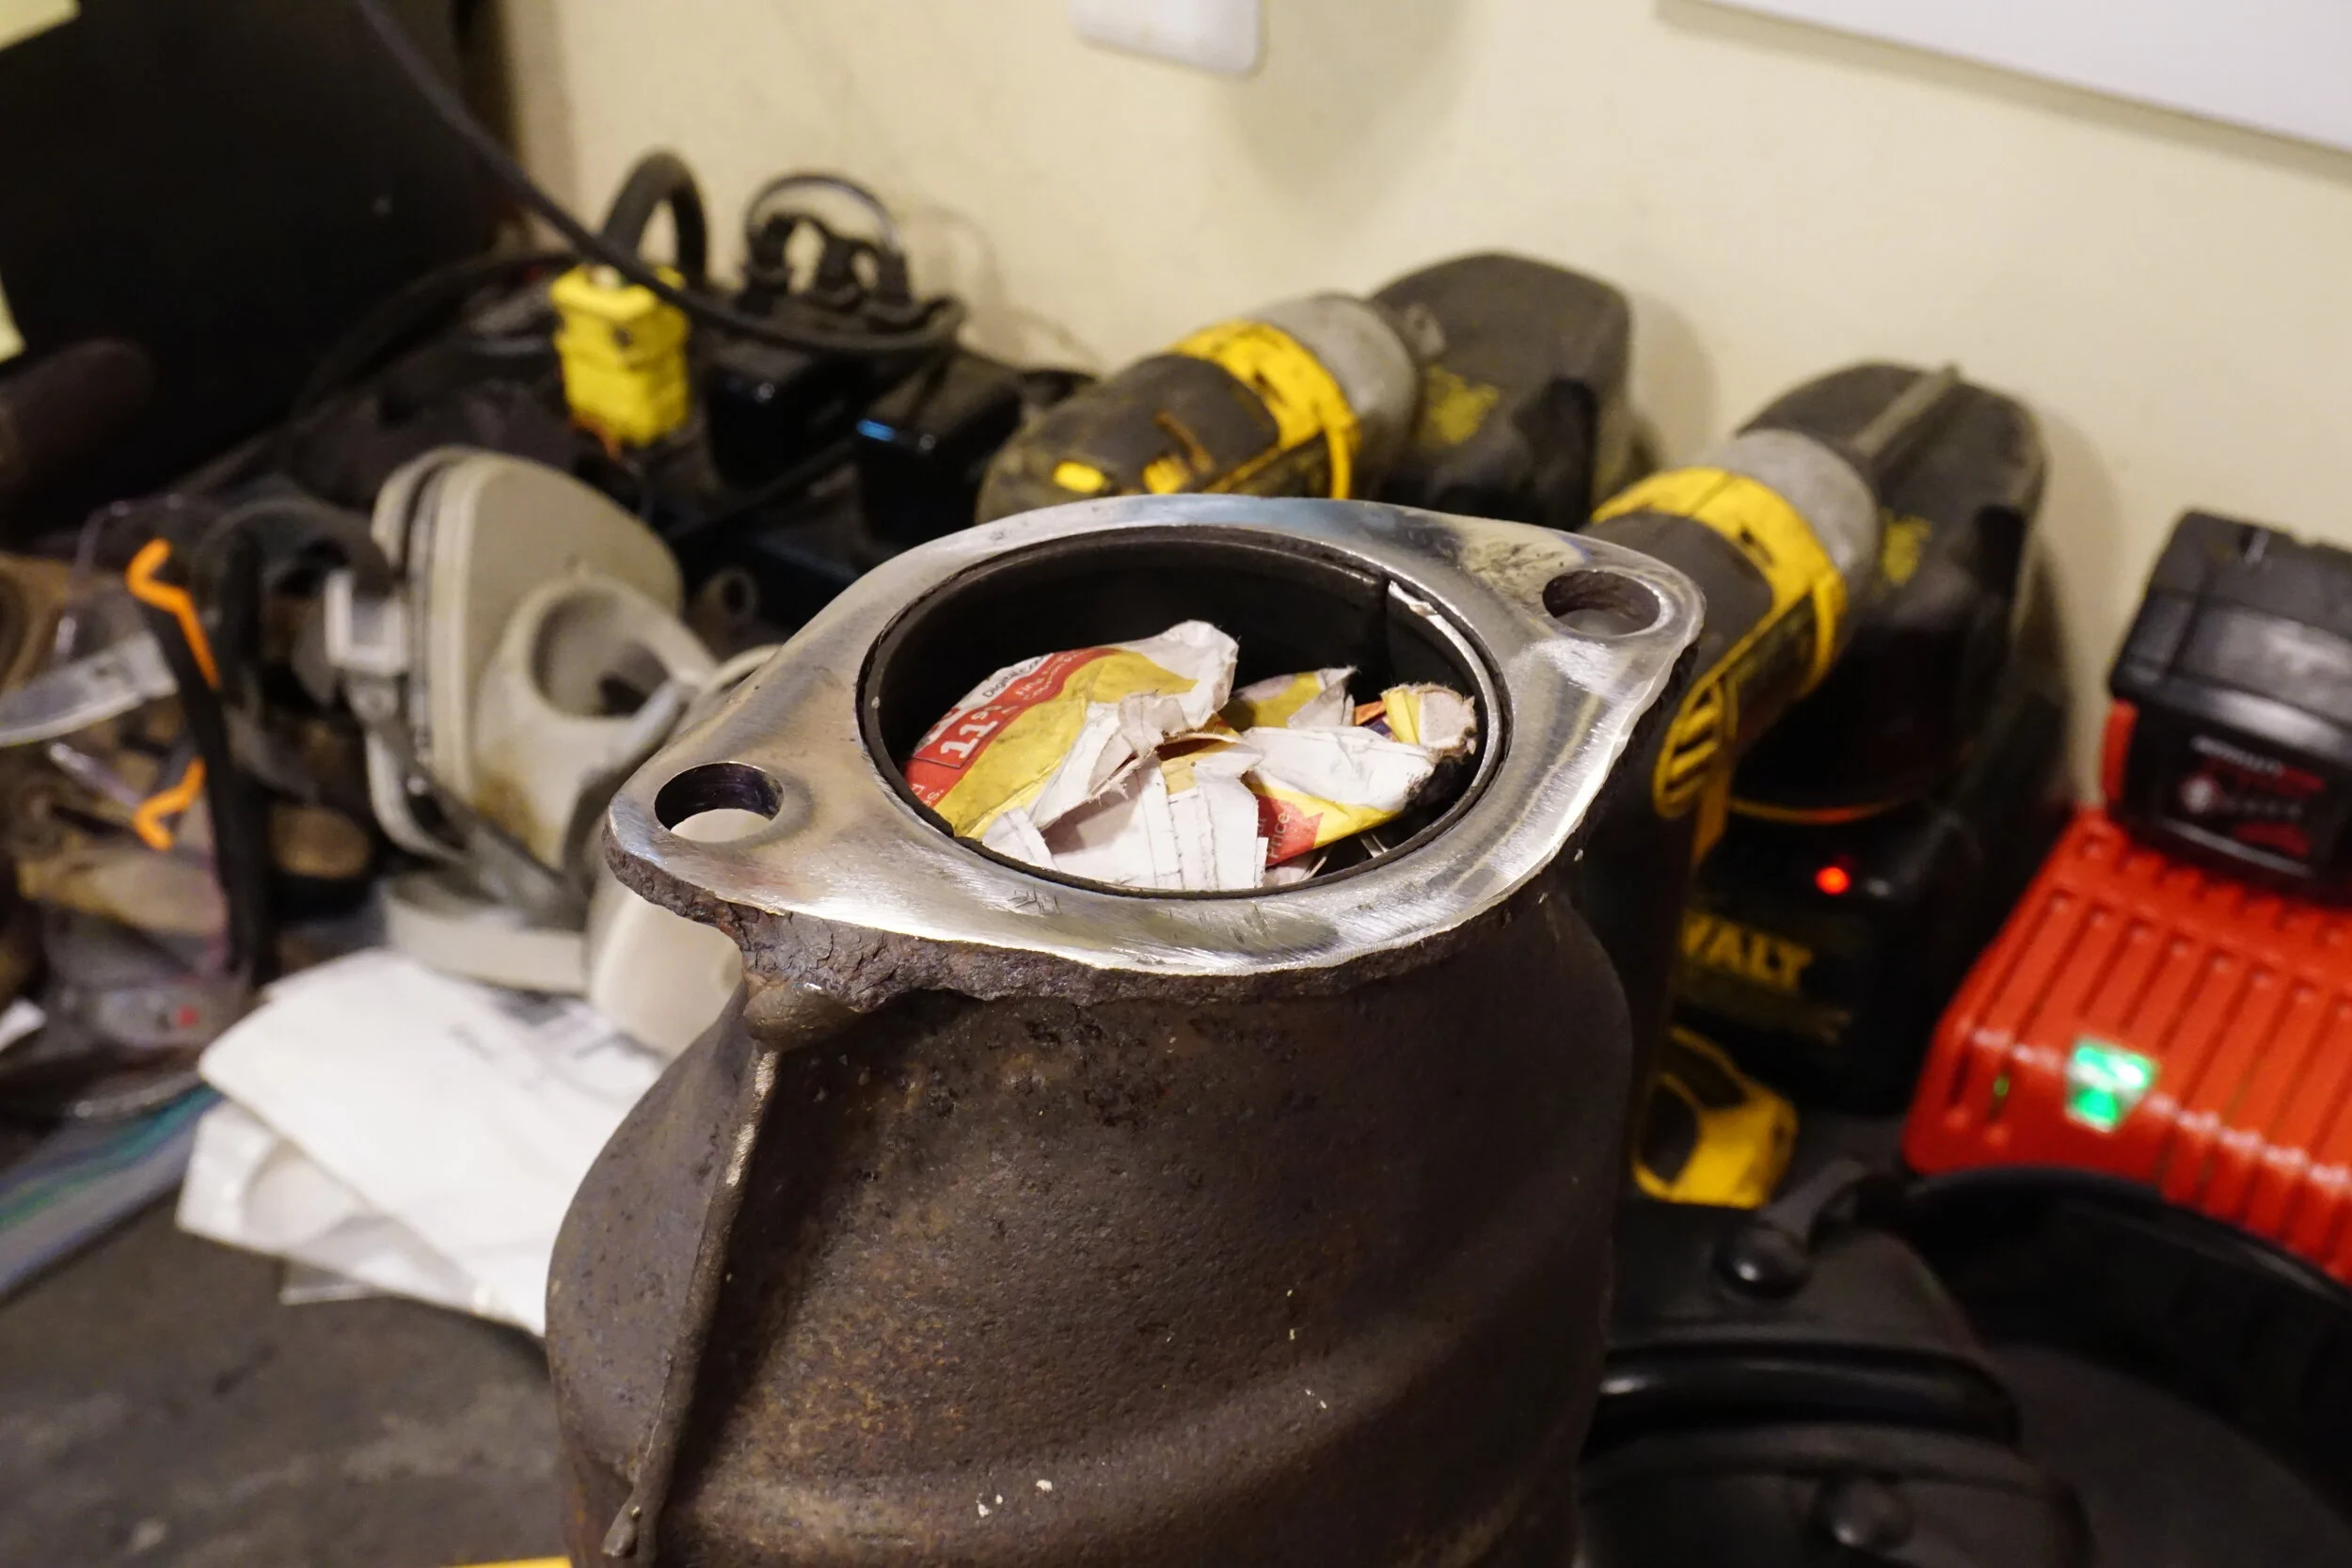

New hardware was needed...

I ended up needing two gaskets between the cat and resonator, and also between the resonator and b-pipe. For added leak protection, I smeared everything with copper RTV. After waiting 24 hours for the RTV to cure, it appears as if the leak has been fixed.
I got sidetracked before beginning another project with my lug nuts. They haven't been spinning on/off very smoothly, so I decided to chase the threads out.

Some were pretty bad while others didn't need much.

It didn't look like any metal shavings came out, just rust.

I cleaned off the cutting oil with brake clean and then ran a paper towel through for final cleanup. Now they go on nice and smooth!

New hardware was needed...
I ended up needing two gaskets between the cat and resonator, and also between the resonator and b-pipe. For added leak protection, I smeared everything with copper RTV. After waiting 24 hours for the RTV to cure, it appears as if the leak has been fixed.
I got sidetracked before beginning another project with my lug nuts. They haven't been spinning on/off very smoothly, so I decided to chase the threads out.
Some were pretty bad while others didn't need much.
It didn't look like any metal shavings came out, just rust.
I cleaned off the cutting oil with brake clean and then ran a paper towel through for final cleanup. Now they go on nice and smooth!
Last edited by 95maxrider; Sep 8, 2020 at 08:09 AM.
I could use some advice on two parts for the 6 speed swap, should I replace the worn down clutch fork and pivot pin?

Both the one on the 5.5th gen and 6th gen transmissions look like this, and I assume they're supposed to be round. The fork is $66 and the pivot is $8. Will I get $70+ worth of benefit from replacing them both?
Both the one on the 5.5th gen and 6th gen transmissions look like this, and I assume they're supposed to be round. The fork is $66 and the pivot is $8. Will I get $70+ worth of benefit from replacing them both?
So, try to stick a bolt through that little access hole to the broken off captive nut, and weld the two together? There's definitively no room for that. Or am I not understanding you correctly?
Drill it out with a drill bit, or a hole saw? Then put the rivnut through the resulting large hole in the body, or somehow through the loose captive nut? I'm so lost.
I'm not familiar with rivnuts, but they look pretty cool. I found a good video on how to install them without any specialized tools:
I'm not familiar with rivnuts, but they look pretty cool. I found a good video on how to install them without any specialized tools:
I didn't understand how you explained it the first time but now I think I get it. The broken bolt and captive nut are completely disconnected and in that body cavity? I would just use a telescoping magnet through the hole you showed to try and get the captive nut out, assuming it's completely loose. If not, then air hammer it up. Then, just use a rivnut for a new mounting point.
I didn't understand how you explained it the first time but now I think I get it. The broken bolt and captive nut are completely disconnected and in that body cavity? I would just use a telescoping magnet through the hole you showed to try and get the captive nut out, assuming it's completely loose. If not, then air hammer it up. Then, just use a rivnut for a new mounting point.
As mentioned earlier this year, I scored some nice interior parts from an I30 at the junkyard, and I finally got around to installing the last of them.
First up was my e-brake handle. I had been looking for a nice black leather one to replace mine, but most of them are of the plastic or tan leather variety. But I did happen upon one that's gray leather and in mint condition, so I decided to give it a try. Mine had gotten chewed up from years of disassembling the interior and not being careful about things.

But the new one is absolutely mint:


I also replaced my gauge cluster cover. It too has been in and out of the car so many times over the years and was looking pretty beat:

But the new one is nice and clean:

While it was all out, I decided to use up more of my squeak-reducing felt and cloth stuff in an attempt to prevent rattles going forward, since I do have poly mounts everywhere. The stock stuff was falling off....

So I put the new stuff on:

I also put some on the three mounting tabs for the cluster:

As well as these mounting tabs for the black plastic trim in front of the cluster:

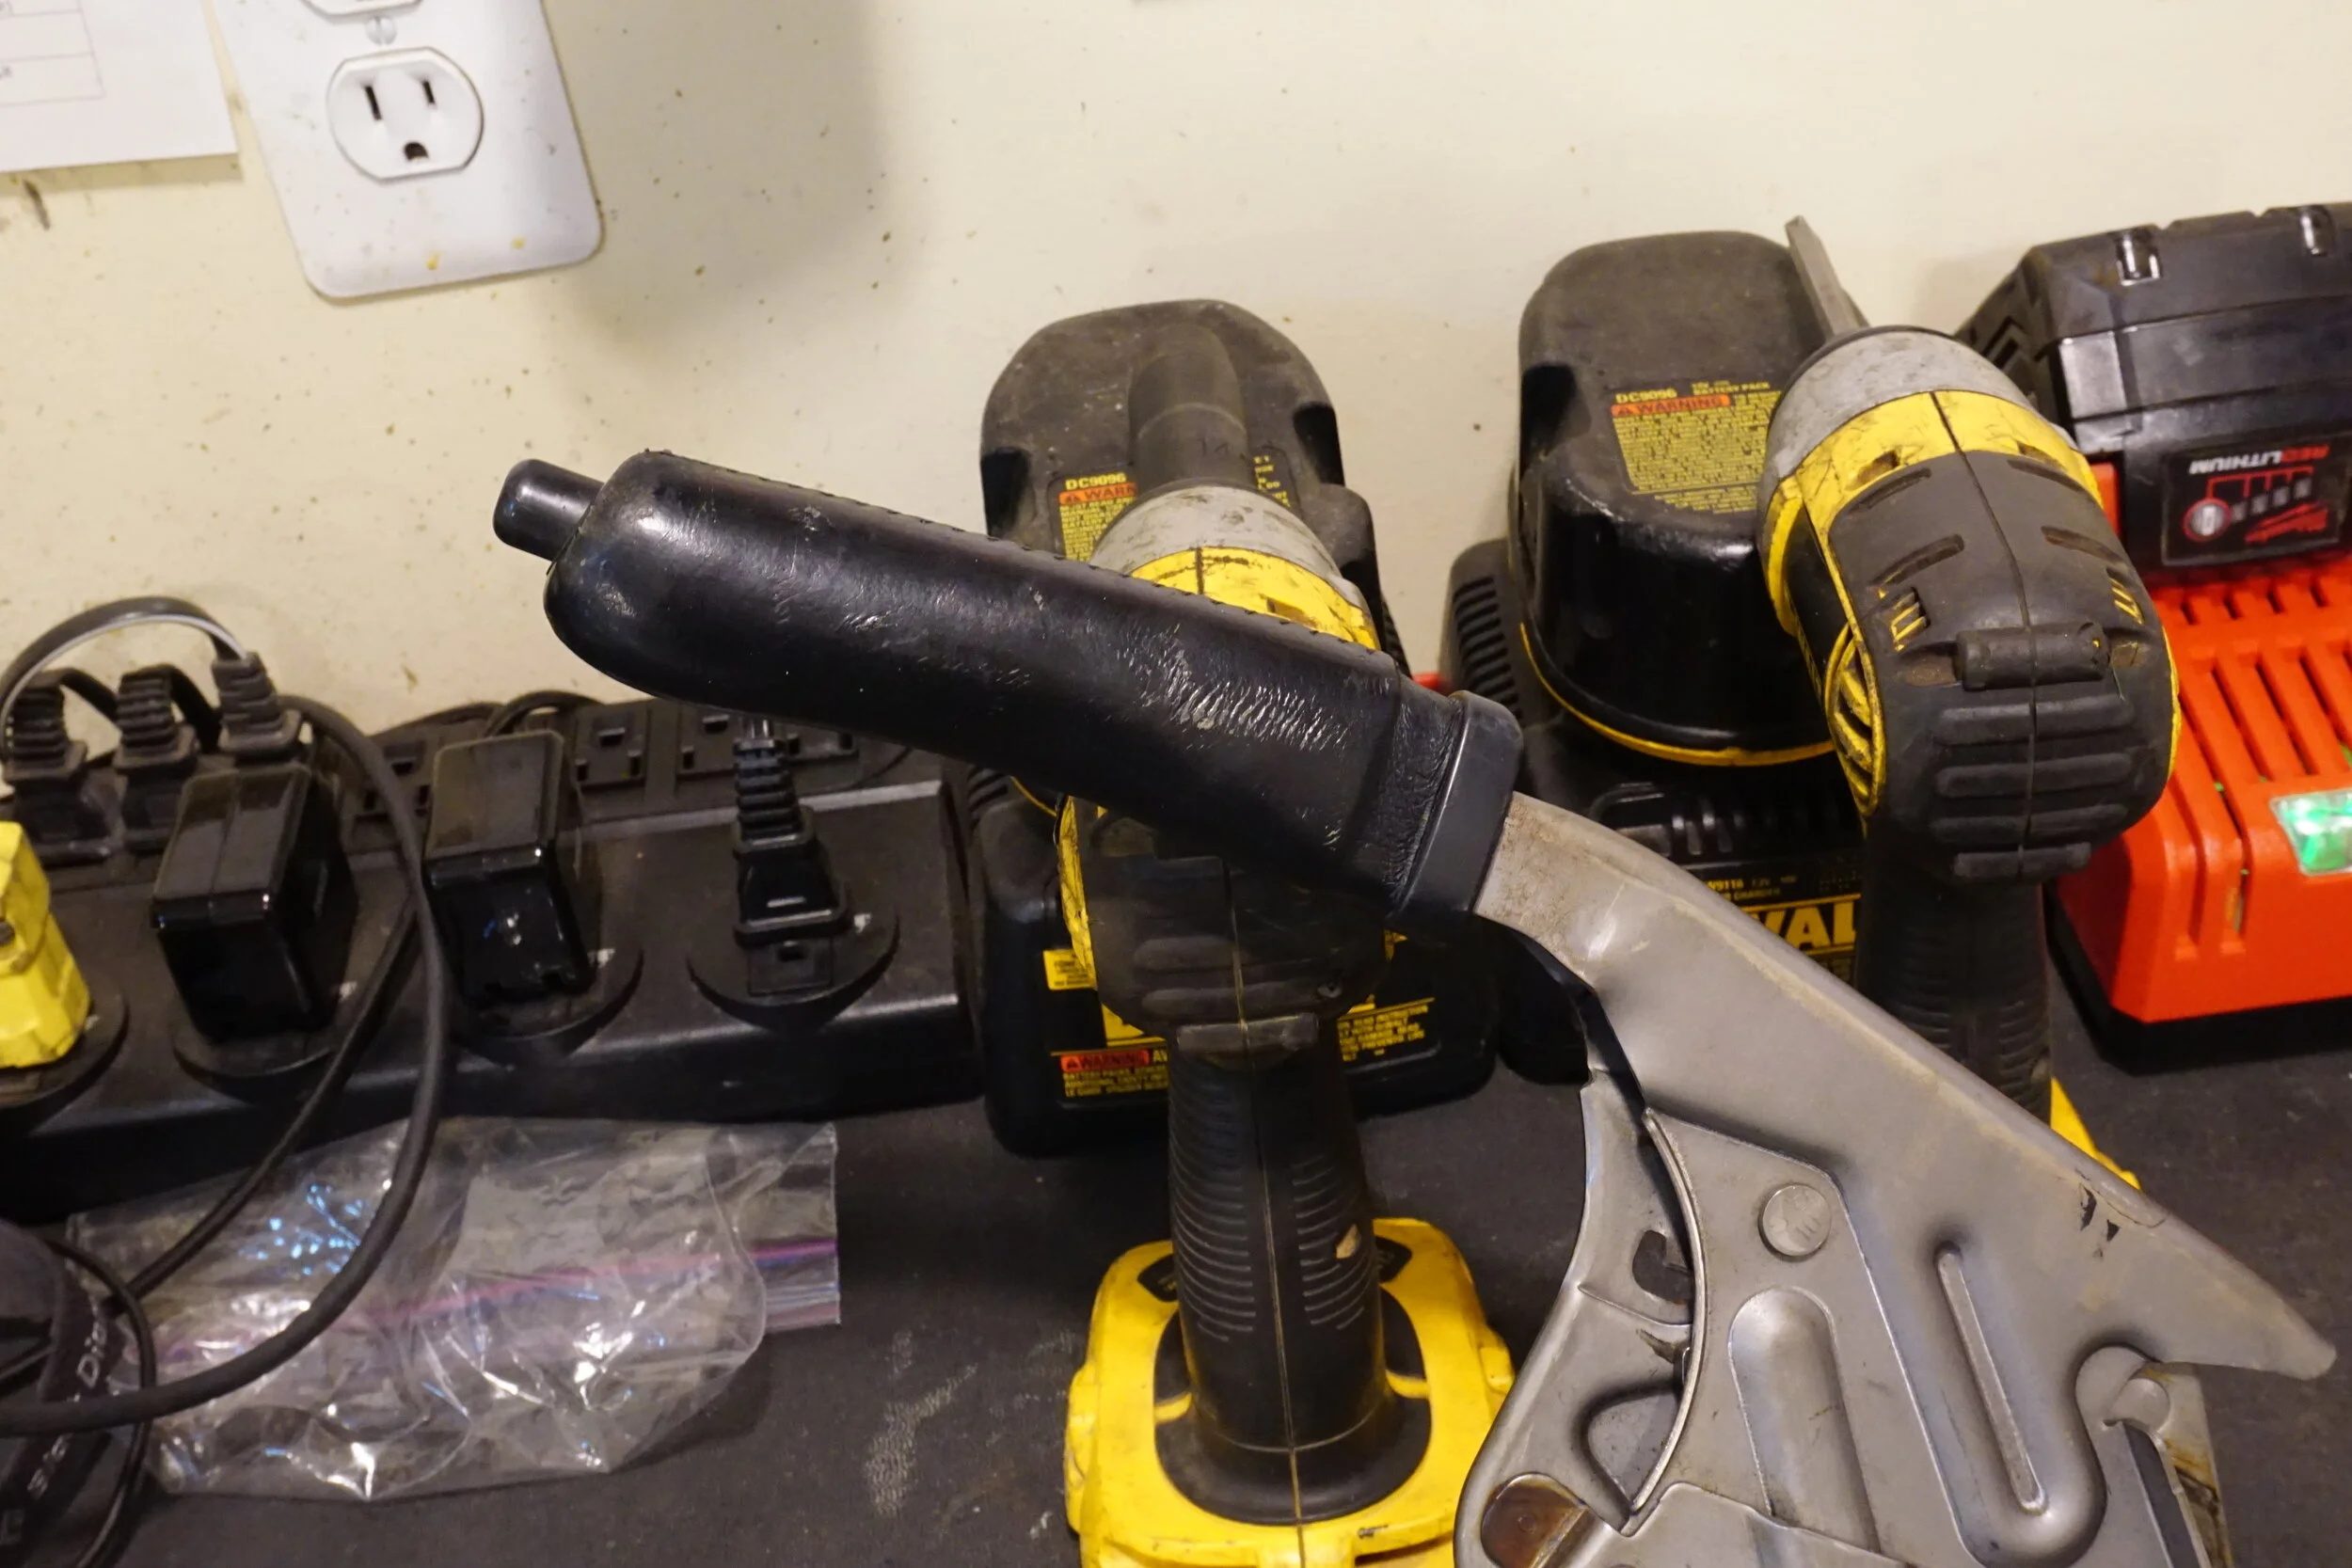
I also finally got the B15 SE-R Spec V steering rack out of the attic (bottom) and decided it was about time to measure the travel and see if it was indeed a quicker rack than the spare 97-99 SE rack (top) I've got.

Well, it's pretty clearly designed differently than our rack, so mounting it would present plenty of problems. Here are the measurements:
Maxima (97 SE) steering rack: AVG=47.7mm per rotation. Something like 2.8 lock to lock.
Sentra SE-R Spec V steering rack: AVG=43mm per rotation. Something like 2.7 lock to lock.
So it looks like it's slower than the rack I've currently got in the car, which I guess means this project is over before it could begin. Looks like I'm stuck with this slow rack for eternity.
One night when I ran out to the store I got back in the car and went to start it up. It cranked for a brief second, then everything went black. No more cranking, no lights on, nothing. WTF was that?? Turns out the main 250a fuse for the (relocated) battery blew after 10+ years of use.

Thankfully I carry a few spares with me, so I threw one in and it's been fine since.
I also signed up for the first racing event in the I30 in like 5+ years at a Trackcross event at Summit Point. Trackcross is where they use half of one of the tracks, and people do timed runs on it. Since you're not doing hot laps for 20 minutes, you don't wear out your brakes or tires, but you still get some time on the track.

I need PDR so bad....

Classing is relatively simple, above or below 200 treadwear tires, NA below 2.5L or FI/above 2.5L, and FWD/RWD/AWD. I was in the FWD, 200+ TW, 2.5L above class. Most cars in the class were new GTIs and Civic SIs, but there was one time attack prepped Scion xA. It's got a turbo, cage, big wing, etc. He apparently is either the fastest car at these events, or second behind an old Audi 90 (?) with like 400+ whp on Hoosiers. Check out the turbo sticking out of the top of the hood:
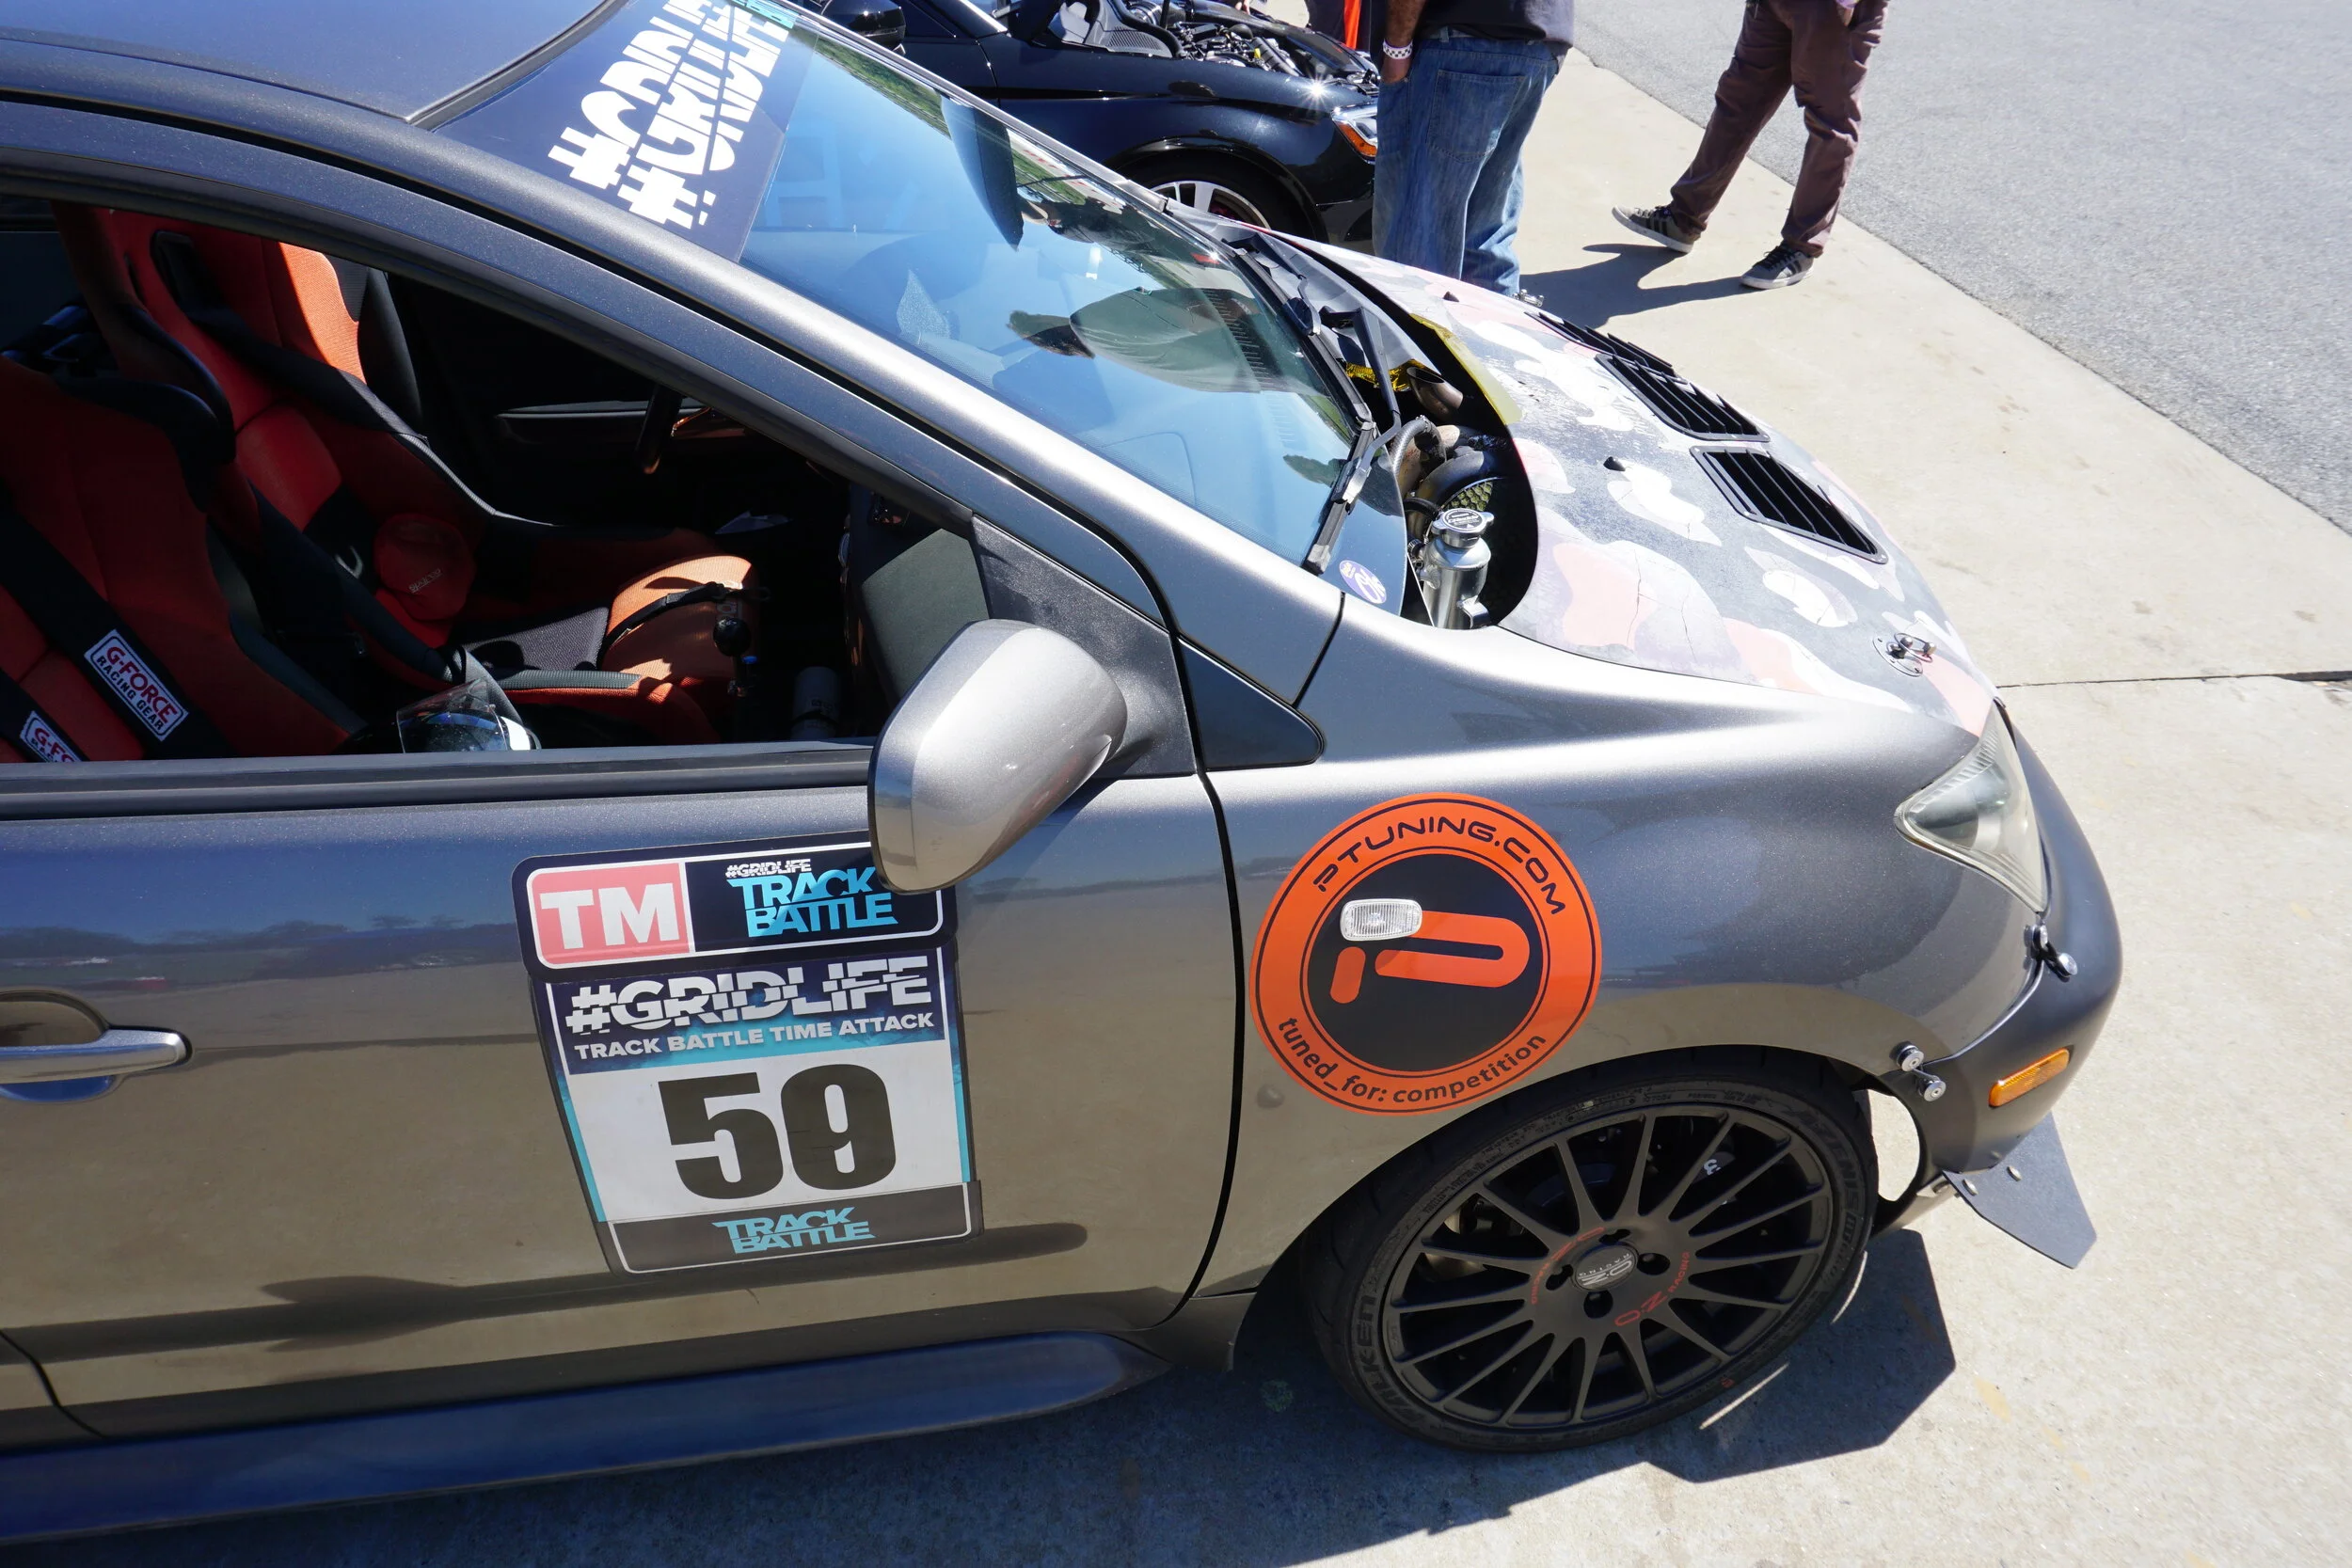
So yeah, I'm never going to win my class. But in the morning, I was in second place behind the xA, albeit by some 3 seconds on a 45 second course, so very far back. In the afternoon they reversed the course, and I ended up in 3rd, some 0.4 behind a newer GTI. Considering this is the first time I've driven the I30 in anger in many years, I was pleasantly surprised at how it felt and how well it did. I realized it does much better on a wide open track than it does on a tight auto-x course. I wasn't bothered by any understeer, although I did wish the steering was about 50% faster, as I have to turn the wheel so far in tight hairpins. But I really had a blast out there and I think I'll do more of these. Power felt good enough, the new Michelins had a ton of grip, and the brakes felt great. People were also very interested in the car once they saw the times I was running, and they were surprised it was NA. They really seemed to dig it. I can't wait to get the 6 speed and 2nd gen 3.5 in the car, then it will really surprise people
The external mic for my GoPro is on the fritz, so the exterior video for the morning is unusable, and it sounded funny in the afternoon. It made my muffler sound like tire squeal or something, I promise it doesn't sound like that in real life.
While the other run group was on track, they opened up the super slick skid pad next to the track. When wet, it has about as much grip as ice. I figured I might as well go out and have some fun, and this was the result:
So, it was kind of stupid, but hey, I was there and it was free.
So now I have a question for anyone still reading: How is the oil pressure supposed to behave in these motors? I thought the rule of thumb was 15-20 PSI at hot idle, and then 10 more for every 1000 RPM. So maybe 80 PSI at 7000 RPM. Well, if it's cold out, my digital oil pressure gauge will be pegged at 100 for a little while, and then come down. When the car is fully hot, it will be about 20 at idle. But it quickly ramps up from there, and as you can see in the videos, by 4000 RPM it's back to being pegged at 100 PSI, which is as high as the gauge reads. My gauge is the Innovate Motorsports MTX-D Oil Pressure & Oil Temperature Gauge. The pressure sensor is in the sandwich plate that has the feed lines going to my oil cooler. The oil cooler lines are -10 AN lines, so they shouldn't be a restriction. I thought my oil cooler was decent enough when I bought it, but it's not a Setrab or anything fancy. Is it possible that something in the system is causing a restriction, causing the pressure to read so high? Since the sensor is in the sandwich plate, I would need to leave that installed to get a reading if I bypass the cooler itself. I guess I could just loop one AN line back to the plate to see if the cooler is causing a restriction. What do you guys think? Is this just how oil pressure works in the VQ, or do I have a problem? To be clear, this isn't anything new, it's been like this as far back as I can remember. How worried should I be?
First up was my e-brake handle. I had been looking for a nice black leather one to replace mine, but most of them are of the plastic or tan leather variety. But I did happen upon one that's gray leather and in mint condition, so I decided to give it a try. Mine had gotten chewed up from years of disassembling the interior and not being careful about things.
But the new one is absolutely mint:
I also replaced my gauge cluster cover. It too has been in and out of the car so many times over the years and was looking pretty beat:
But the new one is nice and clean:
While it was all out, I decided to use up more of my squeak-reducing felt and cloth stuff in an attempt to prevent rattles going forward, since I do have poly mounts everywhere. The stock stuff was falling off....
So I put the new stuff on:
I also put some on the three mounting tabs for the cluster:
As well as these mounting tabs for the black plastic trim in front of the cluster:
I also finally got the B15 SE-R Spec V steering rack out of the attic (bottom) and decided it was about time to measure the travel and see if it was indeed a quicker rack than the spare 97-99 SE rack (top) I've got.
Well, it's pretty clearly designed differently than our rack, so mounting it would present plenty of problems. Here are the measurements:
Maxima (97 SE) steering rack: AVG=47.7mm per rotation. Something like 2.8 lock to lock.
Sentra SE-R Spec V steering rack: AVG=43mm per rotation. Something like 2.7 lock to lock.
So it looks like it's slower than the rack I've currently got in the car, which I guess means this project is over before it could begin. Looks like I'm stuck with this slow rack for eternity.
One night when I ran out to the store I got back in the car and went to start it up. It cranked for a brief second, then everything went black. No more cranking, no lights on, nothing. WTF was that?? Turns out the main 250a fuse for the (relocated) battery blew after 10+ years of use.
Thankfully I carry a few spares with me, so I threw one in and it's been fine since.
I also signed up for the first racing event in the I30 in like 5+ years at a Trackcross event at Summit Point. Trackcross is where they use half of one of the tracks, and people do timed runs on it. Since you're not doing hot laps for 20 minutes, you don't wear out your brakes or tires, but you still get some time on the track.
I need PDR so bad....
Classing is relatively simple, above or below 200 treadwear tires, NA below 2.5L or FI/above 2.5L, and FWD/RWD/AWD. I was in the FWD, 200+ TW, 2.5L above class. Most cars in the class were new GTIs and Civic SIs, but there was one time attack prepped Scion xA. It's got a turbo, cage, big wing, etc. He apparently is either the fastest car at these events, or second behind an old Audi 90 (?) with like 400+ whp on Hoosiers. Check out the turbo sticking out of the top of the hood:
So yeah, I'm never going to win my class. But in the morning, I was in second place behind the xA, albeit by some 3 seconds on a 45 second course, so very far back. In the afternoon they reversed the course, and I ended up in 3rd, some 0.4 behind a newer GTI. Considering this is the first time I've driven the I30 in anger in many years, I was pleasantly surprised at how it felt and how well it did. I realized it does much better on a wide open track than it does on a tight auto-x course. I wasn't bothered by any understeer, although I did wish the steering was about 50% faster, as I have to turn the wheel so far in tight hairpins. But I really had a blast out there and I think I'll do more of these. Power felt good enough, the new Michelins had a ton of grip, and the brakes felt great. People were also very interested in the car once they saw the times I was running, and they were surprised it was NA. They really seemed to dig it. I can't wait to get the 6 speed and 2nd gen 3.5 in the car, then it will really surprise people
The external mic for my GoPro is on the fritz, so the exterior video for the morning is unusable, and it sounded funny in the afternoon. It made my muffler sound like tire squeal or something, I promise it doesn't sound like that in real life.
While the other run group was on track, they opened up the super slick skid pad next to the track. When wet, it has about as much grip as ice. I figured I might as well go out and have some fun, and this was the result:
So, it was kind of stupid, but hey, I was there and it was free.
So now I have a question for anyone still reading: How is the oil pressure supposed to behave in these motors? I thought the rule of thumb was 15-20 PSI at hot idle, and then 10 more for every 1000 RPM. So maybe 80 PSI at 7000 RPM. Well, if it's cold out, my digital oil pressure gauge will be pegged at 100 for a little while, and then come down. When the car is fully hot, it will be about 20 at idle. But it quickly ramps up from there, and as you can see in the videos, by 4000 RPM it's back to being pegged at 100 PSI, which is as high as the gauge reads. My gauge is the Innovate Motorsports MTX-D Oil Pressure & Oil Temperature Gauge. The pressure sensor is in the sandwich plate that has the feed lines going to my oil cooler. The oil cooler lines are -10 AN lines, so they shouldn't be a restriction. I thought my oil cooler was decent enough when I bought it, but it's not a Setrab or anything fancy. Is it possible that something in the system is causing a restriction, causing the pressure to read so high? Since the sensor is in the sandwich plate, I would need to leave that installed to get a reading if I bypass the cooler itself. I guess I could just loop one AN line back to the plate to see if the cooler is causing a restriction. What do you guys think? Is this just how oil pressure works in the VQ, or do I have a problem? To be clear, this isn't anything new, it's been like this as far back as I can remember. How worried should I be?


Thanks! When I swap in a 2nd gen 3.5 and the 6 speed, you can buy my engine/trans and bolt them into your car!
B15/B14/B13 sure.
The track-cross session from 95Max's vids seems fine though, I can handle that and not get too upset.
I definitely miss being out there... Soon... Sooooooon....
But woooooorth it.
So now I have a question for anyone still reading: How is the oil pressure supposed to behave in these motors? I thought the rule of thumb was 15-20 PSI at hot idle, and then 10 more for every 1000 RPM. So maybe 80 PSI at 7000 RPM. Well, if it's cold out, my digital oil pressure gauge will be pegged at 100 for a little while, and then come down. When the car is fully hot, it will be about 20 at idle. But it quickly ramps up from there, and as you can see in the videos, by 4000 RPM it's back to being pegged at 100 PSI, which is as high as the gauge reads. My gauge is the Innovate Motorsports MTX-D Oil Pressure & Oil Temperature Gauge. The pressure sensor is in the sandwich plate that has the feed lines going to my oil cooler. The oil cooler lines are -10 AN lines, so they shouldn't be a restriction. I thought my oil cooler was decent enough when I bought it, but it's not a Setrab or anything fancy. Is it possible that something in the system is causing a restriction, causing the pressure to read so high? Since the sensor is in the sandwich plate, I would need to leave that installed to get a reading if I bypass the cooler itself. I guess I could just loop one AN line back to the plate to see if the cooler is causing a restriction. What do you guys think? Is this just how oil pressure works in the VQ, or do I have a problem? To be clear, this isn't anything new, it's been like this as far back as I can remember. How worried should I be?
The FSM says it should be 14+ PSI at idle, and 43 PSI at 2,000 RPM, but no info about what happens above that. I haven't checked mine yet at 2,000 RPM, but 43 PSI sounds close to what I would expect.
This NICO thread has two people who mention similar pressures to mine, but no real answers as to whether it's normal or not.
I run Motul 5w-40 oil in my car, and just got back my first Blackstone oil analysis:
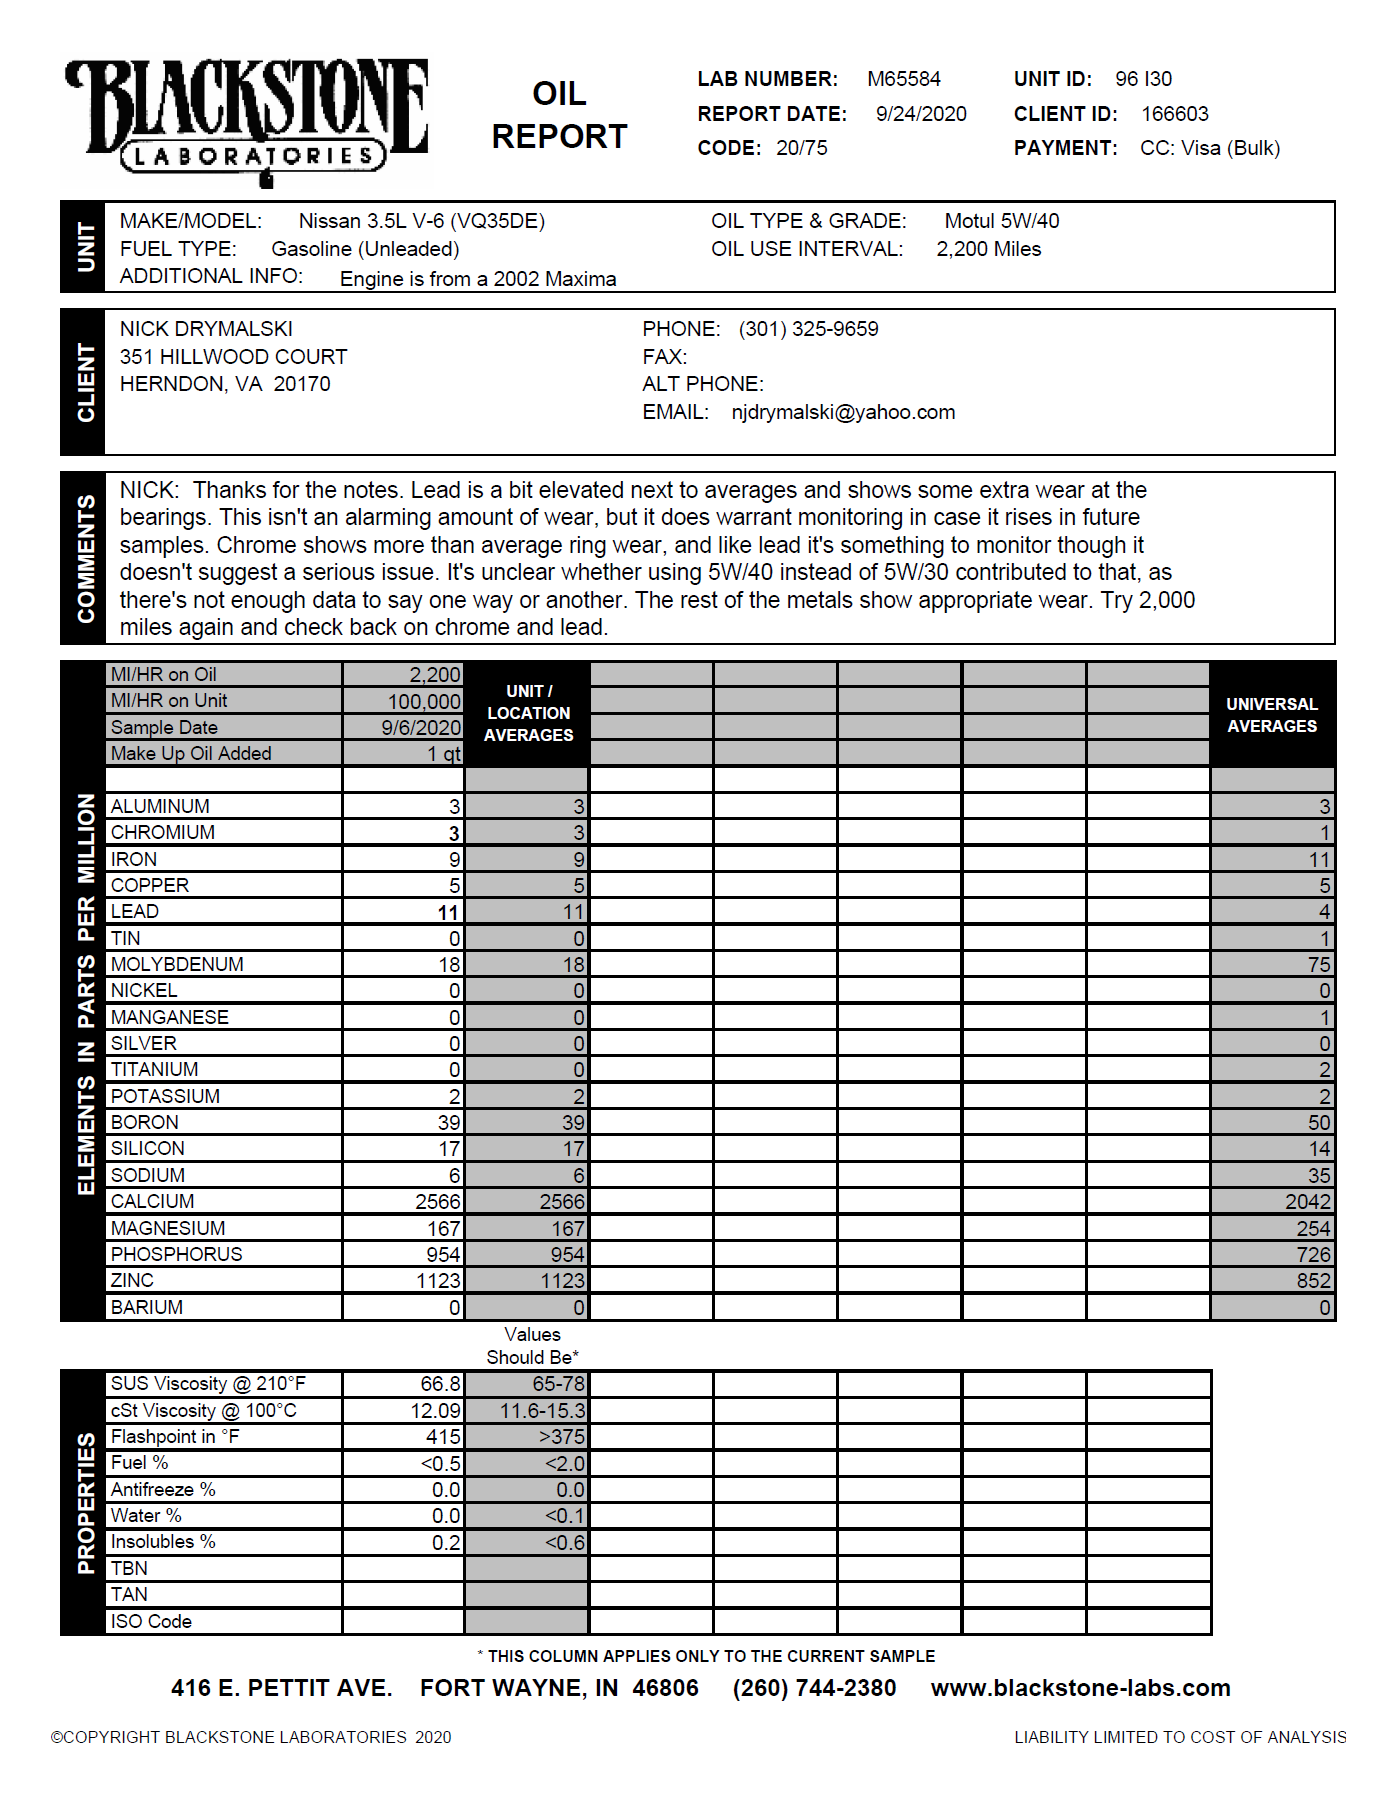
This engine should have at least 100k on it, and many of those were very hard miles courtesy of my buddy oTranscendeal who was the previous owner. It sounds like there is wear occurring, but nothing to get worried about. Any feedback would be appreciated.
It took a while to amass the parts and find some free time, but I finally got around to installing the new front subframe spacers as pioneered by CS_AR in this thread. BTW, what ever happened to CS_AR, is he still around? Haven't seen anything from him in months. He was a great member of the community.
I've been hearing a creaking sound from the front DS of the car for a long time now (over a year?), and haven't been able to track down where it's coming from. I only hear it under braking, and just once per braking cycle, I think at the initial application of the pedal. I assume the reason I don't hear it under acceleration is all the other noise happening. Also for the longest time (many, many years) I've been getting what I can only refer to as "wheel hop under braking". This only occurs at lower speeds, say below 20, and only when I really slam on the brakes suddenly. I don't think it occurs under threshold braking. I've replaced tires, control arms/bushings, axles....pretty much everything in the front end and the problem remains. It's like my front wheels are trying to lock up, but can't, due to the ABS, so they hop instead. I'm guessing the Wilwoods may have something to do with that, but I figured the Fastbrakes rear BBK would do enough to re-balance the brakes that F/R balance wouldn't be too much of an issue. Maybe I just shouldn't slam on my brakes like that
I said all that to say that I started this upgrade with the hope that these new spacers would help one or both of my issues. Both of my old delrin front/top spacers had started to crack, and it never looked like they had been installed 100%, as they sort of hung off the sides of the subframe. These new aluminum spacers looked like they would provide a much larger area to distribute the weight, while also being far less likely to crack over time. The link in CS_AR's thread was dead, so these are the ones I bought.
Here's the DS front/top with a crack easily visible:

And the PS front/top showing how 30% of the subframe was "open" against the body, and also how much of my spacer was hanging off and not pressed on far enough.

Both of my rears were also not seated 100%, and had a large "open" area against the body.

I knew I was going to need full access to the front nuts so I could torque them properly during reassembly, so I undid the three top nuts of my coilovers so the control arms would drop, and I also disconnected the FSB from the end links to get better access. I started by going around and loosening up all of the four main nuts on the bottom of the subframe. The two on the PS seemed a little looser than I expected, while the two on the DS seemed to be too tight even though they had been soaking in penetrating oil. I was eventually able to break the front one loose with a 2' breaker bar, but the rear one would not budge. I even brought out the super Milwaukee impact and banged on it in the middle setting (I was worried the full setting would snap the stud) and it didn't move. Back to the breaker bar, more penetrating oil, more gun, nothing. Well, it was time to try out the new toy. A family member gave me their old acetylene torch, so I set it up and got ready.

Before I could get the nut red hot, the old delrin bushing started to smoke and eventually caught on fire a little bit, so I had to stop. I immediately hit the nut with the big impact and it finally started to move, but it wasn't moving easily. I decided to let it soak in more penetrating oil overnight and come back to it the next day. It was still a pretty crunchy affair, but it did come off. The threads definitely needed to be cleaned up.

They got wire wheeled and chased, as did all the other studs in this job. The rear on the DS was better, but still in need of help before reassembly.

Unfortunately, it looks like I forgot to take after pictures of those. Here's a pic of the burned out spacer:

When I went to disassemble the DS front, the lower spacer and square washer didn't want to budge. They just kind of sat there and didn't move even after I whacked them with a hammer.

It looked like the square washer had rusted itself to the stud, which was not a good thing. I cleaned up the bottom with my Dremel wire wheel, sprayed some penetrating oil up into it, and kept tapping it with a hammer from different directions. Eventually, it started to move and I was able to get it off.

Now those crunchy looking threads aren't used by the nut, that's the part that was inside the big washer, but I couldn't just leave them looking like that, so I chased the threads.

So I could finally start disassembling things and take stock of the situation. The PS rear/bottom was starting to crack around the lip:

But the rear/uppers appeared to be in fine shape. You can see how the aluminum spacers have a wider "small" section that would go against the subframe, and a giant area that would press against the body. They should do a much better job distributing all the weight and forces.

The PS front/lower had started to crack as well:

The DS front/top split in two when I tried to remove it. It was pretty much only being held together by the torque of the nut from below. Again, you can see how much larger the aluminum spacers were in comparison.

As mentioned previously, one of the two 14 mm bolts that attached the SE triangular brace on the DS had rusted to the captive nut inside the body and wouldn't come out. This prevented me from dropping the triangular brace, and thus both spacers on the DS rear. I considered cutting the bolt off above the brace, then cutting the area out of the body where the captive nut was originally welded, re-weld a new nut to the metal, and then welding the metal back to the body. But I looked at it more and decided I would try some finesse first, and just try to cut the head off the bolt, with the hope that I could just put a nut on it and maybe avoid cutting into the car. Once again the flexible arm attachment for my dremel came in handy, and I was able to cut the head off.

The brace dropped, and I was left with this:

It took some work, but I was able to chase the threads and make it so a nut could be installed on it. Unfortunately, since the Perrin poly bushings are thicker than the old delrin spacers, not enough threads came through the brace for me to get a nut on. Oh well, I can come back to that later.
The aluminum spacers installed without a hitch on the rear, but when I went to install them on the front, they simply wouldn't go on. So I took out my calipers and started measuring things. The opening on the aluminum spacers was about 27.5 mm, but the metal post of the subframe was about 31-32 mm after the rubber had been ground off it. So I got out the angle grinder and took off material until they cleared. The opening of the old delrin spacers was about 35 mm.

I've been hearing a creaking sound from the front DS of the car for a long time now (over a year?), and haven't been able to track down where it's coming from. I only hear it under braking, and just once per braking cycle, I think at the initial application of the pedal. I assume the reason I don't hear it under acceleration is all the other noise happening. Also for the longest time (many, many years) I've been getting what I can only refer to as "wheel hop under braking". This only occurs at lower speeds, say below 20, and only when I really slam on the brakes suddenly. I don't think it occurs under threshold braking. I've replaced tires, control arms/bushings, axles....pretty much everything in the front end and the problem remains. It's like my front wheels are trying to lock up, but can't, due to the ABS, so they hop instead. I'm guessing the Wilwoods may have something to do with that, but I figured the Fastbrakes rear BBK would do enough to re-balance the brakes that F/R balance wouldn't be too much of an issue. Maybe I just shouldn't slam on my brakes like that
I said all that to say that I started this upgrade with the hope that these new spacers would help one or both of my issues. Both of my old delrin front/top spacers had started to crack, and it never looked like they had been installed 100%, as they sort of hung off the sides of the subframe. These new aluminum spacers looked like they would provide a much larger area to distribute the weight, while also being far less likely to crack over time. The link in CS_AR's thread was dead, so these are the ones I bought.
Here's the DS front/top with a crack easily visible:
And the PS front/top showing how 30% of the subframe was "open" against the body, and also how much of my spacer was hanging off and not pressed on far enough.
Both of my rears were also not seated 100%, and had a large "open" area against the body.
I knew I was going to need full access to the front nuts so I could torque them properly during reassembly, so I undid the three top nuts of my coilovers so the control arms would drop, and I also disconnected the FSB from the end links to get better access. I started by going around and loosening up all of the four main nuts on the bottom of the subframe. The two on the PS seemed a little looser than I expected, while the two on the DS seemed to be too tight even though they had been soaking in penetrating oil. I was eventually able to break the front one loose with a 2' breaker bar, but the rear one would not budge. I even brought out the super Milwaukee impact and banged on it in the middle setting (I was worried the full setting would snap the stud) and it didn't move. Back to the breaker bar, more penetrating oil, more gun, nothing. Well, it was time to try out the new toy. A family member gave me their old acetylene torch, so I set it up and got ready.
Before I could get the nut red hot, the old delrin bushing started to smoke and eventually caught on fire a little bit, so I had to stop. I immediately hit the nut with the big impact and it finally started to move, but it wasn't moving easily. I decided to let it soak in more penetrating oil overnight and come back to it the next day. It was still a pretty crunchy affair, but it did come off. The threads definitely needed to be cleaned up.
They got wire wheeled and chased, as did all the other studs in this job. The rear on the DS was better, but still in need of help before reassembly.
Unfortunately, it looks like I forgot to take after pictures of those. Here's a pic of the burned out spacer:
When I went to disassemble the DS front, the lower spacer and square washer didn't want to budge. They just kind of sat there and didn't move even after I whacked them with a hammer.
It looked like the square washer had rusted itself to the stud, which was not a good thing. I cleaned up the bottom with my Dremel wire wheel, sprayed some penetrating oil up into it, and kept tapping it with a hammer from different directions. Eventually, it started to move and I was able to get it off.
Now those crunchy looking threads aren't used by the nut, that's the part that was inside the big washer, but I couldn't just leave them looking like that, so I chased the threads.
So I could finally start disassembling things and take stock of the situation. The PS rear/bottom was starting to crack around the lip:
But the rear/uppers appeared to be in fine shape. You can see how the aluminum spacers have a wider "small" section that would go against the subframe, and a giant area that would press against the body. They should do a much better job distributing all the weight and forces.
The PS front/lower had started to crack as well:
The DS front/top split in two when I tried to remove it. It was pretty much only being held together by the torque of the nut from below. Again, you can see how much larger the aluminum spacers were in comparison.
As mentioned previously, one of the two 14 mm bolts that attached the SE triangular brace on the DS had rusted to the captive nut inside the body and wouldn't come out. This prevented me from dropping the triangular brace, and thus both spacers on the DS rear. I considered cutting the bolt off above the brace, then cutting the area out of the body where the captive nut was originally welded, re-weld a new nut to the metal, and then welding the metal back to the body. But I looked at it more and decided I would try some finesse first, and just try to cut the head off the bolt, with the hope that I could just put a nut on it and maybe avoid cutting into the car. Once again the flexible arm attachment for my dremel came in handy, and I was able to cut the head off.
The brace dropped, and I was left with this:
It took some work, but I was able to chase the threads and make it so a nut could be installed on it. Unfortunately, since the Perrin poly bushings are thicker than the old delrin spacers, not enough threads came through the brace for me to get a nut on. Oh well, I can come back to that later.
The aluminum spacers installed without a hitch on the rear, but when I went to install them on the front, they simply wouldn't go on. So I took out my calipers and started measuring things. The opening on the aluminum spacers was about 27.5 mm, but the metal post of the subframe was about 31-32 mm after the rubber had been ground off it. So I got out the angle grinder and took off material until they cleared. The opening of the old delrin spacers was about 35 mm.
With that done, I liberally applied anti-seize to the body and top of the subframe, since they're both steel and the spacer is aluminum, in an effort to prevent corrosion between the two metals. From there, everything went smoothly. I made sure to center the aluminum spacers so they made maximum contact with the subframe.


Same in the rear. I installed the Perrin bushings upside down since they seemed to fit better that way on the triangular brace.

I had to order a full set of the Titan control arm bushings direct from PRG, as the retailer listed in CS_AR's thread no longer stocked them. This means I have two left over, so if you want them, send me a PM. I haven't driven the car yet, but I'll report back when I do. I'm tentatively excited!
Same in the rear. I installed the Perrin bushings upside down since they seemed to fit better that way on the triangular brace.
I had to order a full set of the Titan control arm bushings direct from PRG, as the retailer listed in CS_AR's thread no longer stocked them. This means I have two left over, so if you want them, send me a PM. I haven't driven the car yet, but I'll report back when I do. I'm tentatively excited!

Does anyone have any ideas on what might be going on with my oil pressure? Am I the only one here running an oil pressure gauge?
The FSM says it should be 14+ PSI at idle, and 43 PSI at 2,000 RPM, but no info about what happens above that. I haven't checked mine yet at 2,000 RPM, but 43 PSI sounds close to what I would expect.
This NICO thread has two people who mention similar pressures to mine, but no real answers as to whether it's normal or not.
I run Motul 5w-40 oil in my car, and just got back my first Blackstone oil analysis:
This engine should have at least 100k on it, and many of those were very hard miles courtesy of my buddy oTranscendeal who was the previous owner. It sounds like there is wear occurring, but nothing to get worried about. Any feedback would be appreciated.
Above the 2000 rpm, the general rule is 10psi per 1000rpm. With most cars bleed off pressure at the higher rpms a bit with a relief valve.
Becareful with oil pressure gauges, tons of info about how they can be off and how to test them for accuracy with air. My innovate is definitely off by 1-2 psi.
Last edited by DrunkieTheBear; Nov 4, 2020 at 08:41 AM.
I've got a question for everyone about doing the 6 speed swap. I've read the how-tos, but a buddy mentioned to me that some ABS/brake line stuff on the firewall is in the way of the hole that needs to be cut on the firewall for the cables to pass through. I don't remember seeing anything about this in the how-tos, is this a big deal, or can that stuff just be put to the side a little bit? Is there any reason to take the motor out to make any of this easier, or is that not necessary?
Only thing i remember having to do in the ABS 99 I 6 speed swapped was unbolt the ABS module bracket and ziptie it up higher. Nothing was in the way of routing cables through the firewall for me.
I'd keep the engine in. You should have enough room to cut the hole with a dremel or similar with the trans out.
I'd keep the engine in. You should have enough room to cut the hole with a dremel or similar with the trans out.
But those cars ran for years sans abs/master cyl problems.
There's an i35 in iowa liviing it's life this way as well as I type this.
I don't recall my 96 being in the way but the zip tie method is how all my i35s lived. I was more worried about the master cylinder breaking the bolts on the booster.
But those cars ran for years sans abs/master cyl problems.
There's an i35 in iowa liviing it's life this way as well as I type this.
But those cars ran for years sans abs/master cyl problems.
There's an i35 in iowa liviing it's life this way as well as I type this.
Some flatstock, nuts, and bolts should be able to take care of that. I think it just needed to be rasied up? Can't remember if the bracket was in the way or the ABS module.
Nothing too interesting to report, just me fiddling with some small, stupid projects. I had been on the lookout for some parts at the junkyard and decided to make a day of it and went to four yards getting stuff for my cars and a family member's Legacy GT.
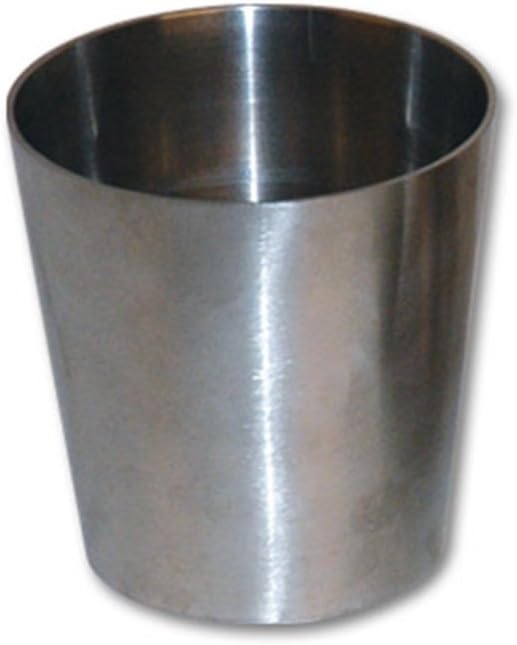
My first discovery was a cup holder for the 95/96 cars that didn't have real ones in the center console, and it mounts in the arm rest, like so:

Unfortunately, that renders the arm rest and storage useless, so I removed it and it's now in storage. I converted to a 97-99 center console long ago, so it's just not needed.
Next up was a rubber door seal for the PS front door. My original one had a tear in it, so I replaced it with one from a junkyard, but it had a crease in it that I didn't like. It took a while to find one in mint condition, but I found one on this trip and grabbed it. Done!


Then for more interior trim stuff. My steering column cover has been through a lot over the years, and a few of its mounting tabs had broken, so it wouldn't fully snap together (top to bottom).

I found one in good condition and got it, and also picked up the black trim that goes around the gauges, since mine was scratched up from being disassembled so many times. The column cover needed to be opened up a bit because the adapter for the Sparco steering wheel is big and would rub otherwise.

Turns out the cover from 95/96 cars is different from the 97-99 cars. The top is more rounded, and the hole for the turn signal stalk is different, so it won't stay on when I signal to make a left turn. I'm going to have to disassemble it and make that space bigger. The more rounded top also made attaching my Techtom MDM-100 more difficult, but I eventually got it to stick.
Like I said, I've taken apart my gauge cluster so many time over the years, and a result of that is that I've apparently lost most of the trim clips that secure it to the dash. I didn't realize this until I tried to remove one at the junkyard and it was much more difficult to remove than mine normally is. This would explain why mine rattles and bugs the crap out of me. Turns out mine has been missing all four of the clip on the bottom:

Not that you can really see it in this crappy picture, but I decided to put on more of my rattle reducing felt and fabric tape stuff around it before I installed it, just to make sure it doesn't rattle anymore.

That made me take a closer look at my cupholders, which also rattle and bug the crap out of me. Ahh, the joys of poly engine and trans mounts! The factory foam padding had been squished to oblivion over 20+ years, so I did my best to replicate it with some HVAC insulation:

It's probably a little thicker than it should be, but so far it seems to be working.
I had picked up the brace under the steering column a while back but hadn't gotten around to installing it, but with everything taken apart for the column cover, I decided this would be a good time. At some point over the last 18 years mine had been removed and not reinstalled. I'm not exactly sure what its purpose is, but I figured it must surely have one, so I wanted it back in there. Maybe to protect my knees in the event of a crash? Easy job, right? Just two bolts?
Yeah, not quite. Somehow, at some point, someone had snapped off one of the bolts in the bracket that the brace attaches to. It's not like there's any rust in there, I have no idea why it would have snapped like that.

Thankfully the bracket is easily removed from the car, so I got to work drilling it out and rethreading the hole. It wasn't terrible, but it made a 5 minute job into an hour job. Ugh. At least the brace is now installed.
Last up was some more 3M Cavity Wax Plus! I had been meaning to spray the insides of the side sills, so I got busy.

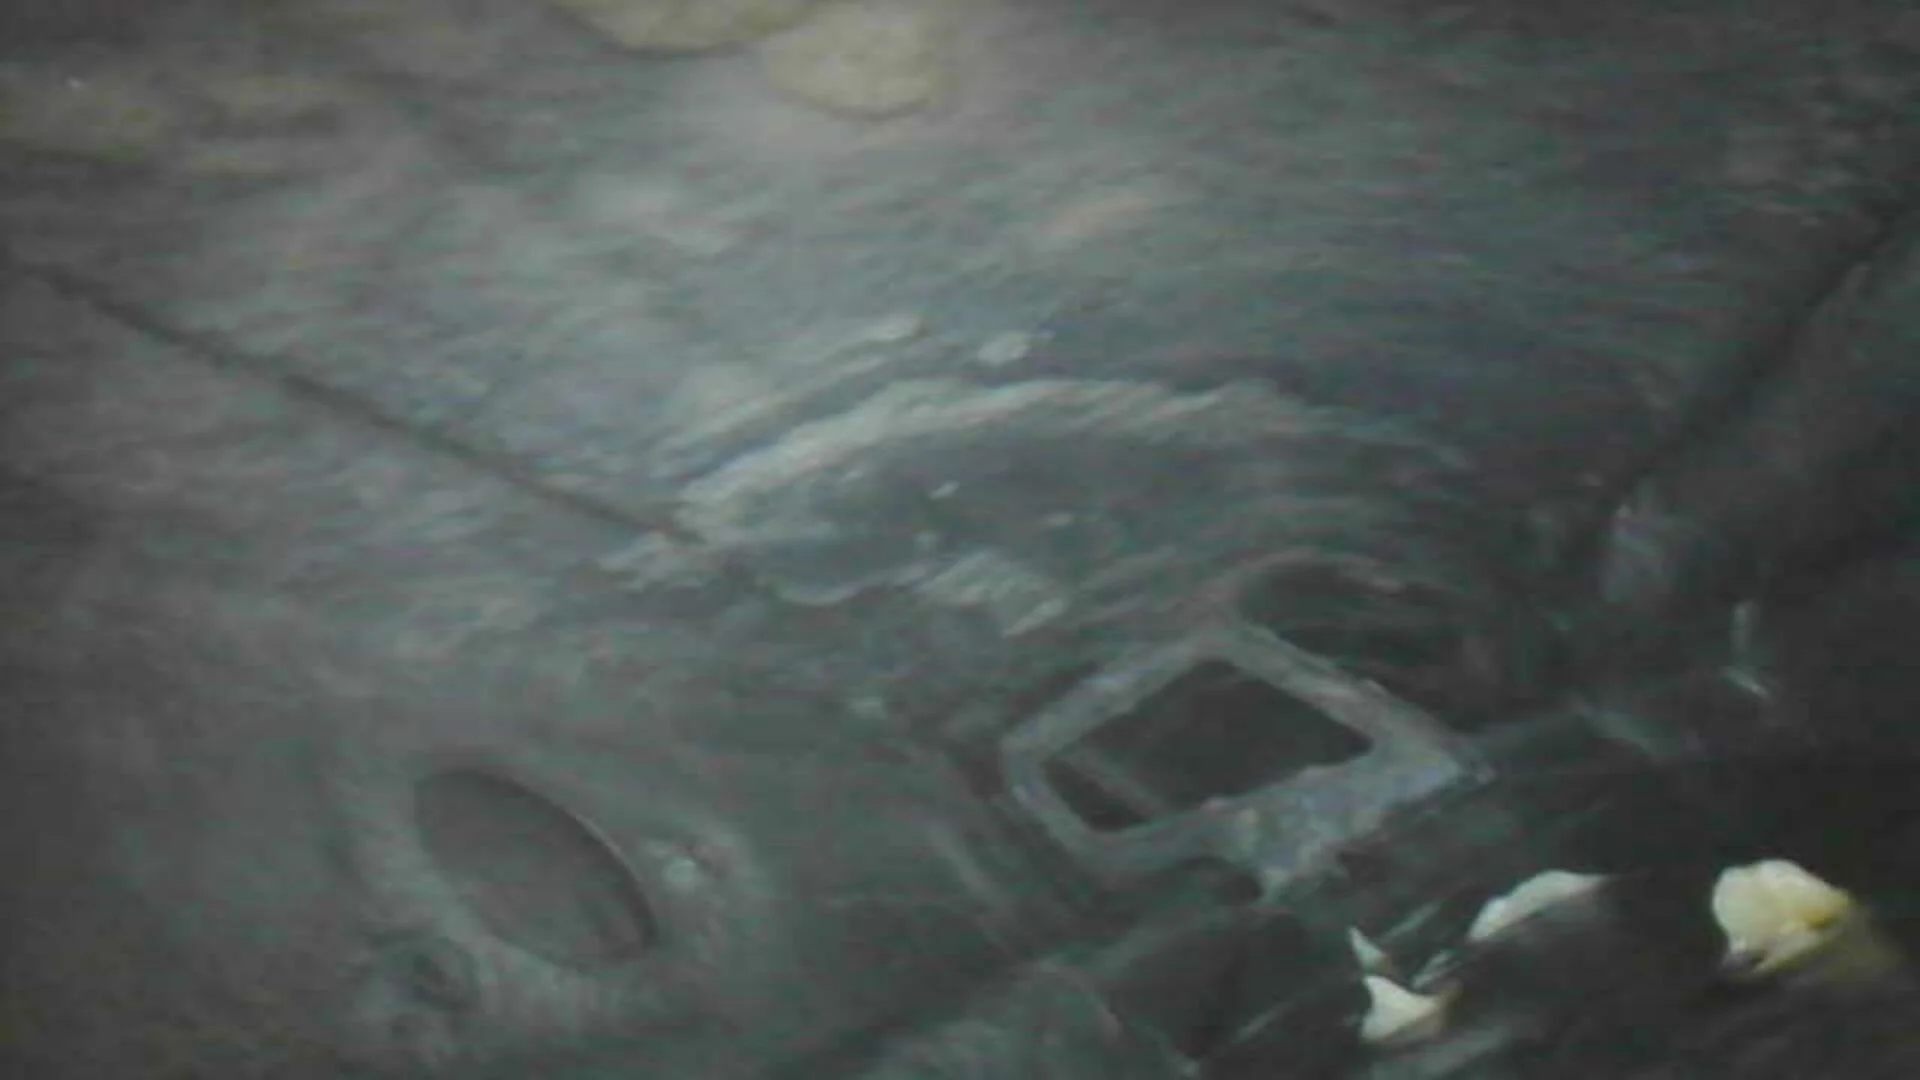
I pulled up the scuff plates and took a look inside the sills. It looked decent, but there was some rust in spots, mostly along the seam. Without thinking, I started spraying, using the holes for the scuff plates to stick the flexible hose through. It was only after I had sprayed one side did I stop and think that maybe spraying this over existing rust might not be the best idea. I remembered hearing a friend talk about some Eastwood product for frame rails, but had never looked into it. Well, it sounds like this stuff may have been a better product to use over existing rust. It's called and it supposedly:
But it was too late, and the cavity wax had already been applied I did two coats before I ran out, but I plan on doing at least one more since it looks like I missed some areas. All I can do is hope that the wax prevents any moisture from getting to the rust and really slows down its spread. I'm not sure if it will really stop it, or just slow it down. But I think when I do the M3 and the FX I'm going to use the Eastwood product. I can always apply wax over that stuff if I want. I will say that the wax absolutely stunk up the inside of the car for days, and I had to leave the windows down for it to air out.
That's all for now while I build up the courage to disassemble my old dead 5 speed trans in preparation for doing the real job to the 6 speed(s).
My first discovery was a cup holder for the 95/96 cars that didn't have real ones in the center console, and it mounts in the arm rest, like so:
Unfortunately, that renders the arm rest and storage useless, so I removed it and it's now in storage. I converted to a 97-99 center console long ago, so it's just not needed.
Next up was a rubber door seal for the PS front door. My original one had a tear in it, so I replaced it with one from a junkyard, but it had a crease in it that I didn't like. It took a while to find one in mint condition, but I found one on this trip and grabbed it. Done!
Then for more interior trim stuff. My steering column cover has been through a lot over the years, and a few of its mounting tabs had broken, so it wouldn't fully snap together (top to bottom).
I found one in good condition and got it, and also picked up the black trim that goes around the gauges, since mine was scratched up from being disassembled so many times. The column cover needed to be opened up a bit because the adapter for the Sparco steering wheel is big and would rub otherwise.
Turns out the cover from 95/96 cars is different from the 97-99 cars. The top is more rounded, and the hole for the turn signal stalk is different, so it won't stay on when I signal to make a left turn. I'm going to have to disassemble it and make that space bigger. The more rounded top also made attaching my Techtom MDM-100 more difficult, but I eventually got it to stick.
Like I said, I've taken apart my gauge cluster so many time over the years, and a result of that is that I've apparently lost most of the trim clips that secure it to the dash. I didn't realize this until I tried to remove one at the junkyard and it was much more difficult to remove than mine normally is. This would explain why mine rattles and bugs the crap out of me. Turns out mine has been missing all four of the clip on the bottom:
Not that you can really see it in this crappy picture, but I decided to put on more of my rattle reducing felt and fabric tape stuff around it before I installed it, just to make sure it doesn't rattle anymore.
That made me take a closer look at my cupholders, which also rattle and bug the crap out of me. Ahh, the joys of poly engine and trans mounts! The factory foam padding had been squished to oblivion over 20+ years, so I did my best to replicate it with some HVAC insulation:
It's probably a little thicker than it should be, but so far it seems to be working.
I had picked up the brace under the steering column a while back but hadn't gotten around to installing it, but with everything taken apart for the column cover, I decided this would be a good time. At some point over the last 18 years mine had been removed and not reinstalled. I'm not exactly sure what its purpose is, but I figured it must surely have one, so I wanted it back in there. Maybe to protect my knees in the event of a crash? Easy job, right? Just two bolts?
Yeah, not quite. Somehow, at some point, someone had snapped off one of the bolts in the bracket that the brace attaches to. It's not like there's any rust in there, I have no idea why it would have snapped like that.
Thankfully the bracket is easily removed from the car, so I got to work drilling it out and rethreading the hole. It wasn't terrible, but it made a 5 minute job into an hour job. Ugh. At least the brace is now installed.
Last up was some more 3M Cavity Wax Plus! I had been meaning to spray the insides of the side sills, so I got busy.
I pulled up the scuff plates and took a look inside the sills. It looked decent, but there was some rust in spots, mostly along the seam. Without thinking, I started spraying, using the holes for the scuff plates to stick the flexible hose through. It was only after I had sprayed one side did I stop and think that maybe spraying this over existing rust might not be the best idea. I remembered hearing a friend talk about some Eastwood product for frame rails, but had never looked into it. Well, it sounds like this stuff may have been a better product to use over existing rust. It's called and it supposedly:
- Tough Phenolic Resin Penetrates And Encapsulates The Rust On The Internal Surface
- Destroys Rust Hiding Inside Chassis So It Won't Rust Through
- Zinc Phosphate Seals It To Prevent Future Corrosion
But it was too late, and the cavity wax had already been applied
I did two coats before I ran out, but I plan on doing at least one more since it looks like I missed some areas. All I can do is hope that the wax prevents any moisture from getting to the rust and really slows down its spread. I'm not sure if it will really stop it, or just slow it down. But I think when I do the M3 and the FX I'm going to use the Eastwood product. I can always apply wax over that stuff if I want. I will say that the wax absolutely stunk up the inside of the car for days, and I had to leave the windows down for it to air out.That's all for now while I build up the courage to disassemble my old dead 5 speed trans in preparation for doing the real job to the 6 speed(s).
Last edited by 95maxrider; Jan 30, 2021 at 08:50 AM.
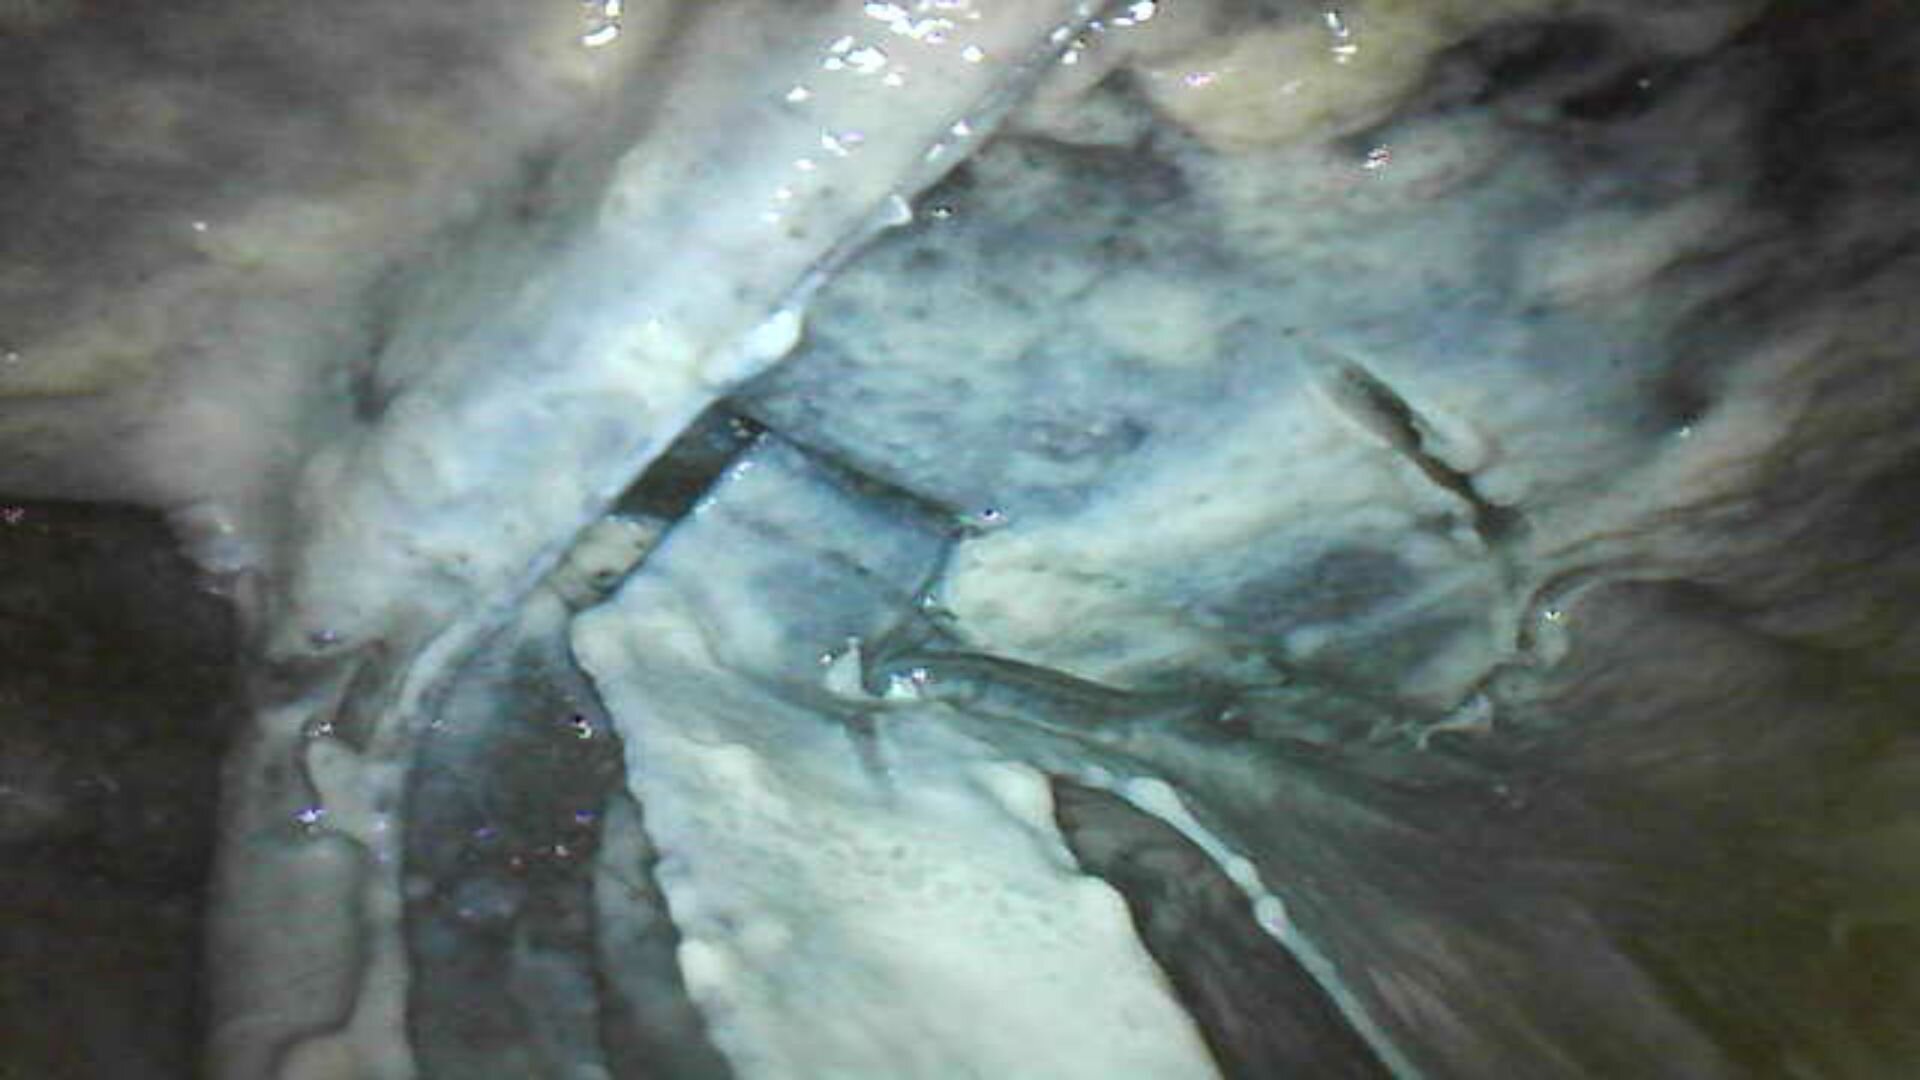
Cavity wax update: This stuff STINKS! I guess the side sills aren't completely sealed off from the cabin (holes for the sill/scuff plates notwithstanding) because it's been weeks since I sprayed the second round of cavity wax and the inside of the car smells terrible. Like, if it smells this bad forever, it may force me to consider getting rid of the car (I'm only being slightly dramatic here). This sucks. At least the sills are well protected from any moisture that gets in there:
On a more positive note, I'm slowly inching my way towards the 6 speed swap....
Schmelly's ring on JWT flywheel

I called JWT about proper torque specs on the screws/tiny bolts, and they said snug is good enough since they're so small. They did warn me that they use red loctite when they assemble it, so I used a torch when removing them to make sure I didn't round them off or break something. I used plenty of red loctite when I put it back together.
This is a thing:

OEM 350z clutch disk, 6th gen pressure plate, throw out bearing, bolts, seals, etc

And I somehow snapped this piece of plastic on my 5.5th gen shifter cable, so now I need to find another set In my defense, it was freezing in my garage and I guess the plastic was brittle.

Ok, so now I need some input from you guys reading. To go with the 2nd gen swap I want to build a 3" exhaust, and I would like to find the best way/location of where to make the transition from 2.5" to 3". Initially I thought I would just make a new 3" version of this pipe after the merge pipe of the Cattman headers:

But now I'm wondering if I would gain more power by making the merge pipe 3" as early as possible, like right after the merge occurs. To smooth out the transition from 2.5" to 3" it looks like something like this would be ideal:
But I don't know jack about exhaust engineering, please let me know if you have any suggestions on how and where I should make the transition from 2.5" to 3".
Also, another question for the hive mind: Will stock 2nd gen injectors be sufficient for a 4" intake (Q45 MAF) and a 3" exhaust?
Thanks!
On a more positive note, I'm slowly inching my way towards the 6 speed swap....
Schmelly's ring on JWT flywheel
I called JWT about proper torque specs on the screws/tiny bolts, and they said snug is good enough since they're so small. They did warn me that they use red loctite when they assemble it, so I used a torch when removing them to make sure I didn't round them off or break something. I used plenty of red loctite when I put it back together.
This is a thing:
OEM 350z clutch disk, 6th gen pressure plate, throw out bearing, bolts, seals, etc
And I somehow snapped this piece of plastic on my 5.5th gen shifter cable, so now I need to find another set
In my defense, it was freezing in my garage and I guess the plastic was brittle.Ok, so now I need some input from you guys reading. To go with the 2nd gen swap I want to build a 3" exhaust, and I would like to find the best way/location of where to make the transition from 2.5" to 3". Initially I thought I would just make a new 3" version of this pipe after the merge pipe of the Cattman headers:
But now I'm wondering if I would gain more power by making the merge pipe 3" as early as possible, like right after the merge occurs. To smooth out the transition from 2.5" to 3" it looks like something like this would be ideal:
But I don't know jack about exhaust engineering, please let me know if you have any suggestions on how and where I should make the transition from 2.5" to 3".
Also, another question for the hive mind: Will stock 2nd gen injectors be sufficient for a 4" intake (Q45 MAF) and a 3" exhaust?
Thanks!
The sooner the better IMO. Think of the exhaust as just a bunch of resisters in series. Also make sure your flex doesn't have a braided ID since these are prone to shrink/collapse. Here's where I transitioned my Cattman Y to 3":

Last edited by 95naSTA; Feb 21, 2021 at 10:08 AM.
I just saw your edit about the braided ID. I was planning on buying a Vibrant flex that is braided:
https://vibrantperformance.com/catal...oducts_id=2422
But they sell a more expensive one for FI applications that appears to have a more robust inner lining. Is this what you would recommend?
https://vibrantperformance.com/catal...0c3ce974dfee3c
Or the very basic one with no liner at all?
https://vibrantperformance.com/catal...0c3ce974dfee3c
Last edited by 95maxrider; Feb 21, 2021 at 11:20 AM.

That Eastwood internal frame coating looks like something I need to get. Thanks for sharing that one!
Cattman headers have had a few different designs, early ones had a 2 piece Y. You should make the pipe bigger right at the merge.
Cattman headers have had a few different designs, early ones had a 2 piece Y. You should make the pipe bigger right at the merge.
So in the interest of full disclosure, I did something stupid a while back. Not proud of it, but I'm going to post it anyways. I was doing some initial cleanup/disassembly of the three filthy 6 speeds I have, and I removed the clutch fork pivot ***** since they appeared to be pretty worn (flat spot on top). Two came out fine, but the one for the 6th gen trans really didn't want to come out. I wasn't thinking, so I just kept banging on it with my impact and didn't use any heat on it. I didn't know it, but apparently they use something like red loctite on it, which was preventing it from coming out easily. Eventually it came out though, and I moved on to something else. Sometime later, I was looking things over and realized I made a terrible mistake. I had broken off the top half of the mount, which made mounting the pivot ball correctly impossible, and I must have thrown away the part that I broke off. As far as I could tell, this basically made the trans a useless paperweight.
I have a buddy who can TIG and has saved me from my own stupidity a few times already, so I hit him up to see if he could save me again. He was concerned that he would have trouble welding to the case since it's cast, but he said he would give it a shot. He also warned me it could potentially fry the bearings, so he attached the ground clamp as close as he could to the area with the hope of preventing that from happening. He ground down the rough edges, so this is what we started with:

He had to build up A LOT of material to get this back to its normal height. It would have been a lot easier if I hadn't lost the piece I had broken off. He had to build up at least 1/2" of material, but it did seem to be working. We kept that bolt in place to try and keep the area straight. Eventually he got it high enough, so he ground the top flat and made new threads in the material. He tied it into two nubs in the case for added strength. We eventually were left with this:

It ain't pretty, but it looks like it will work. I was able to spin the input shaft and shift gears, so hopefully all the bearings are still good. I'll know for sure when I try to install it very soon. And in the end, it turns out the pivot ball is supposed to have a flat spot on top, so none of this was necessary. I'm dumb. But you knew that already.
I have a buddy who can TIG and has saved me from my own stupidity a few times already, so I hit him up to see if he could save me again. He was concerned that he would have trouble welding to the case since it's cast, but he said he would give it a shot. He also warned me it could potentially fry the bearings, so he attached the ground clamp as close as he could to the area with the hope of preventing that from happening. He ground down the rough edges, so this is what we started with:
He had to build up A LOT of material to get this back to its normal height. It would have been a lot easier if I hadn't lost the piece I had broken off. He had to build up at least 1/2" of material, but it did seem to be working. We kept that bolt in place to try and keep the area straight. Eventually he got it high enough, so he ground the top flat and made new threads in the material. He tied it into two nubs in the case for added strength. We eventually were left with this:
It ain't pretty, but it looks like it will work. I was able to spin the input shaft and shift gears, so hopefully all the bearings are still good. I'll know for sure when I try to install it very soon.
And in the end, it turns out the pivot ball is supposed to have a flat spot on top, so none of this was necessary. I'm dumb. But you knew that already.