
Water leak into back seat foot area- many examples!


Water leak into back seat foot area- many examples!
Hi everyone,
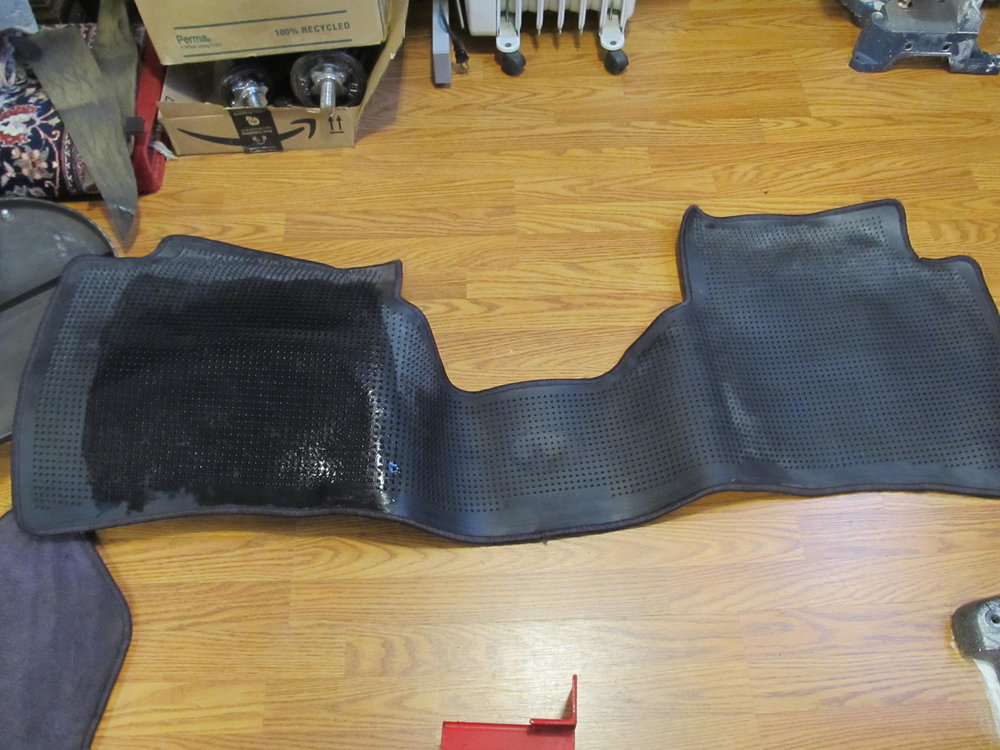
A little while ago while redoing some stuff for my stereo I noticed a large amount of water in the area behind the passenger seat on the floor. This is what tipped me off:
Then this...
And finally, this is what drained out of the carpet over night:

I know what you're thinking: your sunroof drains are clogged! Except I don't have a sunroof in my car!
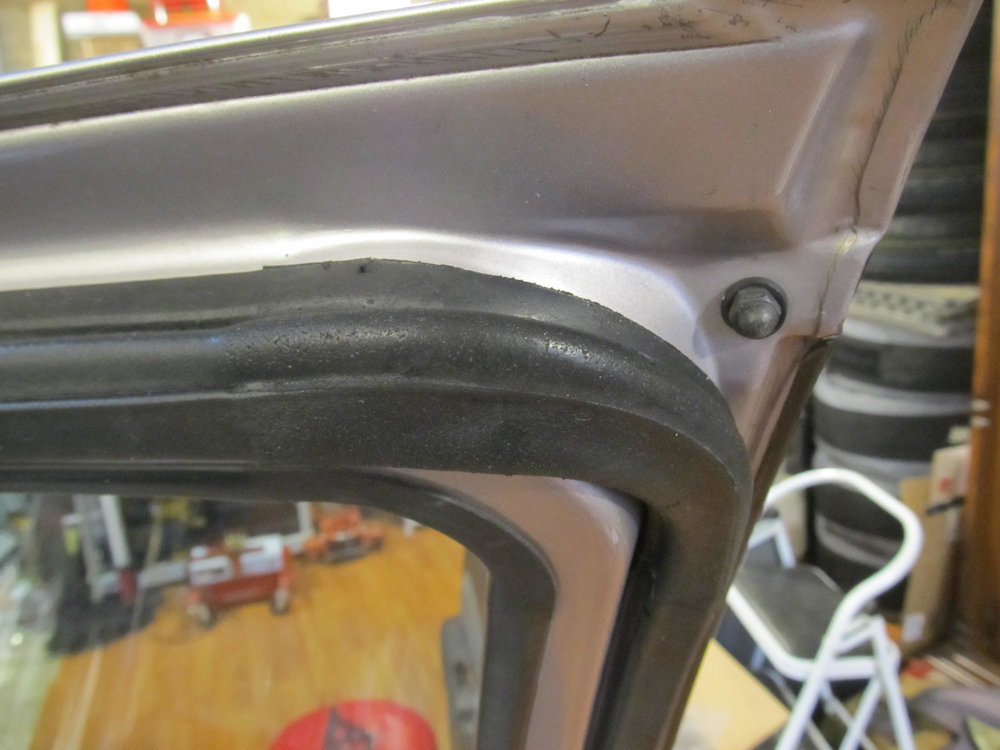
I knew that my door rubber on the PS front door had some rips in it, so I picked up some good ones at the junkyard and installed them.
Old:

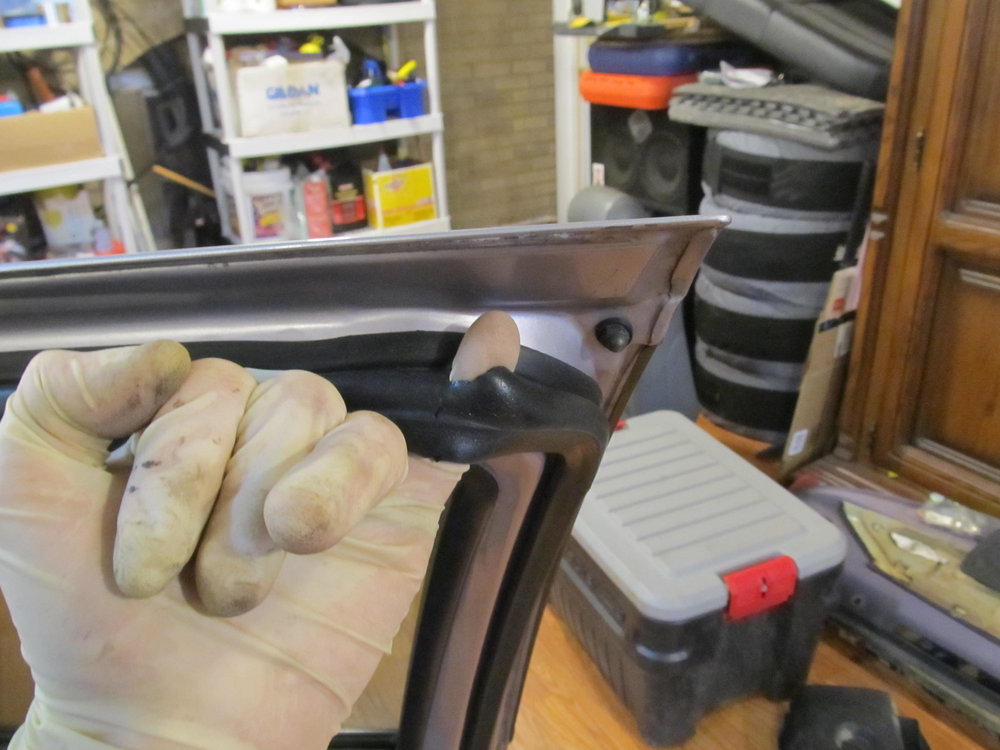
The new one for the body side has a little crease in it, but I don't think it's anything to worry about:
And yet, after all that, I just found the same area soaking wet again. I'm completely stumped as to what's happening here, and how water is getting into that area. I should mention that I park my car in my driveway, which is uphill, so if water gets in the front of the car, it could make its way to the rear without issue. With that said, I saw no indication that anything in front of that area was wet.
In the thread title I mentioned "many examples". Well, I did some digging and it seems like this has happened before. There just never seems to be any resolution posted! Here's what I found:
https://maxima.org/forums/4th-genera...ked-water.html
https://maxima.org/forums/4th-genera...e-problem.html
https://maxima.org/forums/4th-genera...ger-floor.html
https://maxima.org/forums/4th-genera...or-soaked.html
https://maxima.org/forums/4th-genera...leak-help.html
I guess if it comes down to it I'll remove all of the interior A/B/C pillar covers, hop in the car, and have someone spray it with a hose in hopes of finding the leak that way, but if I can get any other ideas, I'd be very grateful. Thanks in advance!
A little while ago while redoing some stuff for my stereo I noticed a large amount of water in the area behind the passenger seat on the floor. This is what tipped me off:
Then this...
And finally, this is what drained out of the carpet over night:
I know what you're thinking: your sunroof drains are clogged! Except I don't have a sunroof in my car!
I knew that my door rubber on the PS front door had some rips in it, so I picked up some good ones at the junkyard and installed them.
Old:
The new one for the body side has a little crease in it, but I don't think it's anything to worry about:
And yet, after all that, I just found the same area soaking wet again. I'm completely stumped as to what's happening here, and how water is getting into that area. I should mention that I park my car in my driveway, which is uphill, so if water gets in the front of the car, it could make its way to the rear without issue. With that said, I saw no indication that anything in front of that area was wet.
In the thread title I mentioned "many examples". Well, I did some digging and it seems like this has happened before. There just never seems to be any resolution posted! Here's what I found:
https://maxima.org/forums/4th-genera...ked-water.html
https://maxima.org/forums/4th-genera...e-problem.html
https://maxima.org/forums/4th-genera...ger-floor.html
https://maxima.org/forums/4th-genera...or-soaked.html
https://maxima.org/forums/4th-genera...leak-help.html
I guess if it comes down to it I'll remove all of the interior A/B/C pillar covers, hop in the car, and have someone spray it with a hose in hopes of finding the leak that way, but if I can get any other ideas, I'd be very grateful. Thanks in advance!

Good thinking. I'm pretty sure I don't have any in my front doors, but I'm not sure about the rears. I'll check on that.

Member
Joined: Jun 2015
Posts: 160
No sunroof and car is parked nose up. Check cowl drain hoses. Could be water is collecting in cowl area high enough to enter HVAC inlet. Is water on both sides of the rear or just one?
Clean the cowl of any leaves. Flush off with hose to make sure drain lines are clear.
Also just to eliminate car position park car downhill.
Clean the cowl of any leaves. Flush off with hose to make sure drain lines are clear.
Also just to eliminate car position park car downhill.

Senior Member
Joined: Jan 2011
Posts: 3,037
From: Central AR
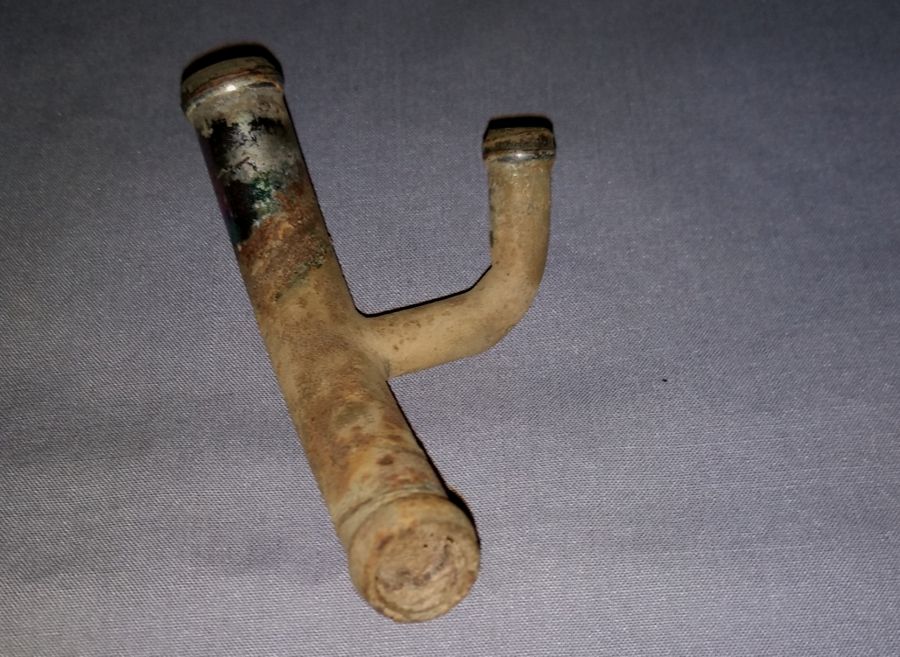
Do you have a sunroof? I've had the problem when one of the rear sunroof drain hoses became clogged. I've found the sunroof drain system will work with one of the four hoses clogged. When two or more lines are clogged, water will start to enter the passenger compartment. I use my air compressor with an air hose wand (the one with the rubber tip) from Harbor Freight to blow out the vents from the top. Once in a while, I will find a corroded Y pipe that connects the antenna drain to the roof drain.


No sunroof and car is parked nose up. Check cowl drain hoses. Could be water is collecting in cowl area high enough to enter HVAC inlet. Is water on both sides of the rear or just one?
Clean the cowl of any leaves. Flush off with hose to make sure drain lines are clear.
Also just to eliminate car position park car downhill.
Clean the cowl of any leaves. Flush off with hose to make sure drain lines are clear.
Also just to eliminate car position park car downhill.
Do you have a sunroof? I've had the problem when one of the rear sunroof drain hoses became clogged. I've found the sunroof drain system will work with one of the four hoses clogged. When two or more lines are clogged, water will start to enter the passenger compartment. I use my air compressor with an air hose wand (the one with the rubber tip) from Harbor Freight to blow out the vents from the top. Once in a while, I will find a corroded Y pipe that connects the antenna drain to the roof drain.
So after fighting with my wiper arms for like two hours, I was finally able to remove them. I got the cowl off, and really don't see much in the way of debris down there. Are there just little invisible drains on either side of the cowl? I'm thinking of pouring something like a cup of water down each side and watch how much drains onto the floor. There's decent access on the driver side, but none on the passenger side due to it being covered with metal. Does anyone know anything about diagnosing cowl leaks?
I also found this thread in the 5th gen forum:
https://maxima.org/forums/5th-genera...ger-floor.html
I'll look at those two holes tomorrow....
I also found this thread in the 5th gen forum:
https://maxima.org/forums/5th-genera...ger-floor.html
I'll look at those two holes tomorrow....
Member
Joined: Jun 2015
Posts: 160
One of the reasons, I said to park the car facing downhill is to eliminate water travel under the carpet and pooling in the rear. I do not think the door seal would leak enough not to leave traces of water on the door panel such as the grab handle. However, take someone for a ride in right rear seat on interstate. Have them listen for wind noise.
When rain is expected or is raining take some very clean and expensive paper towels. Line under the passenger front foot area - under the glove box area - from the ECU to the all the way right. Single sheet - tape if needed and overlap ends by an inch or so. If you have water in the rear and paper towels look and feel dry then water is not coming from the front.

Do you mean the plastic wheel well covers for the front wheels? Because I try to clean mine out once a year! I had them open to measure the water from the cowl dripping down, and there was very little debris in there.
Time for an update, I need some more help!
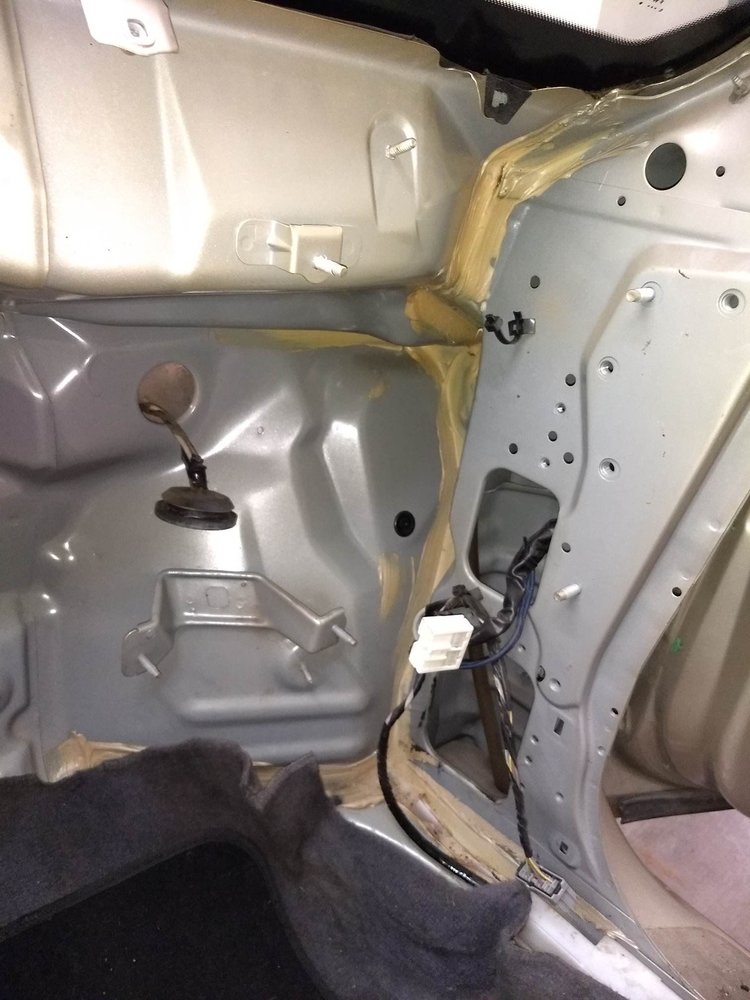
It turns out that the water behind the passenger seat was actually coming from the front of the car, not the rear. That's due to my driveway being on an incline. I located a water leak somewhere around the base of the A pillar on the PS. I removed the A pillar cover, and as far as I can tell, the water isn't coming from anywhere around the windshield. I can only see it coming out from below, in this corner:
So I decided to remove the PS fender to see if there were any visible cracks on the firewall. Unfortunately, taking the fender off did little to help me see where the leak is coming from.
Here are some closeups:

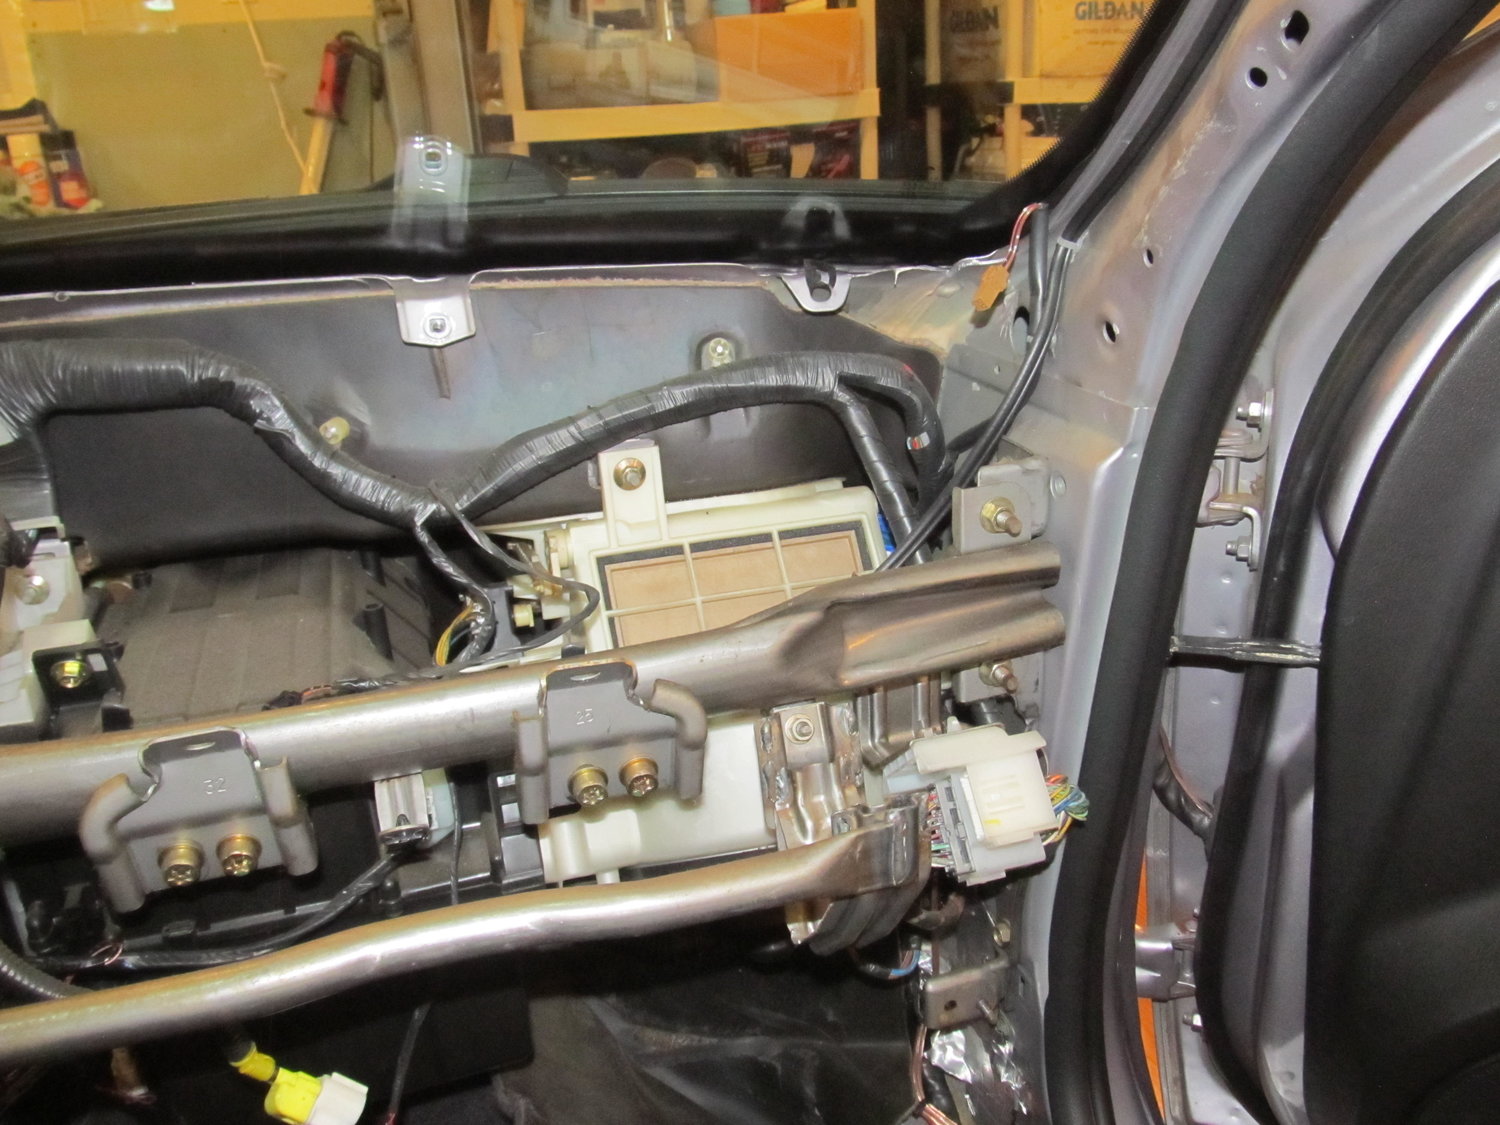
There appears to be a drain hole beneath that large oval hole:

I was able to clear out some debris by sticking my vacuum into the large oval hole, and I think some of it was semi-clogging the drain. I took the car back outside and got the hose ready:

Sure enough, the water mostly drained out of the little drain under the large oval:

This is the view inside the oval hole:
The chamber behind that wall is where the intake for the HVAC is located. That intake sits inside a hole surrounded by metal about 2" high, preventing water from going into the HVAC. Here's a view from the DS:
With my hose putting out a lot of water, no water went into the HVAC. But it did come right into the car again! So this seems to point to the problem being somewhere around the HVAC intake on the firewall, and not higher up around the windshield. The only problem is that I can't see a way to access the area where the leak is occurring, none of the metal around the firewall is removable! The only thing I can think to do now is to remove the dash and/or the heater core. Can anyone think of any other solutions here? Am I overlooking something real simple and stupid? Here's a look at the heater core:
I'd be curious to know if anyone who is sending an A32 to a junkyard might be able to hack up the cowl area and take pics of what's inside. I get the feeling that sealing the crack from the inside of the car isn't going to be as effective as sealing it from the outside. Help!
It turns out that the water behind the passenger seat was actually coming from the front of the car, not the rear. That's due to my driveway being on an incline. I located a water leak somewhere around the base of the A pillar on the PS. I removed the A pillar cover, and as far as I can tell, the water isn't coming from anywhere around the windshield. I can only see it coming out from below, in this corner:
So I decided to remove the PS fender to see if there were any visible cracks on the firewall. Unfortunately, taking the fender off did little to help me see where the leak is coming from.
Here are some closeups:
There appears to be a drain hole beneath that large oval hole:
I was able to clear out some debris by sticking my vacuum into the large oval hole, and I think some of it was semi-clogging the drain. I took the car back outside and got the hose ready:
Sure enough, the water mostly drained out of the little drain under the large oval:
This is the view inside the oval hole:
The chamber behind that wall is where the intake for the HVAC is located. That intake sits inside a hole surrounded by metal about 2" high, preventing water from going into the HVAC. Here's a view from the DS:
With my hose putting out a lot of water, no water went into the HVAC. But it did come right into the car again! So this seems to point to the problem being somewhere around the HVAC intake on the firewall, and not higher up around the windshield. The only problem is that I can't see a way to access the area where the leak is occurring, none of the metal around the firewall is removable! The only thing I can think to do now is to remove the dash and/or the heater core. Can anyone think of any other solutions here? Am I overlooking something real simple and stupid? Here's a look at the heater core:
I'd be curious to know if anyone who is sending an A32 to a junkyard might be able to hack up the cowl area and take pics of what's inside. I get the feeling that sealing the crack from the inside of the car isn't going to be as effective as sealing it from the outside. Help!
Last edited by 95maxrider; Jul 16, 2019 at 03:07 PM.
Member
Joined: Jun 2015
Posts: 160
No sunroof and car is parked nose up. Check cowl drain hoses. Could be water is collecting in cowl area high enough to enter HVAC inlet. Is water on both sides of the rear or just one?
Clean the cowl of any leaves. Flush off with hose to make sure drain lines are clear.
Also just to eliminate car position park car downhill.
Clean the cowl of any leaves. Flush off with hose to make sure drain lines are clear.
Also just to eliminate car position park car downhill.

jesus dude, i would think its easier to buy a new max than go through all that crap. guess you've got a lot of time on your hands. i have a leaking windshield that i'm getting replaced by safe light sometime this summer, problem is they never resealed it properly the first time and now they're going to be doing some body work around the top before installing a new one. pita......
Senior Member
Joined: Jan 2011
Posts: 3,037
From: Central AR
I've been going through a similar nightmare with a 99 Tacoma. Toyota actually issued a TSB about the problem. I used the FlexSeal spray with a Fluid Film extension wand on that. I cut off the tip of the FF extension to reach into the cracks and crevices of the body joint. I couldn't see where I was spraying and had to do it by feel. Note that I should have used clear instead of the black. There are products made by Kent (Moore) automotive that is a sealer spray to correct body joint leaks. For mine, caulk was too thick to begin to get into the cracks that I couldn't see. I tried it a first and gave up and switched to something that would run into the cracks. It took 2 or 3 coats to finally seal it.
Last edited by CS_AR; Jul 18, 2019 at 10:39 AM.
Based on your picture of the HVAC inlet it is a seperate piece from the cowl and is sealed with seam sealer. Use regular silicone caulk and reseal the inlet. Be creative as to how to apply the caulk. A caulk gun might not fit. Use a cheap artist paint brush for hard to reach places. Also look for more seams and caulk them as well.
Originally Posted by max ride 41
jesus dude, i would think its easier to buy a new max than go through all that crap. guess you've got a lot of time on your hands. i have a leaking windshield that i'm getting replaced by safe light sometime this summer, problem is they never resealed it properly the first time and now they're going to be doing some body work around the top before installing a new one. pita....
Originally Posted by CS_AR
I've been going through a similar nightmare with a 99 Tacoma. Toyota actually issued a TSB about the problem. I used the FlexSeal spray with a Fluid Film extension wand on that. I cut off the tip of the FF extension to reach into the cracks and crevices of the body joint. I couldn't see where I was spraying and had to do it by feel. Note that I should have used clear instead of the black. There are products made by Kent (Moore) automotive that is a sealer spray to correct body joint leaks. For mine, caulk was too thick to begin to get into the cracks that I couldn't see. I tried it a first and gave up and switched to something that would run into the cracks. It took 2 or 3 coats to finally seal it.
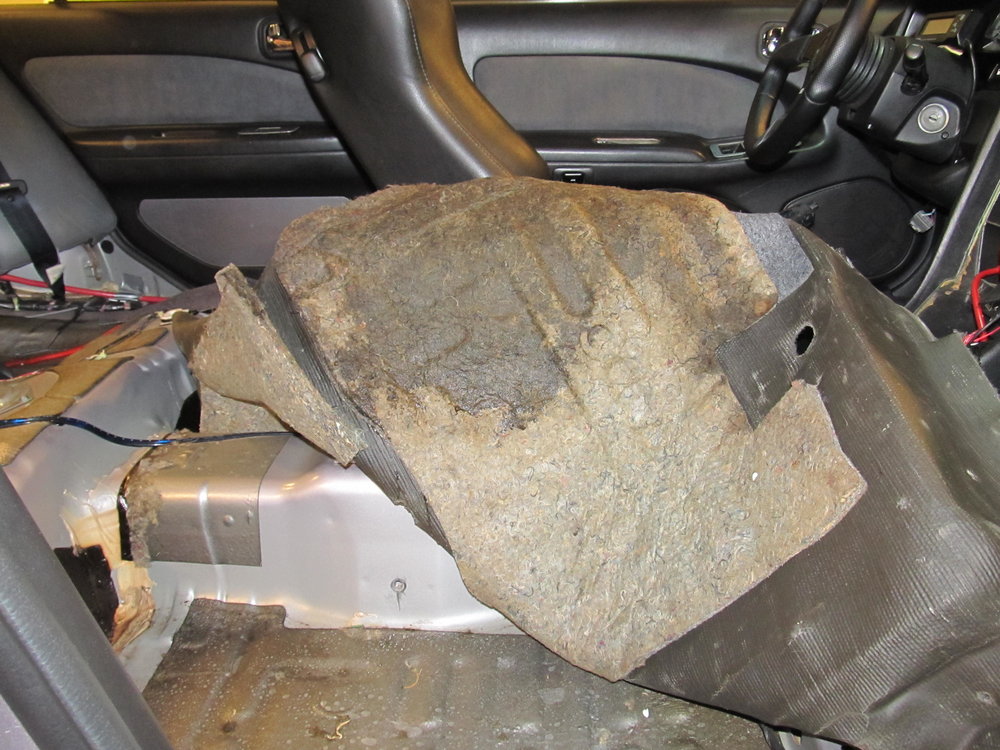
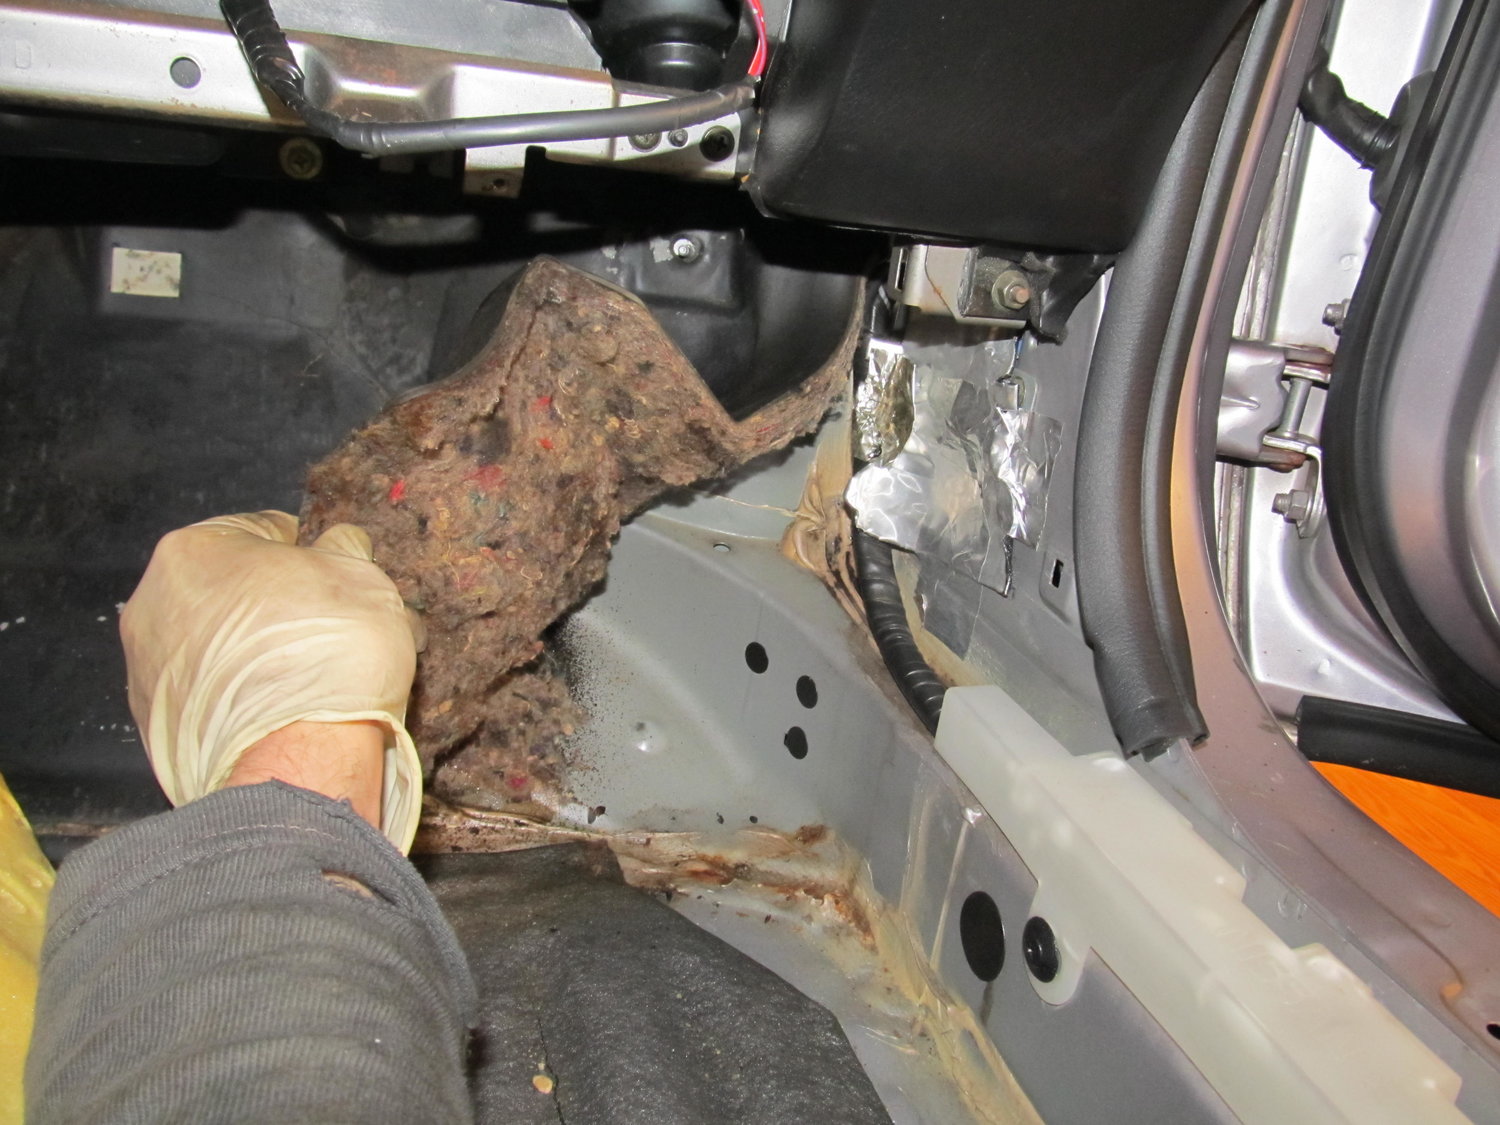
So Schmellyfart is taking apart a car to go to the junkyard, and was nice enough to snap some pics of what the inside of a 4th gen car looks like with the dash and heater core removed. These pictures are very helpful, and if you look close, you can see an area that is rusting, likely around where mine is doing the same:


So the pics are great, but even with this added information, I'm still struggling to figure out how I'm going to seal this up from the outside of the car. Is that even worth the effort, or should I just try to seal it from the interior? The area in the pics that's showing some rust is unreachable as far as I can tell from the outside of the car. I'm considering cutting the entire cowl off, and then having it welded back on, just so I can get access to the HVAC intake area. I'm kind of lost on how to proceed from here. Do I just rip the dash out, and hope for the best? Do I attack it from the exterior, and if so, how? Try to wriggle my hand in there and start blindly smearing goo all over the place? I'm going to play around more with my mini cam over the weekend in the hopes I can get a visual of where the problem is. Either way, thank you for the pics schmelly, they're greatly appreciated!
So the pics are great, but even with this added information, I'm still struggling to figure out how I'm going to seal this up from the outside of the car. Is that even worth the effort, or should I just try to seal it from the interior? The area in the pics that's showing some rust is unreachable as far as I can tell from the outside of the car. I'm considering cutting the entire cowl off, and then having it welded back on, just so I can get access to the HVAC intake area. I'm kind of lost on how to proceed from here. Do I just rip the dash out, and hope for the best? Do I attack it from the exterior, and if so, how? Try to wriggle my hand in there and start blindly smearing goo all over the place? I'm going to play around more with my mini cam over the weekend in the hopes I can get a visual of where the problem is. Either way, thank you for the pics schmelly, they're greatly appreciated!
Senior Member
Joined: Jan 2011
Posts: 3,037
From: Central AR
This may make for some interesting reading on how Taco owners solved the leaking cowl problem.
https://www.tacomaworld.com/threads/...ak-fix.432290/
https://www.tacomaworld.com/threads/...ak-fix.432290/
This may make for some interesting reading on how Taco owners solved the leaking cowl problem.
https://www.tacomaworld.com/threads/...ak-fix.432290/
https://www.tacomaworld.com/threads/...ak-fix.432290/
================================================== ==========================
Did you have a second post that you deleted? I had this in my email, but it isn't showing up here:
Some people put an extension on a caulk gun. This requires calk that is soft enough to flow through the tube. It depends on the area and reach.
https://twstatic.net/attachments/img_2277-jpg
Then if you use a product like FLEXSEAL or a Kent Automotive sealant product with a Fluid Film or Eastwood extension, cut off the brass tip, and make a wire wand for reaching into the hard to reach areas.
https://encrypted-tbn2.gstatic.com/s...TzFVg&usqp=CAc
https://images-na.ssl-images-amazon....pIC1bt%2BL.jpg
Last edited by 95maxrider; Jul 20, 2019 at 06:36 AM.
Senior Member
Joined: Jan 2011
Posts: 3,037
From: Central AR
Thanks for the link! I like the OP's idea and execution, but don't understand why he sealed up the front edge of the cowl (the part facing the engine bay) instead of the part that goes against the firewall/cabin of the vehicle. Or did he do both, and he just couldn't get a picture of the silicone against the firewall?
================================================== ==========================
Did you have a second post that you deleted? I had this in my email, but it isn't showing up here:
Some people put an extension on a caulk gun. This requires calk that is soft enough to flow through the tube. It depends on the area and reach.
https://twstatic.net/attachments/img_2277-jpg
Then if you use a product like FLEXSEAL or a Kent Automotive sealant product with a Fluid Film or Eastwood extension, cut off the brass tip, and make a wire wand for reaching into the hard to reach areas.
https://encrypted-tbn2.gstatic.com/s...TzFVg&usqp=CAc
https://images-na.ssl-images-amazon....pIC1bt%2BL.jpg
I don't see how the guy made pictures without using some kind of a small camera or borescope. That's a nearly impossible place to photograph.
Last edited by CS_AR; Jul 20, 2019 at 07:26 AM.
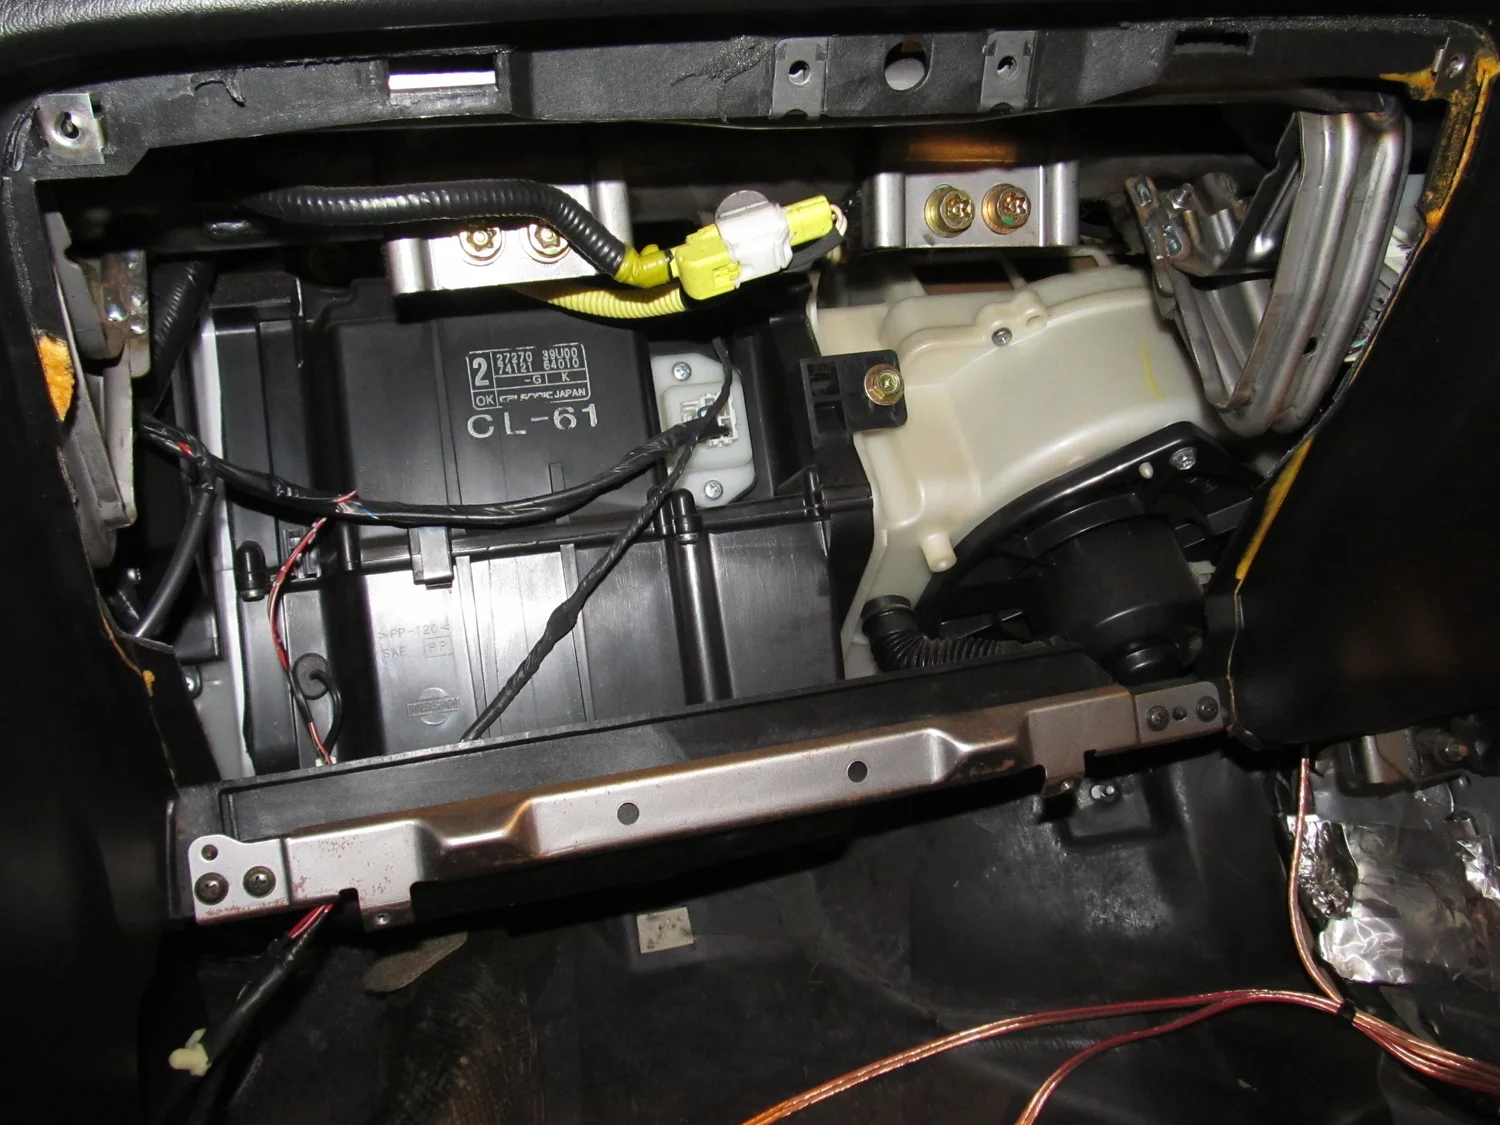
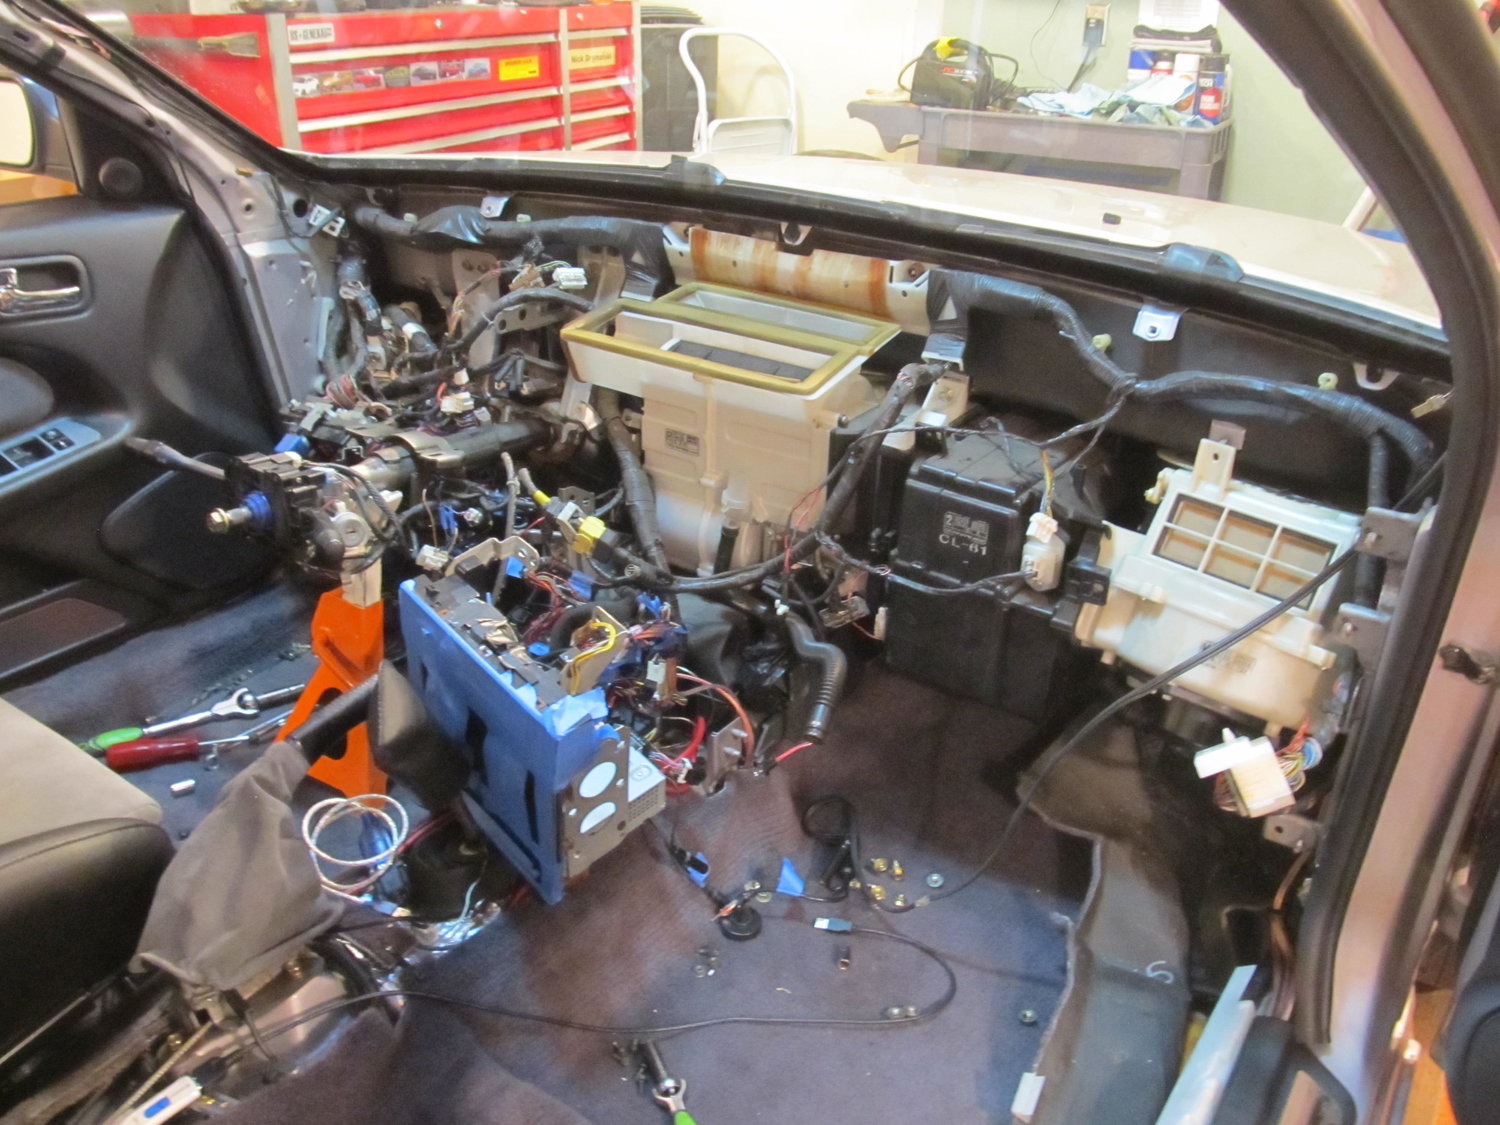
Ok, so I've pulled the dash, and I'm looking at the heater core and blower motor assembly:


I'm really hoping I can remove the blower motor (the white thing on the right) without removing the whole heater core (black part on the left). I'm really not trying to drain all my coolant and my AC lines. Does anyone know if it can be done? Without removing the blower motor, I can't get to any of the seams on the firewall. So close, but so far!
I would also like to remove the PS air bag, as I don't have one on the DS, which disables the PS one, so I might as well get rid of it. Except it seems to be "one piece" with the outer cover:


There are a bunch of bolts and four rivet things, but without the air bag's brackets, there's no way to properly reinstall just the cover. Does anyone know if this can be done, or if I just need to keep the air bag?
I'm really hoping I can remove the blower motor (the white thing on the right) without removing the whole heater core (black part on the left). I'm really not trying to drain all my coolant and my AC lines. Does anyone know if it can be done? Without removing the blower motor, I can't get to any of the seams on the firewall. So close, but so far!
I would also like to remove the PS air bag, as I don't have one on the DS, which disables the PS one, so I might as well get rid of it. Except it seems to be "one piece" with the outer cover:
There are a bunch of bolts and four rivet things, but without the air bag's brackets, there's no way to properly reinstall just the cover. Does anyone know if this can be done, or if I just need to keep the air bag?


Well I got the blower motor out without removing the AC evaporator in the black box to its left! I was under the impression that the black box housed both AC and heater stuff, but upon looking at the lines from the engine bay, it became clear that the black box only held AC stuff. The main blower assembly in the center is what houses the heater stuff I guess. I do have the ability to recharge the AC, but it's not something I'm very good at, and I didn't feel great about venting my whole system to the atmosphere. So I hoped and prayed that I would find a quick and simple way to get out the blower by itself. I went back into the garage this morning pretty worried about what the day had in store. I had the idea that I might want to trim off some plastic from the black box to give me enough room to slide out the blower. I was in there looking at it, and noticed that one of the sides for the black AC box was pretty flimsy. With almost no effort, I was able to snap off a good piece of it. I then followed up with my snips, and with that little bit of plastic out of the way, I could get the blower out! It was a joyous moment to be sure. Here's what I did:
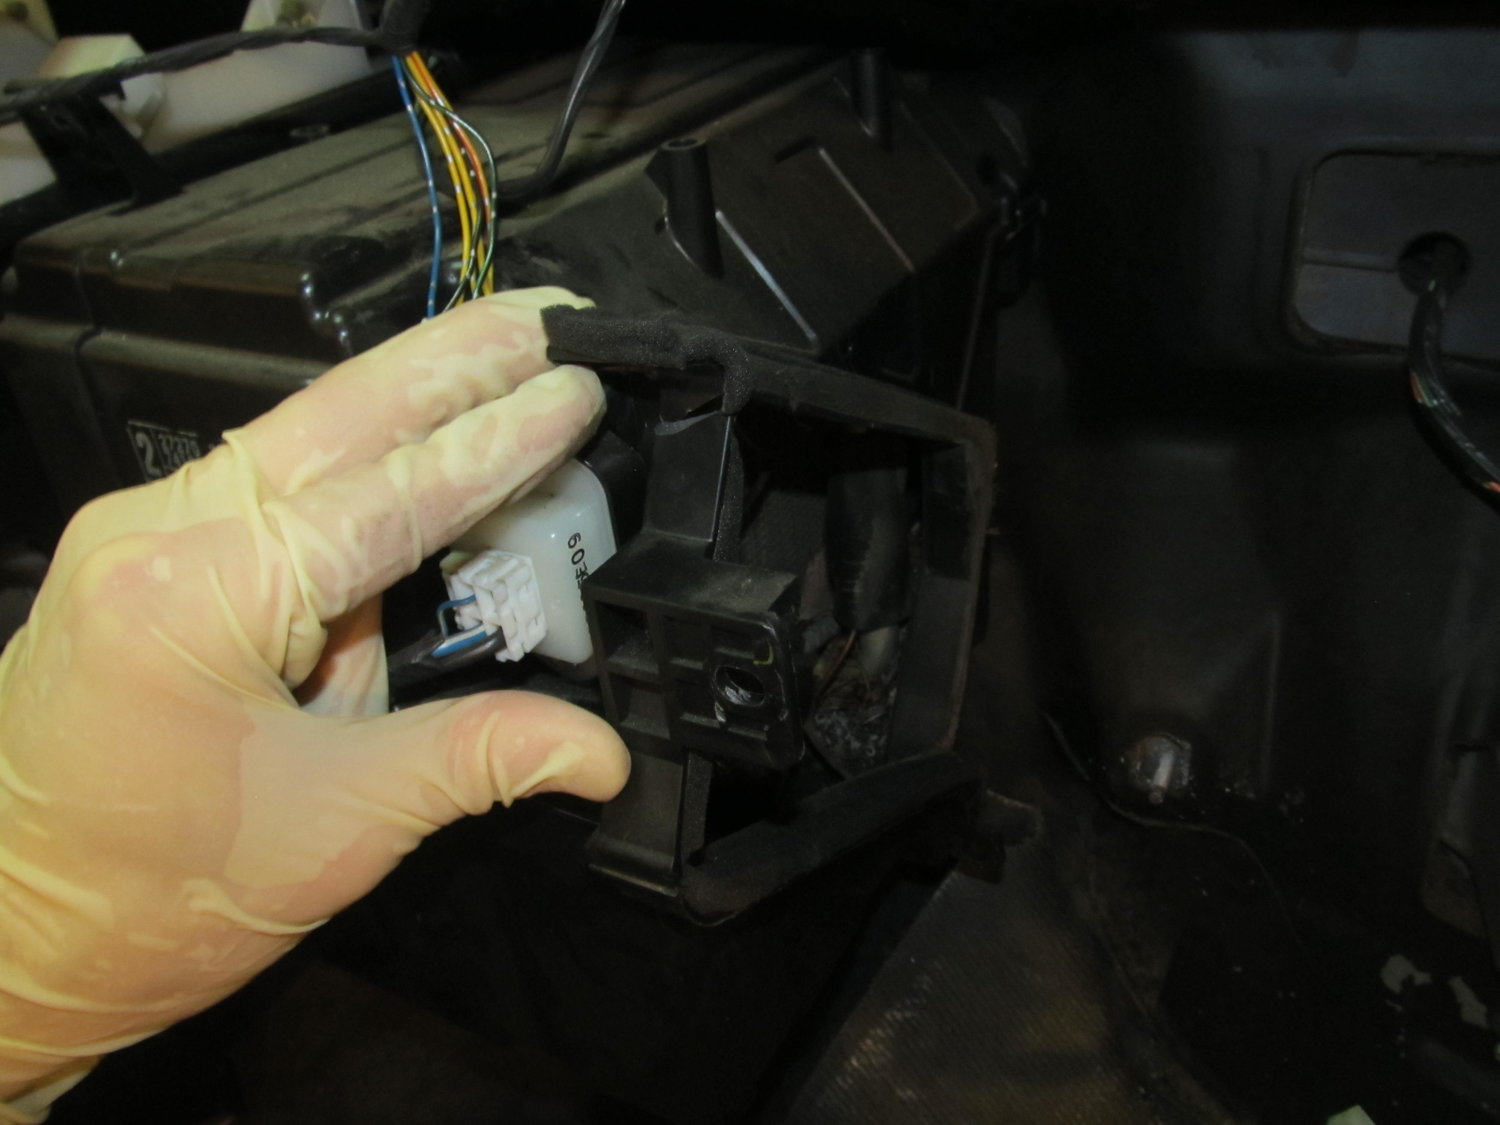

That little bit of plastic was all that was keeping me from getting the blower out!
As this out of focus picture shows, there was a good amount of debris in the evaporator housing:

So I spent some time with different picks and my shop vac and cleaned it all out:

The blower was actually very clean:

So I was then left with this:

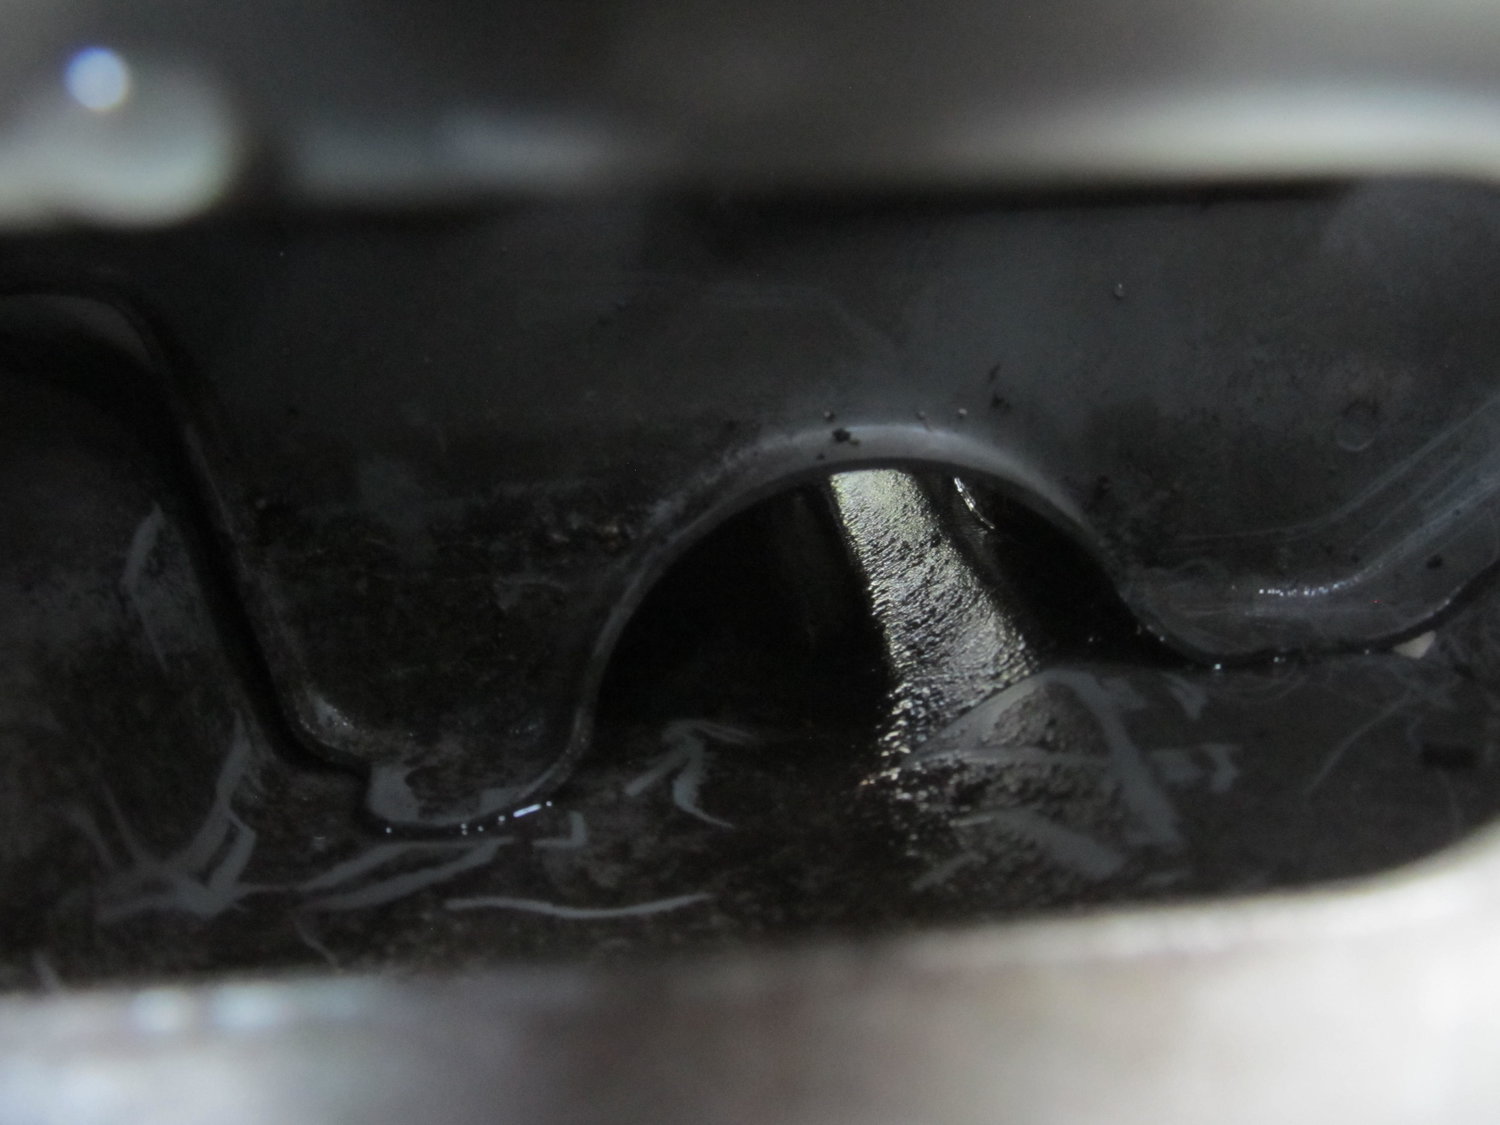
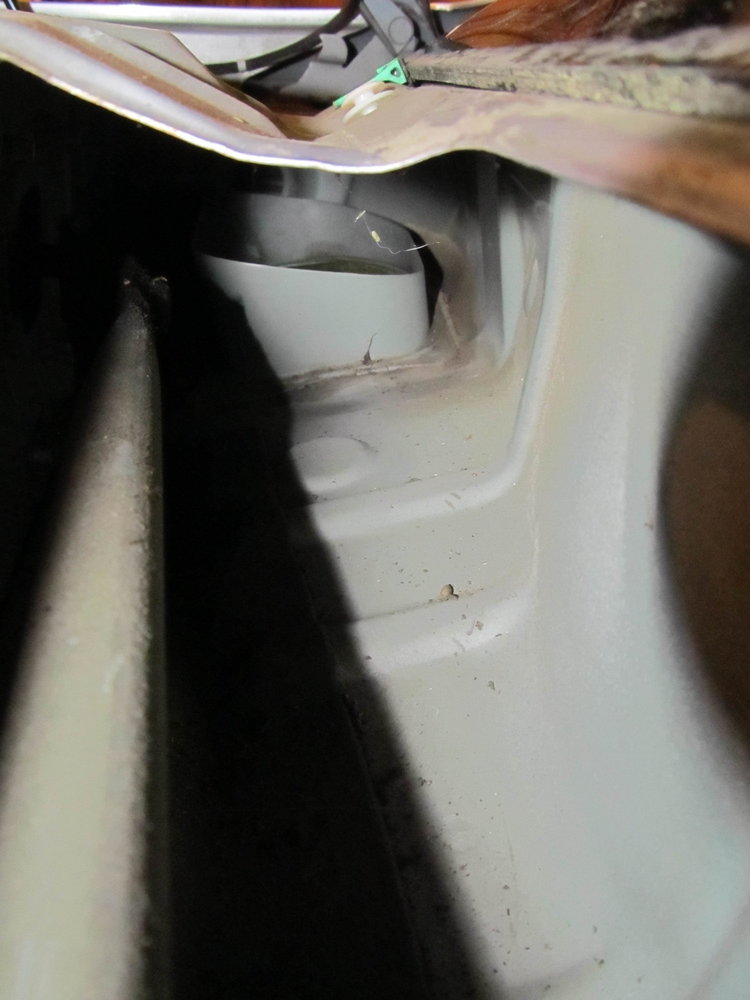
But there was still the factory insulation in the way. I ended up just cutting off a piece so I could get easy access to where I thought the leak was (I'll reinstall properly when I'm all done). And with that, I was FINALLY able to see the source of my water leak:

It's not in the exact same spot as the pics from schmellyfart, but it's not far, maybe 2" away. It's clear that this area has a few body panels coming together, and it's also right next to the drain for the cowl, so being sealed properly is crucial. If you have a water leak in a 4th gen, I wouldn't be surprised to find it's in this area! You can see three water trails coming down from that area, so I'm very confident this was my problem.
I spent quite a bit of time with different wire wheels, both on my big gun and little ones on my dremel, trying to peel back the old seam sealer so I could get a better look at exactly where the water is coming in.

It doesn't really come through in the picture, but the horizontal area just right of center is actually completely open now. I had to scrape the old seam sealer out of it with a screwdriver, because I didn't want any of that old cracked stuff getting in the way of my fresh seam sealer. Now I'll be able to completely refill the gap with new sealer. Access into this area was pretty awkward, and my back was aching after a few hours in there, but I think I'm happy with how clean I was able to get it. When I finally couldn't get it any cleaner, it was time to prep the surface for the seam sealer:

This stuff is SUPER strong, and has tons of warnings all over it. I go full-hazmat when I use this stuff, but professional painters swear by it, so I grit my teeth and bear it. I was considering applying the seam sealer today, but then I thought about it more and realized I would feel much better about it if I bought a new tube of it. My current tube is a few years old, and since I couldn't get a firm answer on its shelf life, I decided I would rather spend another $20 on new sealer than to have my current sealer fail because it was too old and didn't adhere properly. It should be here on Tuesday, so I'll continue after that. But for now I'm feeling pretty damn good that I was able to get the blower out by itself without ruining anything!
I'm left with this to look at, and ponder how many things I'm going to forget to reinstall, or reinstall in the wrong order. I'm not out of the woods yet!

That little bit of plastic was all that was keeping me from getting the blower out!
As this out of focus picture shows, there was a good amount of debris in the evaporator housing:
So I spent some time with different picks and my shop vac and cleaned it all out:
The blower was actually very clean:
So I was then left with this:
But there was still the factory insulation in the way. I ended up just cutting off a piece so I could get easy access to where I thought the leak was (I'll reinstall properly when I'm all done). And with that, I was FINALLY able to see the source of my water leak:
It's not in the exact same spot as the pics from schmellyfart, but it's not far, maybe 2" away. It's clear that this area has a few body panels coming together, and it's also right next to the drain for the cowl, so being sealed properly is crucial. If you have a water leak in a 4th gen, I wouldn't be surprised to find it's in this area! You can see three water trails coming down from that area, so I'm very confident this was my problem.
I spent quite a bit of time with different wire wheels, both on my big gun and little ones on my dremel, trying to peel back the old seam sealer so I could get a better look at exactly where the water is coming in.
It doesn't really come through in the picture, but the horizontal area just right of center is actually completely open now. I had to scrape the old seam sealer out of it with a screwdriver, because I didn't want any of that old cracked stuff getting in the way of my fresh seam sealer. Now I'll be able to completely refill the gap with new sealer. Access into this area was pretty awkward, and my back was aching after a few hours in there, but I think I'm happy with how clean I was able to get it. When I finally couldn't get it any cleaner, it was time to prep the surface for the seam sealer:
This stuff is SUPER strong, and has tons of warnings all over it. I go full-hazmat when I use this stuff, but professional painters swear by it, so I grit my teeth and bear it. I was considering applying the seam sealer today, but then I thought about it more and realized I would feel much better about it if I bought a new tube of it. My current tube is a few years old, and since I couldn't get a firm answer on its shelf life, I decided I would rather spend another $20 on new sealer than to have my current sealer fail because it was too old and didn't adhere properly. It should be here on Tuesday, so I'll continue after that. But for now I'm feeling pretty damn good that I was able to get the blower out by itself without ruining anything!
I'm left with this to look at, and ponder how many things I'm going to forget to reinstall, or reinstall in the wrong order. I'm not out of the woods yet!

Thread
Thread Starter
Forum
Replies
Last Post
erniel
7th Generation Maxima (2009-2015)
7
Oct 6, 2014 02:24 AM
studious04maxima
6th Generation Maxima (2004-2008)
15
Jan 8, 2009 12:31 PM
Kevlo911
4th Generation Maxima (1995-1999)
26
Jun 28, 2004 05:00 AM