
My Massive I30 Revival and Build Thread


Very impressive finish given the tires and power gap from the other vehicles. I ran my first Tracksprint last summer in my FR-S at Autobahn CC but we didn't run our timing system that day. IIRC we got like 15-20 runs with multiple cool down breaks.

extremely impressive brother, and congrats on placing so well ! great to hear the details of the story and your latest update. amazing ! and your car is the definition of the a sleeper! built not bought !

Alright so my car is behaving very strangely and I think I'm gonna need some help from you big brain dudes out there. There are still a few things I need to test out, but I need some help thinking up other possibilities.
It all started about a month ago. I pulled the car out of the garage after sitting for a few days and it was running super rough. My AFR was reading in the 9s at idle, instead of its usual ~14.7. At first I thought it was a sticky injector, so I got my scope out and listened to them, but they all sounded normal. I then happened to look at my fuel pressure, and it was at 52 instead of the 42 it's always been at. I've been running an older Aeromotive AFPR, so I figured it took and dump and needed to be replaced. While I waited for the new one I turned the FP back down to 42, and the AFR rose to 11. Hmm, so it looks like that was only part of the problem. But what could have caused my FP to jump like that? The adjusting nut/bolt was locked super tight.
I then unplugged all 3 O2 sensors, and it went up to 13.5. Ahh, maybe one went bad! So I plugged them back in one at a time and the AFR kept getting closer to 14.7. With them all plugged back in, it fluctuated between 14 and 15. Er, ok, I don't know how to interpret that. Drove the car around for a bit and it went back to 11 at idle. At light cruising it hovered around 14.7. I couldn't get a good look at WOT, but I think it looked normal enough.
I installed a new Aeromotive AFPR and replaced all the rubber lines, simplifying things as I went, and being sure to use high pressure fuel line clamps. I set the FP to 42, and there was no improvement, still around 11 at idle. And that's pretty much what it's been doing the last few weeks, although now it will often drop back down into the 9s, even with FP at 42.
So the problem appears to be most noticeable at idle, which to me would normally indicate a leak somewhere. But don't all leaks cause the car to run lean, rather than super rich? What can cause the car to dump this much fuel in at idle, and from what I can see, only at idle? Bad MAF readings?
On top of that, two other weird things have happened. The first was the day after the trackcross event. I went to start the car, and there was nothing. The battery is relatively new, and it was certainly at a full charge since I drove it a ton the day before. I went and looked at the voltage gauge under the hood, and it was at 0! But then a few minutes later it was back at 12.6, so I tried to start it again, but this time with my wife watching the gauge. Once again, when I tried to start the car it dropped to 0 and stayed there for a bit, then recovered. And then on the next attempt the car started and the problem hasn't come back since. To me, that sounds like a serious voltage drop, maybe at the starter? But why did it only happen twice, and not again in the last few weeks?
The next issue appeared in the last few days as it's gotten a little colder. Both incidents happened within the first minute or two of driving, and the car just stalled out on me. I wasn't paying close enough attention to know if it happened while I was in gear, or if it happened when I shifted from first to second. But the car started right back up after it stalled, and drove normally after that. It's driven without incident the last few days. It seemed like it could have been something a slow/faulty IACV would do (not catching the revs as they dropped during a shift), but at the same time, it almost seemed like the car just lost power/had an electrical issue.
The only thing I have to go on are some codes that came on after I unplugged the O2 sensors. I cleared the codes and they haven't come back in a few weeks.
-P1335 crankshaft position sensor
-P0135 B1S1 O2 sensor
-P0155 B2S1 O2 sensor
Ok, the O2 codes make sense. But that crankshaft sensor deserves a closer look. That could certainly explain the car stalling like it did, but I'm not sure about the running rich and voltage drop problems. Next time the car is in the garage I'll inspect and clean the crank sensors, and also take a close look at the wiring for them. I also plan on replacing my old Innovate WBO2 with a new AEM UEGO. Maybe my wideband just isn't reading properly anymore.
I do have a laptop with Nistune on it, but I have no idea what to look for or how to interpret the data there.
So to all the Sherlock Holmes we have out there, is anything jumping out to you?
it sounds like CPS sensors to me, and once u had that code, that pointed to it more for me. with this 3.5 engine you dropped in did you ever replace the CPS sensors? very classic issue on that engine sometimes with no codes. Your random like symptoms were like mine when I had CPS issues. At idle like opportunities the car would shut off, stall , sometimes at the end when it got really bad start ups were rough and barely start-able . For simplicity I would replace them if you haven't already and see if all these issues go away. (OEM or hitatchi)
also i had a dealer physically check the CPS sensors and they said they were fine ( i had no codes at the time) and they were still the issue. all problems went away after replacement.
also i had a dealer physically check the CPS sensors and they said they were fine ( i had no codes at the time) and they were still the issue. all problems went away after replacement.
Question: How are you supposed to do a continuity test between a harness in the engine bay and the other side where it connects to the ECU? The leads for my multimeter aren't anywhere close to being long enough to do that.
Last edited by 95maxrider; Oct 5, 2022 at 10:50 AM.

Nice track time results! And there is still more that can be done to this platform suspension wise and engine wise.
As far as extending leads on a test meter, I've used 26~28 gauge solid core wire for that. Wrapped it around one of the leads to make an extension, then used electrical tape to insulate and keep the wire wrapped up around the test lead. It doesn't add a whole lot of resistance, you could also measure the resistance of this extended wire setup before starting and on some meters it is possible to zero out that extra resistance before testing anything else (depends on the meter used, but any additional resistance will be in the milli-ohms anyways and not a big impact on the results).
Even easier you could get a set of alligator or mini hook leads that are much longer, they sell them in fairly long lengths. A pair of these would give 12' of total range.
https://www.digikey.com/en/products/...2-72-2/6125794
https://www.digikey.com/en/products/...2-72-0/6125793
Last edited by 98SEBlackMax; Oct 6, 2022 at 10:09 AM.

Regarding the extended S14 ball joints, I was under the impression that the pivot point needed to be raised for the correction to be done correctly, rather than just having an extended shank length. Those appear to keep the pivot point at the stock location and just use longer shanks. Am I mistaken?
Regarding the overall tie rod length when using the SPL outers, according to one poster in this Zilvia.net thread (the one mentioned in the video), these are the lengths of various inner tie rods:
89-94 240sx.. 11.10" (m12x1.25)
95-98 240sx.. 11.37"
95-99 Maxima 11.42"
96-99 I30...... 11.42"
97-01 Q45..... 12.00" (same with 01-06)
00-04 I30...... 12.91"
00-03 Maxima 12.91"
04-08 Maxima 13.30" (same with 04-06)
PSM Spherical....12.5"
The car in the video is an A33, so his inner tie rods are 12.9". Since the SPL outer tie rods are about 0.5" longer than the stock A33 tie rods, he went with shorter Q45 inners (0.9" shorter) to get the proper overall length. He also mentioned that it's not possible to get toe out with stock tie rods, which, unless the A33 is drastically different than the A32, is just plain wrong. Anyways....
Assuming the SPL outers are 0.5" longer than A32 outers, that would mean we would need to use the puny S13 inners, which apparently have a reputation for being pretty weak since they're M12 versus M14 for all the others. So if those can't be used, I wonder if we would just need to trim the length of our inners and/or extend the threads further down the shaft to get the correct overall length.
Oh, and after months of waiting, 2J Racing finally got back to me about the compatibility of their B15 bumpsteer/roll center correction kit on the A32:
"Hey Nick - we ran a few tests on our ball joints (RCK) vs the one you sent. There is a 4.10703% difference, which, even when tack welded to the LCA for track applications it would potentially have a much higher failure rate. Both the B15 and B13 RCKs were tested. I would not recommend using this in your application."
So I asked about them making a kit for the A32, let's see what they say. This also makes me wonder exactly how close those S14 ball joints are to the Maxima ones. Close ain't exactly good enough in this application, it needs to be perfect.
Looks like he used a Gktech S14 ball joint with a longer length (+20 mm).
https://us.gktech.com/bj291-ball-joint-1
Not sure if that S14 ball joint taper is identical though to the A33, in the end it shows him using two washers to get more torque on the ball joint studs as they were coming loose over time. Makes me think the taper is close, but not the same. I was going to order some cheap S14 & S13 ball joints so I could measure the taper compared to the A32/A33. For the old A32 ball joints I just took a quick measurement of 17.3 mm at the top of the cone, 20.5 mm at the base of the cone, and 23.5 mm taper length. I saw on his video he mentions "the taper length is 23mm with a high of 18.6mm and a low of 15mm" , this could explain why the threaded shank went too far up and was slightly hitting the axle and the need for the extra washers to get the ball joint to stay put. It is also a ball joint for a RWD application, so there is no axle there on the S14 to get in the way, again I don't have a S14 ball joint in front of me to compare.
I drew this up quick, it is a steel insert with the S14 taper (from his taper measurements) on the inside. On the Maxima steering knuckles drill out the ball joint taper (19 mm or 3/4" drill bit) and press this in, then spot weld that upper tab to the knuckle in a few areas to keep it in place. This would allow a better fit of the S14 ball joint shank, though you would have to weld the steel insert to cast iron knuckle.
Also instead of using the SPL bump steer kit, it might be worth considering the GK version.
https://us.gktech.com/high-misalignm...ends-12mm-14mm
The kit is offered with different shank lengths for the outer tie rod, so possibly no need to change out the inner tie rods. You could also machine the outer tie rod shank lengths to be slightly shorter and run a tap/die to clean the threads up. However they still need to be flipped as he did in the video, or buy the GK kit and have a new threaded rod made to match the FWD Maxima outer tie rod taper setup (it would be mostly the same, just flip the taper section around).
Last edited by 98SEBlackMax; Oct 14, 2022 at 10:45 AM.
Welp, I installed two new OEM crank sensors, and if anything, the problem is worse. The car struggles to maintain idle and keeps trying to stall. It runs better/almost normal if revs are above 1,000 rpm, but below that it doesn't know what to do. Maybe it just needs more time, but it somehow didn't throw a CEL yet. I guess I'll try to smoke test it tomorrow and see if there's some massive vacuum leak I don't know about. I was about to reinstall the stock ECU and pull the Nistune, but then I realized I would need to install my old intake and MAF, since the Q45 MAF won't play nice with the stock ECU. I'll probably give that a try tomorrow as well after I pull parts out of the attic. If you've got any suggestions, post them up!

Regarding the extended S14 ball joints, I was under the impression that the pivot point needed to be raised for the correction to be done correctly, rather than just having an extended shank length. Those appear to keep the pivot point at the stock location and just use longer shanks. Am I mistaken?
If you raise the pivot point to push the LCA down, you're just making a right triangle between the LCA bushings, old pivot point location and new pivot point. The hypotenuse is the distance from the LCA bushings to the raised pivot point and radius it operates on is basically the same. This setup will function essentially the same as stock ball joints on a lowered car and introduce the same positive camber on compression.
Welp, I installed two new OEM crank sensors, and if anything, the problem is worse. The car struggles to maintain idle and keeps trying to stall. It runs better/almost normal if revs are above 1,000 rpm, but below that it doesn't know what to do. Maybe it just needs more time, but it somehow didn't throw a CEL yet. I guess I'll try to smoke test it tomorrow and see if there's some massive vacuum leak I don't know about. I was about to reinstall the stock ECU and pull the Nistune, but then I realized I would need to install my old intake and MAF, since the Q45 MAF won't play nice with the stock ECU. I'll probably give that a try tomorrow as well after I pull parts out of the attic. If you've got any suggestions, post them up!
As usual I'm way behind on updates. Nothing too interesting to note, just lots of small projects. Let's pick up where we left off before, with the rough running problems.
I installed both of the new OEM crank sensors on the car one night and turned the car on, only to find my super rough idle and super rich AFR had not improved at all. A few days later I started poking around some more to see if I could figure out what was going on. I first stared by reinstalling the rear crank sensor, seeing if I could make sure it was aligned with the flywheel trigger wheel. I didn't see how it could be off by very much, and with it installed you can't see how it lines up with the trigger wheel, so I just tightened it back up and moved on. I was playing around with O2 sensors again with no improvement when I decided to unplug the MAF and see how it reacted. Well I was holding the wires, getting ready to unplug the connector, when all of a sudden the car started running perfectly! I kept jiggling the wires and the connector, seeing if I could get it to misbehave again, but no matter what I did the car ran flawlessly. So I don't know if the connector wasn't fully seated, or if my splice job wasn't perfect, but it's been about a month now and the car hasn't skipped a beat, so I'm considering this problem solved. My AFR isn't perfect, and sometimes takes a while to come from rich to normal at idle (worn out WBO2 sensor?), but it doesn't seem to have any affect on the idle quality. This fix (or the crank sensors?) also seems to have alleviated another annoyance that started when I installed the Q45 MAF, which is that when the car was cold, I would have a bit of a surging problem when taking off from a stop in first gear. It mostly went away when the car warmed up, and I never felt it in any other gear. It felt like there was a huge dip in my torque curve around 2000-3000 rpm. It's quite cold outside now, and the car has been behaving very well.
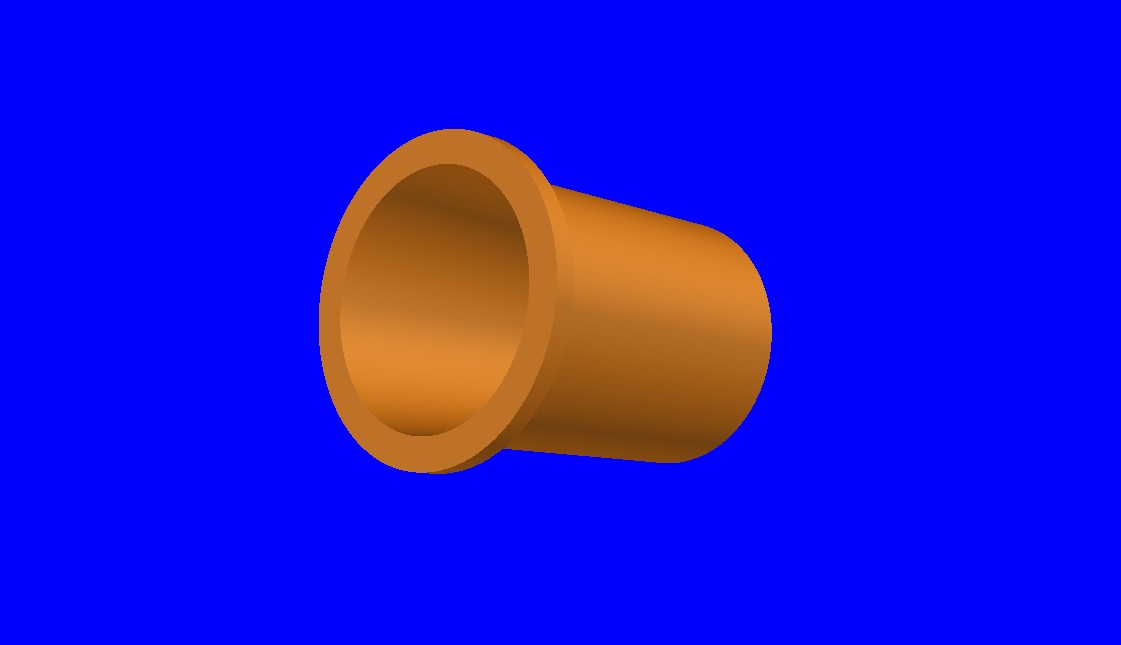
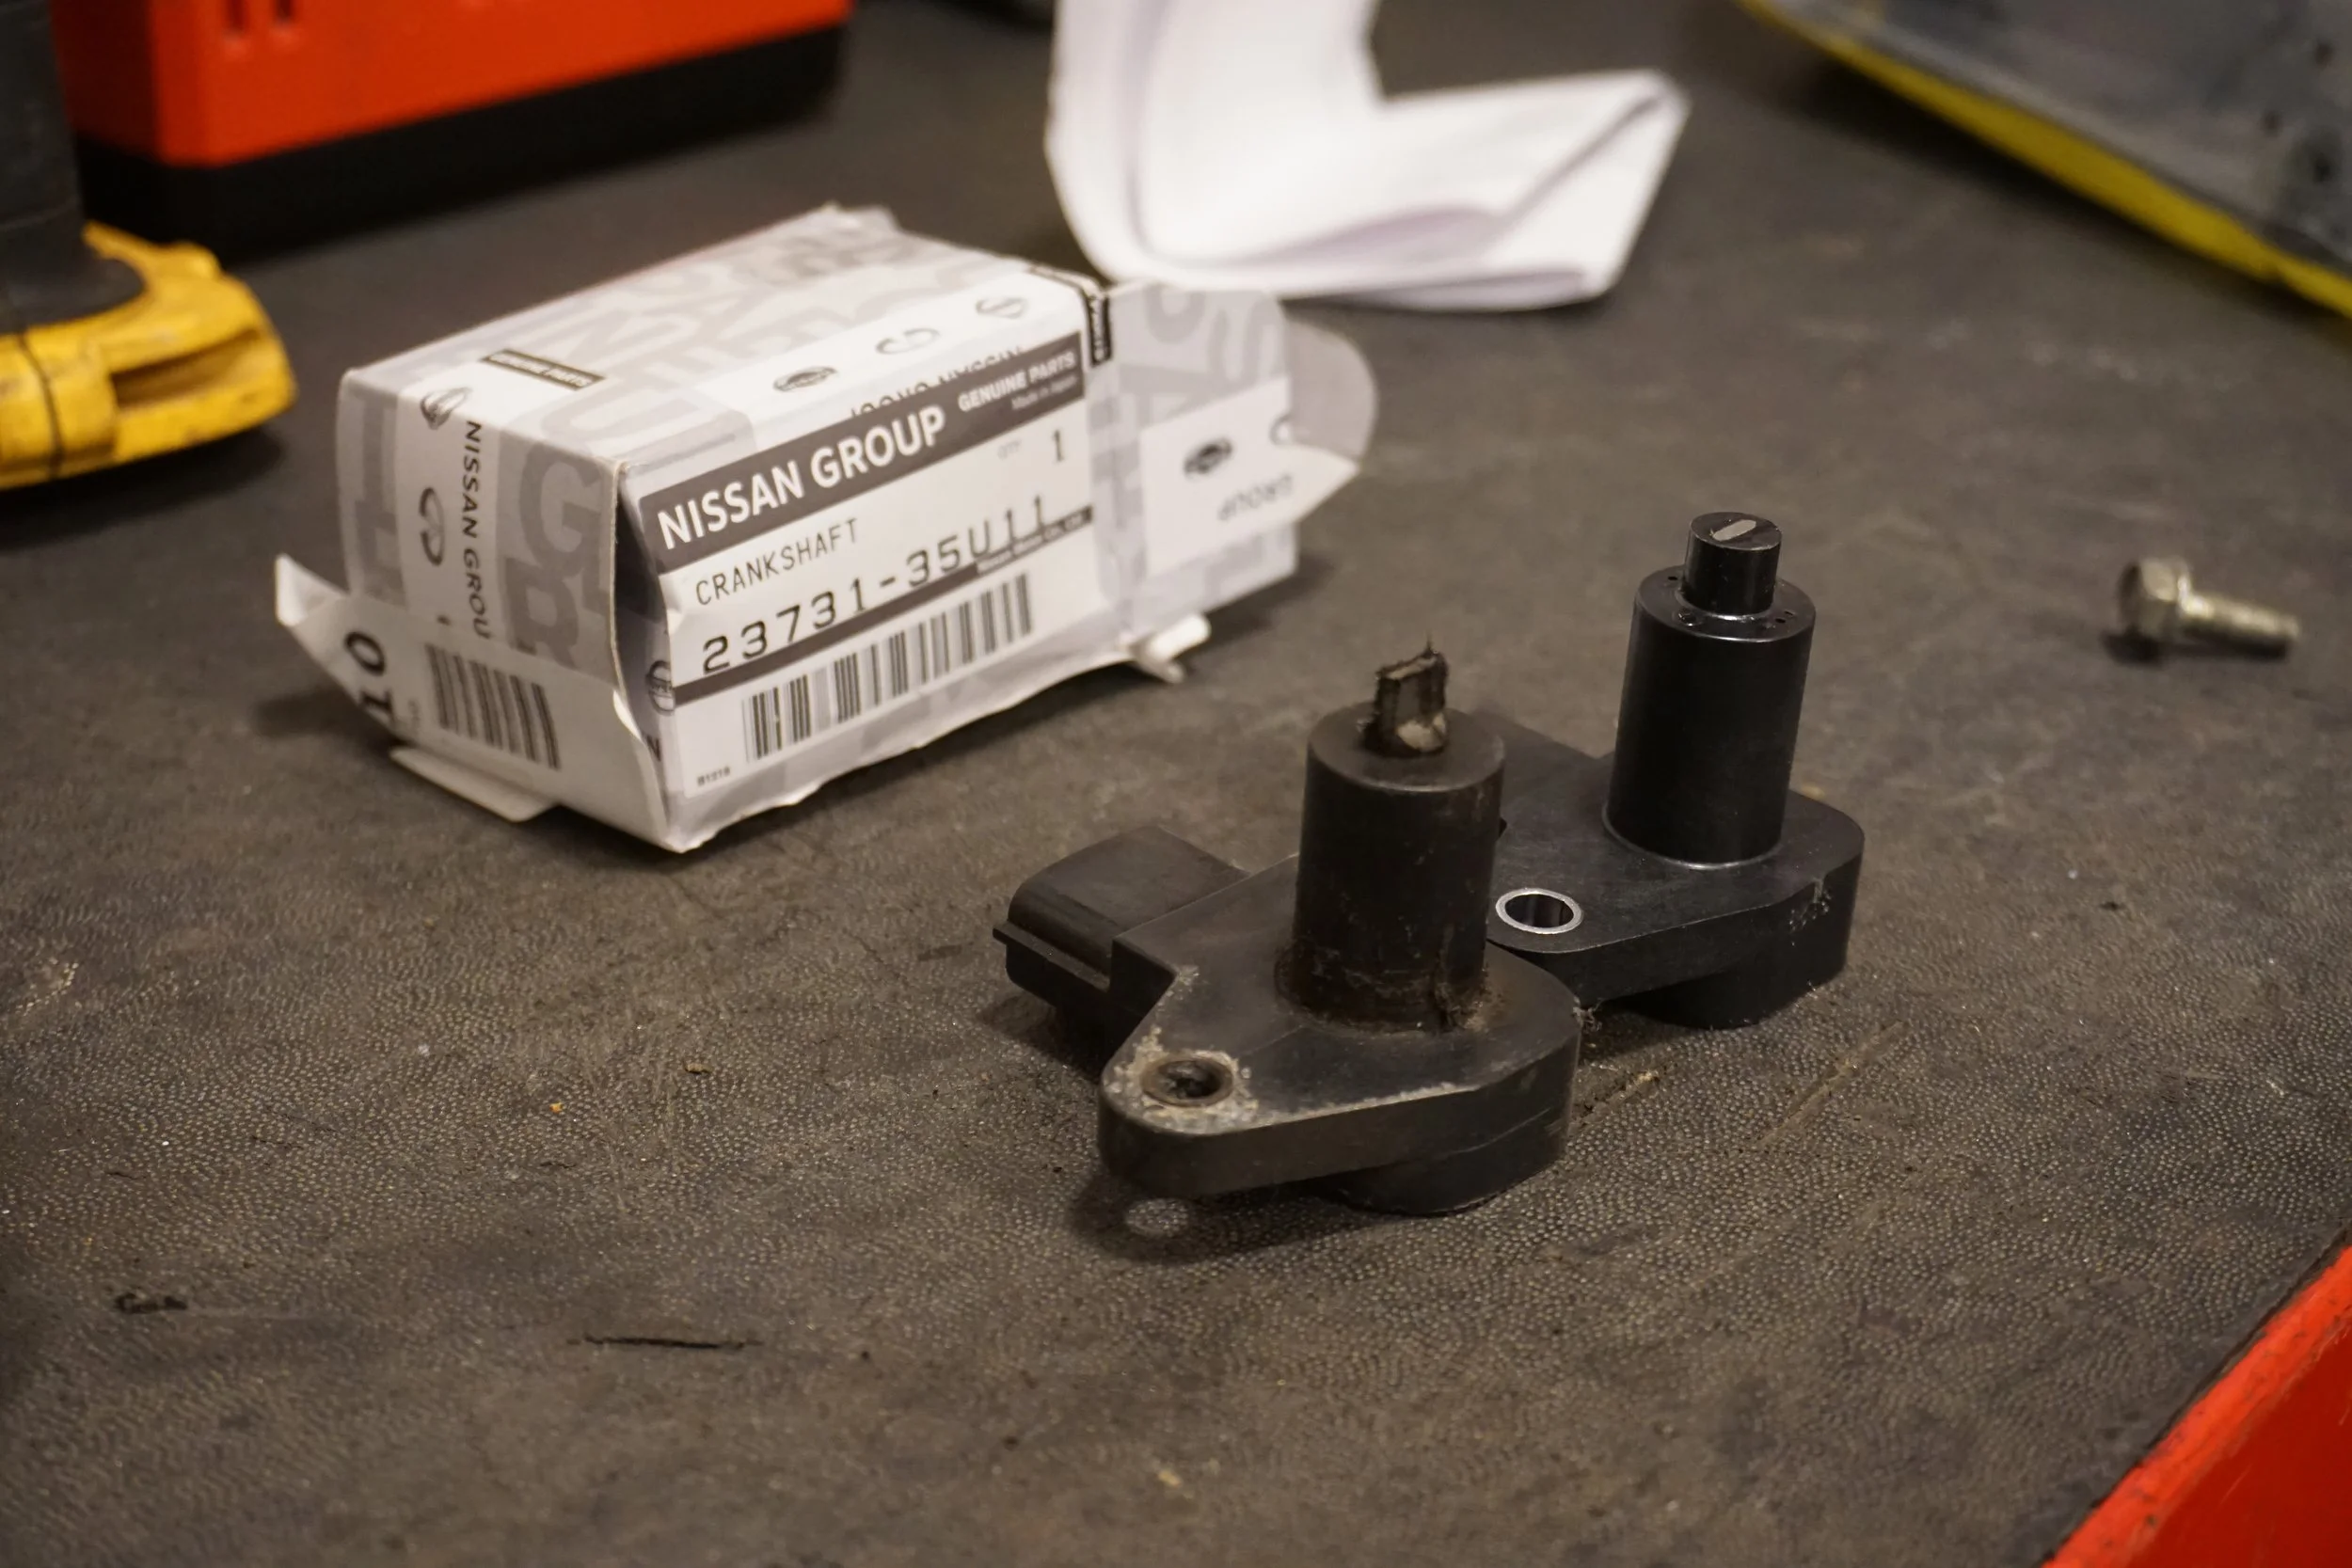
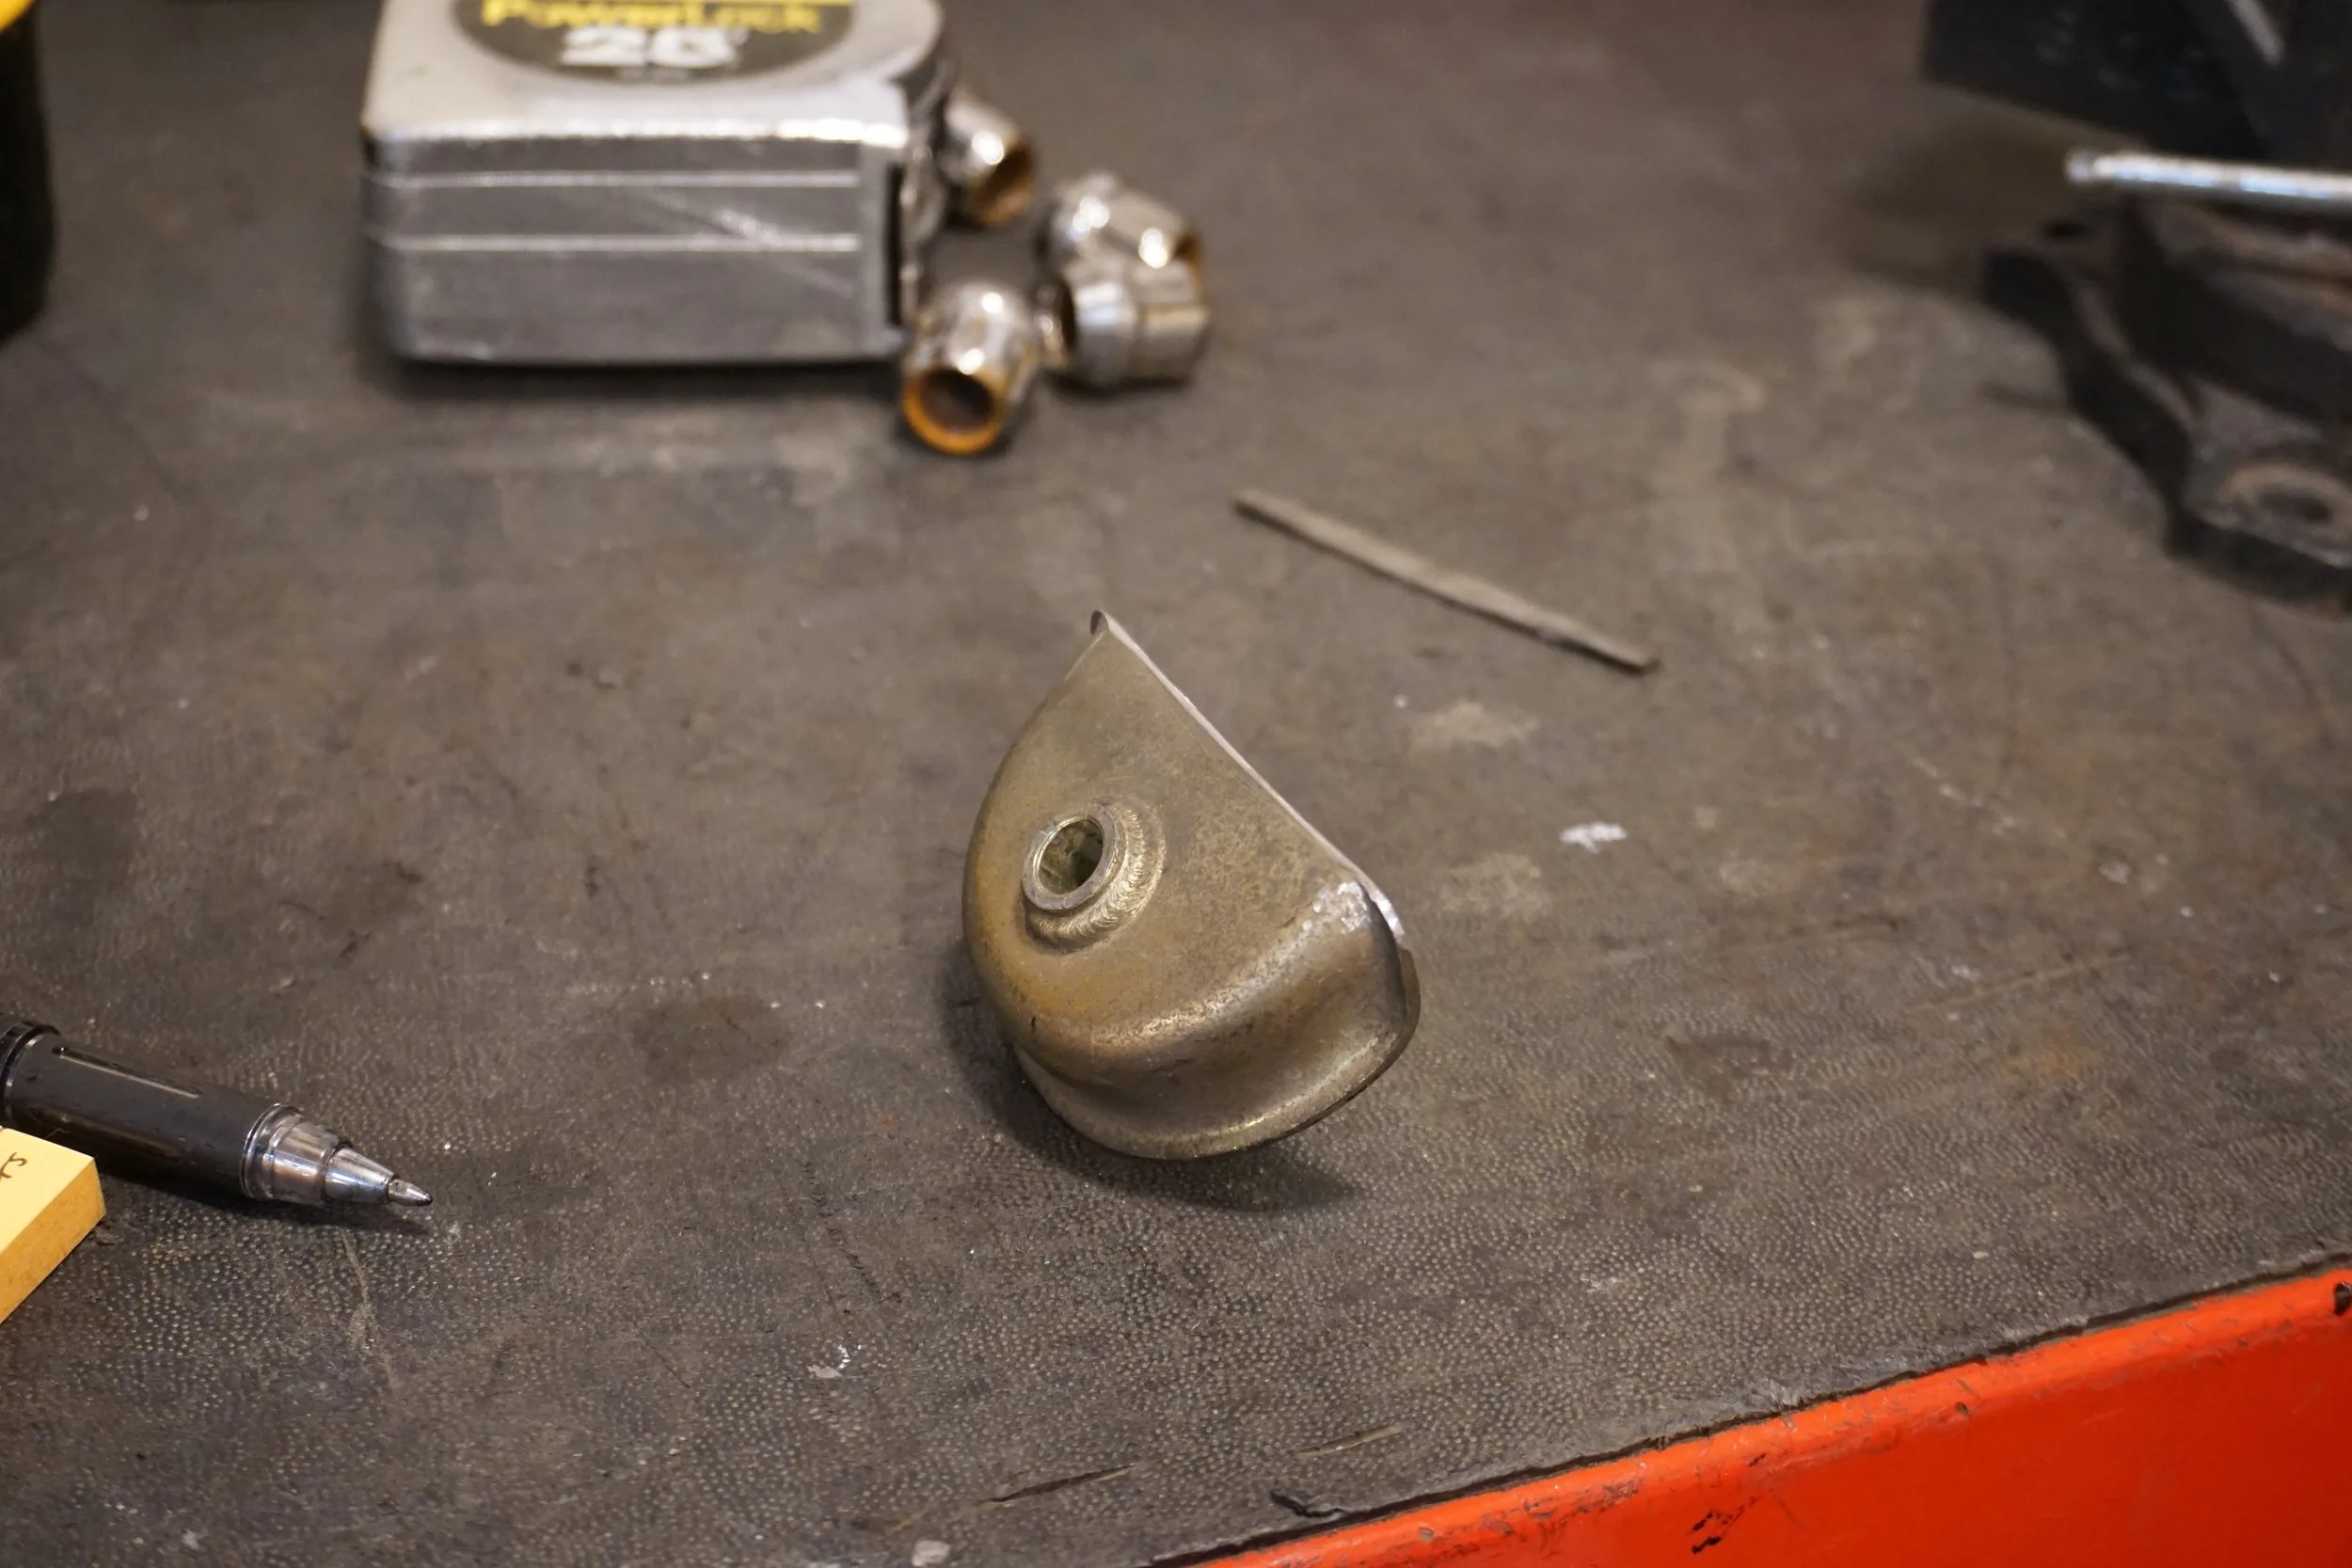
Before I installed the new crank sensors, I checked the resistance of the new ones and compared them to the old ones. The front ones were about the same, but the rear ones were off by HUGE amounts. I thought for sure that I had found the problem, and was surprised that when I started the car up that there was no change or improvement. Both sensors had revised part numbers, and one had a different design:
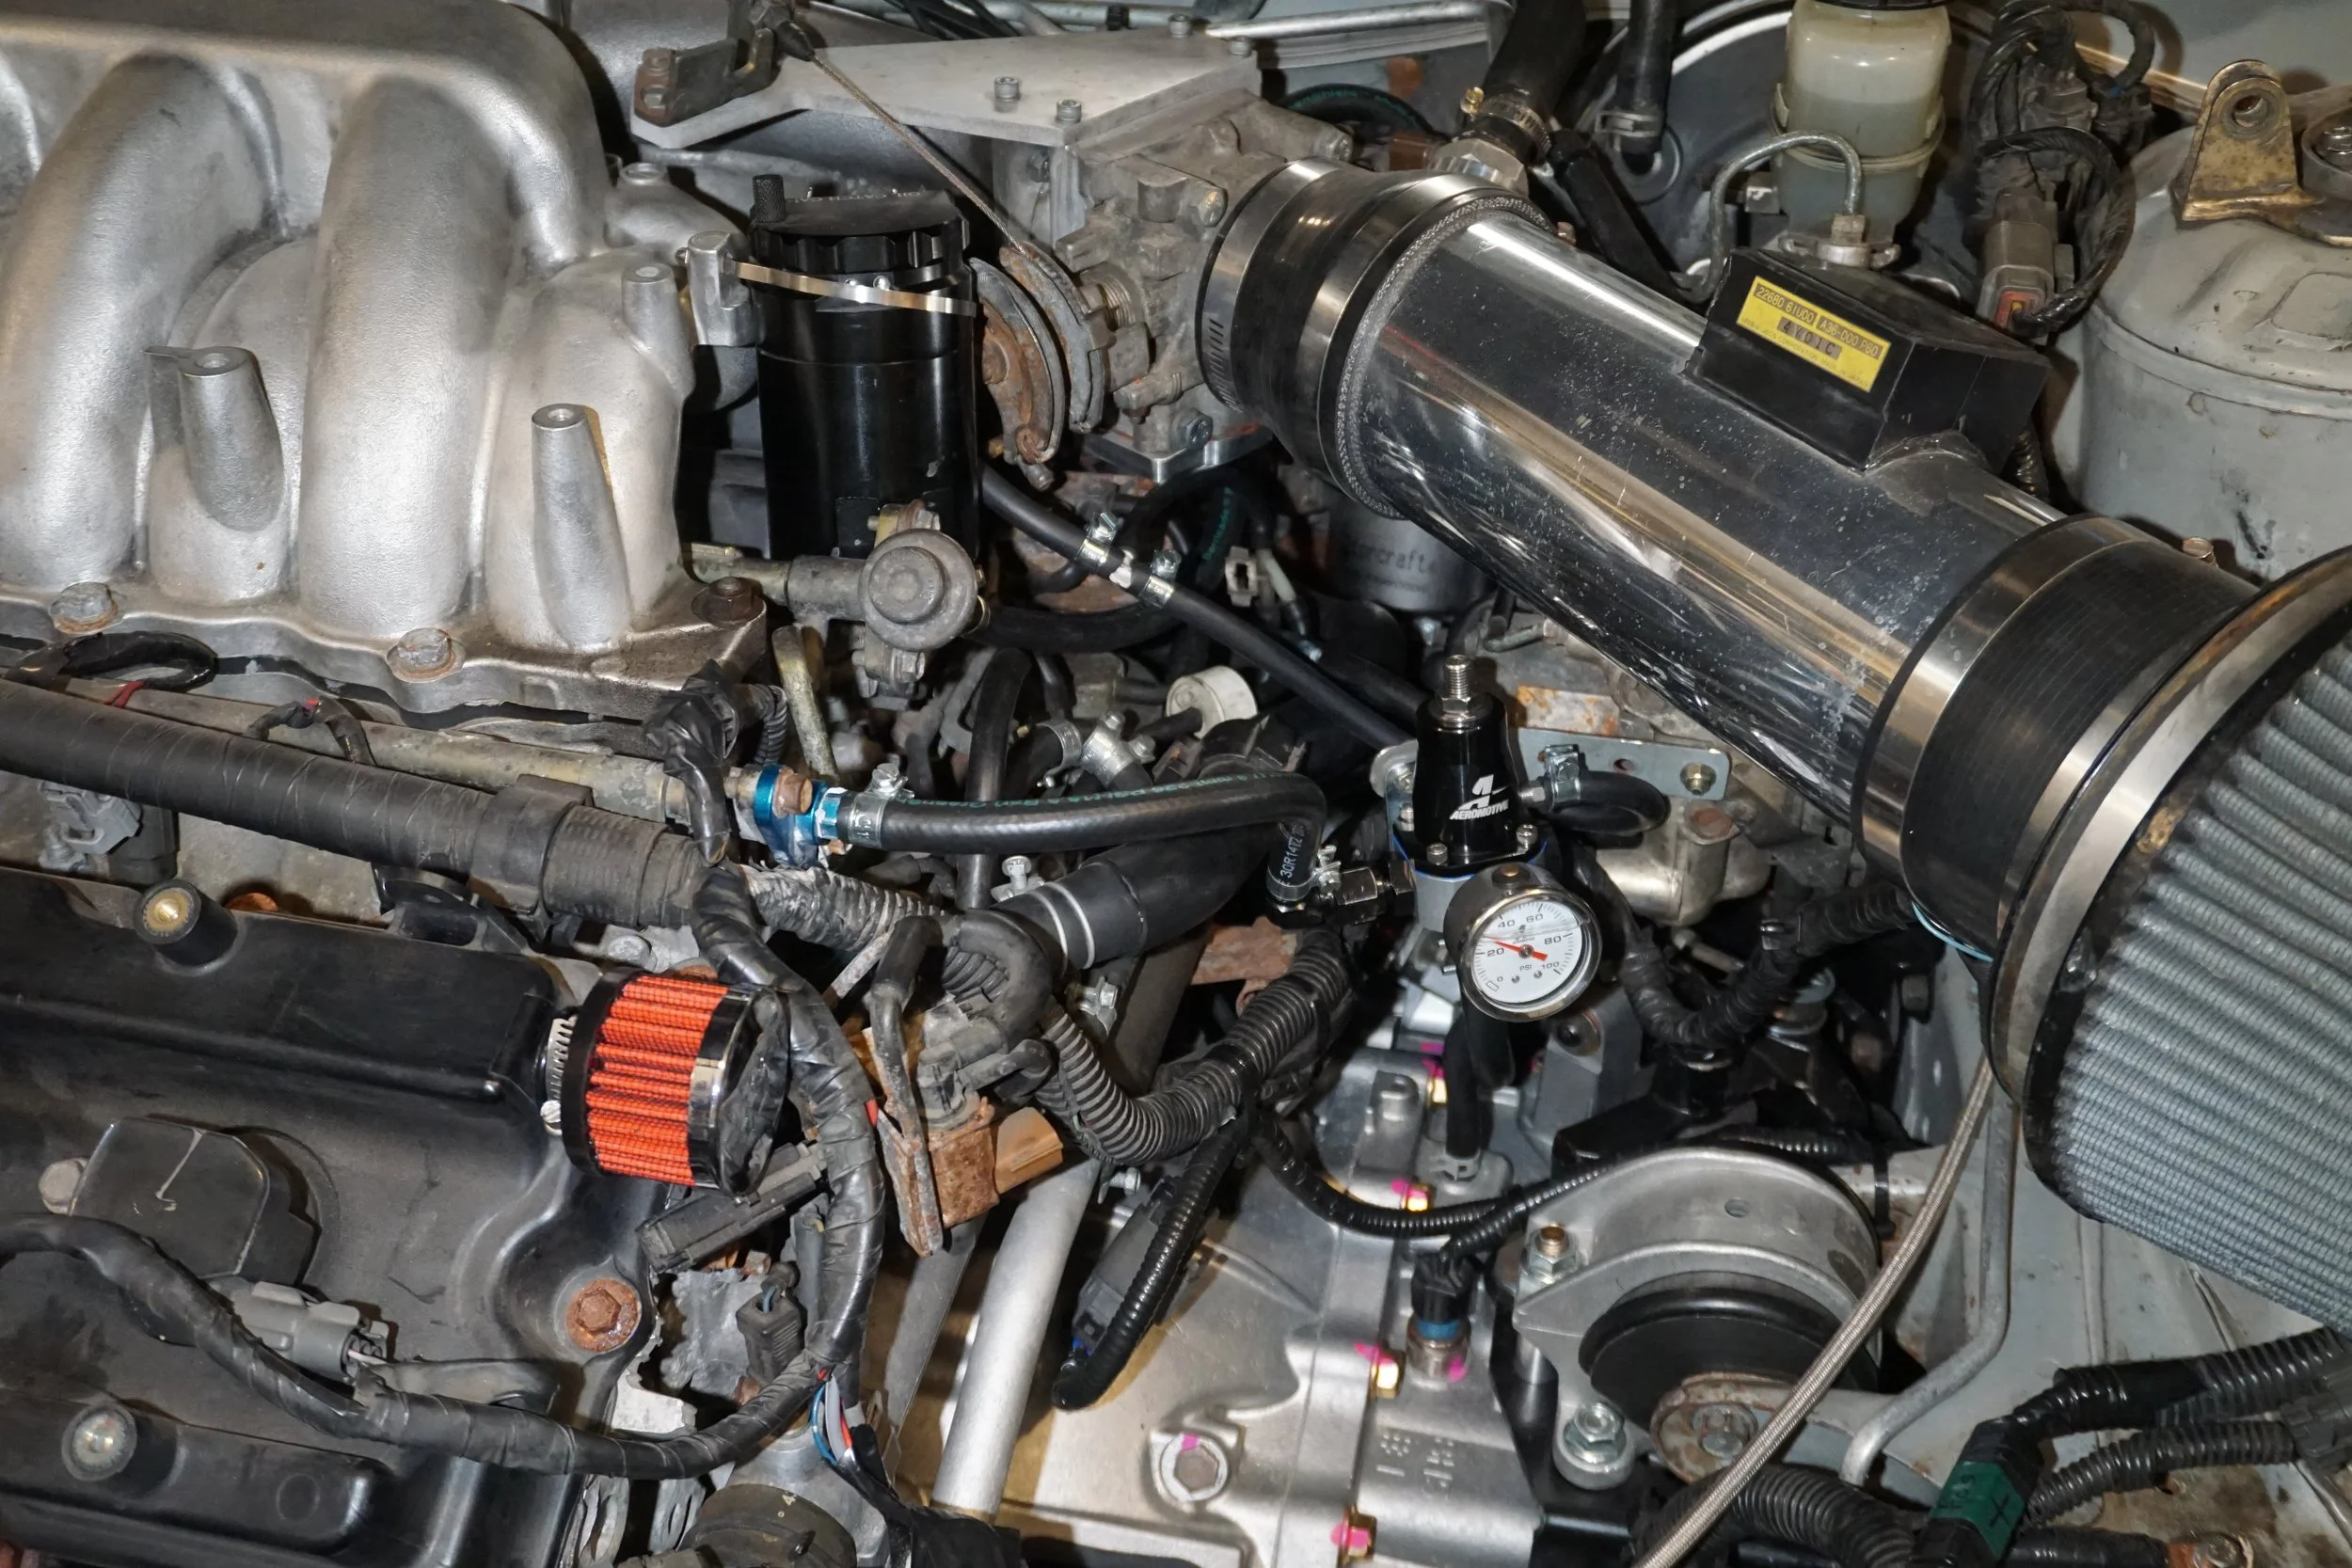
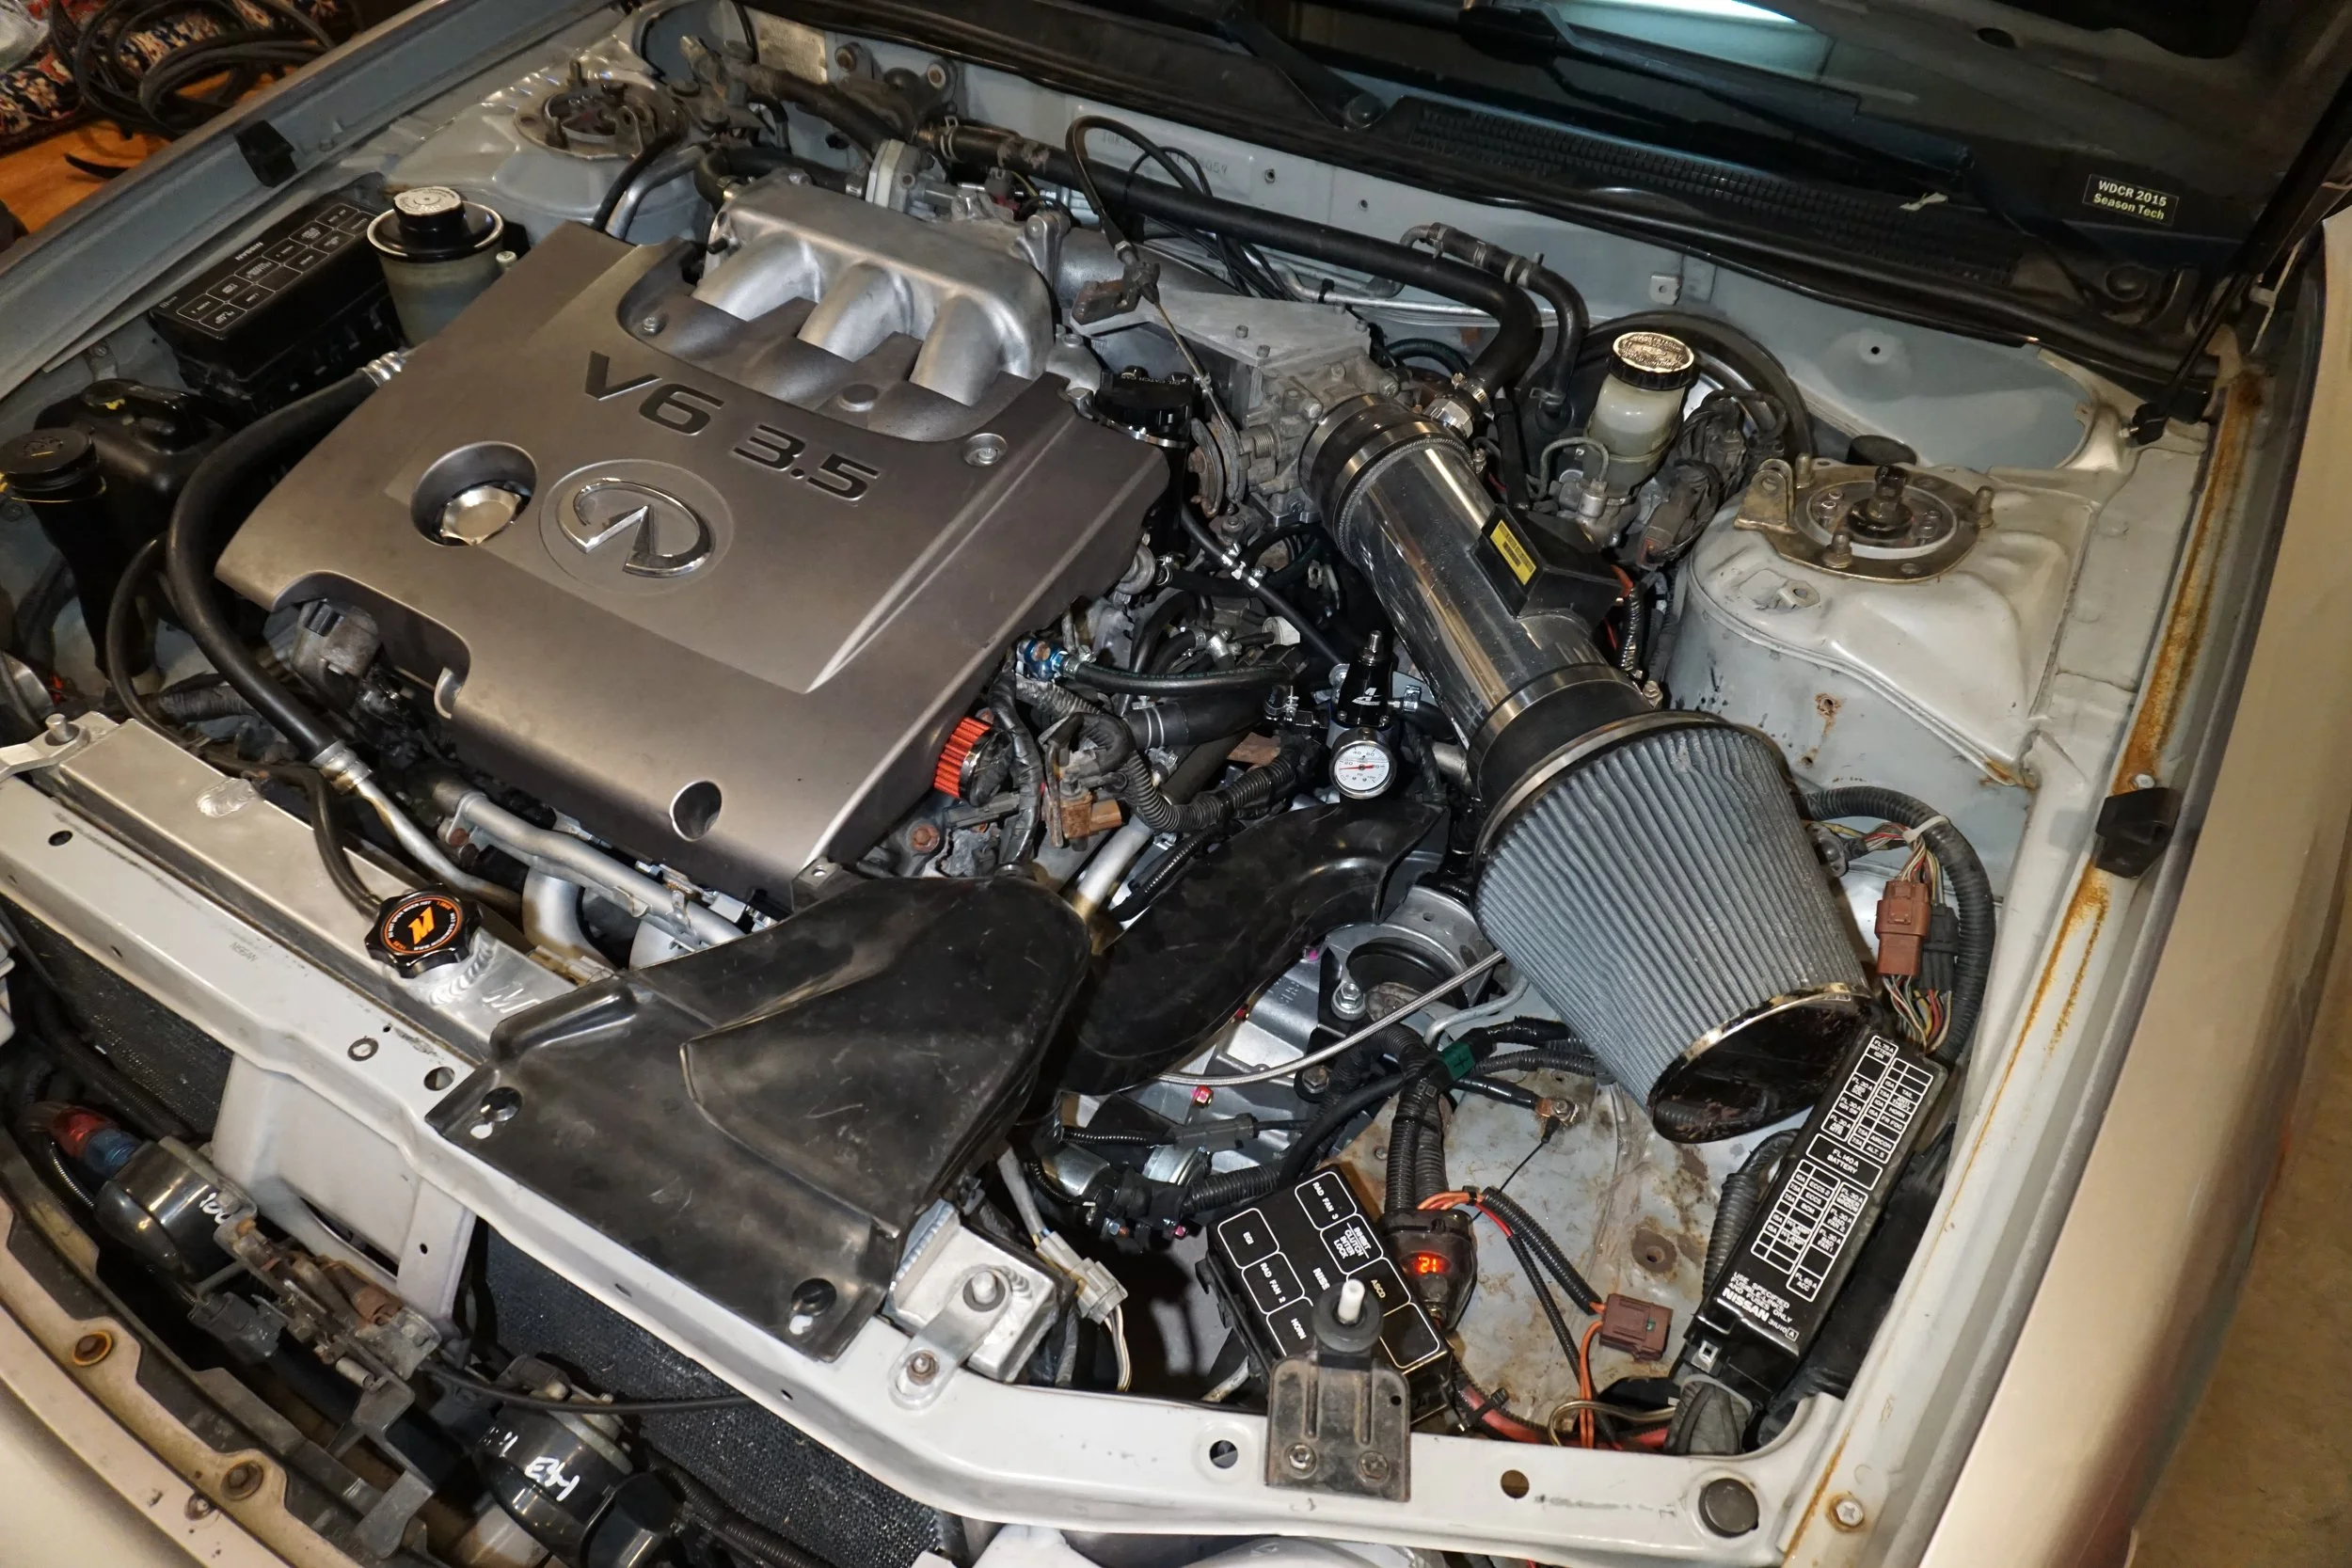
As I think I mentioned before, I replaced my old Aeromotive AFPR with a new one, since I had that weird spike in fuel pressure (52 psi at idle instead of 42). I went with a different and smaller model to save space and clean things up a bit. This gave me the perfect opportunity to completely re-do the AFPR setup, as my old setup left quite a bit to be desired:
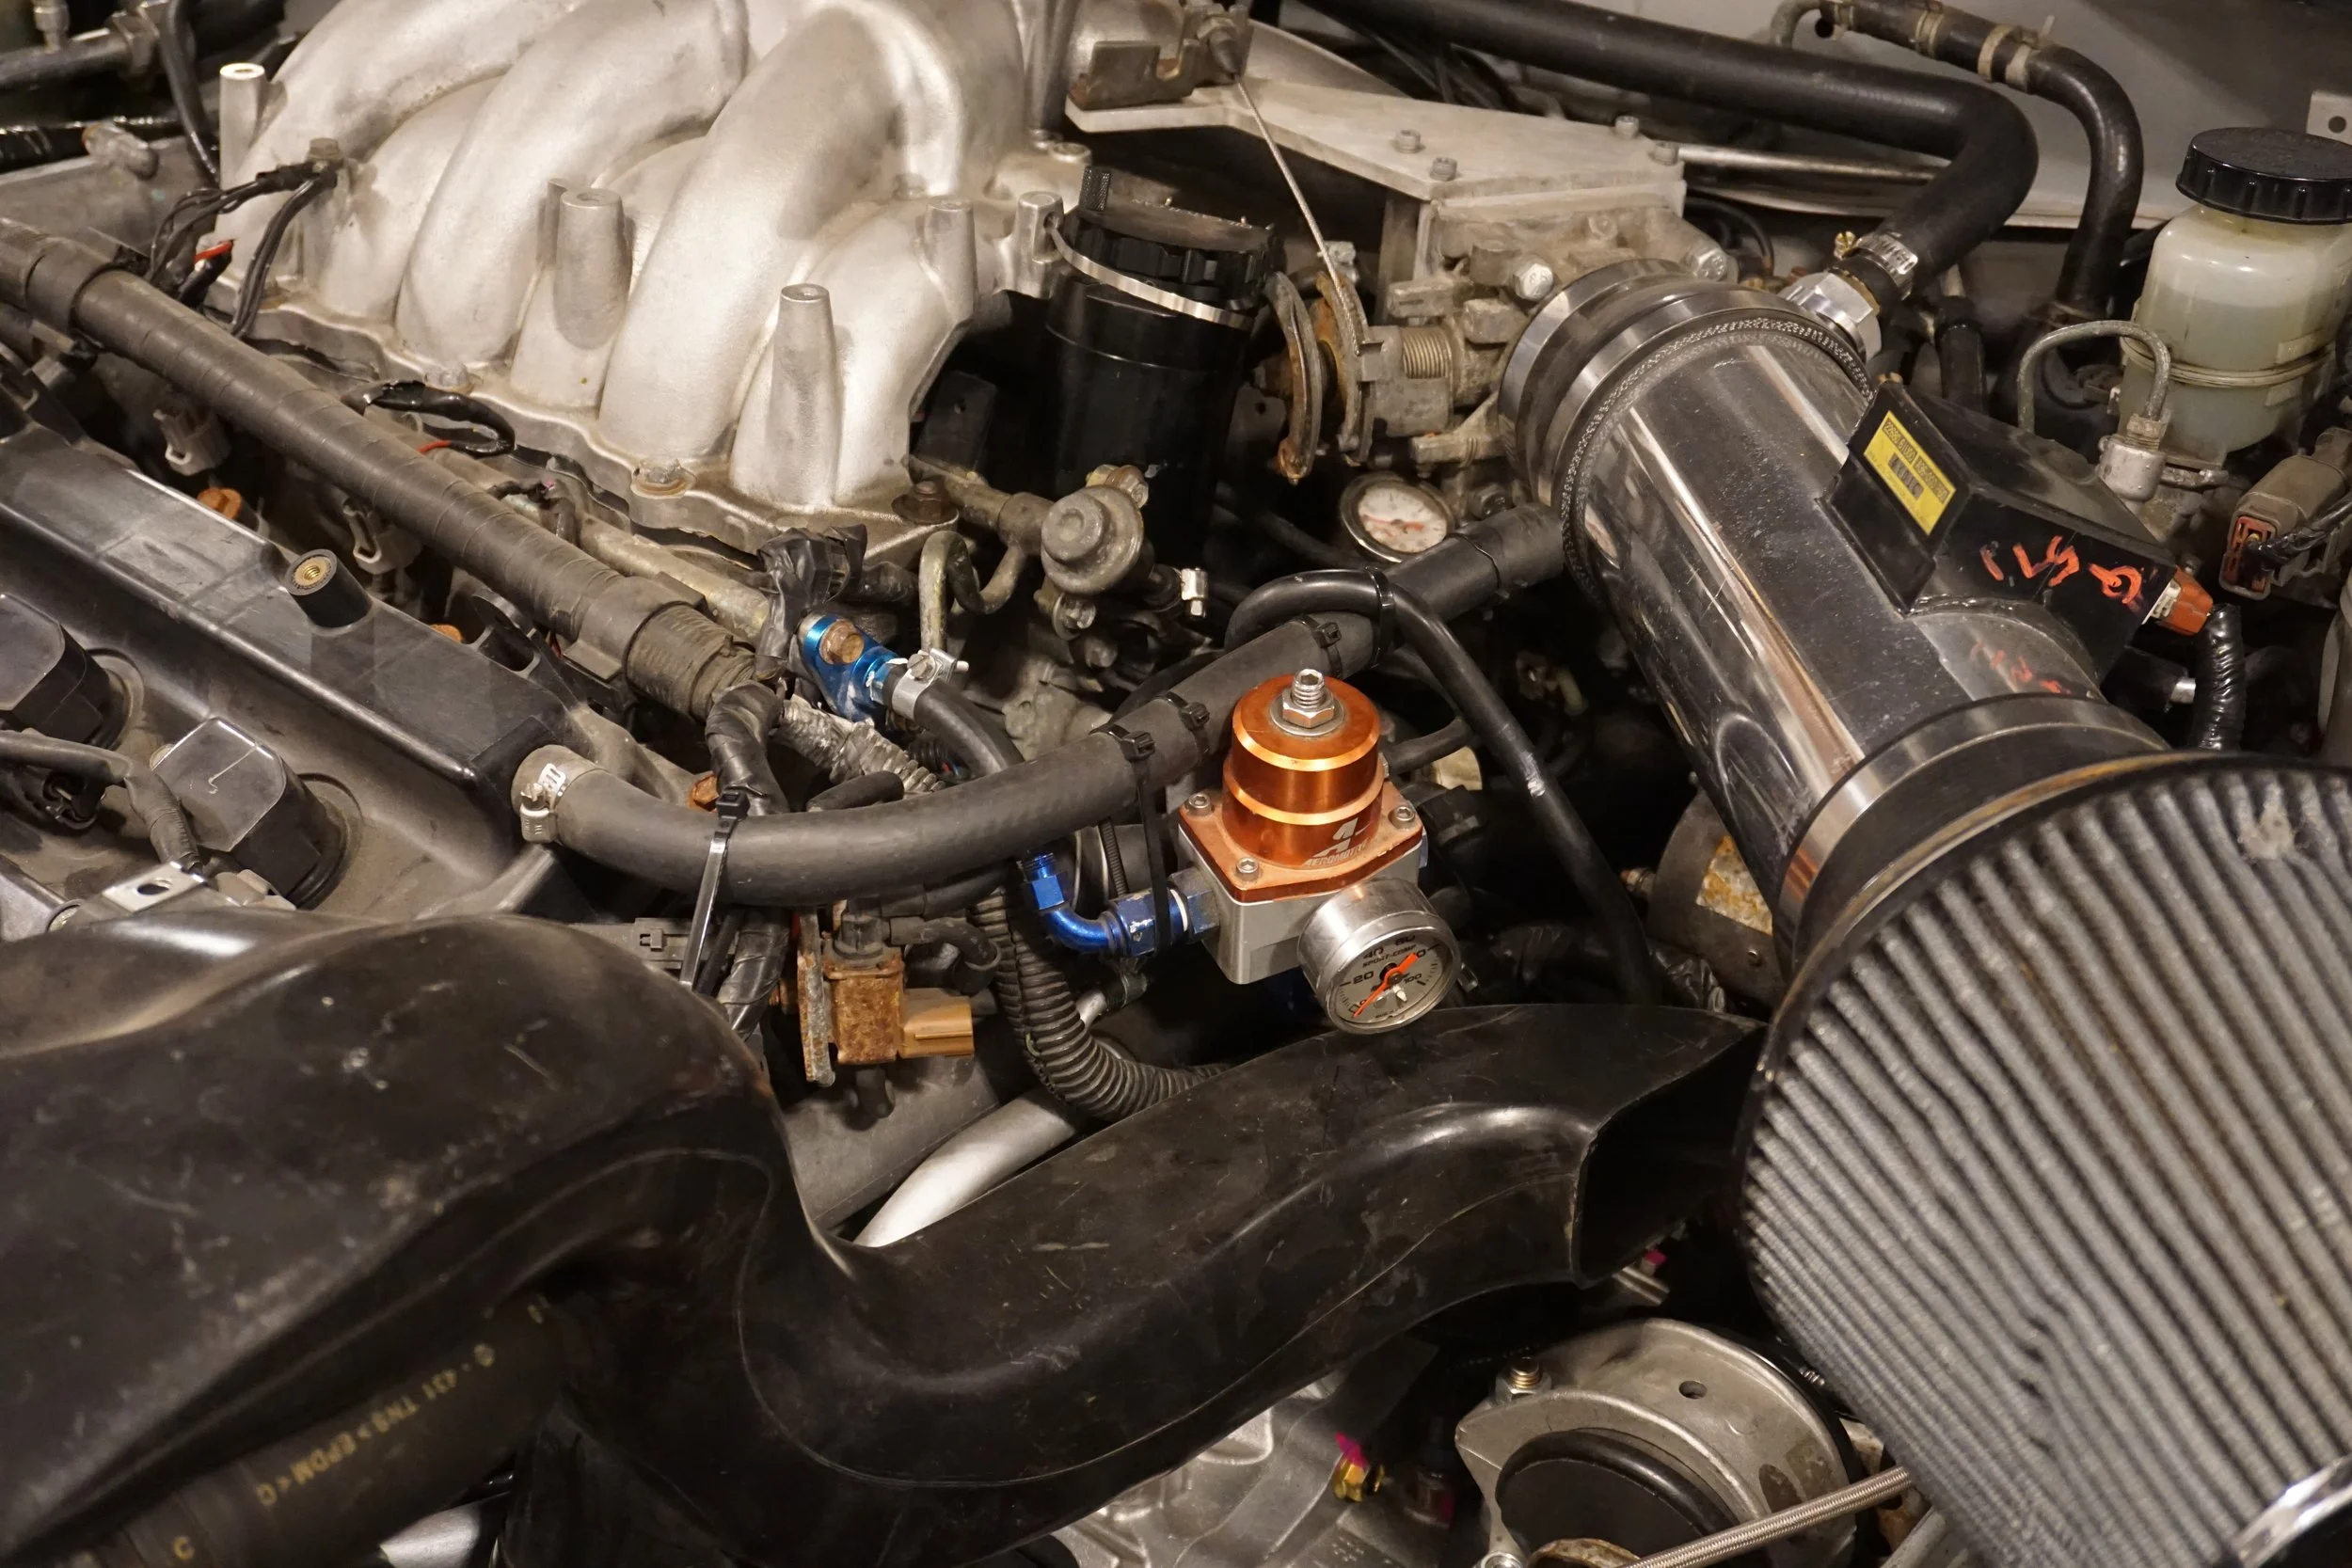
Yeah, it was just held in place with a bunch of zip ties. It held up surprisingly well for 7 years or so, but I always hated how crummy it looked. And with the 4" intake no longer having a port for the vacuum hose from the front valve cover, the hose it had been attached to was now able to flap around, rendering the AFPR even less secure. I also got to install all new HP fuel lines everywhere, and get rid of an old FP gauge that was installed like 18 years ago when I was running nitrous in the car, significantly cleaning things up and reducing the number of places leaks could occur.
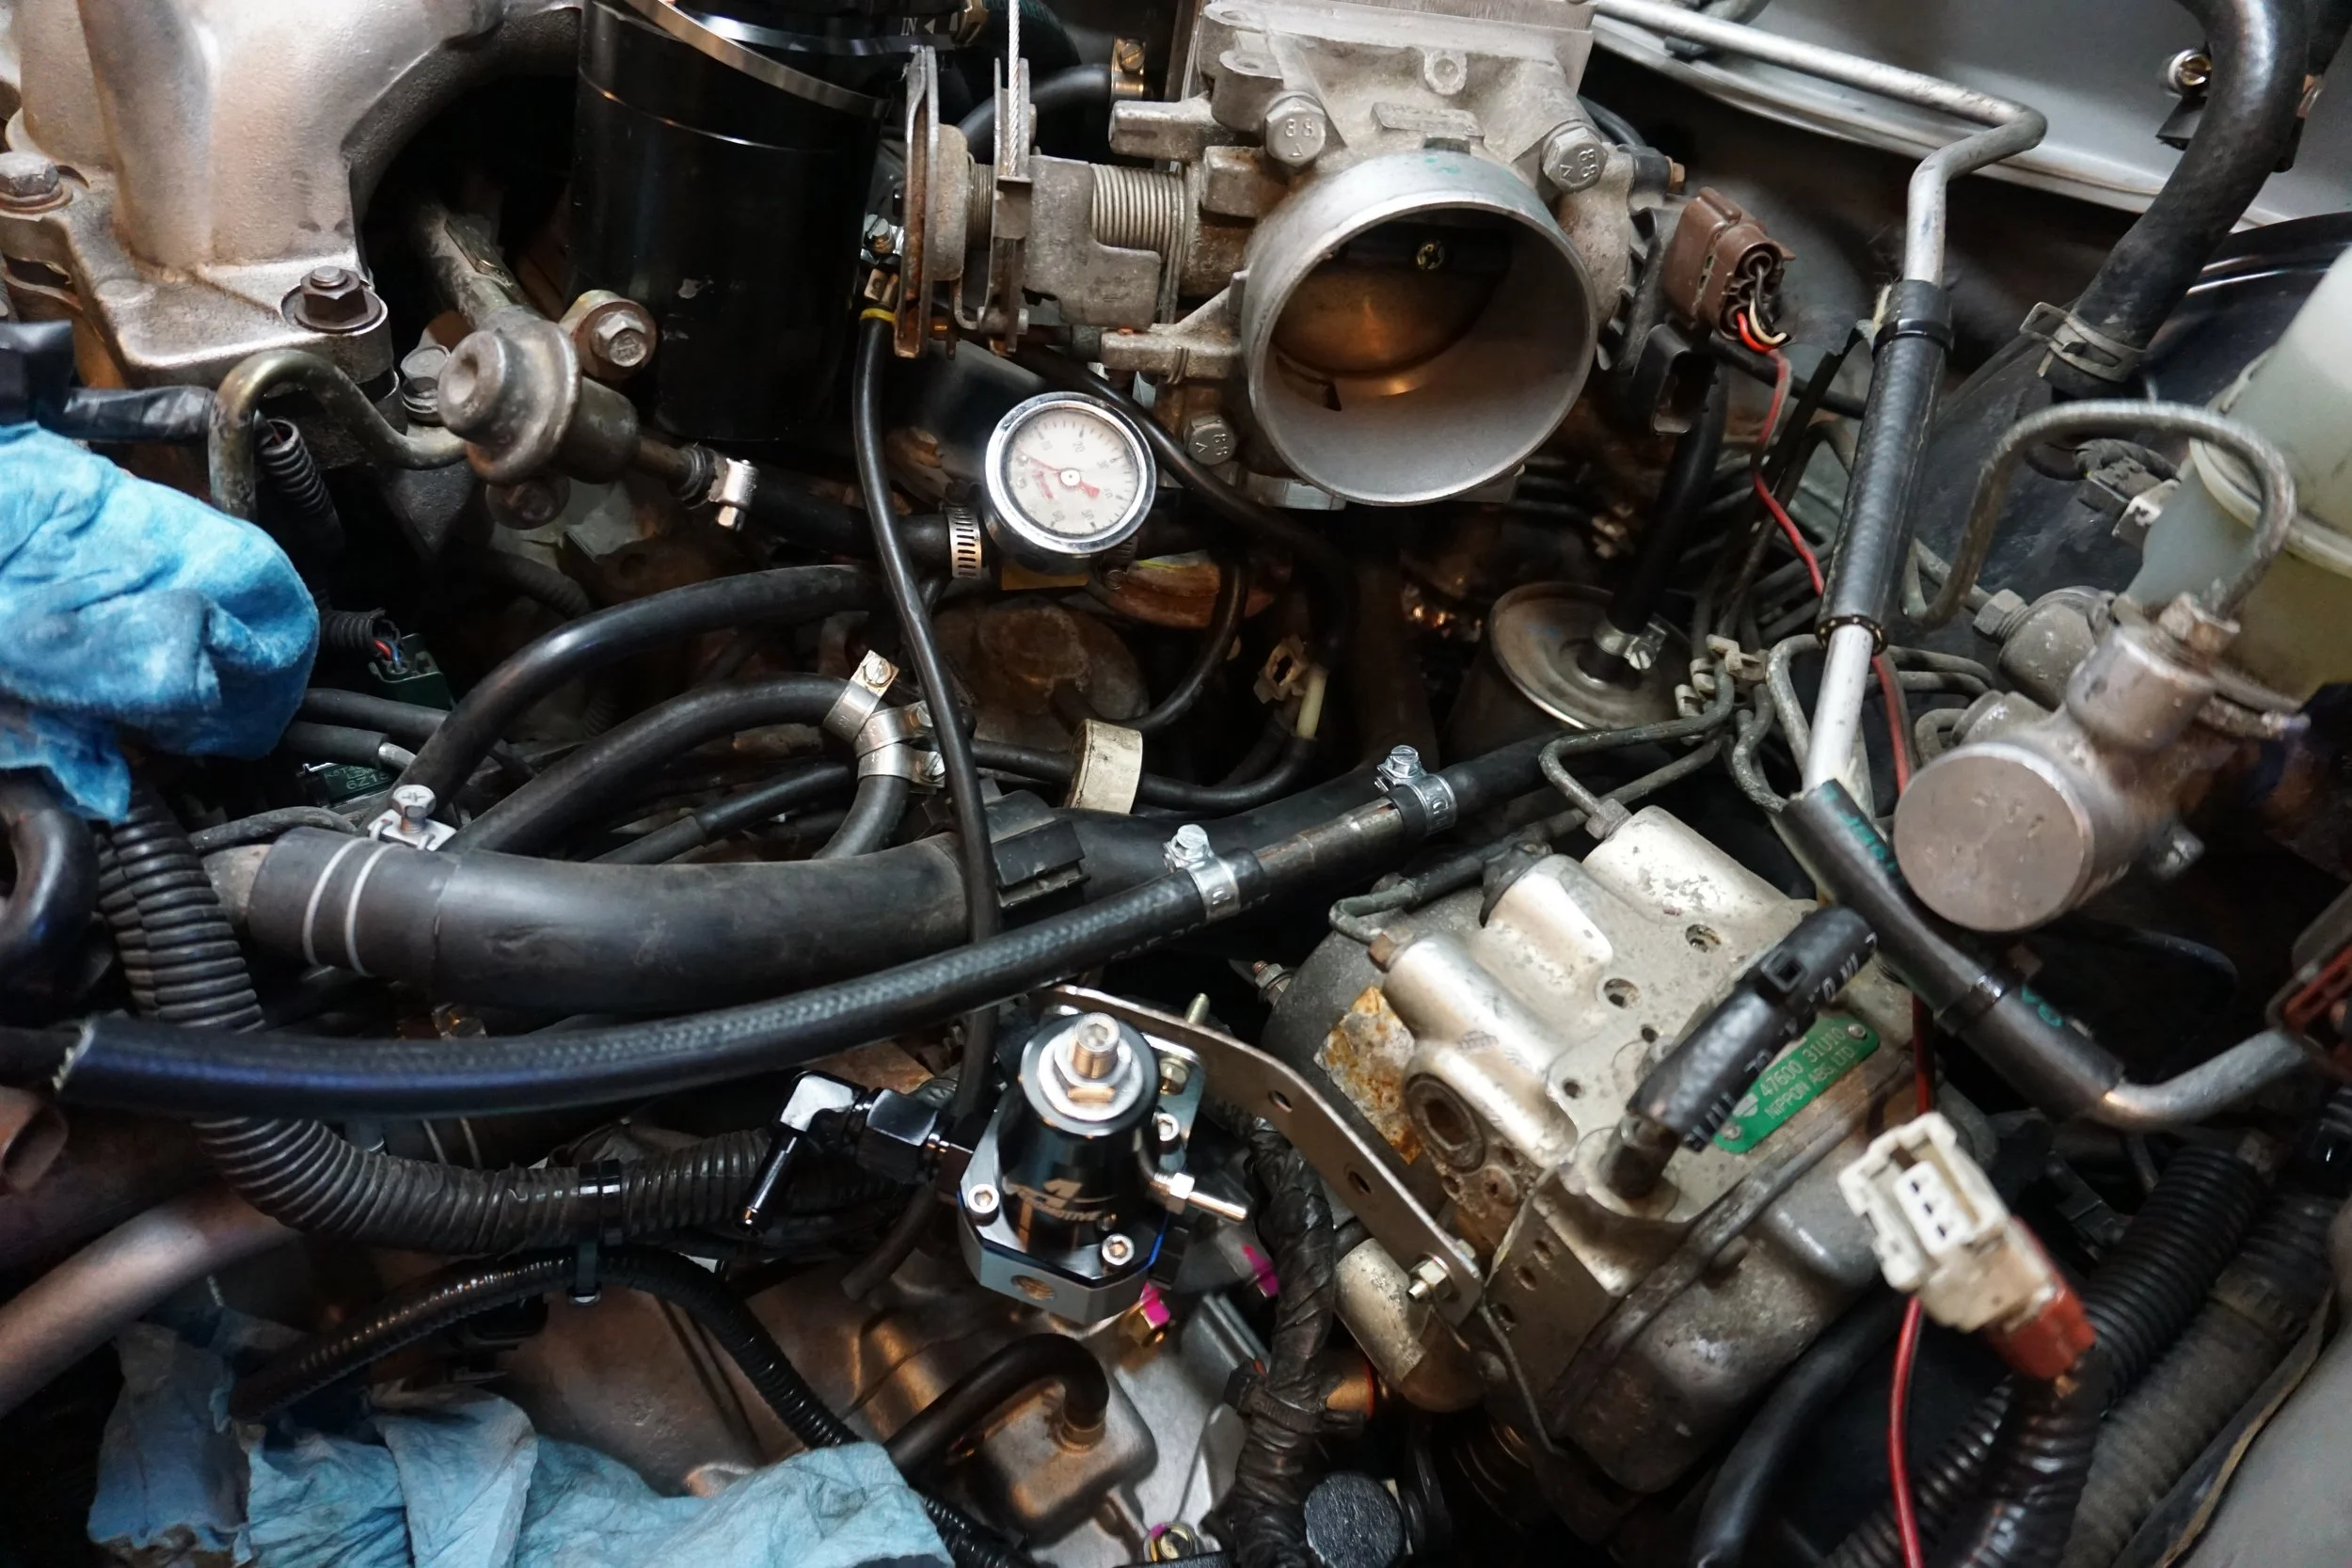
I knew I wanted to hard mount the AFPR somewhere, but I was struggling to find a suitable location. The firewall didn't have enough room, and I couldn't find anything to bolt it to on the DS shock tower. But I realized that the ABS module had a place I could bolt up some scrap metal to, so I went with that, and I think it turned out very well! I took the opportunity to also install a breather filter for the front valve cover.
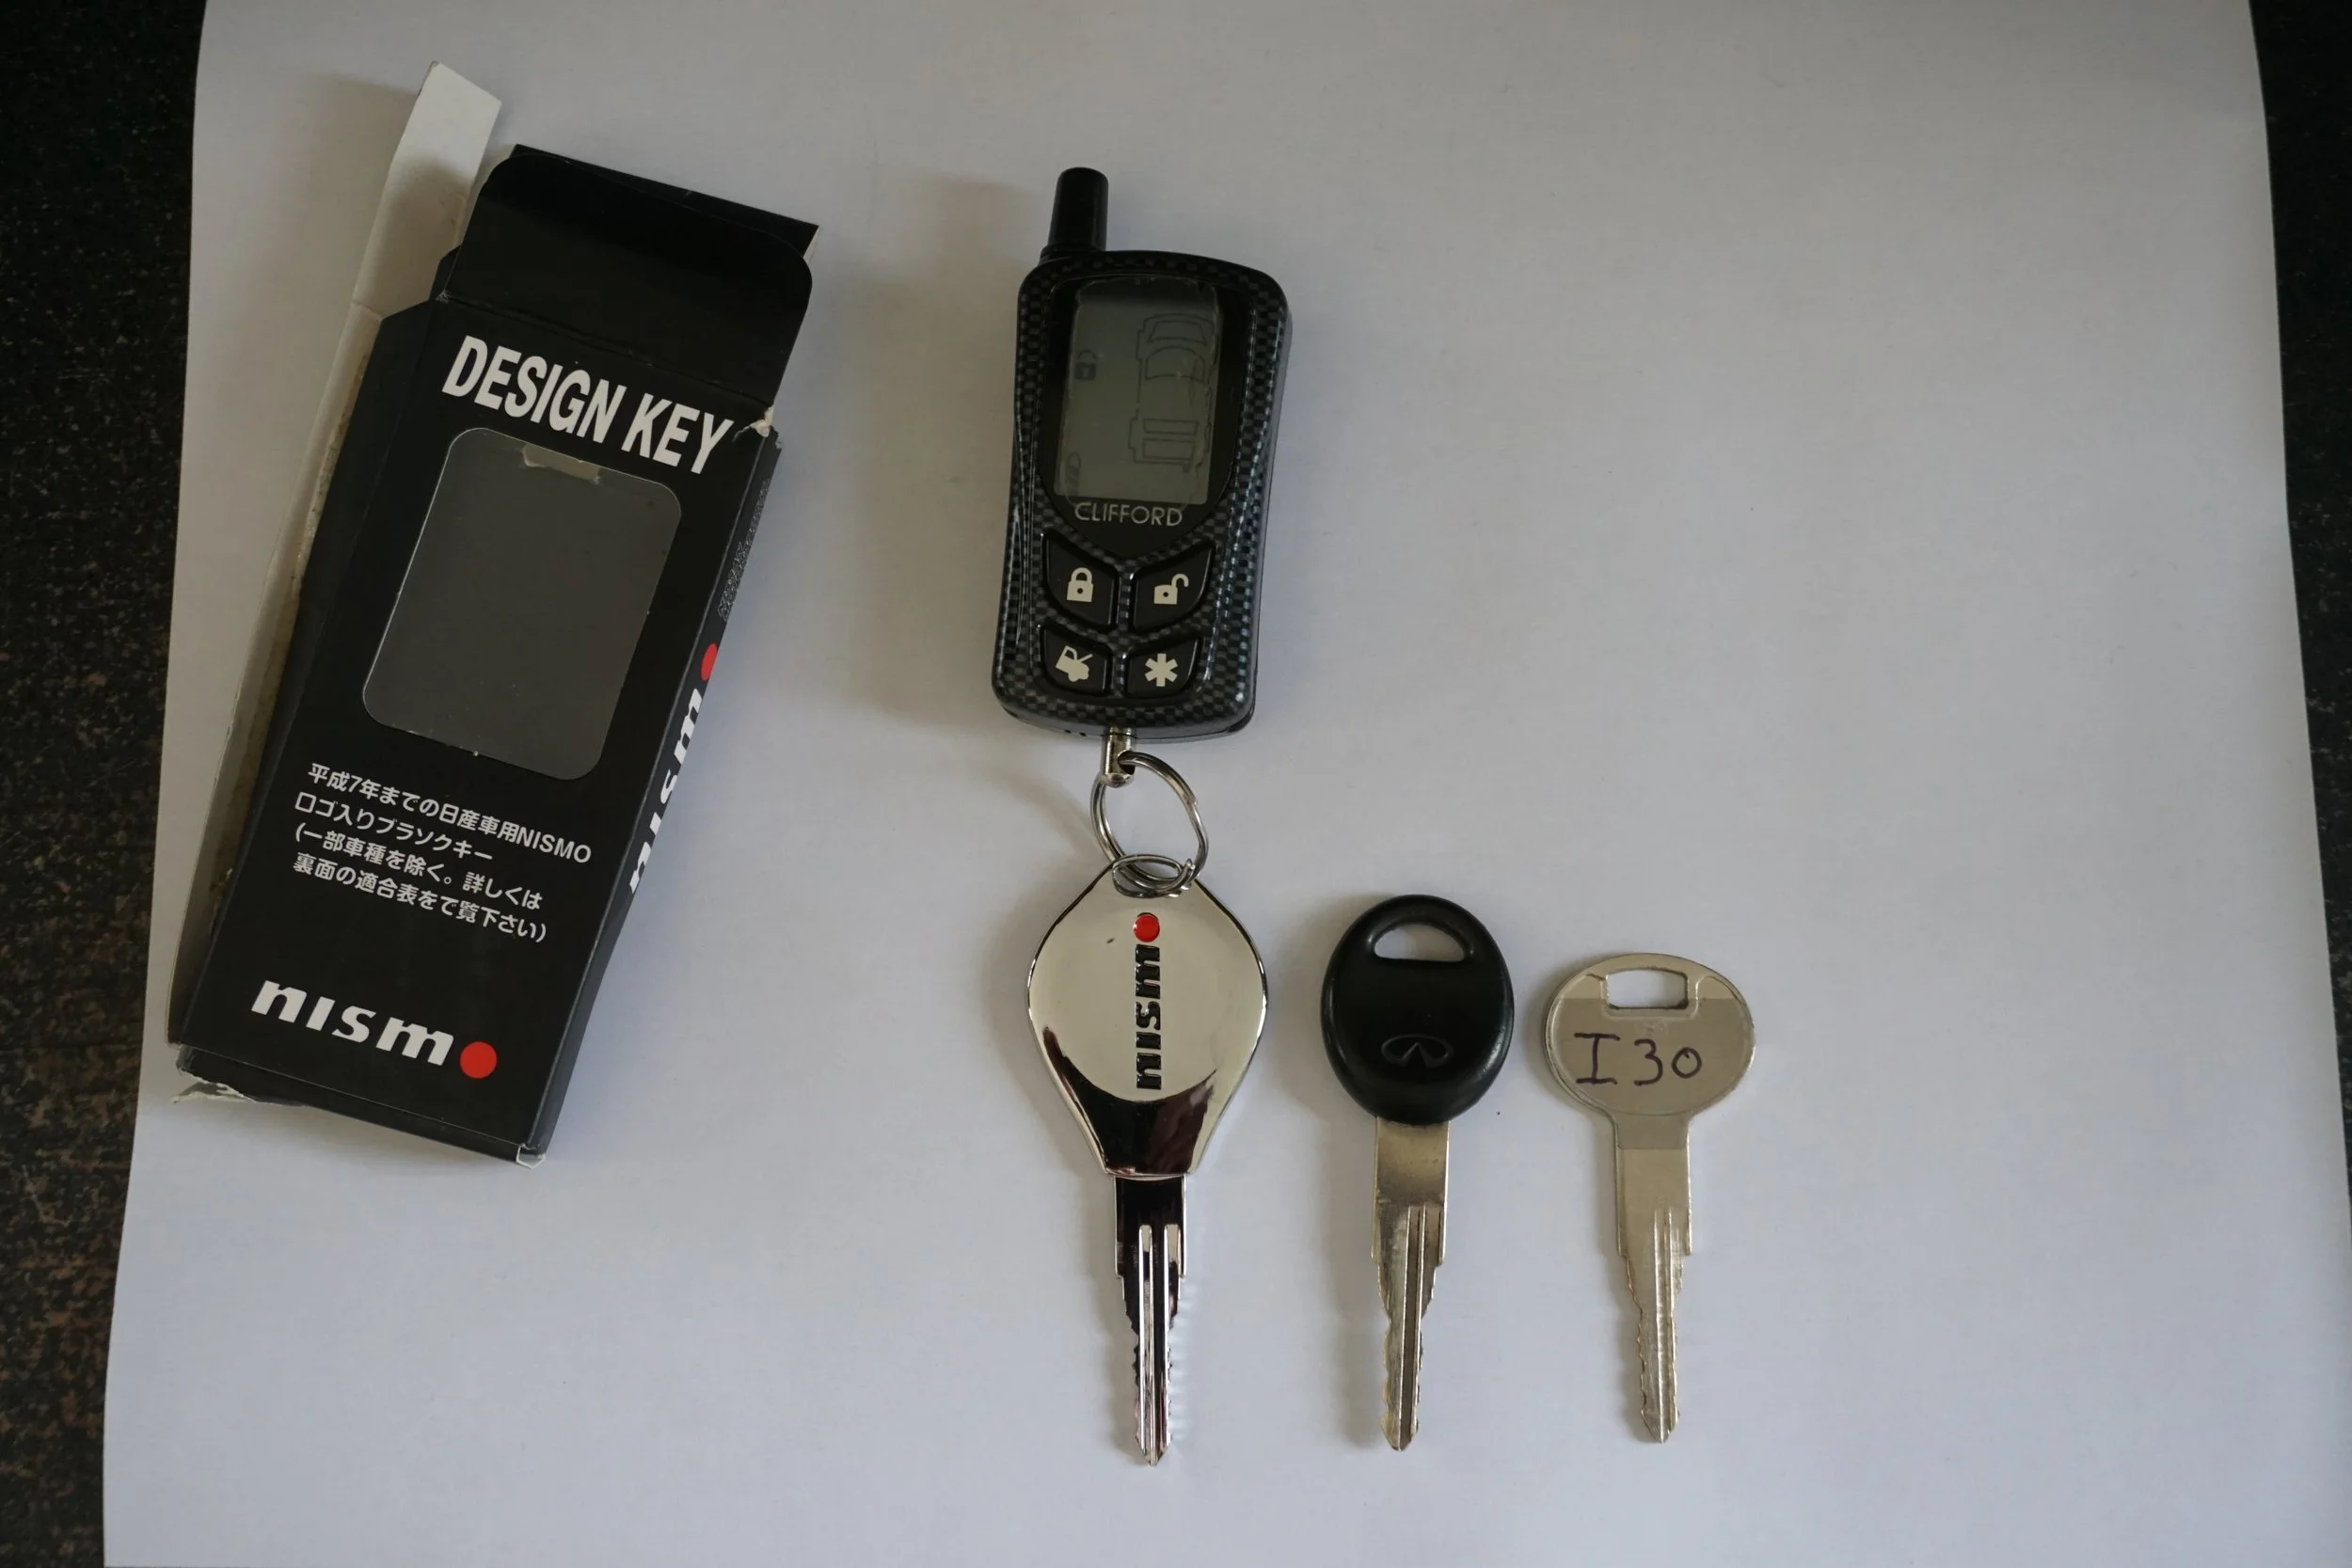
I splurged a while back and bought a Nismo key to replace the dinky black plastic one I've been using for years. It's quite hefty and is nicely polished. I tried to get Infiniti to cut me a fresh key, but they said they didn't keep key codes for cars made before 1998, so I ended up using my old spare key (with far sharper edges) as the basis for cutting the Nismo key. I'm quite pleased
I've got more to post, but I'll leave it at that for now.
I installed both of the new OEM crank sensors on the car one night and turned the car on, only to find my super rough idle and super rich AFR had not improved at all. A few days later I started poking around some more to see if I could figure out what was going on. I first stared by reinstalling the rear crank sensor, seeing if I could make sure it was aligned with the flywheel trigger wheel. I didn't see how it could be off by very much, and with it installed you can't see how it lines up with the trigger wheel, so I just tightened it back up and moved on. I was playing around with O2 sensors again with no improvement when I decided to unplug the MAF and see how it reacted. Well I was holding the wires, getting ready to unplug the connector, when all of a sudden the car started running perfectly! I kept jiggling the wires and the connector, seeing if I could get it to misbehave again, but no matter what I did the car ran flawlessly. So I don't know if the connector wasn't fully seated, or if my splice job wasn't perfect, but it's been about a month now and the car hasn't skipped a beat, so I'm considering this problem solved. My AFR isn't perfect, and sometimes takes a while to come from rich to normal at idle (worn out WBO2 sensor?), but it doesn't seem to have any affect on the idle quality. This fix (or the crank sensors?) also seems to have alleviated another annoyance that started when I installed the Q45 MAF, which is that when the car was cold, I would have a bit of a surging problem when taking off from a stop in first gear. It mostly went away when the car warmed up, and I never felt it in any other gear. It felt like there was a huge dip in my torque curve around 2000-3000 rpm. It's quite cold outside now, and the car has been behaving very well.
Before I installed the new crank sensors, I checked the resistance of the new ones and compared them to the old ones. The front ones were about the same, but the rear ones were off by HUGE amounts. I thought for sure that I had found the problem, and was surprised that when I started the car up that there was no change or improvement. Both sensors had revised part numbers, and one had a different design:
As I think I mentioned before, I replaced my old Aeromotive AFPR with a new one, since I had that weird spike in fuel pressure (52 psi at idle instead of 42). I went with a different and smaller model to save space and clean things up a bit. This gave me the perfect opportunity to completely re-do the AFPR setup, as my old setup left quite a bit to be desired:
Yeah, it was just held in place with a bunch of zip ties. It held up surprisingly well for 7 years or so, but I always hated how crummy it looked. And with the 4" intake no longer having a port for the vacuum hose from the front valve cover, the hose it had been attached to was now able to flap around, rendering the AFPR even less secure. I also got to install all new HP fuel lines everywhere, and get rid of an old FP gauge that was installed like 18 years ago when I was running nitrous in the car, significantly cleaning things up and reducing the number of places leaks could occur.
I knew I wanted to hard mount the AFPR somewhere, but I was struggling to find a suitable location. The firewall didn't have enough room, and I couldn't find anything to bolt it to on the DS shock tower. But I realized that the ABS module had a place I could bolt up some scrap metal to, so I went with that, and I think it turned out very well! I took the opportunity to also install a breather filter for the front valve cover.
I splurged a while back and bought a Nismo key to replace the dinky black plastic one I've been using for years. It's quite hefty and is nicely polished. I tried to get Infiniti to cut me a fresh key, but they said they didn't keep key codes for cars made before 1998, so I ended up using my old spare key (with far sharper edges) as the basis for cutting the Nismo key. I'm quite pleased
I've got more to post, but I'll leave it at that for now.
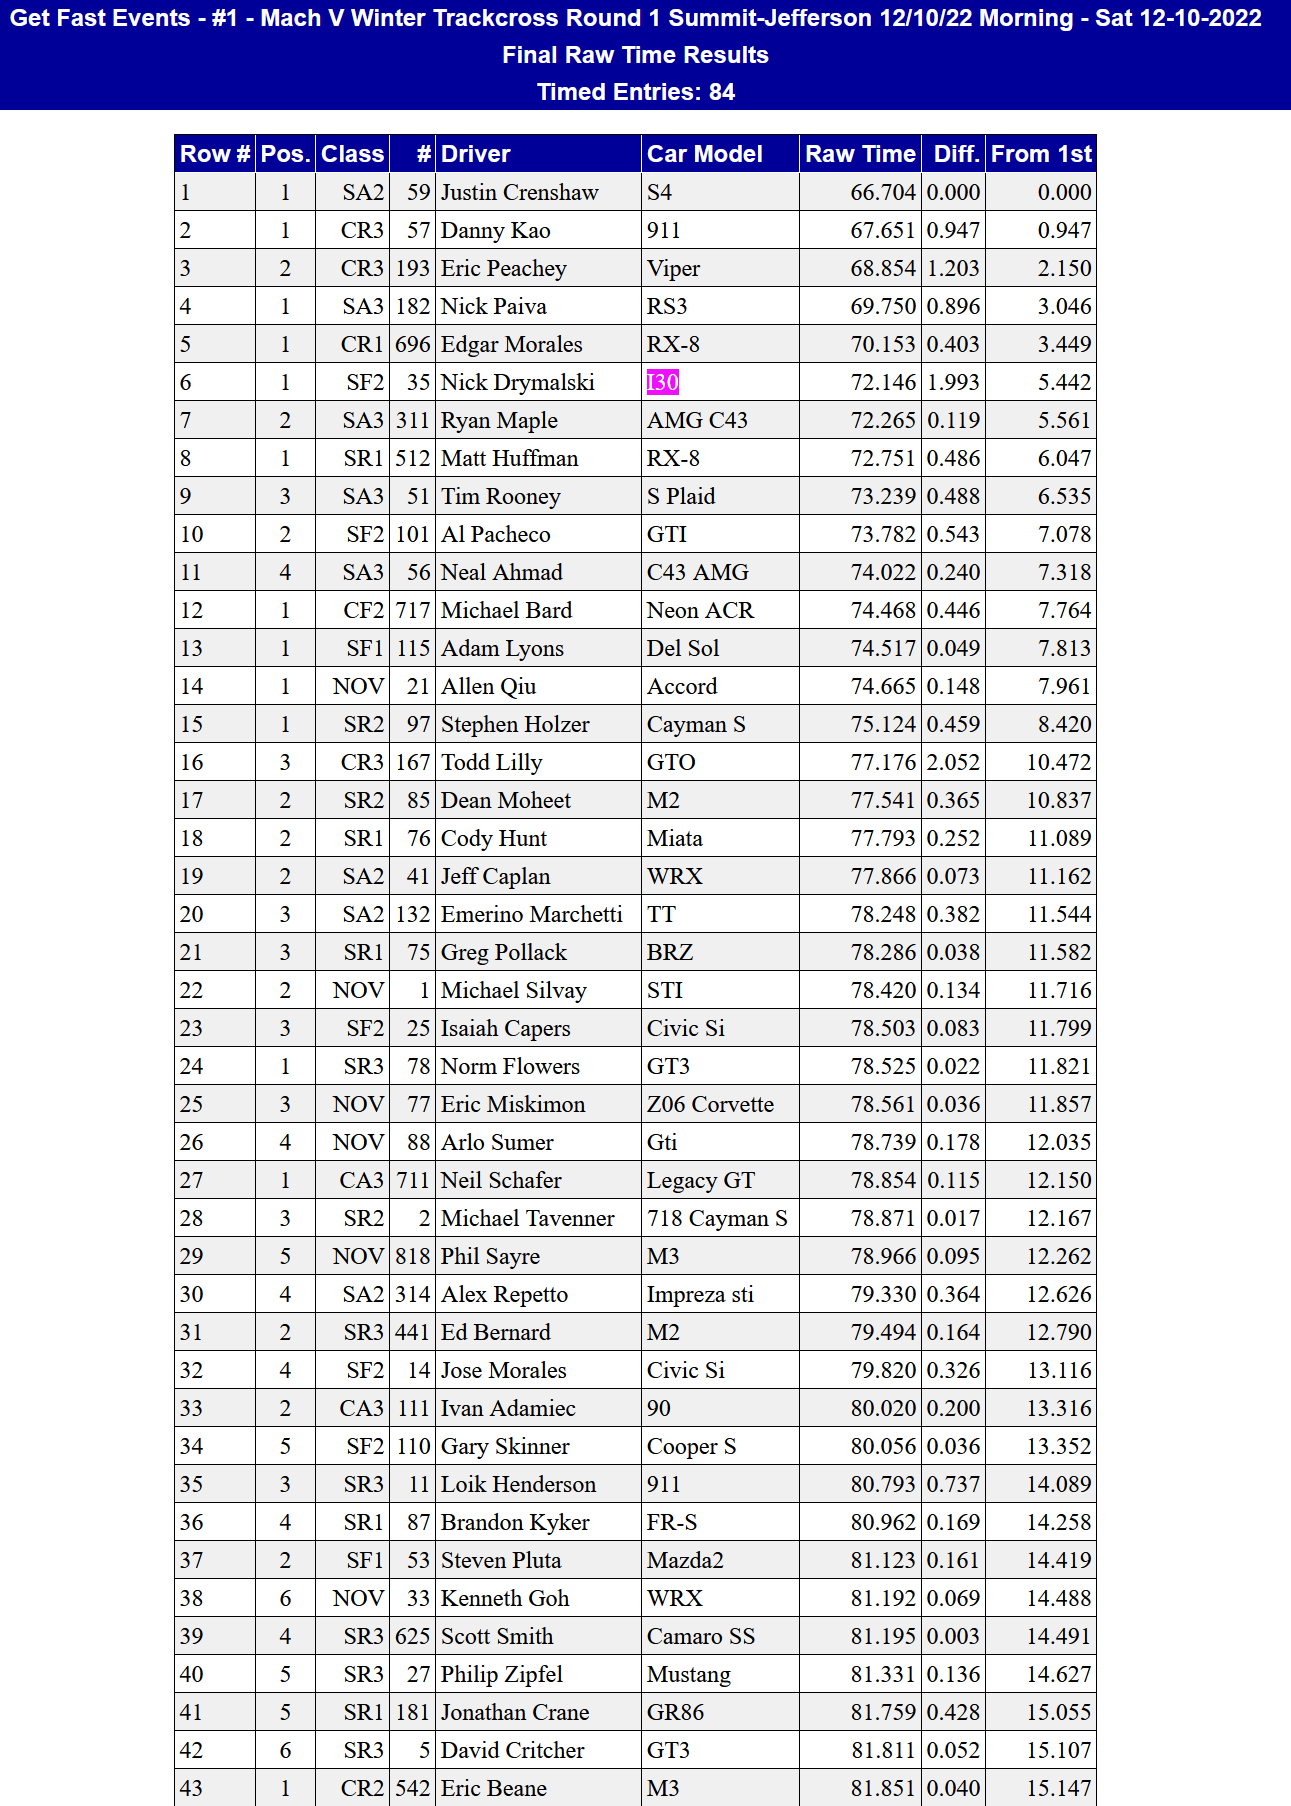
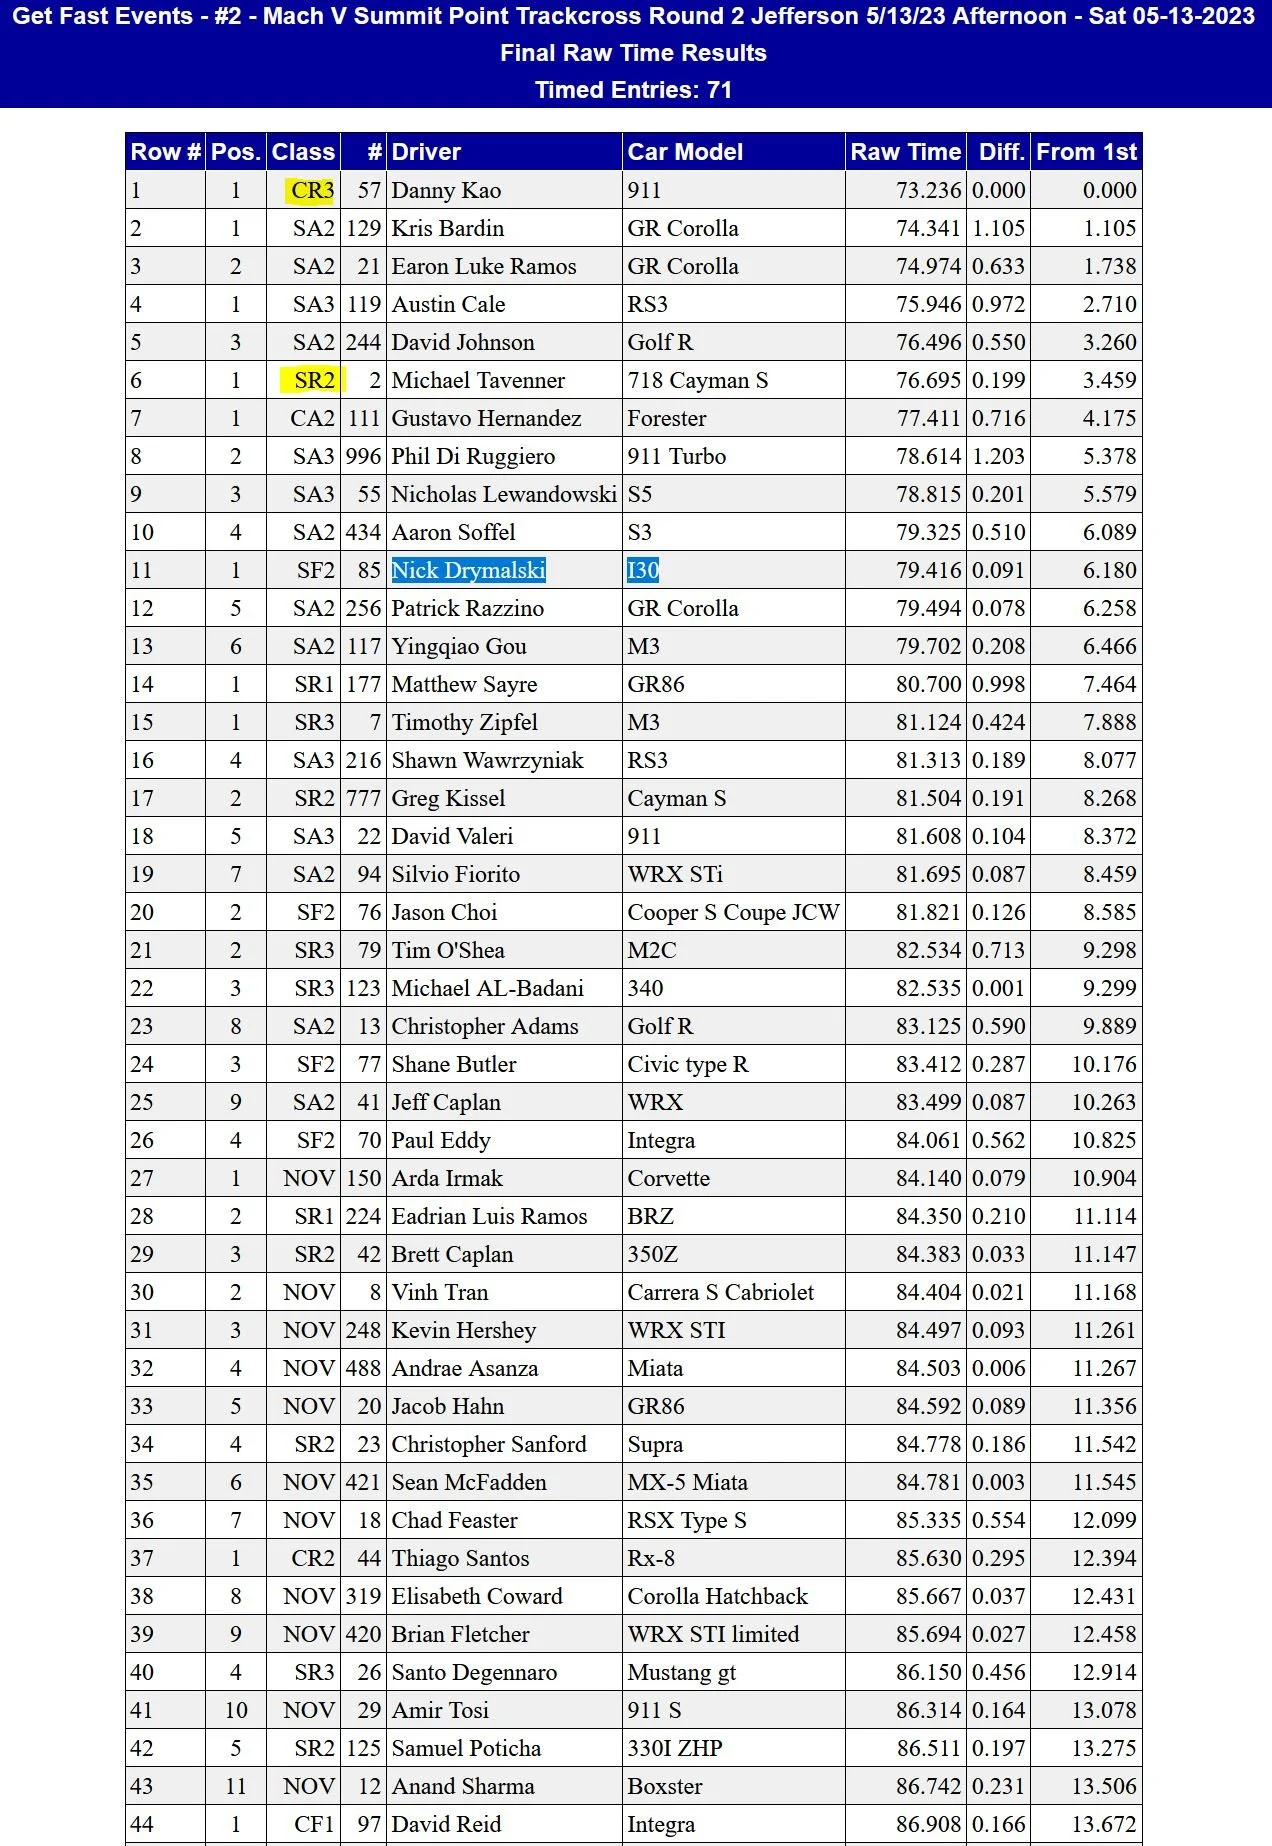
I ran another trackcross event last weekend and it was the first event of the winter series. They tried something they've never done before, which was to run all three of the tracks at Summit Point in one day, with each one being its own "event". Temperatures were around 35-40*, and it was drizzling on my way there, so the conditions weren't ideal for my summer tires. The Mazdaspeed 3 wasn't at this event, but the guy with the 300/370 DSG GTI was there, but ran on his all season tires instead of his 200TW tires. And due to running all three tracks, we only got a few runs on each one, barely enough the learn where you're going. I'm familiar enough with the Shenandoah Circuit by now, but it's been a decade or more since I was on the other two, so I was basically learning them all over again.
I was in the second heat, so our group always ran in better conditions than the cars in the first heat. This was most important for the first event on the Jefferson Circuit, where the track was still wet by the time we started running, but by the end the racing line was drying up. The rear end of my car was very frisky in those conditions, which was quite a bit of fun and a change from how tied down it normally is. I was surprised at how well I was able to put the power down too. My competitor in the GTI was having more trouble with that and said that he wasn't able to go above 75% throttle, which didn't surprise me given 370 wtq and 225 width A/S tires. I jumped out to an early lead and held on to it, winning my class for the first heat. In fact, I did so well (keeping in mind the first run group ran in wetter conditions) that I placed 6th overall out of 84 cars!
That felt really good, and I'm sure I'll never do that well again.
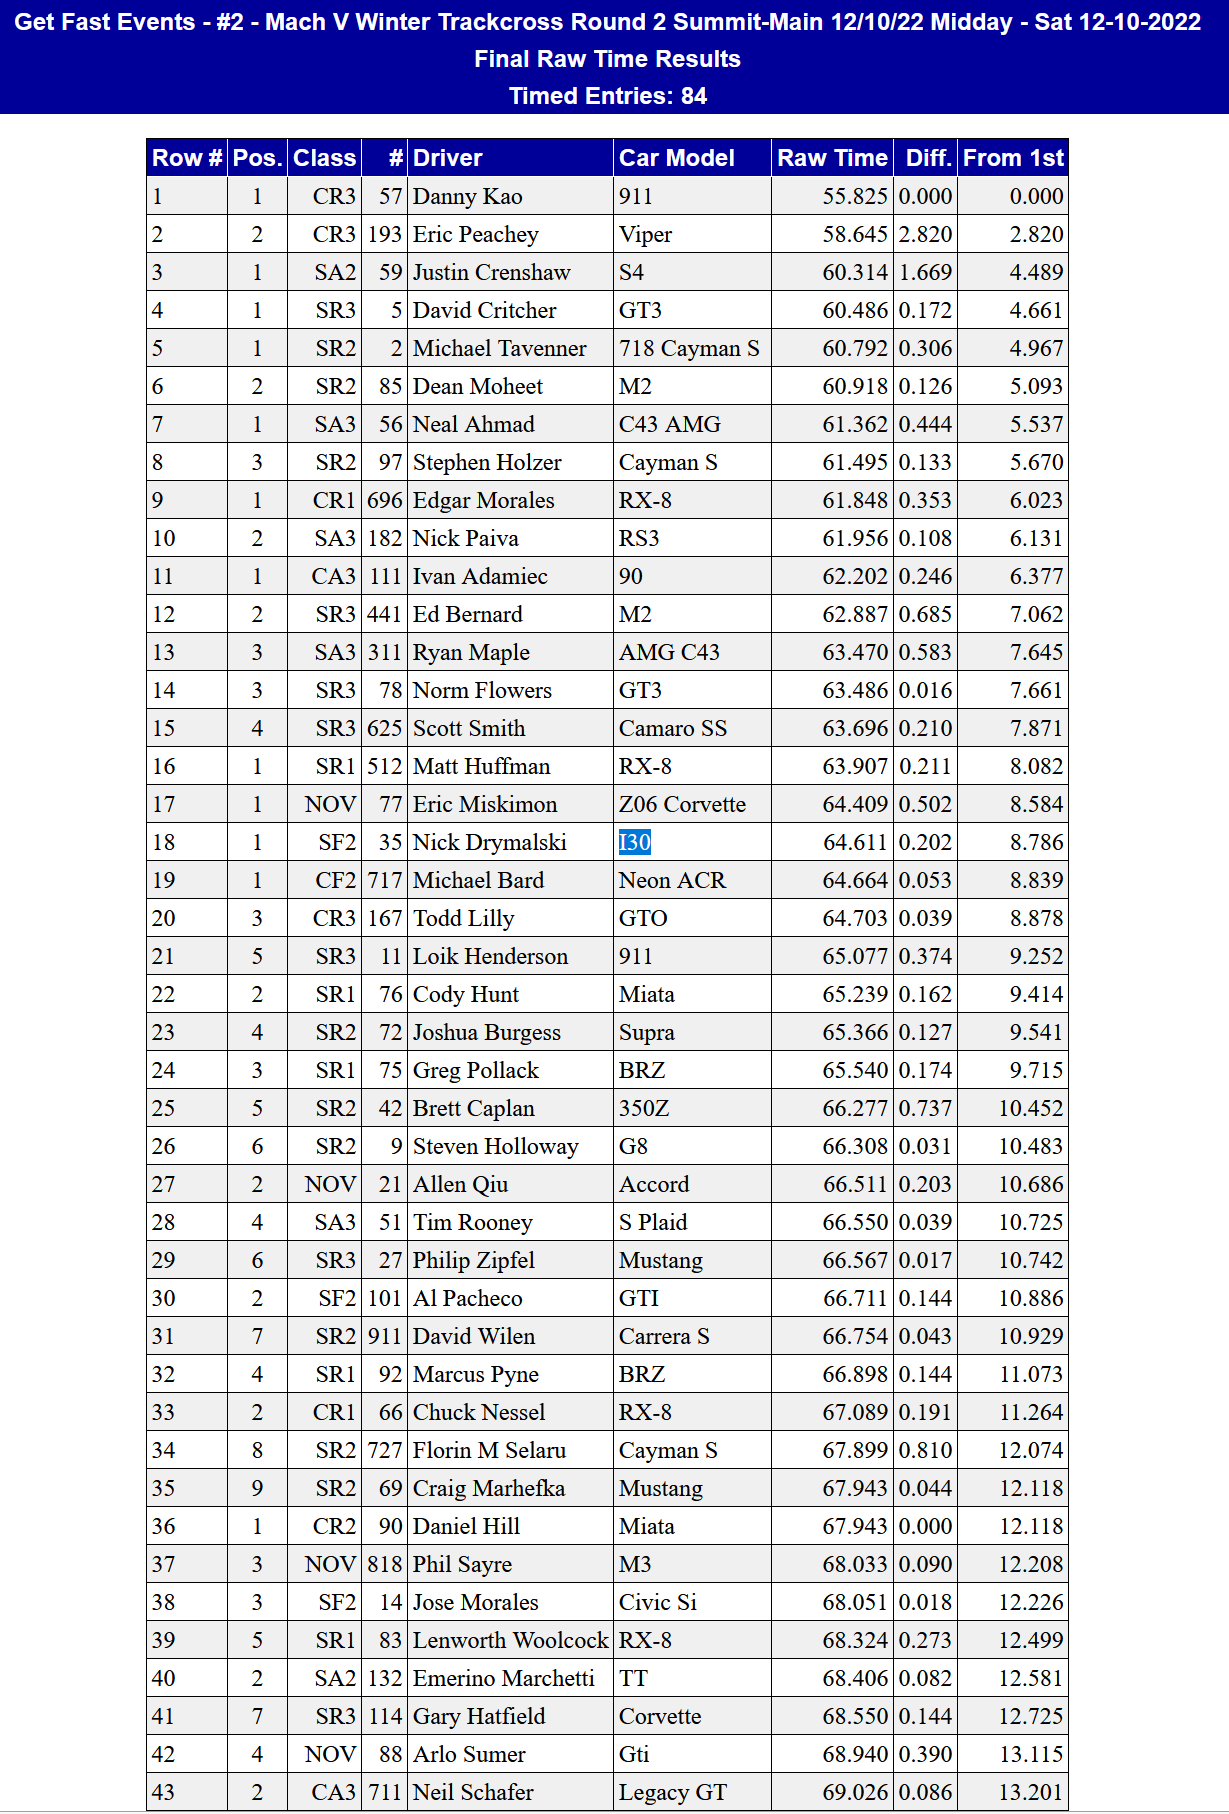
Next up was Summit Main, which is a much faster track and the track was mostly dry by this point. I won my class again and finish 18th overall.
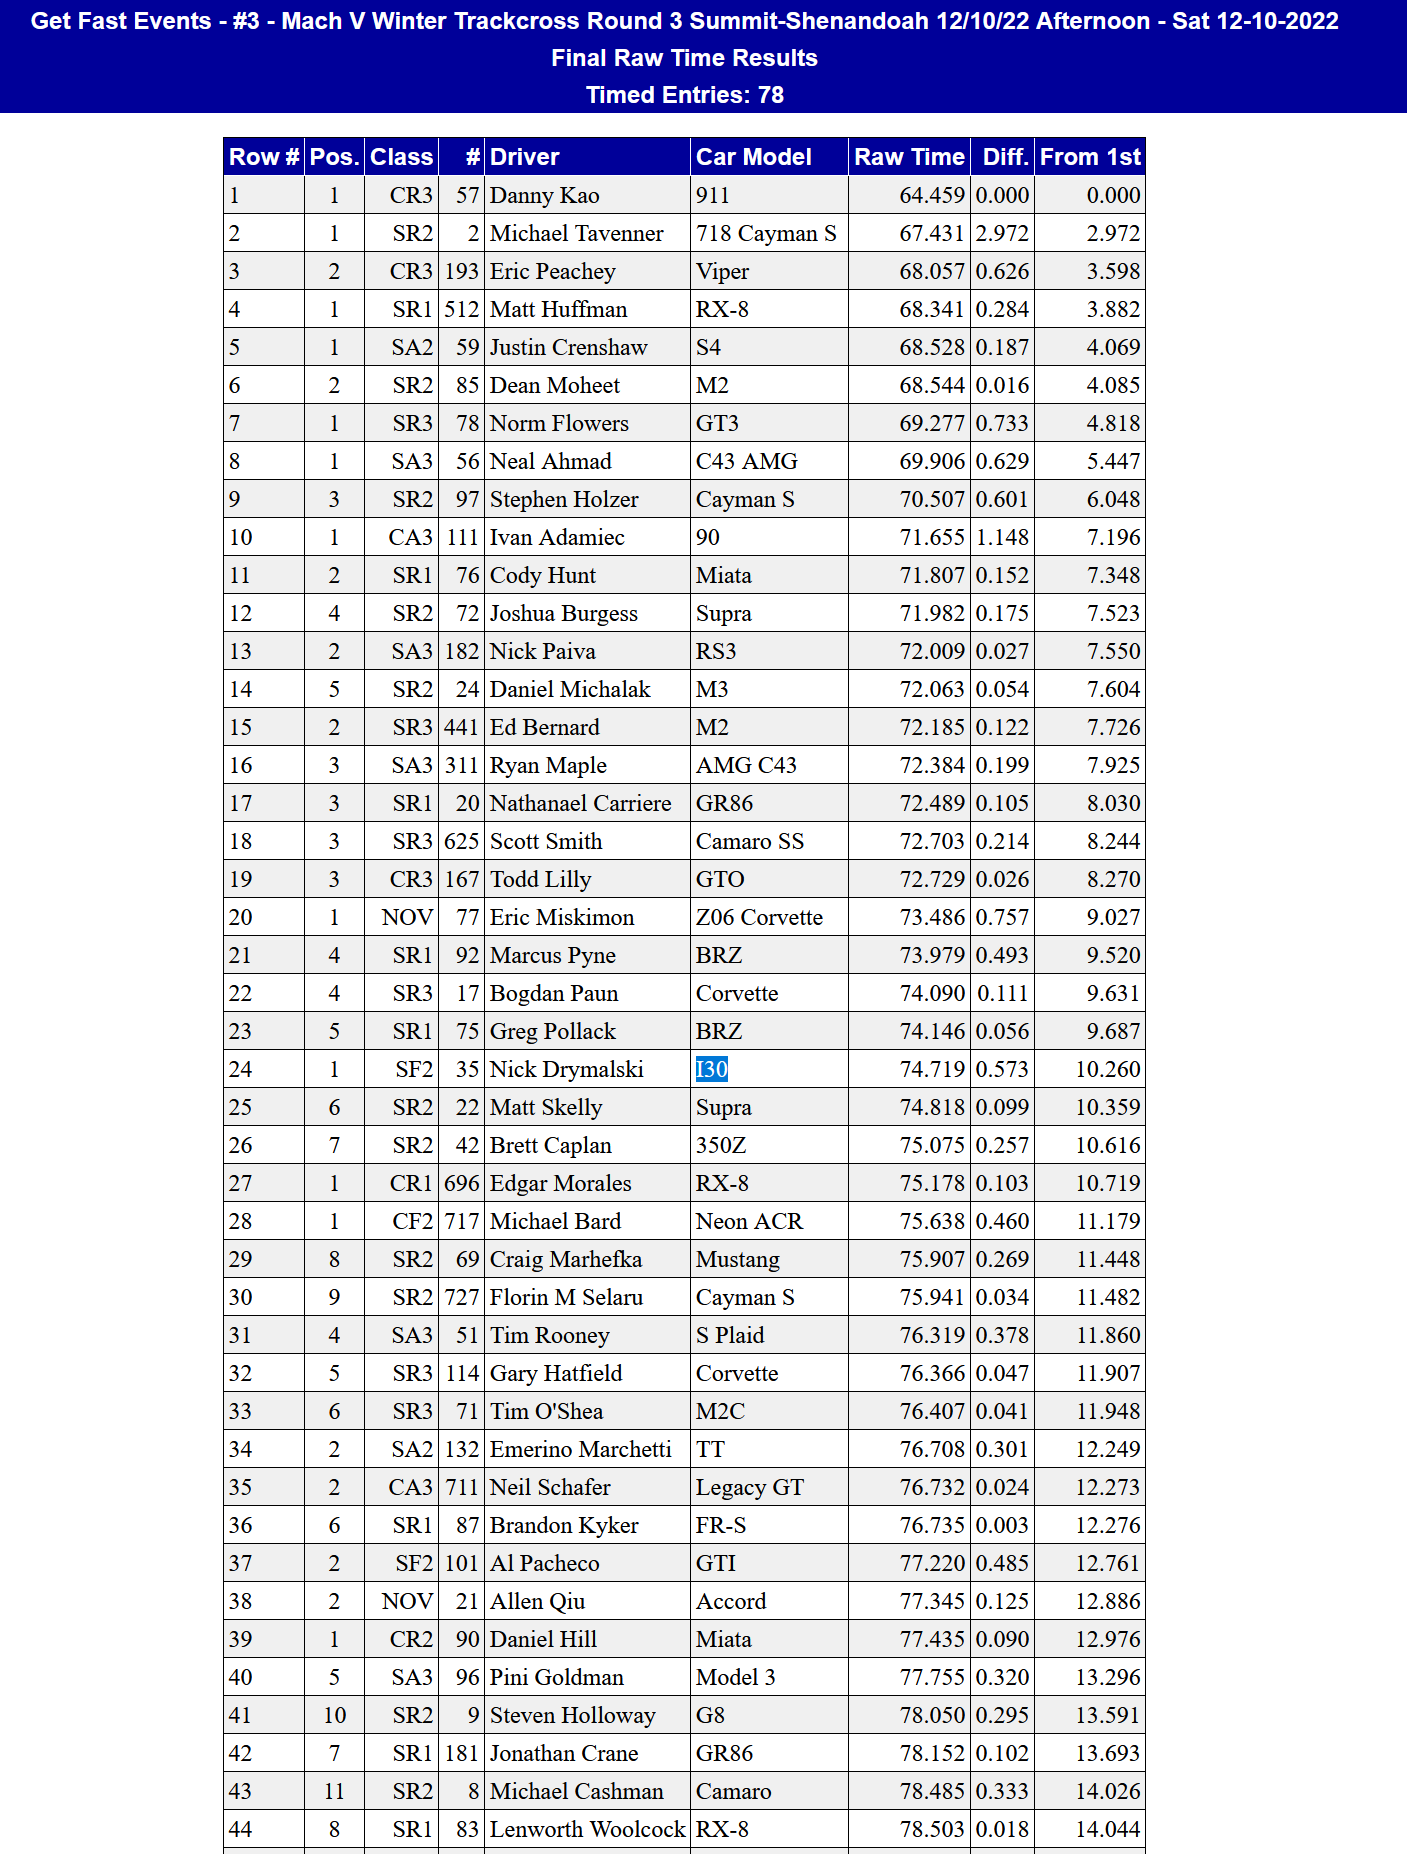
And we finished the day on Shenandoah, where I know my way around for the most part. There are still two sections that I just can't seem to get right. I'm still getting what feels like brake pad knock back, which is quite distressing when braking from over 100 mph, so my braking points leave a lot to be desired throughout the day. My front rotors are at the end of their life, so I need to get new pads/rotors up there soon. Hopefully that will minimize the problem a bit.
So in the end I won all three "events" and had a strong showing overall. Once again people were asking me what I've done to the car and checking it out, and I received more compliments about how good it sounds. But there's still plenty of room for improvement here, from brakes to suspension to power, and of course, the driver. I tried a new location for my external mic, and while it fixed the wind noise issue, it doesn't really capture the true sound of my exhaust, which is more exciting than the video lets on. Enjoy!
I was in the second heat, so our group always ran in better conditions than the cars in the first heat. This was most important for the first event on the Jefferson Circuit, where the track was still wet by the time we started running, but by the end the racing line was drying up. The rear end of my car was very frisky in those conditions, which was quite a bit of fun and a change from how tied down it normally is. I was surprised at how well I was able to put the power down too. My competitor in the GTI was having more trouble with that and said that he wasn't able to go above 75% throttle, which didn't surprise me given 370 wtq and 225 width A/S tires. I jumped out to an early lead and held on to it, winning my class for the first heat. In fact, I did so well (keeping in mind the first run group ran in wetter conditions) that I placed 6th overall out of 84 cars!
That felt really good, and I'm sure I'll never do that well again.
Next up was Summit Main, which is a much faster track and the track was mostly dry by this point. I won my class again and finish 18th overall.
And we finished the day on Shenandoah, where I know my way around for the most part. There are still two sections that I just can't seem to get right. I'm still getting what feels like brake pad knock back, which is quite distressing when braking from over 100 mph, so my braking points leave a lot to be desired throughout the day. My front rotors are at the end of their life, so I need to get new pads/rotors up there soon. Hopefully that will minimize the problem a bit.
So in the end I won all three "events" and had a strong showing overall. Once again people were asking me what I've done to the car and checking it out, and I received more compliments about how good it sounds. But there's still plenty of room for improvement here, from brakes to suspension to power, and of course, the driver. I tried a new location for my external mic, and while it fixed the wind noise issue, it doesn't really capture the true sound of my exhaust, which is more exciting than the video lets on. Enjoy!
Nice showing against some well respected national names from the TT and KOTM communities. You looked smooth and seemed to put power down early on corner exits well enough. End of that main circuit vid#2 reminds me of LimeRock - right, off throttle, underbridge, right, throttle onto front straight.. The Shenendoah track vid# looks like an absolute memory challenge and really trusting your braking and turn in points. As for the sound, do you not have a muff yet for the mic? That should allow for placement anywhere inside or out.
Nice showing against some well respected national names from the TT and KOTM communities. You looked smooth and seemed to put power down early on corner exits well enough. End of that main circuit vid#2 reminds me of LimeRock - right, off throttle, underbridge, right, throttle onto front straight.. The Shenendoah track vid# looks like an absolute memory challenge and really trusting your braking and turn in points. As for the sound, do you not have a muff yet for the mic? That should allow for placement anywhere inside or out.

Time to catch up on a bunch of small projects!
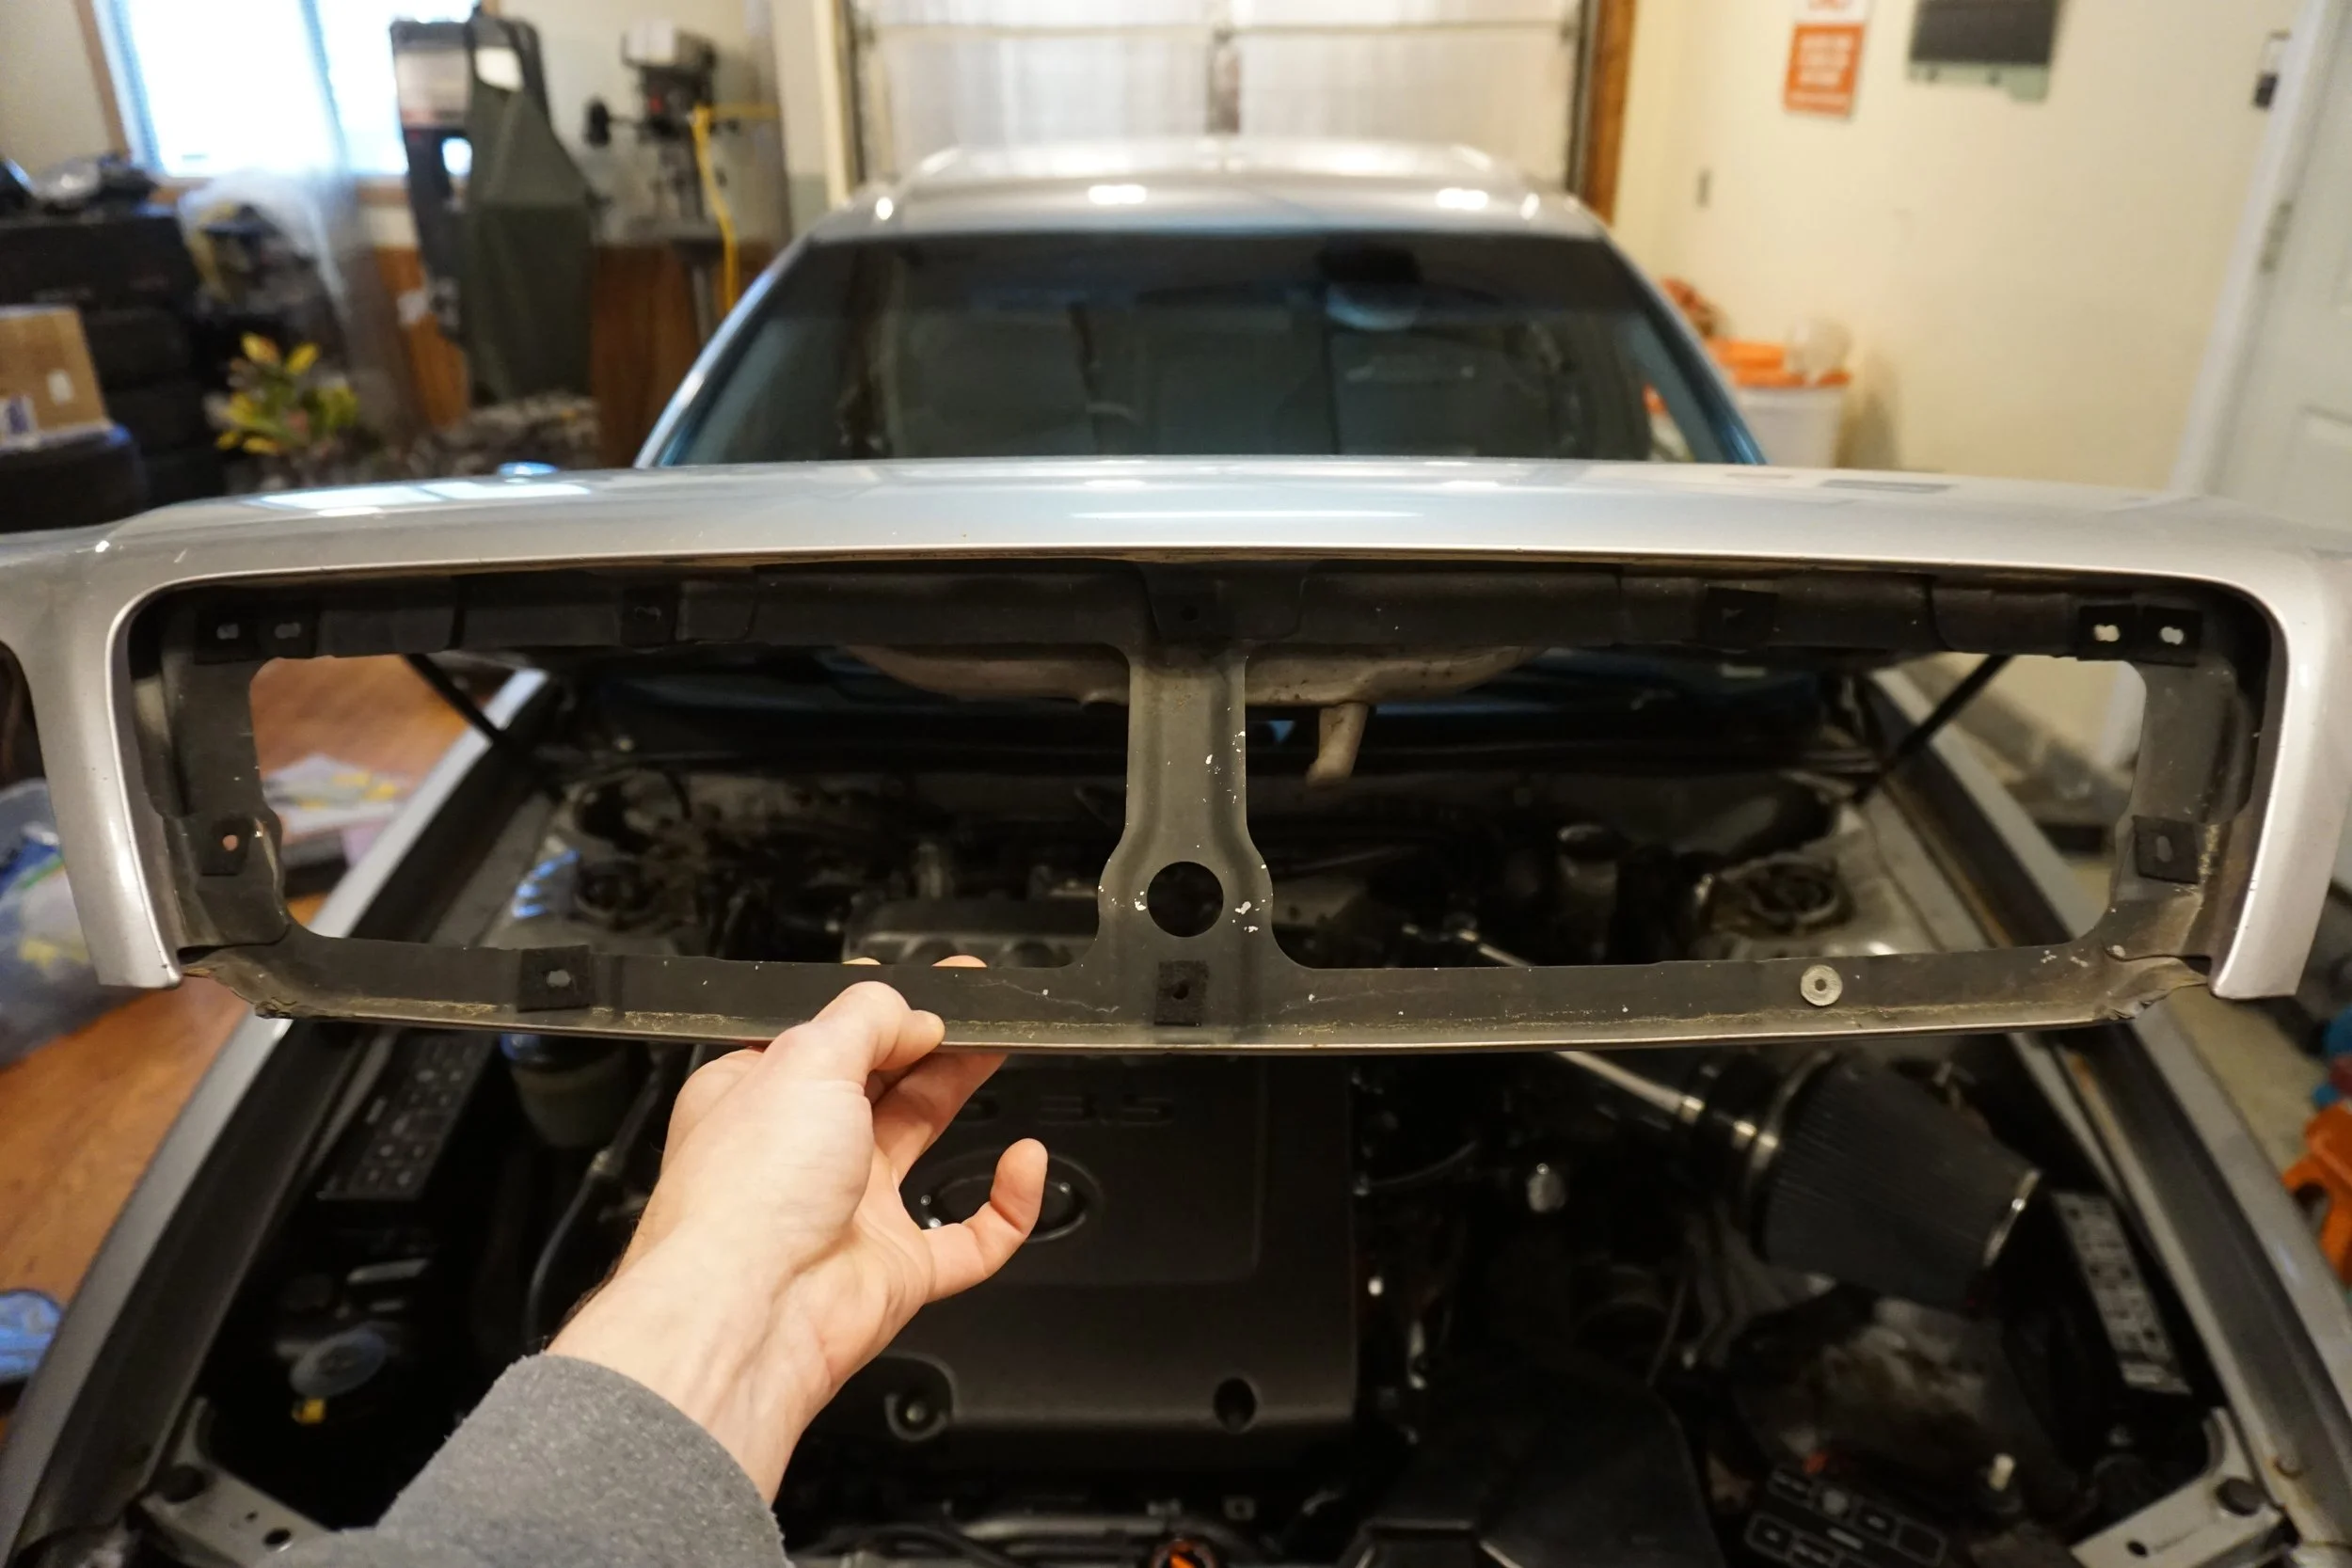
First up: some grille work. In the months when my car wasn't running right and my idle was all crummy, it really made the rattling of my grille stand out. All of my grilles have various broken mounting tabs on them, making it difficult to securely attach them to the hood, so I started out by fixing as many as I could with superglue. Then I moved on to replacing worn out or missing insulators on the hood with some felt material:
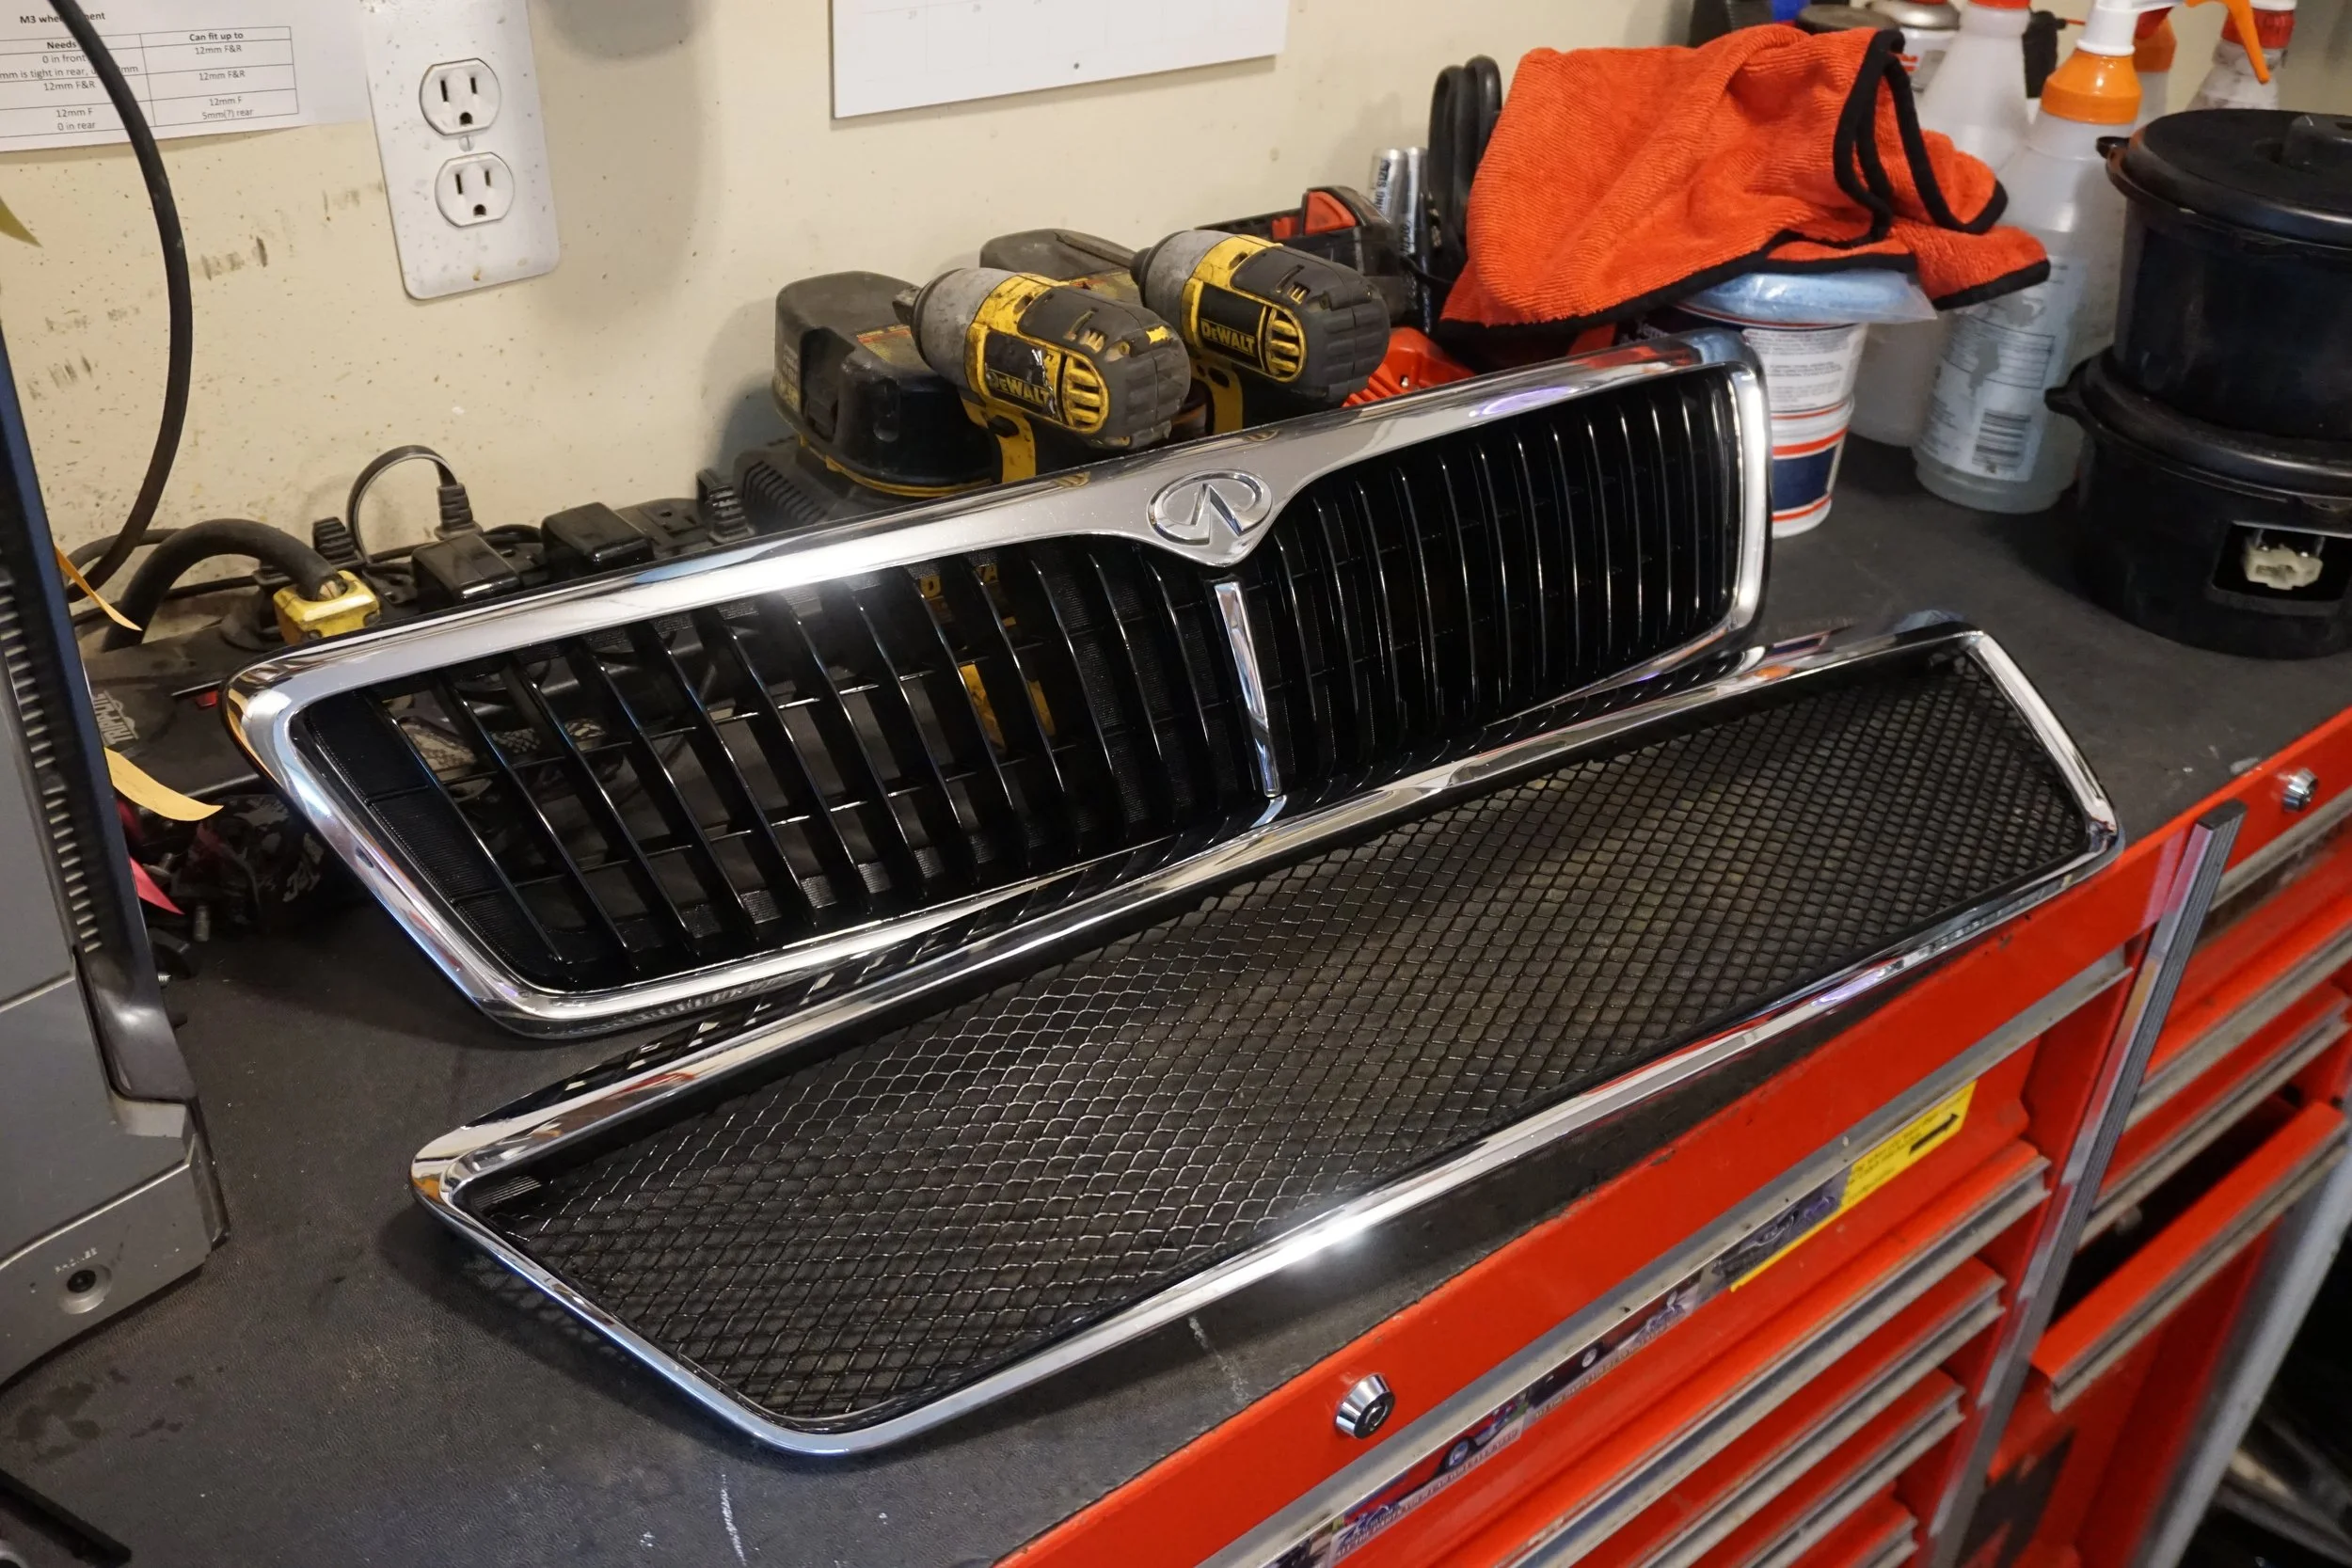
I also tried out my old (apparently) JDM grille that's been sitting in storage for 15+ years. I still don't really care for it, it's too generic.

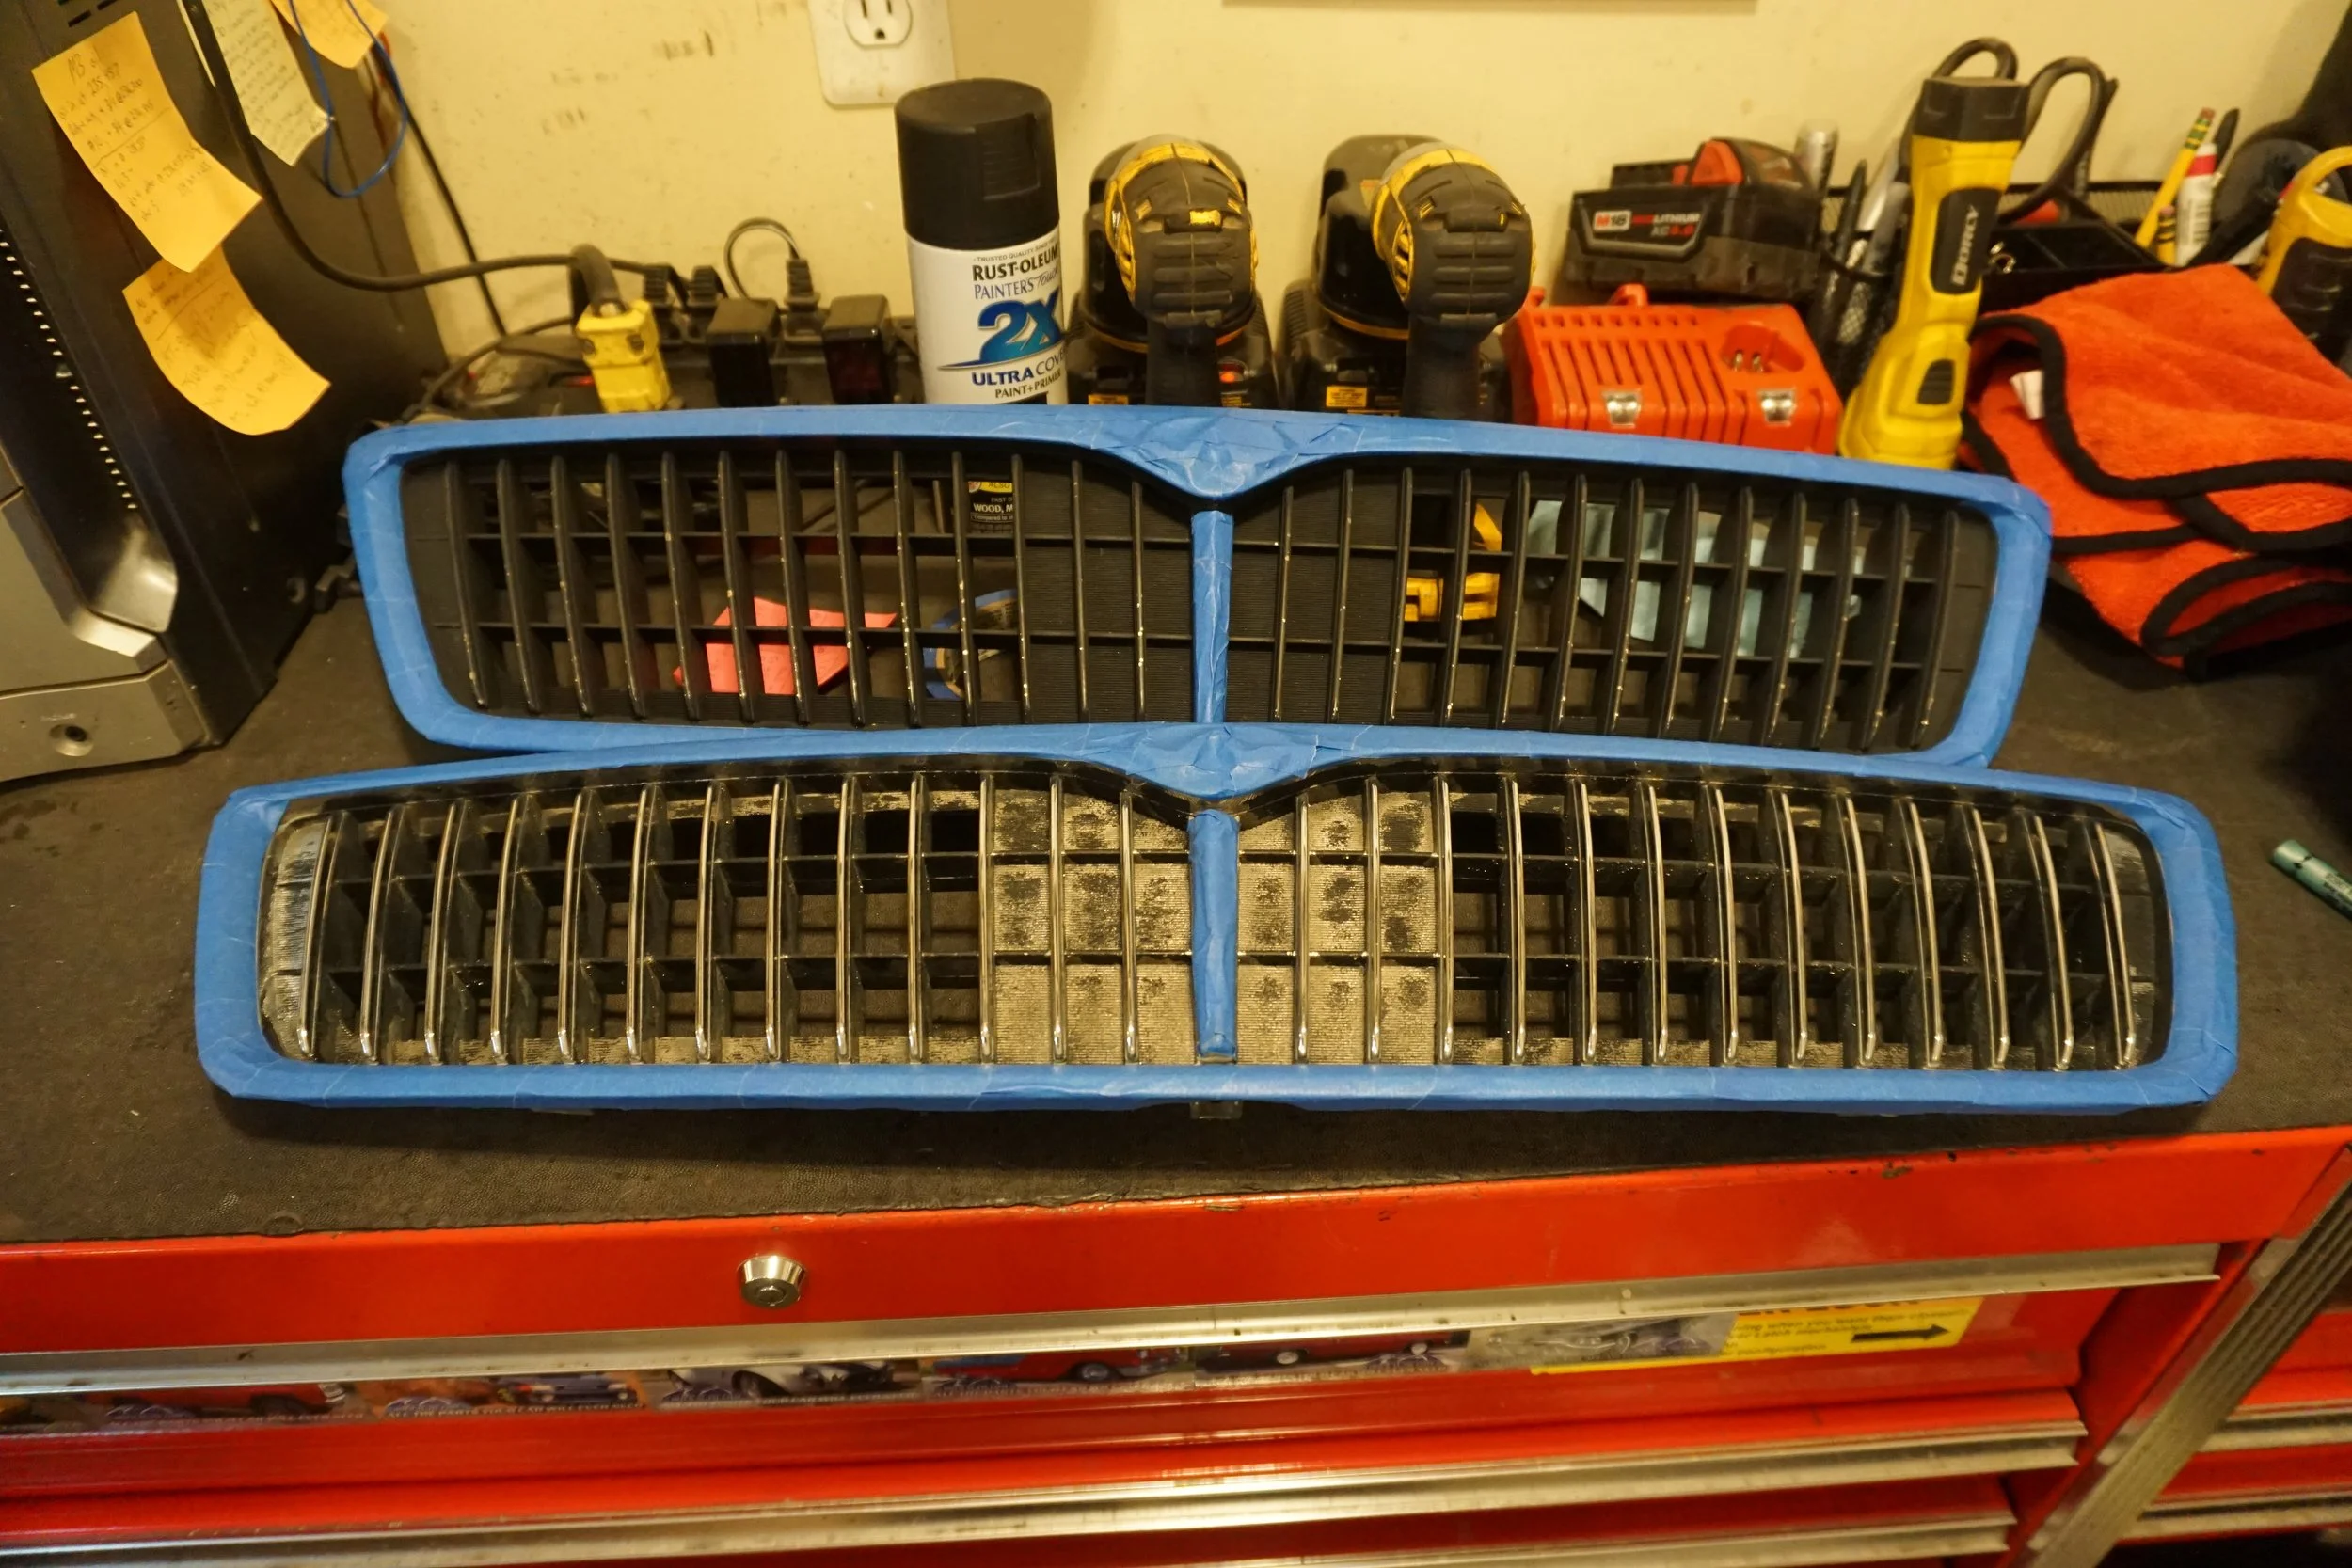
I then started the process of repainting all three of my grilles. One of them I picked up from a junkyard a while back since it was in pretty good condition. The one I've had on my car was last painted probably 10 years ago and rock chips had messed up my black paint job.
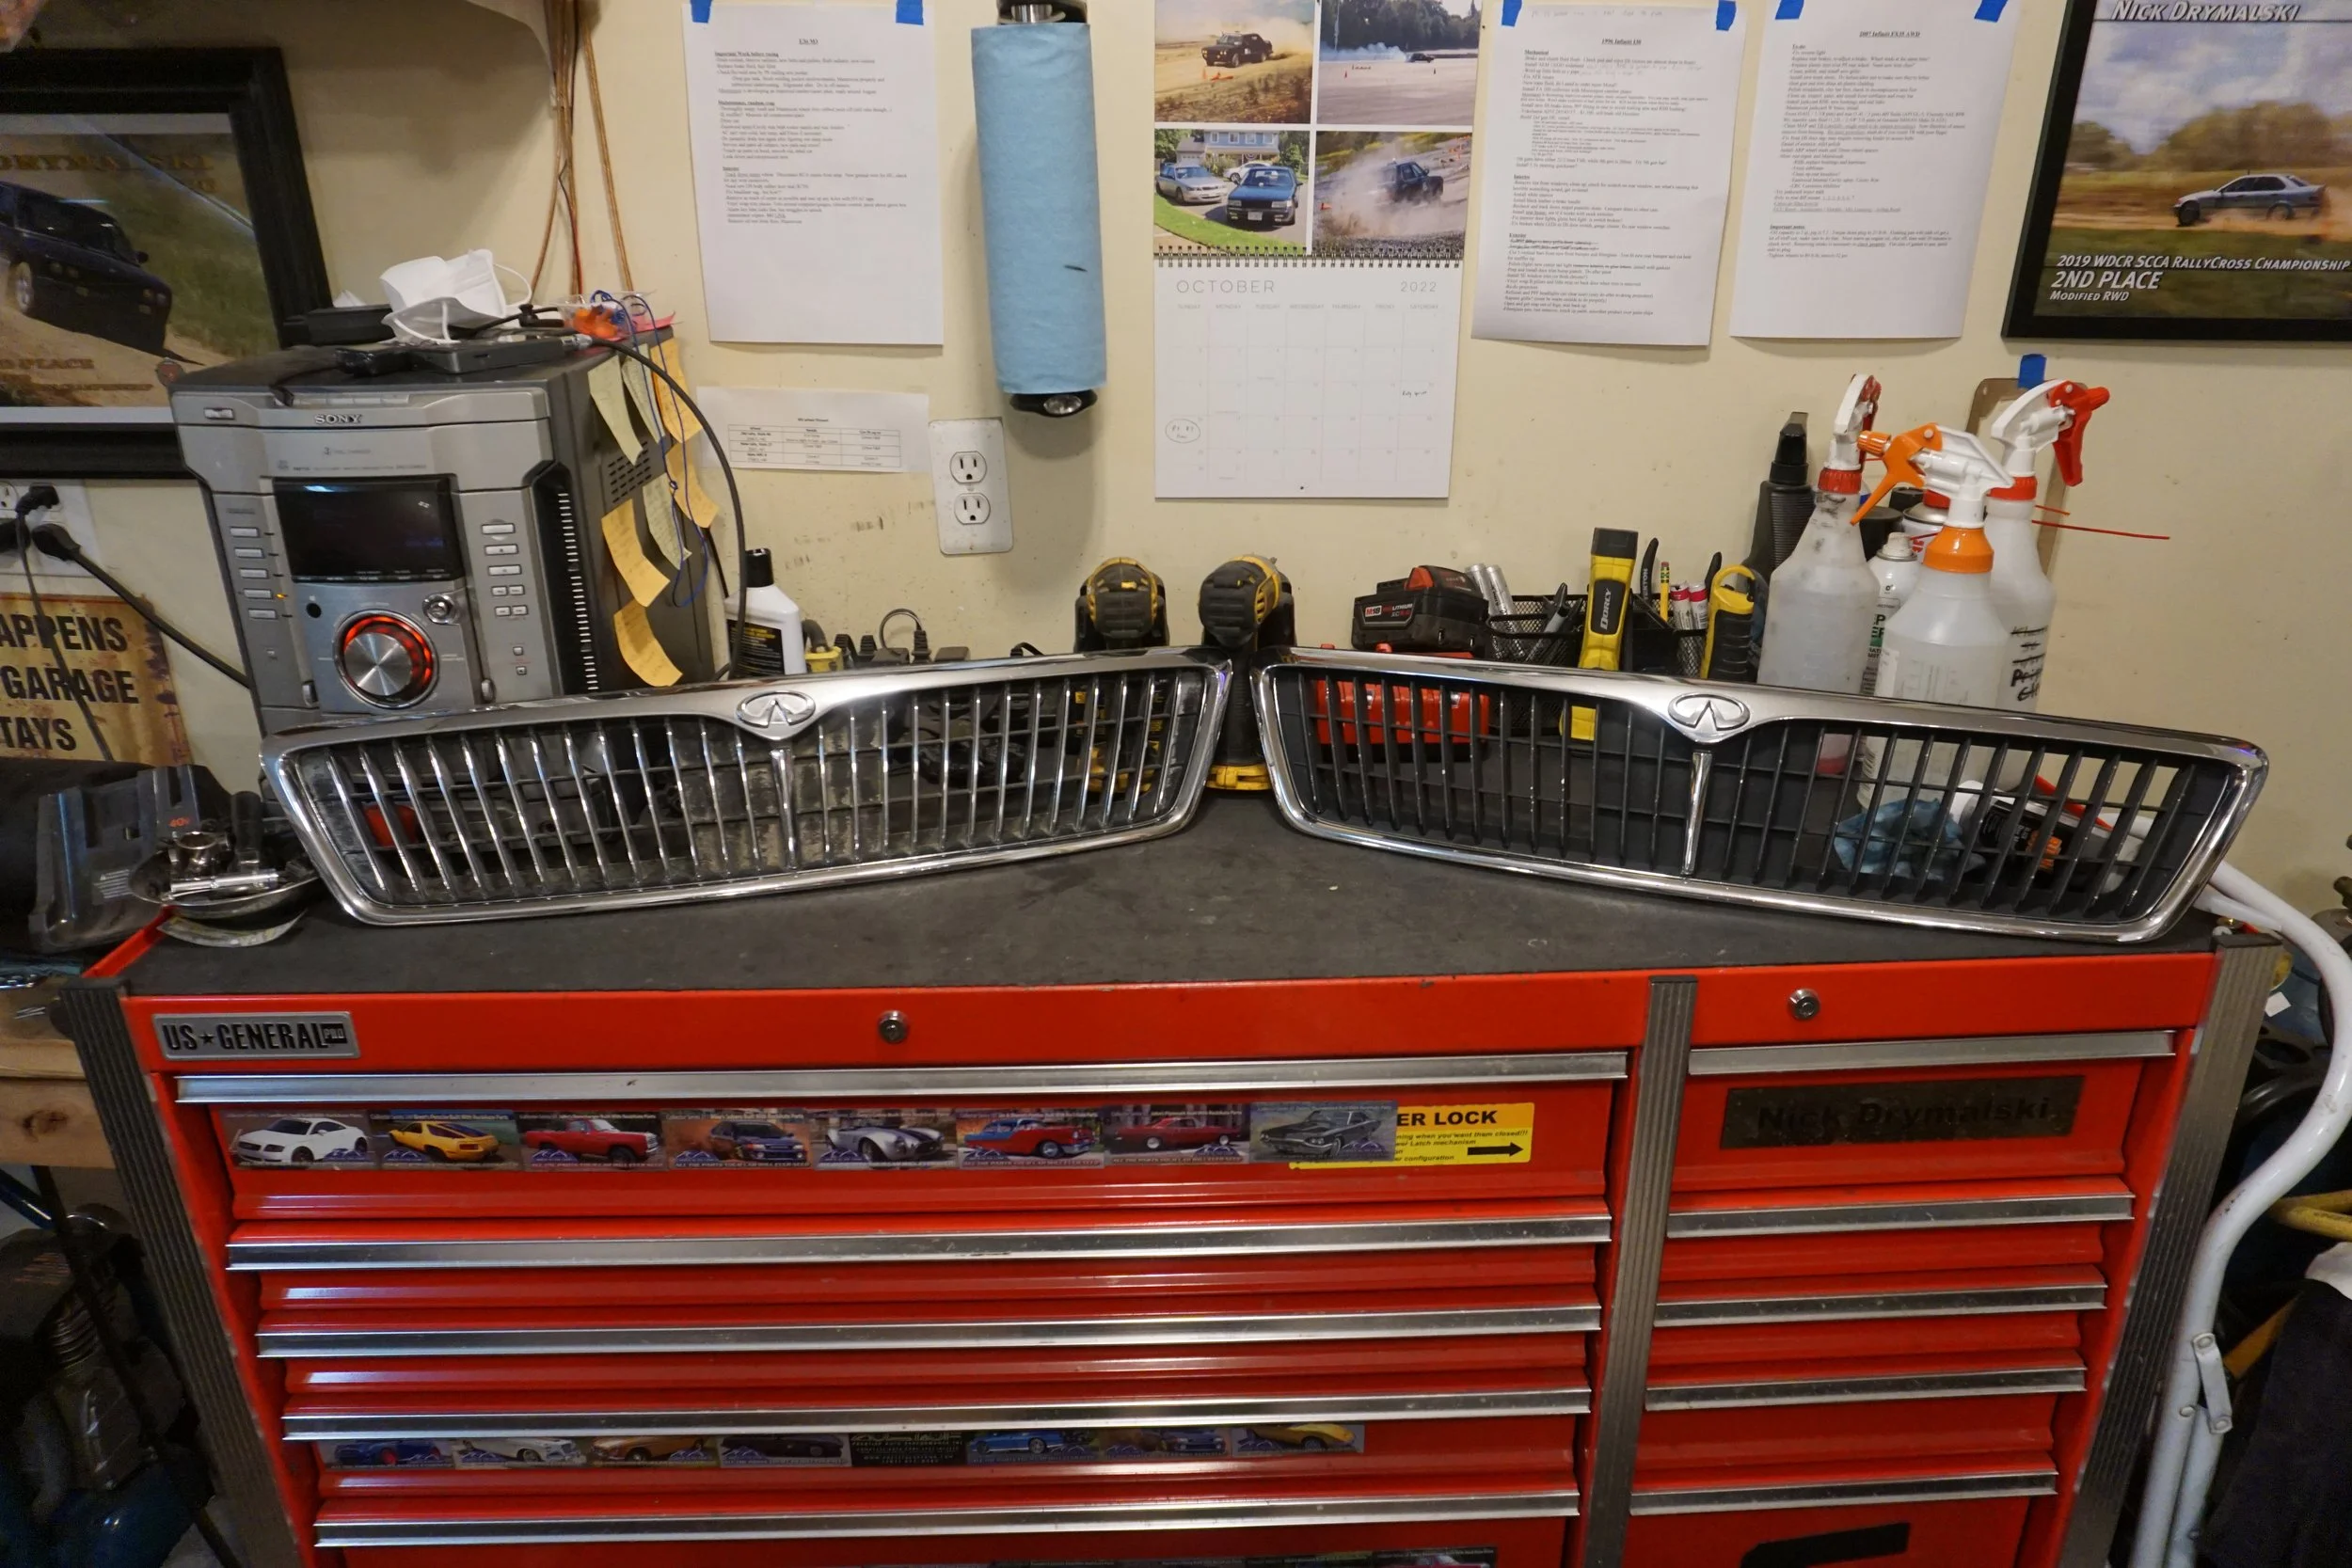
I decided to go with a semi-gloss black this time instead of matte, since I thought it was more in line with an OEM kinda look. Getting them ready for paint took a few hours of sanding and cleaning, but the paint went on well and I think it looks great now. I also polished up the "chrome" on them all which helped make them "pop".
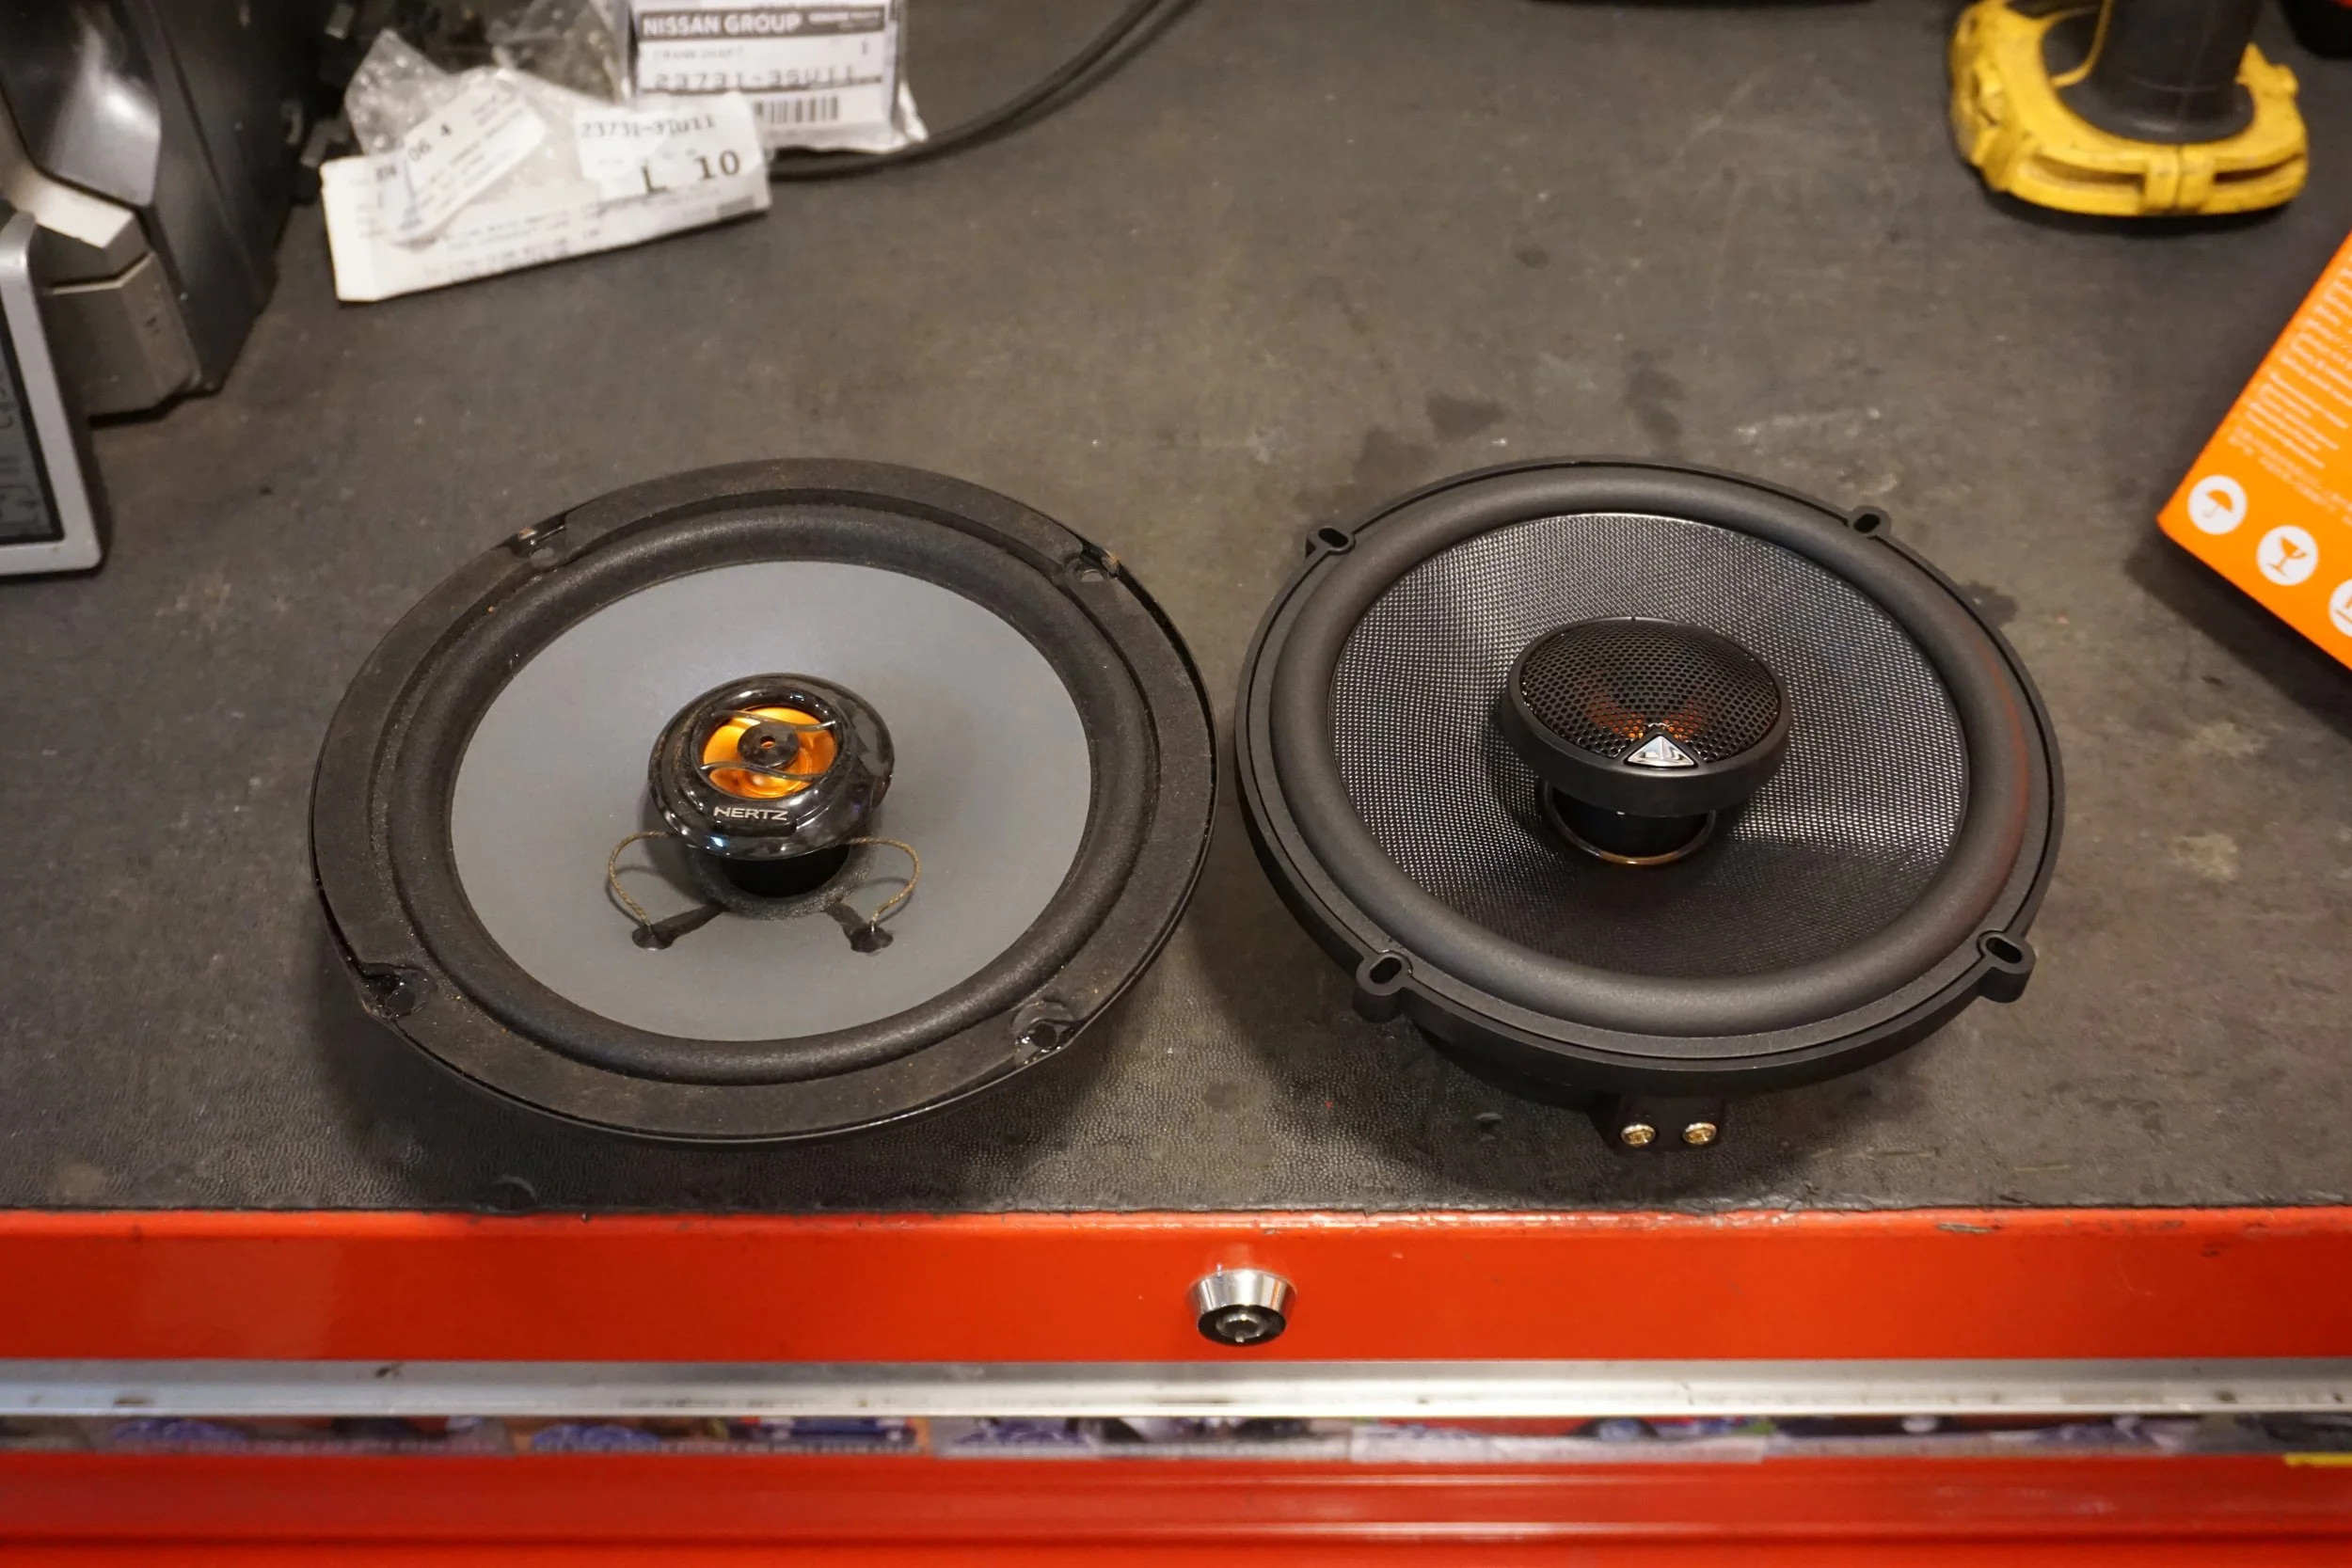
As you may have learned by now, I hate buzzing and rattles in my car, and there was something coming from the rear deck that had been annoying me for a while, so I decided to spend some time and try to figure out what was going on. I played with the fade/balance on the stereo and narrowed it down to the DS rear speaker. The speakers are 10+ years old, so I figured I might as well just install some new ones. I didn't need anything too fancy since my rear speakers are only powered from the headunit and get something like 15w RMS. I went with the JBL Stadium GTO620, which were quite hefty and weighed almost a pound more than the old Hertz did.
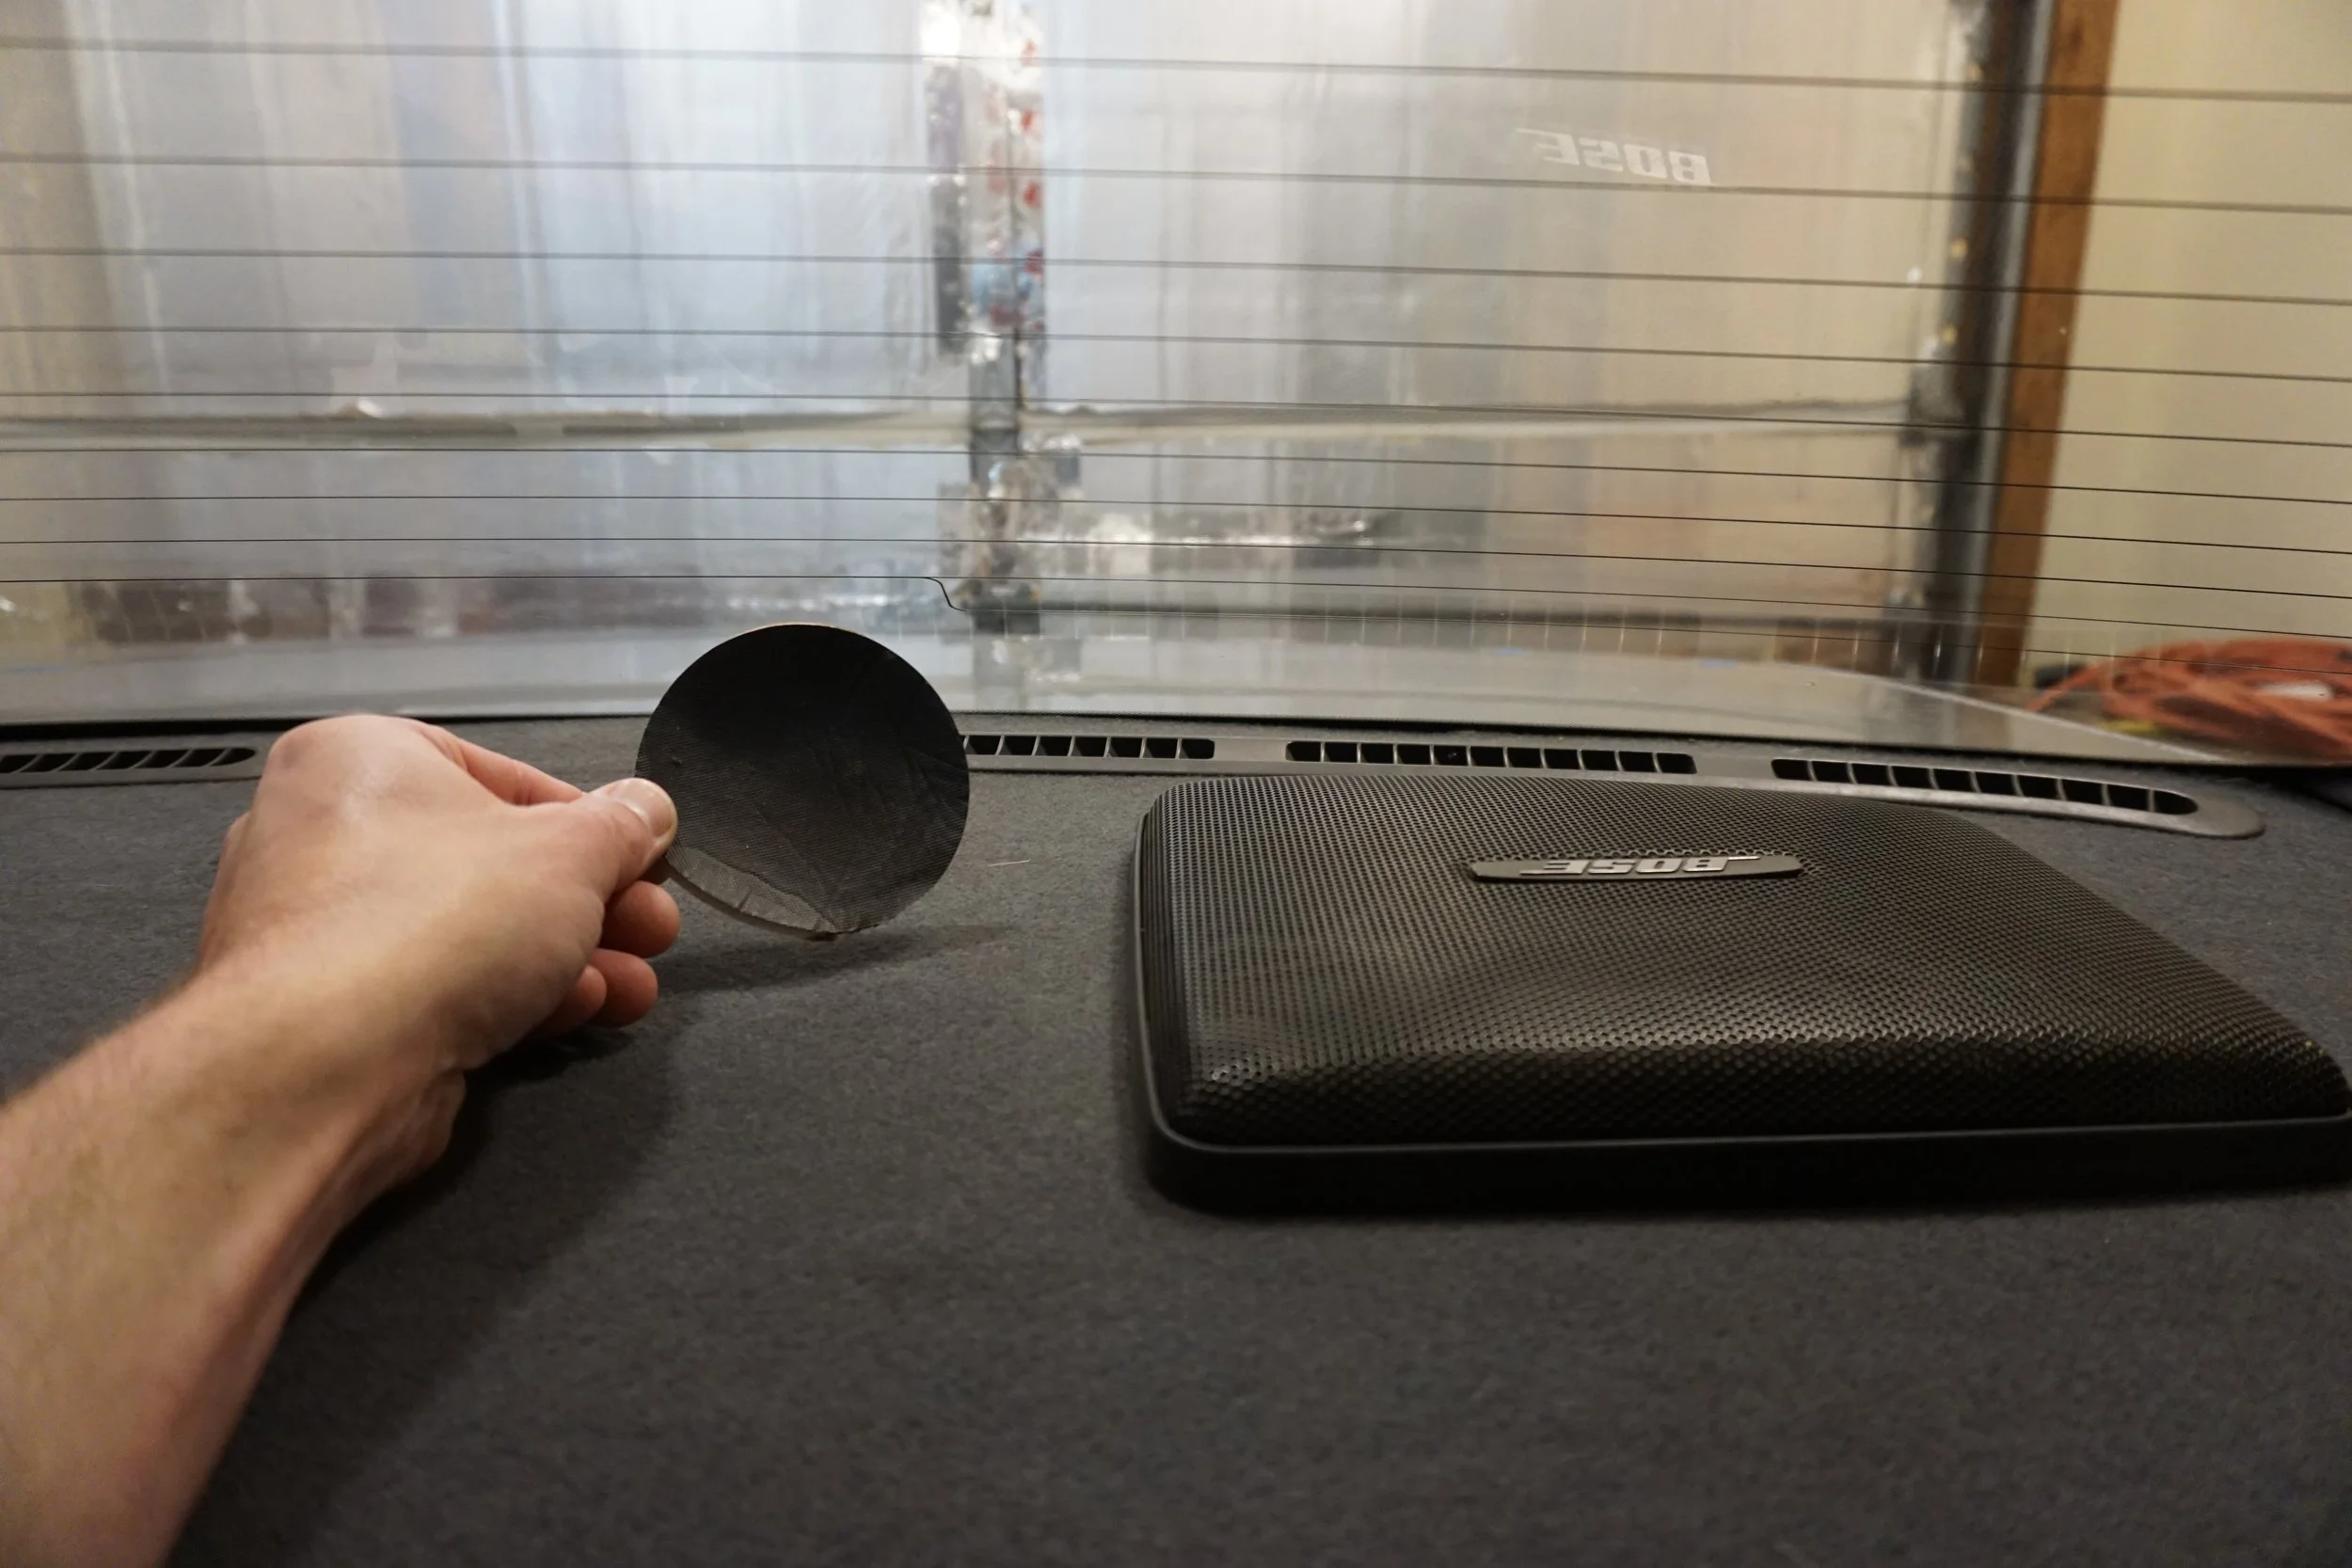
I got them installed, and what do you know? Same old fluttering from the same location. What gives?? I already have a fair amount of sound deadening on the rear deck. To make things more complicated, I couldn't hear the noise when I was sitting close to the rear speakers, I could only clearly hear it when sitting in the driver's seat. I eventually located the source of the problem- a round foam baffle sort of thing between the rear DS speaker and the third brake light. It's adhesive had started to fail, allowing it to flutter along with the bass. I have no idea how I was able to hear if through the rear deck cover, but I could. So I removed it and covered the hole with sound deadener, and the problem was solved!
So in the end I wasted $100 on speakers I didn't need, but I at least solved the problem.
Backing up a few months back to when it was still hot outside, I applied many rounds of Leatherique to my seats. There were many areas of the seats that just kept drinking whatever oil I put on them, while other areas didn't seem to absorb much. You can see the shiny/dull areas:
So after many round of the oil, I followed up with the cleaning step. Supposedly the oil helps bring dirt to the surface, which the cleaner can then pick up. I feel like I keep my seats pretty clean, but the slop bucket begs to differ:

There wasn't a night and day difference in how soft the leather was after all of that, but it did feel a little better, and it certainly looks cleaner than I can ever remember.
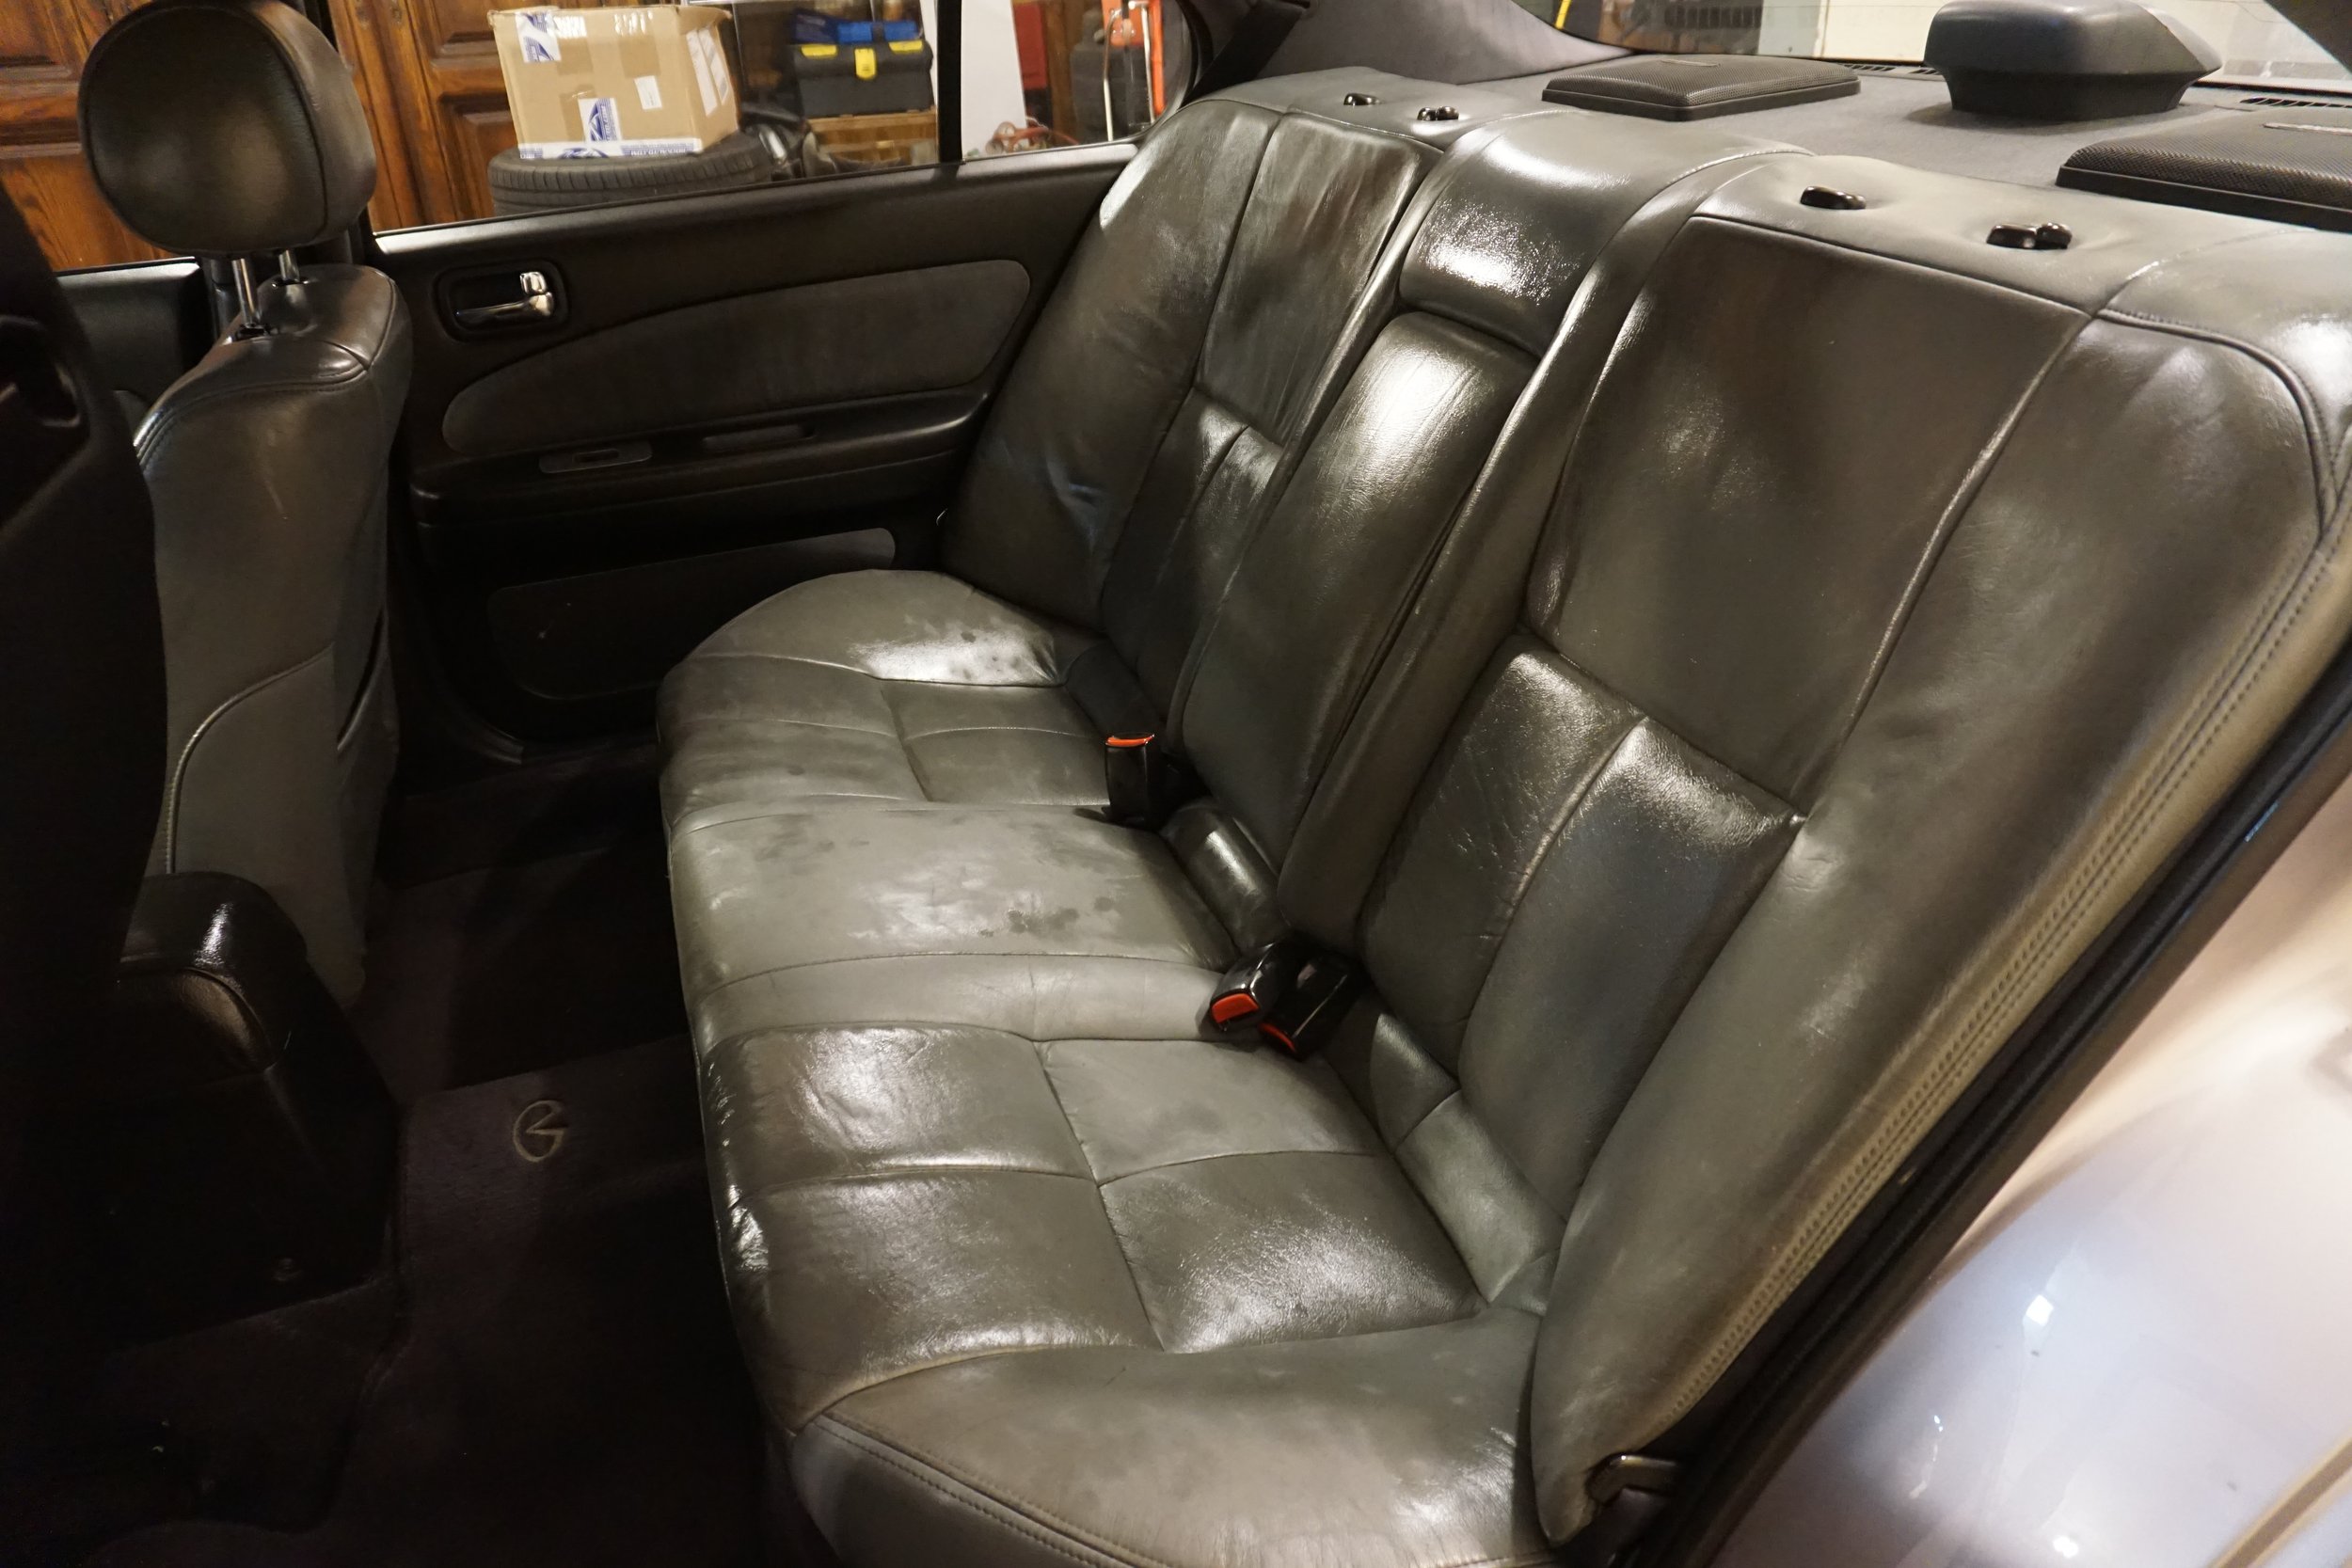
Anyways, so with the rear seat removed to install the new rear speakers, I figured it would be a good time to install the white leather seats I had "restored". I know, they don't really go with or match anything in my interior, but I put all that work into them, and I just wanted to see what they would look like. I'll eventually reinstall my stock seats.
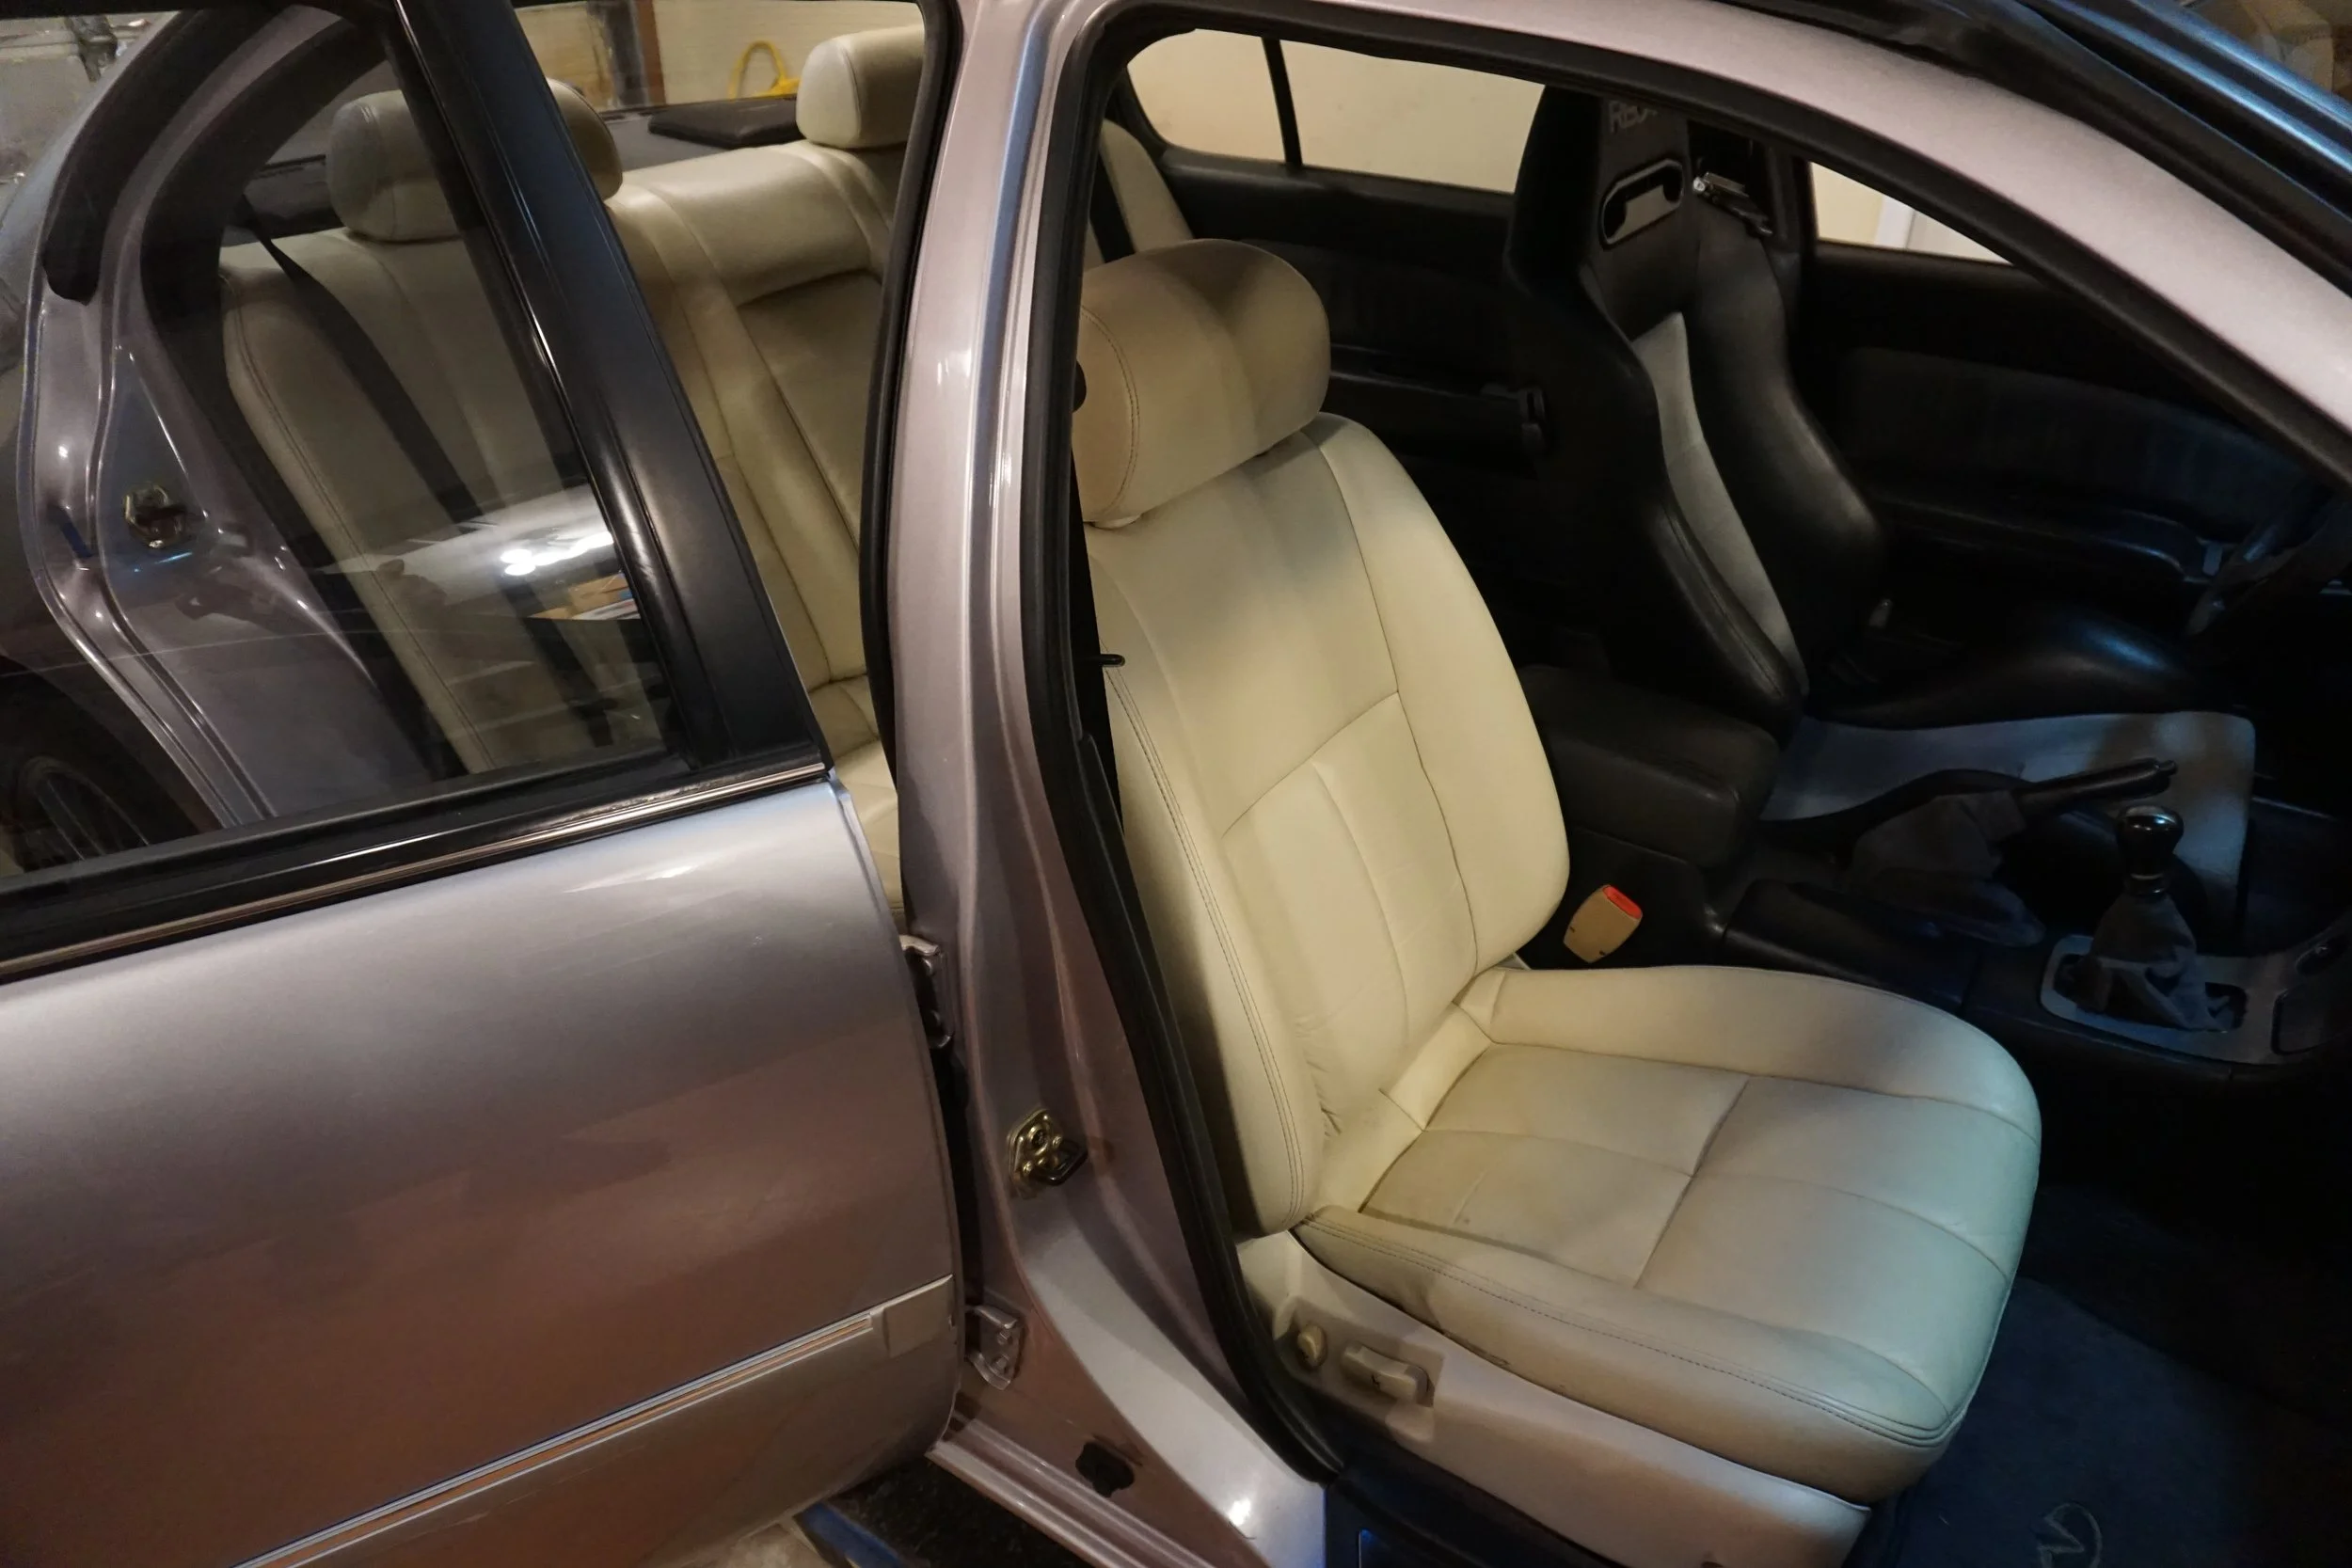
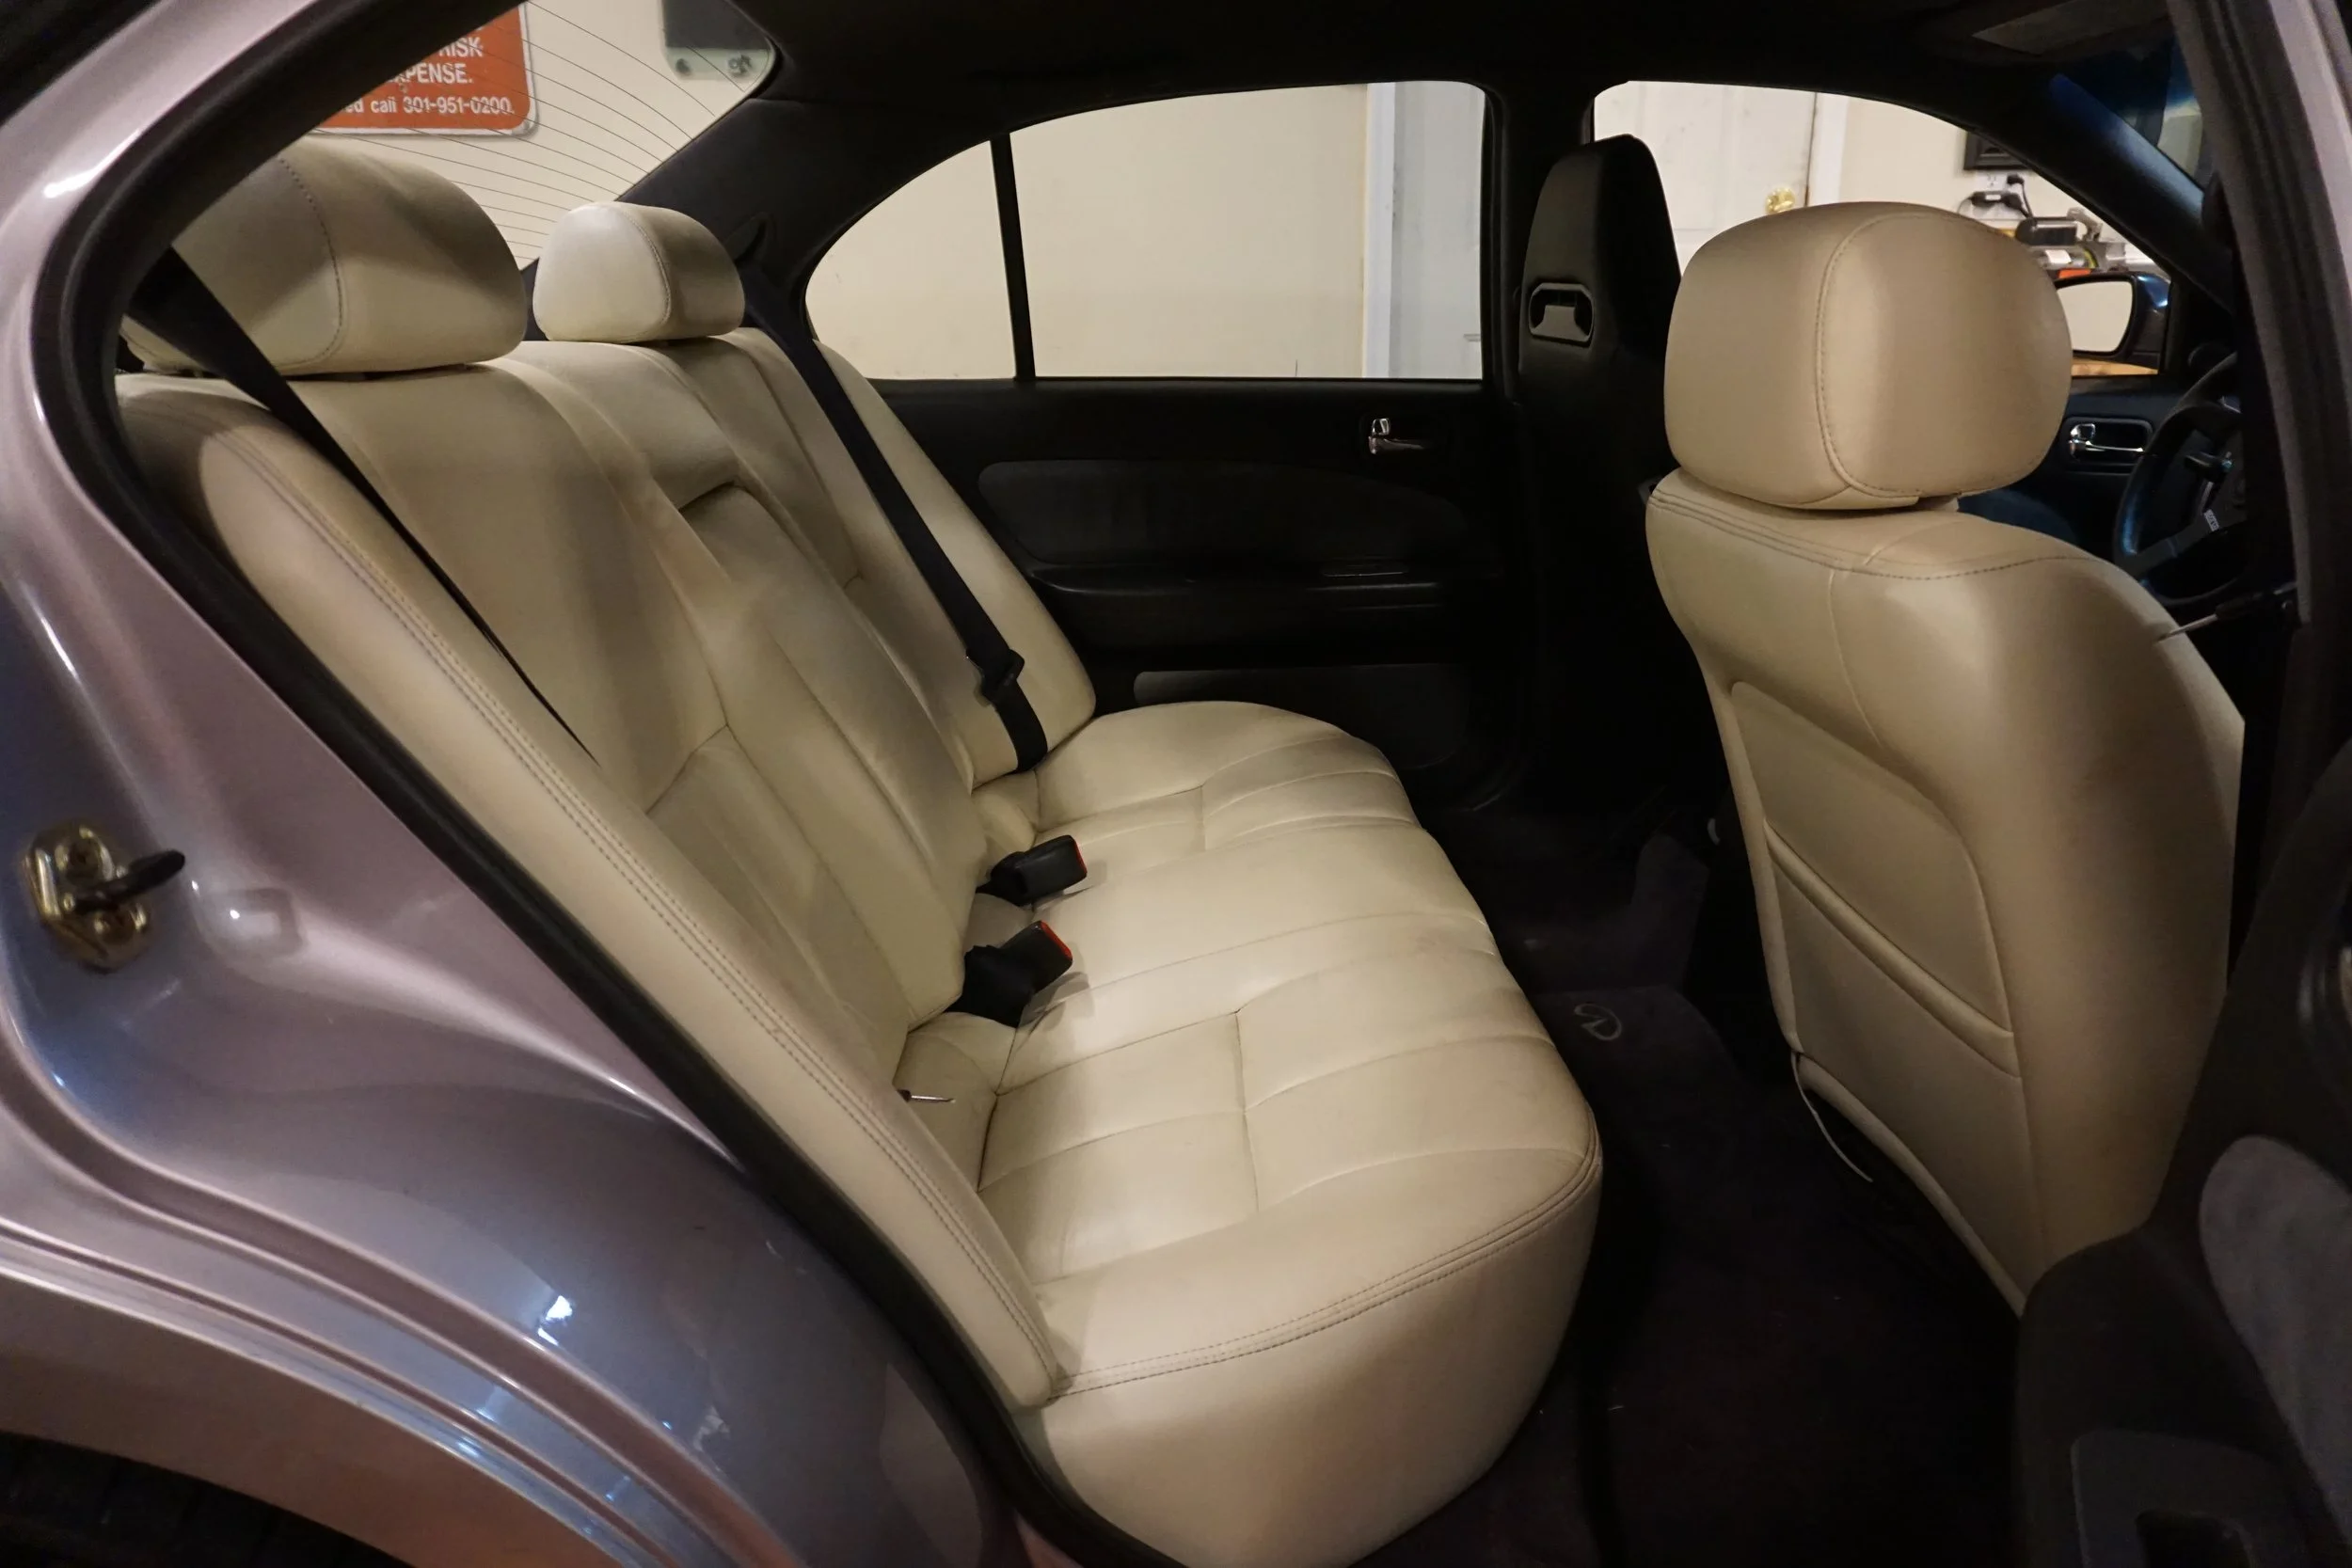
They certainly brighten up my interior!
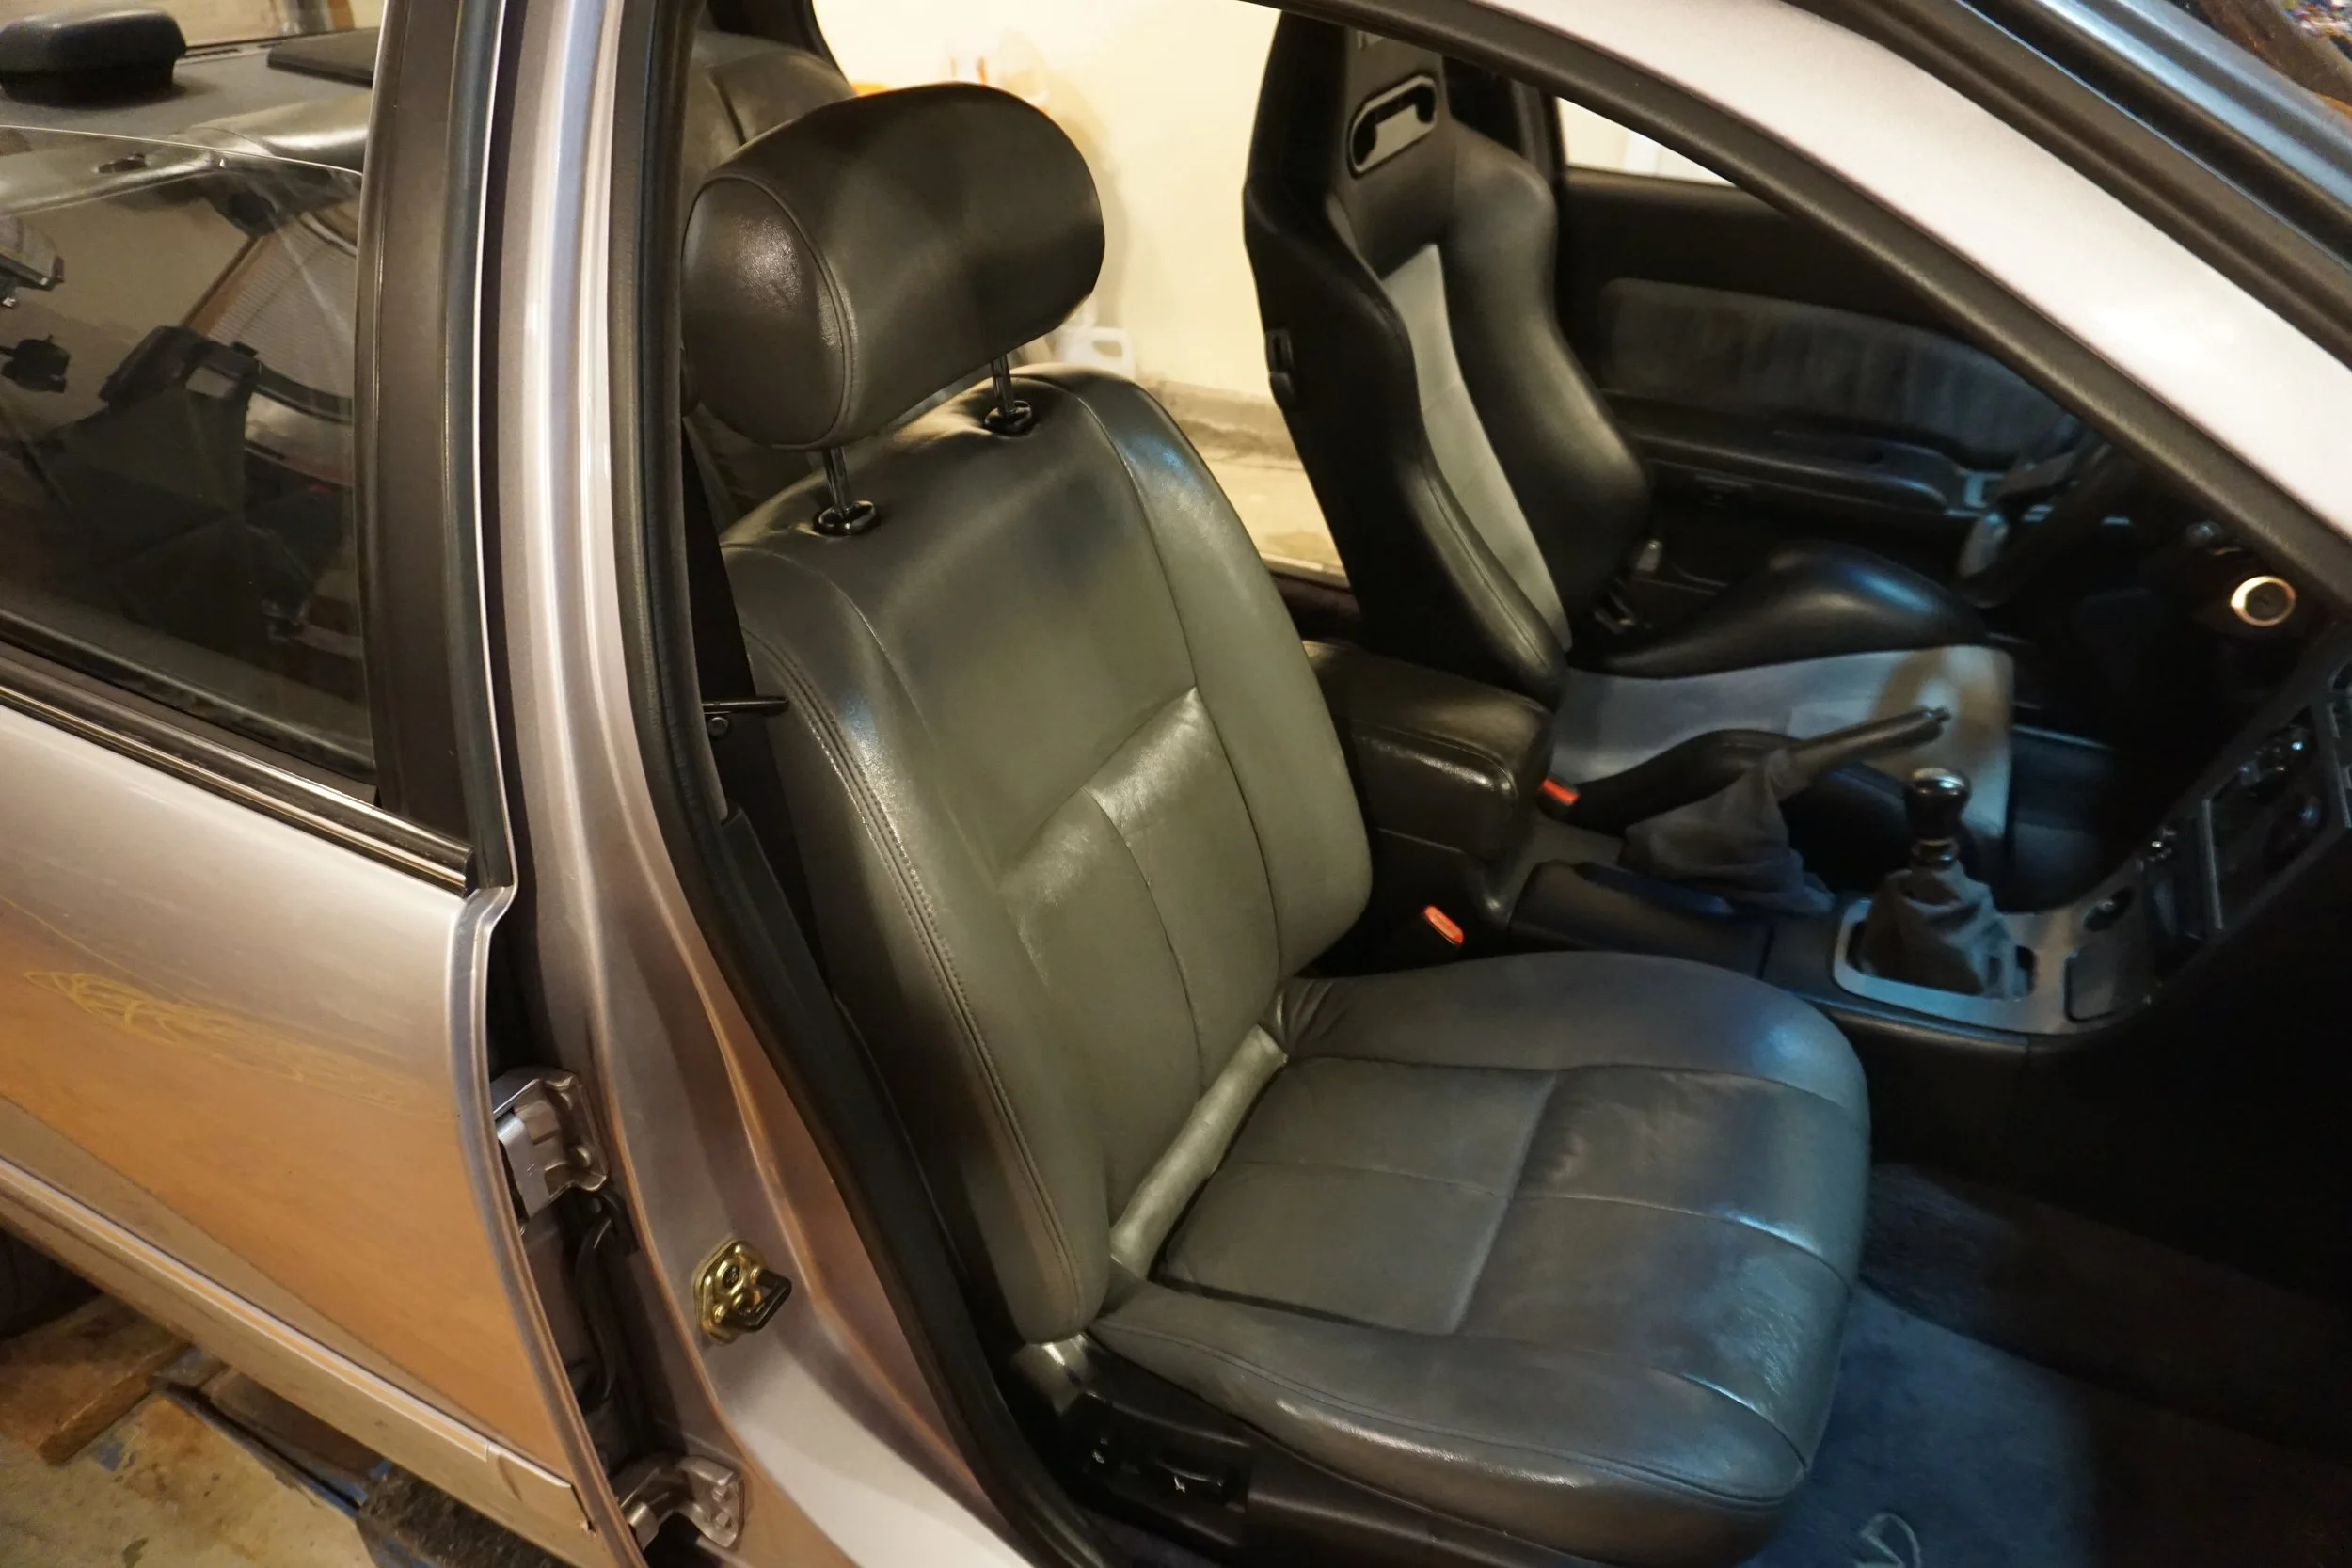
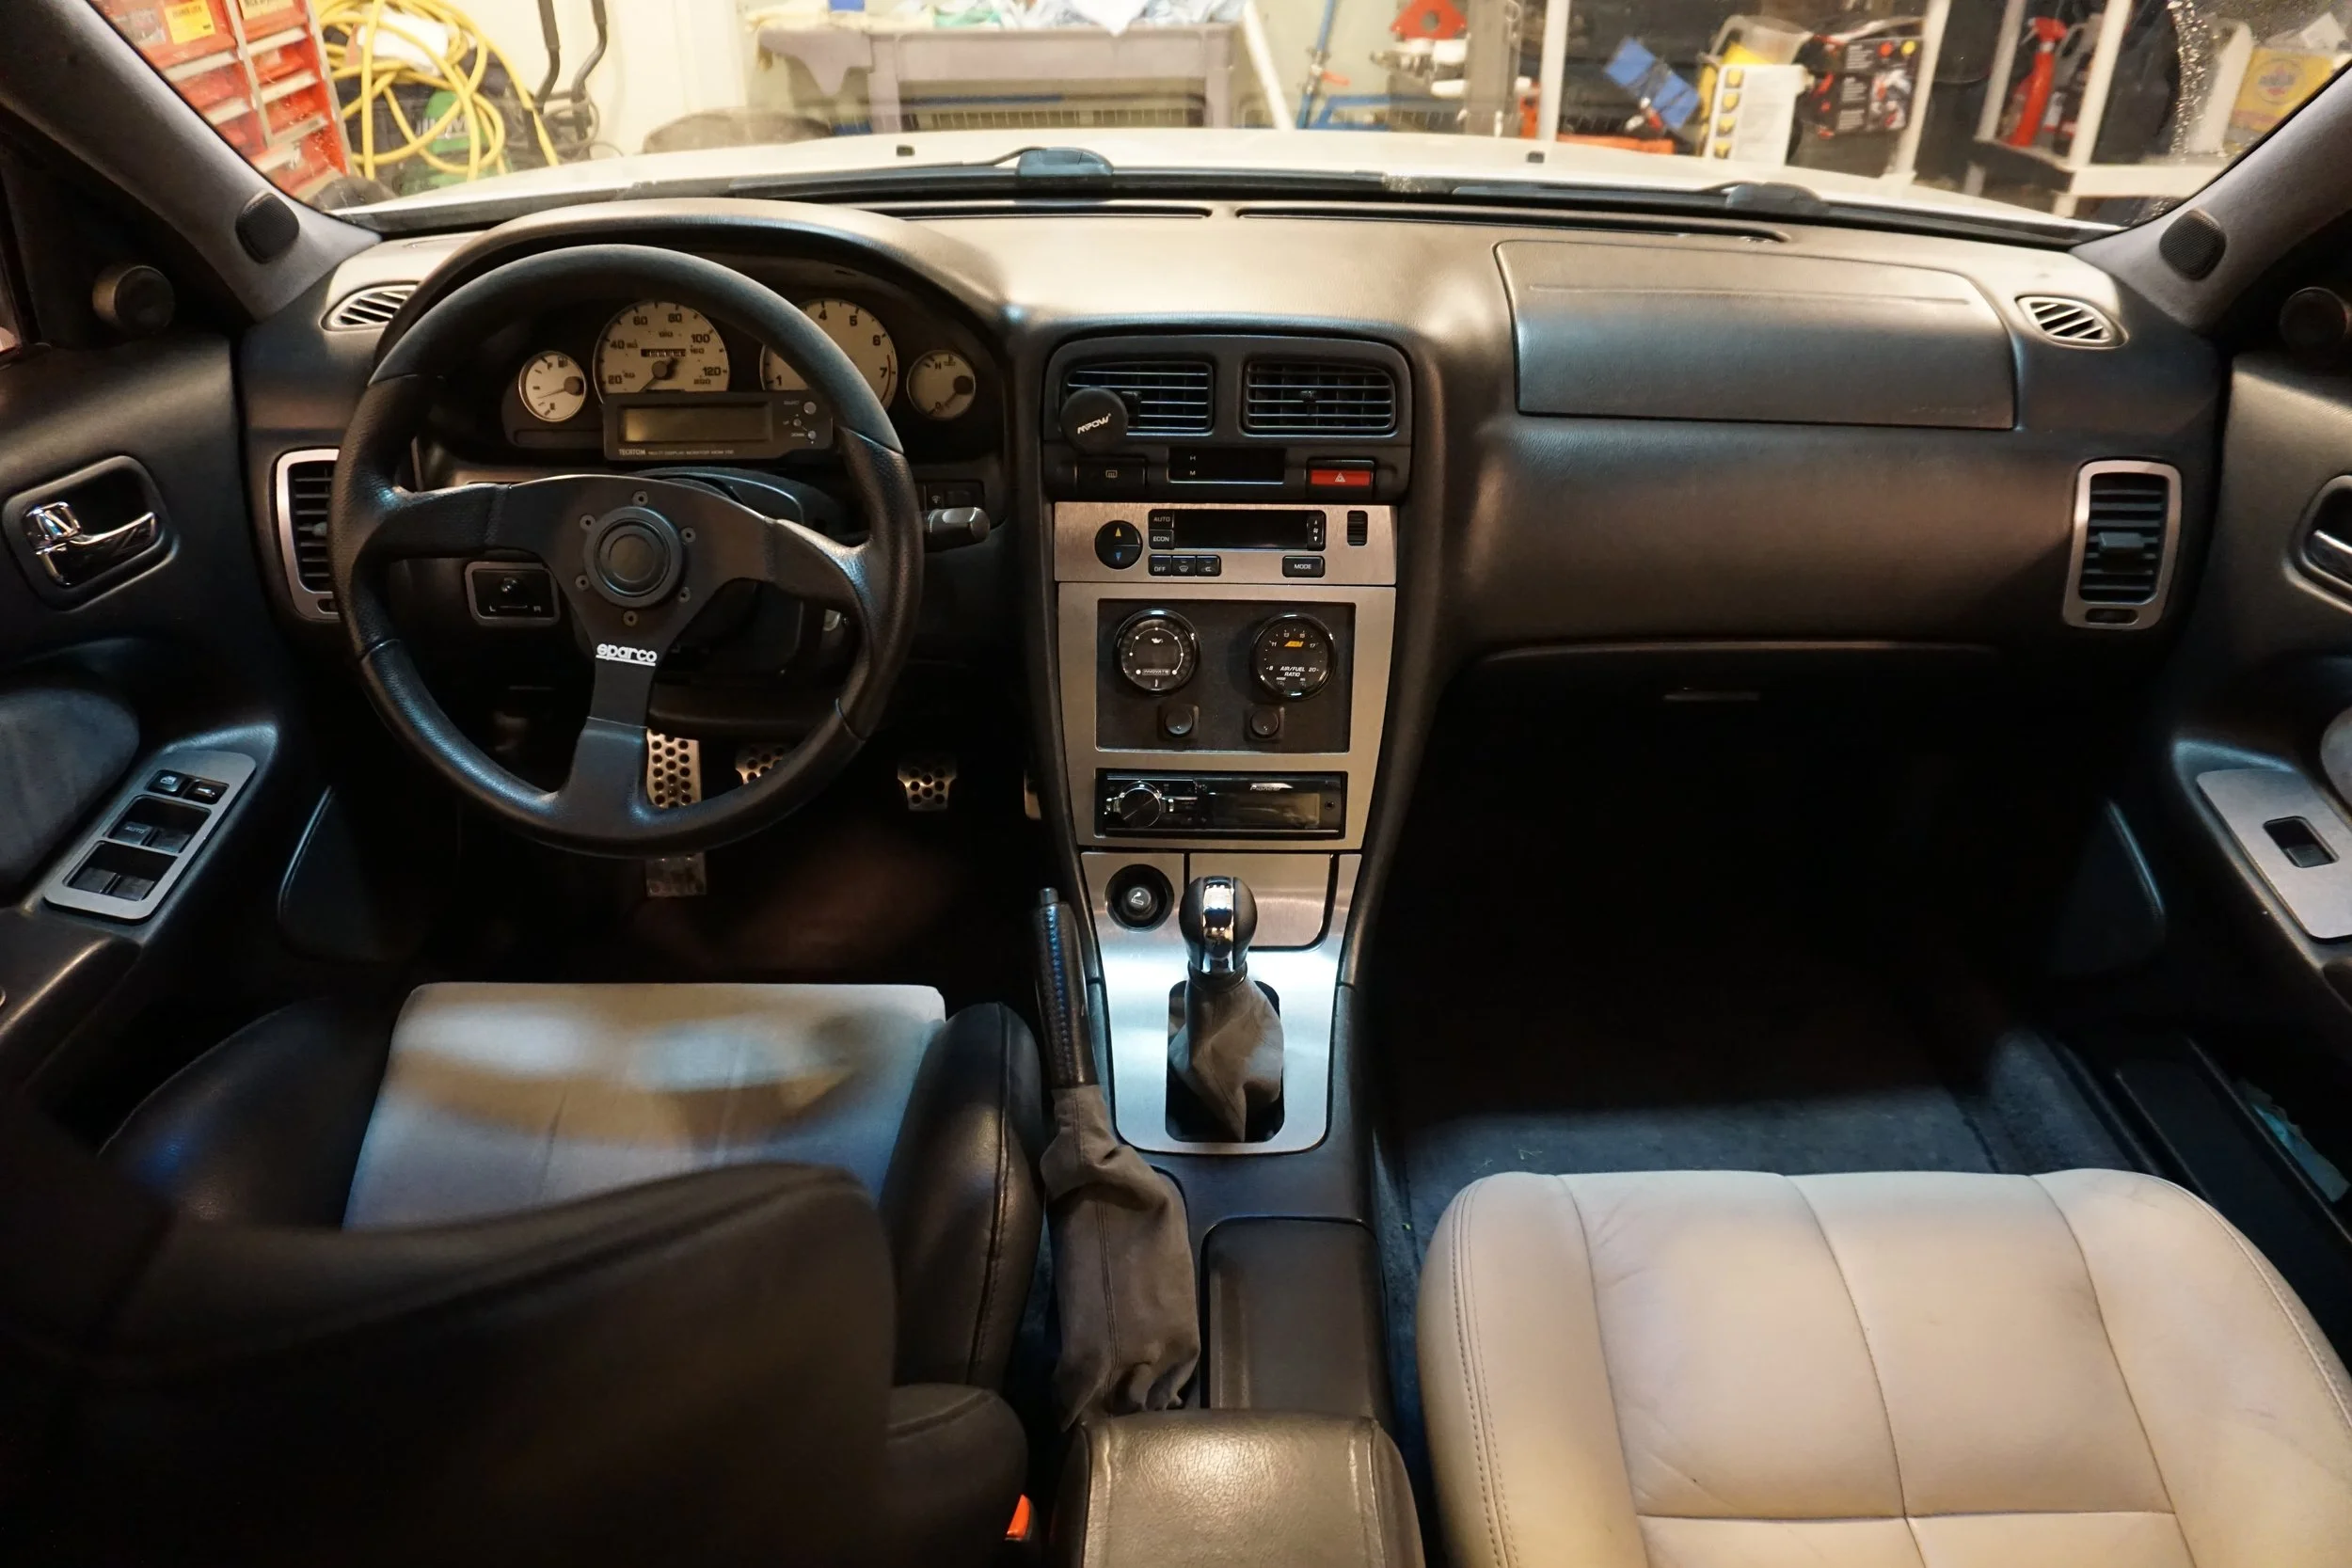
Staying with the interior theme, I had a problem ever since I converted the car to the 6 speed, where my shifter would rub up against my dash kit whenever I tried to put the car in reverse, since it now sits a gate further to the right. I drove around for many months without my shifter surround installed, but eventually decided to fix the problem. You can see the problem here:
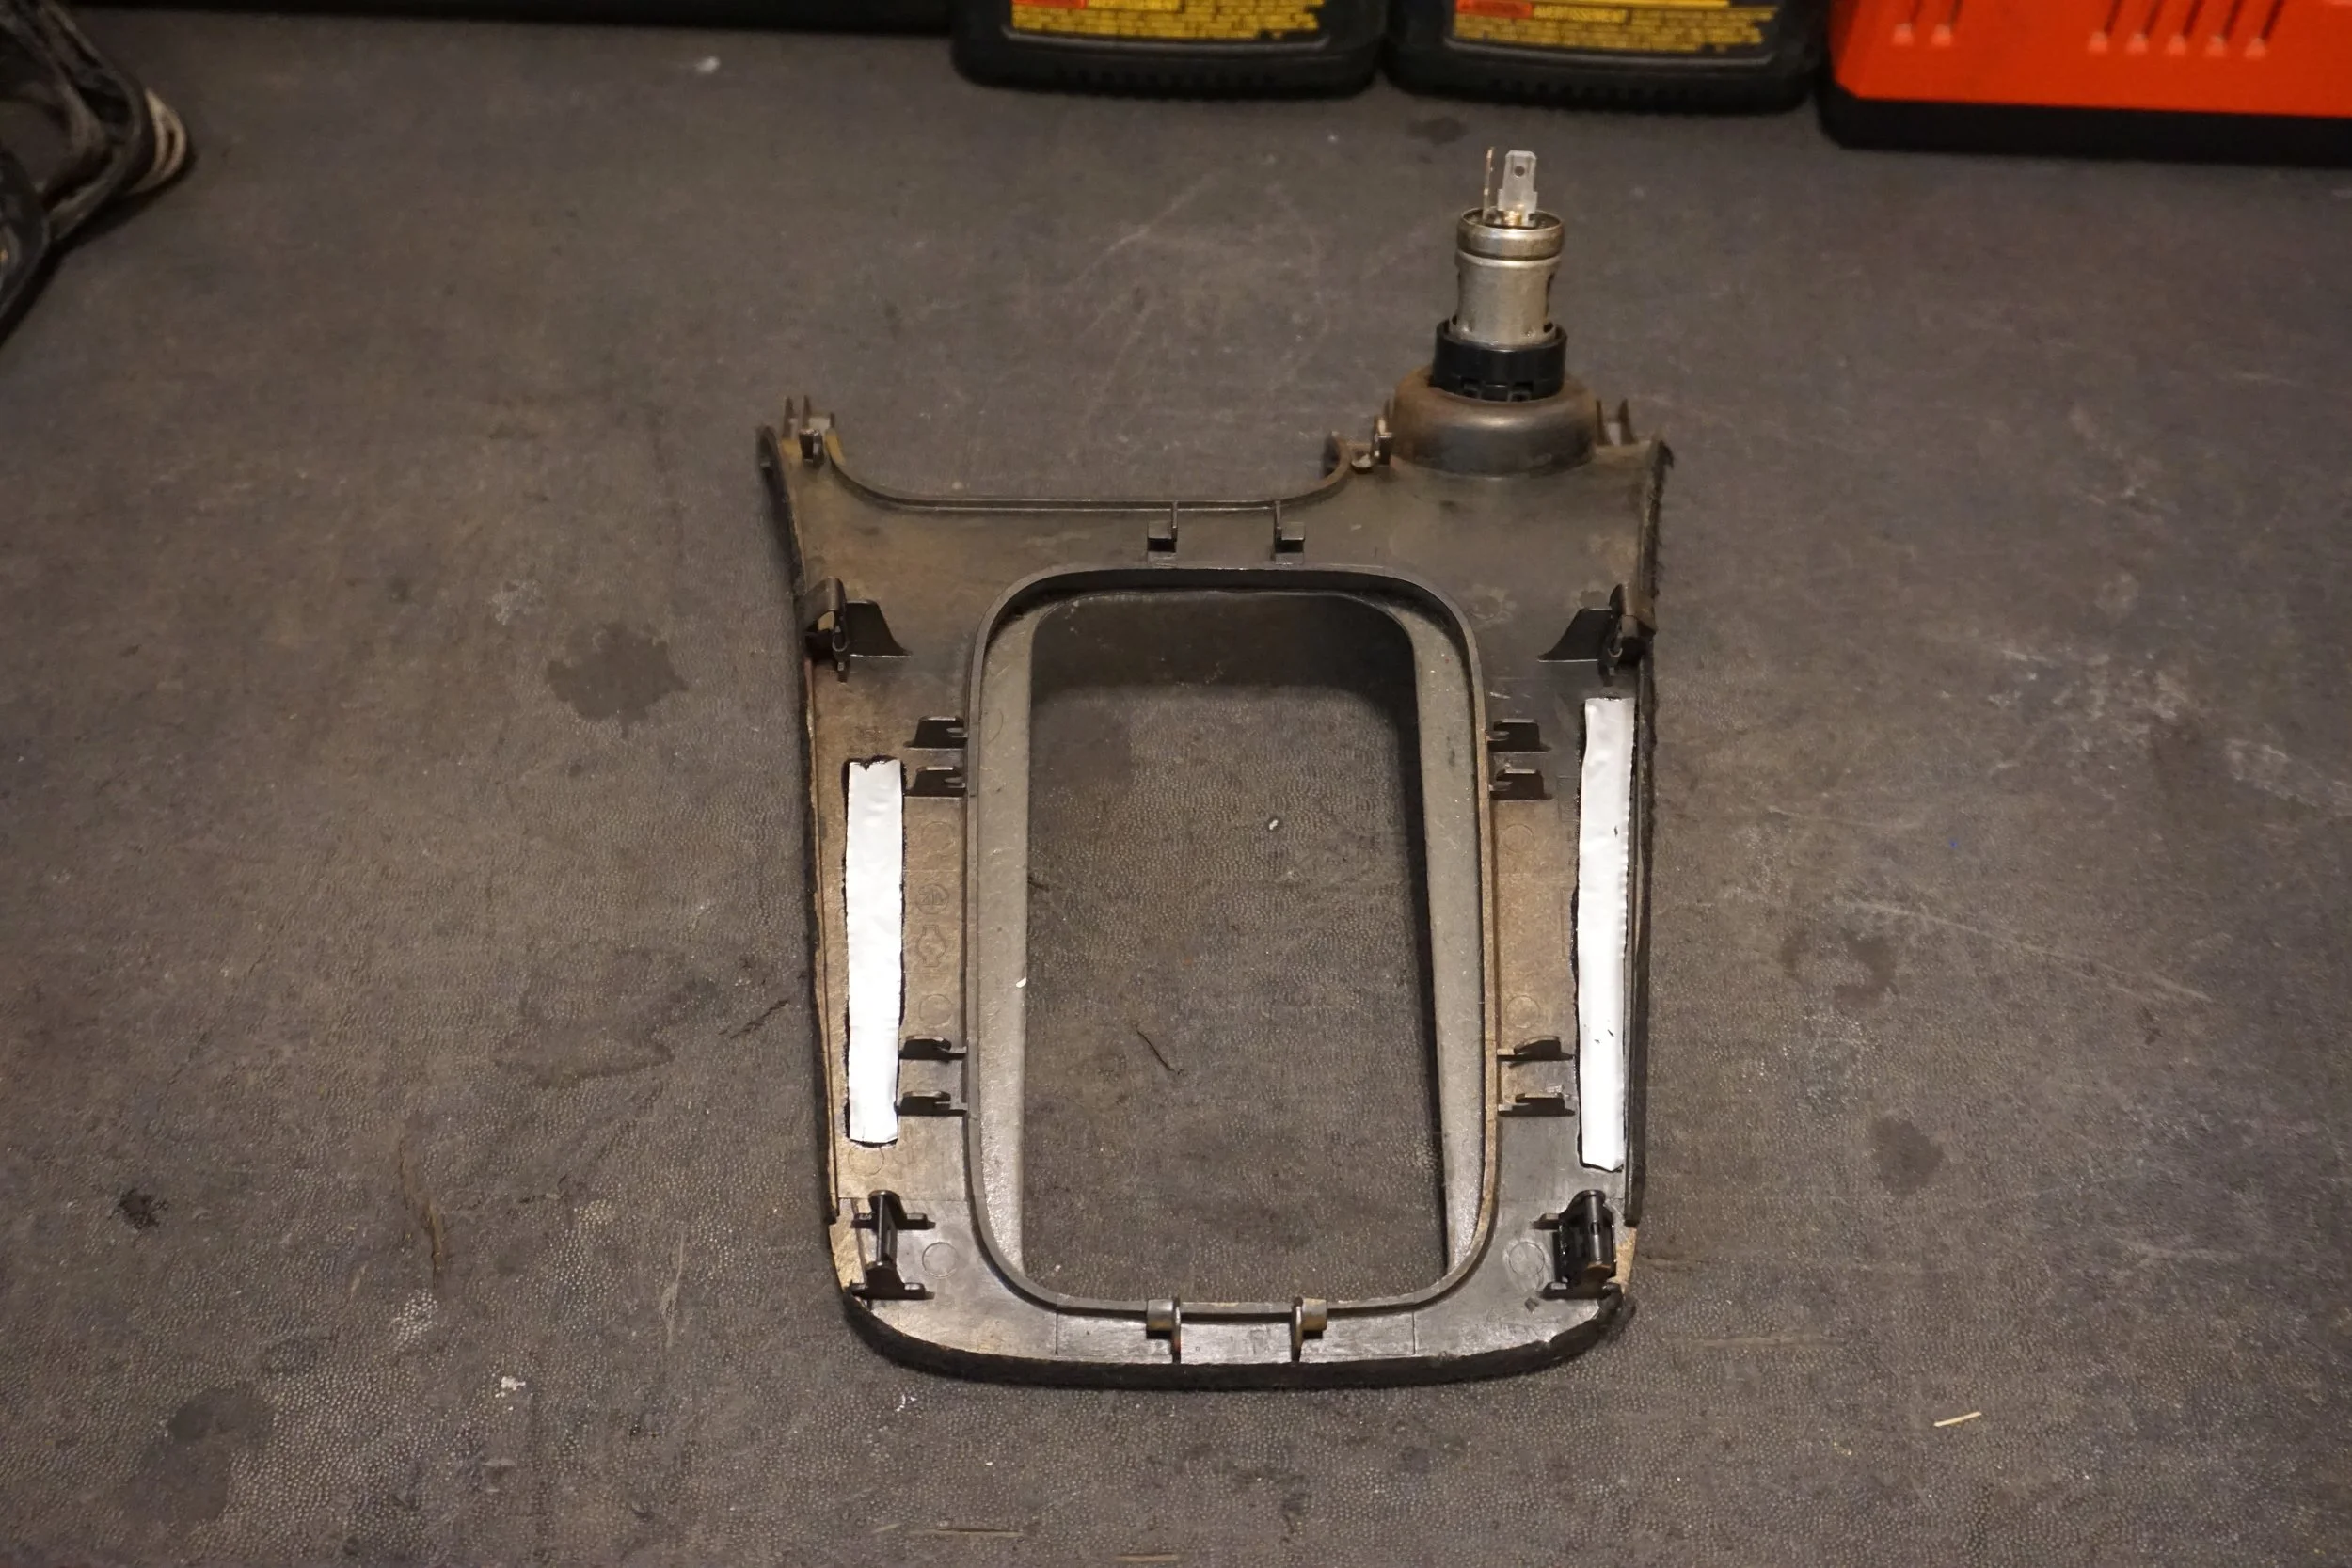
I needed to trim back the dash kit on the right so the shifter could be put into reverse. I was worried that I wouldn't be able to make it straight again after I cut it, or that the corners wouldn't look good, so I went very slowly with the dremel to cut it. I then VERY CAREFULLY used the flap wheel on my angle grinder to smooth down the cuts so it all laid flat, and it actually turned out very well!
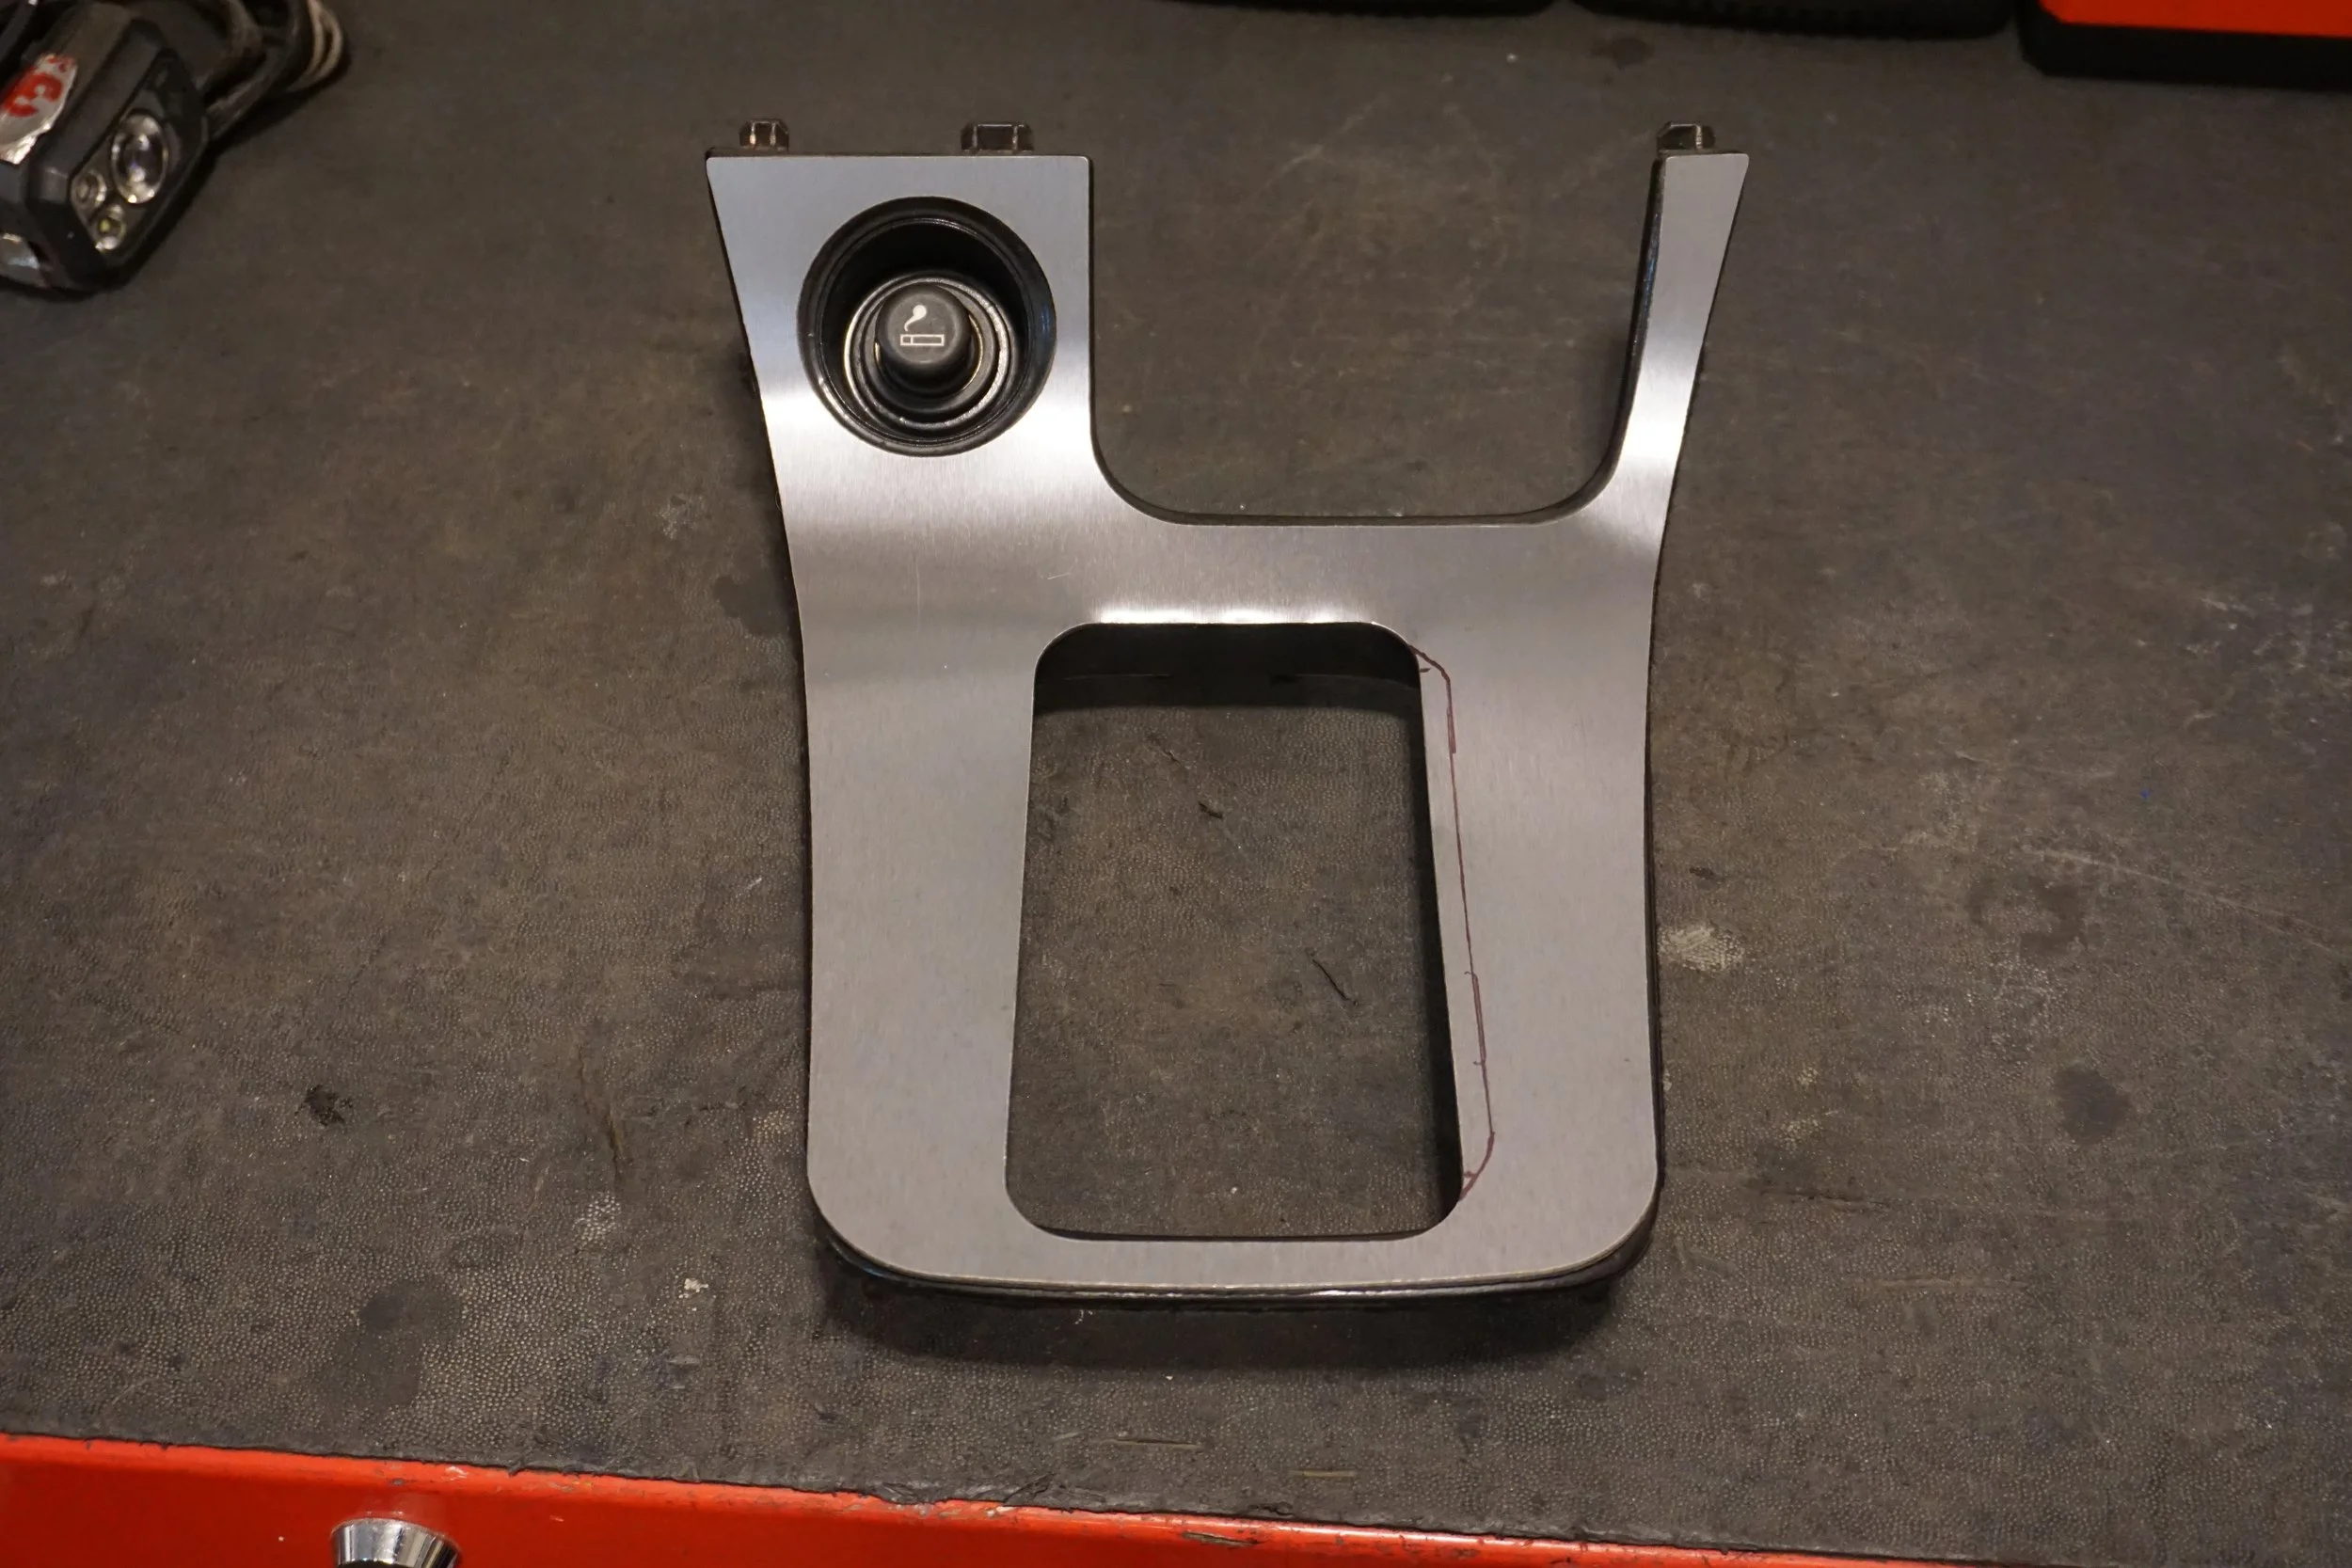
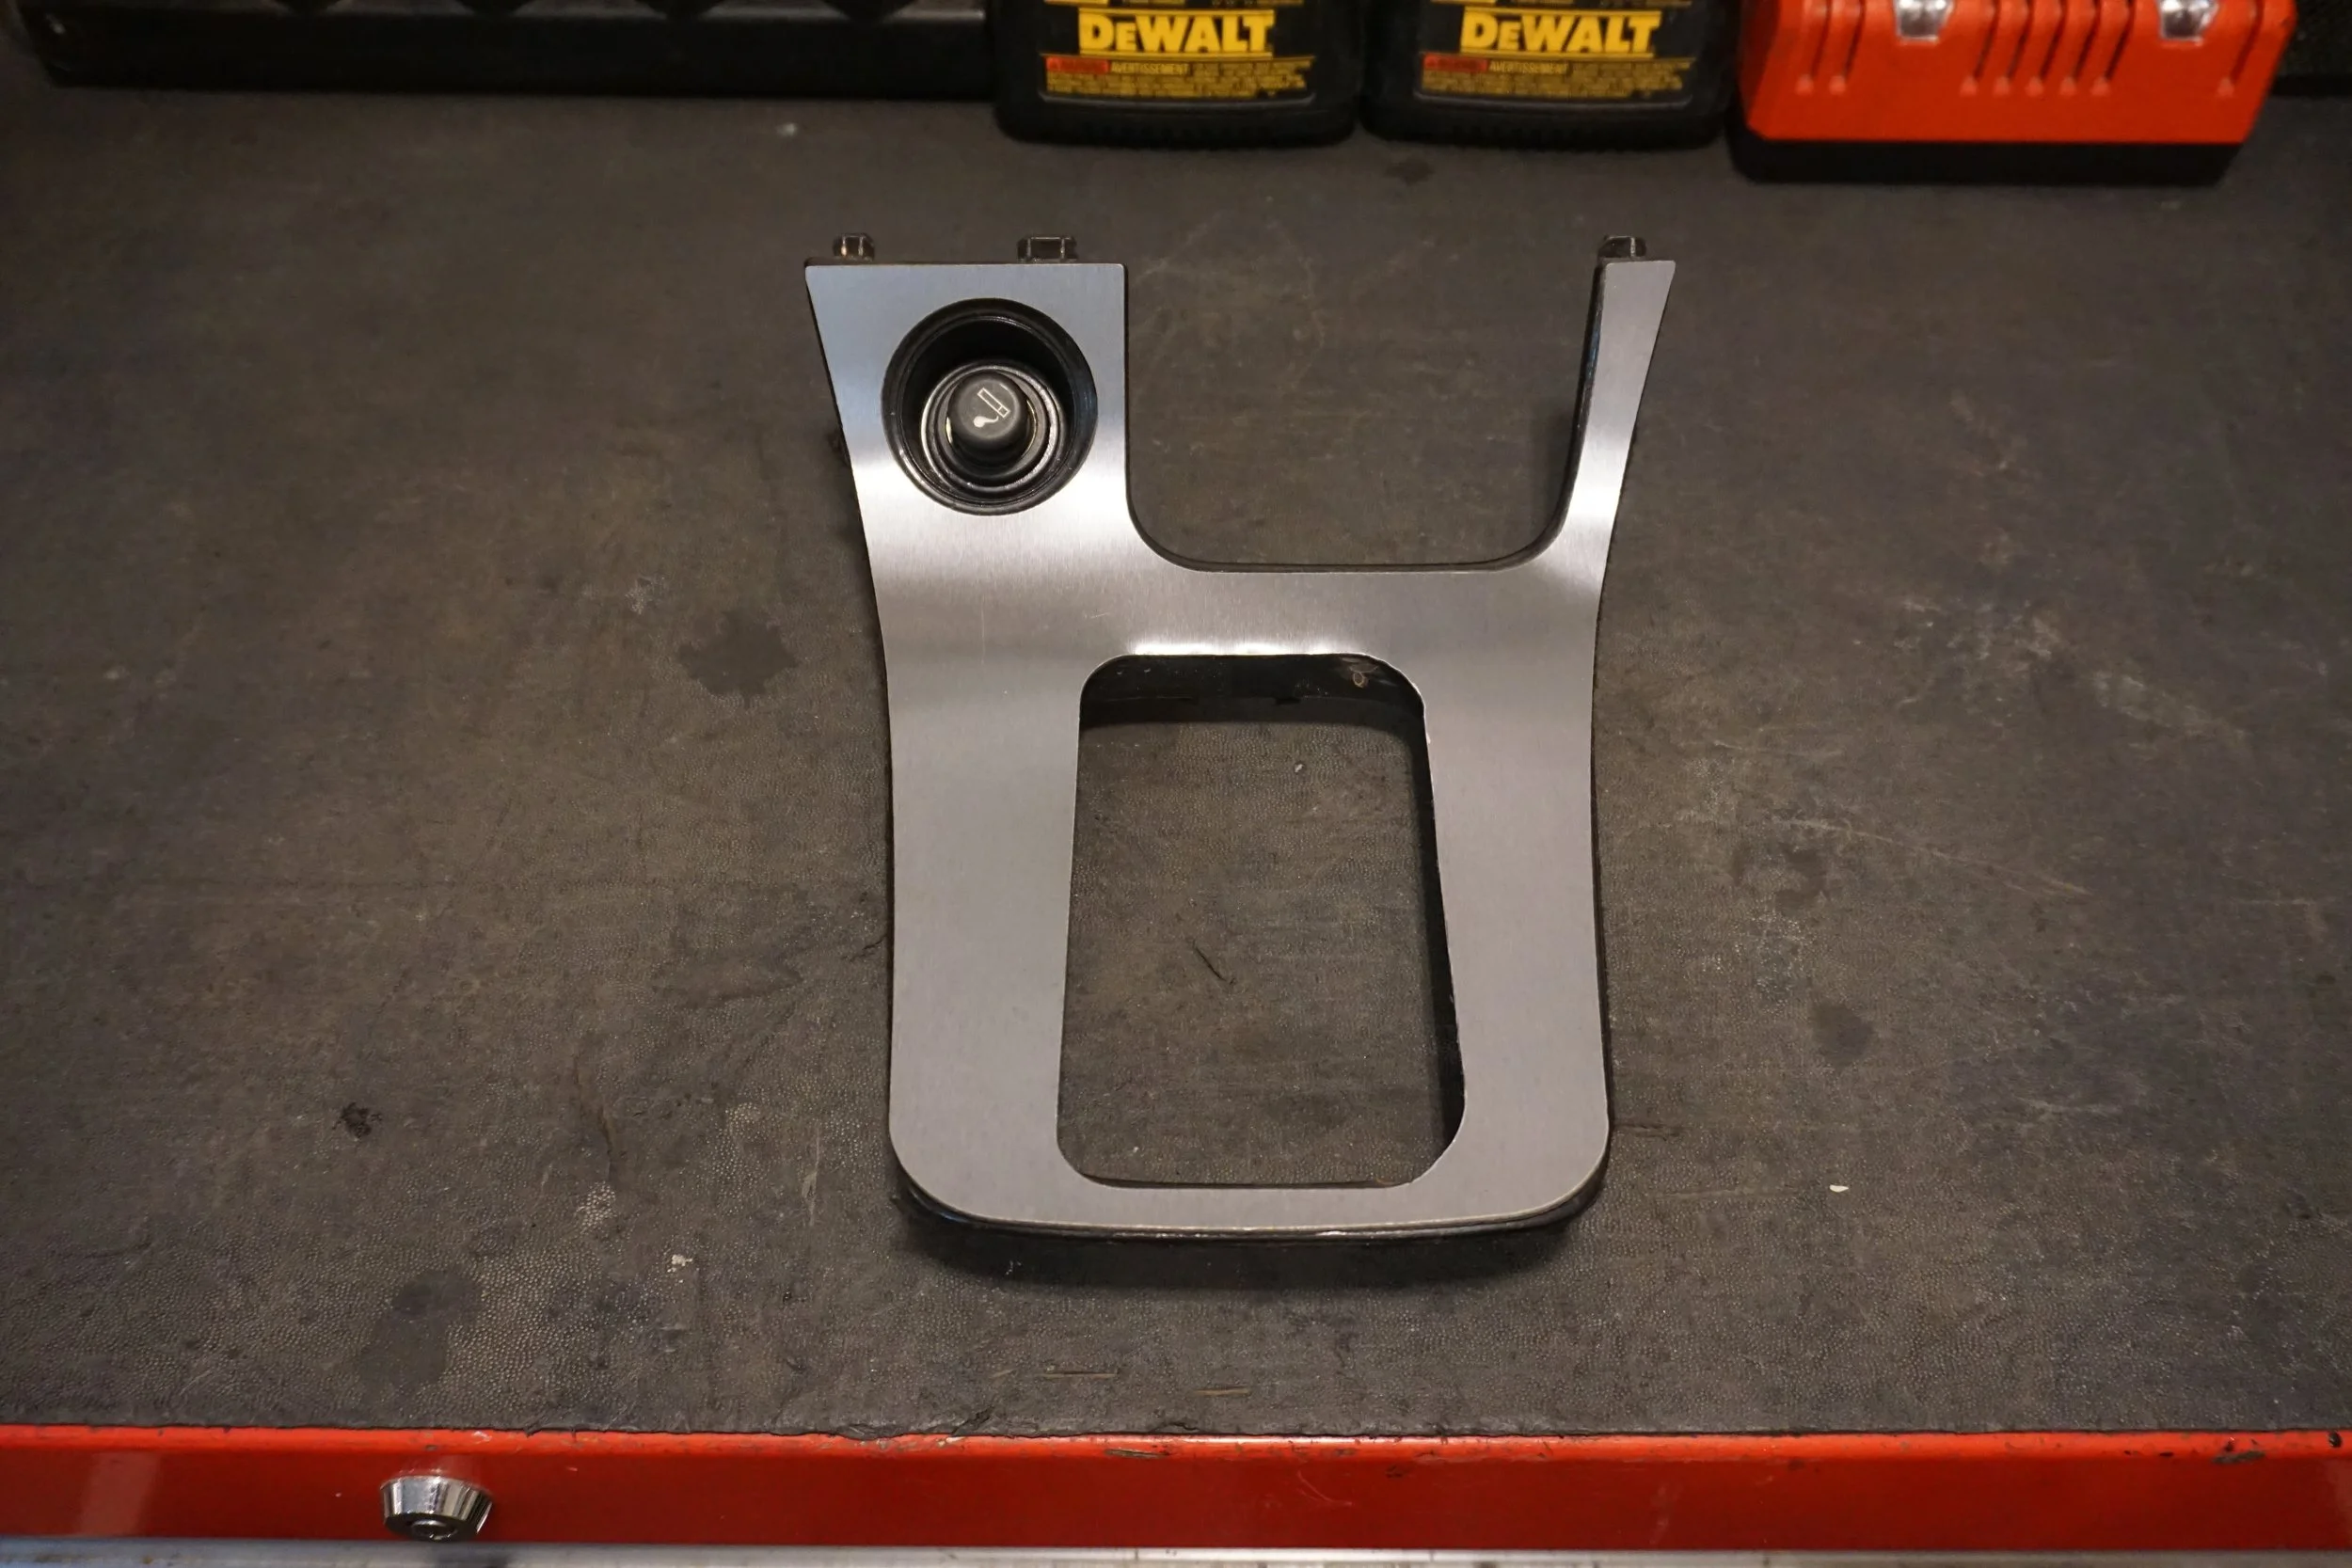
Problem solved!
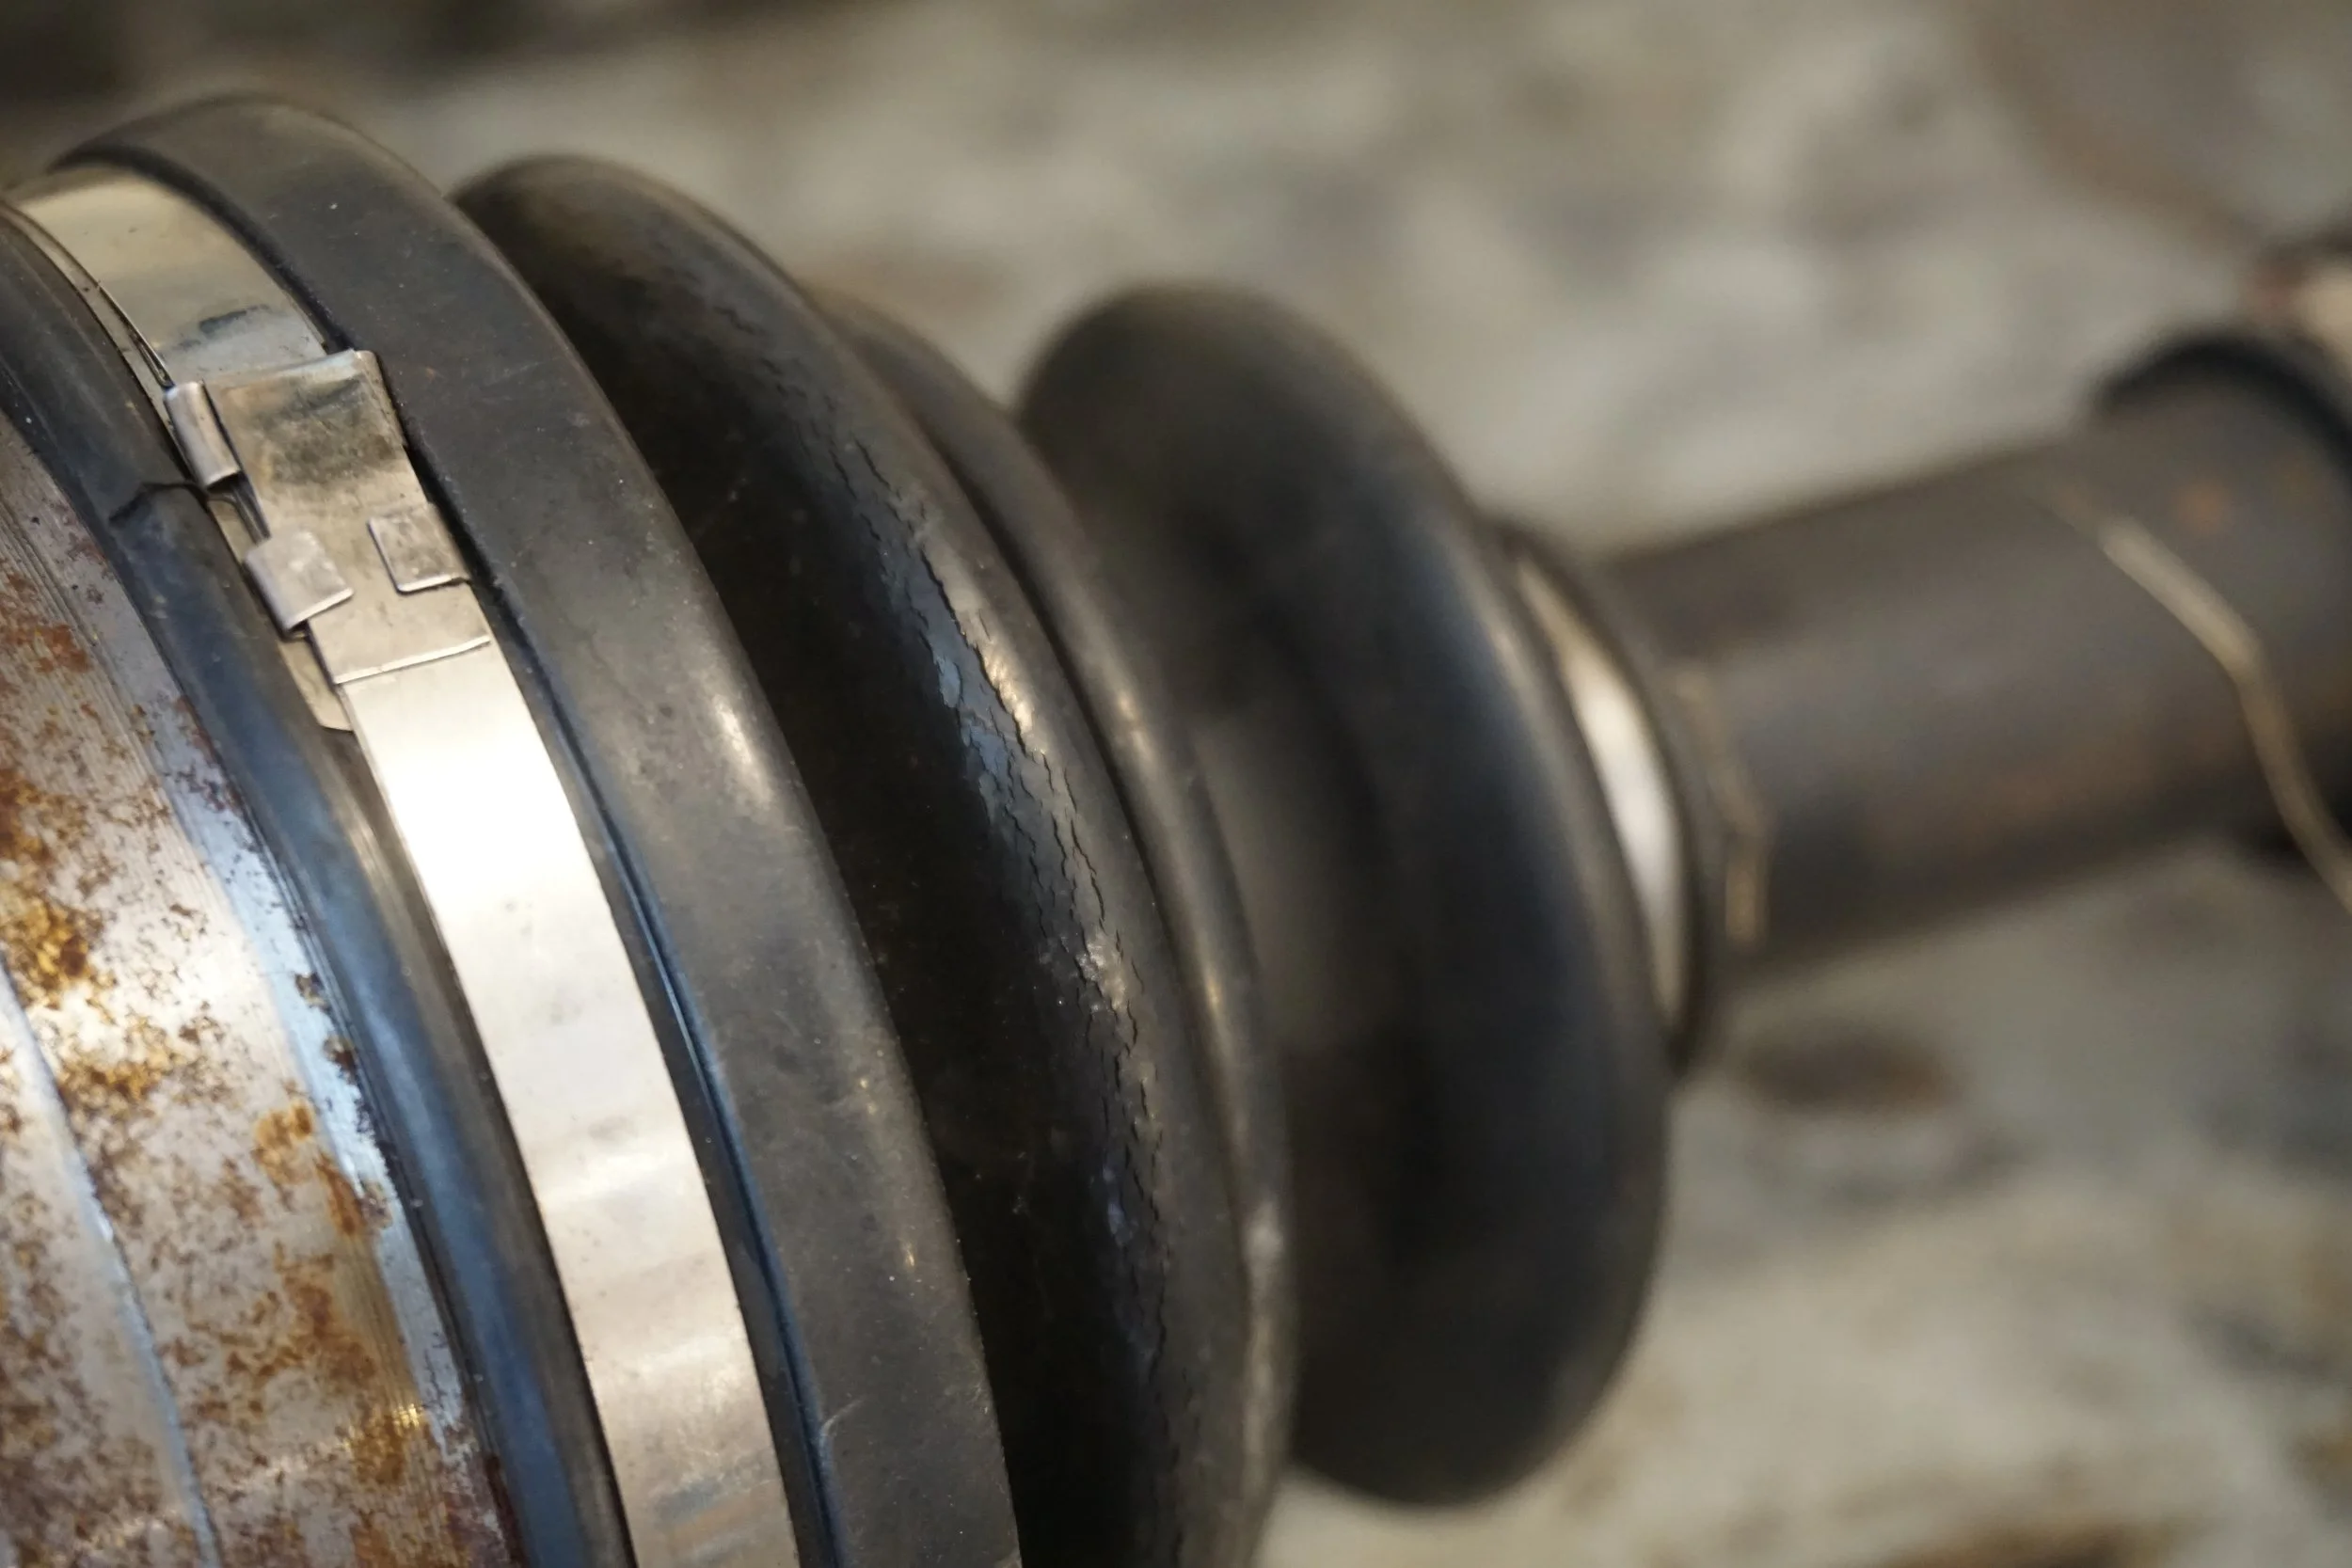
Moving on to some mechanic work....I had to replace the PS axle even though it only had about 1,000 miles on it because the inner boot developed a crack and was spewing grease everywhere. I couldn't help but wonder if this was caused by the inner boot being so compressed due to the 5th gen axle being longer than the 4th gen axle. Or maybe not. While the inner boot didn't have any other evidence of cracks, the outer boot was full of them:
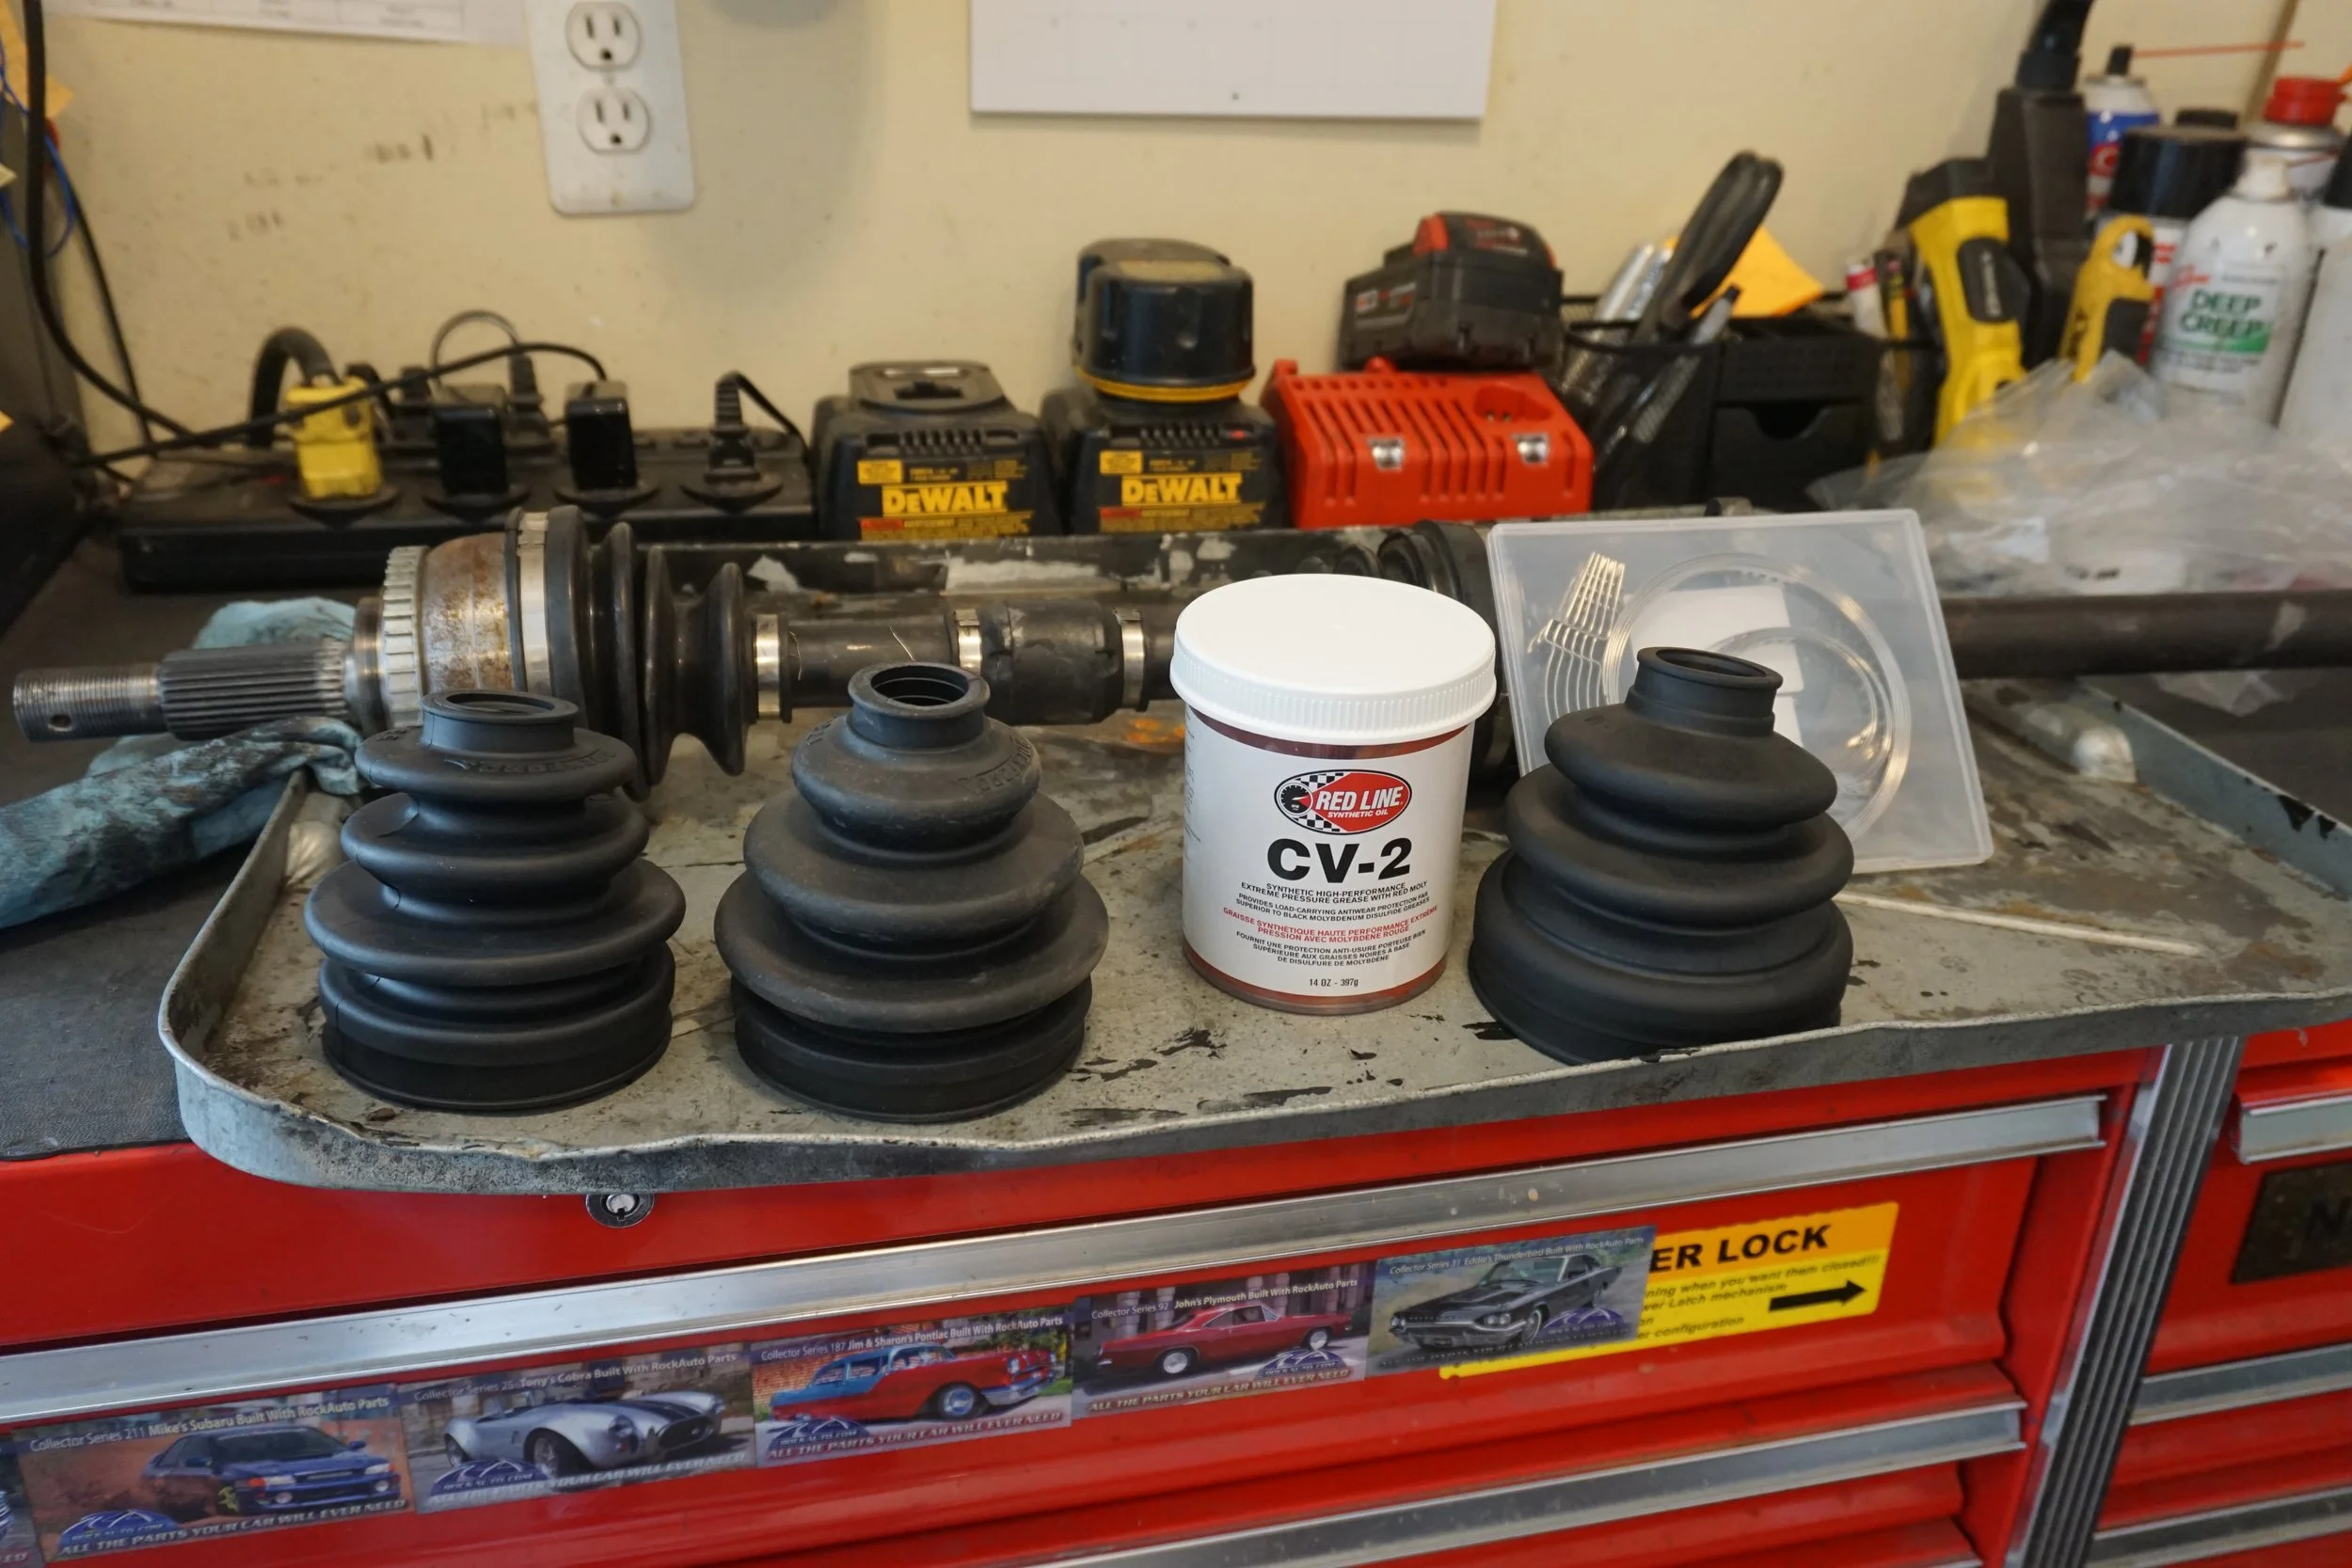
My plan was to replace those crummy boots with some from Rockford CV. Apparently these things are damn near indestructible and have a great reputation in the off-road community. They don't list any boots for a 5th gen, so I took measurements and dug through the catalog until I found four that seemed close enough. I bought the 536-21, 536-10, 281-10, and 178-10A. I also got some nice Redline CV-2 synthetic axle grease.
Unfortunately when I took the axle apart I realized it didn't use normal round boots, and instead used these stupid things with three indentations:
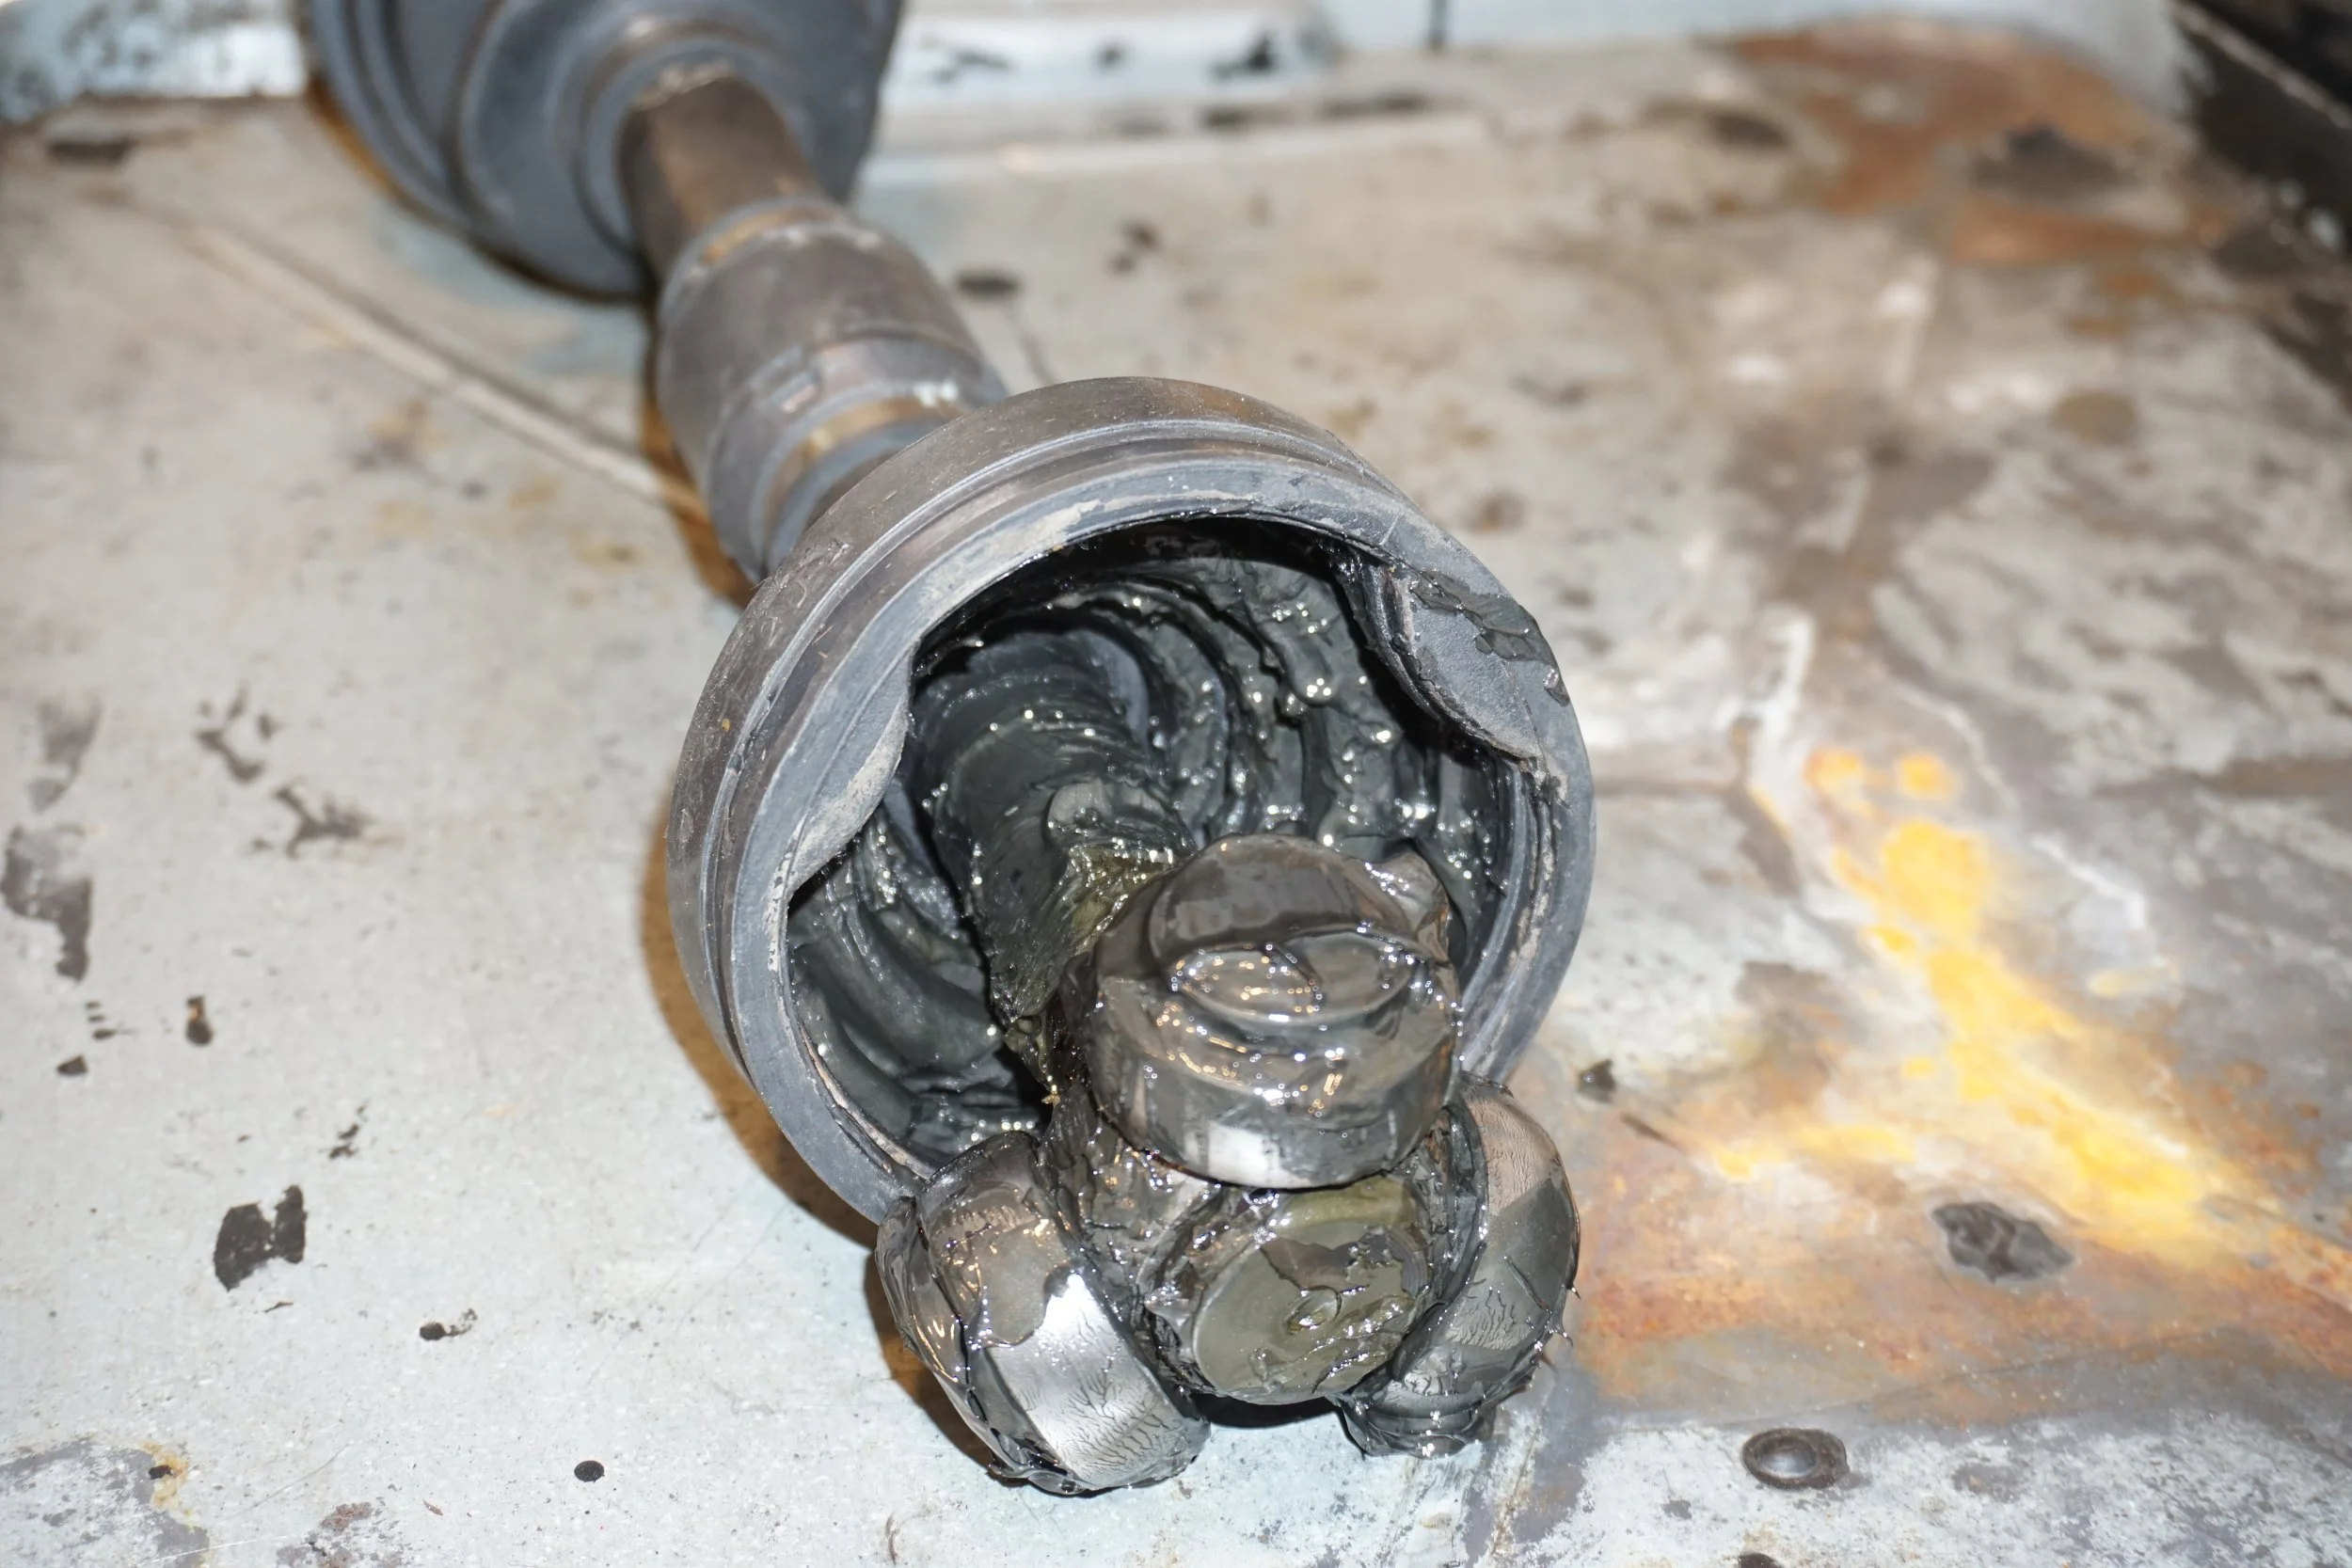
Which meant I couldn't use any of the boots I bought. I ended up going out and getting a new axle from a local parts store and kept the other as a spare. At least the new axle users regular round boots, so if/when they fail I can replace them with these better boots.
First up: some grille work. In the months when my car wasn't running right and my idle was all crummy, it really made the rattling of my grille stand out. All of my grilles have various broken mounting tabs on them, making it difficult to securely attach them to the hood, so I started out by fixing as many as I could with superglue. Then I moved on to replacing worn out or missing insulators on the hood with some felt material:
I also tried out my old (apparently) JDM grille that's been sitting in storage for 15+ years. I still don't really care for it, it's too generic.
I then started the process of repainting all three of my grilles. One of them I picked up from a junkyard a while back since it was in pretty good condition. The one I've had on my car was last painted probably 10 years ago and rock chips had messed up my black paint job.
I decided to go with a semi-gloss black this time instead of matte, since I thought it was more in line with an OEM kinda look. Getting them ready for paint took a few hours of sanding and cleaning, but the paint went on well and I think it looks great now. I also polished up the "chrome" on them all which helped make them "pop".
As you may have learned by now, I hate buzzing and rattles in my car, and there was something coming from the rear deck that had been annoying me for a while, so I decided to spend some time and try to figure out what was going on. I played with the fade/balance on the stereo and narrowed it down to the DS rear speaker. The speakers are 10+ years old, so I figured I might as well just install some new ones. I didn't need anything too fancy since my rear speakers are only powered from the headunit and get something like 15w RMS. I went with the JBL Stadium GTO620, which were quite hefty and weighed almost a pound more than the old Hertz did.
I got them installed, and what do you know? Same old fluttering from the same location. What gives?? I already have a fair amount of sound deadening on the rear deck. To make things more complicated, I couldn't hear the noise when I was sitting close to the rear speakers, I could only clearly hear it when sitting in the driver's seat. I eventually located the source of the problem- a round foam baffle sort of thing between the rear DS speaker and the third brake light. It's adhesive had started to fail, allowing it to flutter along with the bass. I have no idea how I was able to hear if through the rear deck cover, but I could. So I removed it and covered the hole with sound deadener, and the problem was solved!
So in the end I wasted $100 on speakers I didn't need, but I at least solved the problem.
Backing up a few months back to when it was still hot outside, I applied many rounds of Leatherique to my seats. There were many areas of the seats that just kept drinking whatever oil I put on them, while other areas didn't seem to absorb much. You can see the shiny/dull areas:
So after many round of the oil, I followed up with the cleaning step. Supposedly the oil helps bring dirt to the surface, which the cleaner can then pick up. I feel like I keep my seats pretty clean, but the slop bucket begs to differ:
There wasn't a night and day difference in how soft the leather was after all of that, but it did feel a little better, and it certainly looks cleaner than I can ever remember.
Anyways, so with the rear seat removed to install the new rear speakers, I figured it would be a good time to install the white leather seats I had "restored". I know, they don't really go with or match anything in my interior, but I put all that work into them, and I just wanted to see what they would look like. I'll eventually reinstall my stock seats.
They certainly brighten up my interior!
Staying with the interior theme, I had a problem ever since I converted the car to the 6 speed, where my shifter would rub up against my dash kit whenever I tried to put the car in reverse, since it now sits a gate further to the right. I drove around for many months without my shifter surround installed, but eventually decided to fix the problem. You can see the problem here:
I needed to trim back the dash kit on the right so the shifter could be put into reverse. I was worried that I wouldn't be able to make it straight again after I cut it, or that the corners wouldn't look good, so I went very slowly with the dremel to cut it. I then VERY CAREFULLY used the flap wheel on my angle grinder to smooth down the cuts so it all laid flat, and it actually turned out very well!
Problem solved!
Moving on to some mechanic work....I had to replace the PS axle even though it only had about 1,000 miles on it because the inner boot developed a crack and was spewing grease everywhere. I couldn't help but wonder if this was caused by the inner boot being so compressed due to the 5th gen axle being longer than the 4th gen axle. Or maybe not. While the inner boot didn't have any other evidence of cracks, the outer boot was full of them:
My plan was to replace those crummy boots with some from Rockford CV. Apparently these things are damn near indestructible and have a great reputation in the off-road community. They don't list any boots for a 5th gen, so I took measurements and dug through the catalog until I found four that seemed close enough. I bought the 536-21, 536-10, 281-10, and 178-10A. I also got some nice Redline CV-2 synthetic axle grease.
Unfortunately when I took the axle apart I realized it didn't use normal round boots, and instead used these stupid things with three indentations:
Which meant I couldn't use any of the boots I bought. I ended up going out and getting a new axle from a local parts store and kept the other as a spare. At least the new axle users regular round boots, so if/when they fail I can replace them with these better boots.
I also adjusted my RSB for the first time a while back to see if I could notice a difference. I've always run it at 50% stiffness, but I wanted to see what it was like at full stiff. To make future adjustments easier, I made marks on the bar. So I went from 2/4 to 4/4. The difference wasn't noticeable on the street, but it may have helped a little bit on track. Nothing major, but every little bit counts.
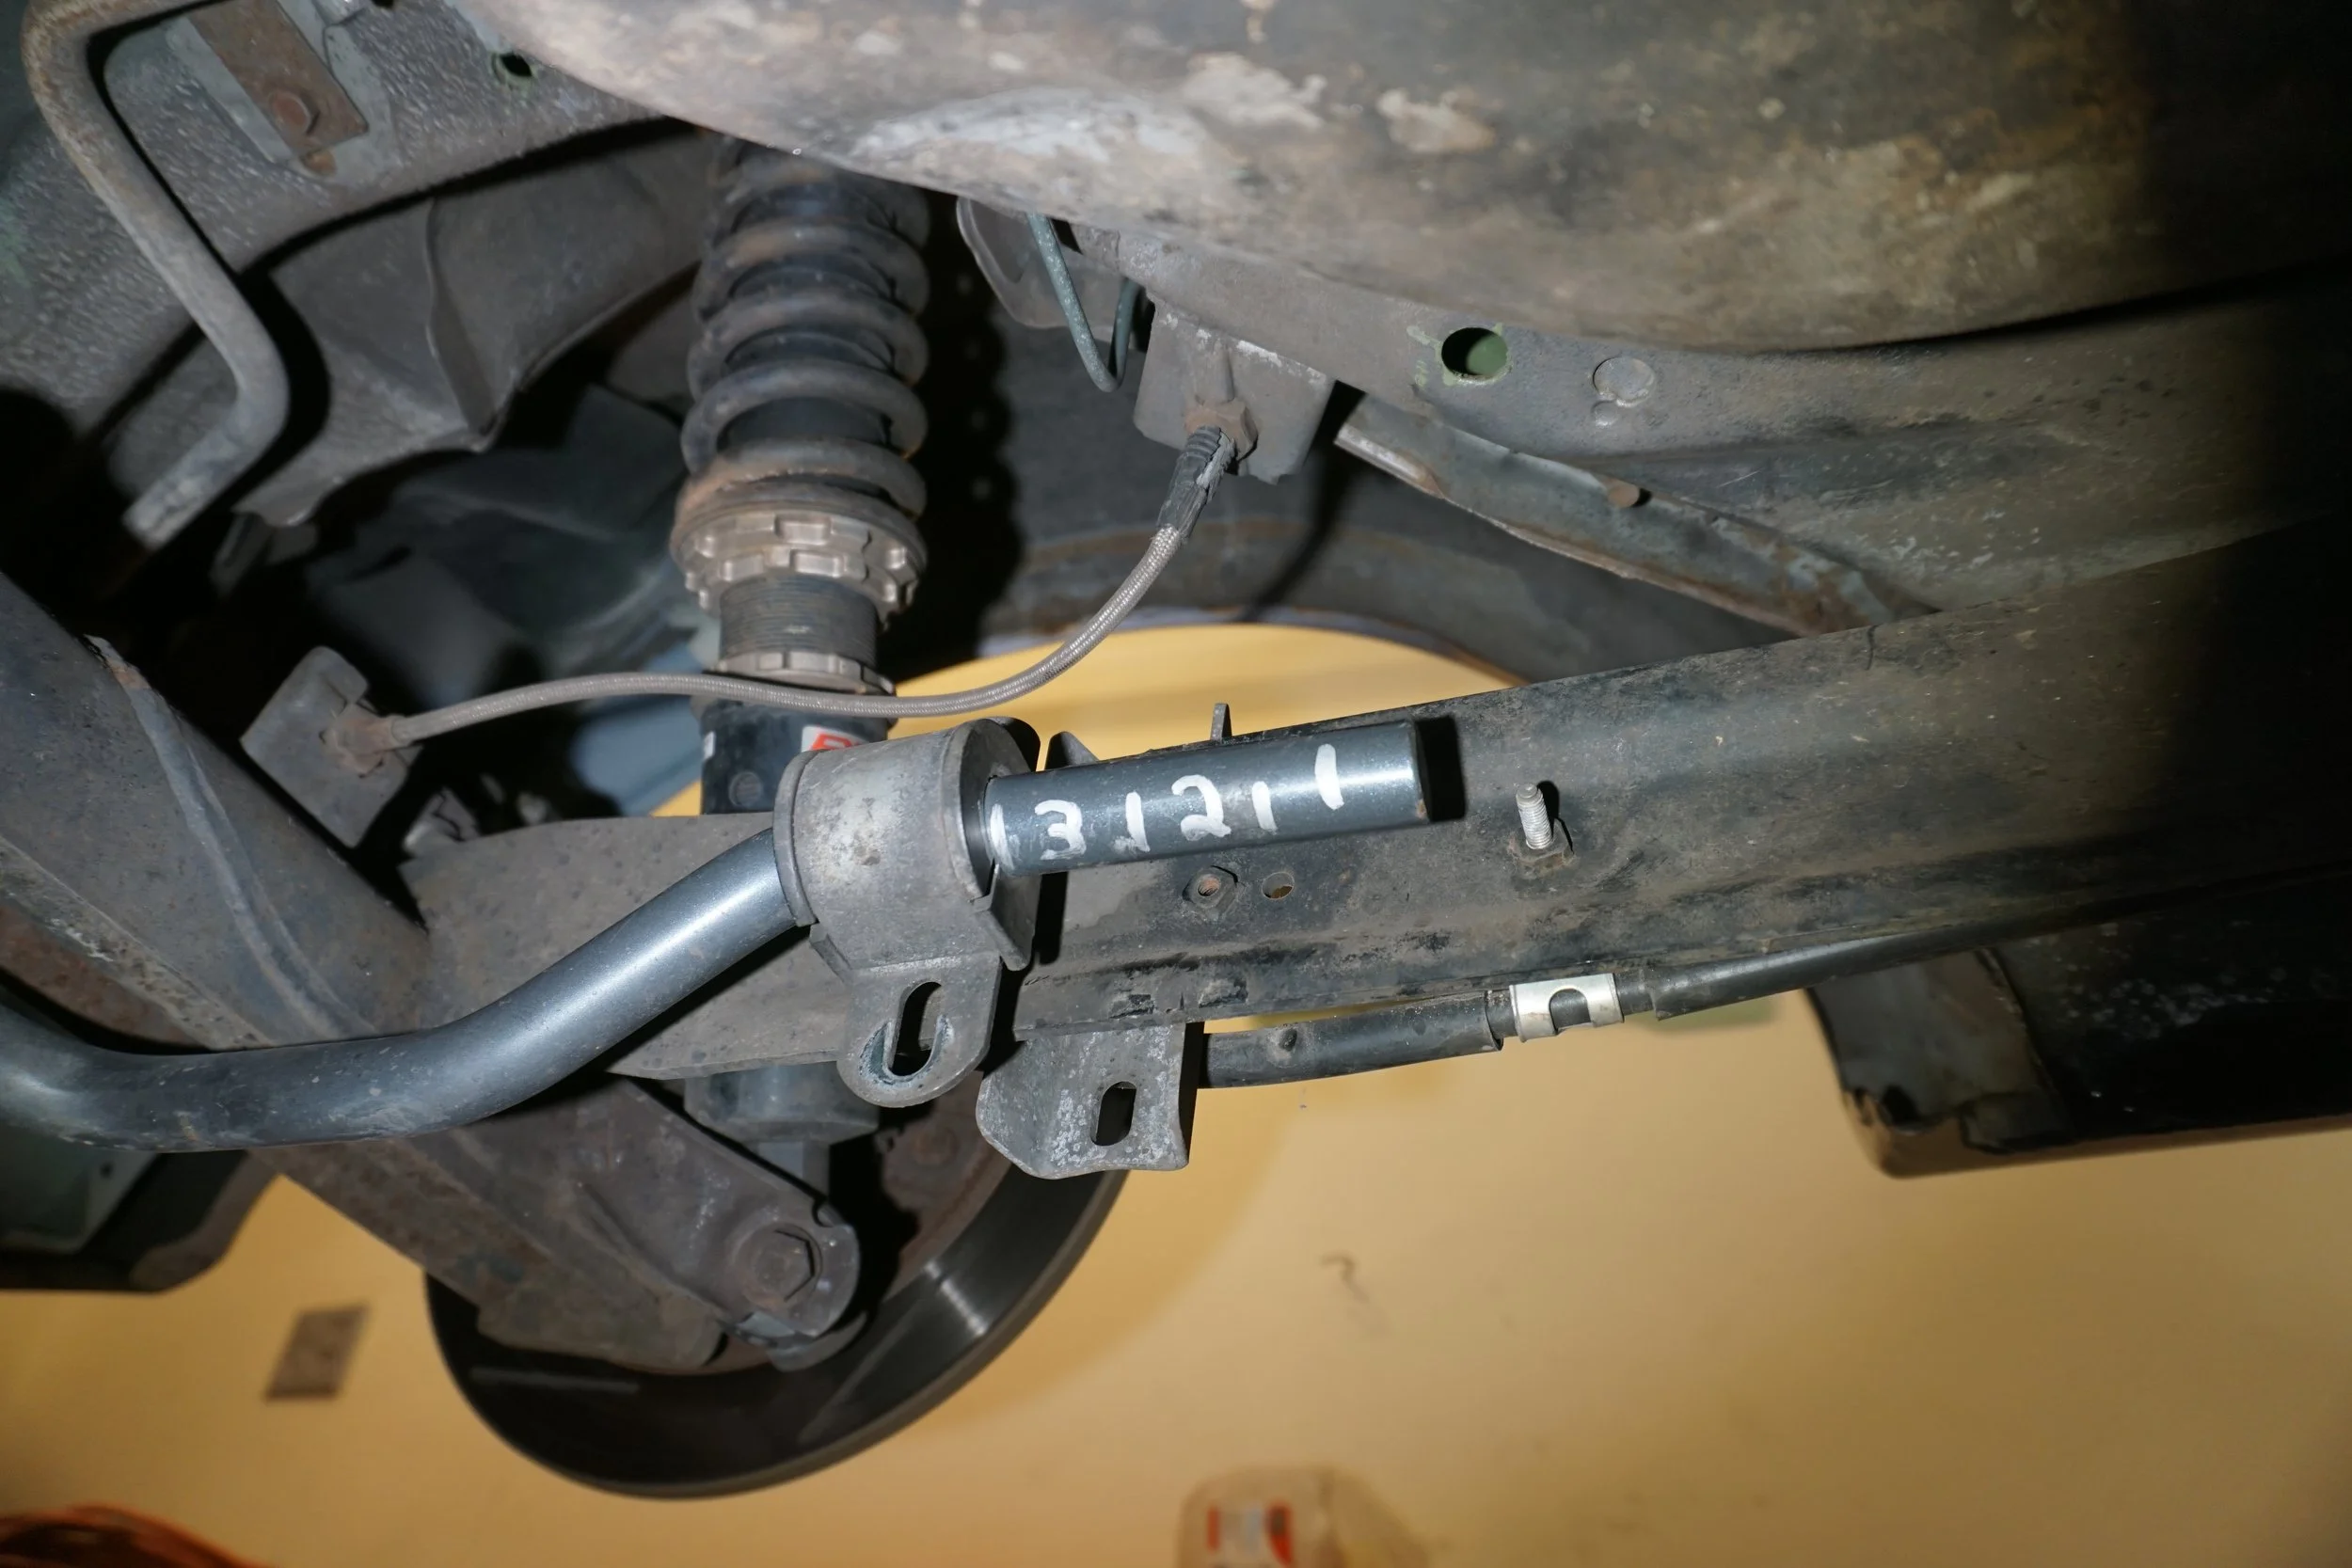
However, putting it at 4/4 put the bracket perilously close to my rear brake line:
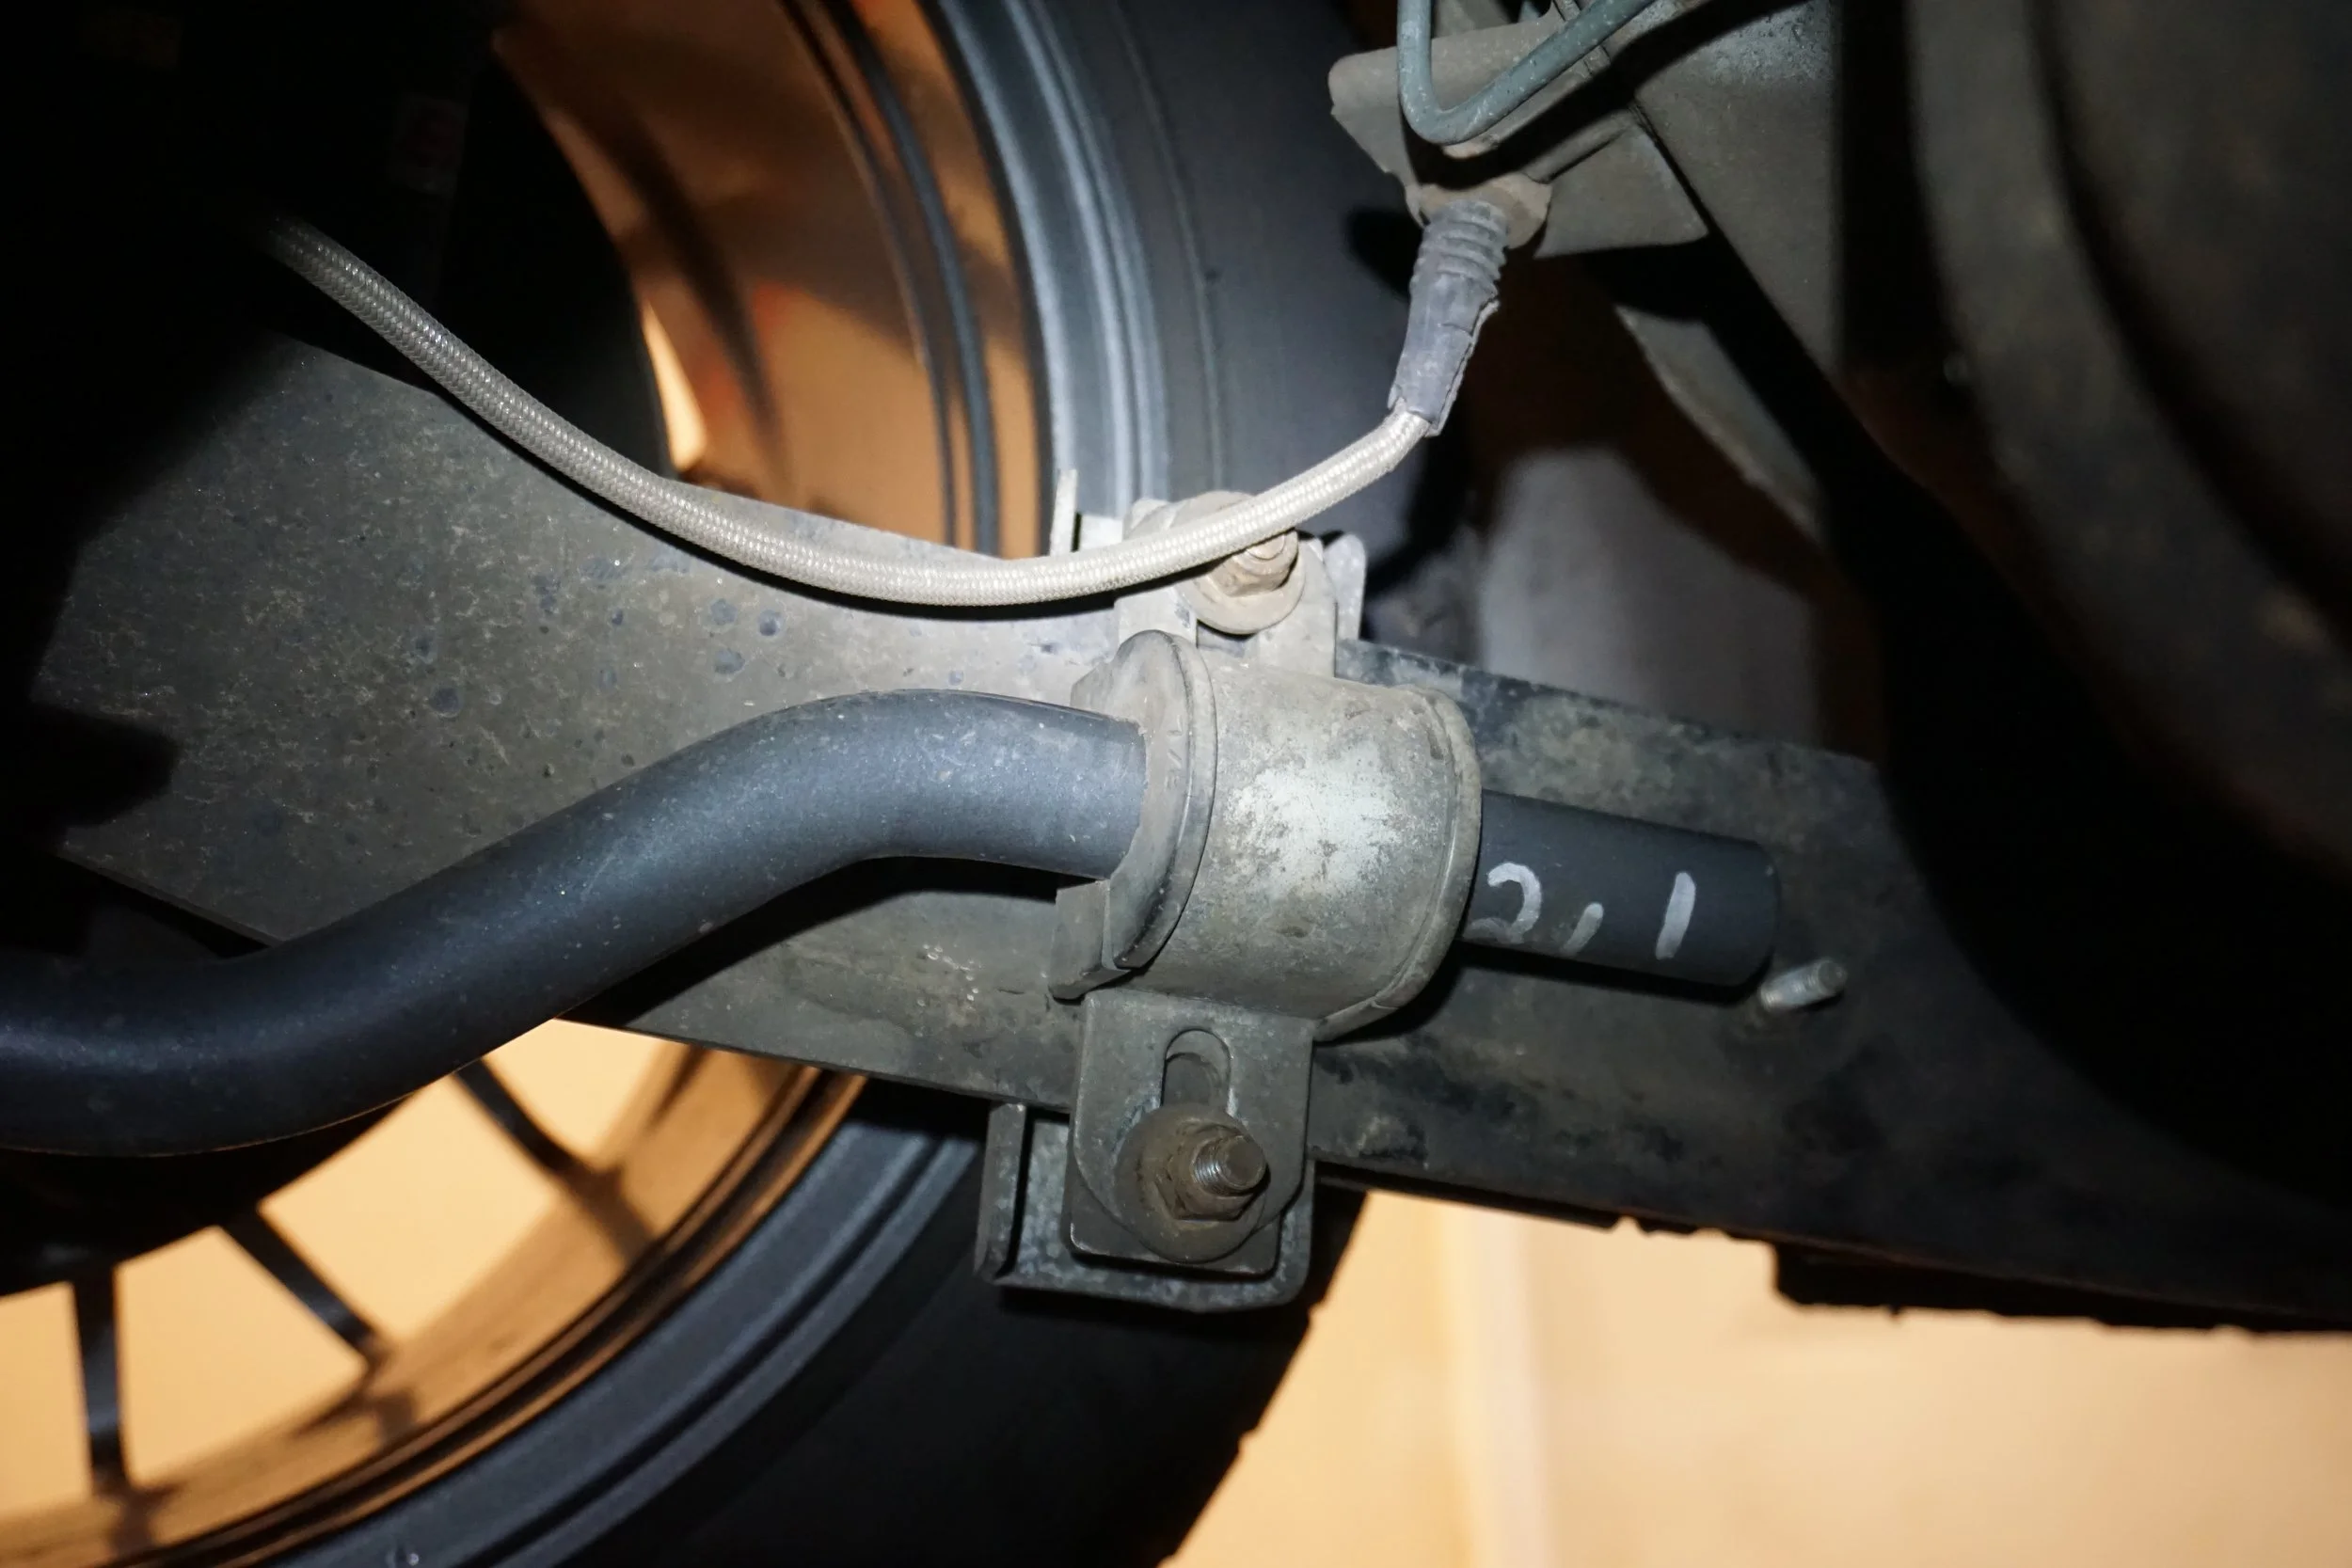
Which got me thinking about relocating the lines a bit to make interference impossible.
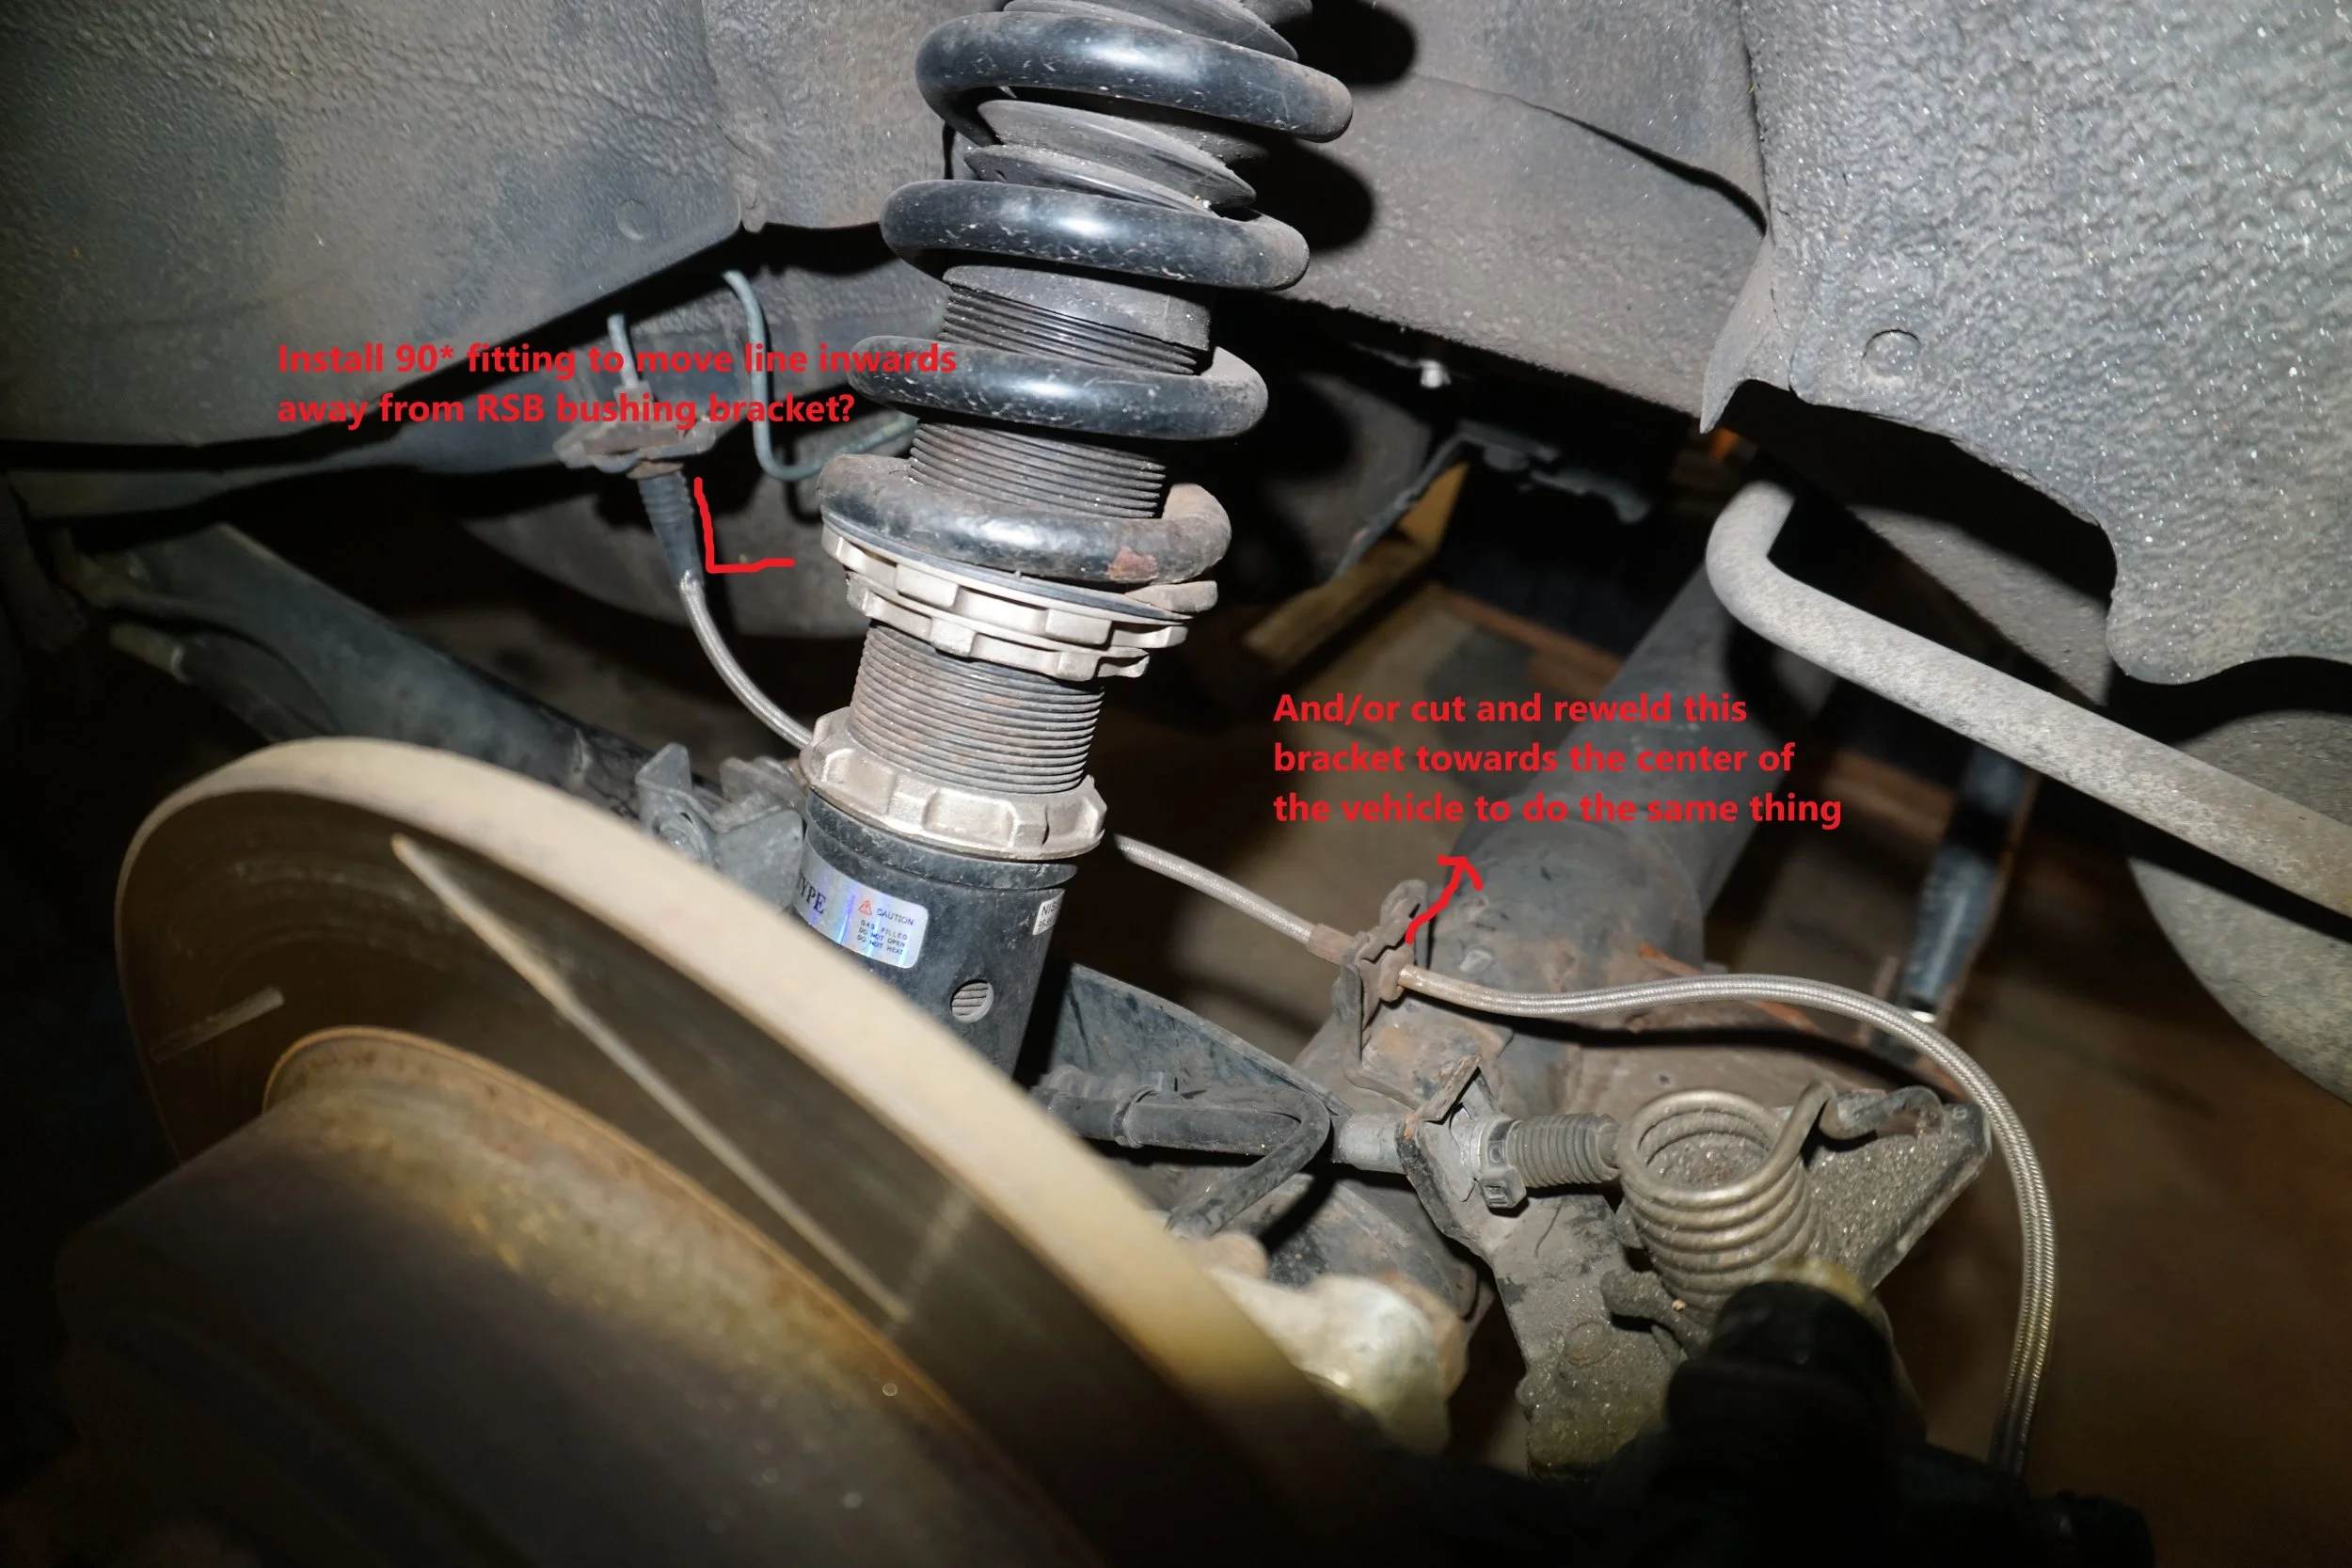
Using a 90* fitting would be the simplest solution, but I don't know what type of flare our brake lines use. The fitting seems to be M10x1.0. Relocating the bracket on the rear beam inboard would probably also do the trick, and I may do that when I drop the beam in the future. Anyone have any input on this?
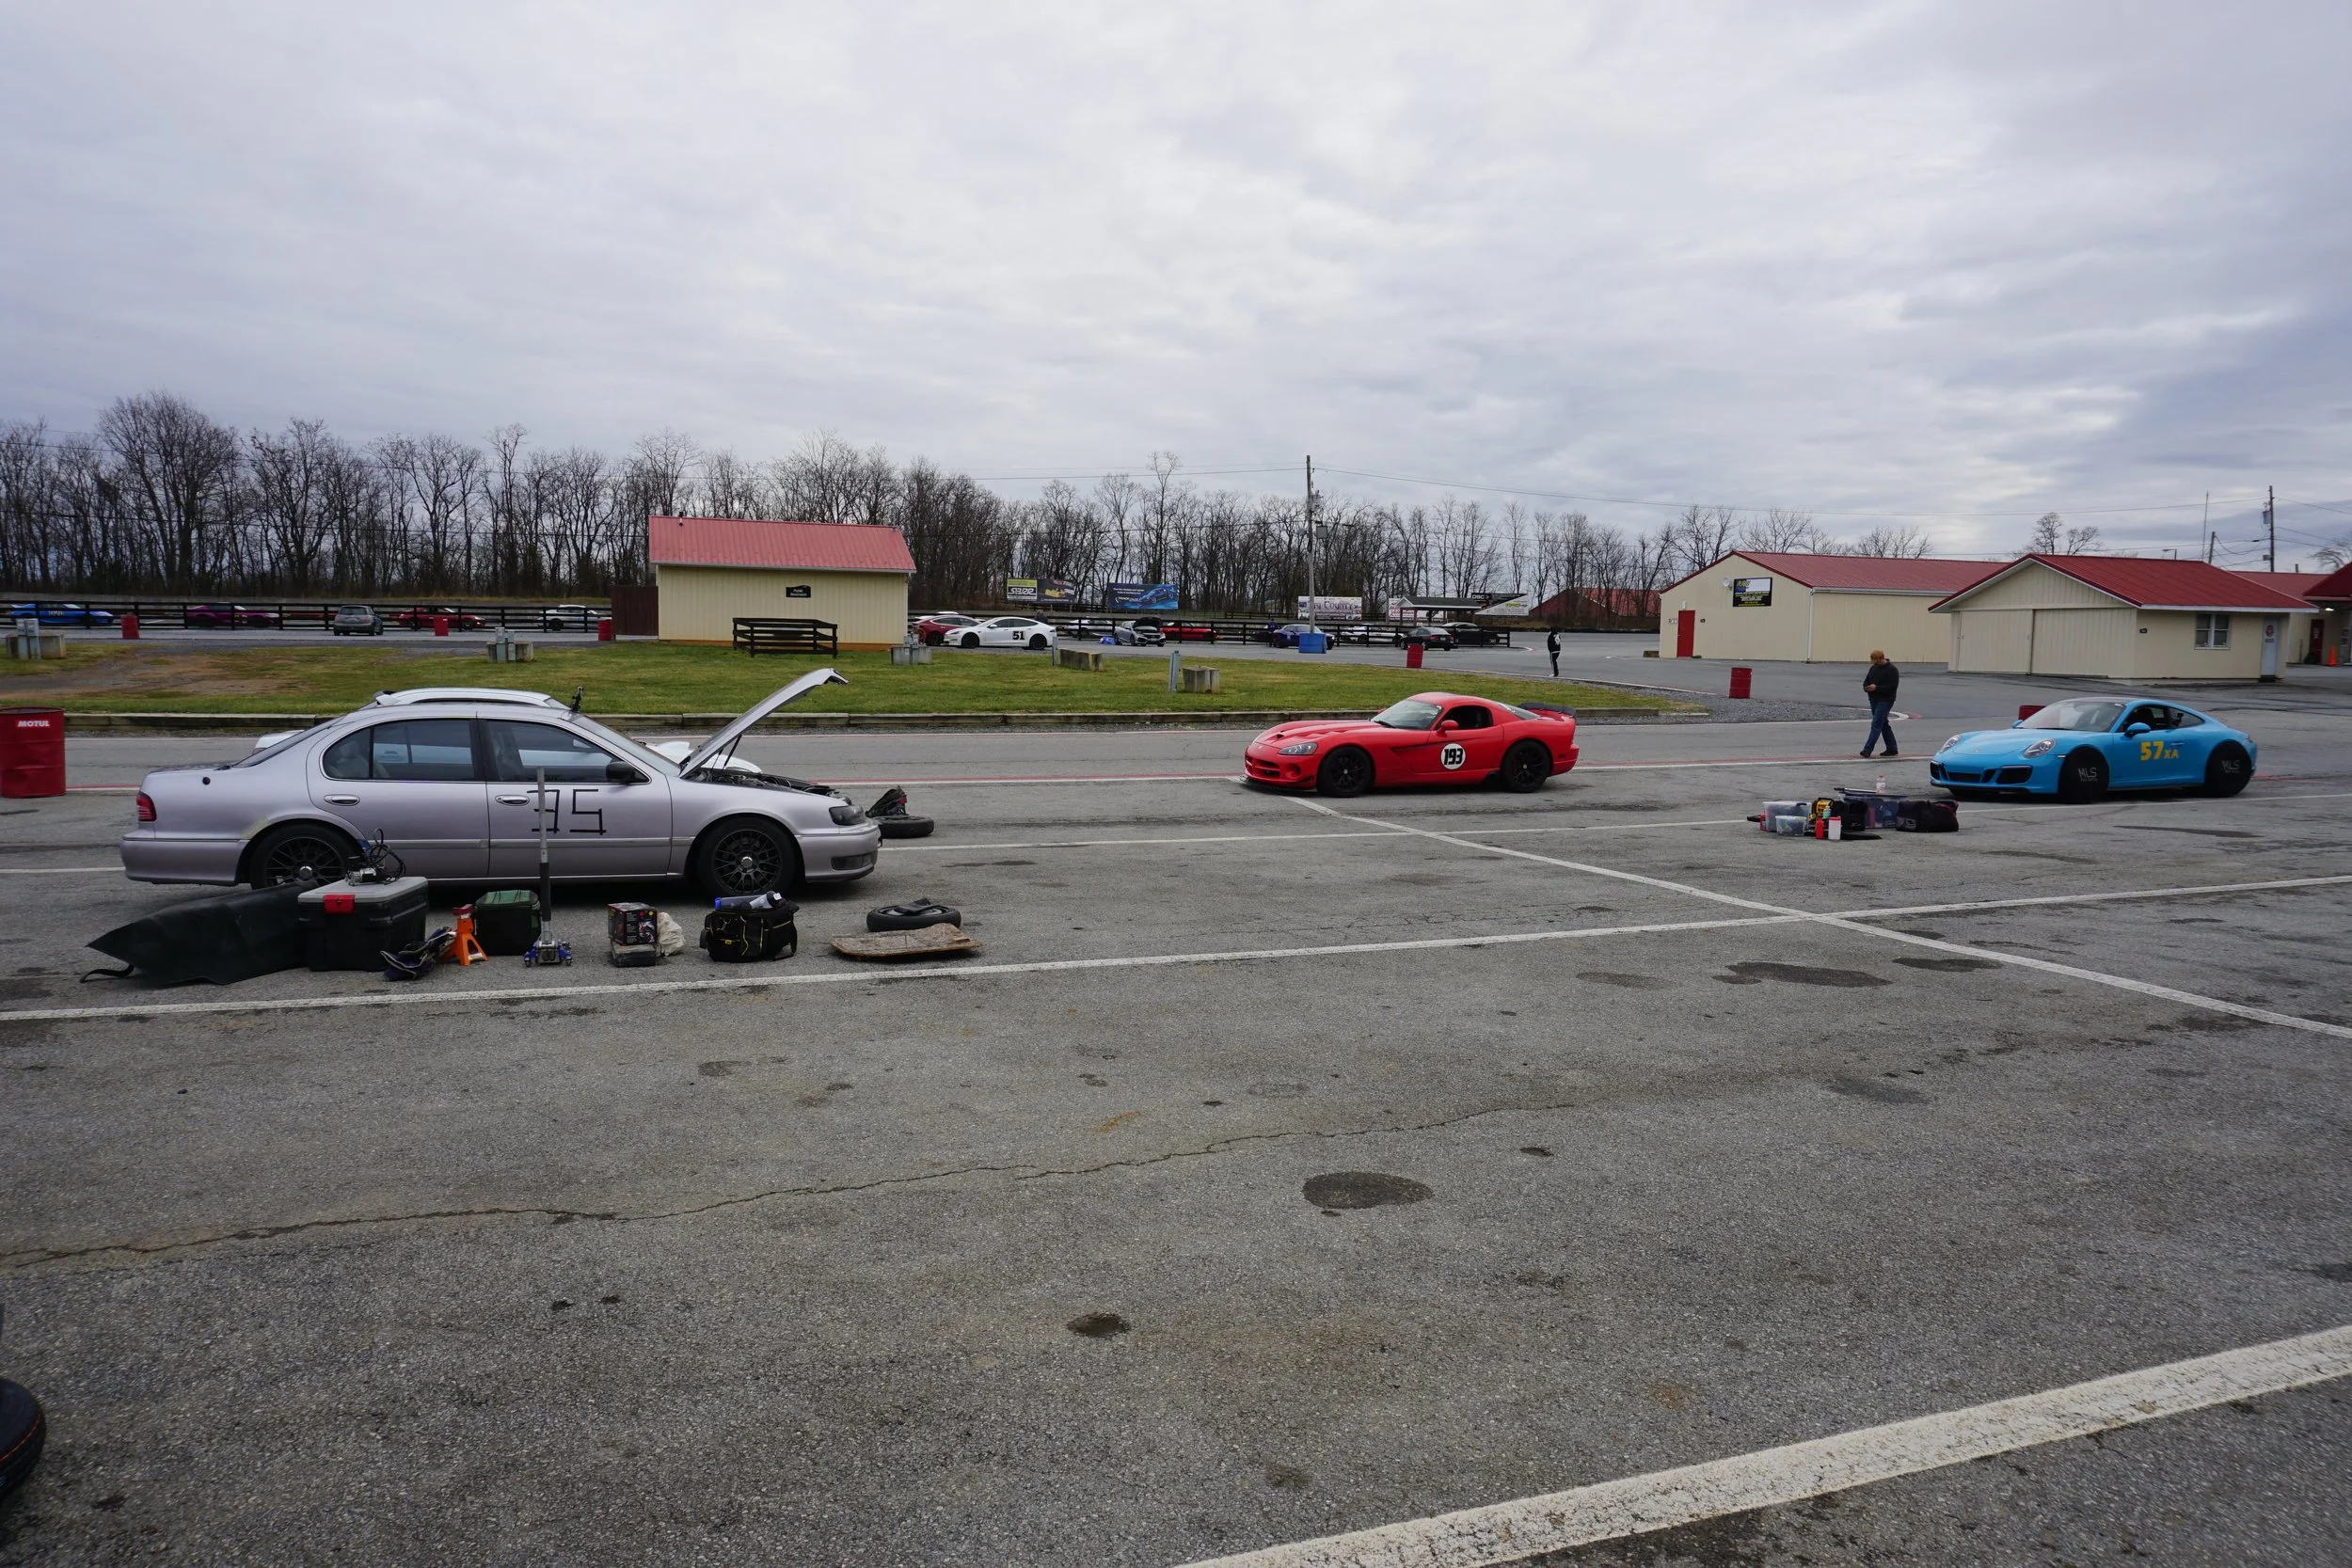
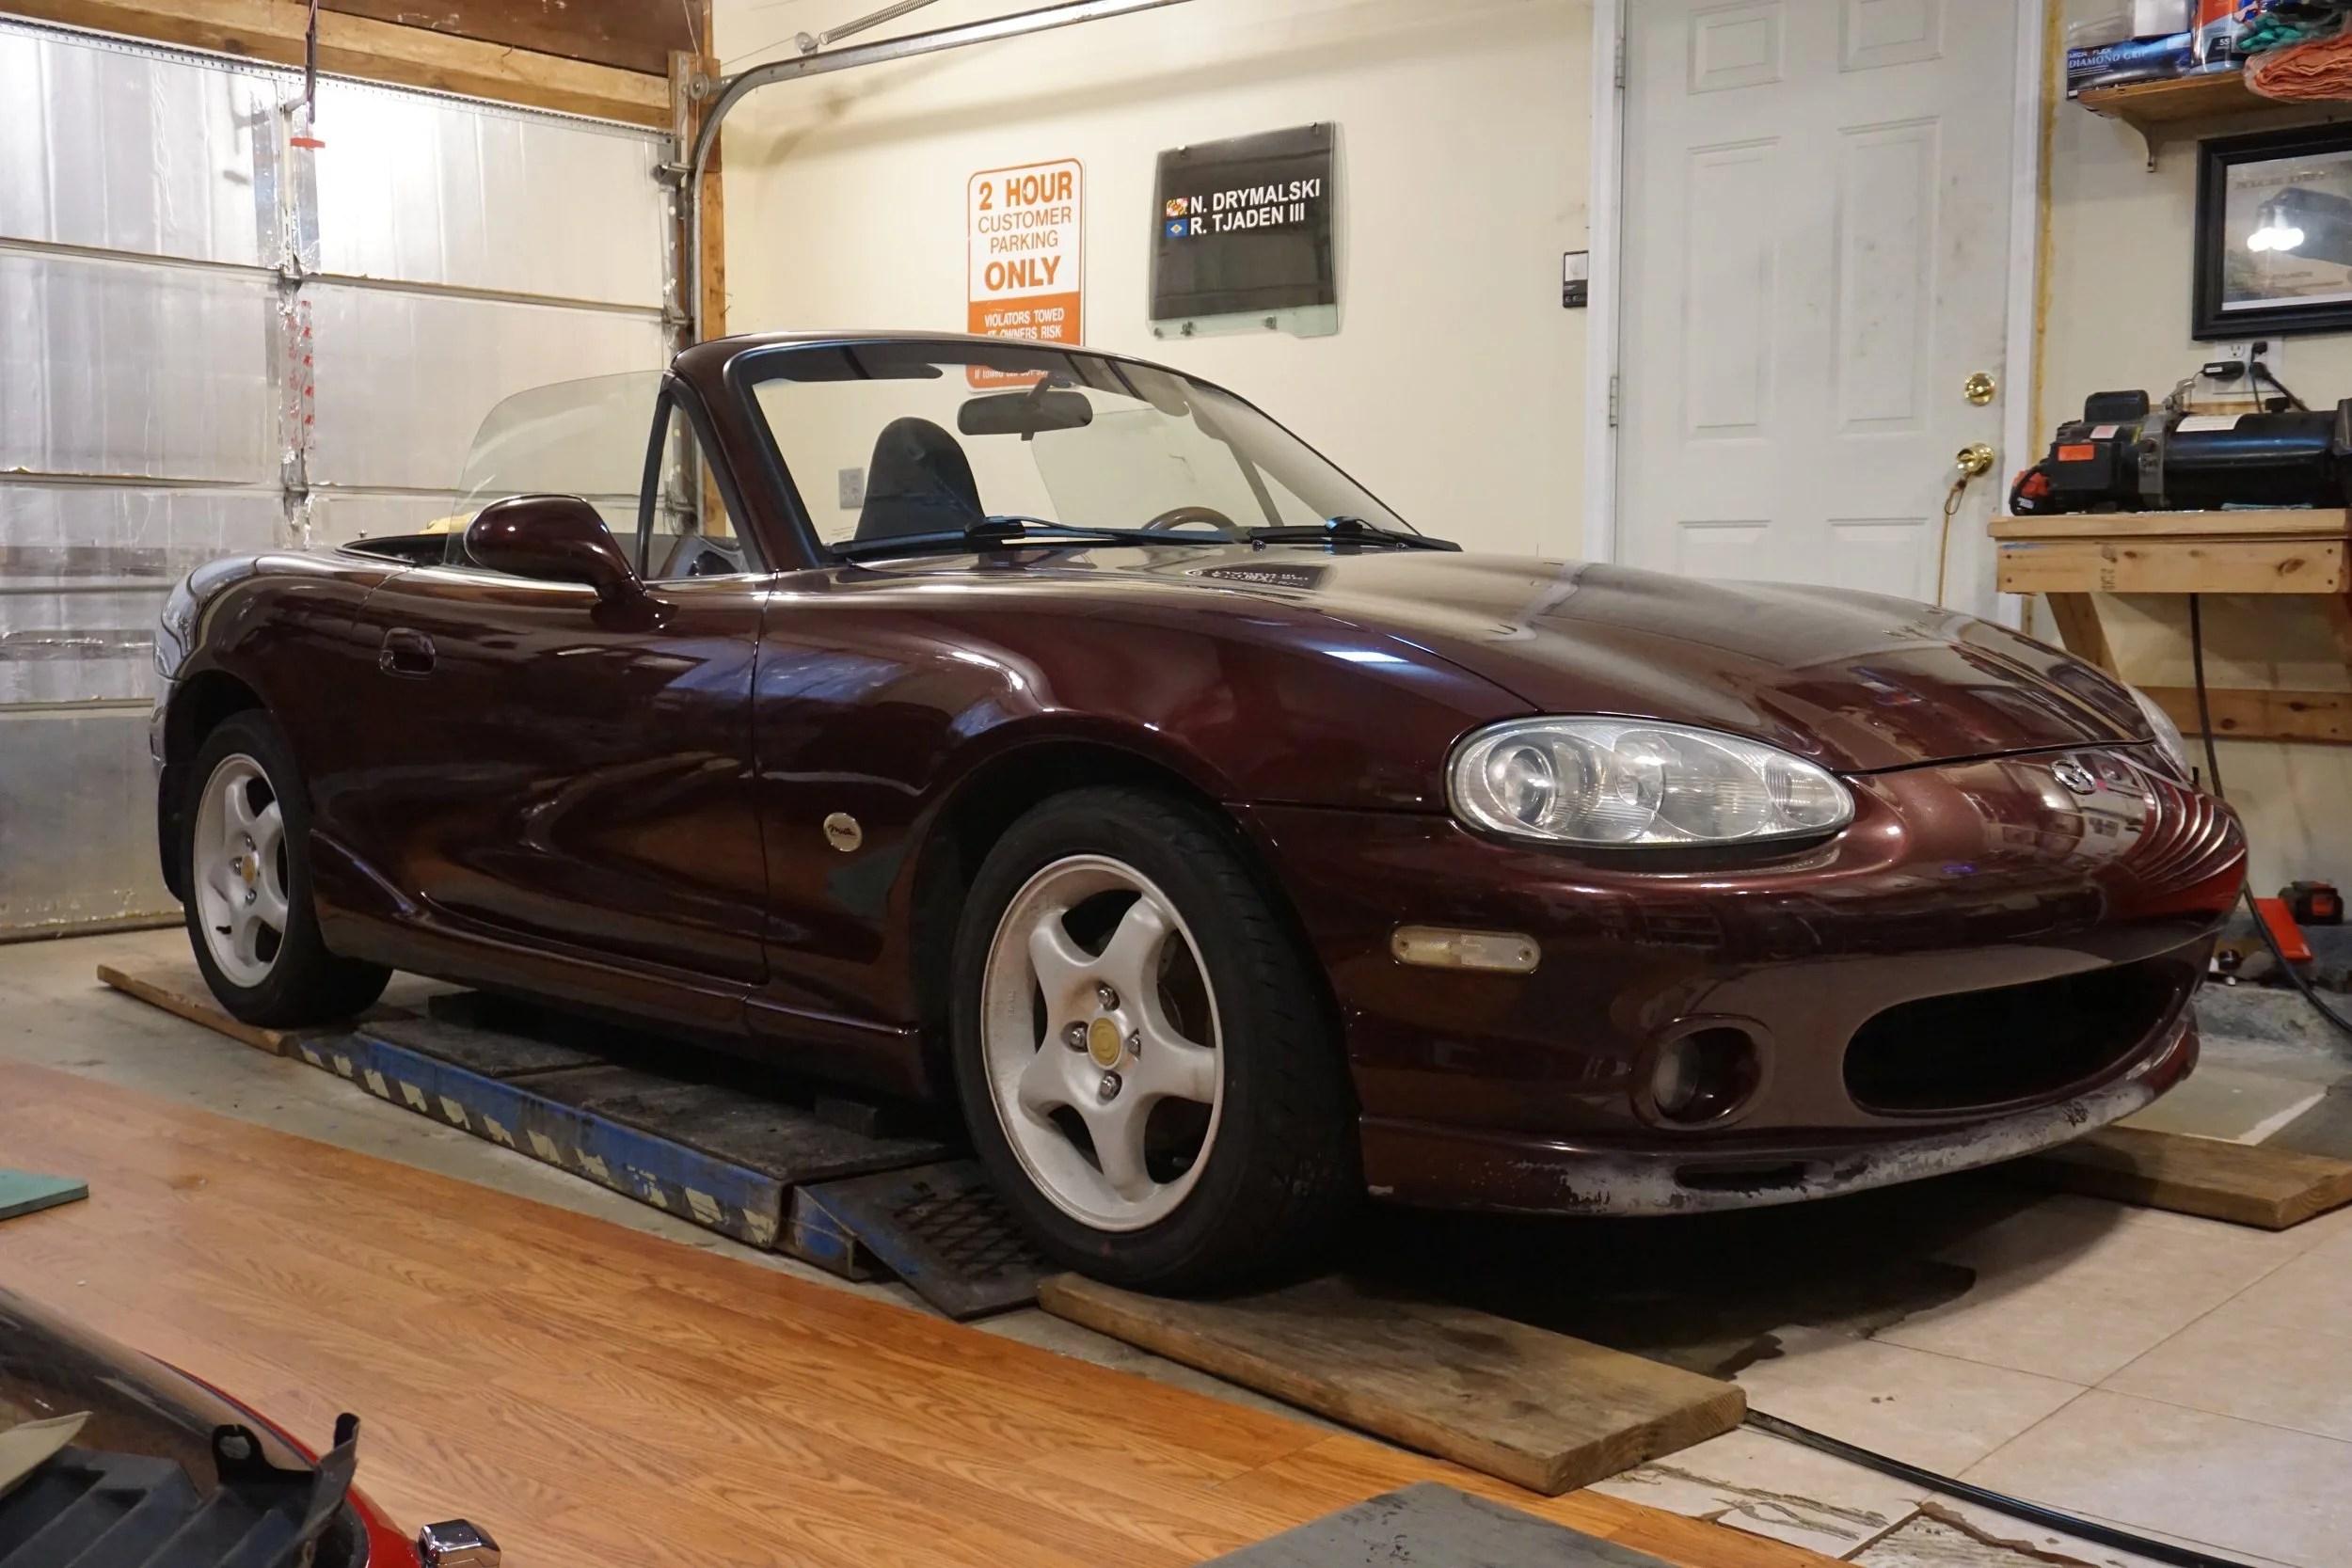
I finally sold my red 95 and 99 Miatas a few months back after picking up a maroon '00. Here's a group pic of all the cars at the time:
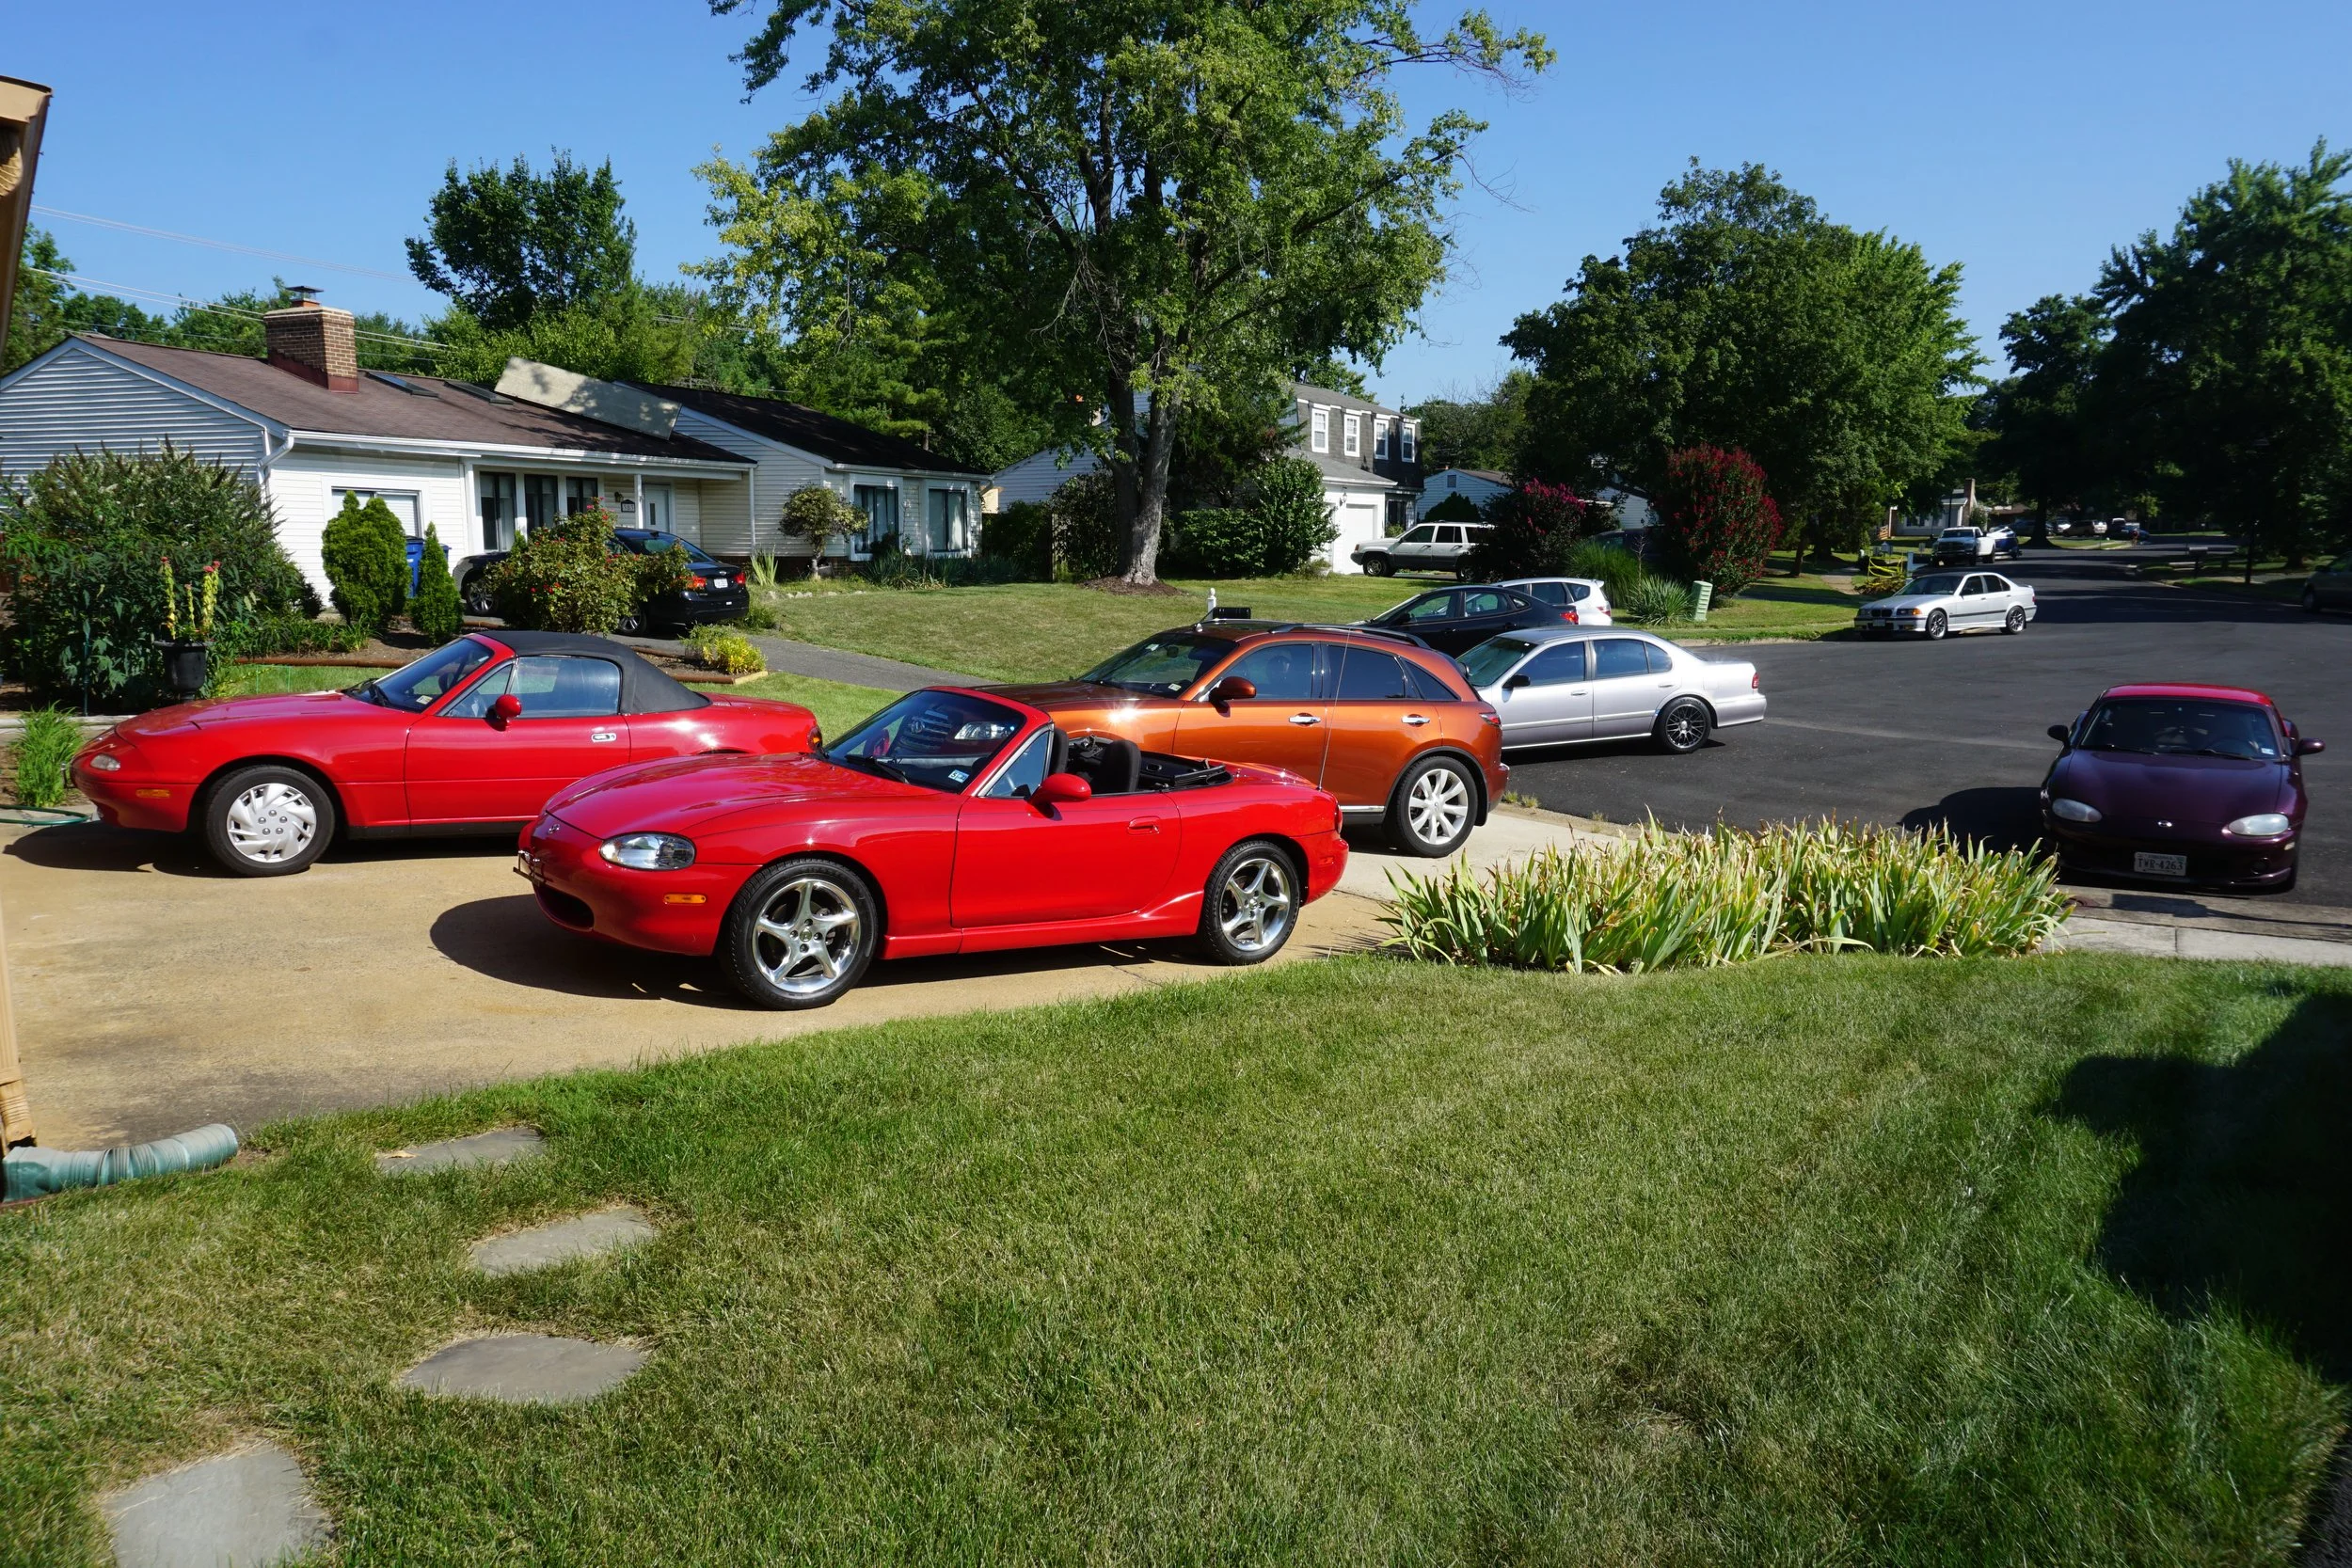
The '00 is one of the Special Editions, so it's got the 6 speed and LSD. The PO had installed some Bilstein coilovers, big FSB, and some other nice little things. It's fun
However, putting it at 4/4 put the bracket perilously close to my rear brake line:
Which got me thinking about relocating the lines a bit to make interference impossible.
Using a 90* fitting would be the simplest solution, but I don't know what type of flare our brake lines use. The fitting seems to be M10x1.0. Relocating the bracket on the rear beam inboard would probably also do the trick, and I may do that when I drop the beam in the future. Anyone have any input on this?
I finally sold my red 95 and 99 Miatas a few months back after picking up a maroon '00. Here's a group pic of all the cars at the time:
The '00 is one of the Special Editions, so it's got the 6 speed and LSD. The PO had installed some Bilstein coilovers, big FSB, and some other nice little things. It's fun
Last edited by 95maxrider; Dec 23, 2022 at 08:07 AM.
Having five cars was too many for me, life is much better with three. It didn't help that three of them were more or less identical. Now if they were five different cars, and I had a huge garage to store them all in, things would be a little different. But trying to shuffle them all around the driveway and in/out of the single garage door was a PITA.

I've got a question for everyone about clutch pedal adjustment. I'm not loving the way my clutch engages so I think some pedal adjustment is in order. The problem is I'm not sure if I should follow the procedure for a 4th gen, or the one for 6 speed 5.5th gens? I've got a 4th gen clutch master cylinder and pedal, but 5.5th gen slave cylinder, clutch, TOB, trans, etc. The dimensions listed in the FSM are wildly different between the two cars, most notably for the pedal free play adjustment. Does anyone know which one I should be following?
Well to answer my question in the last post, I decided to just use the 4th gen measurements to adjust the clutch pedal. The only thing that had room for adjustment and needed to be adjusted was the free play. No big change there obviously.
My Innovate Motorsports wideband O2 sensor/gauge is pretty old at this point, and when I had the car on the dyno last year the operator mentioned that it looked like it was off. I considered replacing just the sensor, but apparently they're hard to find for an older unit like mine, and I wanted to make the switch to AEM since they're apparently easier to work with for data logging. Tech support from Innovate is pretty crappy, too. So I went with the AEM UEGO X-Series and got busy.
The mess of wires in my dash made me very uncomfortable, since it was nearly impossible to tell what was going where. There also appeared to be a "loop" or two that I couldn't make sense of. This was partially the result of a variety of old mechanics doing things, partially due to the mess of wires for the IM WB02, and partially because of the series of different gauges that have been installed over the years. Well, I was determined to fix all of it while installing the new gauge. There's no need to post pictures, because even with it all cleaned up, it still looks like a mess of wires, but I can assure you, it all makes sense now and is much cleaner than before. It helped that the wiring for the AEM was much simpler than that of the IM.
Before, Innovate Motorsports:
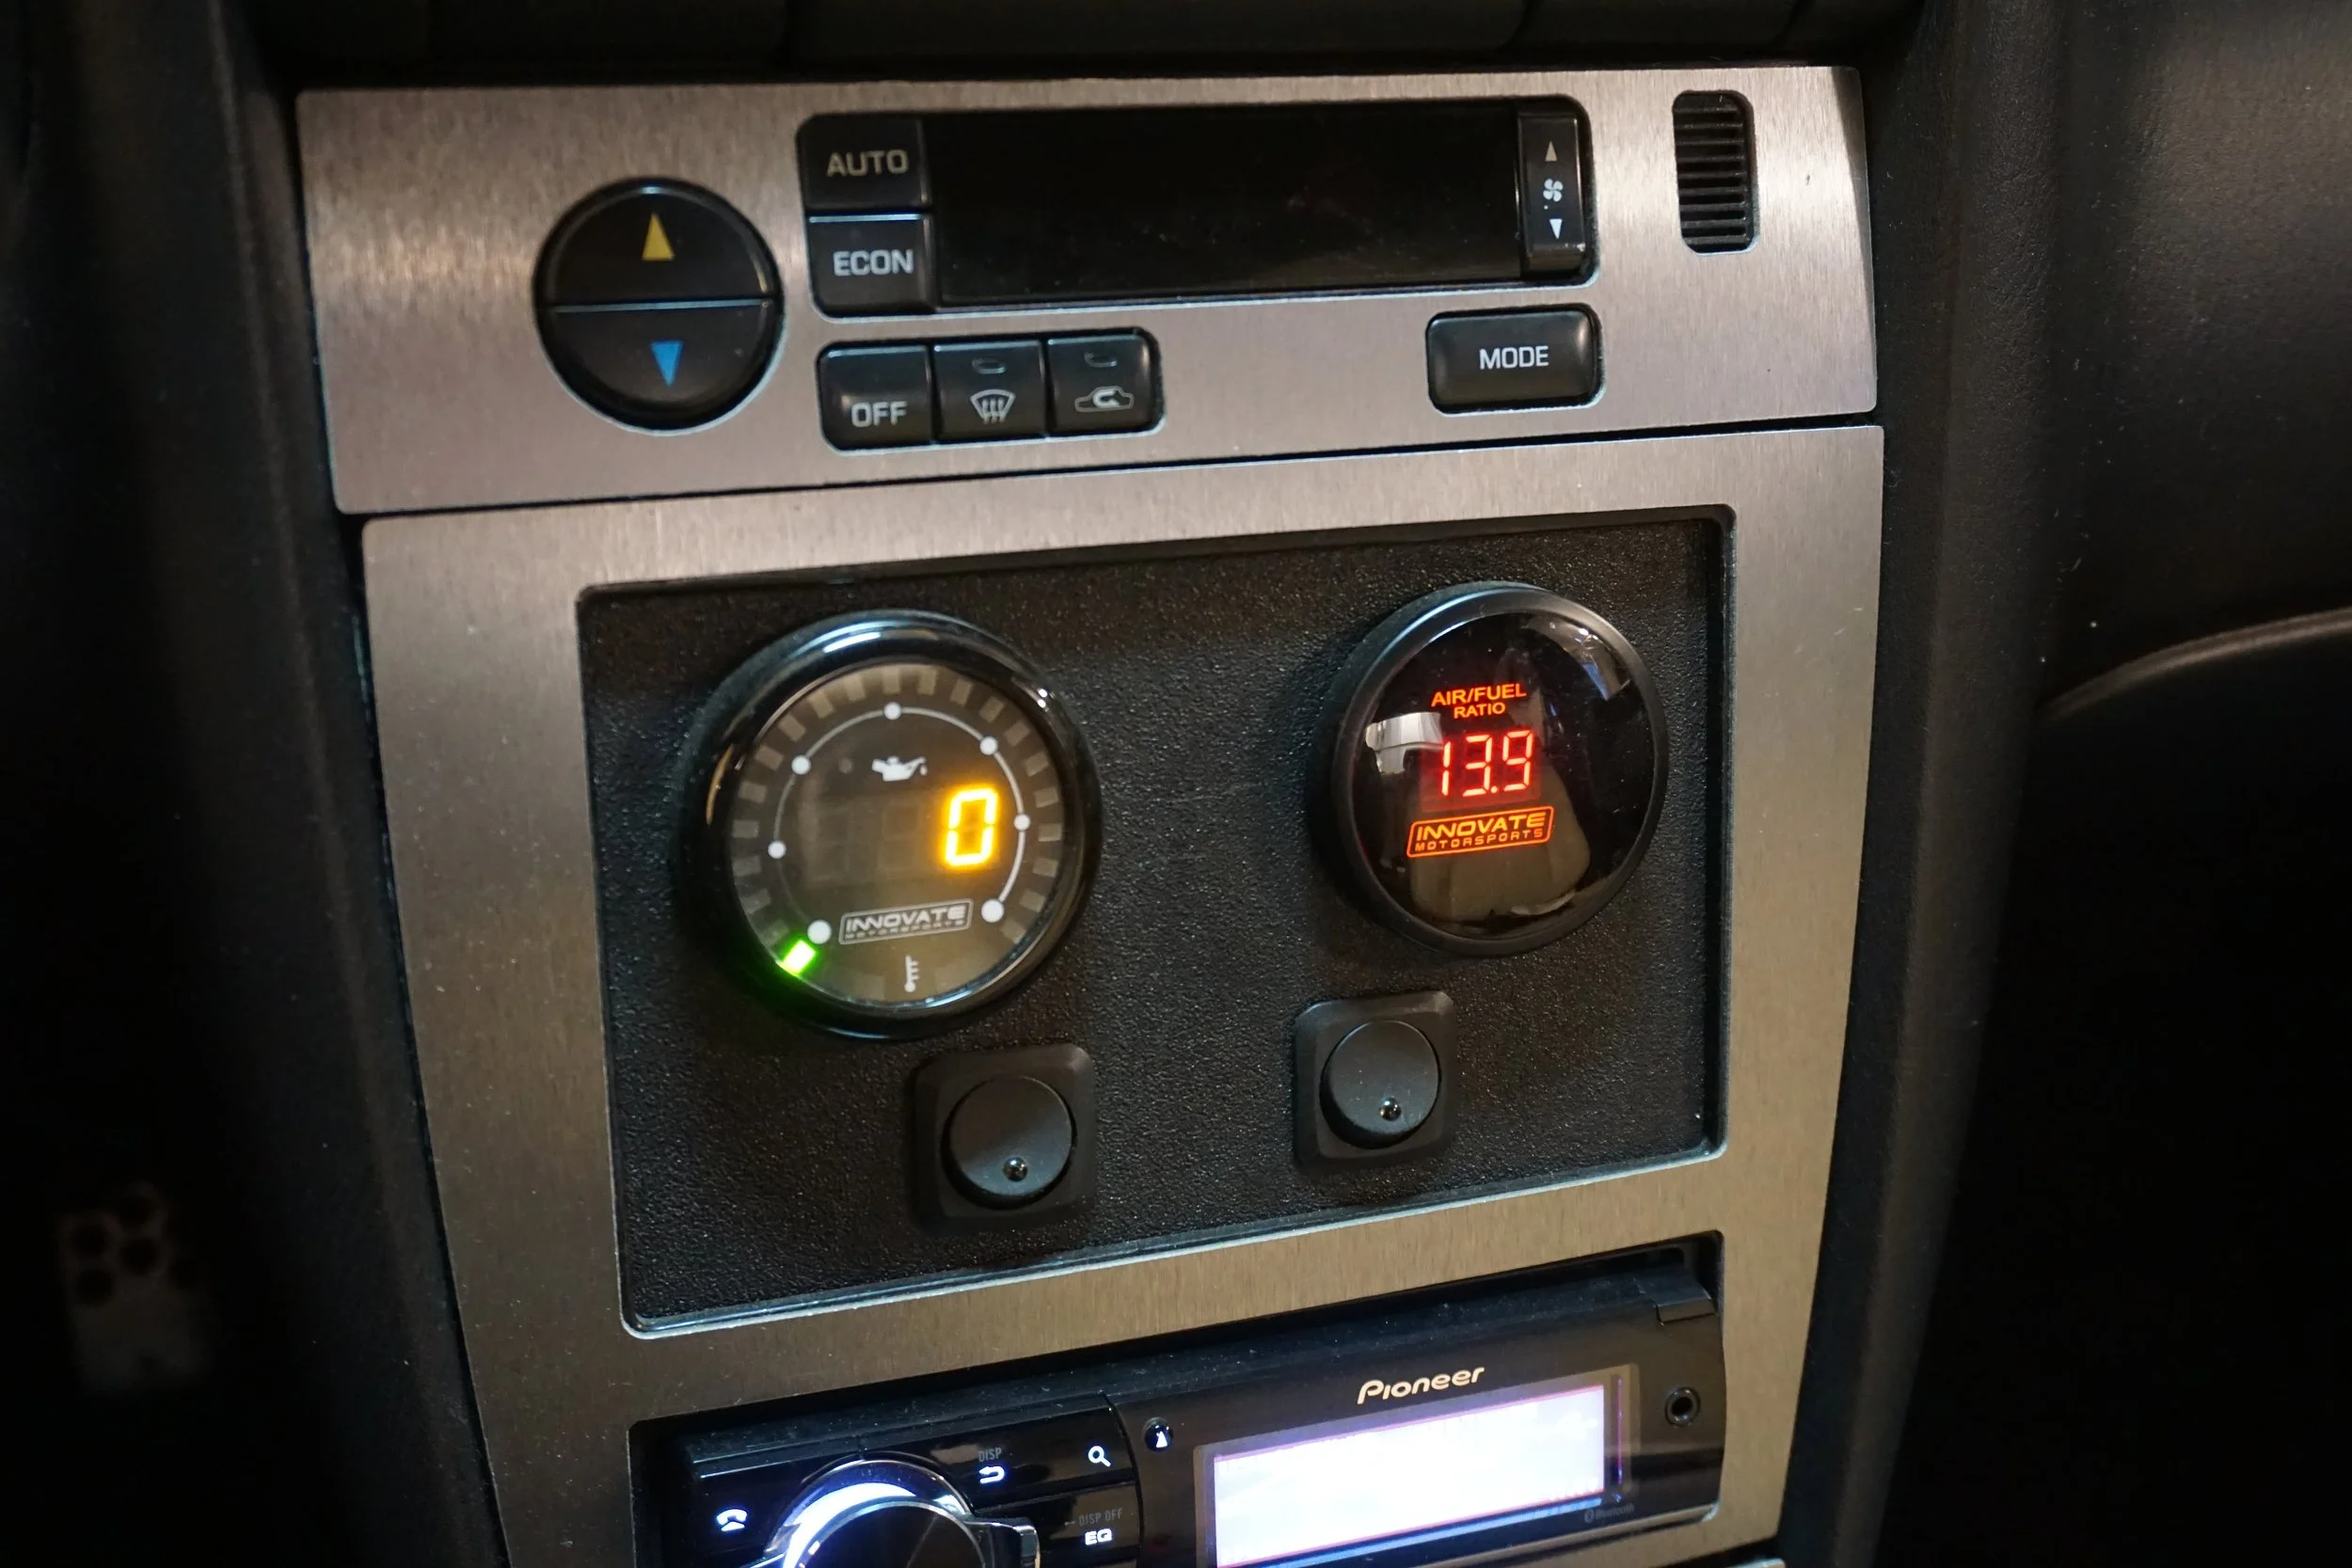
After, AEM:
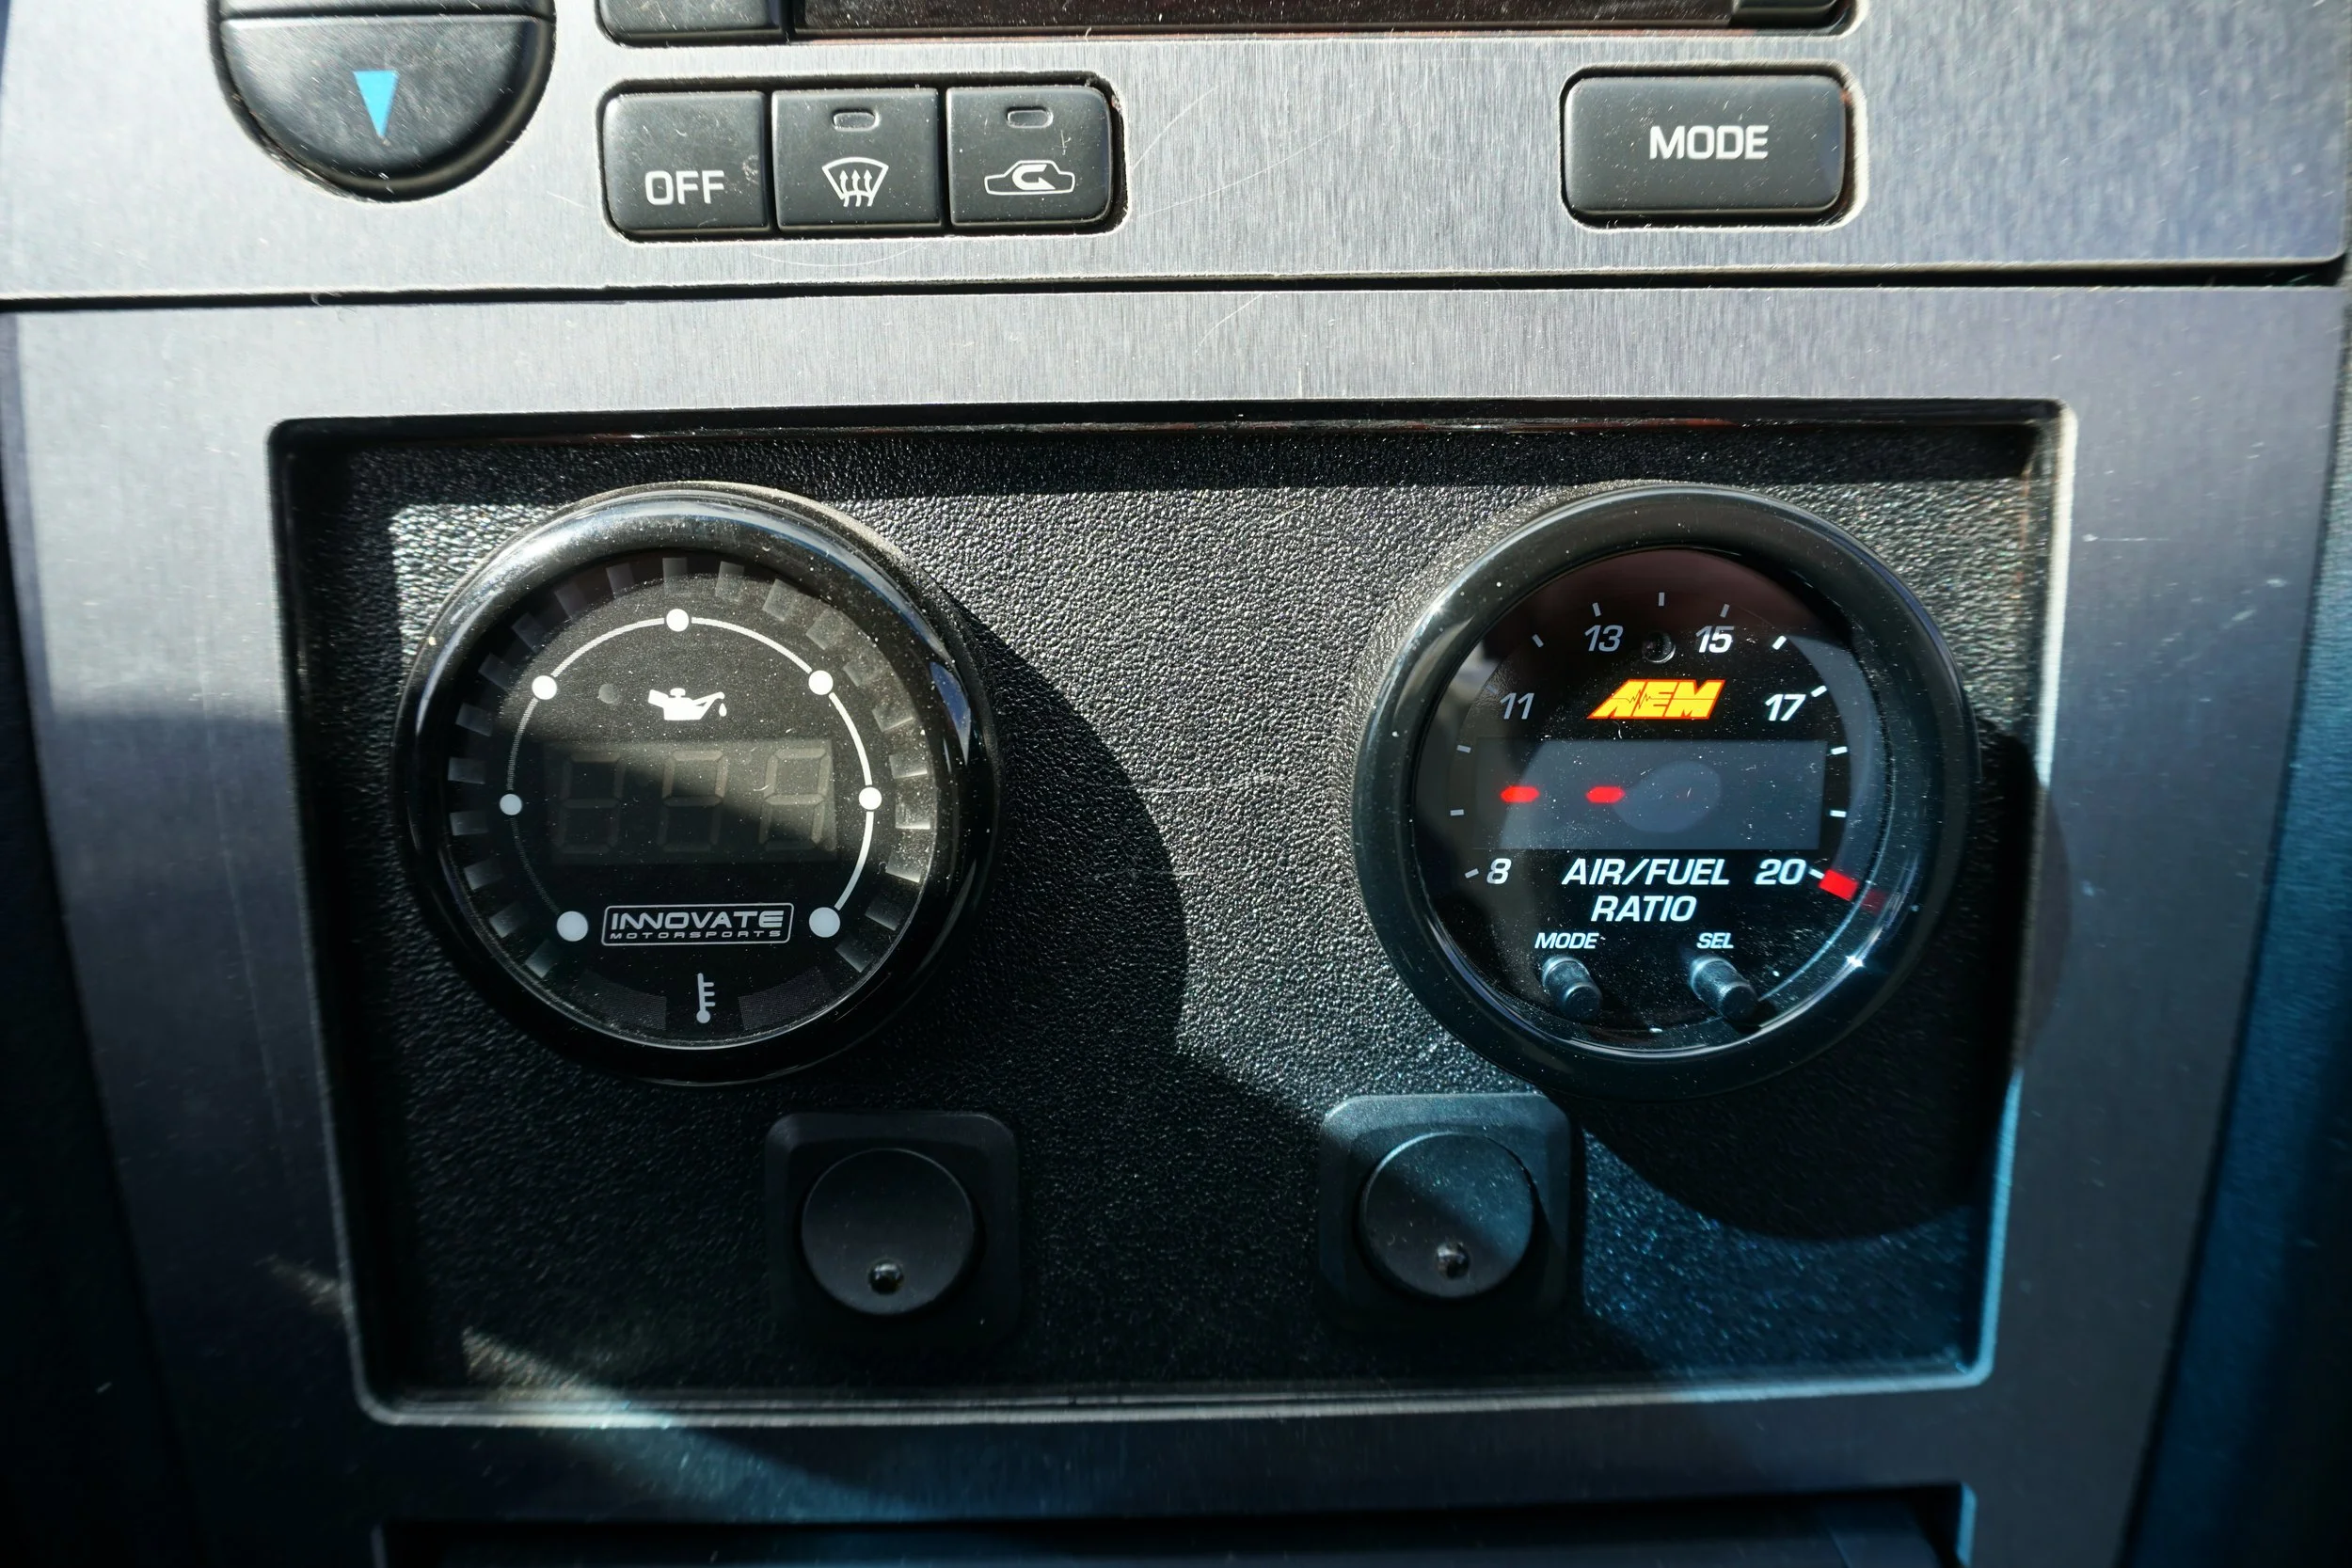
Another reason I went with the AEM is because it has a ring of LEDs around the edge of the gauge that also represent the AFR. I like them because AFR readings on a numerical gauge change so quickly, and the edge LEDs are just easier to keep track of at a quick glance.
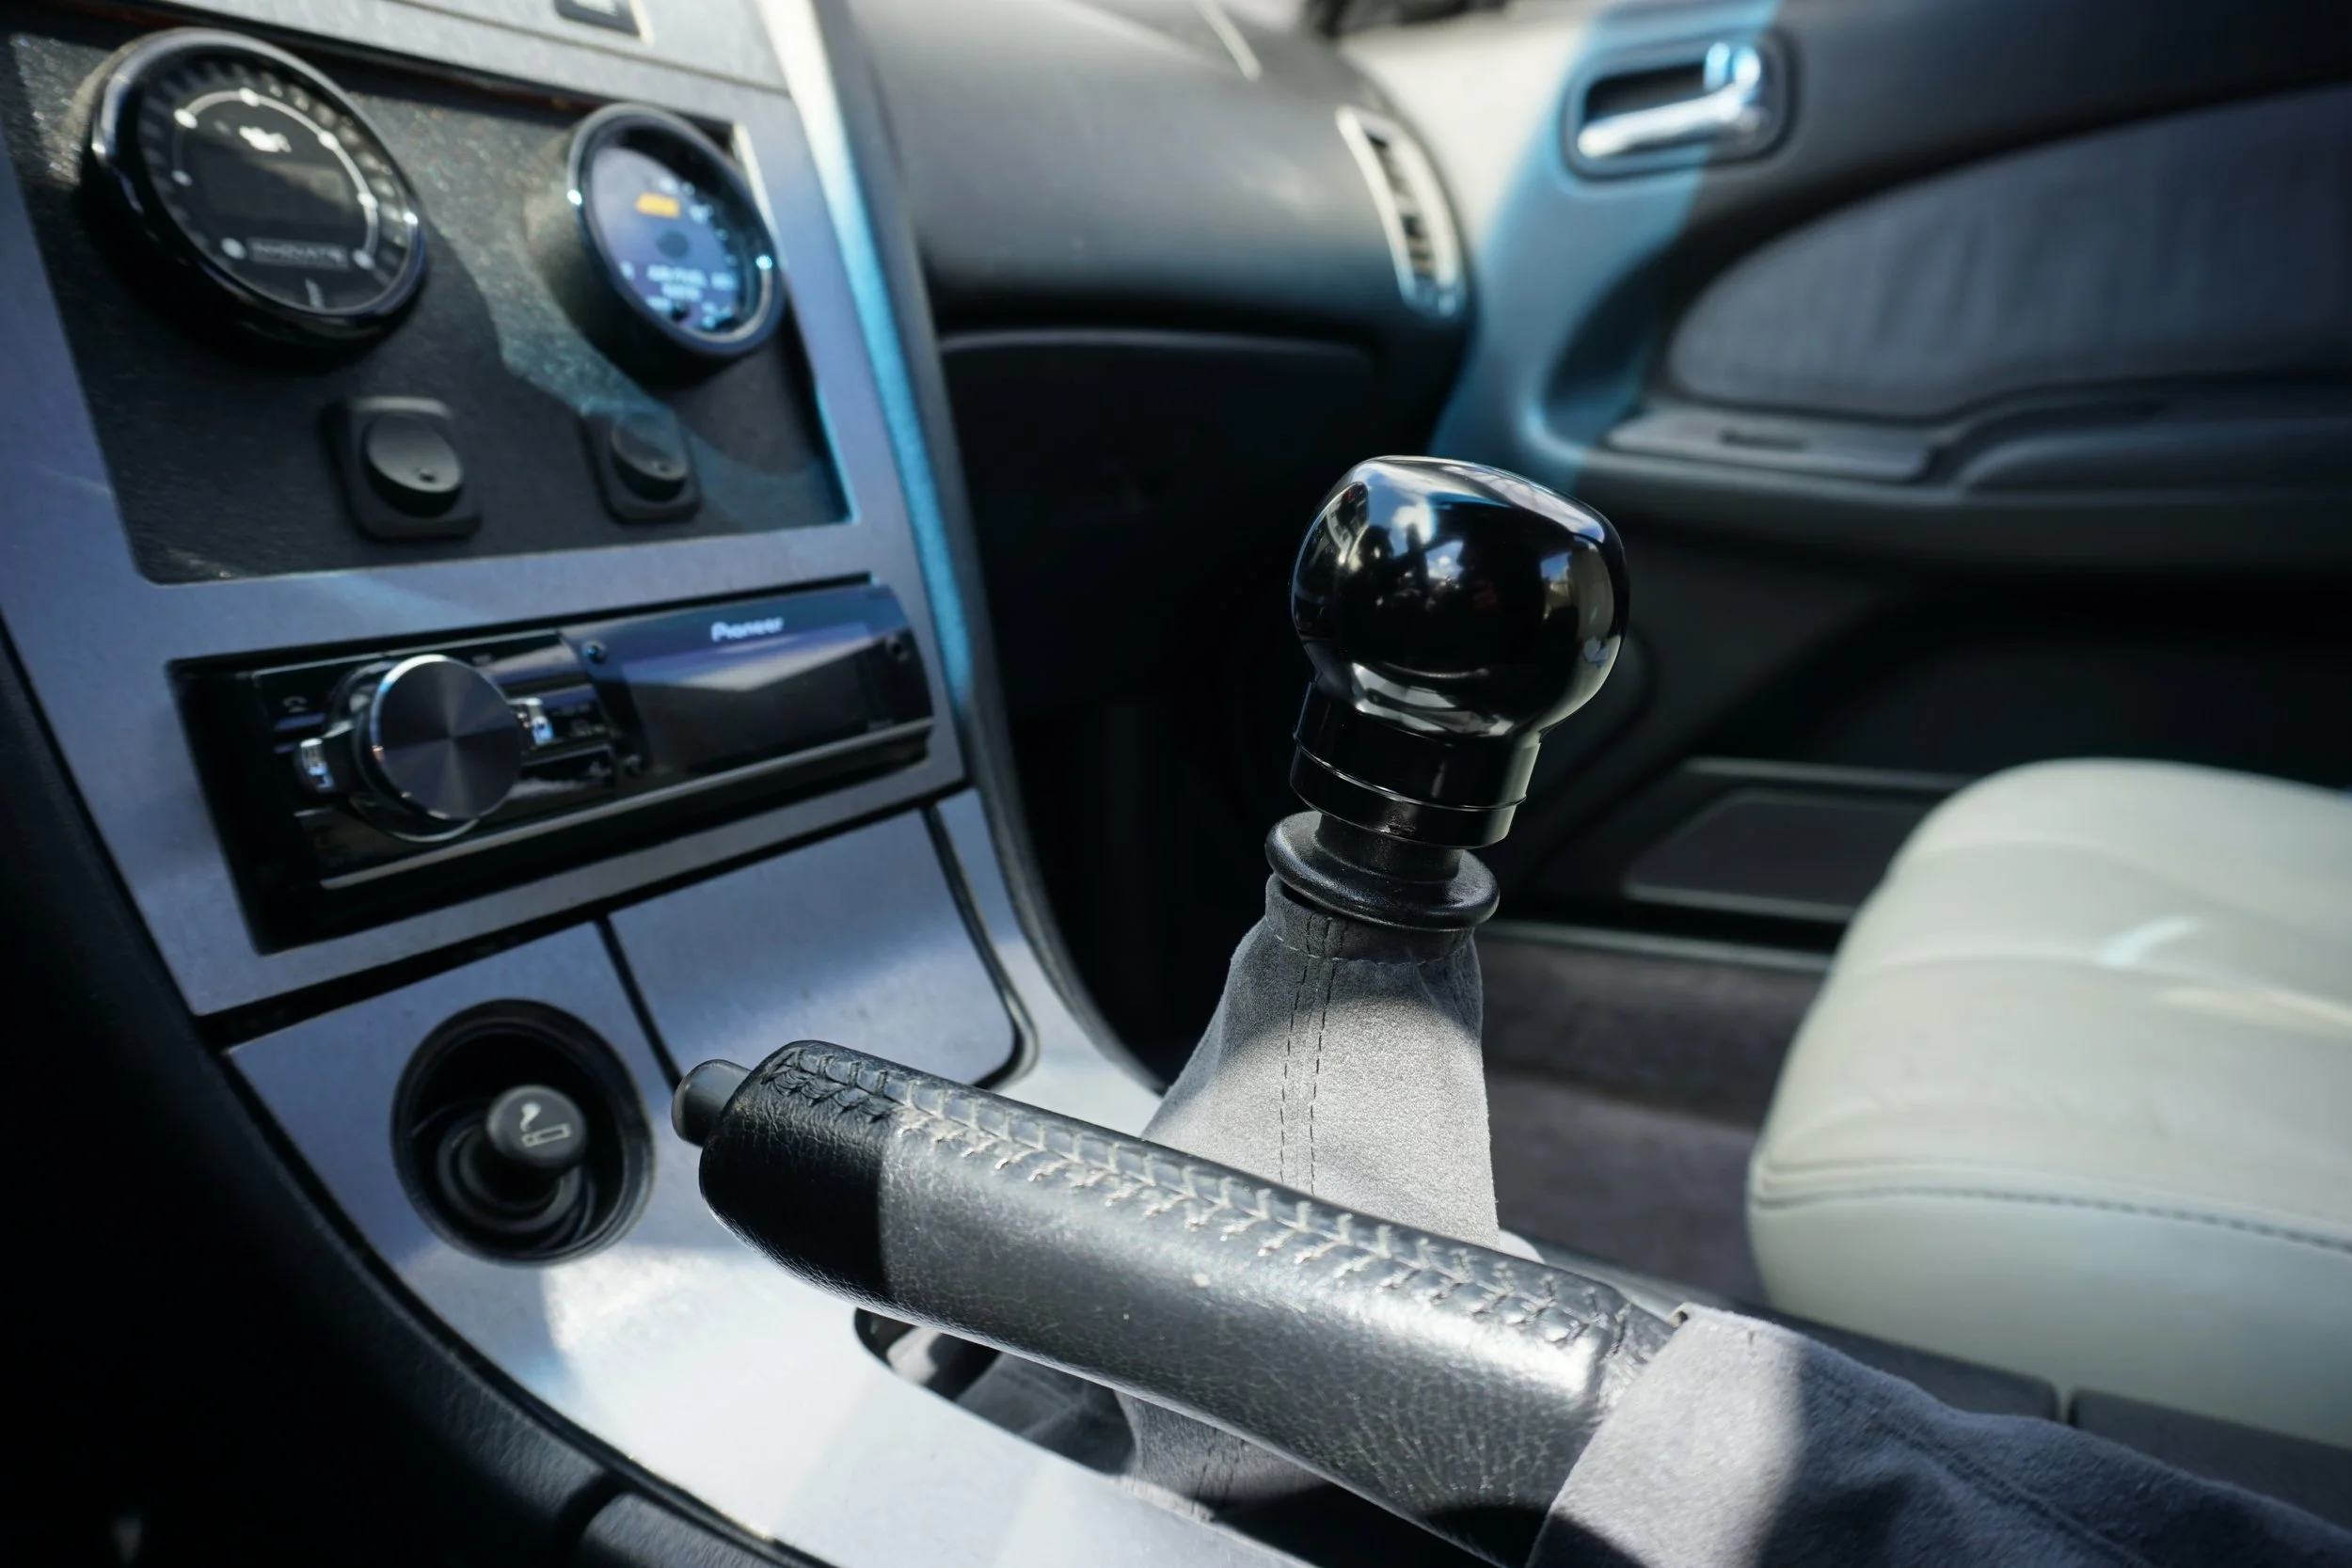
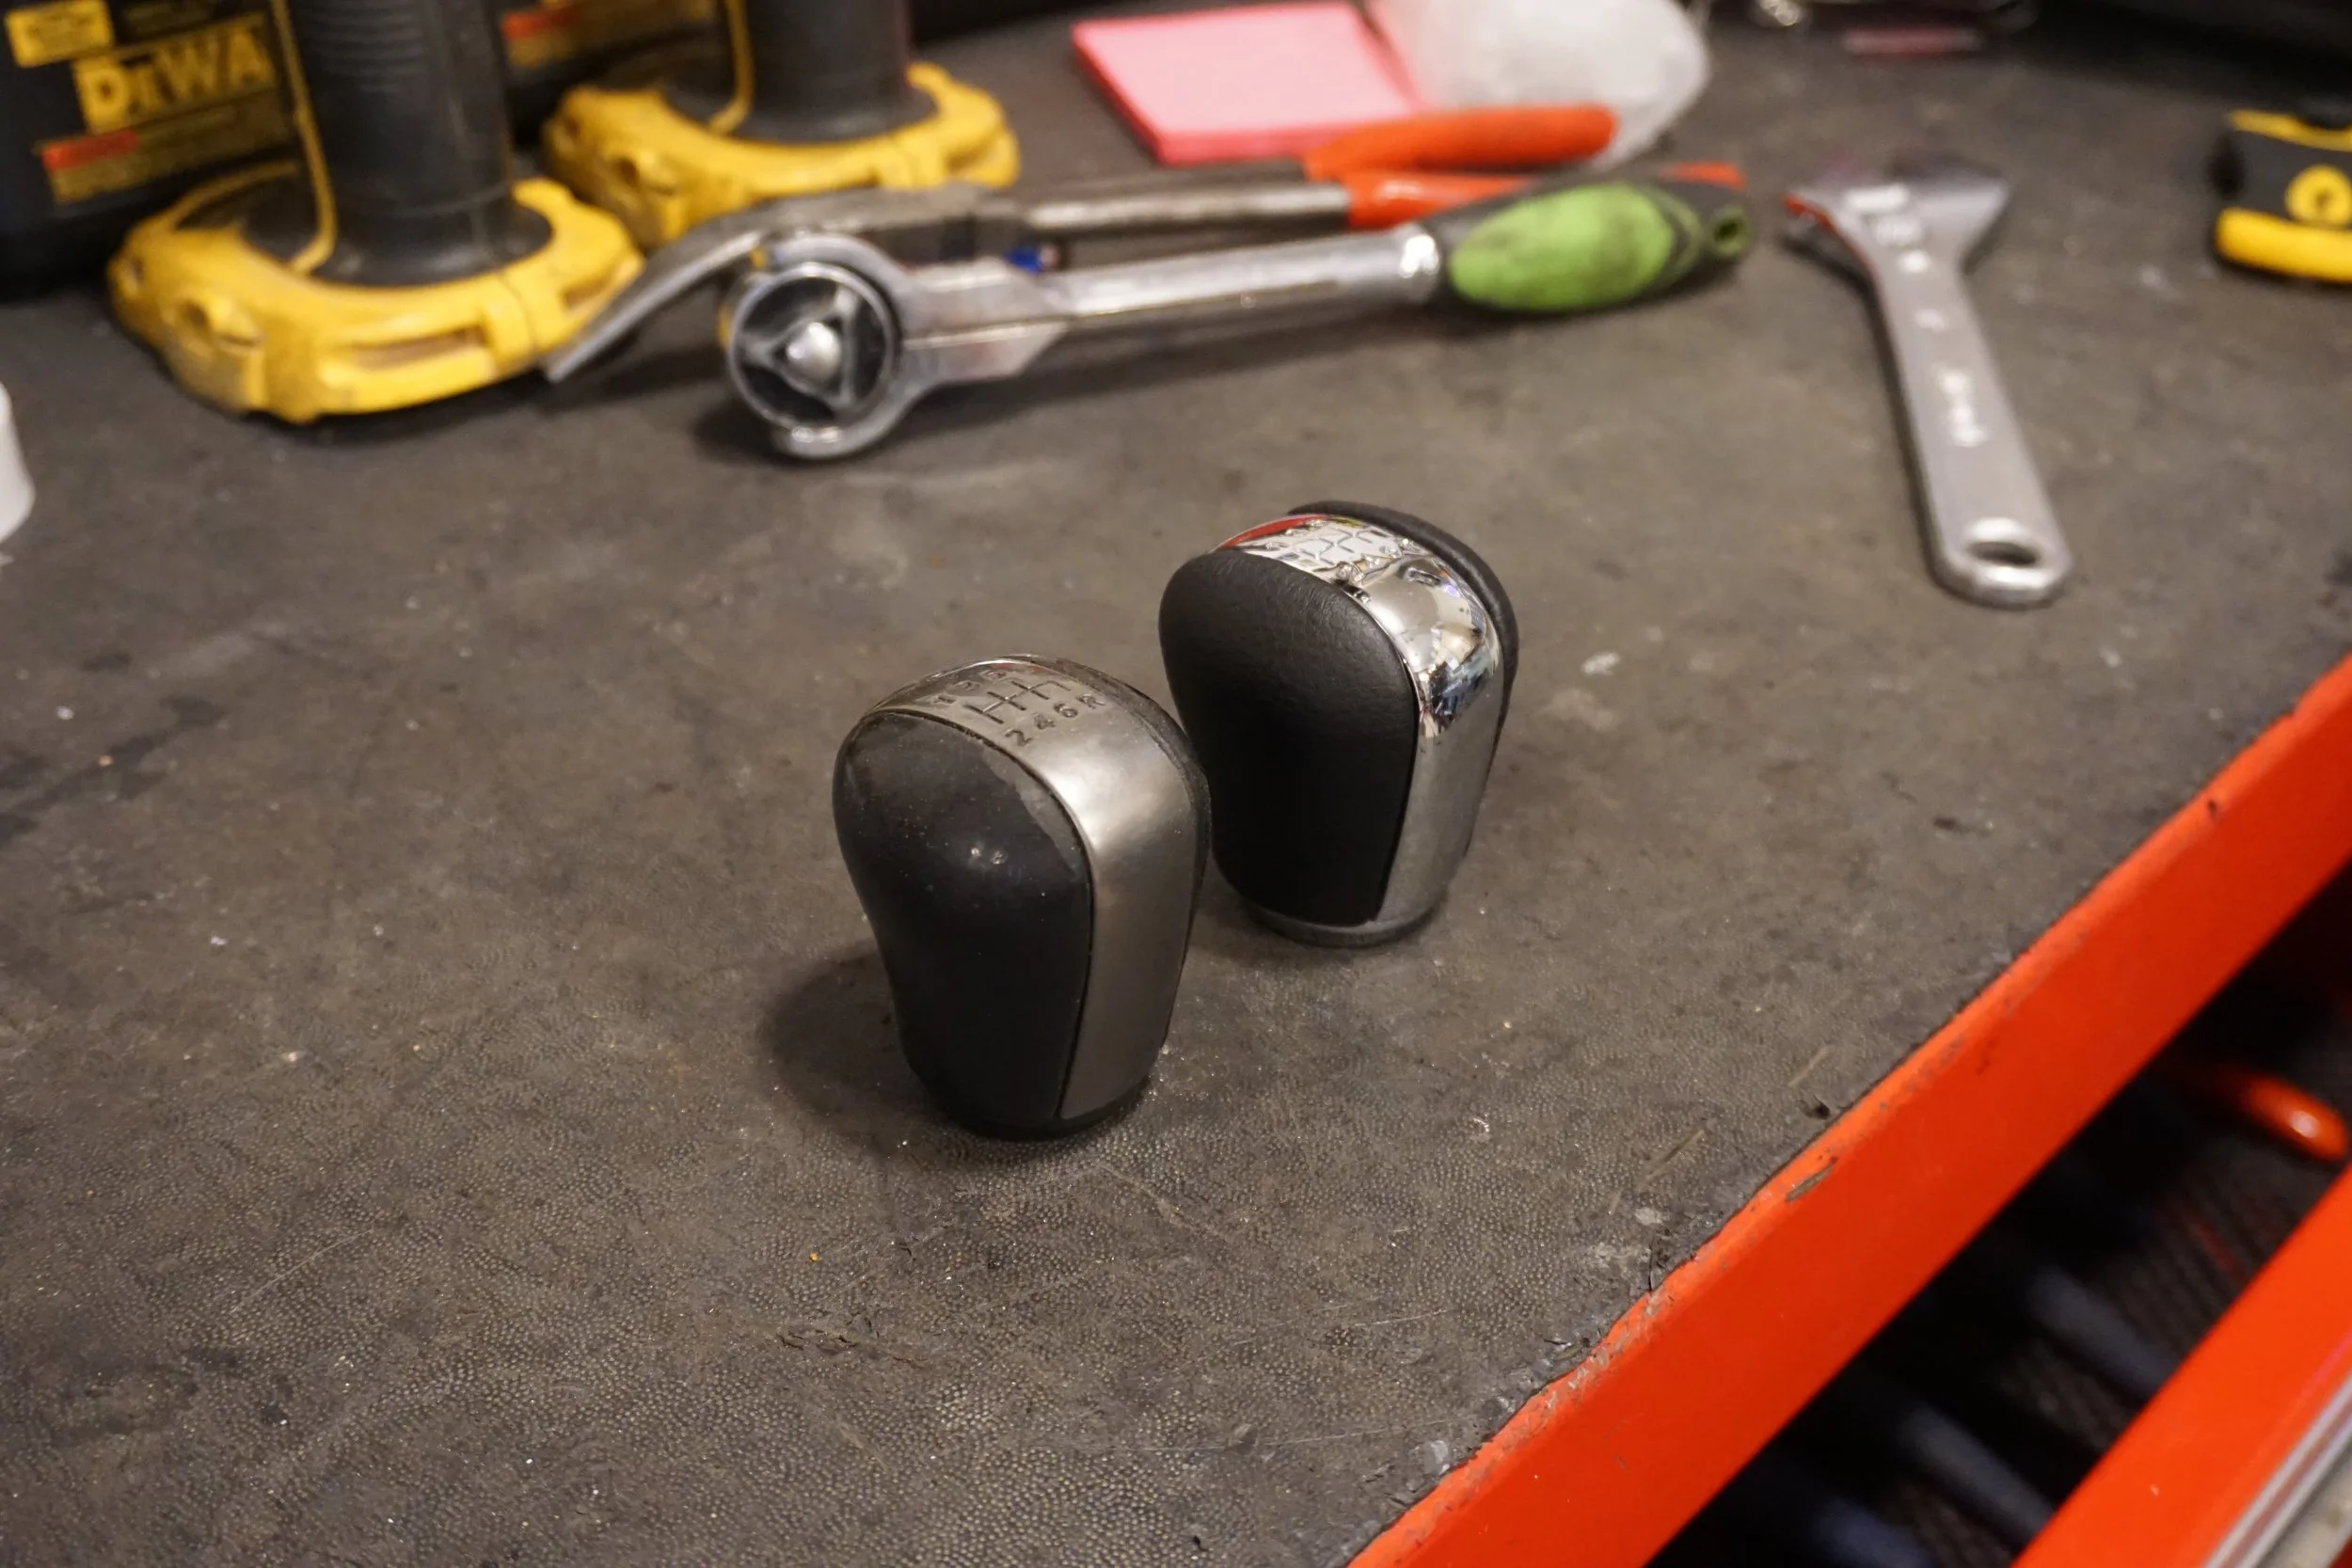
I also bought a weighted shift **** to try out, since the OEM one is so light (around 60 grams). I bought a billet **** (~180 grams) for an Evo or WRX since it was designed to work with their reverse lockout mechanism, only to find it was nowhere close for the Maxima's mechanism. This led to much hogging out and trimming until the mechanism would work properly. In the end, I don't know if there's much improvement in shift feel, and I can't say that I love the shape of it; I think it's just a little too big. Thankfully it wasn't very expensive.
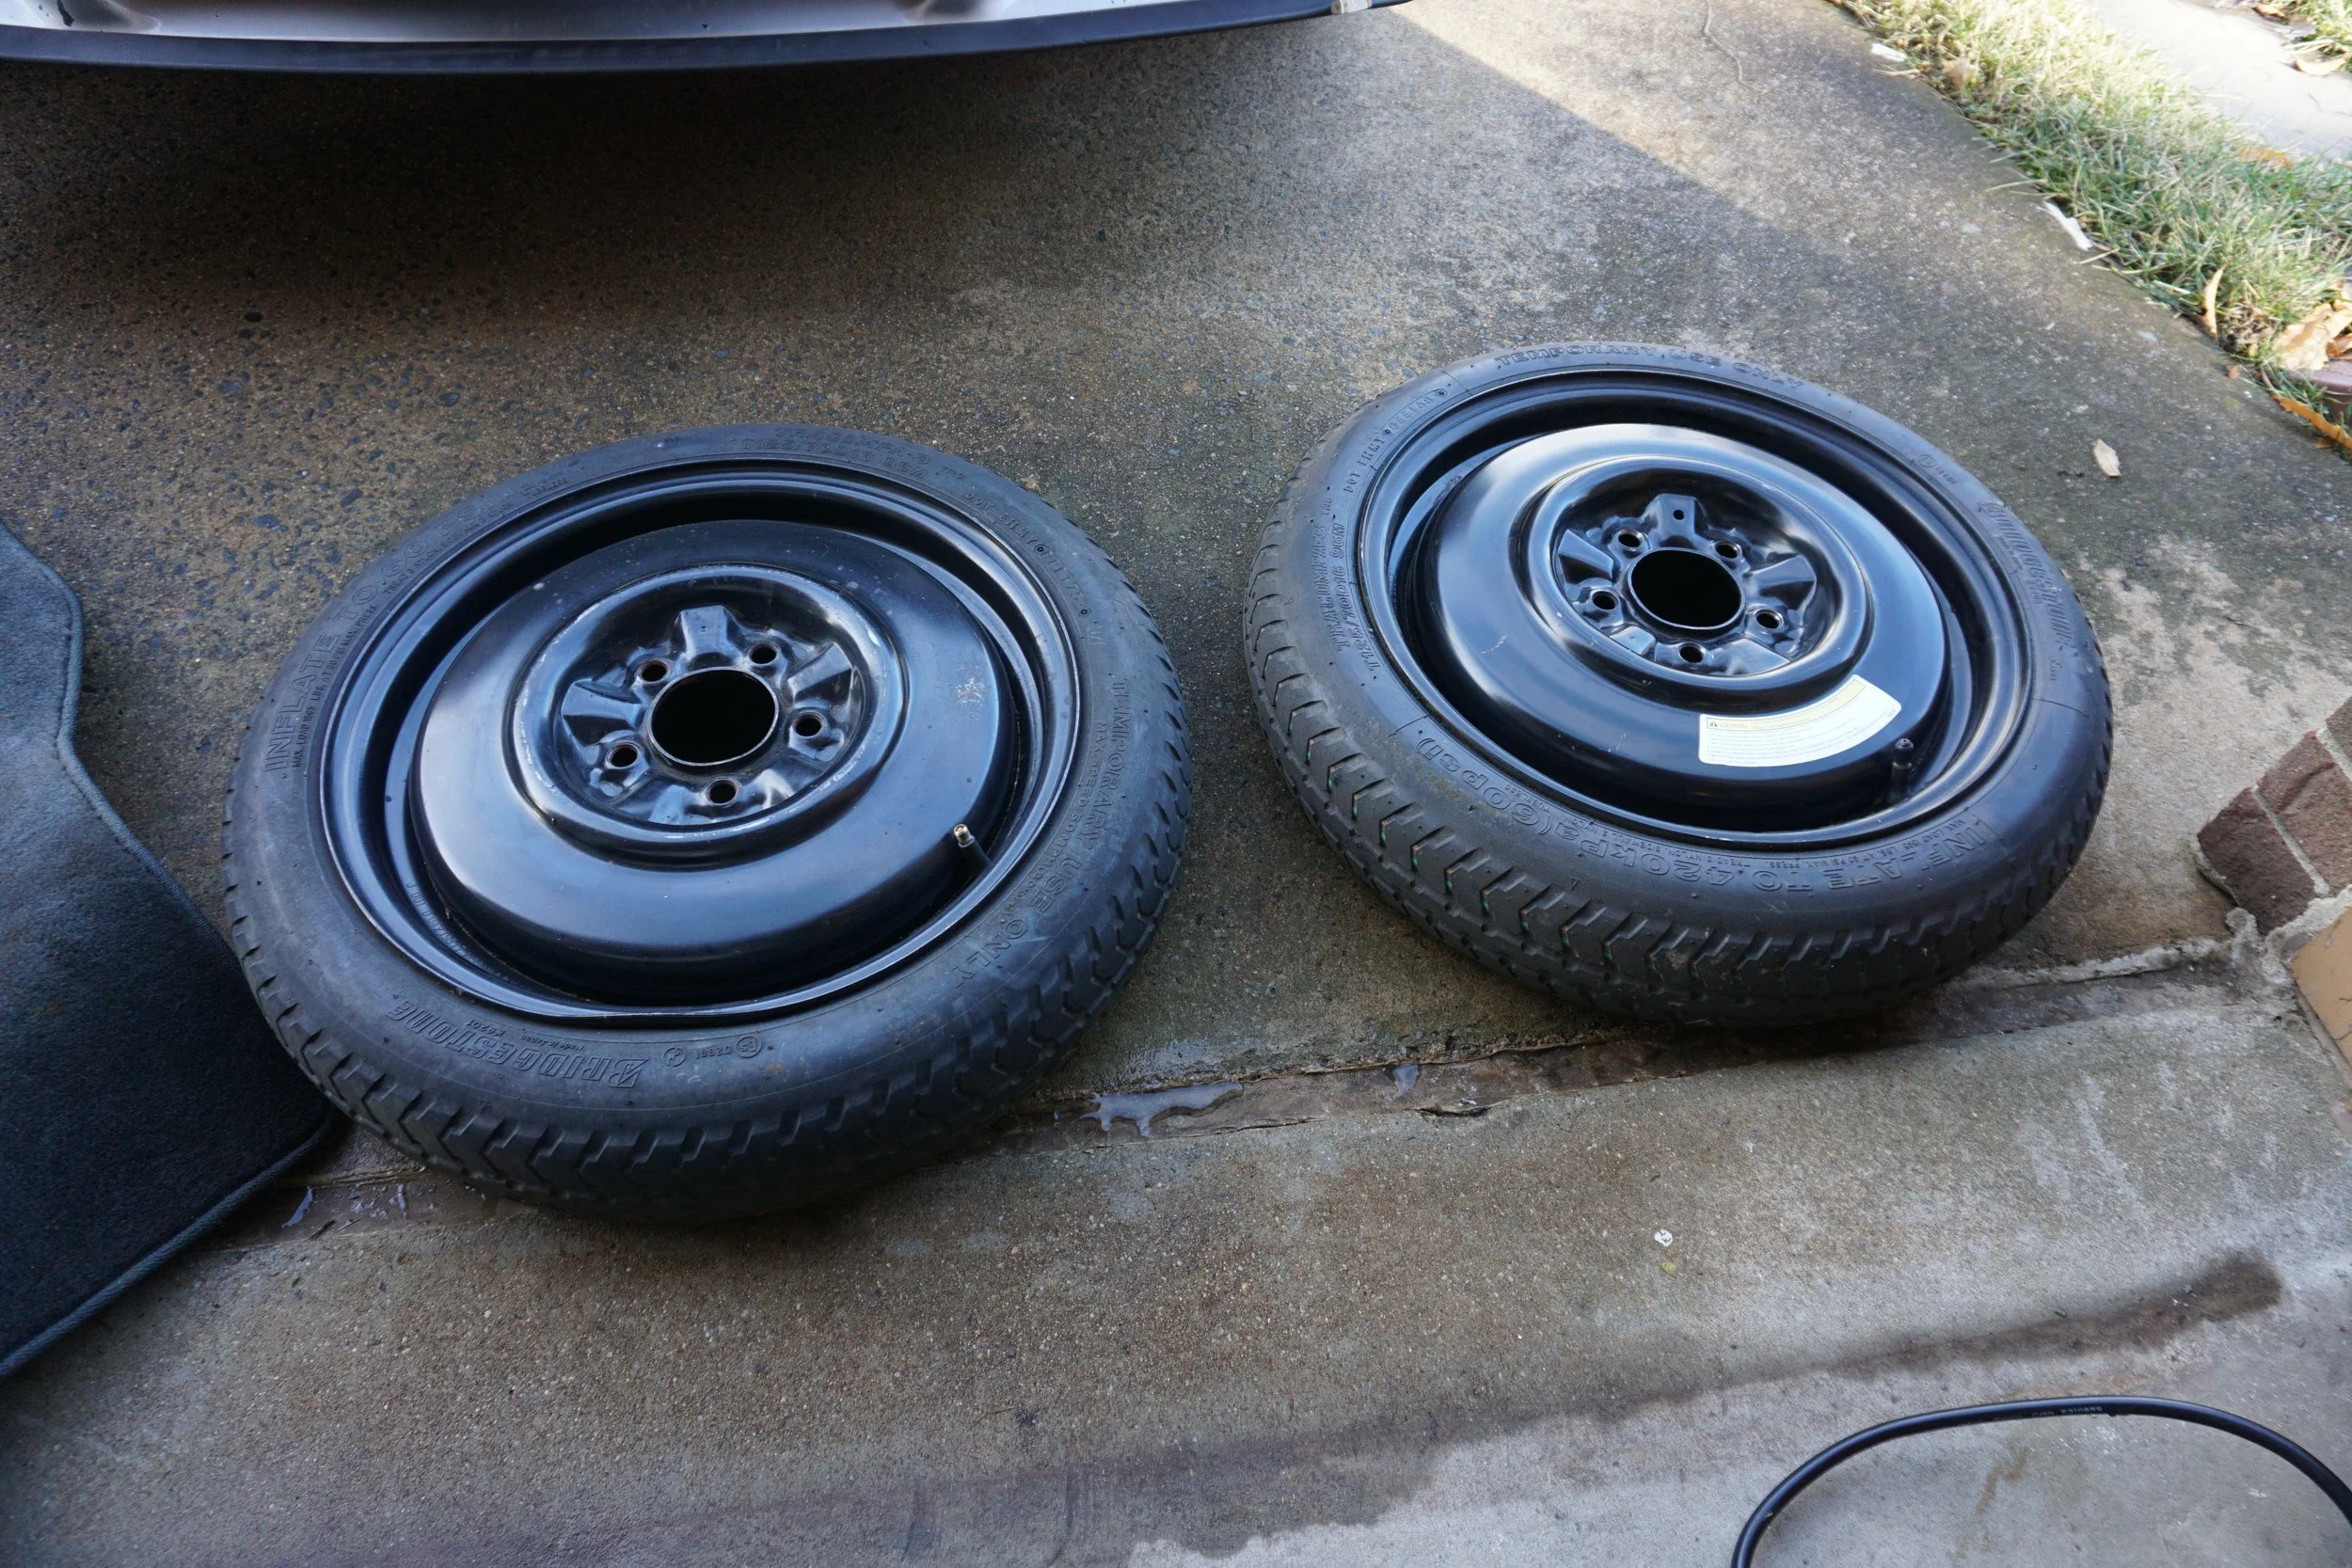
Last year I picked up a spare tire at the junkyard that looked like it had never been used as mine had seen better days (tread is worn and it has a bend in it). I knew it wouldn't fit over my front BBK, but I thought it would at least fit over the rears. Well, not so much. Apparently the rear BBK is just large enough to make the caliper touch the wheel. So I guess I'll be on the lookout for a spare tire off a G35/350z/FX and hope that it will be big enough.
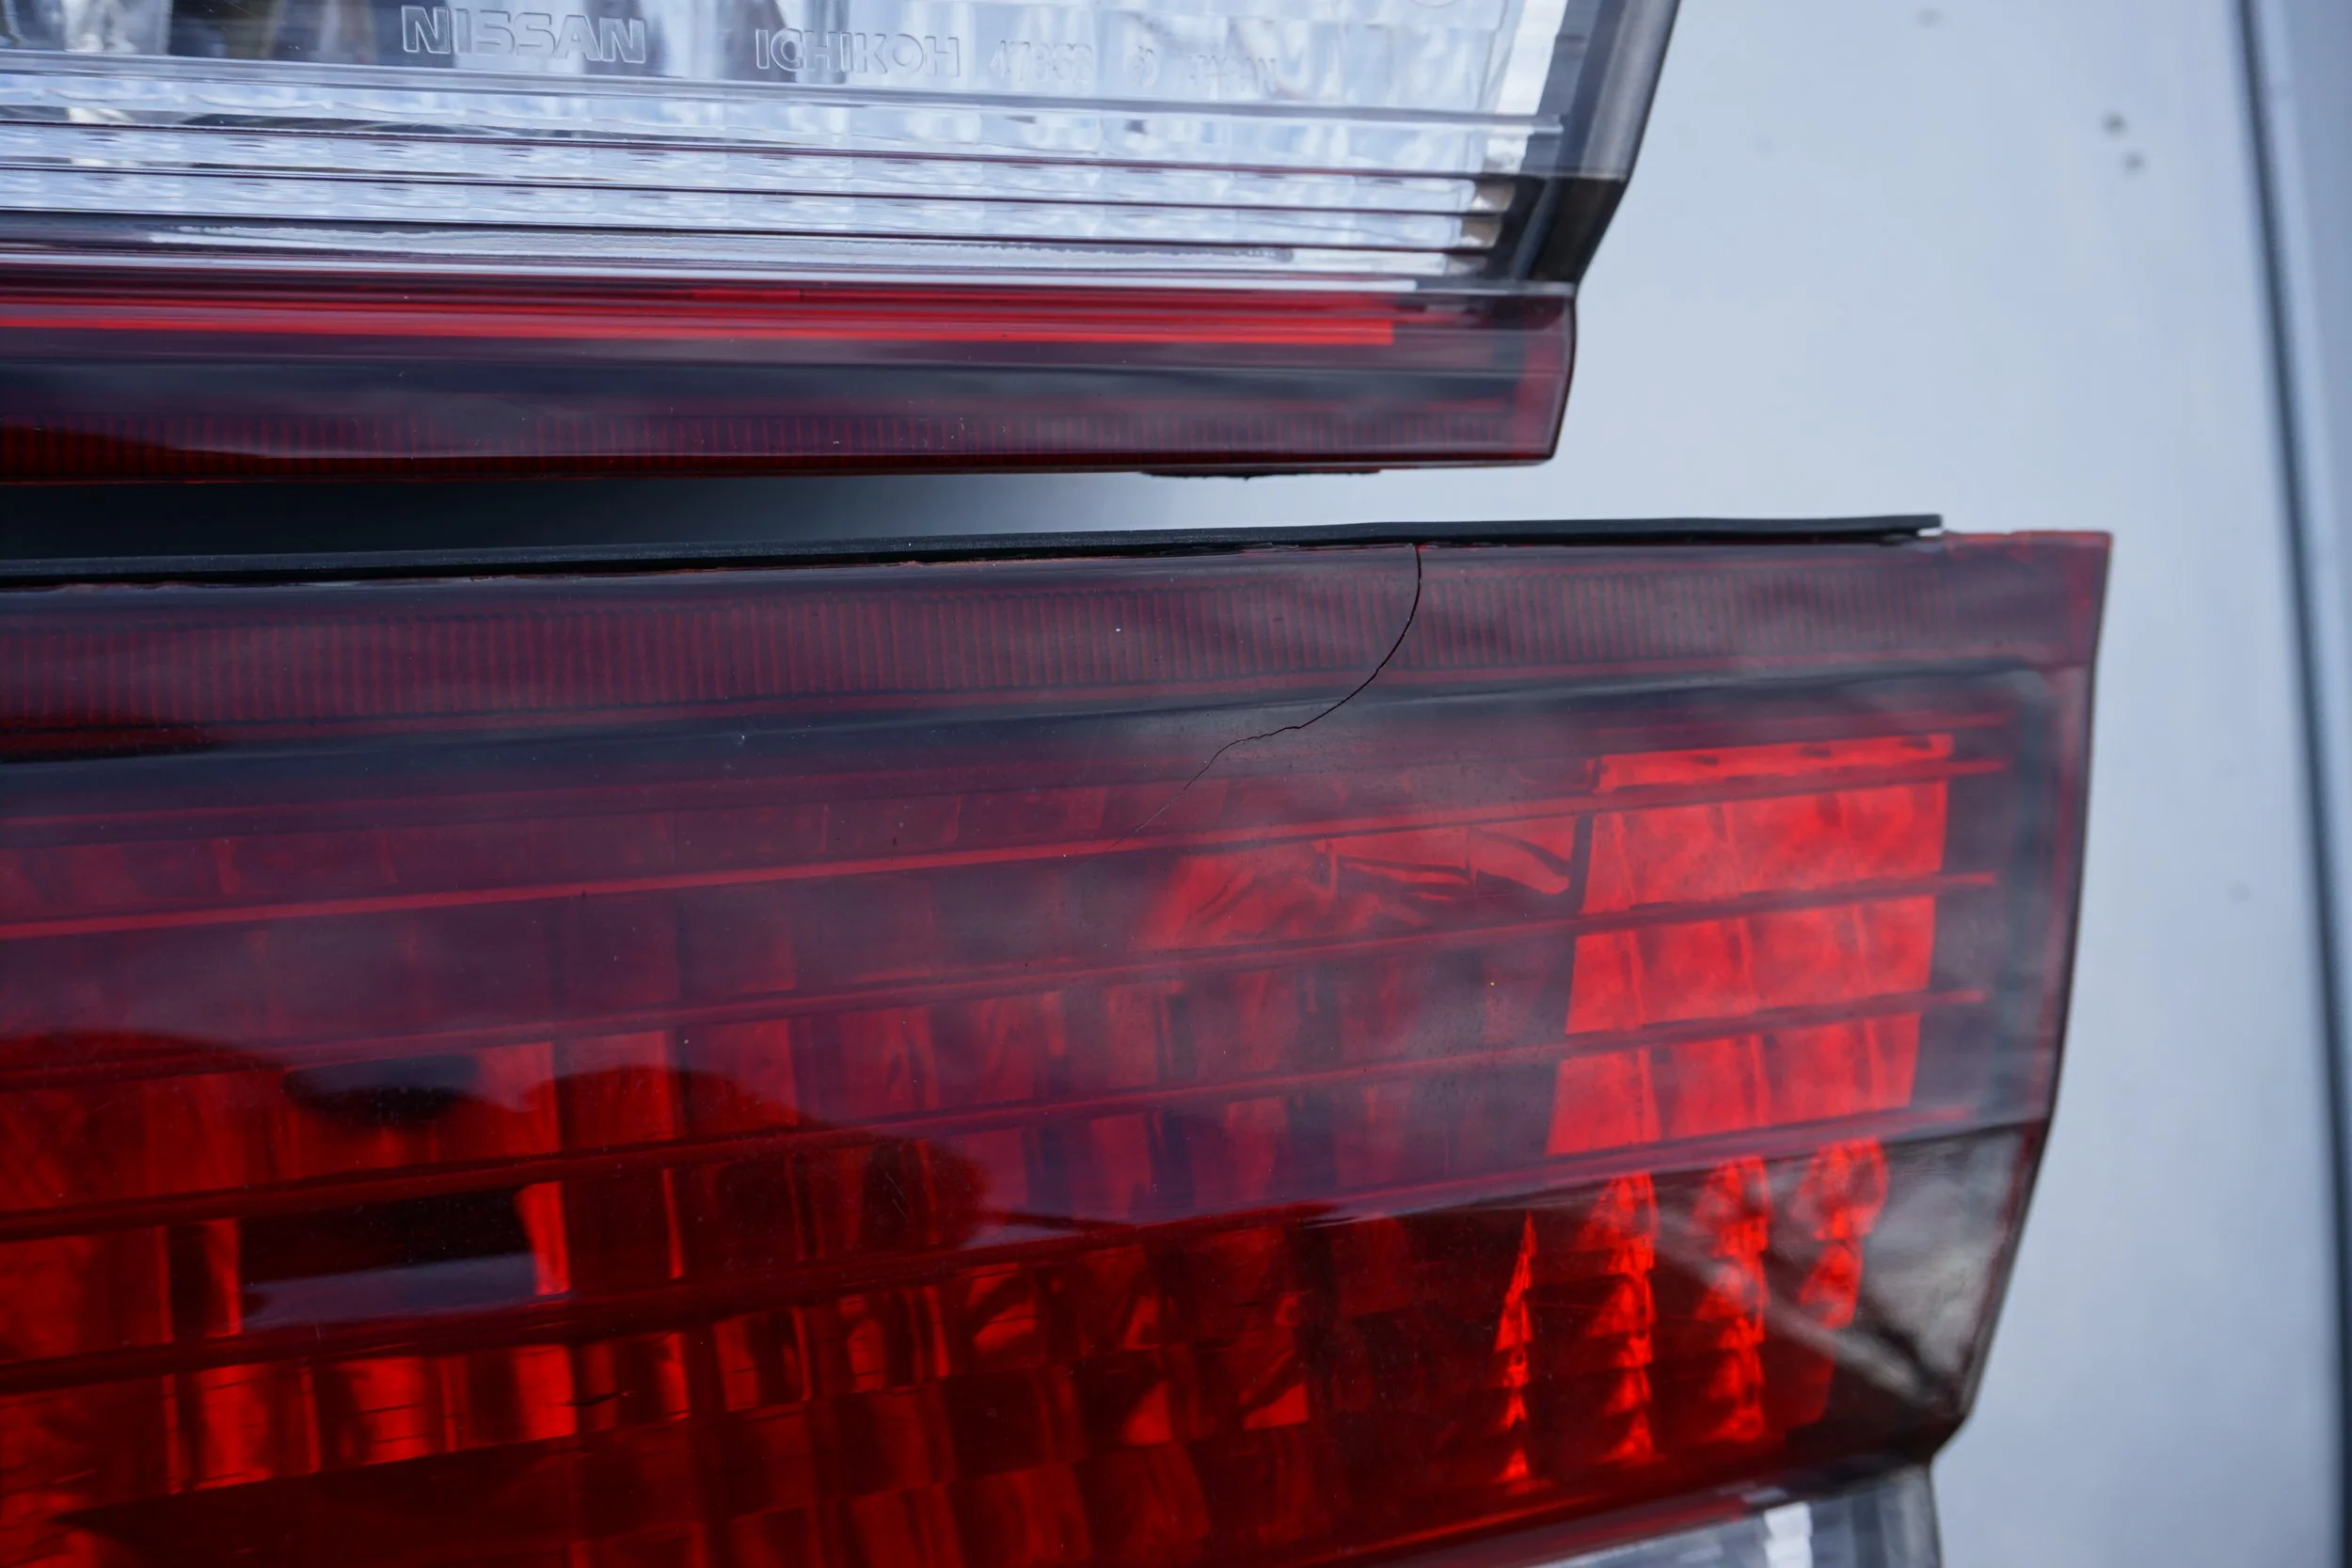
I also replaced my center tail light as the one on my car had a variety of cracks forming. Finding one the the junkyard that wasn't damaged and didn't have the top splitting apart (a very common problem that allows water to get it) took a while, but I finally got one.
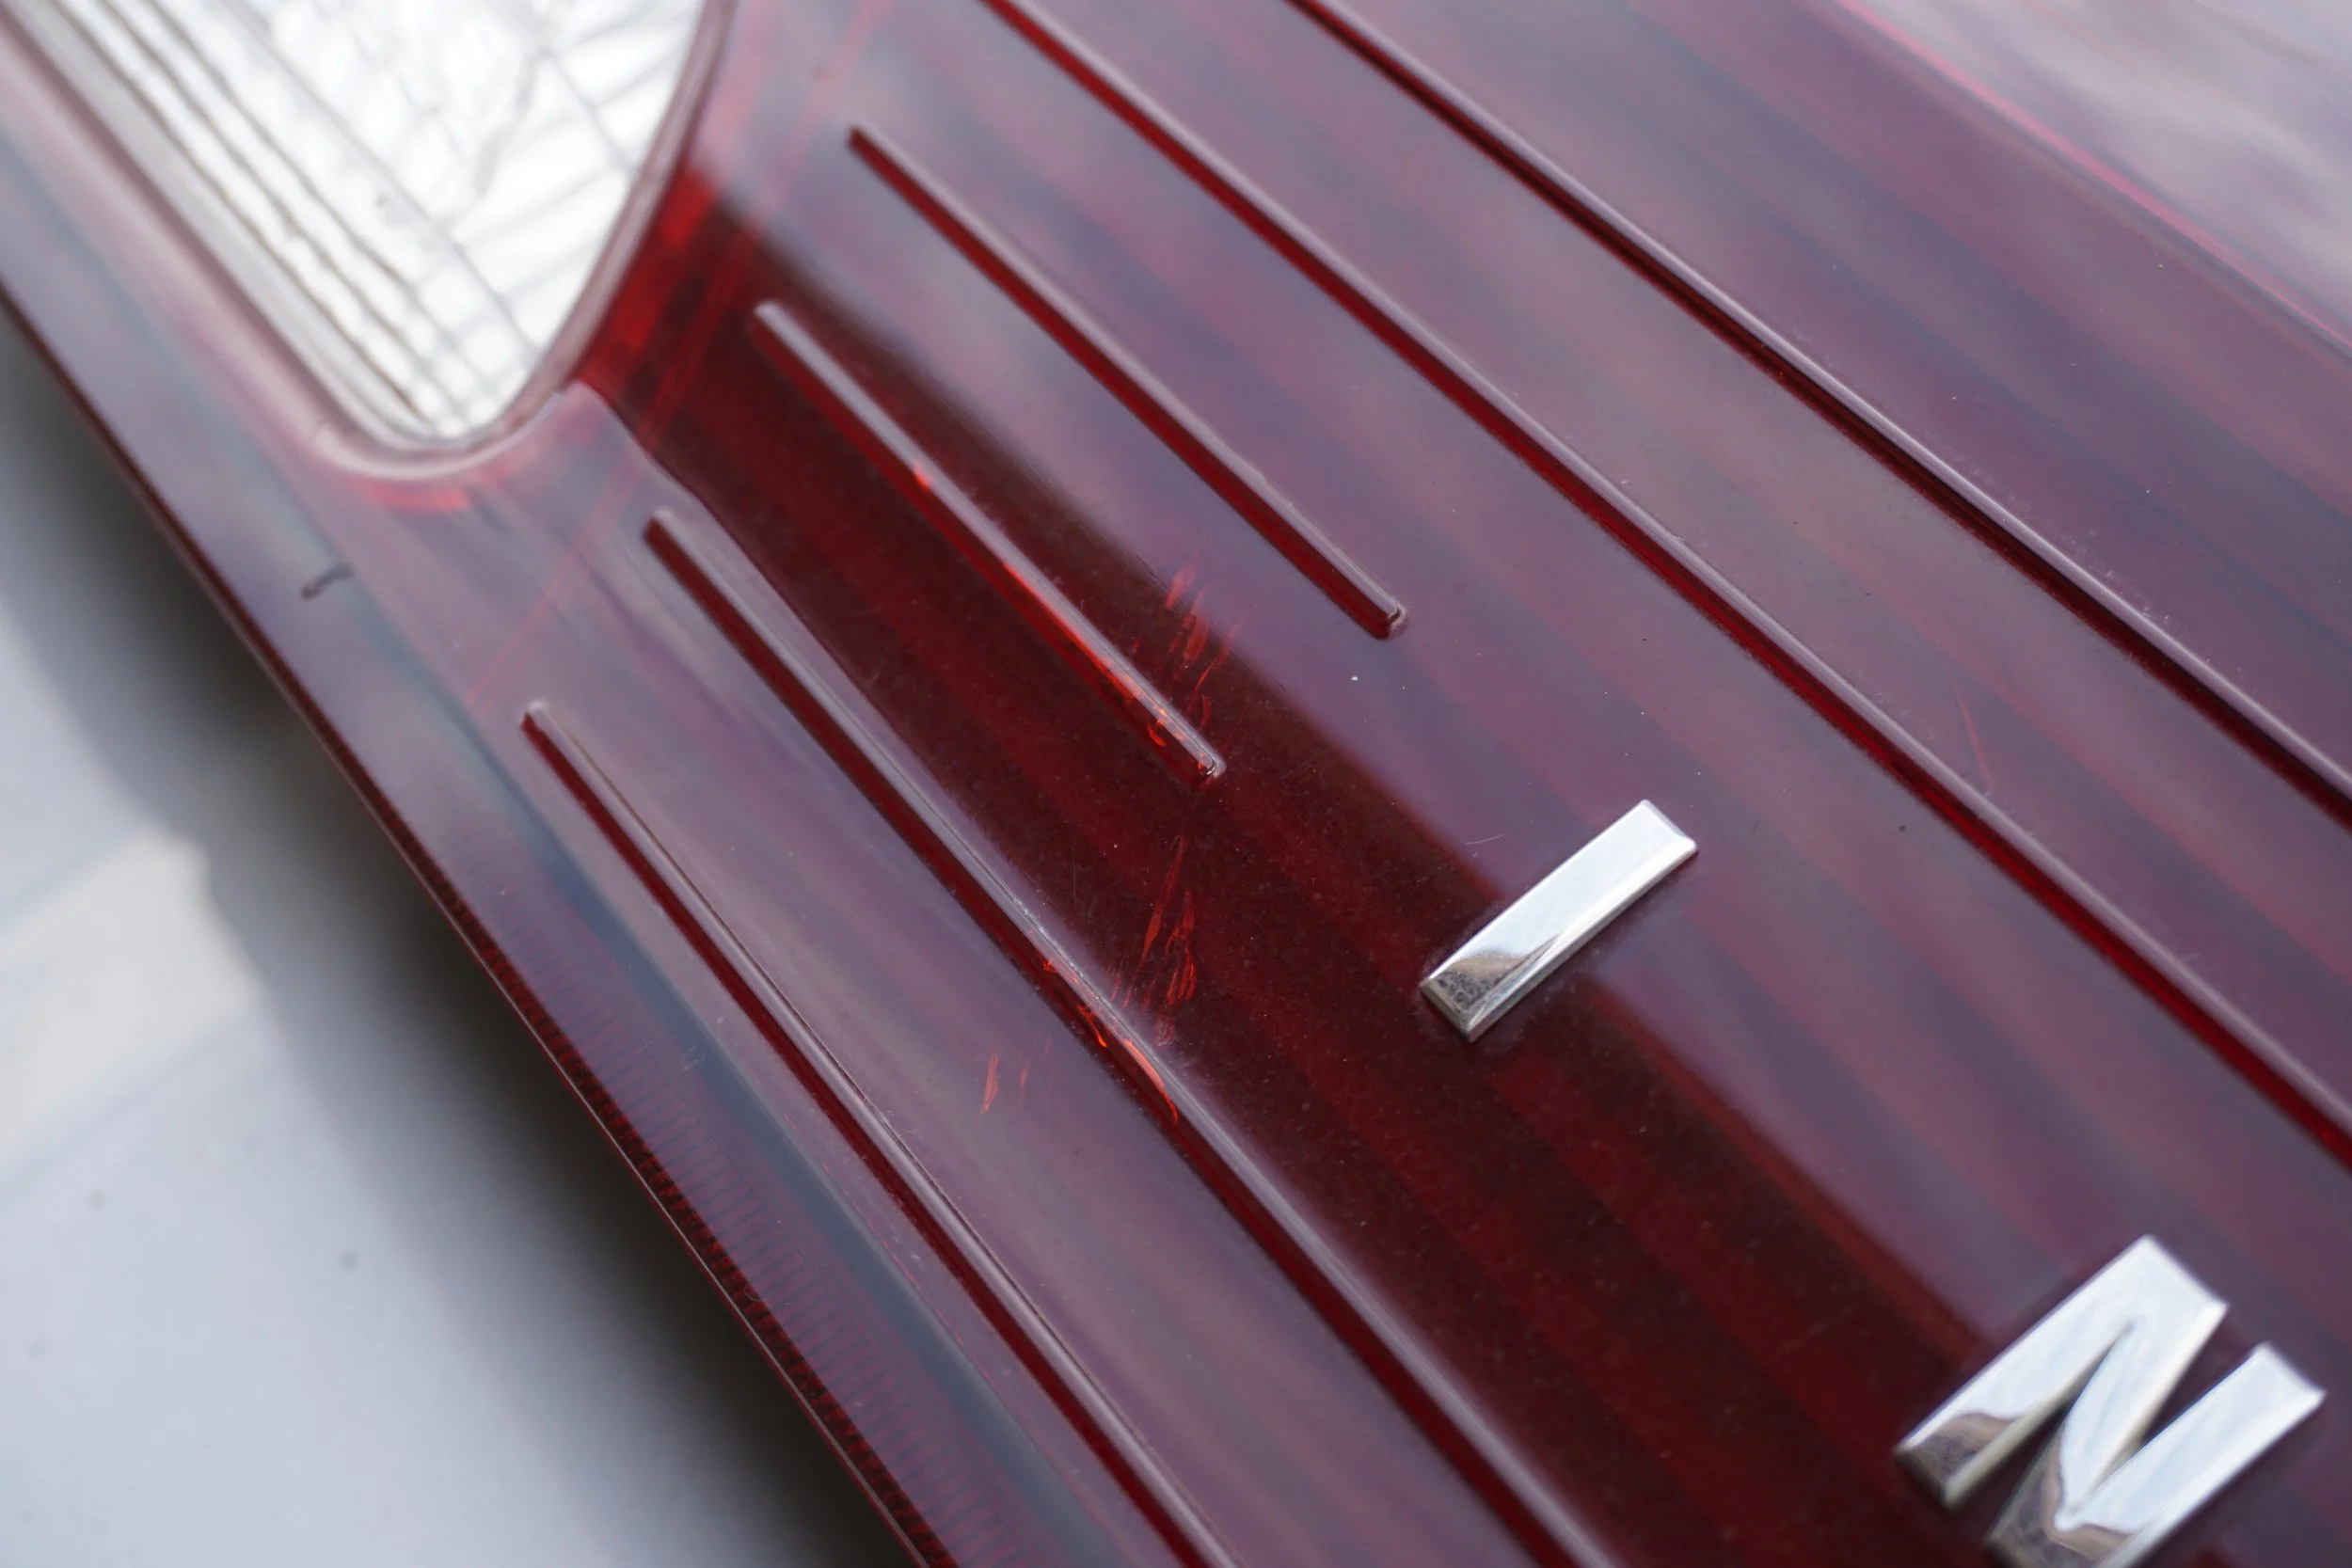
This new one is mint!
I was getting some noises from the back of my car, so I went poking around. Turns out one of the bolts for the panhard rod was loose and the joints needed to be lubed, so with that fixed the main noise was resolved. But I noticed that part of one of the exhaust hangers was awfully close to the body of the muffler, so I trimmed the lip off to give it a little more room to move.

A few weeks ago I went to work and noticed that my steering wheel was off to the left when going straight. The car tracked straight, just the wheel was off, so I ignored it until I had the car on the lift again. Well, I think I found the culprit: a camber bolt had shifted:
I've been waiting to install my new coilovers until a set of trick camber/caster plates were made, but the company is dragging their feet, so I may just need to adapt my current BC plates and set them up again as regular camber plates instead of my current caster plate/camber bolt setup. I hate not being able to unbolt the coilover without messing up my alignment!
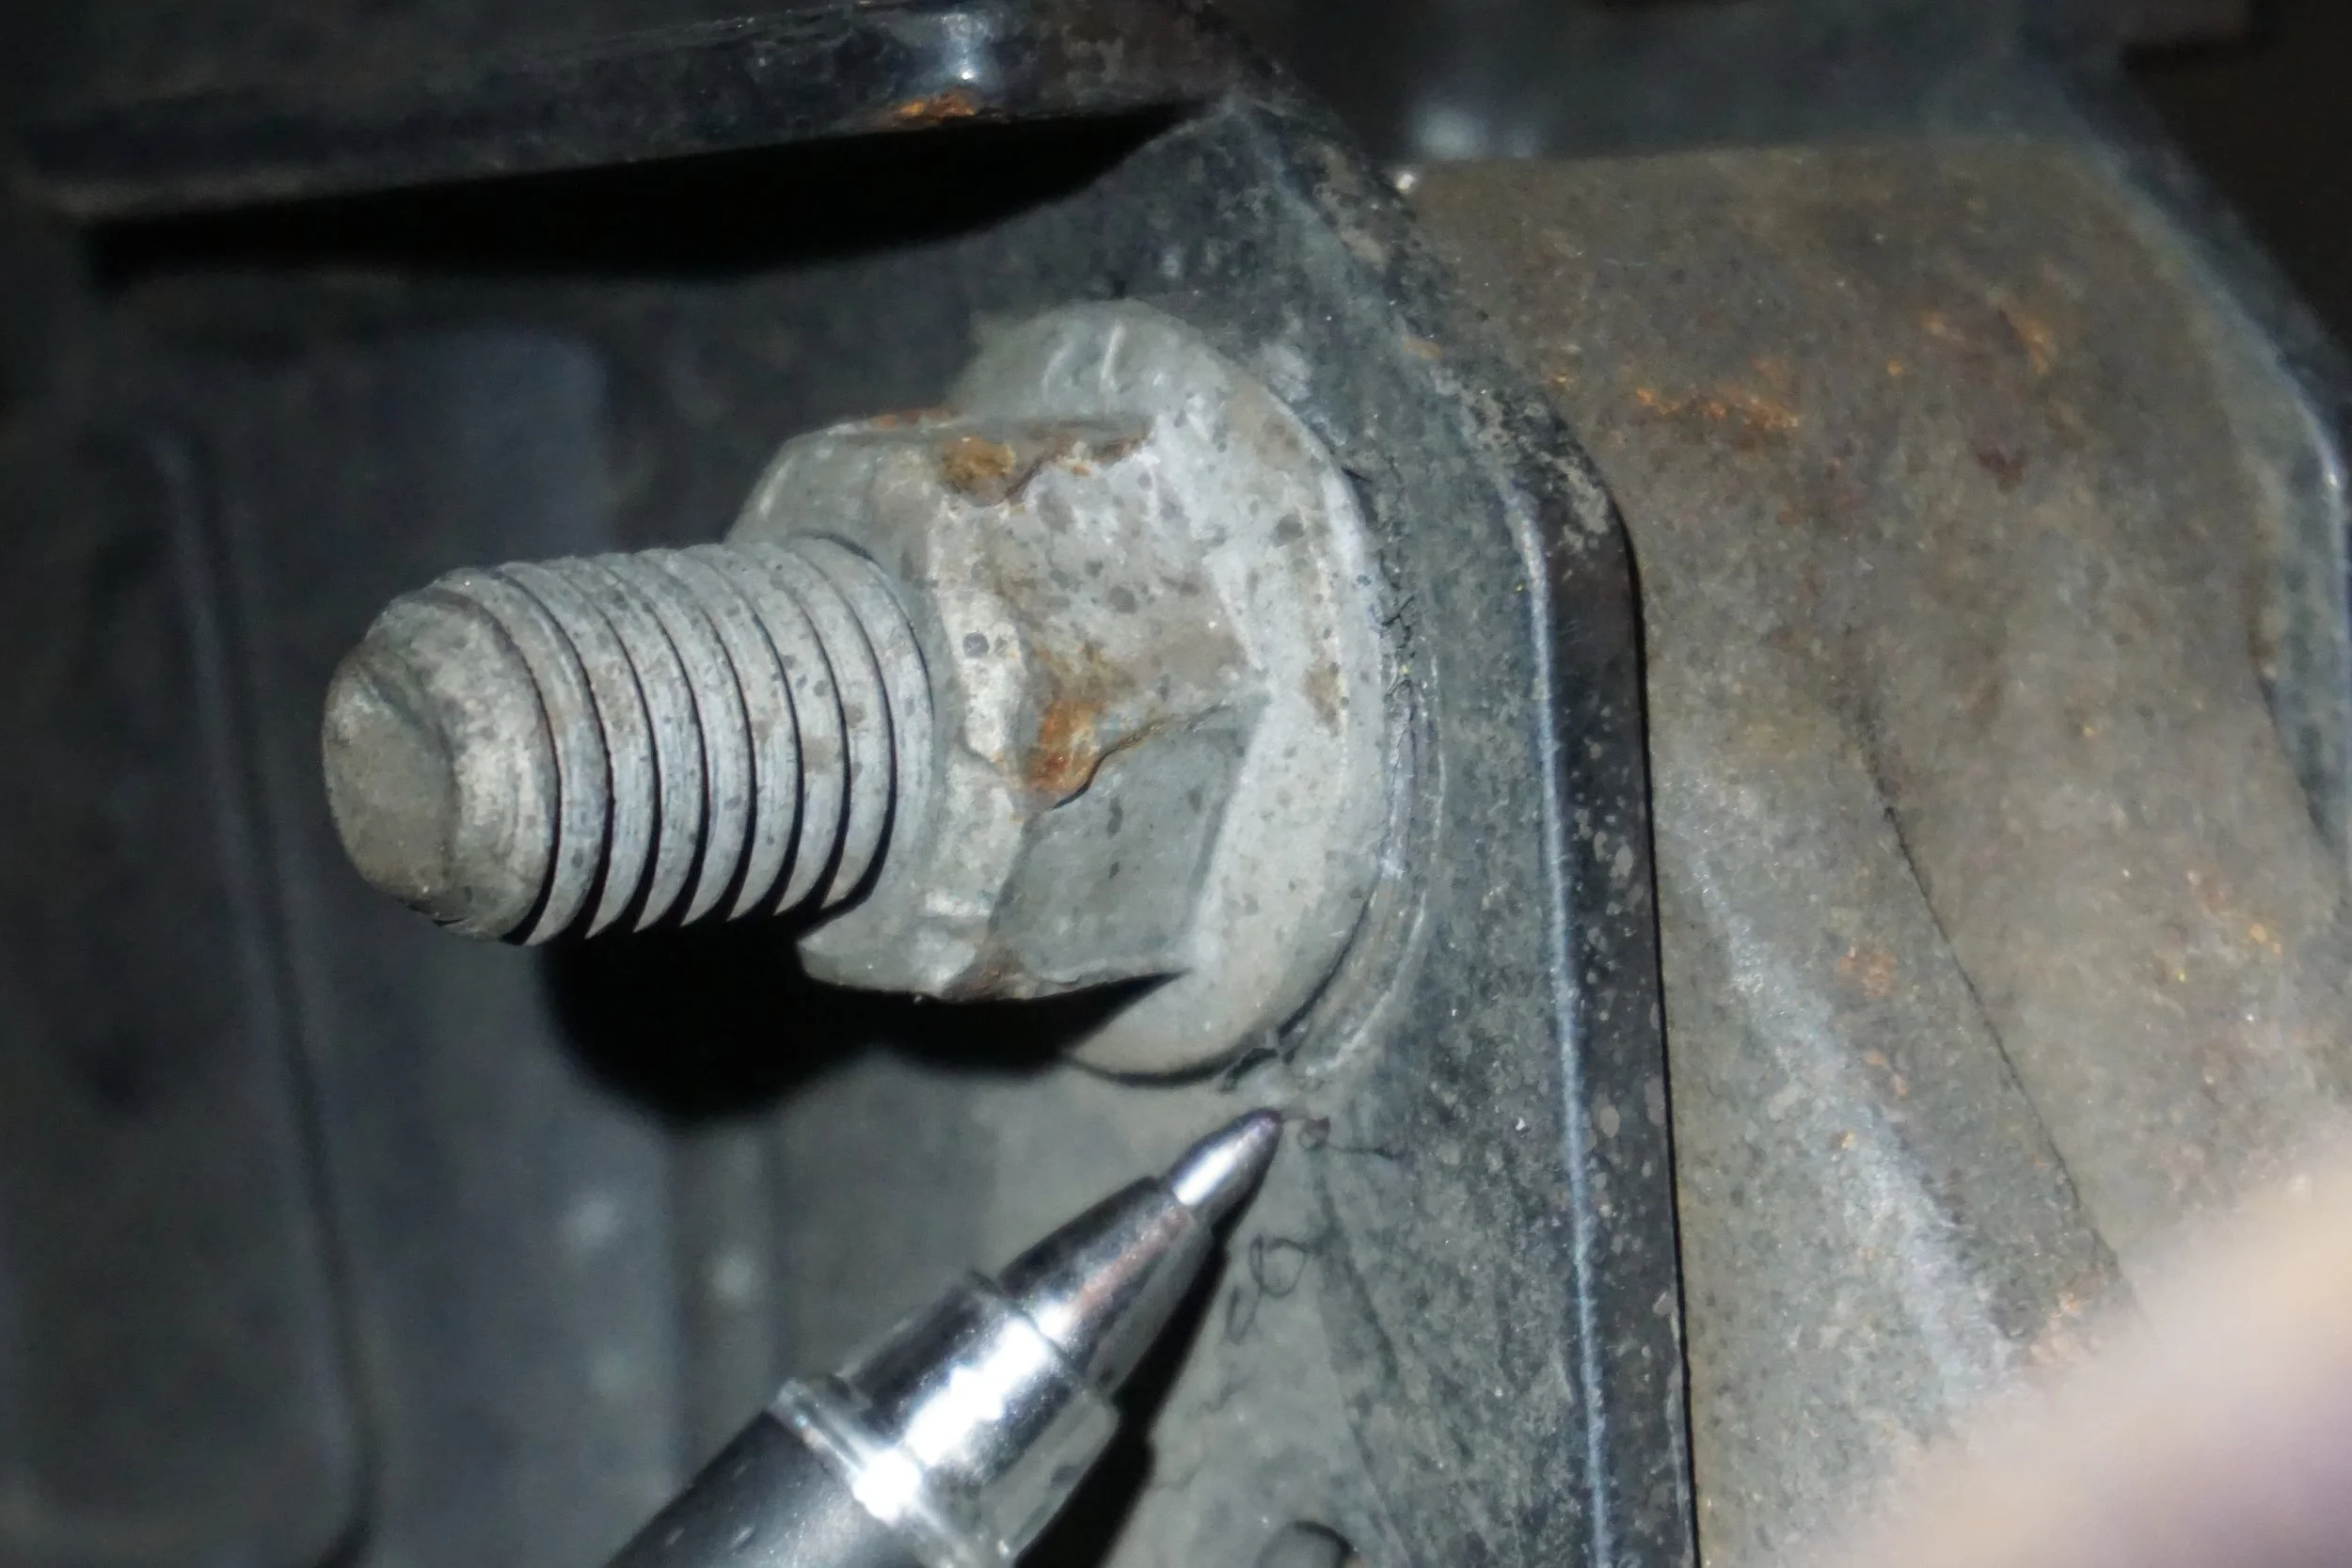
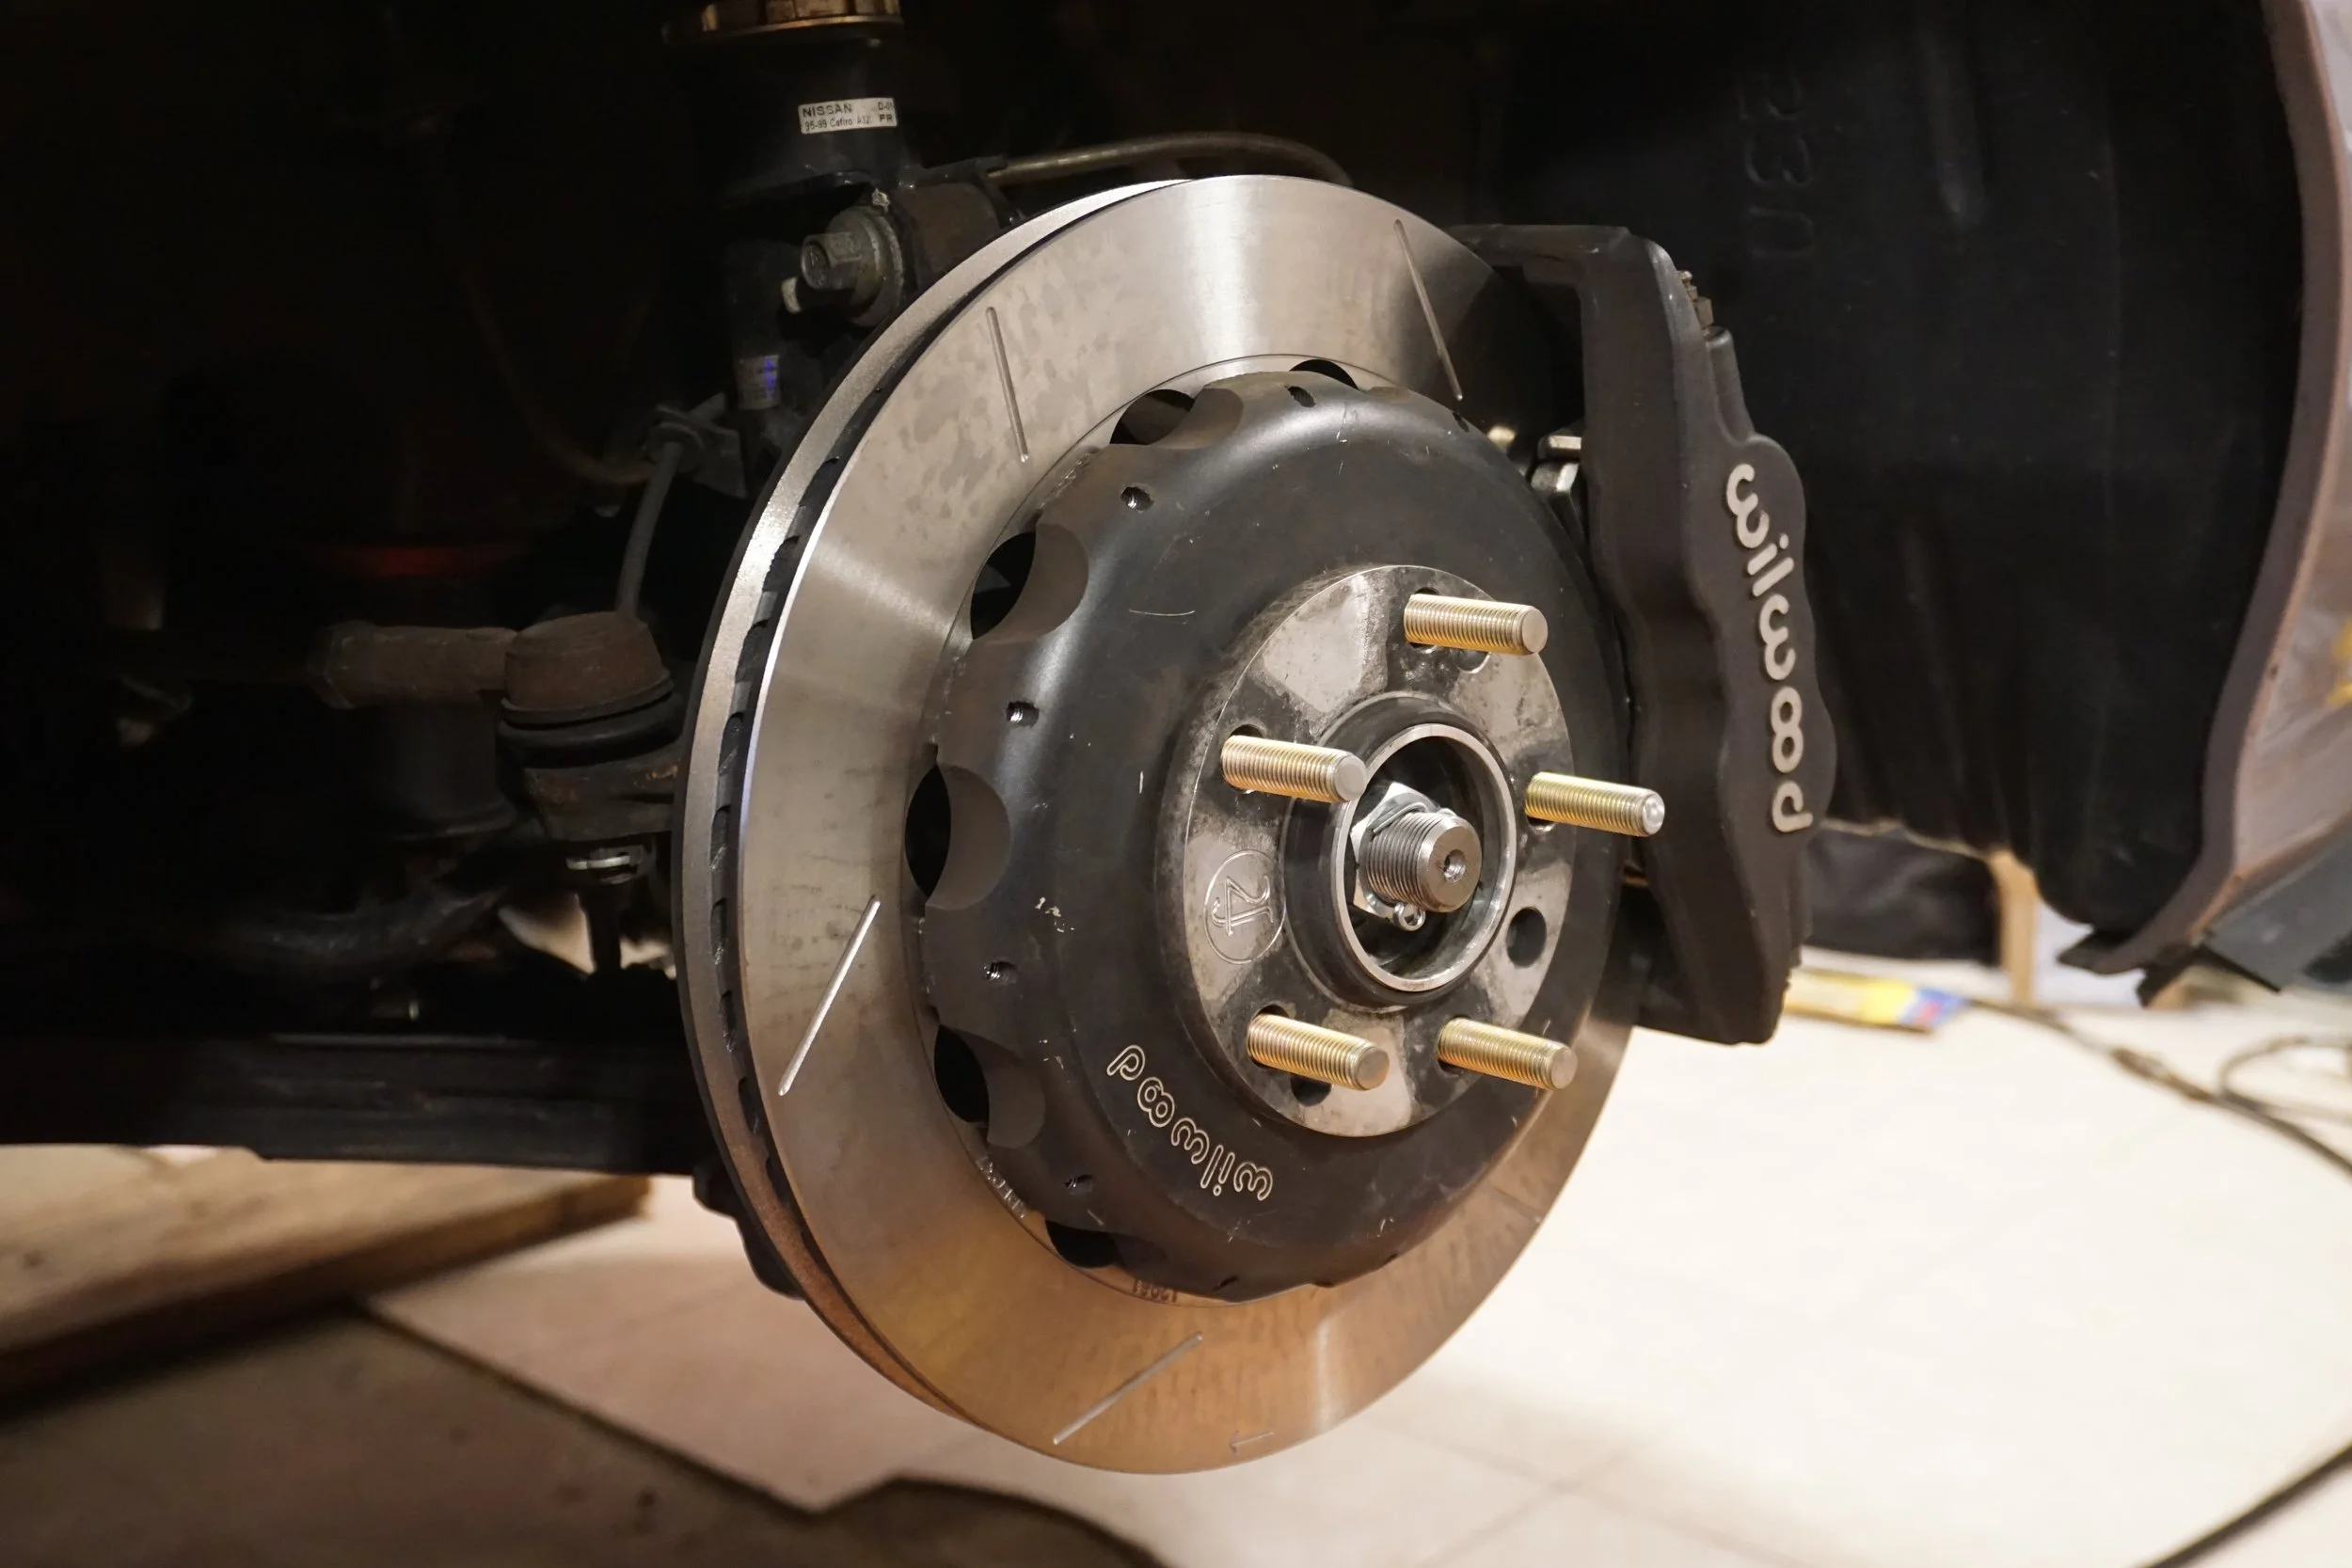
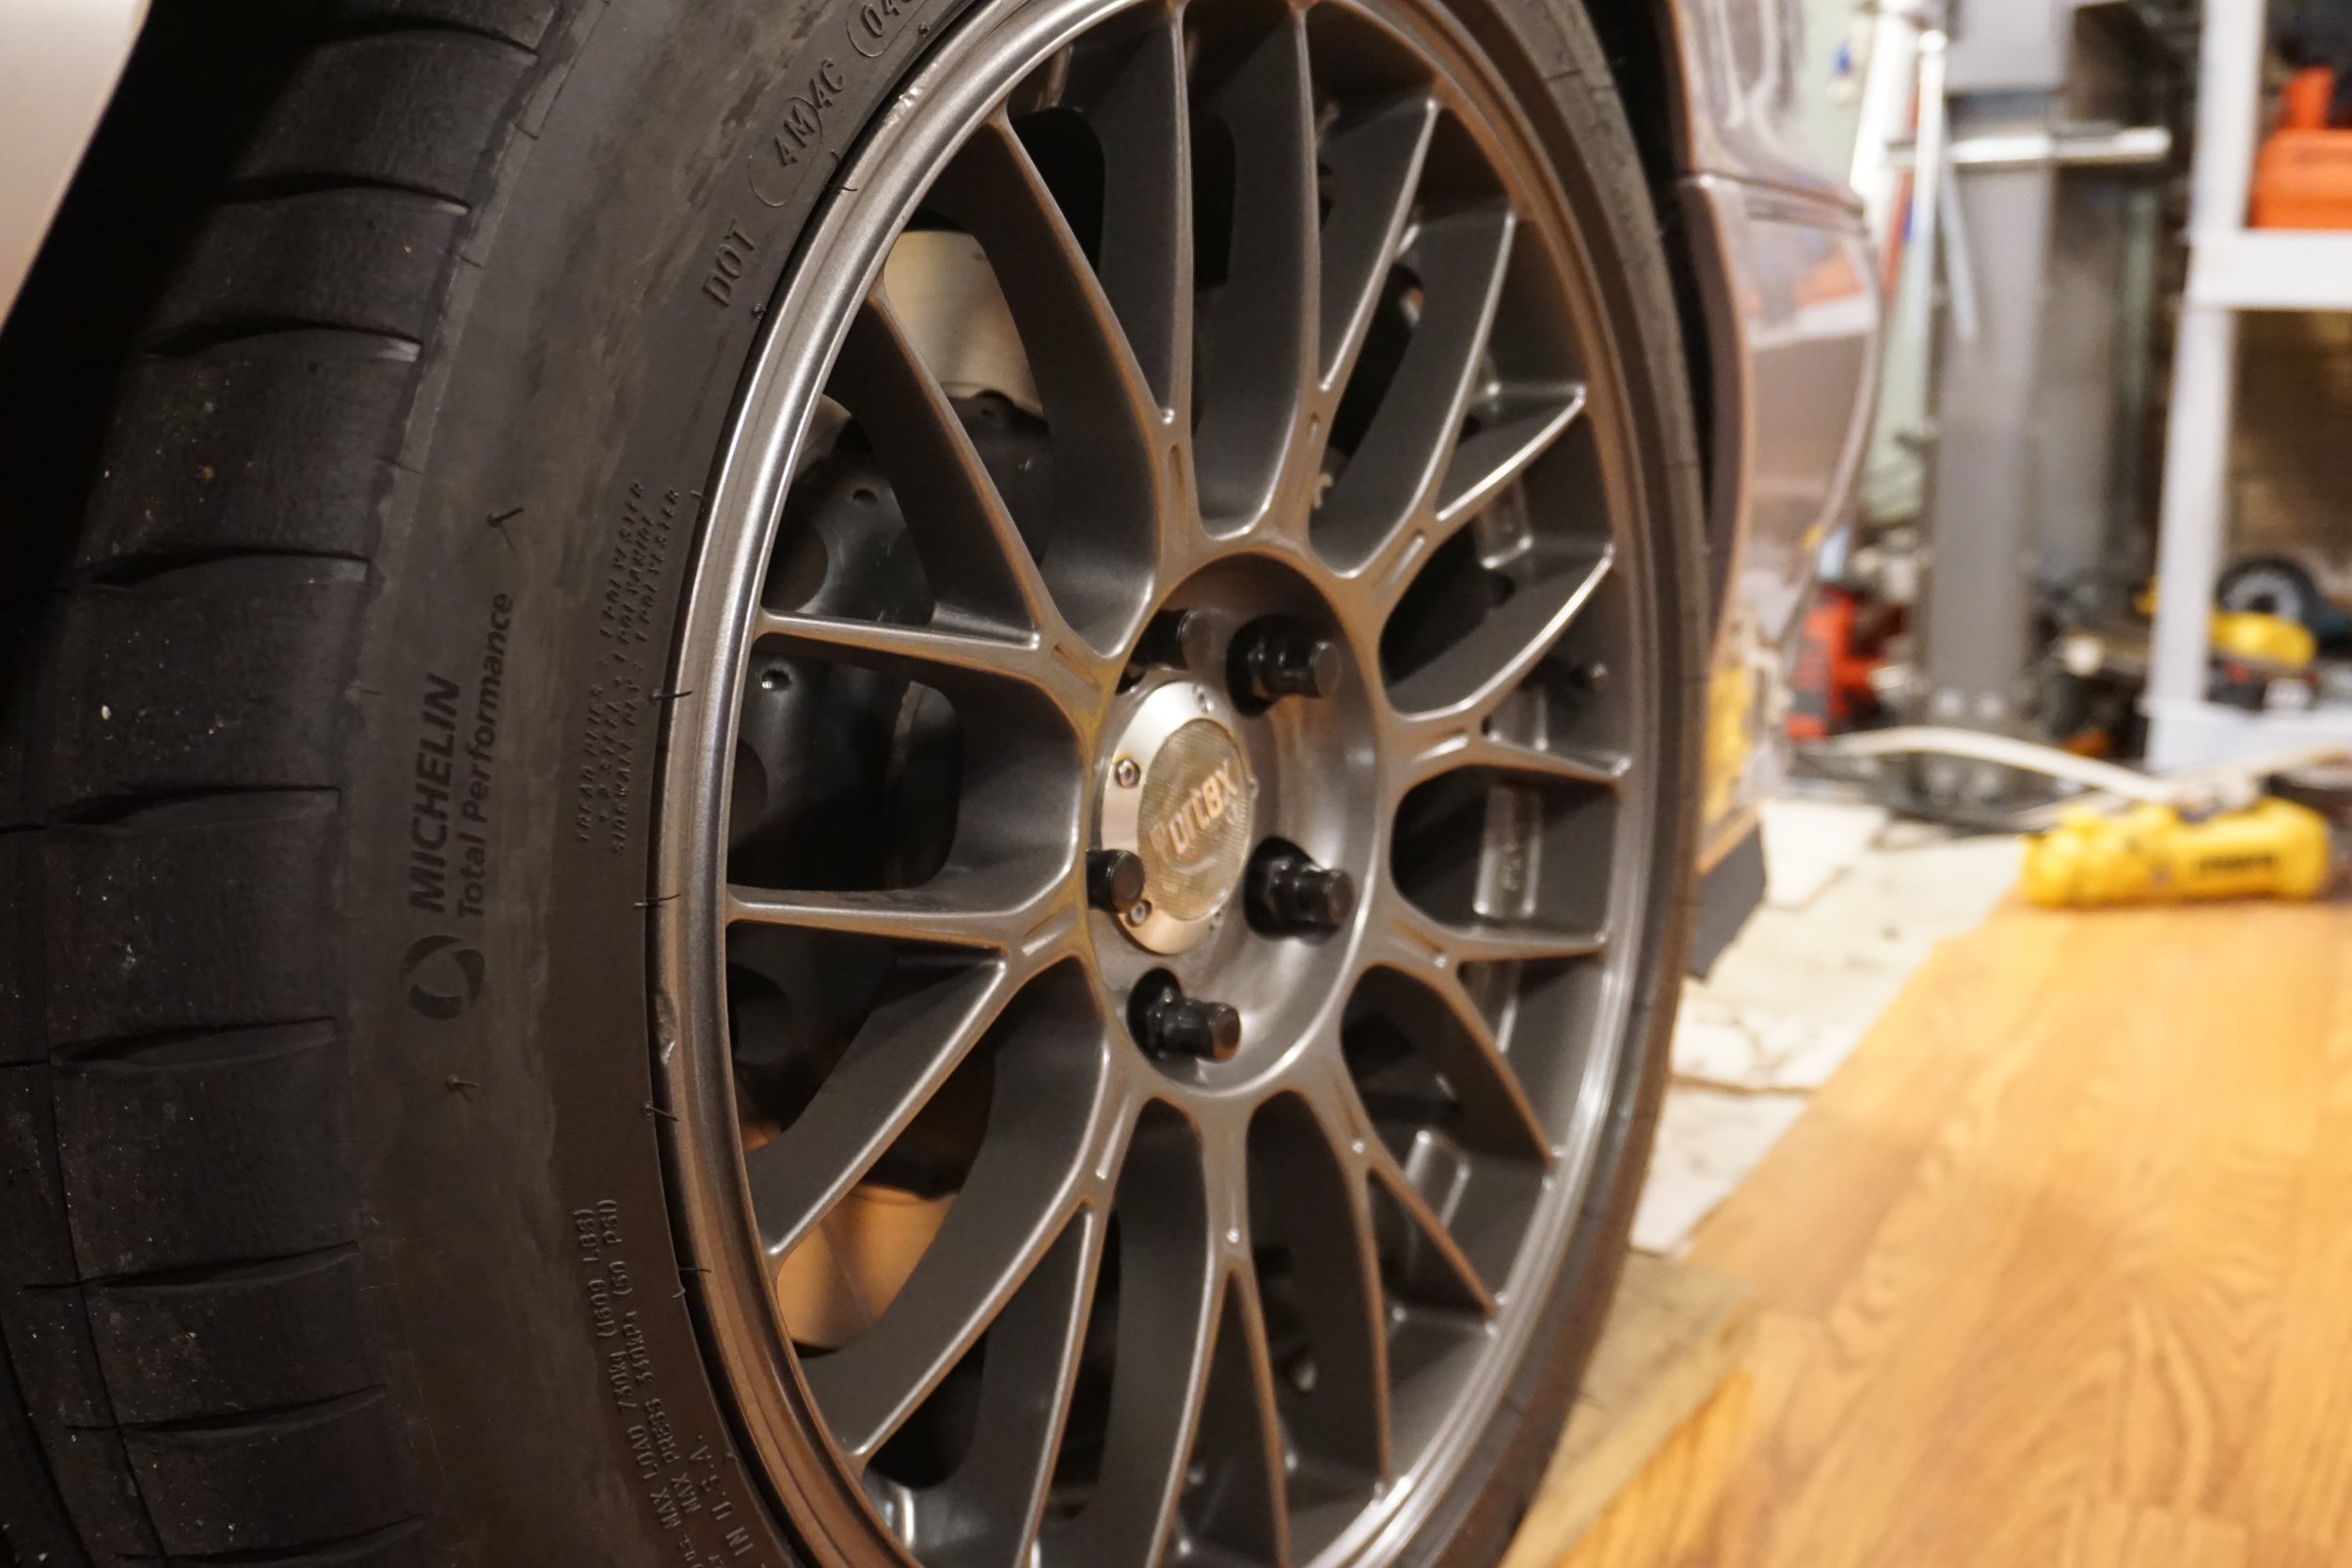
And after many months of waiting for these things to come back in stock, I was finally able to replace my old ARP wheel studs with new ones. I hated how rusty they've become, so my old ones will go on the wife's FX so I can put some spacers on it. I also wanted to make the move to closed end lug nuts to protect the finish of the studs, and finding a set that was long enough and of good quality took some trial and error. Even then, these things were just barely long enough, so to be sure they could torque down properly, I cut off the nub at the end of the new studs to give them a little more room. With the wheel stud installer tool I was able to remove the old studs and install all the new ones in like 20 minutes, it was super easy!
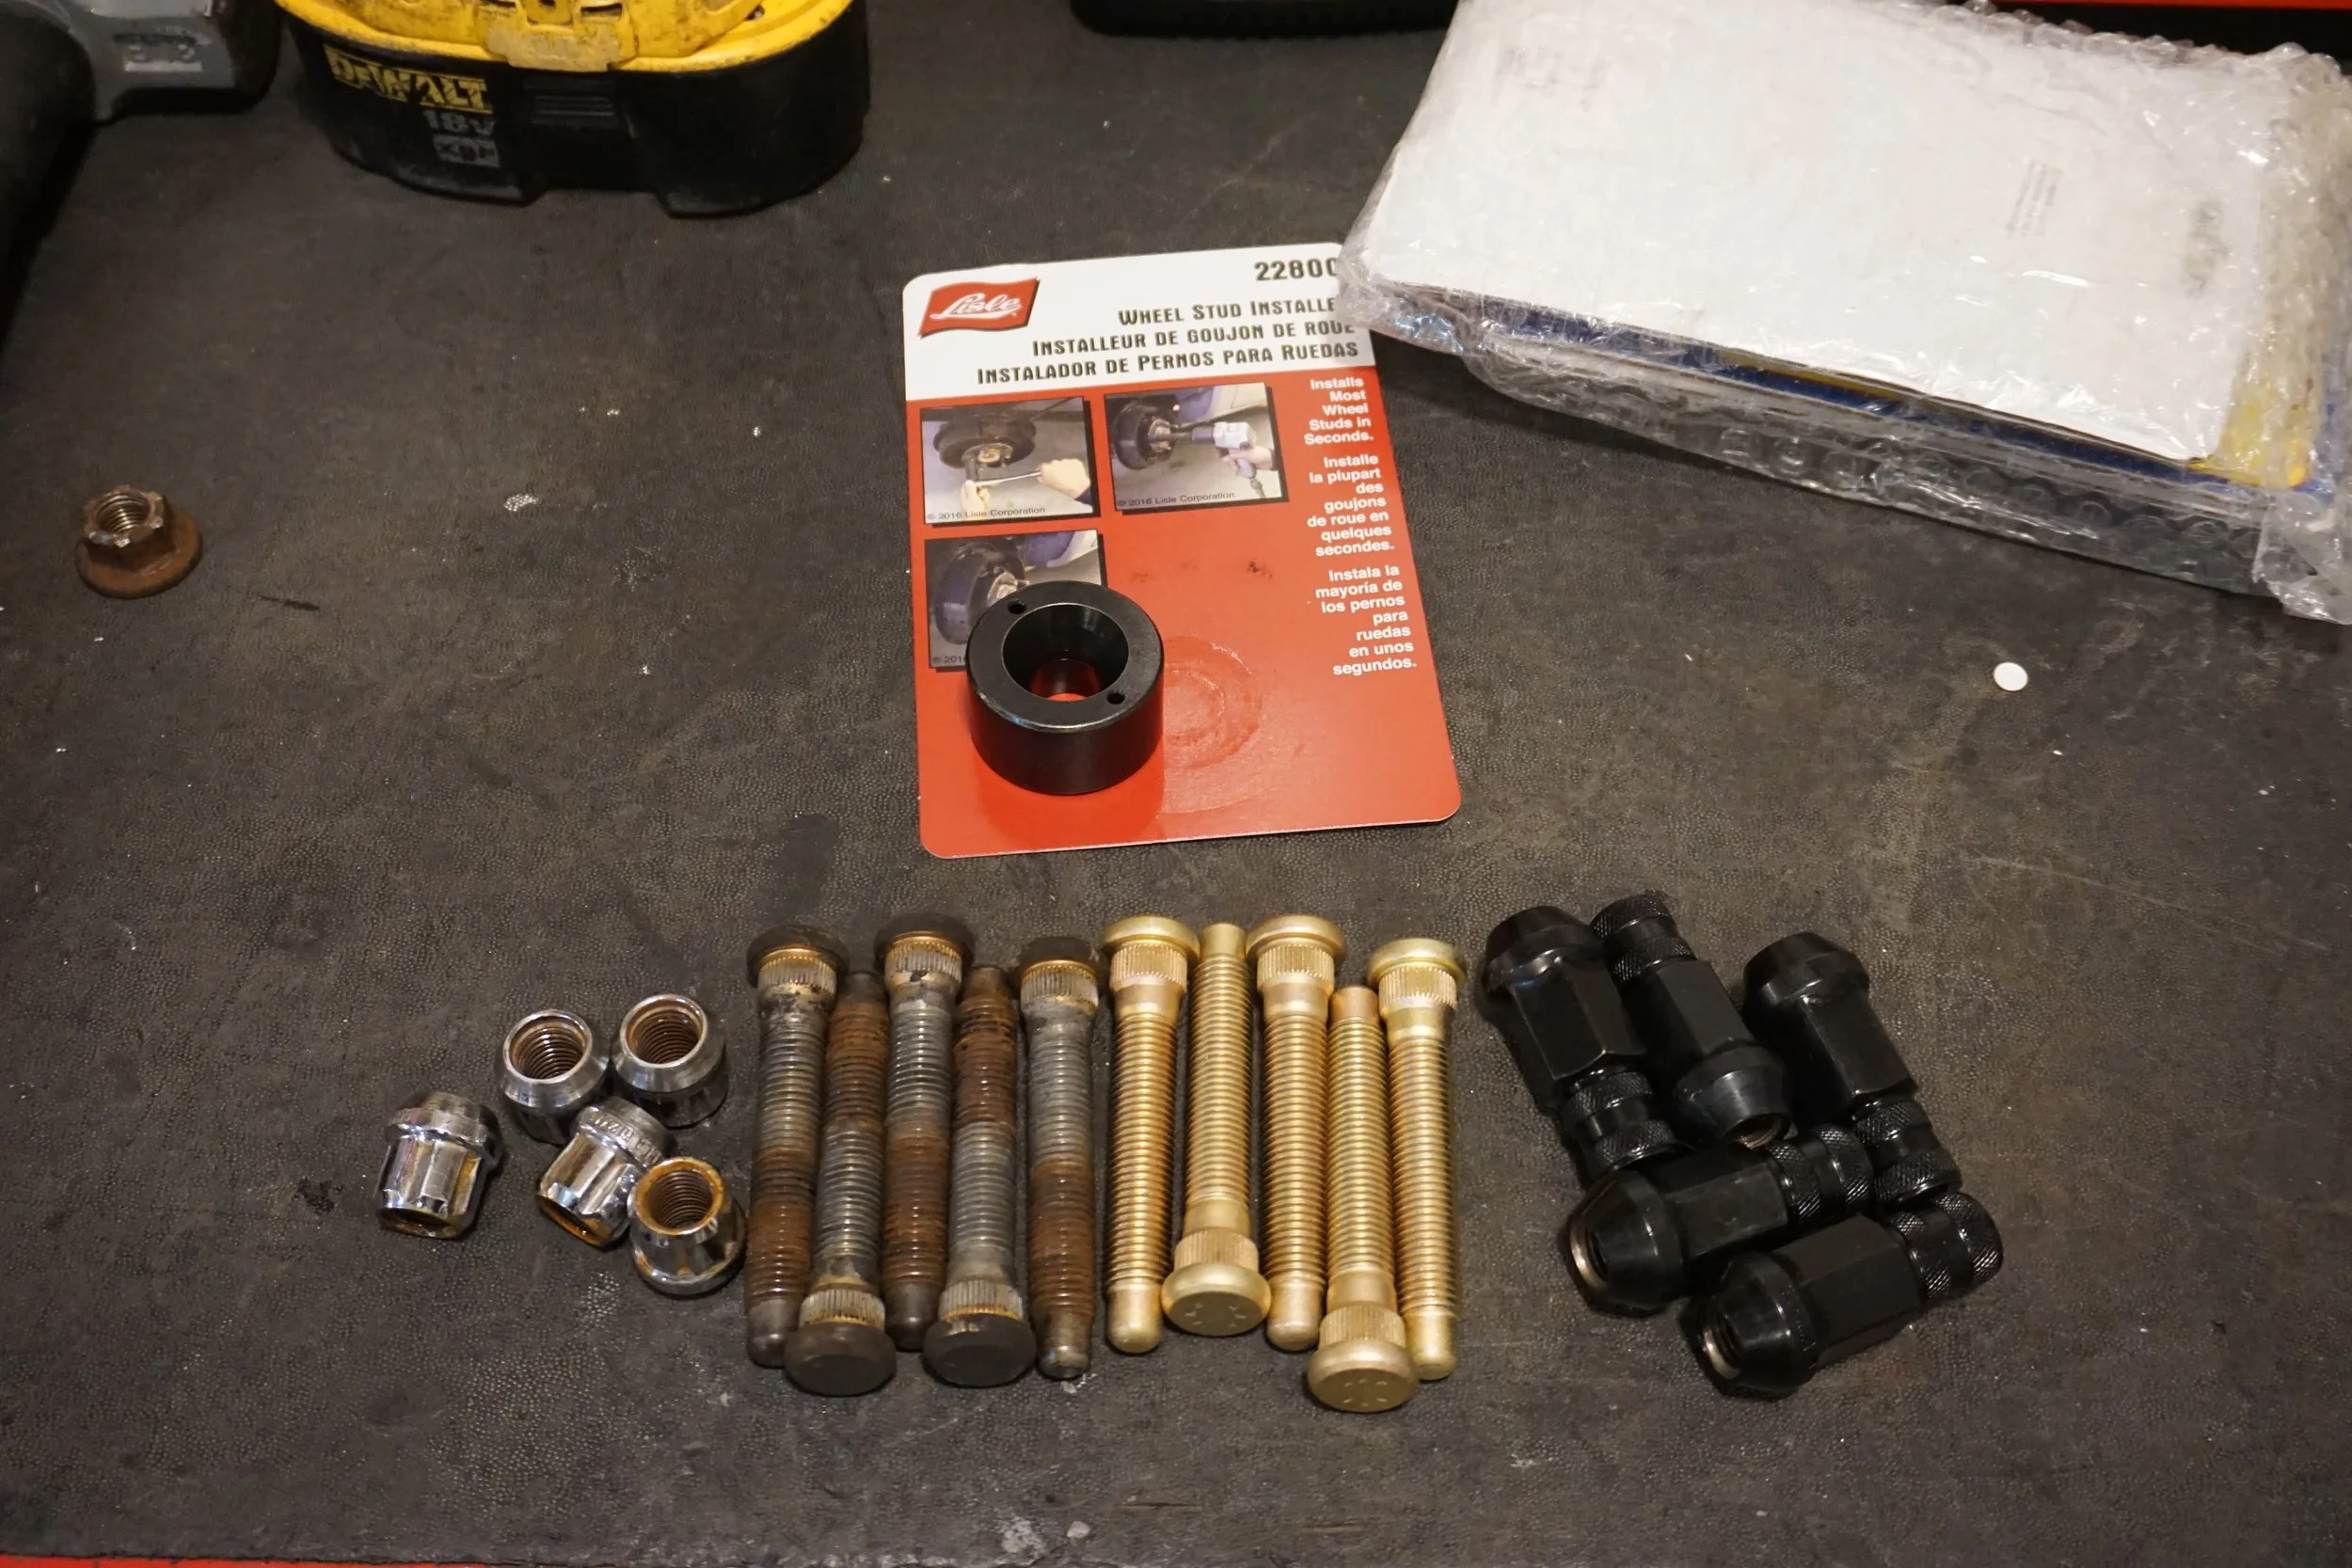
The only downside of the long steel lug nuts is their weight; a set of 5 weighs like 10 ounces more than the old short open ones!
It was also time to replace my front pads and rotors. I changed from the Wilwood Polymatrix E compound to the BP-20 compound, which is apparently better suited to street and track driving, while the E was better for auto-x. So far, so good, but I won't know for sure until the next trackcross event in May.
That's all for now. I've been busy setting up an 80 gallon air compressor so I can start media blasting and painting. This year is going to be busy!

My Innovate Motorsports wideband O2 sensor/gauge is pretty old at this point, and when I had the car on the dyno last year the operator mentioned that it looked like it was off. I considered replacing just the sensor, but apparently they're hard to find for an older unit like mine, and I wanted to make the switch to AEM since they're apparently easier to work with for data logging. Tech support from Innovate is pretty crappy, too. So I went with the AEM UEGO X-Series and got busy.
The mess of wires in my dash made me very uncomfortable, since it was nearly impossible to tell what was going where. There also appeared to be a "loop" or two that I couldn't make sense of. This was partially the result of a variety of old mechanics doing things, partially due to the mess of wires for the IM WB02, and partially because of the series of different gauges that have been installed over the years. Well, I was determined to fix all of it while installing the new gauge. There's no need to post pictures, because even with it all cleaned up, it still looks like a mess of wires, but I can assure you, it all makes sense now and is much cleaner than before. It helped that the wiring for the AEM was much simpler than that of the IM.
Before, Innovate Motorsports:
After, AEM:
Another reason I went with the AEM is because it has a ring of LEDs around the edge of the gauge that also represent the AFR. I like them because AFR readings on a numerical gauge change so quickly, and the edge LEDs are just easier to keep track of at a quick glance.
I also bought a weighted shift **** to try out, since the OEM one is so light (around 60 grams). I bought a billet **** (~180 grams) for an Evo or WRX since it was designed to work with their reverse lockout mechanism, only to find it was nowhere close for the Maxima's mechanism. This led to much hogging out and trimming until the mechanism would work properly. In the end, I don't know if there's much improvement in shift feel, and I can't say that I love the shape of it; I think it's just a little too big. Thankfully it wasn't very expensive.
Last year I picked up a spare tire at the junkyard that looked like it had never been used as mine had seen better days (tread is worn and it has a bend in it). I knew it wouldn't fit over my front BBK, but I thought it would at least fit over the rears. Well, not so much. Apparently the rear BBK is just large enough to make the caliper touch the wheel. So I guess I'll be on the lookout for a spare tire off a G35/350z/FX and hope that it will be big enough.
I also replaced my center tail light as the one on my car had a variety of cracks forming. Finding one the the junkyard that wasn't damaged and didn't have the top splitting apart (a very common problem that allows water to get it) took a while, but I finally got one.
This new one is mint!
I was getting some noises from the back of my car, so I went poking around. Turns out one of the bolts for the panhard rod was loose and the joints needed to be lubed, so with that fixed the main noise was resolved. But I noticed that part of one of the exhaust hangers was awfully close to the body of the muffler, so I trimmed the lip off to give it a little more room to move.
A few weeks ago I went to work and noticed that my steering wheel was off to the left when going straight. The car tracked straight, just the wheel was off, so I ignored it until I had the car on the lift again. Well, I think I found the culprit: a camber bolt had shifted:
I've been waiting to install my new coilovers until a set of trick camber/caster plates were made, but the company is dragging their feet, so I may just need to adapt my current BC plates and set them up again as regular camber plates instead of my current caster plate/camber bolt setup. I hate not being able to unbolt the coilover without messing up my alignment!
And after many months of waiting for these things to come back in stock, I was finally able to replace my old ARP wheel studs with new ones. I hated how rusty they've become, so my old ones will go on the wife's FX so I can put some spacers on it. I also wanted to make the move to closed end lug nuts to protect the finish of the studs, and finding a set that was long enough and of good quality took some trial and error. Even then, these things were just barely long enough, so to be sure they could torque down properly, I cut off the nub at the end of the new studs to give them a little more room. With the wheel stud installer tool I was able to remove the old studs and install all the new ones in like 20 minutes, it was super easy!
The only downside of the long steel lug nuts is their weight; a set of 5 weighs like 10 ounces more than the old short open ones!
It was also time to replace my front pads and rotors. I changed from the Wilwood Polymatrix E compound to the BP-20 compound, which is apparently better suited to street and track driving, while the E was better for auto-x. So far, so good, but I won't know for sure until the next trackcross event in May.
That's all for now. I've been busy setting up an 80 gallon air compressor so I can start media blasting and painting. This year is going to be busy!
But wait, there's more! I forgot to post up about the last two Trackcross events. I'll try to keep it brief.
The second event of the winter series back was in January and temps were around 35*. We were on the main Summit Point circuit, and although a variety of Minis joined the class for the day, my only real competition was the Mk.7 GTI with 300/380 at the wheels. Long story short, I won both the AM and PM heats for my class, and came in 31/87 overall in the AM and 33/87 in the PM. In the AM I was beat by one other FWD car in the class above me- a 400 WHP GTI with a big turbo. In the PM I beat him and all other FWD cars, and the only cars that beat me with less HP were two BRZs. Overall I was pretty pleased with the car and had a ton of fun.
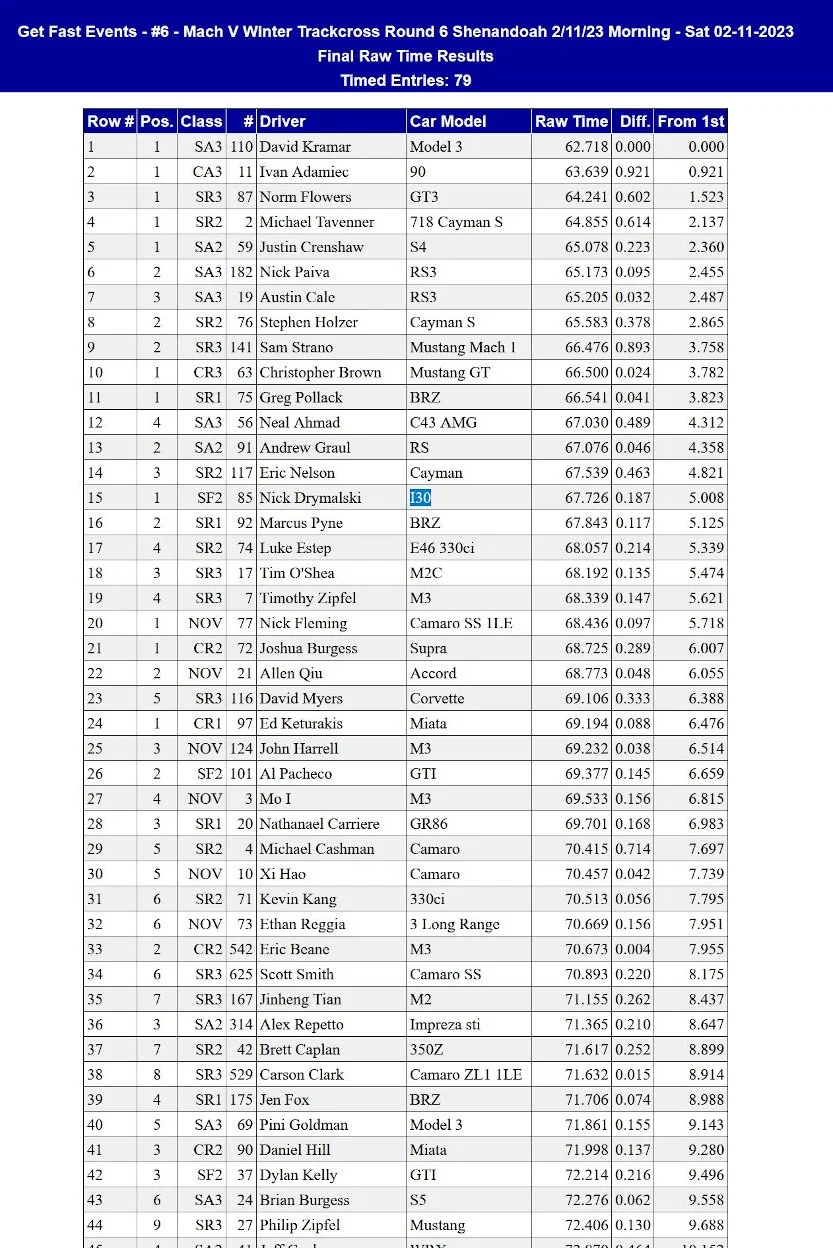
The third and final event of the winter series was in February, and once again temps were around 40*. We were back on the Shenandoah Circuit, and once again I was up against the GTI. The course layout for the day eliminated the two long straightaways of the track, so it evened up the playing field a bit compared to the prior event where the more powerful cars could really shine. As a result, I won both heats again, and placed 15/79 in the AM and 22/77 in the PM! To give a little context, Ivan in the Audi 90 (2nd overall) makes something like 400 AWHP and runs R comps, and if I had to guess runs 0-60 in less than 3 seconds. He finished 4 seconds ahead of me, and I'm guessing the majority of that was on the launch alone. Sam Strano, a legend in his own right, was driving a new Mustang Mach 1 (480 HP) and was only a little over a second faster than me. To say I'm proud of my car is an understatement!
I've mentioned that there's room for improvement, and since it's so much fun to do ricer math in my head and dream about things, here's the general outline for my plans. I hope to be able to do them all this year.
-2nd/3rd gen 3.5 swap: +50 whp peak, +100 at redline (still waiting on a couple parts before beginning)
-Improve braking/pad knockback problems: New pads/rotors already installed, will be doing wheel bearings soon
-Suspension improvements: A number of things are in the works
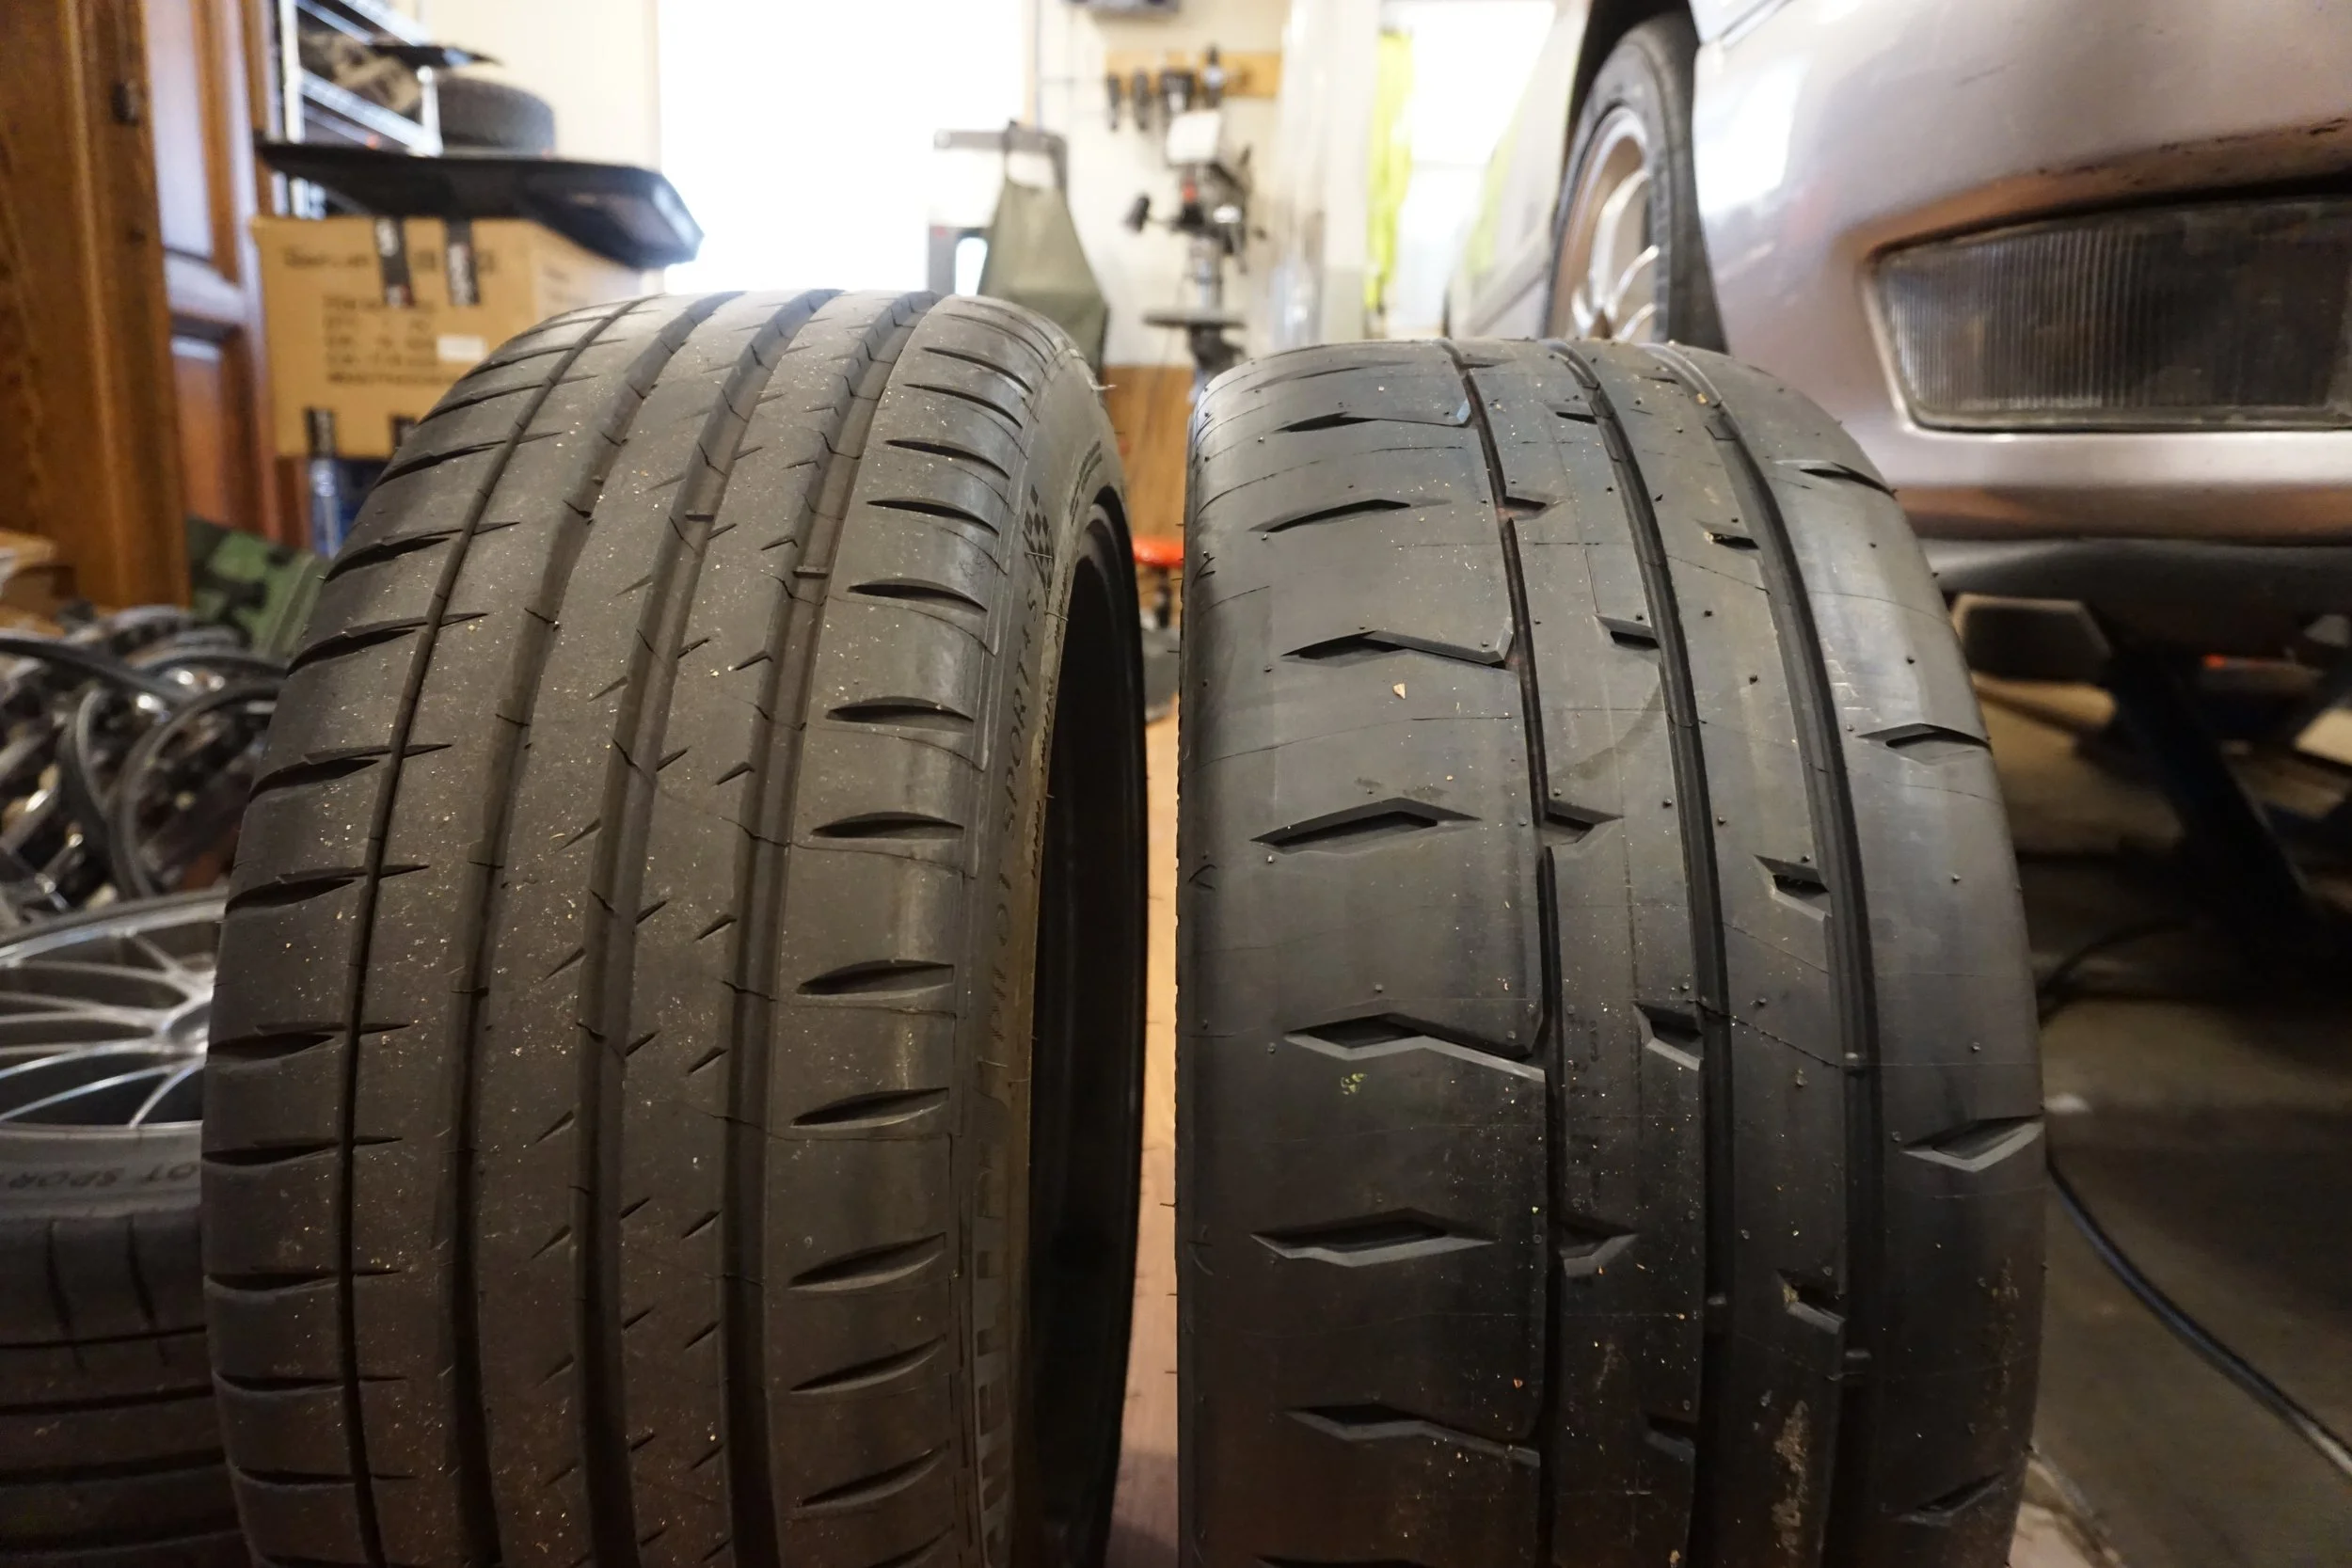
-Tires: Move from the very good Michelin PS4S tires to even better Bridgestone Potenza RE-71RS on slightly wider and lighter wheels
I don't know, I think all of those combined should be good for a few seconds, what do you think?
The second event of the winter series back was in January and temps were around 35*. We were on the main Summit Point circuit, and although a variety of Minis joined the class for the day, my only real competition was the Mk.7 GTI with 300/380 at the wheels. Long story short, I won both the AM and PM heats for my class, and came in 31/87 overall in the AM and 33/87 in the PM. In the AM I was beat by one other FWD car in the class above me- a 400 WHP GTI with a big turbo. In the PM I beat him and all other FWD cars, and the only cars that beat me with less HP were two BRZs. Overall I was pretty pleased with the car and had a ton of fun.
The third and final event of the winter series was in February, and once again temps were around 40*. We were back on the Shenandoah Circuit, and once again I was up against the GTI. The course layout for the day eliminated the two long straightaways of the track, so it evened up the playing field a bit compared to the prior event where the more powerful cars could really shine. As a result, I won both heats again, and placed 15/79 in the AM and 22/77 in the PM! To give a little context, Ivan in the Audi 90 (2nd overall) makes something like 400 AWHP and runs R comps, and if I had to guess runs 0-60 in less than 3 seconds. He finished 4 seconds ahead of me, and I'm guessing the majority of that was on the launch alone. Sam Strano, a legend in his own right, was driving a new Mustang Mach 1 (480 HP) and was only a little over a second faster than me. To say I'm proud of my car is an understatement!
I've mentioned that there's room for improvement, and since it's so much fun to do ricer math in my head and dream about things, here's the general outline for my plans. I hope to be able to do them all this year.
-2nd/3rd gen 3.5 swap: +50 whp peak, +100 at redline (still waiting on a couple parts before beginning)
-Improve braking/pad knockback problems: New pads/rotors already installed, will be doing wheel bearings soon
-Suspension improvements: A number of things are in the works
-Tires: Move from the very good Michelin PS4S tires to even better Bridgestone Potenza RE-71RS on slightly wider and lighter wheels
I don't know, I think all of those combined should be good for a few seconds, what do you think?
Time for a quick non-I30 related project!
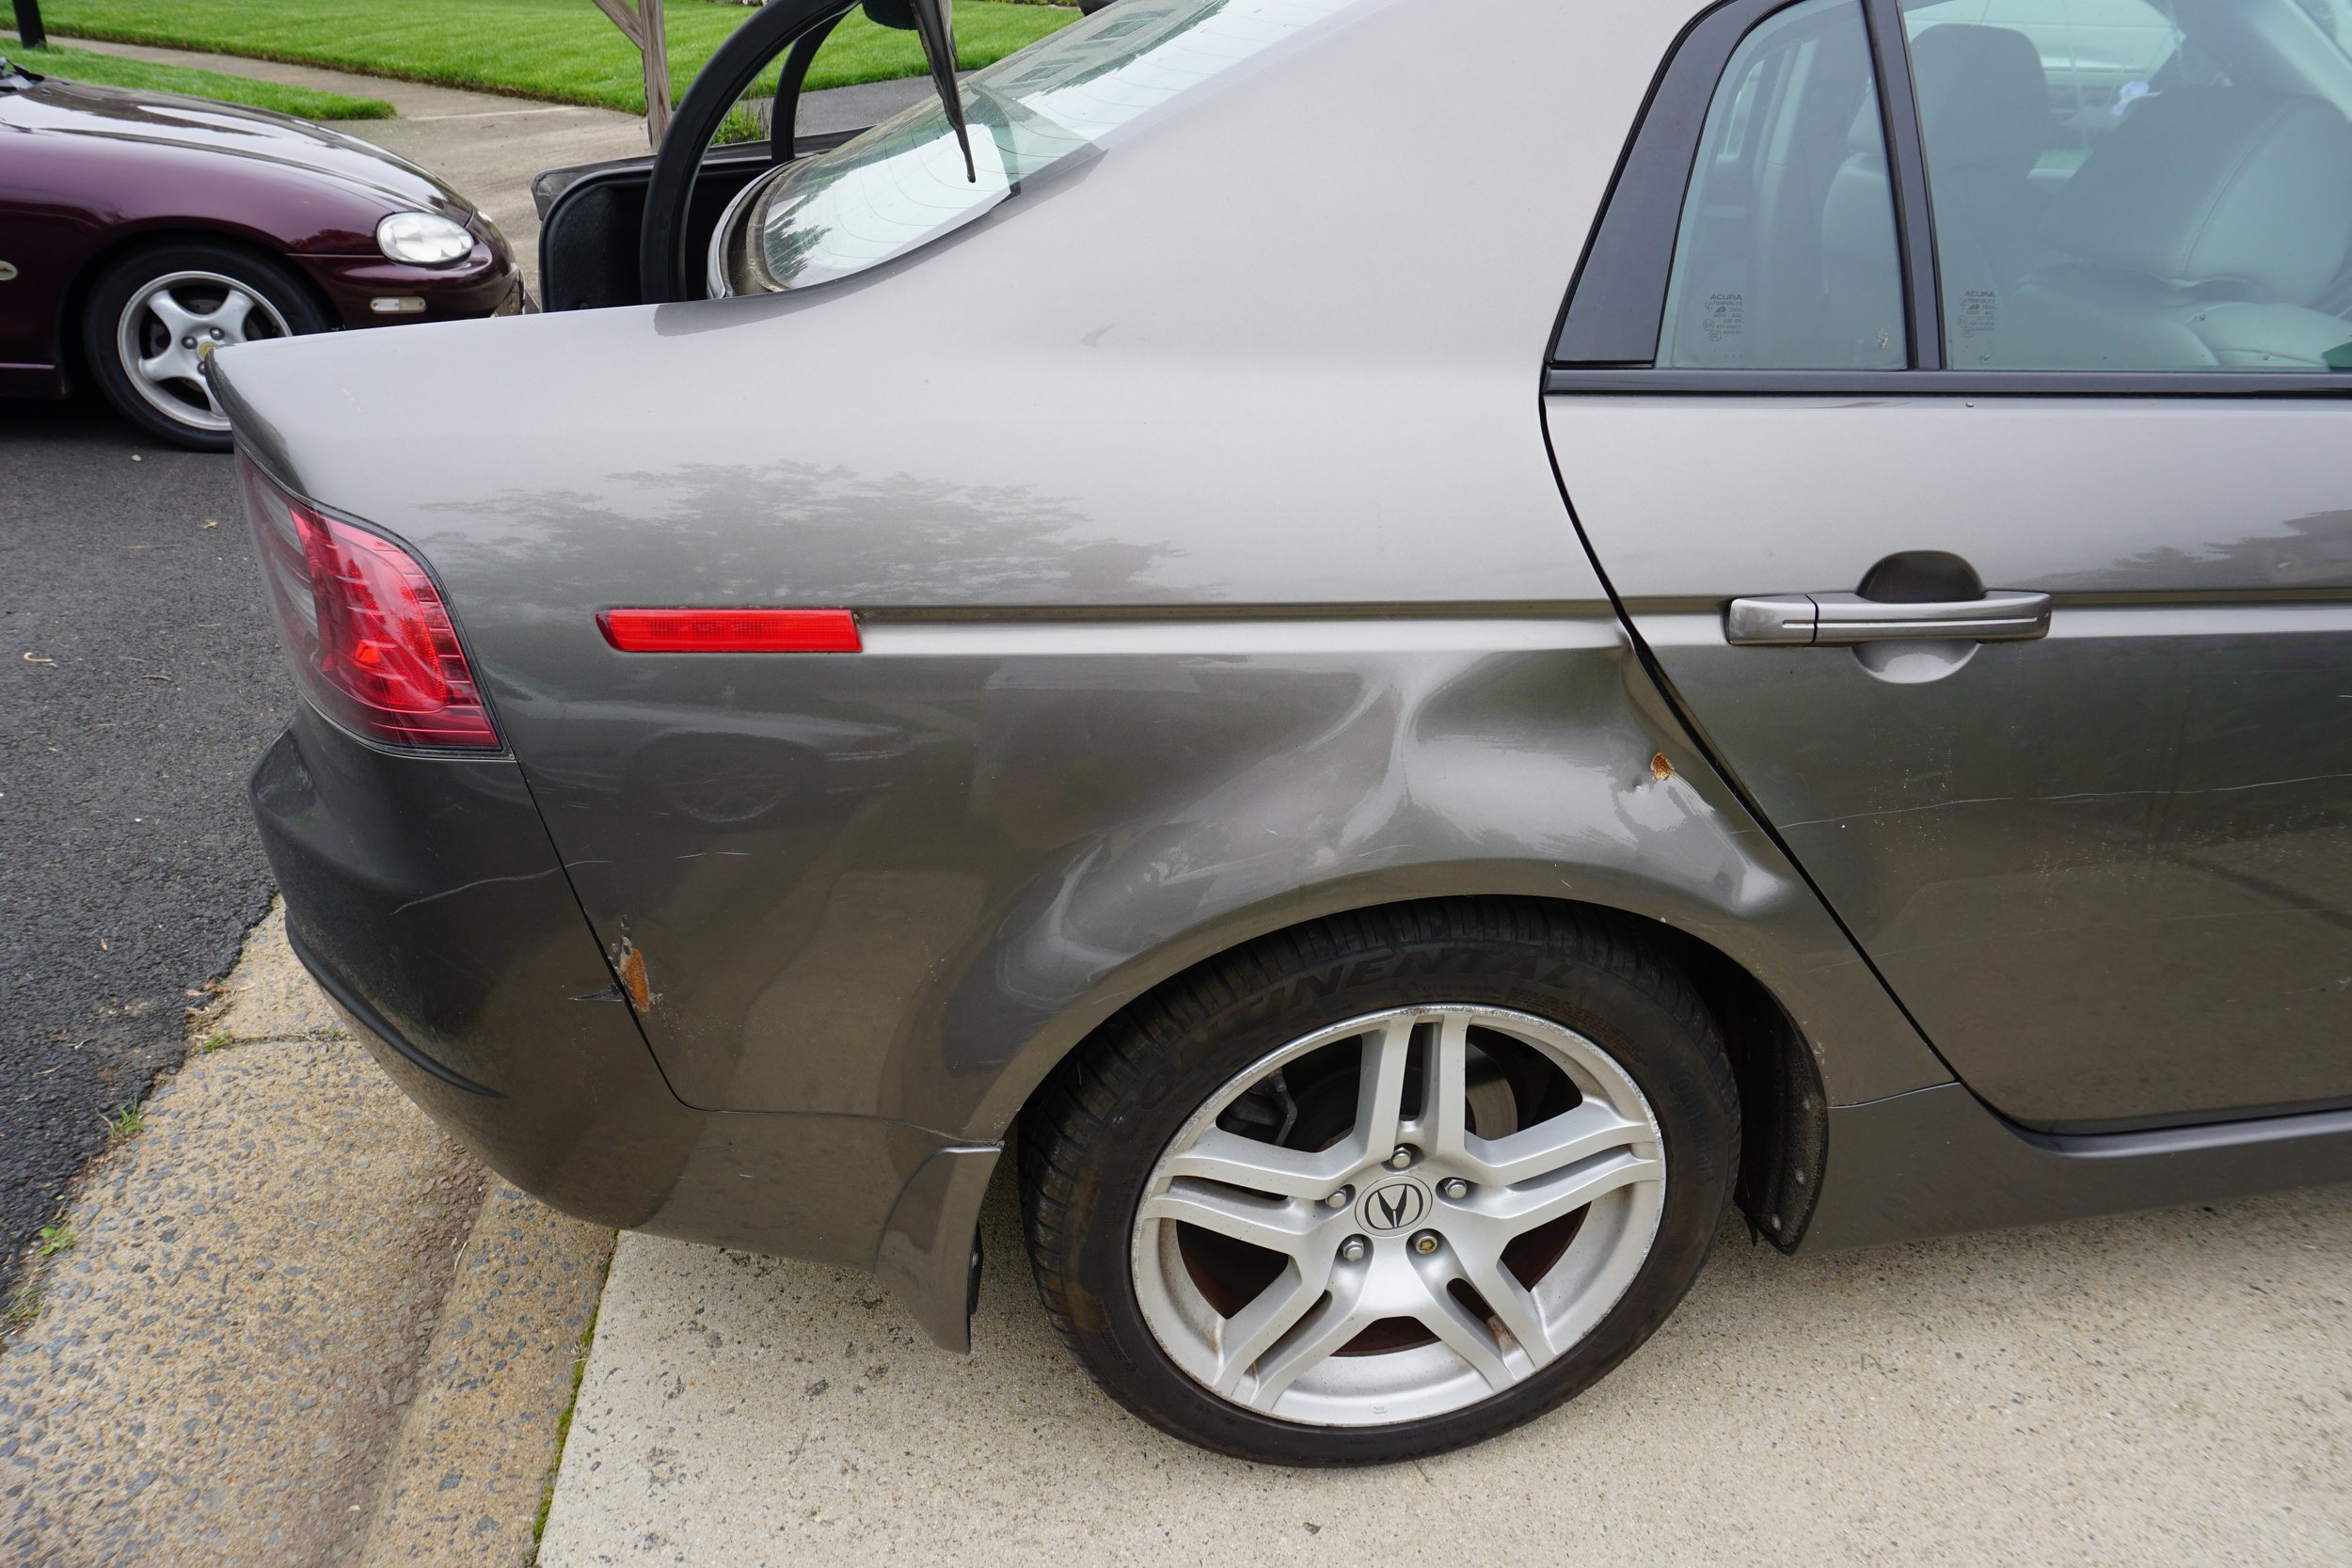
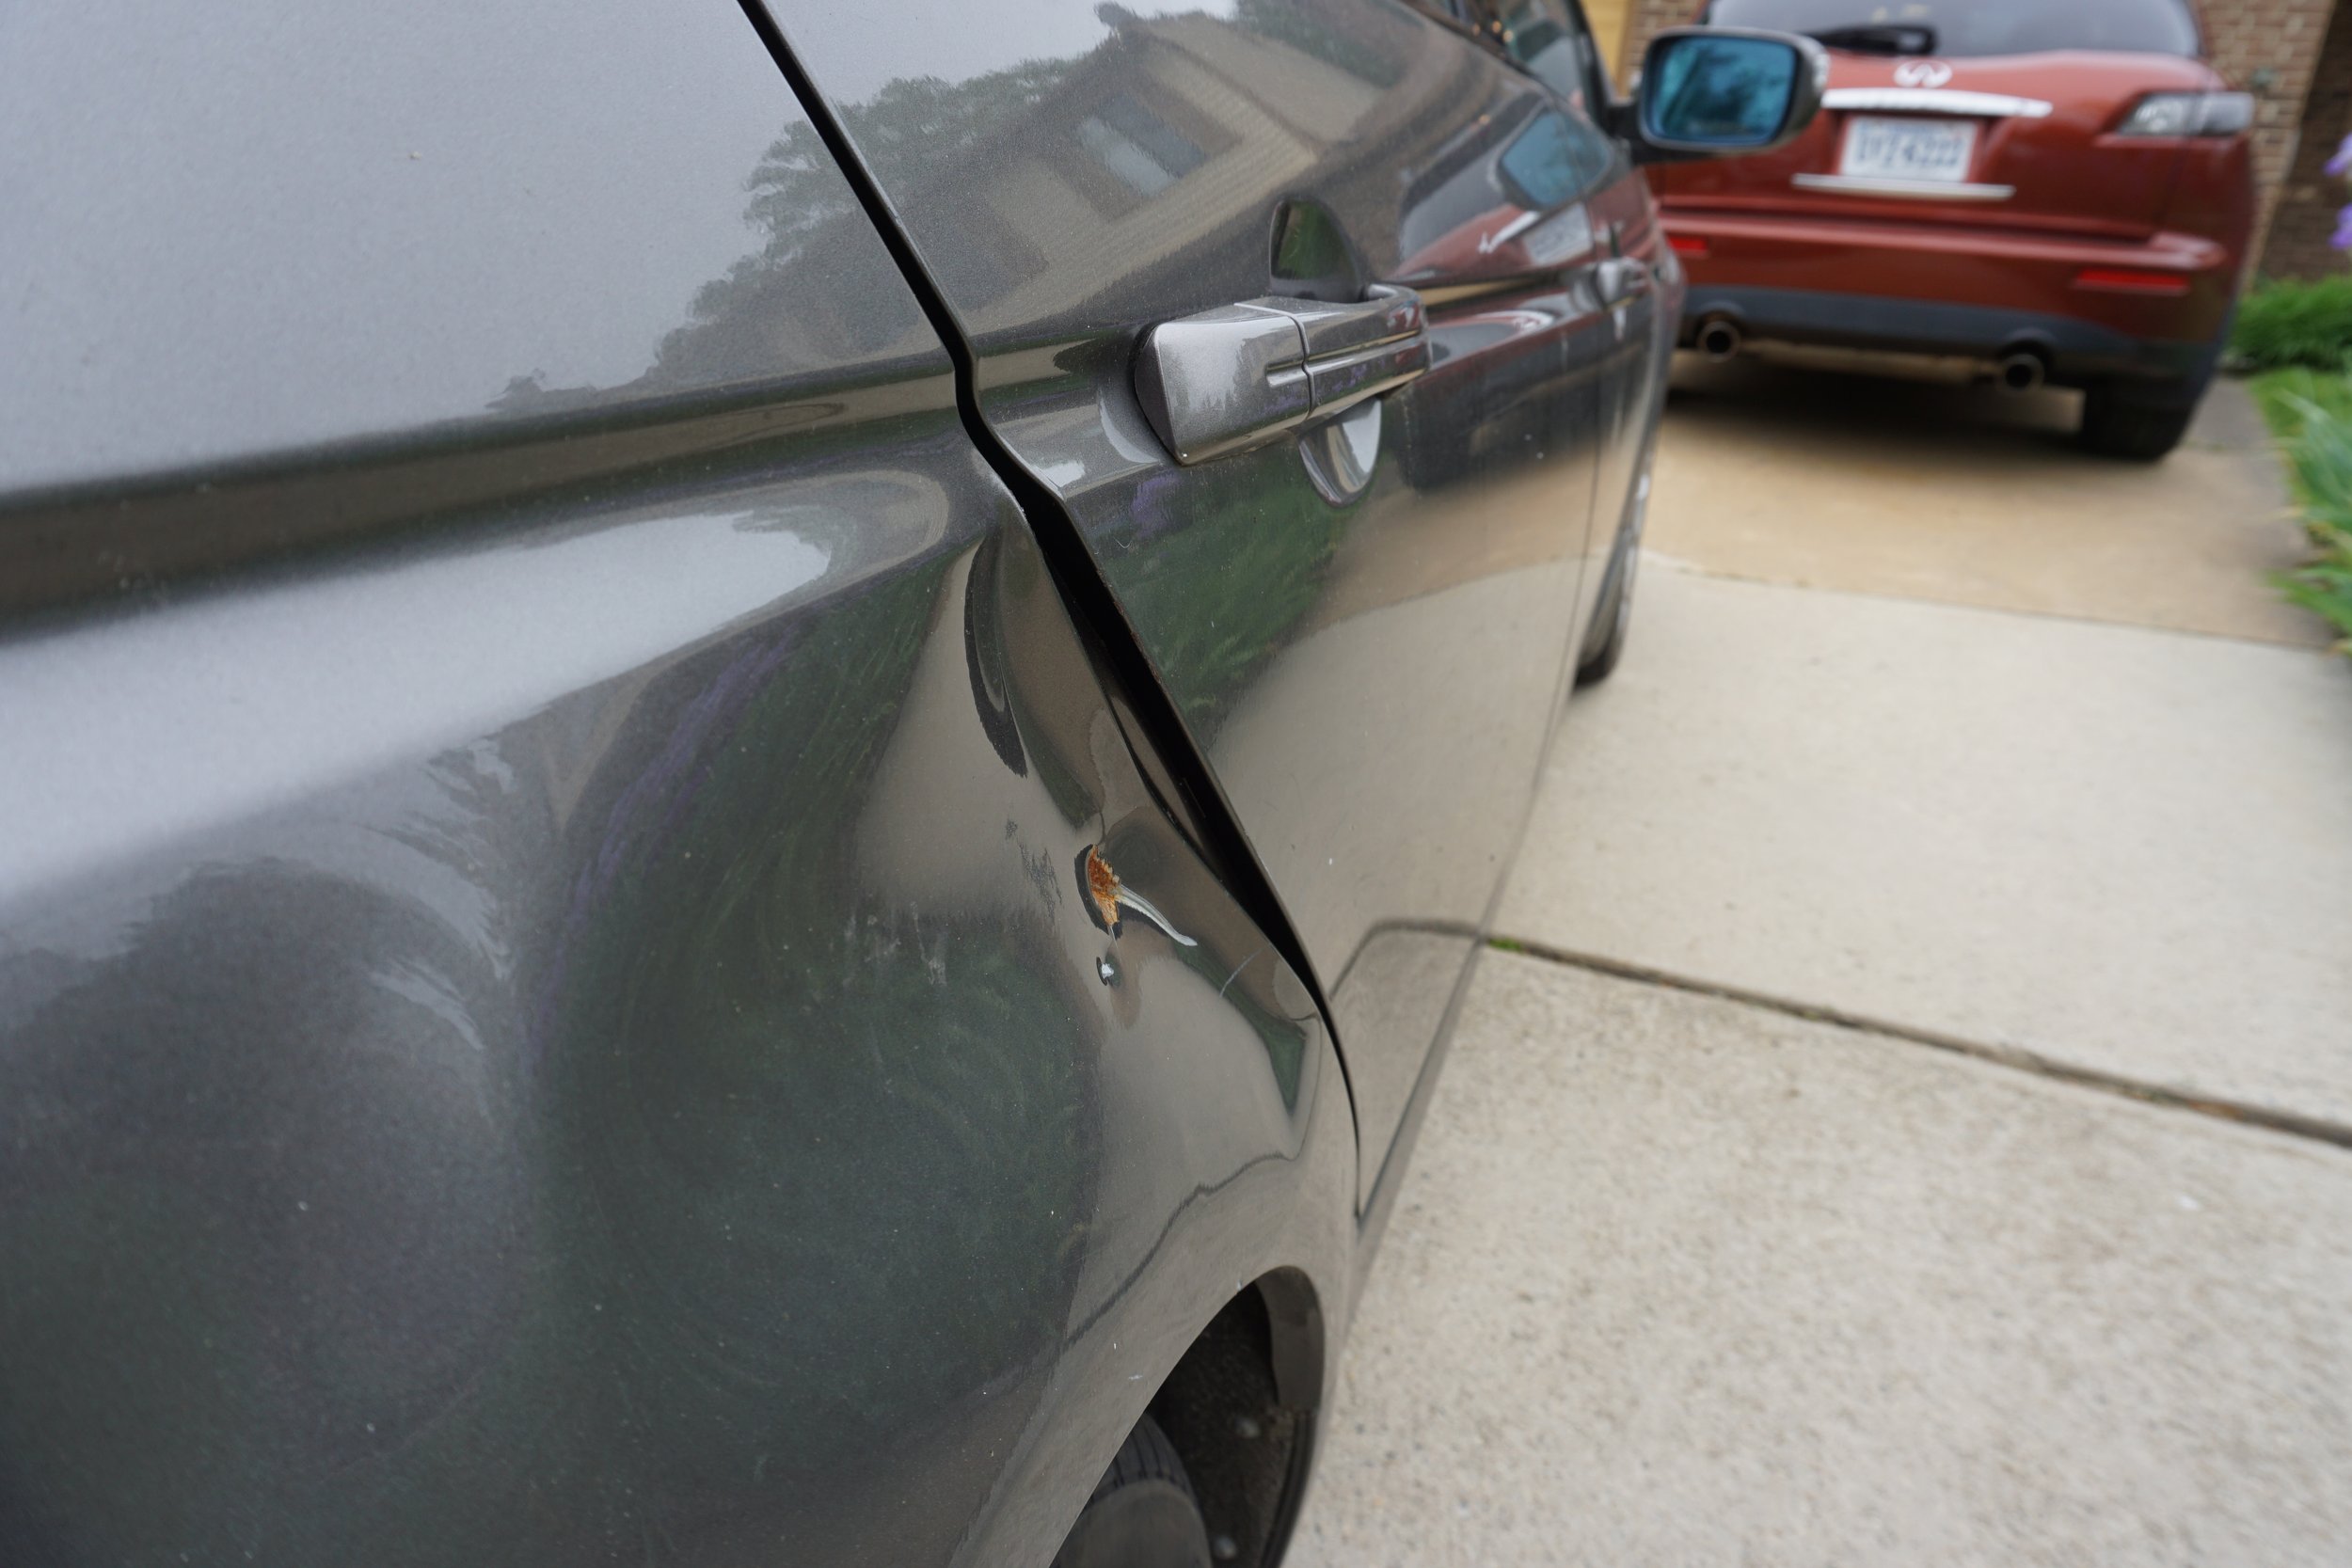
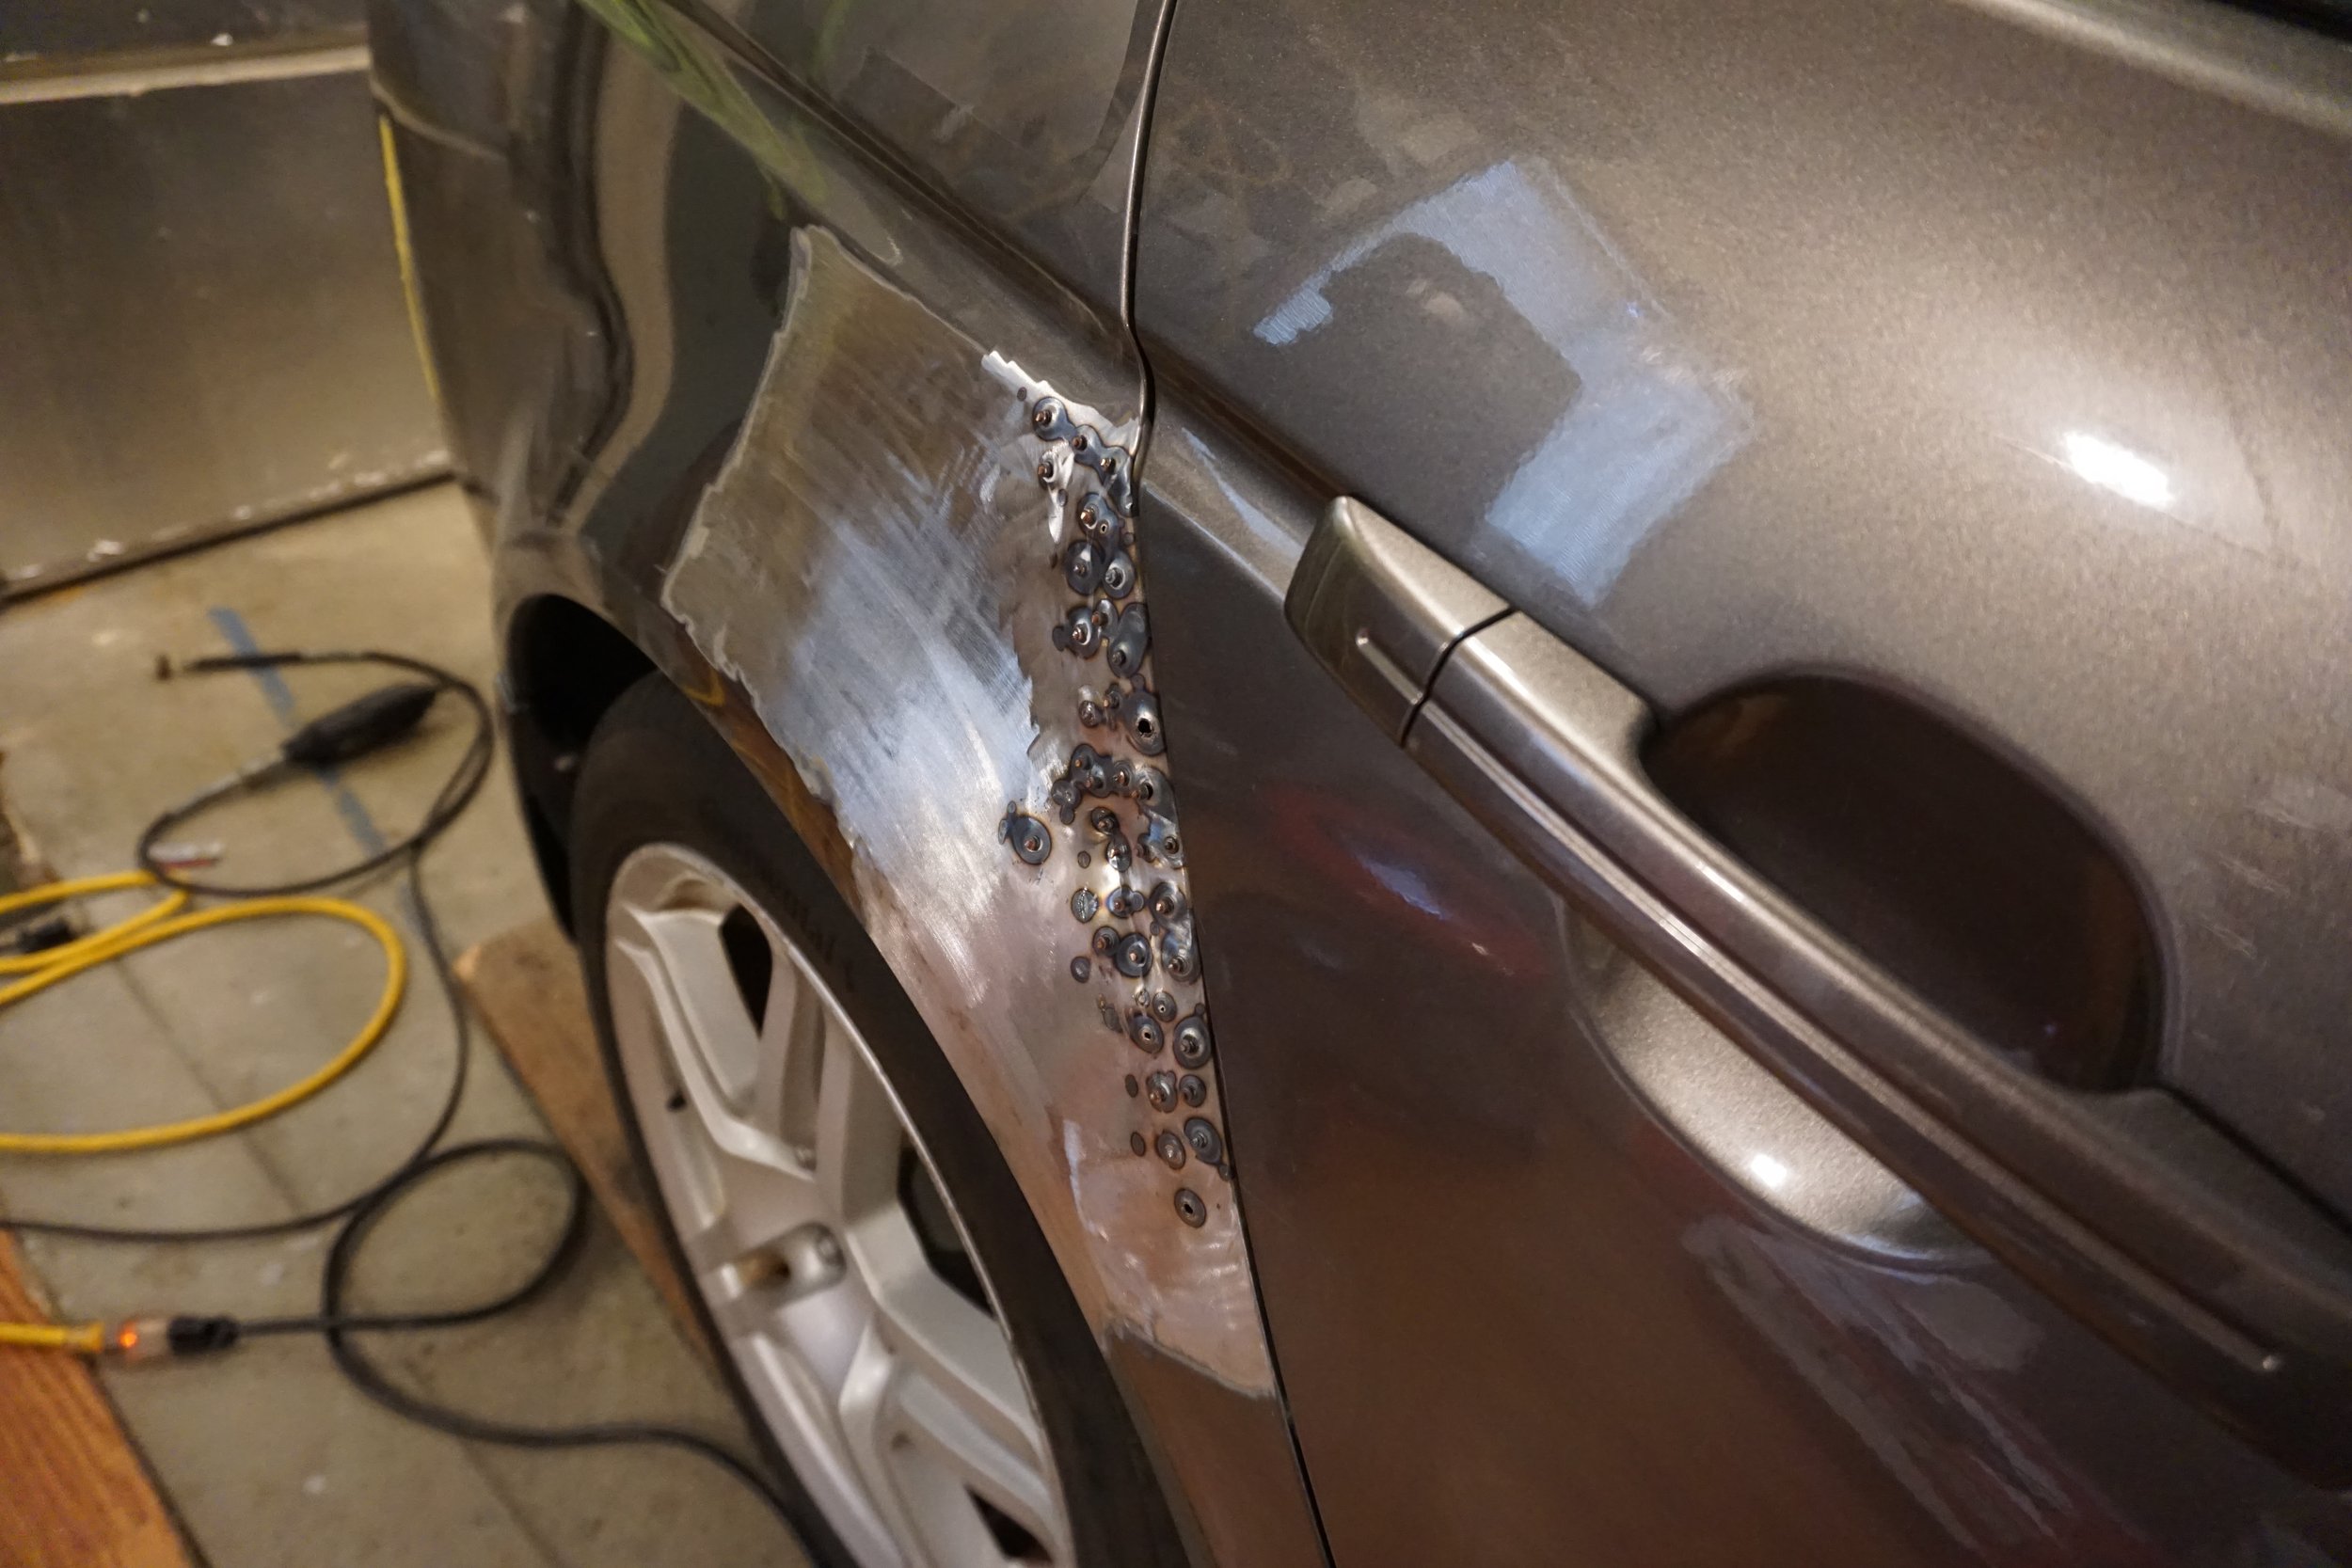
I set up my new 80 gallon air compressor (19 CFM at 90 psi), routed all of the PEX piping, set up the air filtration/dryer, and ordered a whole lot of other supplies and completed my first "real" painting project on my mom's Acura TL. I've done stuff with 2K rattle cans before, but now I've got real paint guns, and real high quality primers, paints, and clear coats. Since my mom doesn't exactly have an eye for paint perfection, her car was the perfect test bed for all of my new tools so I could make my mistakes on her car before moving onto my own. I made plenty of mistakes, but was able to correct almost all of them, and in the end I was very happy with how the job turned out.
After the stud welder and puller:
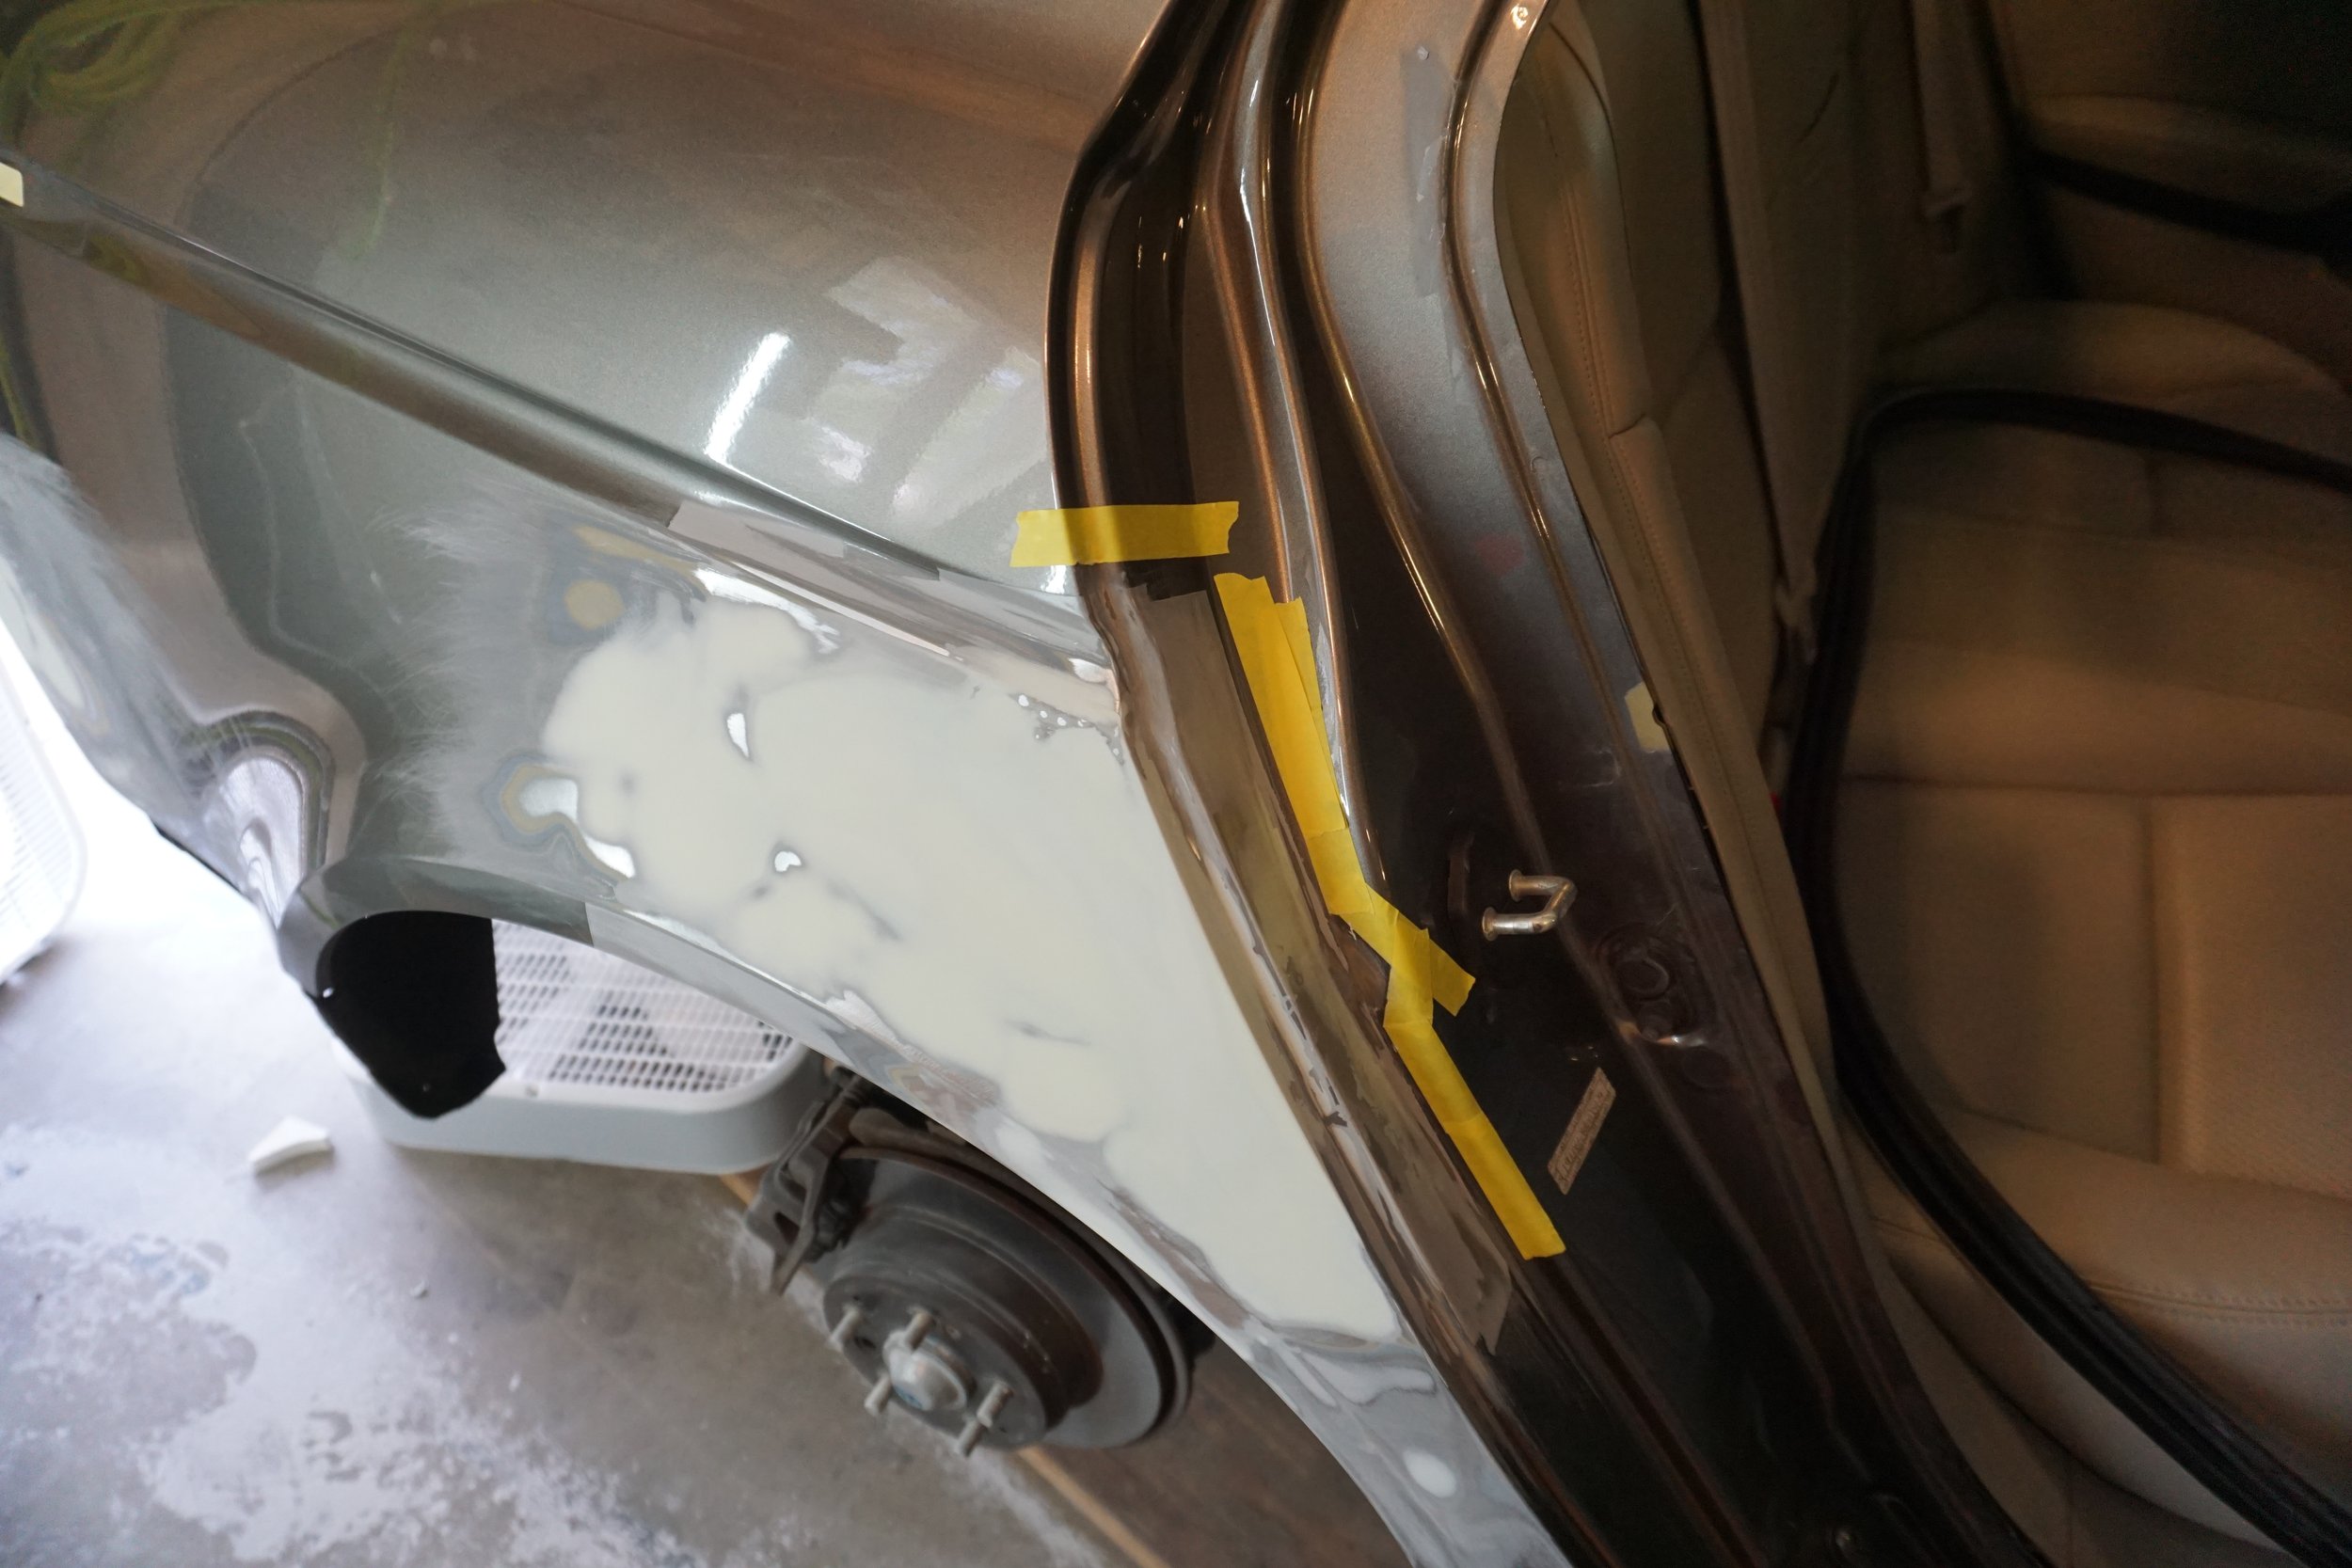
After epoxy primer on all bare metal and then body filler:
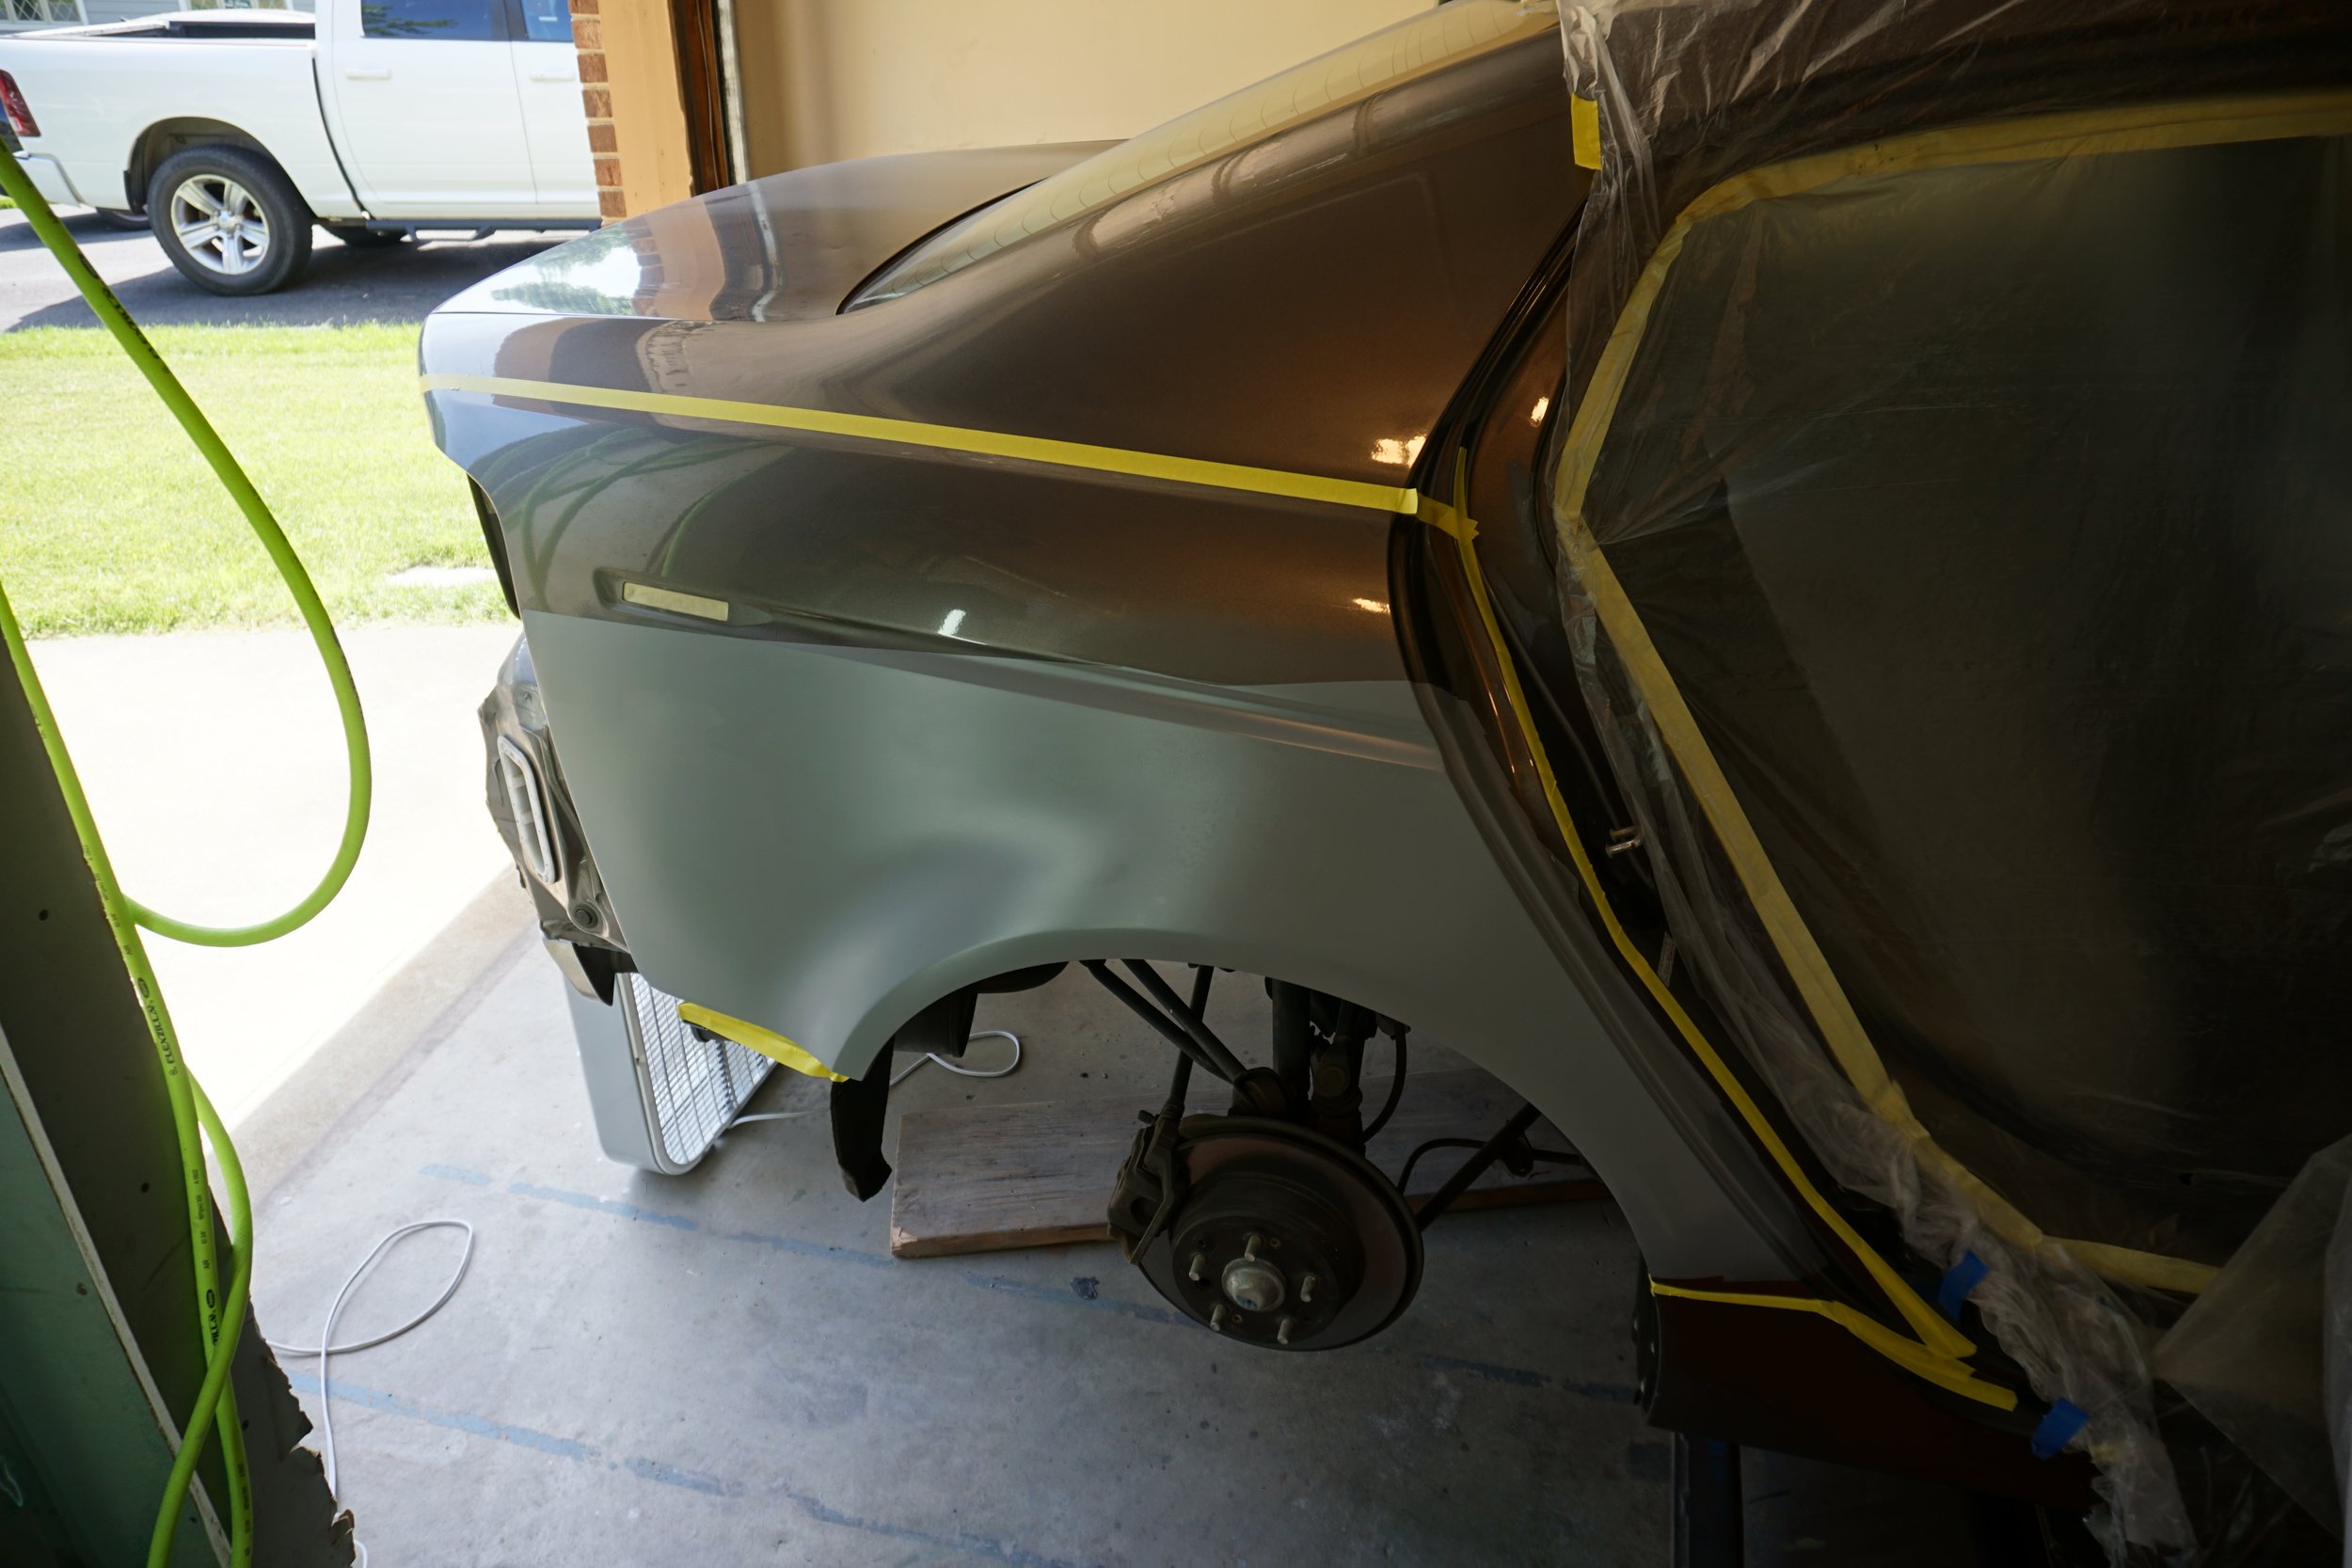
After 2K primer and blocking:
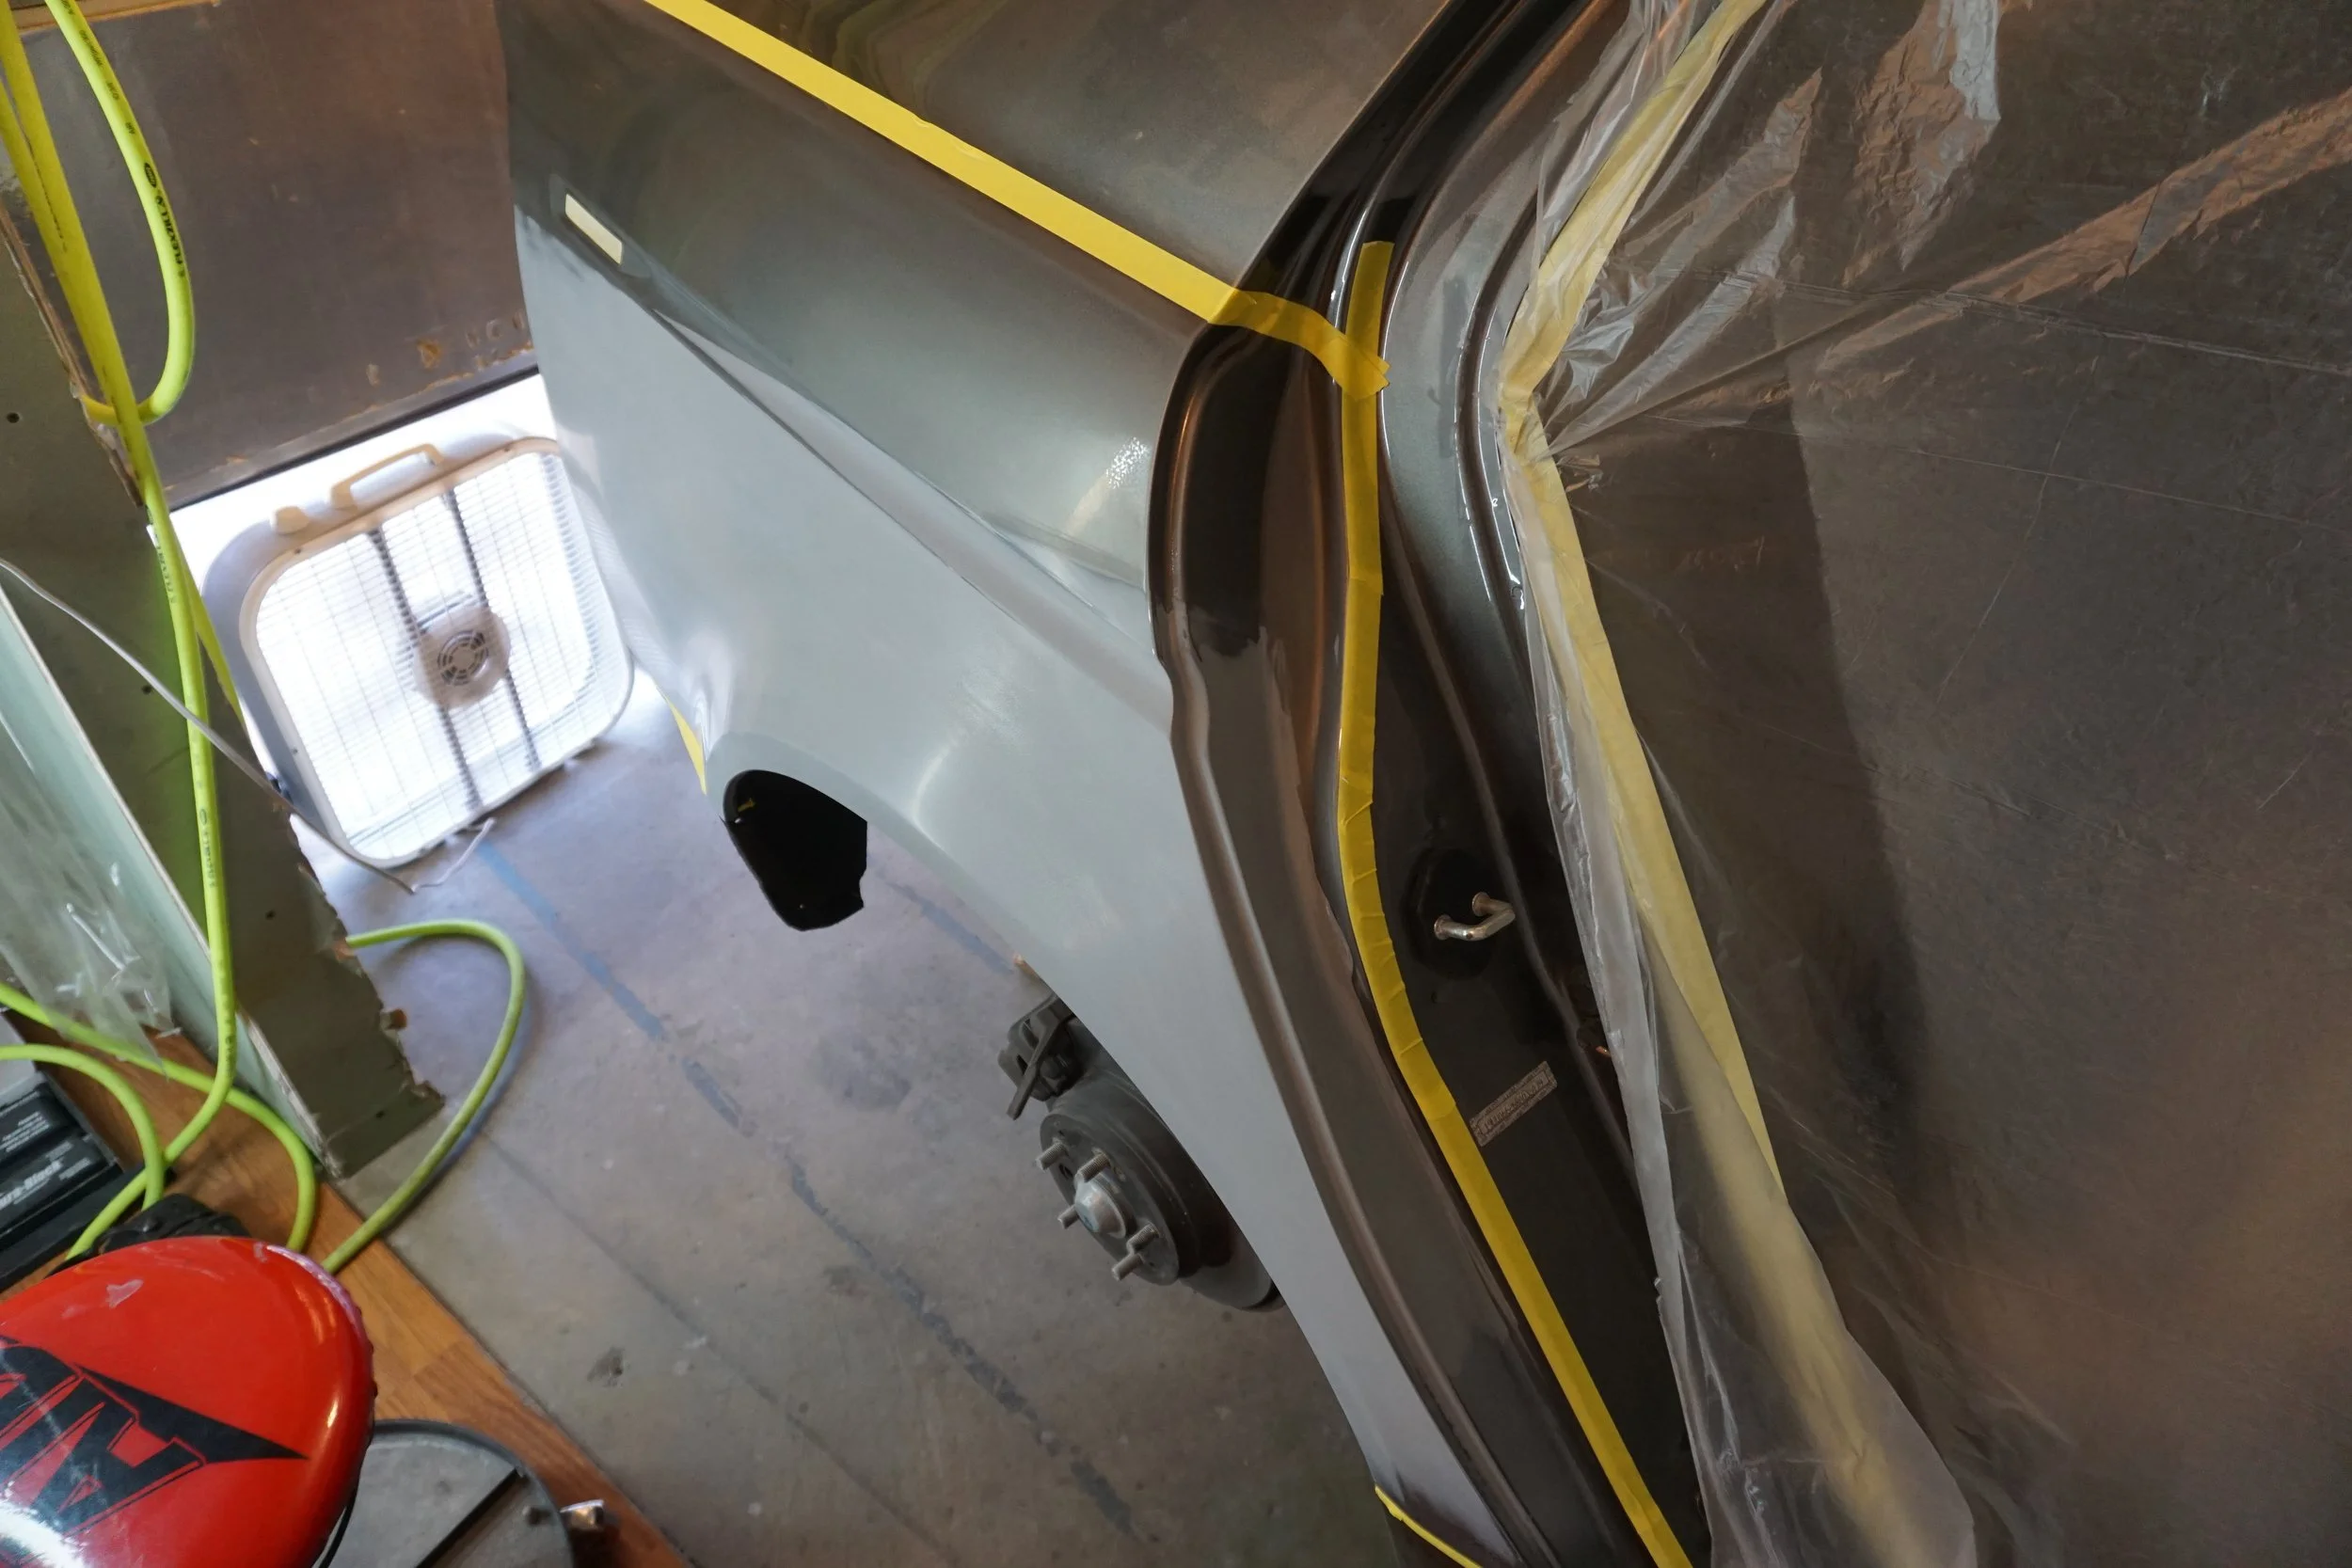
After clear base and base coat:
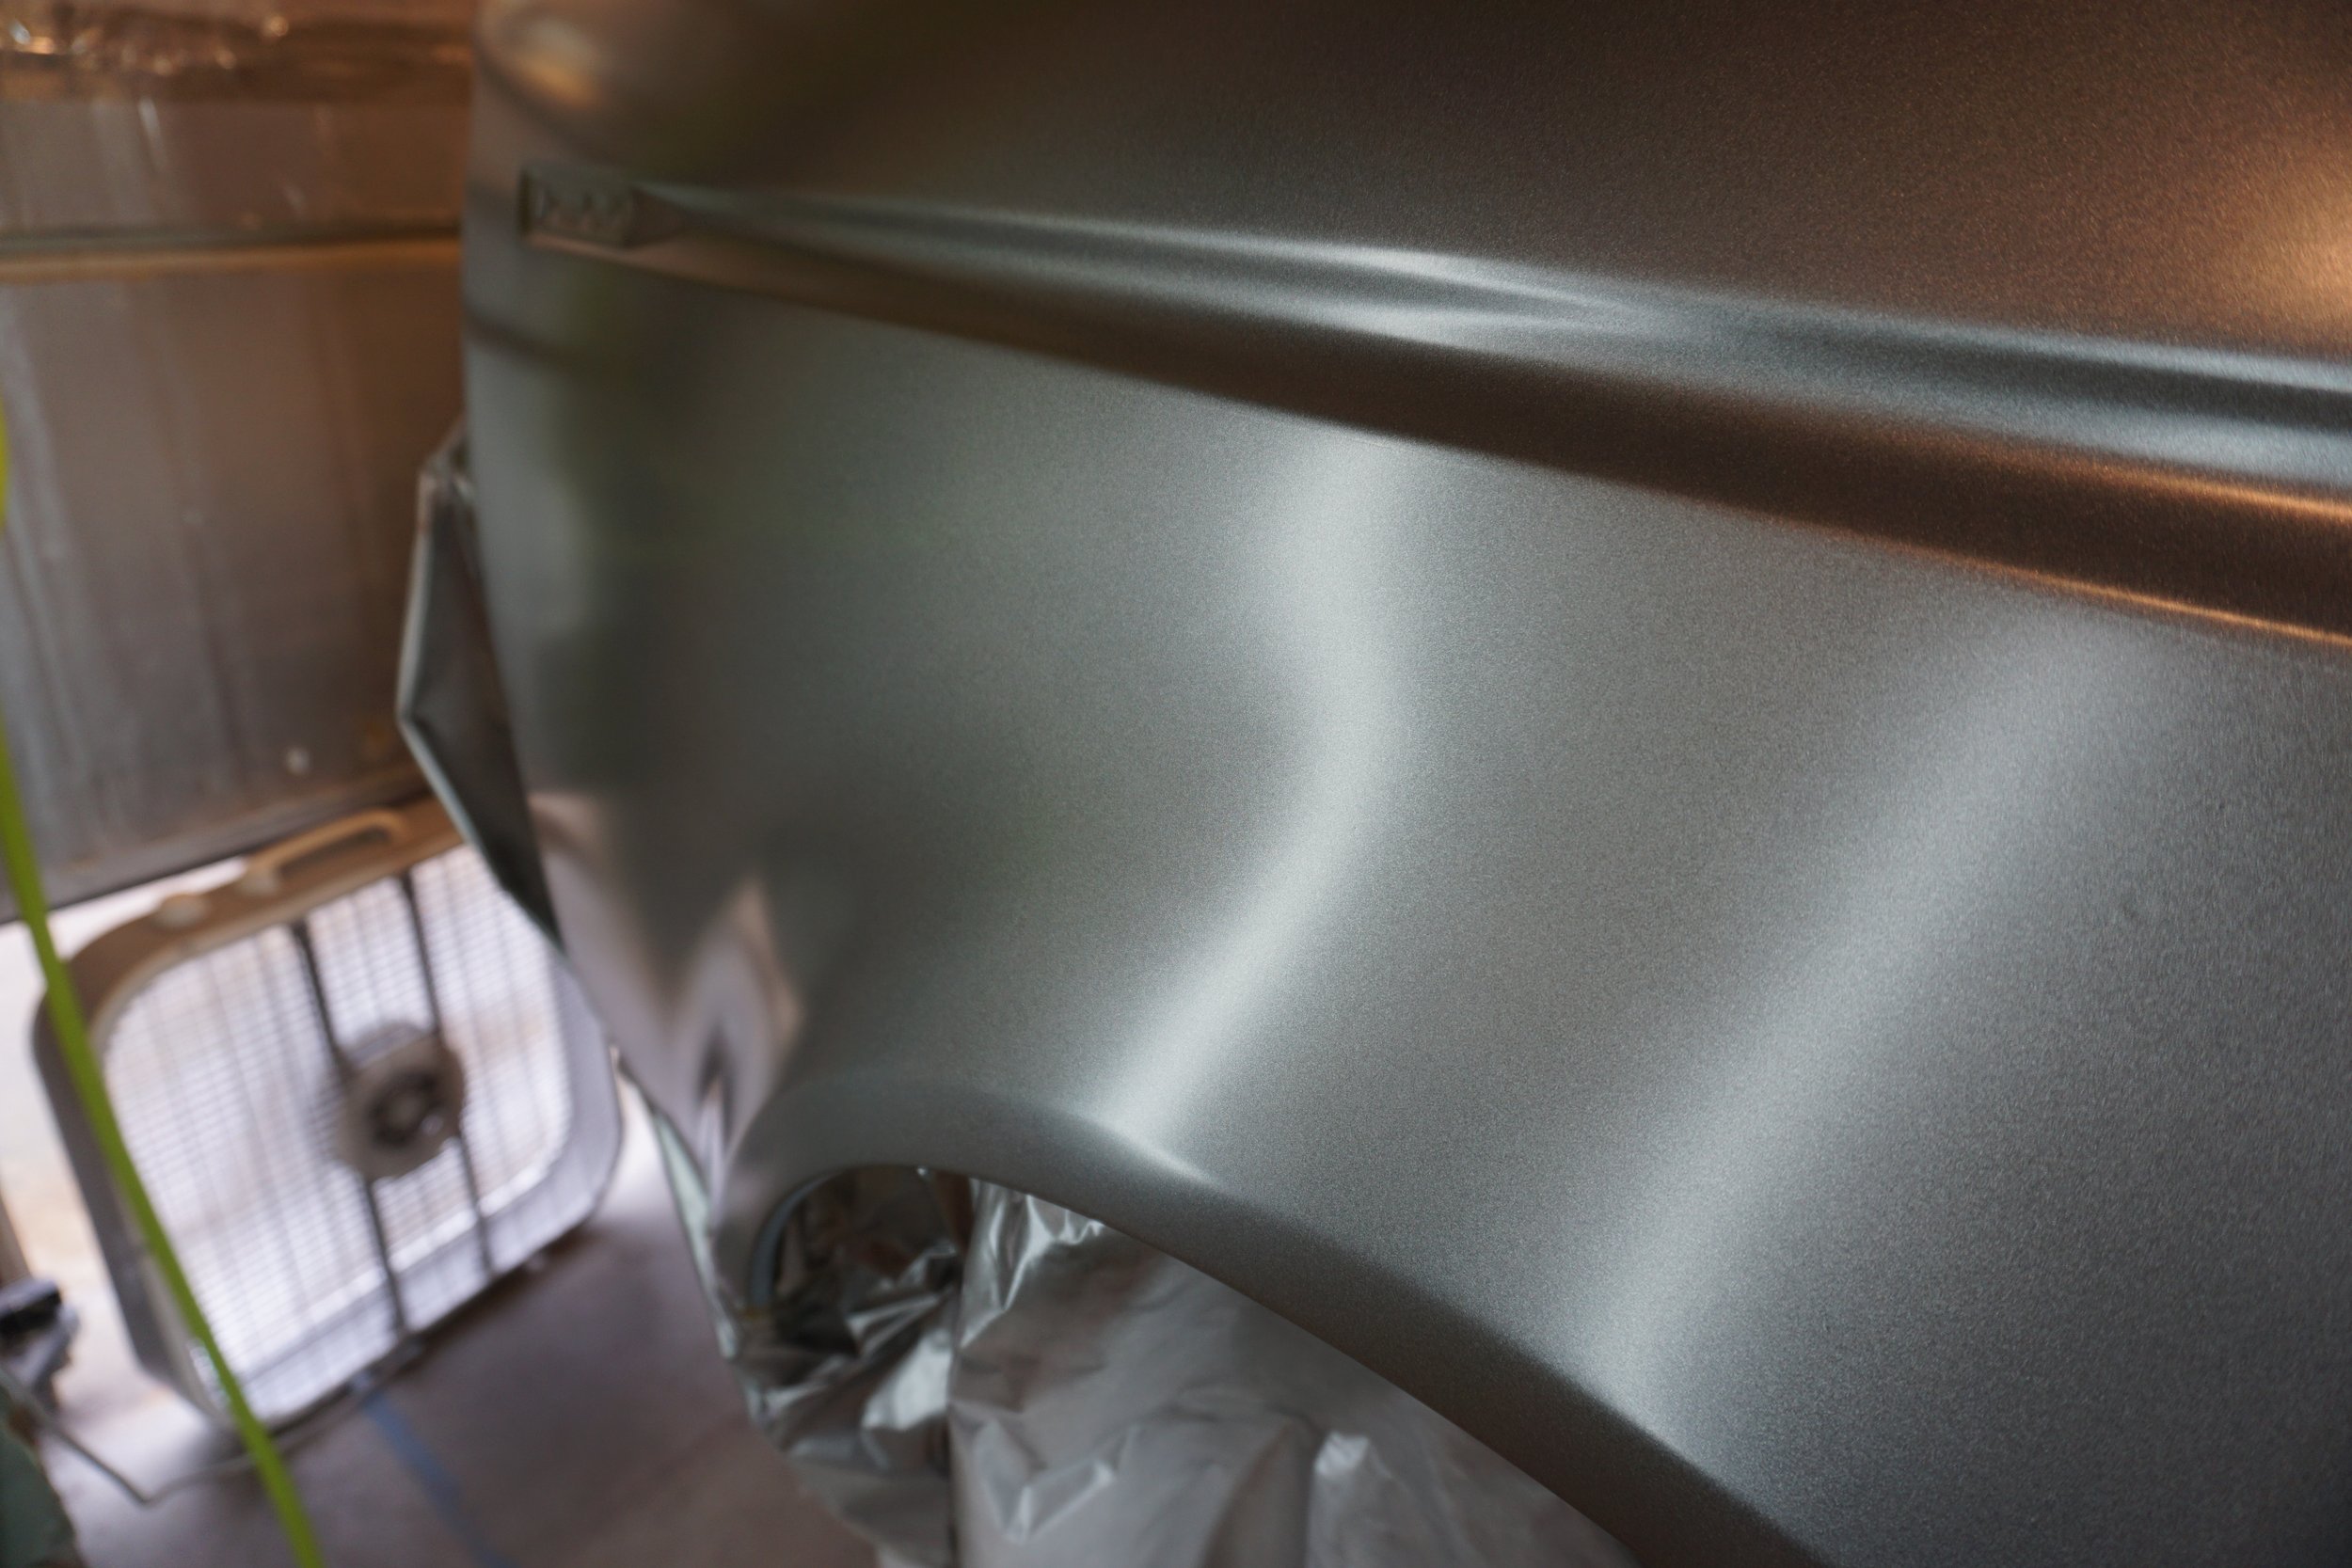
And after clear coat, cutting, and buffing:
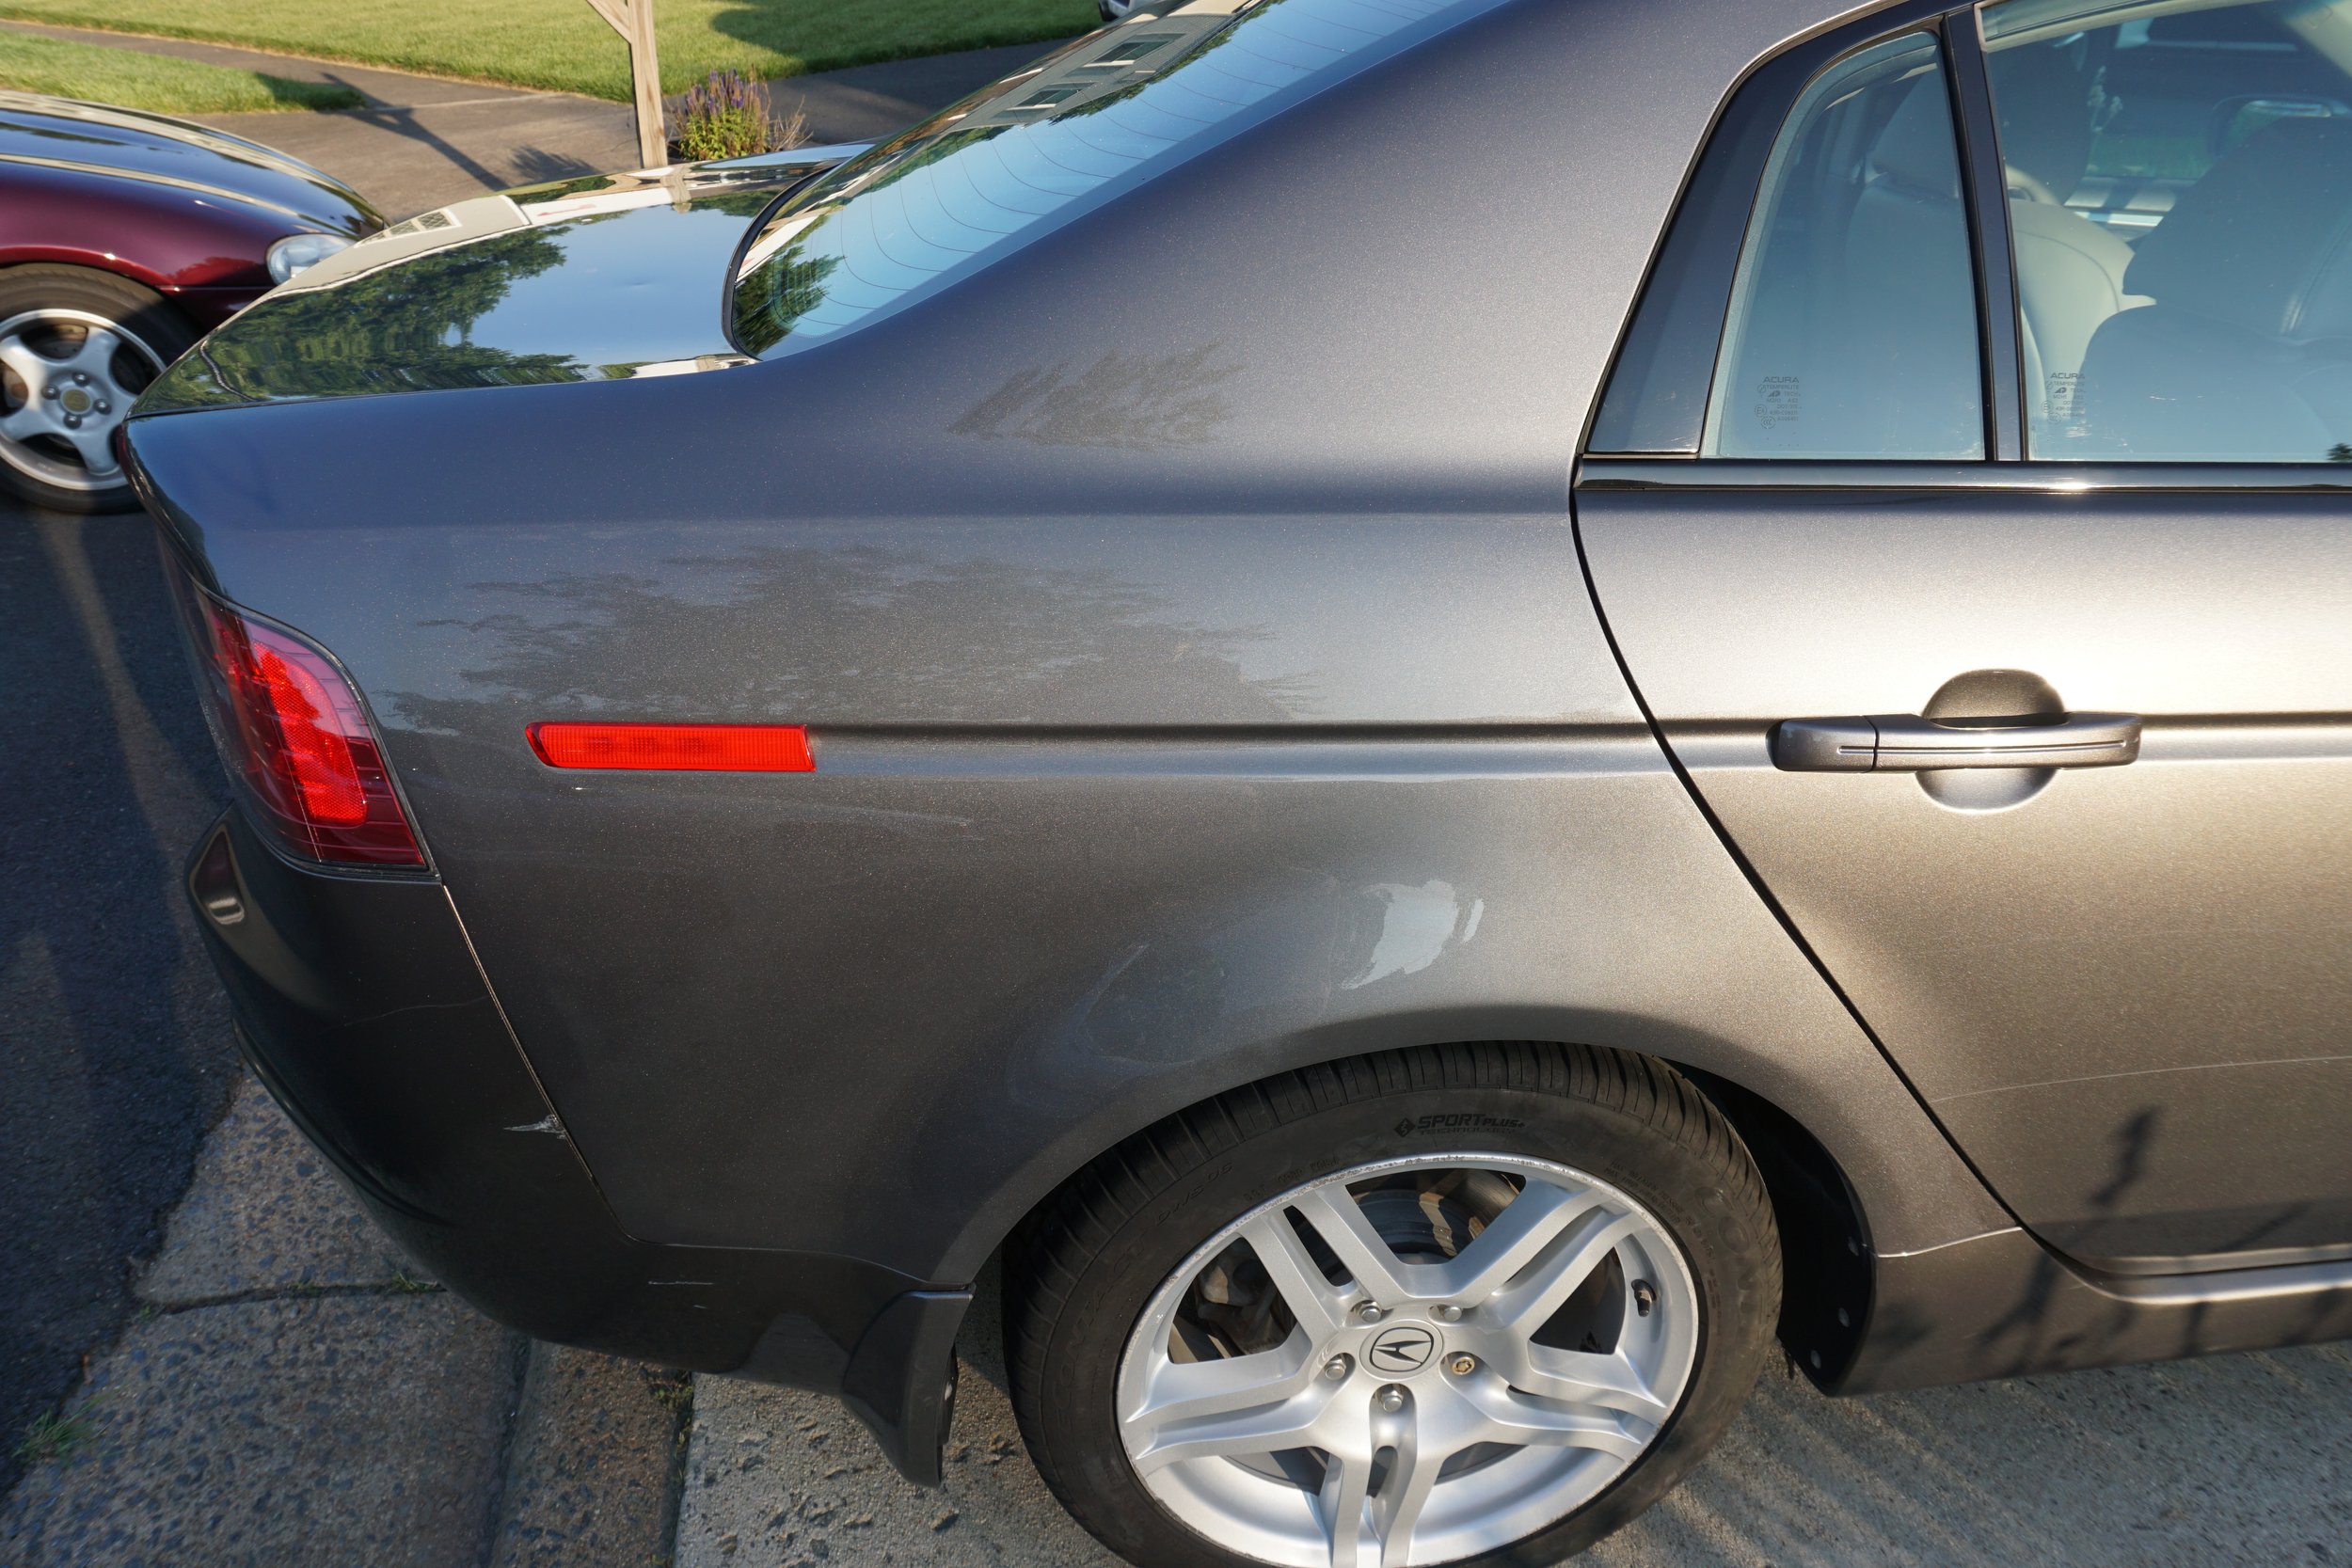
Blending into the door and bumper were out of the scope of this project; my mom just wanted it fixed enough so rust wouldn't become an issue in the future. I made a ton of mistakes, but learned from all of them. I'll be doing a few more projects before doing the I30 as I demand perfection on my car.
I set up my new 80 gallon air compressor (19 CFM at 90 psi), routed all of the PEX piping, set up the air filtration/dryer, and ordered a whole lot of other supplies and completed my first "real" painting project on my mom's Acura TL. I've done stuff with 2K rattle cans before, but now I've got real paint guns, and real high quality primers, paints, and clear coats. Since my mom doesn't exactly have an eye for paint perfection, her car was the perfect test bed for all of my new tools so I could make my mistakes on her car before moving onto my own. I made plenty of mistakes, but was able to correct almost all of them, and in the end I was very happy with how the job turned out.
After the stud welder and puller:
After epoxy primer on all bare metal and then body filler:
After 2K primer and blocking:
After clear base and base coat:
And after clear coat, cutting, and buffing:
Blending into the door and bumper were out of the scope of this project; my mom just wanted it fixed enough so rust wouldn't become an issue in the future. I made a ton of mistakes, but learned from all of them. I'll be doing a few more projects before doing the I30 as I demand perfection on my car.
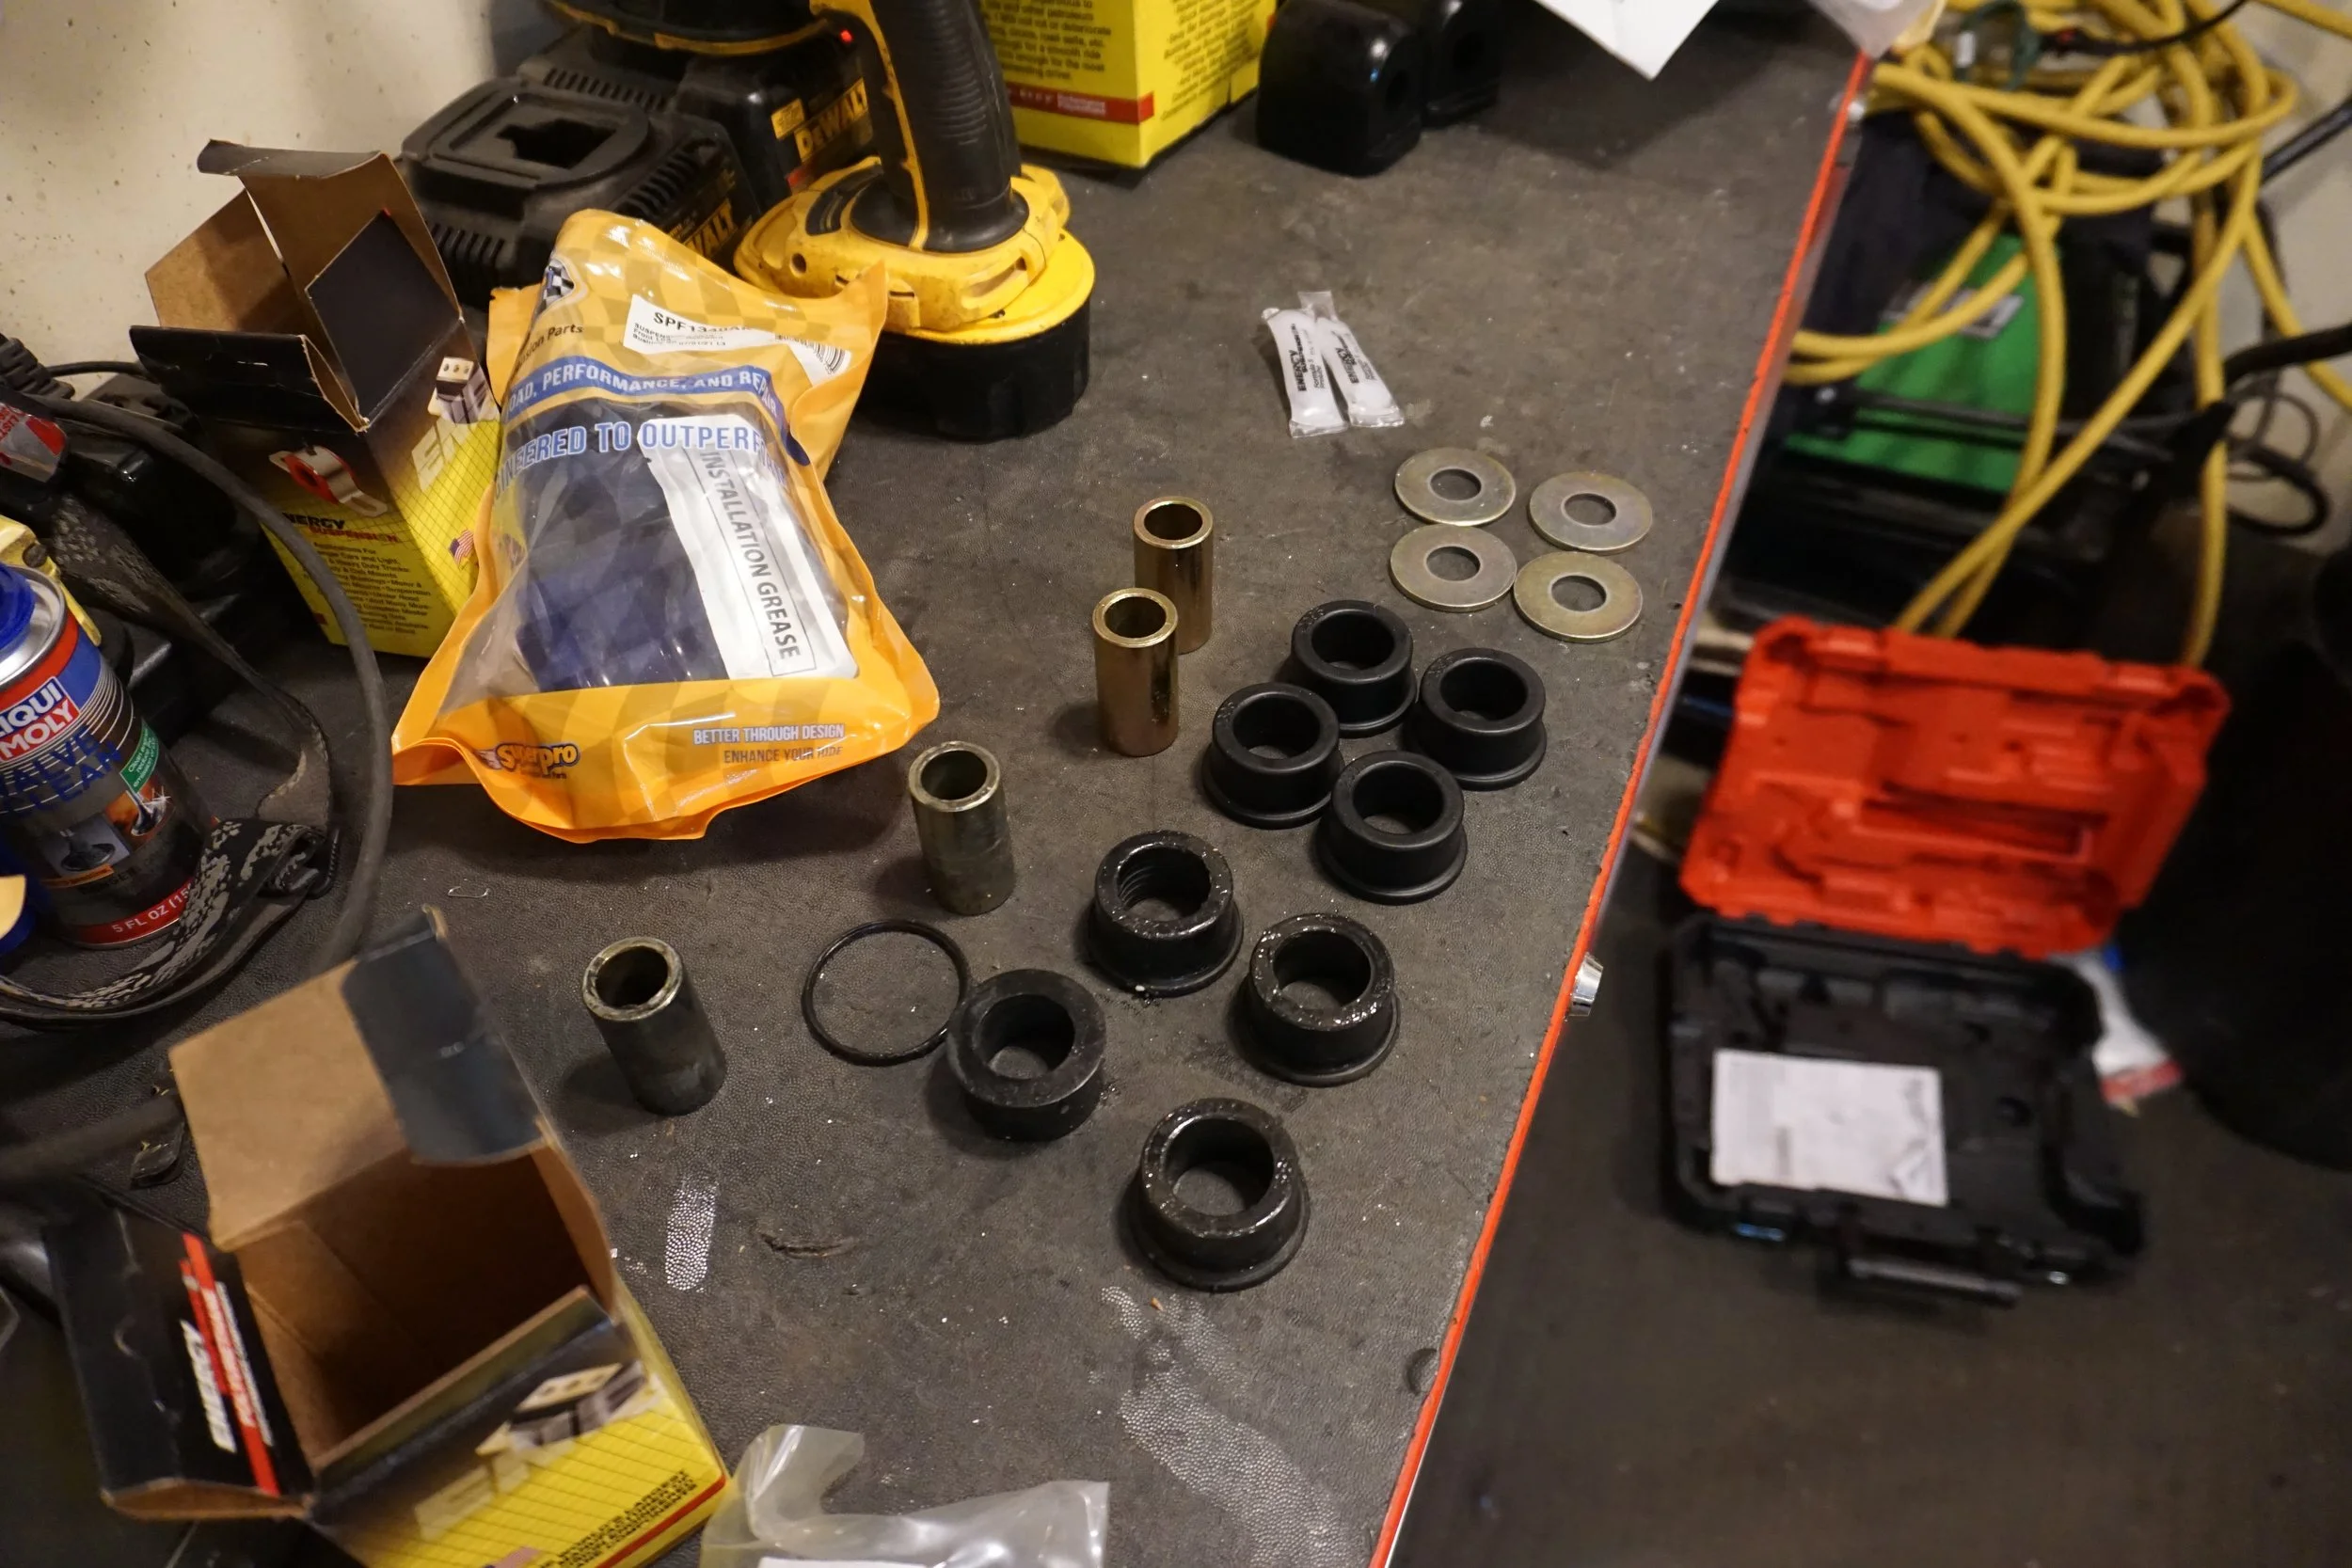
But I do have some I30 content for you as we started up the summer session of trackcross! But first, some repairs were needed. The ES poly control arm bushing was shot on the PS, likely due to a combination of heat from the y-pipe and leaking PS fluid, so I needed to replace that before racing. You can see a ring actually broke off from the poly bushing, which allowed the control arm to move around a lot and was causing pretty awful grinding noises when taking hard turns on the track.
I then decided to play around with an idea I had, which was to make a shield for the front bushings to keep the leaking fluids off of them. I used some plastic sheeting for notebooks and made this janky contraption:
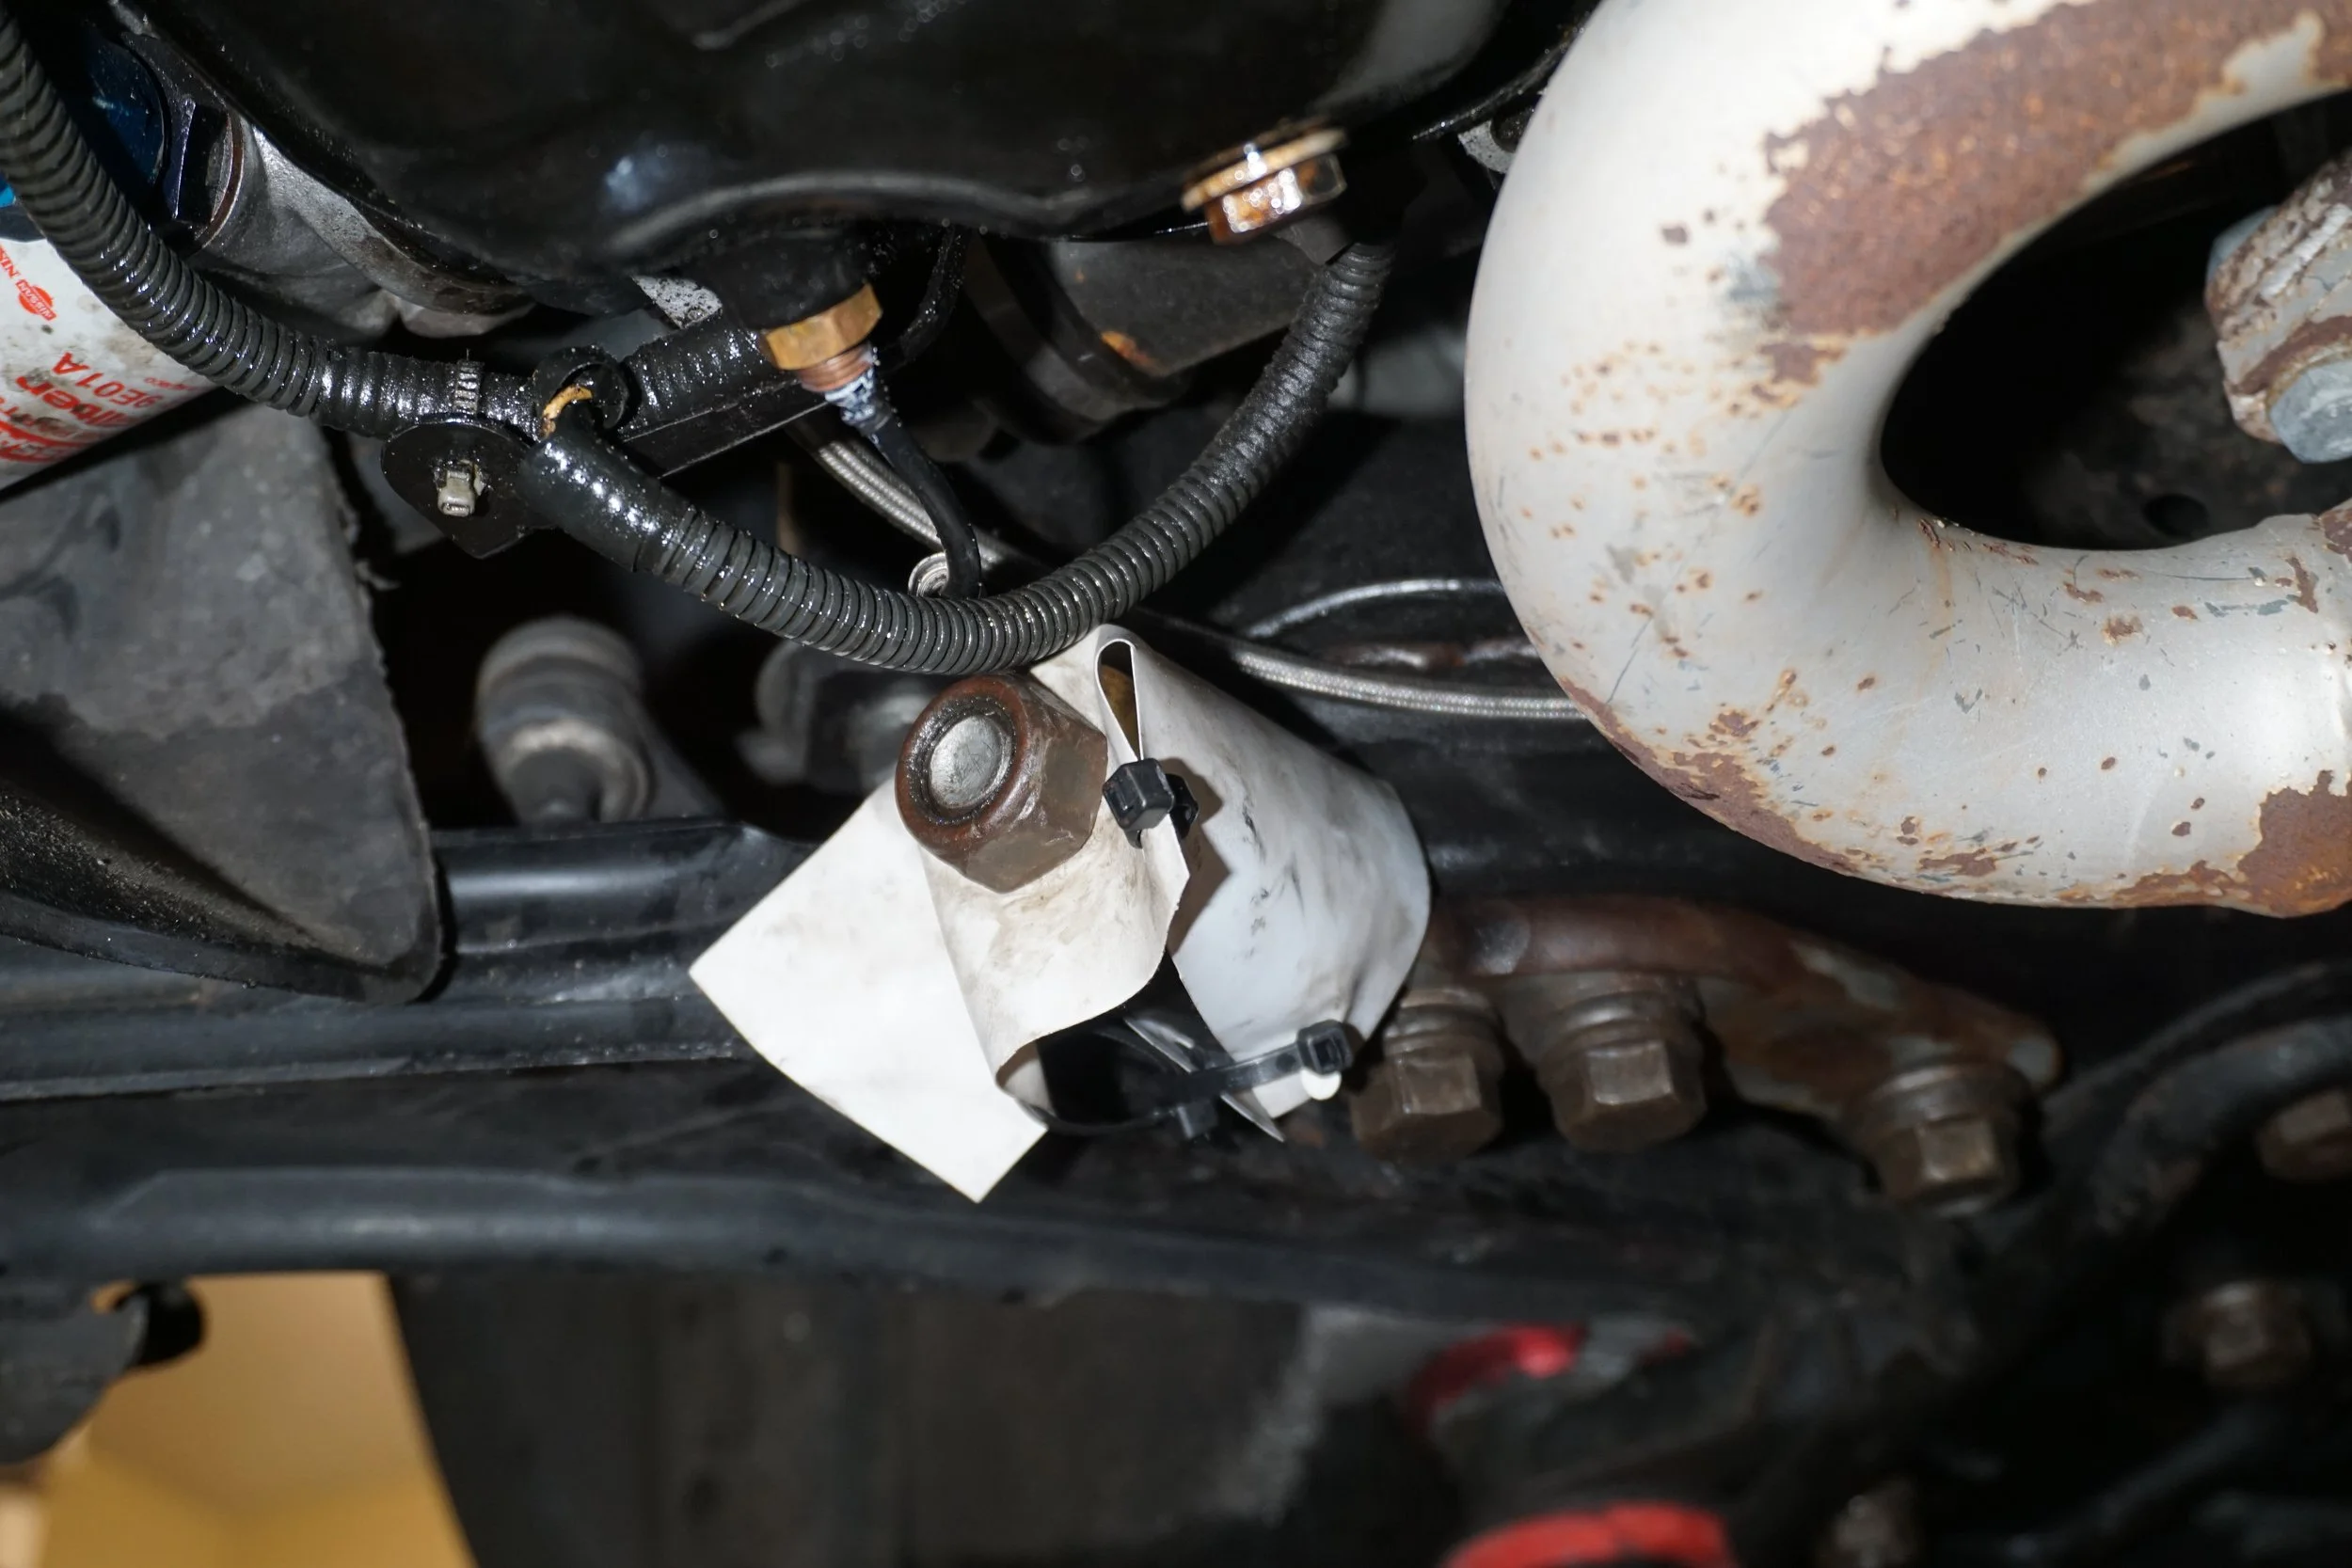
It won't do **** for the heat coming from the exhaust though, so a final design would probably need to be made from thin aluminum or steel.
I also got my new 245/40/17 Bridgestone RE71RS mounted up on my old 17x8.5 Enkei RPF1s. They'll only be used for trackcross events, my PS4S tires will still be for daily use and racing in the rain.
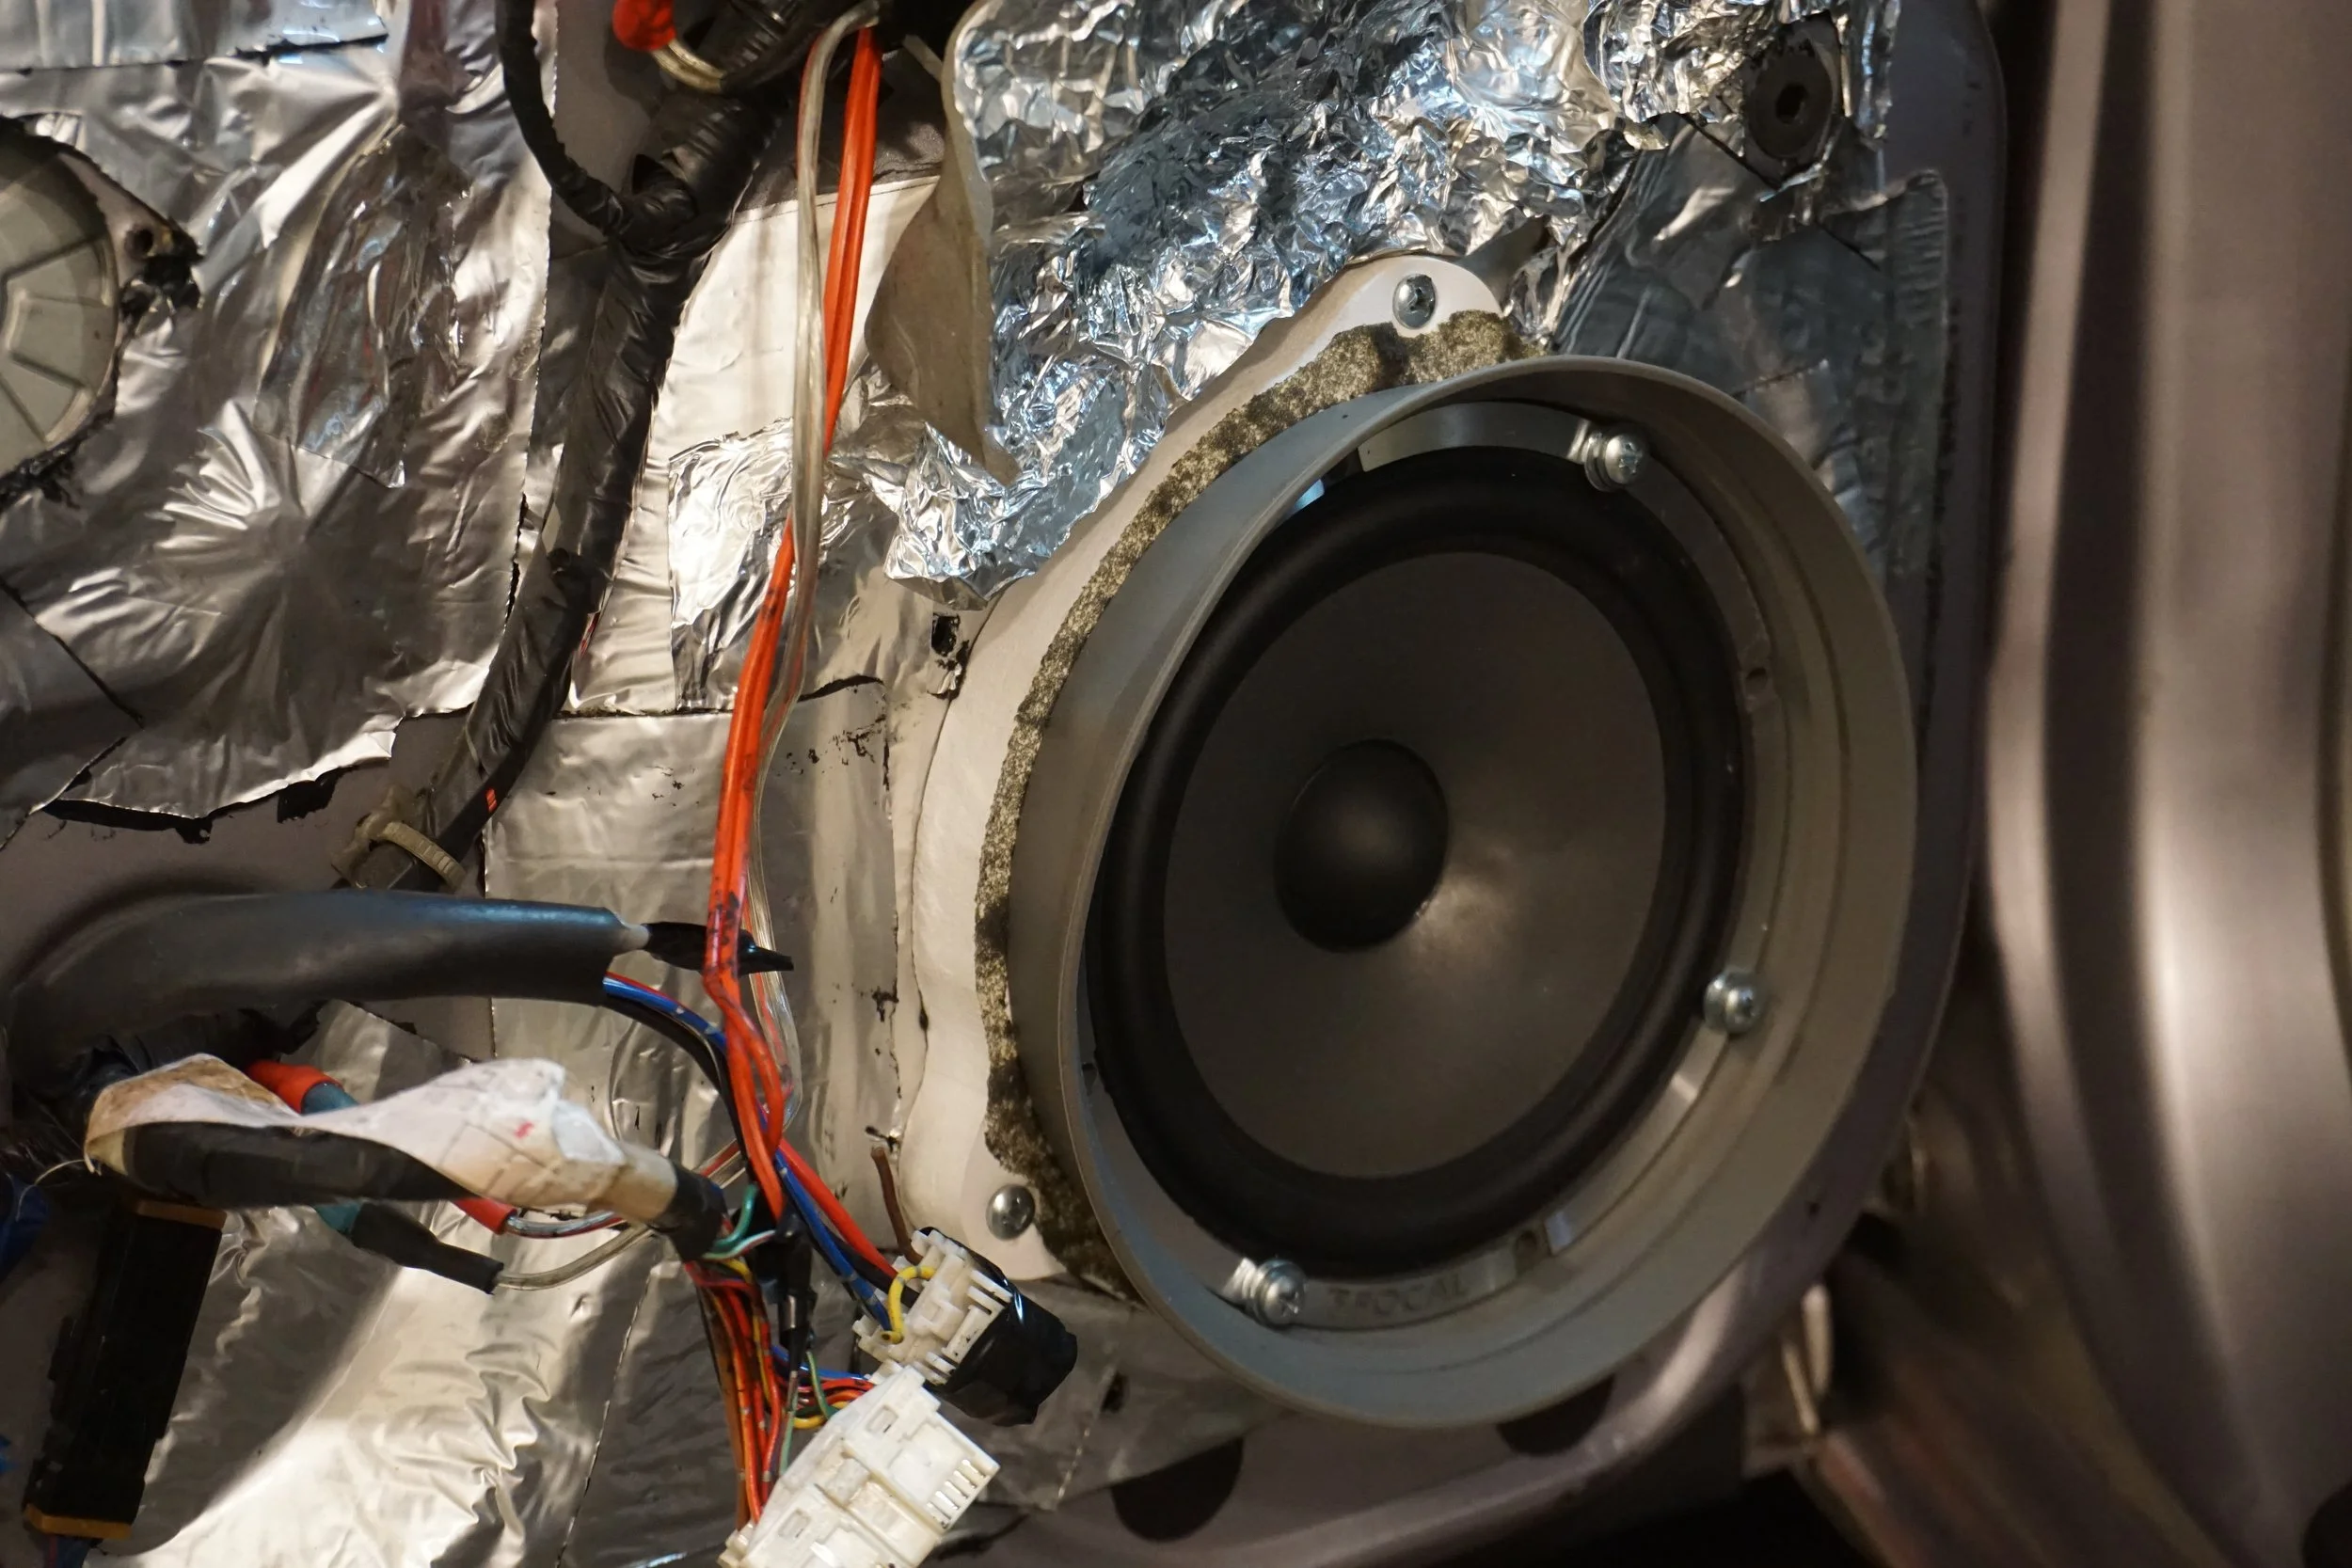
I also installed some new silicone speaker baffles to replace my old foam ones, as I was quiet impressed with how they performed in my Miata. Not shown are the sound deadening/waffle baffle pads stuck to the outer door skin directly behind the speaker. The goal is to eliminate the rattles I hear in my door panels when I crank the stereo up. I haven't had a whole lot of time to assess these yet in the I30, but so far they seem promising.
These are the ones I bought:
Anyways, onto the race! With new front brakes, awesome new tires, and fresh control arm bushings, I was feeling pretty good about the car. Good thing too, as my class was full of cars, including the Mazdaspeed 3 from last summer (now with even more power than before, probably 350 whp) and a brand new Civic Type R. The forecast was looking iffy for rain, and I'm pretty sure my Michelins are better in the rain than the Bridgestones, but I took the chance and ran the Bridgestones. Things were nice and dry while the other half of the cars ran first in the morning, but by the time my heat went the rain came and we were on a soaked track. I ended the morning in 2nd place behind some GTI (not the one I'm normally competing against) because I think he got to race in the dry on his first run before the rain started. I dialed the tire pressures way down and softened up the suspension, and the car felt pretty damn good. I was surprised at how well the new tires put down power in the wet; I had no problem going WOT in 2nd gear and above.
In the afternoon session, both heats ran in the same wet conditions, so times could be compared against all cars. This time I got out to an early lead in my class and never looked back, winning easily. When the final results came out I was pretty shocked with how well I did. I was in 11th overall, but 8 of the 10 cars that beat me were AWD, so I was the 3rd fastest 2WD car overall, behind only a new 911 GTS and a Cayman S.
Hell, I was less than a second behind a 996 911 Turbo! Here's the vid:
There's more than a month before the next event, and I hope to finally install my new and very exciting suspension setup before then. Keep your eyes peeled for some things you've never seen before on any Maxima!
I then decided to play around with an idea I had, which was to make a shield for the front bushings to keep the leaking fluids off of them. I used some plastic sheeting for notebooks and made this janky contraption:
It won't do **** for the heat coming from the exhaust though, so a final design would probably need to be made from thin aluminum or steel.
I also got my new 245/40/17 Bridgestone RE71RS mounted up on my old 17x8.5 Enkei RPF1s. They'll only be used for trackcross events, my PS4S tires will still be for daily use and racing in the rain.
I also installed some new silicone speaker baffles to replace my old foam ones, as I was quiet impressed with how they performed in my Miata. Not shown are the sound deadening/waffle baffle pads stuck to the outer door skin directly behind the speaker. The goal is to eliminate the rattles I hear in my door panels when I crank the stereo up. I haven't had a whole lot of time to assess these yet in the I30, but so far they seem promising.
These are the ones I bought:
Anyways, onto the race! With new front brakes, awesome new tires, and fresh control arm bushings, I was feeling pretty good about the car. Good thing too, as my class was full of cars, including the Mazdaspeed 3 from last summer (now with even more power than before, probably 350 whp) and a brand new Civic Type R. The forecast was looking iffy for rain, and I'm pretty sure my Michelins are better in the rain than the Bridgestones, but I took the chance and ran the Bridgestones. Things were nice and dry while the other half of the cars ran first in the morning, but by the time my heat went the rain came and we were on a soaked track. I ended the morning in 2nd place behind some GTI (not the one I'm normally competing against) because I think he got to race in the dry on his first run before the rain started. I dialed the tire pressures way down and softened up the suspension, and the car felt pretty damn good. I was surprised at how well the new tires put down power in the wet; I had no problem going WOT in 2nd gear and above.
In the afternoon session, both heats ran in the same wet conditions, so times could be compared against all cars. This time I got out to an early lead in my class and never looked back, winning easily. When the final results came out I was pretty shocked with how well I did. I was in 11th overall, but 8 of the 10 cars that beat me were AWD, so I was the 3rd fastest 2WD car overall, behind only a new 911 GTS and a Cayman S.
Hell, I was less than a second behind a 996 911 Turbo! Here's the vid:
There's more than a month before the next event, and I hope to finally install my new and very exciting suspension setup before then. Keep your eyes peeled for some things you've never seen before on any Maxima!
Last edited by 95maxrider; Jun 3, 2023 at 09:45 AM.
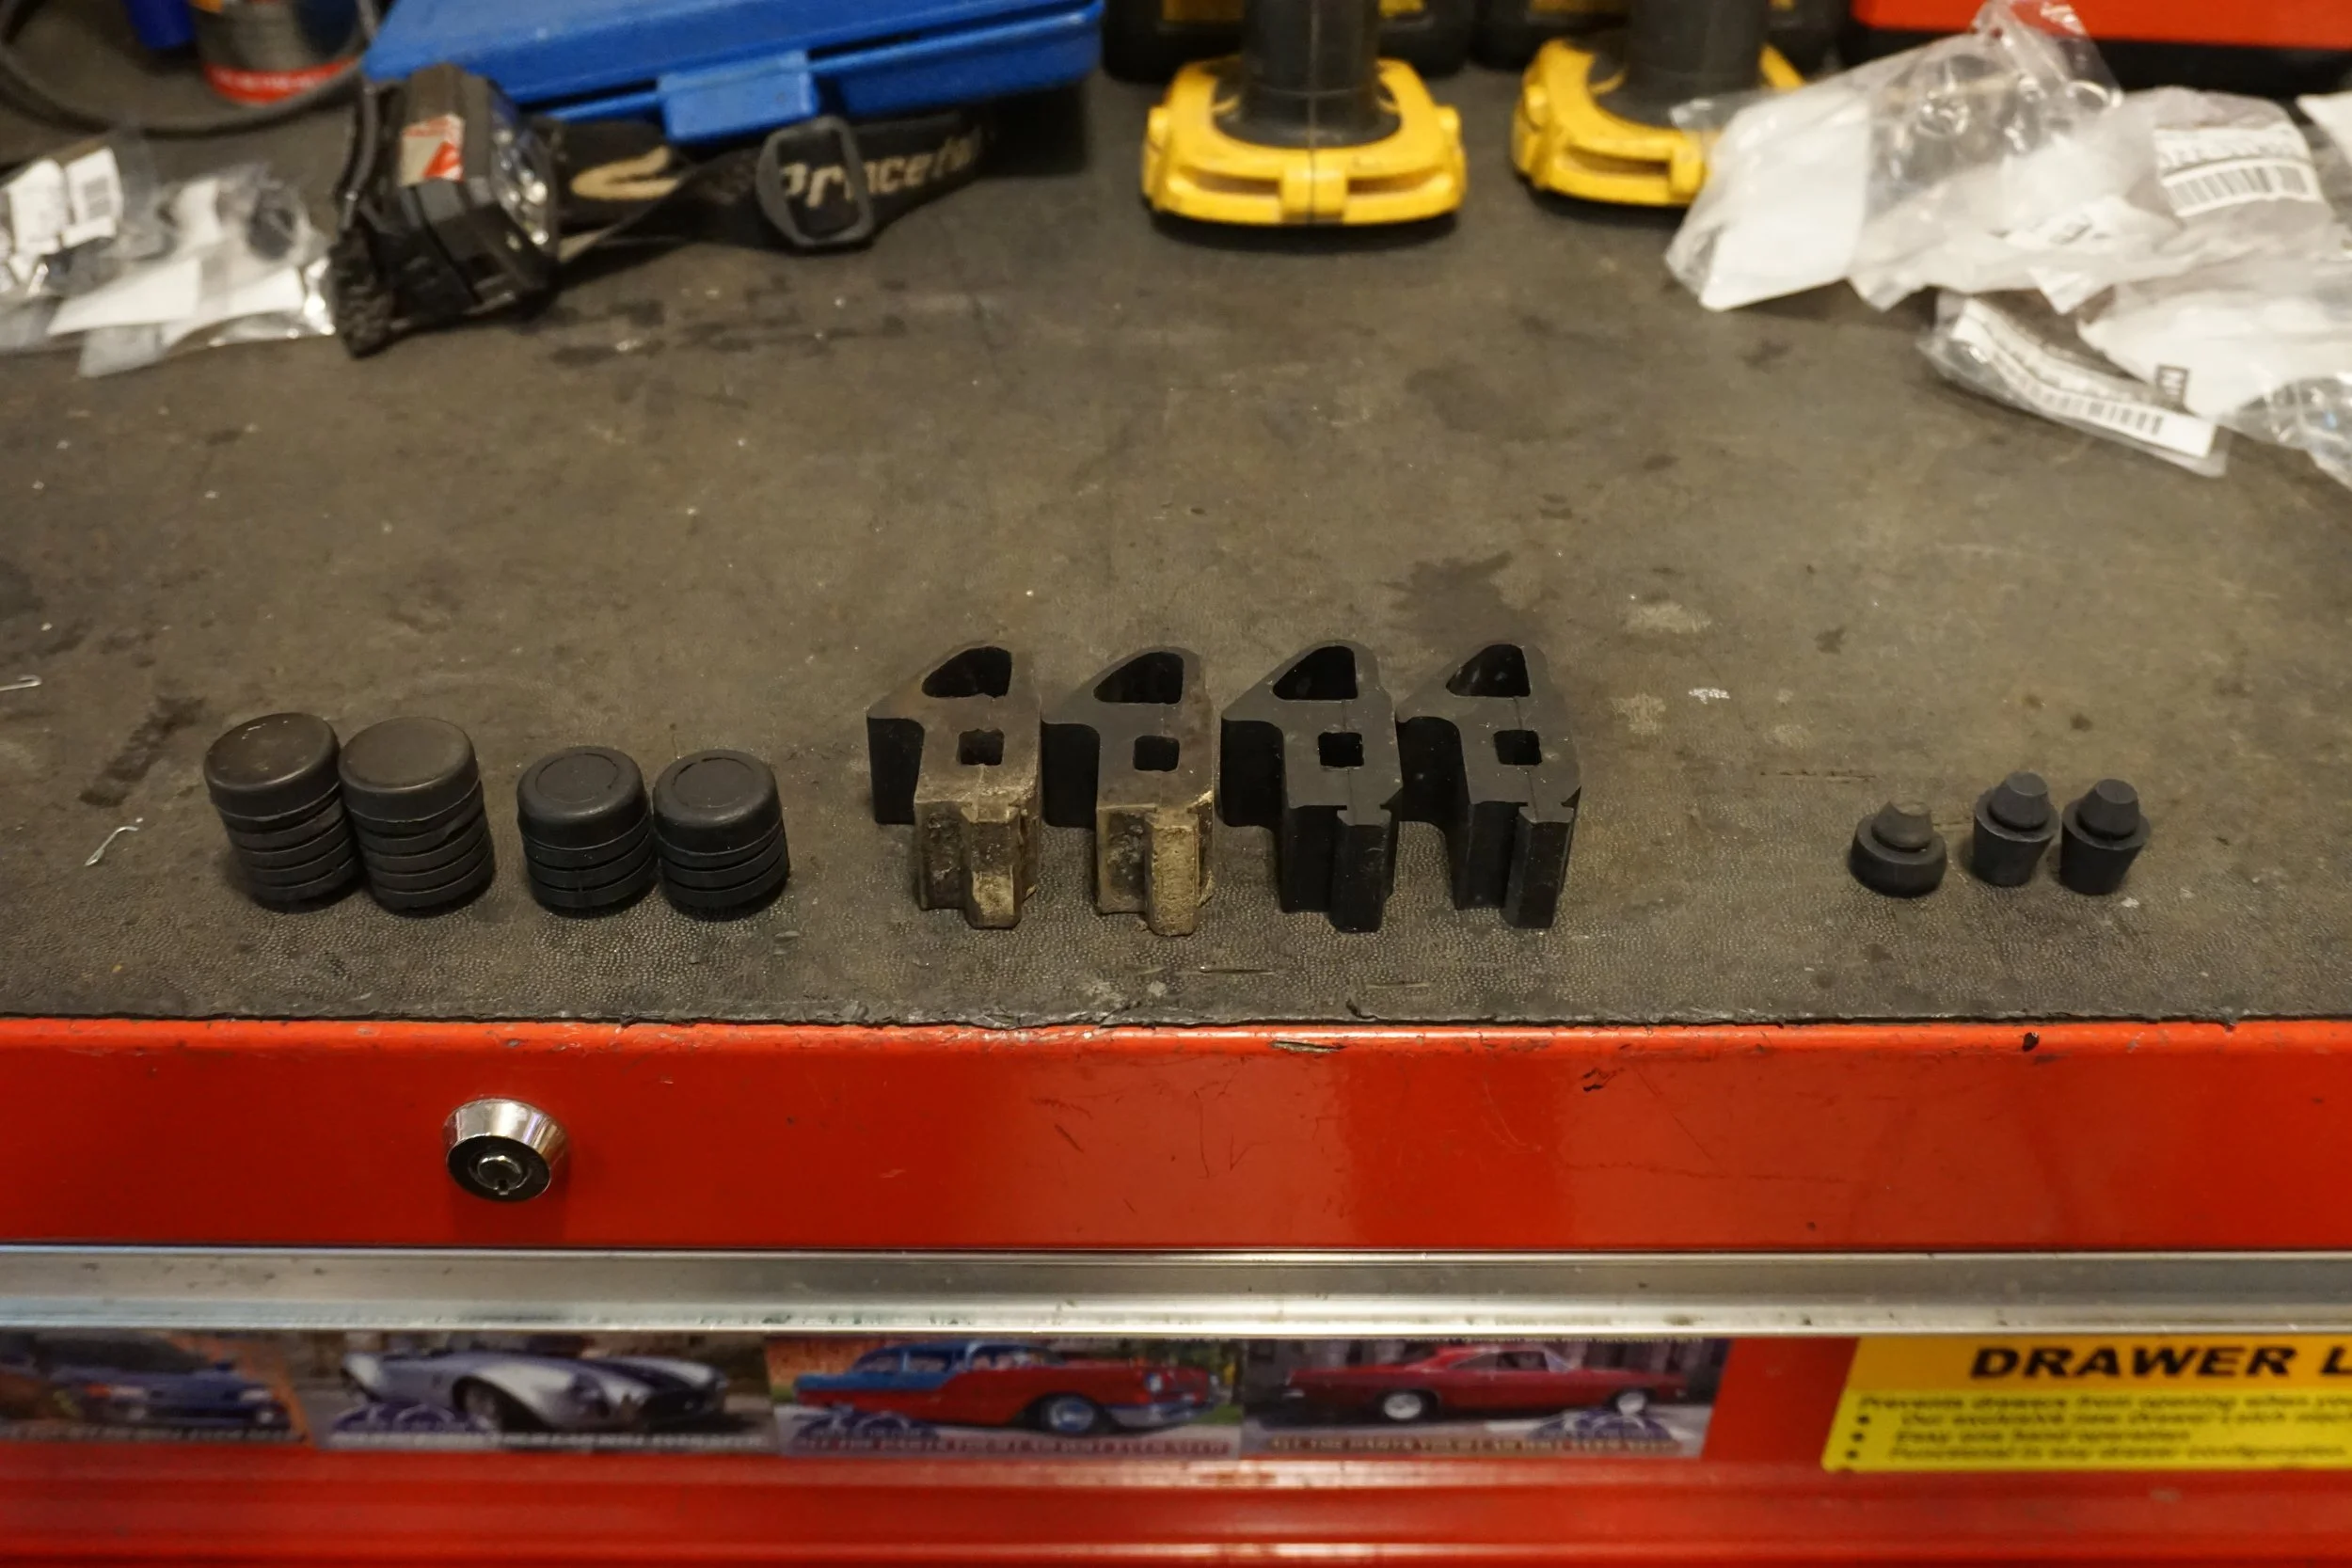
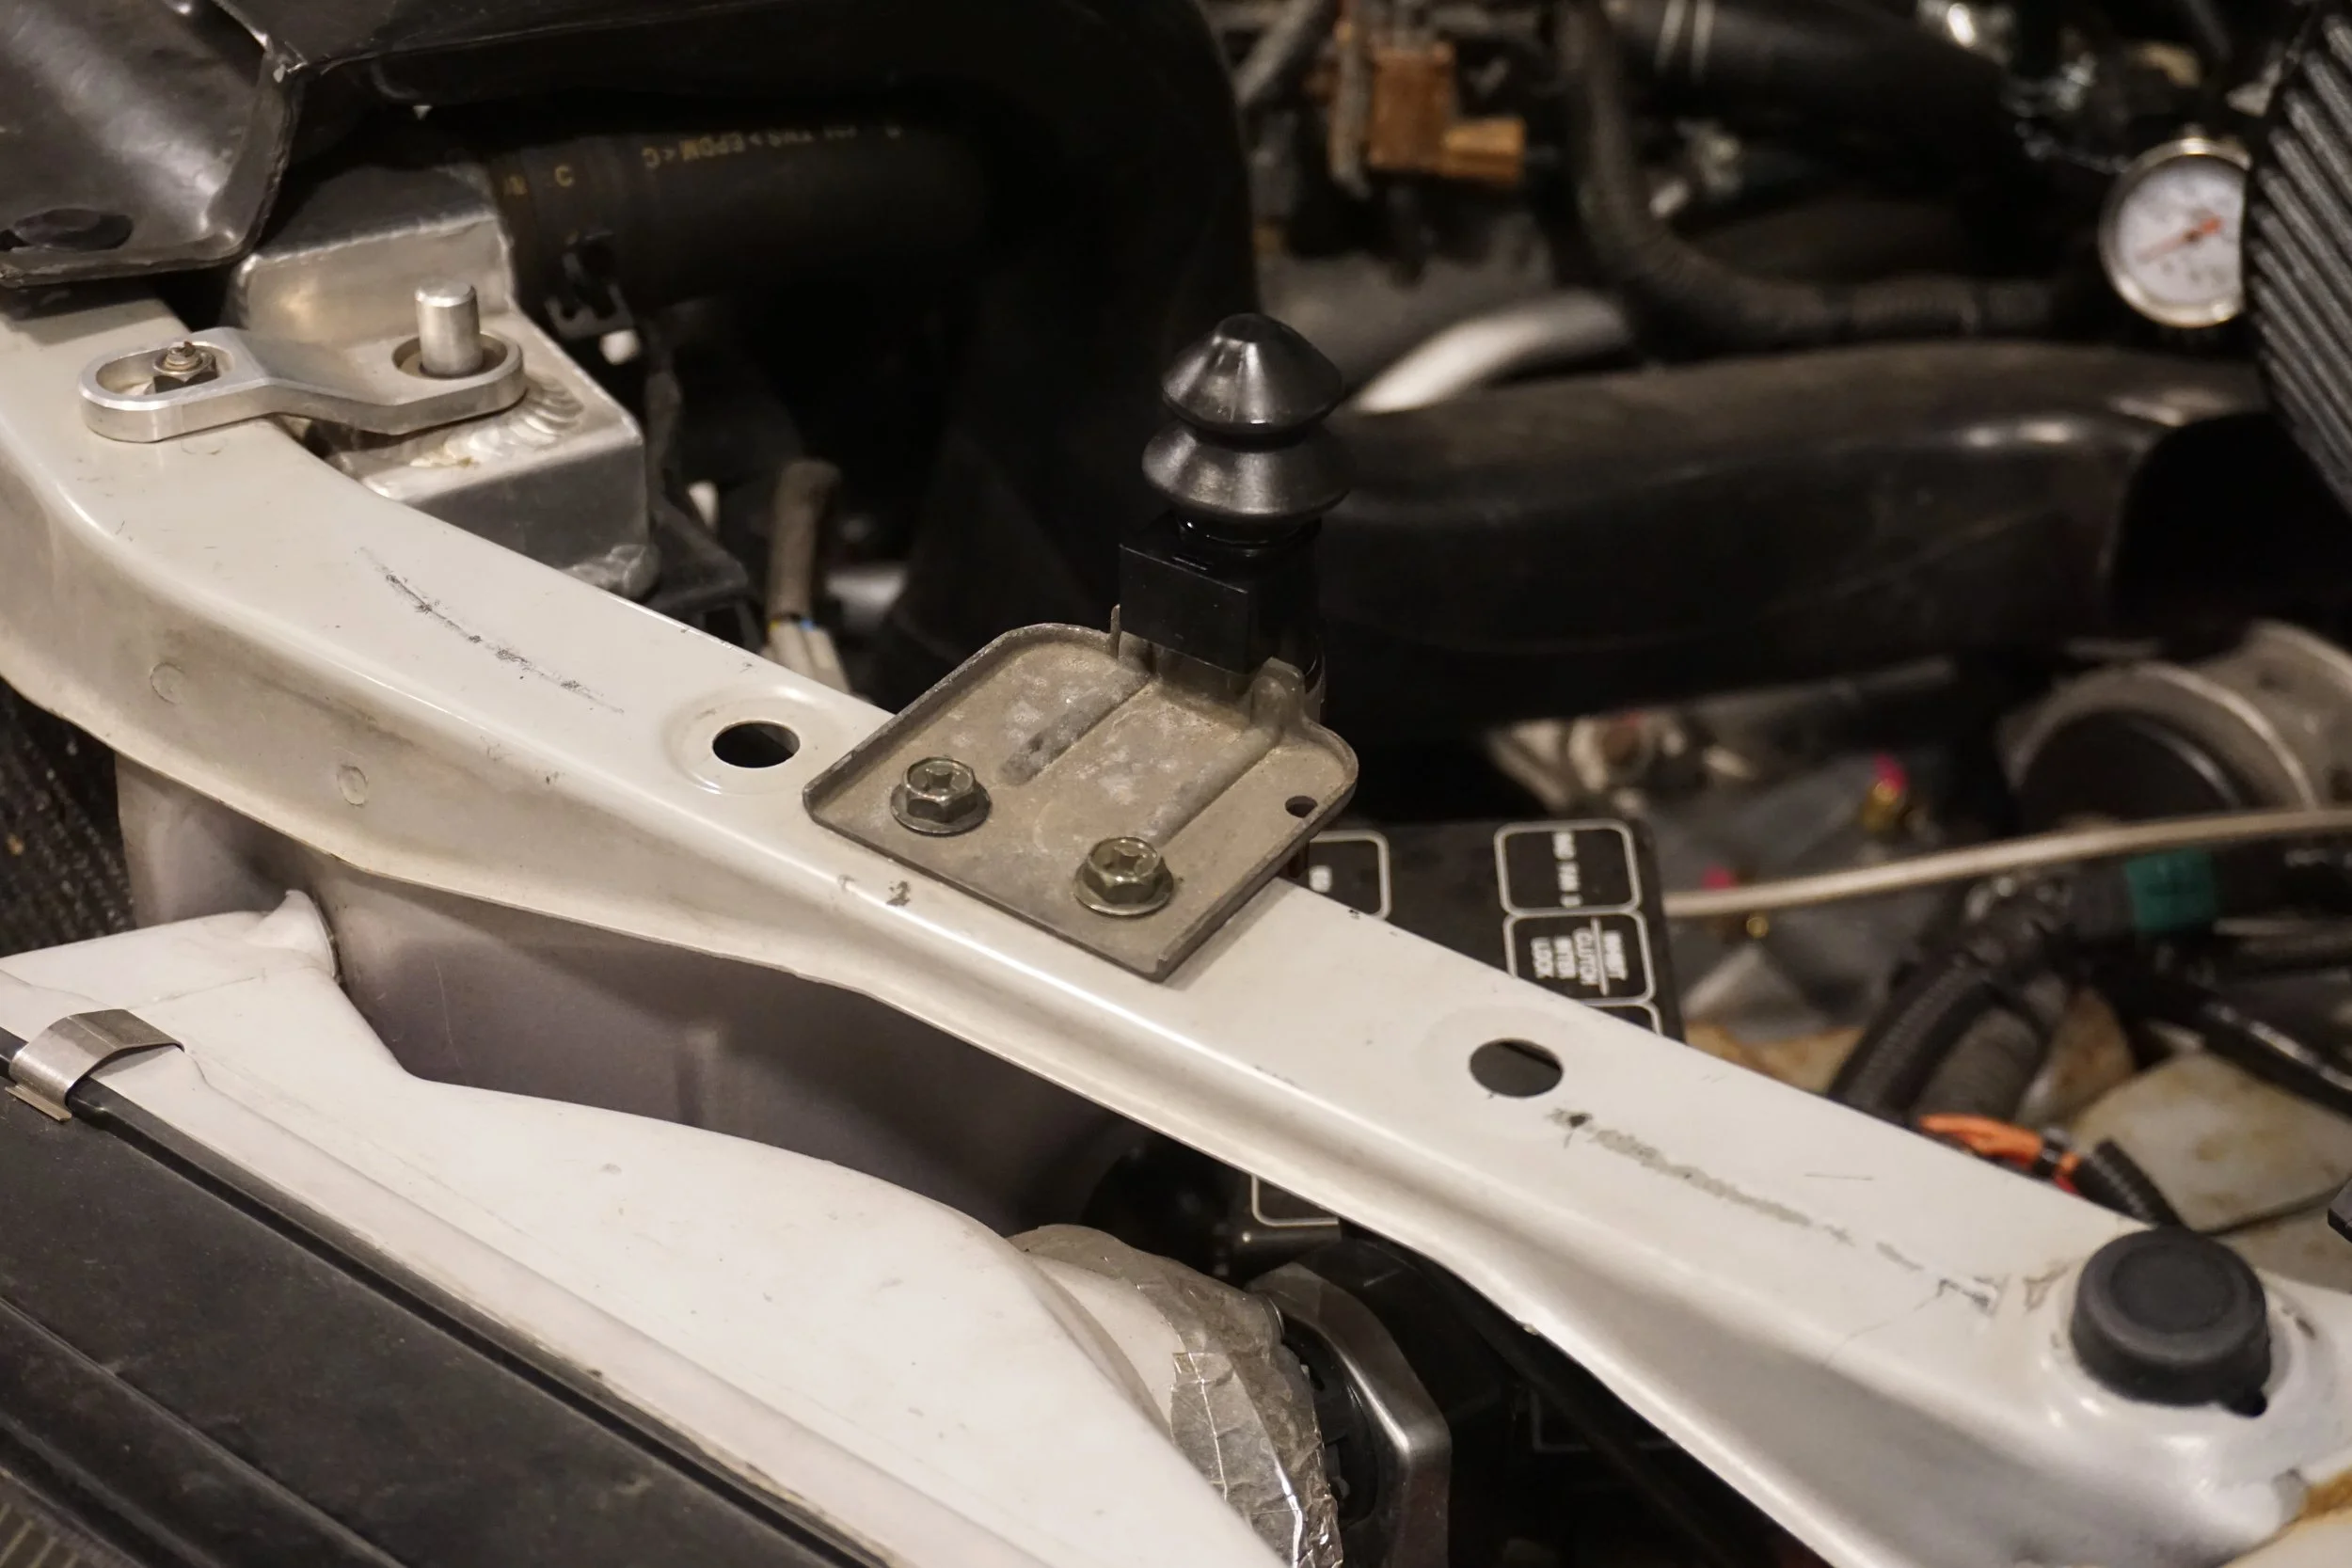
I'm still waiting on a few parts to arrive before I dive into the suspension work, so I did a few small things in the meantime. First, I replaced all of the rubber bumpers under the hood with new pieces.
Then I installed an aftermarket shift ****. I wasn't loving the shape of the heavy metal one, and this aftermarket one was in between (120g) the weight of the stock **** (about 60g) and the metal one (180g). I don't love the chrome plastic on it, but it does feel good in use.
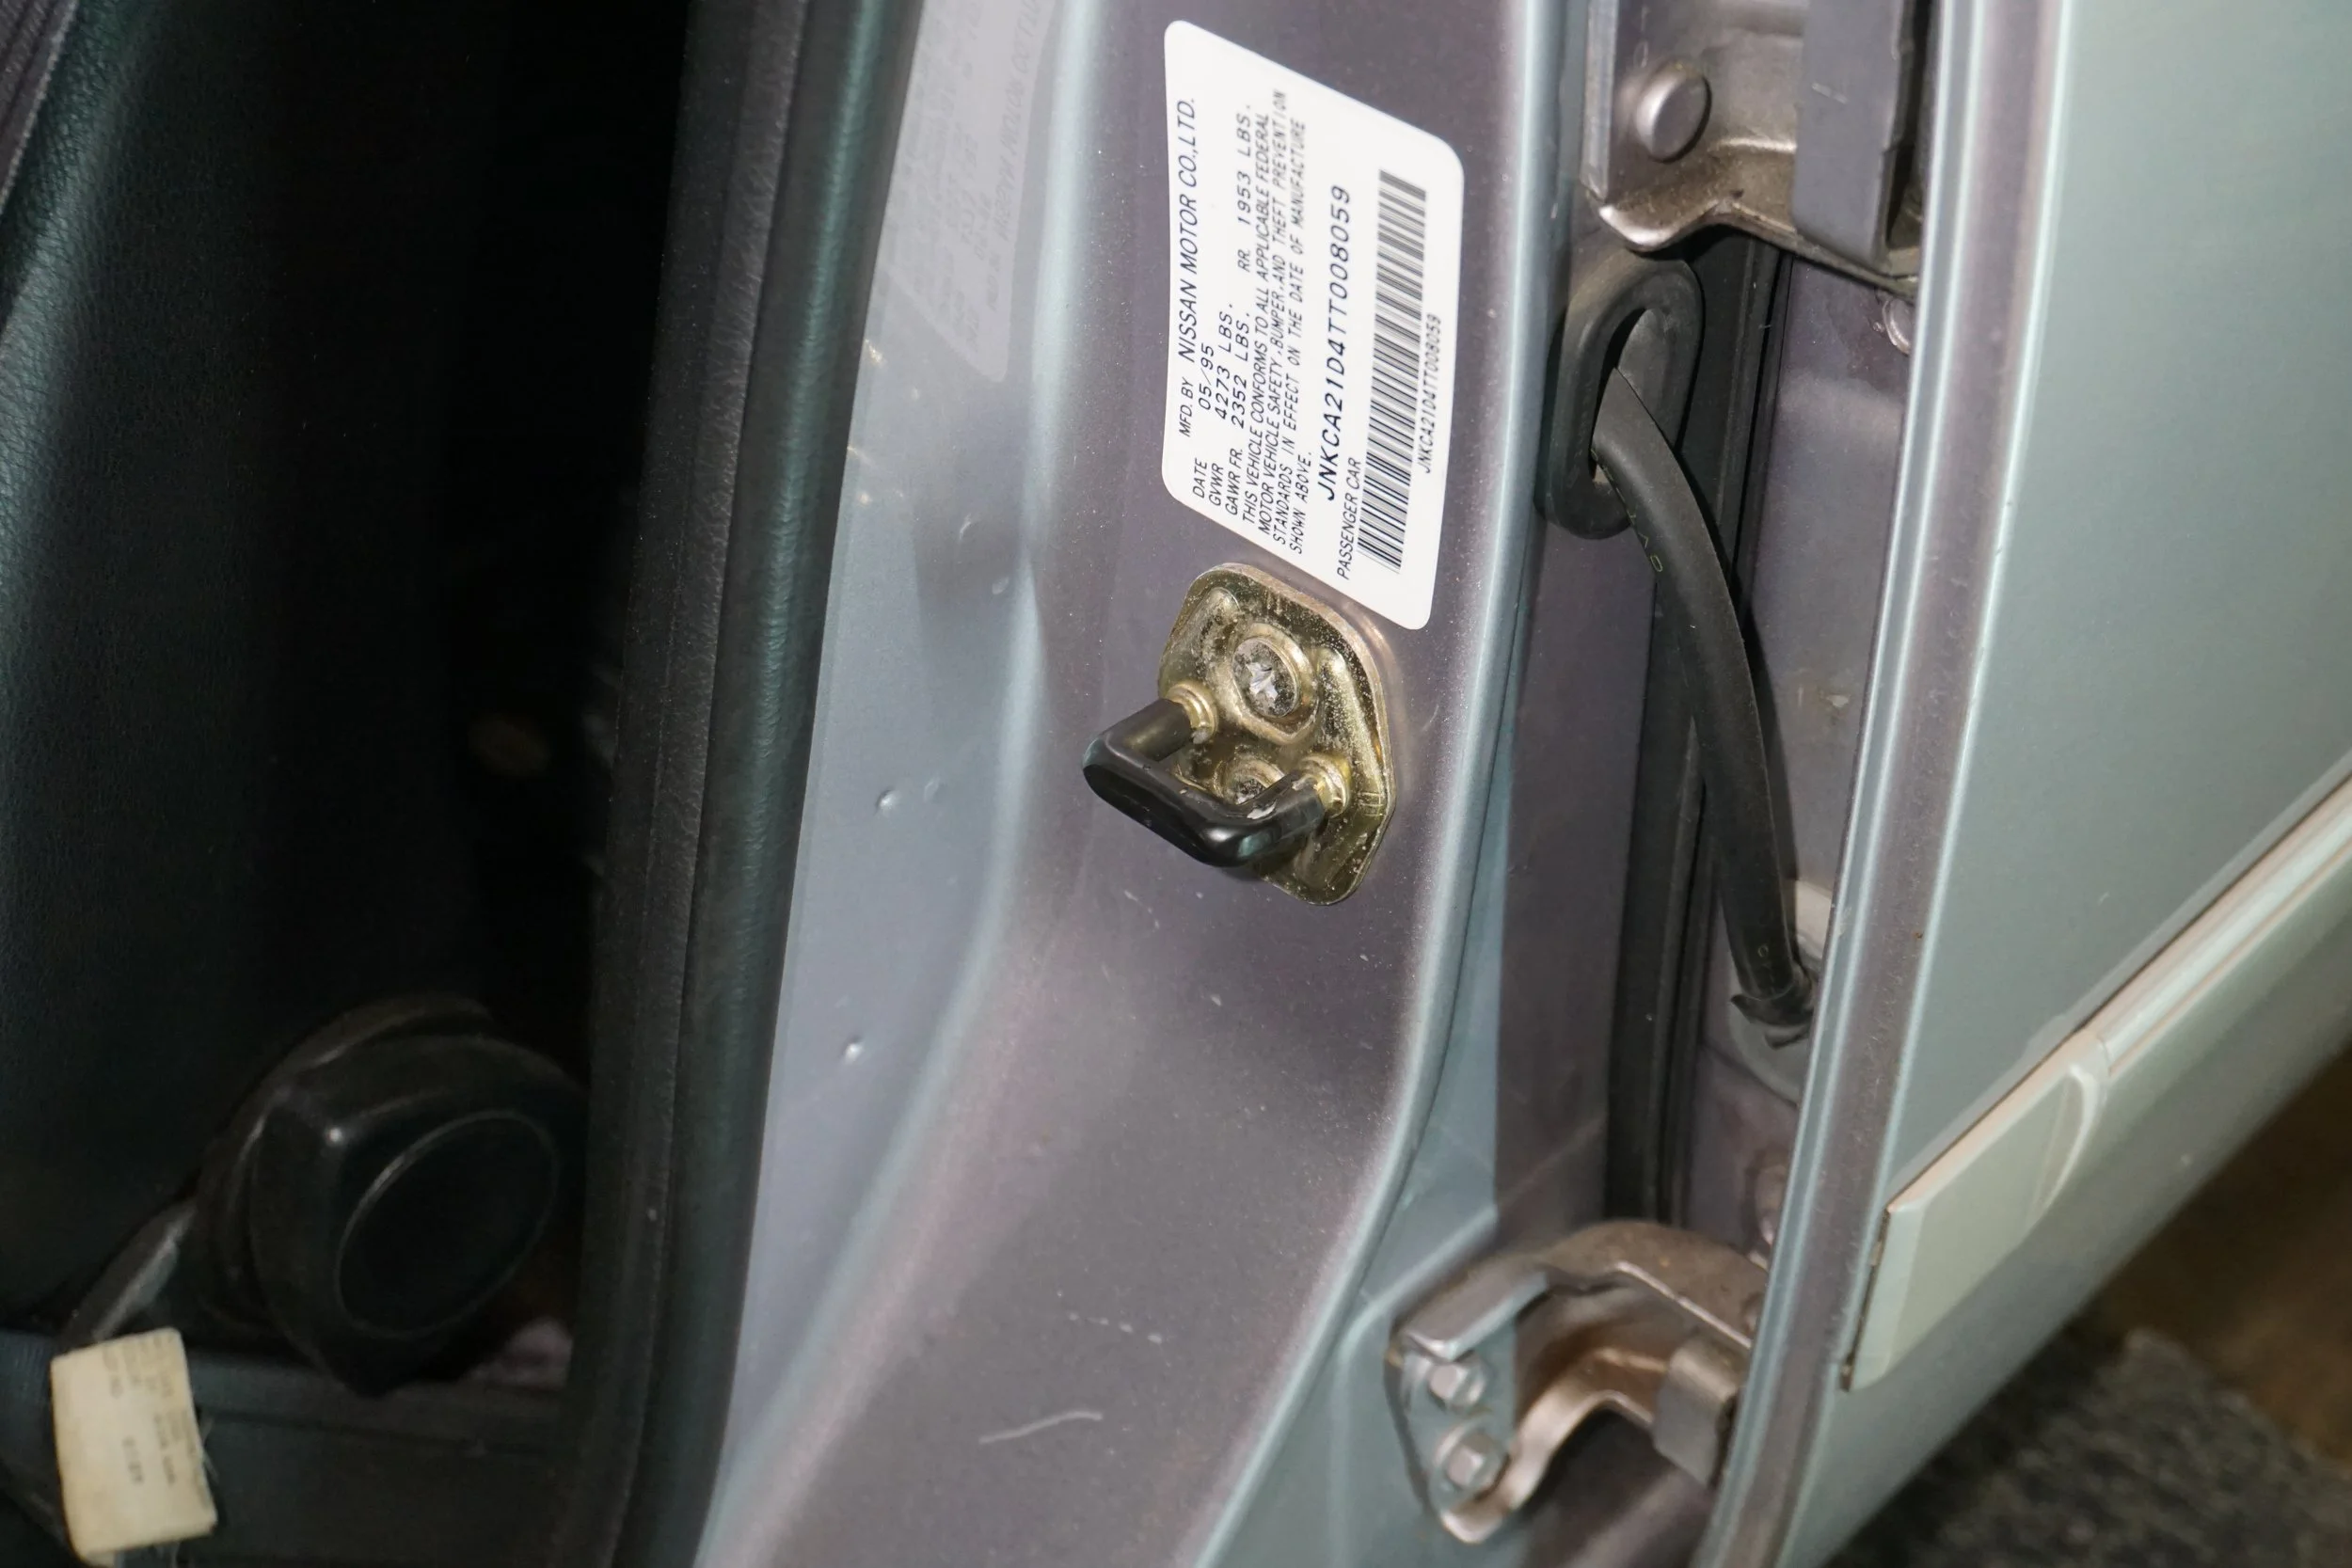
I went to the junkyard for the first time in over a year and got some stuff, like 3 "new" door latches to replace the three on my car that had broken plastic:
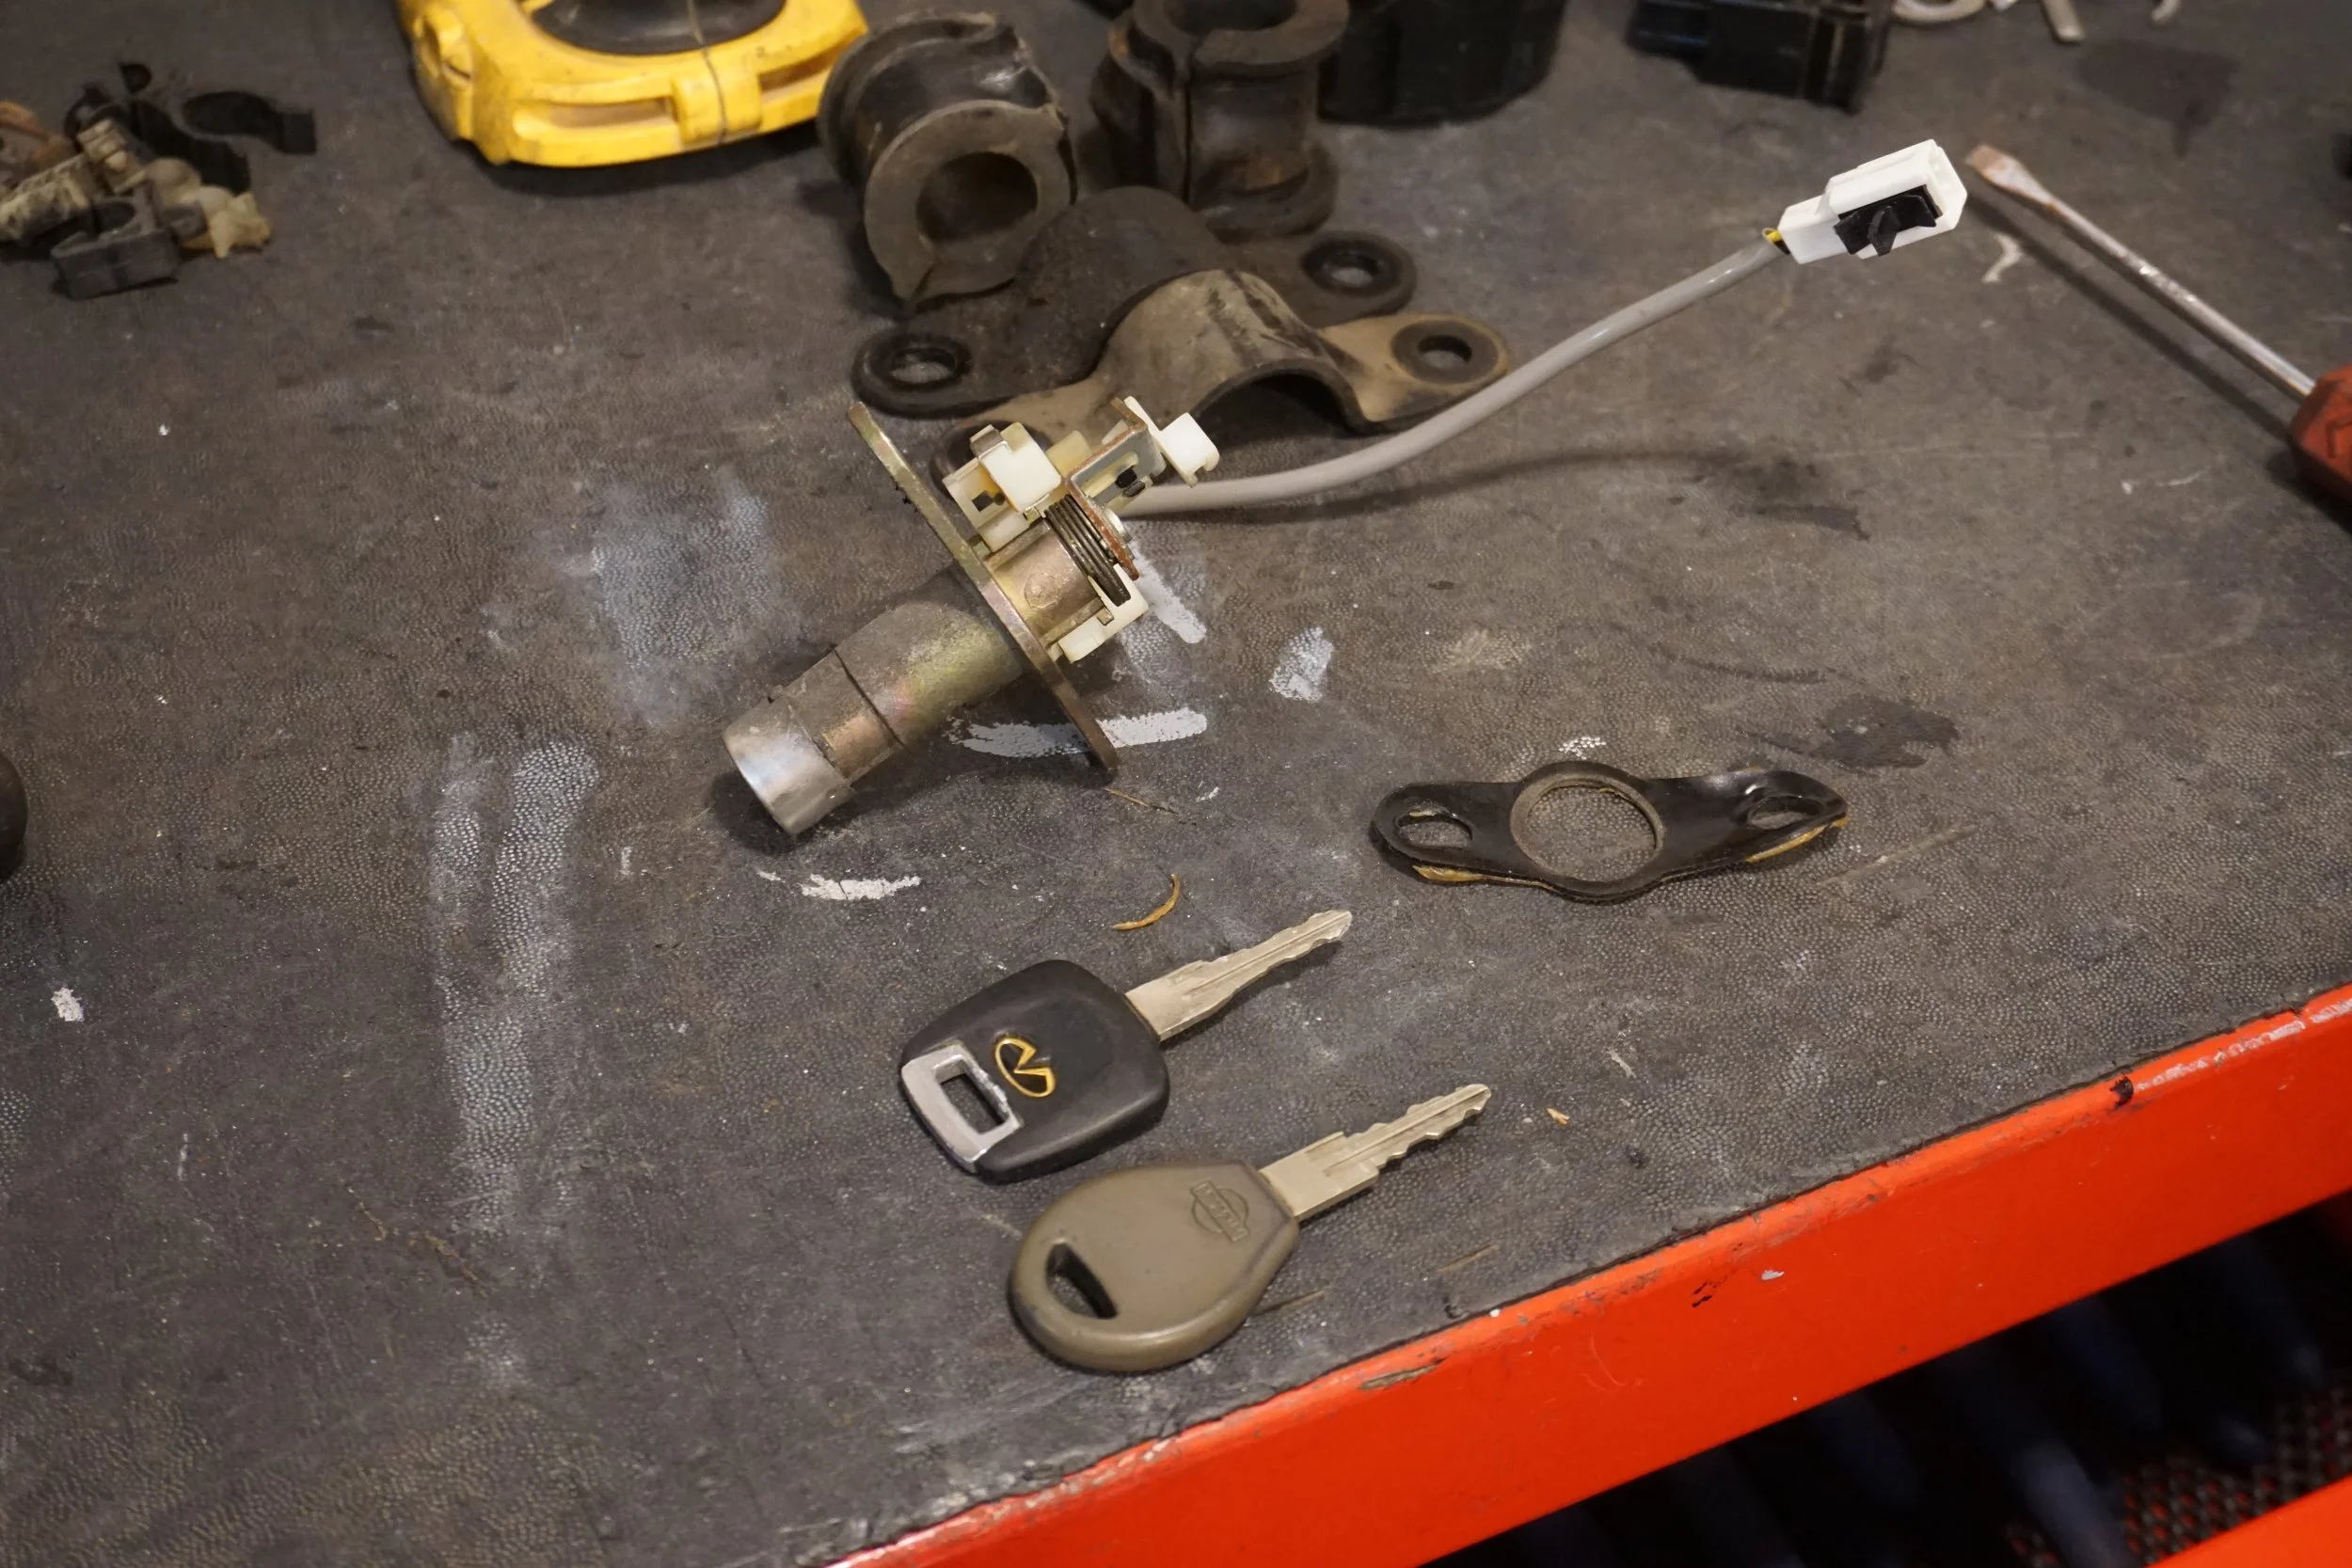
And a trunk lock cylinder and matching key to replace mine (which was a replacement after the original died). The Infiniti key is much nicer than the stupid Nissan key
And I found a car with an intact rubber boot for the hood switch, so I went from this:
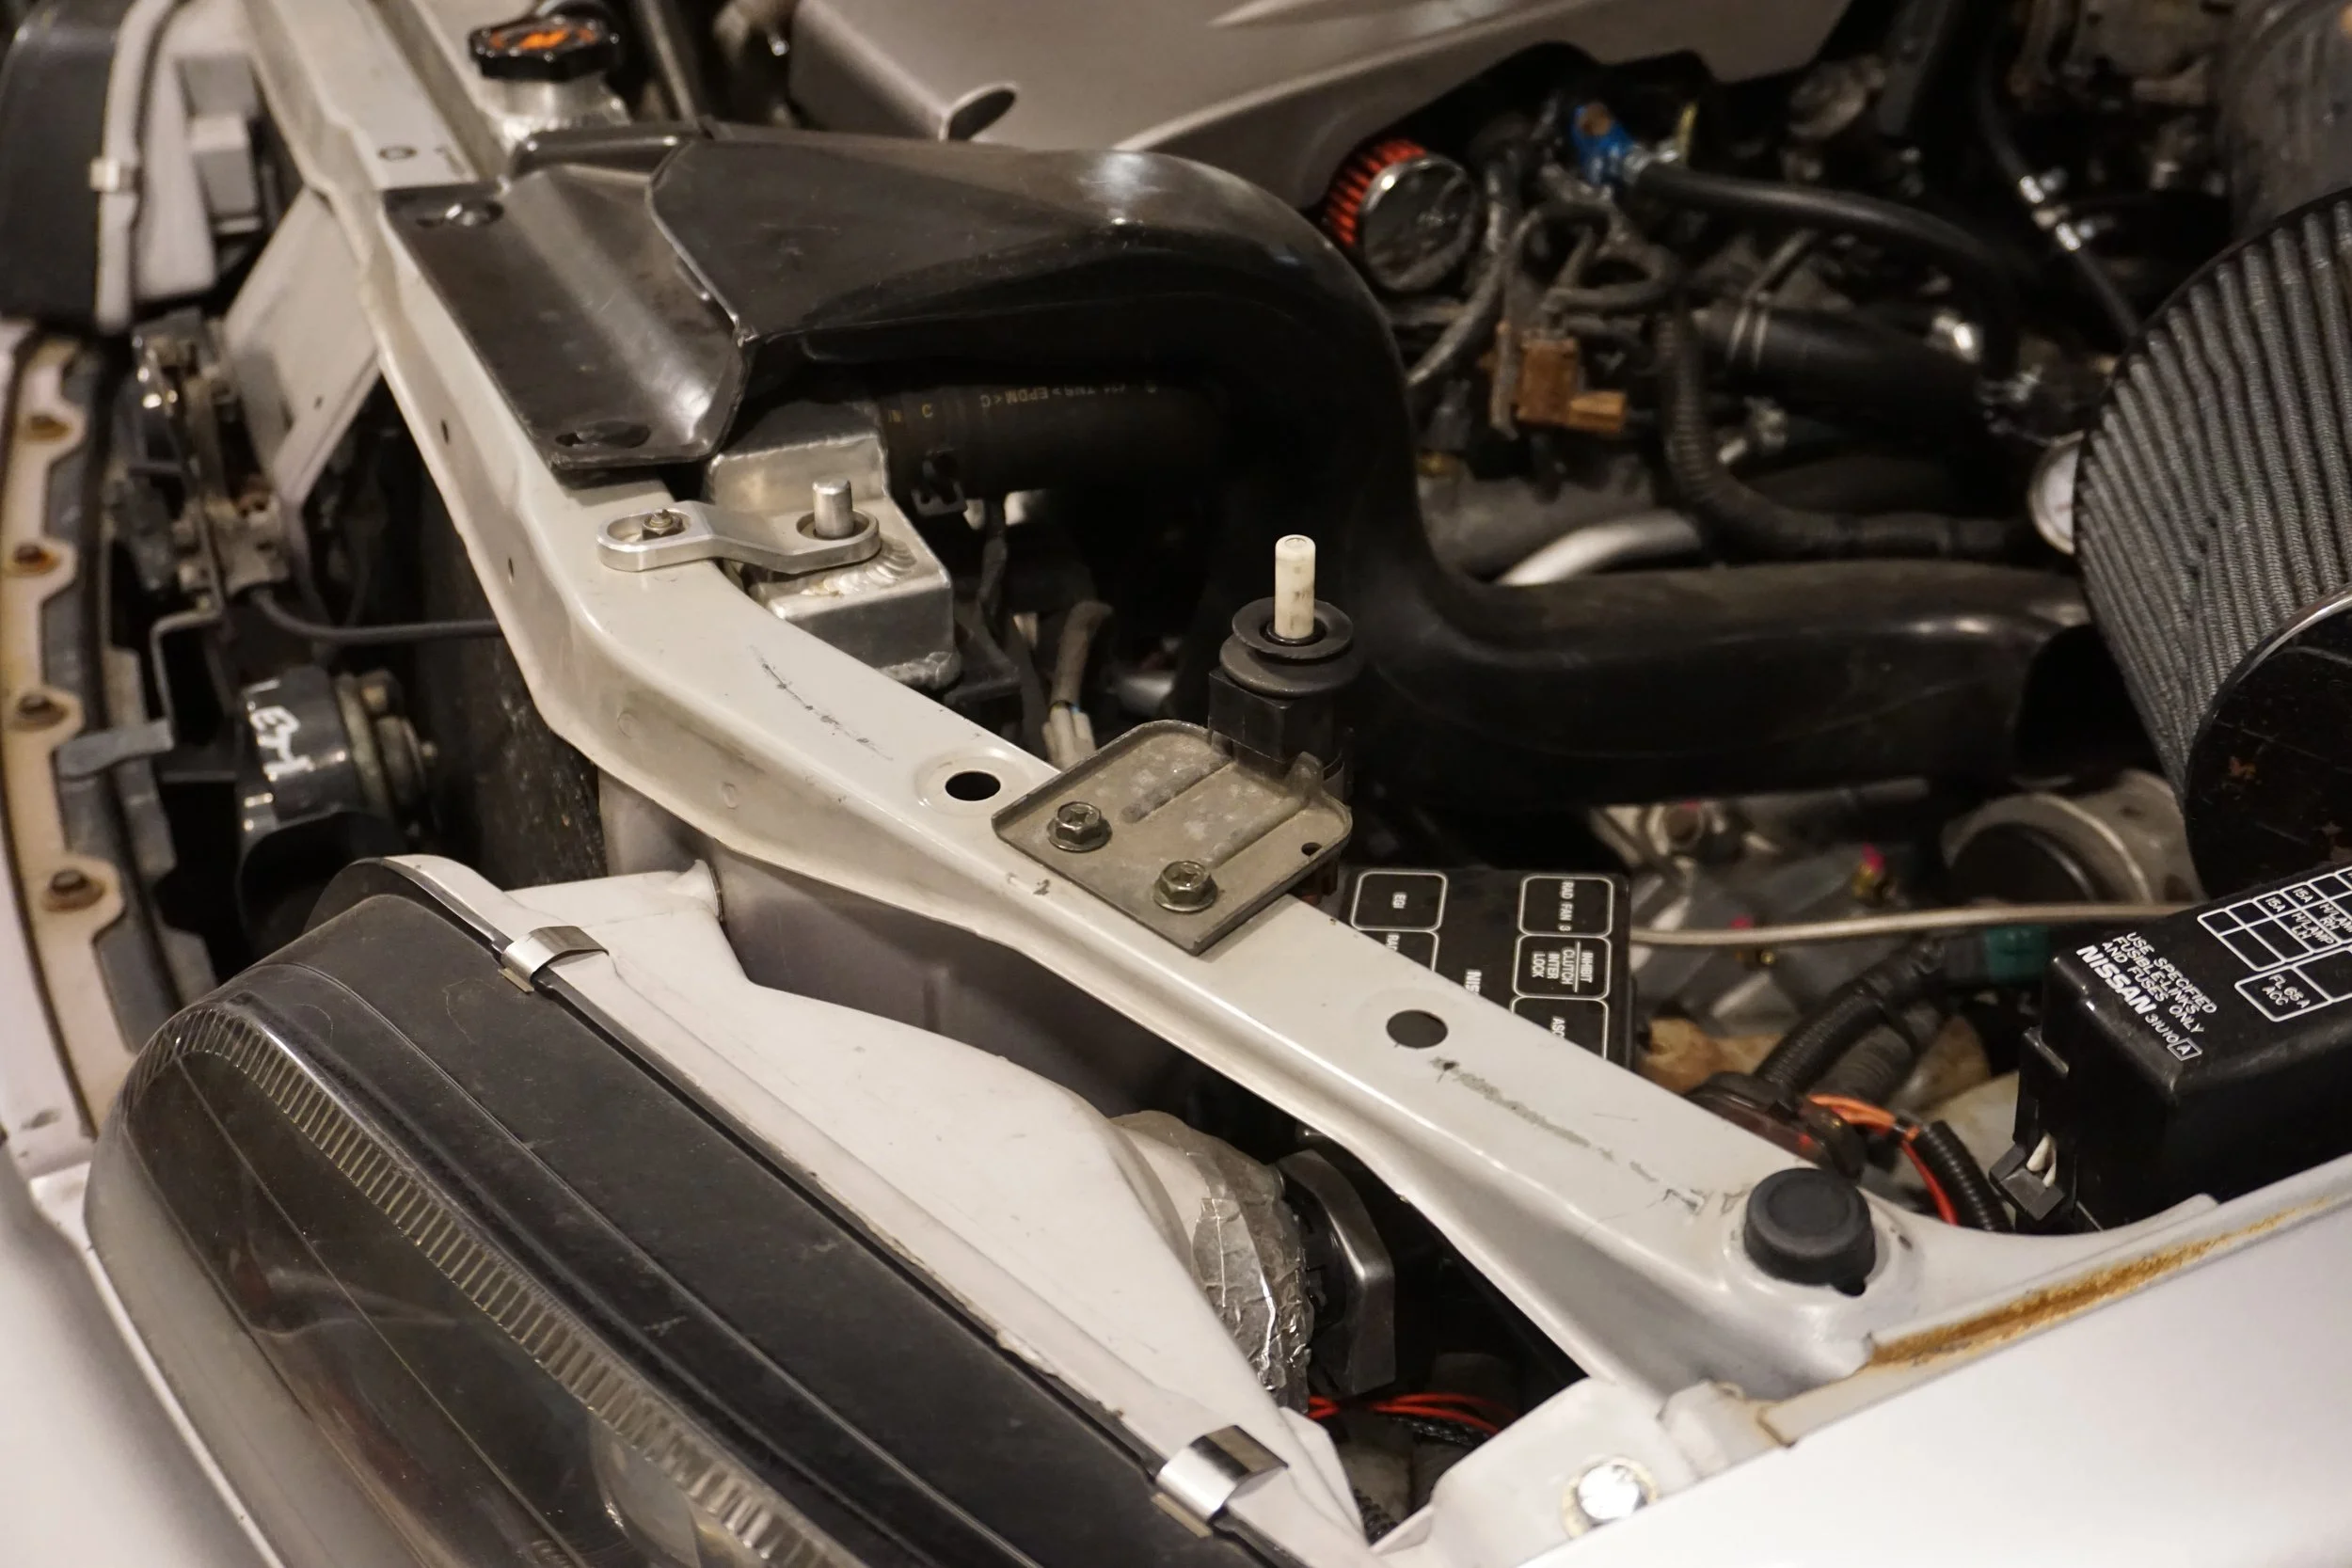
To this:
Note: It appears as if this part is the same between 4th and 5th gens, and since 5th gens are newer, there's a better chance of finding one in good condition if you look there.
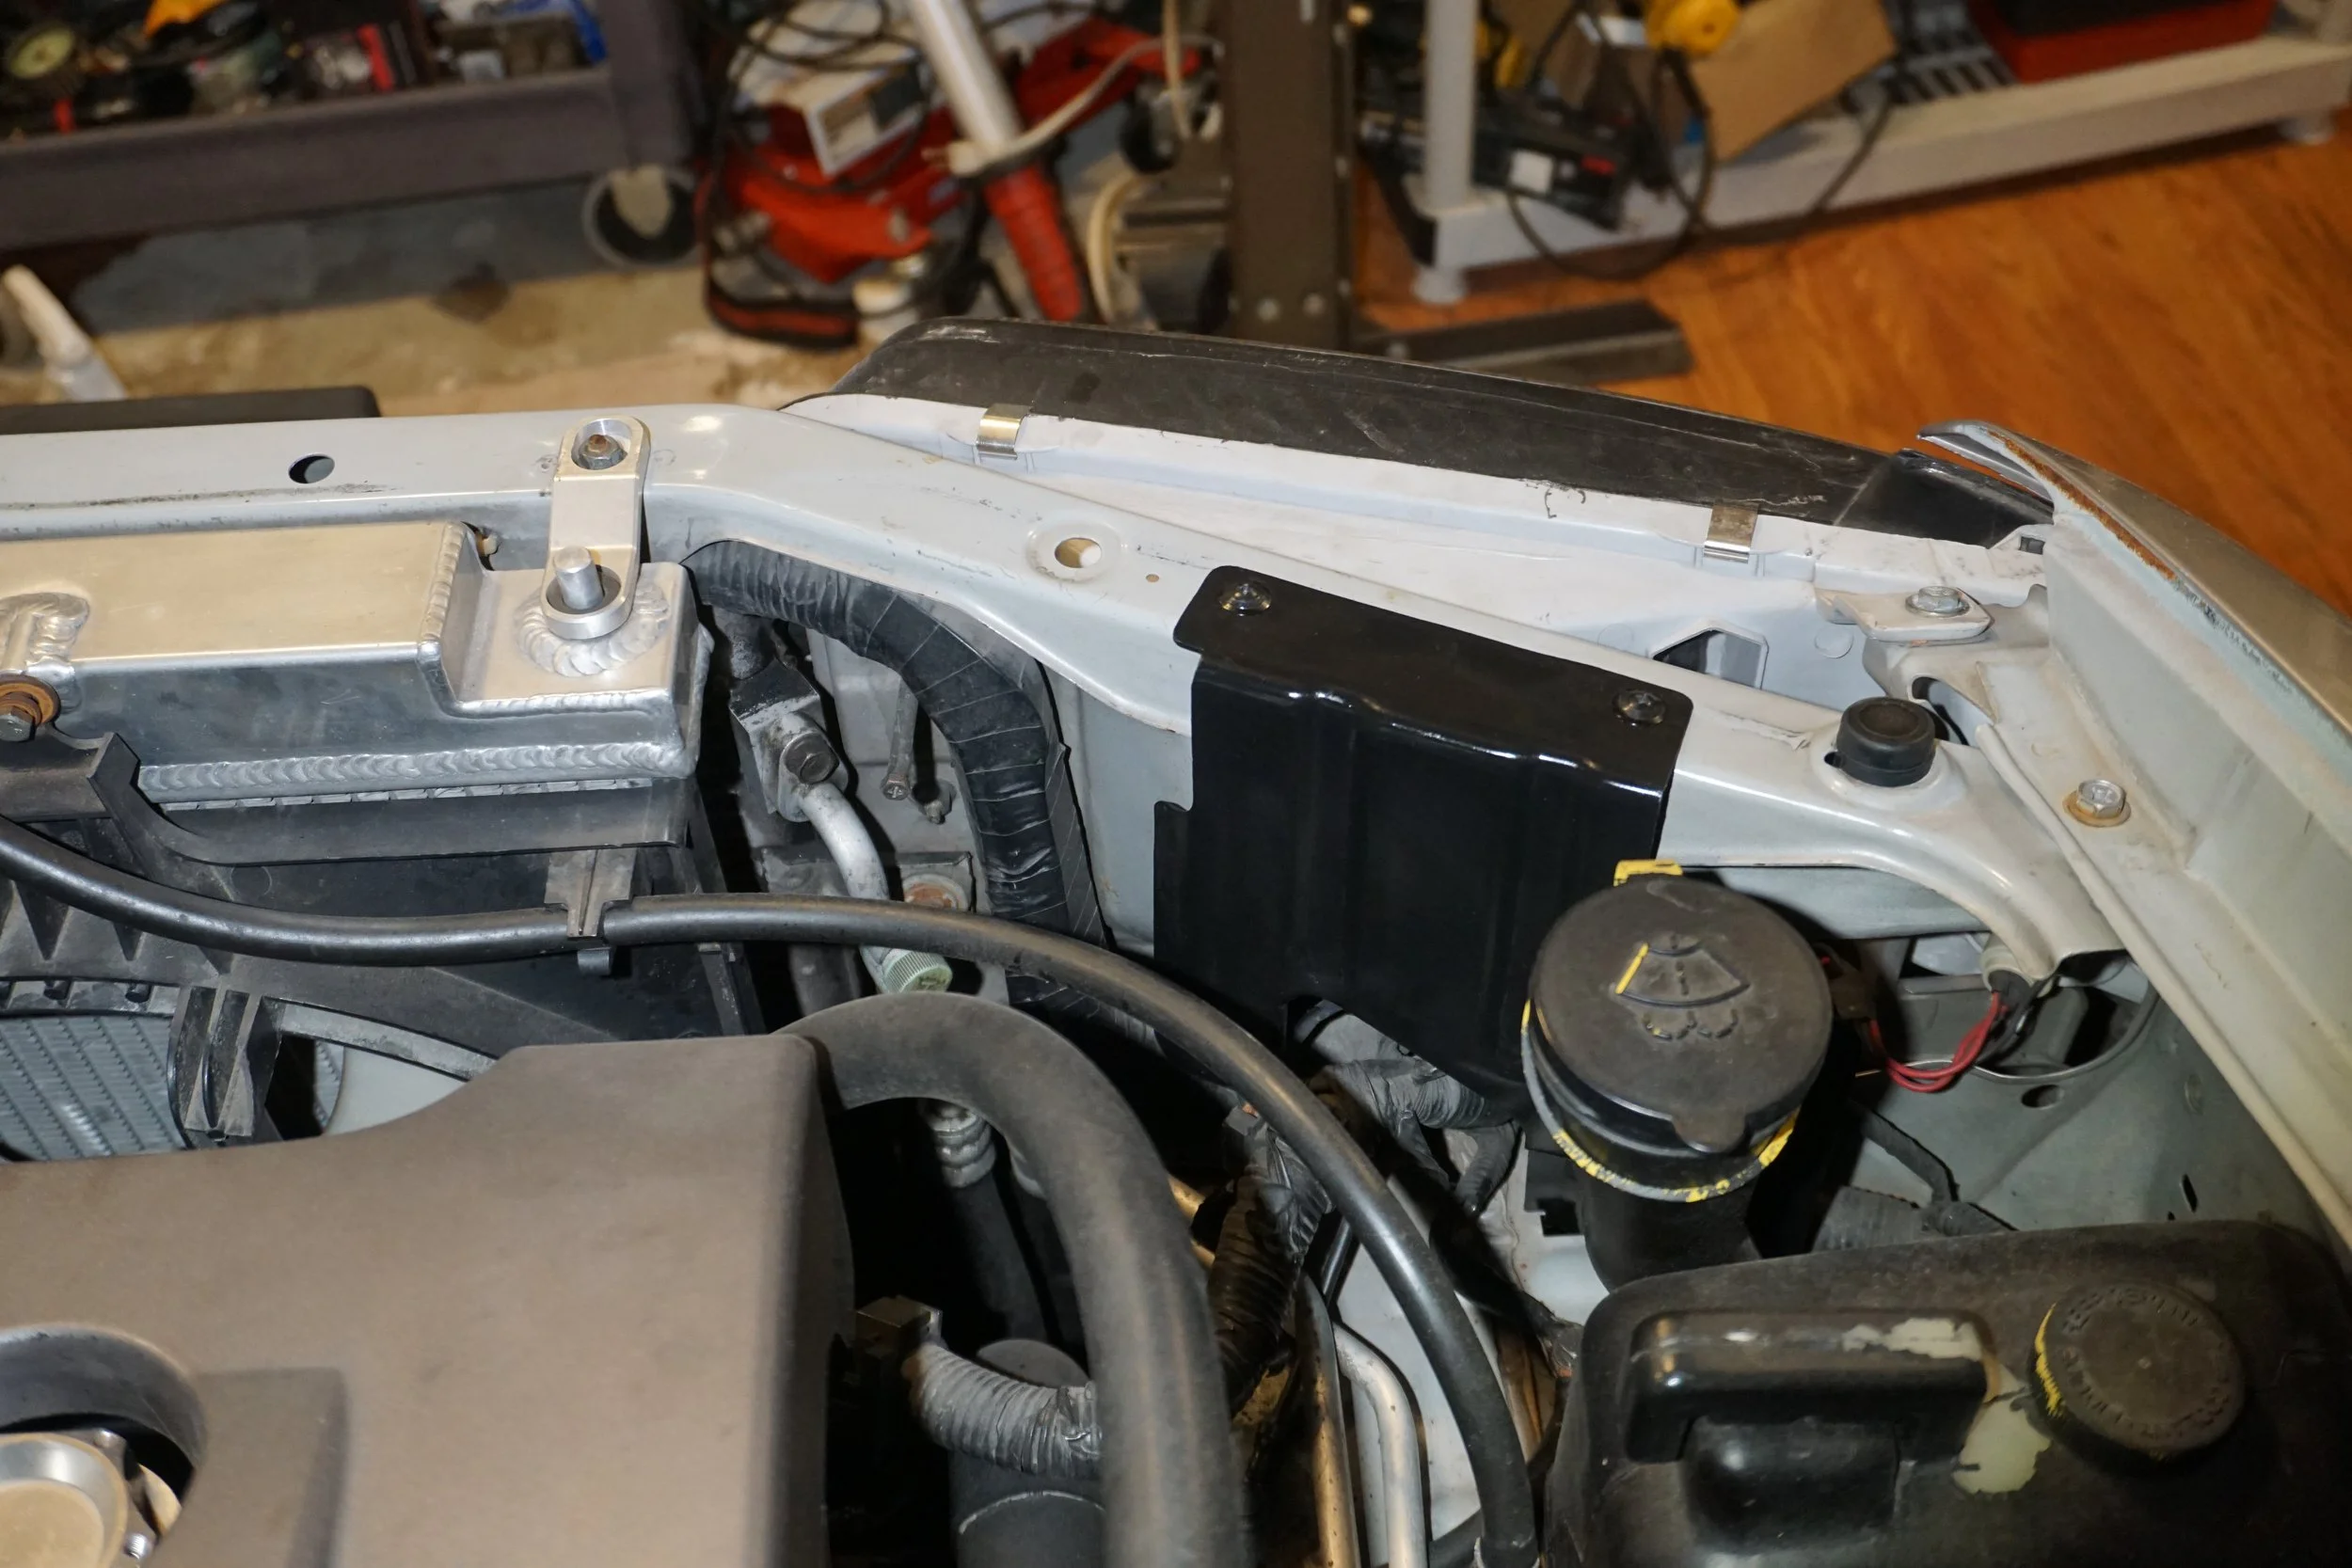
I found an I30 there that had this plastic shield behind the PS headlight. I have no idea what purpose it really serves, but I grabbed it anyways.
That's all for now, but big changes are coming soon!
Then I installed an aftermarket shift ****. I wasn't loving the shape of the heavy metal one, and this aftermarket one was in between (120g) the weight of the stock **** (about 60g) and the metal one (180g). I don't love the chrome plastic on it, but it does feel good in use.
I went to the junkyard for the first time in over a year and got some stuff, like 3 "new" door latches to replace the three on my car that had broken plastic:
And a trunk lock cylinder and matching key to replace mine (which was a replacement after the original died). The Infiniti key is much nicer than the stupid Nissan key
And I found a car with an intact rubber boot for the hood switch, so I went from this:
To this:
Note: It appears as if this part is the same between 4th and 5th gens, and since 5th gens are newer, there's a better chance of finding one in good condition if you look there.
I found an I30 there that had this plastic shield behind the PS headlight. I have no idea what purpose it really serves, but I grabbed it anyways.
That's all for now, but big changes are coming soon!
Last edited by 95maxrider; Jun 13, 2023 at 07:01 AM.
Time for a quick non-I30 related project!
I set up my new 80 gallon air compressor (19 CFM at 90 psi), routed all of the PEX piping, set up the air filtration/dryer, and ordered a whole lot of other supplies and completed my first "real" painting project on my mom's Acura TL. I've done stuff with 2K rattle cans before, but now I've got real paint guns, and real high quality primers, paints, and clear coats. Since my mom doesn't exactly have an eye for paint perfection, her car was the perfect test bed for all of my new tools so I could make my mistakes on her car before moving onto my own. I made plenty of mistakes, but was able to correct almost all of them, and in the end I was very happy with how the job turned out.
After the stud welder and puller:
After epoxy primer on all bare metal and then body filler:
After 2K primer and blocking:
After clear base and base coat:
And after clear coat, cutting, and buffing:
Blending into the door and bumper were out of the scope of this project; my mom just wanted it fixed enough so rust wouldn't become an issue in the future. I made a ton of mistakes, but learned from all of them. I'll be doing a few more projects before doing the I30 as I demand perfection on my car.
so with out blending did you stop hard at that top horizontal tape line? I am truly impressed, its hard to see it even with out being blended, maybe the door but that could be the angle of the sunset in that pic. what were your other "mistakes" , very inspiring to see this effort man.
I made mistakes at almost every stage in the process, from using the stud puller for the first time, to my application of body filler, to one of the applications of epoxy, and the edges of the clear coat. I think I put in more than 50 hours into this, but I learned so much and gained a lot of confidence to tackle my own cars next, so I'd say it was worth it. I'll be painting the front lip on the Miata, and then a panel or two on the M3, and then the I30 will be last, since I demand perfection on this car!
That TL body/paint work came out awesome, especially for that being your first time painting something. Nice work.
I've done some decent bodywork in the past and tried to get into painting, starting with laying down higher quality 2k primer from a gun. For whatever reason I could not get it to lay right. I tried everything. Tweaking ratios, tip sizes, different days for humidity being a factor, all kinds of stuff, one variable at a time and just failed every time. I rarely give up on stuff but it pissed me off so much I hung it up. I may revisit it sometime down the line but I have way way less time now with 2 kids. So props to you got getting so far so quick with it.
I've done some decent bodywork in the past and tried to get into painting, starting with laying down higher quality 2k primer from a gun. For whatever reason I could not get it to lay right. I tried everything. Tweaking ratios, tip sizes, different days for humidity being a factor, all kinds of stuff, one variable at a time and just failed every time. I rarely give up on stuff but it pissed me off so much I hung it up. I may revisit it sometime down the line but I have way way less time now with 2 kids. So props to you got getting so far so quick with it.
If you're interested in getting back into it shoot me a PM and I can send you all of the guides I've put together, it's a lot of information to take in.
It occurred to me that I never posted up any information about swapping in the 6 speed transmission, which for such an important project is a grave oversight. This started back in 2021 with the initial conversion, and was then completed in 2022 with the installation of the final transmission. I'll be posting up a how-to guide in another thread with details on the process, so I'll try to keep it to a high level overview in this thread.
I started by installing a 6th gen open diff trans while I waited for my 5.5th gen trans to be rebuilt and customized. Here's the initial parts list:
6th gen trans, JWT flywheel, OEM 350Z clutch disc, OEM 6th gen pressure plate, 2J Racing shifter bushings, 4th gen axle bracket, 5.5th gen shifter cables and shifter, new Sachs slave cylinder, new starter, Schmelly trans bracket and flywheel timing ring, Sentra engine (trans) mount with ES poly insert
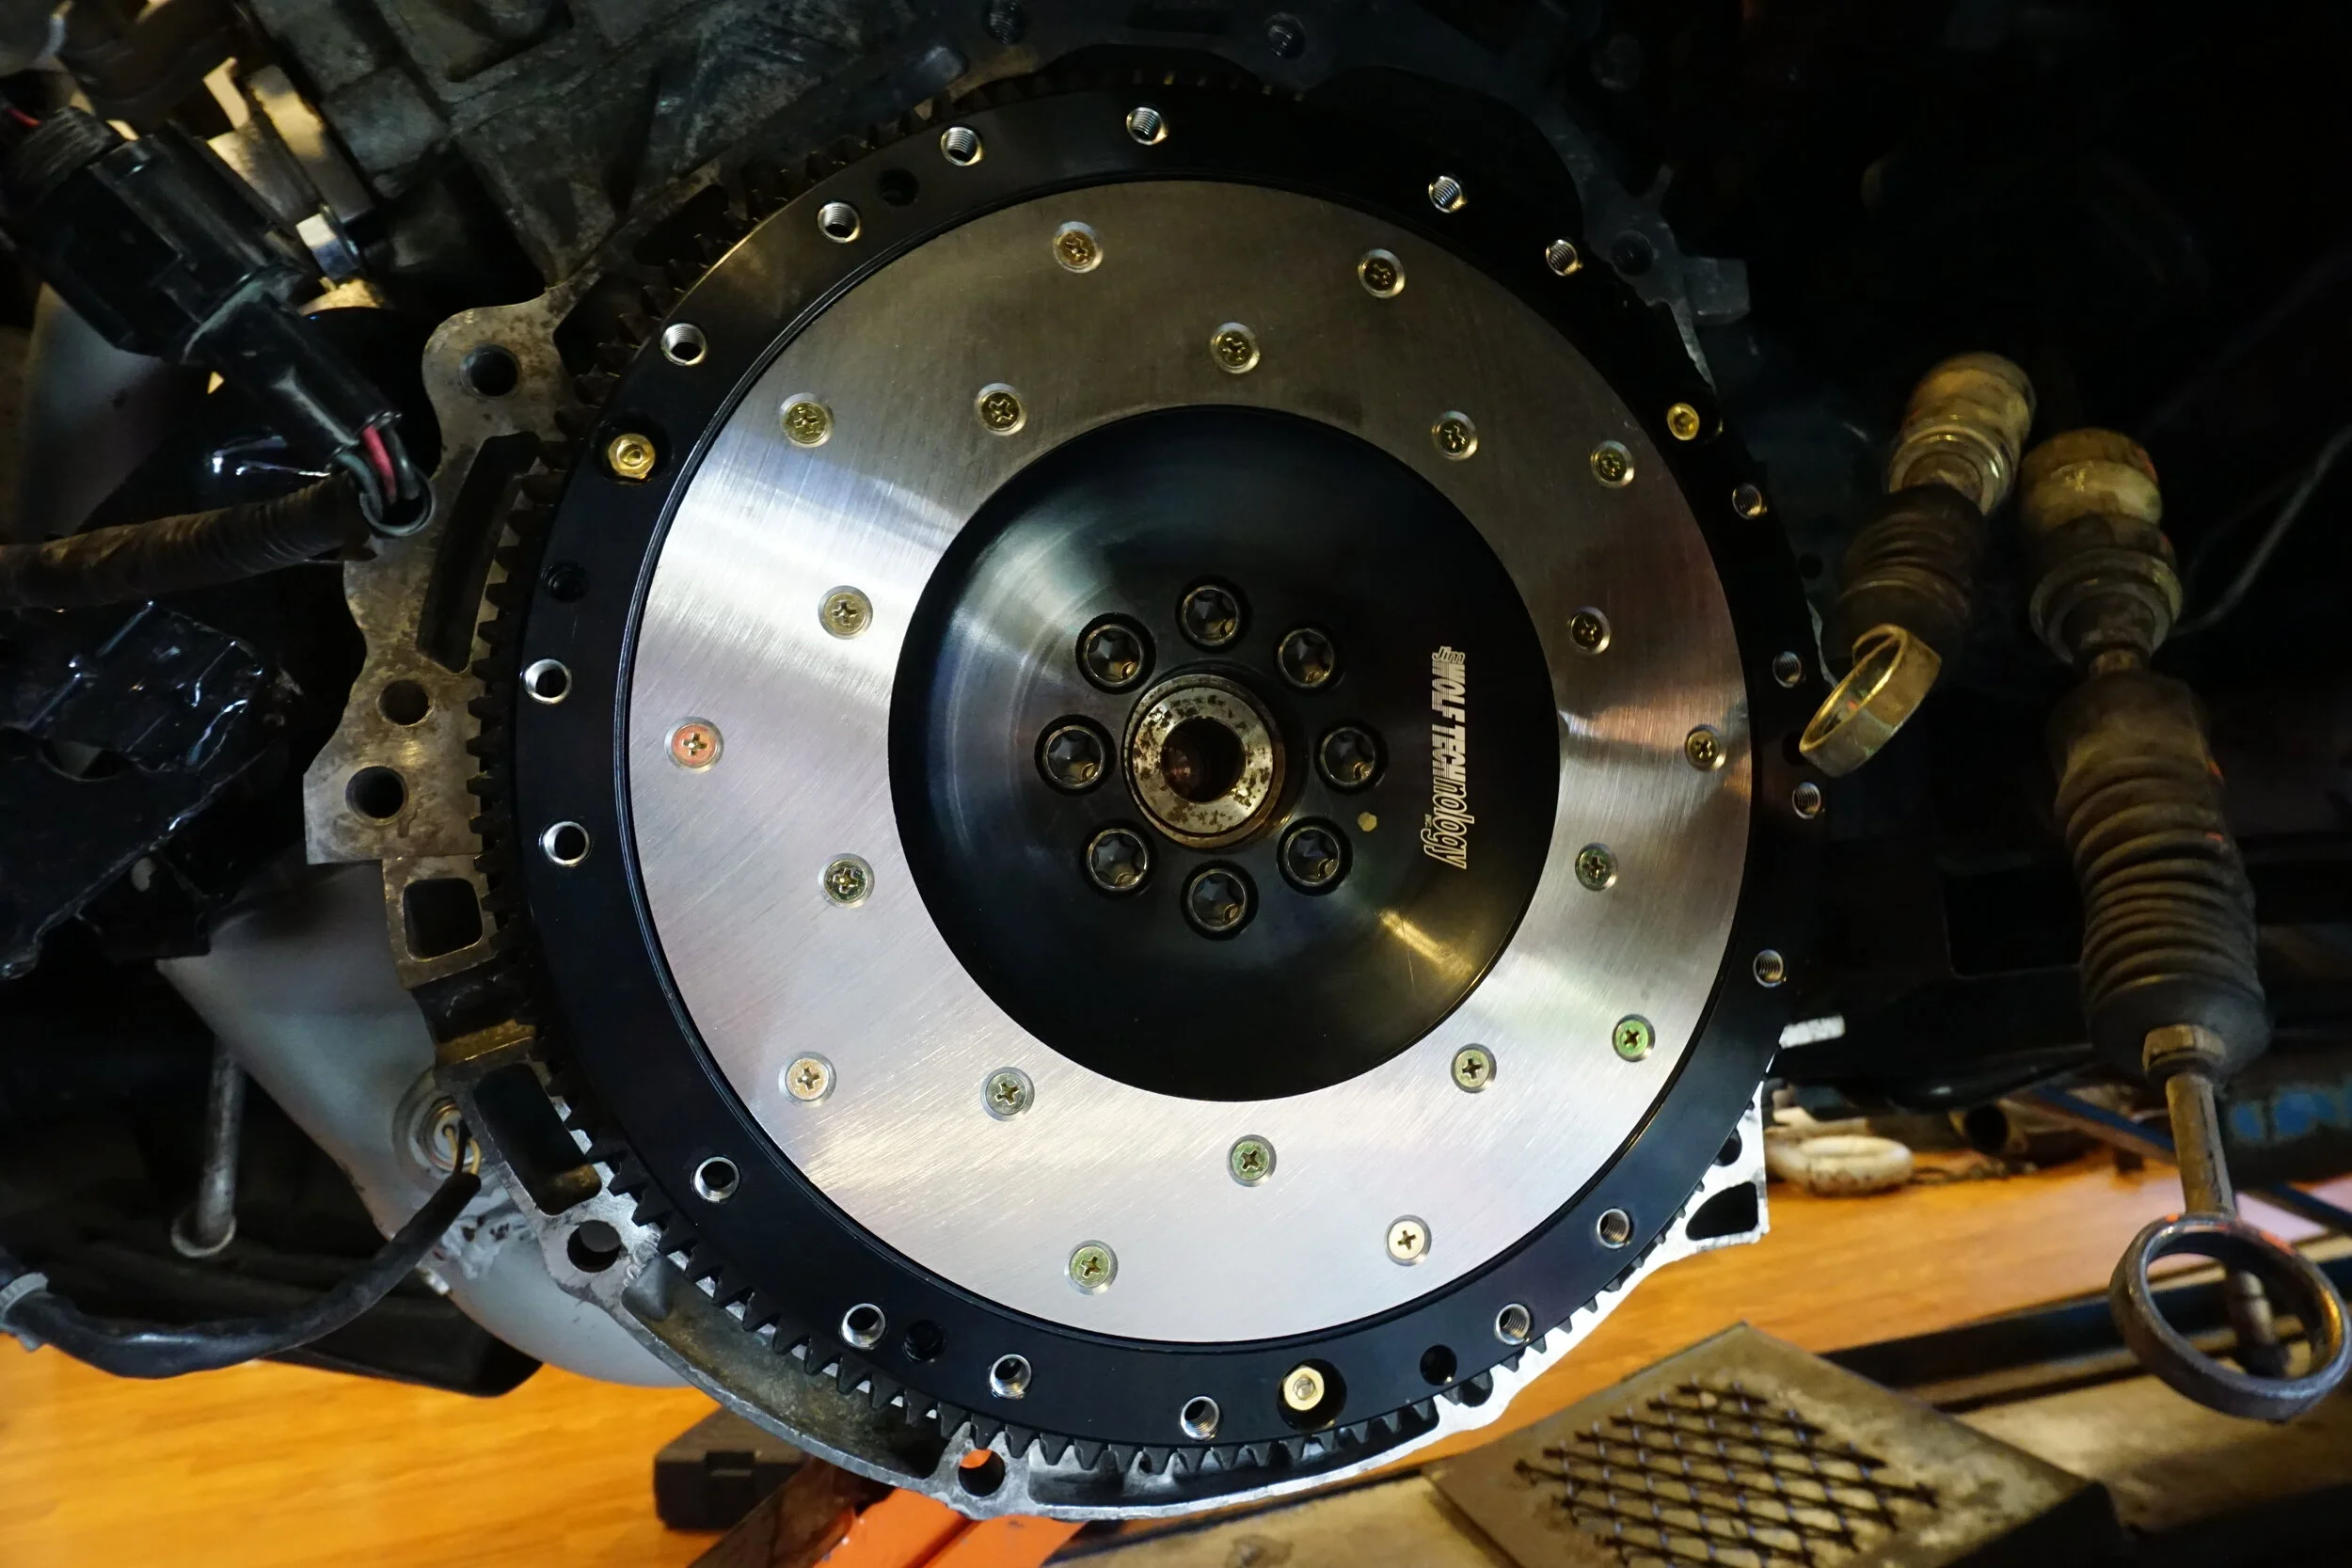
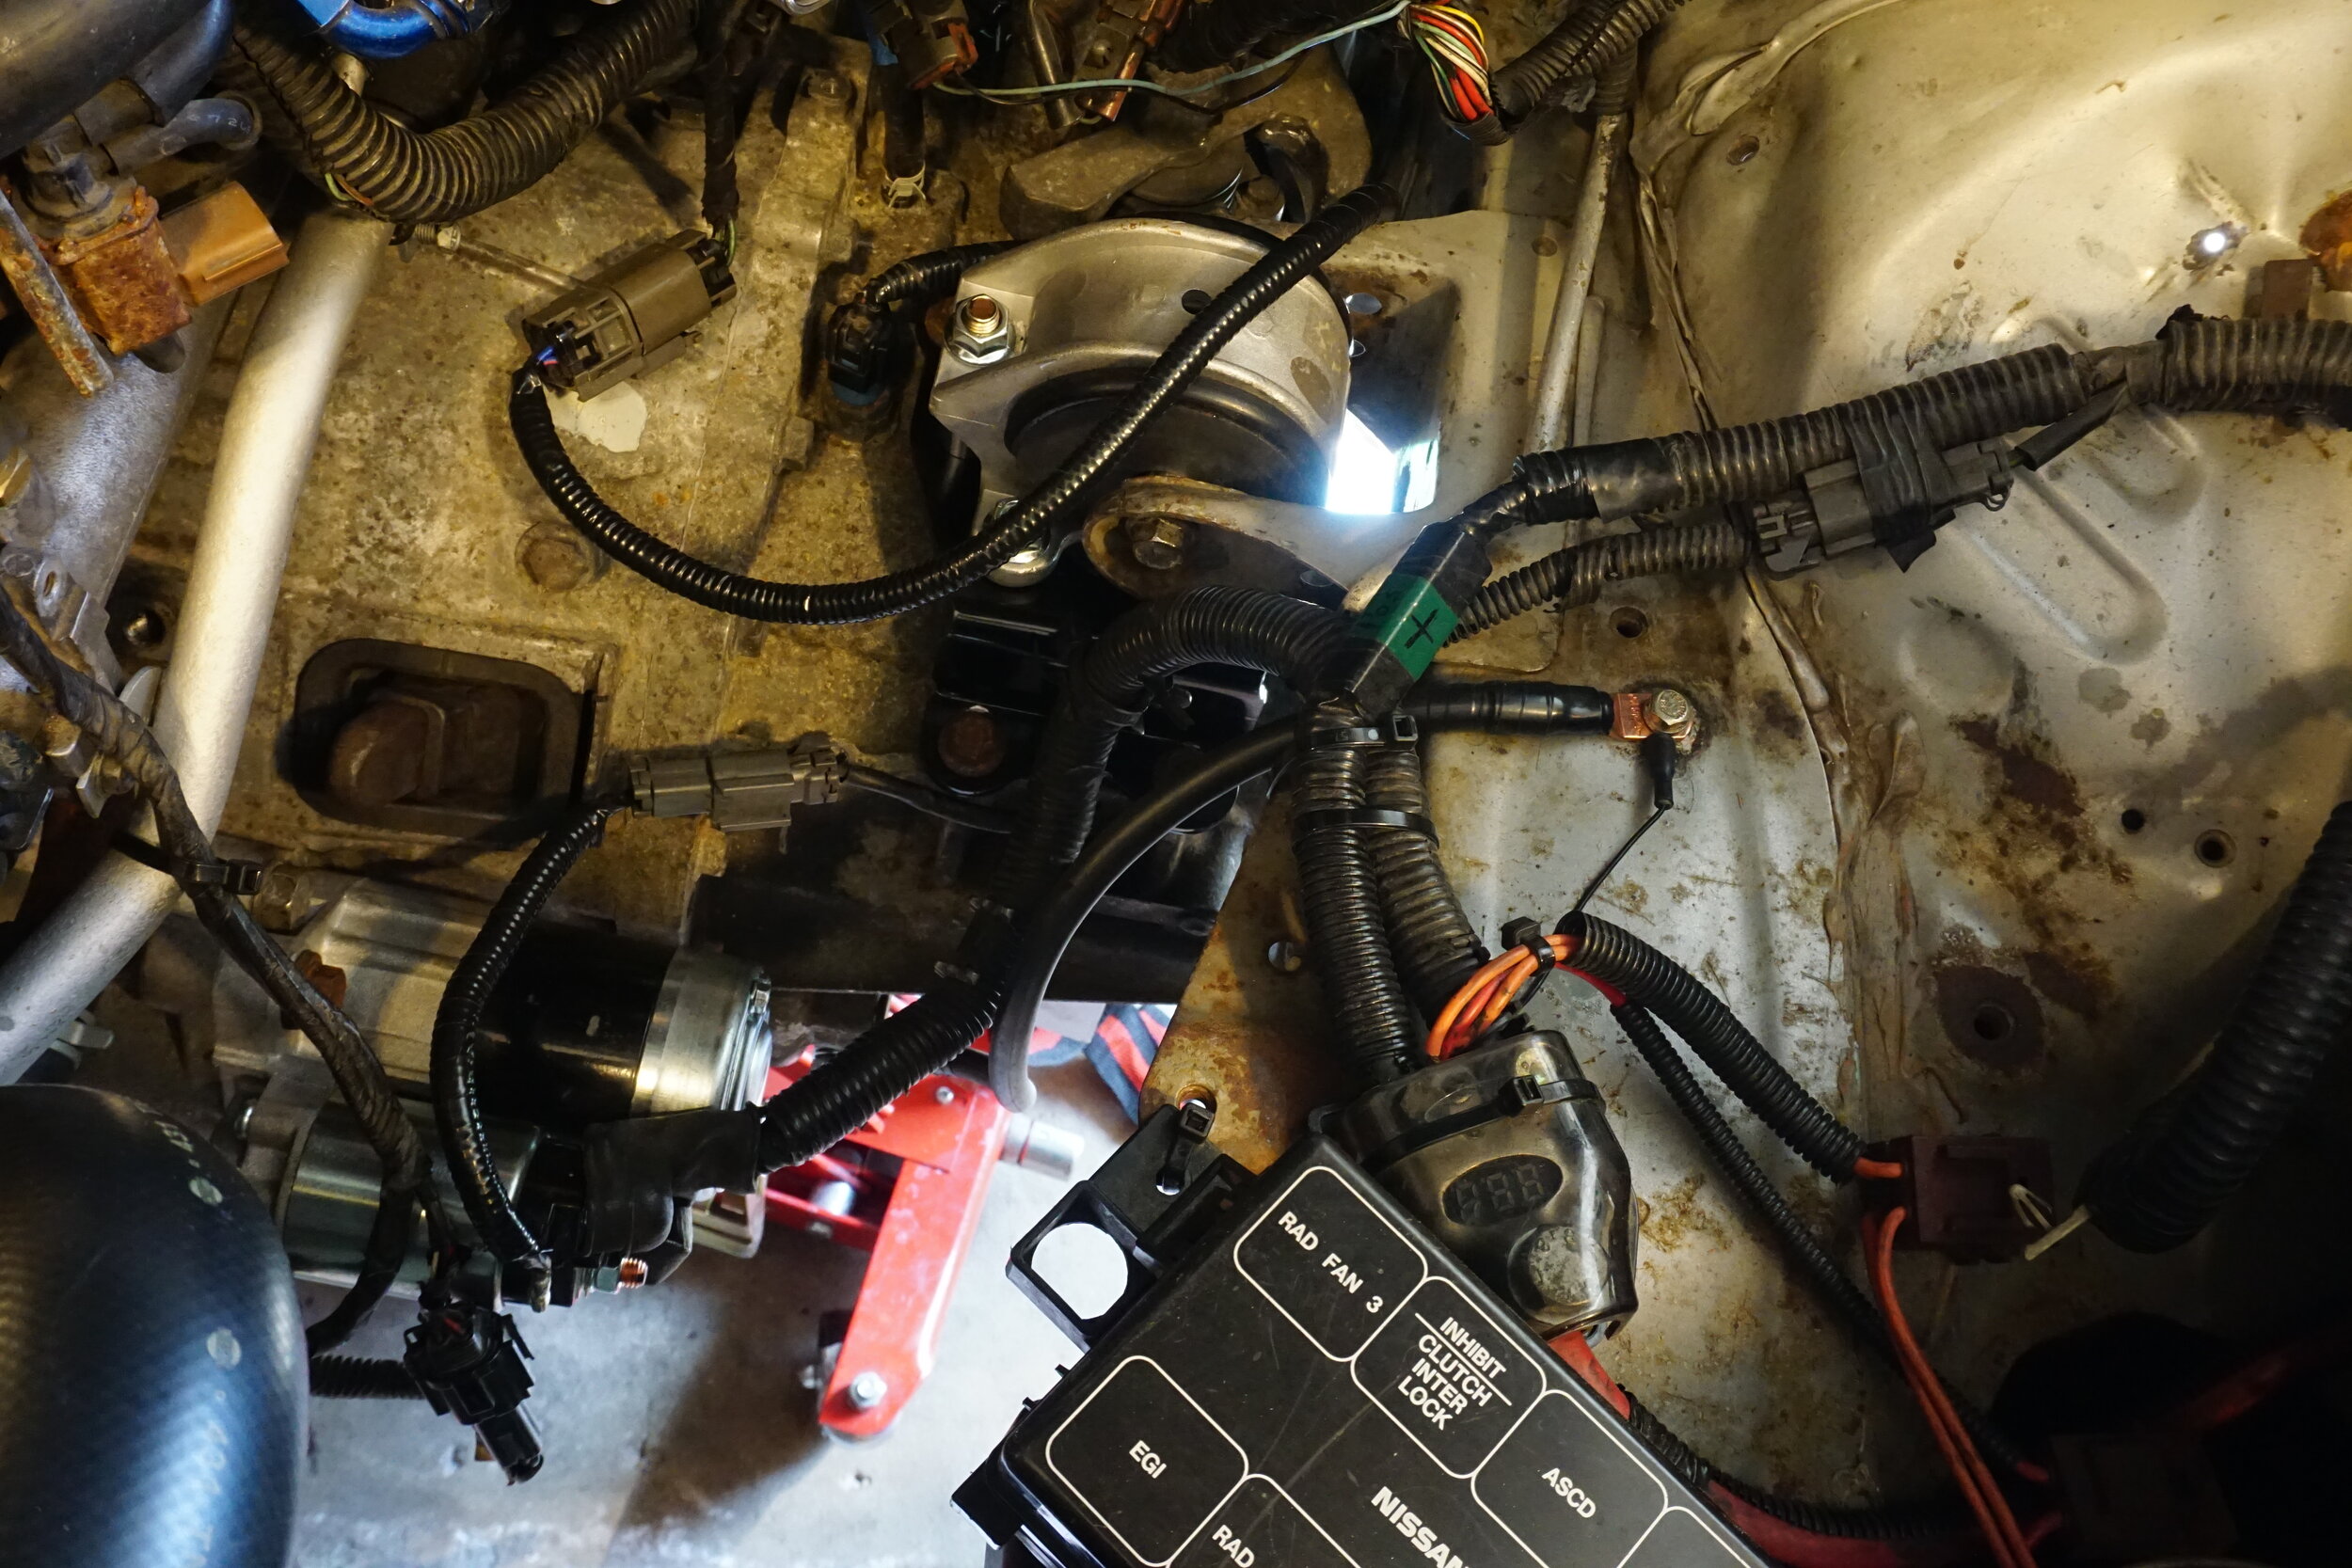
I eventually got it all working only to find the 6th gen trans didn't have a 3rd gear! This put a serious damper on things and as a result I didn't drive the car a whole lot that year. But I did send out my 5.5th gen trans to Team RIP Engineering (TRE) in Michigan to have some work done, which took MUCH longer than anticipated. This is the shop Nealoc used to work at, and they had done a 5 speed trans for me way back when. I wanted to use the 5.5th gen trans as my base since 3rd gear on it is stronger than the 6th gen trans due to having a single instead of double syncros (IIRC). But 5.5th gen trans are only 3.8 FD, while the 6th gen trans are 4.1 FD. Using the online gearing calculators I could see I wanted 4.1 or even shorter, so something would need to be done. Aaron informed me way back about the 4.4 FD that was apparently only used in the 2002 Sentra SE-R Spec-V, and when I plugged that into the calculator I knew that was what I wanted. So I found one of those, tore it apart, and sent the necessary parts to TRE. Here's what went into the build:
-Brand new OEM bearings and synchro rings
-2002 Nissan Sentra SE-R Spec-V 4.4 final drive ratio/output shaft and input, reverse gear stack and HLSD
-2002 Nissan Maxima 3-6 gearset, Sentra 1-2 gears
-Disassembly, hot tank, visual inspection, wet MAGNAFLUX inspection, contact pattern inspection
-Gear detail: corner rounding, lead edge trim back, tip relief, engagement teeth profiling, synchro cone modification, gearstack offset modification, shift rail & selector modification.
-High intensity, double saturation, special process, shot peening of gearset.
-Bead blast case
-New Neodymium magnet
Out with the old and in with the new
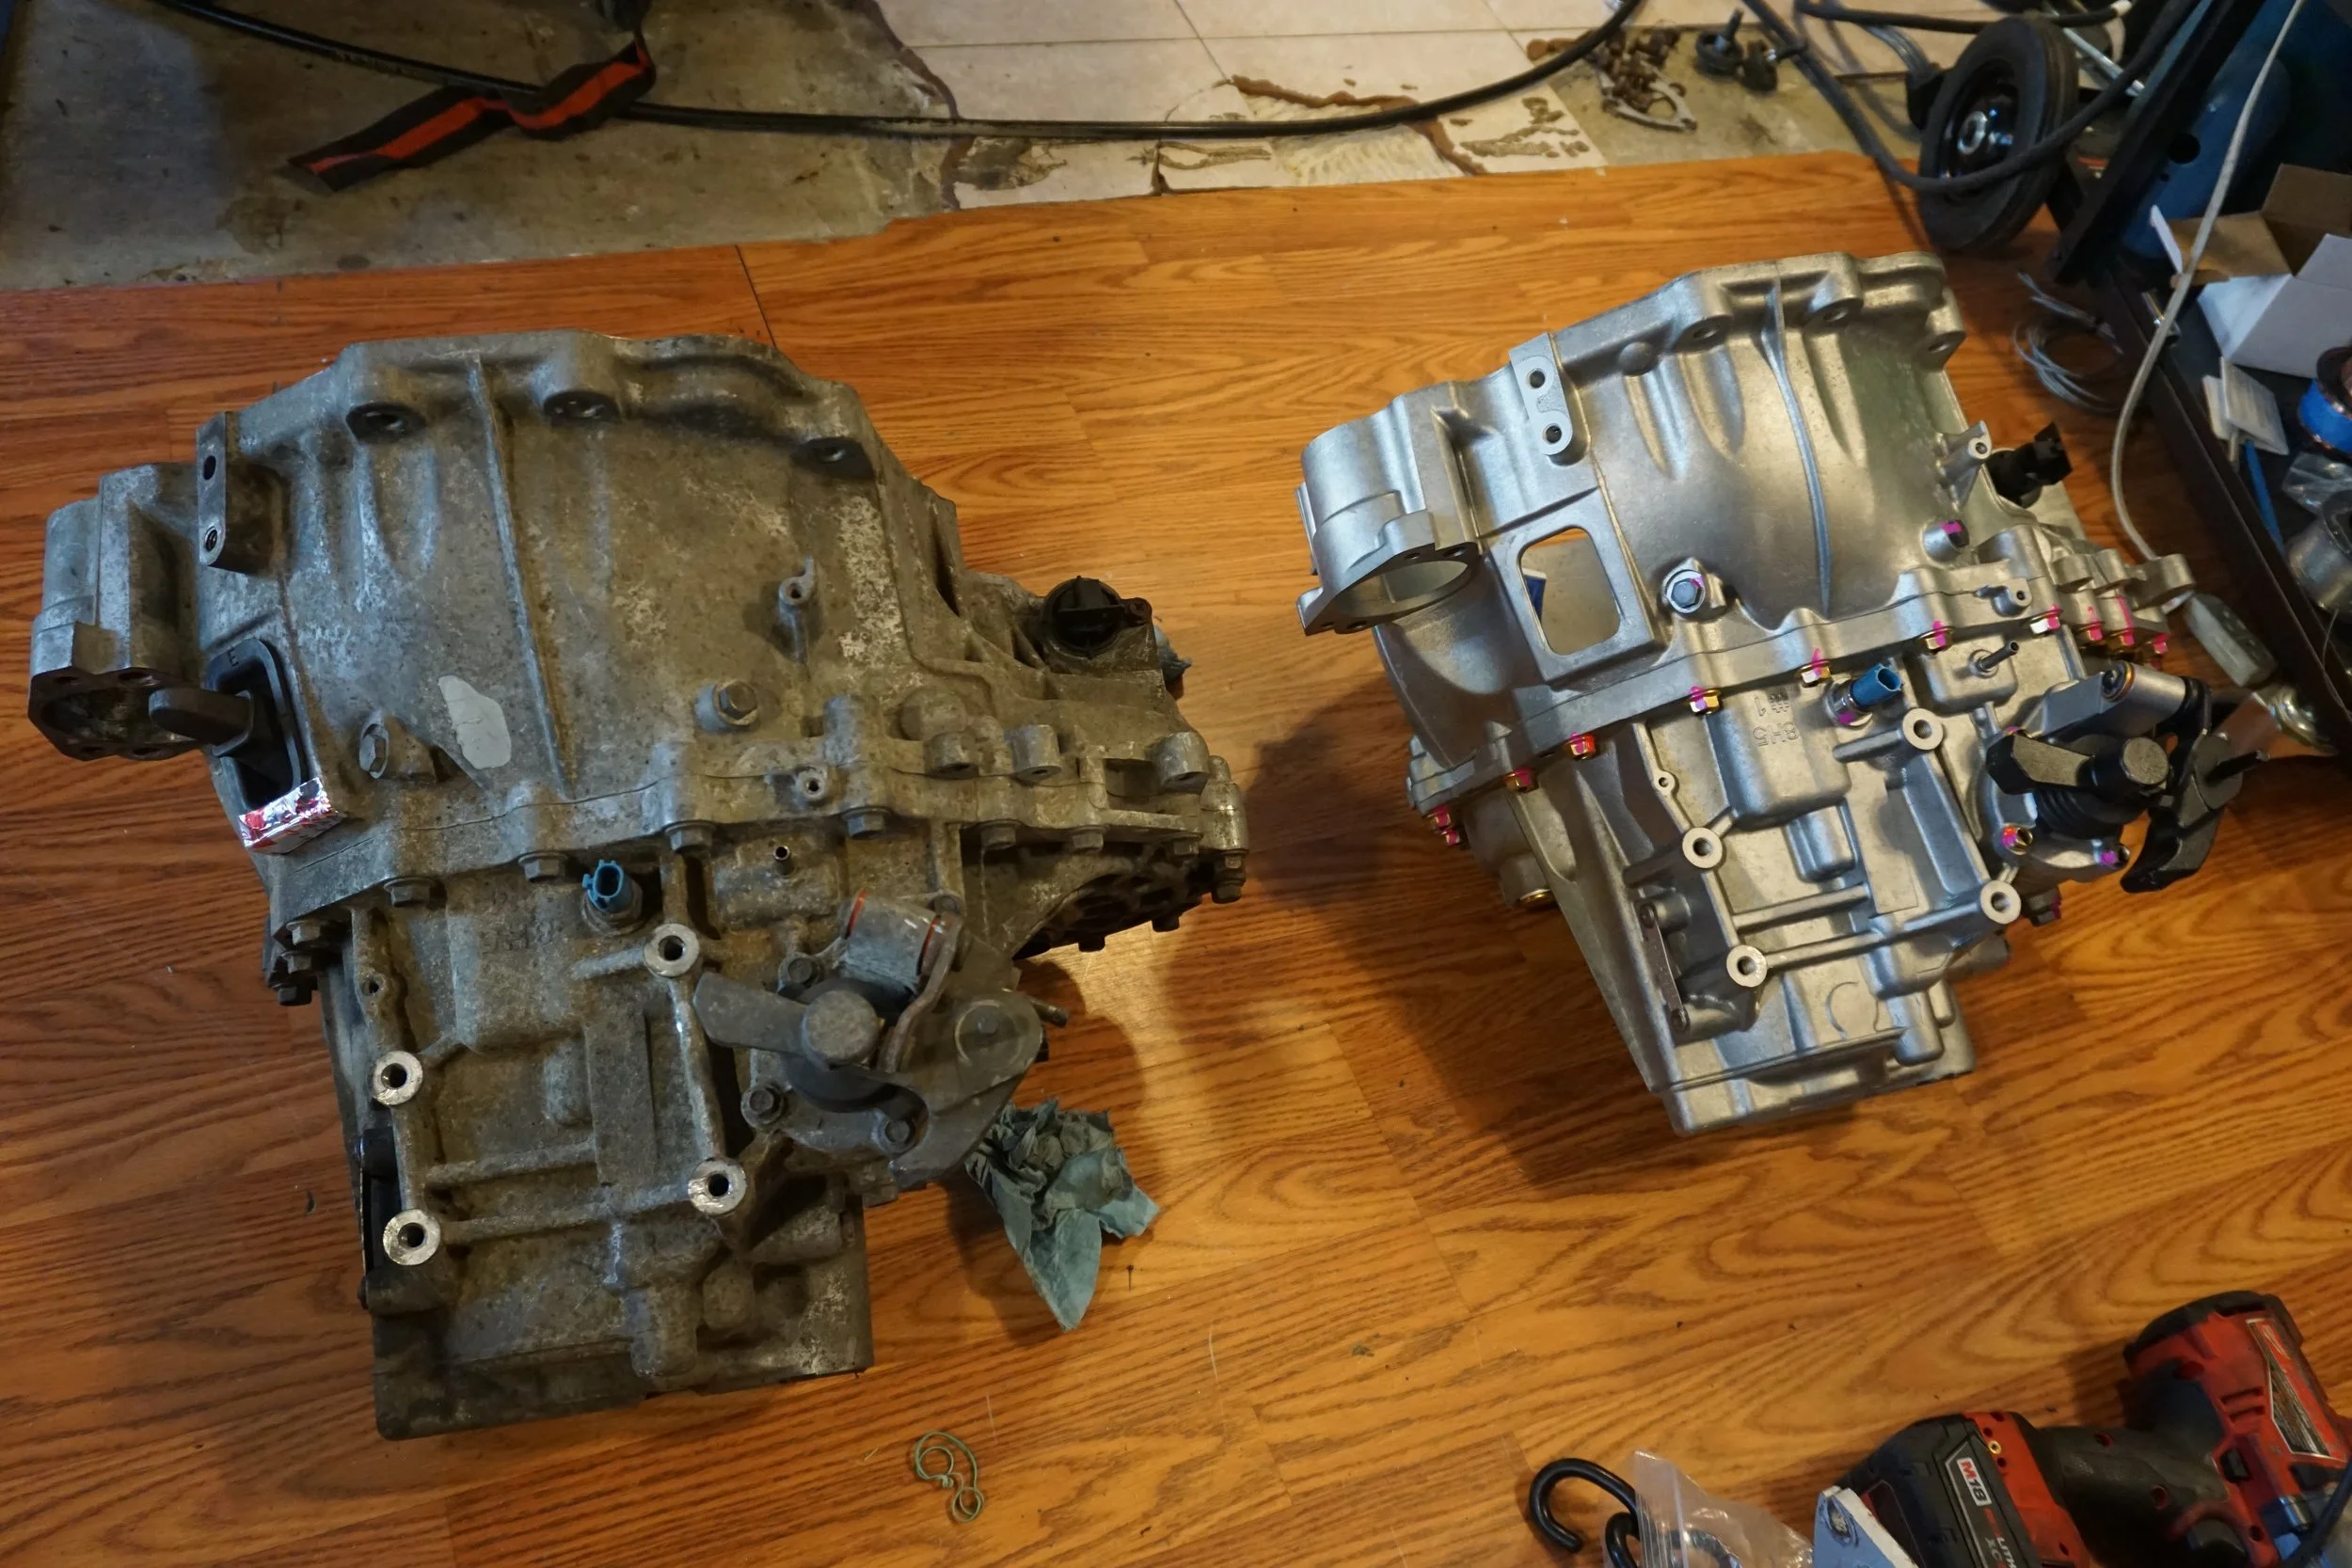
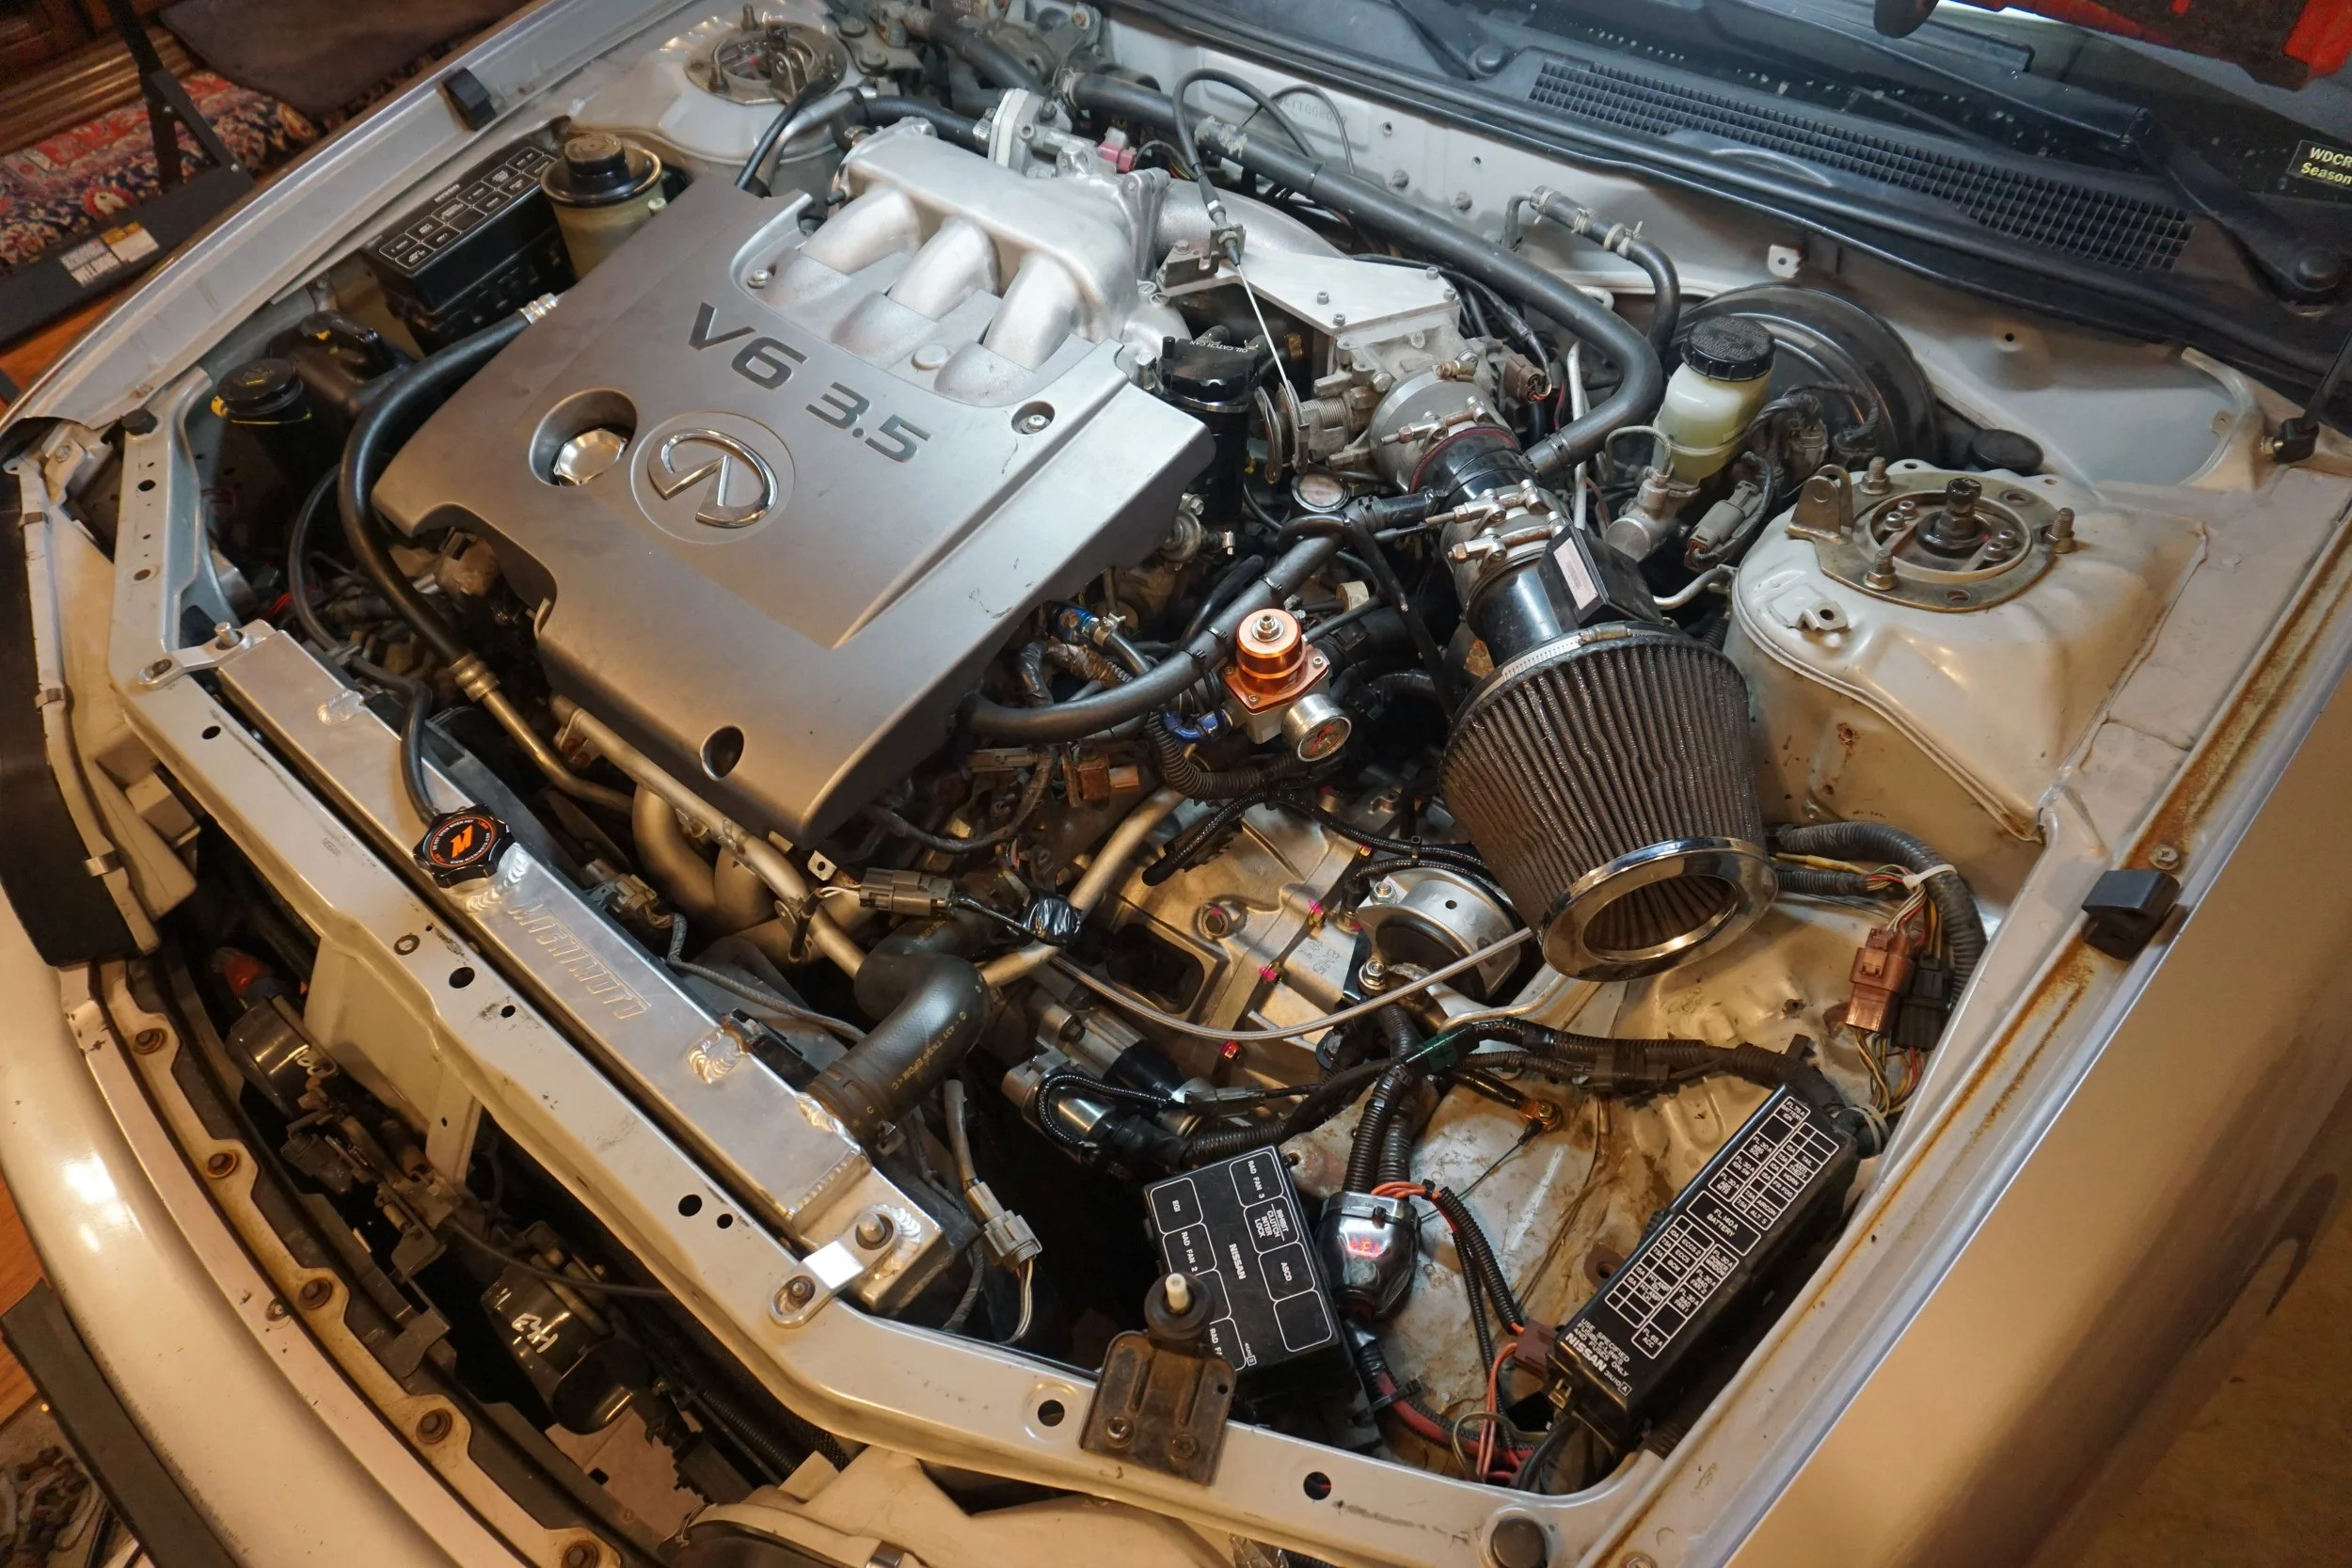
Here's a little chart I put together to show the drastic differences between gear sets and FD ratios:
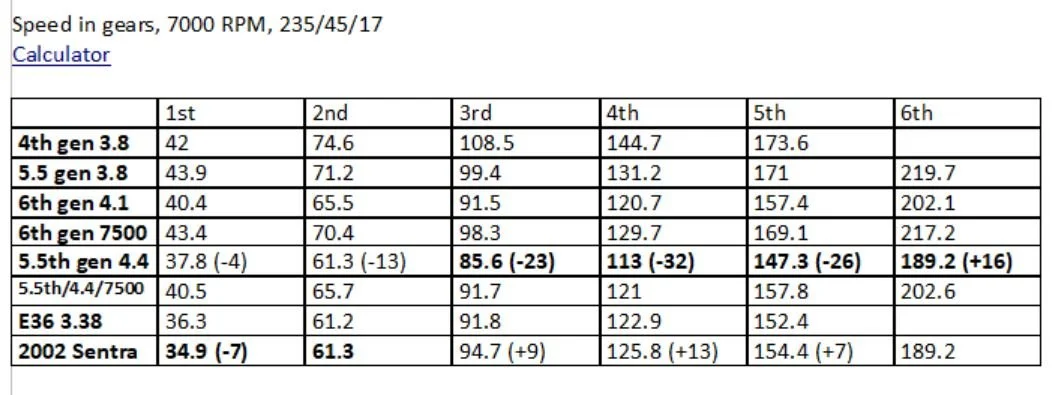
Going from a 5 speed to a 4.4 6-speed, 2nd gear is 13 MPH shorter, 3rd is 23, and 4th is 32! And even with the super short FD, thanks to having a 6th gear, the top speed of the car is 16 MPH higher. So in-gear acceleration is off the charts, plus I get better fuel economy on the highway. Win-win!
The only complaints I have about the 6 speed are pretty minor. I preferred the shifter feel of the 5 speed over the cable driven 6 speed, and my 2nd and 3rd gears are sometimes not the smoothest to go into, even with new synchros. But the change to the car was dramatic and well worth the high effort and cost. Even after a year with it in there, I still LOL when I go WOT in 2nd gear, and I've redlined 3rd gear more in the last year than I did the previous 19 years with the car. Did I mention that I've now had my car for over 20 years? Got the damn thing back in 2003! Here's to another 20 years!
I started by installing a 6th gen open diff trans while I waited for my 5.5th gen trans to be rebuilt and customized. Here's the initial parts list:
6th gen trans, JWT flywheel, OEM 350Z clutch disc, OEM 6th gen pressure plate, 2J Racing shifter bushings, 4th gen axle bracket, 5.5th gen shifter cables and shifter, new Sachs slave cylinder, new starter, Schmelly trans bracket and flywheel timing ring, Sentra engine (trans) mount with ES poly insert
I eventually got it all working only to find the 6th gen trans didn't have a 3rd gear! This put a serious damper on things and as a result I didn't drive the car a whole lot that year. But I did send out my 5.5th gen trans to Team RIP Engineering (TRE) in Michigan to have some work done, which took MUCH longer than anticipated. This is the shop Nealoc used to work at, and they had done a 5 speed trans for me way back when. I wanted to use the 5.5th gen trans as my base since 3rd gear on it is stronger than the 6th gen trans due to having a single instead of double syncros (IIRC). But 5.5th gen trans are only 3.8 FD, while the 6th gen trans are 4.1 FD. Using the online gearing calculators I could see I wanted 4.1 or even shorter, so something would need to be done. Aaron informed me way back about the 4.4 FD that was apparently only used in the 2002 Sentra SE-R Spec-V, and when I plugged that into the calculator I knew that was what I wanted. So I found one of those, tore it apart, and sent the necessary parts to TRE. Here's what went into the build:
-Brand new OEM bearings and synchro rings
-2002 Nissan Sentra SE-R Spec-V 4.4 final drive ratio/output shaft and input, reverse gear stack and HLSD
-2002 Nissan Maxima 3-6 gearset, Sentra 1-2 gears
-Disassembly, hot tank, visual inspection, wet MAGNAFLUX inspection, contact pattern inspection
-Gear detail: corner rounding, lead edge trim back, tip relief, engagement teeth profiling, synchro cone modification, gearstack offset modification, shift rail & selector modification.
-High intensity, double saturation, special process, shot peening of gearset.
-Bead blast case
-New Neodymium magnet
Out with the old and in with the new
Here's a little chart I put together to show the drastic differences between gear sets and FD ratios:
Going from a 5 speed to a 4.4 6-speed, 2nd gear is 13 MPH shorter, 3rd is 23, and 4th is 32! And even with the super short FD, thanks to having a 6th gear, the top speed of the car is 16 MPH higher. So in-gear acceleration is off the charts, plus I get better fuel economy on the highway. Win-win!
The only complaints I have about the 6 speed are pretty minor. I preferred the shifter feel of the 5 speed over the cable driven 6 speed, and my 2nd and 3rd gears are sometimes not the smoothest to go into, even with new synchros. But the change to the car was dramatic and well worth the high effort and cost. Even after a year with it in there, I still LOL when I go WOT in 2nd gear, and I've redlined 3rd gear more in the last year than I did the previous 19 years with the car. Did I mention that I've now had my car for over 20 years? Got the damn thing back in 2003! Here's to another 20 years!
Last edited by 95maxrider; Jun 30, 2023 at 07:49 AM.
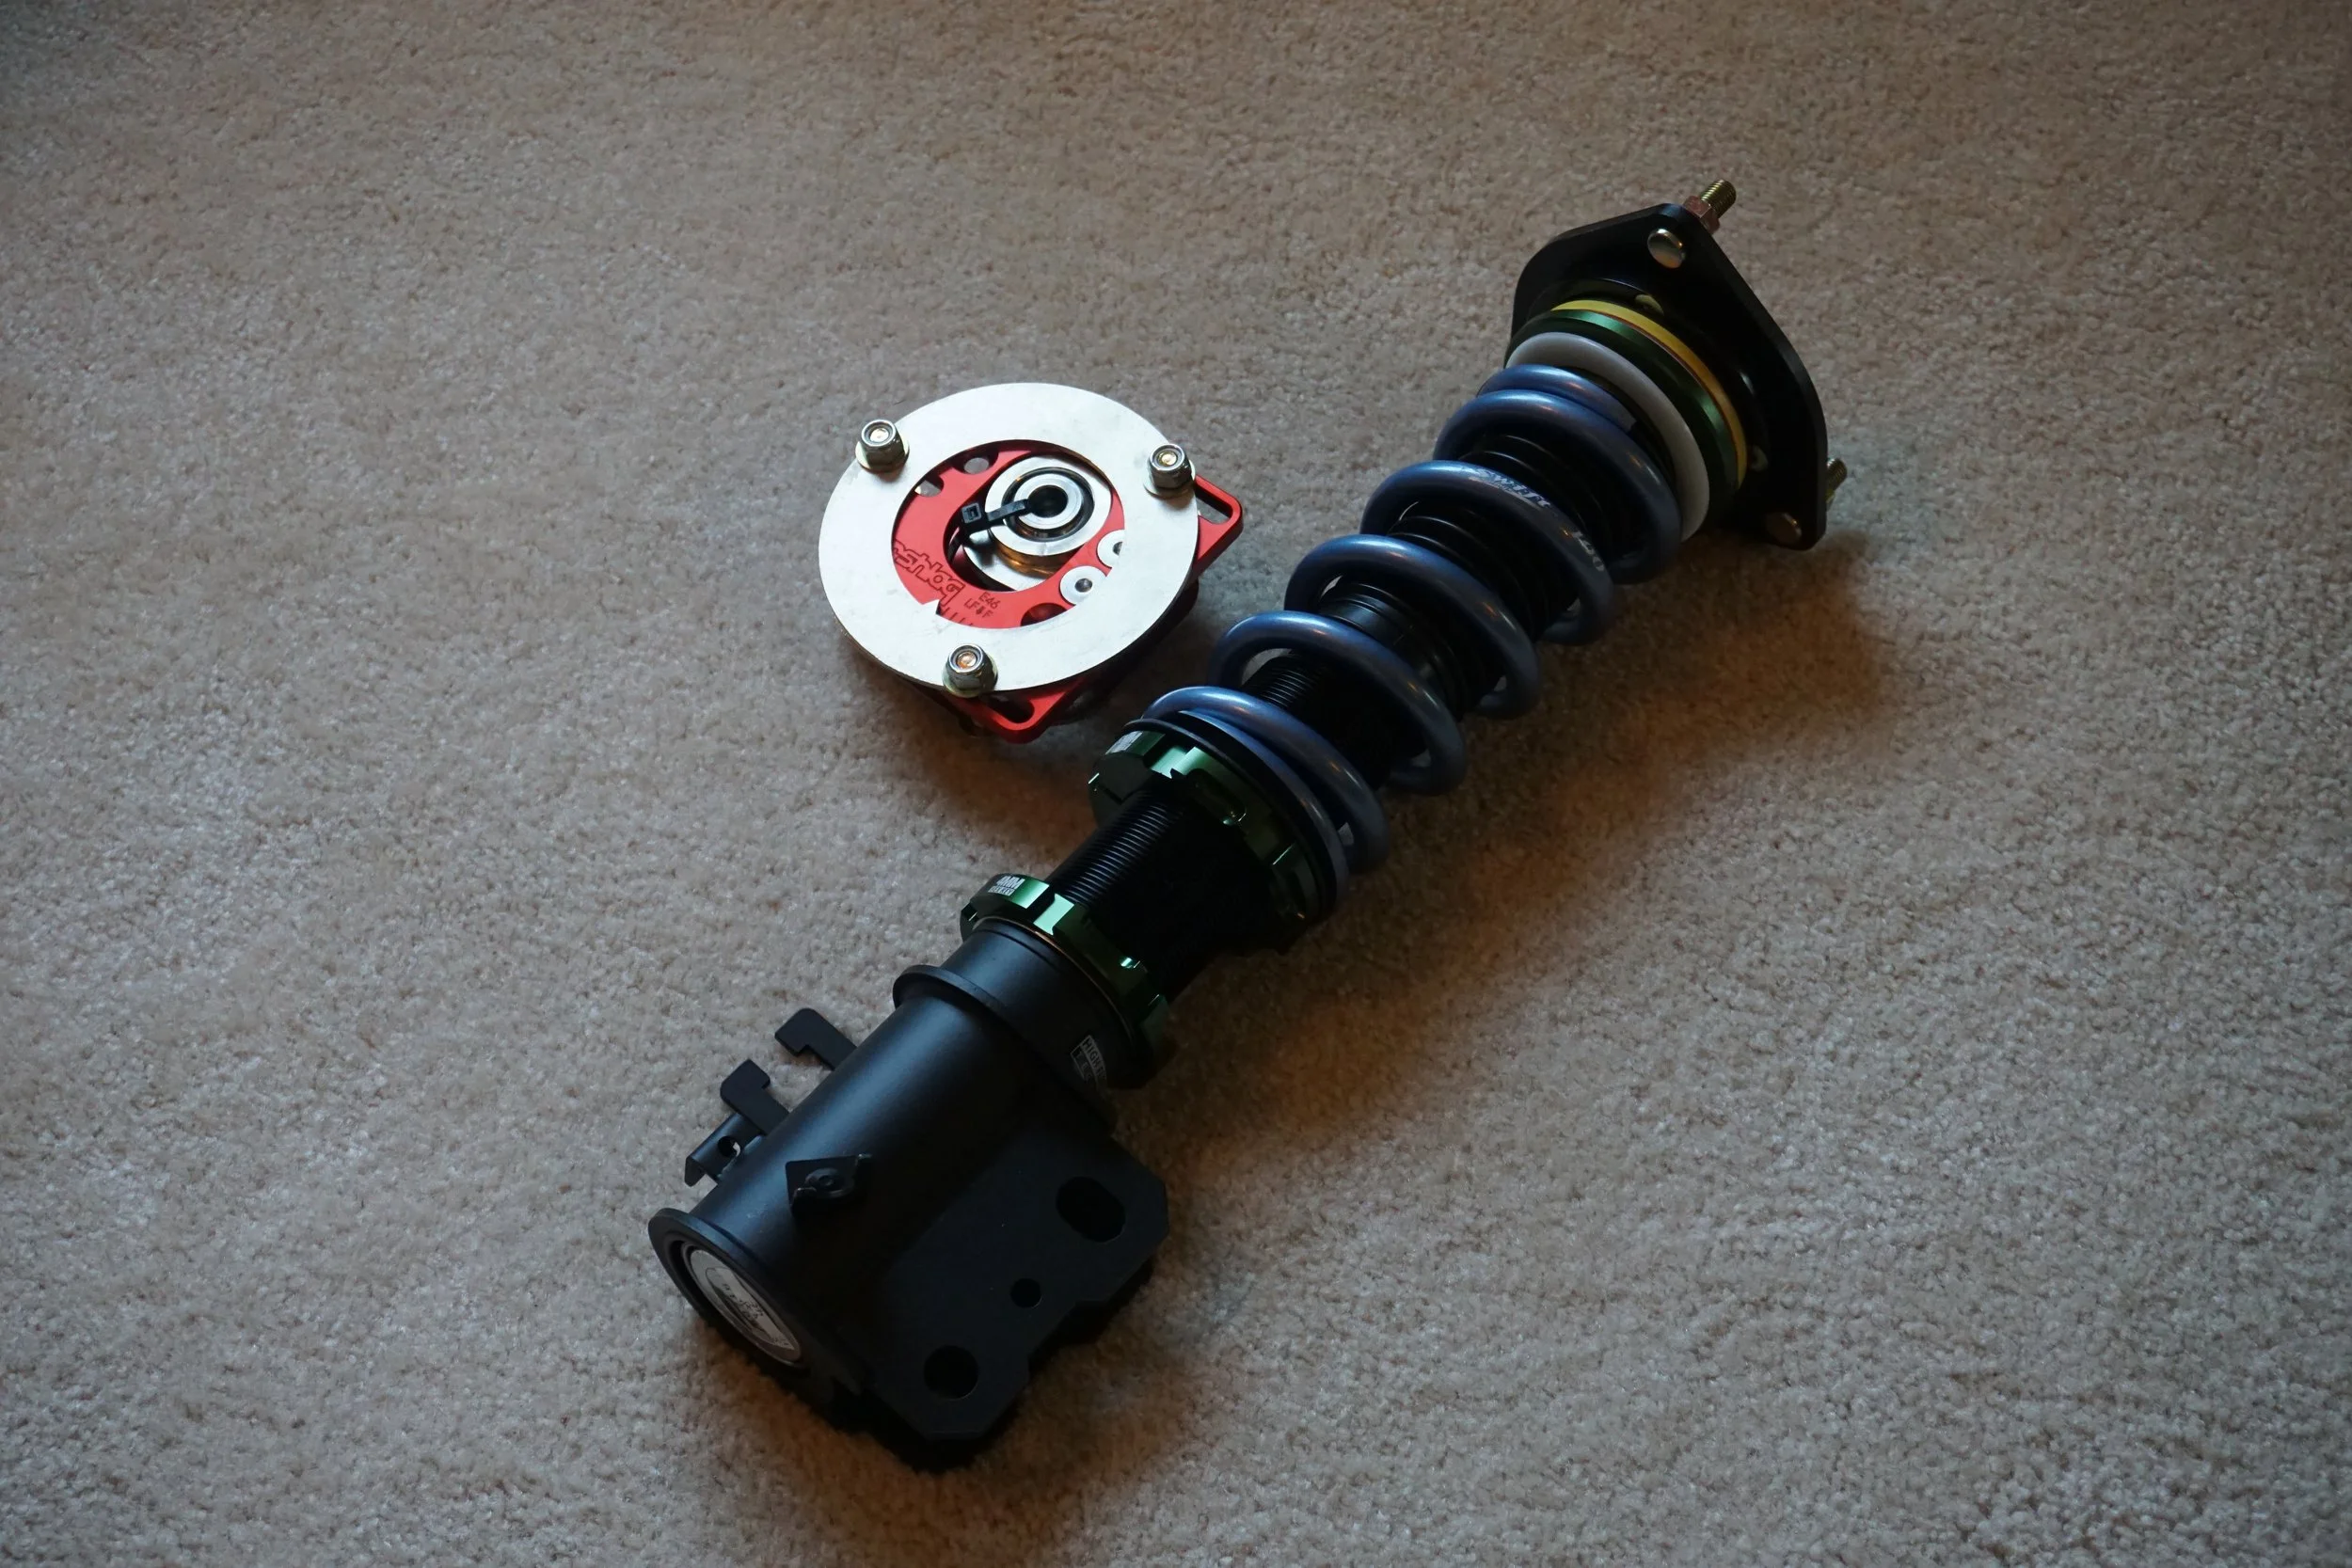
What, no Pathfinder or RZ34 parts in the tranny? Most every other gen/vehicle is represented! Strange looking camber/caster plate, but looks capable. I never liked the Frankensteined Stillen plates I finished with.
Alright well neither project is finished, but I'll post up what I've got. Let's start with the sway bar.
Some time ago I was looking through the Energy Suspension catalog and noticed that they offered a 23mm FSB bushing for the 5.5th gens, versus the 20mm (or was it 21mm?) for the 4th gen. I was curious if the bar would fit on a 4th gen, and what it would do for the handling of the car. Word on the street was that I would need to use a 5th gen subframe to make it work, but without definitive proof that would bolt up to a 4th gen (let along the hassle of dealing with different control arm, knuckles, brakes, etc) I wanted to see if I could make the 23mm work on a 4th gen subframe. I found a 23mm bar on an auto 5.5th gen SE at the junkyard and removed it. "Word on the street" is that the bar for the 6MT 5.5th gens is even stiffer than for the autos, but that has yet to be confirmed. For now, I'll start with this bar and see what happens.
I started by testing out my new media blasting tank with some fine coal slag and got that rusty bar looking all fresh again.
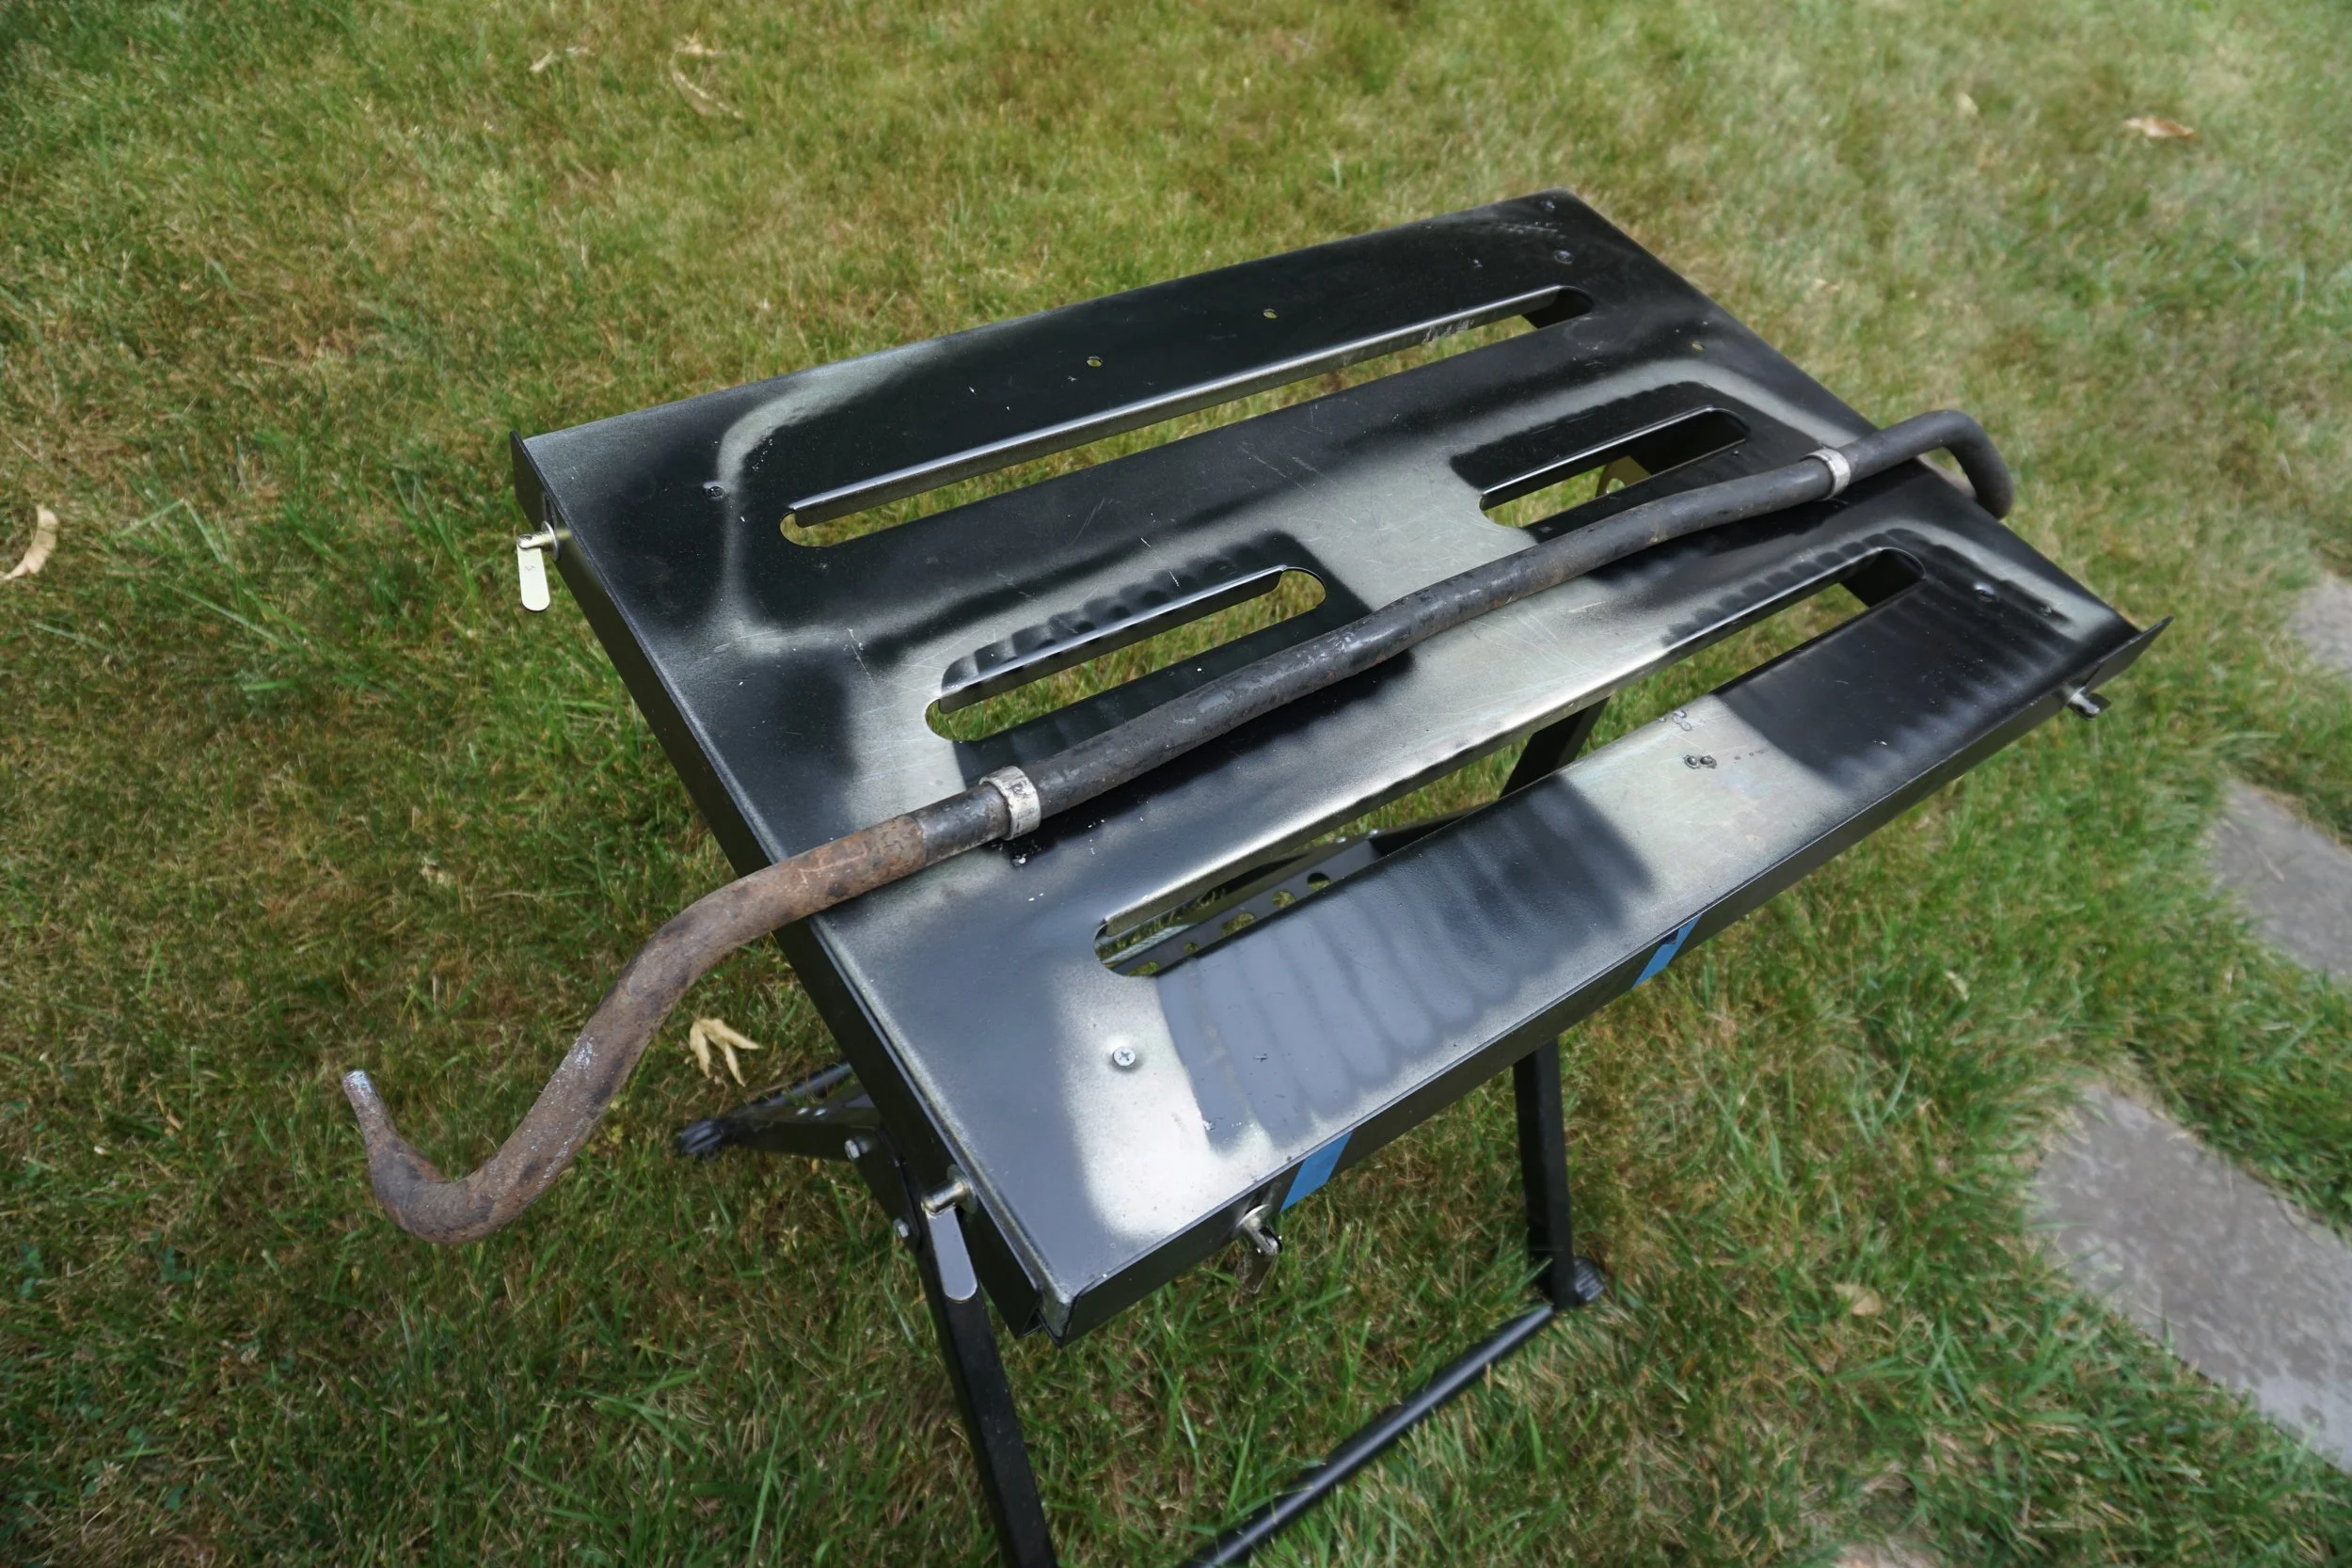
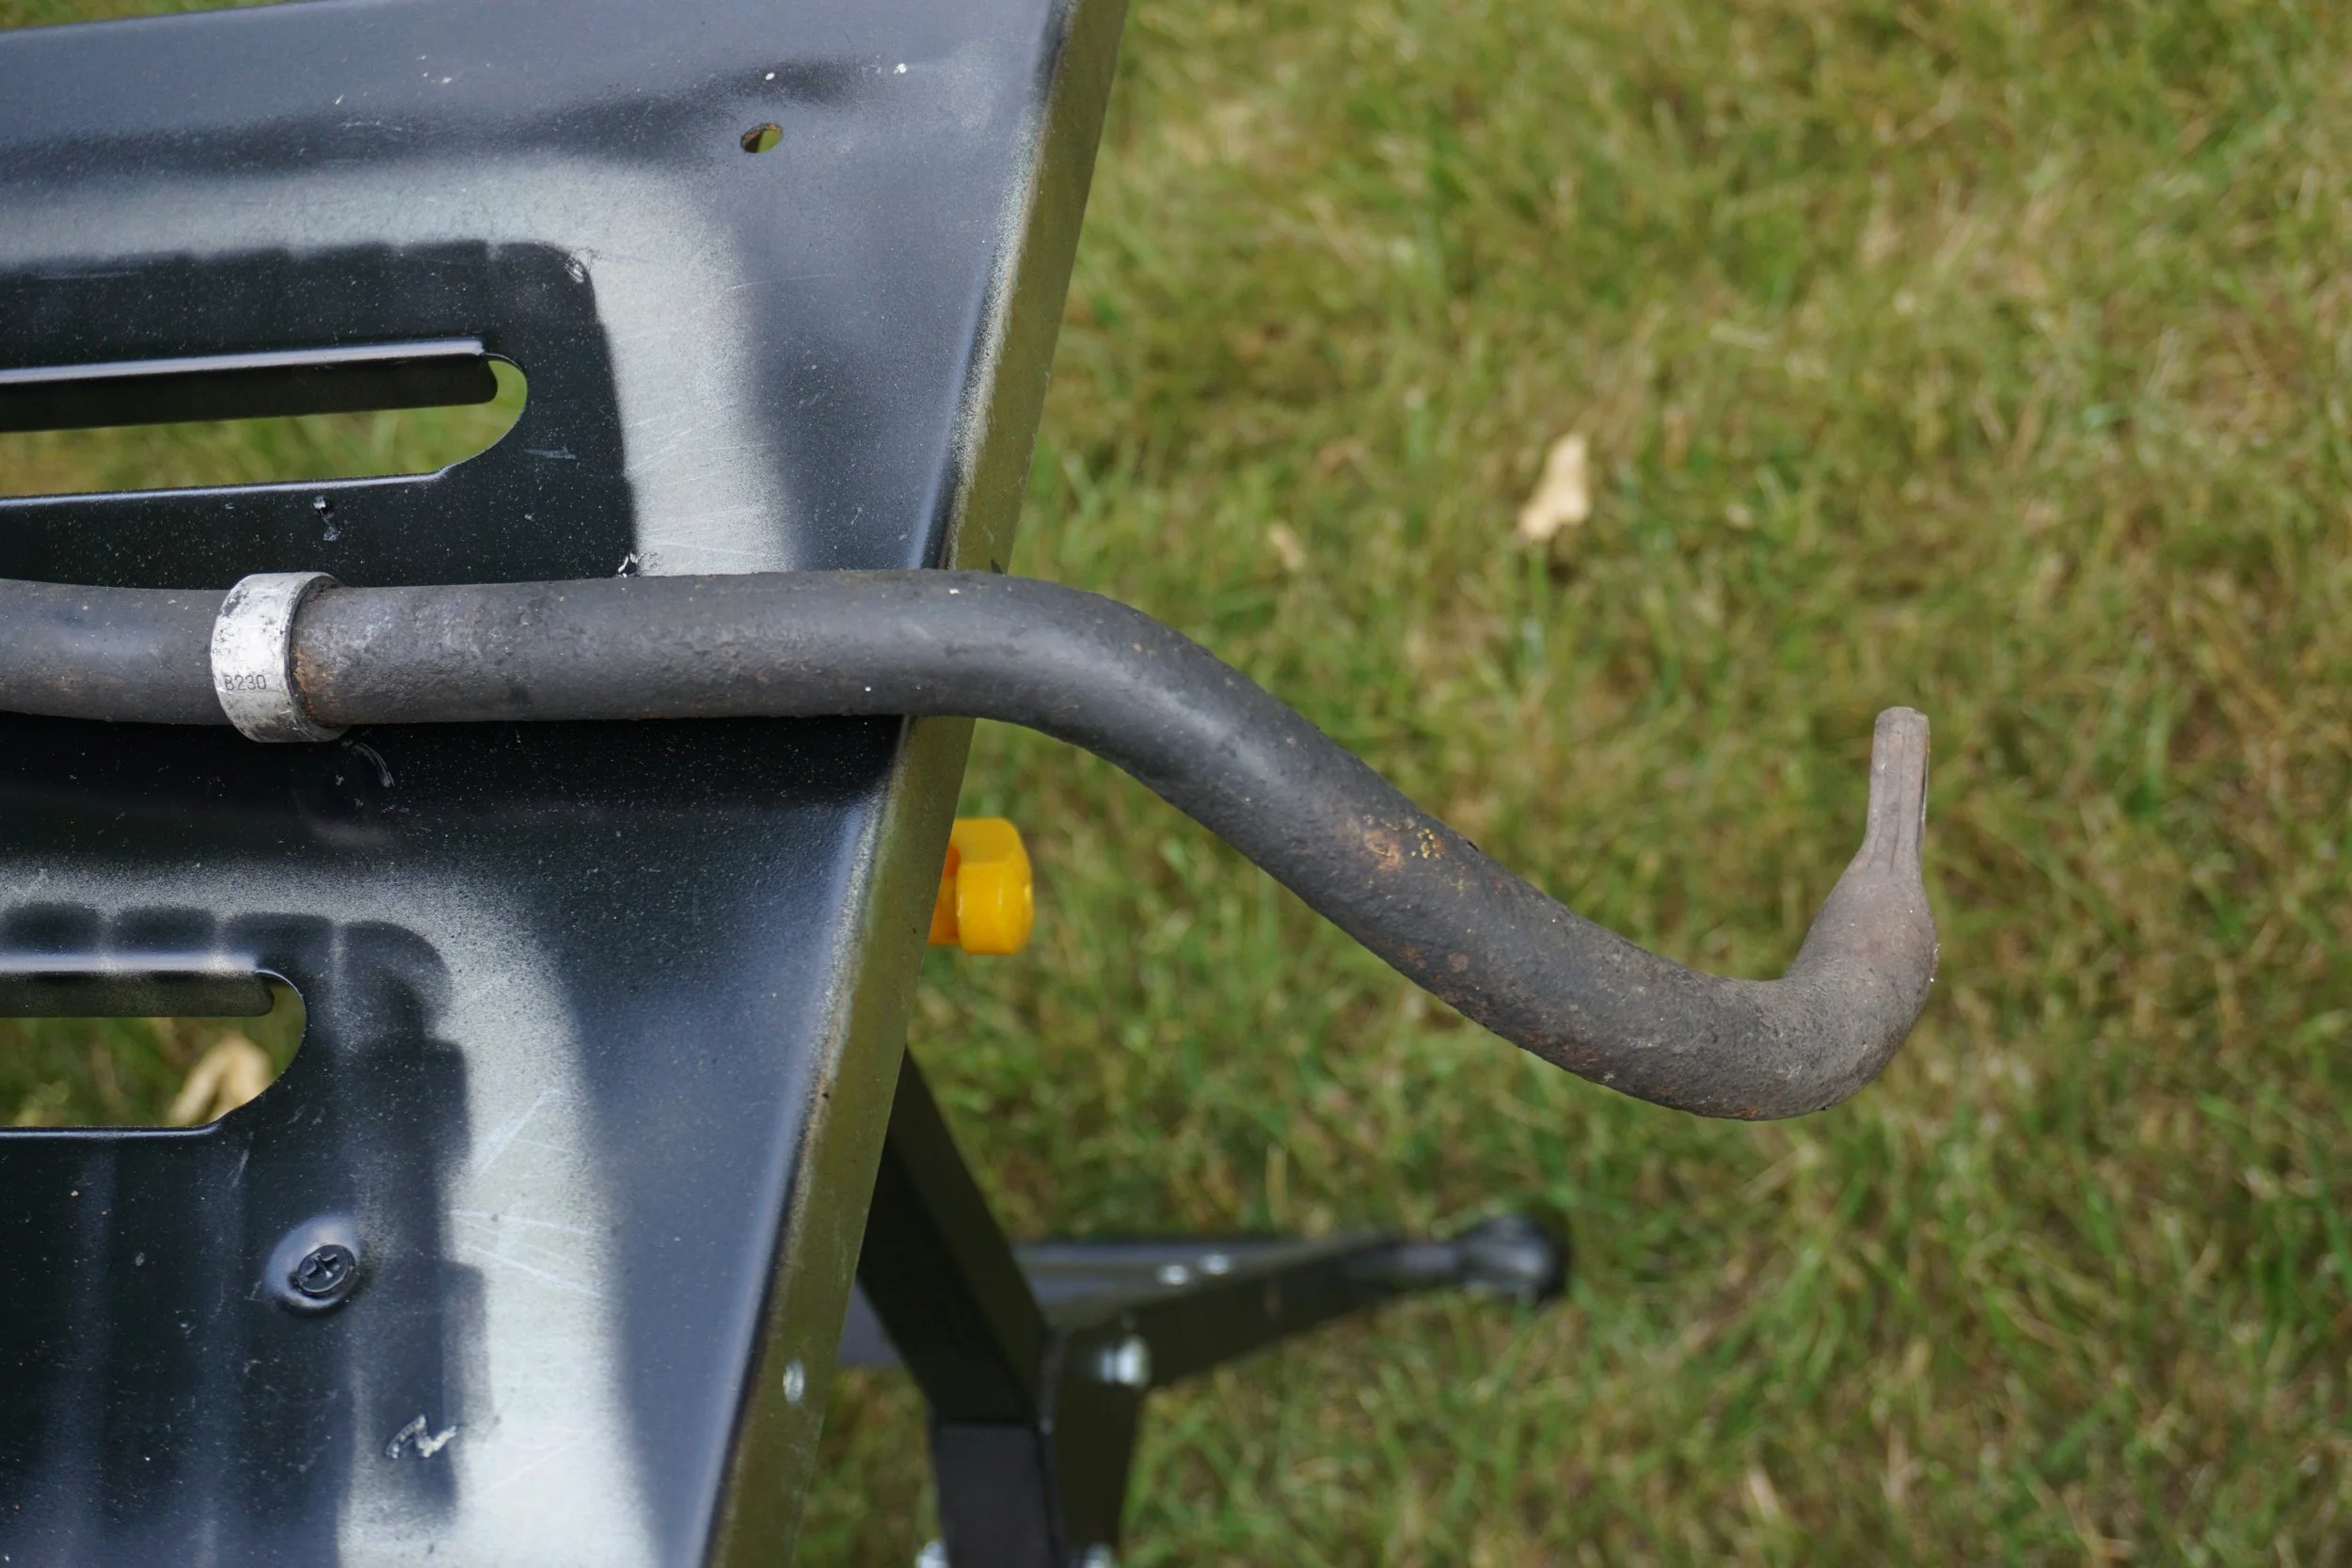
As you can see, the shape and length of the bar is quite different than my stock bar. And the blaster got it down to bare metal in no time! Goodbye wire wheels and angle grinder! I've got a new superpower in my fight against rust.
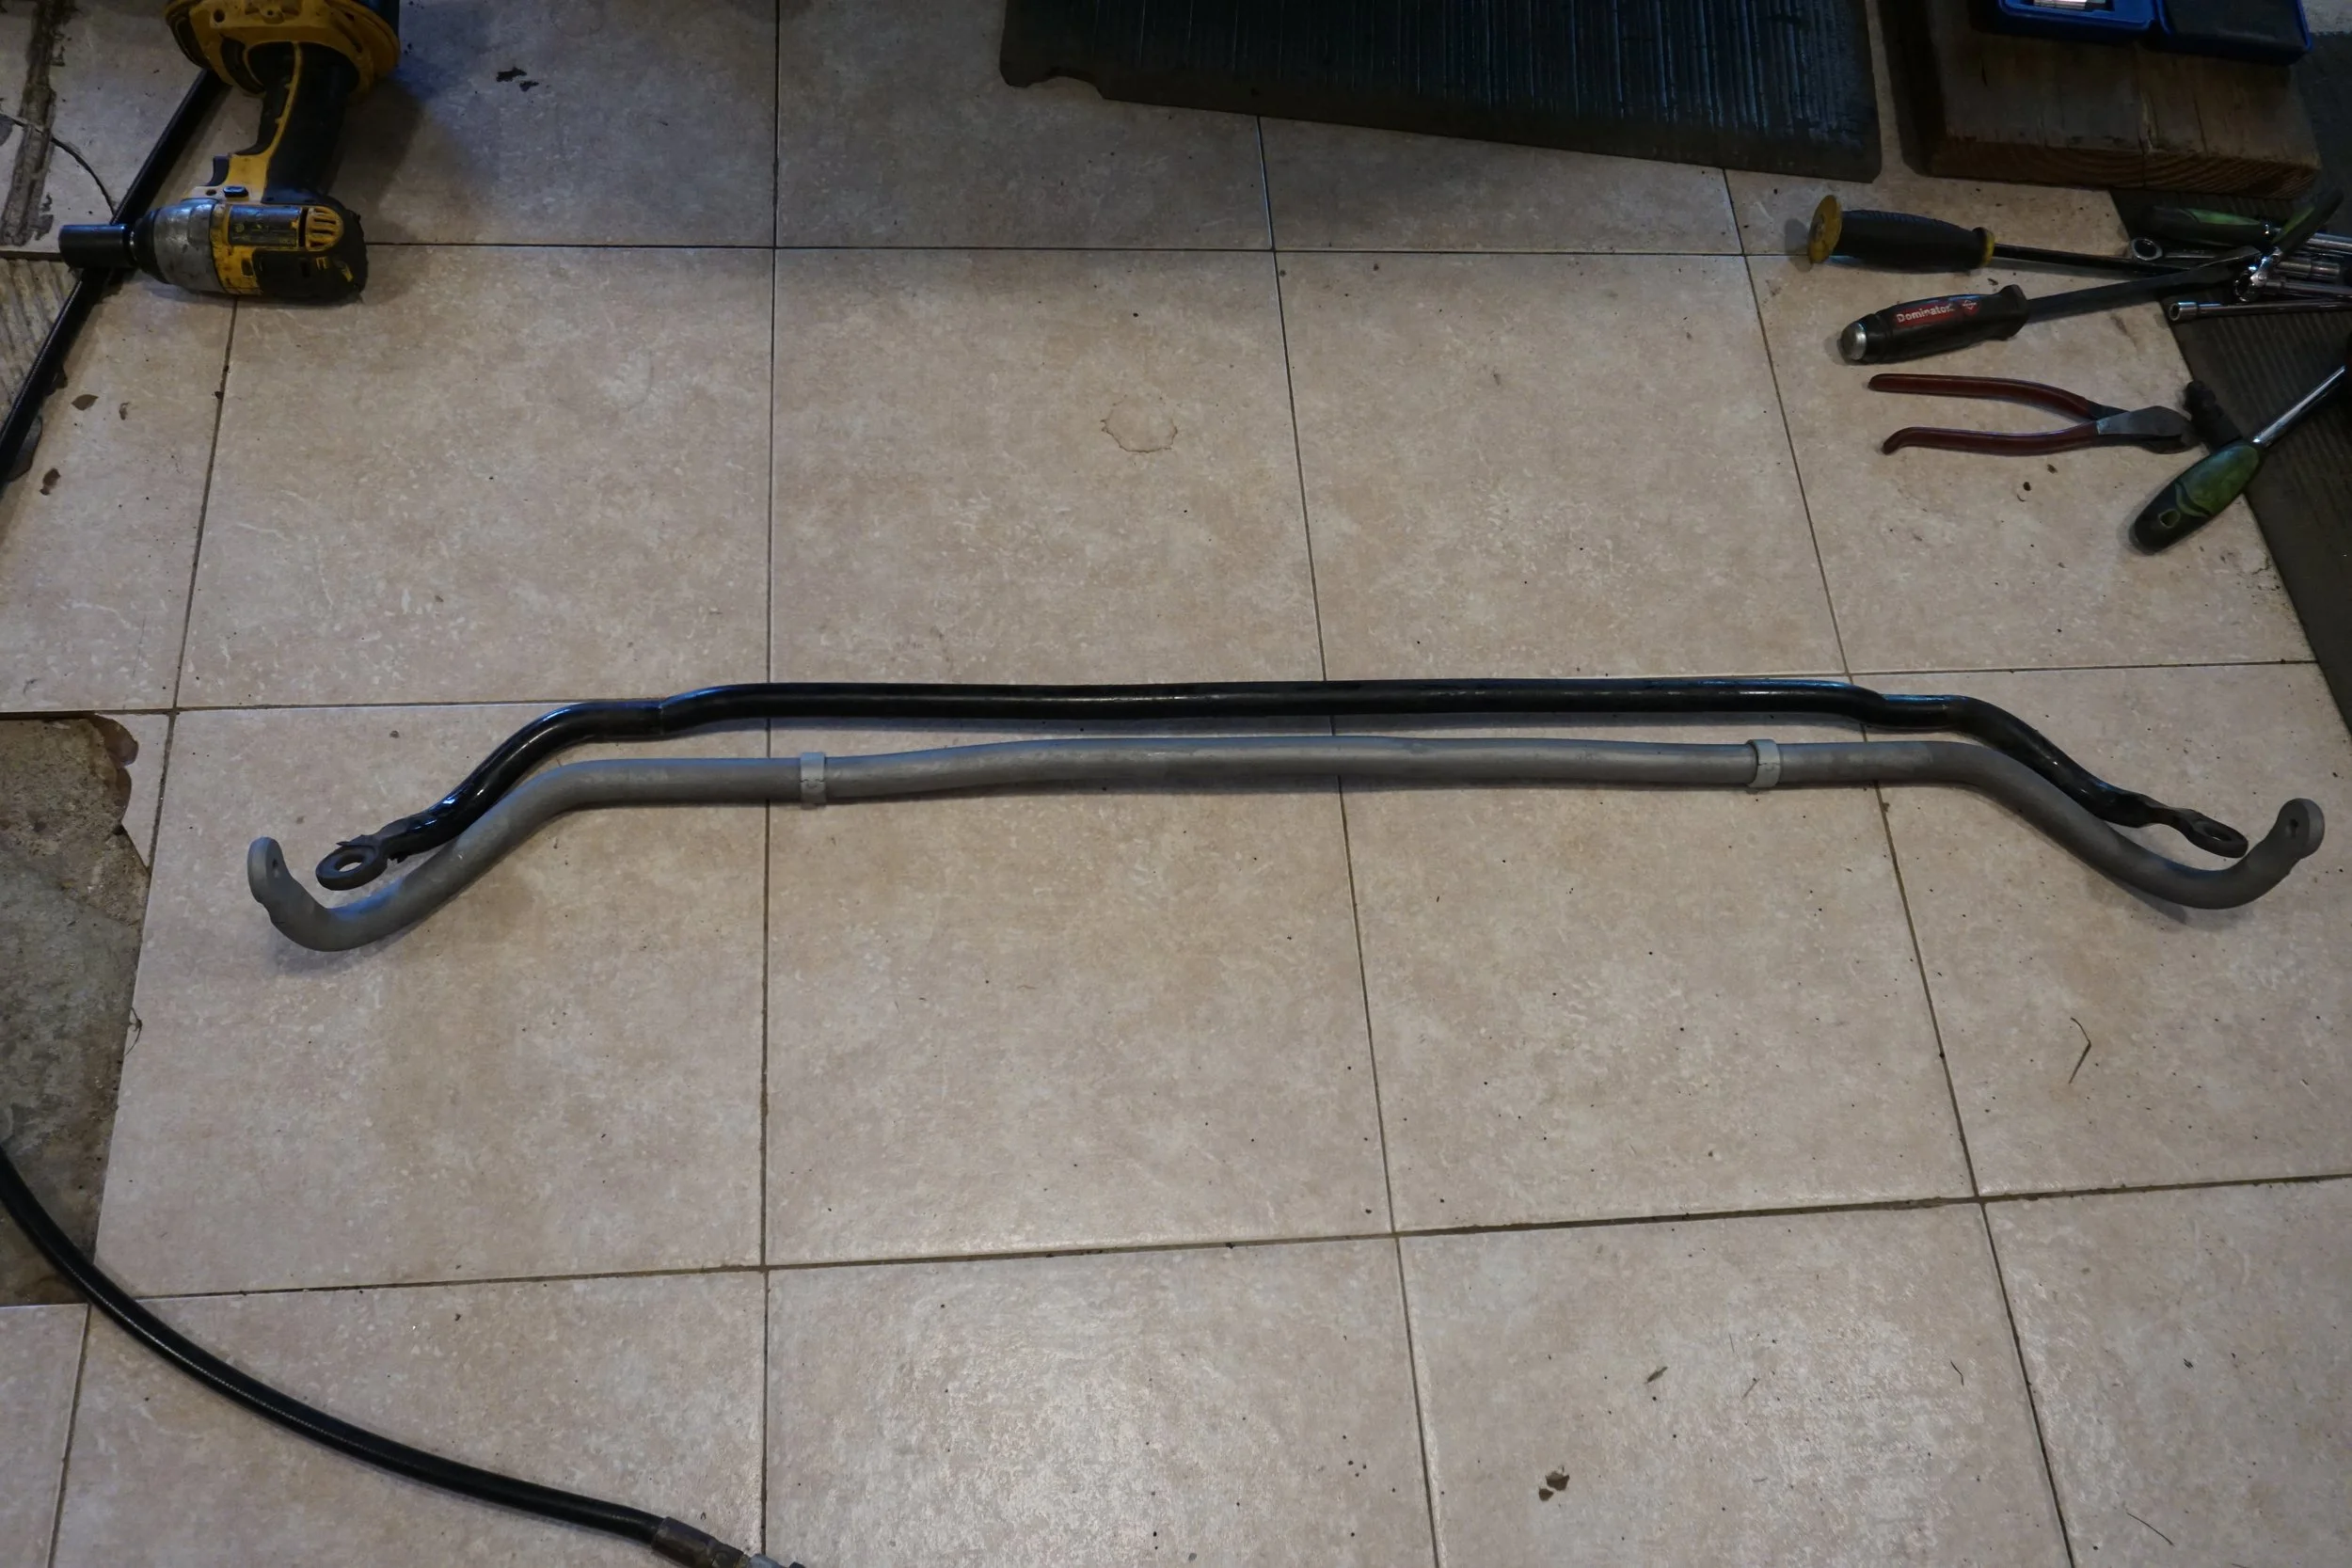
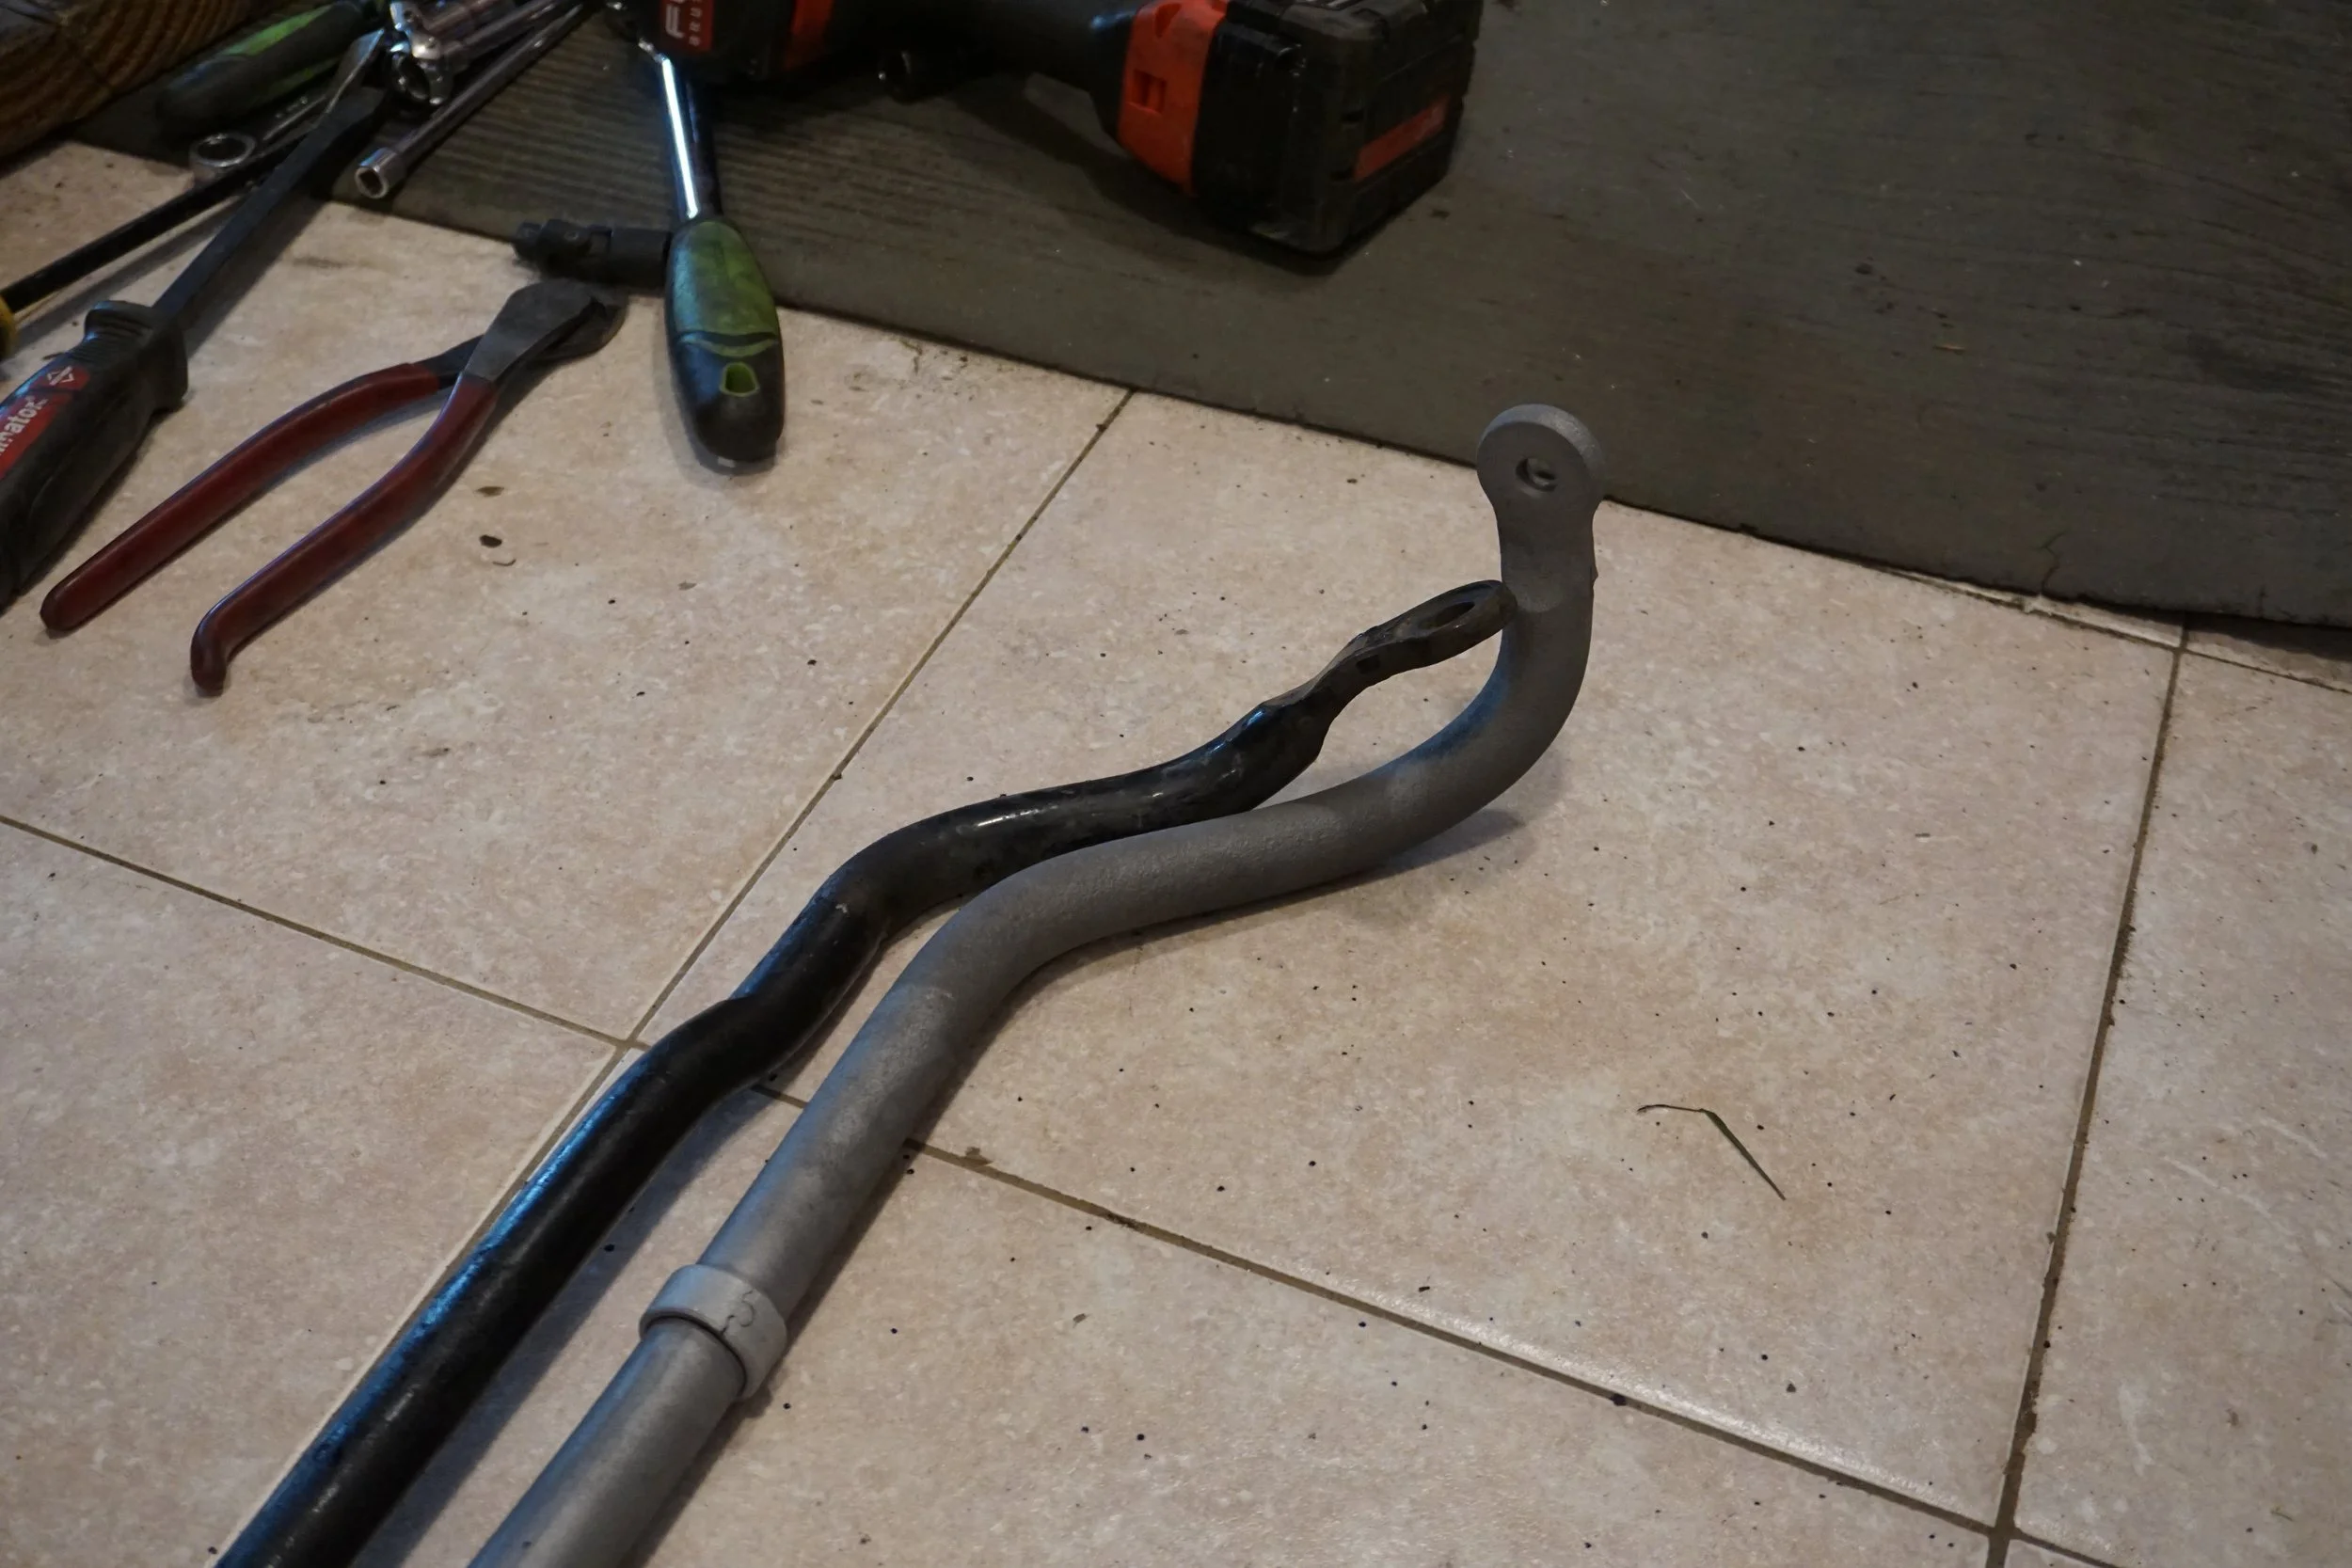
When I was removing the bar from the car at the junkyard, I immediately realized the stock 5th gen bushing design wasn't going to work on a 4th gen. The 4th gen bushings have a flat bottom, while the 5th gen bushings were round. The 5th gen subframe has a U shaped cutout in it, allowing the bar to sit down in it, versus the 4th gen where the bar sits on top.
So I bought two different 23mm bushings from ES to try out. One was just bushings, while the other came with brackets to fit the bushings. Since the first bushings wouldn't fit in the factory brackets, I moved onto the much larger ones that came with brackets. Doing some quick initial test fitting, I saw the bar was hitting the bracket for the steering rack, so I trimmed down the bushings a bit to give it some space.
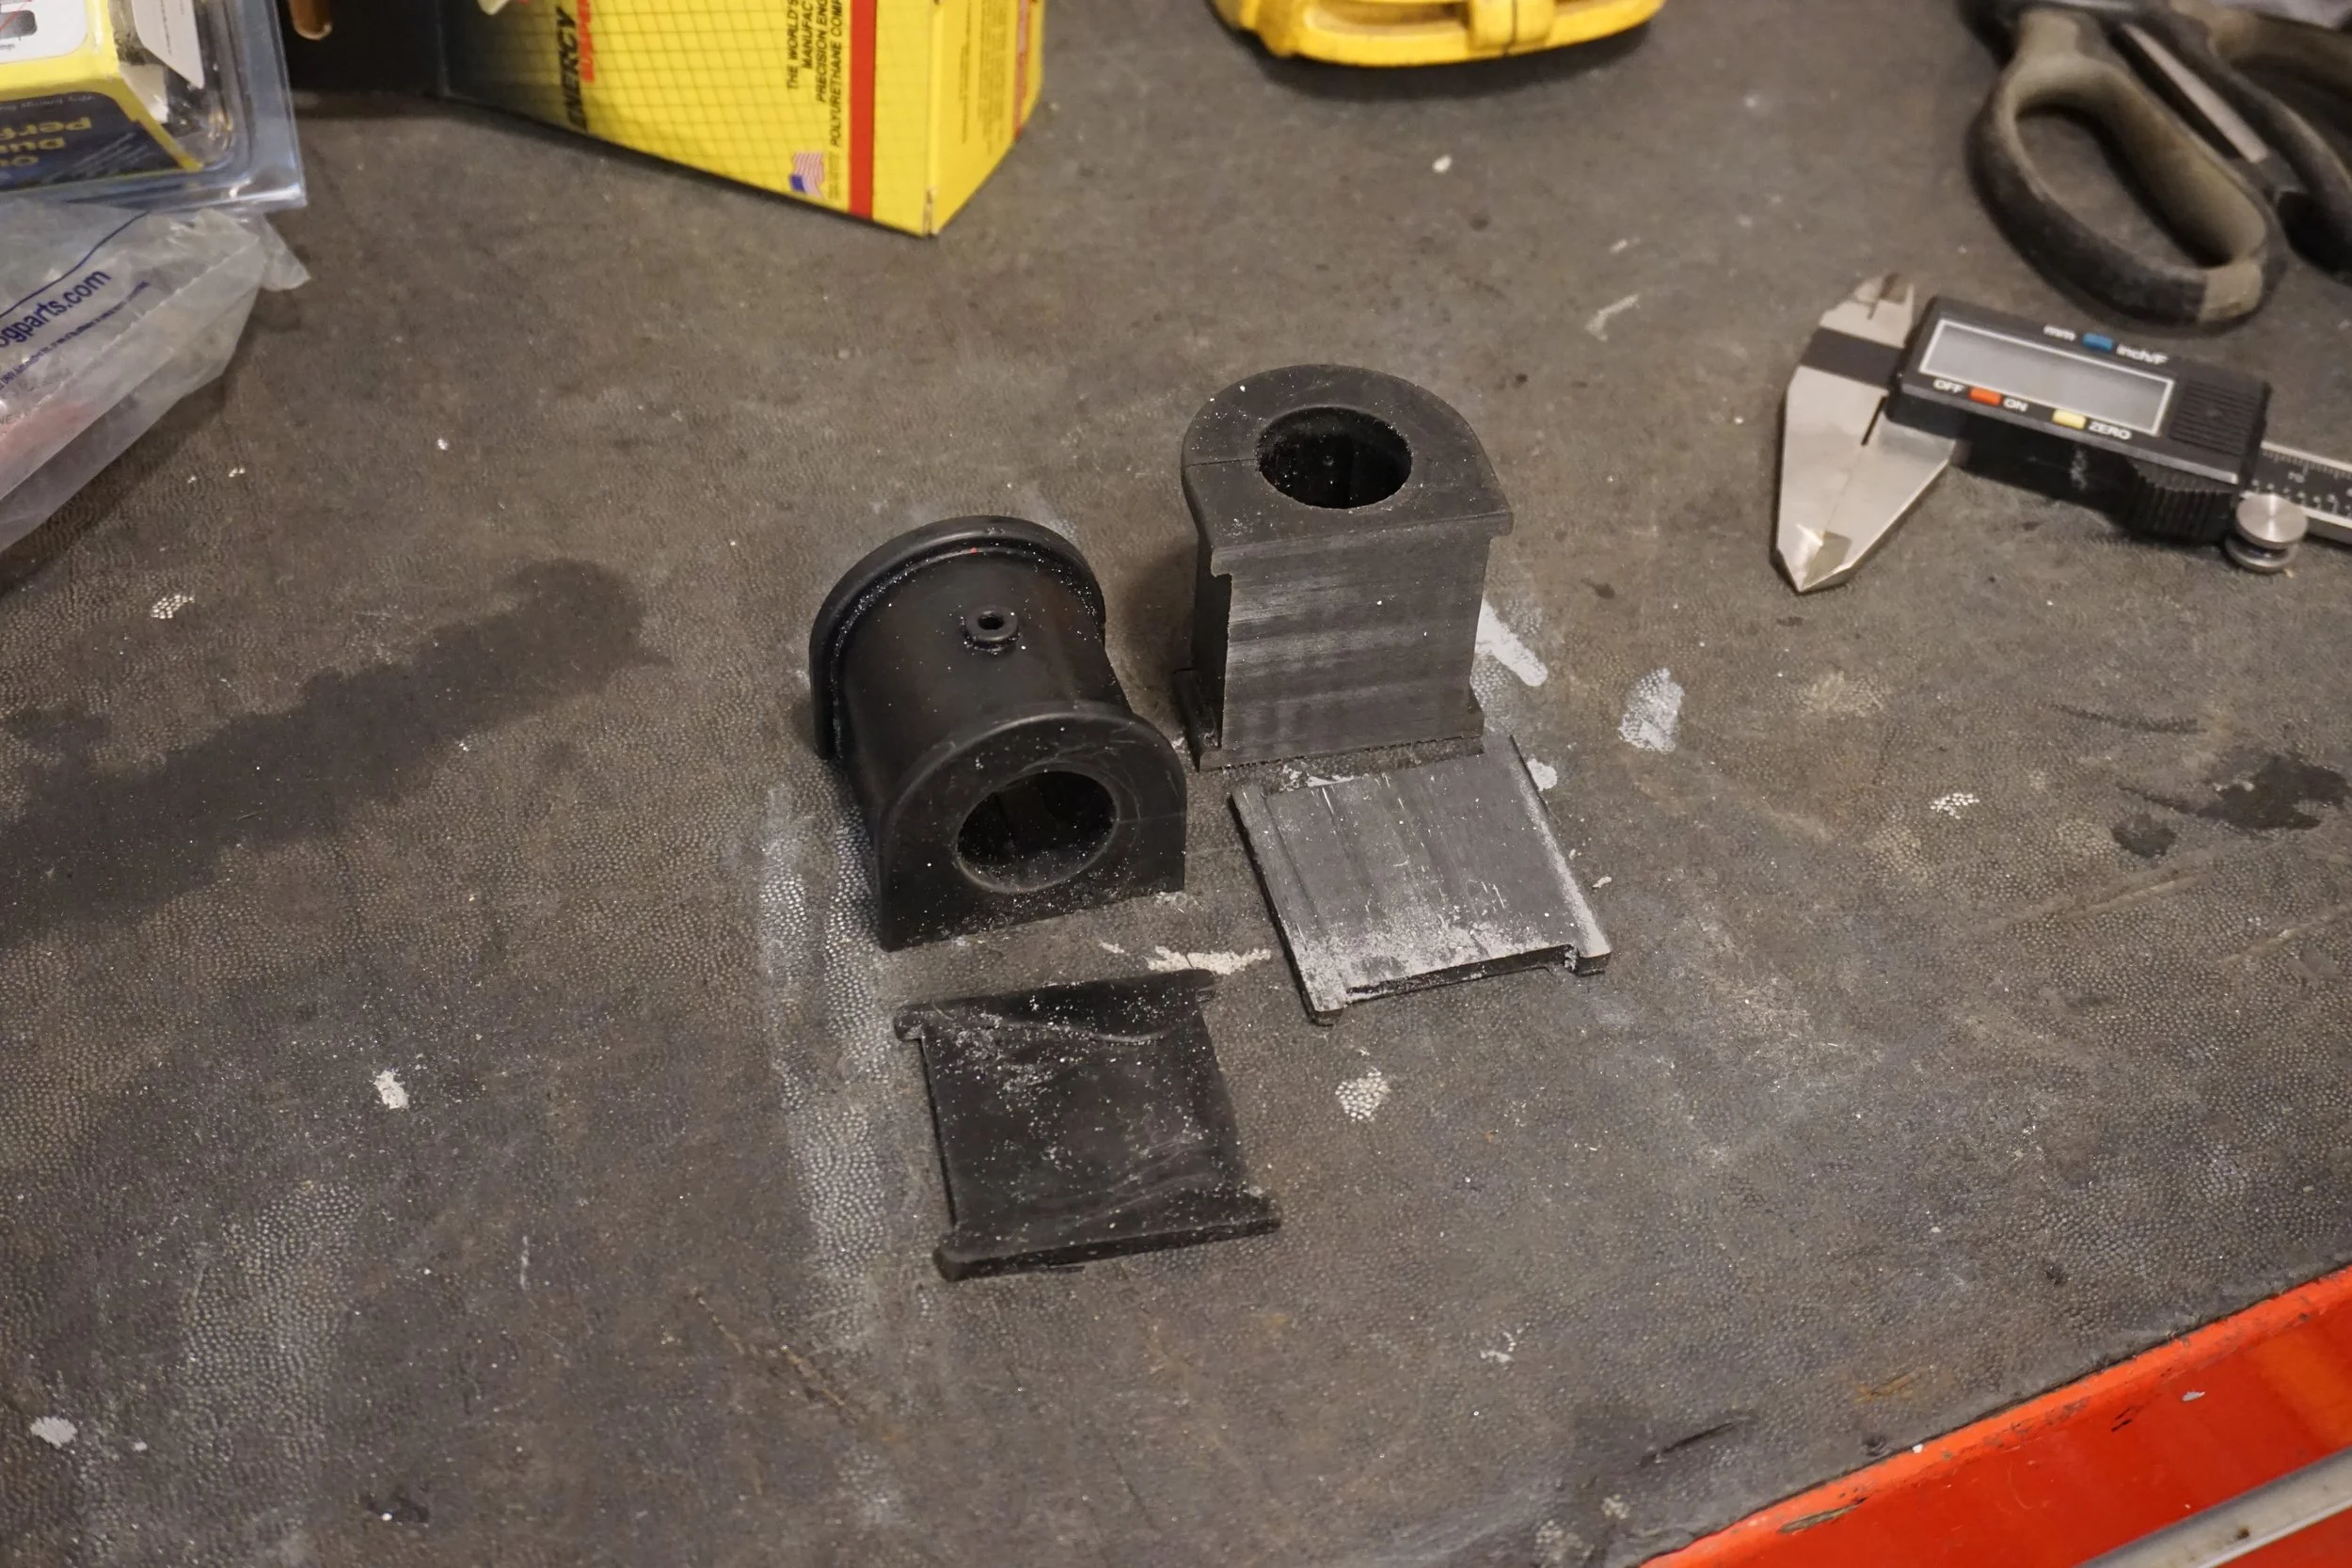
The ES brackets wouldn't bolt up to the car since the bolt holes are offset from center.
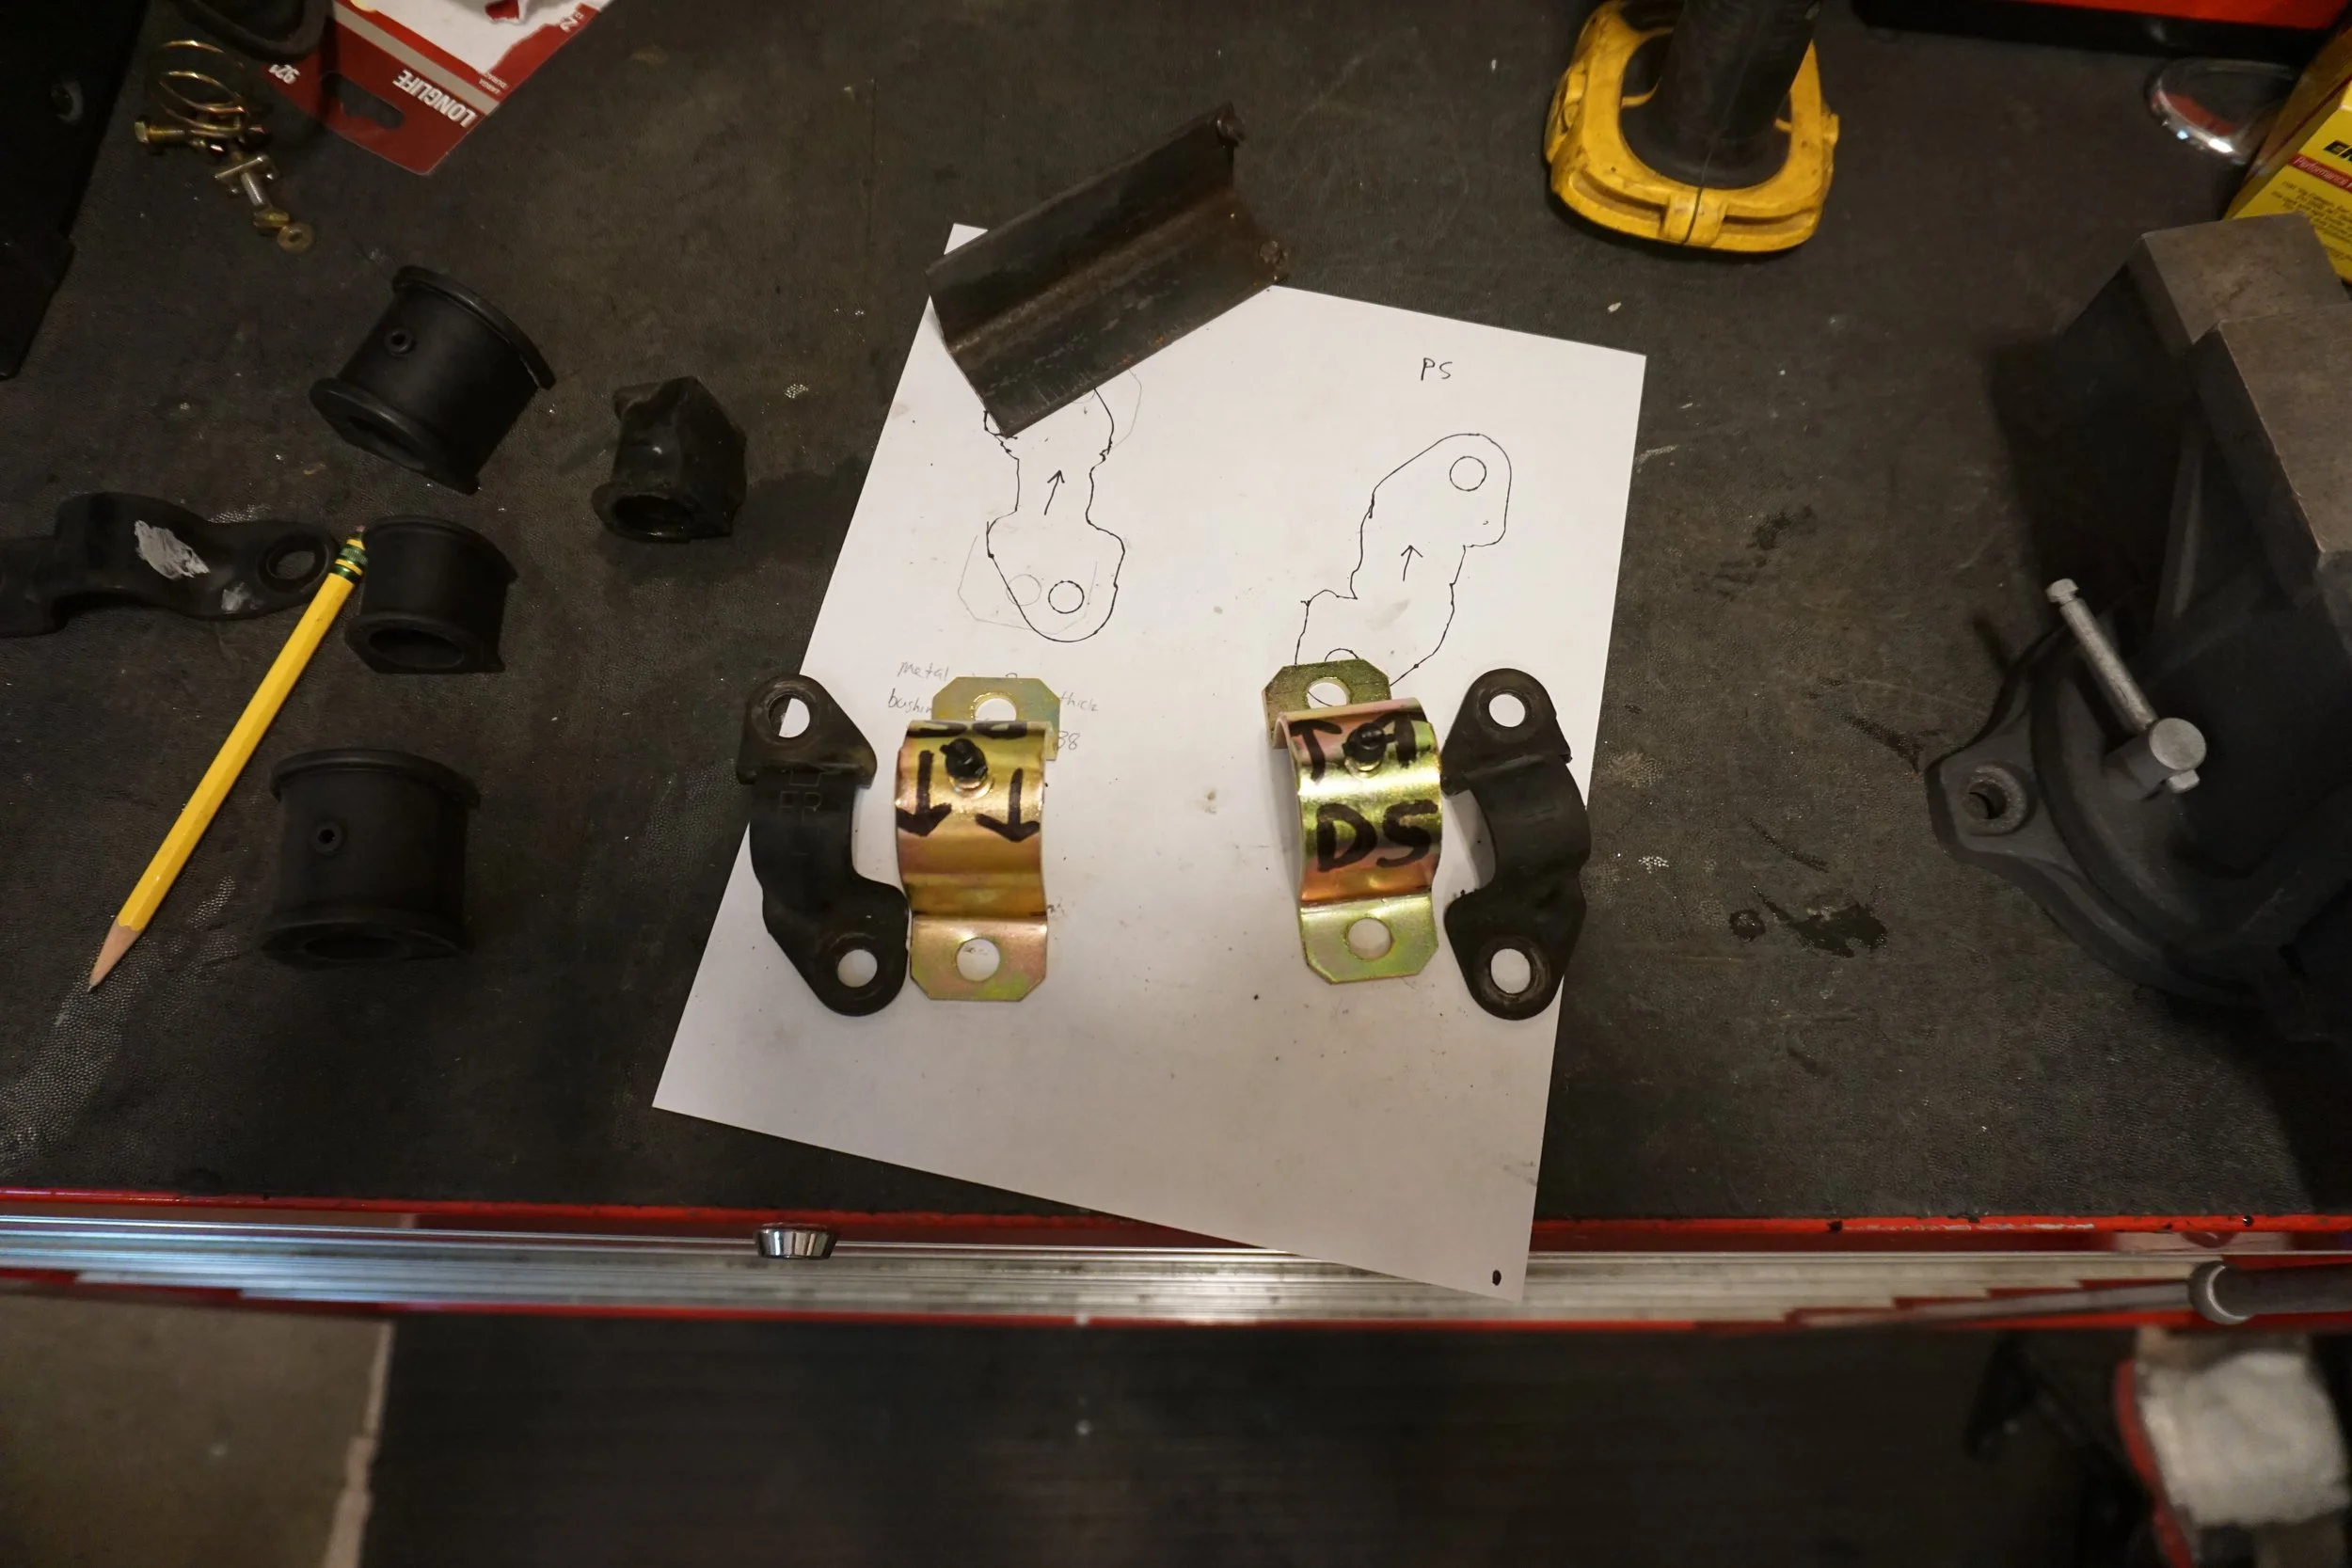
So I found some appropriately sized scrap metal lying around, cleaned it up, cut up the ES brackets, and welded stuff together.
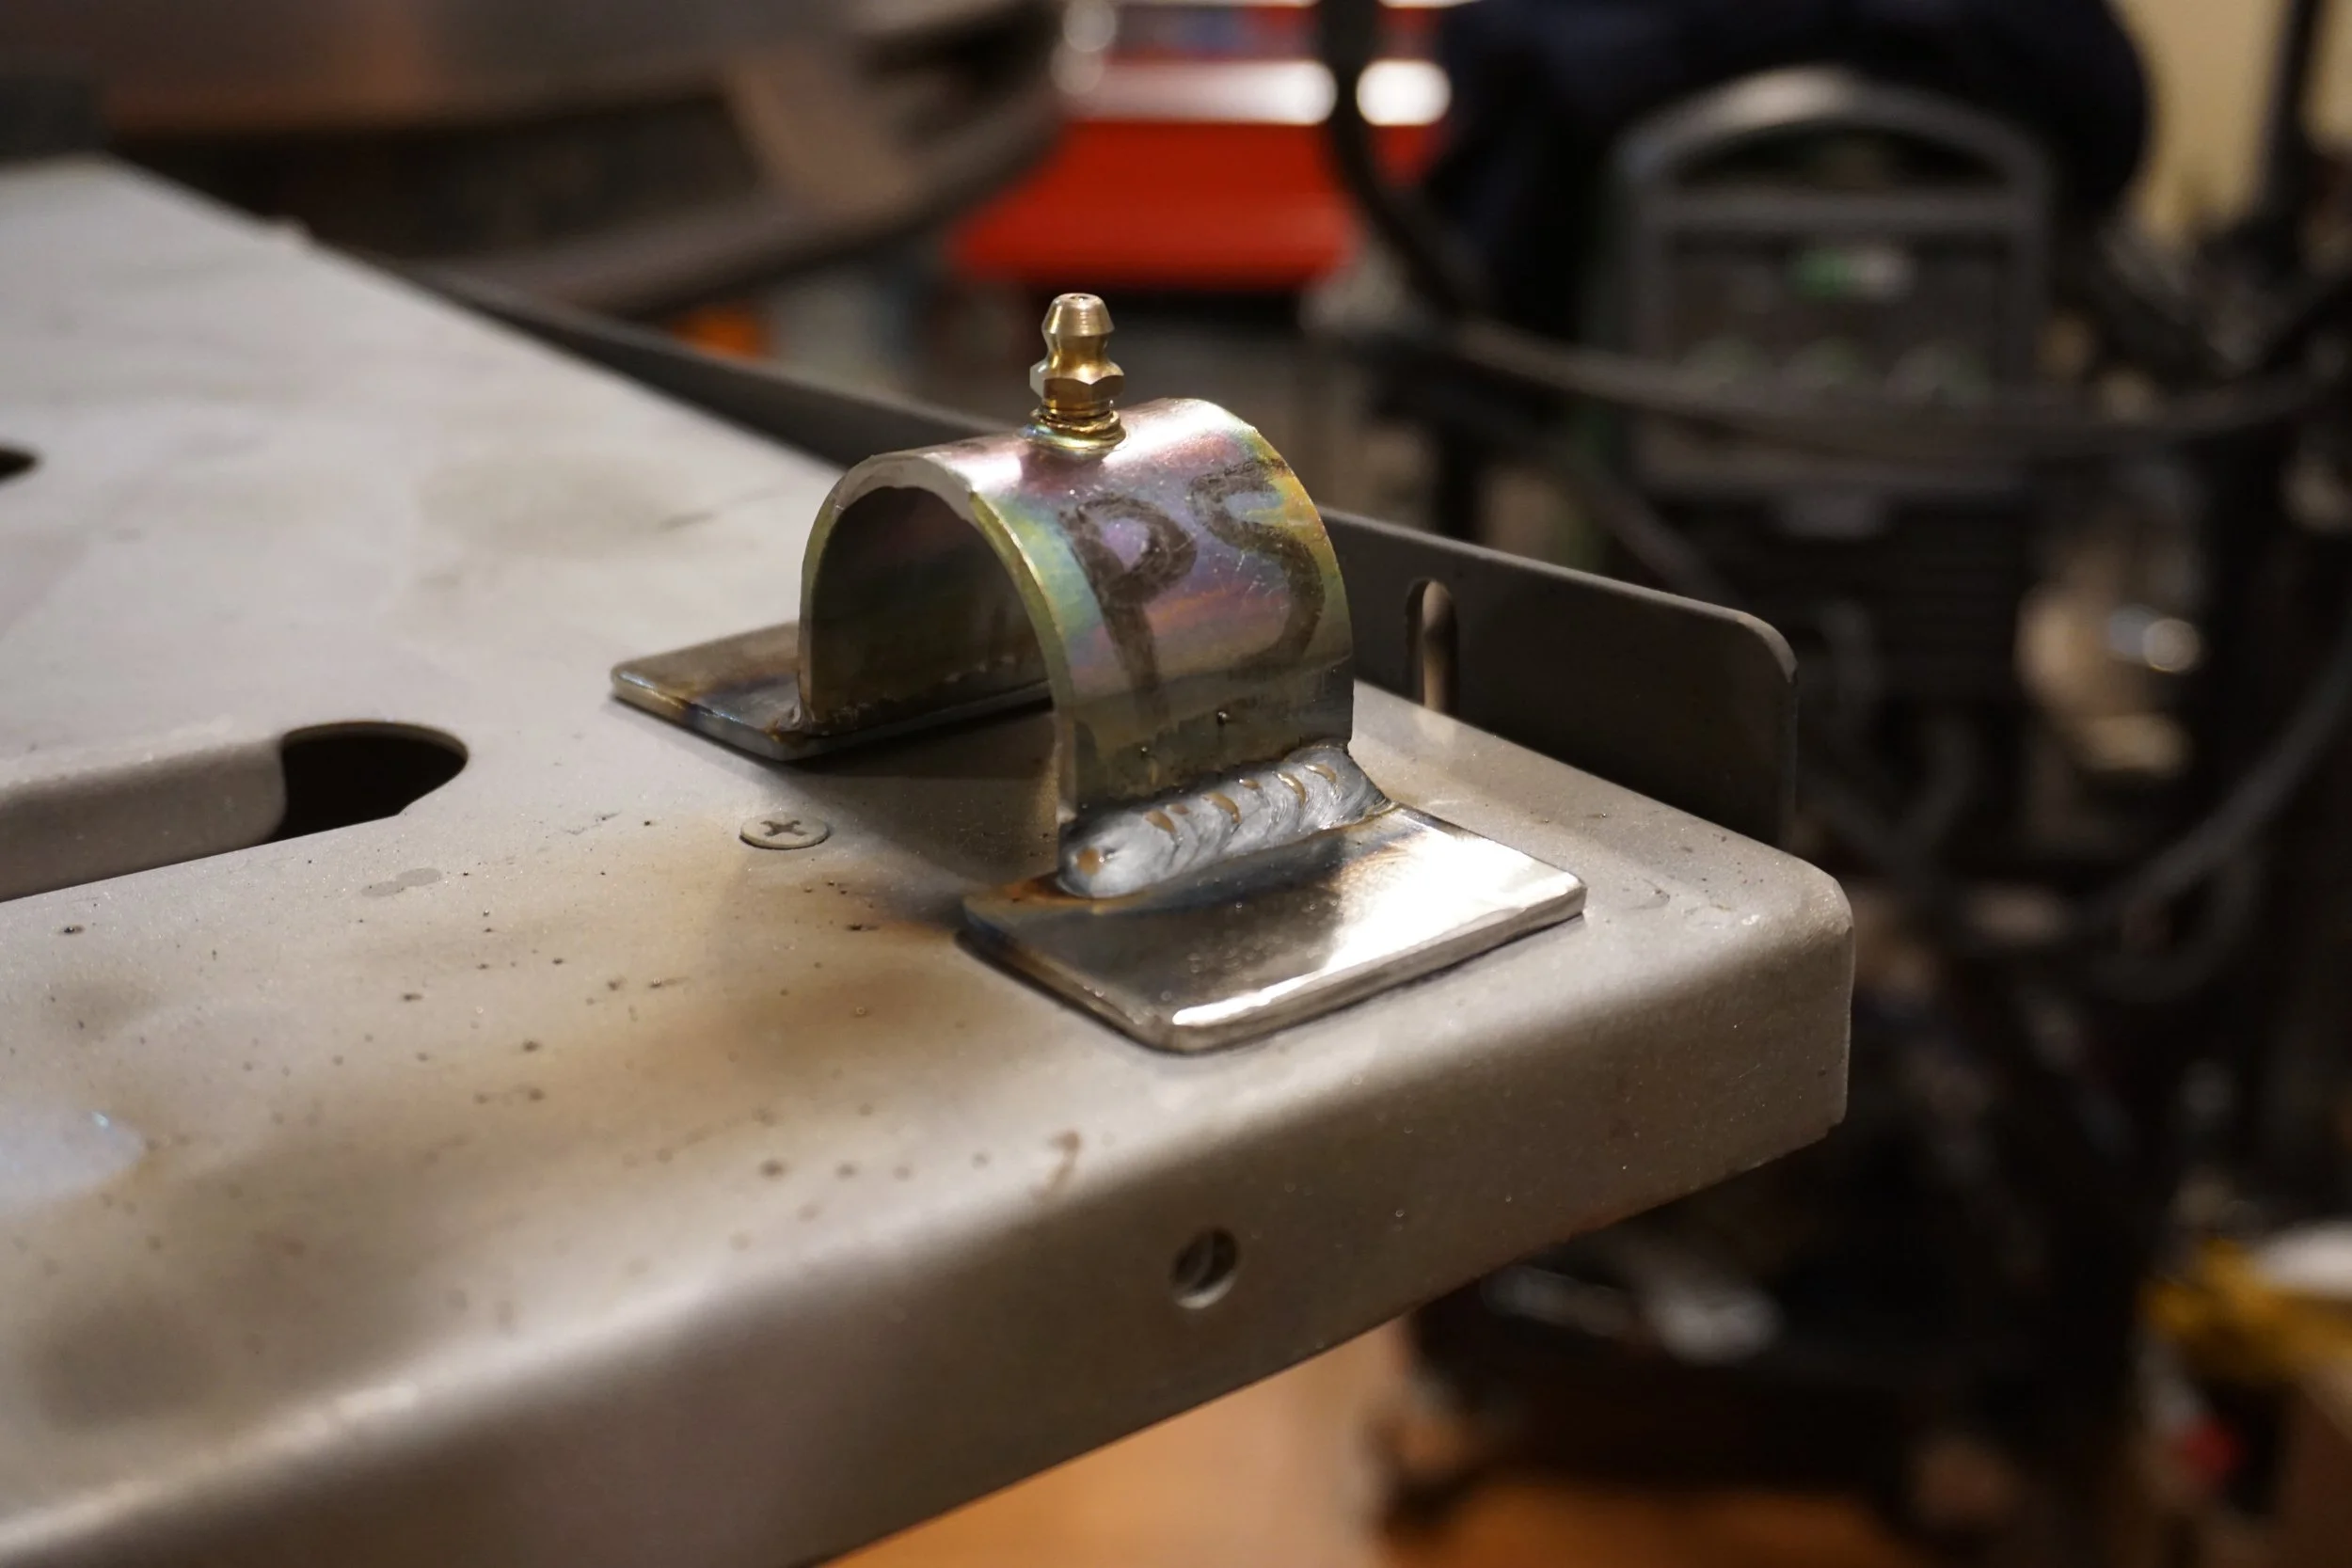
I had been using some Moog 5th gen end links for initial fitting, but it seemed like they were at the end of their range at full droop, and I knew I wanted something adjustable to remove any preload, so I did some digging on adjustable links. I settled on some Flyin' Miata links for the NB since they seemed to have the correct length range and they were reasonably priced.
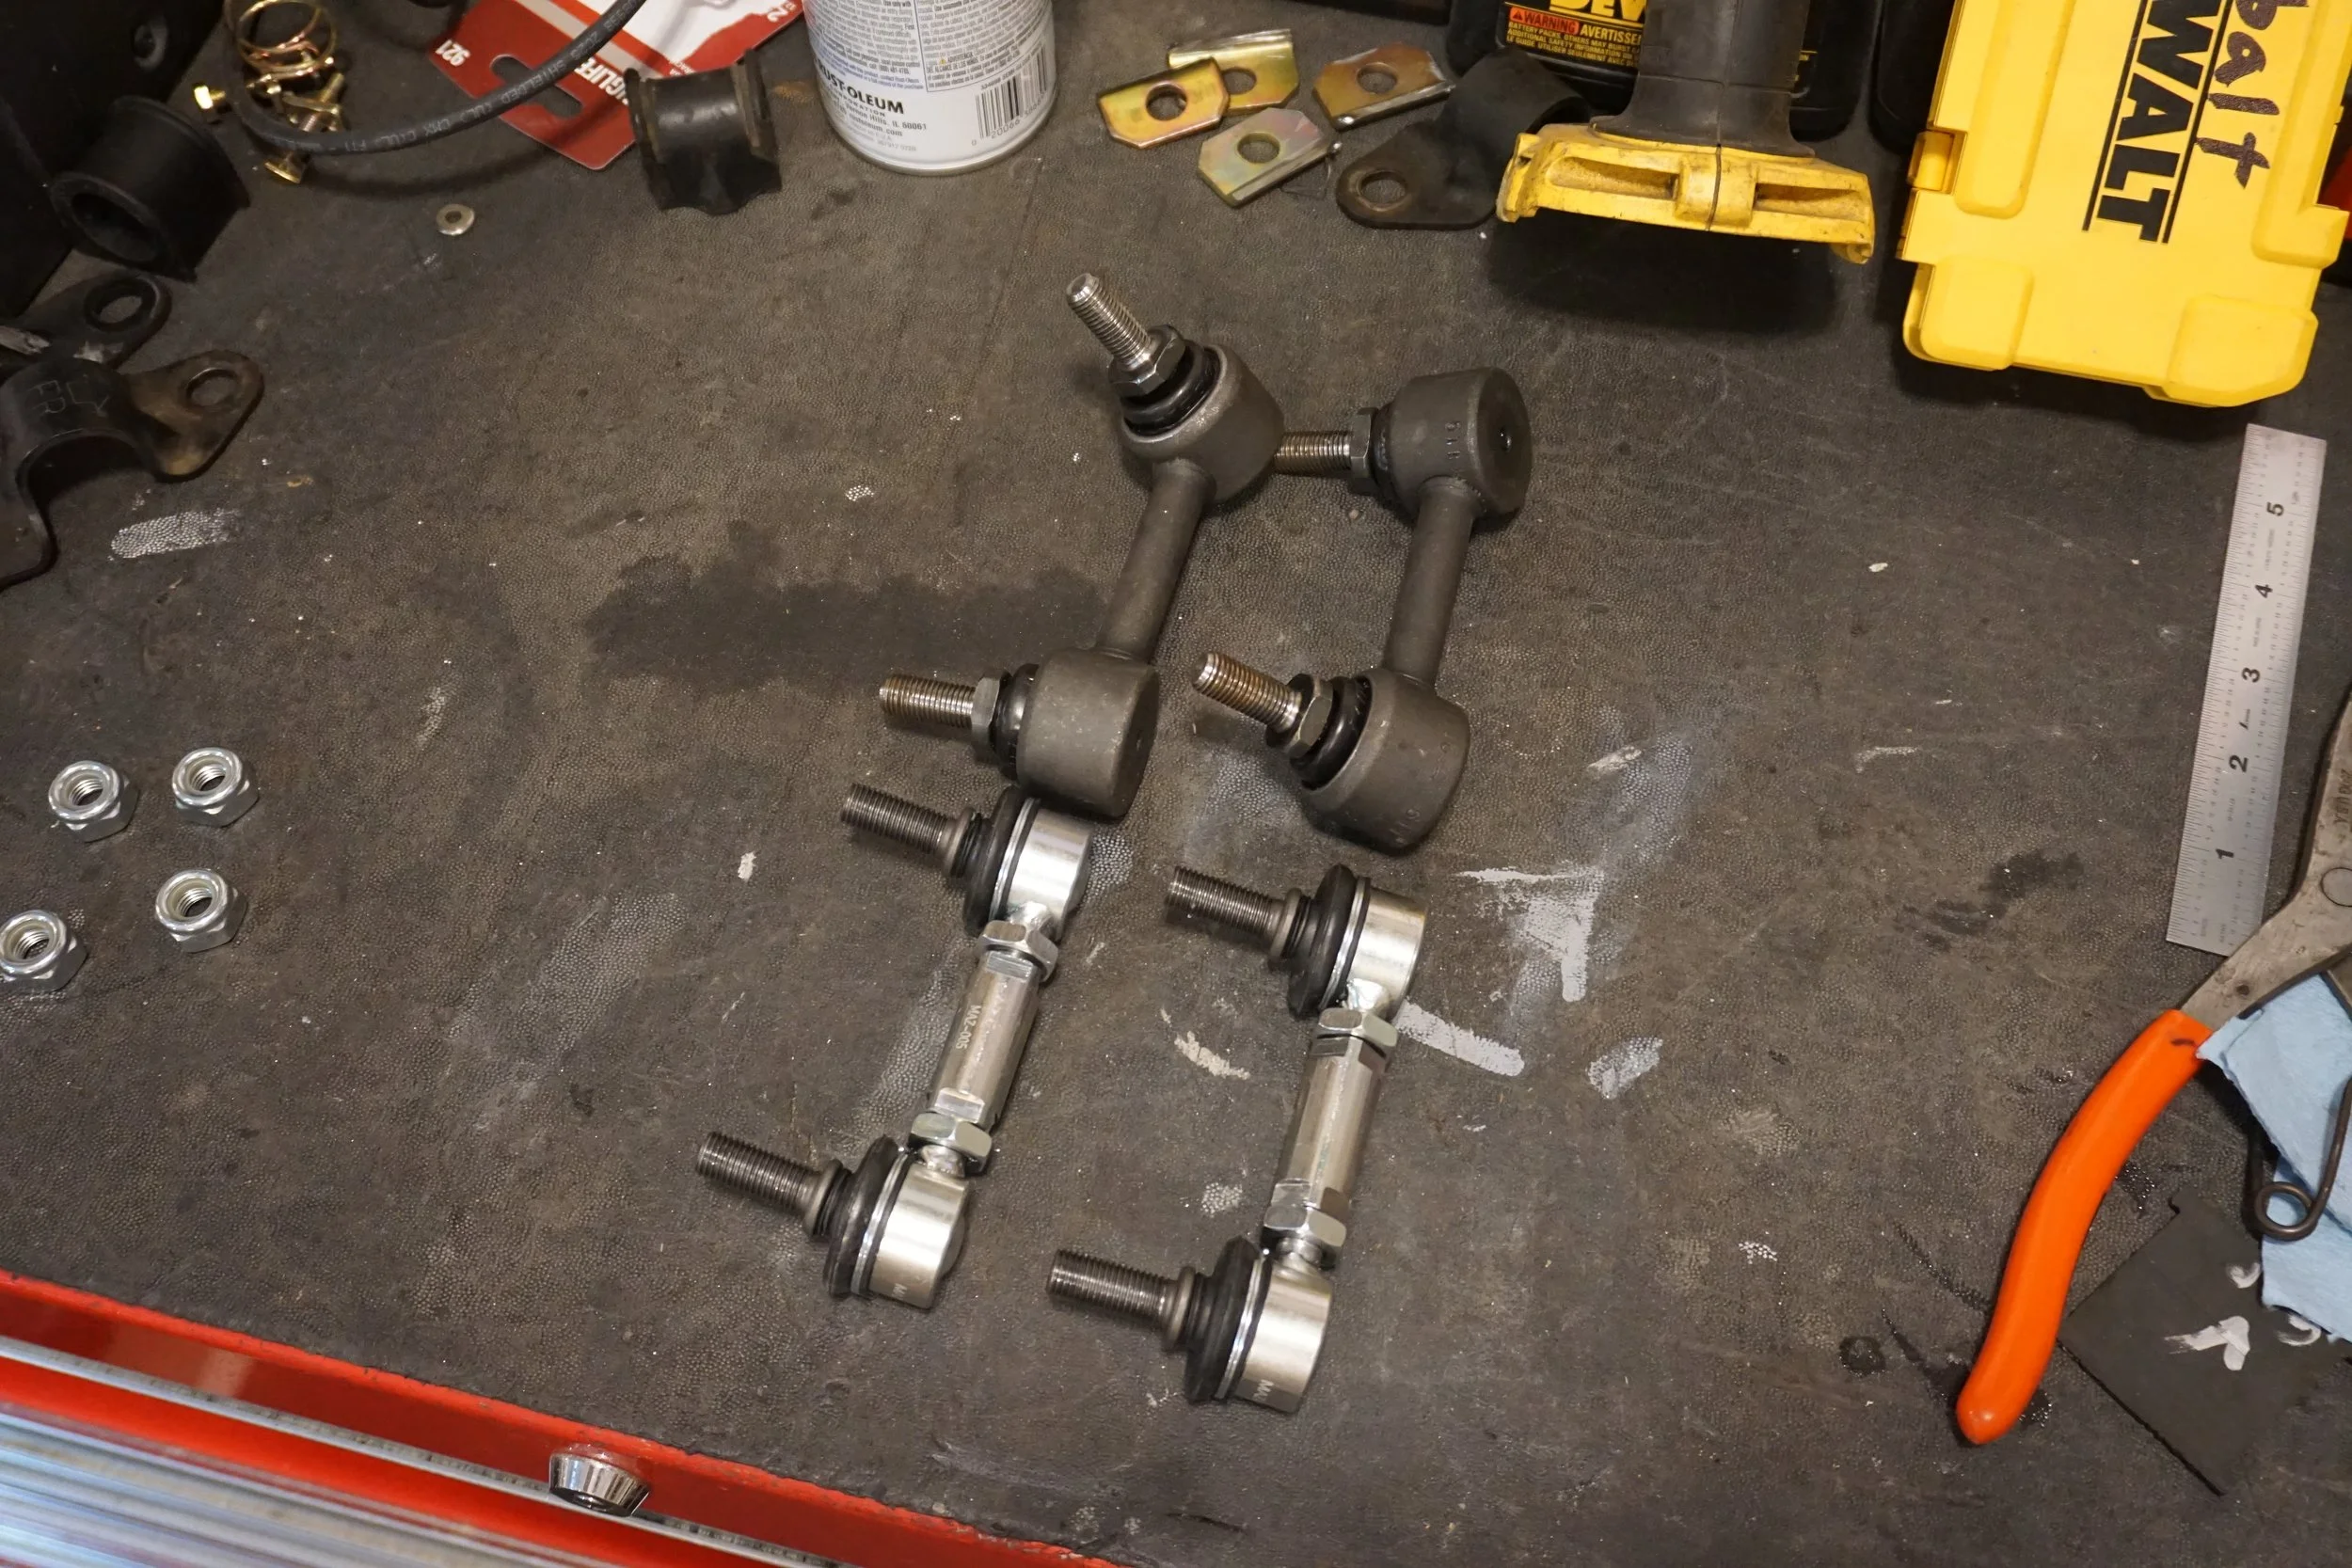
After much test fitting, I had the brackets finished.
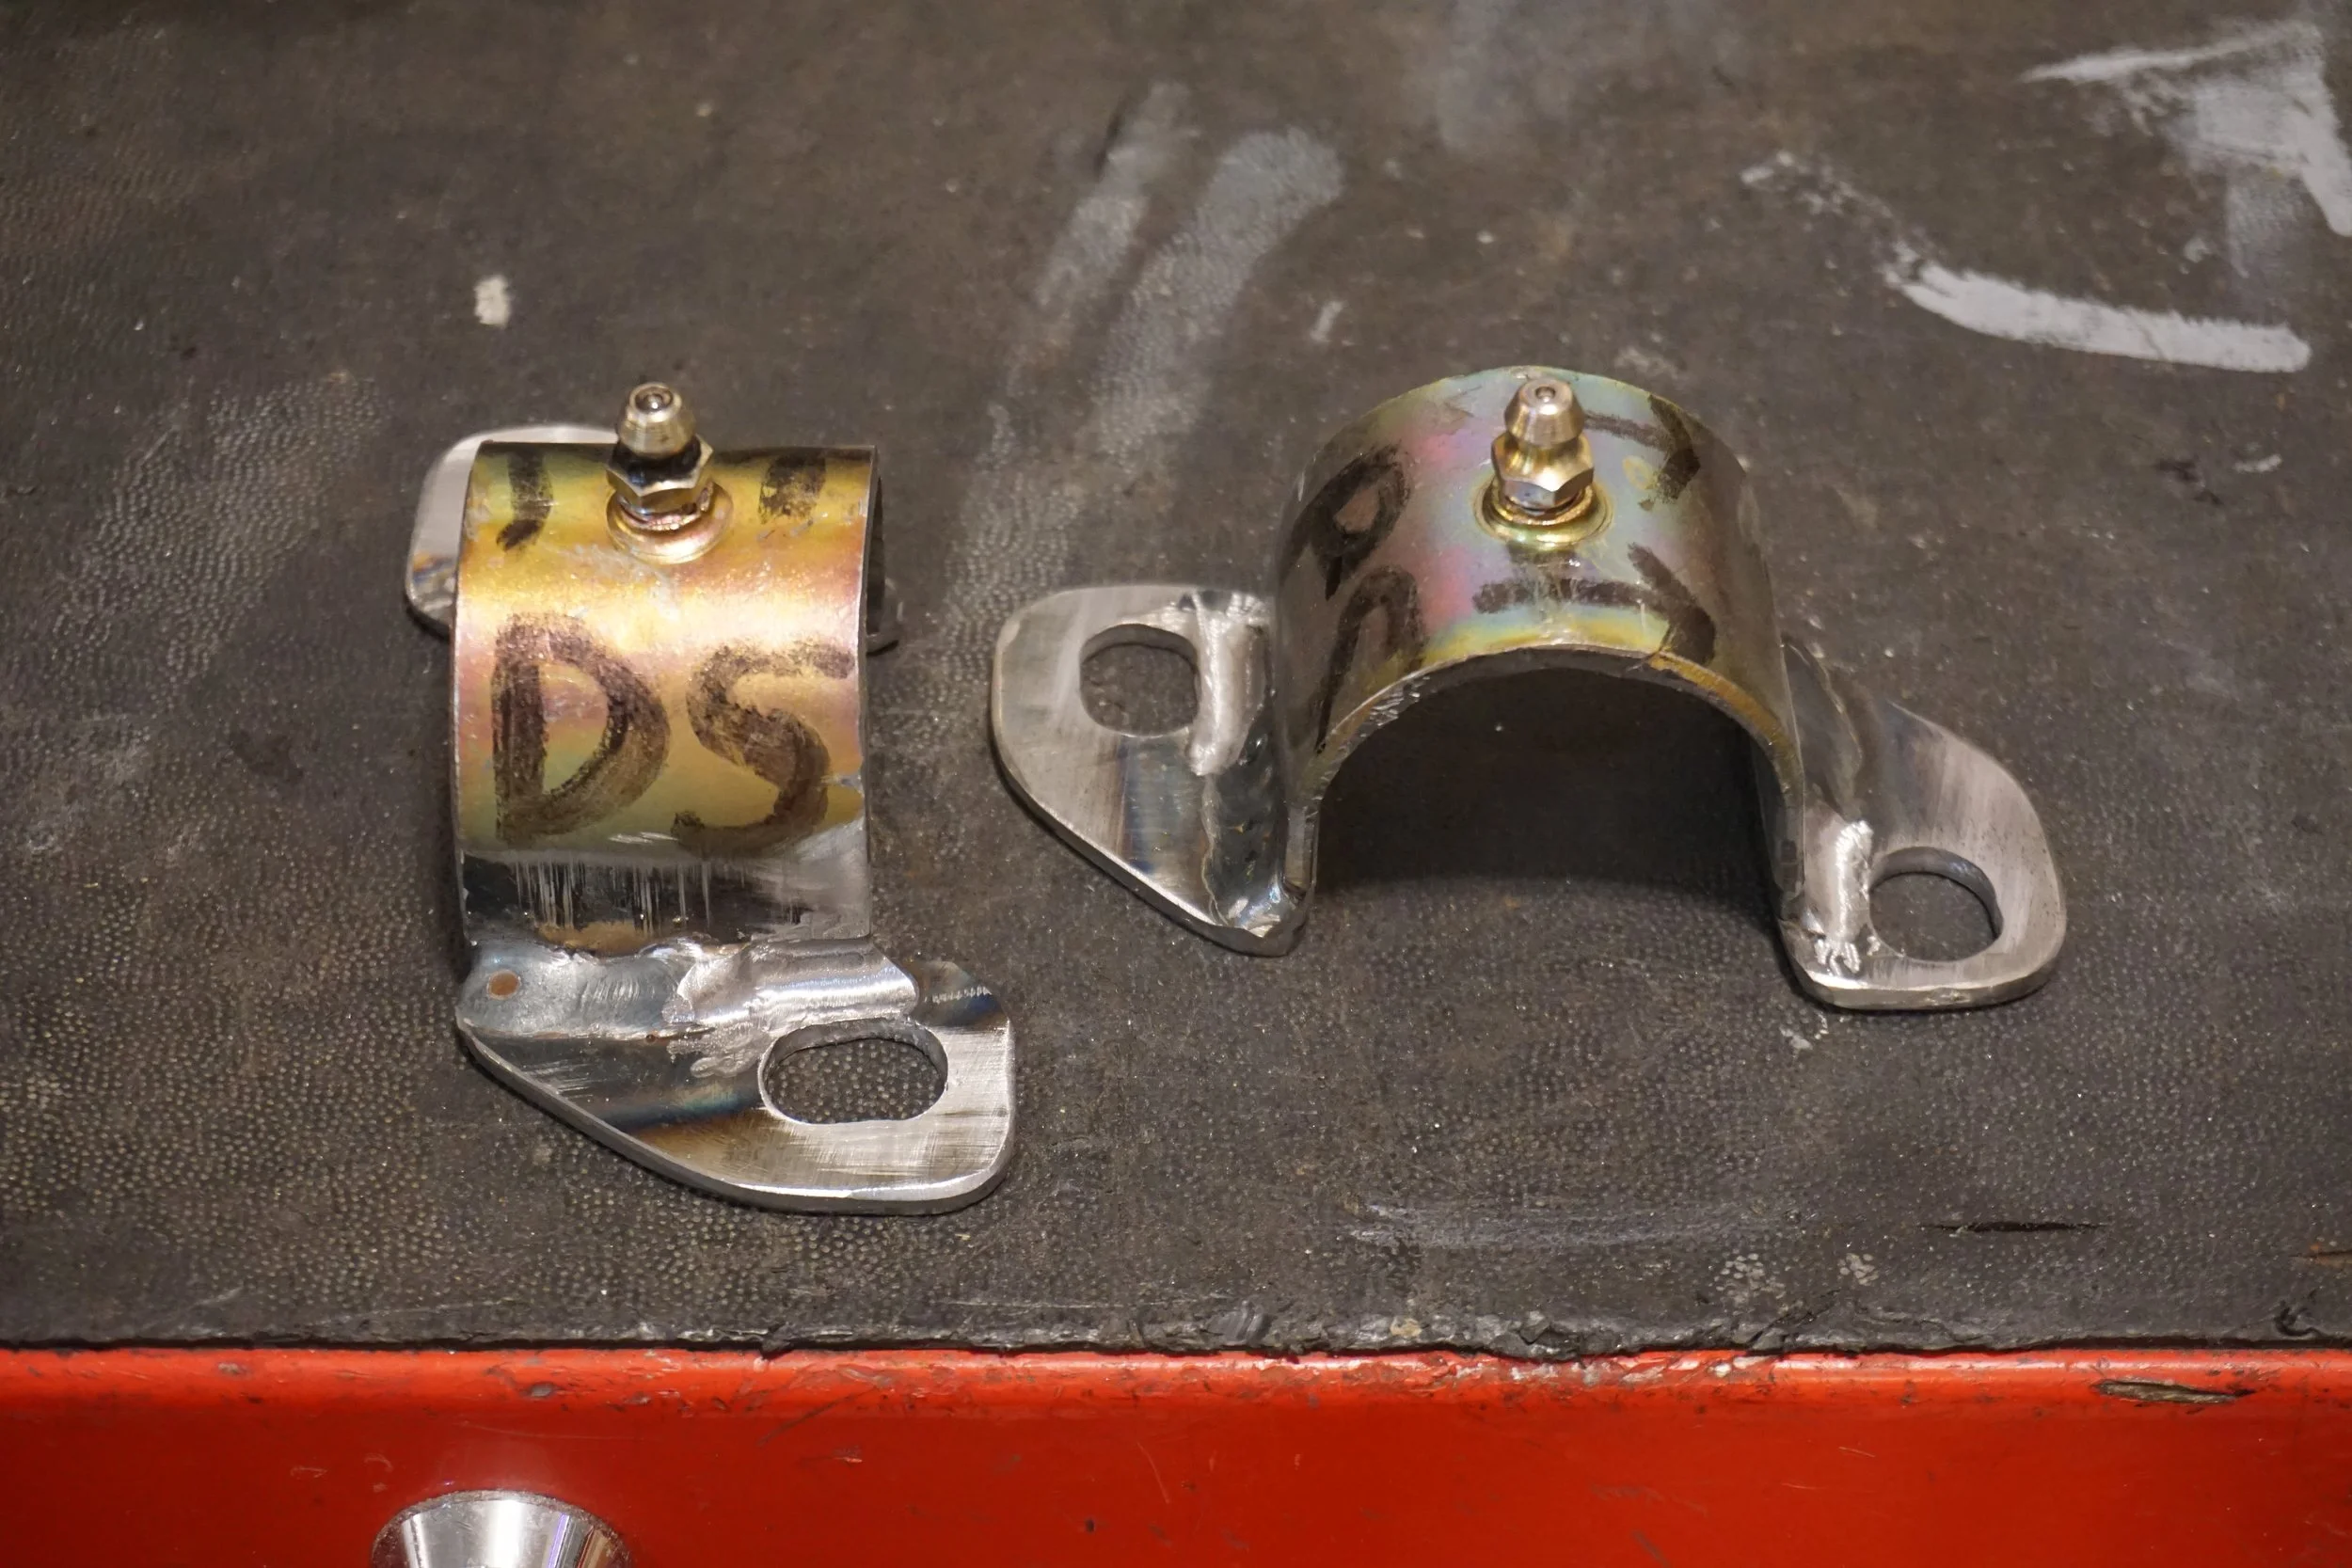
Original vs the new stuff
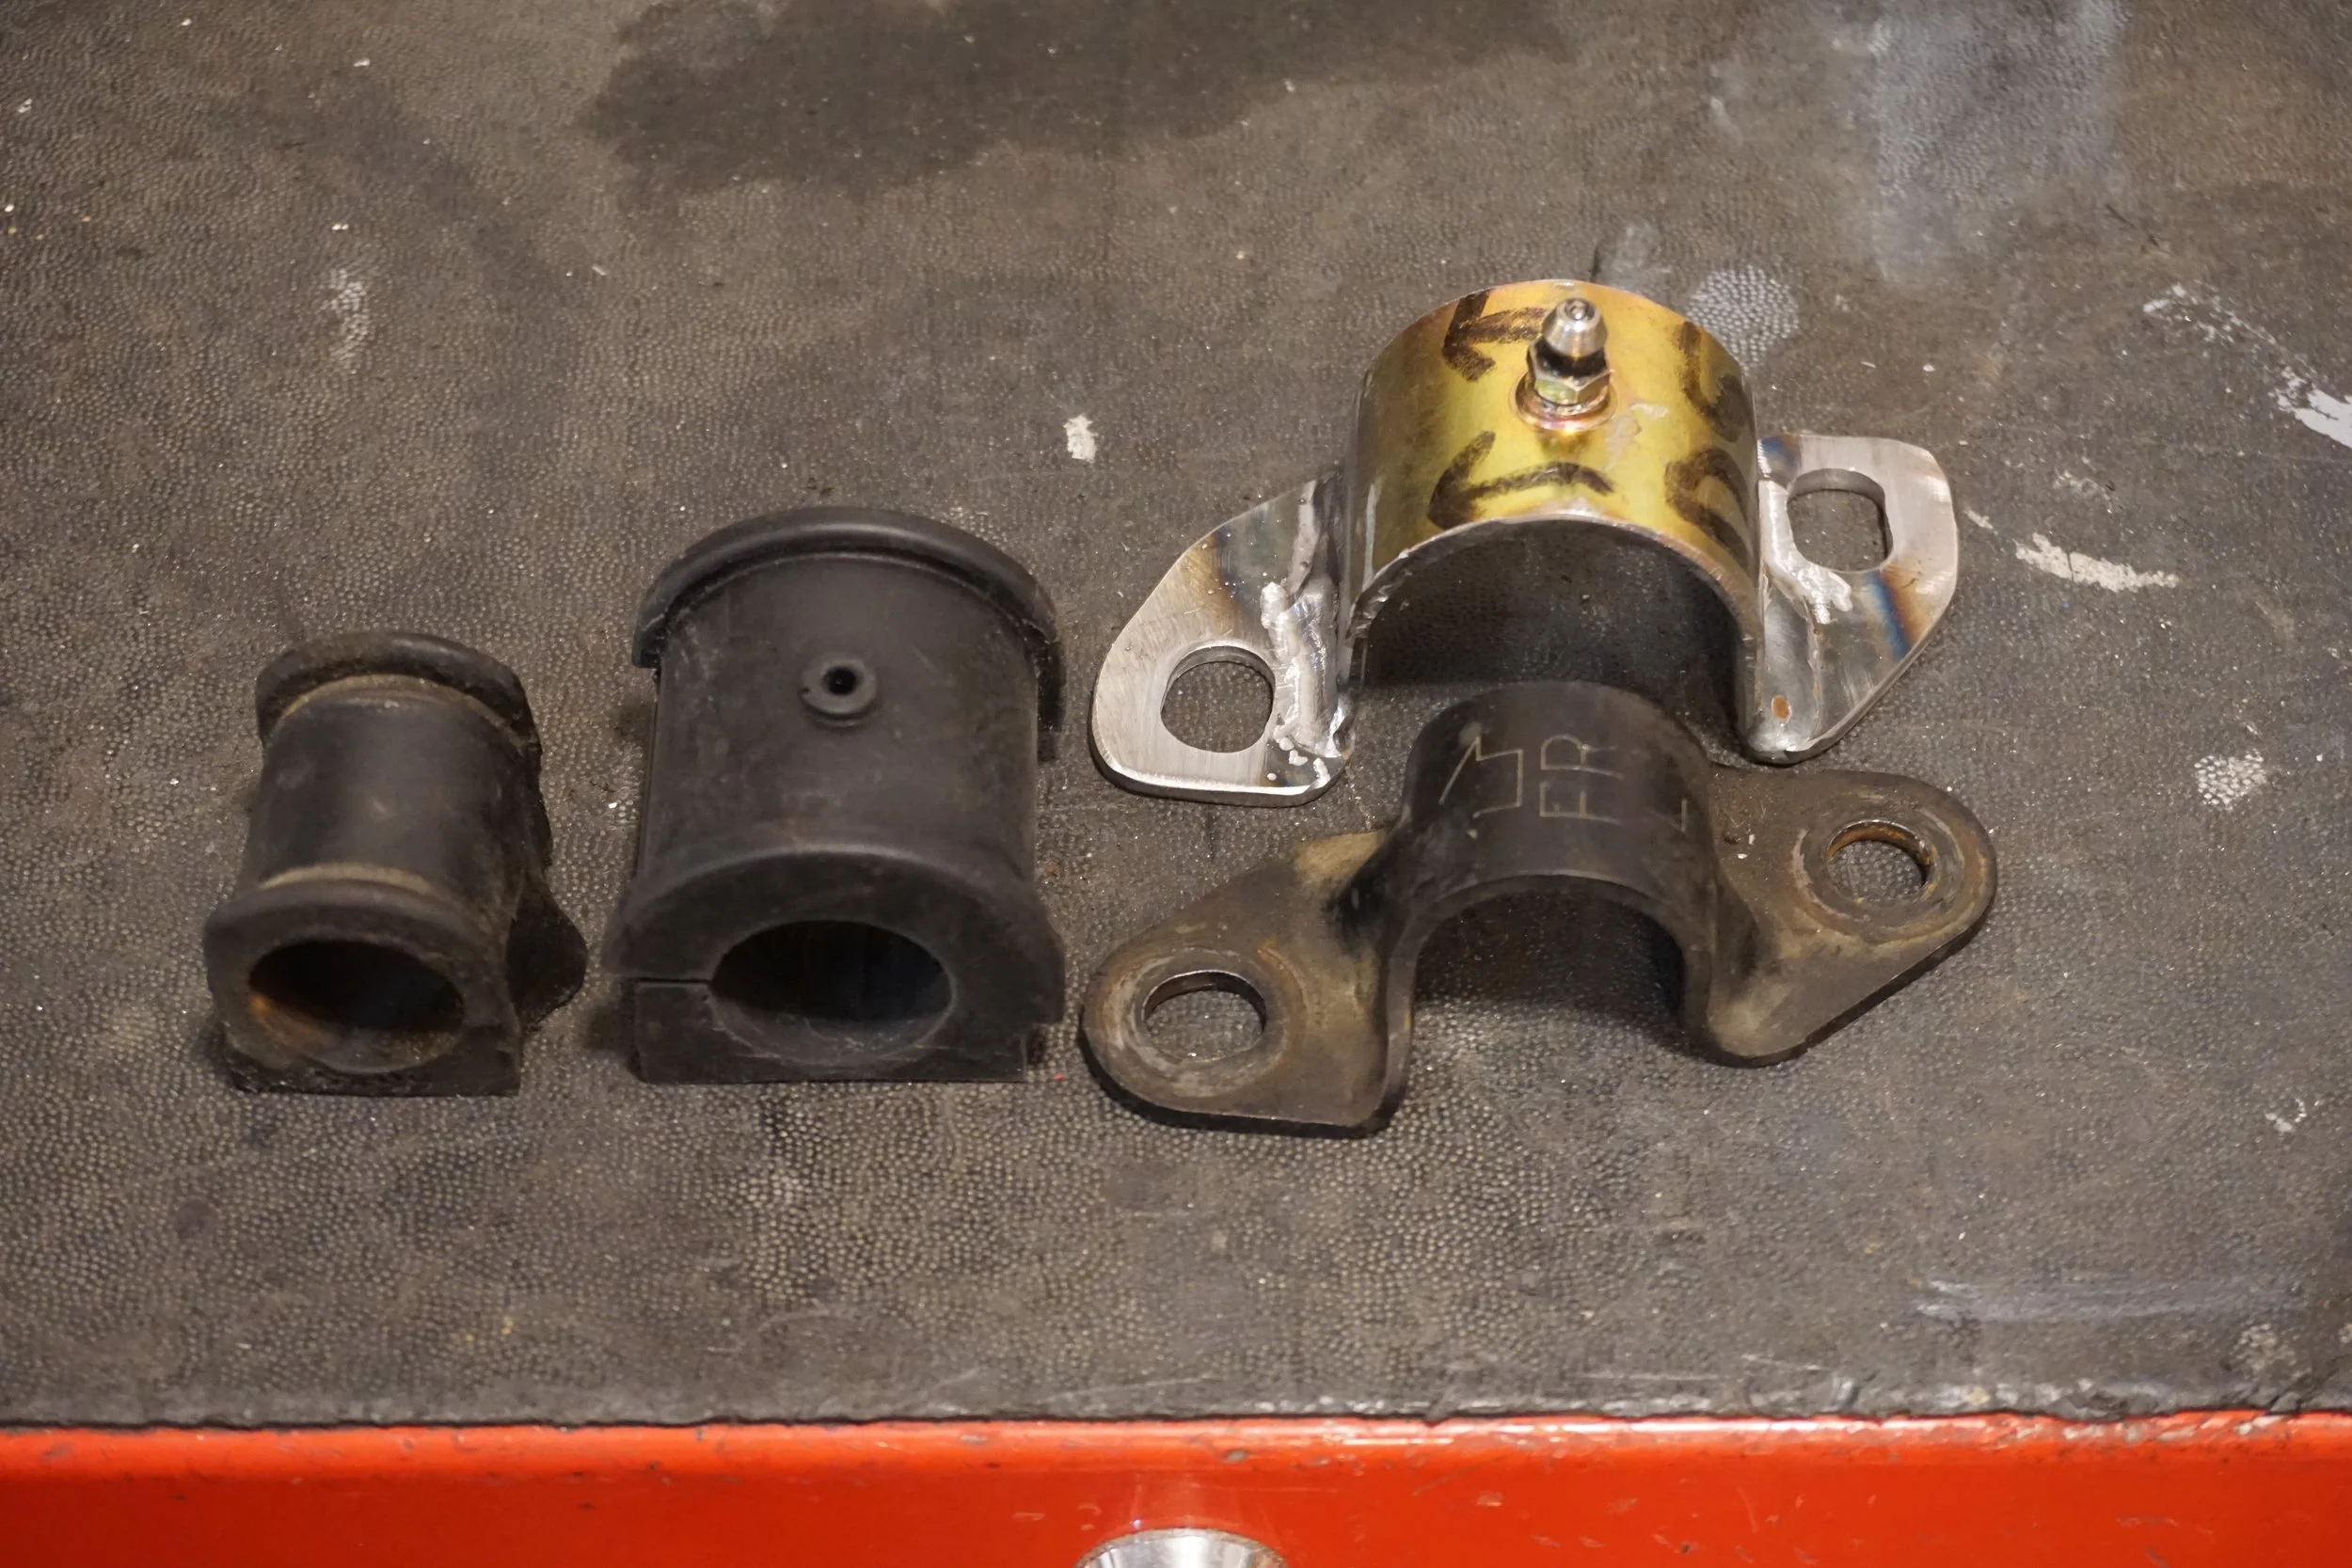
I also had to grind out a fair amount of metal from the subframe so the larger, and differently shaped, bar would fit. I'm really hoping I didn't compromise the strength of the subframe in the process. All test fitting was done with the car in the air, so I still have no idea what's going to happen when it's on the ground and driven in anger. To keep rust from forming I painted the area white, hoping that if any cracks form, they would be easier to spot than if I painted it black.
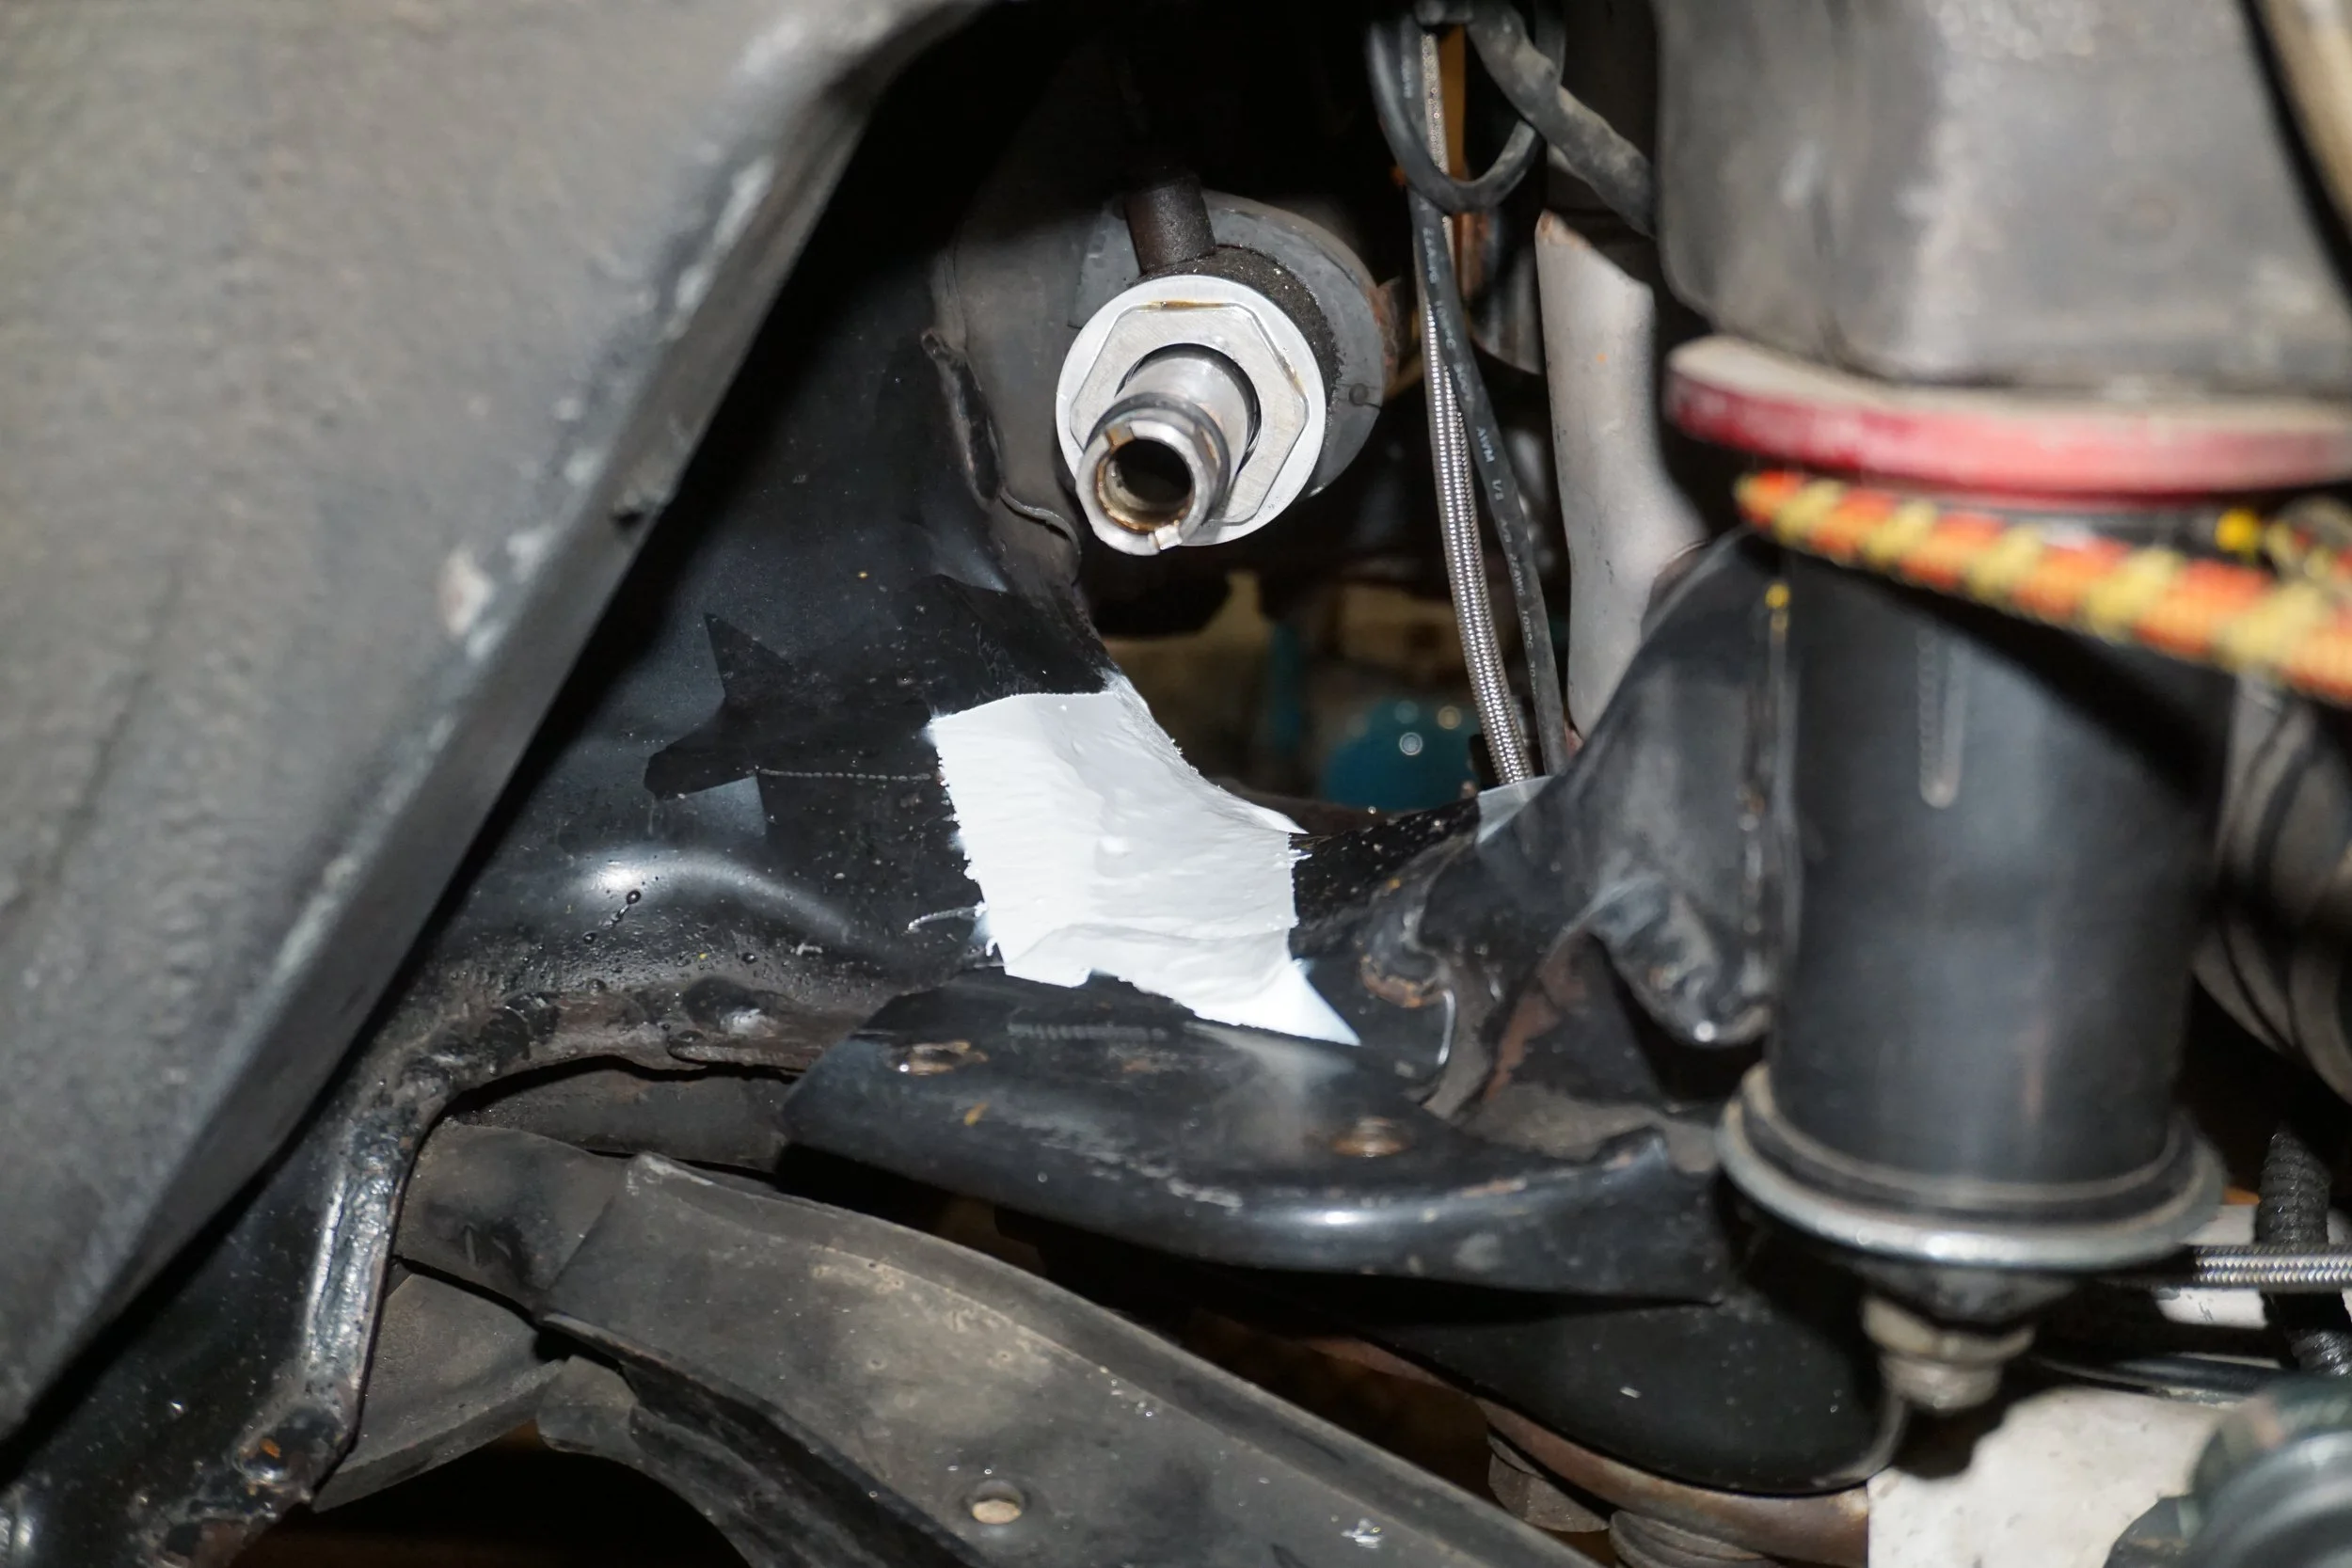
I'm cautiously optimistic about this! But in the meantime, it's time for a suspension refresh and upgrade!
I've had my BC Racing coilovers on for something like 12 years now, and I must say they have done an admirable job, with no obvious leaks or egregious noises or clunks. But I know in the wide world of suspension, they're considered low to (maybe) mid-grade pieces, and I've been hankering for something higher quality. Due to the paucity of parts for the 4th gen, I tried to see if anyone would make something custom for me, but I was either turned down or given outrageous prices I couldn't afford or justify. I'm not sure how I found them at this point (as this was over a year ago now), but I saw that Fortune Auto offers coilovers for the 4th and 5th gen. They've got a great reputation in the track day community, and they're built just a few hours south of me in Virginia, so, lacking any other options aside from BCs, I figured I would try them out.
I went with their entry level 500 series coilovers since those are the only ones they offer for Maximas, but they offer many more options for other cars. These are their "8th gen" coilovers.
Fortune Auto
The base spring rates for the 4th gen are 10k/6k, and 10k/8k for 5th gens. I've been running 9k/8k on the BCs, so I went with 10k/8k for the FAs. They offer a few upgrades, but the only one I went with was for the Swift Springs. I've only ever heard great things about Swifts, but this thread going over spring dyno results sealed the deal for me. And there is plenty of anecdotal evidence that they ride better than regular springs, which would be great if true, as I'm always trying to scratch back any civility I can. My wife still complains that she doesn't like the way the car rides...but at least I solved the exhaust noise complaints when I built my 3" exhaust!
Anyways, I bought these about a year ago and was all excited to install them, but when I got them out of the box I realized that they didn't come with camber plates! Apparently FA doesn't offer camber plates for a number of applications, probably on account of the popularity of the platform. When I placed my order I was the first "real" customer to order a set for a Maxima. They had built a single set for prototyping, and that was it before me. This sent me on a long search for some high quality camber plates I could use. But of course I had to complicate matters by wanting plates that could also adjust for caster, since part of my plan was to finally stop using camber bolts and go back to factory bolts. Remember that I had re-drilled my shock towers and rotated my camber plates 90* so they would adjust for caster.
I'll skip over a bunch of stuff and just say that I finally settled on plates made by Vorshlag. They are very highly regarded in the BMW community and offer all sorts of cool parts. I was also considering Ground Control plates, but when my local BMW racing shop (who have more than two decades of experience racing at high levels) said Vorshlags are much higher quality, that sealed the deal for me. It didn't hurt that I received amazing tech support along the way from Vorshlag, while I never received anything back from GC. I gave Vorshlag a few dimensions of the FA shocks and they put together the right parts for their plates to mount up.
But Vorshlag doesn't make anything for a Maxima, of course! So I had to figure out which of their existing camber/caster plates could be made to work on a 4th gen. I eventually settled on plates made for the E46. It was going to be close, but they would work (after some more drilling of the tower).
The install was pretty uneventful, aside from trying to make sure I drilled the new holes correctly so the camber/caster adjustments would be "true". The E46 bolt pattern is smaller than stock, so each bolt was pretty close to the center hole of the tower. At the rear of the car, I decided to do something about the interference between the shock body at the bracket on the rear beam. I've known for a while that my BCs had been scraping against the mount/bracket, but when I saw that the FAs would have a similar problem, I ground off some metal from the mount/bracket to give them some room.
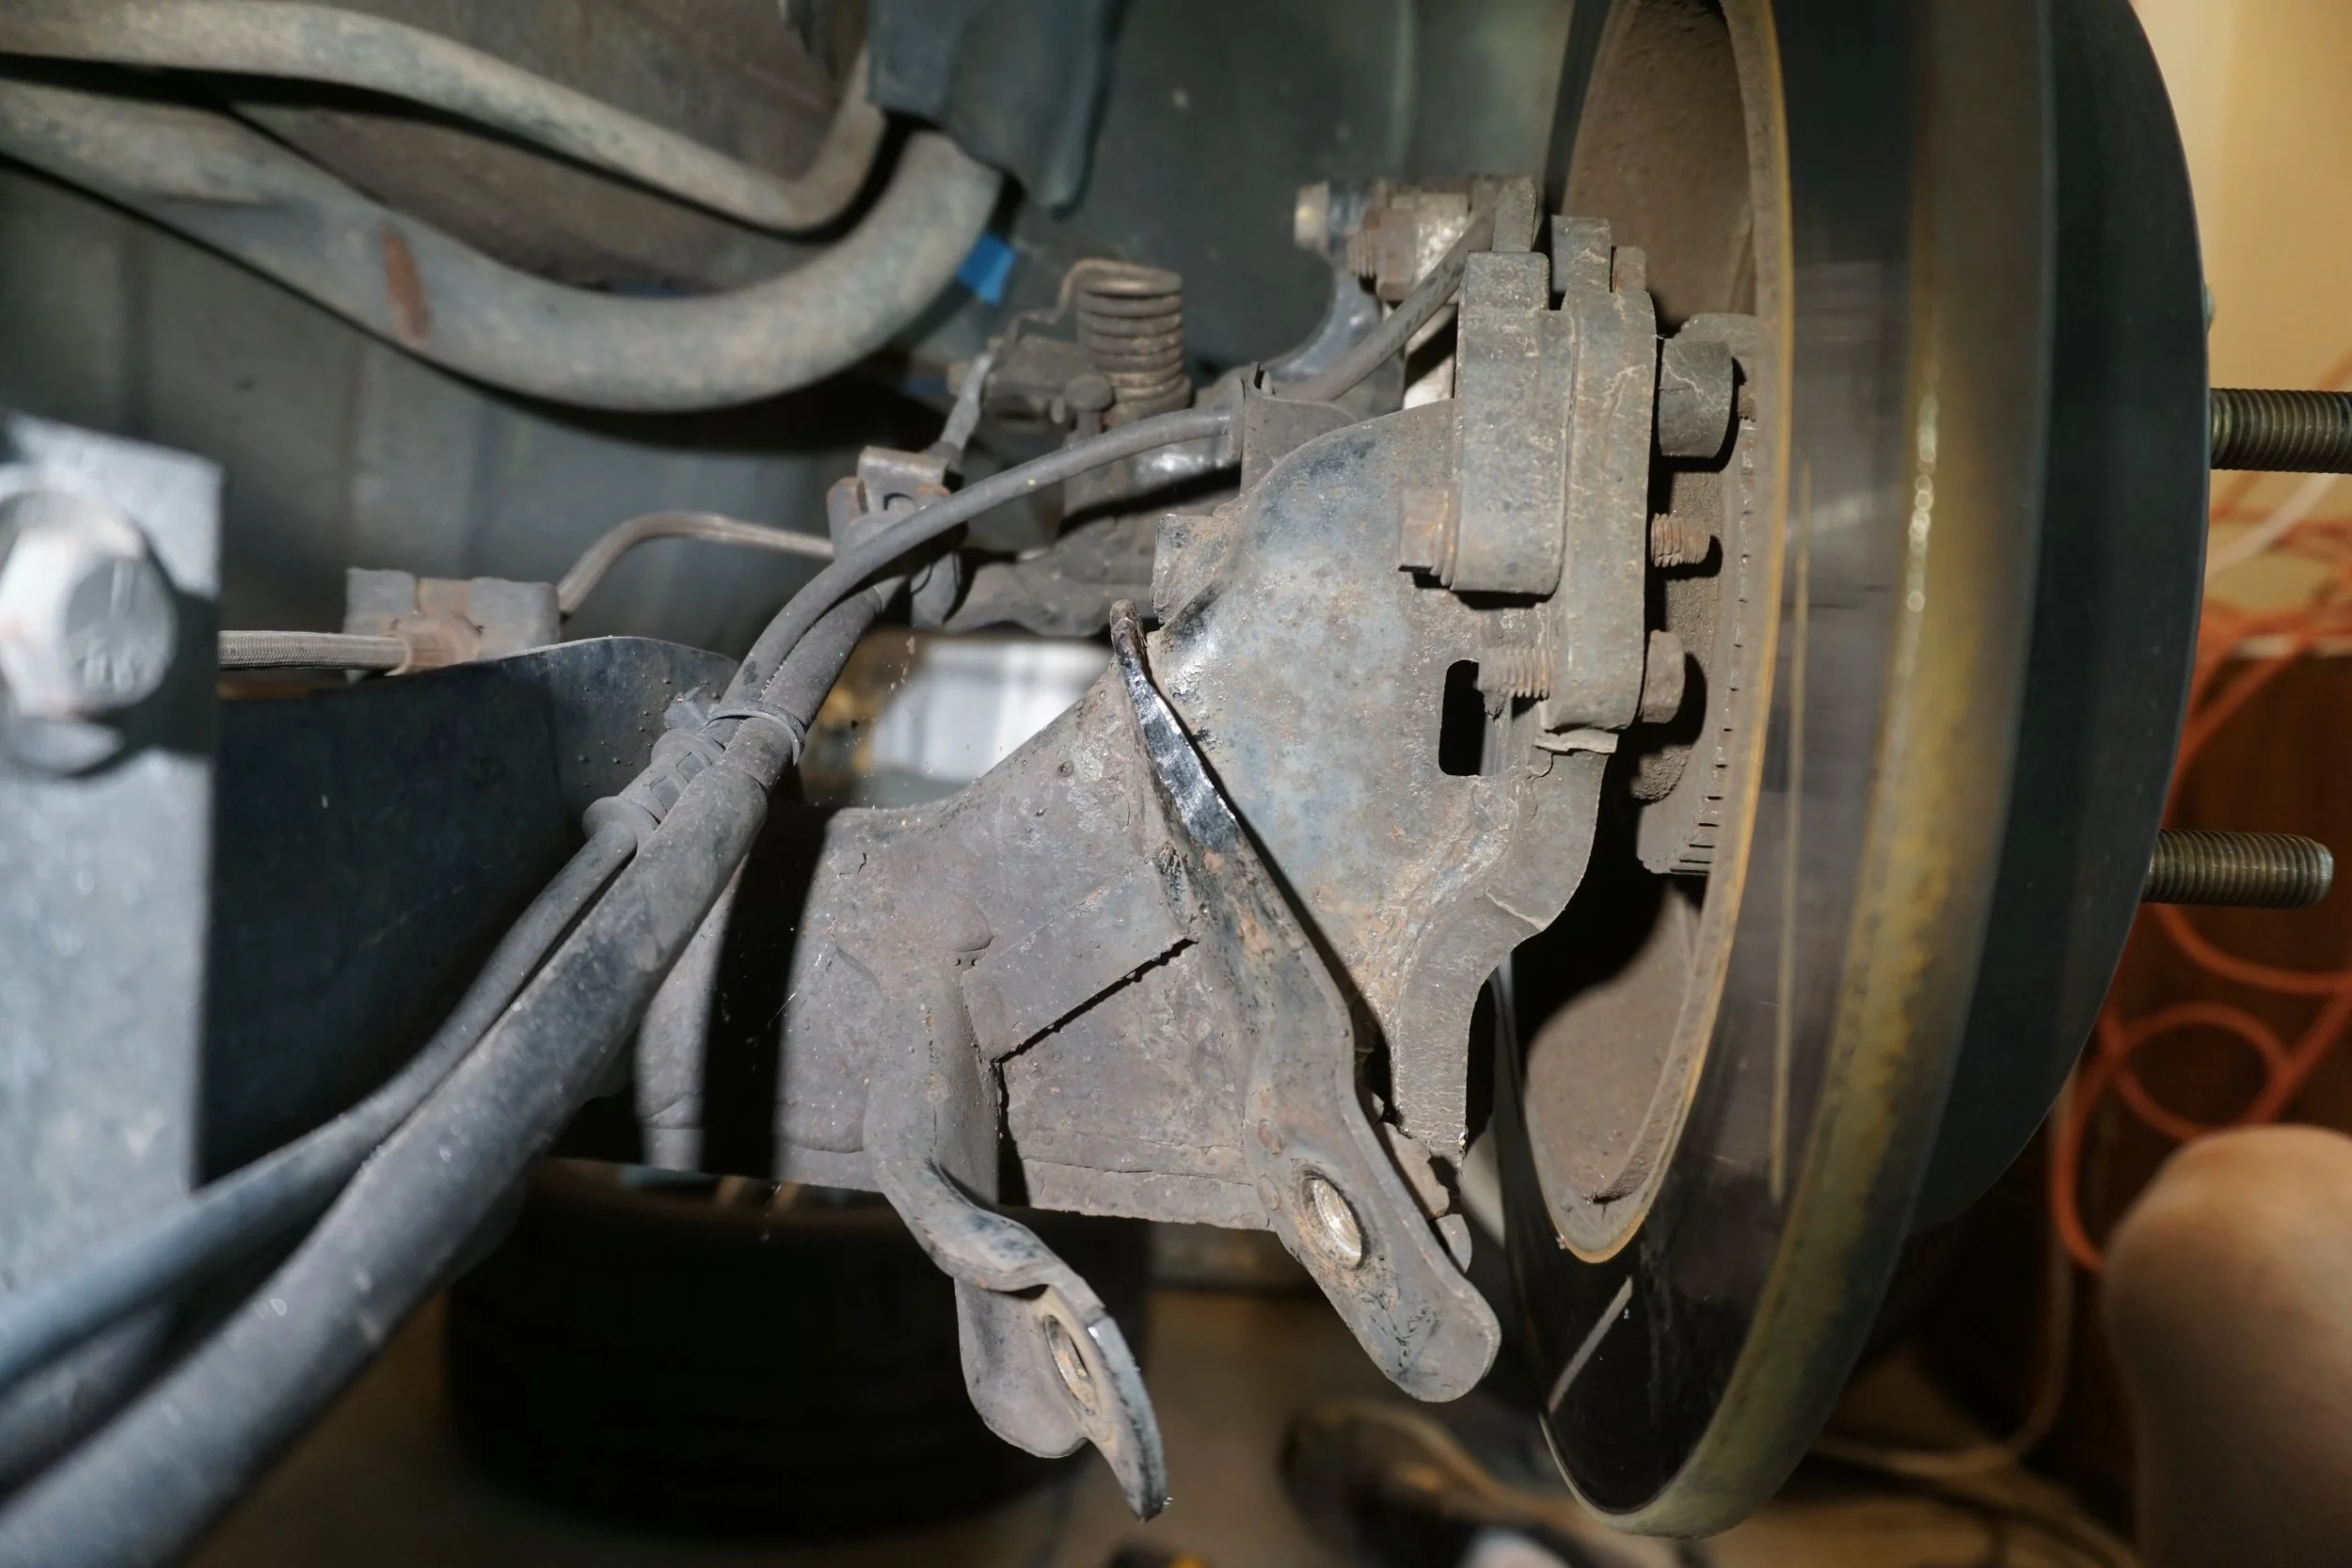
I made some gaskets along the way in an effort to improve NVH:
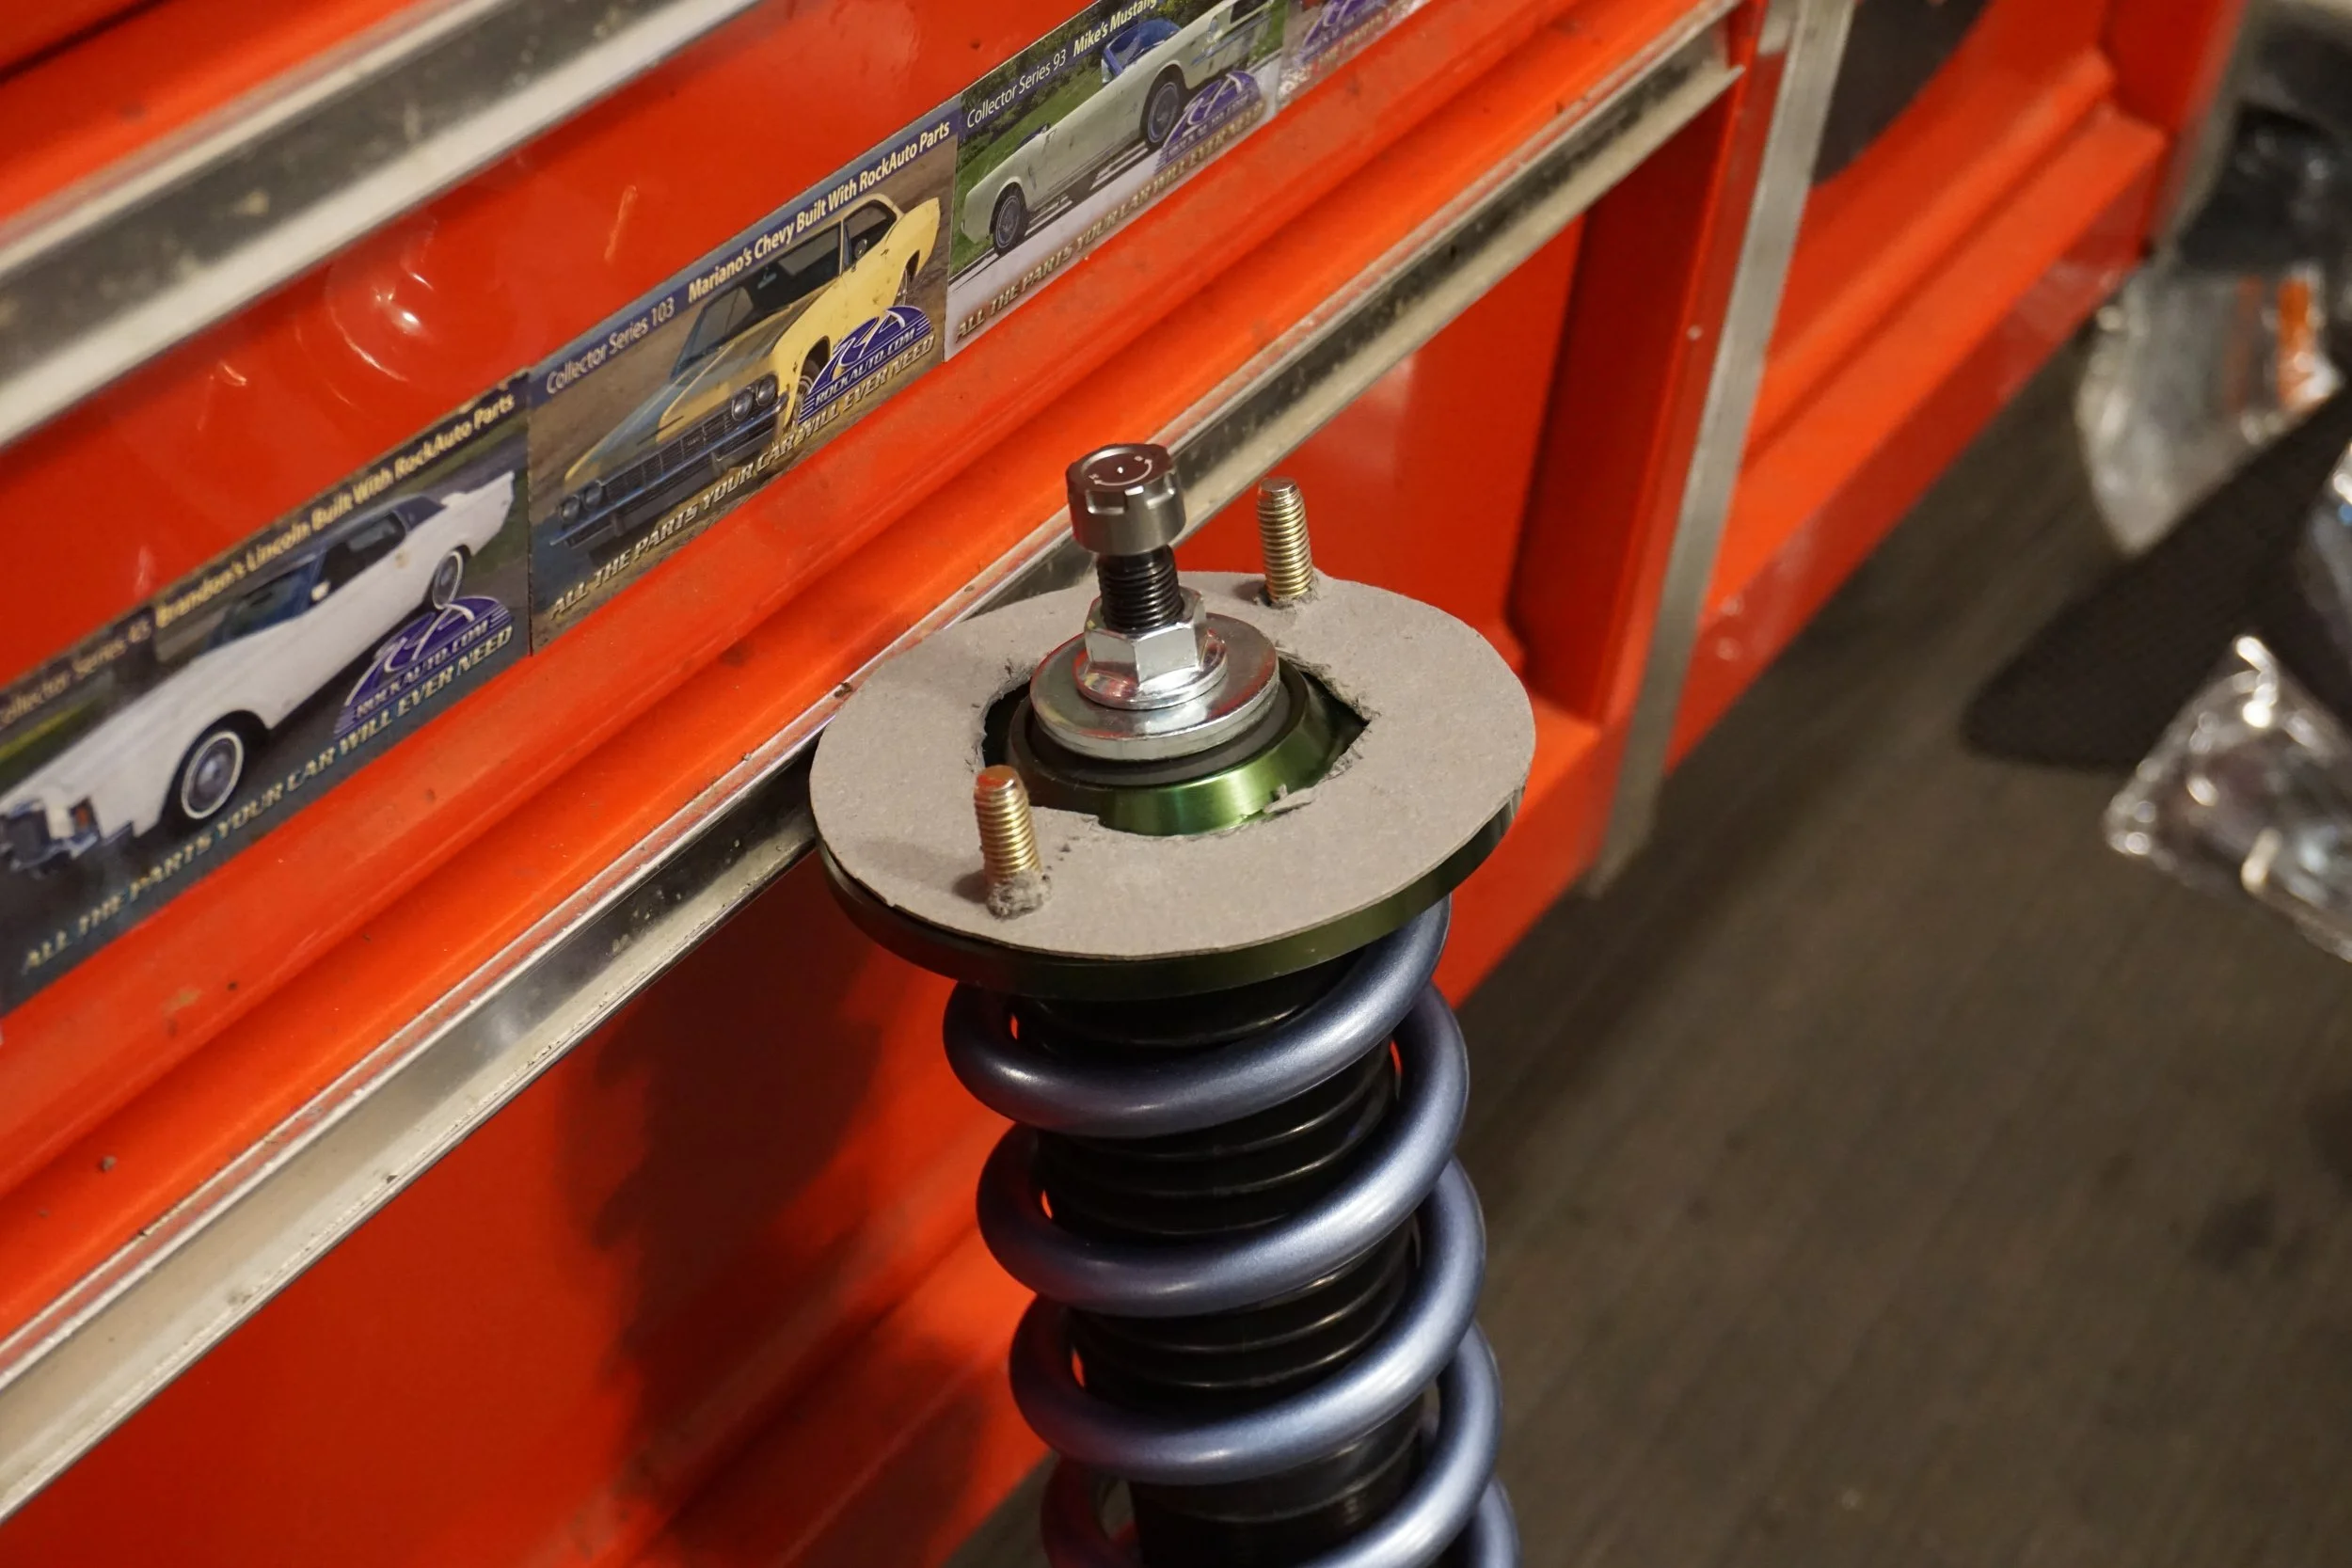
New vs old
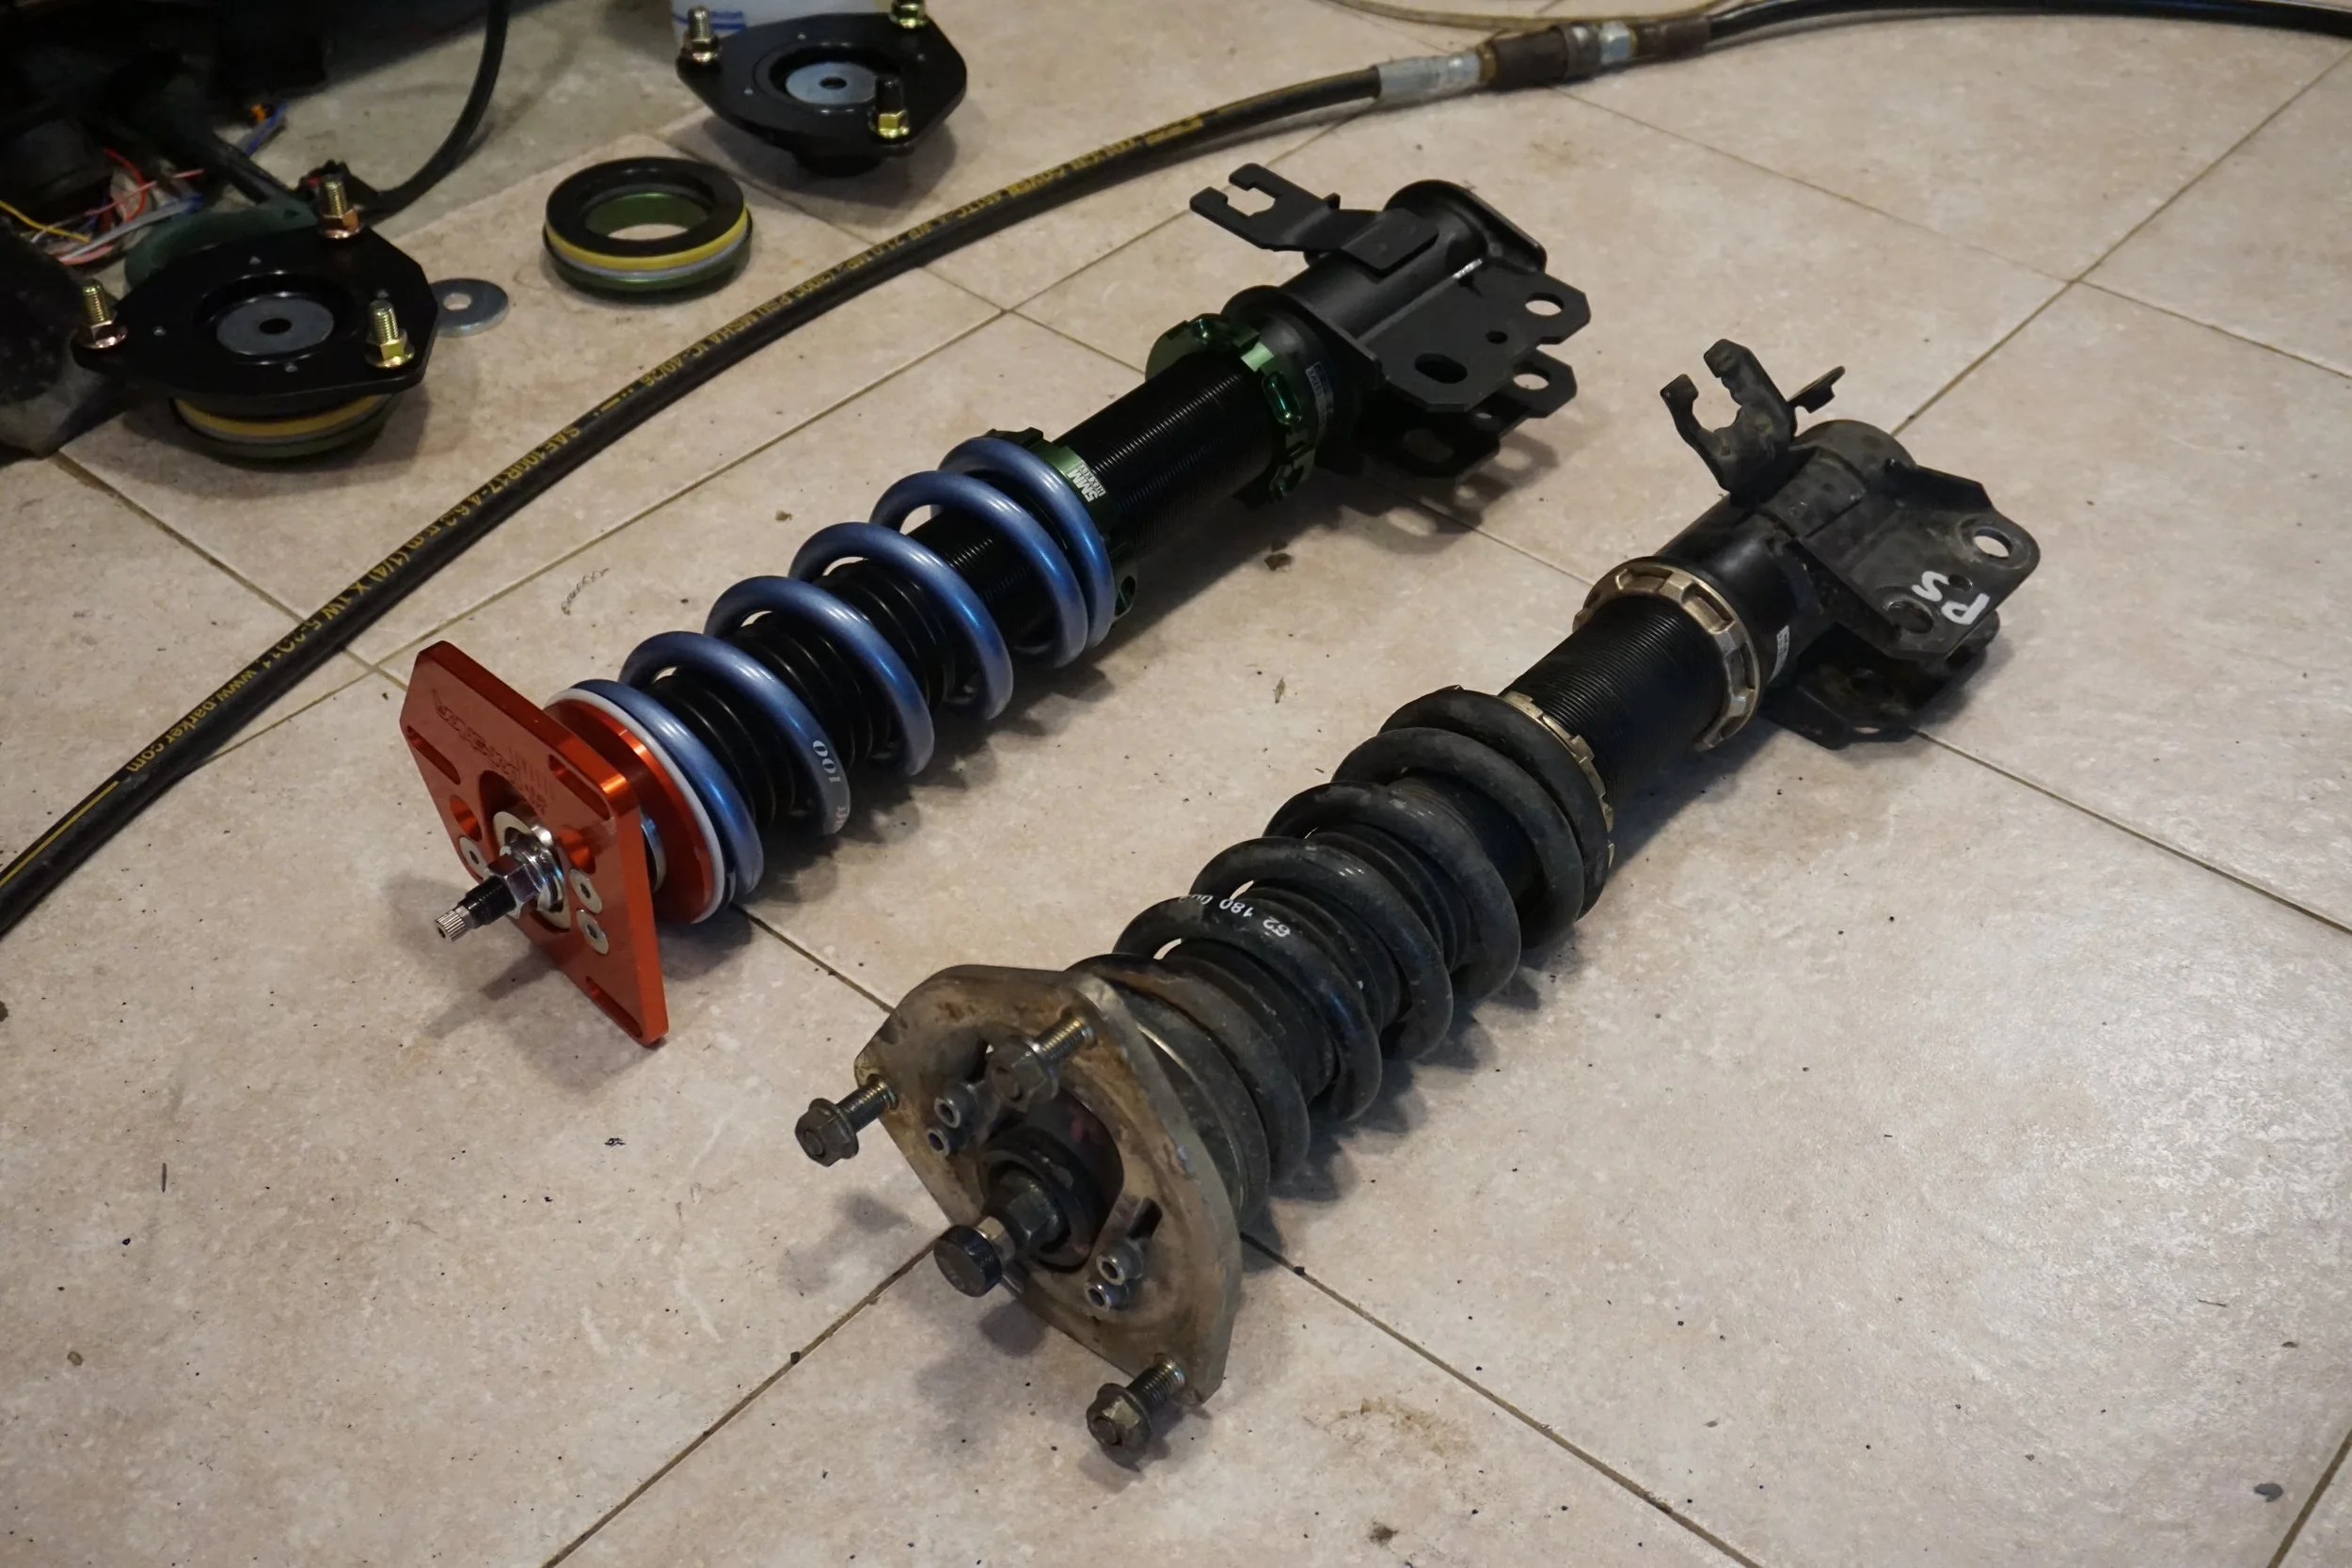
New hardware for the fronts....ooooh pretty. Goodbye camber bolts!
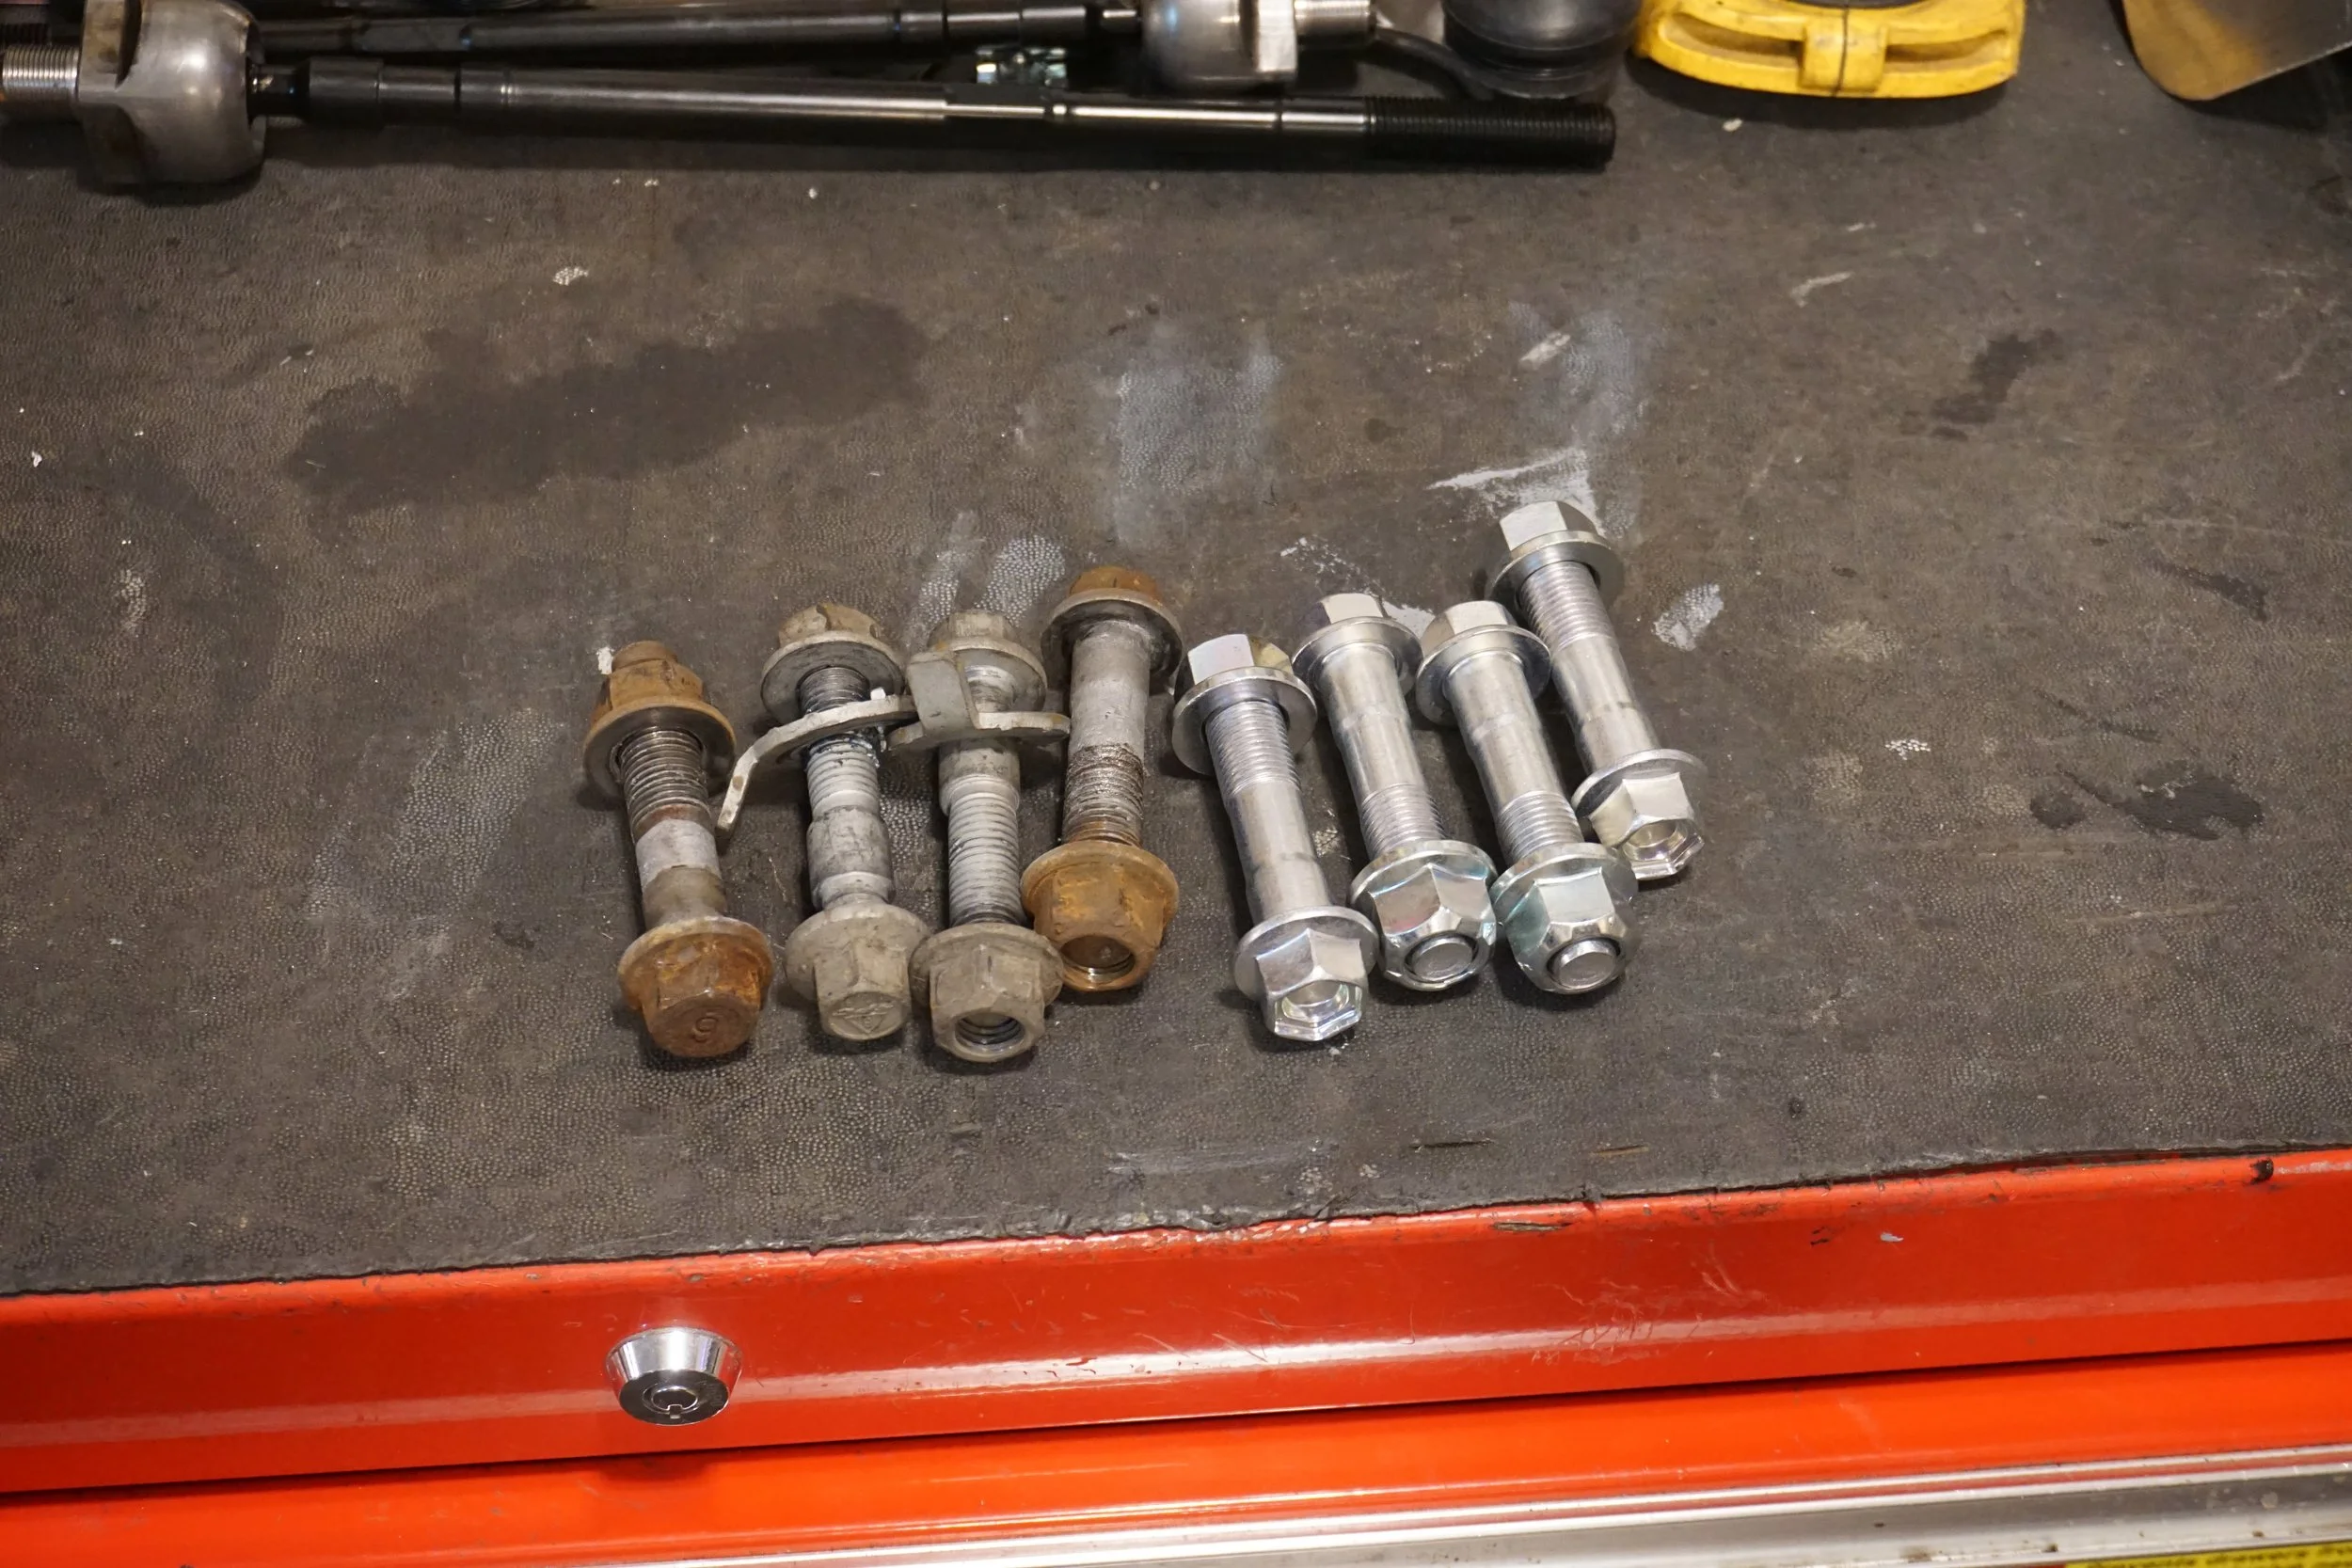
Since I wasn't sure how much caster the new plates were going to give, I picked up some offset control arm bushings from SuperPro to add more caster:
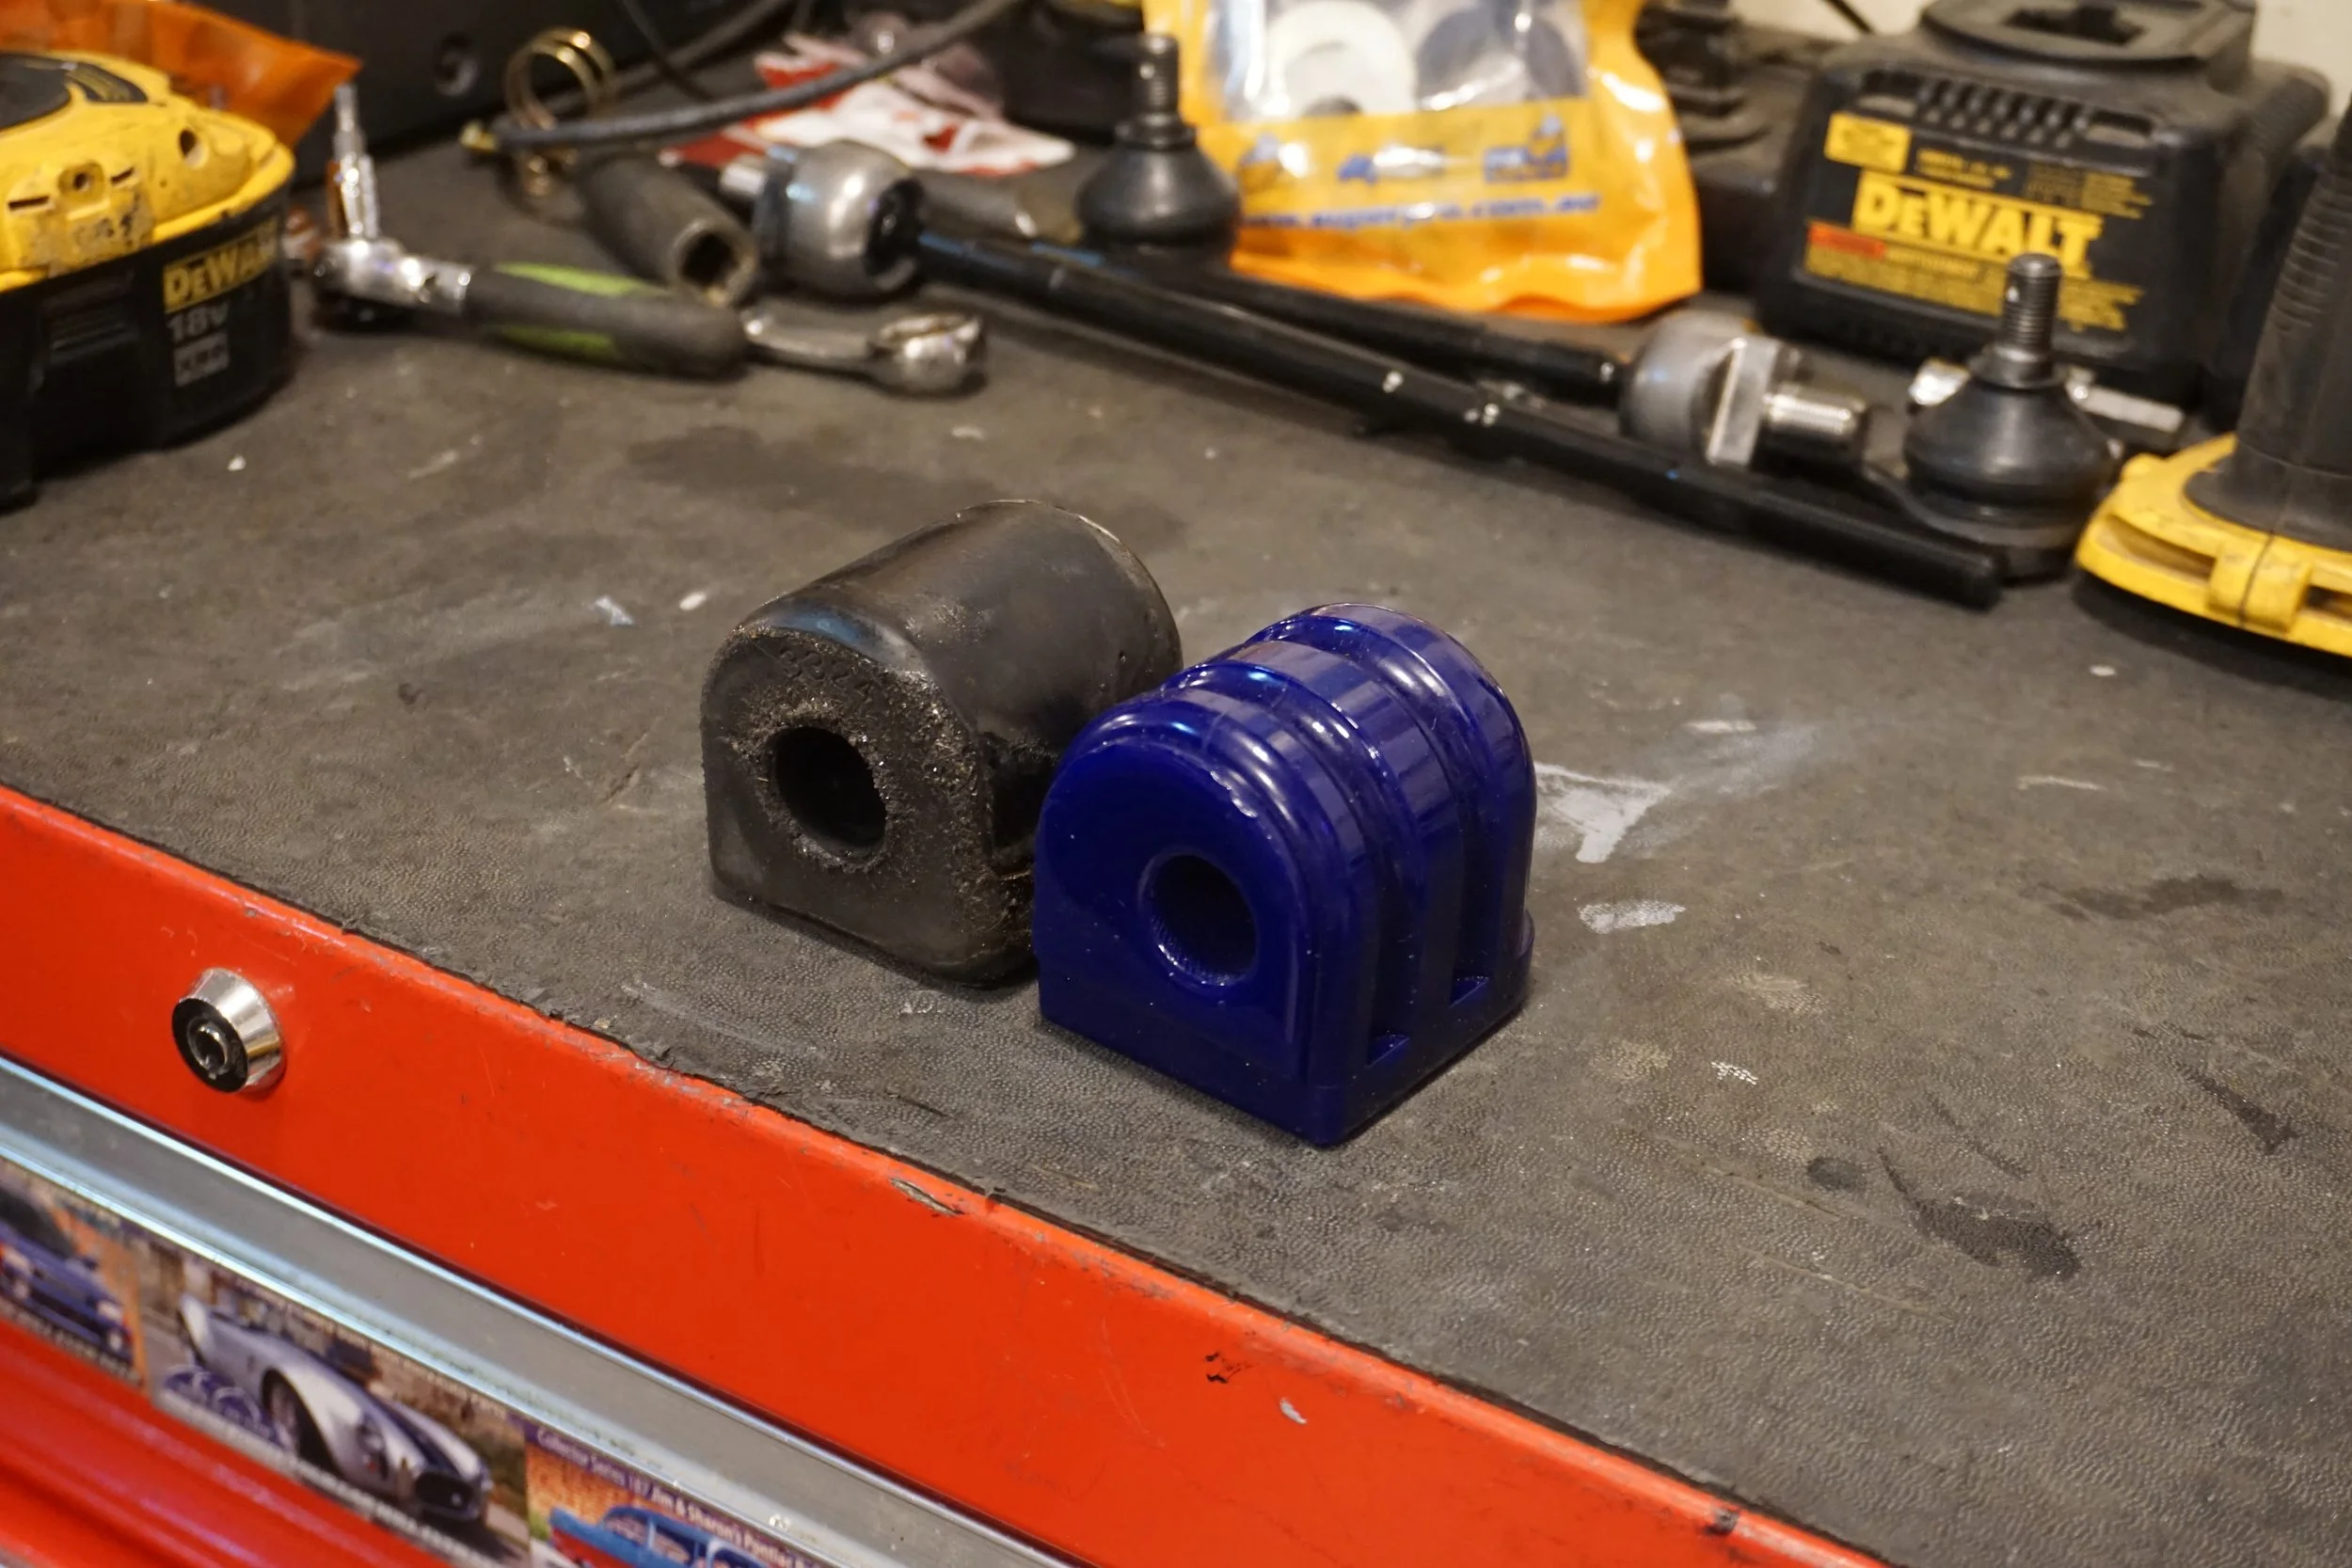
And I don't know about the rest of you, but my front control arm bushing on the passenger side always disintegrates and fails while the one on the driver side looks great. My car leaks oil on that side, so for a long time I thought that was the oil was causing the failure. But then I realized the heat from the loop in the Cattman header y-pipe probably had more to do with it than the oil. So I made a little heat shield out of aluminum!
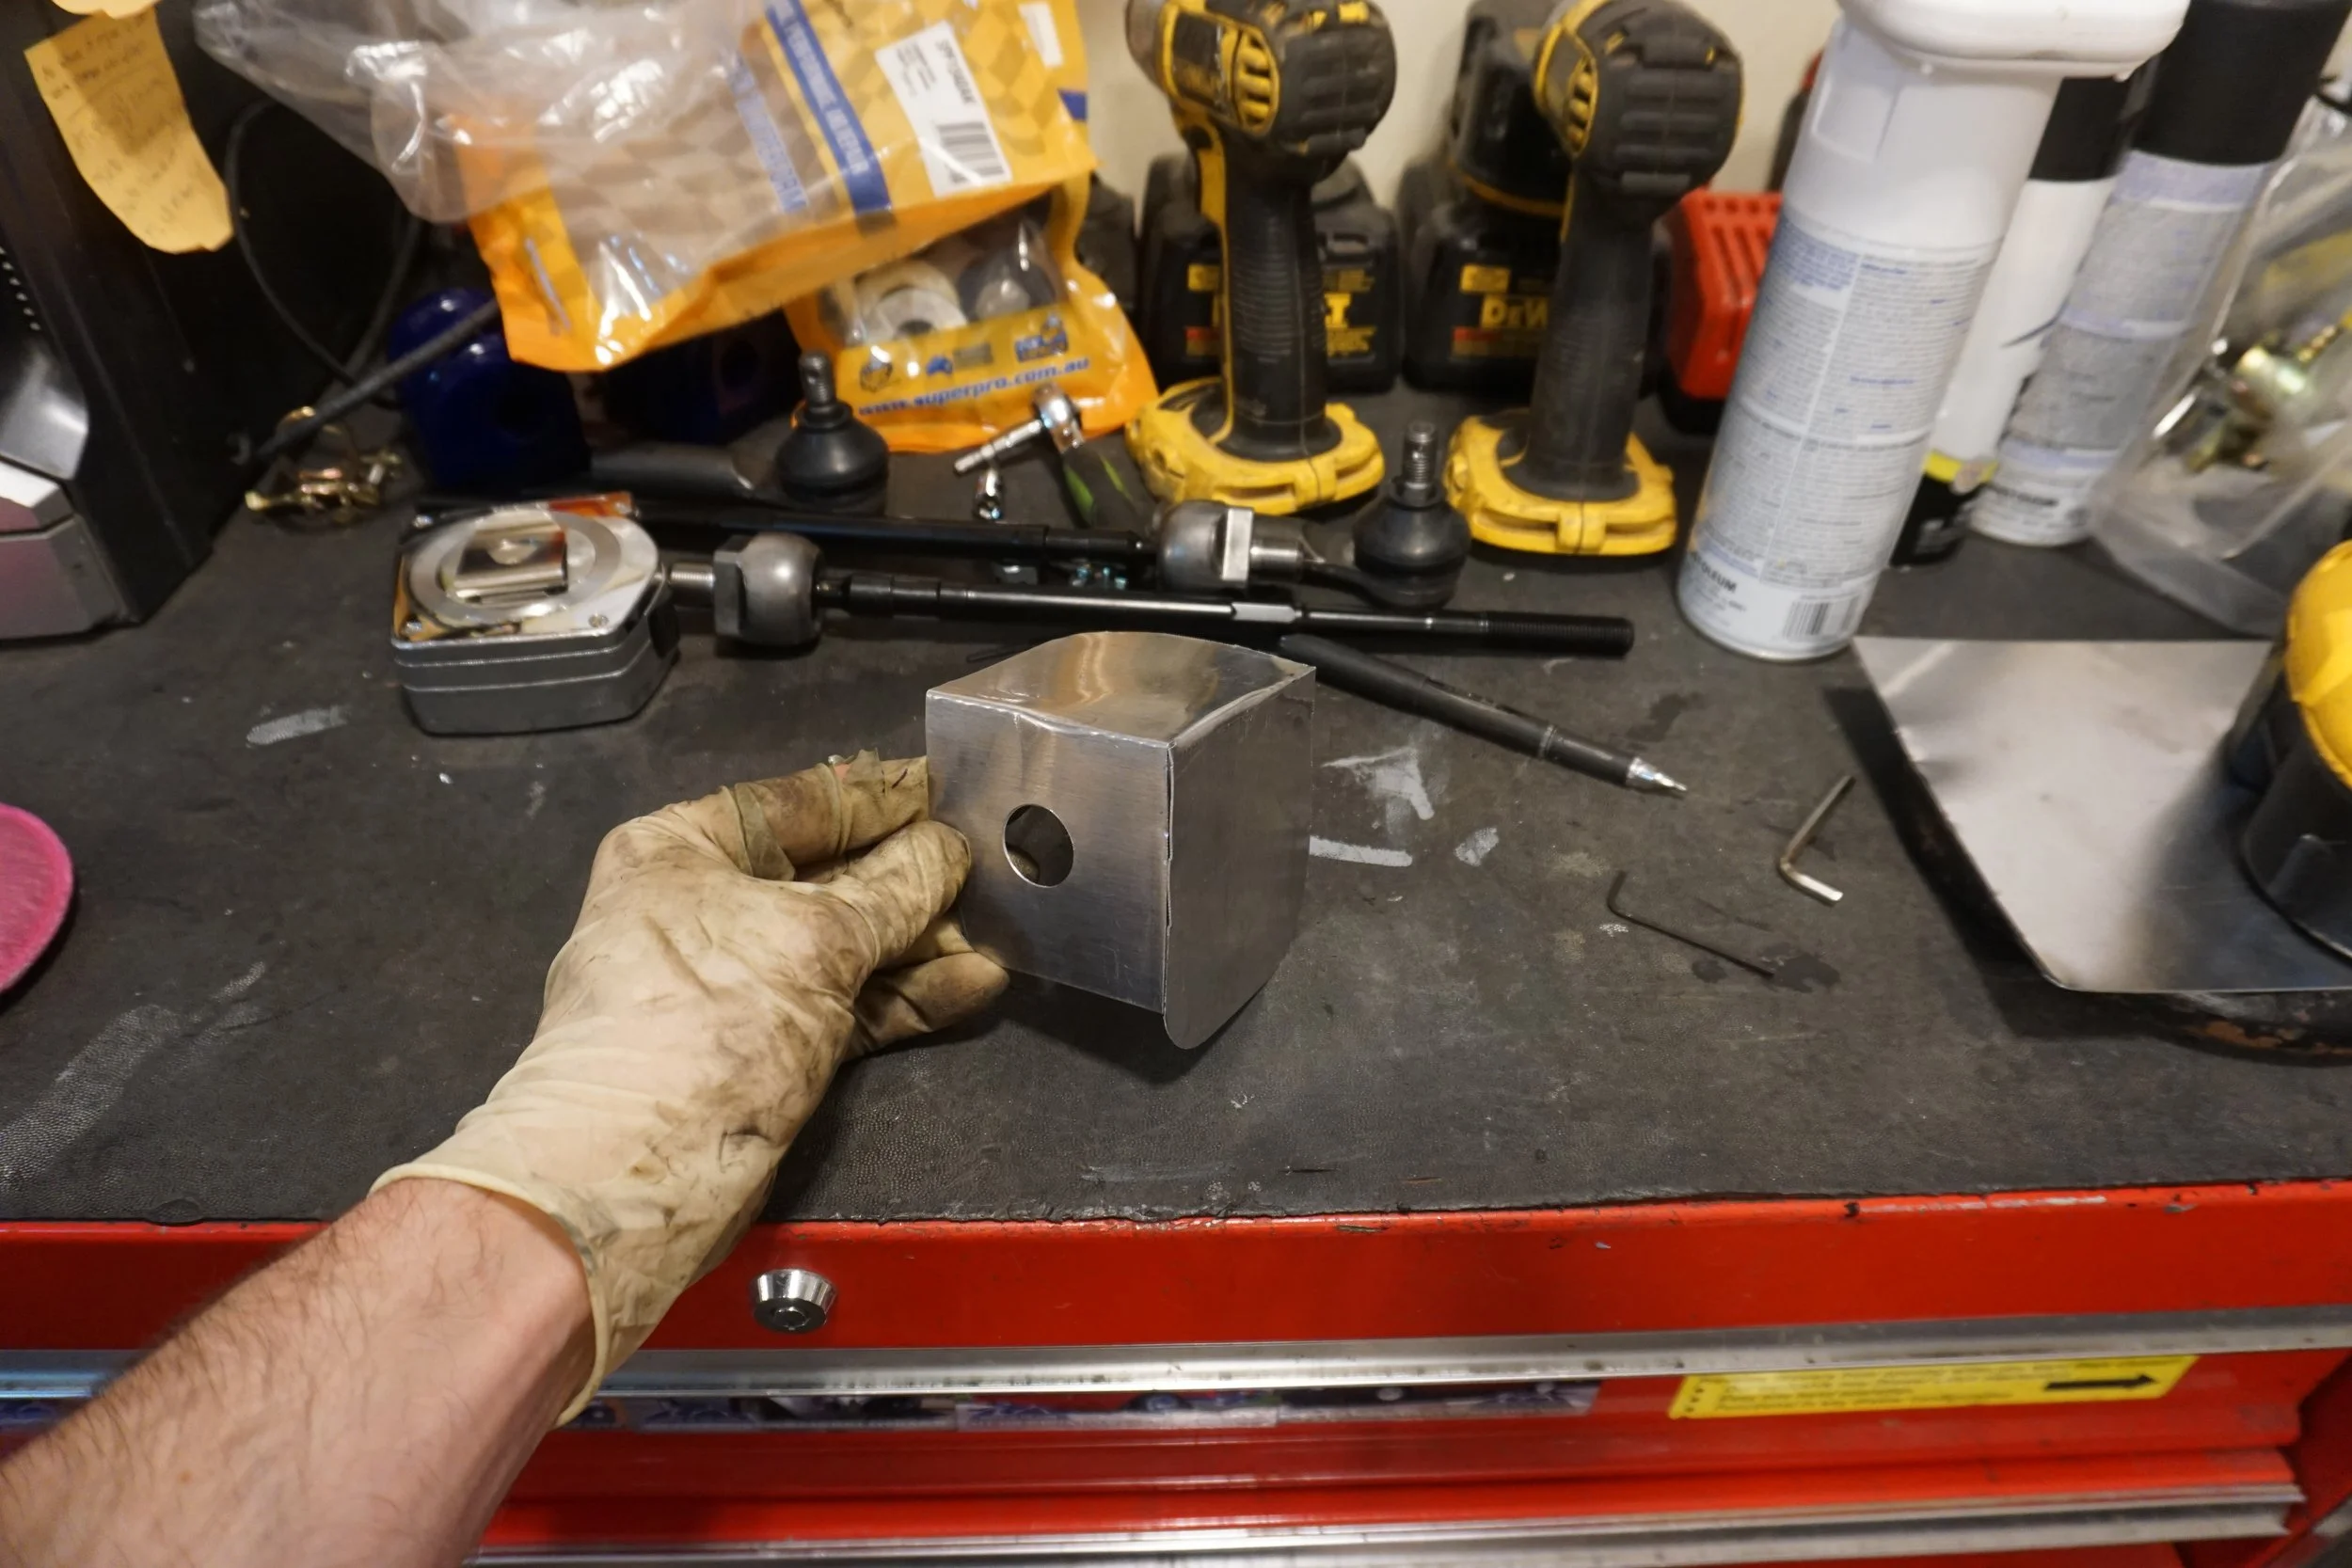
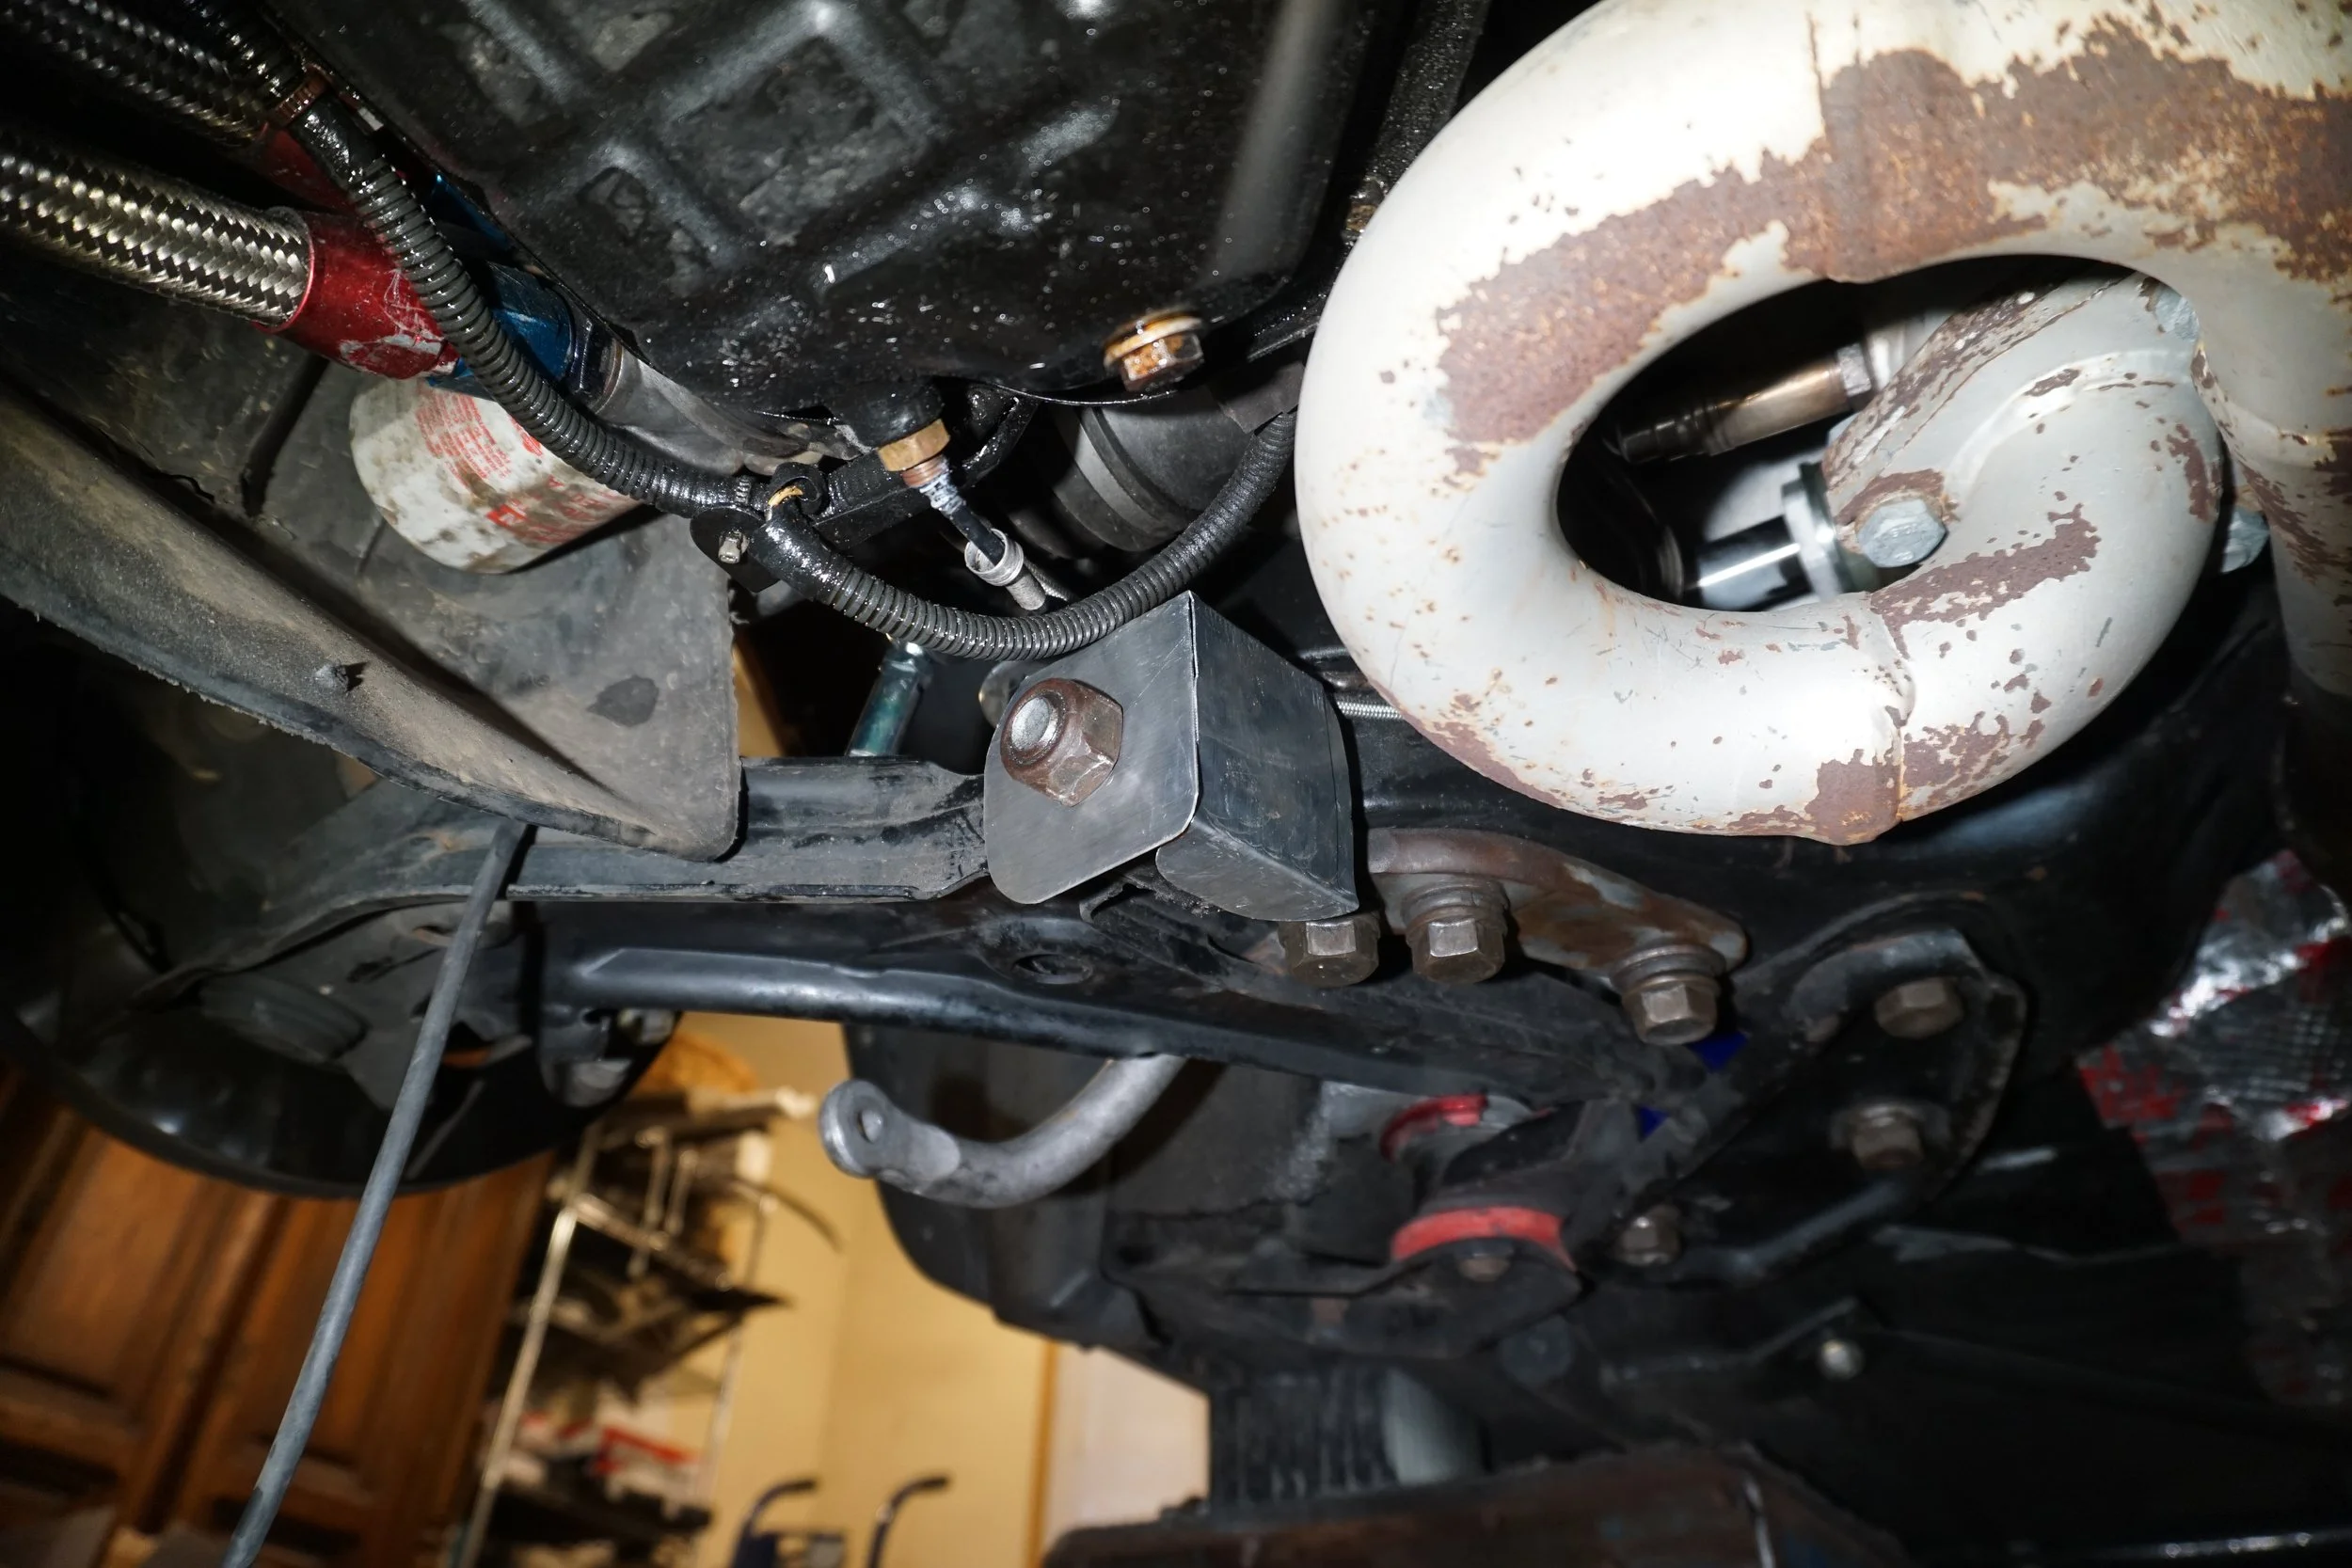
And it should protect it from the oil too
And that's where I'm at. I still haven't put the car back on the ground, and I'm getting it aligned next week. And there's still plenty more to come!
Some time ago I was looking through the Energy Suspension catalog and noticed that they offered a 23mm FSB bushing for the 5.5th gens, versus the 20mm (or was it 21mm?) for the 4th gen. I was curious if the bar would fit on a 4th gen, and what it would do for the handling of the car. Word on the street was that I would need to use a 5th gen subframe to make it work, but without definitive proof that would bolt up to a 4th gen (let along the hassle of dealing with different control arm, knuckles, brakes, etc) I wanted to see if I could make the 23mm work on a 4th gen subframe. I found a 23mm bar on an auto 5.5th gen SE at the junkyard and removed it. "Word on the street" is that the bar for the 6MT 5.5th gens is even stiffer than for the autos, but that has yet to be confirmed. For now, I'll start with this bar and see what happens.
I started by testing out my new media blasting tank with some fine coal slag and got that rusty bar looking all fresh again.
As you can see, the shape and length of the bar is quite different than my stock bar. And the blaster got it down to bare metal in no time! Goodbye wire wheels and angle grinder! I've got a new superpower in my fight against rust.
When I was removing the bar from the car at the junkyard, I immediately realized the stock 5th gen bushing design wasn't going to work on a 4th gen. The 4th gen bushings have a flat bottom, while the 5th gen bushings were round. The 5th gen subframe has a U shaped cutout in it, allowing the bar to sit down in it, versus the 4th gen where the bar sits on top.
So I bought two different 23mm bushings from ES to try out. One was just bushings, while the other came with brackets to fit the bushings. Since the first bushings wouldn't fit in the factory brackets, I moved onto the much larger ones that came with brackets. Doing some quick initial test fitting, I saw the bar was hitting the bracket for the steering rack, so I trimmed down the bushings a bit to give it some space.
The ES brackets wouldn't bolt up to the car since the bolt holes are offset from center.
So I found some appropriately sized scrap metal lying around, cleaned it up, cut up the ES brackets, and welded stuff together.
I had been using some Moog 5th gen end links for initial fitting, but it seemed like they were at the end of their range at full droop, and I knew I wanted something adjustable to remove any preload, so I did some digging on adjustable links. I settled on some Flyin' Miata links for the NB since they seemed to have the correct length range and they were reasonably priced.
After much test fitting, I had the brackets finished.
Original vs the new stuff
I also had to grind out a fair amount of metal from the subframe so the larger, and differently shaped, bar would fit. I'm really hoping I didn't compromise the strength of the subframe in the process. All test fitting was done with the car in the air, so I still have no idea what's going to happen when it's on the ground and driven in anger. To keep rust from forming I painted the area white, hoping that if any cracks form, they would be easier to spot than if I painted it black.
I'm cautiously optimistic about this! But in the meantime, it's time for a suspension refresh and upgrade!
I've had my BC Racing coilovers on for something like 12 years now, and I must say they have done an admirable job, with no obvious leaks or egregious noises or clunks. But I know in the wide world of suspension, they're considered low to (maybe) mid-grade pieces, and I've been hankering for something higher quality. Due to the paucity of parts for the 4th gen, I tried to see if anyone would make something custom for me, but I was either turned down or given outrageous prices I couldn't afford or justify. I'm not sure how I found them at this point (as this was over a year ago now), but I saw that Fortune Auto offers coilovers for the 4th and 5th gen. They've got a great reputation in the track day community, and they're built just a few hours south of me in Virginia, so, lacking any other options aside from BCs, I figured I would try them out.
I went with their entry level 500 series coilovers since those are the only ones they offer for Maximas, but they offer many more options for other cars. These are their "8th gen" coilovers.
Fortune Auto
The base spring rates for the 4th gen are 10k/6k, and 10k/8k for 5th gens. I've been running 9k/8k on the BCs, so I went with 10k/8k for the FAs. They offer a few upgrades, but the only one I went with was for the Swift Springs. I've only ever heard great things about Swifts, but this thread going over spring dyno results sealed the deal for me. And there is plenty of anecdotal evidence that they ride better than regular springs, which would be great if true, as I'm always trying to scratch back any civility I can. My wife still complains that she doesn't like the way the car rides...but at least I solved the exhaust noise complaints when I built my 3" exhaust!
Anyways, I bought these about a year ago and was all excited to install them, but when I got them out of the box I realized that they didn't come with camber plates! Apparently FA doesn't offer camber plates for a number of applications, probably on account of the popularity of the platform. When I placed my order I was the first "real" customer to order a set for a Maxima. They had built a single set for prototyping, and that was it before me. This sent me on a long search for some high quality camber plates I could use. But of course I had to complicate matters by wanting plates that could also adjust for caster, since part of my plan was to finally stop using camber bolts and go back to factory bolts. Remember that I had re-drilled my shock towers and rotated my camber plates 90* so they would adjust for caster.
I'll skip over a bunch of stuff and just say that I finally settled on plates made by Vorshlag. They are very highly regarded in the BMW community and offer all sorts of cool parts. I was also considering Ground Control plates, but when my local BMW racing shop (who have more than two decades of experience racing at high levels) said Vorshlags are much higher quality, that sealed the deal for me. It didn't hurt that I received amazing tech support along the way from Vorshlag, while I never received anything back from GC. I gave Vorshlag a few dimensions of the FA shocks and they put together the right parts for their plates to mount up.
But Vorshlag doesn't make anything for a Maxima, of course! So I had to figure out which of their existing camber/caster plates could be made to work on a 4th gen. I eventually settled on plates made for the E46. It was going to be close, but they would work (after some more drilling of the tower).
The install was pretty uneventful, aside from trying to make sure I drilled the new holes correctly so the camber/caster adjustments would be "true". The E46 bolt pattern is smaller than stock, so each bolt was pretty close to the center hole of the tower. At the rear of the car, I decided to do something about the interference between the shock body at the bracket on the rear beam. I've known for a while that my BCs had been scraping against the mount/bracket, but when I saw that the FAs would have a similar problem, I ground off some metal from the mount/bracket to give them some room.
I made some gaskets along the way in an effort to improve NVH:
New vs old
New hardware for the fronts....ooooh pretty. Goodbye camber bolts!
Since I wasn't sure how much caster the new plates were going to give, I picked up some offset control arm bushings from SuperPro to add more caster:
And I don't know about the rest of you, but my front control arm bushing on the passenger side always disintegrates and fails while the one on the driver side looks great. My car leaks oil on that side, so for a long time I thought that was the oil was causing the failure. But then I realized the heat from the loop in the Cattman header y-pipe probably had more to do with it than the oil. So I made a little heat shield out of aluminum!
And it should protect it from the oil too
And that's where I'm at. I still haven't put the car back on the ground, and I'm getting it aligned next week. And there's still plenty more to come!

I've always thought that the passenger LCA bushing has been oil/ps fluid. Good catch on heat from the exhaust.
Excited to see how the swaybar turns out!
Do you want some custom TPU (thermoplastic polyurethane) gaskets for the coilover tophats?
Excited to see how the swaybar turns out!
Do you want some custom TPU (thermoplastic polyurethane) gaskets for the coilover tophats?

Sure! If nothing else they'll look a lot classier than the paper gasket material I've got in there now.

